a website’s pages into logical categories For example, ebay.com has its site broken down into fashion, motors, electronics & technology, etc. Site navigation is a collection of user interfaces that help users to navigate a site For example, menus, treeviews, and breadcrumbs They help the user know where they are in the site Also help the user to move around the site
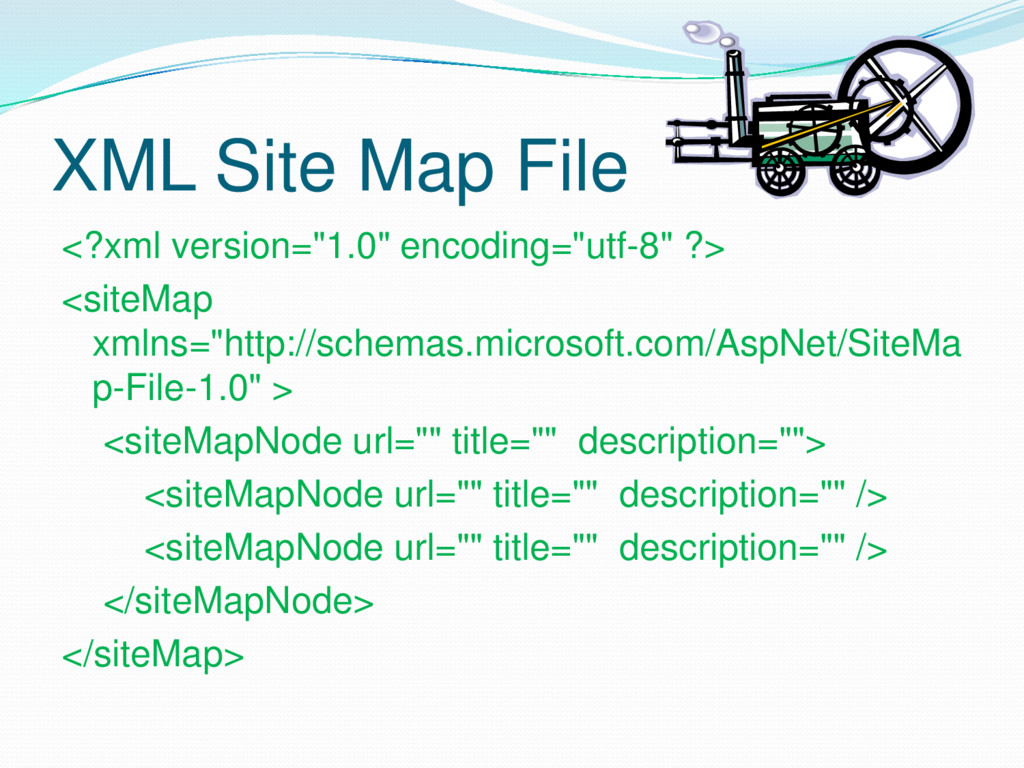
display the site-navigation controls The site-navigation controls are based on the site map The site map is defined in an XML file XML stands for eXtensible Markup Language Similar to HTML with opening & closing tags and attributes & values in the opening tag Used to define data For example, the web.config file is an XML file
1. SiteMapPath – provides a breadcrumb, which is a single line of text showing the user her location in the website’s structure 2. TreeView – displays a hierarchical view of the site’s structure 3. Menu – displays menus & sub-menus
XML file automatically updates the navigation Web control display for the breadcrumbs, trees, and menus Basic steps: 1. Define the website structure in a site map 2. Create the site map XML file 3. Then, activate the appropriate Web controls
structure consisting of folders and web pages As an example website, we need to build a website with several related web pages for an online bookstore Open up Visual Web Developer Create a new ASP.NET Empty Web Site Call it “WebSiteBookstore”
to add webpages or folders Add the following webpages: 5 files: Default.aspx, OnSale.aspx, Legal.aspx, Privacy.aspx, & About.aspx Add these folders: 3 folders: Sports, Fiction, Technology Add a Default.aspx webpage to each folder Add these sub-folders to the Technology folder 2 folders: Computers, Electronics Add a Default.aspx webpage to each sub-folder
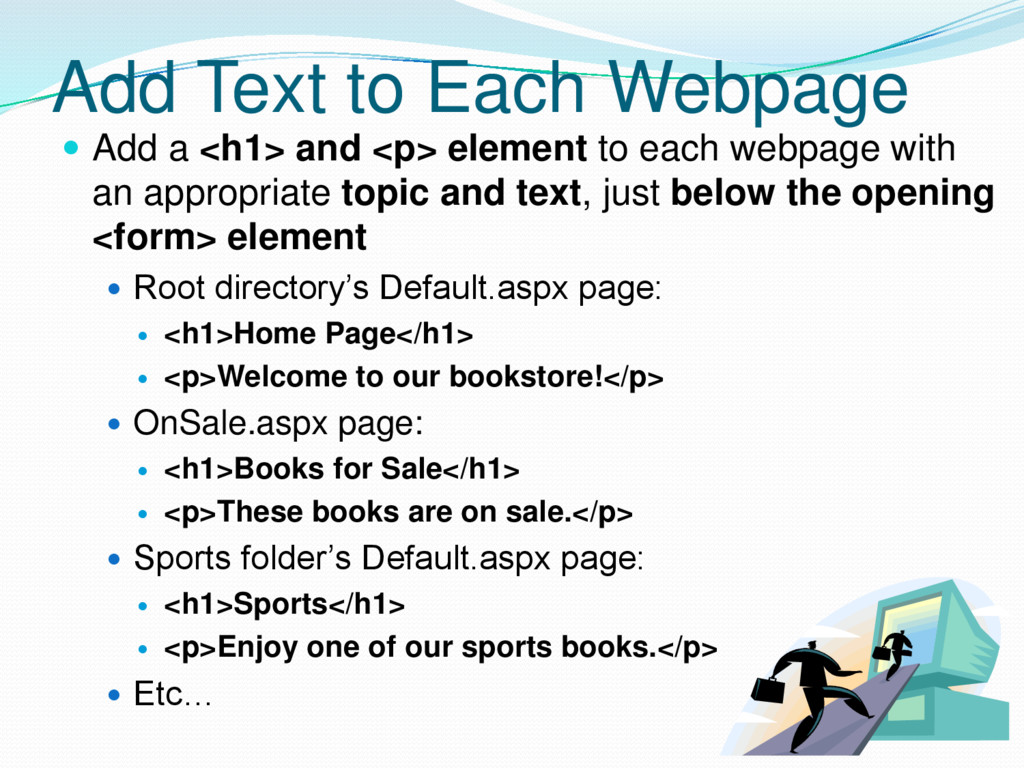
<p> element to each webpage with an appropriate topic and text, just below the opening <form> element Root directory’s Default.aspx page: <h1>Home Page</h1> <p>Welcome to our bookstore!</p> OnSale.aspx page: <h1>Books for Sale</h1> <p>These books are on sale.</p> Sports folder’s Default.aspx page: <h1>Sports</h1> <p>Enjoy one of our sports books.</p> Etc…
map 1. Right-click on the website’s name in Solution Explorer window 2. Choose Add New Item 3. In Add New Item dialogue box, choose the Site Map option 4. Click the Add button 5. This will add the site map XML file Web.sitemap to your website 6. Open up this file & check it out!
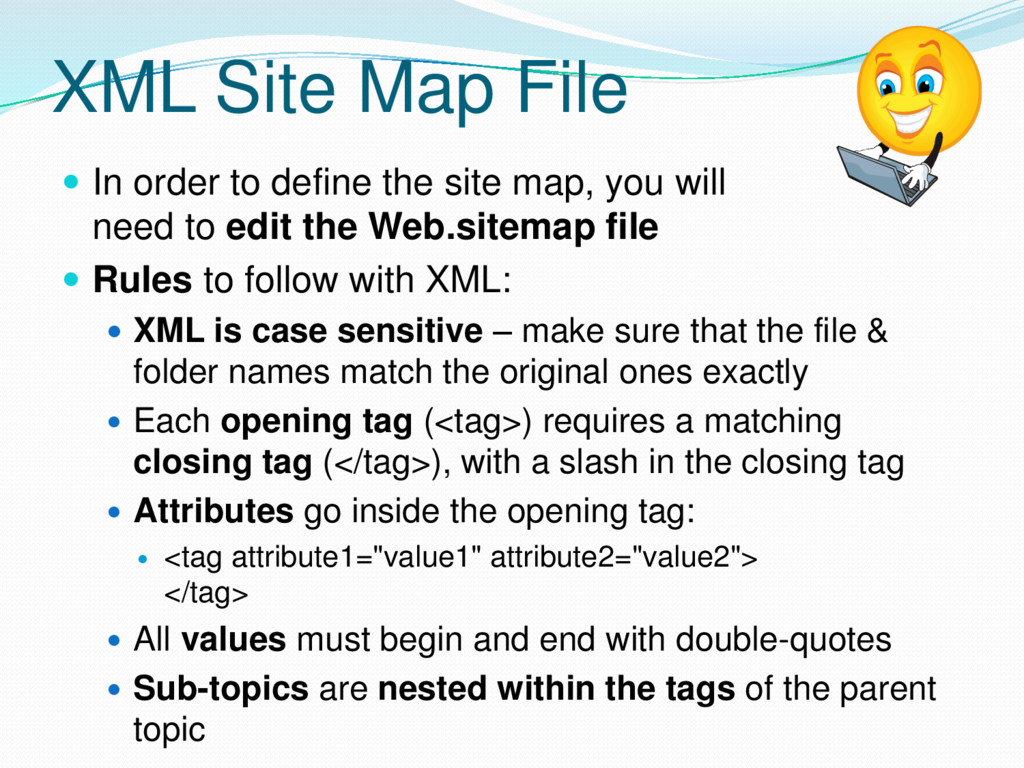
site map, you will need to edit the Web.sitemap file Rules to follow with XML: XML is case sensitive – make sure that the file & folder names match the original ones exactly Each opening tag (<tag>) requires a matching closing tag (</tag>), with a slash in the closing tag Attributes go inside the opening tag: <tag attribute1="value1" attribute2="value2"> </tag> All values must begin and end with double-quotes Sub-topics are nested within the tags of the parent topic
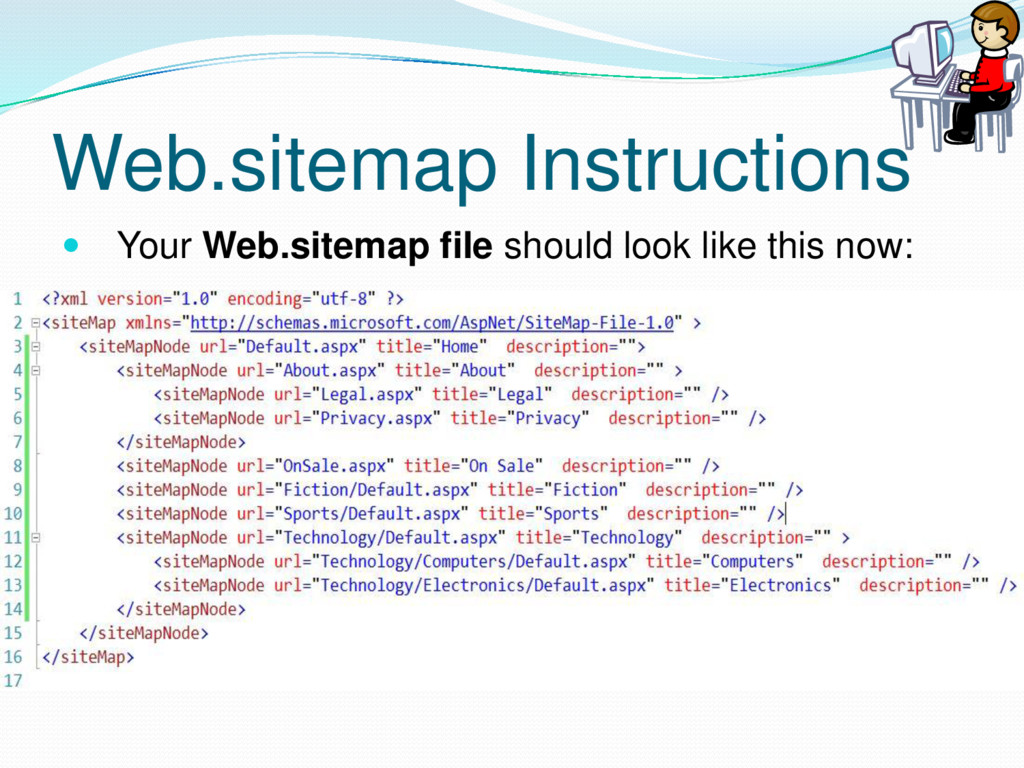
nested tags, then there is always an opening and closing tag Each opening tag (<tag>) requires a matching closing tag (</tag>) – note slash in the closing tag If a tag does not contain nested tags, then there is only an opening tag with a slash (/) at the end So all you need the opening tag with a slash (<tag />) Example: <siteMapNode url="About.aspx" title="About" description=""> <siteMapNode url="Legal.aspx" title="Legal" description="" /> <siteMapNode url="Privacy.aspx" title="Privacy" description="" /> </siteMapNode>
the Home section, we will have these sub- sections: About, On Sale, Fiction, Sports, Technology Therefore, all of the sub-sections are nested inside the Home section “nested” means that we put the tags between the opening and closing tag for the Home section
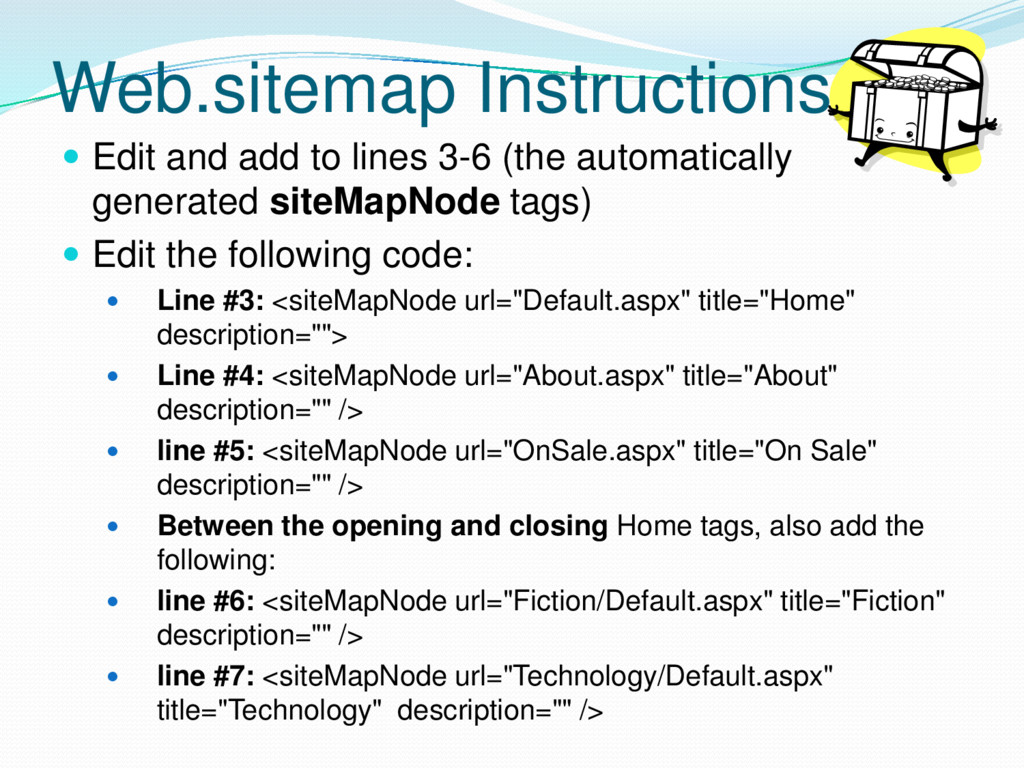
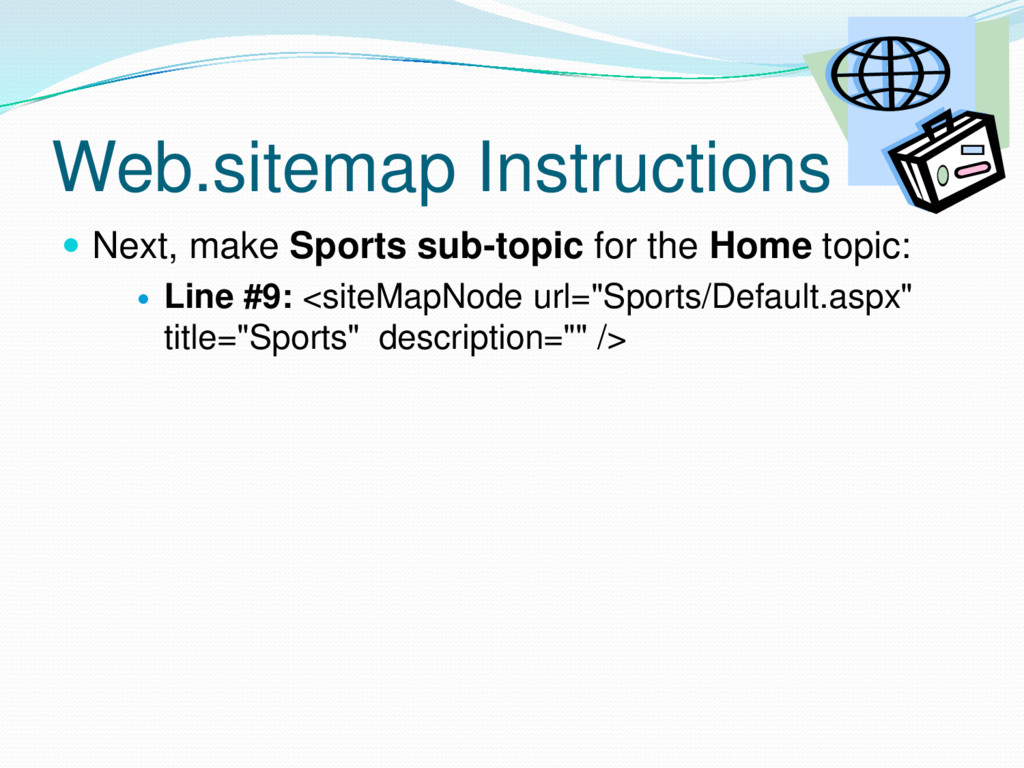
automatically generated siteMapNode tags) Edit the following code: Line #3: <siteMapNode url="Default.aspx" title="Home" description=""> Line #4: <siteMapNode url="About.aspx" title="About" description="" /> line #5: <siteMapNode url="OnSale.aspx" title="On Sale" description="" /> Between the opening and closing Home tags, also add the following: line #6: <siteMapNode url="Fiction/Default.aspx" title="Fiction" description="" /> line #7: <siteMapNode url="Technology/Default.aspx" title="Technology" description="" />
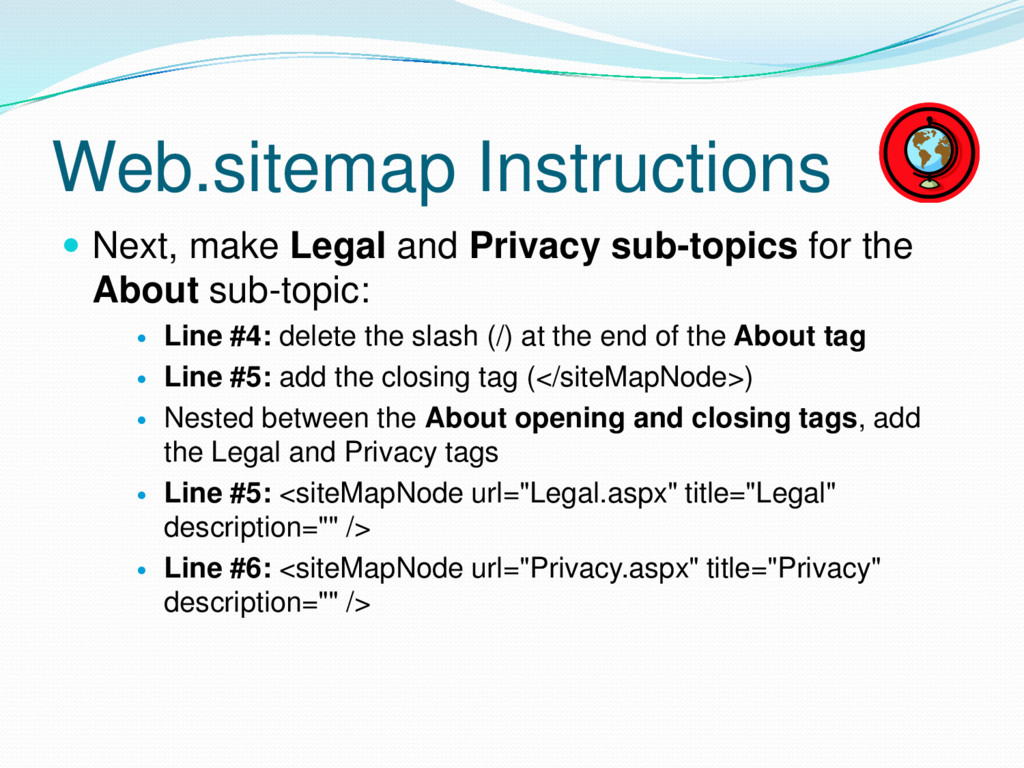
the About sub-topic: Line #4: delete the slash (/) at the end of the About tag Line #5: add the closing tag (</siteMapNode>) Nested between the About opening and closing tags, add the Legal and Privacy tags Line #5: <siteMapNode url="Legal.aspx" title="Legal" description="" /> Line #6: <siteMapNode url="Privacy.aspx" title="Privacy" description="" />
for the Technology sub-topic: Line #10: delete the slash (/) at the end of the tag for Technology Line #11: add the Technology closing tag (</siteMapNode>) Nested between the Technology opening and closing tags, add the Computers and Electronics tags Line #11: <siteMapNode url="Technology/Computers/Default.aspx" title="Computers" description="" /> Line #12: <siteMapNode url="Technology/Electronics/Default.aspx" title="Electronics" description="" />
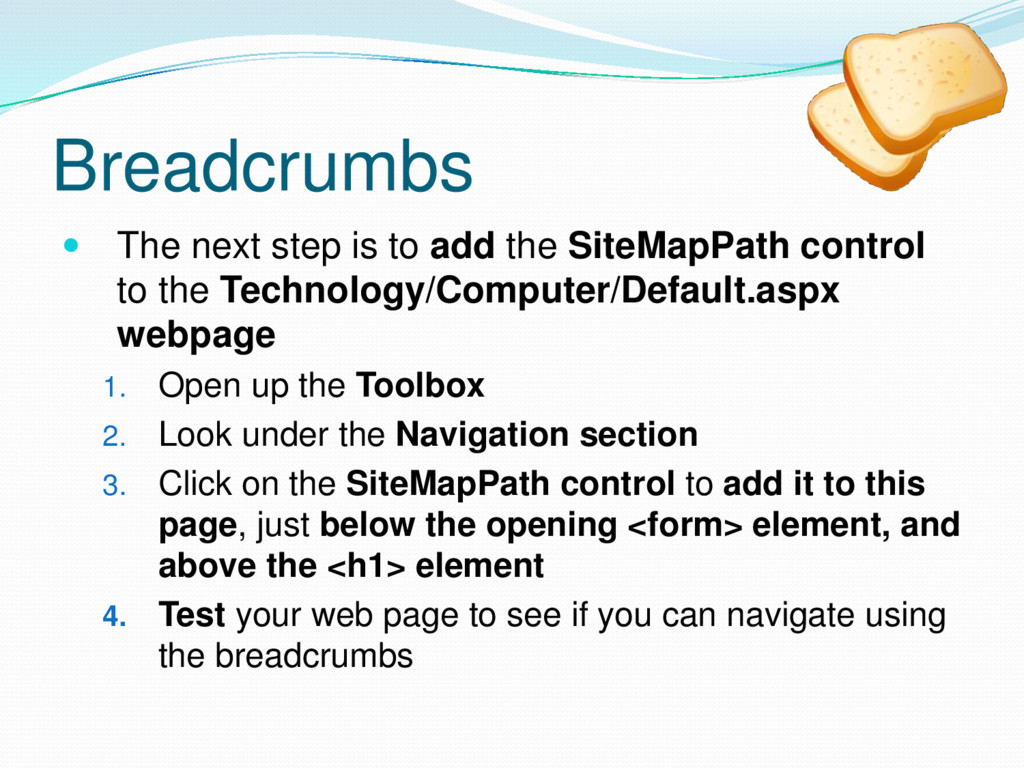
control to the Technology/Computer/Default.aspx webpage 1. Open up the Toolbox 2. Look under the Navigation section 3. Click on the SiteMapPath control to add it to this page, just below the opening <form> element, and above the <h1> element 4. Test your web page to see if you can navigate using the breadcrumbs
you can customize The SiteMapPath has a list of nodes and path separators A node is a section in the site map hierarchy For example, the SiteMapPath in the Technology/Computers/Default.aspx has these 3 nodes: Home, Technology, Computers A path separator is what separates each node For example, the default separator is the greater-than sign (>)
a “node” The SiteMapPath has 3 kinds of nodes Root node – the top of the hierarchy Current node – the current web page’s node General node – all other nodes, except root & current node
the SiteMapPath control in any window, and make changes to the properties in the Properties window on the bottom right Can also use Auto Format option: 1. Click on Design view 2. Click on SiteMapPath’s smart tag 3. Click on Auto Format 4. Select a Scheme 5. Click Apply, then click OK
control to all of the webpages 1. Copy the code for the SiteMapPath control from the Technology/Computer/Default.aspx webpage 2. Paste the code to each page, just below the opening <form> element, and above the <h1> element 3. Test your web pages to see if you can navigate using the breadcrumbs
of a website using a collapsible tree A visitor can see all of the different parts of the website Each node in the tree is a hyperlink to a certain section of the web site
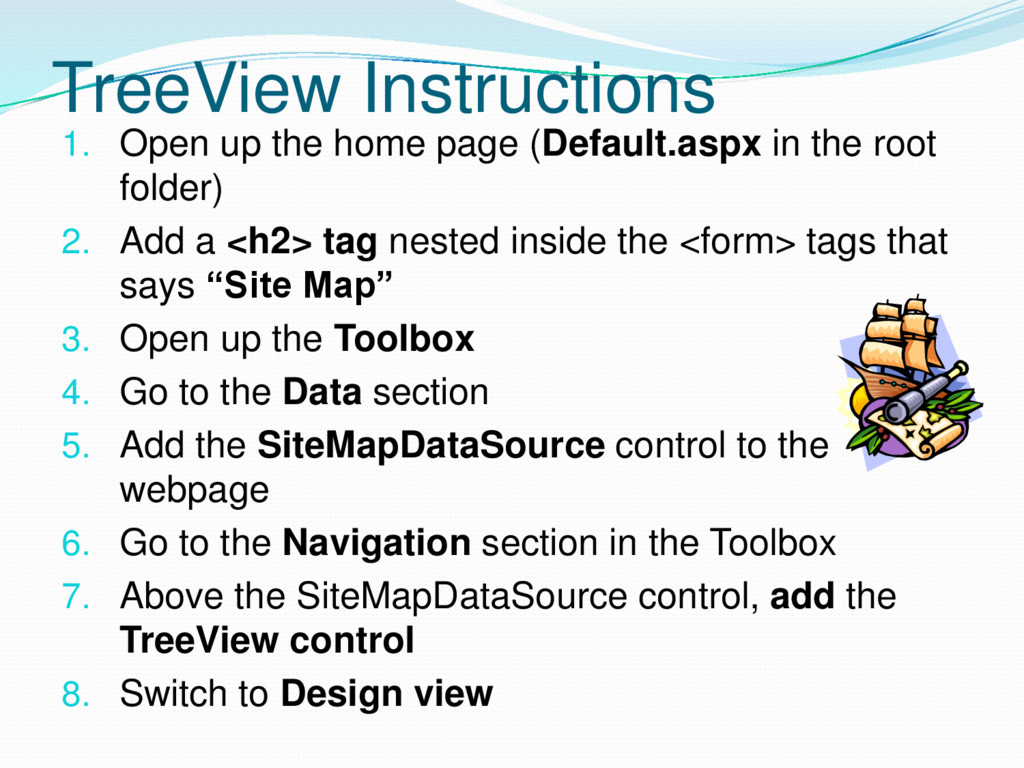
the root folder) 2. Add a <h2> tag nested inside the <form> tags that says “Site Map” 3. Open up the Toolbox 4. Go to the Data section 5. Add the SiteMapDataSource control to the webpage 6. Go to the Navigation section in the Toolbox 7. Above the SiteMapDataSource control, add the TreeView control 8. Switch to Design view
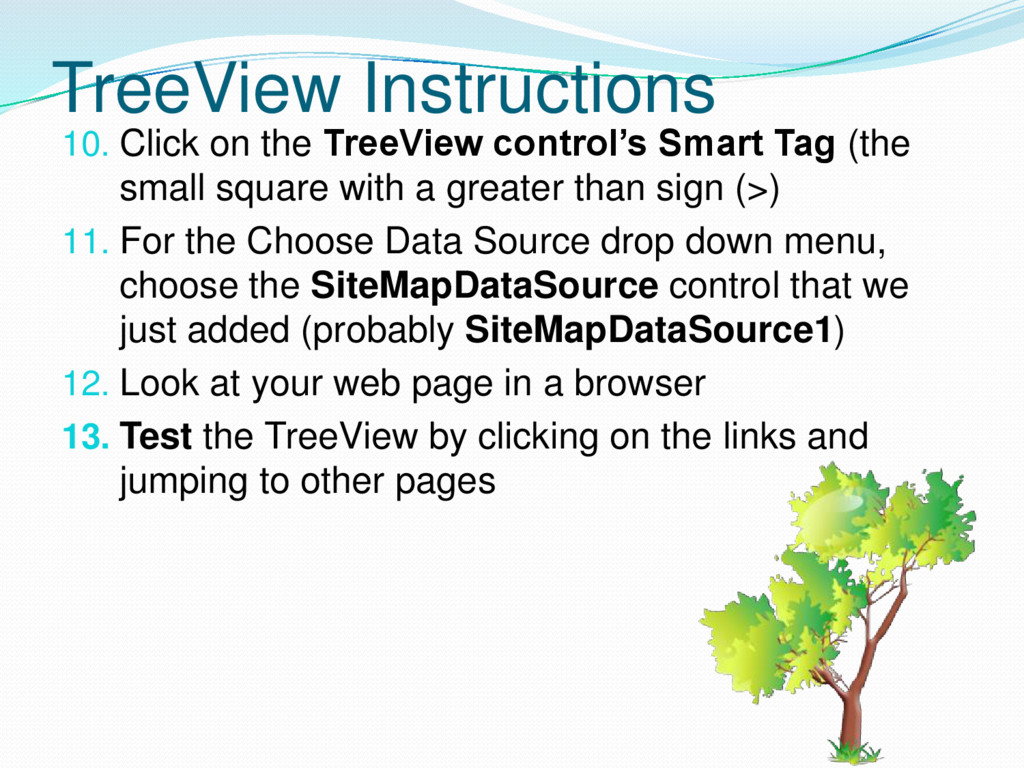
(the small square with a greater than sign (>) 11. For the Choose Data Source drop down menu, choose the SiteMapDataSource control that we just added (probably SiteMapDataSource1) 12. Look at your web page in a browser 13. Test the TreeView by clicking on the links and jumping to other pages
a “node” The SiteMapPath has 4 kinds of nodes Root node – the top of the hierarchy (home page) Parent node – have children nodes (sub-topics) Leaf node – have a parent node (are organized under a topic), but no children nodes Selected node – current page being visited In the Properties window, Styles section, you can set the styles of each kind of node HoverNodeStyle – style for a node when the mouse hovers over it NodeStyle – style for all of the nodes
interface to show all of the web pages in the entire site 1. Open the Default.aspx page for Home 2. Add a <h2> element with the title “Site Menu” 3. Open up the Toolbox 4. Go to the Navigation section 5. Add the Menu control to the webpage 6. Switch to Design view
Tag (the small square with a greater than sign (>) 11. For the Choose Data Source drop down menu, choose the SiteMapDataSource control that we just added (probably SiteMapDataSource1) 12. Look at your web page in a browser 13. Make sure the Menu works by clicking on the links and jumping to other pages
dynamic part Static part is always displayed By default, this is only the 1st level of the menu (Home page) Dynamic part is only displayed when the user hovers the mouse over that part of the menu To change what part is displayed, go to Properties window, Behavior section, StaticDisplayLevels property and change it to integer 2 Check out how this changes the appearance of the Menu (it should show the 1st and 2nd levels)