Upgrade to Pro — share decks privately, control downloads, hide ads and more …

Homebrewing and You

Homebrewing and You

How to get started homebrewing in 5 minutes.

Derek Springer

September 20, 2012
Tweet

More Decks by Derek Springer

Other Decks in How-to & DIY

Transcript

  1. Why Homebrew? • It's what started civilization! (possibly) • You

    can do something people have done for literally thousands of years! (even Egyptians!) • Homebrew people are the best people (the friendliest bunch!) • *Everyone* supports your hobby! (except for weirdos!) • It will save you money! (nope!) • When you are done, you have beer.
  2. Some Definitions • Wort – pronounced “wert” The liquid created

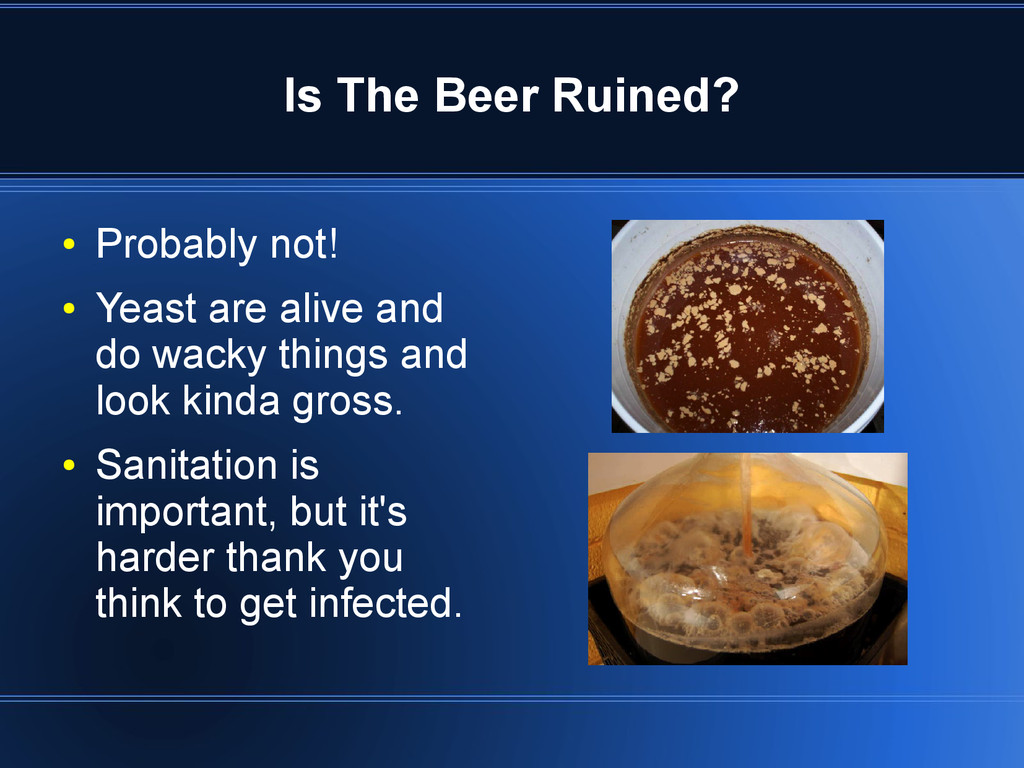
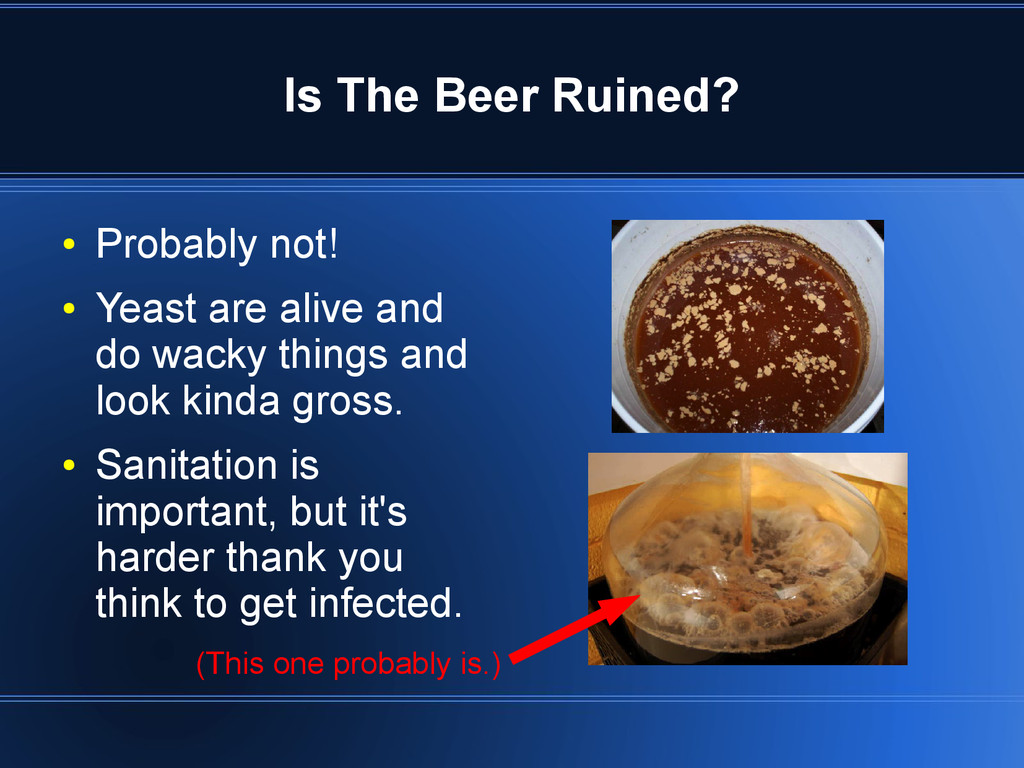
    after extracting the sugars from malt. Either “sweet” or “hopped.” • Trub – prounounced “troob” The junk (proteins, hops, yeast, etc) that collects on the bottom. • Krausen – pronounced “kroy-zen” Foamy mass of yeast & protein that forms during the most active part of fermentation.
  3. A Big Pot • ~ 4 gal/15L • Bigger is

    better • Stainless is best • Aluminum is OK
  4. A Big Bucket (or two) • 6.5 gallon / 24.7L

    • Food grade • Also: – Lid – Stopper – Airlock • Bottling bucket w/ spigot.
  5. Lots of Bottles • 40 – 50 bottles. • Proper

    etiquette is to remove labels. • ~1” lip on top. • Brown bottles are best. • Twistoff is no good.
  6. A Recipe • Malt Extract • Speciality Grains • Hops

    • Yeast • (Stick to ales at first)
  7. Step 2: Steep Speciality Grains • Hold at ~160F /

    ~70C for 30 minutes. • Extracts flavor, head- building proteins. • It's like making a tea! • Strain back into your other pot of water.
  8. Step 3: Add Malt Extract • Once bubbles form on

    bottom of pot. • Turn off heat, add malt, stir in thoroughly, turn heat back on.
  9. Step 4: Add Hops • Once wort is boiling. •

    These hops add bitterness. • Watch for boil-overs • Keep a spray bottle handy.
  10. Step 7: Cool Wort • Fill your sink with ice.

    • Stir the wort with your sanitized spoon.
  11. Step 8: Prepare Yeast • Dry yeast needs to be

    prepped. • Liquid yeast can be brought to room temp.
  12. Step 9: Pitch Yeast • Make sure wort is <

    75F / 24C. • Just dump it all in.
  13. Step 10: Aerate Wort • Pour from bucket to bucket.

    • Pour through strainer. • Beat with egg-beater. • “Shake it like a Polaroid® picture.”
  14. Step 11: Wait a Long Time! • Two to three

    weeks. • Keep your fermentor close to ~68F / ~20 C • Avoid light.
  15. Step 12: Bottle Your Beer • Add ~3/4 cup dextrose.

    – ~4.25 oz – ~120 g • Rack beer via siphon into bottling bucket. • Get a bottling wand!
  16. Step 13: Wait a Little Longer • 1 week is

    bare minimum. • 3 weeks is optimal.
  17. Is The Beer Ruined? • Probably not! • Yeast are

    alive and do wacky things and look kinda gross. • Sanitation is important, but it's harder thank you think to get infected.
  18. Is The Beer Ruined? • Probably not! • Yeast are

    alive and do wacky things and look kinda gross. • Sanitation is important, but it's harder thank you think to get infected. (This one probably is.)
  19. Recommended Reading The Complete Joy of Homebrewing By Charlie Papazian

    How to Brew By John Palmer http://www.howtobrew.com/
  20. Learn to Homebrew Day • Saturday, Nov. 3rd • Check

    with your local homebrew supply for details.