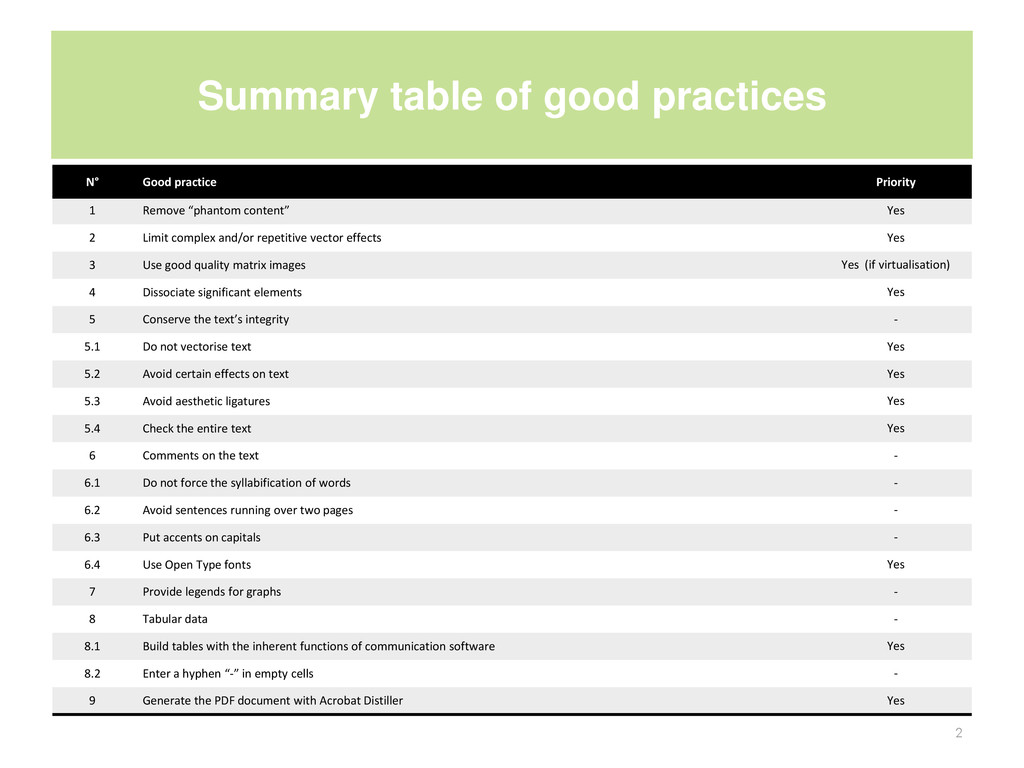
Remove “phantom content” Yes 2 Limit complex and/or repetitive vector effects Yes 3 Use good quality matrix images Yes (if virtualisation) 4 Dissociate significant elements Yes 5 Conserve the text’s integrity - 5.1 Do not vectorise text Yes 5.2 Avoid certain effects on text Yes 5.3 Avoid aesthetic ligatures Yes 5.4 Check the entire text Yes 6 Comments on the text - 6.1 Do not force the syllabification of words - 6.2 Avoid sentences running over two pages - 6.3 Put accents on capitals - 6.4 Use Open Type fonts Yes 7 Provide legends for graphs - 8 Tabular data - 8.1 Build tables with the inherent functions of communication software Yes 8.2 Enter a hyphen “-” in empty cells - 9 Generate the PDF document with Acrobat Distiller Yes 2
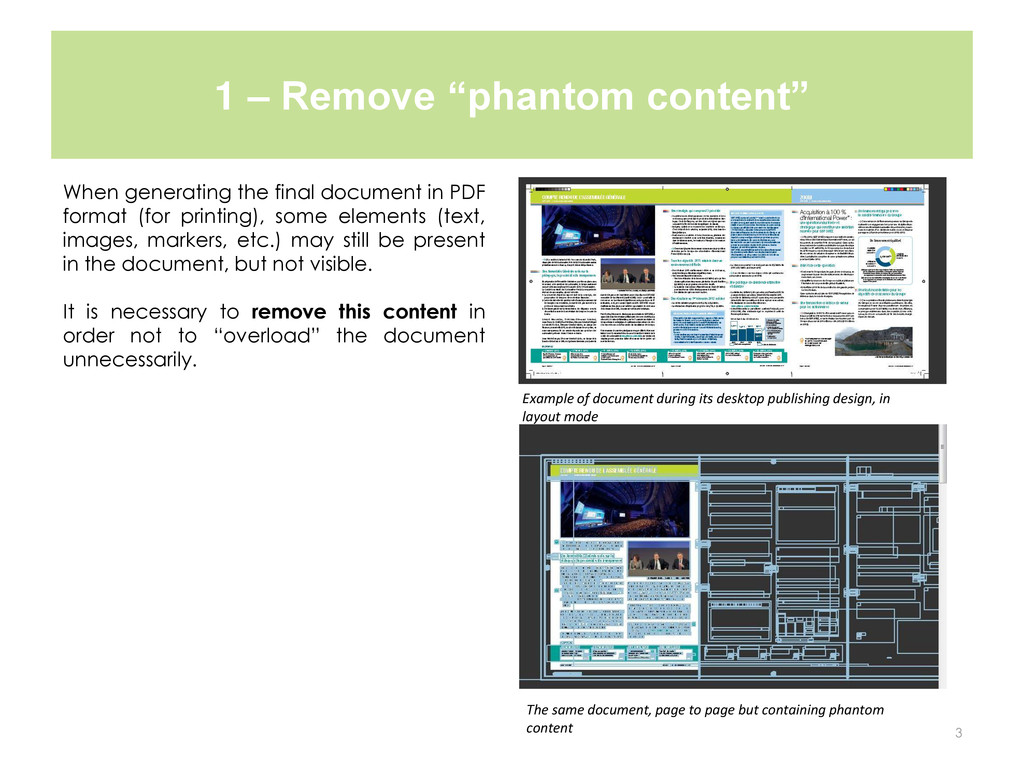
its desktop publishing design, in layout mode The same document, page to page but containing phantom content When generating the final document in PDF format (for printing), some elements (text, images, markers, etc.) may still be present in the document, but not visible. It is necessary to remove this content in order not to “overload” the document unnecessarily.
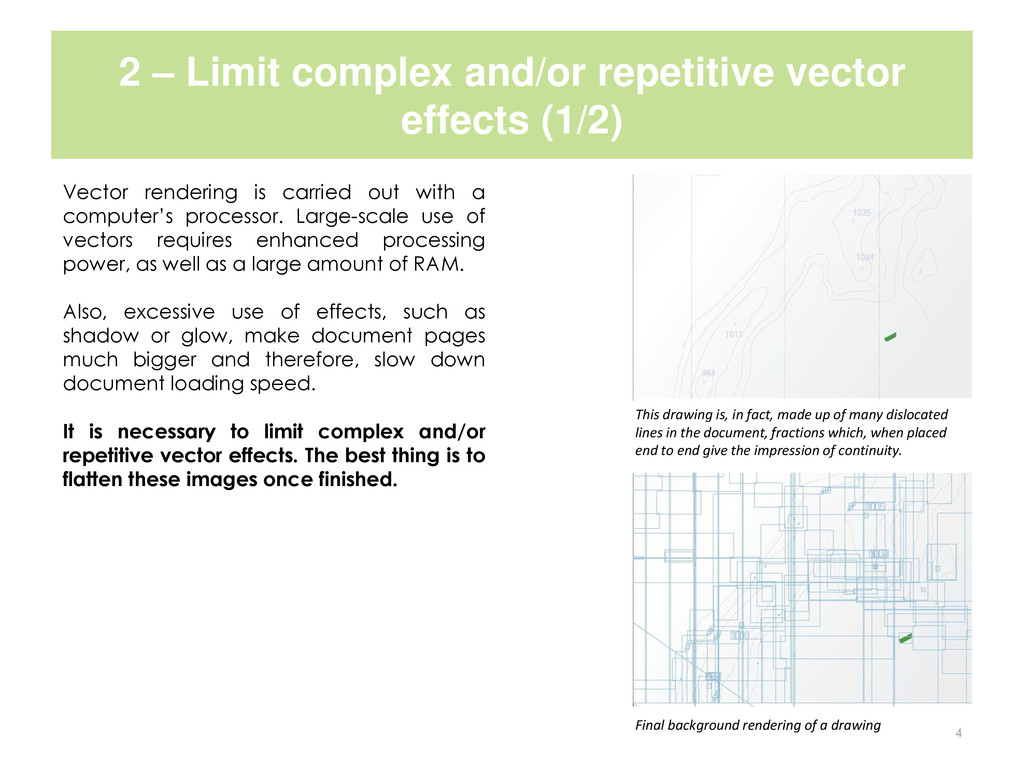
Final background rendering of a drawing This drawing is, in fact, made up of many dislocated lines in the document, fractions which, when placed end to end give the impression of continuity. Vector rendering is carried out with a computer’s processor. Large-scale use of vectors requires enhanced processing power, as well as a large amount of RAM. Also, excessive use of effects, such as shadow or glow, make document pages much bigger and therefore, slow down document loading speed. It is necessary to limit complex and/or repetitive vector effects. The best thing is to flatten these images once finished.
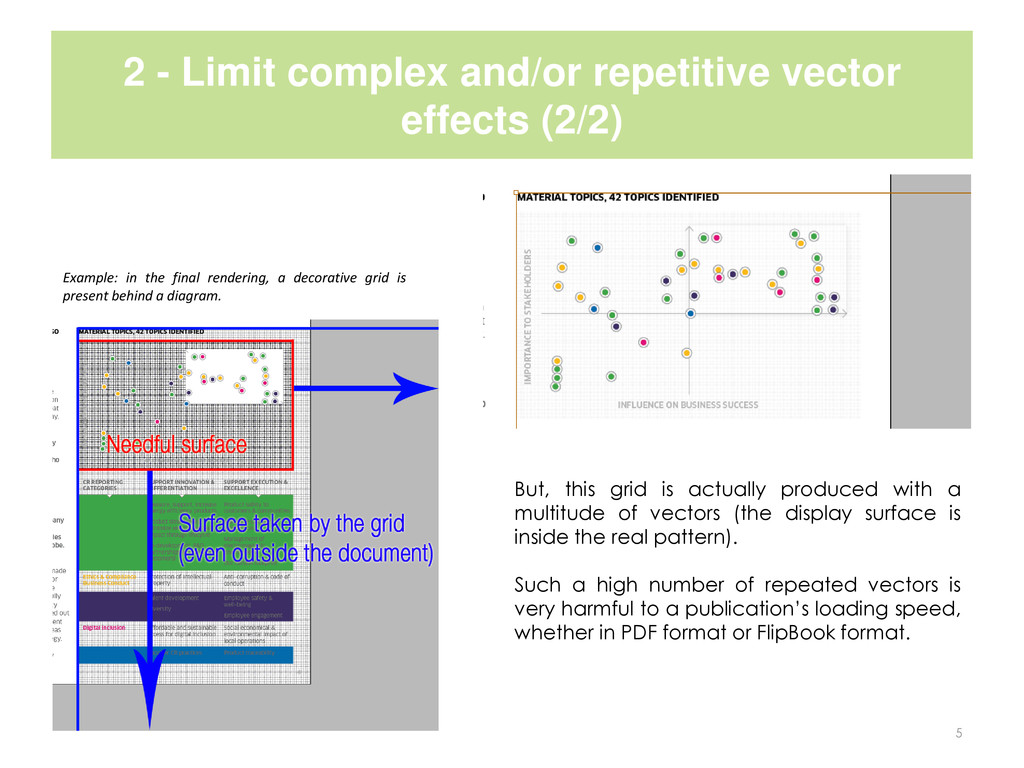
Example: in the final rendering, a decorative grid is present behind a diagram. But, this grid is actually produced with a multitude of vectors (the display surface is inside the real pattern). Such a high number of repeated vectors is very harmful to a publication’s loading speed, whether in PDF format or FlipBook format.
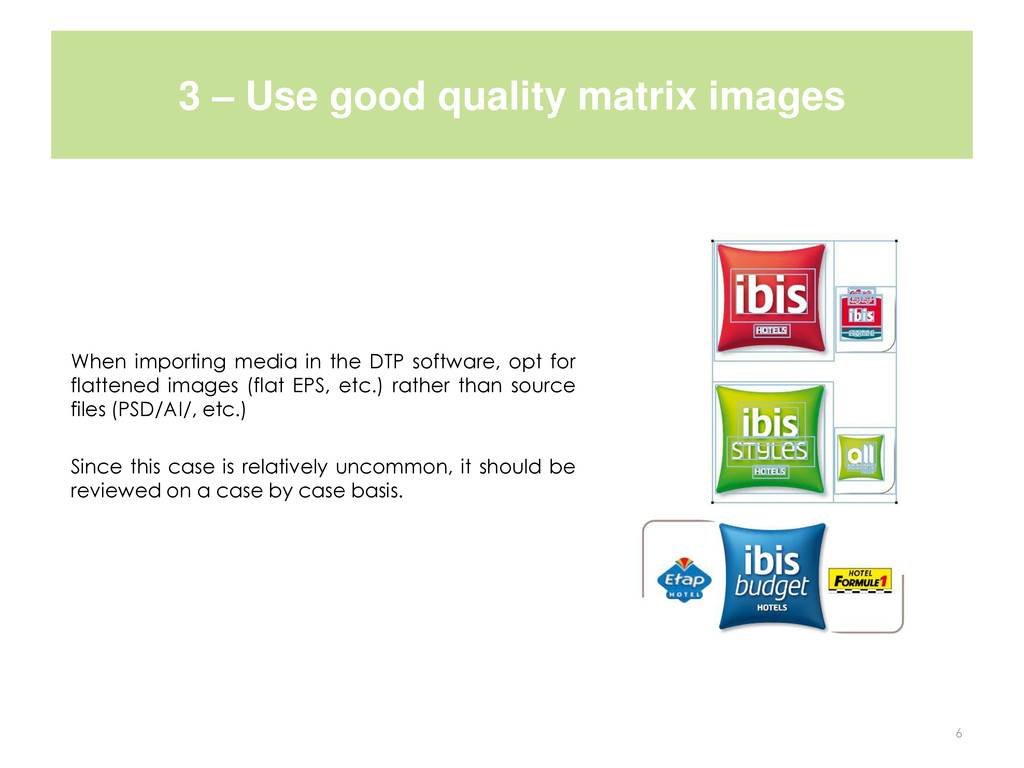
media in the DTP software, opt for flattened images (flat EPS, etc.) rather than source files (PSD/AI/, etc.) Since this case is relatively uncommon, it should be reviewed on a case by case basis.
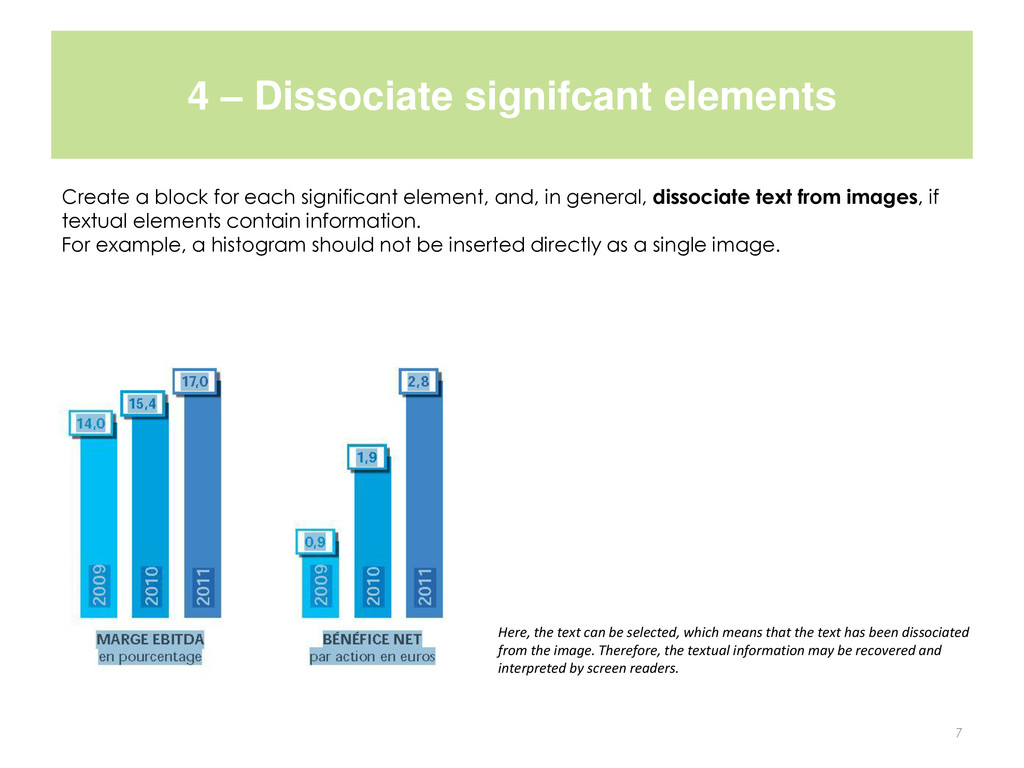
significant element, and, in general, dissociate text from images, if textual elements contain information. For example, a histogram should not be inserted directly as a single image. 7 Here, the text can be selected, which means that the text has been dissociated from the image. Therefore, the textual information may be recovered and interpreted by screen readers.
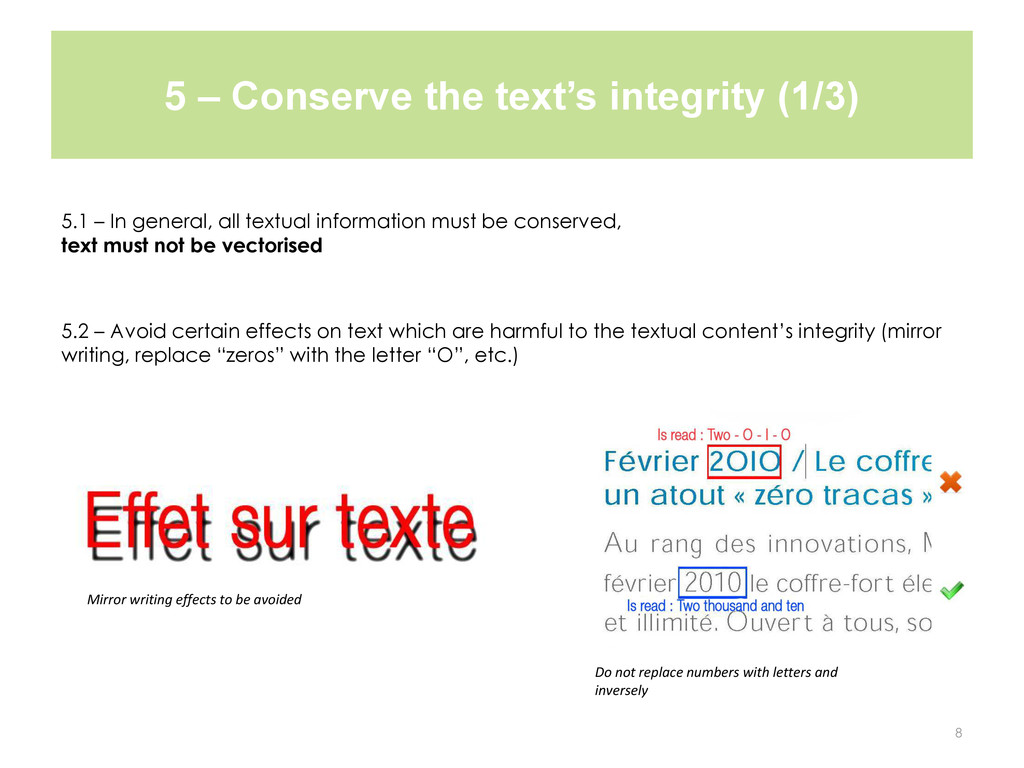
general, all textual information must be conserved, text must not be vectorised 5.2 – Avoid certain effects on text which are harmful to the textual content’s integrity (mirror writing, replace “zeros” with the letter “O”, etc.) 8 Mirror writing effects to be avoided Do not replace numbers with letters and inversely
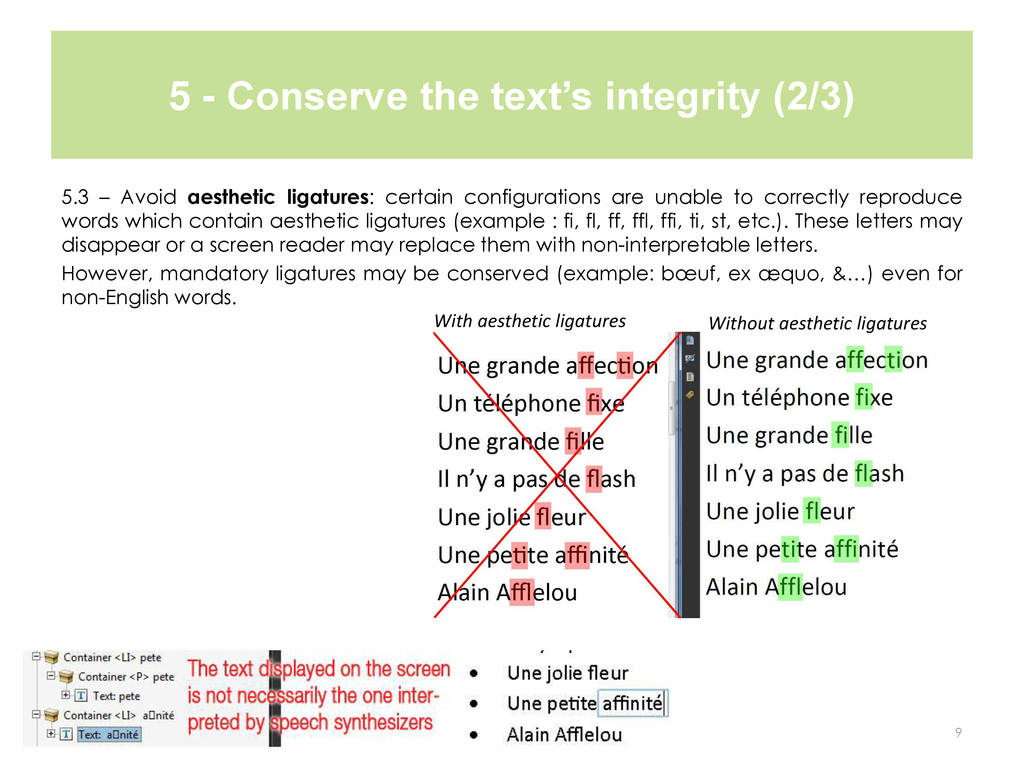
aesthetic ligatures: certain configurations are unable to correctly reproduce words which contain aesthetic ligatures (example : fi, fl, ff, ffl, ffi, ti, st, etc.). These letters may disappear or a screen reader may replace them with non-interpretable letters. However, mandatory ligatures may be conserved (example: bœuf, ex æquo, &…) even for non-English words. 9 Without aesthetic ligatures With aesthetic ligatures
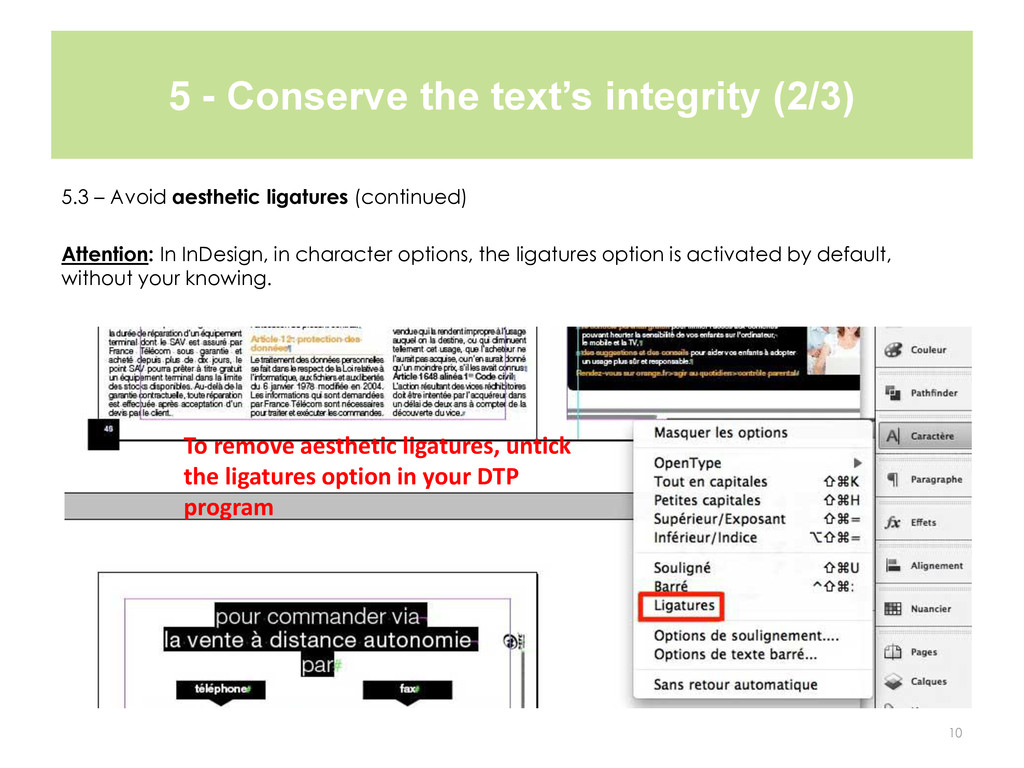
aesthetic ligatures (continued) Attention: In InDesign, in character options, the ligatures option is activated by default, without your knowing. 10 To remove aesthetic ligatures, untick the ligatures option in your DTP program
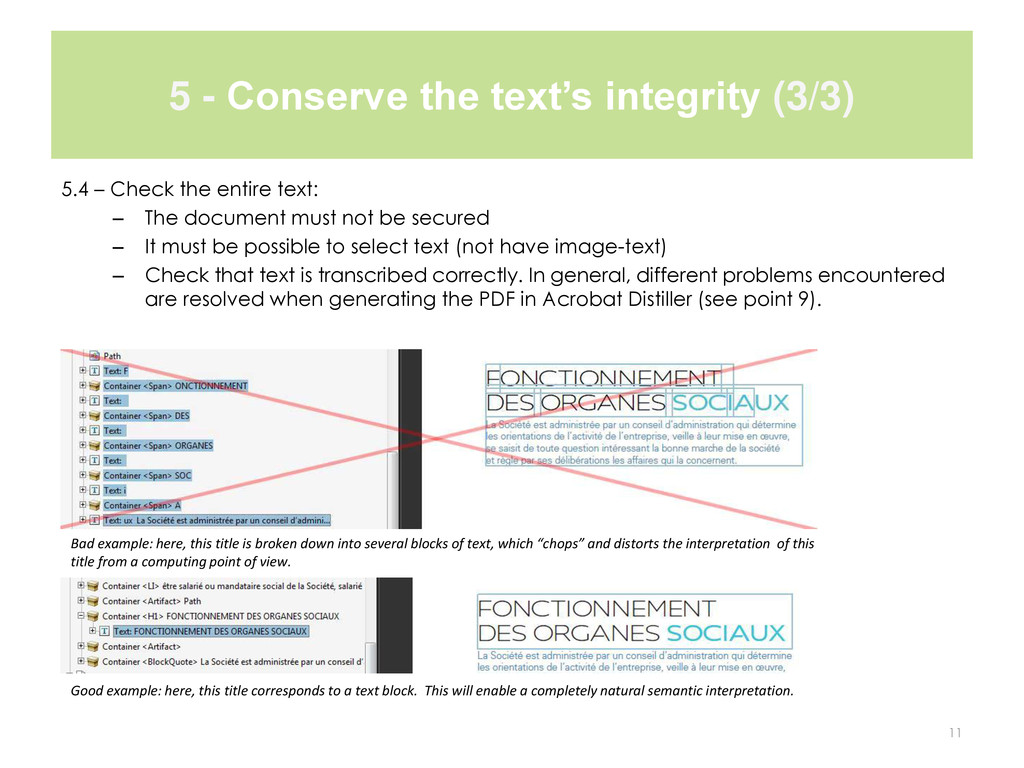
the entire text: – The document must not be secured – It must be possible to select text (not have image-text) – Check that text is transcribed correctly. In general, different problems encountered are resolved when generating the PDF in Acrobat Distiller (see point 9). 11 Good example: here, this title corresponds to a text block. This will enable a completely natural semantic interpretation. Bad example: here, this title is broken down into several blocks of text, which “chops” and distorts the interpretation of this title from a computing point of view.
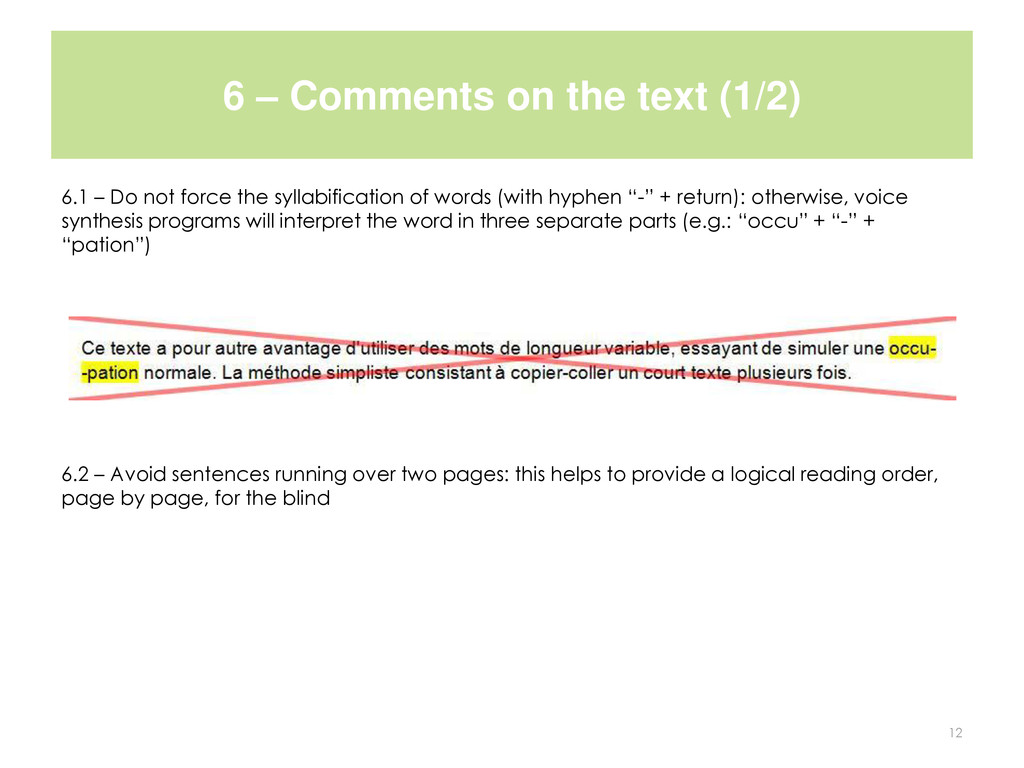
not force the syllabification of words (with hyphen “-” + return): otherwise, voice synthesis programs will interpret the word in three separate parts (e.g.: “occu” + “-” + “pation”) 6.2 – Avoid sentences running over two pages: this helps to provide a logical reading order, page by page, for the blind 12
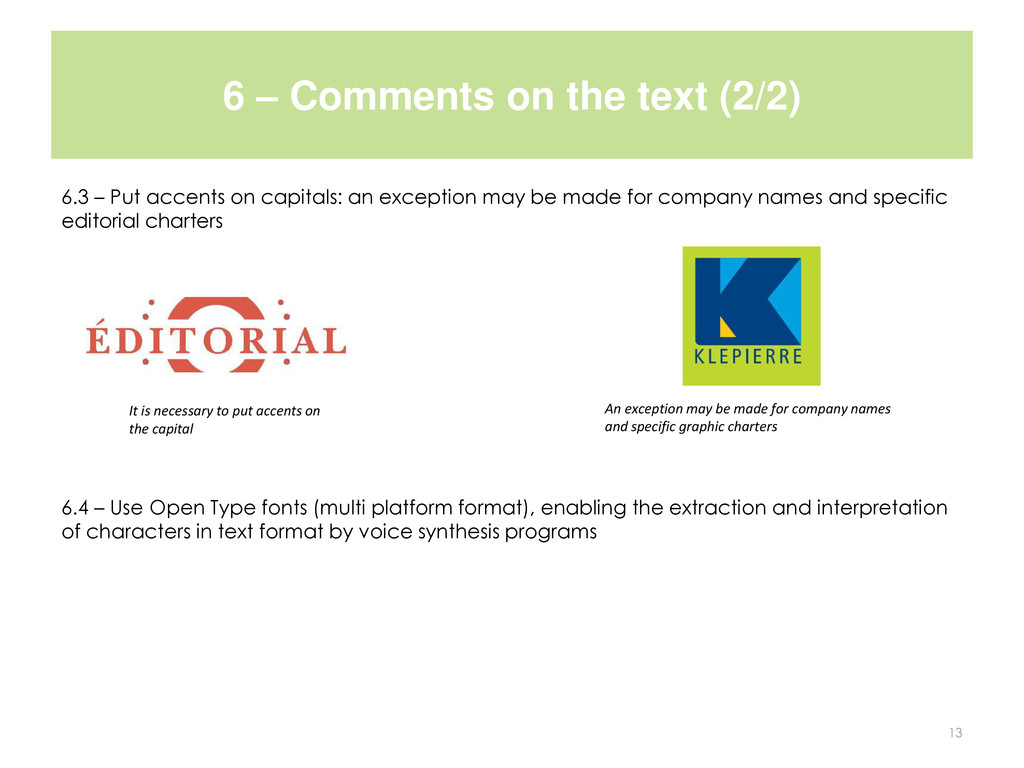
accents on capitals: an exception may be made for company names and specific editorial charters 6.4 – Use Open Type fonts (multi platform format), enabling the extraction and interpretation of characters in text format by voice synthesis programs 13 It is necessary to put accents on the capital An exception may be made for company names and specific graphic charters
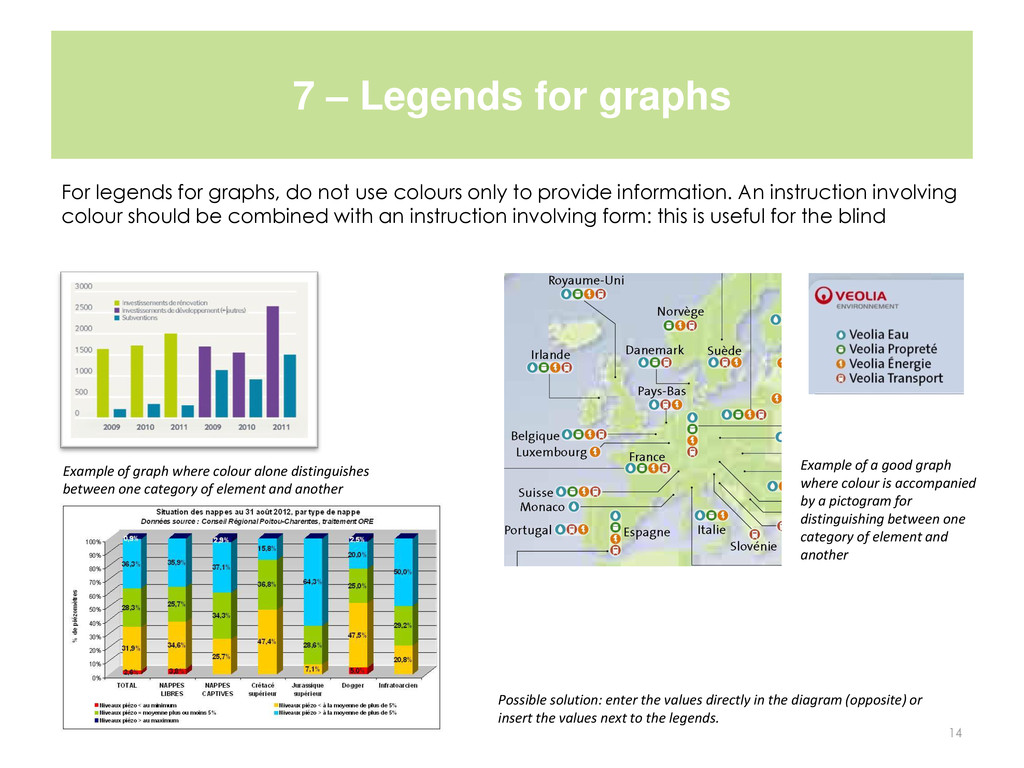
not use colours only to provide information. An instruction involving colour should be combined with an instruction involving form: this is useful for the blind 14 Example of graph where colour alone distinguishes between one category of element and another Example of a good graph where colour is accompanied by a pictogram for distinguishing between one category of element and another Possible solution: enter the values directly in the diagram (opposite) or insert the values next to the legends.
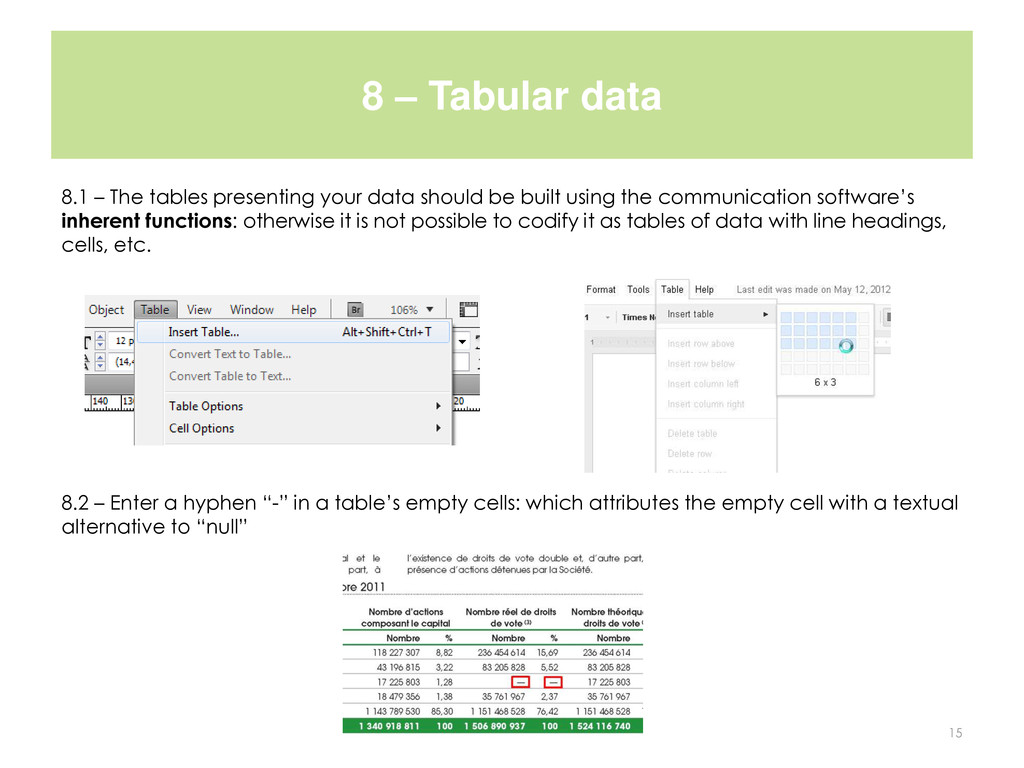
data should be built using the communication software’s inherent functions: otherwise it is not possible to codify it as tables of data with line headings, cells, etc. 8.2 – Enter a hyphen “-” in a table’s empty cells: which attributes the empty cell with a textual alternative to “null” 15
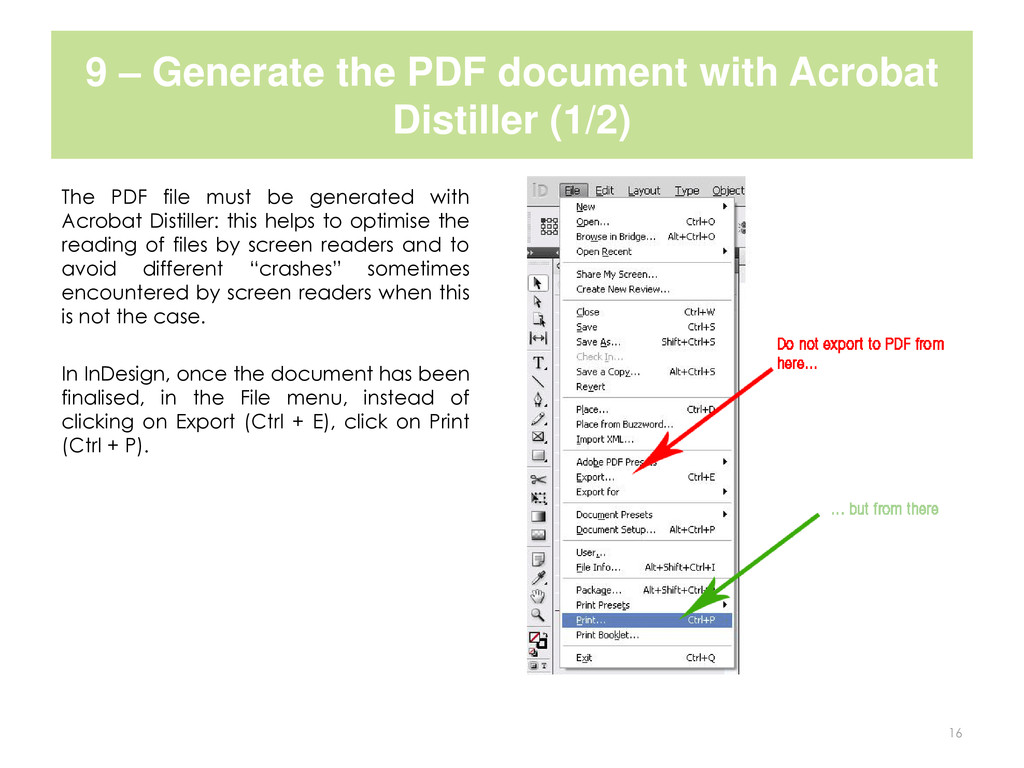
The PDF file must be generated with Acrobat Distiller: this helps to optimise the reading of files by screen readers and to avoid different “crashes” sometimes encountered by screen readers when this is not the case. In InDesign, once the document has been finalised, in the File menu, instead of clicking on Export (Ctrl + E), click on Print (Ctrl + P). 16
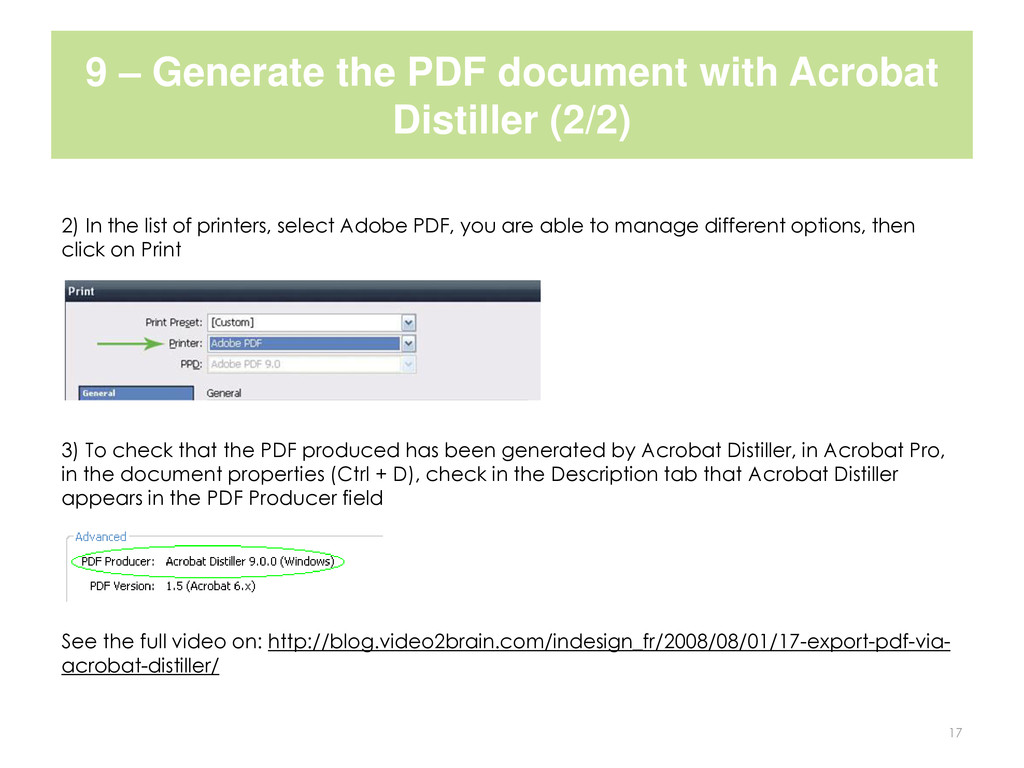
2) In the list of printers, select Adobe PDF, you are able to manage different options, then click on Print 3) To check that the PDF produced has been generated by Acrobat Distiller, in Acrobat Pro, in the document properties (Ctrl + D), check in the Description tab that Acrobat Distiller appears in the PDF Producer field See the full video on: http://blog.video2brain.com/indesign_fr/2008/08/01/17-export-pdf-via- acrobat-distiller/ 17