Recover Photos From an SD Card Without Risking the Rest of Your Shoot
A spreadsheet can be rebuilt. A presentation can be recreated. A photograph of a once-in-a-lifetime moment cannot.
That is why losing images from a camera card feels different from ordinary file loss.
For a wedding photographer, it could be the first kiss. For a wildlife photographer, the only usable frame from hours in the field. For a travel creator, it may be a location you will not visit again.
If photos disappear from an SD card, the most important thing is not to panic and continue shooting.
Stop using the card immediately.
Deleted photos may remain recoverable while their original data is still present. New photos, especially high-resolution RAW files or long burst sequences, can overwrite that storage quickly.
Why Deleted Photos May Still Be Recoverable
When a camera deletes an image, it does not necessarily erase every piece of the photo from flash memory immediately.
Instead, the file system can mark that space as available to reuse. The camera stops listing the image, but some or all of its underlying data may remain until new content occupies the same storage.
This is why photo recovery is possible in some deletion cases.
It is also why there is no guaranteed recovery window measured in hours or days.
A deleted photo on a card left untouched for several days may still be available. The same image on a card used for another high-volume shoot may be overwritten much sooner.
Formatting and file-system corruption can create similar situations. The photos may no longer appear normally even though some image data remains physically present.
Recovery, however, is never guaranteed. Once original sectors are overwritten, software cannot recreate the lost sensor data.
Protect the Card Before You Try Photo Recovery
As soon as you notice missing photos, protect the source media.
Stop taking new pictures and remove the card once the camera has finished any active write process.
Do not format it, even if the camera or computer suggests formatting.
Avoid file-system repair tools before recovery, and do not copy new files onto the card.
If you use a full-size SD card, you can also engage its lock tab before putting it into a compatible reader as an additional reminder not to write to it. The main goal is behavioral: treat the original card as read-only source material until the shoot has been recovered.
For paid client work, keep the card untouched even after finding a promising recovered copy until you have opened and verified the recovered originals elsewhere.
Check Whether the Photos Already Exist Somewhere Else
Before scanning, check the rest of your photography workflow.
A second copy may already exist on:
the second card from a dual-slot camera,
a Mac or PC import folder,
an external SSD,
a NAS,
a cloud backup,
a tethered-capture folder,
another workstation used during ingest.
This is particularly important in professional photography environments where files may pass through multiple devices before editing.
Do not confuse a proxy or preview with an original.
If a complete copy exists elsewhere, use it. If not, preserve the original card and proceed to recovery.
Recover Deleted Photos From an SD Card With Recoverit
If the card is still readable by your computer but the original photos are no longer accessible normally, the next step is to scan the storage without altering it.
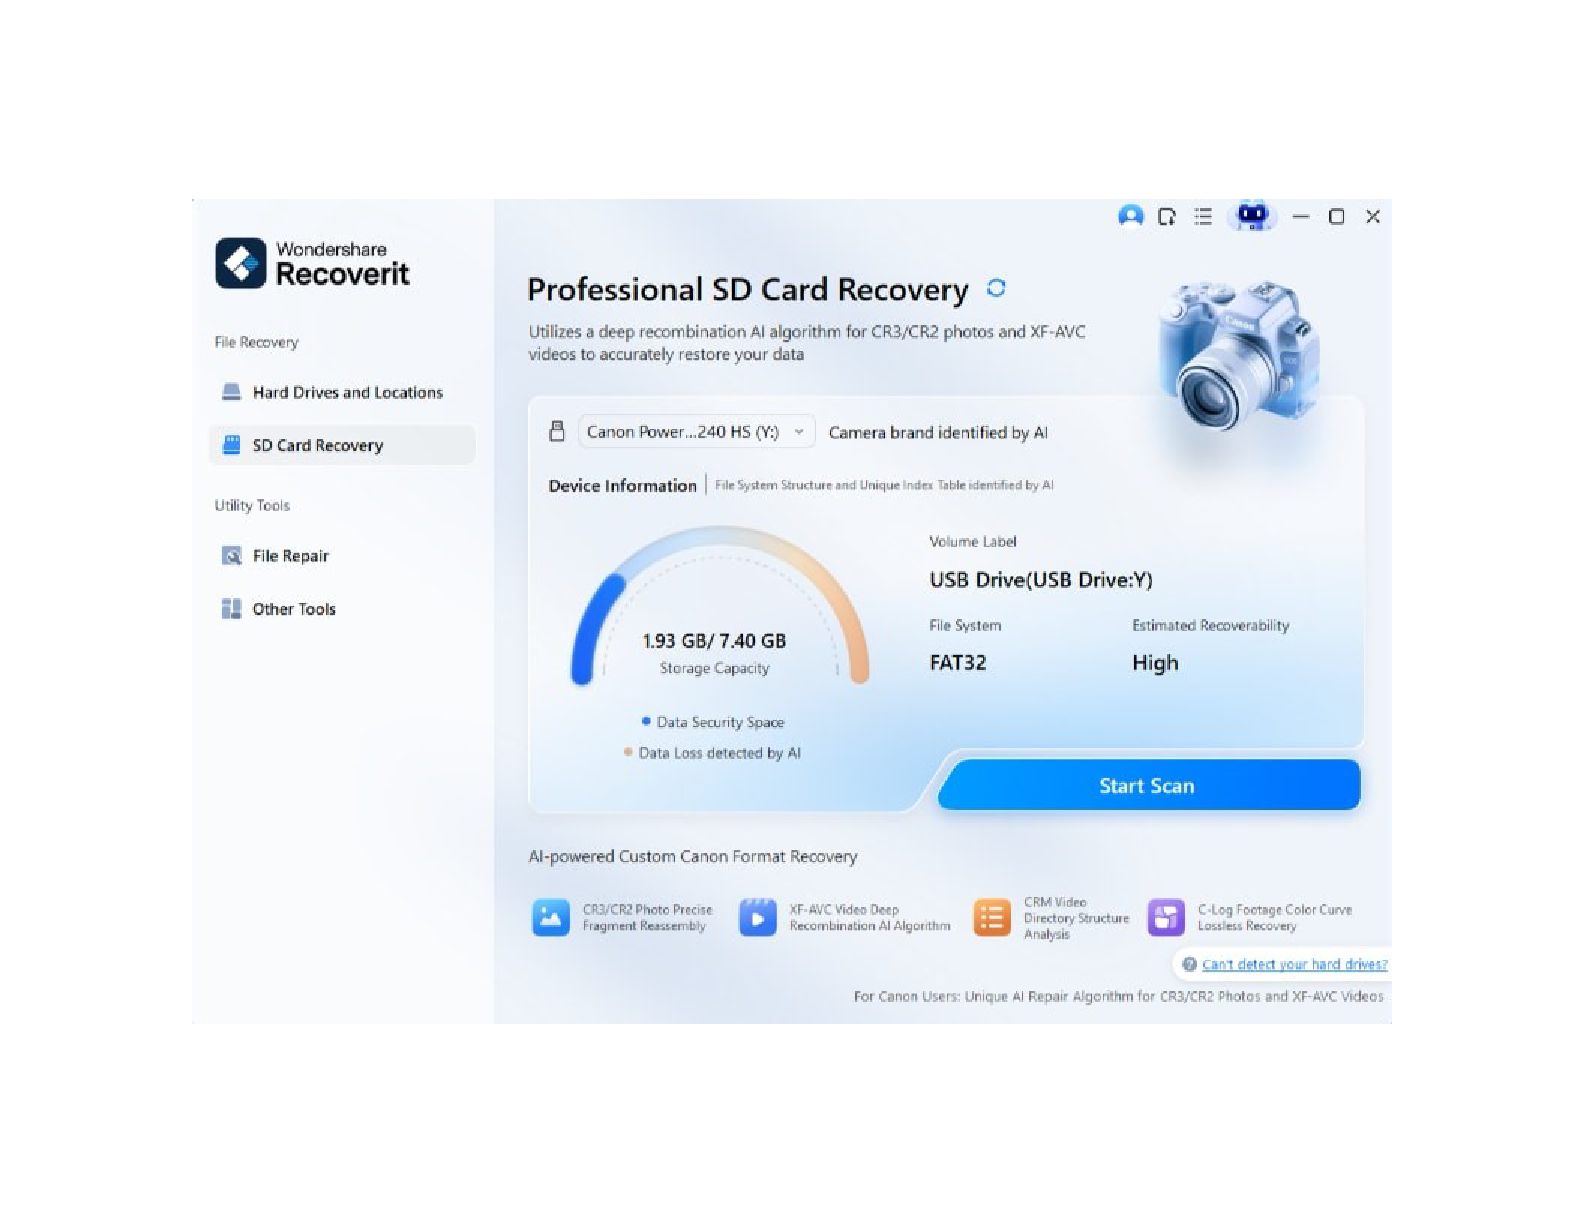
Wondershare Recoverit is a data recovery software for Windows and Mac. It can scan connected camera memory cards and other storage for deleted, formatted, RAW, corrupted, and inaccessible media. Recoverit supports common photos as well as camera RAW formats and allows users to preview and filter recoverable files before saving them to another drive. It is designed for computer and connected-storage recovery,
Step 1: Connect the Camera Card
Use a reliable card reader and connect the SD or microSD card to your Windows PC or Mac. If the operating system asks you to format the card, cancel the request.
Open Recoverit and choose the affected card from the SD Card Recovery section or storage-device list.
Step 2: Start Scanning
Begin the scan and leave the card connected.
Recoverit searches the storage for image and other media data that can still be identified. Depending on the card and what happened, results may retain familiar names and folders or appear in reorganized recovery categories.
Step 3: Focus on the Photo Formats That Matter
Photography workflows often contain more than JPEGs.
Depending on the camera system, the missing originals may include formats such as:
Canon CR2 or CR3,
Nikon NEF,
Sony ARW,
Adobe DNG,
Fujifilm RAF,
other supported RAW formats.
Recoverit’s current camera card recovery guidance specifically covers RAW formats such as CR2, CR3, NEF, DNG, and ARW alongside standard photo files.
Filter the result around the formats relevant to your shoot rather than searching every recovered item equally.
Step 4: Find the Exact Photo You Need
This can become the hardest part of photo recovery.
A scan may find hundreds or thousands of images, but formatting or file-system damage can remove meaningful filenames and folder structures.
Traditional filtering still helps: use file type, date, size, camera metadata where available, and previews.
Recoverit’s newer AI Search workflow adds another approach for creator-heavy scans. Where supported, users can search recovered media using remembered information, capture-device information, the file size, and other characteristics.
AI Search is designed to narrow existing scan results and help users locate likely matches. It is not a separate recovery engine and does not make overwritten photos recoverable.
Step 5: Preview and Recover to Another Drive
Preview likely images where possible.
Once you identify the correct photos, select them and recover them to your computer or a separate external drive.
Do not save them back to the source SD card.
After recovery, open the files in an appropriate viewer or RAW editor and confirm that the full-resolution image—not only a thumbnail—is usable.
Create a Better Memory-Card Workflow for Future Shoots
The best photo recovery strategy starts before anything is lost.
Build a predictable workflow around every card:
Shoot → Ingest → Verify → Back Up → Cull → Format
After a shoot, copy the files to primary storage and create another verified backup before erasing the card. Open several RAW files and confirm the expected image count instead of trusting a completed progress bar alone.
Rotate cards so that a single failure does not affect multiple assignments.
And avoid formatting an original camera card until you are sure the images exist in at least two safe places.
Final Thoughts
When photographs disappear from an SD card, the biggest threat is often what happens afterward.
Do not keep shooting. Do not format the card. Do not repair it before the images are safe.
Check your backups first, then scan the original storage if necessary. A recovery tool such as Recoverit can help photographers filter, preview, and locate recoverable RAW and standard image files, while newer search features can reduce the effort of finding one important shot among a large recovery result.
A memory card can be replaced.
The moment you captured on it may never happen again.


 ismulesoftrightforyourbusiness
 harutiro
 chack411
 oracle4engineer
 kakakakakku
 vivion
 ennael
 slsops
 ichiki1023
 ishiirikie
 kameitomohiro
 kmiya84377
 masahirokawahara
 maggiecrowley
 asonas
 axbom
axbom
 speakerdeck
 kimpetersen
 colly
colly
 tamaranovitovic
 helmedeiros
 cassininazir
 aleyda
 samanthasiow
 skipperchong