How to Recover Deleted Files From an SD Card Before They’re Overwritten
It takes only one wrong button press.
You are reviewing photos in-camera, delete a few obvious rejects, and realize that one of them was actually the shot the client wanted. Or you remove several GoPro clips to free space before noticing that the best take was included in the selection.
The instinct may be to keep using the camera while you search for a solution later.
Don’t do that.
If you want to recover deleted files from an SD card, stop using the card immediately. Accidental deletion does not always destroy the underlying file data at once, but every new photo or recording can reduce the chance of getting it back.
What Happens When You Delete a File From an SD Card?
An SD card uses a file system to keep track of where files are stored and how the device should find them.
When a file is deleted, the system may remove its directory entry or mark its storage space as available rather than instantly overwriting every byte of the original file.
To the camera or computer, the file appears gone.
To recovery software, some of the old data may still be discoverable until something else is written into the same storage area.
This is why accidental deletion can sometimes be reversible and why continued use is so dangerous.
Suppose you delete several RAW images from a nearly full card and then shoot another 500 photos. Those new images need storage space. Some may be written over sectors that previously belonged to the deleted files.
Once that happens, full recovery becomes much less likely.
Five Things to Do Immediately After Accidental Deletion
Your first response should be about preservation, not repair.
Stop shooting or recording. Do not take another photo just to check whether the camera is still working.
Remove the SD card. Once the camera has finished any active write process, power it down if necessary and remove the card safely.
Do not format it. Formatting does not help recover deleted files and can make the original file-system information harder to use.
Do not copy anything onto the card. Even a small test file creates new writes.
Connect the card to a computer through a reliable reader. Recovery is easier to control from Windows or macOS than by continuing to work with the card inside the recording device.
Check Whether Another Copy Already Exists
Before scanning the card, spend a few minutes checking for another usable copy.
For creators, that might mean:
an earlier import folder on a Mac or PC,
a second memory card from a dual-slot camera,
an external SSD used during ingest,
a NAS or server,
a cloud backup,
an exported version from an editing project.
If a complete original already exists elsewhere, restoring from that copy is safer than doing unnecessary recovery work.
Recover Deleted SD Card Files With Recoverit
If no complete backup exists and the files are no longer visible through the normal file system, the next practical step is to scan the original card.
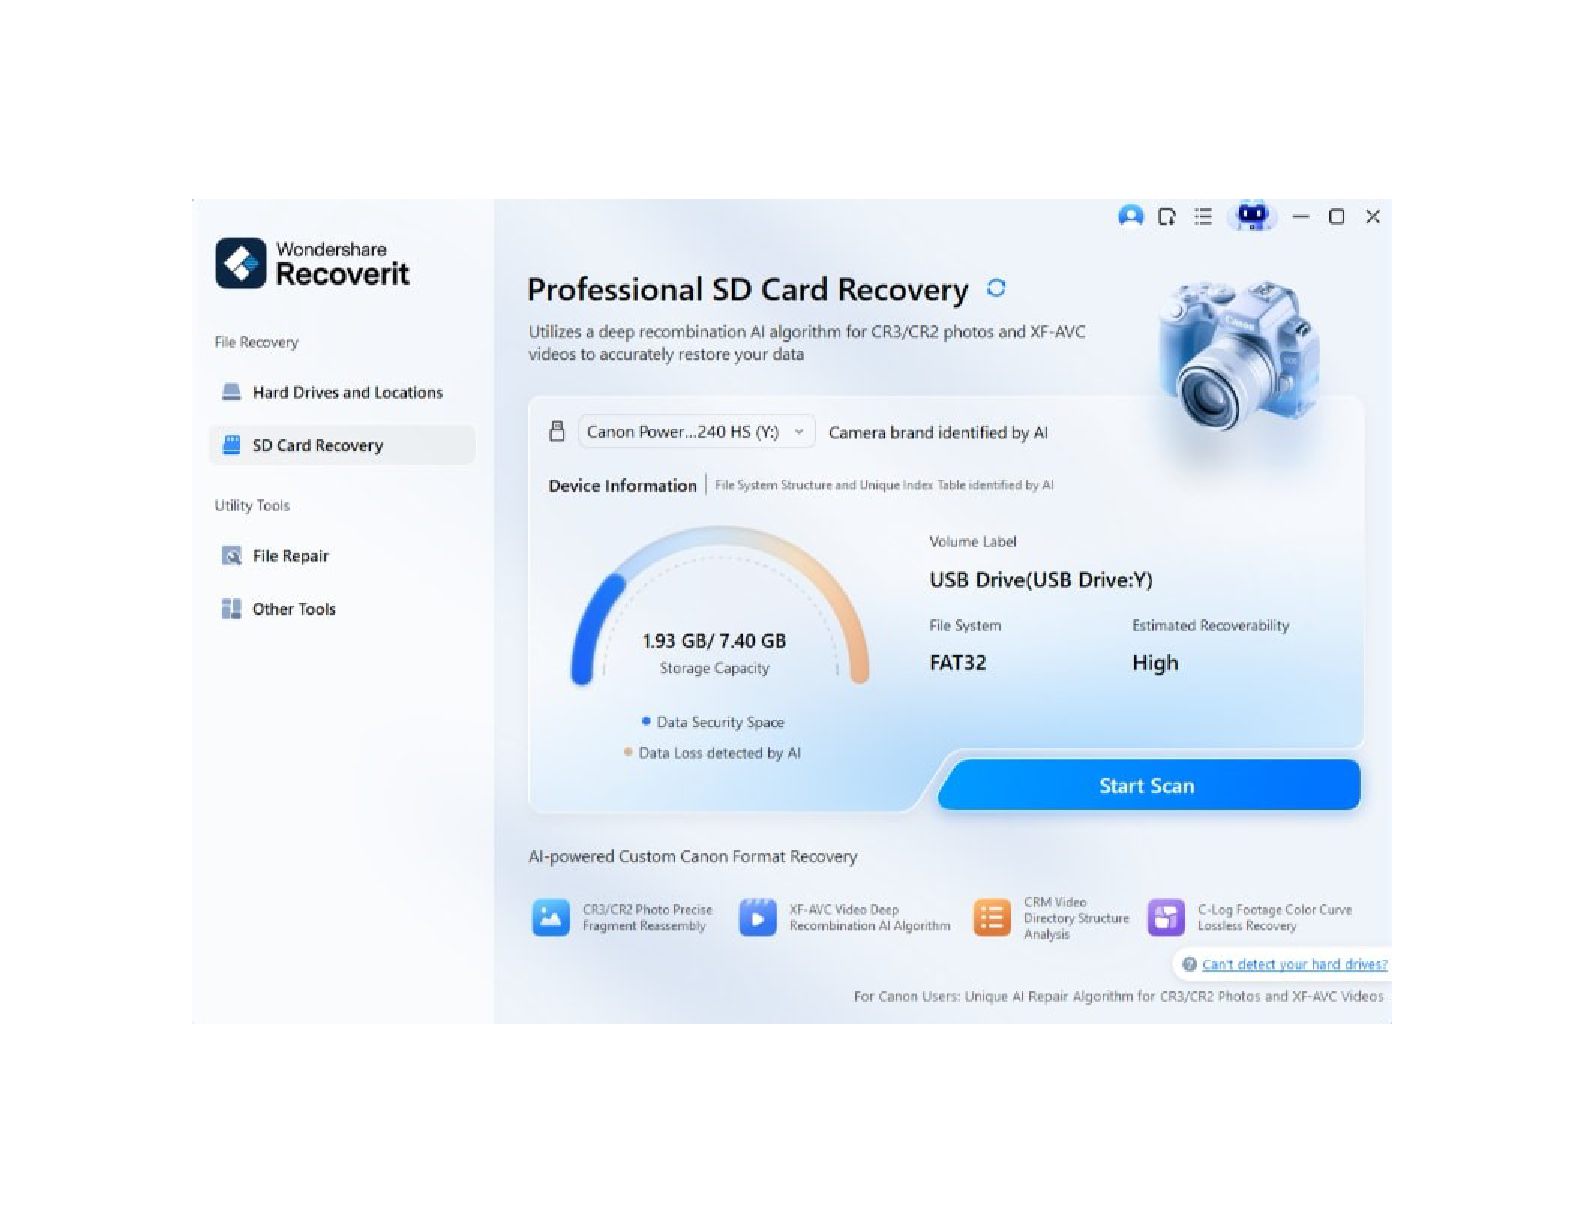
Wondershare Recoverit is data recovery software for Windows and Mac that can scan connected storage devices such as SD and microSD cards for deleted and otherwise lost files. It can display and filter recoverable photos, videos, documents, and creator formats before users save selected files to another location.
Step 1: Connect the Original SD Card
Insert the affected card into a stable card reader.
Launch Recoverit and go to the SD Card Recovery section. Identify the correct card by its capacity and device information. Avoid selecting another external SSD or storage drive by mistake.
Step 2: Scan the Card
Start the scan.
Do not use the SD card for any other task during this process. The goal is to inspect its current state without adding new files.
As results appear, Recoverit organizes found data and provides filters that help narrow large result sets.
Step 3: Narrow the Results
Think about what was deleted.
If you are a photographer, focus on relevant photo formats. Depending on the camera, those might include JPEG plus formats such as CR2, CR3, NEF, ARW, or DNG.
If you lost footage, concentrate on video formats such as MP4 or MOV.
Filtering matters because modern cards can contain thousands of files, including thumbnails, sidecars, proxies, and older assets that are unrelated to the deletion.
Step 4: Preview Likely Files
Preview the files before recovery.
Do not restore 30,000 files simply because the scan found them. Look first for the images, footage, or documents that actually matter.
A preview is useful evidence that the software can identify the file, although it should not be treated as an absolute guarantee that every byte of a large or partially overwritten file is intact.
Step 5: Recover Files Somewhere Else
Once you identify the target files, click Recover and choose a different destination.
A folder on your Mac or Windows computer is fine. A separate external SSD is also suitable.
The important rule is to avoid saving recovered data back onto the same SD card because those writes could replace other deleted files that have not yet been recovered.
What If Only Some Deleted Files Appear?
Partial results are common enough that they should not automatically be interpreted as software failure.
One deleted file may remain almost completely intact while another has already been partly overwritten. Large videos can also be more vulnerable to fragmentation than small files.
Other factors include:
how much the card was used after deletion,
whether the card was nearly full,
whether the file system was damaged,
whether the original filename and folder metadata survived,
whether recording was interrupted before a file finished writing.
If a recovered file appears but will not open, do not assume repeated scans will rebuild missing sectors. If the original storage blocks have been replaced, software cannot recreate the missing original content from nothing.
When Does Deletion Become Permanent?
There is no universal countdown such as “deleted files remain recoverable for 24 hours.”
What matters is new writing, not time by itself.
A card sitting untouched in a drawer for a week may preserve deleted data better than a card that was reused for an hour immediately after deletion.
That makes creator behavior especially important. High-resolution burst photography and high-bitrate 4K or 8K recording can write large amounts of new data quickly.
The safest rule is therefore simple:
Once you realize the wrong file was deleted, retire that card from the shoot until recovery is finished.
Prevent the Same Accident on Your Next Shoot
Accidental deletion is difficult to eliminate completely, but a better workflow reduces its impact.
Avoid aggressively culling files in-camera during a critical shoot. Back up the card before major deletion sessions. Where available, use dual-card recording for high-value assignments.
Most importantly, do not treat the memory card as your long-term archive.
Move finished work through a predictable sequence:
Capture → Import → Verify → Back Up → Cull → Format
With that process in place, one accidental Delete command becomes an inconvenience rather than a crisis.
Final Thoughts
Deleted SD card files are easiest to recover before the card returns to active use.
Stop shooting, avoid formatting or repair commands, check for another complete copy, and scan the original card if necessary. A tool such as Recoverit can help identify and preview deleted files before saving selected data to another drive.
The sooner you stop writing to the card, the better chance the original data has of still being there.


 ismulesoftrightforyourbusiness
 orroyalties
 malna
malna
 nozomi
 mj6237
 sasukefinanciallab
 takemura_yuto
 gatechnologies
 laskoi
 attelu
 loglass2019
 takeshisumida_
 mercari_inc
 apolaine
 letsgokoyo
 erikaheidi
 rkaga
rkaga
 frankvandijk
 vanstee
 thekraken
 rakko
rakko
 aleyda
 ryanjones
 sergeychernyshev
 geoffreycrofte