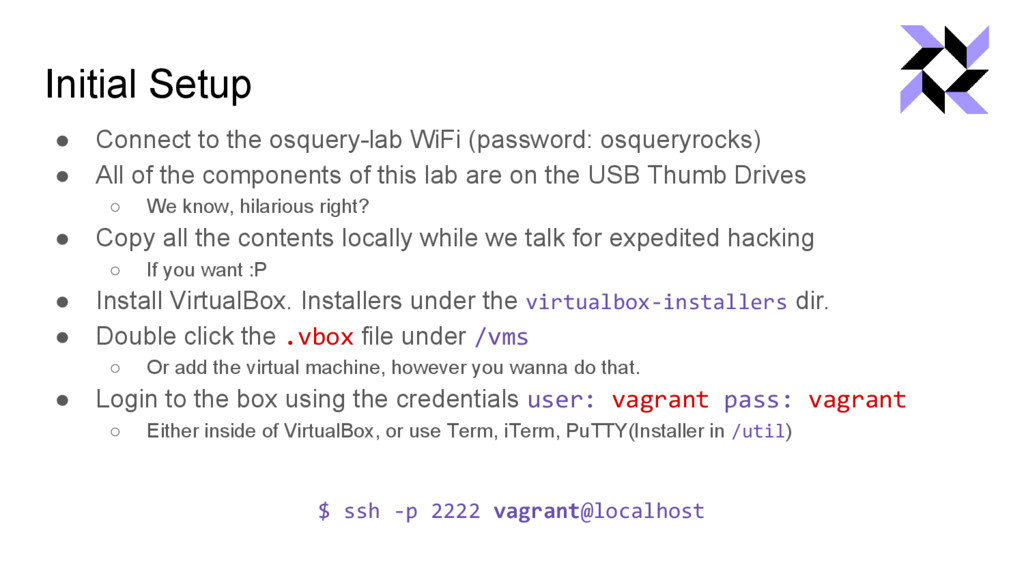
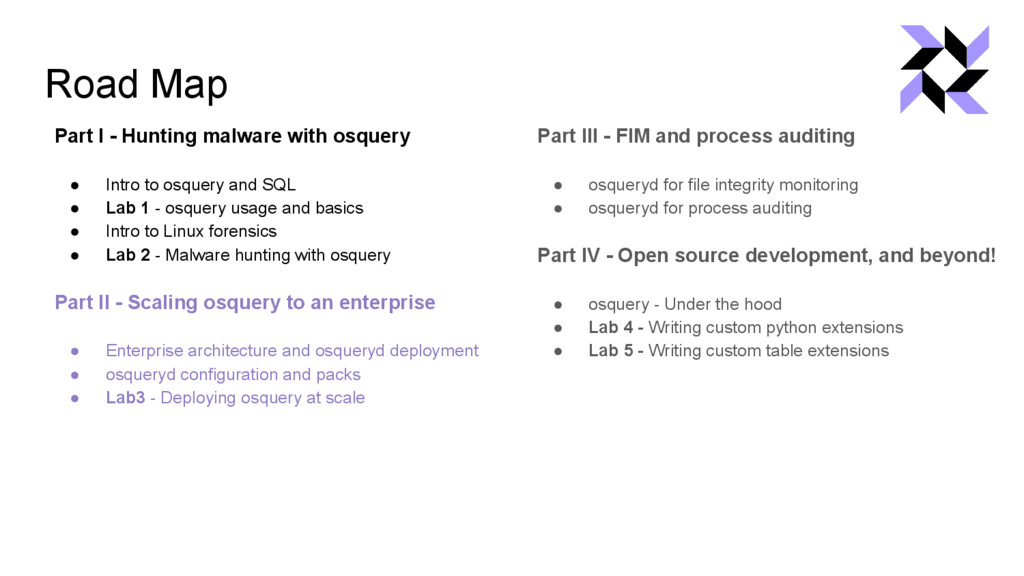
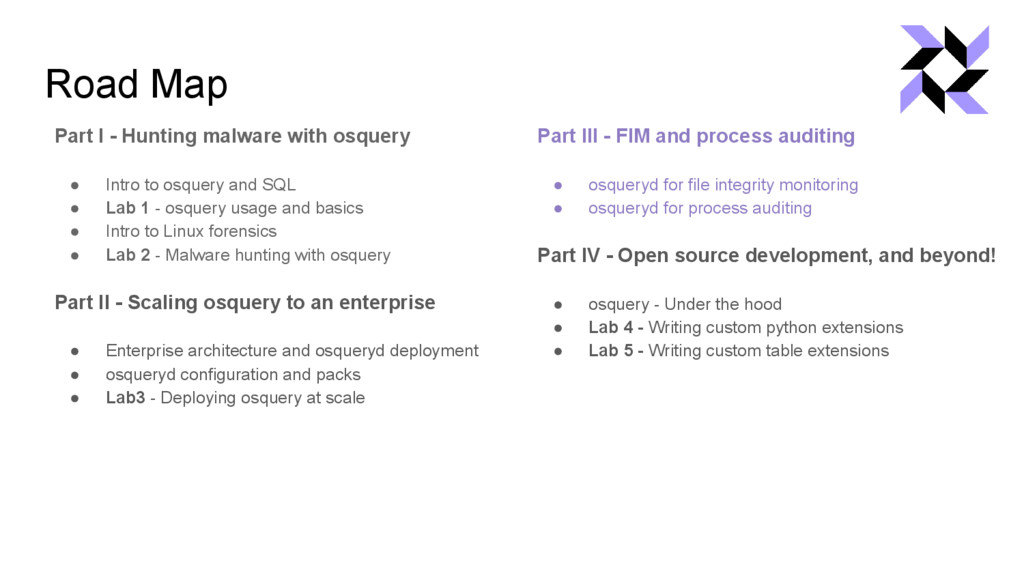
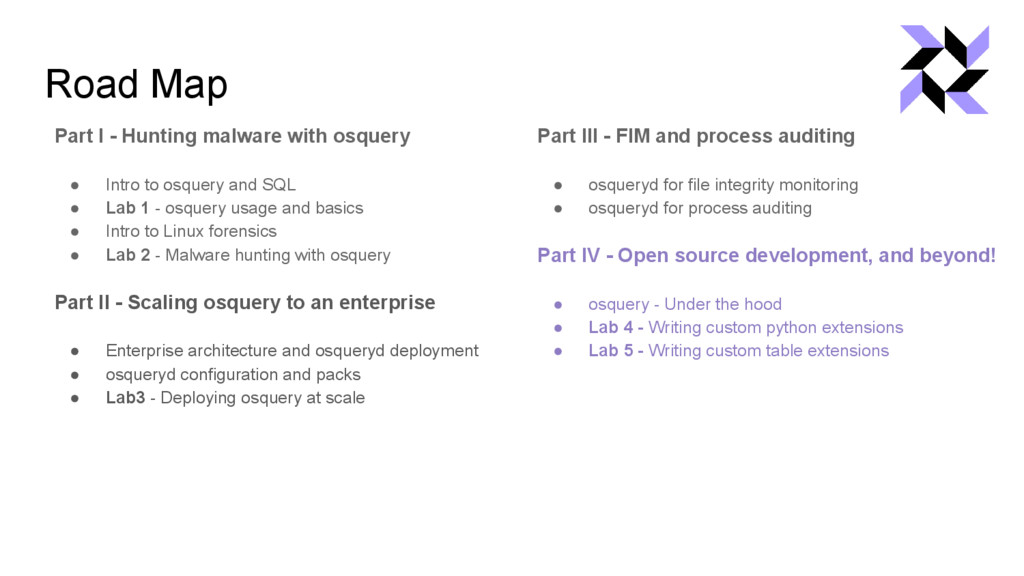
This workshop is an introduction to osquery, an open source SQL-powered operating system for instrumentation and analytics. osquery is developed and used by Facebook to proactively hunt for abnormalities. Since osquery allows us to easily ask questions about our infrastructure, it provides powerful capabilities, such as finding malware persistence techniques and scanning IOCs across our fleets of machines. This workshop is a very hands-on training and we expect participants to be comfortable with CLI. The workshop is broken into three components:
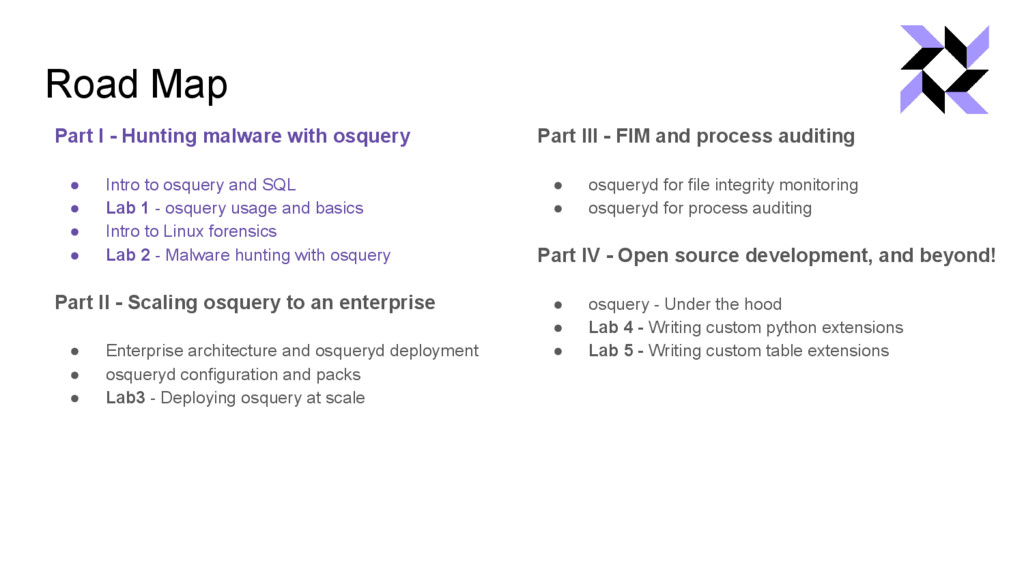
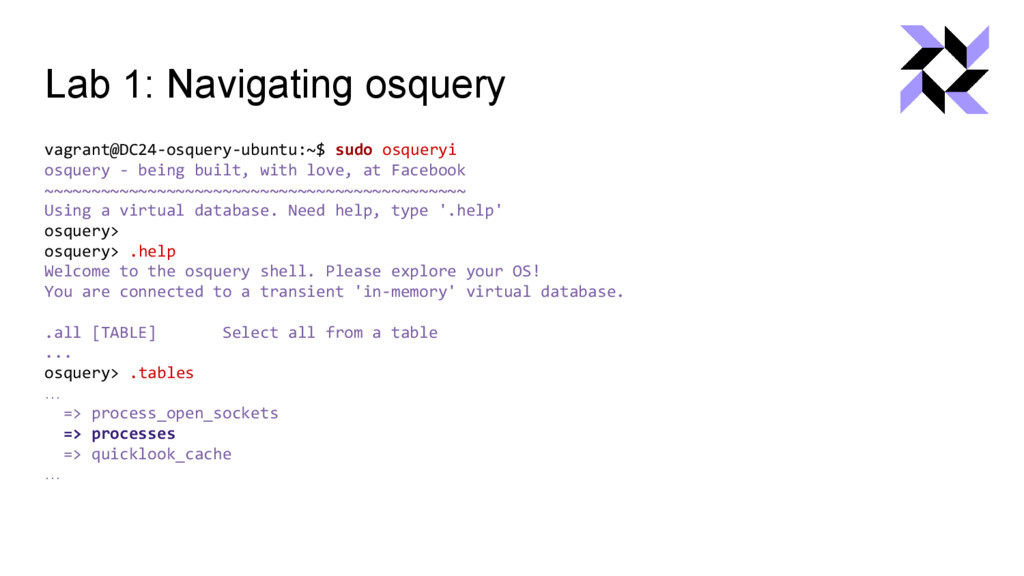
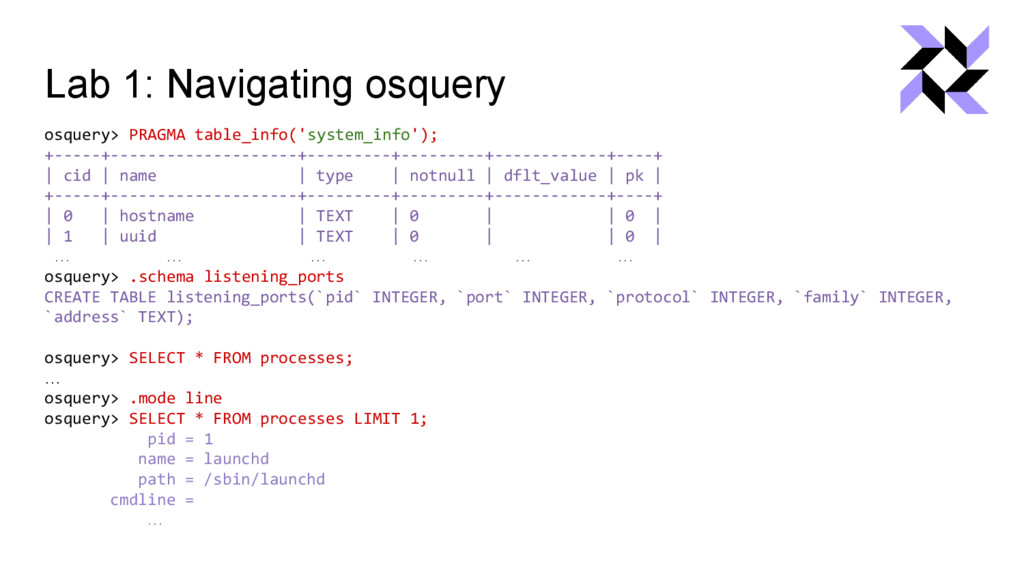
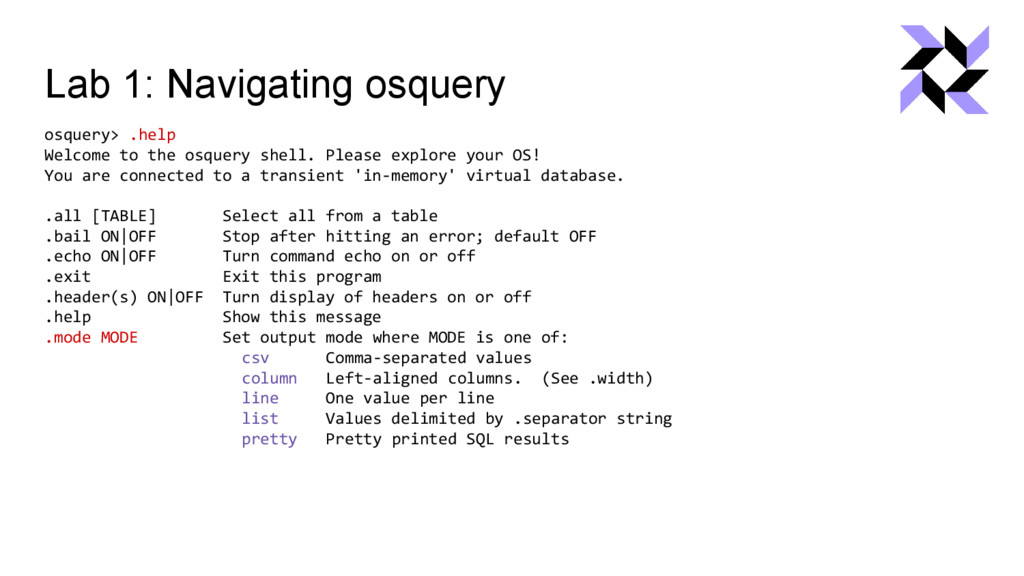
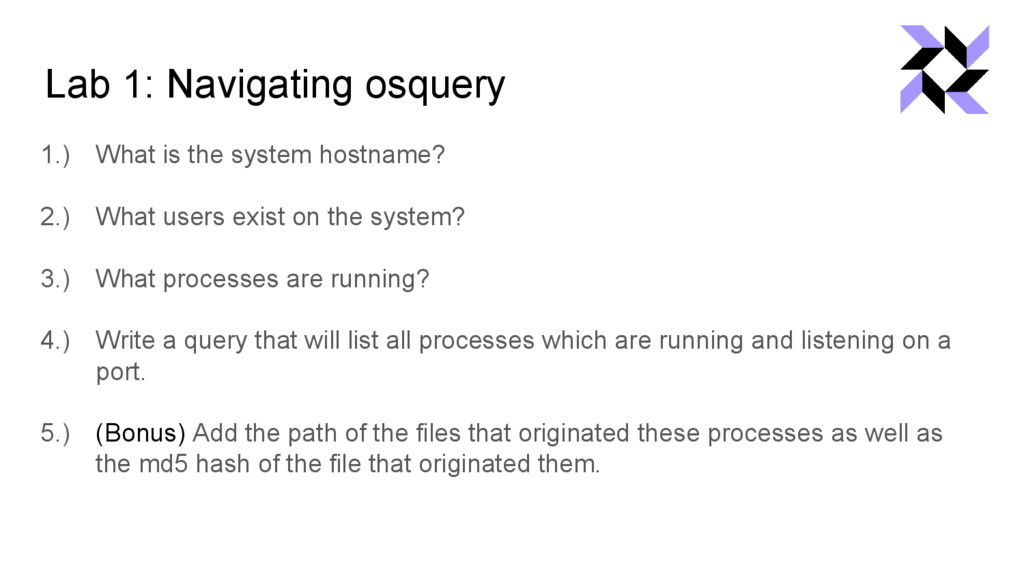
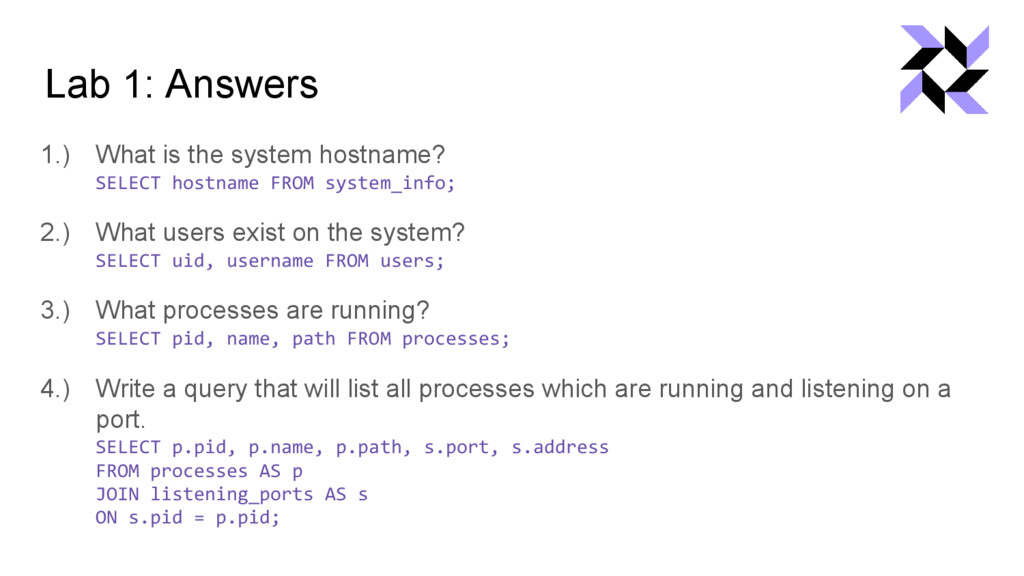
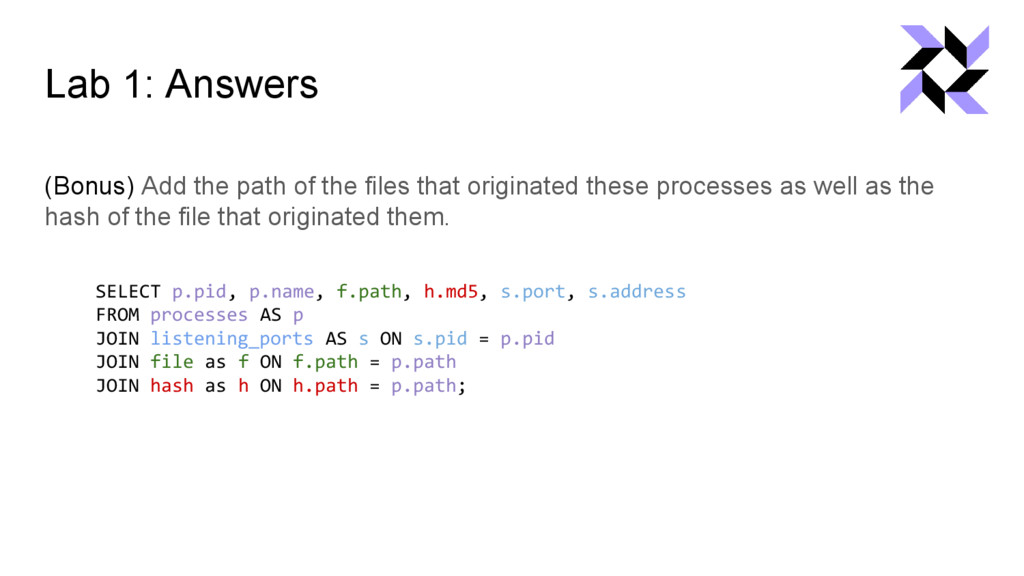
Part I - hunting malware with osquery (1.5 hours) The first section of the workshop will make use of the interactive osquery command line tool (osqueryi) to hunt for characteristics of malware residing on a local system. The goal of this section is to get students familiar with writing SQL statements and to understand how osquery makes use of core tables to abstract operating system artifacts.
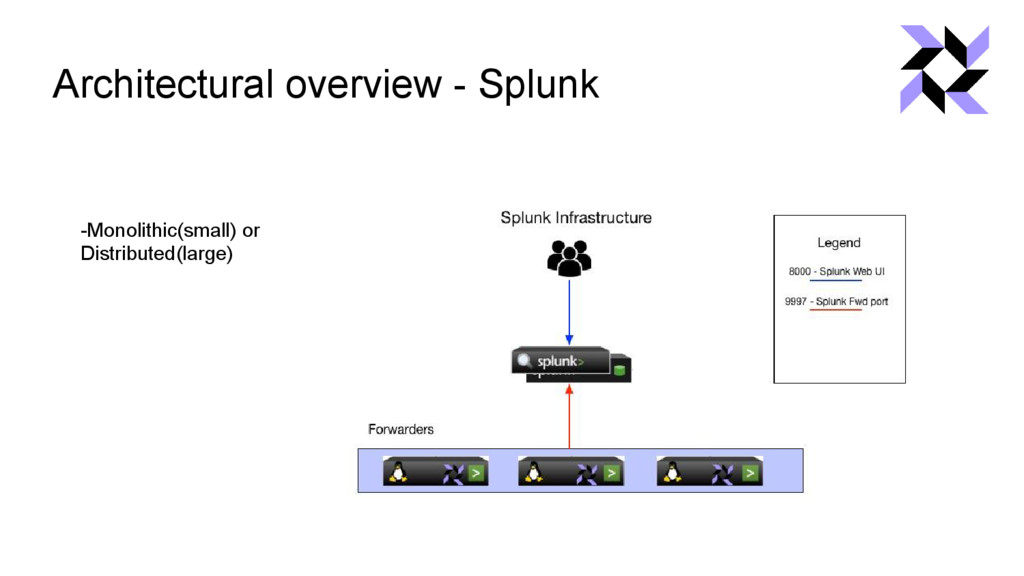
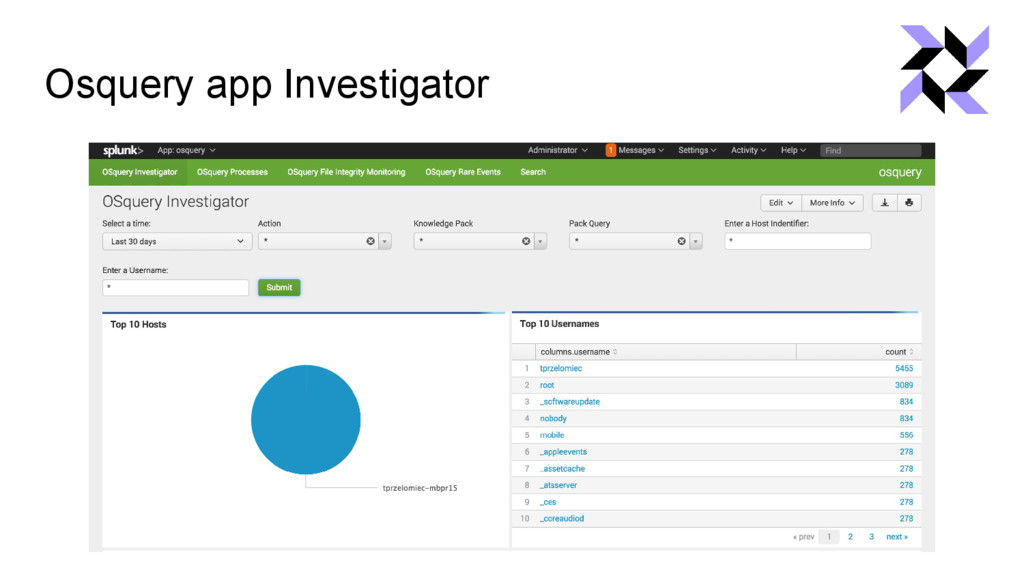
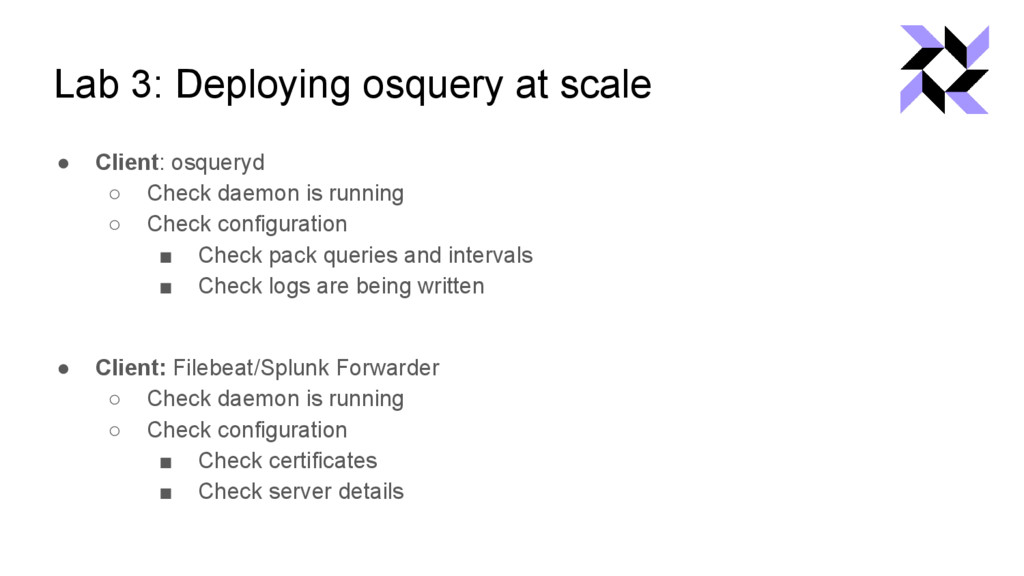
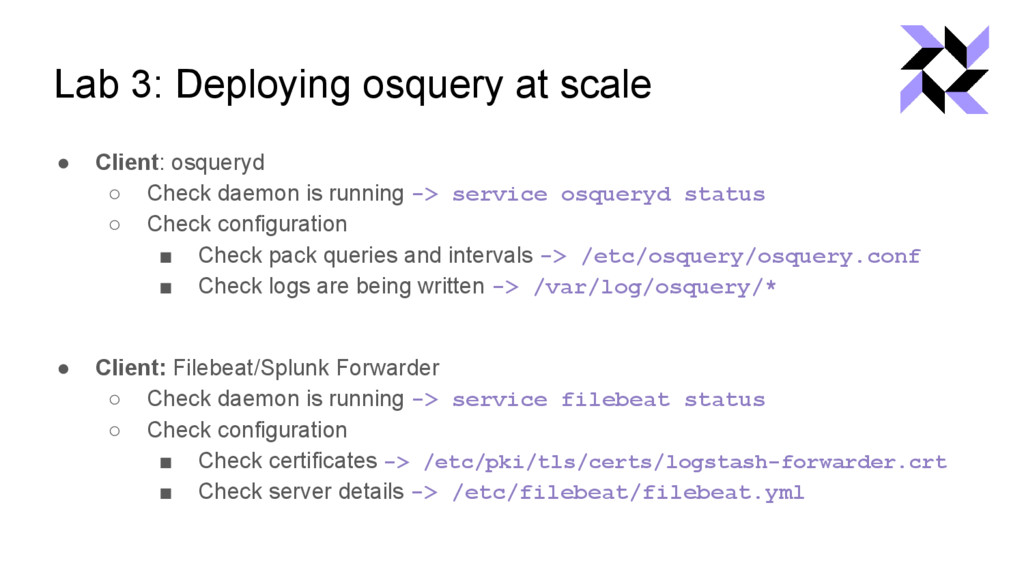
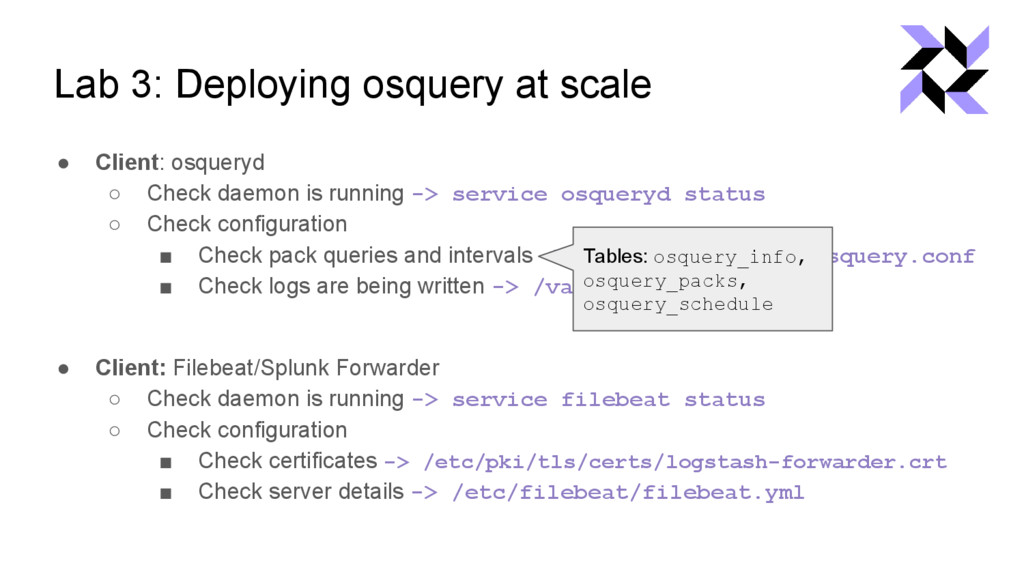
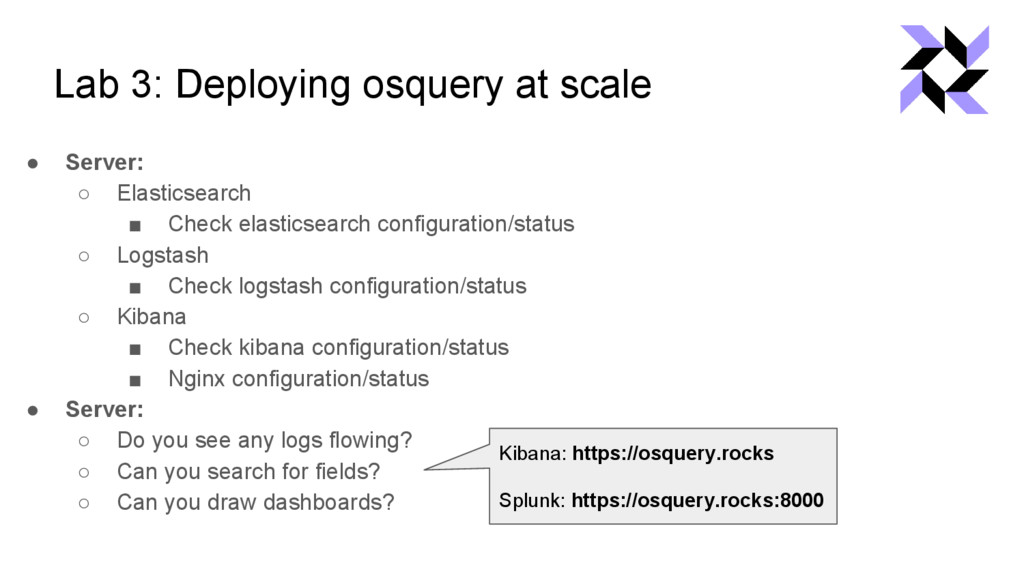
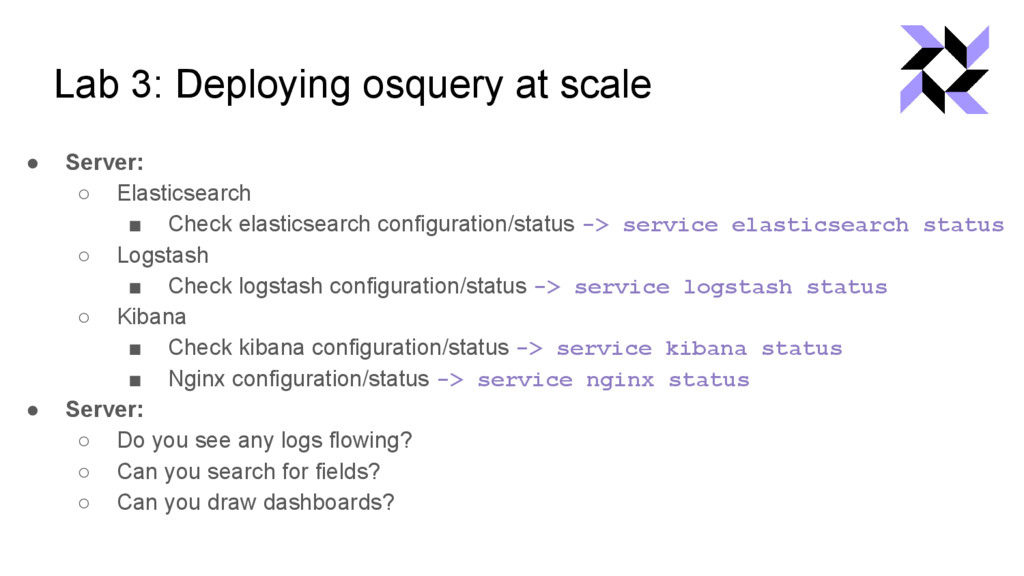
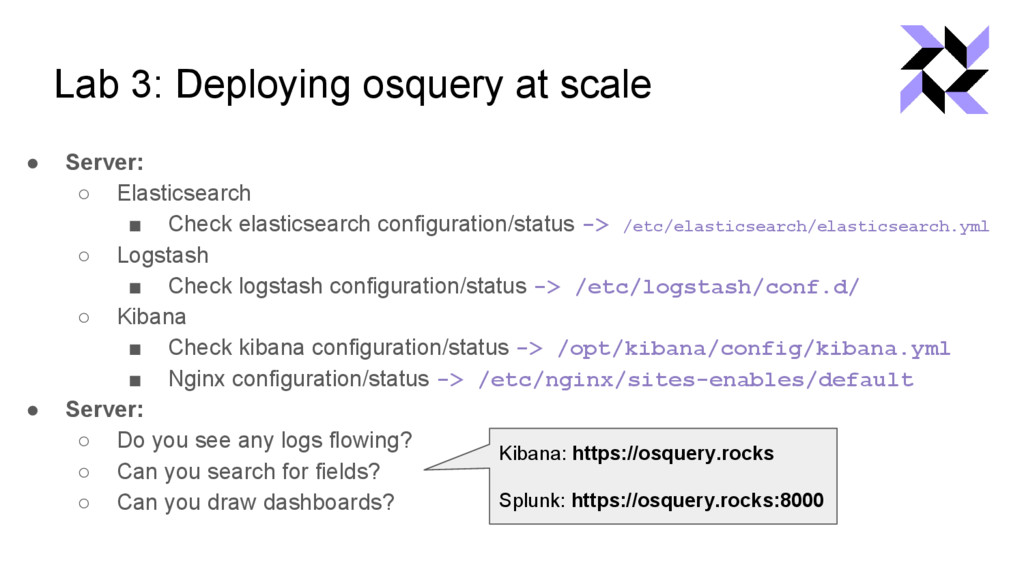
Part II - osquery at scale (1.5 hours): The second part of the workshop will focus on automation and deployment of osquery at a larger scale. You will learn how to write “query packs” which are utilized to collect and analyze the results from various endpoints in an enterprise. We will demonstrate this concept with the use of virtual machines, however the methodologies can be extrapolated to larger enterprises.
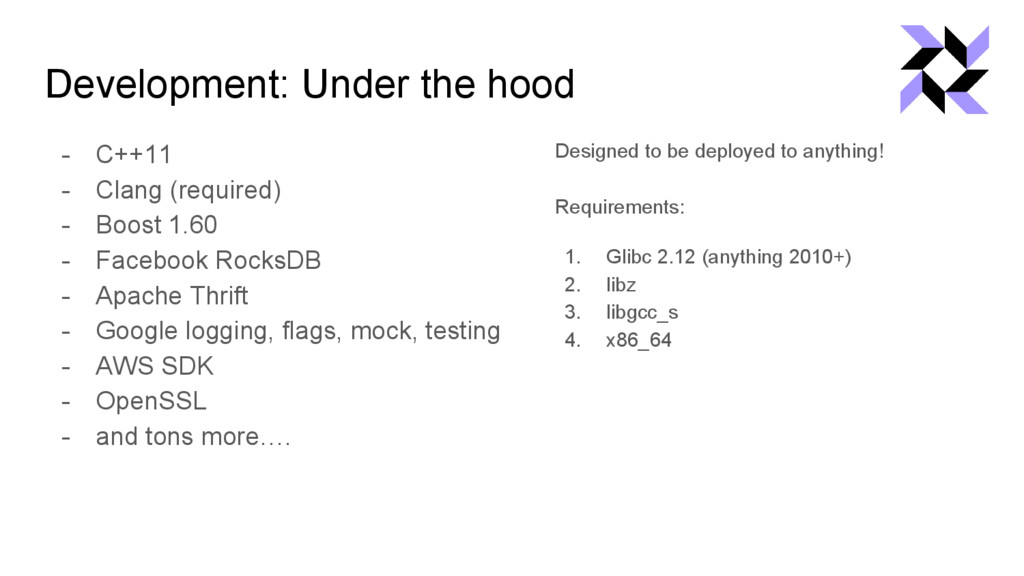
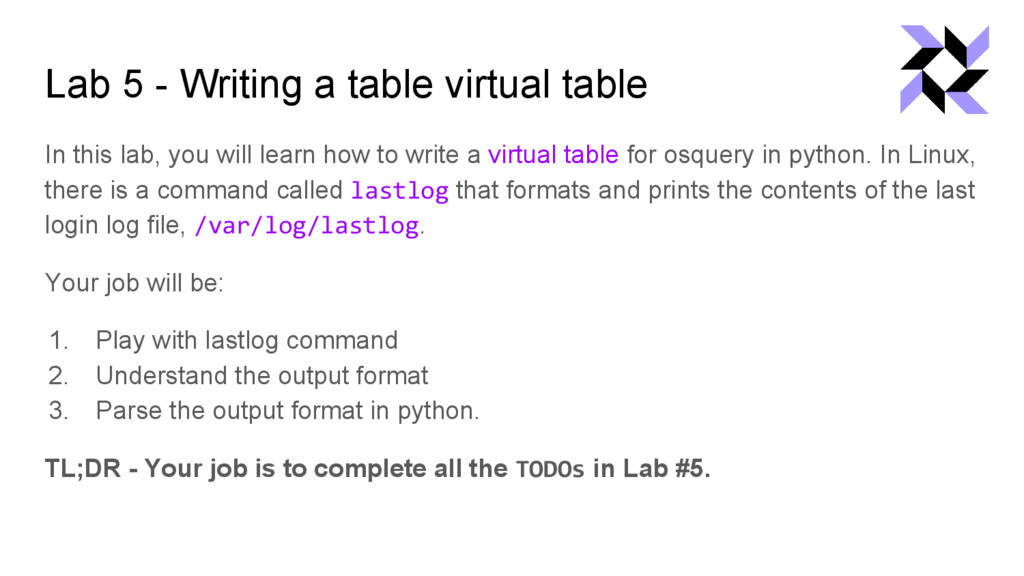
Part III - osquery development (optional - 0.5 to 1 hours): The last part of the workshop focuses on osquery development. We will walk you through some of the core components of osquery so you can have a deeper understand of this application. The goal being to give the student sufficient information to hack on the osquery project. This segment is largely optional and designed for people who want to get familiar with how osquery works under the hood.
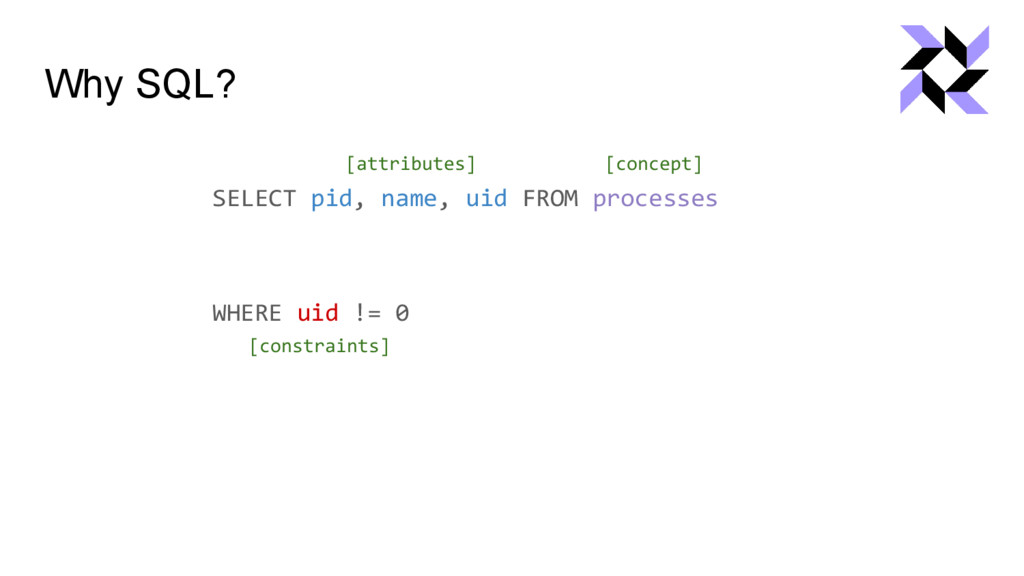
![Why SQL? SELECT pid, name, uid FROM processes [concept]](https://files.speakerdeck.com/presentations/88cb6a42b1a64faa8203f65a01ca6ed7/slide_8.jpg)
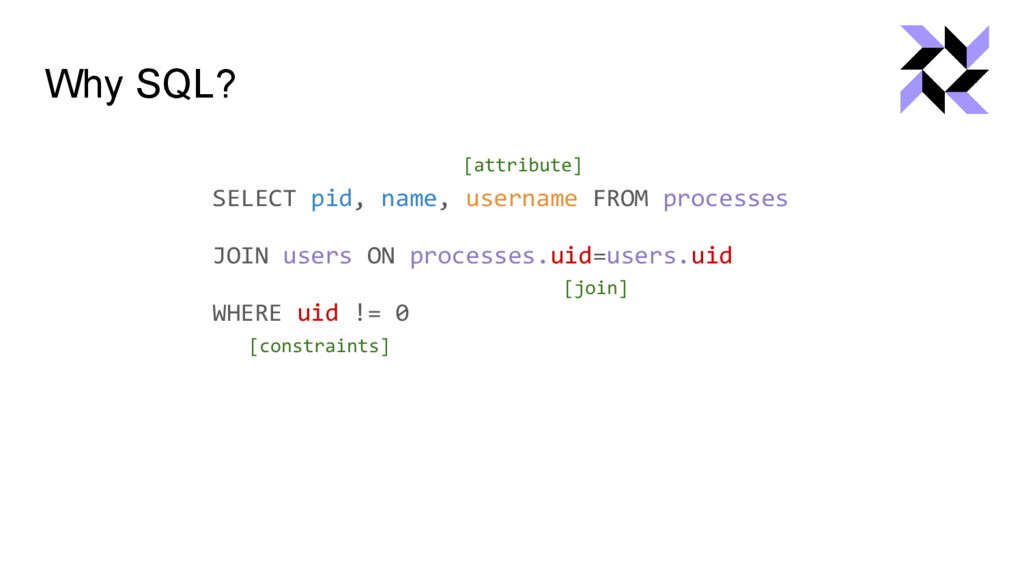
![Why SQL? SELECT pid, name, uid FROM processes [concept] [attributes]](https://files.speakerdeck.com/presentations/88cb6a42b1a64faa8203f65a01ca6ed7/slide_9.jpg)
![Server: Logstash (filter) filter { if [type] == "osquery_json" {](https://files.speakerdeck.com/presentations/88cb6a42b1a64faa8203f65a01ca6ed7/slide_50.jpg)
![Server: Logstash (output) output { elasticsearch { hosts => ["localhost:9200"]](https://files.speakerdeck.com/presentations/88cb6a42b1a64faa8203f65a01ca6ed7/slide_51.jpg)
![Splunk configuration • Splunk Forwarder ◦ - inputs.conf [monitor:///var/log/osquery/osqueryd.results.log] index](https://files.speakerdeck.com/presentations/88cb6a42b1a64faa8203f65a01ca6ed7/slide_57.jpg)
![File integrity monitoring $ osqueryi --config_check --config_path /etc/hosts [1] $](https://files.speakerdeck.com/presentations/88cb6a42b1a64faa8203f65a01ca6ed7/slide_71.jpg)
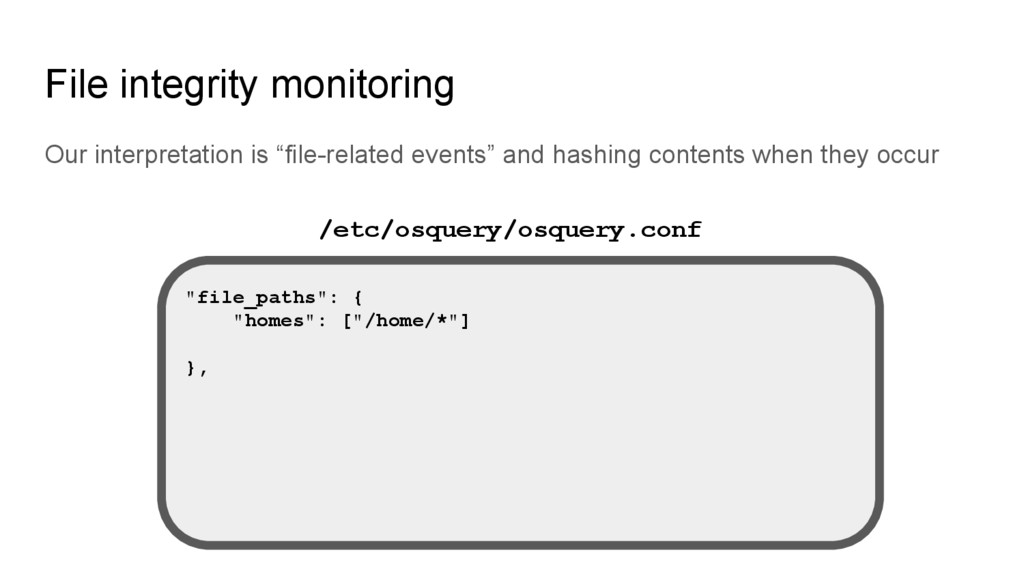
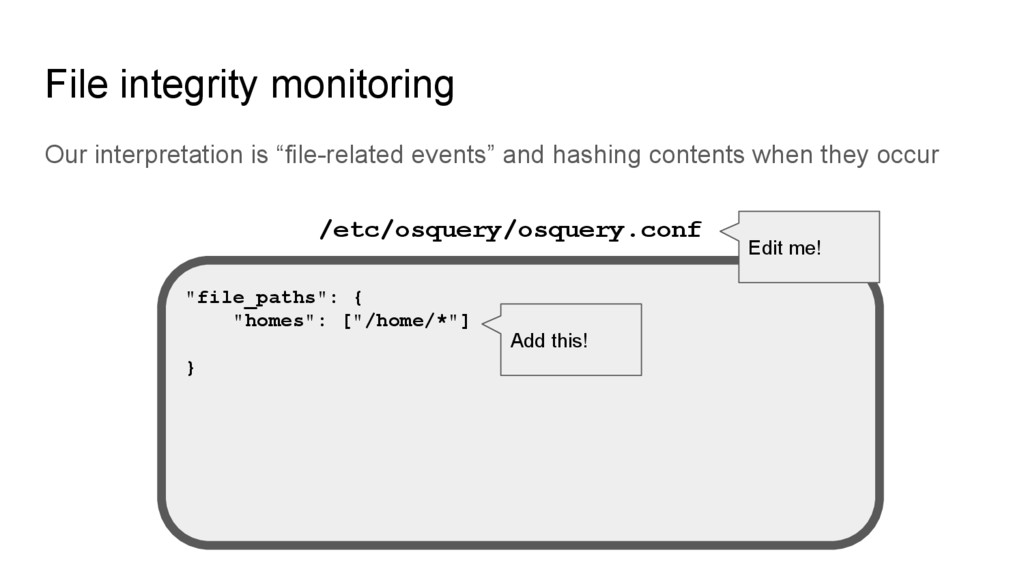
!["file_paths": { "homes": ["/home/*"] } File integrity monitoring /etc/osquery/osquery.conf What](https://files.speakerdeck.com/presentations/88cb6a42b1a64faa8203f65a01ca6ed7/slide_72.jpg)
![File integrity monitoring "file_paths": { "homes": ["/home/**"] } /etc/osquery/osquery.conf How](https://files.speakerdeck.com/presentations/88cb6a42b1a64faa8203f65a01ca6ed7/slide_73.jpg)
![File integrity monitoring "file_paths": { "homes": ["/home/**"], "etc": [ "/etc/ssh/*",](https://files.speakerdeck.com/presentations/88cb6a42b1a64faa8203f65a01ca6ed7/slide_74.jpg)
![File integrity monitoring $ osqueryi --verbose --nodisable_events [...] Added file](https://files.speakerdeck.com/presentations/88cb6a42b1a64faa8203f65a01ca6ed7/slide_75.jpg)
![File integrity monitoring $ osqueryi --verbose --nodisable_events [...] Added file](https://files.speakerdeck.com/presentations/88cb6a42b1a64faa8203f65a01ca6ed7/slide_76.jpg)
![File integrity monitoring $ osqueryi --verbose --nodisable_events [...] Added file](https://files.speakerdeck.com/presentations/88cb6a42b1a64faa8203f65a01ca6ed7/slide_77.jpg)