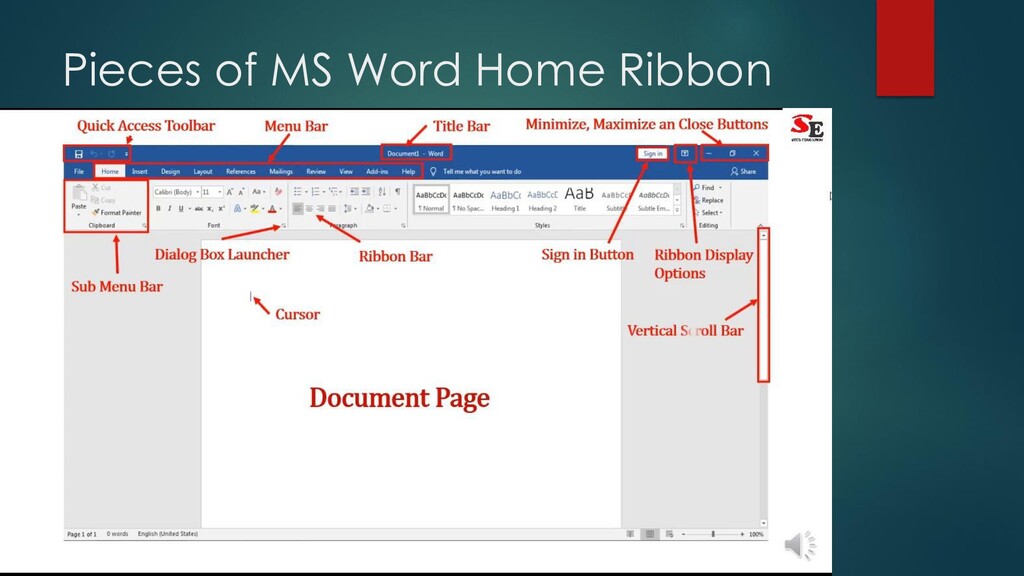
screen Ribbons – takes place of the menu bar (2003 version & previous) Document Area – the area you are working on (indicated by the mock paper on image in previous slide) Status Bar – at the bottom of the window and has several different pieces of information
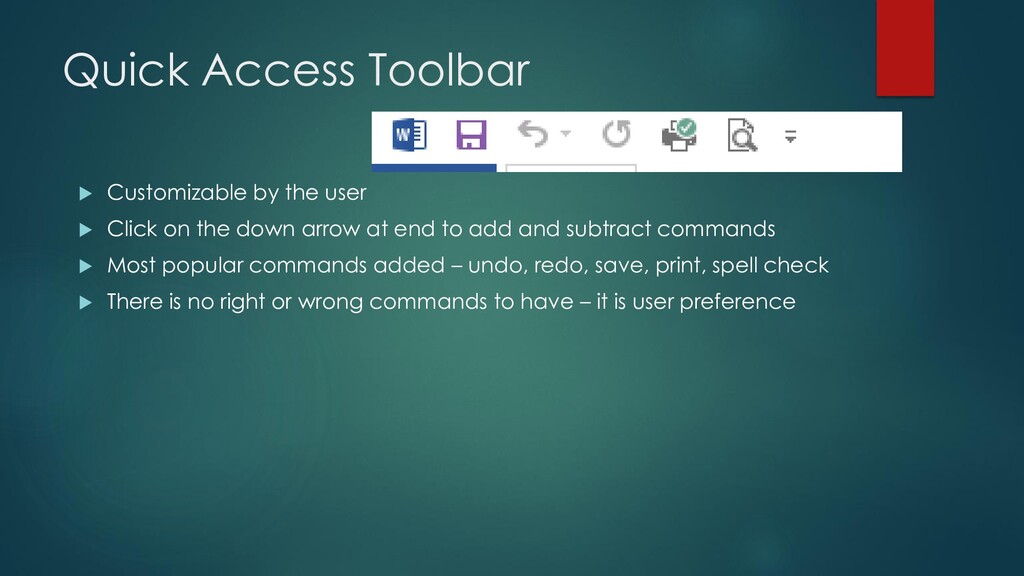
on the down arrow at end to add and subtract commands Most popular commands added – undo, redo, save, print, spell check There is no right or wrong commands to have – it is user preference
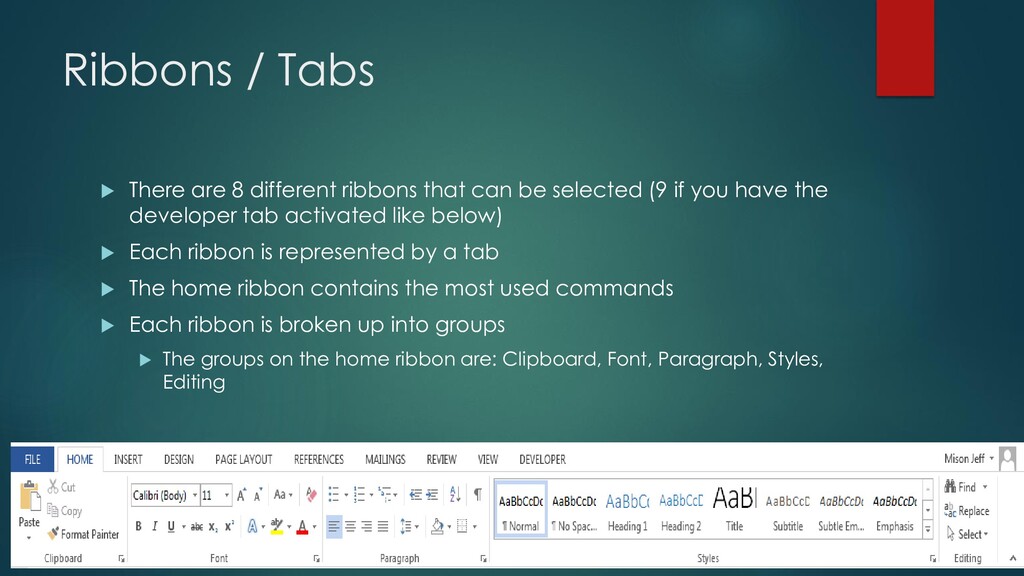
can be selected (9 if you have the developer tab activated like below) Each ribbon is represented by a tab The home ribbon contains the most used commands Each ribbon is broken up into groups The groups on the home ribbon are: Clipboard, Font, Paragraph, Styles, Editing
left of a vertical blinking line called an insertion point As the user types the insertion point moves To insert a blank line or move to the next line hit the ENTER key Computer assumes user is starting a new paragraph when ENTER is struck – will automatically capitalize 1st letter Wordwrap allows the user to type words in a paragraph continually with out pressing the ENTER key at the end of each line Old School typewriters required user to press ENTER at end of each line
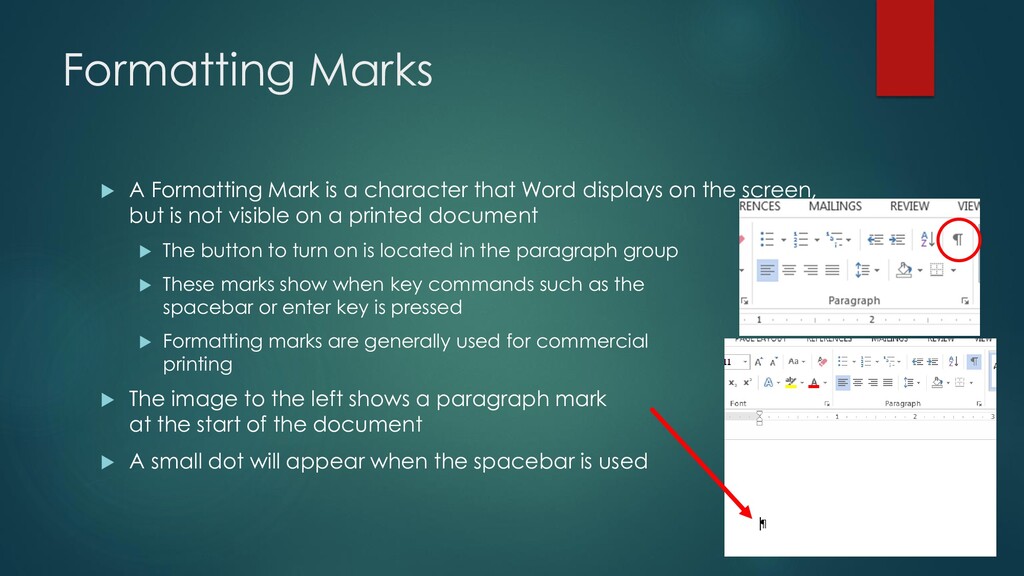
Word displays on the screen, but is not visible on a printed document The button to turn on is located in the paragraph group These marks show when key commands such as the spacebar or enter key is pressed Formatting marks are generally used for commercial printing The image to the left shows a paragraph mark at the start of the document A small dot will appear when the spacebar is used
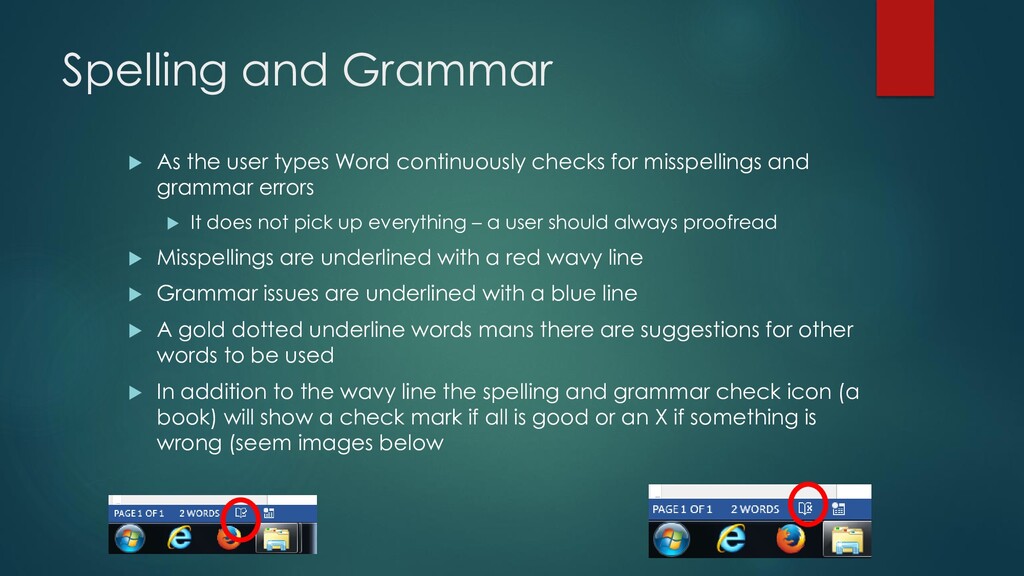
checks for misspellings and grammar errors It does not pick up everything – a user should always proofread Misspellings are underlined with a red wavy line Grammar issues are underlined with a blue line A gold dotted underline words mans there are suggestions for other words to be used In addition to the wavy line the spelling and grammar check icon (a book) will show a check mark if all is good or an X if something is wrong (seem images below
of Paragraph formatting – changing the appearance of a paragraph. Examples: Centering text Adding bullets Character formatting – changing the way characters (letters, numbers, symbols) appear. Example: Bolding text Change the color
of letters, numbers and characters Calibri us the default font in Word 2019 Font size – defines the size of the character Measure in a unit called points 1 point = 1/72 of an inch (pretty small) Default font size in word 2013 is 11 Theme – set of unified formats for fonts, colors and graphics.
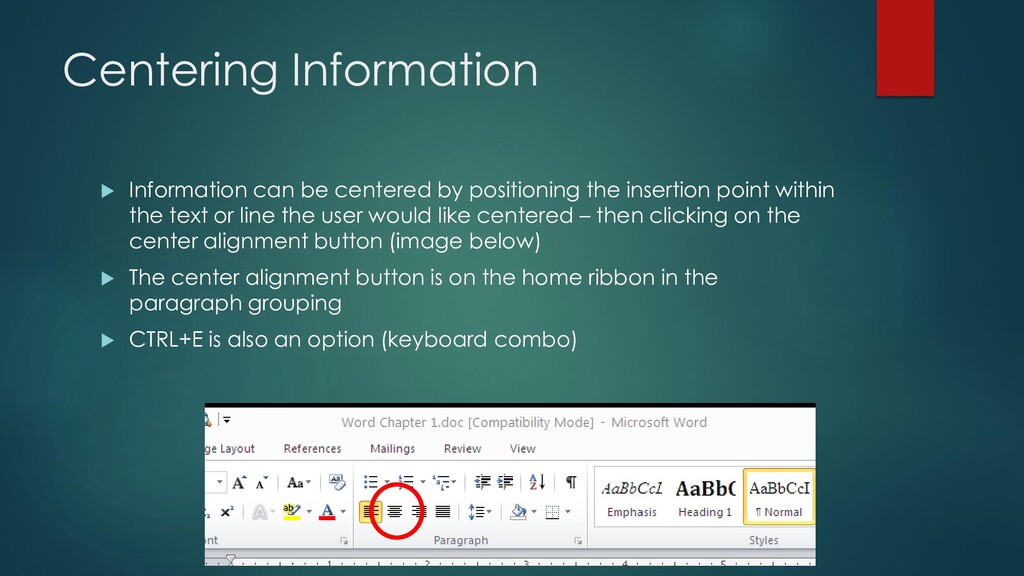
insertion point within the text or line the user would like centered – then clicking on the center alignment button (image below) The center alignment button is on the home ribbon in the paragraph grouping CTRL+E is also an option (keyboard combo)
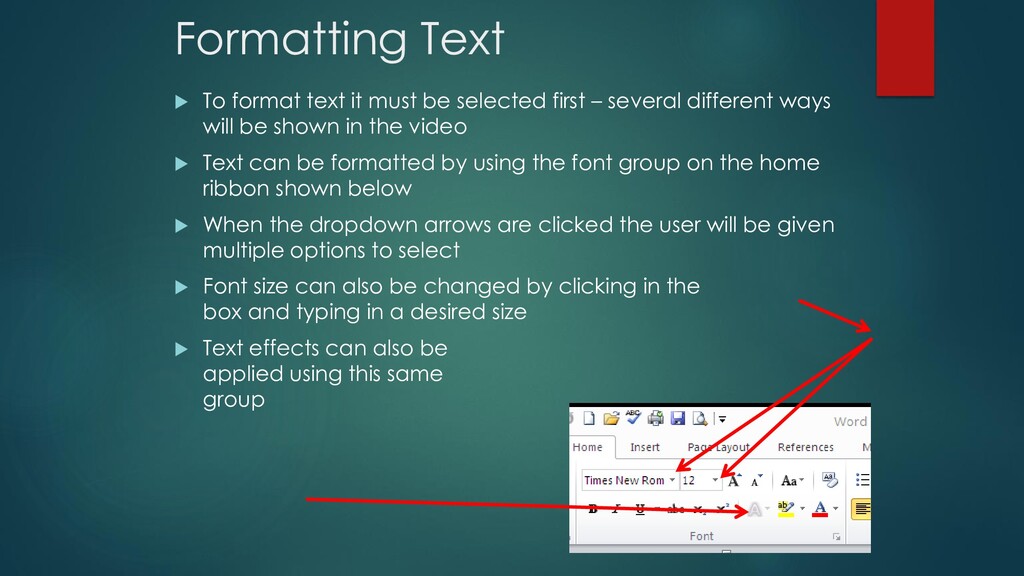
first – several different ways will be shown in the video Text can be formatted by using the font group on the home ribbon shown below When the dropdown arrows are clicked the user will be given multiple options to select Font size can also be changed by clicking in the box and typing in a desired size Text effects can also be applied using this same group
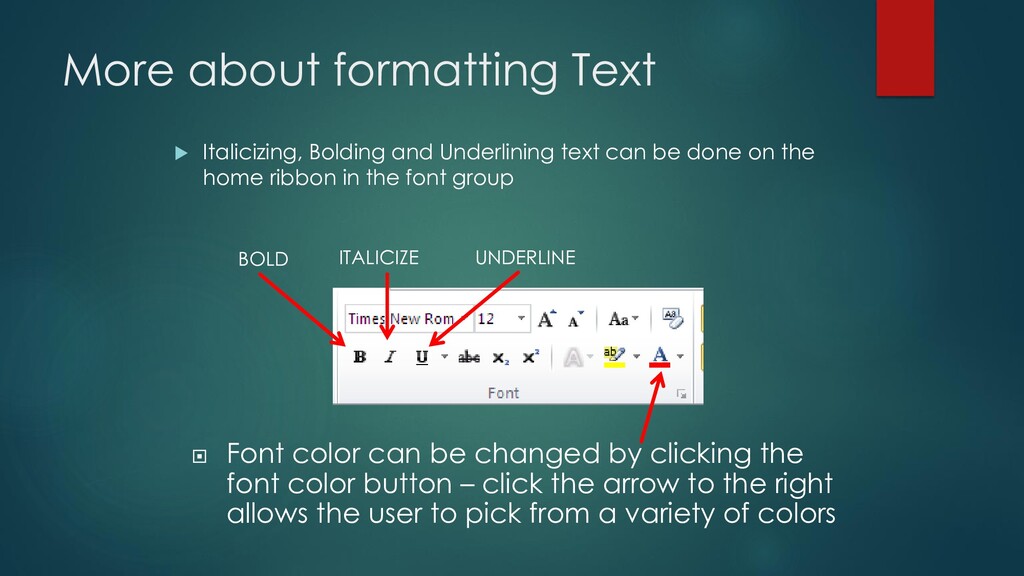
can be done on the home ribbon in the font group BOLD ITALICIZE UNDERLINE Font color can be changed by clicking the font color button – click the arrow to the right allows the user to pick from a variety of colors
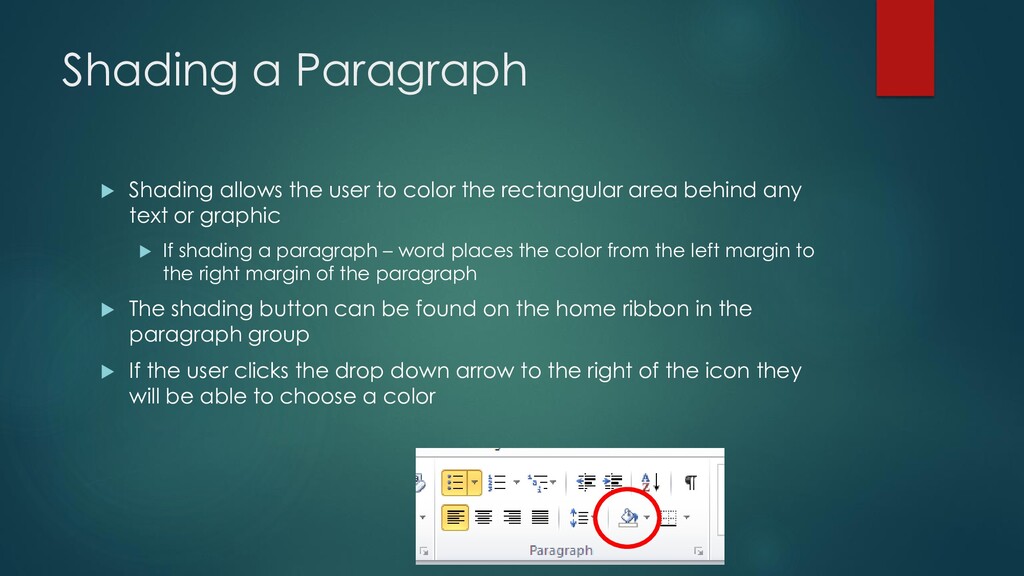
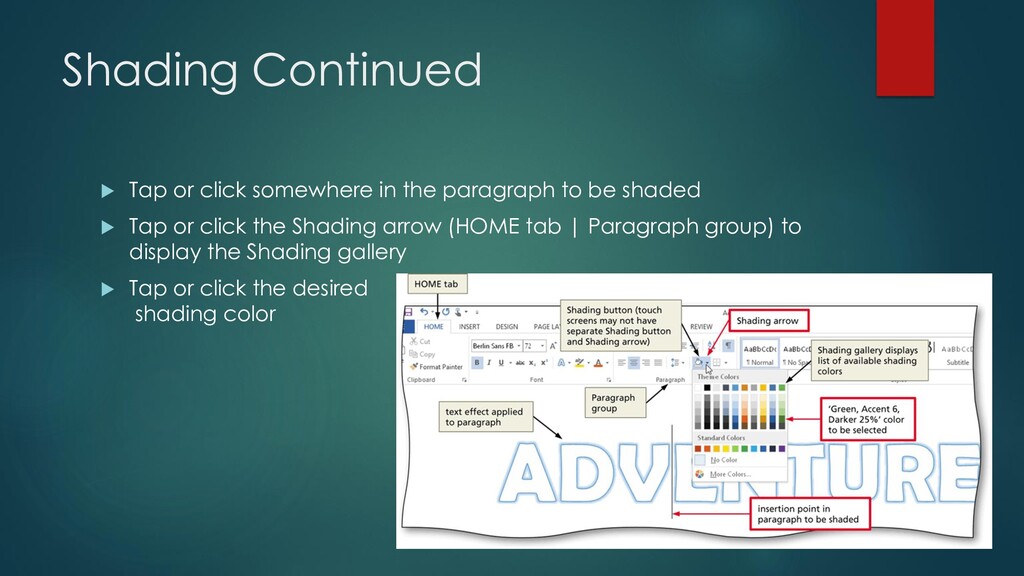
the rectangular area behind any text or graphic If shading a paragraph – word places the color from the left margin to the right margin of the paragraph The shading button can be found on the home ribbon in the paragraph group If the user clicks the drop down arrow to the right of the icon they will be able to choose a color
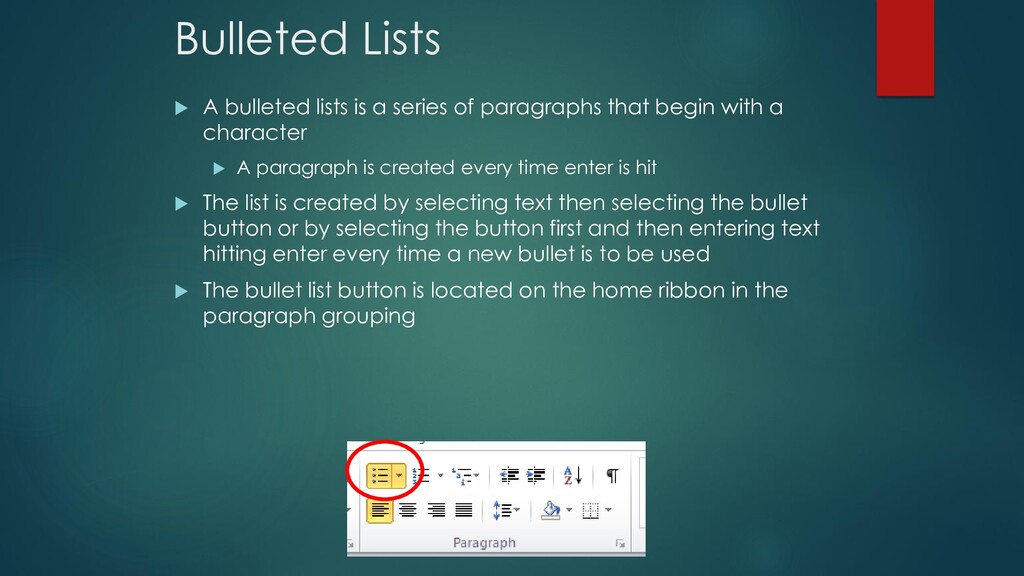
paragraphs that begin with a character A paragraph is created every time enter is hit The list is created by selecting text then selecting the bullet button or by selecting the button first and then entering text hitting enter every time a new bullet is to be used The bullet list button is located on the home ribbon in the paragraph grouping
to undo the last 50 actions that the user has made If the undo button has been used the user can use the redo button if the undo action was not desired. The Undo / Redo buttons are located on the quick access toolbar – top left of screen UNDO REDO
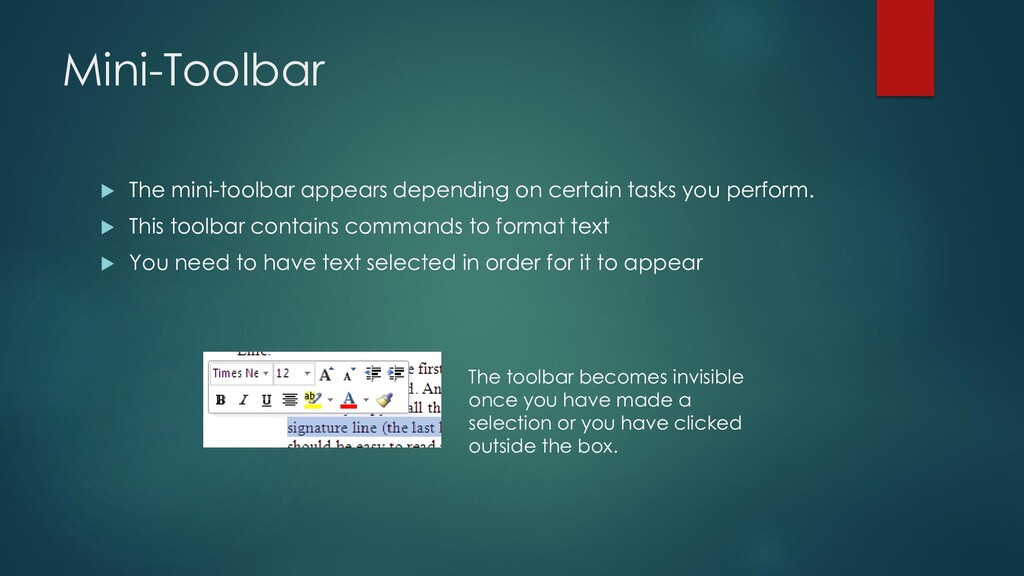
perform. This toolbar contains commands to format text You need to have text selected in order for it to appear The toolbar becomes invisible once you have made a selection or you have clicked outside the box.
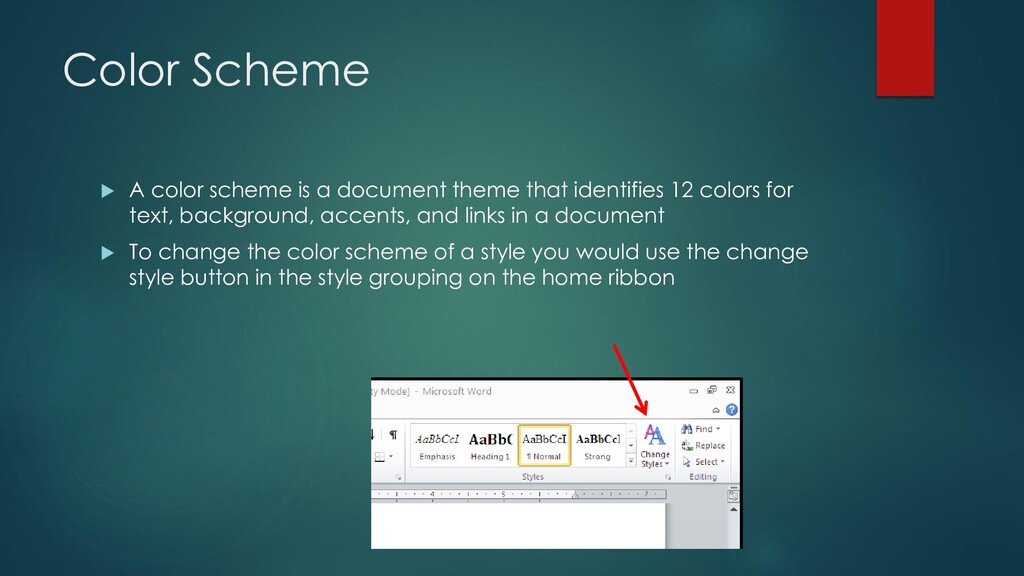
that identifies 12 colors for text, background, accents, and links in a document To change the color scheme of a style you would use the change style button in the style grouping on the home ribbon
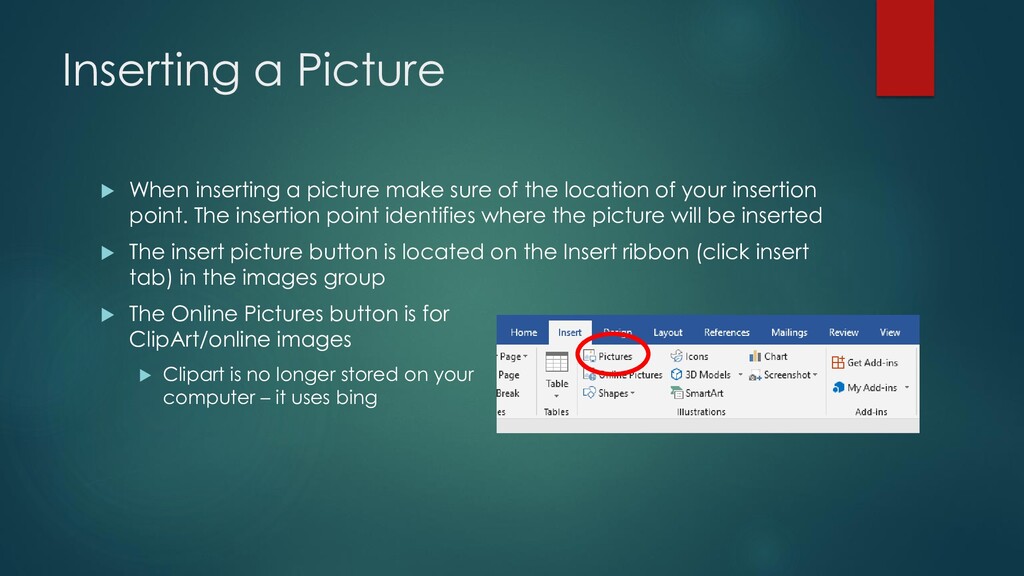
of the location of your insertion point. The insertion point identifies where the picture will be inserted The insert picture button is located on the Insert ribbon (click insert tab) in the images group The Online Pictures button is for ClipArt/online images Clipart is no longer stored on your computer – it uses bing
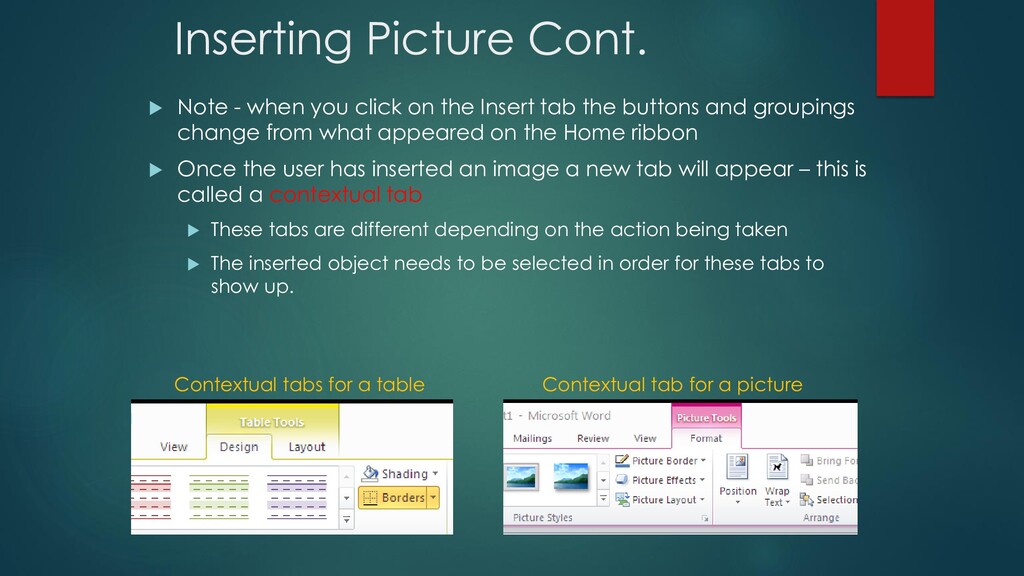
the Insert tab the buttons and groupings change from what appeared on the Home ribbon Once the user has inserted an image a new tab will appear – this is called a contextual tab These tabs are different depending on the action being taken The inserted object needs to be selected in order for these tabs to show up. Contextual tabs for a table Contextual tab for a picture
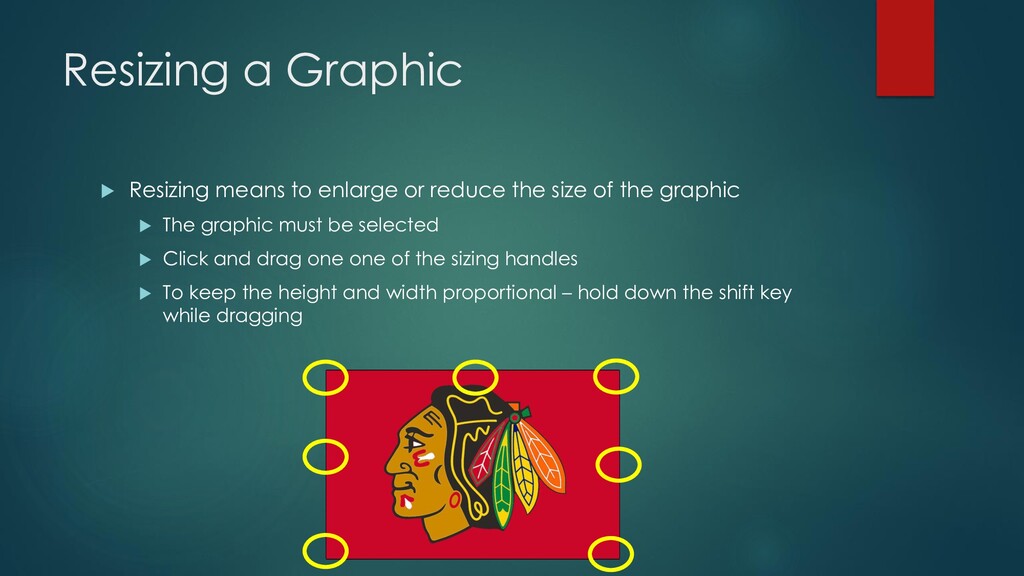
the size of the graphic The graphic must be selected Click and drag one one of the sizing handles To keep the height and width proportional – hold down the shift key while dragging
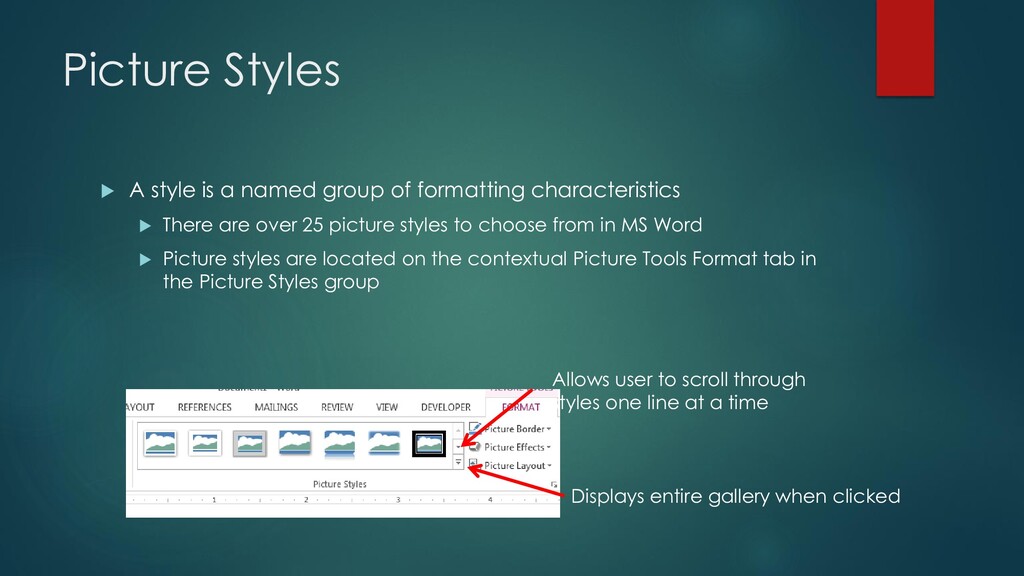
formatting characteristics There are over 25 picture styles to choose from in MS Word Picture styles are located on the contextual Picture Tools Format tab in the Picture Styles group Allows user to scroll through styles one line at a time Displays entire gallery when clicked
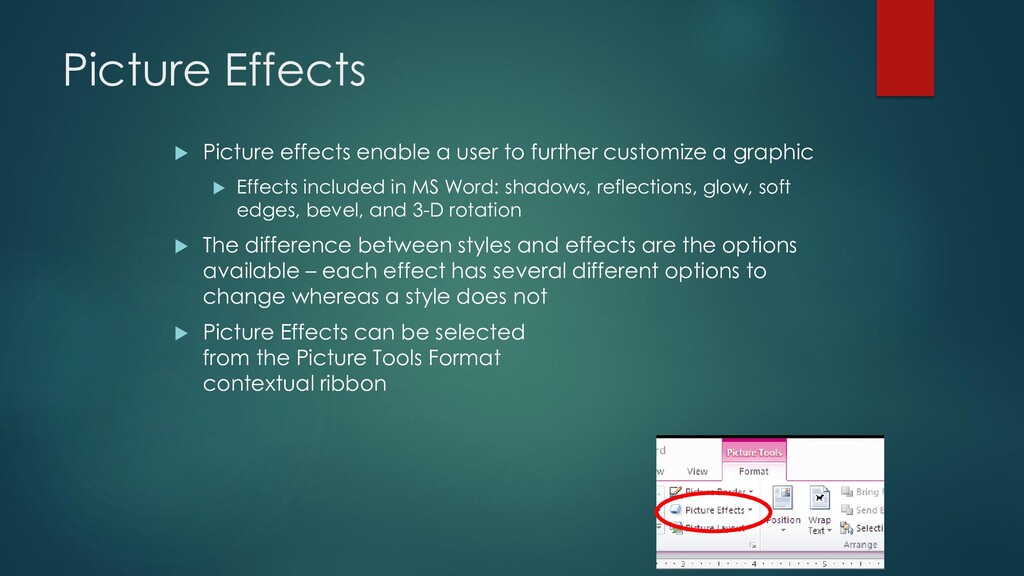
customize a graphic Effects included in MS Word: shadows, reflections, glow, soft edges, bevel, and 3-D rotation The difference between styles and effects are the options available – each effect has several different options to change whereas a style does not Picture Effects can be selected from the Picture Tools Format contextual ribbon
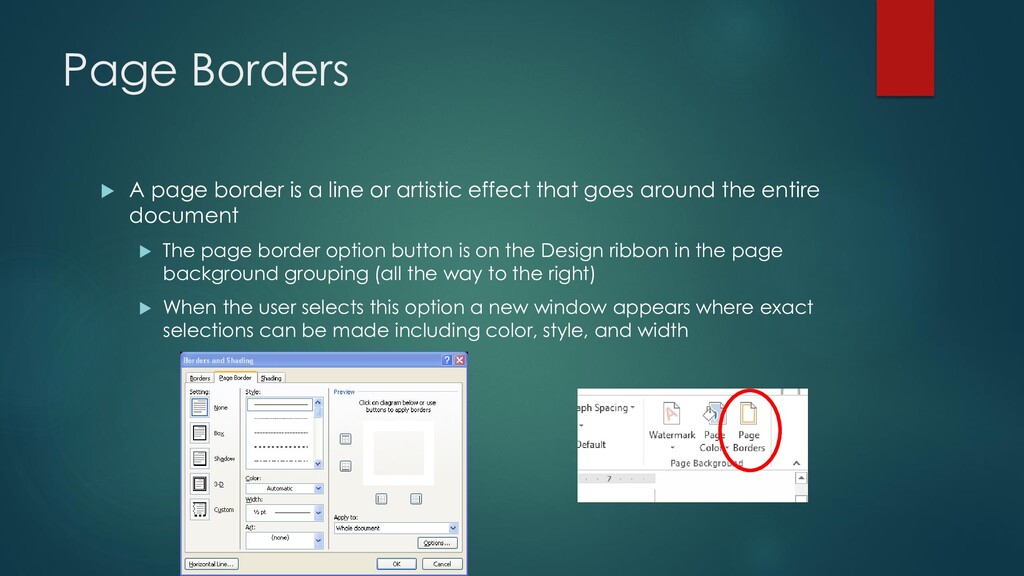
artistic effect that goes around the entire document The page border option button is on the Design ribbon in the page background grouping (all the way to the right) When the user selects this option a new window appears where exact selections can be made including color, style, and width
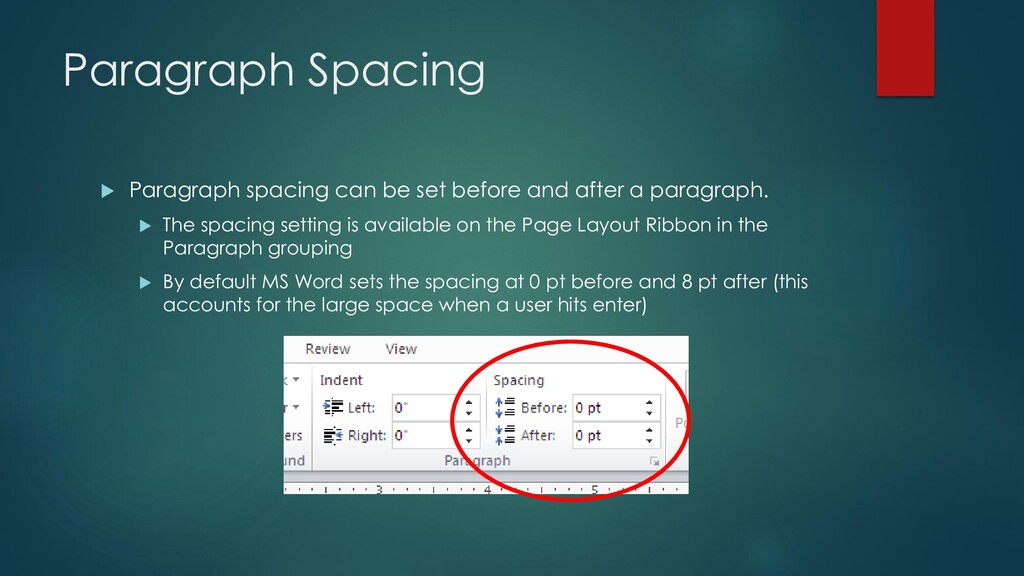
after a paragraph. The spacing setting is available on the Page Layout Ribbon in the Paragraph grouping By default MS Word sets the spacing at 0 pt before and 8 pt after (this accounts for the large space when a user hits enter)
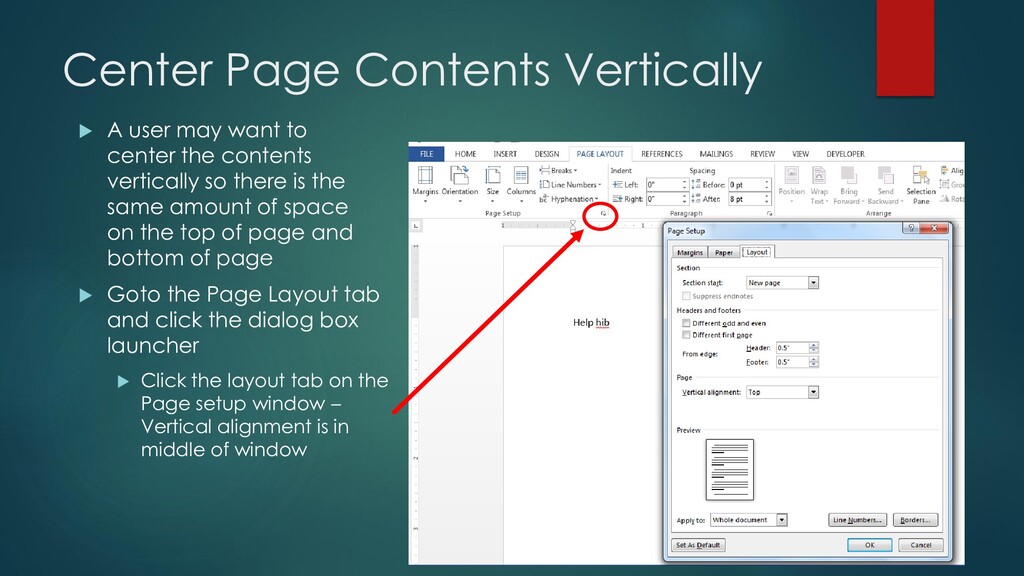
center the contents vertically so there is the same amount of space on the top of page and bottom of page Goto the Page Layout tab and click the dialog box launcher Click the layout tab on the Page setup window – Vertical alignment is in middle of window
delete text from a document: The delete key – when this is pressed it will delete one character to the right The backspace key – this will erase one character to the left Selecting an entire word or sentence and then pressing delete or backspace will erase the selection When moving text the user should use the drag-and-drop method Select the text to be moved | click and hold on that text | move the text to the desired location | release the mouse button
file To get to the document properties window click the file tab | click info Another word for the properties of a document is metadata A Keyword is a word or phrase that further describes the document You will not need to fill out this information – even if the book tells you to


 uchi8977
 signer
 2720japanoke
 matleenalaakso
 juanmartin2026
 ichiroc
 moriyuya
 auctria
 yoshimura_datam
 hiola
hiola
 rashwhitman
 dragon2
 akademiya2063
 aleyda
 reverentgeek
 trishagee
 michaelherold
 nikkihalliwell
 marcduiker
 addyosmani
 mkilby
 lemiorhan
 cromwellryan
 tammyeverts