Upgrade to Pro — share decks privately, control downloads, hide ads and more …

Getting Sassy with WordPress 4.7 and Jetpack

Job
March 04, 2017

Getting Sassy with WordPress 4.7 and Jetpack

WordPress builders often will use a free or premium WordPress theme to make their website. With adding a bit of CSS, you can easily tweak the design a little bit.

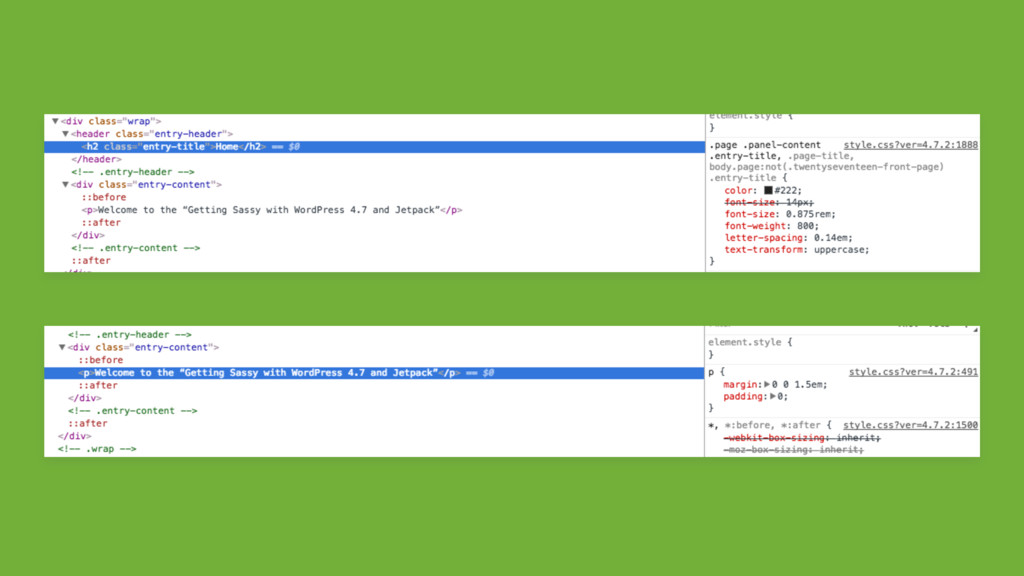
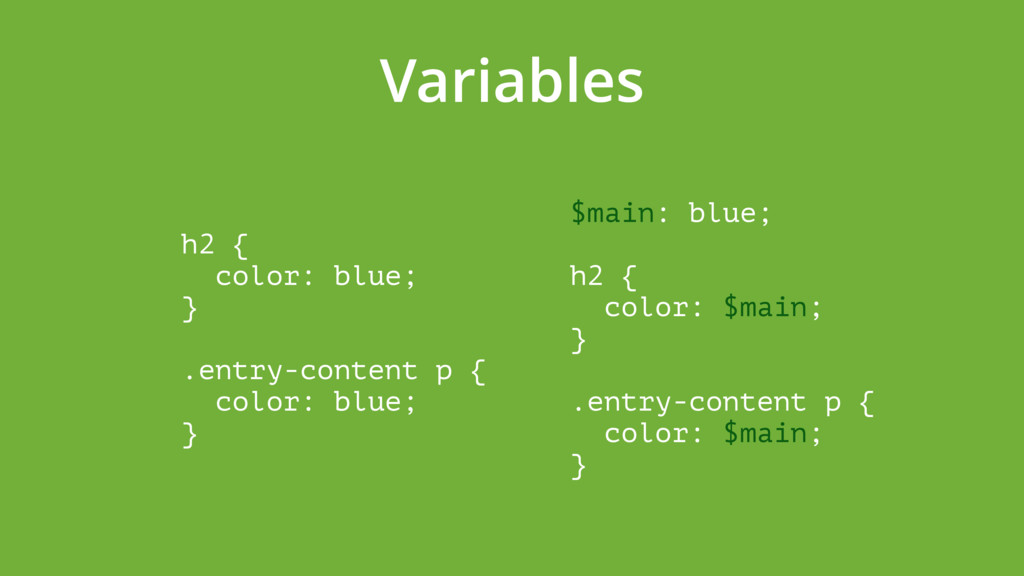
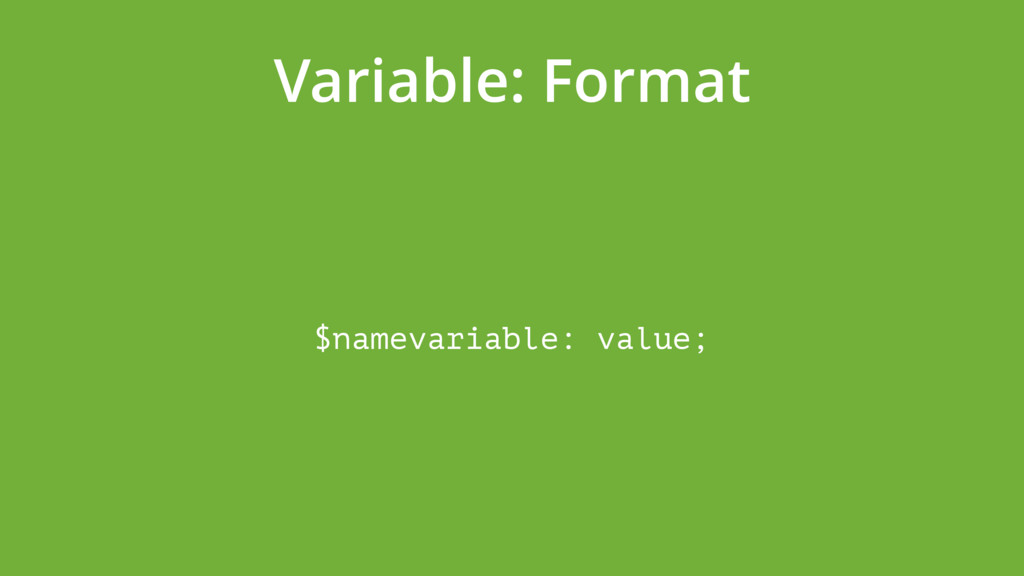
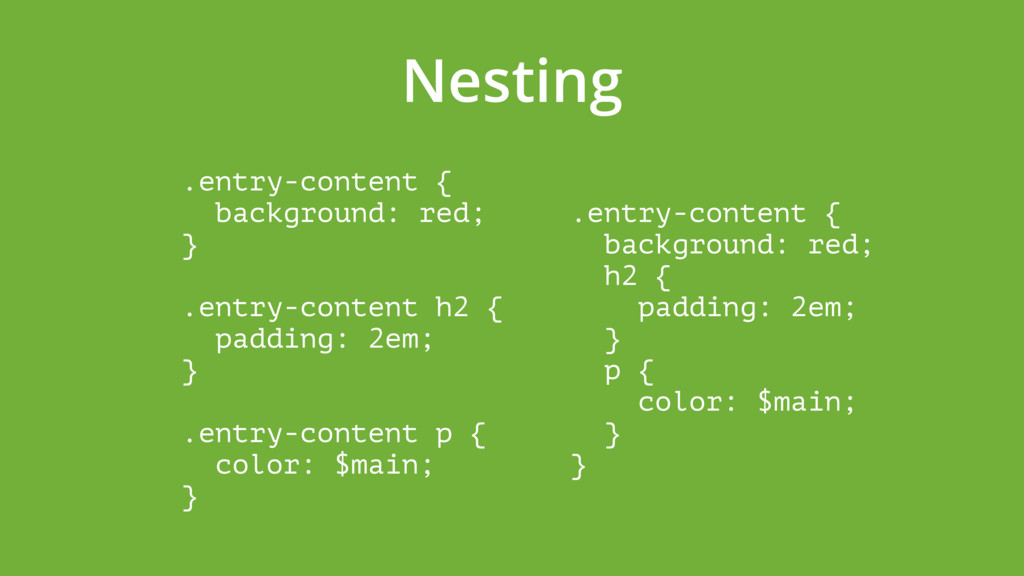
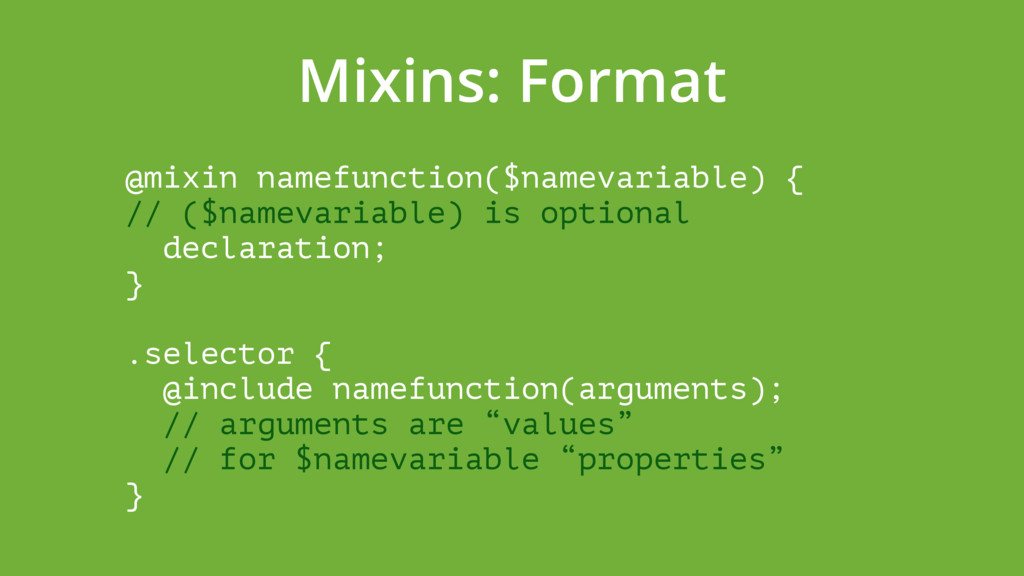
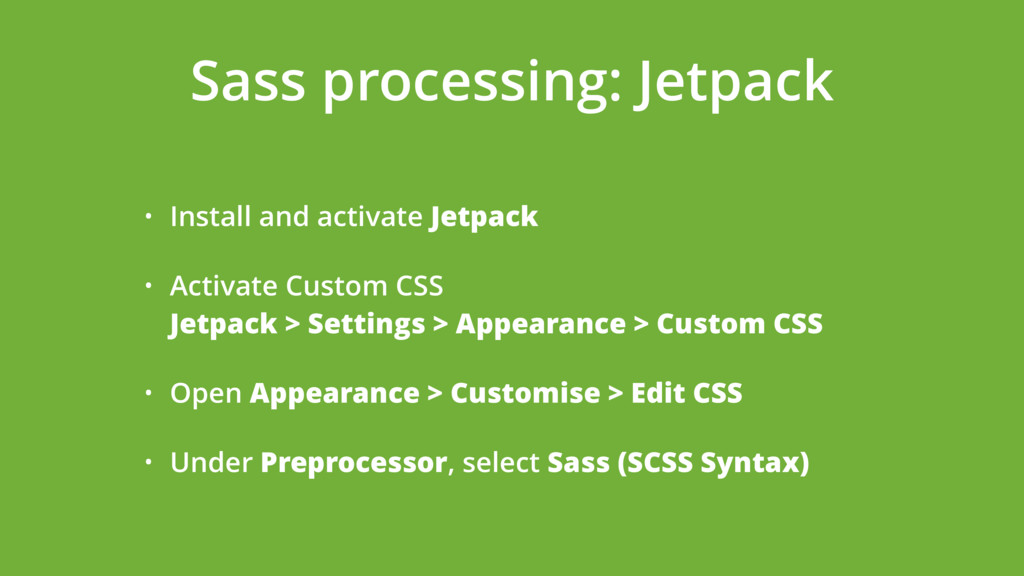
With the release of WordPress 4.7, the customizer now includes support for custom CSS with a direct preview of the custom code. If you install Jetpack to your website, you will not only see a nice looking syntax, you're also able to activate a preprocessor and use Sass (syntactically awesome style sheets) from with the customizer.

In this workshop at CMS Africa 2017, I introduced Sass and together we did some exercises using the Twenty Seventeen theme, the customizer and Jetpack.

Job

March 04, 2017
Tweet

More Decks by Job

Other Decks in Technology

Transcript

  1. Chrome Dev Tools: Inspect • Go to your site •

    right-click > inspect • Look at elements tab
  2. Syntax: Overview h1 {
 color: blue;
 font-size: 12px;
 } selector

    {
 property: value; = declaration
 property: value; = declaration
 }
  3. Syntax: Selectors <body>
 <h2>Header
 </h2>
 <p class=“first”>Paragraph describing some important

    thing.
 </p>
 <p id=“last”>On a last note.
 </p>
 </body> • element: body, h2, p • class: .first • id: #last
  4. Exercise • cms.mystagingwebsite.com • Change the colour of 
 “Home”

    • Change the colour and font size of 
 “Welcome to the …”
  5. Variables h2 {
 color: blue;
 }
 
 .entry-content p {


    color: blue;
 } $main: blue;
 
 h2 {
 color: $main;
 }
 
 .entry-content p {
 color: $main;
 }
  6. Some variable to use • Fonts
 $font-main: ‘Raleway’, sans-serif;
 (of

    course, you first need to @import that font) • Colours
 $grey: #eee; • Sizes
 $wide: 1024px;

  7. Nesting .entry-content {
 background: red;
 }
 
 .entry-content h2 {


    padding: 2em;
 }
 
 .entry-content p {
 color: $main;
 } .entry-content {
 background: red;
 h2 {
 padding: 2em;
 }
 p {
 color: $main;
 }
 }
  8. Nesting: Format selector_level_1 {
 declaration; 
 // only applies to

    L1
 selector_level_2 {
 declaration; 
 // only applies to L2 within L1
 }
 }
  9. Mixins img {
 -webkit-border-radius: 10px;
 -moz-border-radius: 10px;
 -ms-border-radius: 10px;
 border-radius:

    10px;
 }
 
 .box {
 -webkit-border-radius: 5%;
 -moz-border-radius: 5%;
 -ms-border-radius: 5%;
 border-radius: 5%;
 } @mixin border-radius($radius) {
 -webkit-border-radius: $radius;
 -moz-border-radius: $radius;
 -ms-border-radius: $radius;
 border-radius: $radius;
 }
 
 img {
 @include border-radius(10px);
 }
 
 .box {
 @include border-radius(5%);
 }
  10. Mixins: Format @mixin namefunction($namevariable) {
 // ($namevariable) is optional
 declaration;


    }
 
 .selector {
 @include namefunction(arguments);
 // arguments are “values”
 // for $namevariable “properties”
 }
  11. Some mixins to use Media queries @mixin wide {
 @media

    (min-width: 1024px) {
 @content;
 }
 }
 
 .entry-content {
 p {
 margin-left: 10px;
 @include wide {
 margin-left: 20px;
 }
 }
 } Transitions @mixin transition($args...) {
 -webkit-transition: $args;
 -moz-transition: $args;
 -ms-transition: $args;
 -o-transition: $args;
 transition: $args
 }
 
 .button {
 background: white;
 @include transition(background 1s);
 &:hover {
 background: black;
 }
 }
  12. Some mixins to use Variable clusters @mixin large-text {
 font:

    {
 family: Arial;
 size: 20px;
 weight: bold;
 }
 color: $main;
 }
 
 p {
 @include large-text;
 } But also for: • Box shadows • Content blocks • …
  13. Sass processing: Jetpack • Install and activate Jetpack • Activate

    Custom CSS
 Jetpack > Settings > Appearance > Custom CSS • Open Appearance > Customise > Edit CSS • Under Preprocessor, select Sass (SCSS Syntax)
  14. Exercise • Set colour variables • Set font variables On

    the shop page • Set rounded edges for all product images • Change the font of the product titles • Make the purchase buttons look different • Use transitions on the buttons 
 (e.g. let a:hover colour change take 1 sec)
  15. Review • Go over code together • Next exercises: -

    Try another Sass line - Explore Grunt.js or another compiler