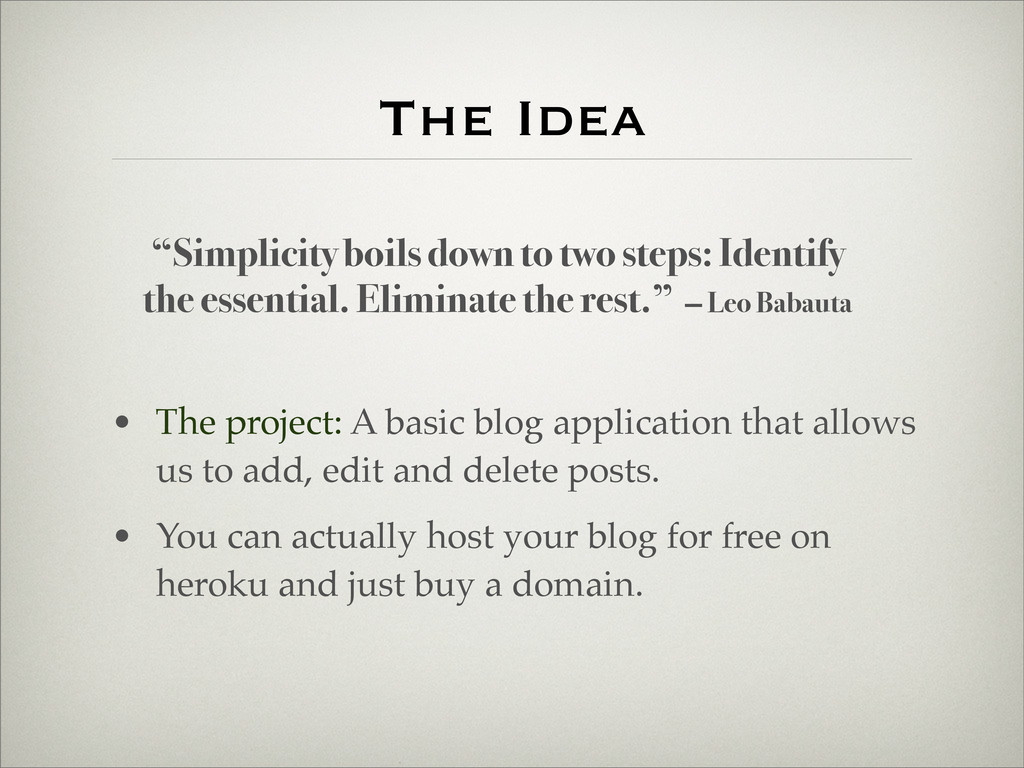
allows us to add, edit and delete posts. • You can actually host your blog for free on heroku and just buy a domain. “Simplicity boils down to two steps: Identify the essential. Eliminate the rest.” — Leo Babauta
what you like. Textmate has bundles for Ruby on Rails, HAML and others. • For Linux, GEdit is quite good and it’s even free. For some time I have been using Gmate. • HAML Textmate Bundle • Ruby on Rails Textmate Bundle
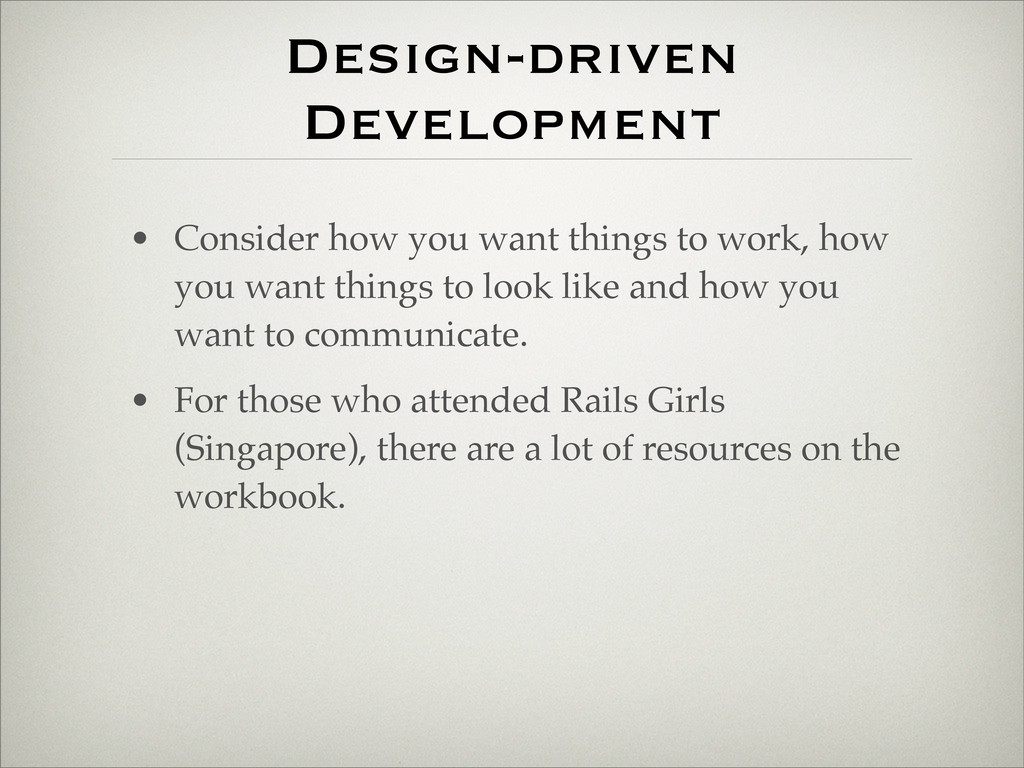
how you want things to look like and how you want to communicate. • For those who attended Rails Girls (Singapore), there are a lot of resources on the workbook.
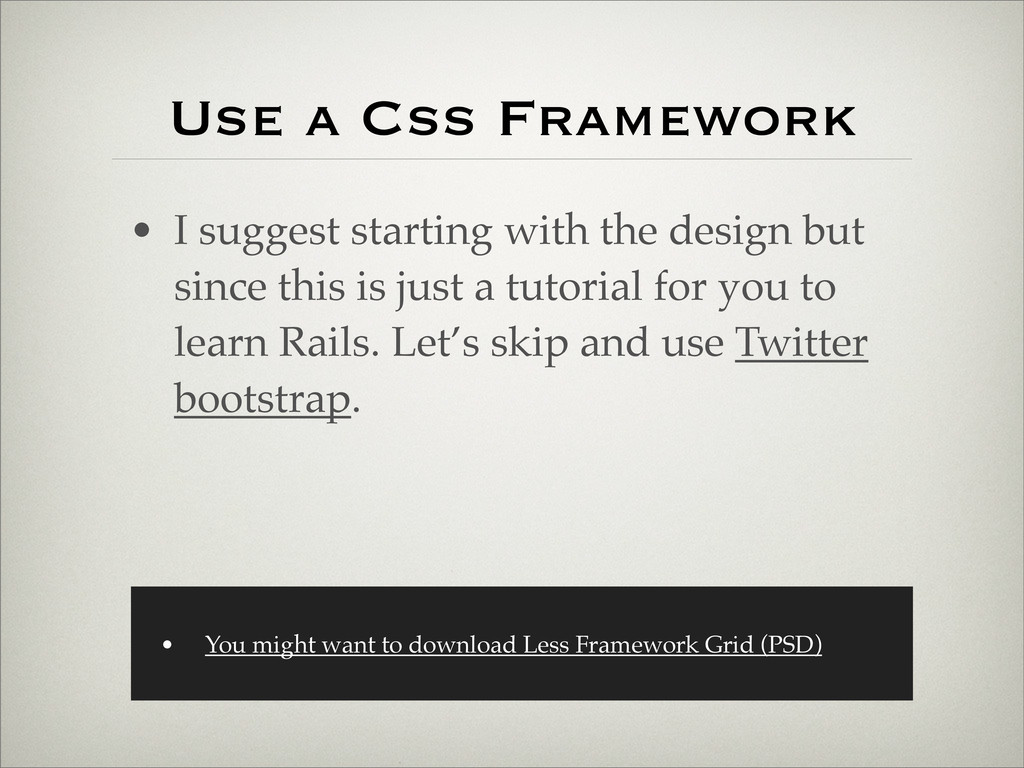
design but since this is just a tutorial for you to learn Rails. Let’s skip and use Twitter bootstrap. • You might want to download Less Framework Grid (PSD)
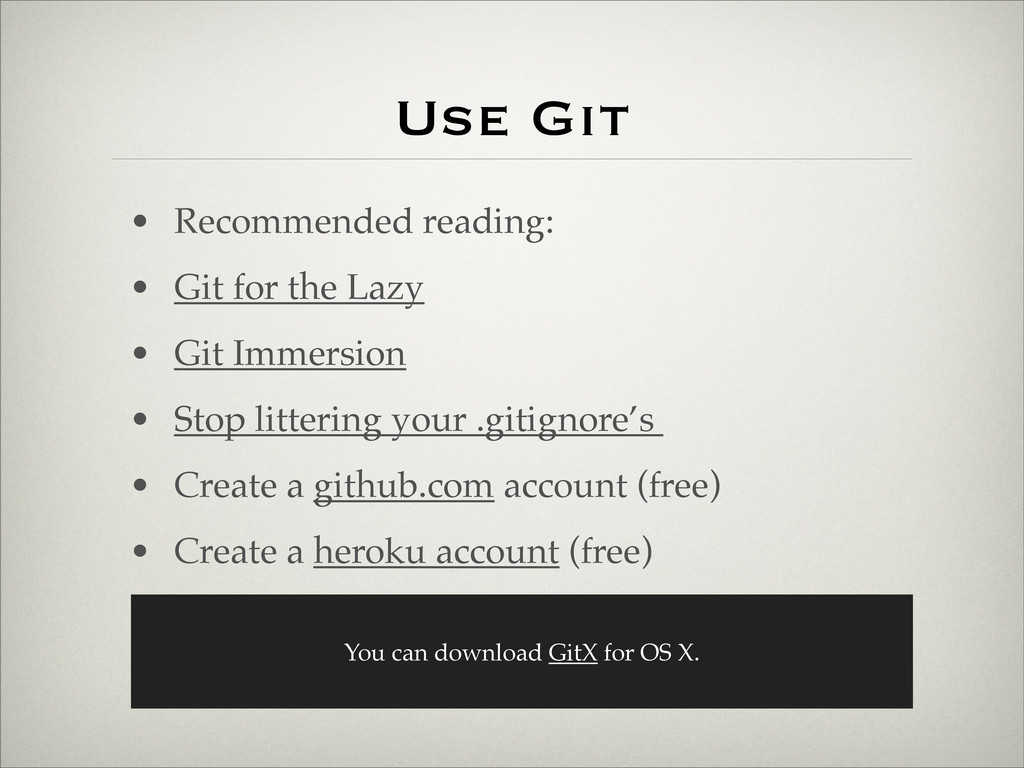
• Git Immersion • Stop littering your .gitignore’s • Create a github.com account (free) • Create a heroku account (free) You can download GitX for OS X.
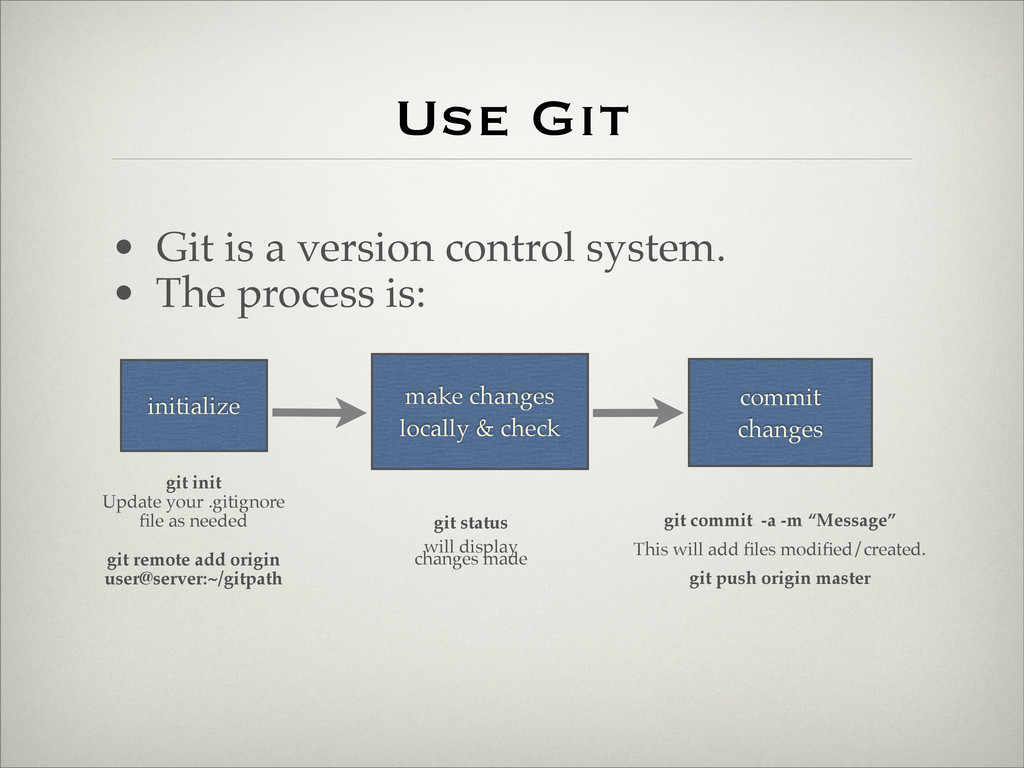
The process is: make changes locally & check commit changes git commit -a -m “Message” This will add files modified/created. git push origin master git status will display changes made initialize git init Update your .gitignore file as needed git remote add origin user@server:~/gitpath
to read and understand • REST - The wiki definition is complex. Please read about RESTful Rails. • CRUD - The actions we perform — create, read, update, delete. • MVC - Model View Controller Must Read: RESTful Rails
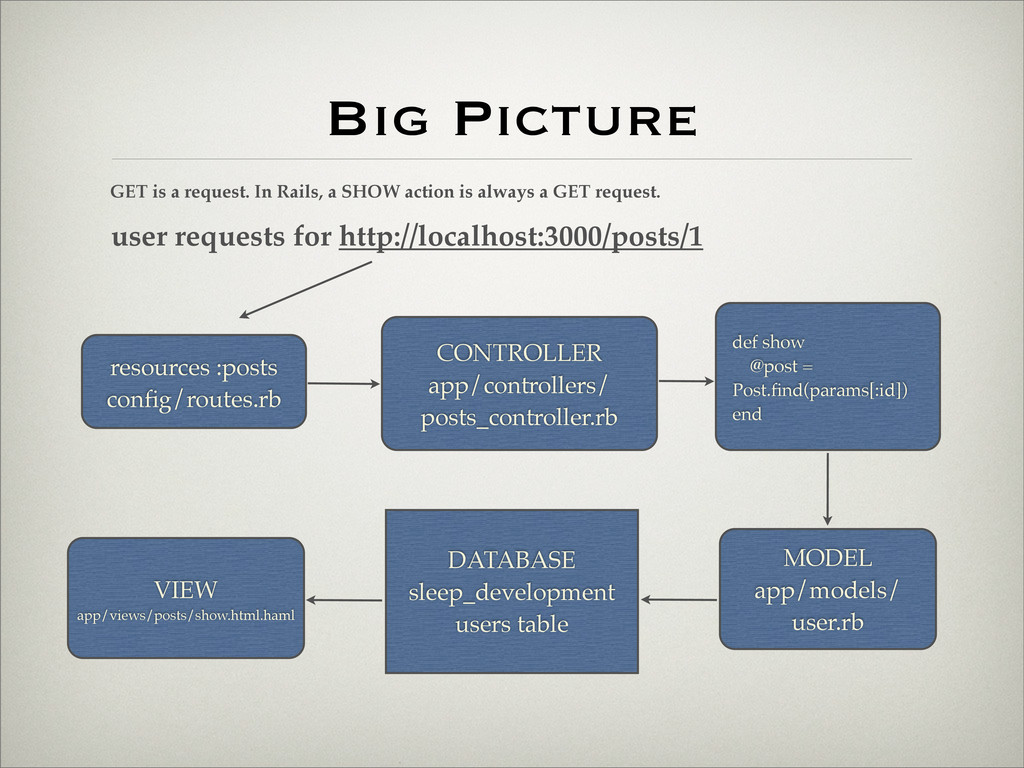
Rails, a SHOW action is always a GET request. user requests for http://localhost:3000/posts/1 CONTROLLER app/controllers/ posts_controller.rb def show @post = Post.find(params[:id]) end MODEL app/models/ user.rb DATABASE sleep_development users table VIEW app/views/posts/show.html.haml
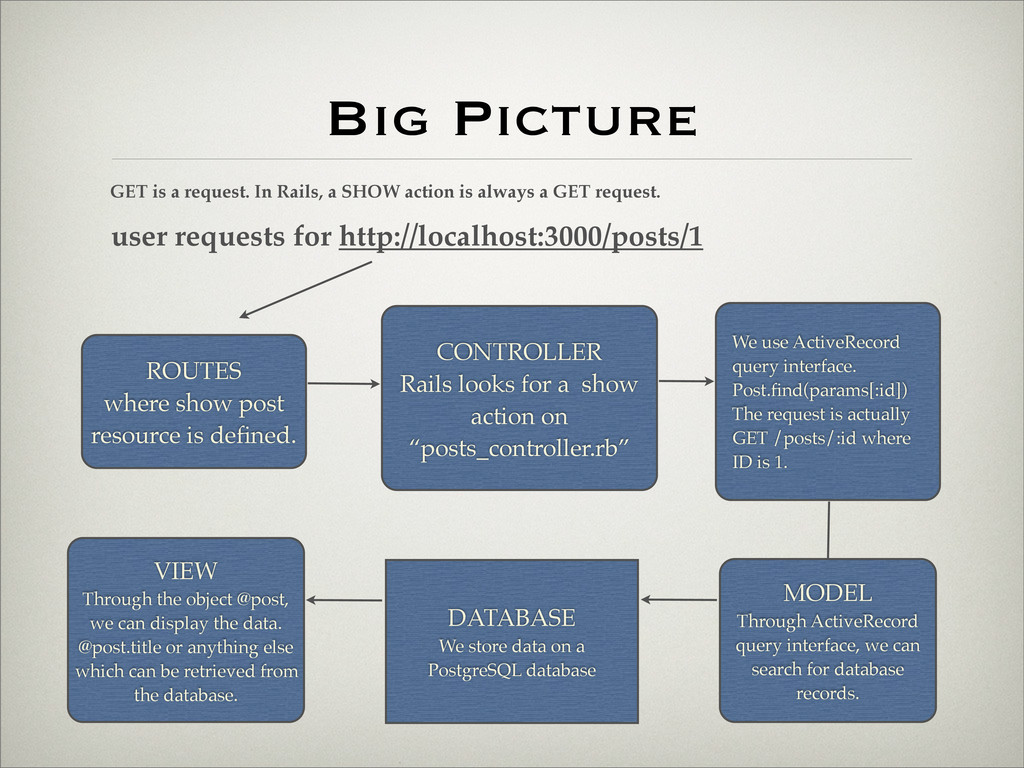
is a request. In Rails, a SHOW action is always a GET request. user requests for http://localhost:3000/posts/1 CONTROLLER Rails looks for a show action on “posts_controller.rb” We use ActiveRecord query interface. Post.find(params[:id]) The request is actually GET /posts/:id where ID is 1. MODEL Through ActiveRecord query interface, we can search for database records. DATABASE We store data on a PostgreSQL database VIEW Through the object @post, we can display the data. @post.title or anything else which can be retrieved from the database.
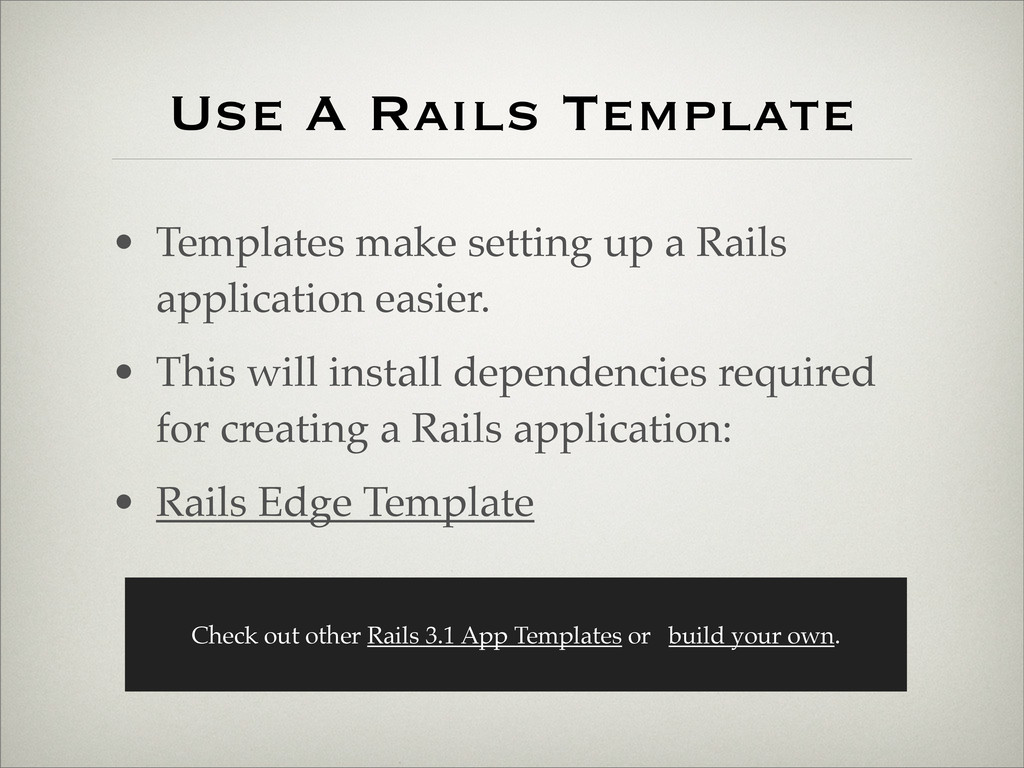
Rails application easier. • This will install dependencies required for creating a Rails application: • Rails Edge Template Check out other Rails 3.1 App Templates or build your own.
raw.github.com/bridgeutopia/rails- edge-template/master/template.rb Answer yes for all except for the MySQL part. We will use PostgreSQL here and Twitter Bootstrap.
Mac/Linux OS as suggested, your username should be the same as your Mac username. You config/database.yml should look like: development: adapter: postgresql encoding: unicode database: sleep_development pool: 5 username: katz password: database name will depend on the name of your app by default or it could be renamed to anything less confusing for you.
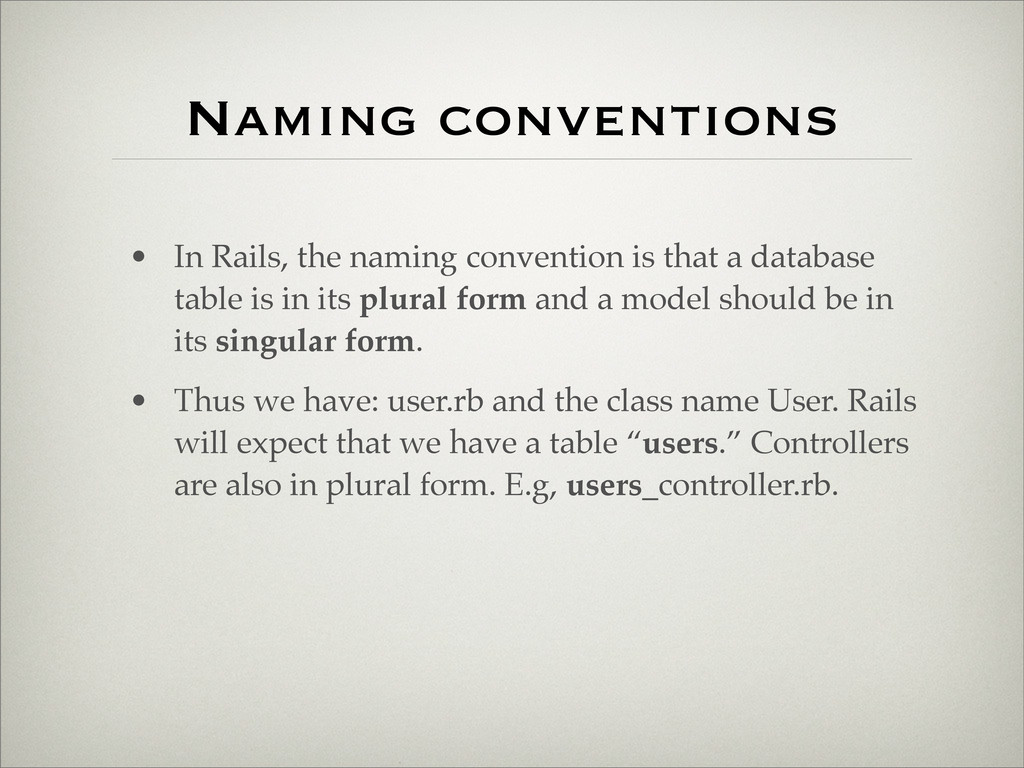
a database table is in its plural form and a model should be in its singular form. • Thus we have: user.rb and the class name User. Rails will expect that we have a table “users.” Controllers are also in plural form. E.g, users_controller.rb.
logic. • Essentially, we have an admin “user” who wants to login to create a post. And be able to update and delete it as well. Important: Learn Active Record Query Interface “FAT Models, Thin Controllers” is a best practice but I would go against FAT anything in your application. If you organize classes well enough, it won’t be so FAT. More on that later.
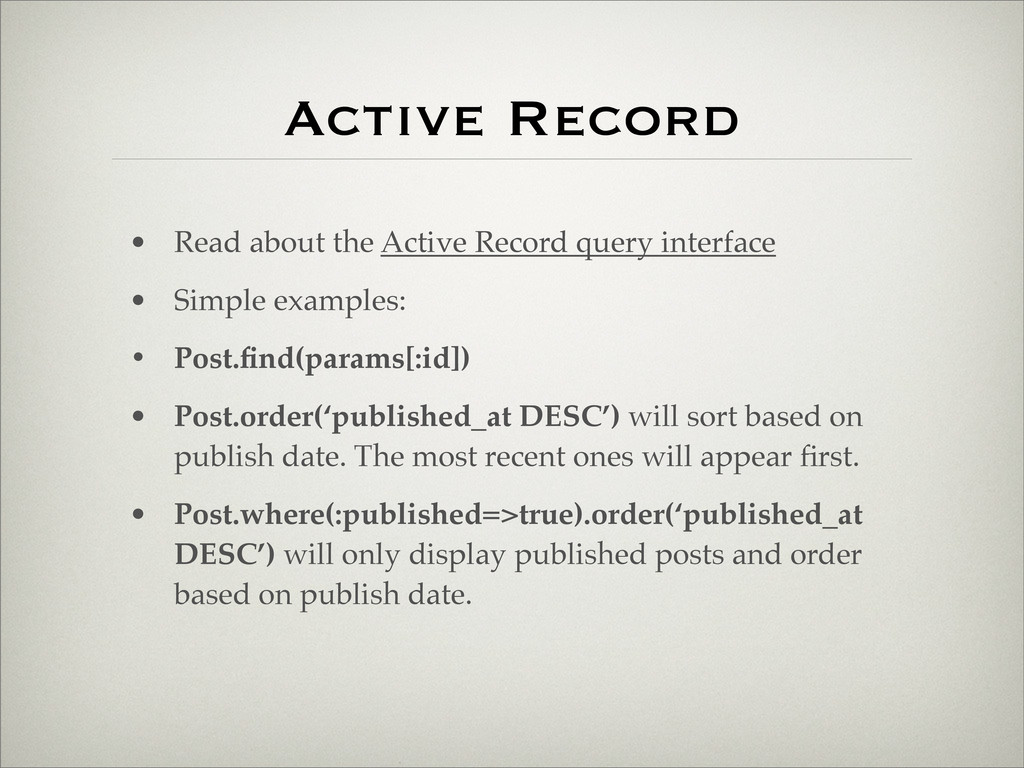
• Simple examples: • Post.find(params[:id]) • Post.order(‘published_at DESC’) will sort based on publish date. The most recent ones will appear first. • Post.where(:published=>true).order(‘published_at DESC’) will only display published posts and order based on publish date.
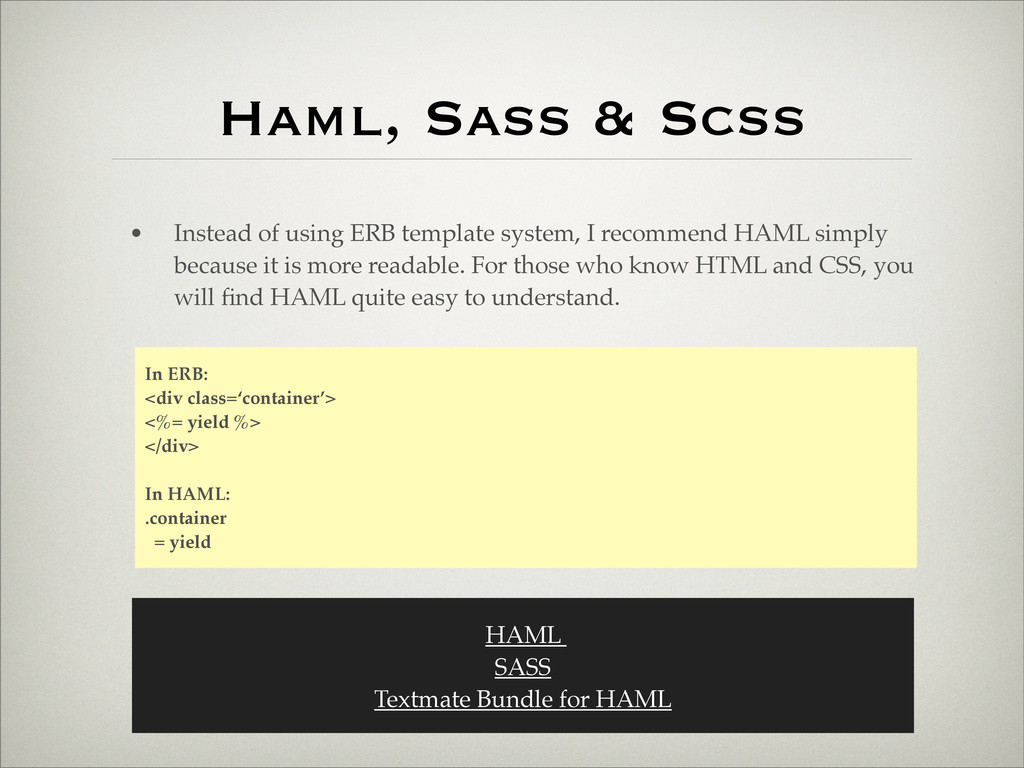
system, I recommend HAML simply because it is more readable. For those who know HTML and CSS, you will find HAML quite easy to understand. In ERB: <div class=‘container’> <%= yield %> </div> In HAML: .container = yield HAML SASS Textmate Bundle for HAML
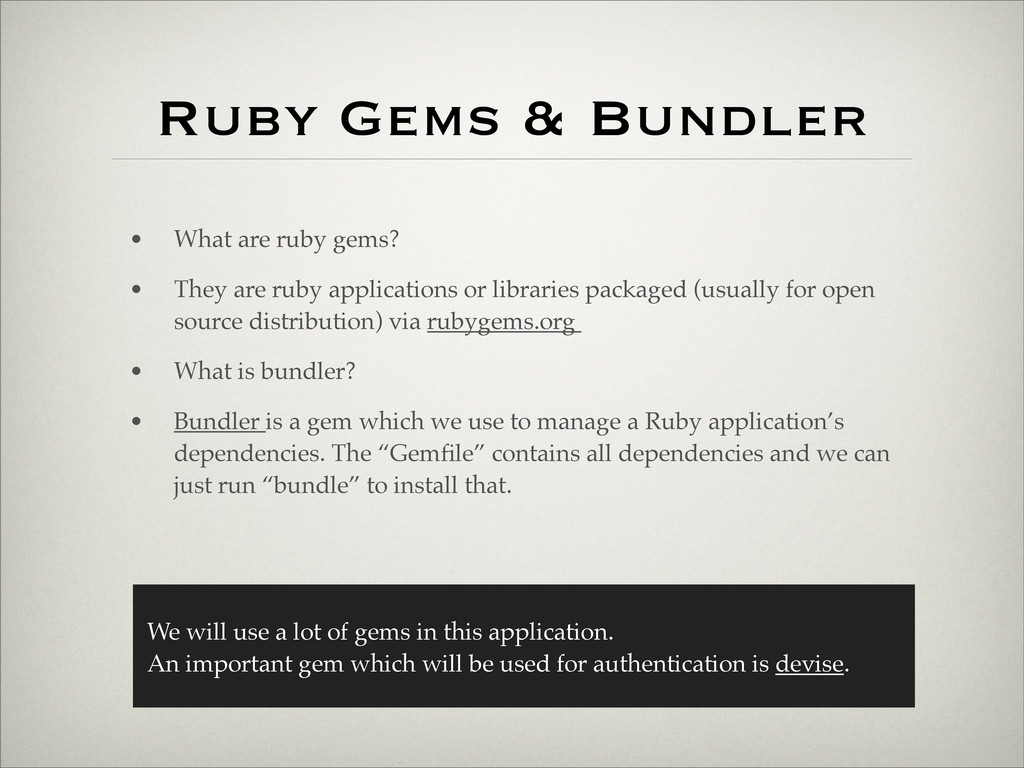
They are ruby applications or libraries packaged (usually for open source distribution) via rubygems.org • What is bundler? • Bundler is a gem which we use to manage a Ruby application’s dependencies. The “Gemfile” contains all dependencies and we can just run “bundle” to install that. We will use a lot of gems in this application. An important gem which will be used for authentication is devise.
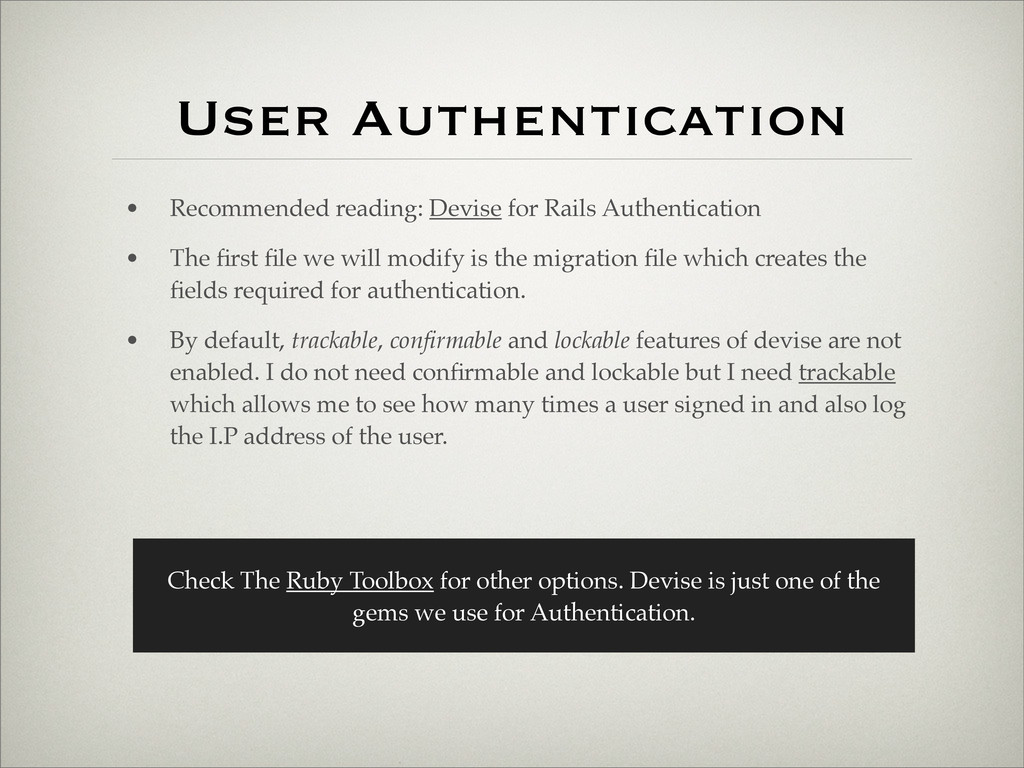
The first file we will modify is the migration file which creates the fields required for authentication. • By default, trackable, confirmable and lockable features of devise are not enabled. I do not need confirmable and lockable but I need trackable which allows me to see how many times a user signed in and also log the I.P address of the user. Check The Ruby Toolbox for other options. Devise is just one of the gems we use for Authentication.
answered “yes”. You can read the documentation and try to see whether there are any issues on github but I think it’s very stable. What devise changes can we do for this app? Create HAML views Allow user to sign in using username or email
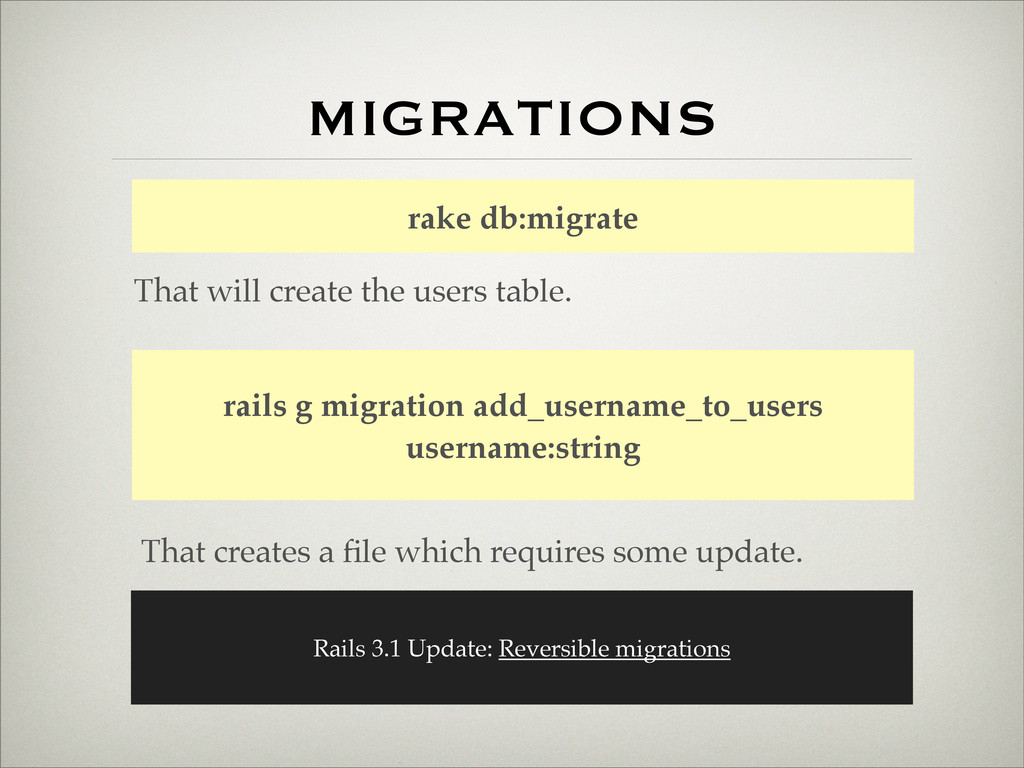
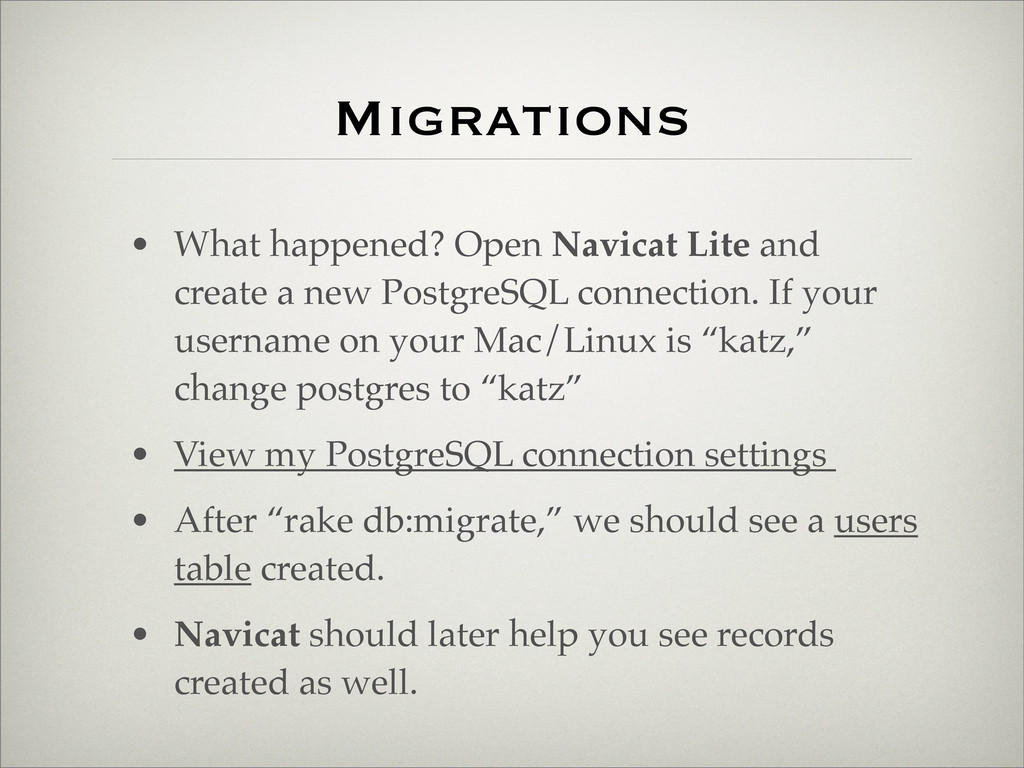
There’s quite a lot but for now you only have to bother about two things: rake db:create:all and rake db:migrate • rake db:create:all will create all databases for 3 different environments based on your config/database.yml file • rake db:migrate will create the table “user” based on the migration file we just updated.
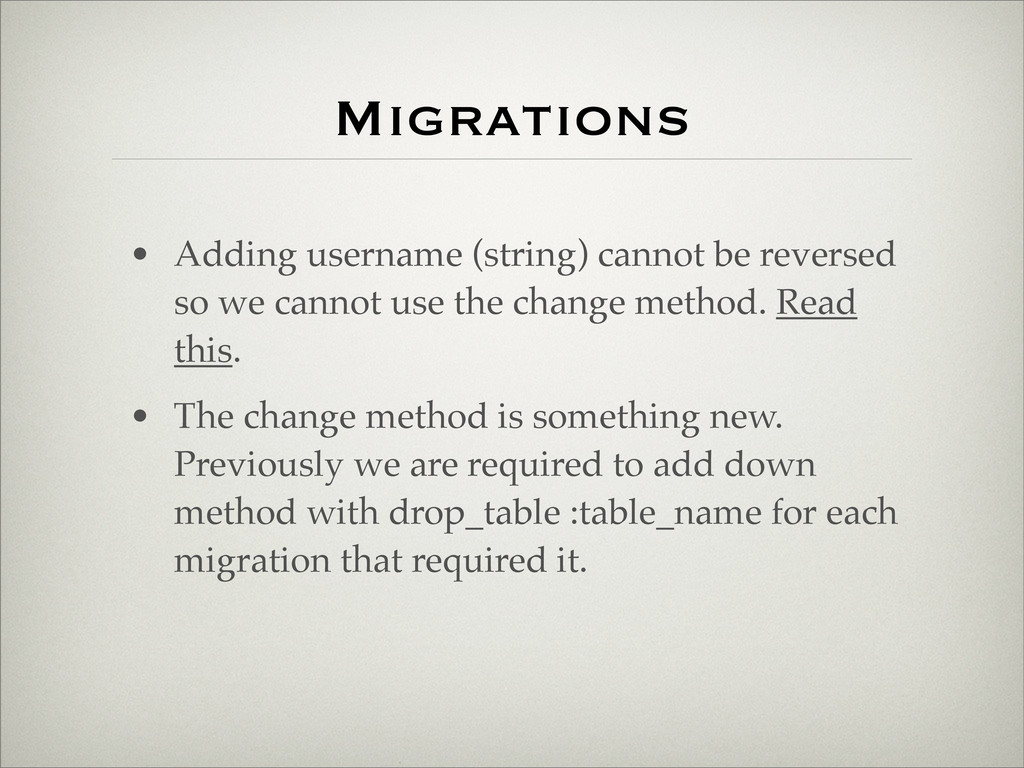
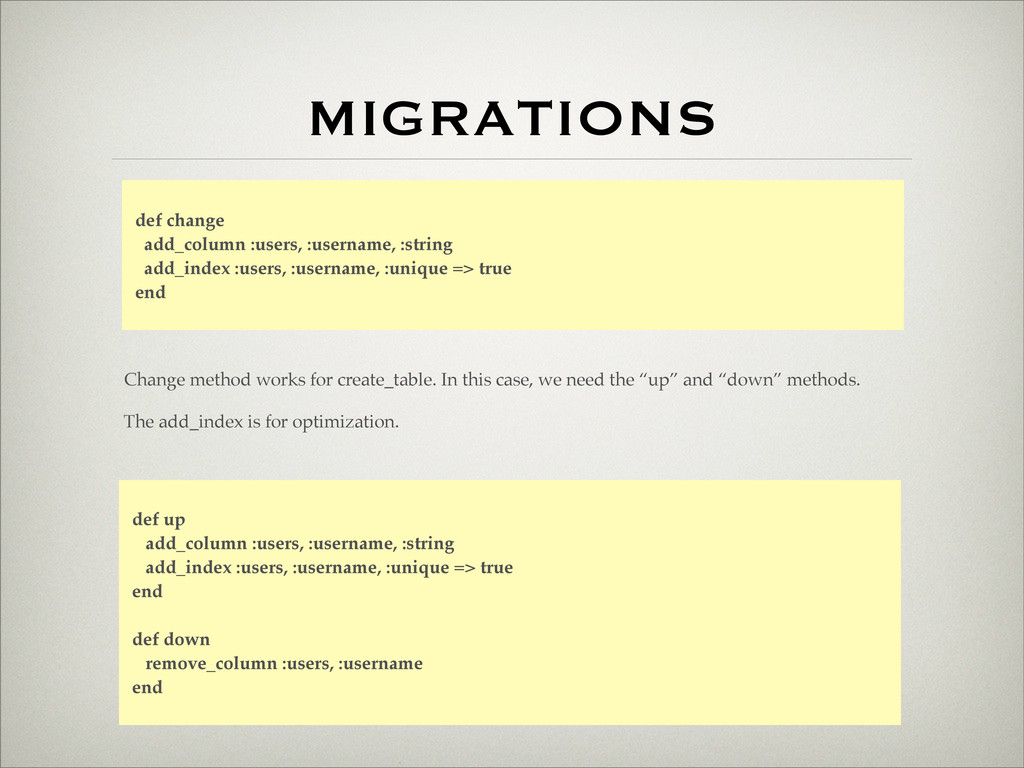
cannot use the change method. Read this. • The change method is something new. Previously we are required to add down method with drop_table :table_name for each migration that required it.
:unique => true end Change method works for create_table. In this case, we need the “up” and “down” methods. The add_index is for optimization. def up add_column :users, :username, :string add_index :users, :username, :unique => true end def down remove_column :users, :username end
new PostgreSQL connection. If your username on your Mac/Linux is “katz,” change postgres to “katz” • View my PostgreSQL connection settings • After “rake db:migrate,” we should see a users table created. • Navicat should later help you see records created as well.
On app/models/user.rb, we can add: validates :username, :presence=>true, :uniqueness=>true • We want to make sure username is present and unique every time we create or update a user. But even the validation will not work unless we specify that the field username is accessible via Ruby’s attr_accessible attr_accessible :email, :password, :password_confirmation, :remember_me, :username • attr_accessible doesn’t always have to exist for all of your models. It is added for security. To know more about it, read this.
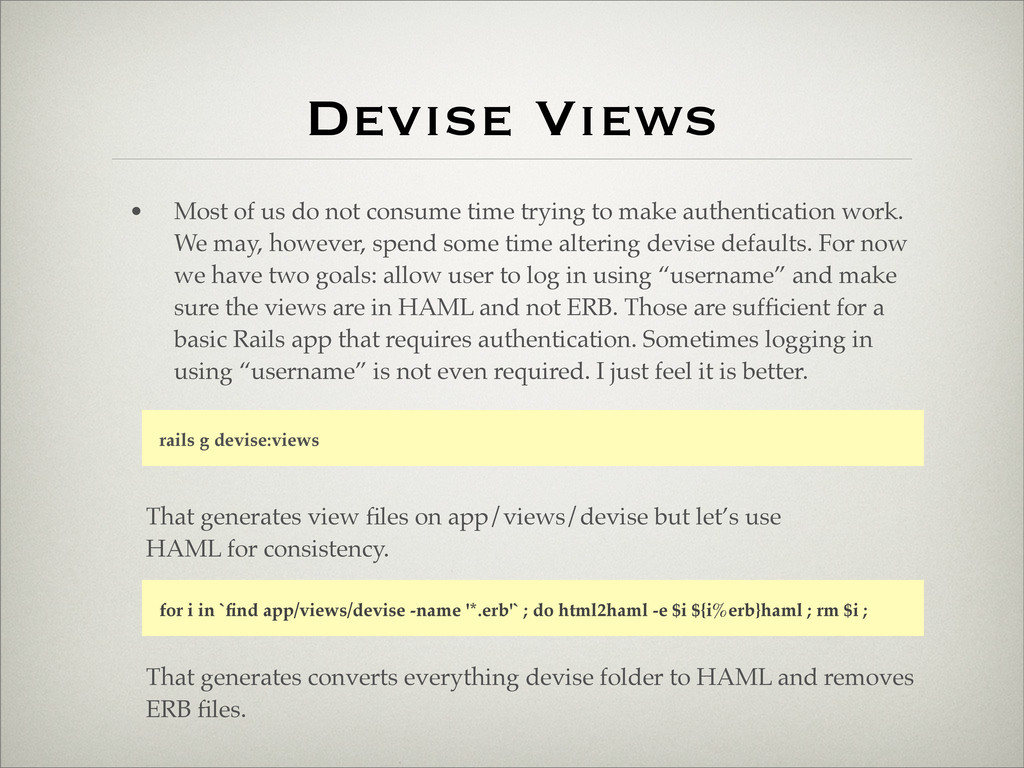
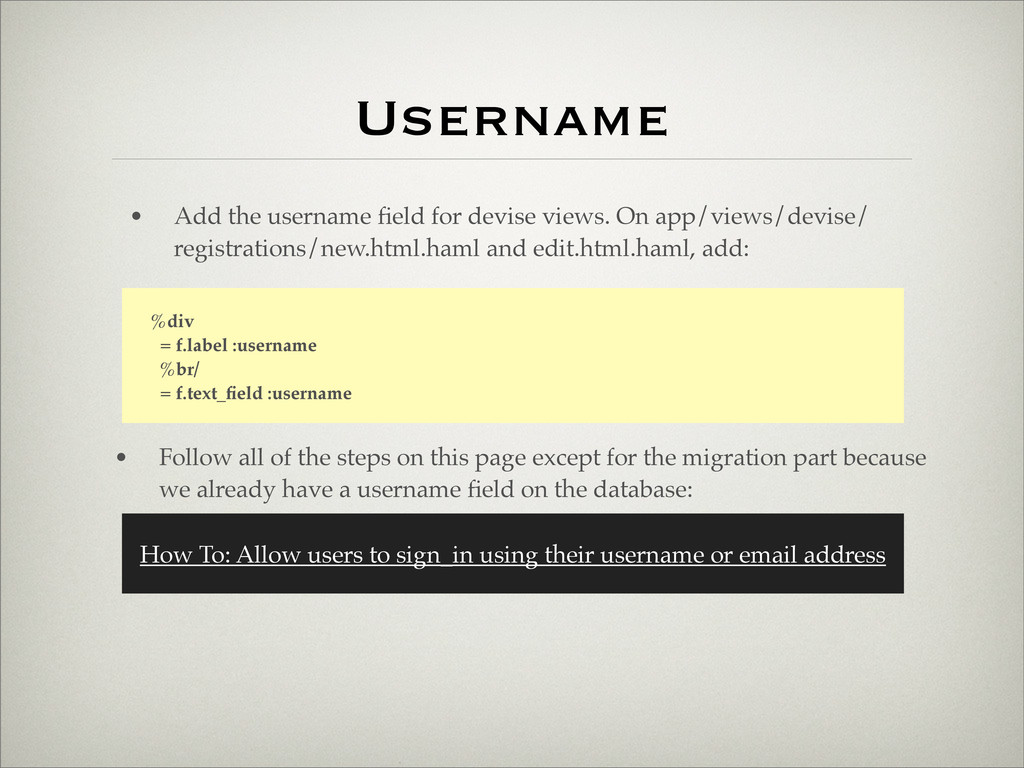
trying to make authentication work. We may, however, spend some time altering devise defaults. For now we have two goals: allow user to log in using “username” and make sure the views are in HAML and not ERB. Those are sufficient for a basic Rails app that requires authentication. Sometimes logging in using “username” is not even required. I just feel it is better. rails g devise:views That generates view files on app/views/devise but let’s use HAML for consistency. for i in `find app/views/devise -name '*.erb'` ; do html2haml -e $i ${i%erb}haml ; rm $i ; That generates converts everything devise folder to HAML and removes ERB files.
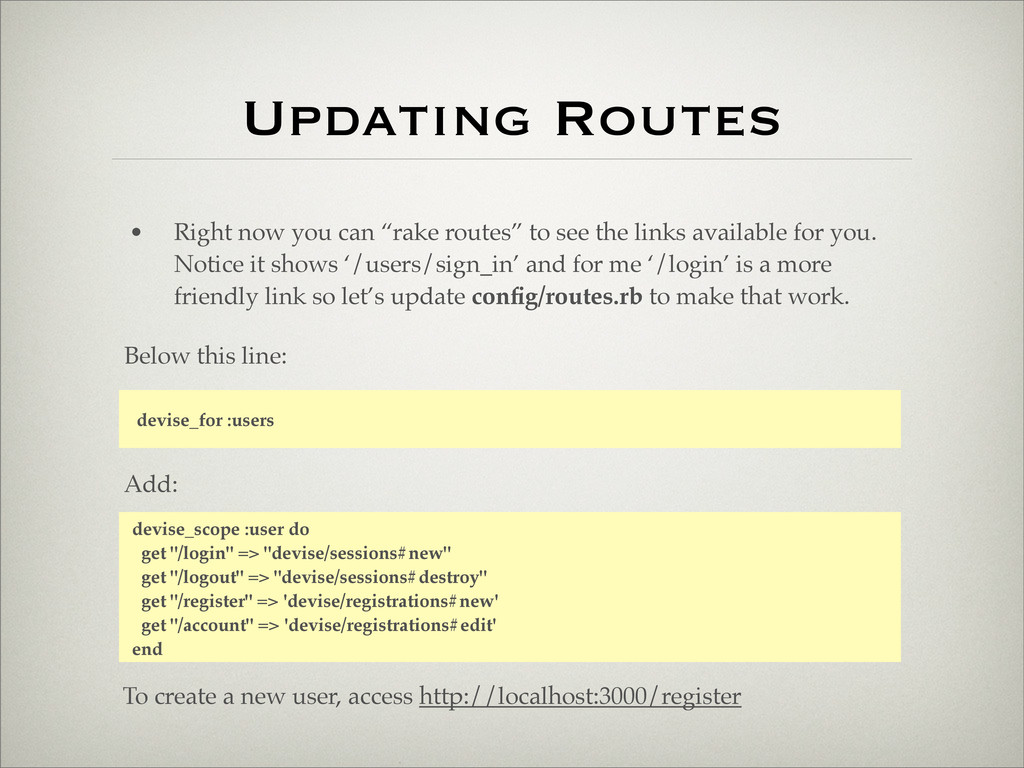
see the links available for you. Notice it shows ‘/users/sign_in’ and for me ‘/login’ is a more friendly link so let’s update config/routes.rb to make that work. devise_for :users Below this line: Add: devise_scope :user do get "/login" => "devise/sessions#new" get "/logout" => "devise/sessions#destroy" get "/register" => 'devise/registrations#new' get "/account" => 'devise/registrations#edit' end To create a new user, access http://localhost:3000/register
app/views/devise/ registrations/new.html.haml and edit.html.haml, add: %div = f.label :username %br/ = f.text_field :username • Follow all of the steps on this page except for the migration part because we already have a username field on the database: How To: Allow users to sign_in using their username or email address
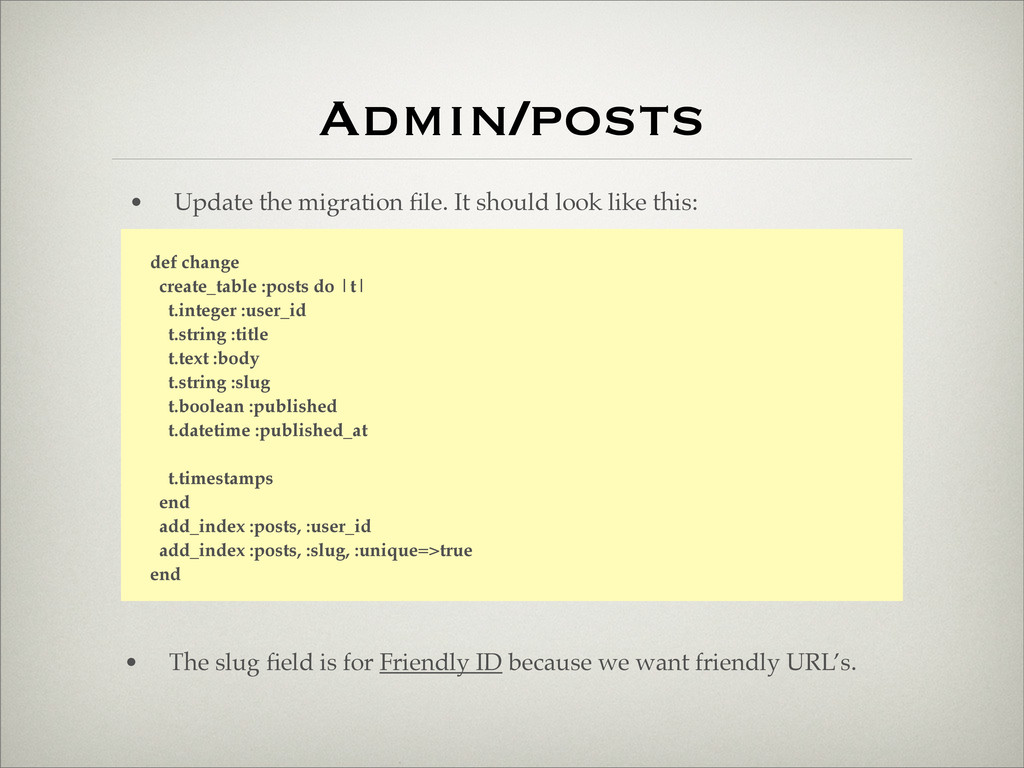
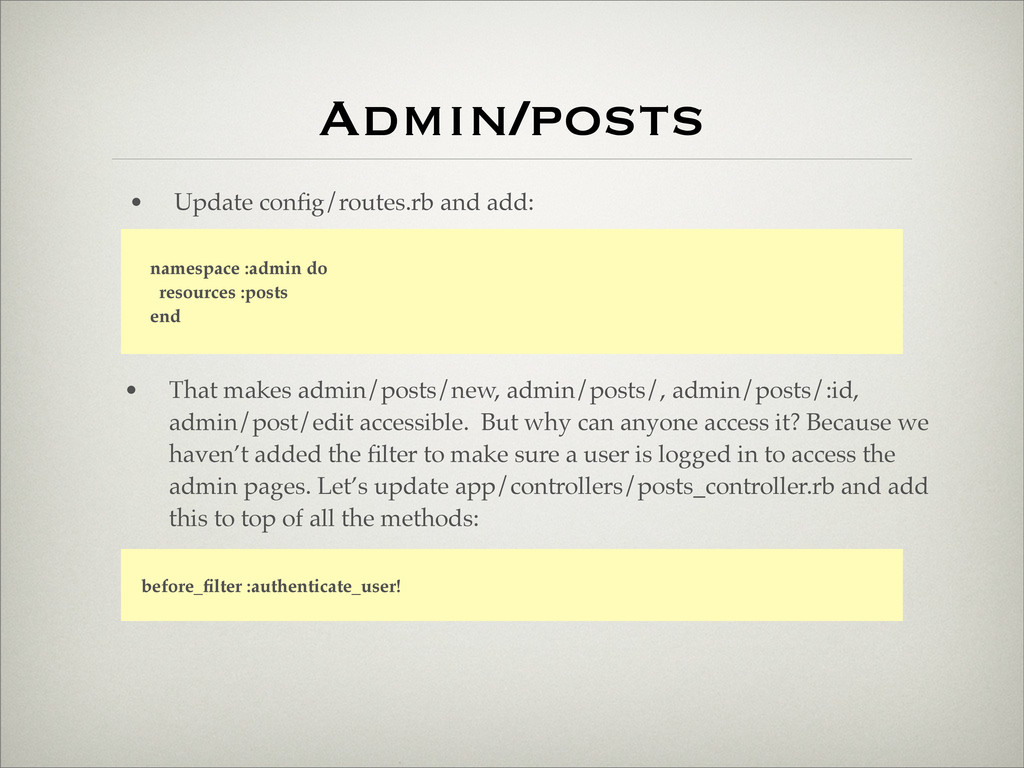
needed to create a post. But we’ll try to create a namespace so we can create posts via / admin/posts/new rather than /posts/new. rails g scaffold post user_id:integer title:string body:text slug:string published:boolean mkdir -p app/views/admin/posts && cp -R app/views/posts/* app/views/admin/posts • That will copy view files to views/admin. But we need to update the form view (admin/views/posts/_form.html.haml). Change this line: = semantic_form_for @post do |f| • to this: = semantic_form_for [:admin, @post] do |f|
this: def change create_table :posts do |t| t.integer :user_id t.string :title t.text :body t.string :slug t.boolean :published t.datetime :published_at t.timestamps end add_index :posts, :user_id add_index :posts, :slug, :unique=>true end • The slug field is for Friendly ID because we want friendly URL’s.
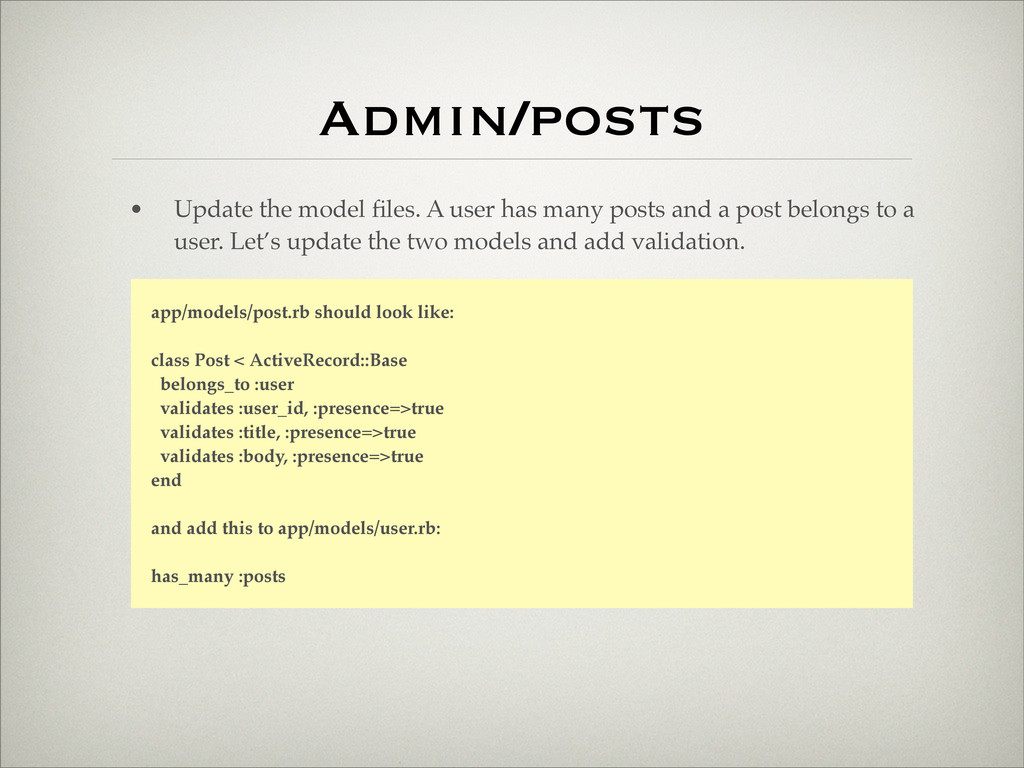
posts and a post belongs to a user. Let’s update the two models and add validation. app/models/post.rb should look like: class Post < ActiveRecord::Base belongs_to :user validates :user_id, :presence=>true validates :title, :presence=>true validates :body, :presence=>true end and add this to app/models/user.rb: has_many :posts
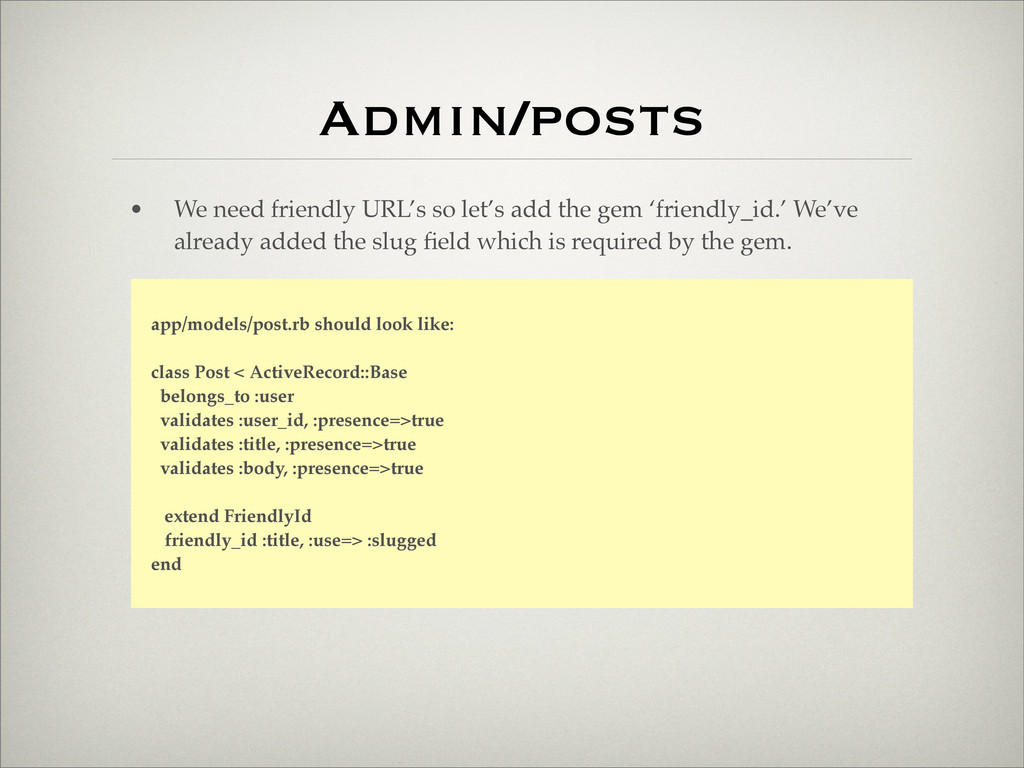
gem ‘friendly_id.’ We’ve already added the slug field which is required by the gem. app/models/post.rb should look like: class Post < ActiveRecord::Base belongs_to :user validates :user_id, :presence=>true validates :title, :presence=>true validates :body, :presence=>true extend FriendlyId friendly_id :title, :use=> :slugged end
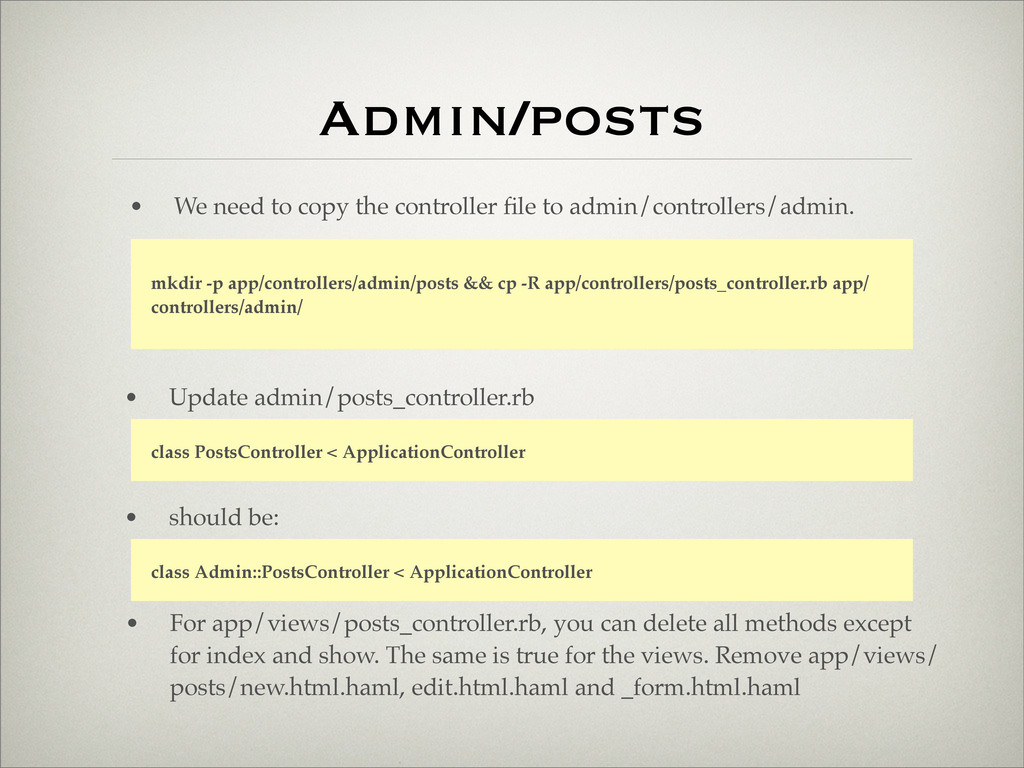
admin/controllers/admin. mkdir -p app/controllers/admin/posts && cp -R app/controllers/posts_controller.rb app/ controllers/admin/ • Update admin/posts_controller.rb class PostsController < ApplicationController • should be: class Admin::PostsController < ApplicationController • For app/views/posts_controller.rb, you can delete all methods except for index and show. The same is true for the views. Remove app/views/ posts/new.html.haml, edit.html.haml and _form.html.haml
:posts end • That makes admin/posts/new, admin/posts/, admin/posts/:id, admin/post/edit accessible. But why can anyone access it? Because we haven’t added the filter to make sure a user is logged in to access the admin pages. Let’s update app/controllers/posts_controller.rb and add this to top of all the methods: before_filter :authenticate_user!
Simply replace new_post_path to new_admin_post_path and edit_post_path(post) to edit_admin_post_path(post) on the views. And update admin/ controllers/posts_controller.rb redirect paths: @post = Post.new(params[:post]) should now be @post = Post.new(params[:post].merge(:user => current_user)) • We need to know who created the post at least so let’s update the create action. redirect_to @post should now be redirect_to admin_post_path(@post)
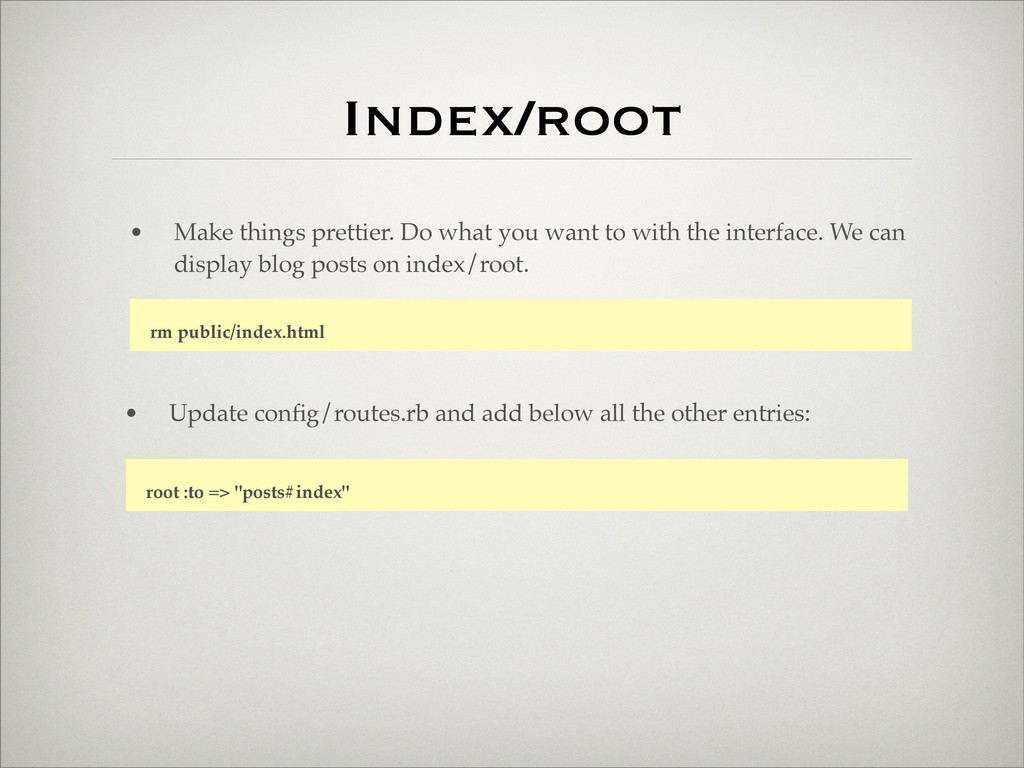
with the interface. We can display blog posts on index/root. rm public/index.html • Update config/routes.rb and add below all the other entries: root :to => "posts#index"
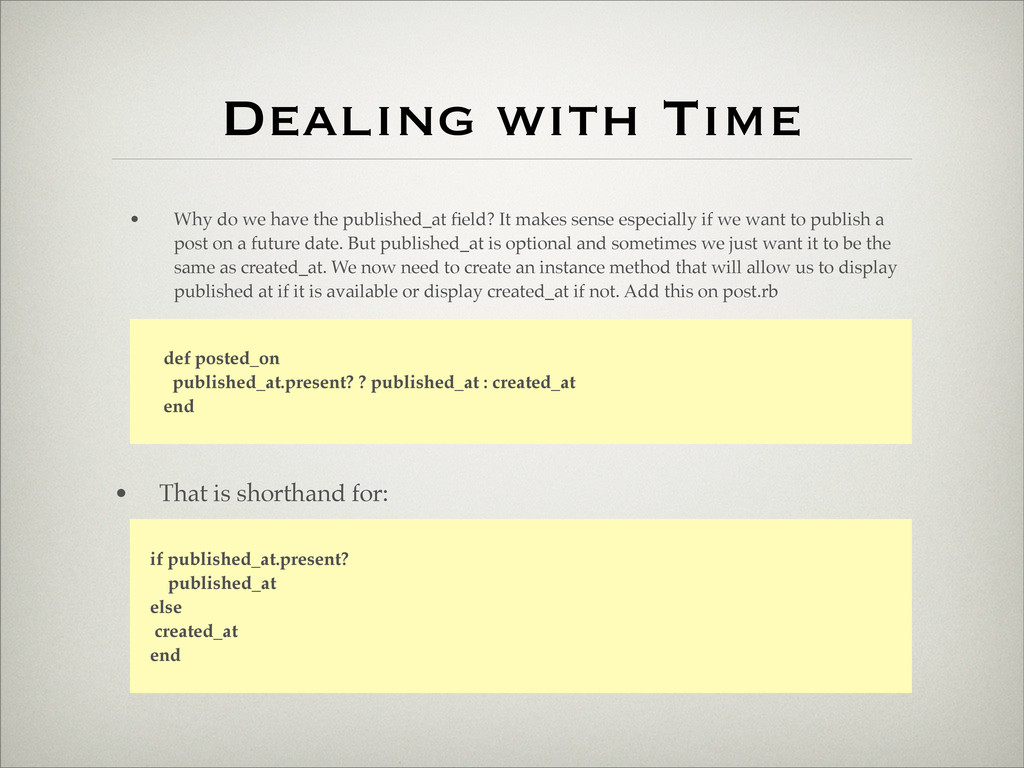
field? It makes sense especially if we want to publish a post on a future date. But published_at is optional and sometimes we just want it to be the same as created_at. We now need to create an instance method that will allow us to display published at if it is available or display created_at if not. Add this on post.rb def posted_on published_at.present? ? published_at : created_at end • That is shorthand for: if published_at.present? published_at else created_at end
and remove the hours and minutes. I like that and prefer that. So I added config/initializers/time_formats.rb Time::DATE_FORMATS[:no_time] = "%B %d, %Y" • On the views file (posts/index.html.haml), we can use that format. .post-details= "Posted on #{post.posted_on.to_s(:no_time)}"
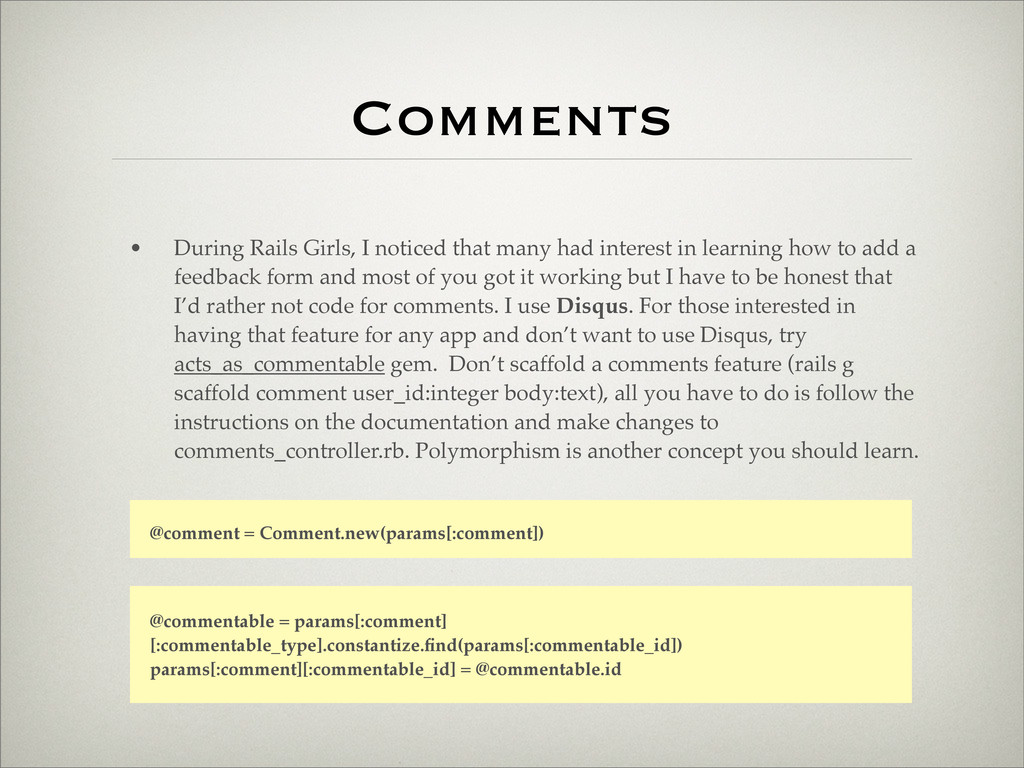
interest in learning how to add a feedback form and most of you got it working but I have to be honest that I’d rather not code for comments. I use Disqus. For those interested in having that feature for any app and don’t want to use Disqus, try acts_as_commentable gem. Don’t scaffold a comments feature (rails g scaffold comment user_id:integer body:text), all you have to do is follow the instructions on the documentation and make changes to comments_controller.rb. Polymorphism is another concept you should learn. @comment = Comment.new(params[:comment]) @commentable = params[:comment] [:commentable_type].constantize.find(params[:commentable_id]) params[:comment][:commentable_id] = @commentable.id
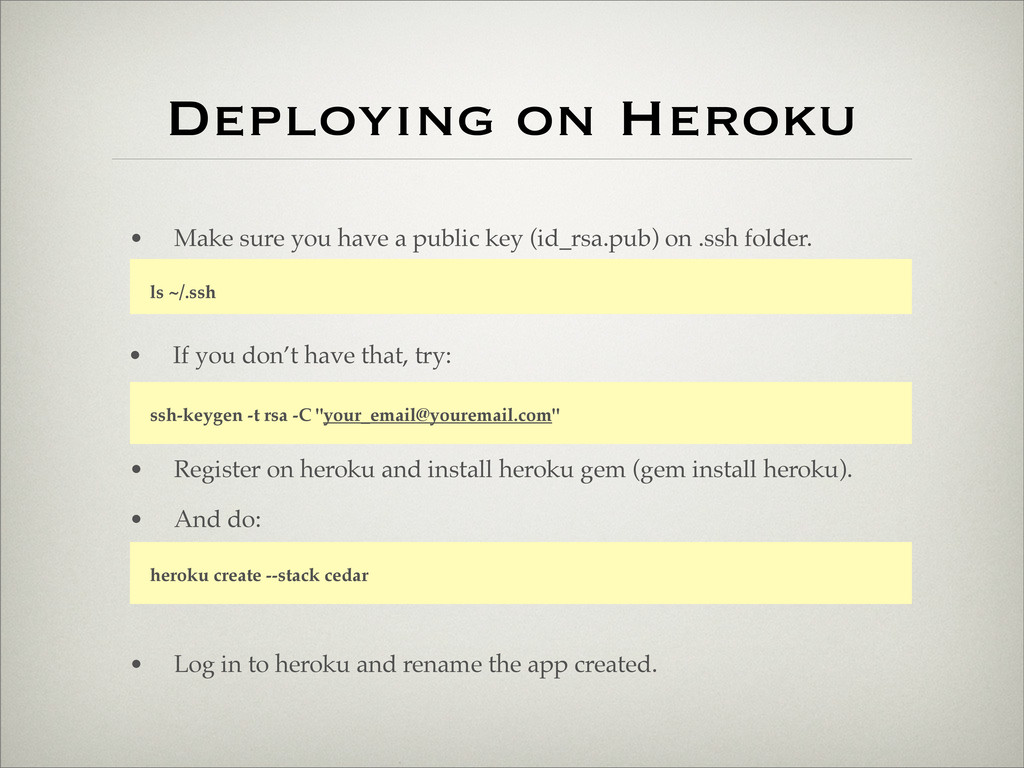
key (id_rsa.pub) on .ssh folder. ls ~/.ssh • If you don’t have that, try: ssh-keygen -t rsa -C "[email protected]" • Register on heroku and install heroku gem (gem install heroku). • And do: heroku create --stack cedar • Log in to heroku and rename the app created.
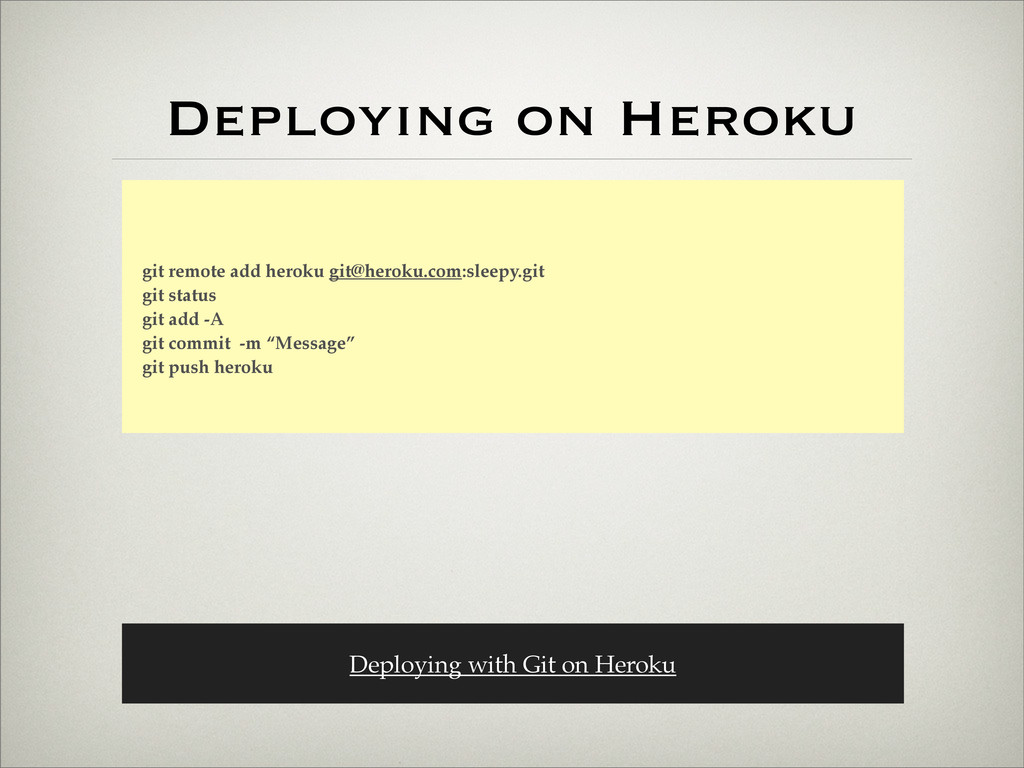
postgres://username:password@hostname/database heroku run rake --trace db:migrate RAILS_ENV=production rake assets:precompile git commit -a -m ‘all that’ git push heroku master heroku run rake --trace db:migrate Update your config/database.yml only if the last command returns an error.
admit I have a lot to learn despite being an old, senior developer. • If you are a serious type who wants to learn how to get things done right, learn about Test Driven Development. Based on experience, when apps become too complex and there are no tests written, even with a QA tester, it’s difficult to see what’s wrong. The last thing you want to hear is a user complaining. RSpec
![Deploying on Heroku PostgreSQL on Heroku heroku run console ENV[‘DATABASE_URL’]](https://files.speakerdeck.com/presentations/4fef90ec26808702610126b8/slide_48.jpg)