Upgrade to Pro — share decks privately, control downloads, hide ads and more …

Ch. 6 - Airway Management & Respiratory Emergencies

Ch. 6 - Airway Management & Respiratory Emergencies

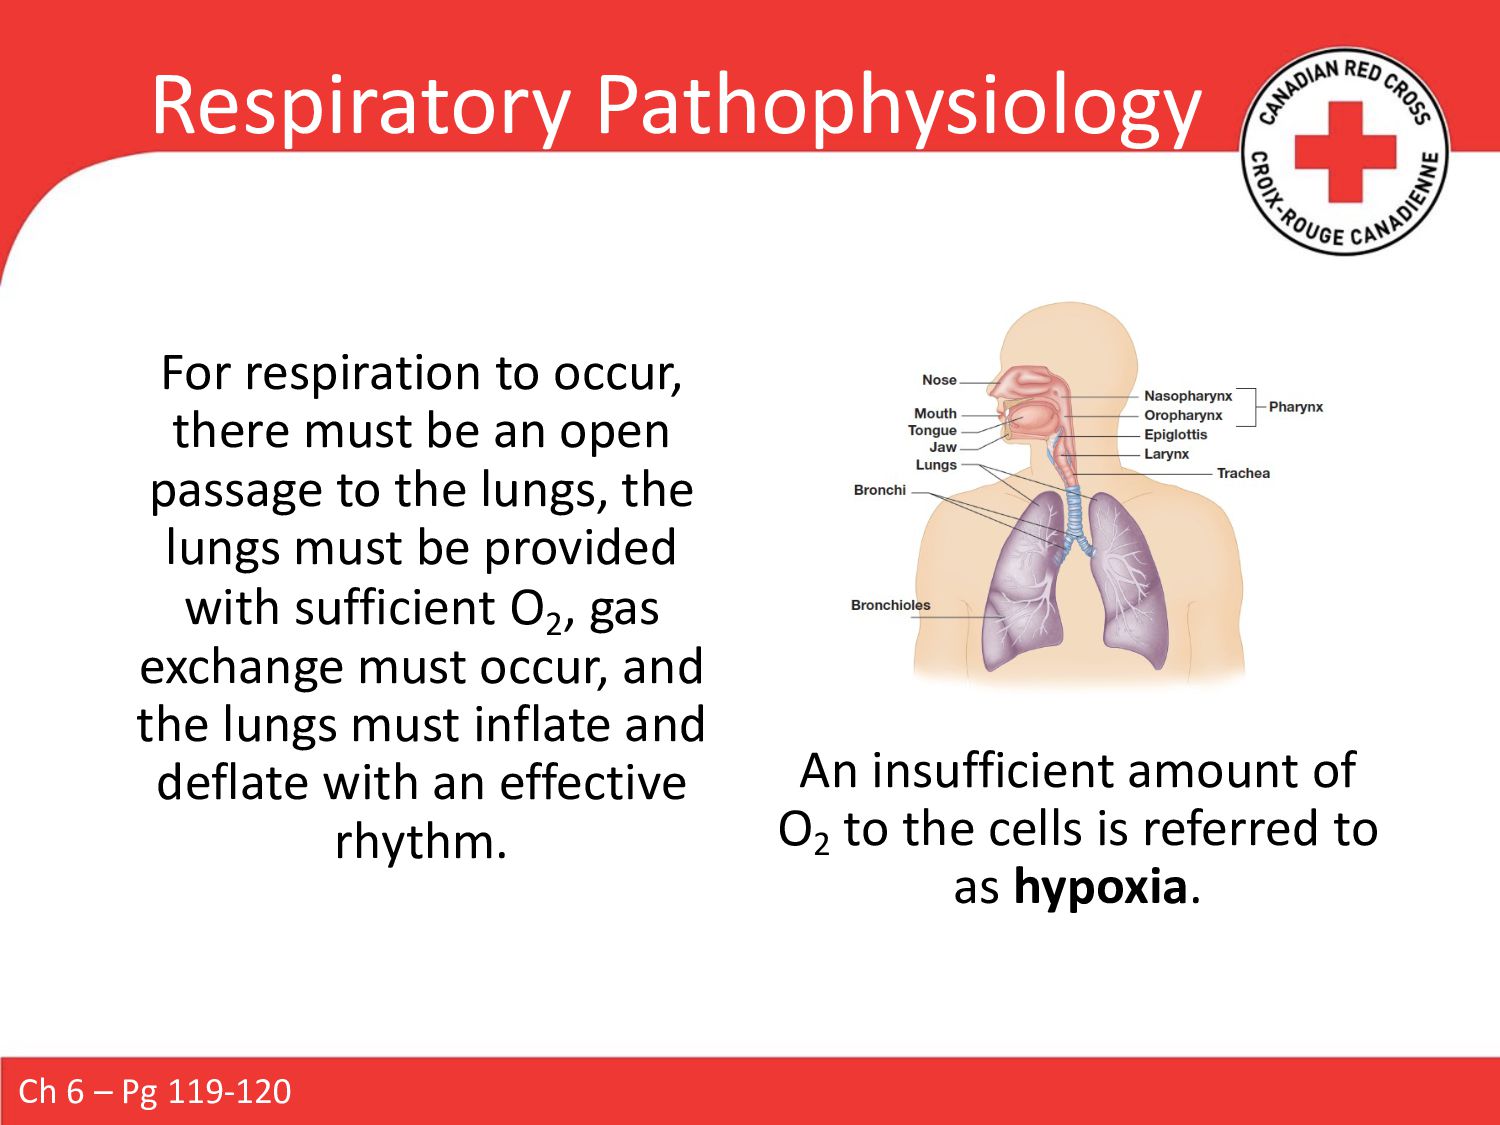
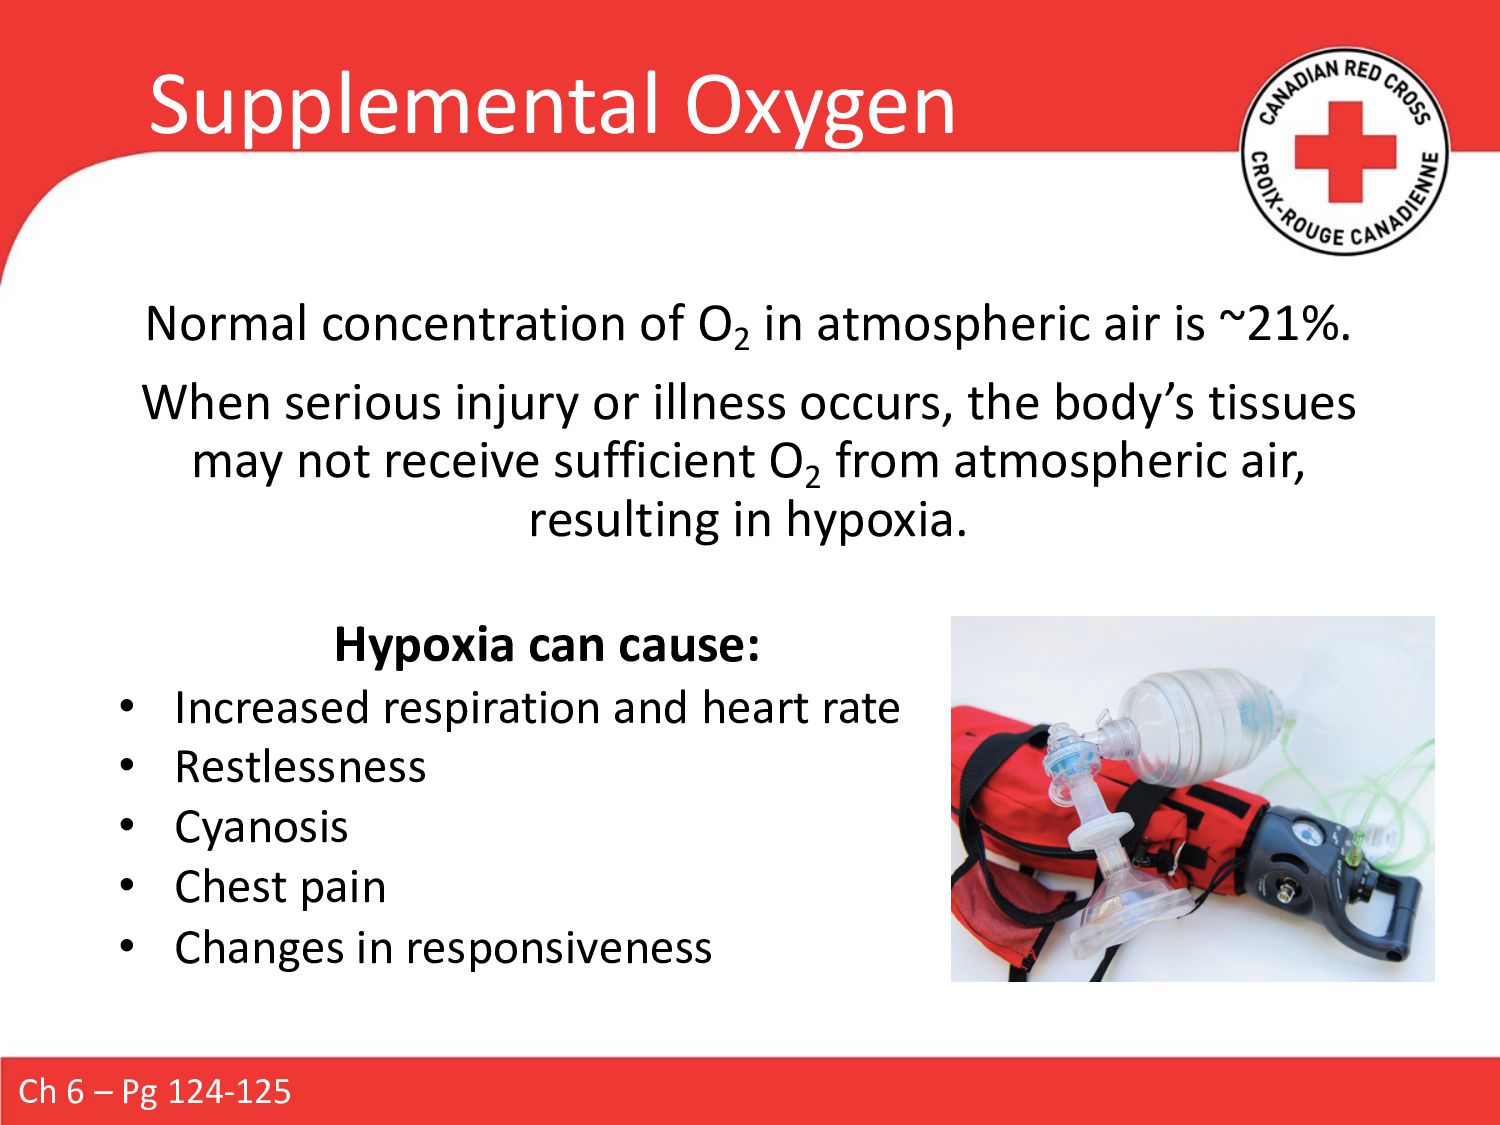
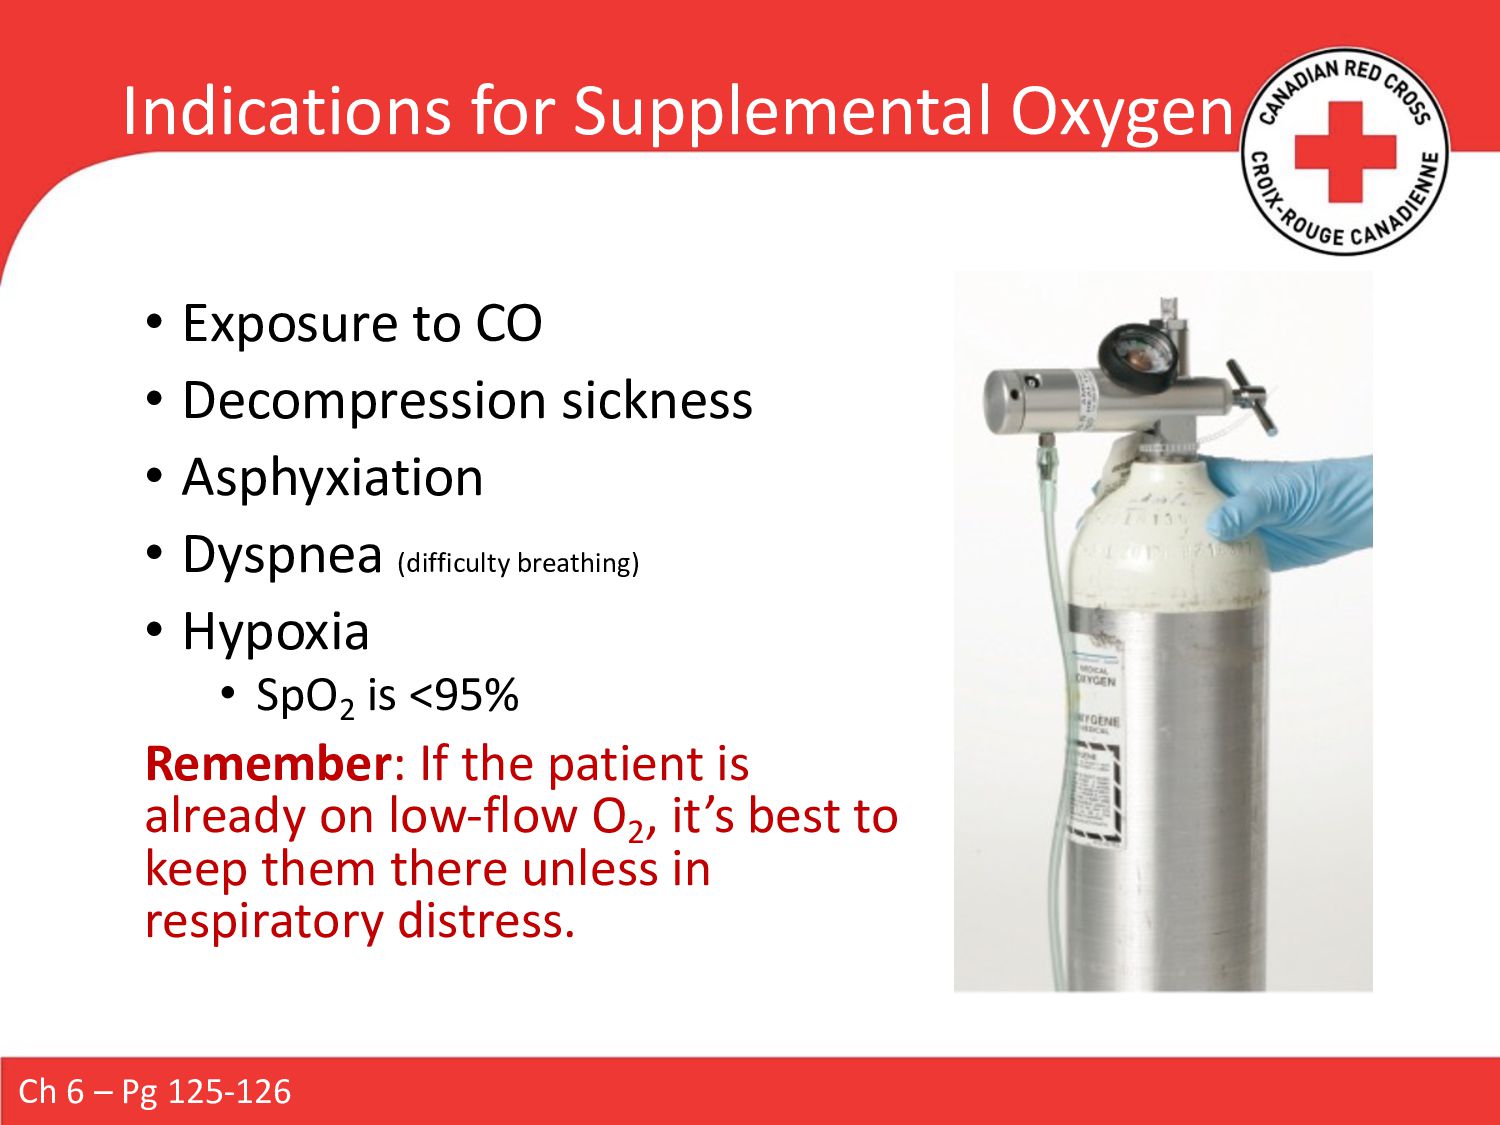
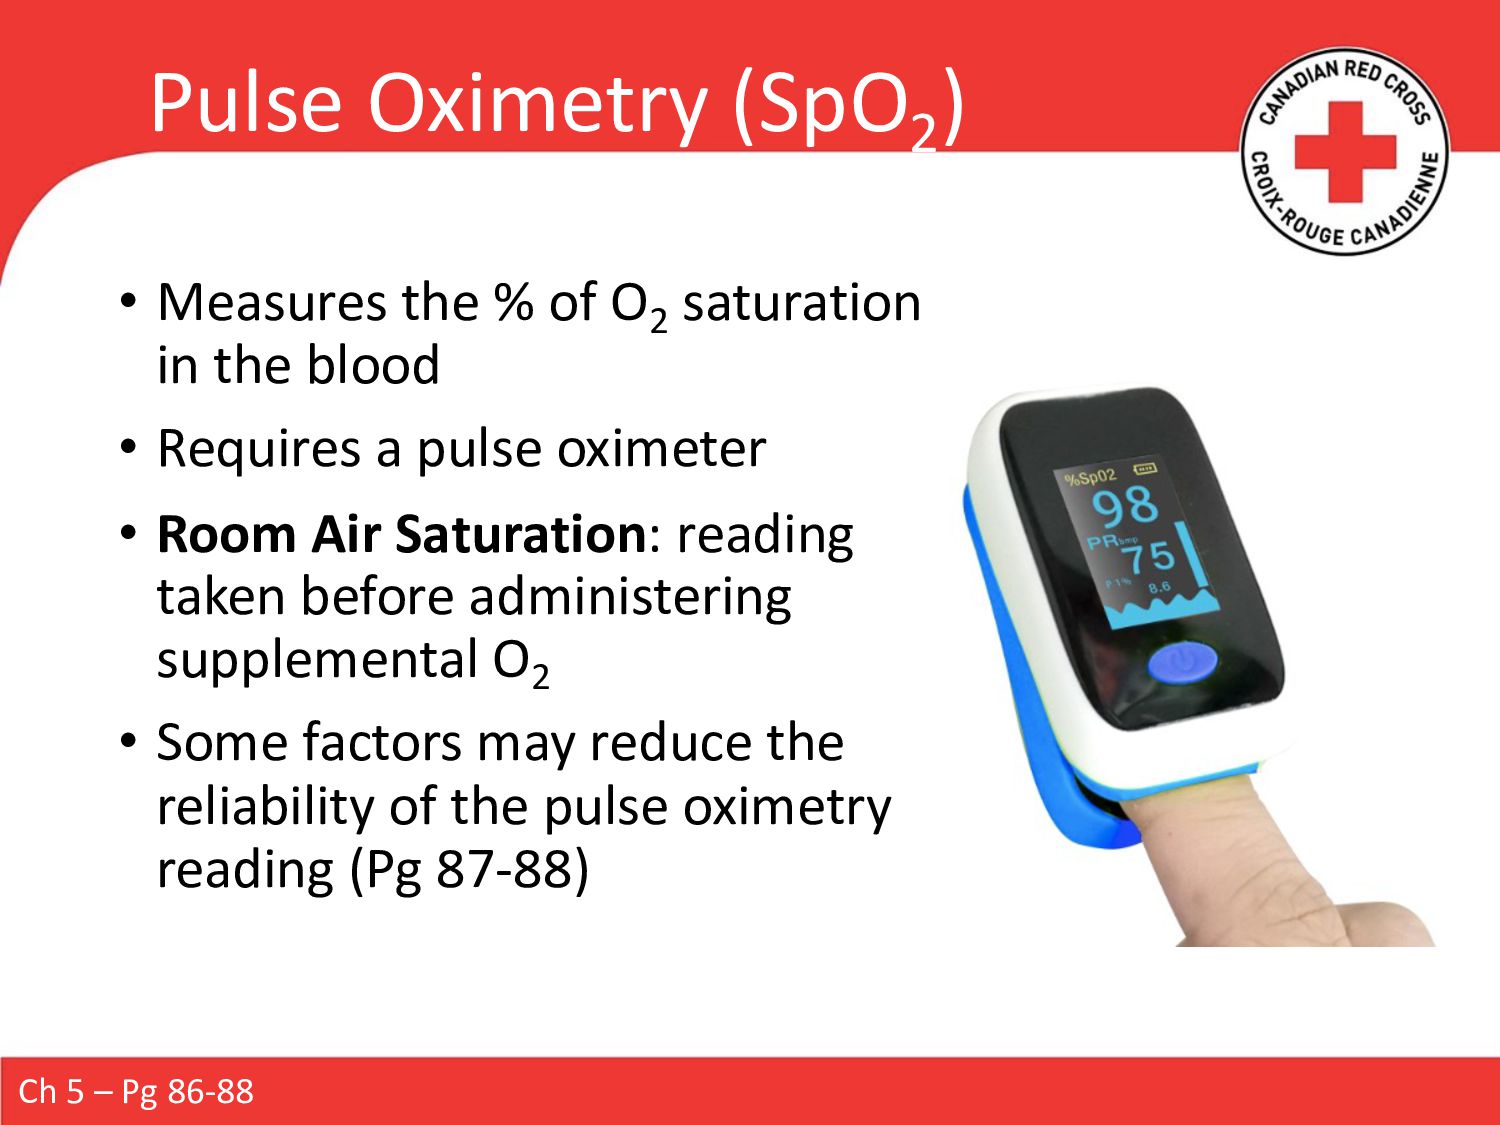
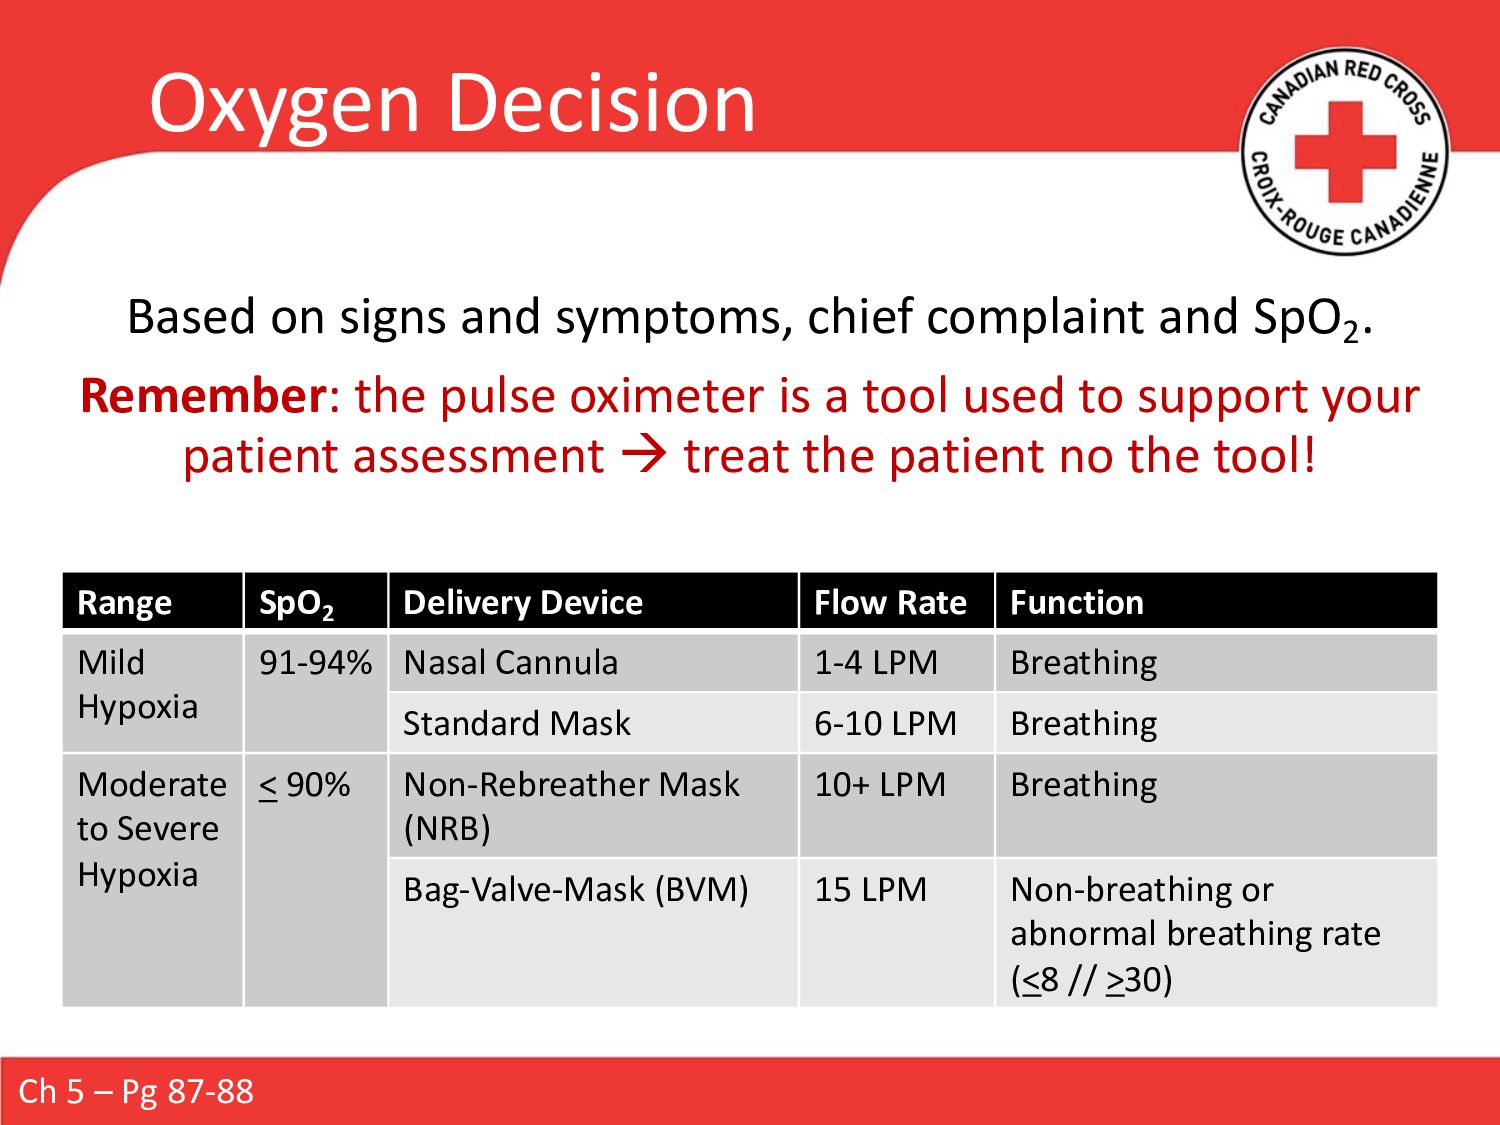
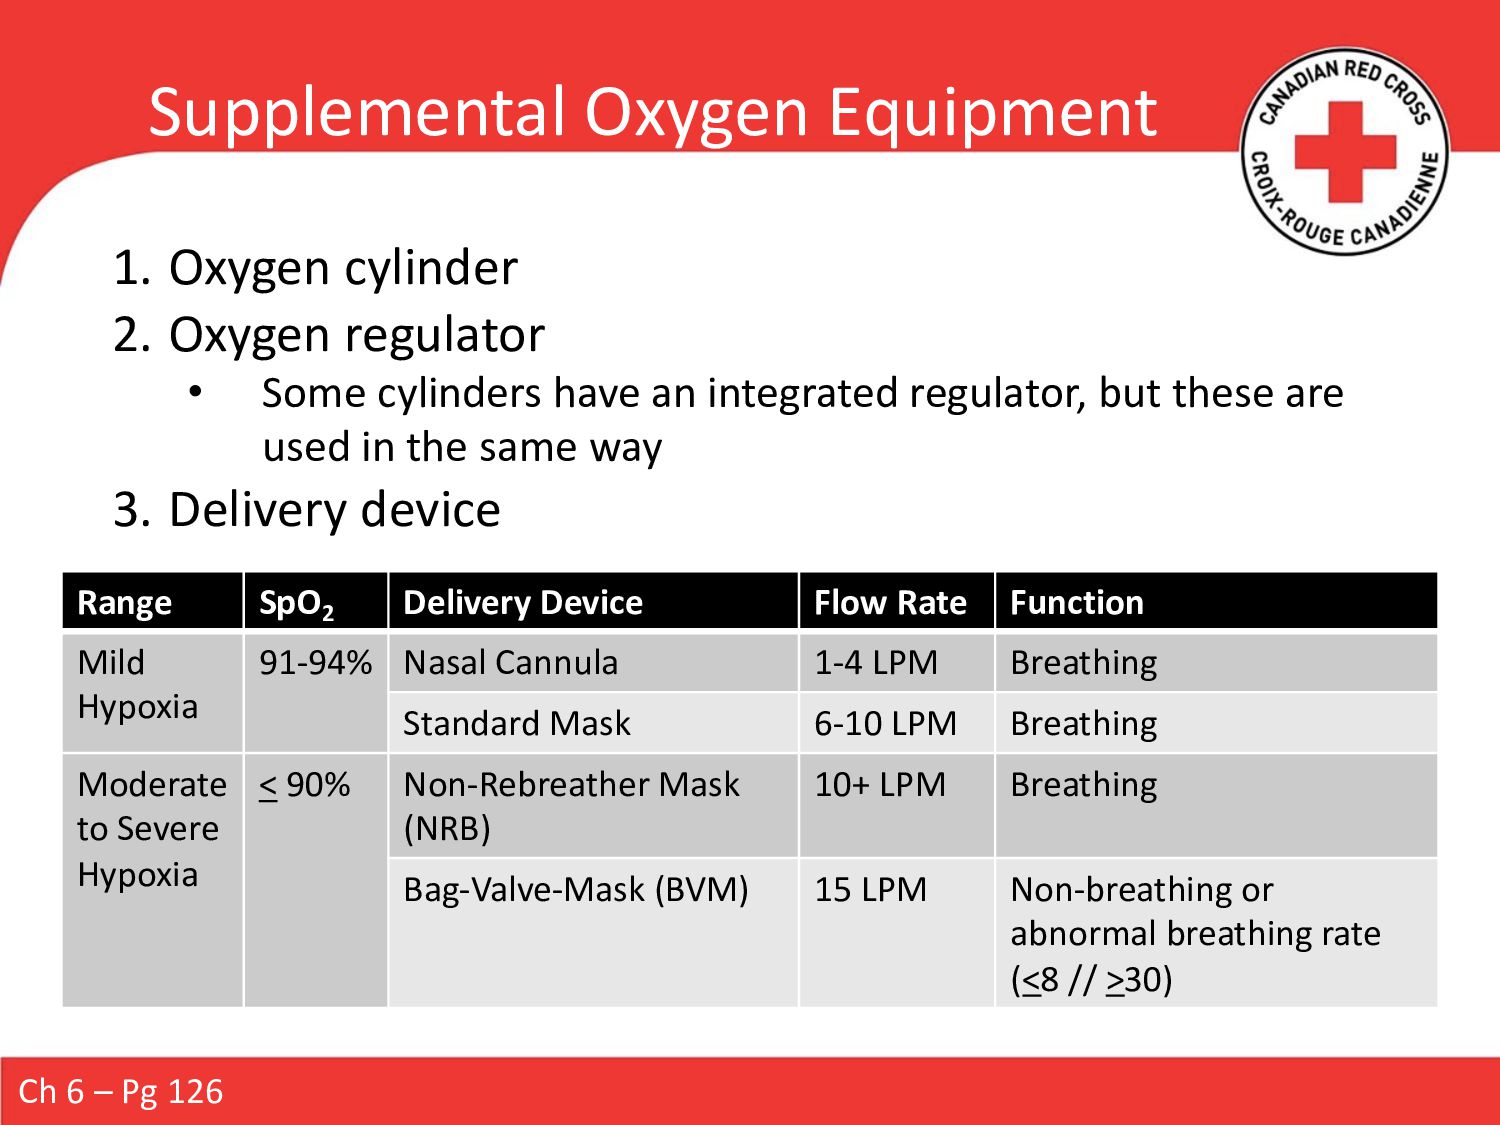
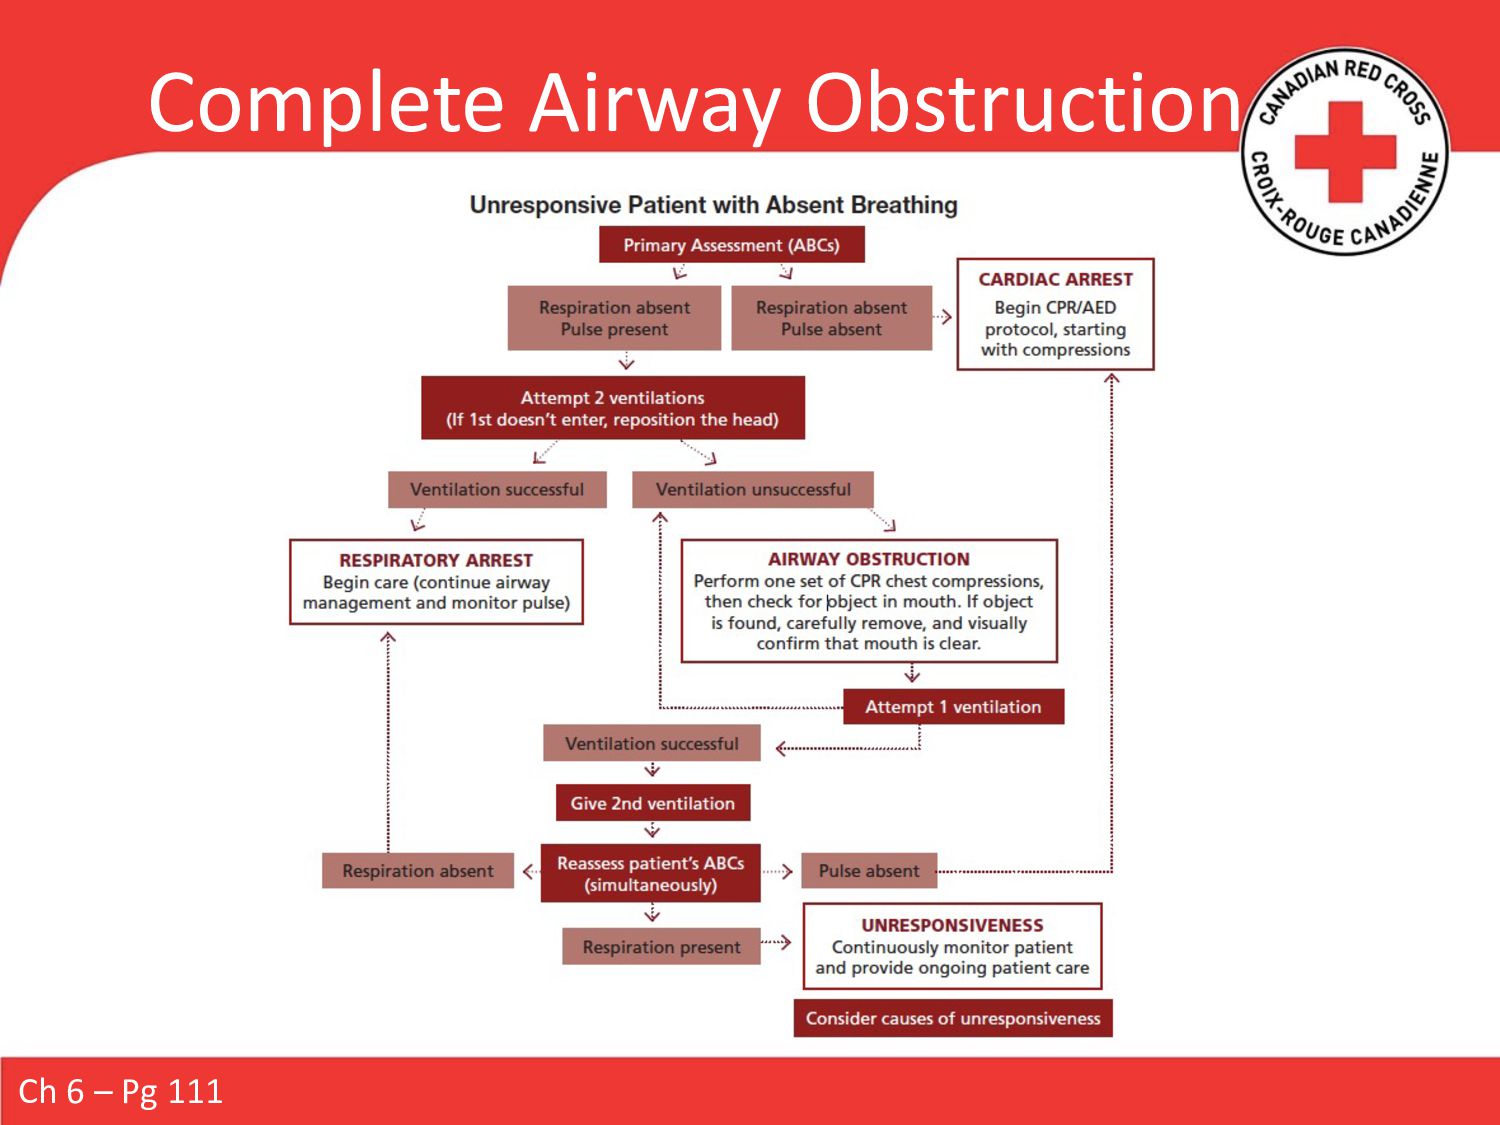
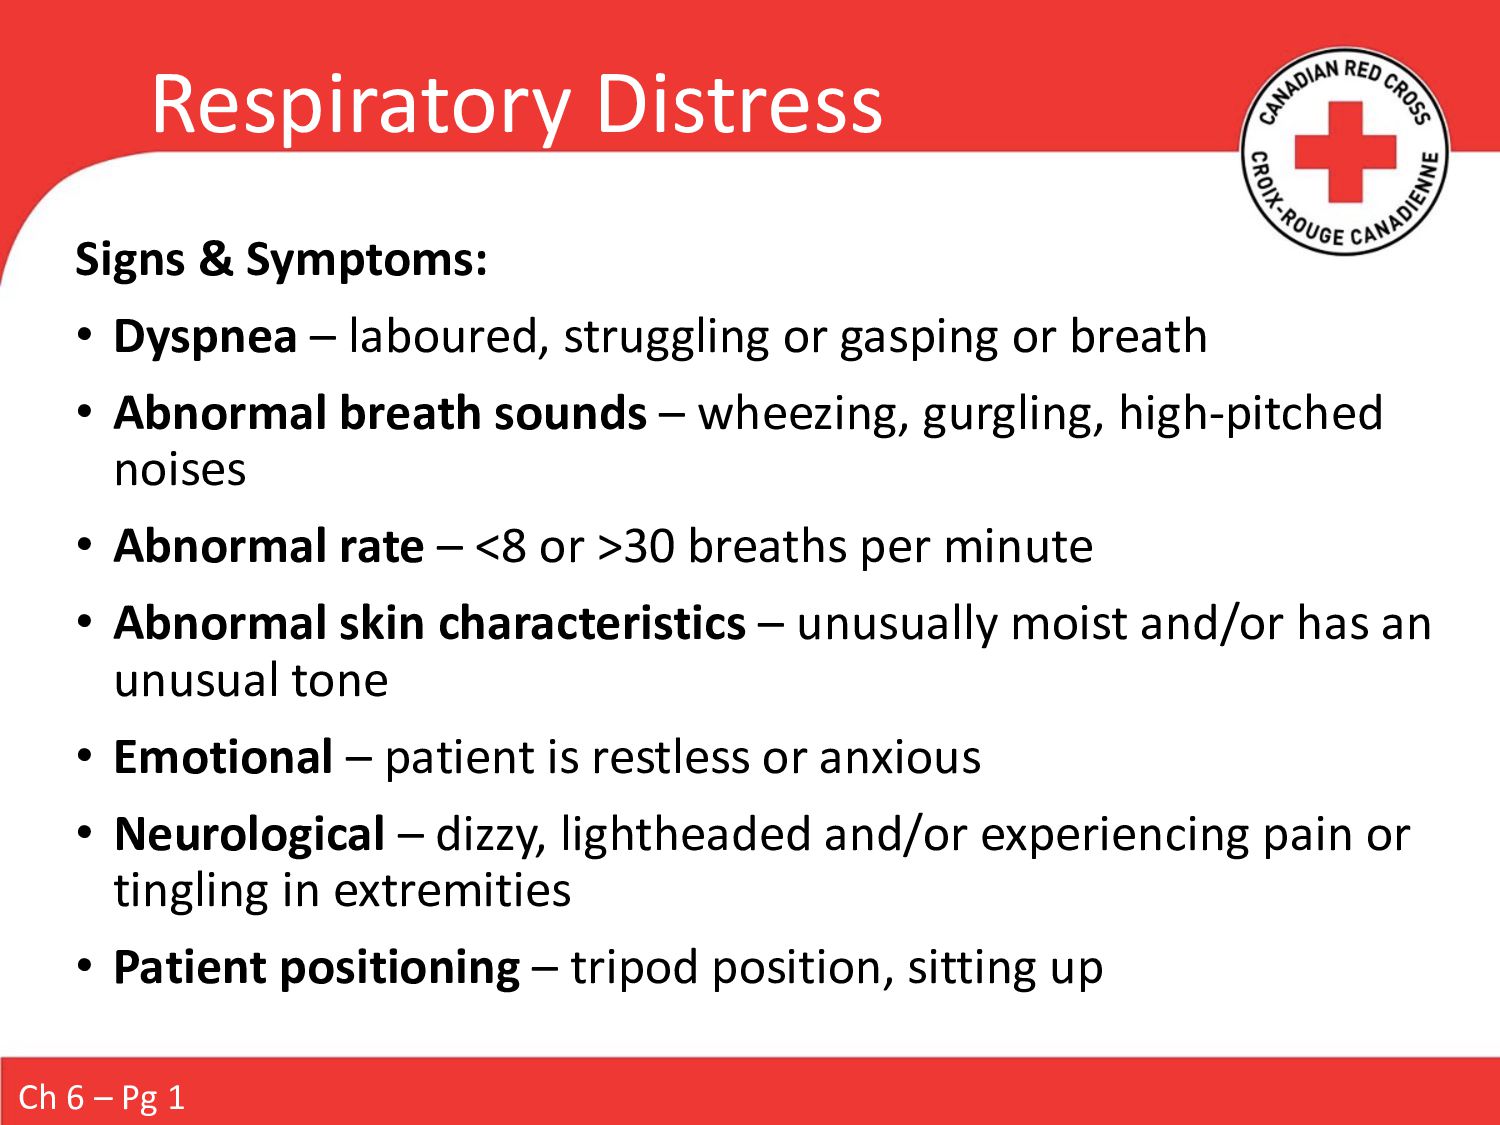
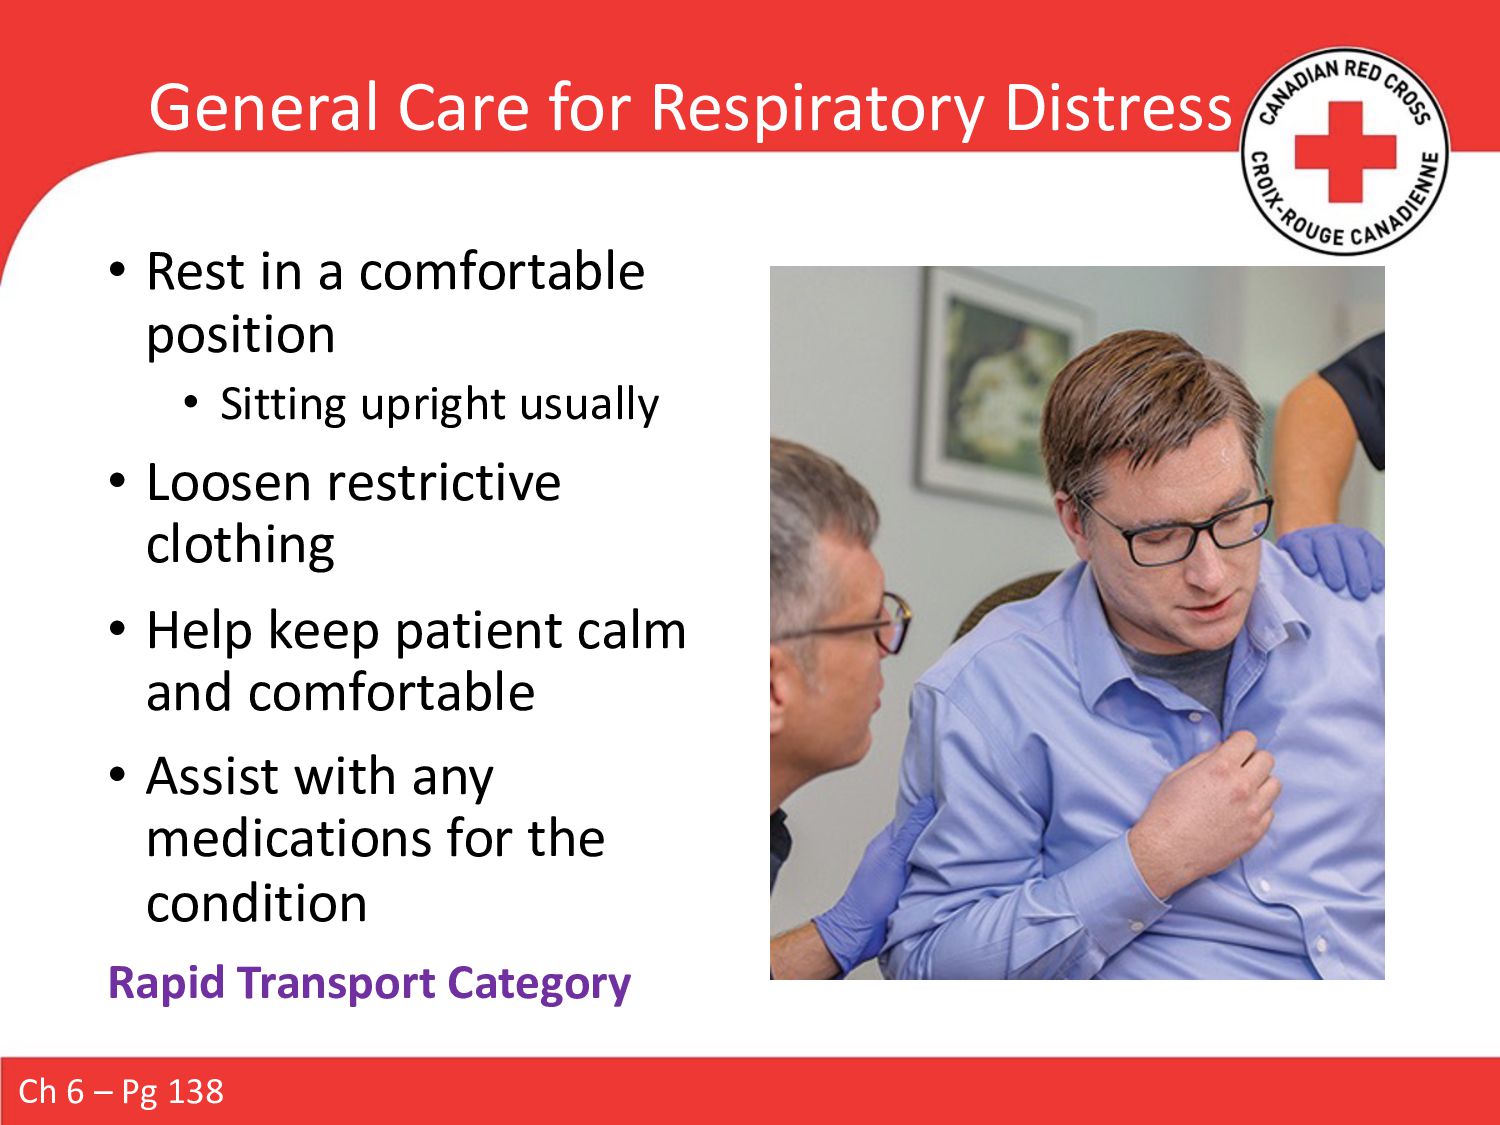
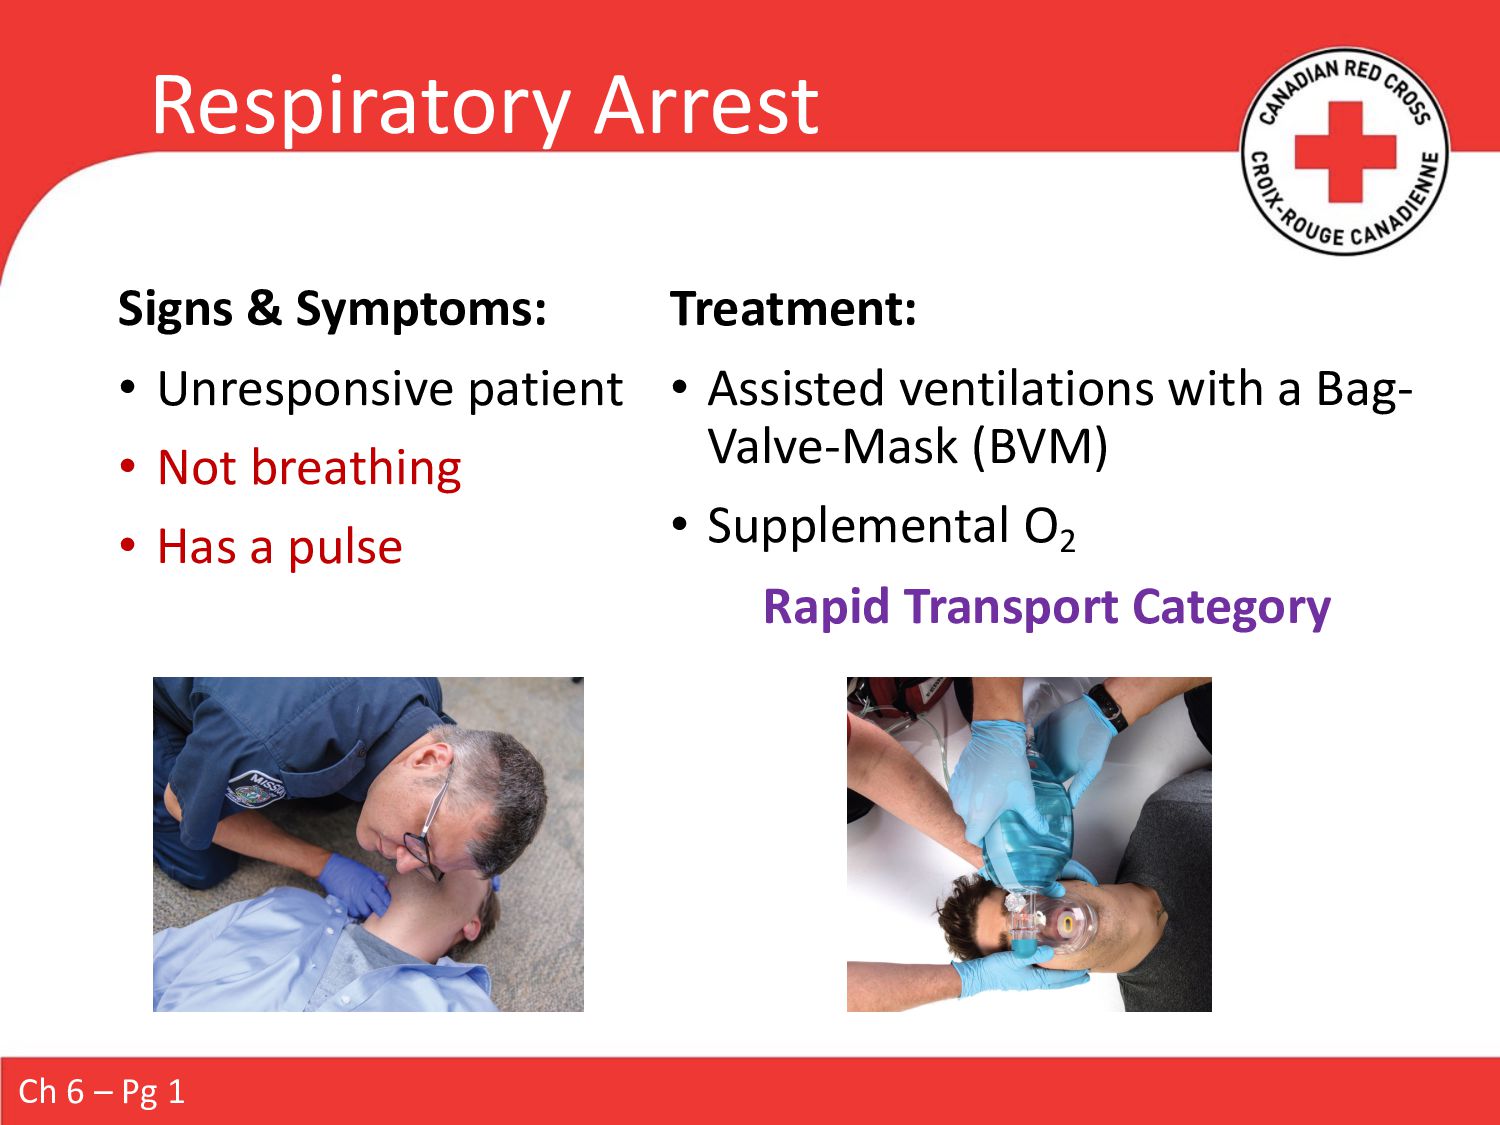
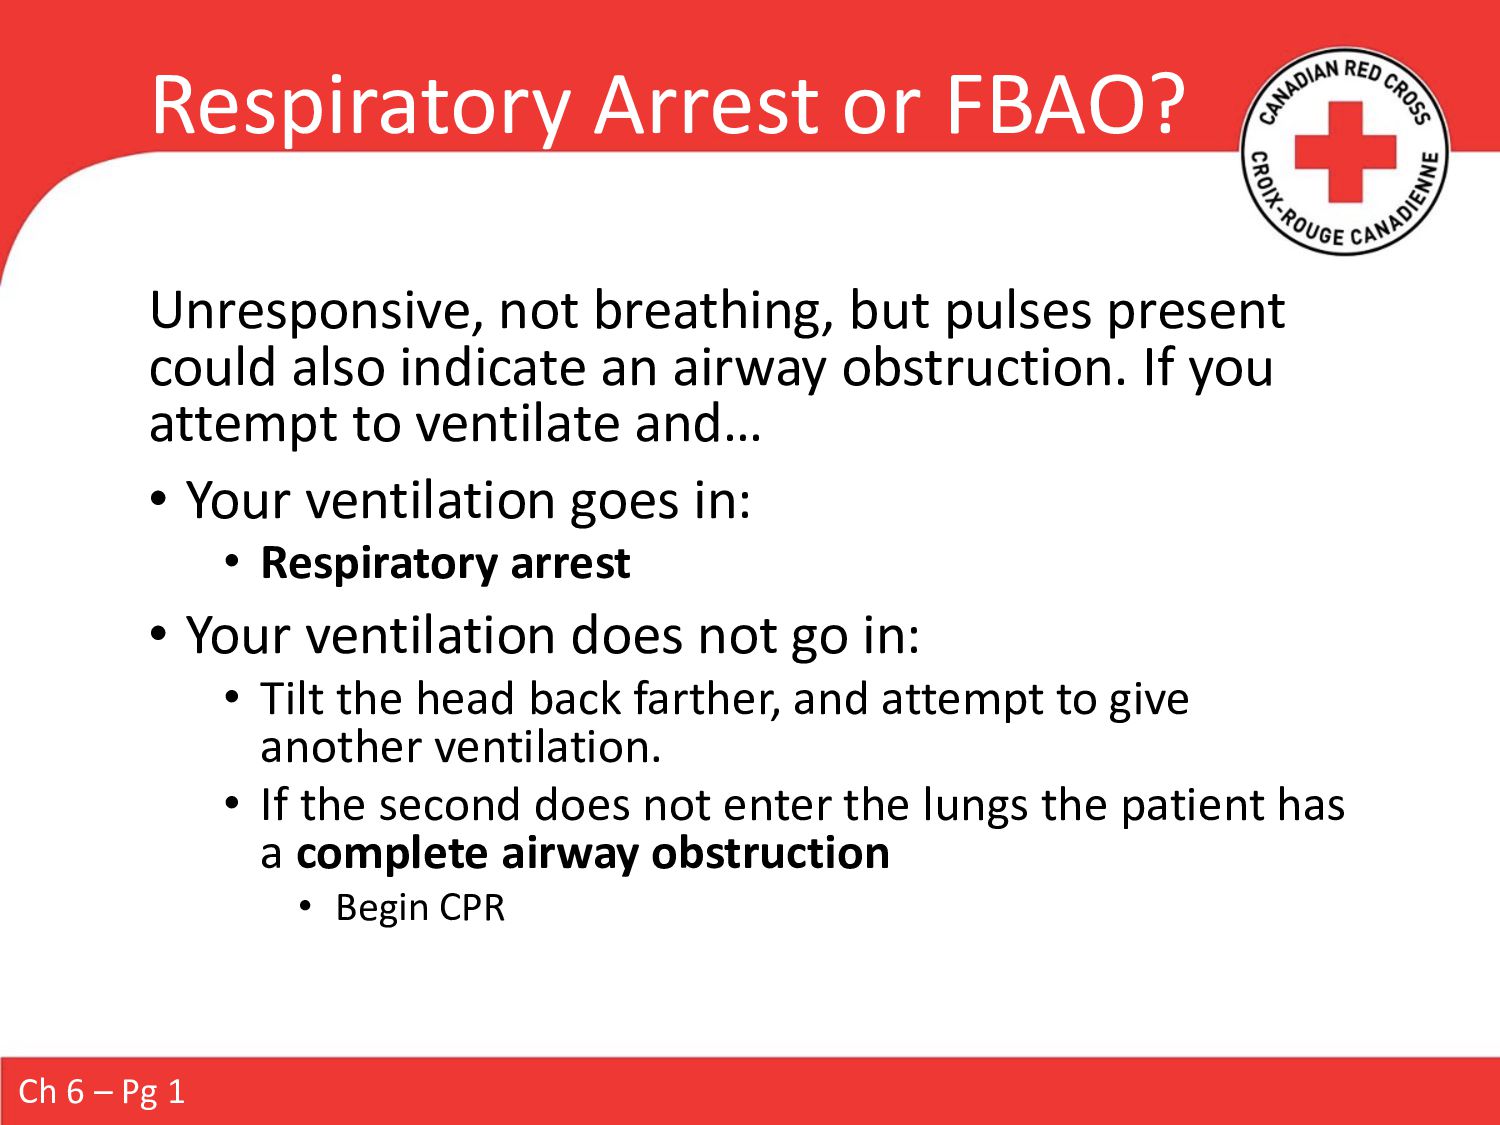
Because oxygen is vital to life, you must always ensure that the patient has an open airway and is breathing effectively. Airway and respiratory problems should be apparent when you check the patient’s ABCs during your primary assessment. A respiratory emergency can occur in two ways: Respiration becomes difficult or ineffective, or respiration stops entirely. A patient who is having difficulty breathing (dyspnea) is in respiratory distress. A patient who has stopped breathing is in respiratory arrest.

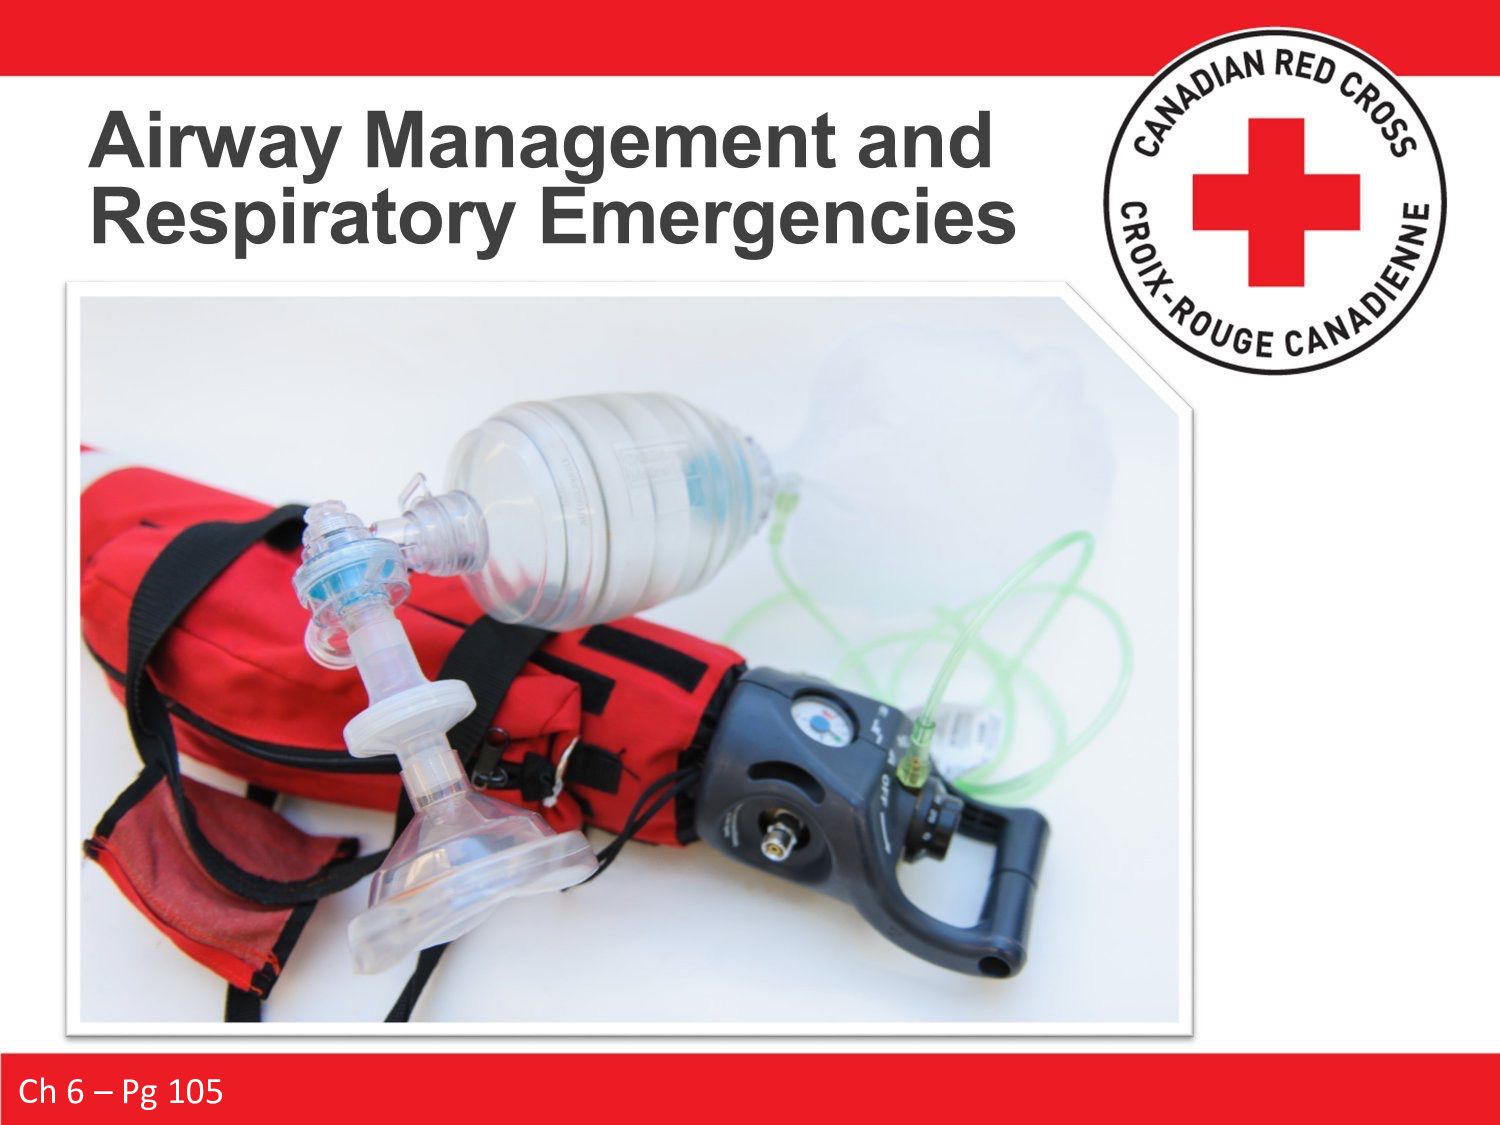
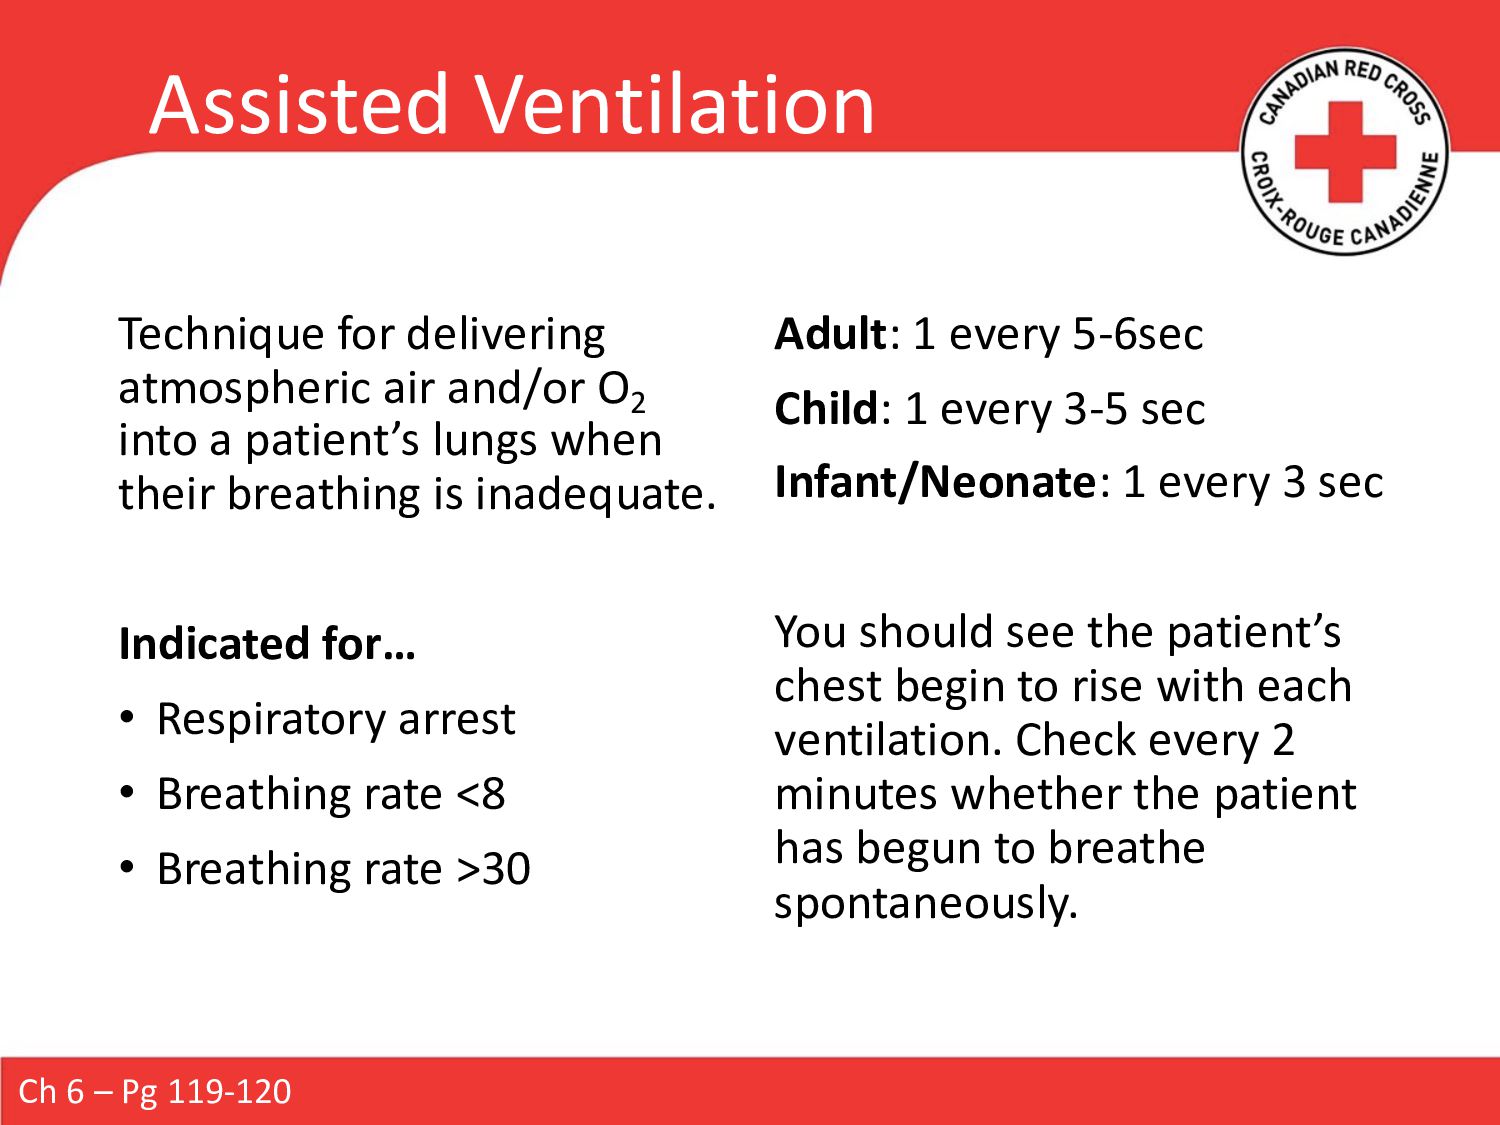
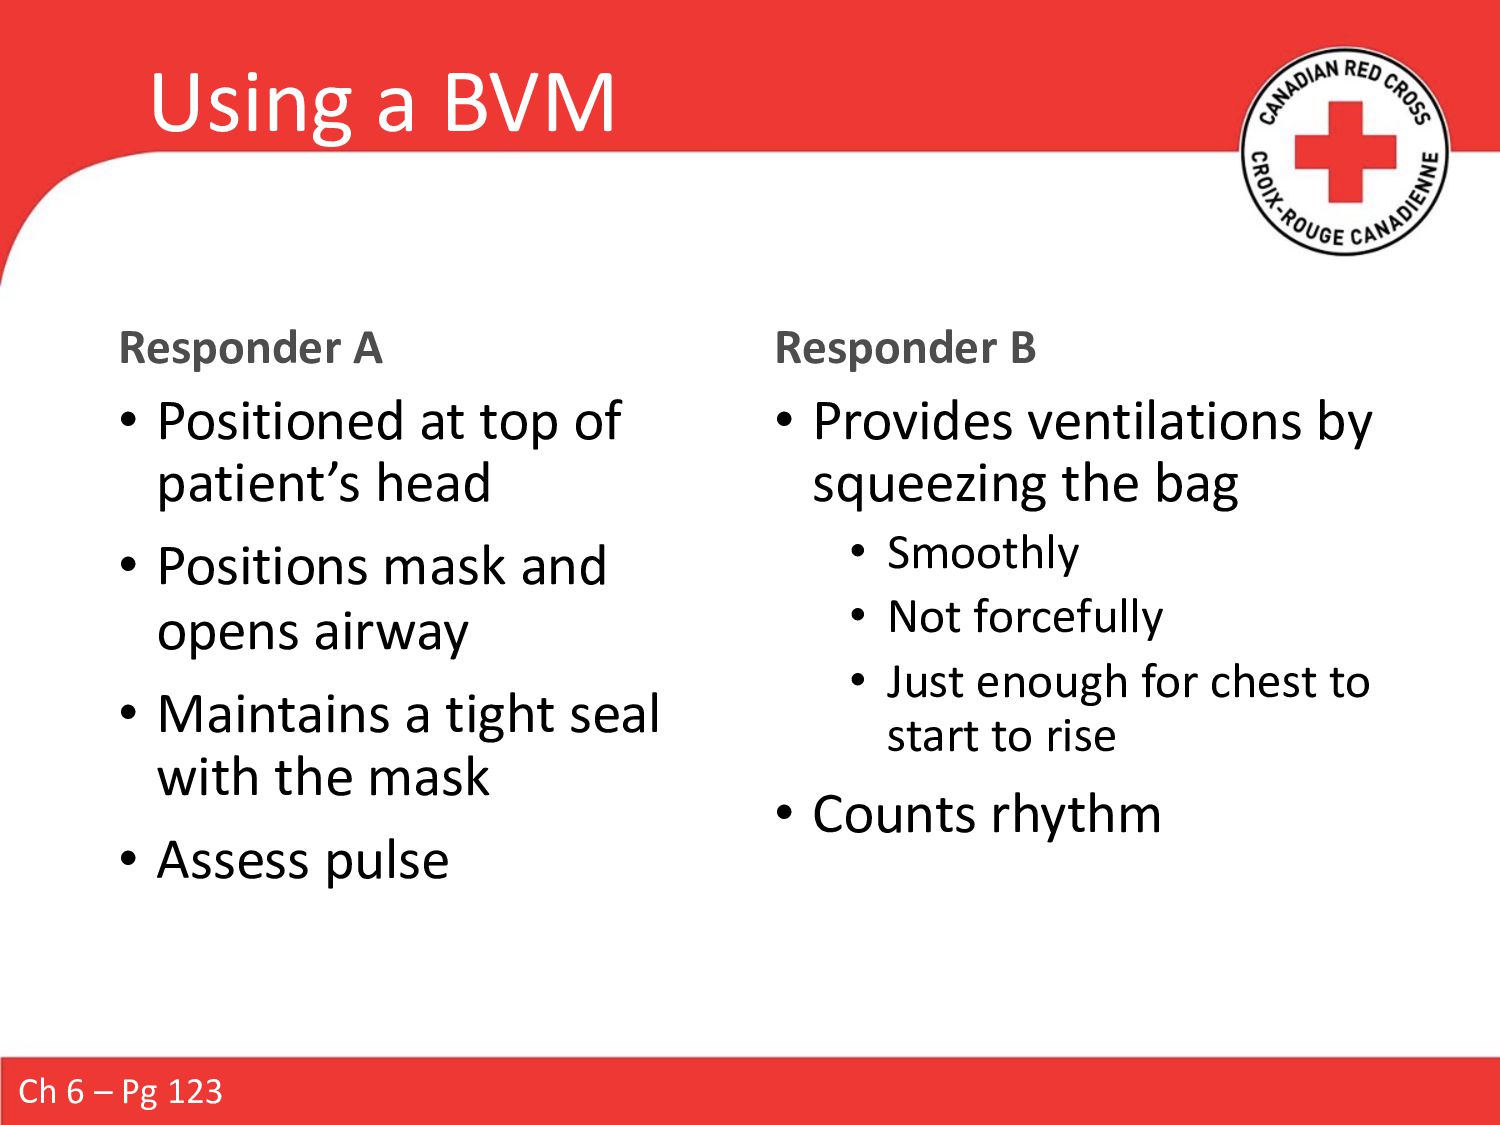
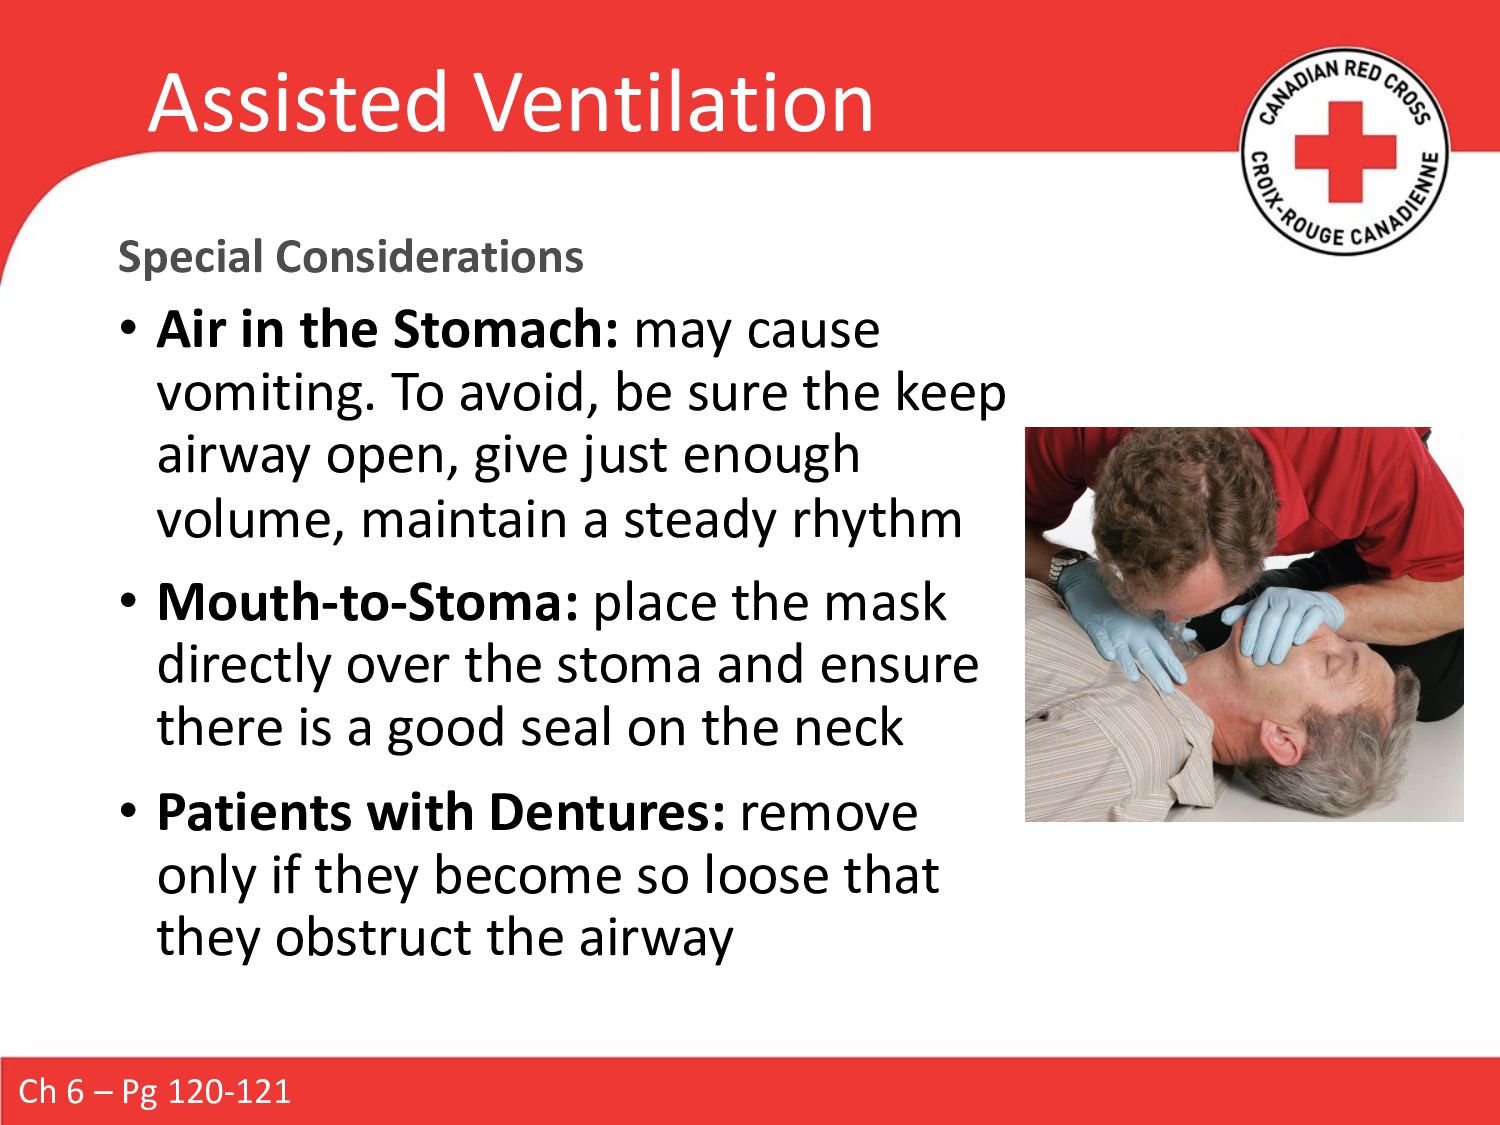
Airway management and ventilation can contribute significantly to the survival and recovery of a seriously ill or injured patient. A number of devices can help you maintain an open airway, perform ventilations, and/or increase the oxygen concentration in a patient’s bloodstream. In addition, some of these devices limit the potential for infection.

Laura Glenn

February 23, 2024
Tweet

More Decks by Laura Glenn

Other Decks in Education

Transcript

  1. Introduction Airway and respiratory problems should be apparent when you

    check the patient’s ABC’s. Respiratory emergencies can occur in two ways: Respiratory Distress: respiration becomes difficult or ineffective Respiratory Arrest: respiration stops entirely Because the circulatory and respiratory systems are interconnected, signs of respiratory impairment can indicate a circulatory emergency as well.
  2. Respiratory Pathophysiology For respiration to occur, there must be an

    open passage to the lungs, the lungs must be provided with sufficient O2 , gas exchange must occur, and the lungs must inflate and deflate with an effective rhythm. An insufficient amount of O2 to the cells is referred to as hypoxia. Ch 6 – Pg 119-120
  3. General S&S of Respiratory Emergencies • Cannot catch their breath

    or gasping for air • Fast, slow, deep, shallow or laboured • Wheezing, gurgling, or shrill high-pitched sounds • Moist or unusual skin tone • Dizzy, lightheaded • Chest pain or tingling in the hands and feet • Apprehensive, fearful, restless or anxious • Unusual position (ex: tripod position, guarding)
  4. Airway and Respiratory Tools and Techniques Airway Opening Mouth Opening

    Airway Adjuncts Supplemental Oxygen Pulse Oximetry Suctioning
  5. Head-tilt-chin-lift (unresponsive, NO head/spinal injury) Ch 5 – Pg 84

    Jaw thrust (unresponsive, suspected head/spinal injury) If the patient is speaking, moaning or crying they have an open airway Airway Opening Techniques
  6. Airway Adjuncts A tube inserted into patient’s upper airway to

    assist in keeping it patent. • Especially patients with a DLOR à tongue can cause an anatomical obstruction Remember: • FBAO’s must be cleared before an adjunct can be inserted (we will come back to this) • Adjuncts may not be sufficient to maintain patency on their own: • You must continue to monitor patient’s respirations and use manual techniques such as HTCL/Jaw Thrust as needed Ch 6 – Pg 131
  7. Oropharyngeal Airway (OPA) Ch 6 – Pg 131-132 • Inserted

    into the mouth of an unresponsive patient • A properly sized and inserted OPA will NOT interfere with assisted ventilations or oxygen therapy • Extends from the earlobe to the corner of the mouth
  8. Inserting an OPA - Adult Ch 6 – Pg 131-132

    1) Open the patient’s mouth, then insert gently, sliding the tip along the roof of the mouth 2) When the device is 1/2 – 1/3 of the way into the mouth, rotate 180° 3) The OPA should drop into the throat without resistance. The flange should rest on the patient’s lips
  9. Inserting an OPA - Child Ch 6 – Pg 132

    1) Open the patient’s mouth, then insert gently, sliding the tip along the inside of the cheek 2) When the device is 1/2 – 1/3 of the way into the mouth, rotate 90° 3) The OPA should drop into the throat without resistance. The flange should rest on the patient’s lips
  10. Inserting an OPA - Infant Ch 6 – Pg 132-133

    1) Hold the tongue against the bottom of the mouth with a tongue depressor 2) Place the OPA against the lower lip with the concave side facing down 3) Slide smoothly into place without rotating, following the natural curvature of the mouth and throat
  11. OPA Considerations Patient appears unresponsive, but gags: • Stop your

    attempt • Maintain airway patency using other methods (HTCL or jaw thrust) and continue on • Reattempt to insert OPA frequently • A small change in responsiveness may allow the patient to accept the adjunct Suctioning: • OPA must be removed before suctioning airway, then reinserted afterwards Ch 6 – Pg 131 (NPA will not interfere with either of these)
  12. Nasopharyngeal Airway (NPA) Ch 6 – Pg 134 • Inserted

    into the nose of a patient with a DLOR • A properly sized and inserted OPA will not interfere with assisted ventilations or oxygen therapy • Extends from the earlobe to the tip of the nose • Ensure that the diameter is no larger than the nostril
  13. Inserting an NPA Ch 6 – Pg 134 1) Lubricate

    with a water-soluble lubricant, then insert into the patient’s right nostril, with the bevel towards the septum Remember: • If you feel even minor resistance, do not attempt to force the NPA • If the NPA doesn’t pass easily, remove it and try the other nostril 2) Gently advance the airway straight in (not upward) until the flange rests against the patient’s nostril
  14. NPA Contraindications Contraindication definition: a specific situation in which a

    treatment should not be used because it may be harmful to the patient) NPA Contraindications: • Suspected skull fracture • Facial trauma • Epistaxis • Stop your attempt of that nostril and try the other side • If epistaxis occurs on the left side, both nostrils are now compromised Ch 6 – Pg 135
  15. Supplemental Oxygen Normal concentration of O2 in atmospheric air is

    ~21%. When serious injury or illness occurs, the body’s tissues may not receive sufficient O2 from atmospheric air, resulting in hypoxia. Ch 6 – Pg 124-125 Hypoxia can cause: • Increased respiration and heart rate • Restlessness • Cyanosis • Chest pain • Changes in responsiveness
  16. Indications for Supplemental Oxygen • Exposure to CO • Decompression

    sickness • Asphyxiation • Dyspnea (difficulty breathing) • Hypoxia • SpO2 is <95% Remember: If the patient is already on low-flow O2 , it’s best to keep them there unless in respiratory distress. Ch 6 – Pg 125-126
  17. Pulse Oximetry (SpO2 ) • Measures the % of O2

    saturation in the blood • Requires a pulse oximeter • Room Air Saturation: reading taken before administering supplemental O2 • Some factors may reduce the reliability of the pulse oximetry reading (Pg 87-88) Ch 5 – Pg 86-88
  18. Oxygen Decision Based on signs and symptoms, chief complaint and

    SpO2 . Remember: the pulse oximeter is a tool used to support your patient assessment à treat the patient no the tool! Ch 5 – Pg 87-88 Range SpO2 Delivery Device Flow Rate Function Mild Hypoxia 91-94% Nasal Cannula 1-4 LPM Breathing Standard Mask 6-10 LPM Breathing Moderate to Severe Hypoxia < 90% Non-Rebreather Mask (NRB) 10+ LPM Breathing Bag-Valve-Mask (BVM) 15 LPM Non-breathing or abnormal breathing rate (<8 // >30)
  19. Supplemental Oxygen Equipment Ch 6 – Pg 126 Range SpO2

    Delivery Device Flow Rate Function Mild Hypoxia 91-94% Nasal Cannula 1-4 LPM Breathing Standard Mask 6-10 LPM Breathing Moderate to Severe Hypoxia < 90% Non-Rebreather Mask (NRB) 10+ LPM Breathing Bag-Valve-Mask (BVM) 15 LPM Non-breathing or abnormal breathing rate (<8 // >30) 1. Oxygen cylinder 2. Oxygen regulator • Some cylinders have an integrated regulator, but these are used in the same way 3. Delivery device
  20. Supplemental Oxygen Be vigilant any time O2 is being administered:

    • Do not operate around open flame or sparks • Do not drop, drag, roll or stand cylinders upright and freestanding • Do not use grease, oil, tape, or petroleum to lubricate • When disinfecting, prevent any materials from entering the inlet port Ch 6 – Pg 125
  21. Suction • For removing mucus, vomitus, water, blood, etc. from

    a patient’s airway • Safer and more effective than rolling a patient and performing a finger sweep • Unless there is a large quantity of material: roll patient first, then suction • If an OPA is inserted, remove prior to suctioning • If necessary, reinsert once the airway is clear Ch 6 – Pg 136-137
  22. Suction 1. Measure the distance of insertion (earlobe to corner

    of mouth) 2. Open the mouth and insert the catheter to the maximum depth just measured 3. Provide rapid suction until airway is clear 4. After, give patient supplemental O2 Ch 6 – Pg 136-137
  23. Suctioning Considerations • If the device malfunctions or does not

    adequately clear the airway, roll the patient and perform a finger sweep • A bulb syringe is used to provide suction for an infant • Ensure you deflate the bulb BEFORE inserting it • If patient has tracheostomy or stoma, suction through tube or hole. Do not insert suction tip more than 5cm beyond lower edge of the opening Ch 6 – Pg 136-137
  24. Foreign Body Airway Obstruction When an airway is blocked by

    a foreign object such as food, a small toy, or by fluids such as vomit, blood, mucus, or saliva. Can be either partial or complete. Common causes include: • Swallowing large pieces of poorly chewed food • Drinking alcohol before or during meals • Wearing dentures • Laughing or talking while eating • Eating too quickly • Walking, playing, or running with food or objects in the mouth Ch 6 – Pg 107-108 Foreign Body Airway Obstruction
  25. Partial Airway Obstruction Patient can still have good air entry,

    depending on the severity of the obstruction. Signs & Symptoms: • Coughing • Wheezing • May clutch at throat with one or both hands Ch 6 – Pg 108 Foreign Body Airway Obstruction
  26. Partial Airway Obstruction Treatment: Have the patient cough forcefully •

    Seated and leaning forward slightly Remember: Can aggravate an underlying condition (angina or asthma) or progress to a complete airway obstruction. Ch 6 – Pg 108 Foreign Body Airway Obstruction
  27. Complete Airway Obstruction Essentially prevents respiration. The patient will NOT

    be able to breathe, cough, or speak, and will quickly lose responsiveness and asphyxiate without intervention. Signs & Symptoms: • Unable to speak, breathe or cough effectively • May cough weakly • May make high-pitched noises • May clutch at throat with one or both hands Ch 6 – Pg 108 Foreign Body Airway Obstruction
  28. Complete Airway Obstruction Treatment: Specific interventions depend on whether the

    patient is responsive or unresponsive and can also be affected by other factors (if the patient is pregnant, obese, an infant, or in a wheelchair). Ch 6 – Pg 108 Foreign Body Airway Obstruction
  29. Back Blows Abdominal Thrusts Chest Thrusts Ch 6 – Pg

    108-110 Complete Airway Obstruction – Responsive Adult and Child Other Considerations… Foreign Body Airway Obstruction
  30. Ch 6 – Pg 111-113 Complete Airway Obstruction – Responsive

    Infant Treatment: • Alternate sets of back blows and modified chest thrusts • Preferable to sit or kneel • Even if the infant seems to be breathing well, they should be examined by more advanced medical personnel Foreign Body Airway Obstruction
  31. Complete Airway Obstruction – UNRESPONSIVE Adult, Child, Infant If the

    patient becomes unresponsive, they will collapse to the ground. Attempting to support the patient’s full weight unexpectedly can result in injury to you, so focus instead on protecting the head and neck. Treatment: • CPR, looking in the mouth and removing anything found Ch 6 – Pg 110-113 Foreign Body Airway Obstruction Rapid Transport Category
  32. • 30 chest compressions • Look inside the mouth •

    If you see an object, carefully remove it • Attempt to ventilate • If breath goes in, give a second breath • If breath does NOT go in, reposition the head • If breath continues to NOT go in, resume 30 chest compressions • Tilting the patient’s head back farther is only necessary on your initial attempt • Attempt only one breath on consecutive cycles Ch 6 – Pg 110 Complete Airway Obstruction – UNRESPONSIVE Adult, Child, Infant
  33. Obstructed Airway Self-Rescue 1. Dial EMS/911 • Leave the phone

    off the hook 2. Move to a place where you will be noticed 3. Perform abdominal thrusts on a safe object with no sharp edges or corners Ch 6 – Pg 113
  34. When the Obstruction is Cleared • Reassess the ABC’s •

    The patient may require additional intervention for respiratory distress or cardiac arrest • Patient should be referred to a physician ASAP • Interventions that clear the airway, such as back blows, can result in trauma Ch 6 – Pg 113
  35. Remember This Slide? - Airway Adjuncts A tube inserted into

    patient’s upper airway to assist in keeping it patent (airway patency) • Especially patients with a DLOR à tongue can cause an anatomical obstruction Remember: • FBAO’s must be cleared before an adjunct can be inserted • May not be sufficient to maintain patency on its own: • You must continue to monitor patient’s respirations and use manual techniques such as HTCL/Jaw Thrust as necessary Ch 6 – Pg 131
  36. Anatomical Airway Obstruction When the airway is blocked by an

    anatomical structure: • Tongue • Most common obstruction in an unresponsive patient • Refer to airway opening techniques • Swollen tissues of the mouth and throat • Trauma to the neck • Anaphylaxis Ch 6 – Pg 107
  37. Anaphylaxis A life-threatening allergic reaction that causes the air passages

    to constrict. Usually occurs suddenly, though it may occur 30 minutes or more after exposure. Some patients may carry an epinephrine auto- injector. Common triggers include: • Food • Medication • Insect venom Ch 6 – Pg 113-114
  38. Anaphylaxis Signs & Symptoms: • Swelling, redness, hives, itching, rash

    • Dizzy, confused, distressed, faint, weakness • Nausea, vomiting • Coughing, wheezing, tightness in chest and throat • These respiratory issues can progress to an obstructed airway as the tongue and throat swell Ch 6 – Pg 107 Rapid Transport Category
  39. Suspect an allergic reaction if… • There is unusual inflammation

    or rash after contact with possible allergen • Assess the patient’s airway and breathing • If patient is in respiratory distress or complains throat is closing, you should suspect anaphylaxis Treatment: • Help the patient into the most comfortable position for breathing • Monitor ABC’s • Keep them calm Allergic Reaction / ?Anaphylaxis Ch 6 – Pg 114
  40. Treatment for known anaphylaxis: • Use an epinephrine auto-injector •

    Assist or administer if it is within your scope of practice or covered by medical direction • Because epinephrine does not correct the underlying condition, the patient requires immediate transport to a medical facility Anaphylaxis Ch 6 – Pg 114
  41. How to Use an Epinephrine Auto-Injector 1. Check the 6

    Rights of Medication (Ch 22 – see next slide) 2. Remove the safety cap 3. Position the injection tip against the patient’s outer thigh and push firmly 4. Hold in place for 10 seconds 5. Rub the injection site for ~30 seconds 6. Ensure the used auto-injector is transported with the patient If a patient does not improve within 5 minutes of the initial dose of epinephrine, a second dose may be indicated. Oral antihistamines can also help to counteract the effects of the reaction, especially if taken soon after the onset of symptoms. Ch 6 – Pg 114
  42. The Six Rights of Medication Quick detour to Ch 22…

    1. Right person 2. Right medication 3. Right dosage 4. Right time 5. Right route 6. Right documentation • Time, dose, route, effect Ch 22 – Pg 370-371
  43. Chronic Obstructive Pulmonary Disease A set of conditions characterized by

    a loss of lung function: • Emphysema • Chronic bronchitis • Bronchospasm Typically affects those 65 years and older with a long history or smoking. Patients may get cold or flu more frequently, and they also experience shortness of breath (SOB) under conditions that do not tax most healthy people. Ch 6 – Pg 115
  44. Chronic Obstructive Pulmonary Disease Signs & Symptoms: • SOB, gasping

    for air with sudden onset • Sitting upright, leaning forwards • Barrel-chested appearance • Coarse rattling sounds in the lungs • Distended neck veins • Cyanosis • Pursed lip breathing • The presence of an O2 system Treatment: In a patient with COPD who has a true hypoxic drive, increased O2 could slow down or stop breathing. However, this is rarely encountered in the field, as EMS is usually called for a patient who is acutely SOB. If you do encounter this, you should… • Administer high-flow O2 Ch 6 – Pg 115-116 Rapid Transport Category
  45. Asthma A condition that narrows the air passages that makes

    breathing difficult by… • Spasming of muscles lining the bronchi • Swelling of the bronchi themselves Common Triggers: • Allergic reaction to food, pollen, a drug, or an insect sting • Emotional distress • Cold weather • Physical activity Ch 6 – Pg 116
  46. Asthma Signs & Symptoms: • Difficulty breathing • Wheezing during

    exhalation • Air trapping • Patient’s chest appears larger than normal Ch 6 – Pg 116 RTC if patient does not improve with medication and/or rest
  47. How to Use a Metered Dose Inhaler Normally, patients are

    easily able to control their attacks with medication 1. Check the 6 Rights of Medication 2. Shake inhaler 3-4 times 3. Remove cap • Put inhaler into spacer if available 4. Tell patient to breathe out 5. Have person put the mouthpiece between teeth, then close lips around 6. Tell patient to press top of inhaler once while taking one slow, full breath in • If patient is unable to press top, you may do it instead if the patient asks you to 7. Have patient hold breath as long as comfortable (up to 10 seconds) then exhale Ch 6 – Pg 116-117
  48. Respiratory Distress Signs & Symptoms: • Dyspnea – laboured, struggling

    or gasping or breath • Abnormal breath sounds – wheezing, gurgling, high-pitched noises • Abnormal rate – <8 or >30 breaths per minute • Abnormal skin characteristics – unusually moist and/or has an unusual tone • Emotional – patient is restless or anxious • Neurological – dizzy, lightheaded and/or experiencing pain or tingling in extremities • Patient positioning – tripod position, sitting up Ch 6 – Pg 1
  49. General Care for Respiratory Distress • Rest in a comfortable

    position • Sitting upright usually • Loosen restrictive clothing • Help keep patient calm and comfortable • Assist with any medications for the condition Rapid Transport Category Ch 6 – Pg 138
  50. Respiratory Arrest Signs & Symptoms: • Unresponsive patient • Not

    breathing • Has a pulse Treatment: • Assisted ventilations with a Bag- Valve-Mask (BVM) • Supplemental O2 Rapid Transport Category Ch 6 – Pg 1
  51. Respiratory Arrest or FBAO? Unresponsive, not breathing, but pulses present

    could also indicate an airway obstruction. If you attempt to ventilate and… • Your ventilation goes in: • Respiratory arrest • Your ventilation does not go in: • Tilt the head back farther, and attempt to give another ventilation. • If the second does not enter the lungs the patient has a complete airway obstruction • Begin CPR Ch 6 – Pg 1
  52. Assisted Ventilation Technique for delivering atmospheric air and/or O2 into

    a patient’s lungs when their breathing is inadequate. Indicated for… • Respiratory arrest • Breathing rate <8 • Breathing rate >30 Adult: 1 every 5-6sec Child: 1 every 3-5 sec Infant/Neonate: 1 every 3 sec You should see the patient’s chest begin to rise with each ventilation. Check every 2 minutes whether the patient has begun to breathe spontaneously. Ch 6 – Pg 119-120
  53. Using a BVM Responder A • Positioned at top of

    patient’s head • Positions mask and opens airway • Maintains a tight seal with the mask • Assess pulse Responder B • Provides ventilations by squeezing the bag • Smoothly • Not forcefully • Just enough for chest to start to rise • Counts rhythm Ch 6 – Pg 123
  54. Assisted Ventilation Special Considerations • Air in the Stomach: may

    cause vomiting. To avoid, be sure the keep airway open, give just enough volume, maintain a steady rhythm • Mouth-to-Stoma: place the mask directly over the stoma and ensure there is a good seal on the neck • Patients with Dentures: remove only if they become so loose that they obstruct the airway Ch 6 – Pg 120-121