Upgrade to Pro
— share decks privately, control downloads, hide ads and more …
Speaker Deck
Features
Speaker Deck
PRO
Sign in
Sign up for free
Search
Search
X-Village - CRUD in Flask
Search
Sponsored
·
Your Podcast. Everywhere. Effortlessly.
Share. Educate. Inspire. Entertain. You do you. We'll handle the rest.
→
Lee Wei
August 16, 2018
Programming
350
0
Share
Embed
Copy iframe code
Copy JS code
Copy link
Start on current slide
X-Village - CRUD in Flask
Lee Wei
August 16, 2018
More Decks by Lee Wei
See All by Lee Wei
YourAl Is Only As Good As Your Data Pipeline
leew
0
20
觸發觸發器器,那個你可能不熟的 Apache Airflow 元件
leew
0
86
20251127 開源菜雞的隨意雜談
leew
0
51
住手啊,這樣用 Python 寫程式沒有人會獲得幸福的
leew
0
100
Unlocking the Future of Data Pipeline
leew
0
280
Hold on! You have a data team in PyCon Taiwan!
leew
0
62
朝聖之路
leew
0
140
20250328 Airflow 3.0 The First Glance
leew
0
420
踏入開源的第一步
leew
0
280
Other Decks in Programming
See All in Programming
AIエージェントで 変わるAndroid開発環境
takahirom
2
720
【SRE NEXT 2026 Lunch Session】一人目専任SREの立ち上げを加速する ― AIと進めたオンボーディングで2分を0.04秒にした話
pkshadeck
PRO
0
3.1k
Foundation Models frameworkで画像分析
ryodeveloper
1
140
信頼性について考えてみる(SRE NEXT 2026 miniLT)
hayama17
0
210
5分で問診!Composer セキュリティ健康診断
codmoninc
0
630
SLOをサービス品質の共通言語にするために 取り組んできたこと
wakana0222
0
560
はてなアカウント基盤 State of the Union
cockscomb
1
1.3k
ルールを書いて終わらせないハーネスエンジニアリング
yug1224
4
1.8k
[RVD26] Vibe Architecture en 2040 : Darwin a-t-il (enfin) eu raison des architectes ?
alexandretouret
0
100
Go言語とトイモデルで学ぶTransformerの気持ち / fukuokago23-transformer
monochromegane
0
140
php-fpmのプロセスが枯渇した日-調査・対処・そして本当にやるべきだったこと-
shibuchaaaan
0
150
【やさしく解説 設計編 #0】DDDのコード、読めるのに分からない人へ
panda728
PRO
2
280
Featured
See All Featured
Measuring Dark Social's Impact On Conversion and Attribution
stephenakadiri
2
240
Intergalactic Javascript Robots from Outer Space
tanoku
273
27k
4 Signs Your Business is Dying
shpigford
187
22k
Thoughts on Productivity
jonyablonski
76
5.3k
AI Search: Implications for SEO and How to Move Forward - #ShenzhenSEOConference
aleyda
1
1.3k
How to Think Like a Performance Engineer
csswizardry
28
2.7k
Building the Perfect Custom Keyboard
takai
2
820
First, design no harm
axbom
PRO
2
1.2k
Keith and Marios Guide to Fast Websites
keithpitt
413
23k
Organizational Design Perspectives: An Ontology of Organizational Design Elements
kimpetersen
PRO
1
780
The Anti-SEO Checklist Checklist. Pubcon Cyber Week
ryanjones
0
190
"I'm Feeling Lucky" - Building Great Search Experiences for Today's Users (#IAC19)
danielanewman
230
23k
Transcript
CRUD in Flask X-Village 網⾴頁開發課程 By Wei Lee
⼼心理理建設 • 你可能不會在這堂課學到很多Flask的細節 • 那會學到什什麼呢? • 從頭構思⼀一個後端 • 怎麼逐步修改後端
• 你可能會在這次的教學中 • 看不懂程式碼在做什什麼 • 發現程式的執⾏行行⾏行行為不如預期 • 這都是正常的 • 這次的教學是帶著⼤大家從不好的甚⾄至錯誤的程式碼,⼀一步
⼀一步理理解和修改 ⼼心理理建設
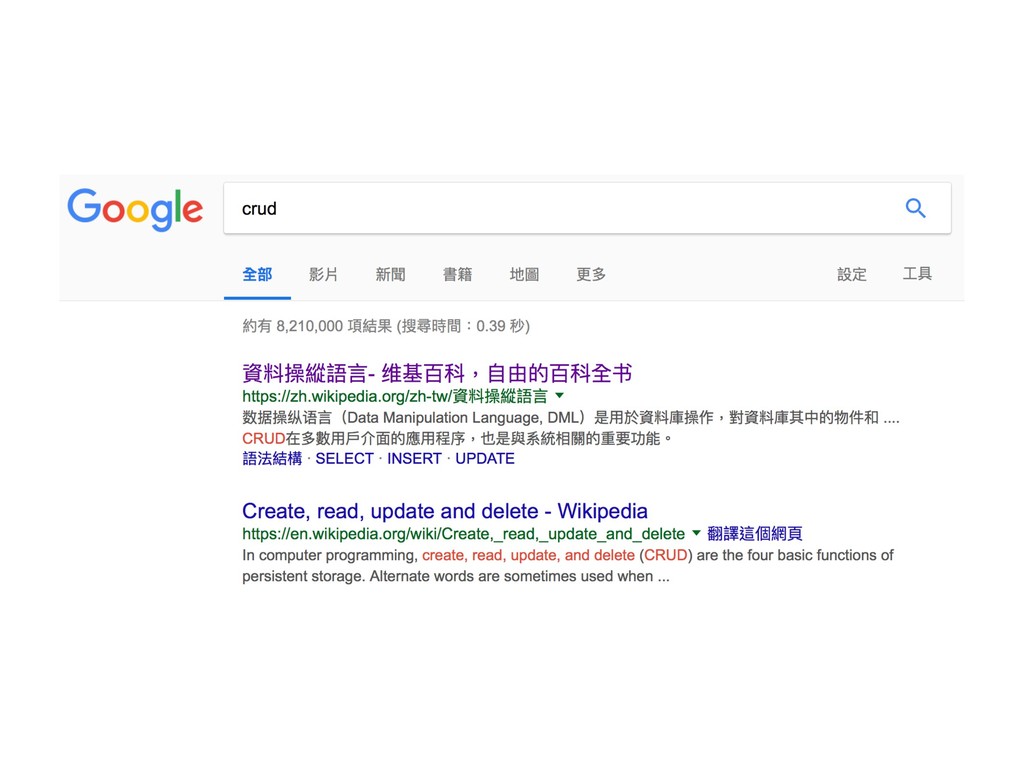
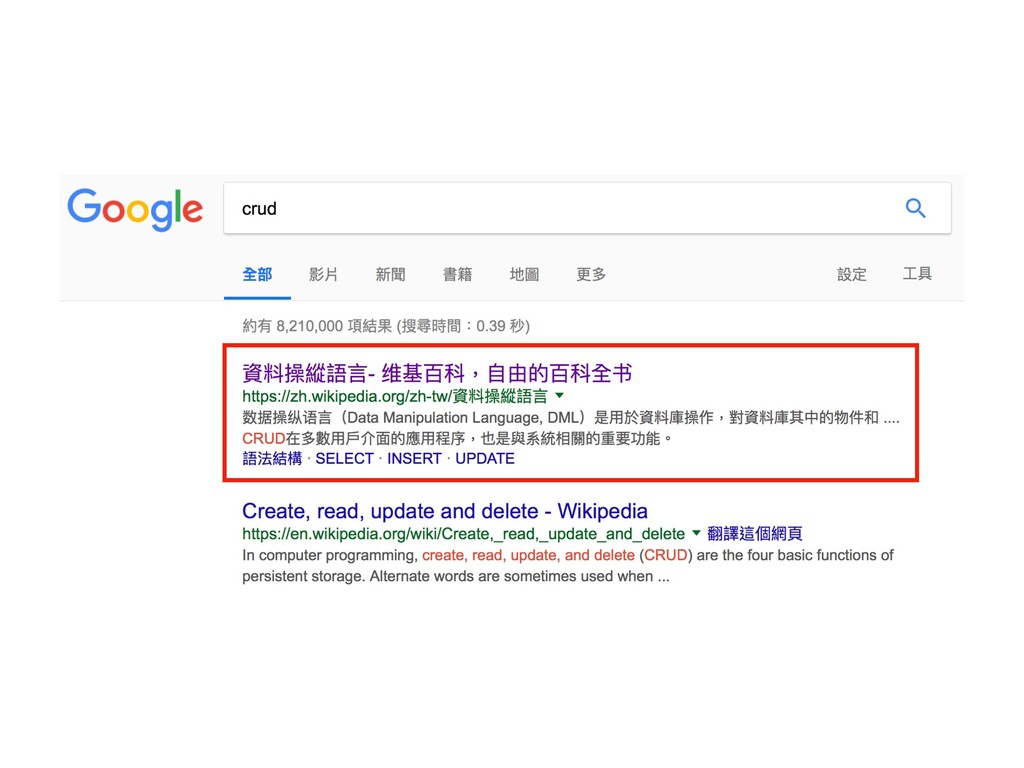
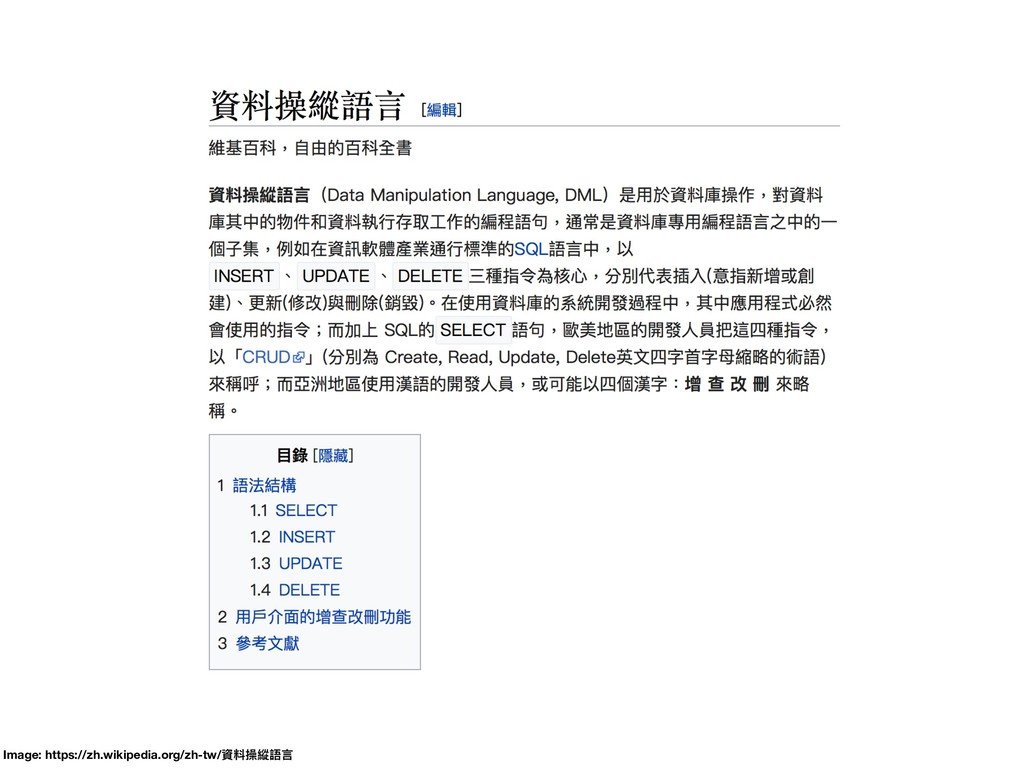
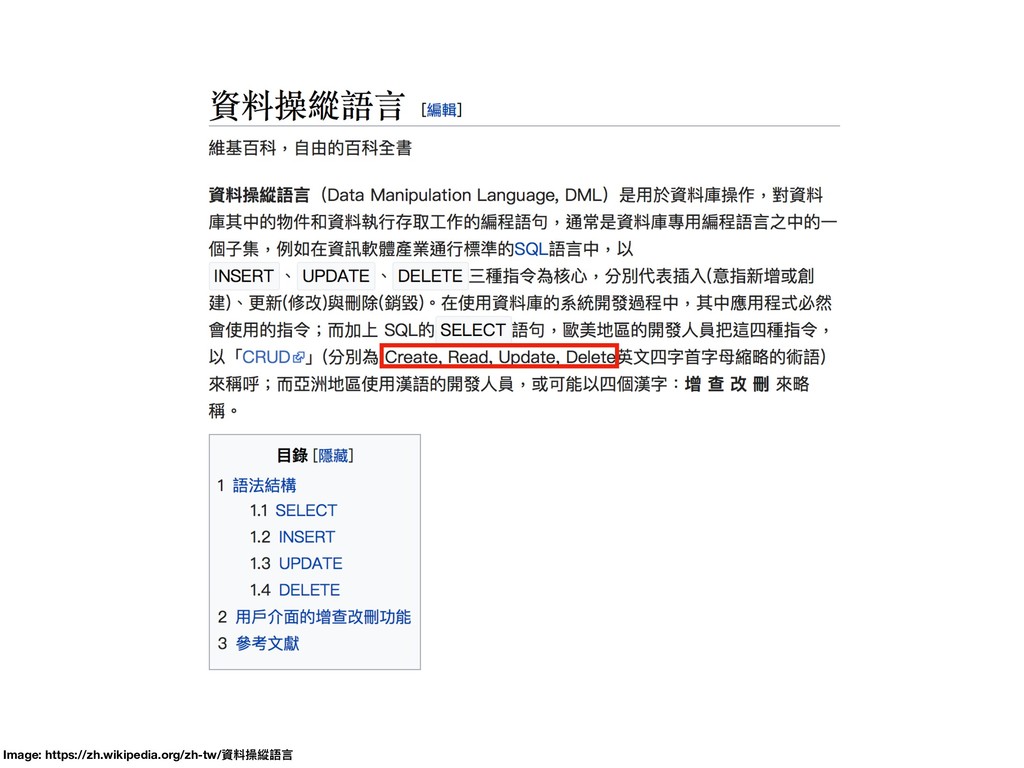
什什麼是CRUD?
Image: http://lmgtfy.com/?q=CRUD
None
None
Image: https://zh.wikipedia.org/zh-tw/資料操縱語⾔言
Image: https://zh.wikipedia.org/zh-tw/資料操縱語⾔言
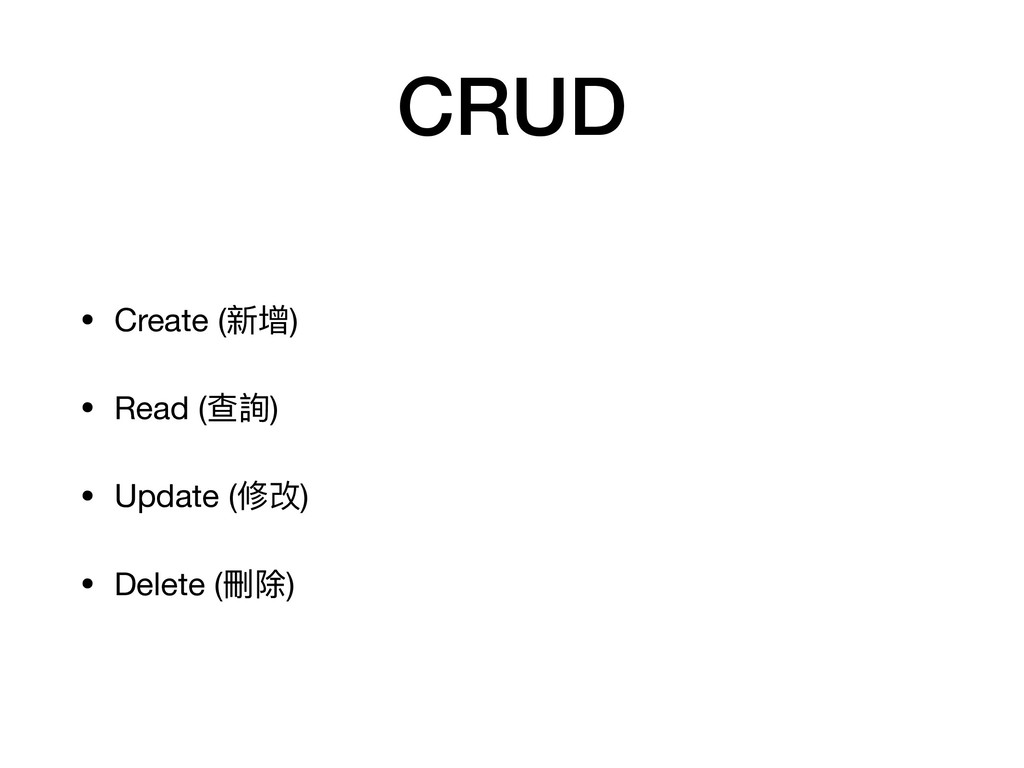
CRUD • Create (新增) • Read (查詢) • Update (修改)
• Delete (刪除)
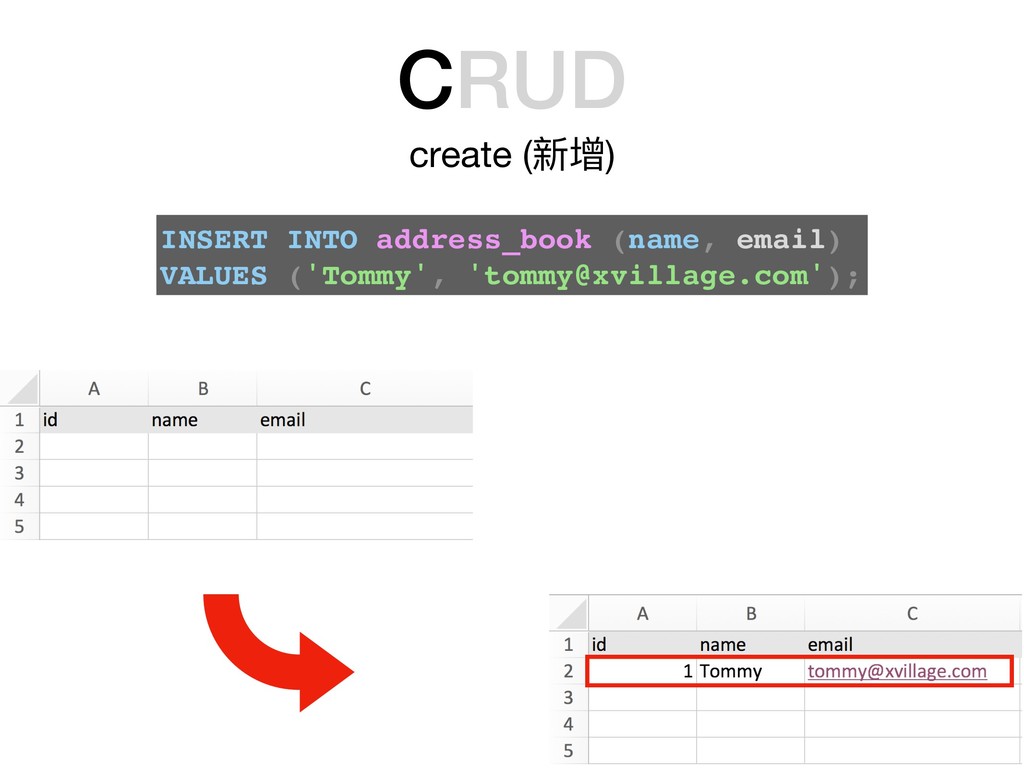
CRUD create (新增) INSERT INTO address_book (name, email) VALUES ('Tommy',
'
[email protected]
');
CRUD create (新增) INSERT INTO address_book (name, email) VALUES ('Tommy',
'
[email protected]
');
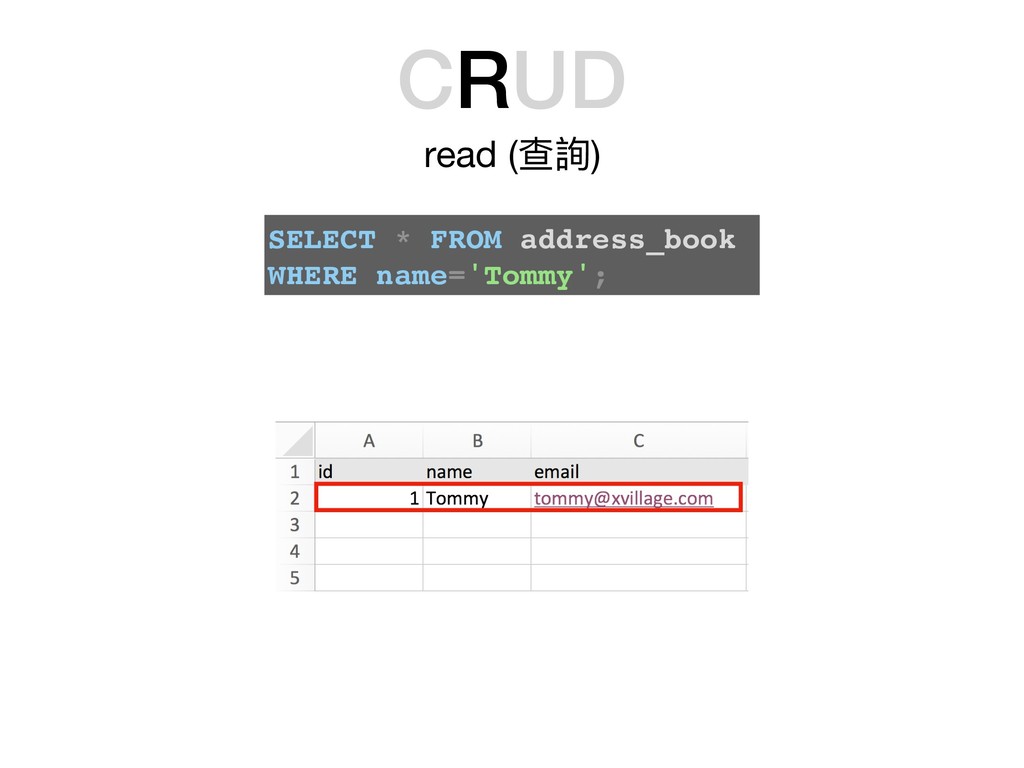
CRUD read (查詢) SELECT * FROM address_book WHERE name='Tommy';
CRUD read (查詢) SELECT * FROM address_book WHERE name='Tommy';
CRUD update (修改) UPDATE address_book SET name='Tom', email='
[email protected]
' WHERE name=‘Tommy';
CRUD update (修改) UPDATE address_book SET name='Tom', email='
[email protected]
' WHERE name=‘Tommy';
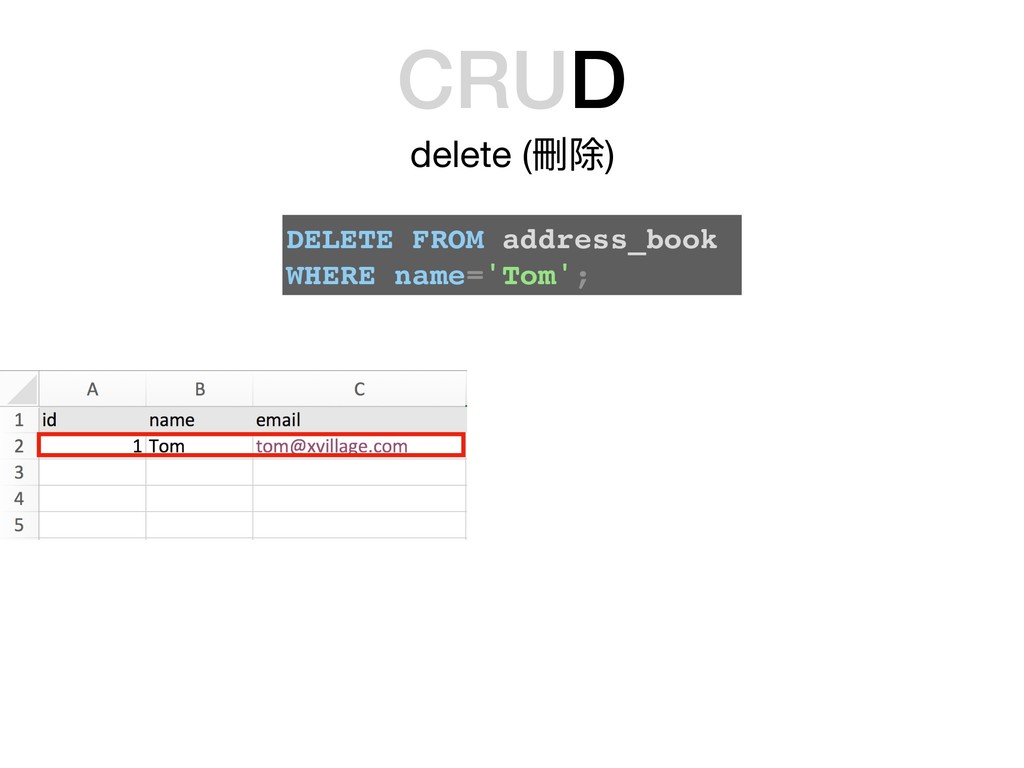
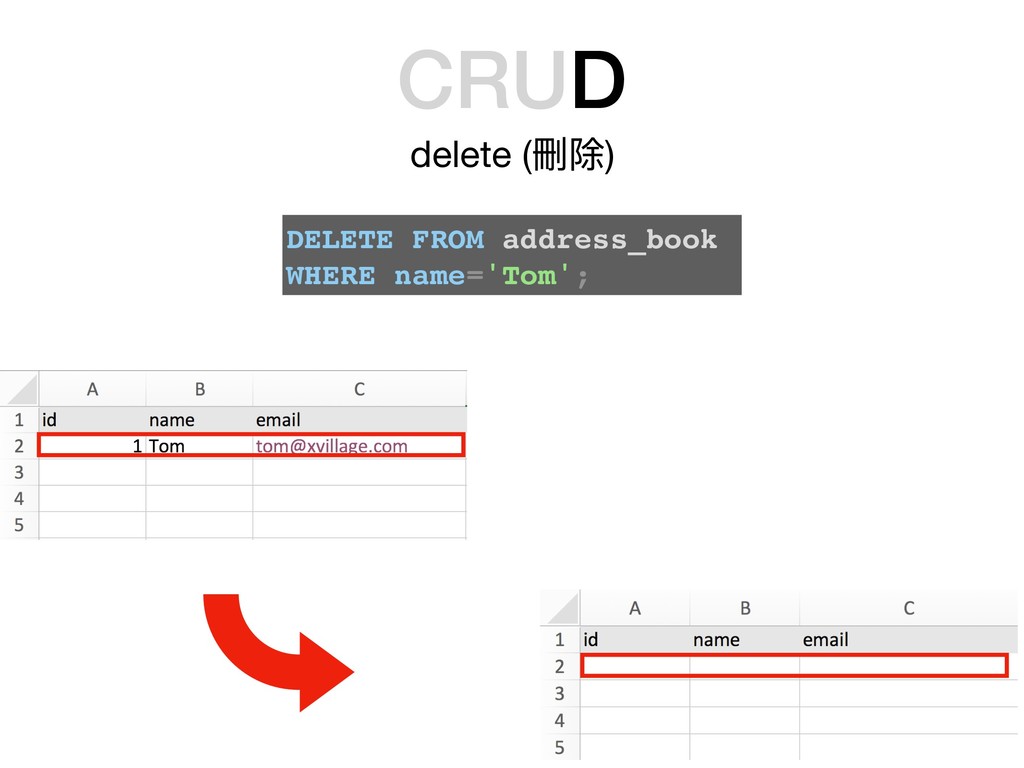
CRUD delete (刪除) DELETE FROM address_book WHERE name='Tom';
CRUD delete (刪除) DELETE FROM address_book WHERE name='Tom';
CRUD的概念念其實就這樣 接下來來就要進入在Flask實作的部分了了!
正式進入實作前 先來來說說這堂課最後要完成什什麼吧 Image: https://pixabay.com/en/goal-setting-goal-dart-target-1955806/
記帳程式
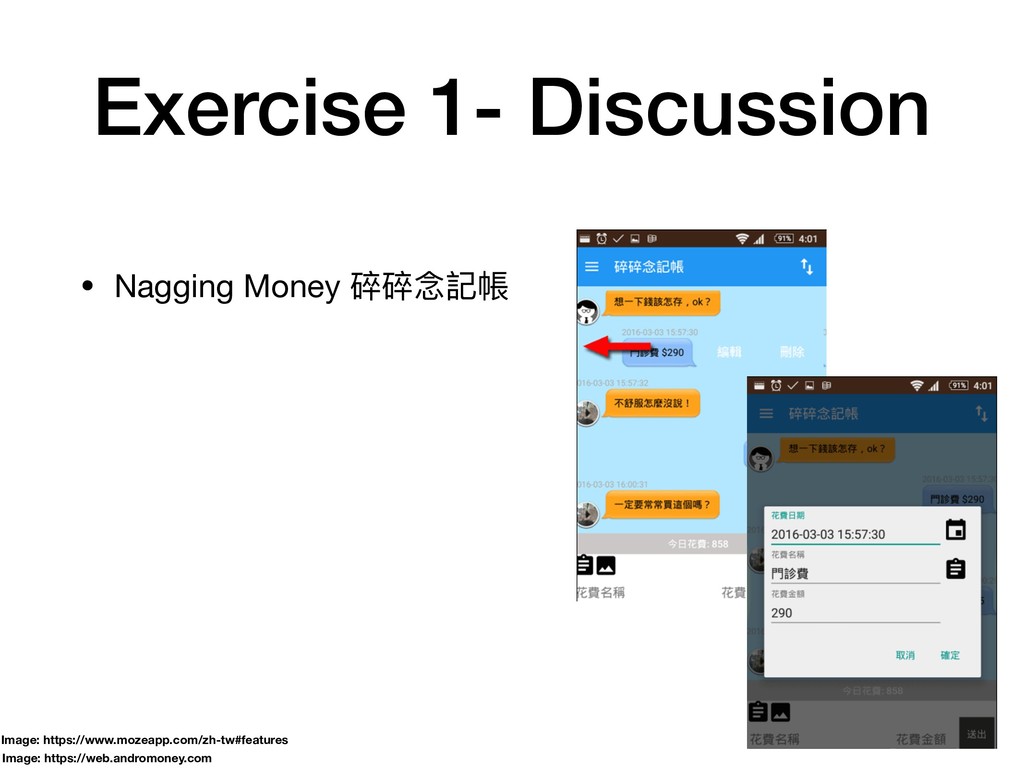
Exercise 1 你有⽤用過什什麼記帳程式? 找找看現在有哪些記帳程式是比較多⼈人⽤用的?
Exercise 1- Discussion • Nagging Money 碎碎念念記帳 Image: https://www.mozeapp.com/zh-tw#features Image:
https://web.andromoney.com
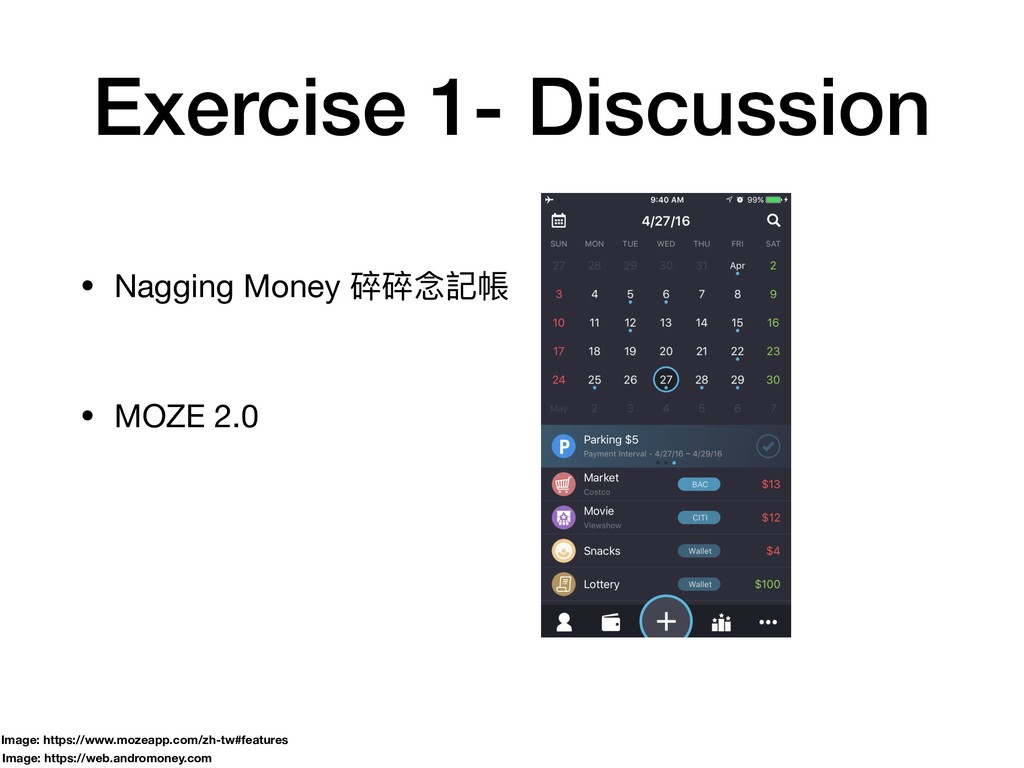
Exercise 1- Discussion • Nagging Money 碎碎念念記帳 • MOZE 2.0
Image: https://www.mozeapp.com/zh-tw#features Image: https://web.andromoney.com
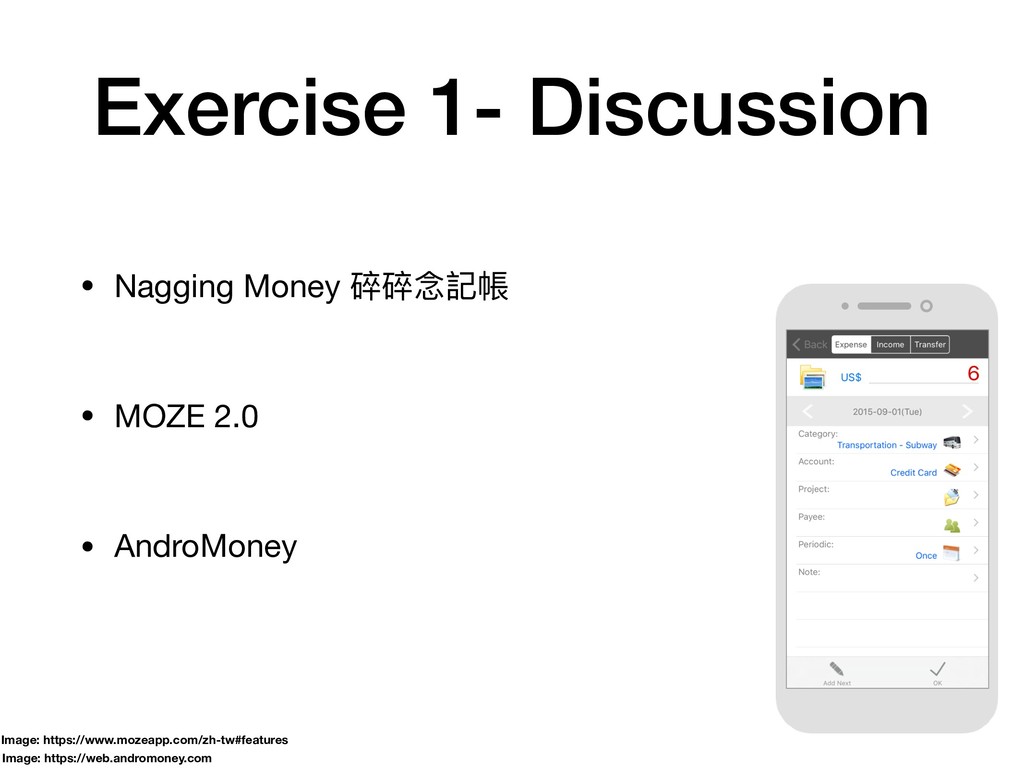
Exercise 1- Discussion • Nagging Money 碎碎念念記帳 • MOZE 2.0
Image: https://www.mozeapp.com/zh-tw#features • AndroMoney Image: https://web.andromoney.com
Exercise 2 你覺得⼀一個最基本的記帳程式要什什麼功能?
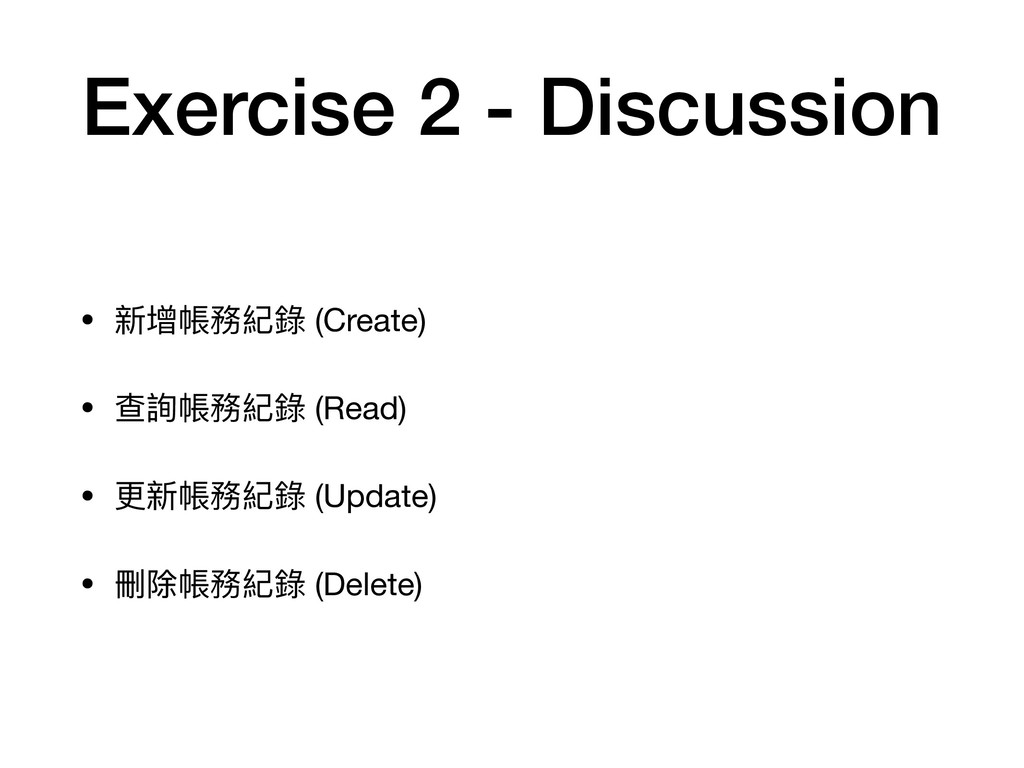
Exercise 2 - Discussion • 新增帳務紀錄 (Create) • 查詢帳務紀錄 (Read)
• 更更新帳務紀錄 (Update) • 刪除帳務紀錄 (Delete)
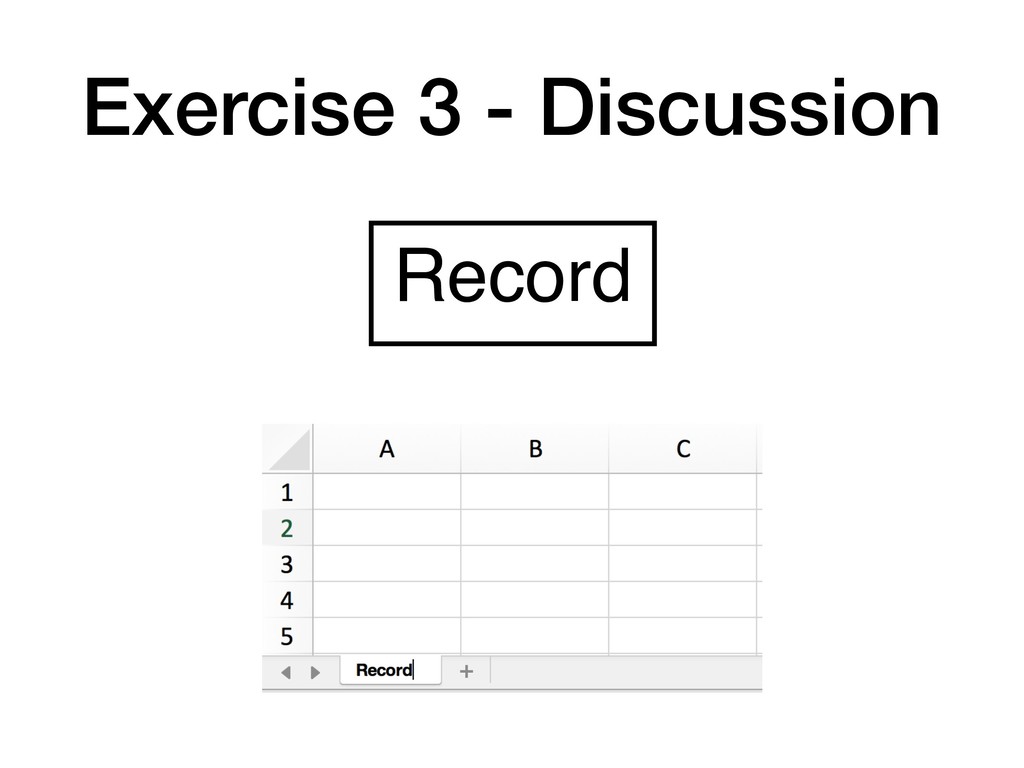
Exercise 3 你覺得要達到這樣的⽬目的我們需要什什麼資料表? ?
Exercise 3 - Discussion Record
Exercise 4 Record這個資料表要有什什麼欄欄位? ?
Student id [INTEGER] name [STRING(120)] Grade student_id [INTEGER] id [INTEGER]
score [TEXT] subject [TEXT] {0,1} 0..N 補充 - ER diagram • Entity-relationship Diagram • ⼀一種描述資料庫中資料架構的⽅方式 • ER模型
Student id [INTEGER] name [STRING(120)] Grade student_id [INTEGER] id [INTEGER]
score [TEXT] subject [TEXT] {0,1} 0..N 補充 - ER diagram • Entity-relationship Diagram • ⼀一種描述資料庫中資料架構的⽅方式 • ER模型 資料表名稱
Student id [INTEGER] name [STRING(120)] Grade student_id [INTEGER] id [INTEGER]
score [TEXT] subject [TEXT] {0,1} 0..N 補充 - ER diagram • Entity-relationship Diagram • ⼀一種描述資料庫中資料架構的⽅方式 • ER模型 資料欄欄位 (欄欄位名稱[欄欄位型別])
Student id [INTEGER] name [STRING(120)] Grade student_id [INTEGER] id [INTEGER]
score [TEXT] subject [TEXT] {0,1} 0..N 補充 - ER diagram (cont.)
Student id [INTEGER] name [STRING(120)] Grade student_id [INTEGER] id [INTEGER]
score [TEXT] subject [TEXT] {0,1} 0..N 補充 - ER diagram (cont.) 對⼀一筆Student的資料來來說,可以有0~多個Grade的資料
Student id [INTEGER] name [STRING(120)] Grade student_id [INTEGER] id [INTEGER]
score [TEXT] subject [TEXT] {0,1} 0..N 補充 - ER diagram (cont.) 對⼀一筆Student的資料來來說,可以有0~多個Grade的資料 對⼀一筆Grade來來說,可以有0或1個Student的資料
補充 - ER diagram (cont.) Student id [INTEGER] name [STRING(120)]
Grade student_id [INTEGER] id [INTEGER] score [TEXT] subject [TEXT] {0,1} 0..N Student id [INTEGER] name [STRING(120)] Grade student_id [INTEGER] id [INTEGER] score [TEXT] subject [TEXT] {0,1} 0..N
補充 - ER diagram (cont.) Student id [INTEGER] name [STRING(120)]
Grade student_id [INTEGER] id [INTEGER] score [TEXT] subject [TEXT] {0,1} 0..N Student id [INTEGER] name [STRING(120)] Grade student_id [INTEGER] id [INTEGER] score [TEXT] subject [TEXT] {0,1} 0..N
補充 - ER diagram (cont.) Student id [INTEGER] name [STRING(120)]
Grade student_id [INTEGER] id [INTEGER] score [TEXT] subject [TEXT] {0,1} 0..N Student id [INTEGER] name [STRING(120)] Grade student_id [INTEGER] id [INTEGER] score [TEXT] subject [TEXT] {0,1} 0..N
補充 - ER diagram (cont.) Student id [INTEGER] name [STRING(120)]
Grade student_id [INTEGER] id [INTEGER] score [TEXT] subject [TEXT] {0,1} 0..N Student id [INTEGER] name [STRING(120)] Grade student_id [INTEGER] id [INTEGER] score [TEXT] subject [TEXT] {0,1} 0..N
補充 - ER diagram (cont.) Student id [INTEGER] name [STRING(120)]
Grade student_id [INTEGER] id [INTEGER] score [TEXT] subject [TEXT] {0,1} 0..N Student id [INTEGER] name [STRING(120)] Grade student_id [INTEGER] id [INTEGER] score [TEXT] subject [TEXT] {0,1} 0..N
Exercise 4 Record這個資料表要有什什麼欄欄位? ?
Exercise 4 - Discussion Record cost [INTEGER]
Exercise 4 - Discussion Record cost [INTEGER] 如果我們新增了了兩兩筆cost都是100的Record, 我們要怎麼分辨他們?
Exercise 4 - Discussion Record id [INTEGER] cost [INTEGER]
Exercise 4 - Discussion Record id [INTEGER] cost [INTEGER] 只有cost,之後使⽤用者會知道這筆帳花在什什麼上嗎?
Exercise 4 - Discussion Record id [INTEGER] name [STRING(120)] cost
[INTEGER]
Exercise 4 - Discussion Record id [INTEGER] name [STRING(120)] cost
[INTEGER] 我們回到上⼀一堂課結束前,最後的設計了了!
到⽬目前為⽌止,我們⼀一⾏行行程式碼都還沒動
我想說的是... Image: Photoed by LeeW in Pycon TW 2017
我想說的是... Image: Photoed by LeeW in Pycon TW 2017
我想說的是... Image: Photoed by LeeW in Pycon TW 2017
先想好,再寫code
Clone Sample Code From GitHub git clone https://github.com/x-village/web- acccounting-example cd
web-acccounting-example git checkout 0.1 本次課程的範例例程式碼,都在GitHub上了了 ⾃自⼰己去找吧(???
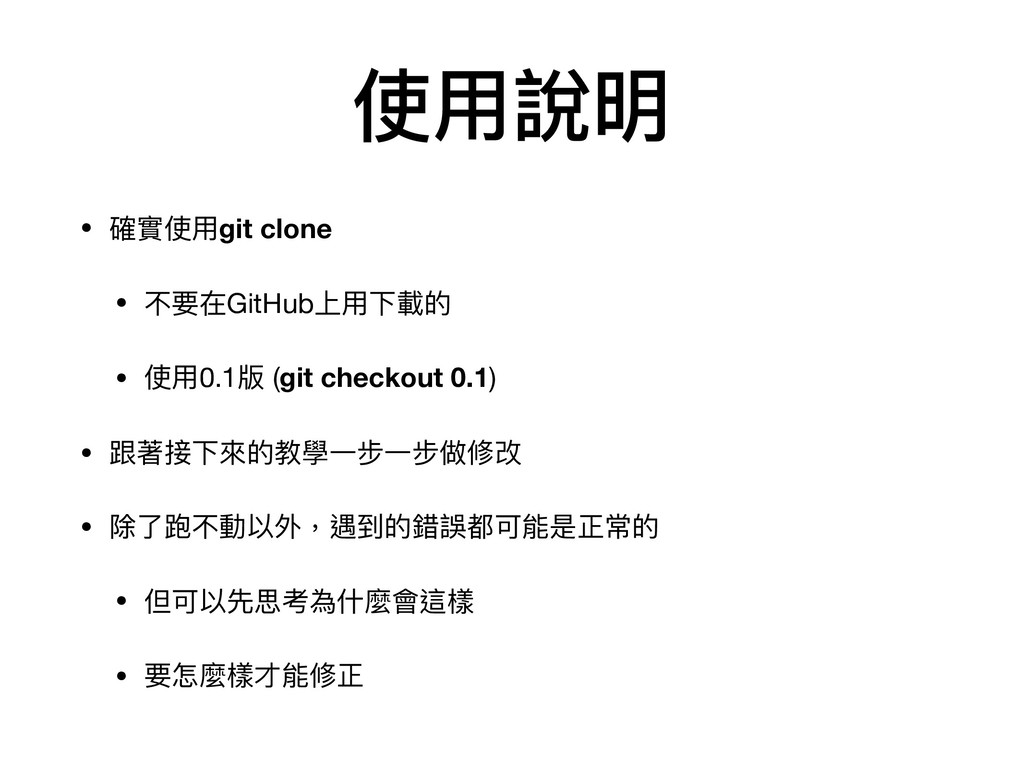
使⽤用說明 • 確實使⽤用git clone • 不要在GitHub上⽤用下載的 • 使⽤用0.1版 (git checkout
0.1) • 跟著接下來來的教學⼀一步⼀一步做修改 • 除了了跑不動以外,遇到的錯誤都可能是正常的 • 但可以先思考為什什麼會這樣 • 要怎麼樣才能修正
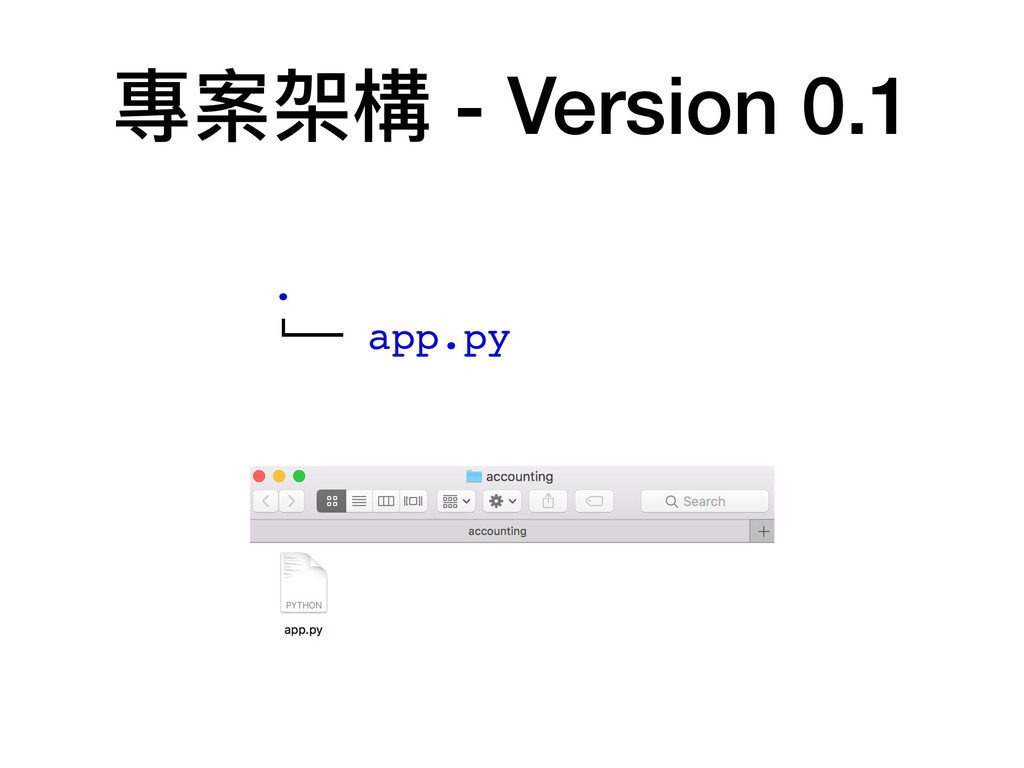
專案架構 - Version 0.1 . !"" app.py
app.py (1/2) 1 from flask import Flask 2 from flask_sqlalchemy
import SQLAlchemy 3 from flask_migrate import Migrate 4 5 6 app = Flask(__name__) 7 app.config['SQLALCHEMY_DATABASE_URI'] = 'sqlite:///test.db' 8 app.config.setdefault('SQLALCHEMY_TRACK_MODIFICATIONS', True) 9 10 db = SQLAlchemy(app) 11 migrate = Migrate(app, db)
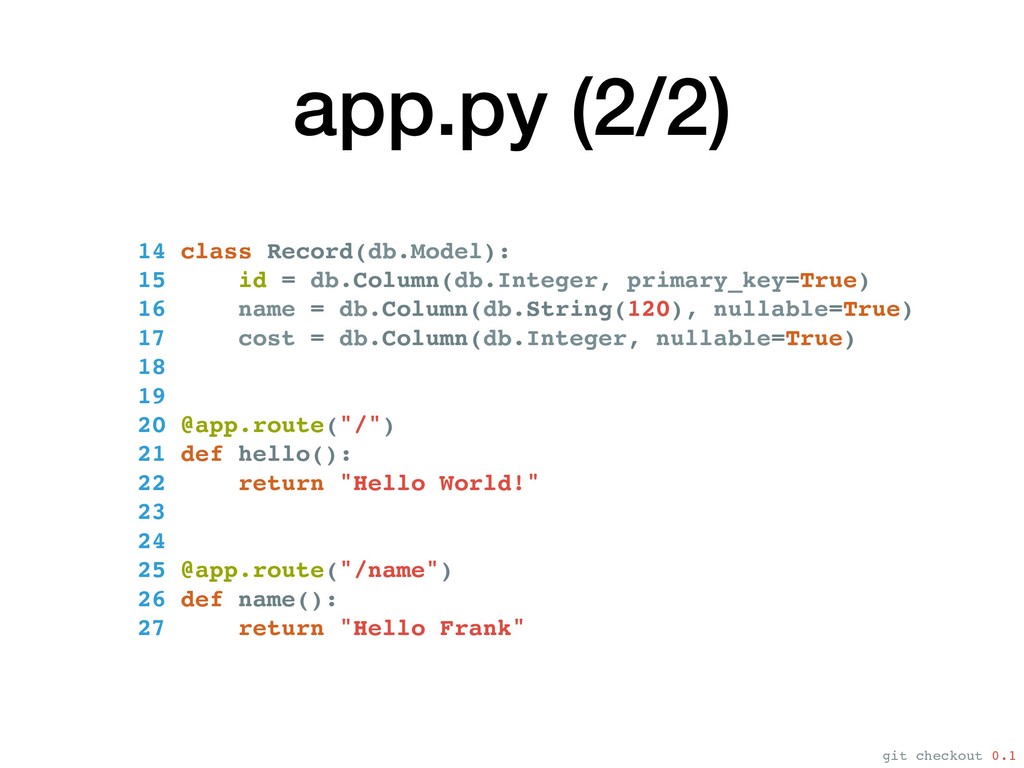
app.py (2/2) 14 class Record(db.Model): 15 id = db.Column(db.Integer, primary_key=True)
16 name = db.Column(db.String(120), nullable=True) 17 cost = db.Column(db.Integer, nullable=True) 18 19 20 @app.route("/") 21 def hello(): 22 return "Hello World!" 23 24 25 @app.route("/name") 26 def name(): 27 return "Hello Frank" git checkout 0.1
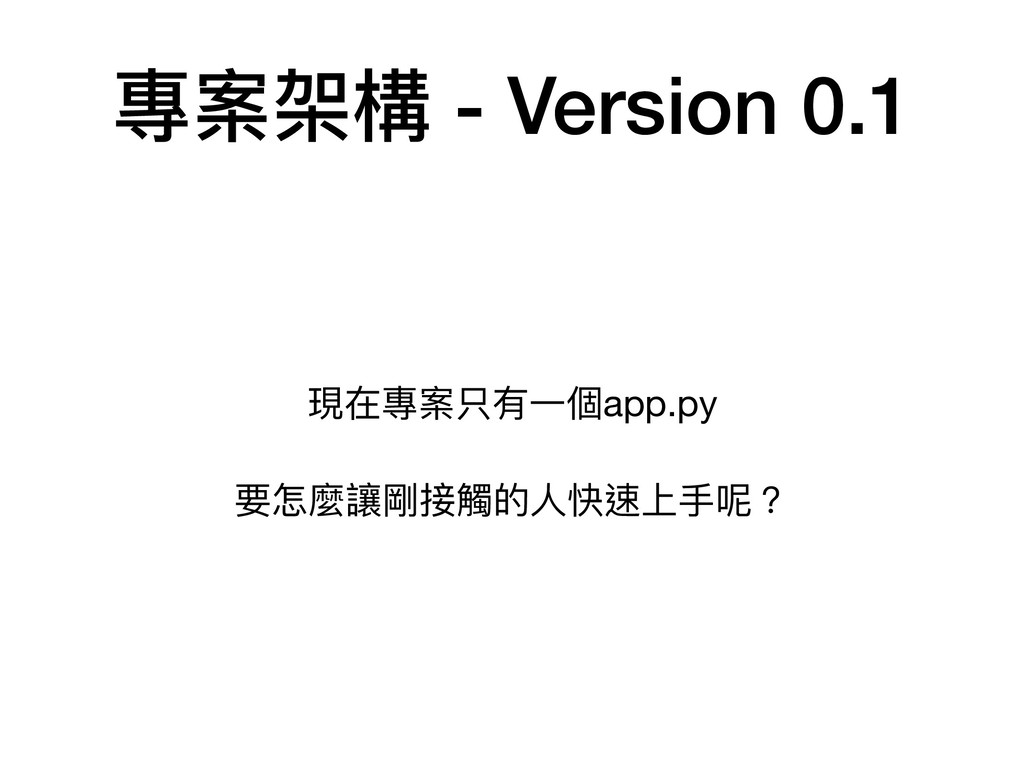
專案架構 - Version 0.1 現在專案只有⼀一個app.py 要怎麼讓剛接觸的⼈人快速上⼿手呢?
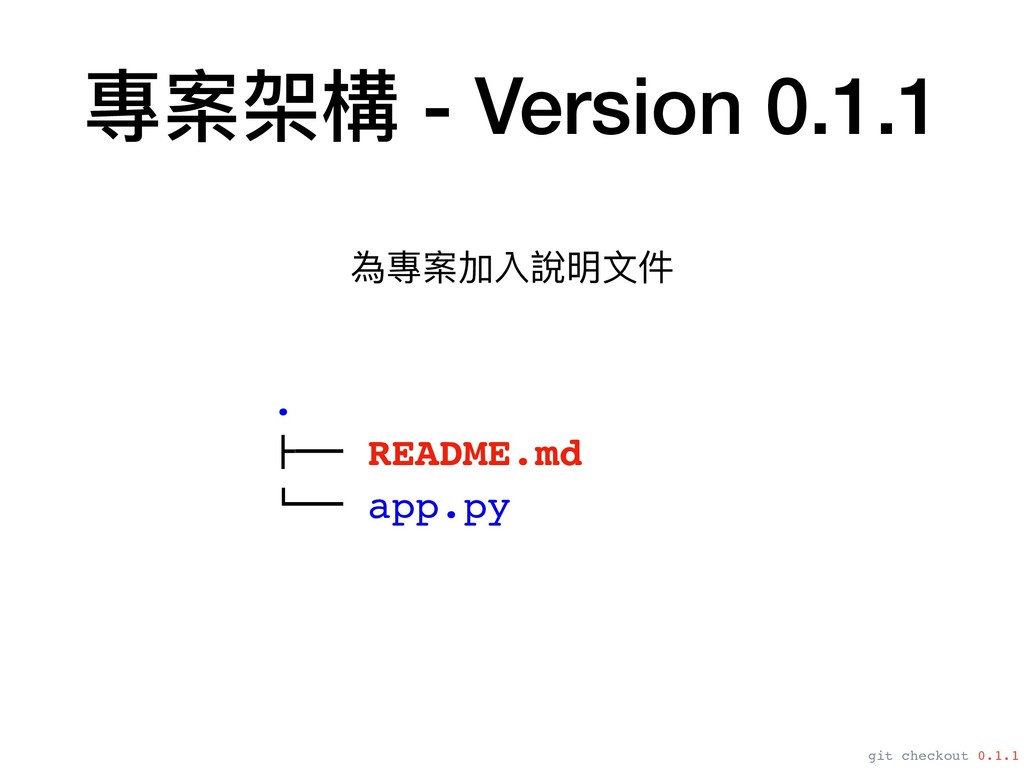
專案架構 - Version 0.1.1 . #"" README.md !"" app.py git
checkout 0.1.1 為專案加入說明⽂文件
README
File "/home/leew/web-acccounting-example/app.py", line 2, in <module> from flask_sqlalchemy import SQLAlchemy
ModuleNotFoundError: No module named 'flask_sqlalchemy'
File "/home/leew/web-acccounting-example/app.py", line 2, in <module> from flask_sqlalchemy import SQLAlchemy
ModuleNotFoundError: No module named 'flask_sqlalchemy' 好像少了了⼀一些需要的函式庫
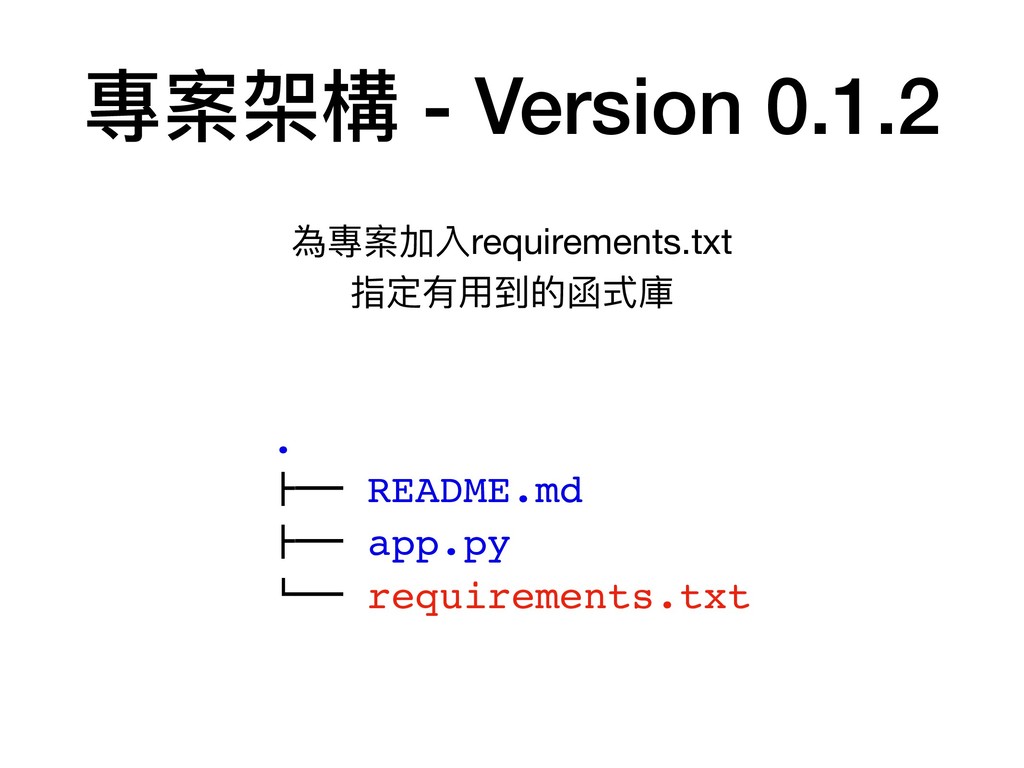
專案架構 - Version 0.1.2 . #"" README.md #"" app.py !""
requirements.txt 為專案加入requirements.txt 指定有⽤用到的函式庫
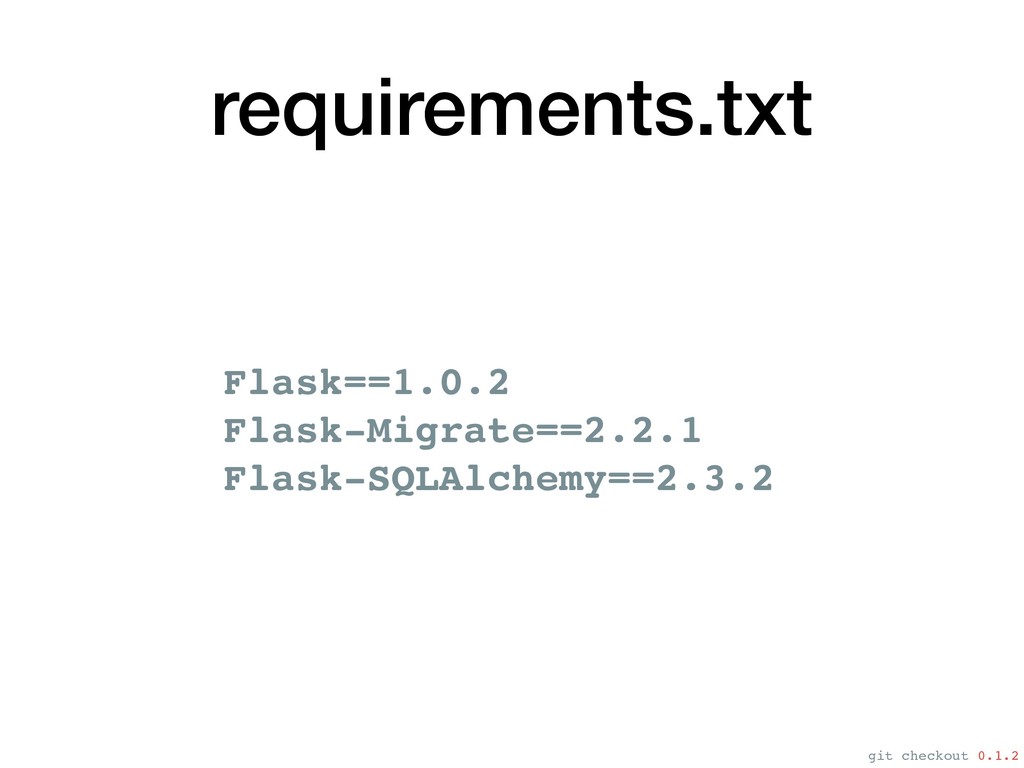
requirements.txt Flask==1.0.2 Flask-Migrate==2.2.1 Flask-SQLAlchemy==2.3.2 git checkout 0.1.2
pip install -r requirements.txt 於是新加入的⼈人知道我們需要哪些函式庫了了!
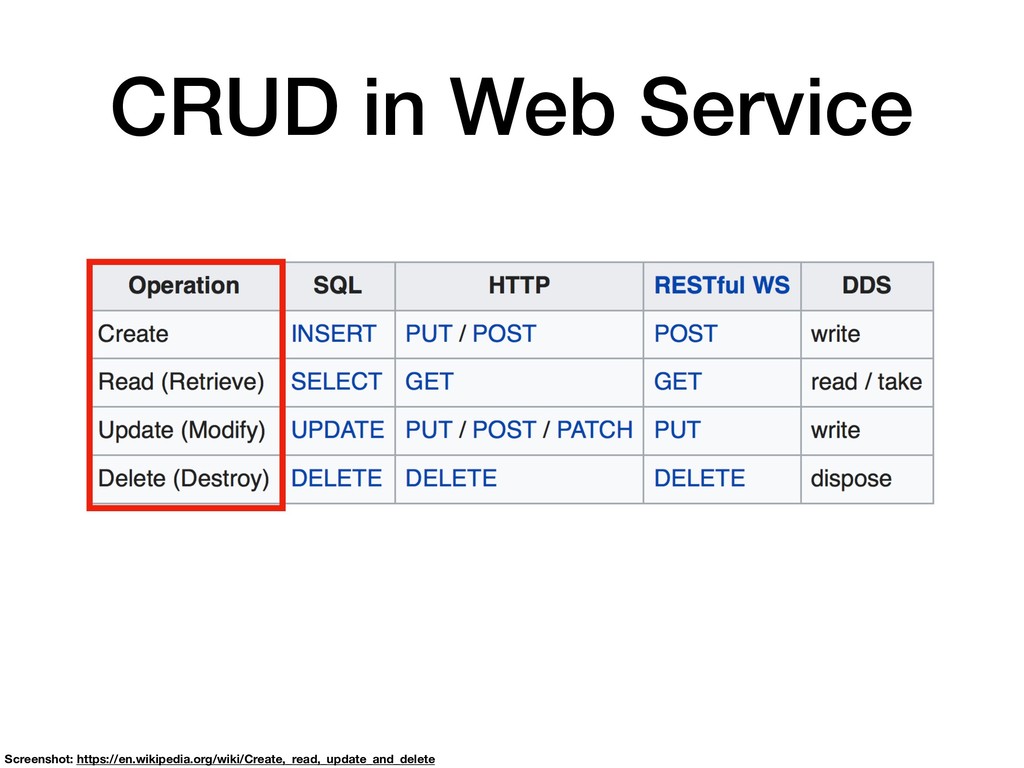
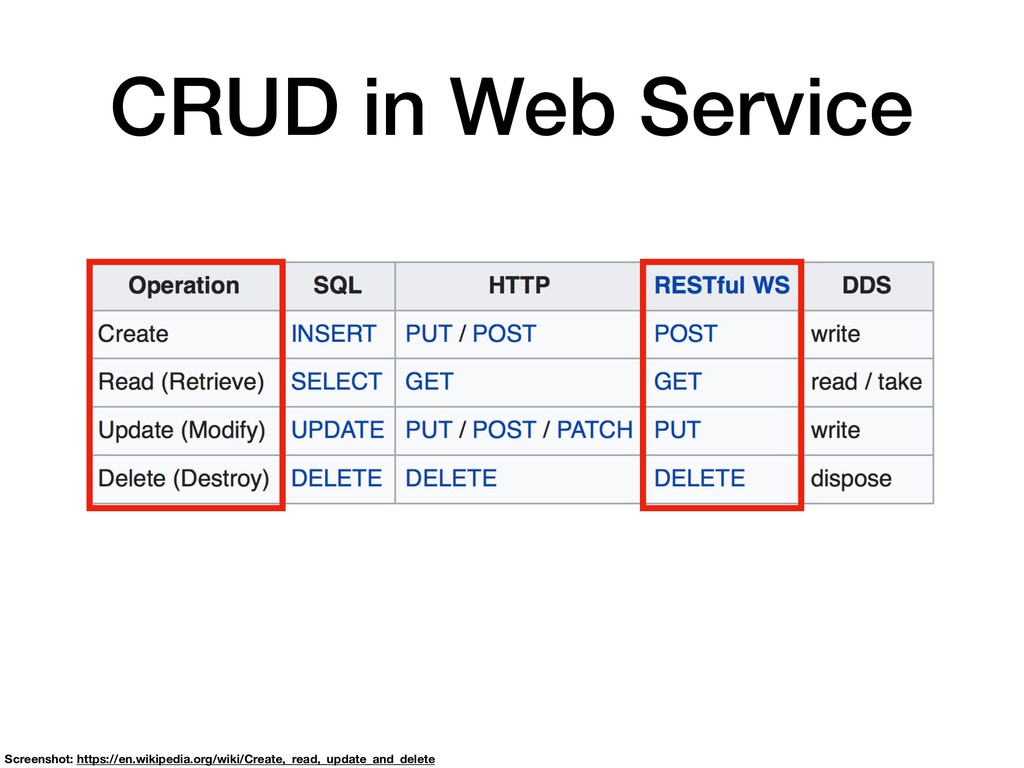
CRUD in Web Service Screenshot: https://en.wikipedia.org/wiki/Create,_read,_update_and_delete
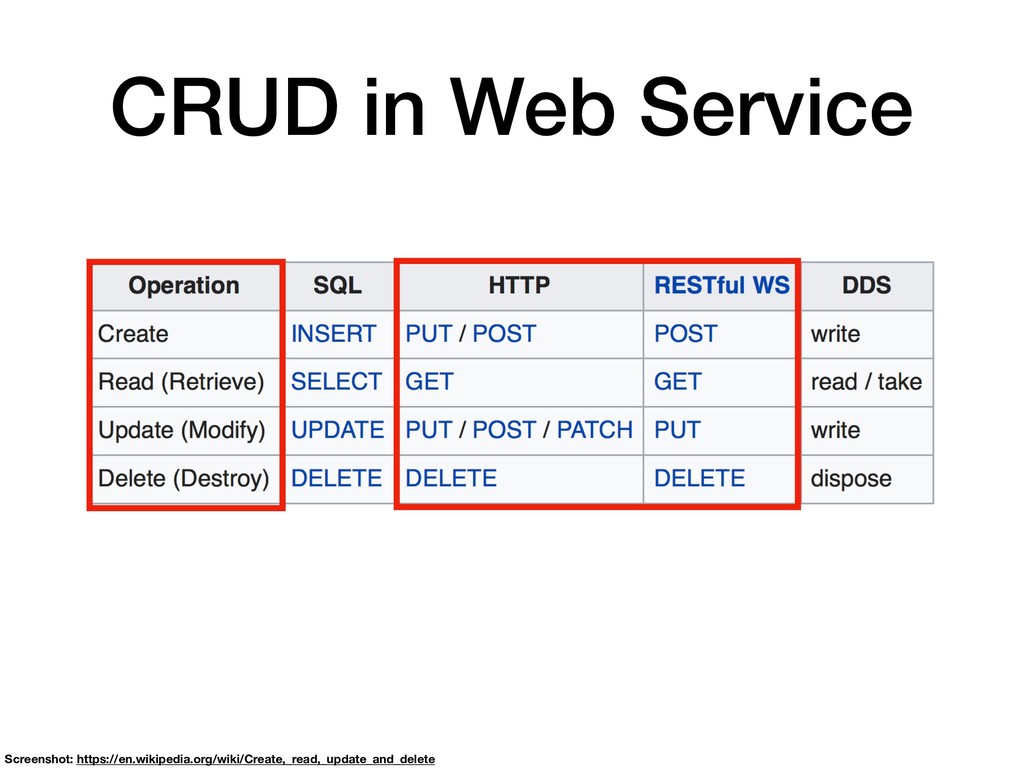
CRUD in Web Service Screenshot: https://en.wikipedia.org/wiki/Create,_read,_update_and_delete
CRUD in Web Service Screenshot: https://en.wikipedia.org/wiki/Create,_read,_update_and_delete
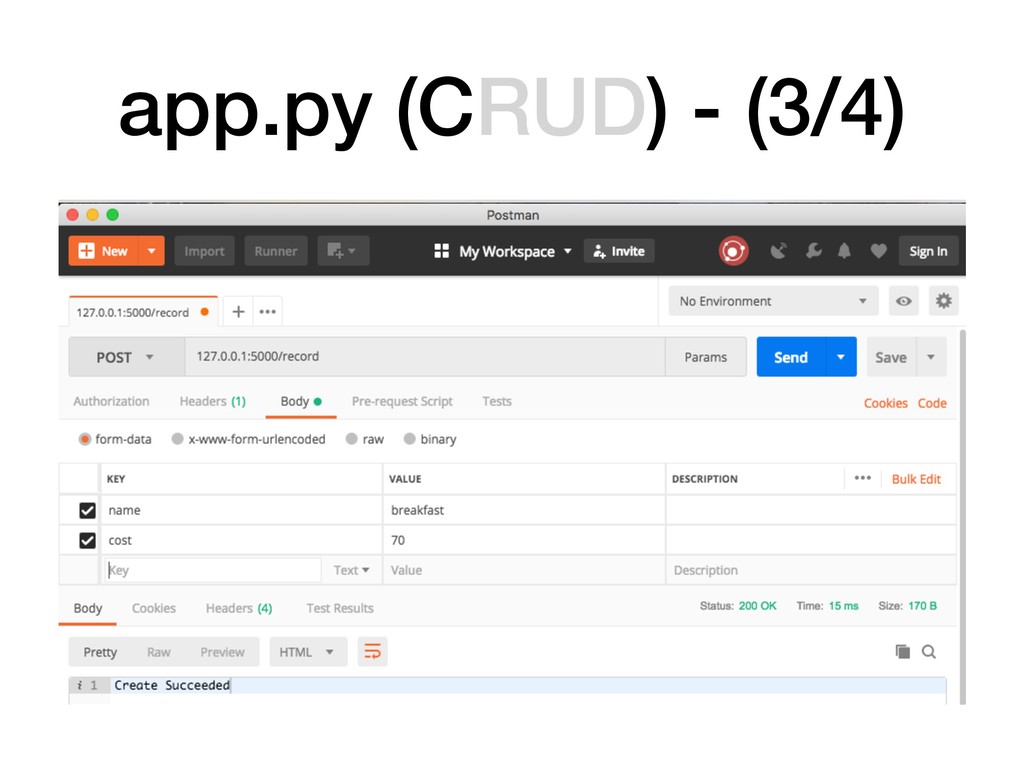
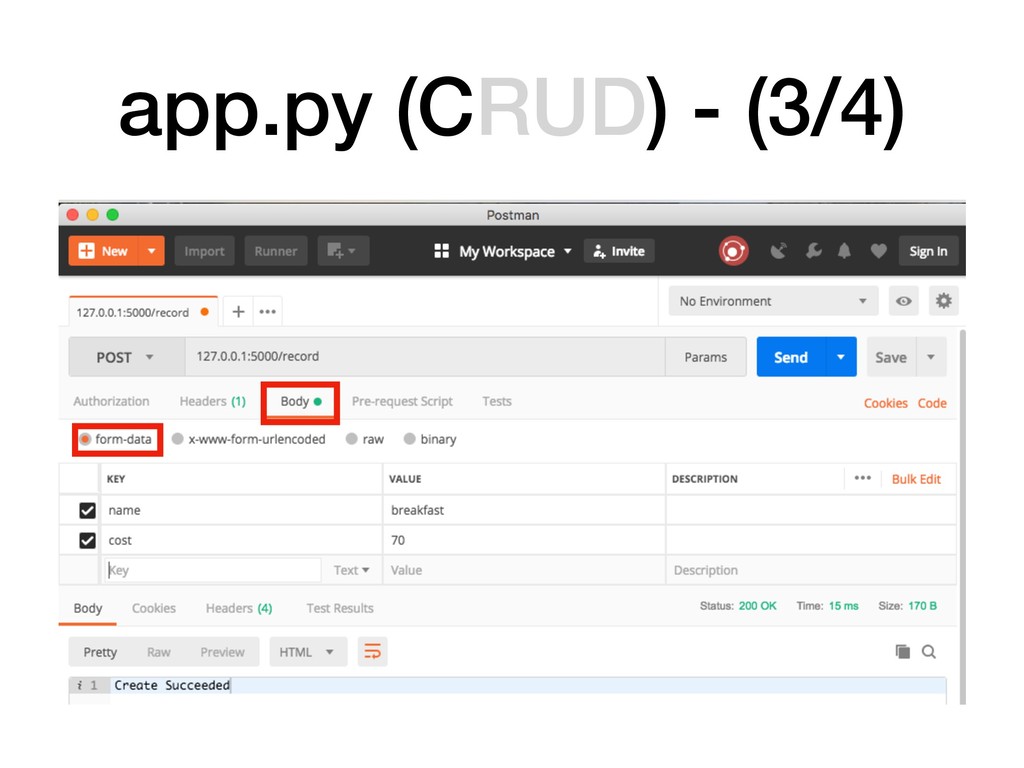
app.py (CRUD) 新增帳務紀錄 35 @app.route("/record", methods=['POST']) 36 def add_record(): 37
record = Record(name='breakfast', cost=70) 38 db.session.add(record) 39 db.session.commit() 40 return 'Create Succeeded', 200
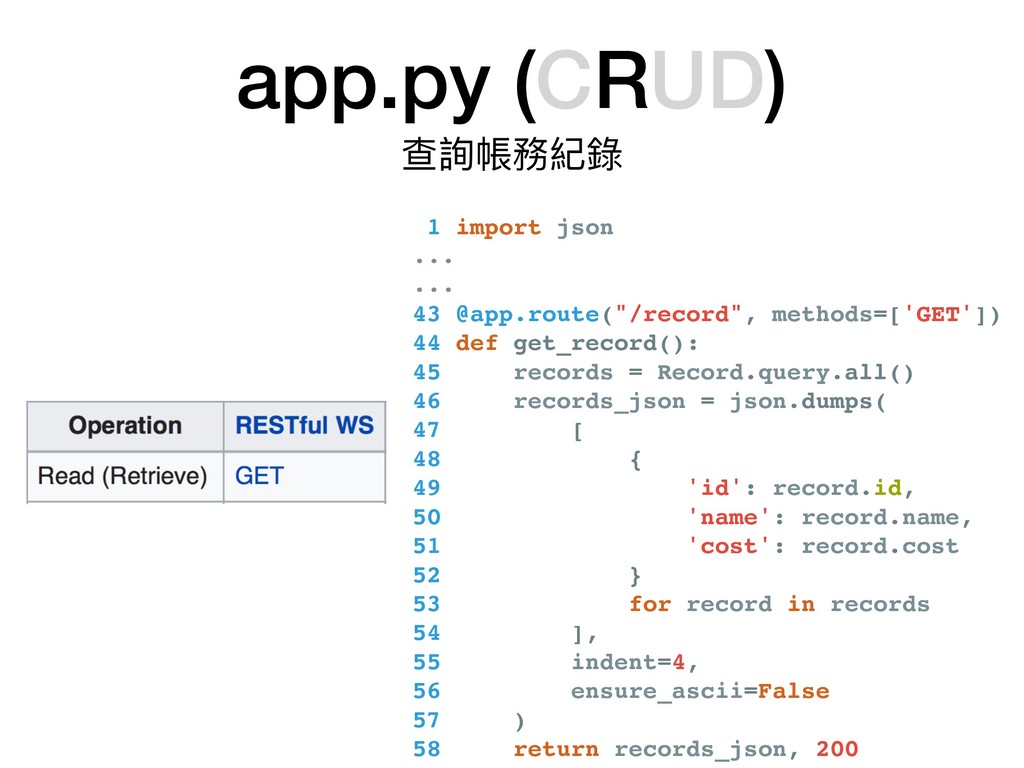
app.py (CRUD) 查詢帳務紀錄 1 import json ... ... 43 @app.route("/record",
methods=['GET']) 44 def get_record(): 45 records = Record.query.all() 46 records_json = json.dumps( 47 [ 48 { 49 'id': record.id, 50 'name': record.name, 51 'cost': record.cost 52 } 53 for record in records 54 ], 55 indent=4, 56 ensure_ascii=False 57 ) 58 return records_json, 200
app.py (CRUD) 查詢帳務紀錄 61 @app.route("/record", methods=["PUT"]) 62 def update_record(): 63
records = Record.query.filter_by(name='breakfast') 64 return 'Update Succeeded', 200
app.py (CRUD) 刪除帳務紀錄 67 @app.route("/record", methods=["DELETE"]) 68 def delete_record(): 69
first_record = Record.query.filter_by(name='breakfast').first() 70 db.session.delete(first_record) 71 db.session.commit() 72 return 'Delete Succeeded', 200 git checkout 0.2.0
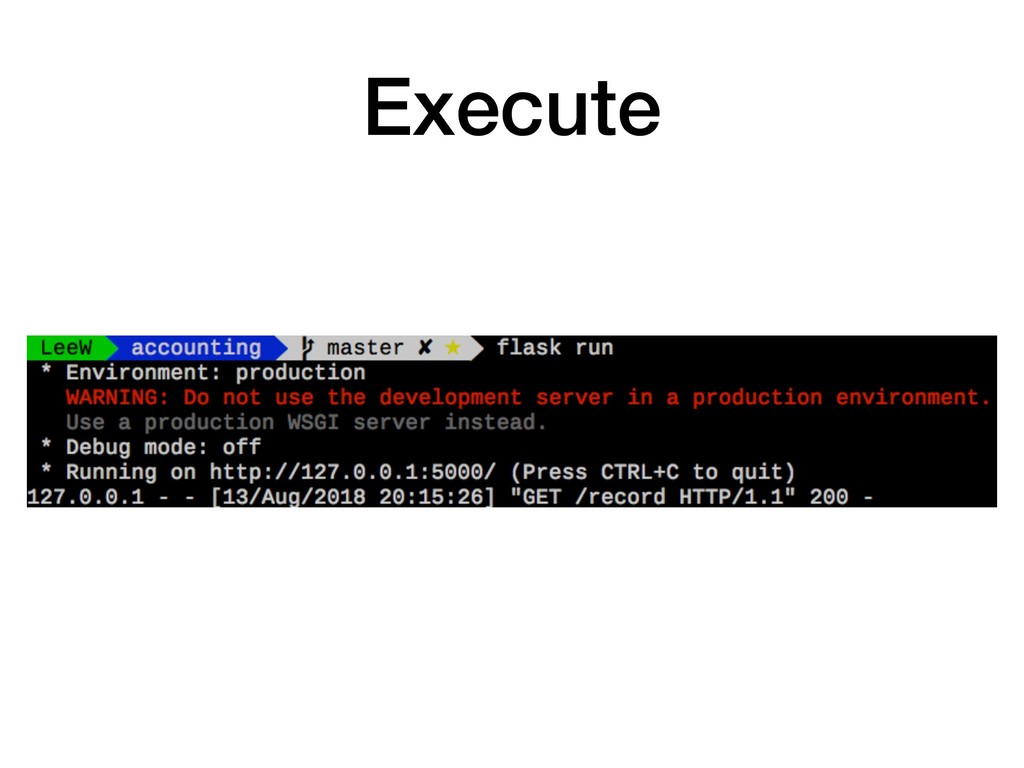
Execute
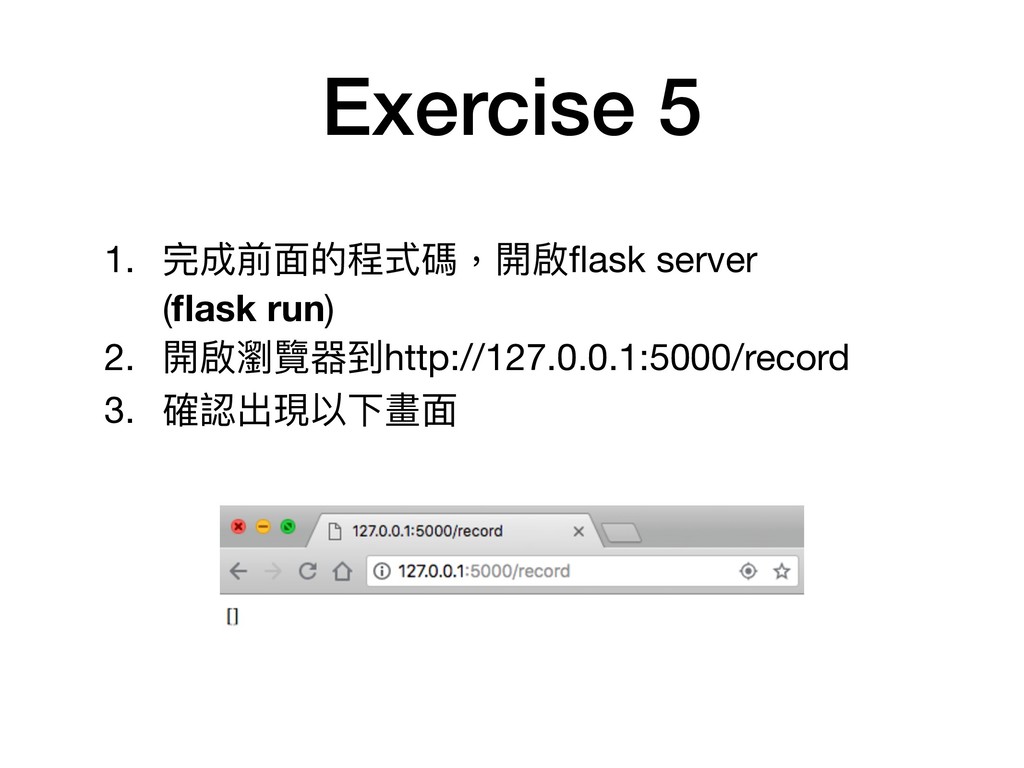
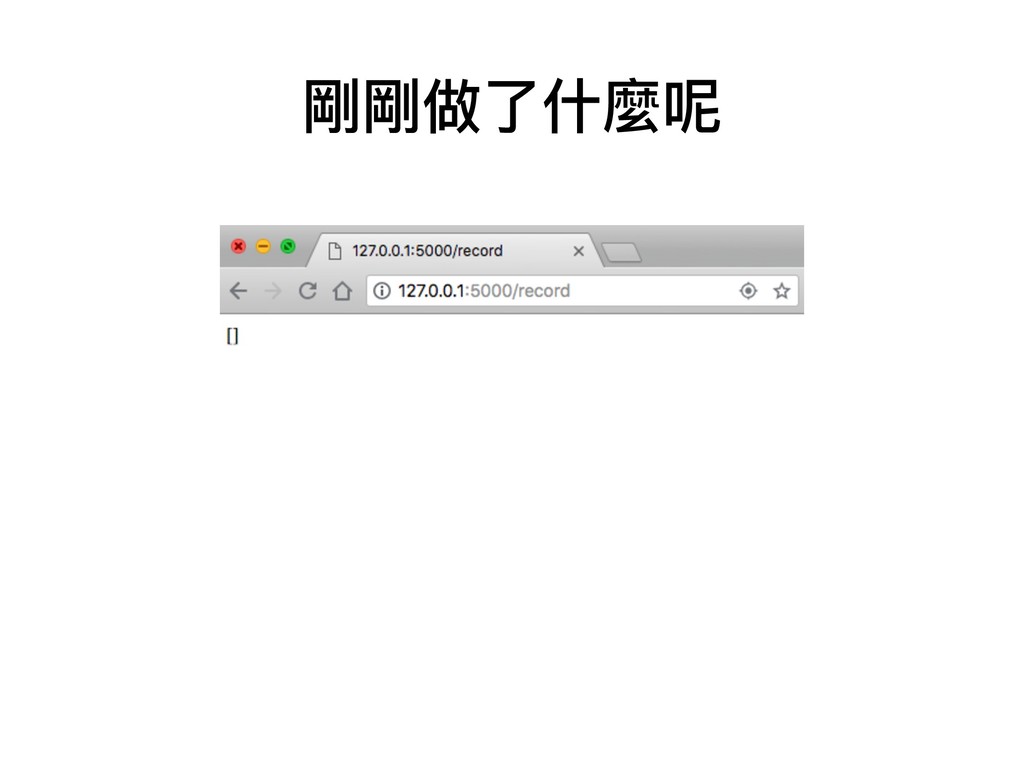
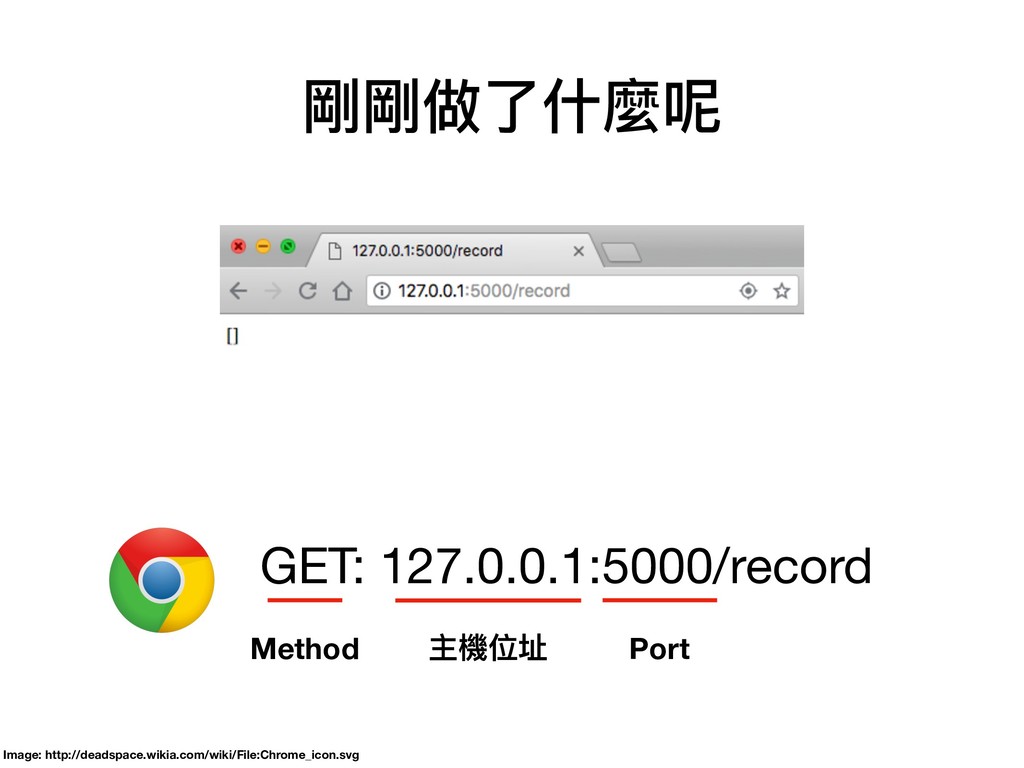
Exercise 5 1. 完成前⾯面的程式碼,開啟flask server (flask run) 2. 開啟瀏覽器到http://127.0.0.1:5000/record 3.
確認出現以下畫⾯面
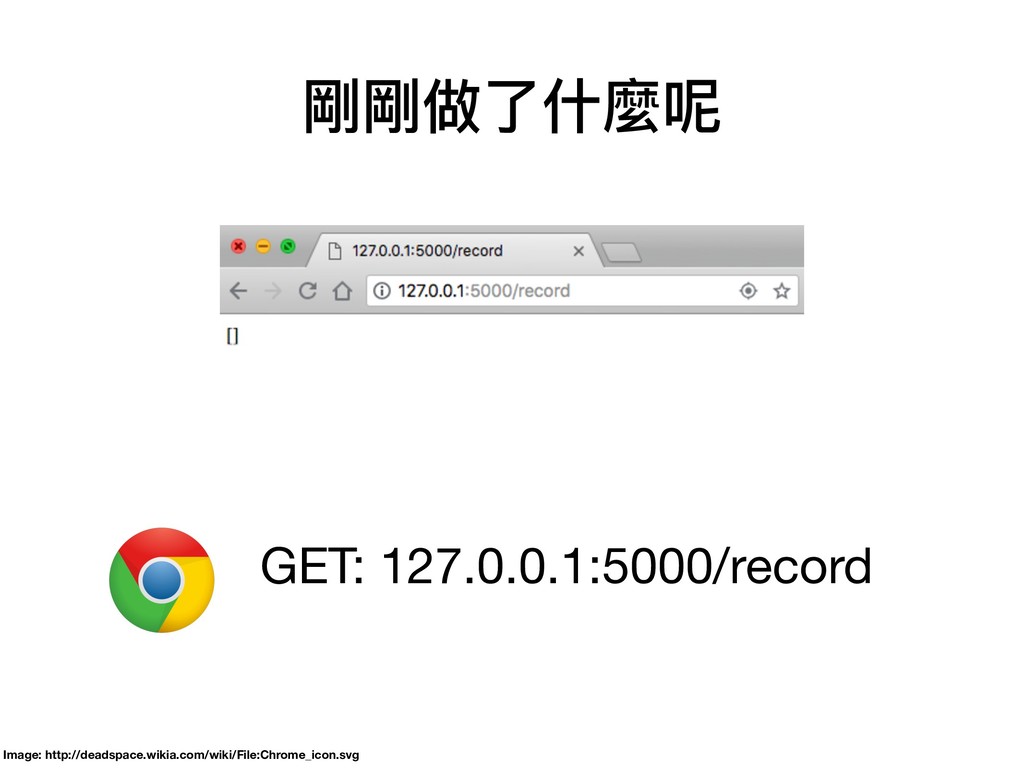
剛剛做了了什什麼呢
Image: http://deadspace.wikia.com/wiki/File:Chrome_icon.svg GET: 127.0.0.1:5000/record 剛剛做了了什什麼呢
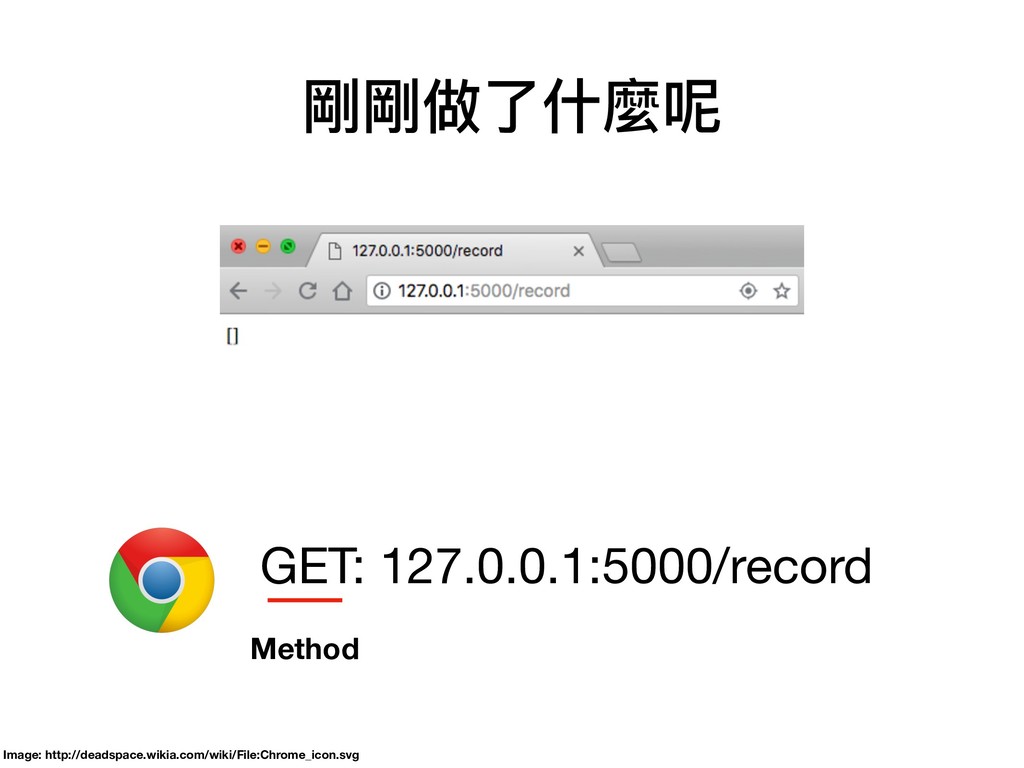
Image: http://deadspace.wikia.com/wiki/File:Chrome_icon.svg GET: 127.0.0.1:5000/record Method 剛剛做了了什什麼呢
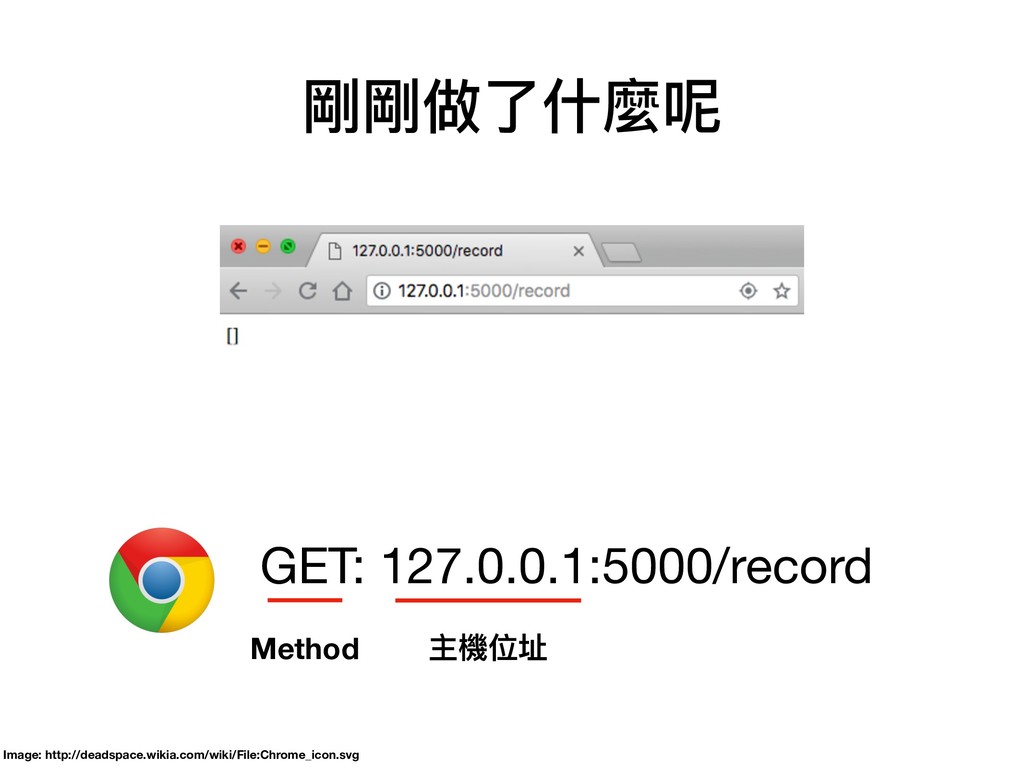
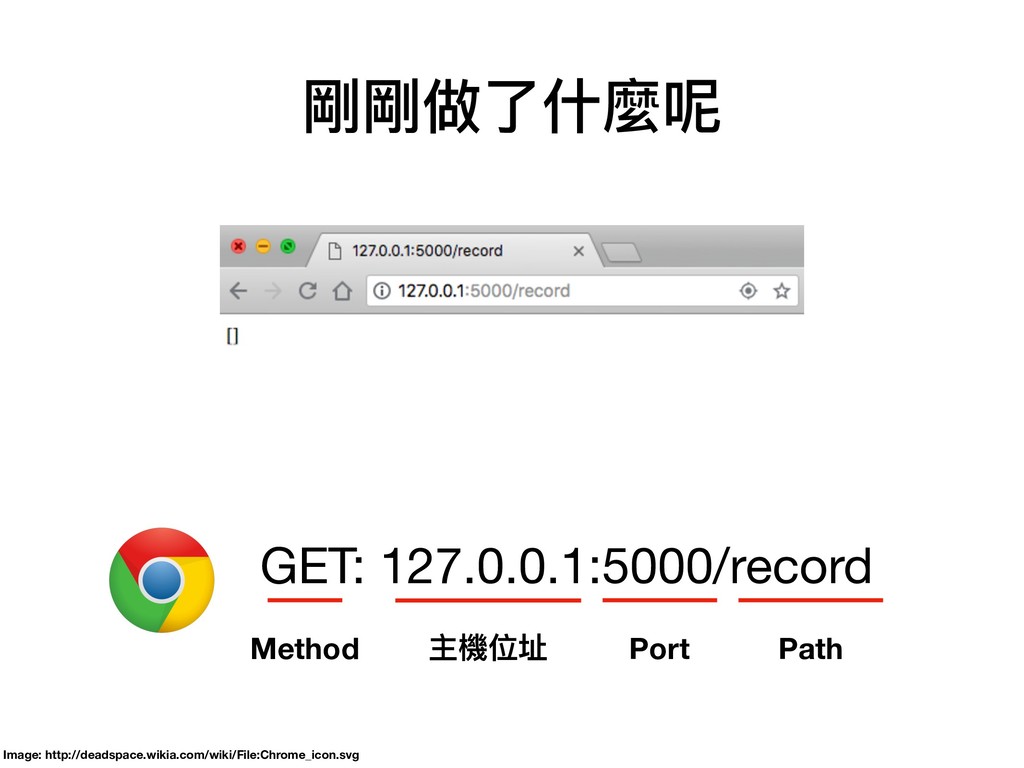
Image: http://deadspace.wikia.com/wiki/File:Chrome_icon.svg GET: 127.0.0.1:5000/record Method 主機位址 剛剛做了了什什麼呢
Image: http://deadspace.wikia.com/wiki/File:Chrome_icon.svg GET: 127.0.0.1:5000/record Method 主機位址 Port 剛剛做了了什什麼呢
Image: http://deadspace.wikia.com/wiki/File:Chrome_icon.svg GET: 127.0.0.1:5000/record Method 主機位址 Port Path 剛剛做了了什什麼呢
Image: http://deadspace.wikia.com/wiki/File:Chrome_icon.svg GET: 127.0.0.1:5000/record 因為現在還沒有東⻄西 所以是空的list Method 主機位址 Port Path
剛剛做了了什什麼呢
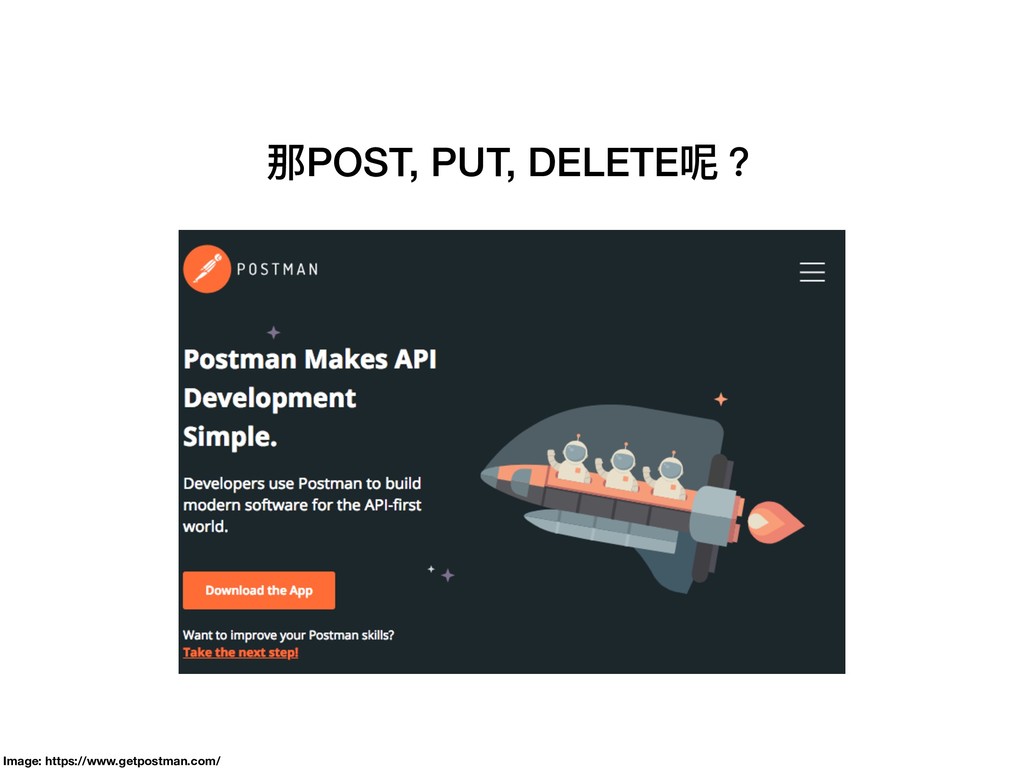
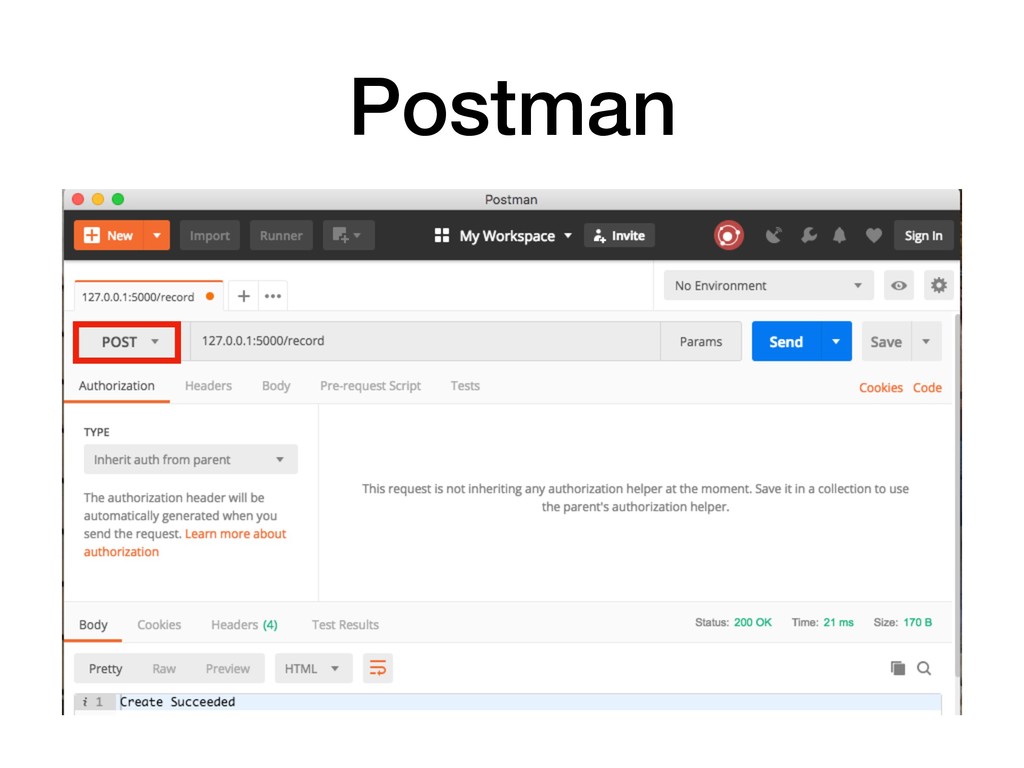
那POST, PUT, DELETE呢? Image: https://www.getpostman.com/
那POST, PUT, DELETE呢? Image: https://www.getpostman.com/
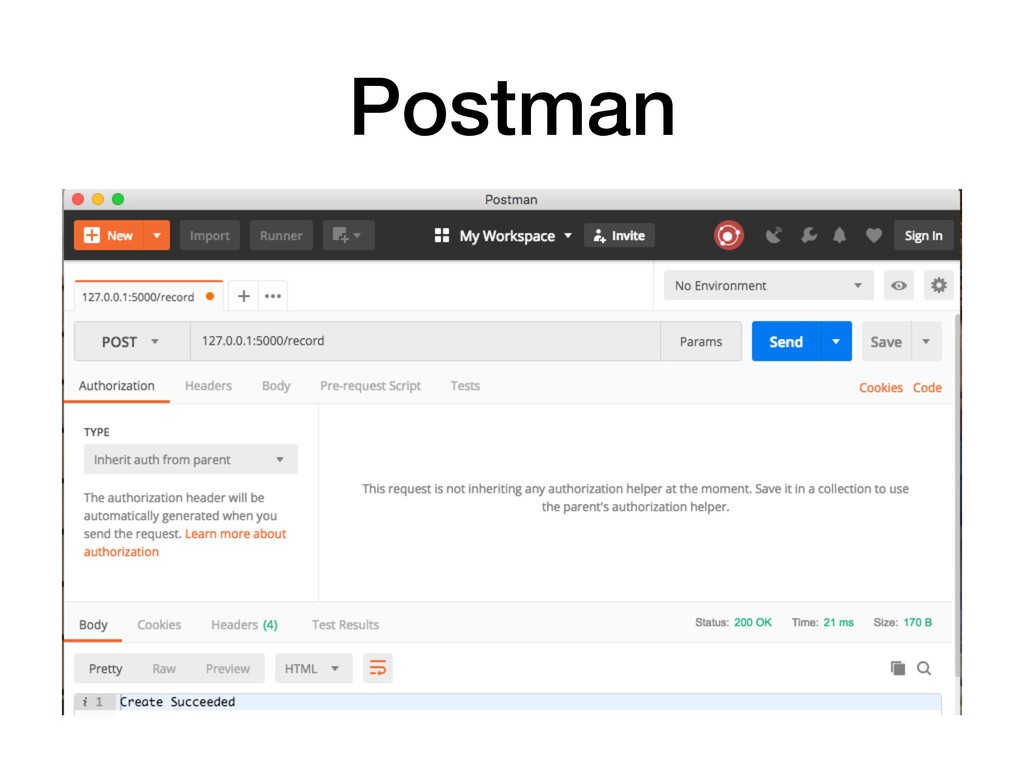
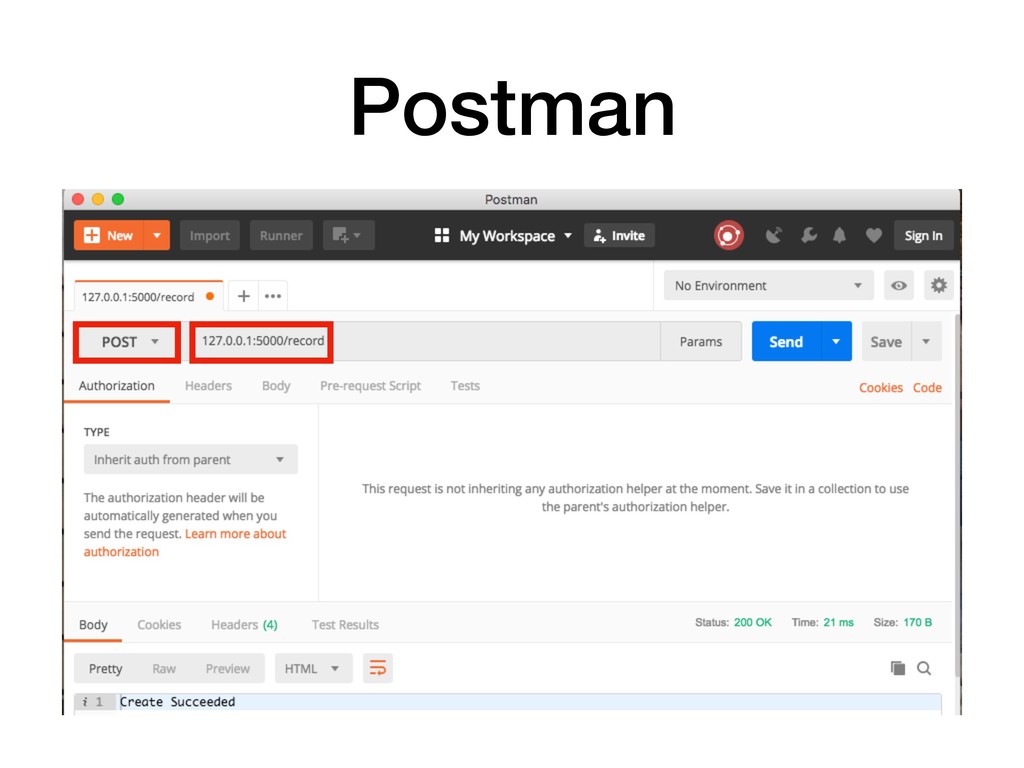
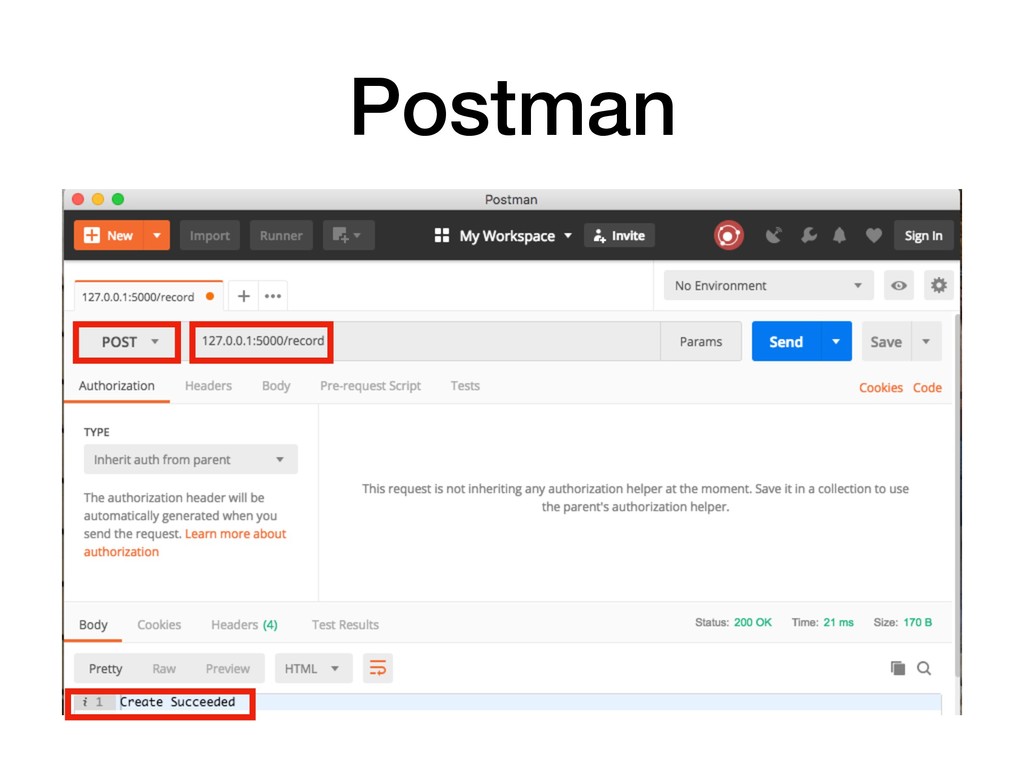
Postman
Postman
Postman
Postman
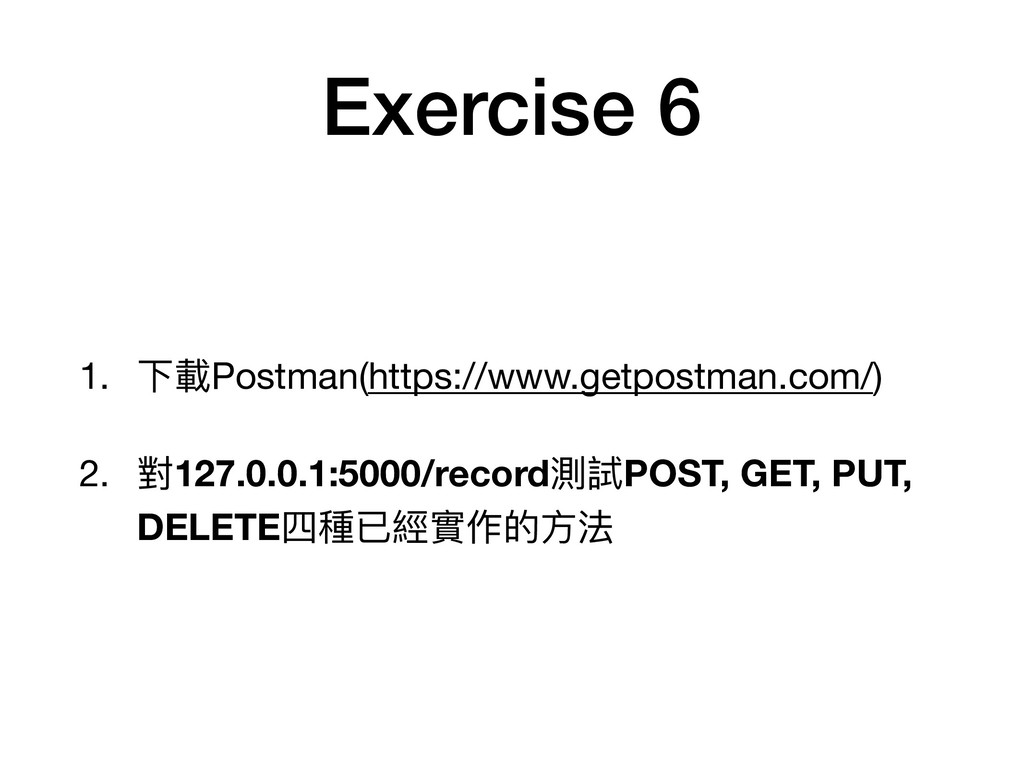
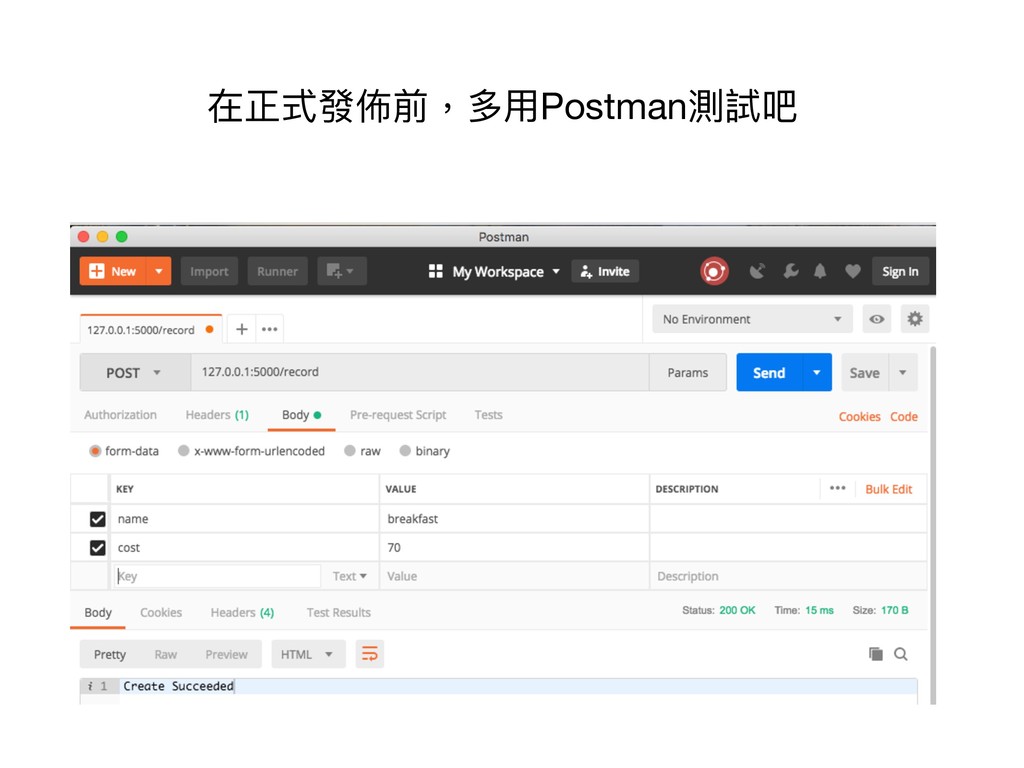
Exercise 6 1. 下載Postman(https://www.getpostman.com/) 2. 對127.0.0.1:5000/record測試POST, GET, PUT, DELETE四種已經實作的⽅方法
現在回頭來來看程式碼在做什什麼吧
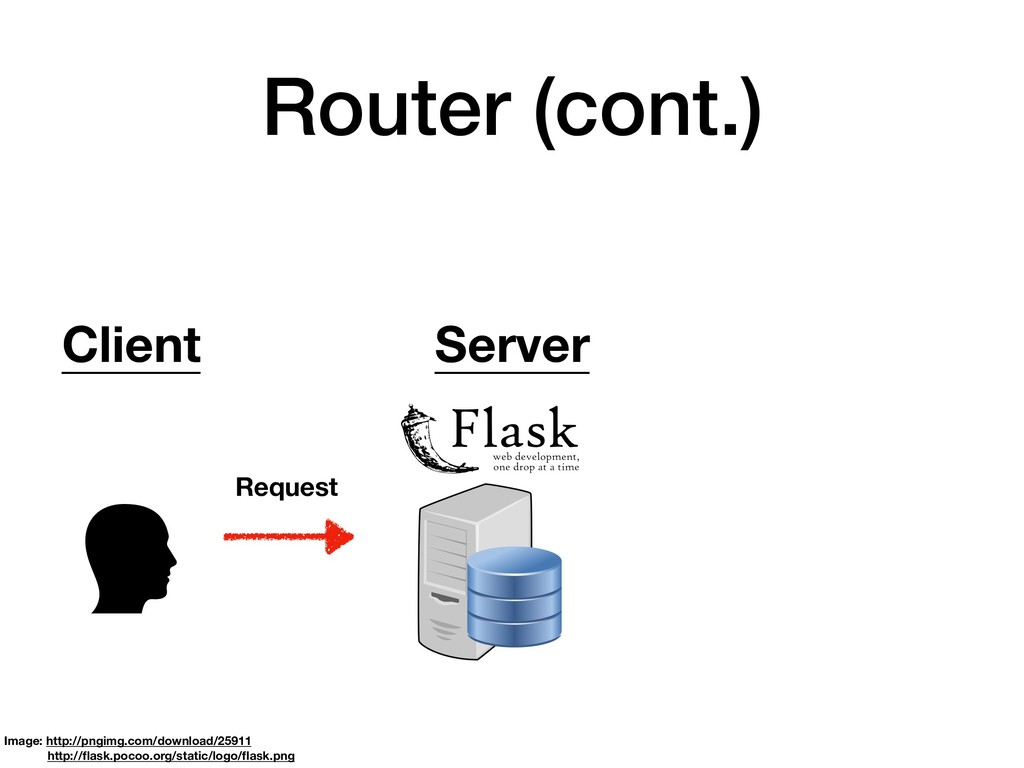
Router @app.route("/record", methods=['POST']) def add_record(): record = Record(name='breakfast', cost=70) db.session.add(record)
db.session.commit() return 'Create Succeeded', 200
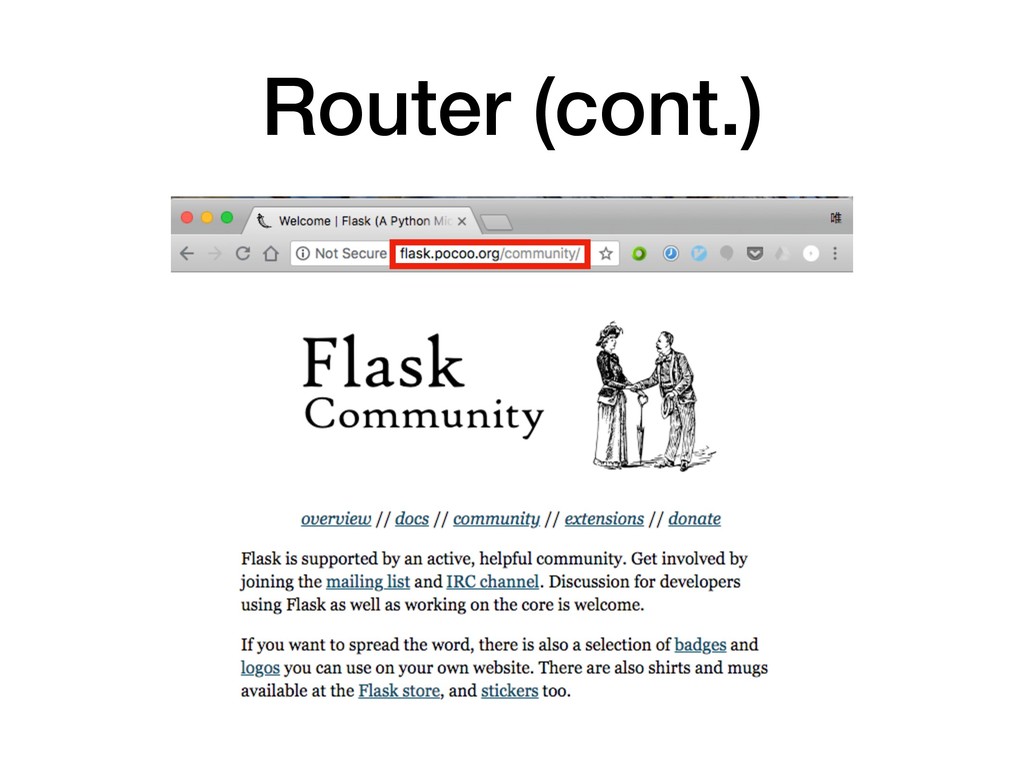
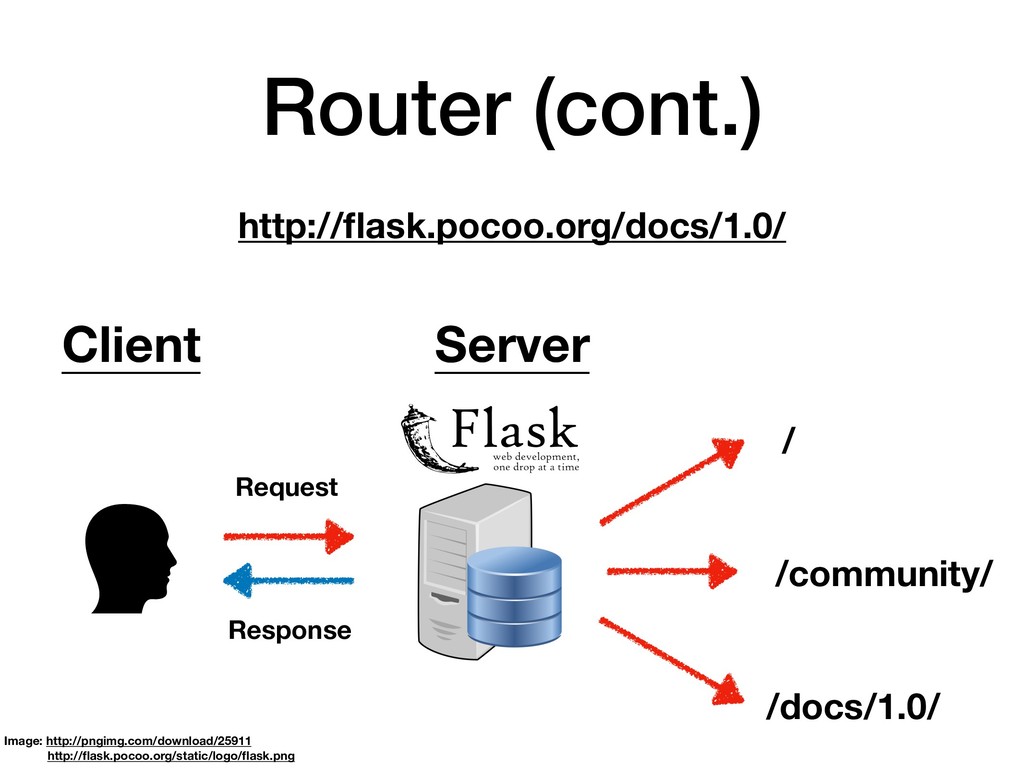
Router (cont.) Image: http://pngimg.com/download/25911 http://flask.pocoo.org/static/logo/flask.png Client Server
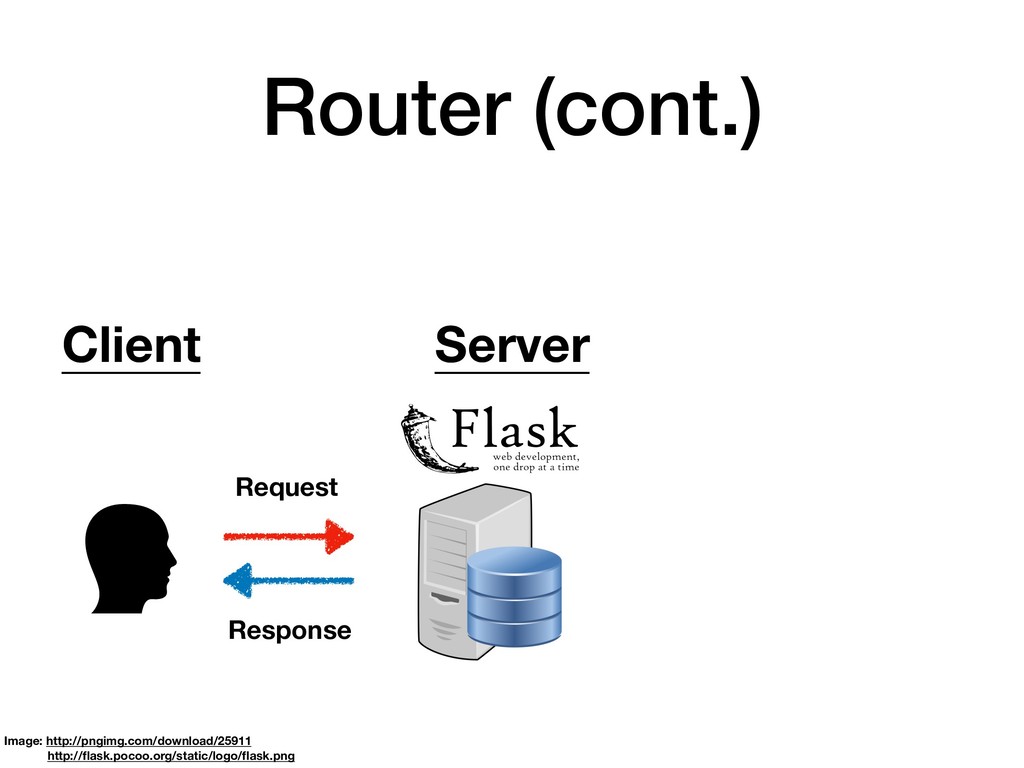
Router (cont.) Image: http://pngimg.com/download/25911 http://flask.pocoo.org/static/logo/flask.png Client Request Server
Router (cont.) Image: http://pngimg.com/download/25911 http://flask.pocoo.org/static/logo/flask.png Client Request Response Server
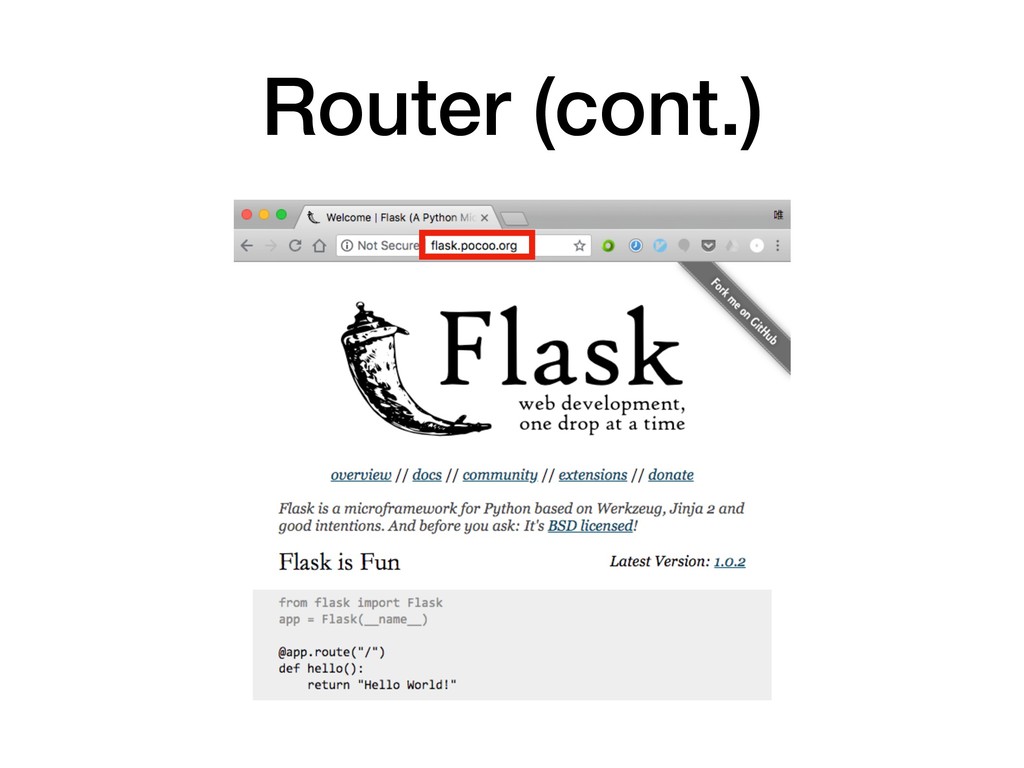
Router (cont.)
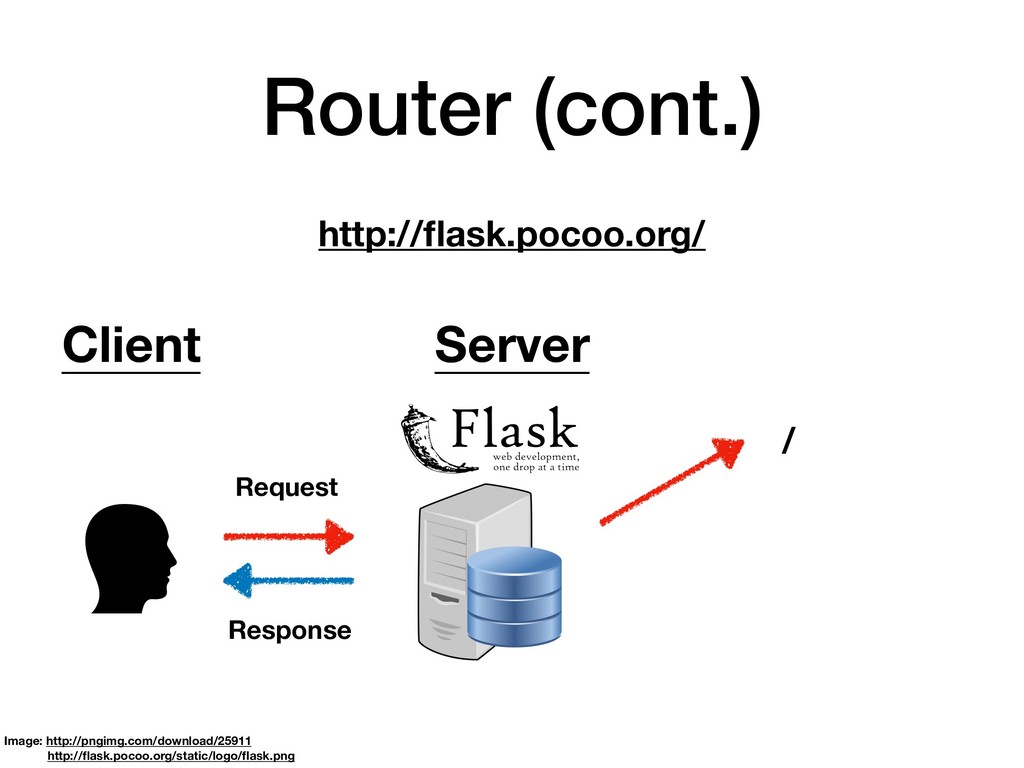
Router (cont.) Image: http://pngimg.com/download/25911 http://flask.pocoo.org/static/logo/flask.png Client Request Response / Server
http://flask.pocoo.org/
Router (cont.)
Router (cont.) Image: http://pngimg.com/download/25911 http://flask.pocoo.org/static/logo/flask.png Client Request Response / /community/
Server http://flask.pocoo.org/community/
Router (cont.)
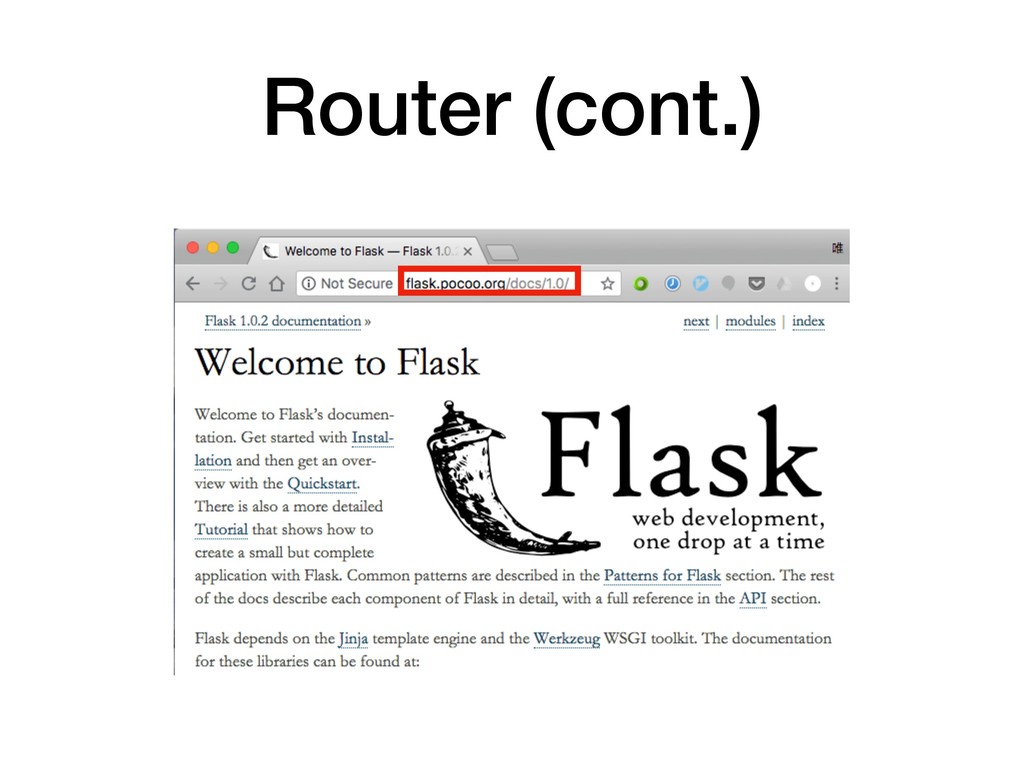
Router (cont.) Image: http://pngimg.com/download/25911 http://flask.pocoo.org/static/logo/flask.png Client Request Response http://flask.pocoo.org/docs/1.0/ /
/community/ /docs/1.0/ Server
再回到程式碼
app.py (CRUD) - (1/4) @app.route("/record", methods=['POST']) def add_record(): record =
Record( name=‘breakfast', cost=70 ) db.session.add(record) db.session.commit() return 'Create Succeeded', 200
app.py (CRUD) - (1/4) @app.route("/record", methods=['POST']) def add_record(): record =
Record( name=‘breakfast', cost=70 ) db.session.add(record) db.session.commit() return 'Create Succeeded', 200 對/record這個route,做POST
app.py (CRUD) - (1/4) @app.route("/record", methods=['POST']) def add_record(): record =
Record( name=‘breakfast', cost=70 ) db.session.add(record) db.session.commit() return 'Create Succeeded', 200 創立⼀一筆名稱為breakfast, 花費為70的record
app.py (CRUD) - (1/4) @app.route("/record", methods=['POST']) def add_record(): record =
Record( name=‘breakfast', cost=70 ) db.session.add(record) db.session.commit() return 'Create Succeeded', 200 將剛創立的record加入資料庫
app.py (CRUD) - (1/4) @app.route("/record", methods=['POST']) def add_record(): record =
Record( name=‘breakfast', cost=70 ) db.session.add(record) db.session.commit() return 'Create Succeeded', 200 回傳⽂文字 狀狀態碼 Reference
明明就是要新增 為什什麼完全沒看到接受使⽤用者輸入的地⽅方呢? Image: https://pxhere.com/en/photo/1403204
@app.route("/record", methods=['POST']) def add_record(): record = Record(name='breakfast', cost=70) db.session.add(record) db.session.commit()
return 'Create Succeeded', 200 from flask import Flask, request ... ... req_data = request.form name = req_data['name'] cost = req_data['cost'] app.py (CRUD) - (2/4) git checkout 0.2.2
@app.route("/record", methods=['POST']) def add_record(): record = Record(name='breakfast', cost=70) db.session.add(record) db.session.commit()
return 'Create Succeeded', 200 from flask import Flask, request ... ... req_data = request.form name = req_data['name'] cost = req_data['cost'] app.py (CRUD) - (2/4) git checkout 0.2.2 取得client傳入資訊
app.py (CRUD) - (3/4)
app.py (CRUD) - (3/4)
app.py (CRUD) - (3/4)
app.py (CRUD) - (3/4)
app.py (CRUD) - (4/4)
app.py (CRUD) - (4/4)
app.py (CRUD) - (4/4)
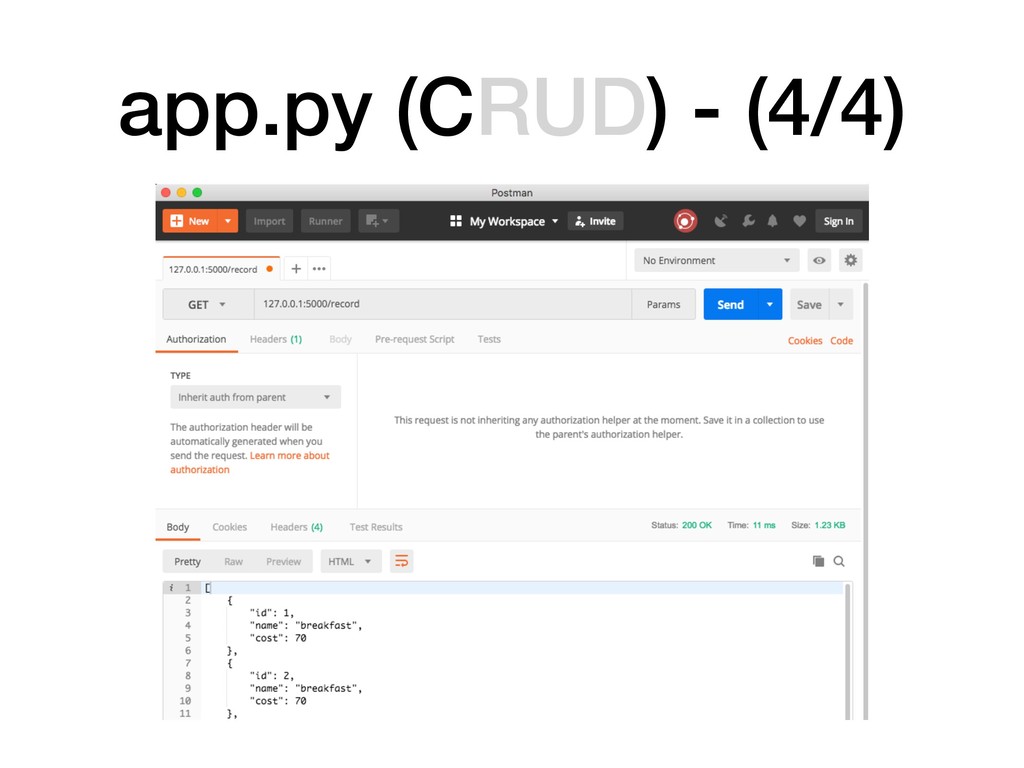
app.py (CRUD) - (1/7) @app.route("/record", methods=['GET']) def get_record(): ... ...
get_record? get_records?
app.py (CRUD) - (1/7) @app.route("/record", methods=['GET']) def get_record(): ... ...
get_record? get_records? 這樣的命名是不是有可能造成誤解呢
app.py (CRUD) - (2/7) import json ... ... @app.route("/record", methods=['GET'])
def get_record (): records = Record.query.all() records_json = json.dumps( [ { 'id': record.id, 'name': record.name, 'cost': record.cost } for record in records ], indent=4, ensure_ascii=False ) return records_json, 200 s git checkout 0.2.3
app.py (CRUD) - (3/7) import json ... ... @app.route("/record", methods=['GET'])
def get_records(): records = Record.query.all() records_json = json.dumps( [ { 'id': record.id, 'name': record.name, 'cost': record.cost } for record in records ], indent=4, ensure_ascii=False ) return records_json, 200
app.py (CRUD) - (3/7) import json ... ... @app.route("/record", methods=['GET'])
def get_records(): records = Record.query.all() records_json = json.dumps( [ { 'id': record.id, 'name': record.name, 'cost': record.cost } for record in records ], indent=4, ensure_ascii=False ) return records_json, 200 從資料庫中找出所有record資料
app.py (CRUD) - (3/7) import json ... ... @app.route("/record", methods=['GET'])
def get_records(): records = Record.query.all() records_json = json.dumps( [ { 'id': record.id, 'name': record.name, 'cost': record.cost } for record in records ], indent=4, ensure_ascii=False ) return records_json, 200 json.dumps( ..., indent=4, ensure_ascii=False ) 把某個物件轉成json格式的字串串
app.py (CRUD) - (3/7) 這種做法叫list comprehension 跟下⾯面的程式碼效果是⼀一樣的 some_list = list()
for record in records: record_data = { 'id': record.id, 'name': record.name, 'cost': record.cost } some_list.append(record_data) import json ... ... @app.route("/record", methods=['GET']) def get_records(): records = Record.query.all() records_json = json.dumps( [ { 'id': record.id, 'name': record.name, 'cost': record.cost } for record in records ], indent=4, ensure_ascii=False ) return records_json, 200
如果不會這種寫法 會不會造成程式碼寫不出來來
如果不會這種寫法 會不會造成程式碼寫不出來來 並不會!
import json ... ... @app.route("/record", methods=['GET']) def get_records(): records =
Record.query.all() records_json = json.dumps( [ { 'id': record.id, 'name': record.name, 'cost': record.cost } for record in records ], indent=4, ensure_ascii=False ) return records_json, 200 app.py (CRUD) - (4/7) 處理理json這種常⾒見見的操作 Flask當然幫我們處理理好了了
import json ... ... @app.route("/record", methods=['GET']) def get_records(): records =
Record.query.all() records_json = json.dumps( [ { 'id': record.id, 'name': record.name, 'cost': record.cost } for record in records ], indent=4, ensure_ascii=False ) return records_json, 200 app.py (CRUD) - (4/7) import json ... ... @app.route("/record", methods=['GET']) def get_records(): records = Record.query.all() records_json = json.dumps( [ { 'id': record.id, 'name': record.name, 'cost': record.cost } for record in records ], indent=4, ensure_ascii=False ) return records_json, 200 處理理json這種常⾒見見的操作 Flask當然幫我們處理理好了了
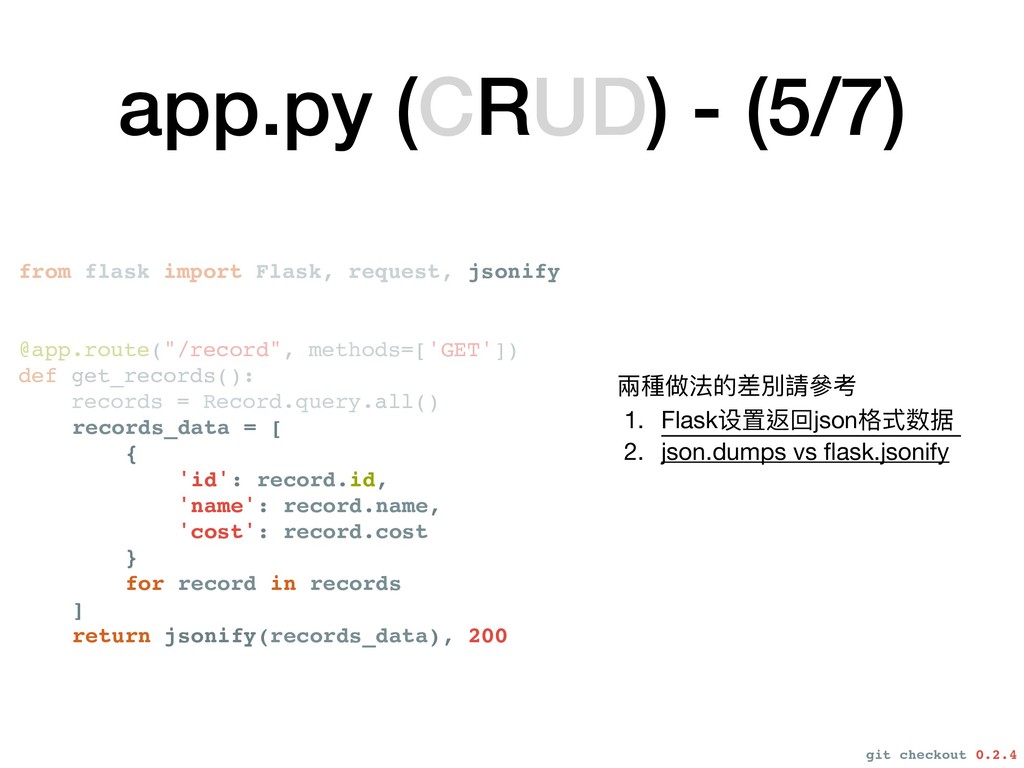
app.py (CRUD) - (5/7) jsonify records_data = [ { 'id':
record.id, 'name': record.name, 'cost': record.cost } for record in records ] return jsonify(records_data), 200 from flask import Flask, request, @app.route("/record", methods=['GET']) def get_records(): records = Record.query.all() 兩兩種做法的差別請參參考 1. Flask设置返回json格式数据 2. json.dumps vs flask.jsonify git checkout 0.2.4
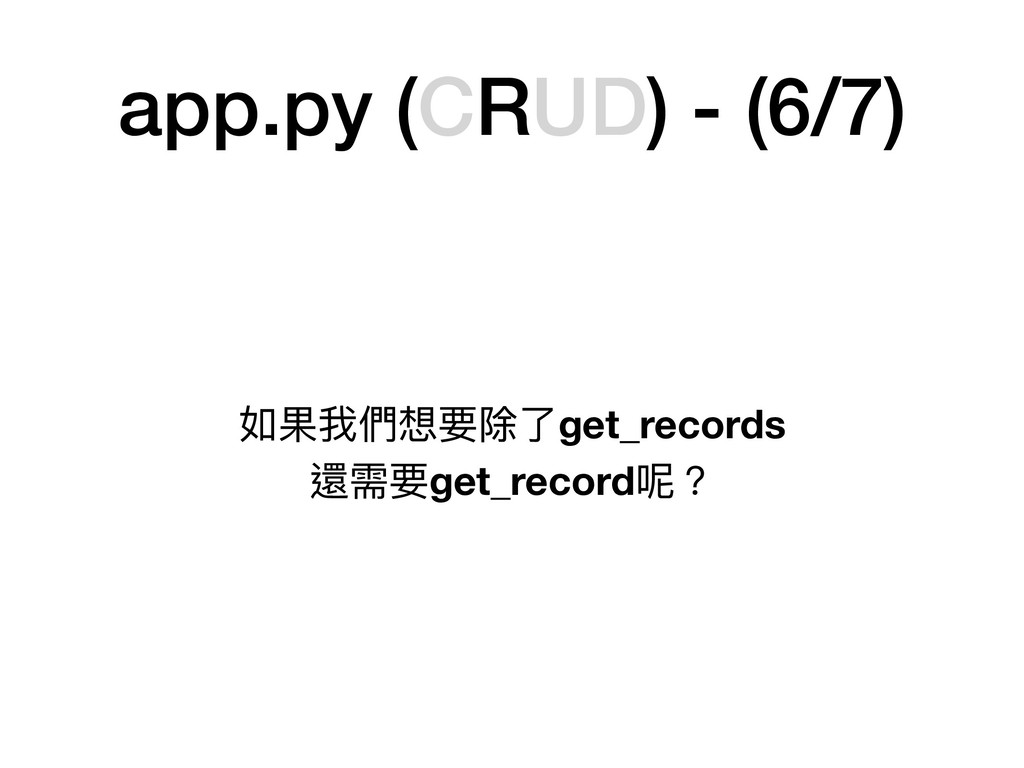
app.py (CRUD) - (6/7) 如果我們想要除了了get_records 還需要get_record呢?
app.py (CRUD) - (7/7) @app.route( ‘/record/<int:record_id>', methods=[‘GET'] ) def get_record(record_id):
record = ( Record.query .filter_by(id=record_id).first() ) record_data = { 'id': record.id, 'name': record.name, 'cost': record.cost } return jsonify(record_data), 200 git checkout 0.2.5 Warning: 這是新的function(get_record)跟前⾯面的get_records不⼀一樣
app.py (CRUD) - (7/7) @app.route( ‘/record/<int:record_id>', methods=[‘GET'] ) def get_record(record_id):
record = ( Record.query .filter_by(id=record_id).first() ) record_data = { 'id': record.id, 'name': record.name, 'cost': record.cost } return jsonify(record_data), 200 指定某⼀一筆record的id git checkout 0.2.5 Warning: 這是新的function(get_record)跟前⾯面的get_records不⼀一樣
app.py (CRUD) - (7/7) @app.route( ‘/record/<int:record_id>', methods=[‘GET'] ) def get_record(record_id):
record = ( Record.query .filter_by(id=record_id).first() ) record_data = { 'id': record.id, 'name': record.name, 'cost': record.cost } return jsonify(record_data), 200 從資料庫找出符合條件的 第⼀一筆record git checkout 0.2.5 Warning: 這是新的function(get_record)跟前⾯面的get_records不⼀一樣
@app.route("/record", methods=["PUT"]) def update_record(): records = Record.query.filter_by(name=‘breakfast') return 'Update Succeeded',
200 app.py (CRUD) - (1/2)
@app.route("/record", methods=["PUT"]) def update_record(): records = Record.query.filter_by(name=‘breakfast') return 'Update Succeeded',
200 app.py (CRUD) - (1/2) @app.route("/record", methods=["PUT"]) def update_record(): records = Record.query.filter_by(name=‘breakfast') return 'Update Succeeded', 200
app.py (CRUD) - (2/2) @app.route( ‘/record/<int:record_id>', methods=[‘PUT'] ) def update_record(record_id):
req_data = request.form record = ( Record.query .filter_by(id=record_id).first() ) record.name = req_data['name'] record.cost = req_data['cost'] db.session.add(record) db.session.commit() return ‘Update Succeeded', 200 git checkout 0.2.6
app.py (CRUD) - (2/2) @app.route( ‘/record/<int:record_id>', methods=[‘PUT'] ) def update_record(record_id):
req_data = request.form record = ( Record.query .filter_by(id=record_id).first() ) record.name = req_data['name'] record.cost = req_data['cost'] db.session.add(record) db.session.commit() return ‘Update Succeeded', 200 取得client傳來來的資料 git checkout 0.2.6
app.py (CRUD) - (2/2) @app.route( ‘/record/<int:record_id>', methods=[‘PUT'] ) def update_record(record_id):
req_data = request.form record = ( Record.query .filter_by(id=record_id).first() ) record.name = req_data['name'] record.cost = req_data['cost'] db.session.add(record) db.session.commit() return ‘Update Succeeded', 200 找出指定的record git checkout 0.2.6
app.py (CRUD) - (2/2) @app.route( ‘/record/<int:record_id>', methods=[‘PUT'] ) def update_record(record_id):
req_data = request.form record = ( Record.query .filter_by(id=record_id).first() ) record.name = req_data['name'] record.cost = req_data['cost'] db.session.add(record) db.session.commit() return ‘Update Succeeded', 200 更更新record資訊 git checkout 0.2.6
app.py (CRUD) - (2/2) @app.route( ‘/record/<int:record_id>', methods=[‘PUT'] ) def update_record(record_id):
req_data = request.form record = ( Record.query .filter_by(id=record_id).first() ) record.name = req_data['name'] record.cost = req_data['cost'] db.session.add(record) db.session.commit() return ‘Update Succeeded', 200 將修改過後的record存入資料庫 git checkout 0.2.6
@app.route("/record", methods=["DELETE"]) def delete_record(): first_record = ( Record.query .filter_by(name=‘breakfast’).first() )
db.session.delete(first_record) db.session.commit() return 'Delete Succeeded', 200 app.py (CRUD) - (1/2)
@app.route("/record", methods=["DELETE"]) def delete_record(): first_record = ( Record.query .filter_by(name=‘breakfast’).first() )
db.session.delete(first_record) db.session.commit() return 'Delete Succeeded', 200 app.py (CRUD) - (1/2) 找到名稱是breakfast的record
@app.route("/record", methods=["DELETE"]) def delete_record(): first_record = ( Record.query .filter_by(name=‘breakfast’).first() )
db.session.delete(first_record) db.session.commit() return 'Delete Succeeded', 200 app.py (CRUD) - (1/2) 刪除指定record
@app.route("/record", methods=["DELETE"]) def delete_record(): first_record = ( Record.query .filter_by(name=‘breakfast’).first() )
db.session.delete(first_record) db.session.commit() return 'Delete Succeeded', 200 app.py (CRUD) - (1/2) 刪除指定record 等等,為什什麼這個功能只能刪除breakfast的record?
@app.route("/record", methods=["DELETE"]) def delete_record(): first_record = ( Record.query .filter_by(name=‘breakfast’).first() )
db.session.delete(first_record) db.session.commit() return 'Delete Succeeded', 200 app.py (CRUD) - (1/2) @app.route("/record", methods=["DELETE"]) def delete_record(): first_record = ( Record.query .filter_by(name=‘breakfast’).first() ) db.session.delete(first_record) db.session.commit() return 'Delete Succeeded', 200 等等,為什什麼這個功能只能刪除breakfast的record?
def delete_record(record_id): db.session.delete(record) db.session.commit() return 'Delete Succeeded', 200 @app.route("/record/<int:record_id>", methods=["DELETE"])
record = Record.query.filter_by(id=record_id).first() app.py (CRUD) - (2/2) git checkout 0.2.7
def delete_record(record_id): db.session.delete(record) db.session.commit() return 'Delete Succeeded', 200 @app.route("/record/<int:record_id>", methods=["DELETE"])
record = Record.query.filter_by(id=record_id).first() app.py (CRUD) - (2/2) git checkout 0.2.7 從資料庫找出符合條件的 第⼀一筆record
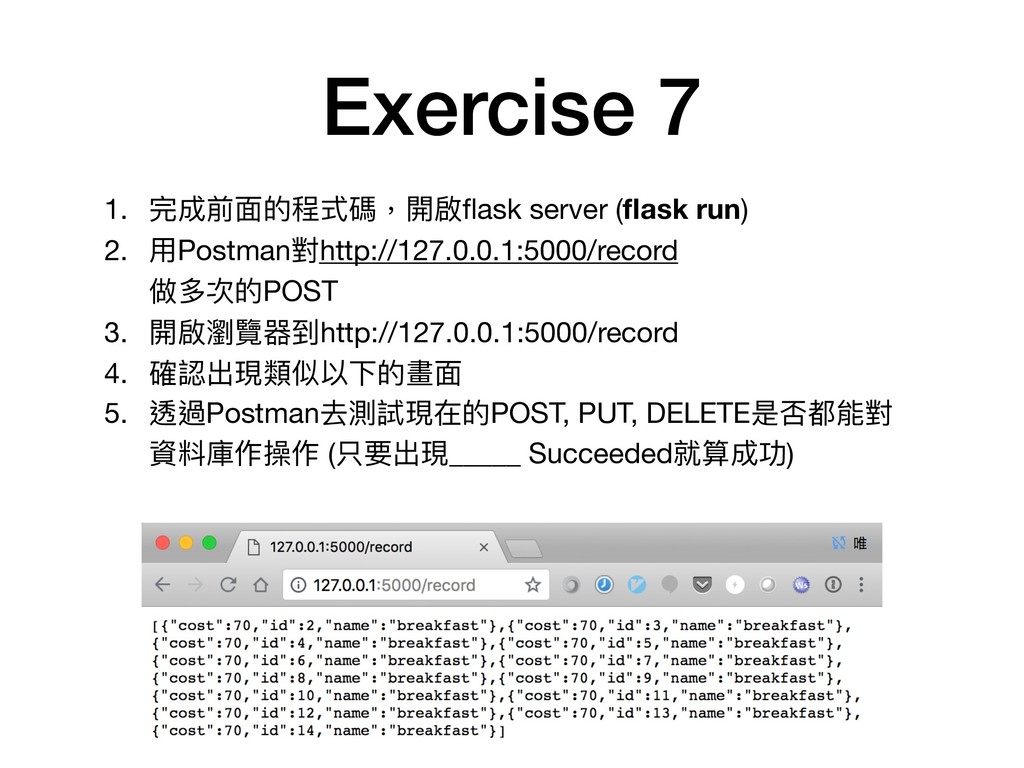
Exercise 7 1. 完成前⾯面的程式碼,開啟flask server (flask run) 2. ⽤用Postman對http://127.0.0.1:5000/record 做多次的POST
3. 開啟瀏覽器到http://127.0.0.1:5000/record 4. 確認出現類似以下的畫⾯面 5. 透過Postman去測試現在的POST, PUT, DELETE是否都能對 資料庫作操作 (只要出現_____ Succeeded就算成功)
終於完成CRUD了了!
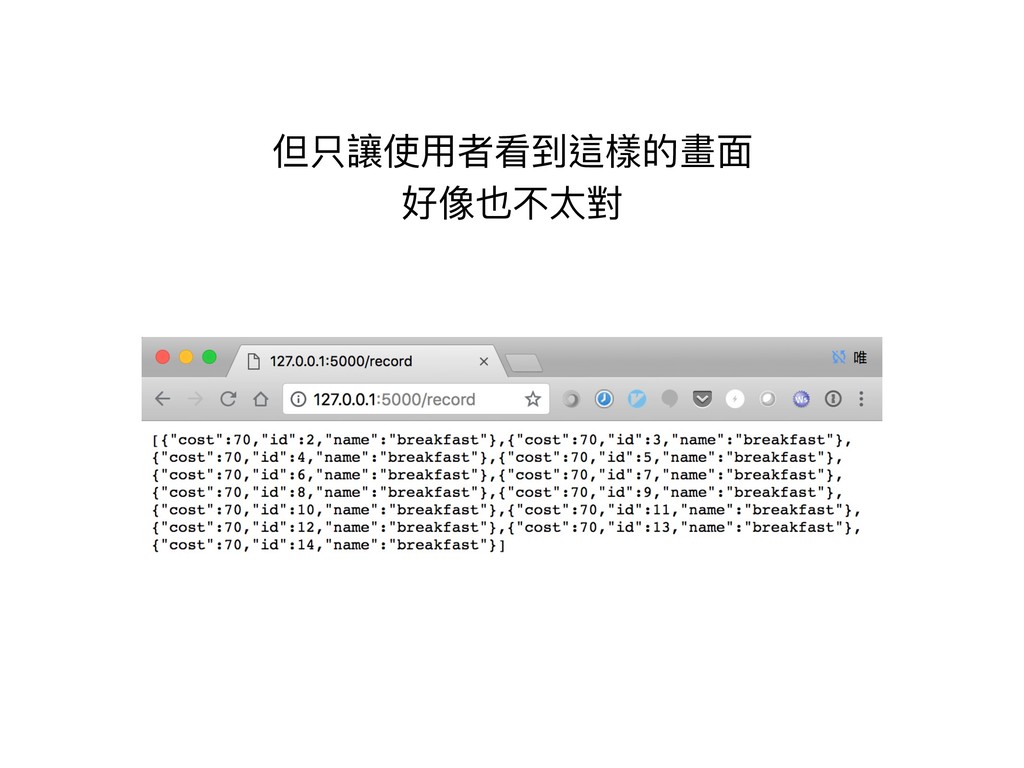
但只讓使⽤用者看到這樣的畫⾯面 好像也不太對
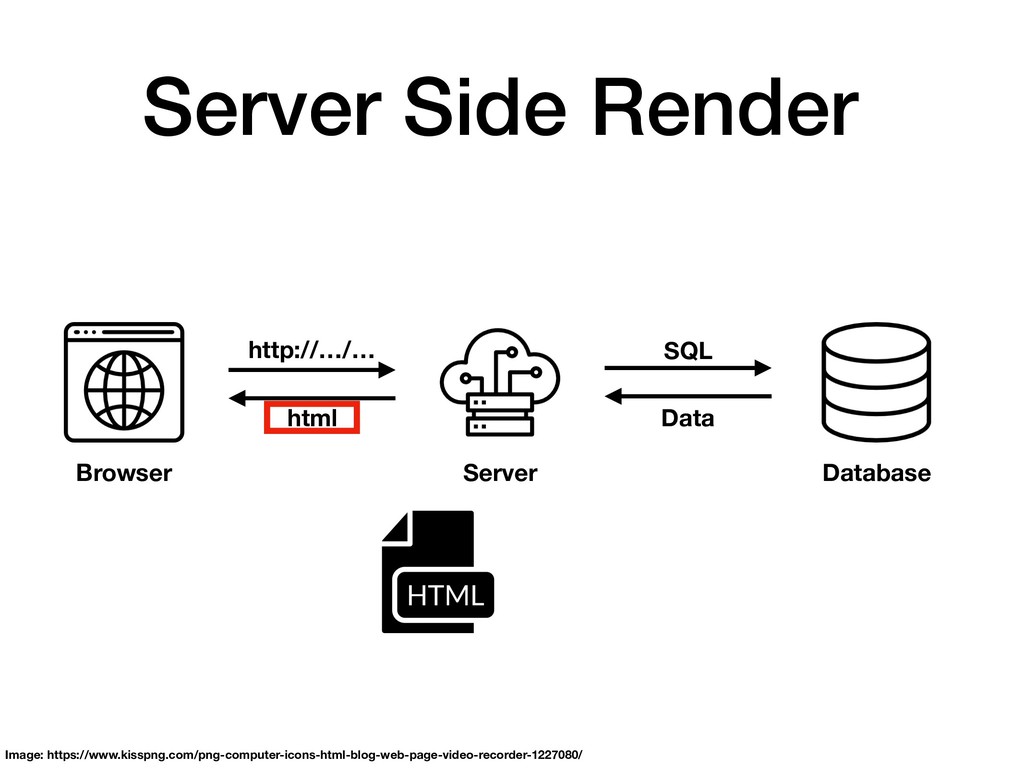
Server Side Render Browser Server Database http://…/… html SQL Data
Image: https://www.kisspng.com/png-computer-icons-html-blog-web-page-video-recorder-1227080/
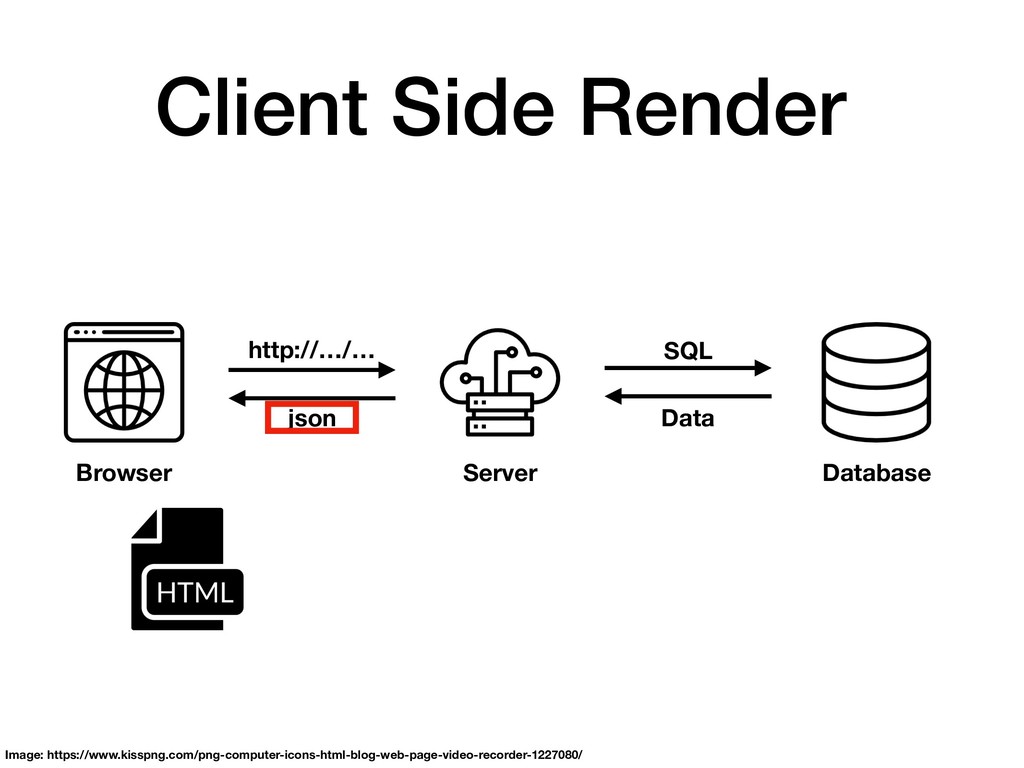
Client Side Render Browser Server Database http://…/… json SQL Data
Image: https://www.kisspng.com/png-computer-icons-html-blog-web-page-video-recorder-1227080/
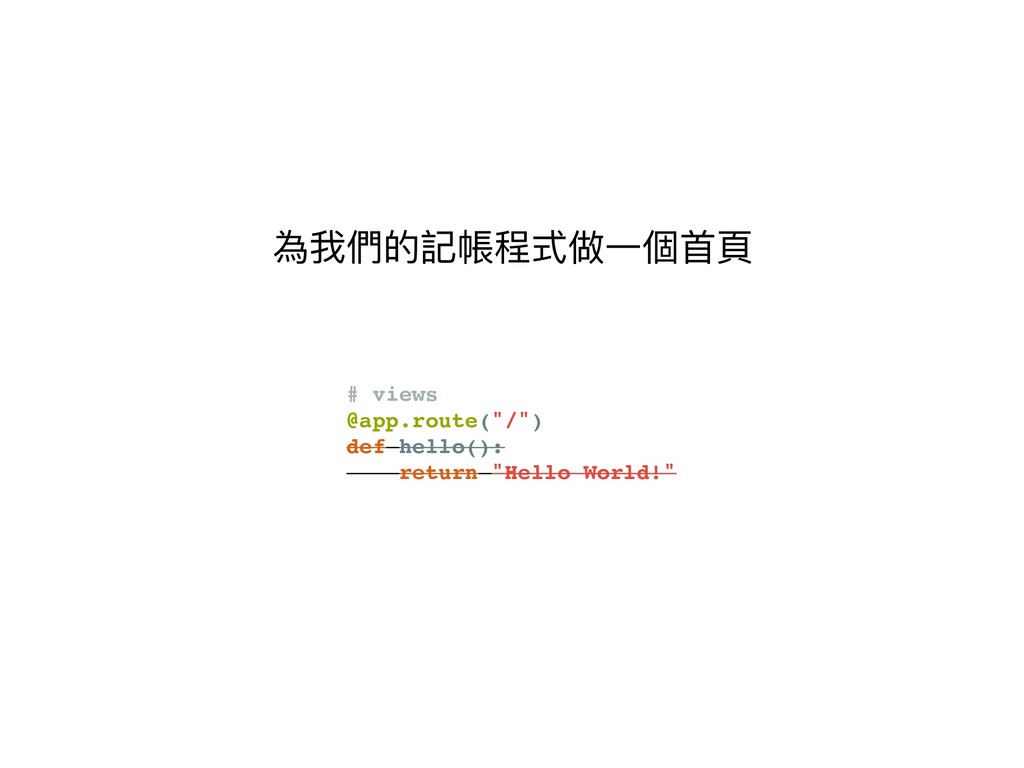
# views @app.route("/") def hello(): return "Hello World!" 為我們的記帳程式做⼀一個⾸首⾴頁
# views @app.route("/") def hello(): return "Hello World!" 為我們的記帳程式做⼀一個⾸首⾴頁
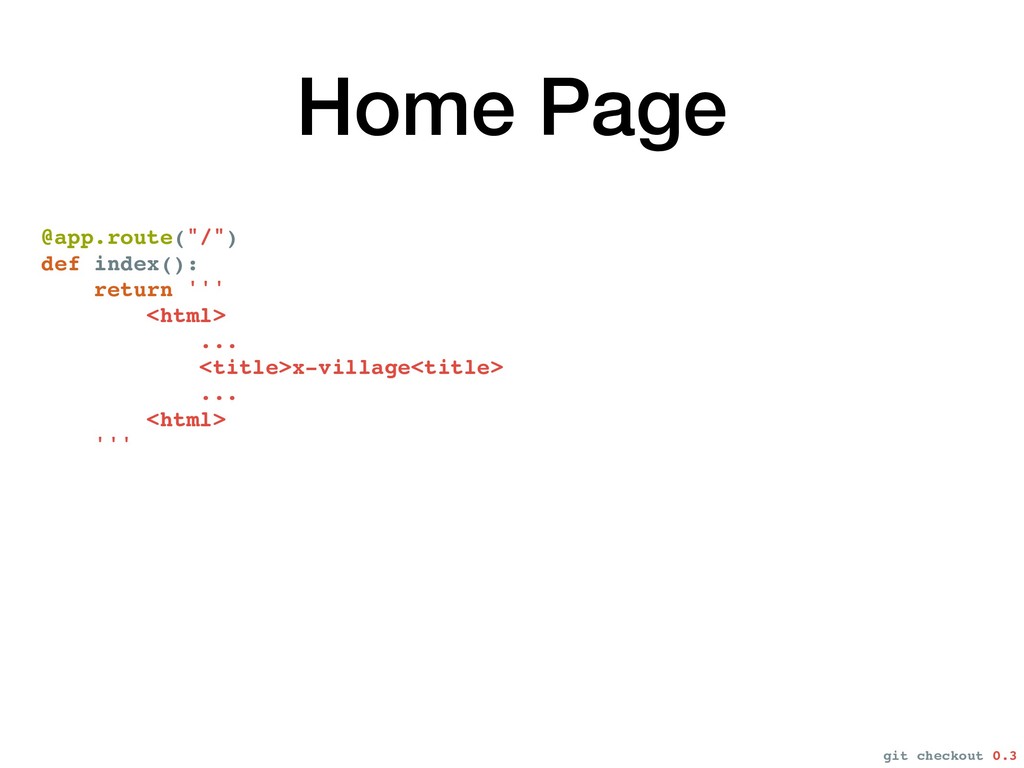
Home Page @app.route("/") def index(): return ''' <html> ... <title>x-village<title>
... <html> ''' git checkout 0.3
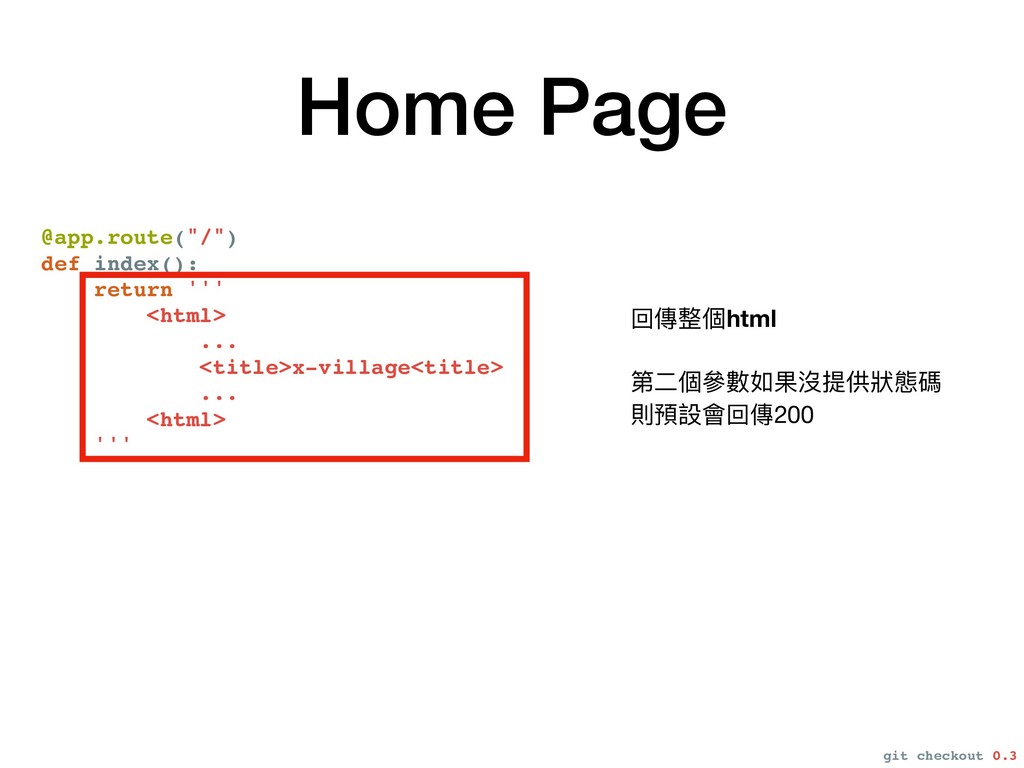
Home Page @app.route("/") def index(): return ''' <html> ... <title>x-village<title>
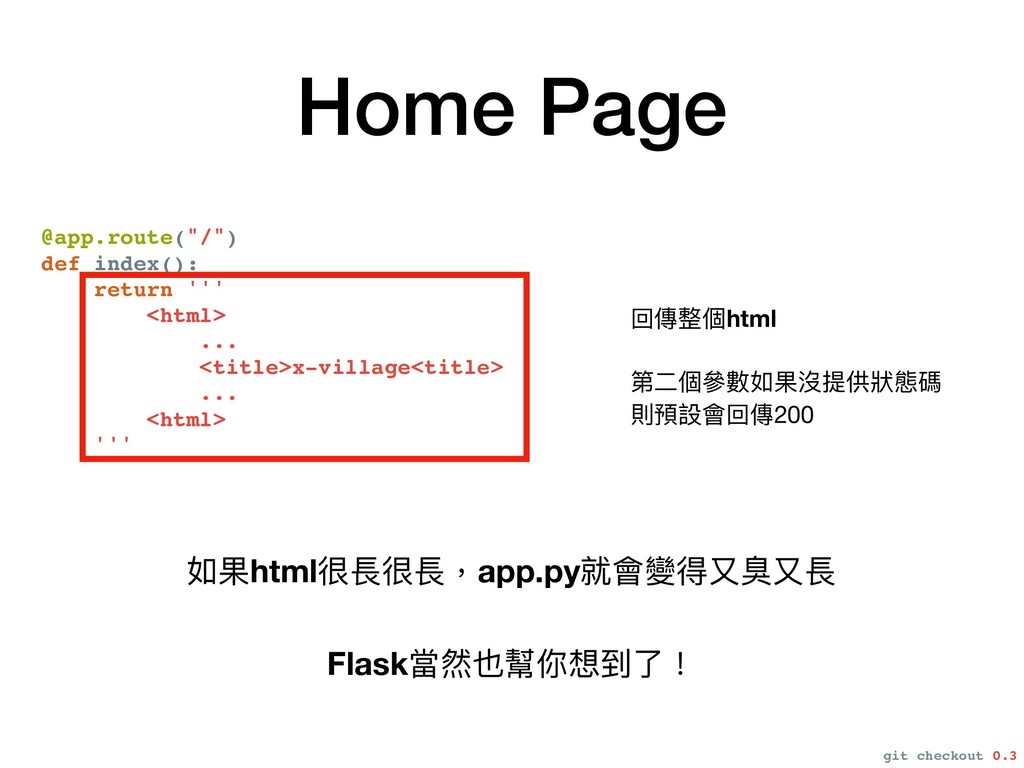
... <html> ''' 回傳整個html 第⼆二個參參數如果沒提供狀狀態碼 則預設會回傳200 git checkout 0.3
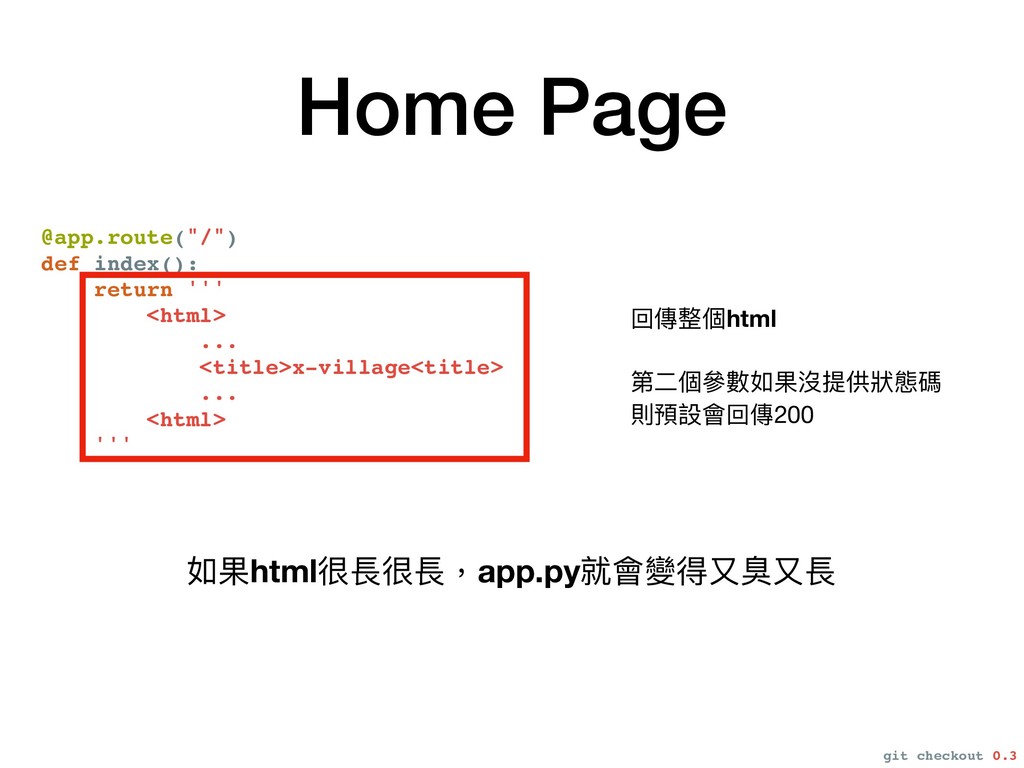
Home Page @app.route("/") def index(): return ''' <html> ... <title>x-village<title>
... <html> ''' 回傳整個html 第⼆二個參參數如果沒提供狀狀態碼 則預設會回傳200 如果html很長很長,app.py就會變得⼜又臭⼜又長 git checkout 0.3
Home Page @app.route("/") def index(): return ''' <html> ... <title>x-village<title>
... <html> ''' 回傳整個html 第⼆二個參參數如果沒提供狀狀態碼 則預設會回傳200 如果html很長很長,app.py就會變得⼜又臭⼜又長 Flask當然也幫你想到了了! git checkout 0.3
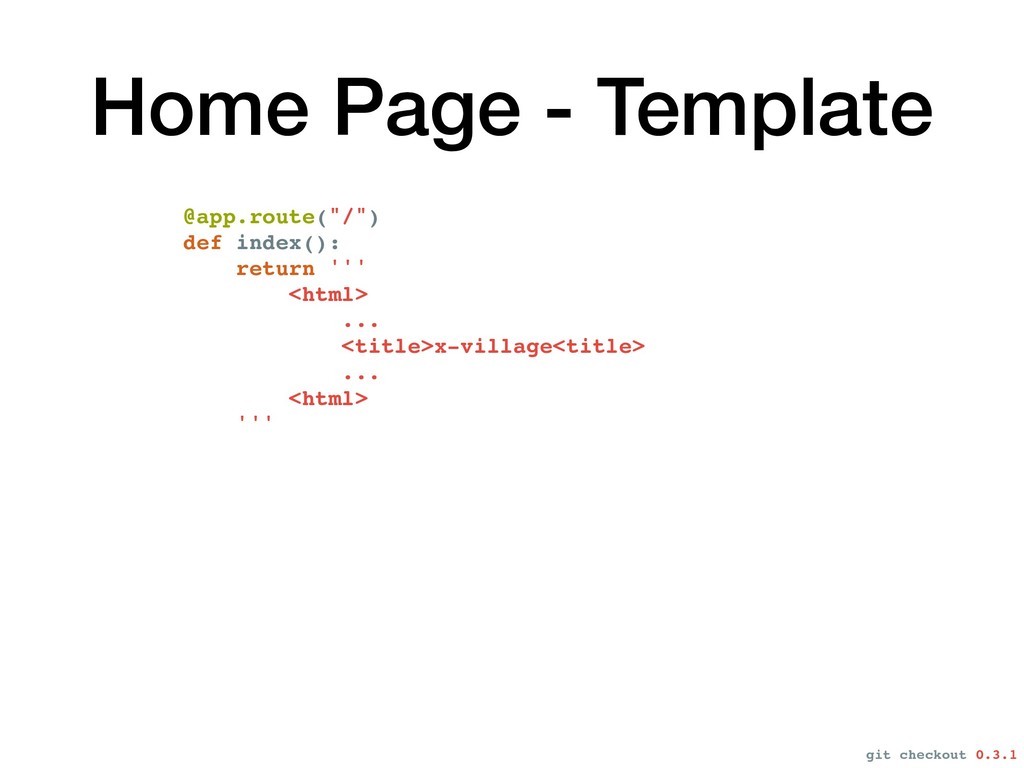
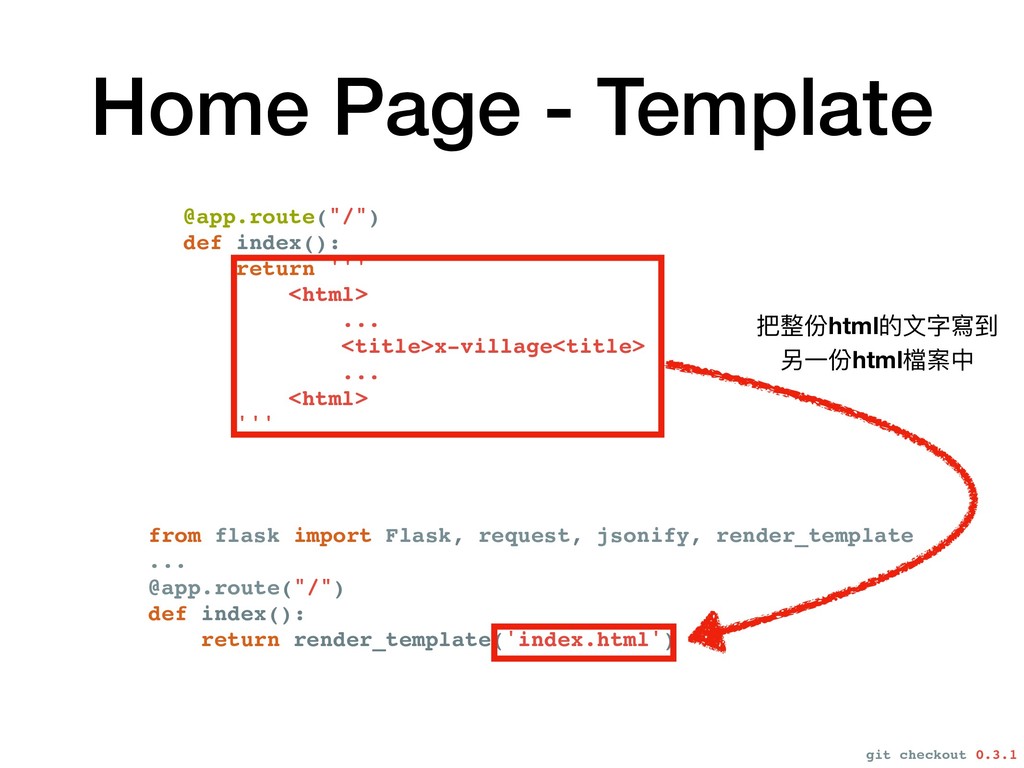
Home Page - Template @app.route("/") def index(): return ''' <html>
... <title>x-village<title> ... <html> ''' git checkout 0.3.1
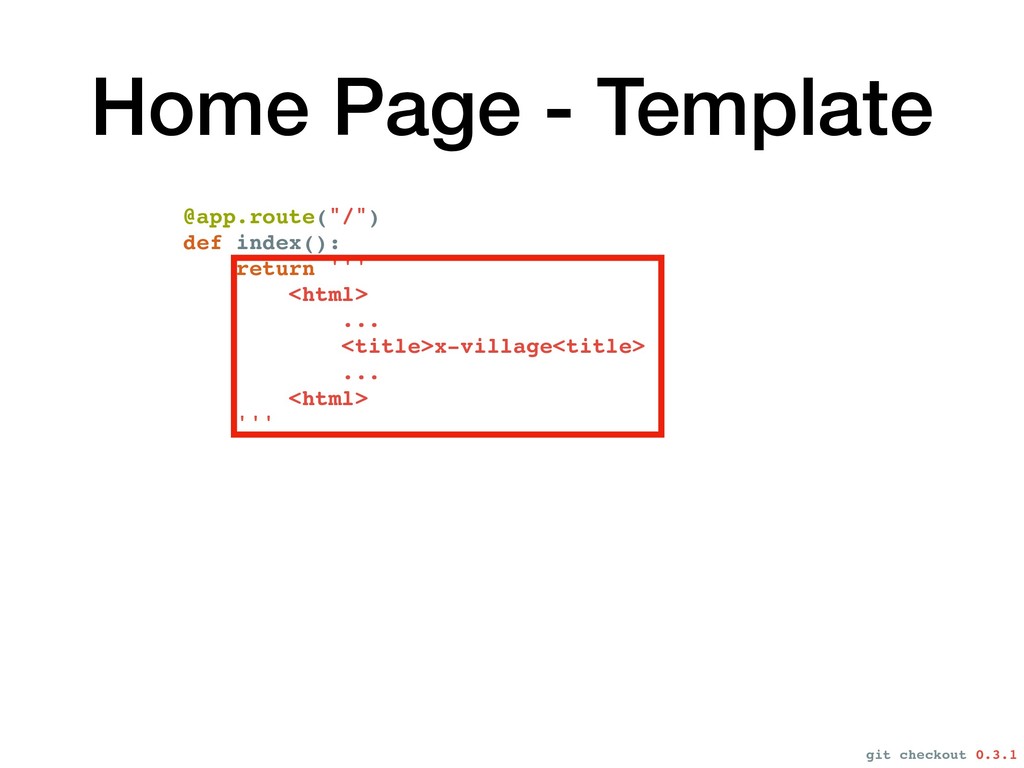
Home Page - Template @app.route("/") def index(): return ''' <html>
... <title>x-village<title> ... <html> ''' git checkout 0.3.1
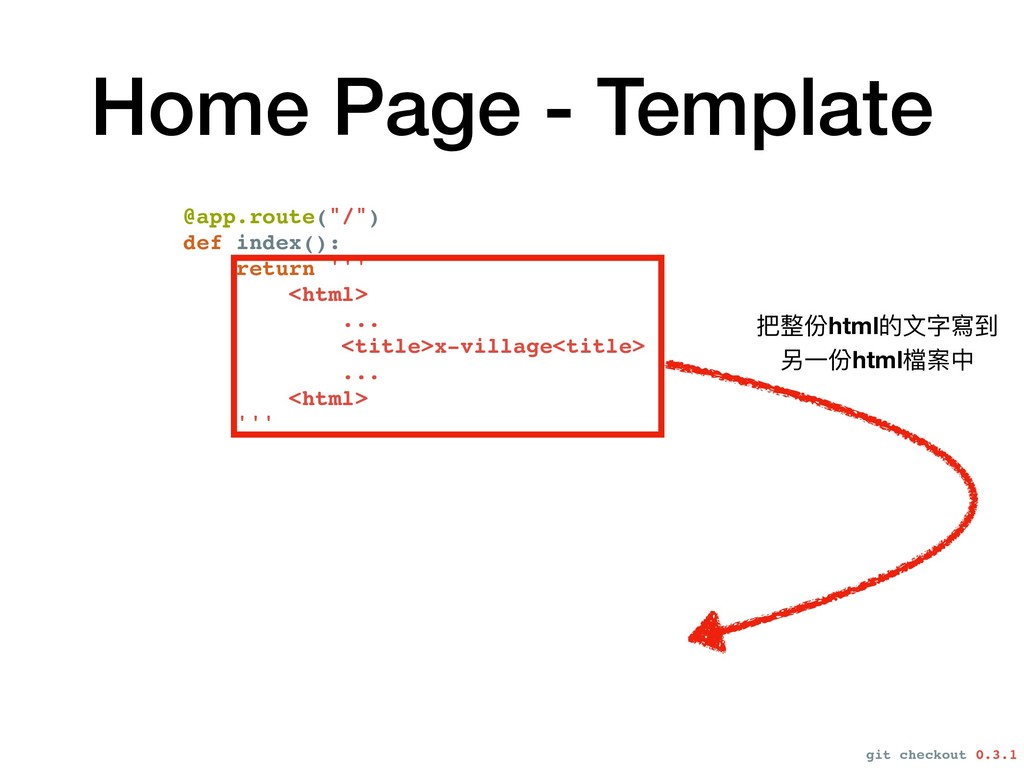
Home Page - Template @app.route("/") def index(): return ''' <html>
... <title>x-village<title> ... <html> ''' 把整份html的⽂文字寫到 另⼀一份html檔案中 git checkout 0.3.1
Home Page - Template from flask import Flask, request, jsonify,
render_template ... @app.route("/") def index(): return render_template('index.html') @app.route("/") def index(): return ''' <html> ... <title>x-village<title> ... <html> ''' 把整份html的⽂文字寫到 另⼀一份html檔案中 git checkout 0.3.1
#"" README.md #"" app.py #"" index.html !"" requirements.txt 為什什麼flask找不到我的index.html
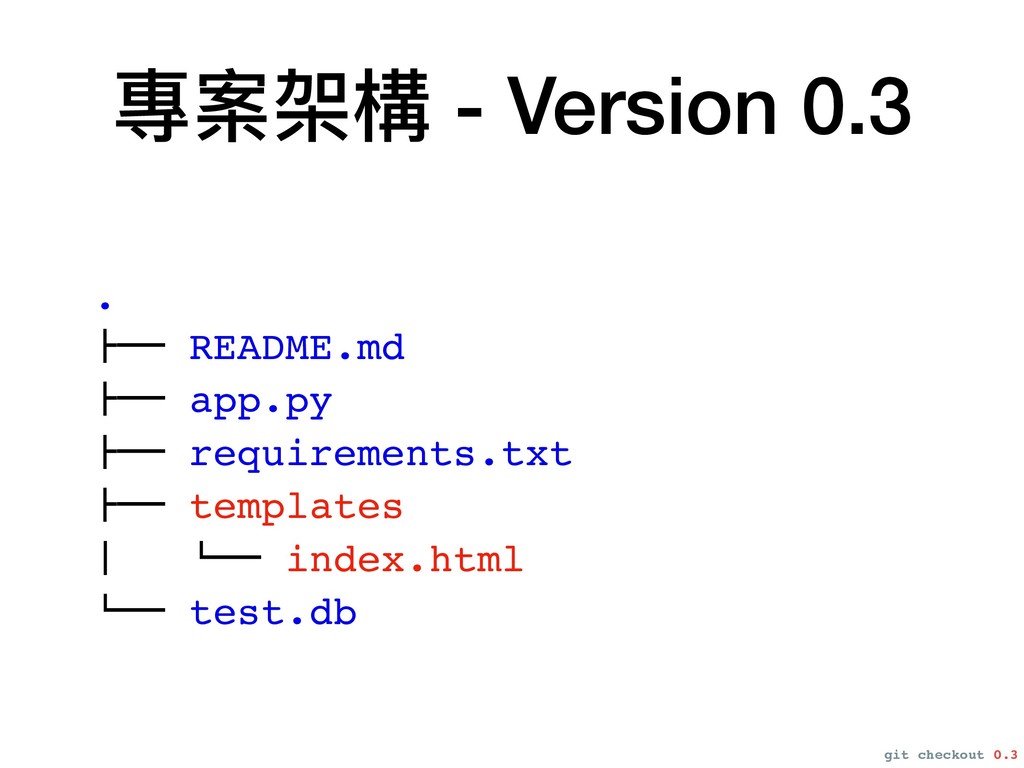
. #"" README.md #"" app.py #"" requirements.txt #"" templates $
!"" index.html !"" test.db 專案架構 - Version 0.3 git checkout 0.3
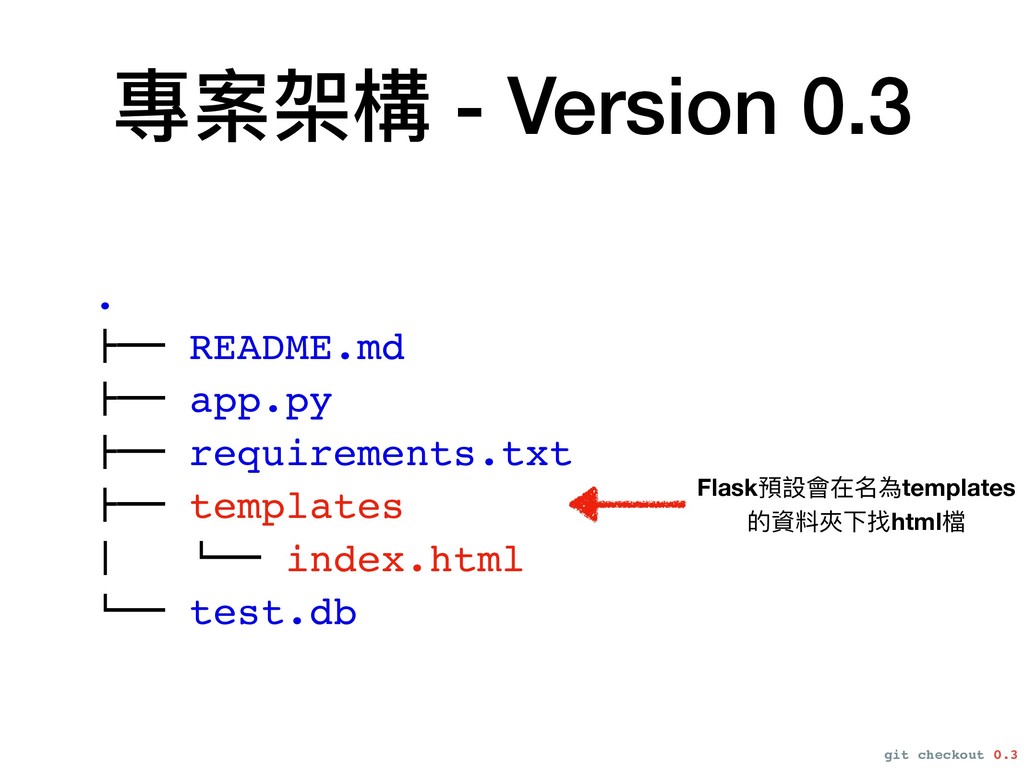
. #"" README.md #"" app.py #"" requirements.txt #"" templates $
!"" index.html !"" test.db 專案架構 - Version 0.3 git checkout 0.3 Flask預設會在名為templates 的資料夾下找html檔
Designed by Po-Chun Lu Download Here https://raw.githubusercontent.com/x-village/web-acccounting-example/0.3/templates/index.html 因為這堂課教的是後端,前端的程式碼就先給你了了
如果只是回傳整份html 好像看不太出有後端的好處
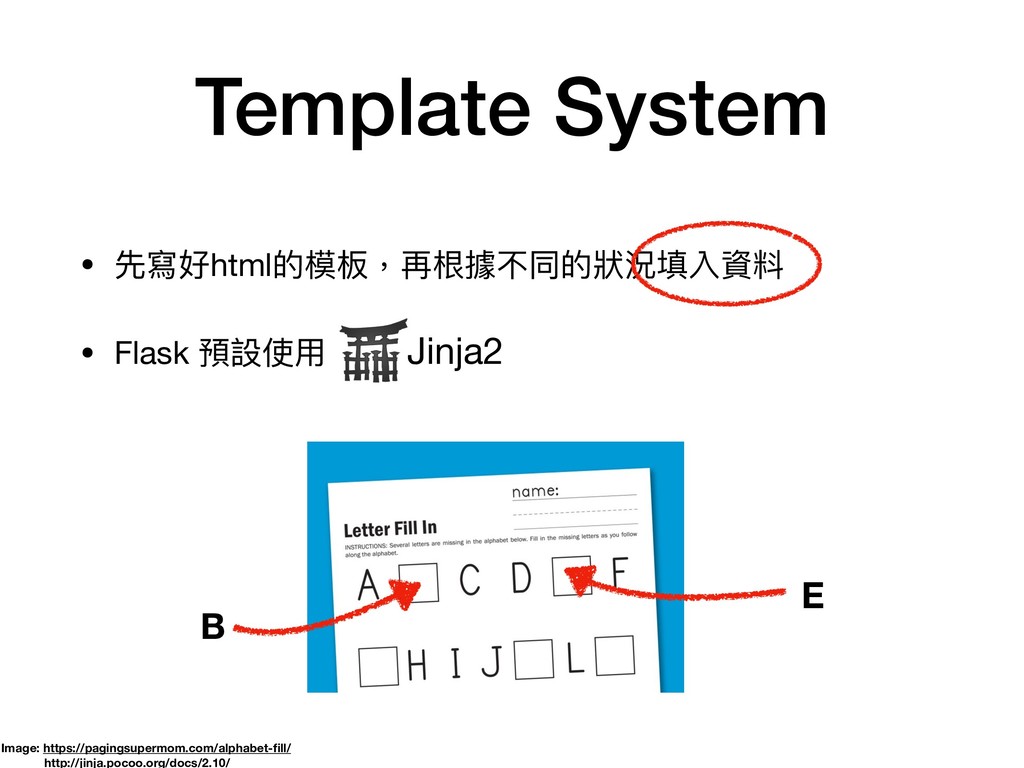
Template System • 先寫好html的模板,再根據不同的狀狀況填入資料 • Flask 預設使⽤用 Jinja2 Image: https://pagingsupermom.com/alphabet-fill/
http://jinja.pocoo.org/docs/2.10/
Template System • 先寫好html的模板,再根據不同的狀狀況填入資料 • Flask 預設使⽤用 Jinja2 Image: https://pagingsupermom.com/alphabet-fill/
http://jinja.pocoo.org/docs/2.10/
Template System • 先寫好html的模板,再根據不同的狀狀況填入資料 • Flask 預設使⽤用 Jinja2 Image: https://pagingsupermom.com/alphabet-fill/
http://jinja.pocoo.org/docs/2.10/ B
Template System • 先寫好html的模板,再根據不同的狀狀況填入資料 • Flask 預設使⽤用 Jinja2 Image: https://pagingsupermom.com/alphabet-fill/
http://jinja.pocoo.org/docs/2.10/ B E
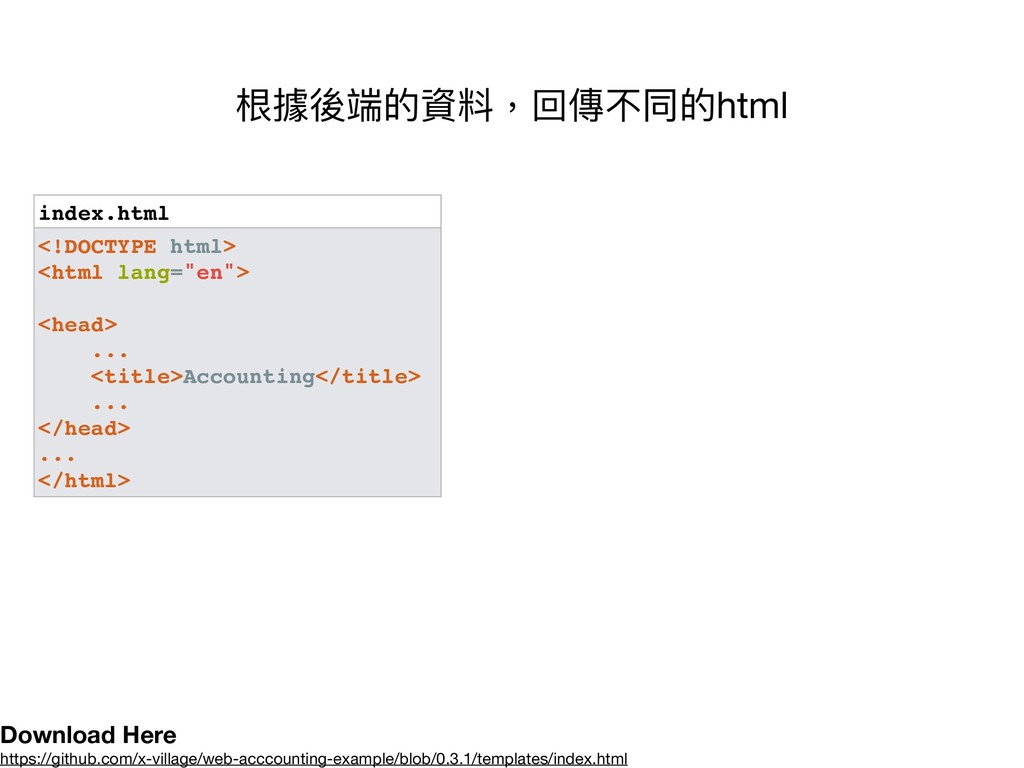
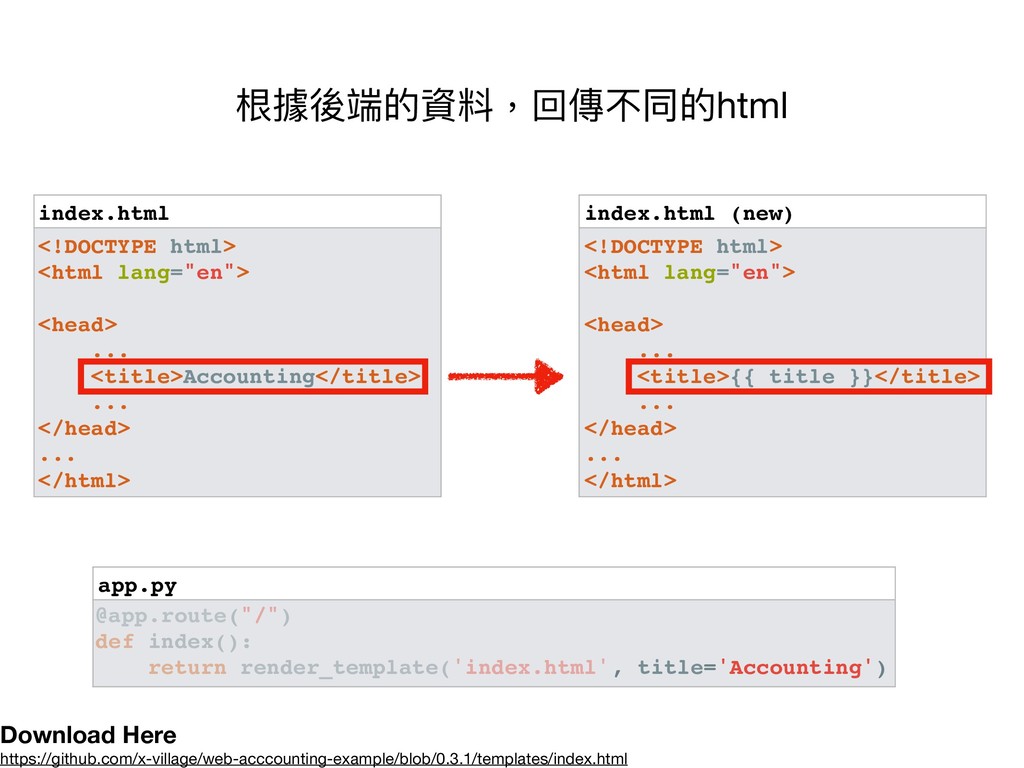
index.html <!DOCTYPE html> <html lang="en"> <head> ... <title>Accounting</title> ... </head>
... </html> 根據後端的資料,回傳不同的html Download Here https://github.com/x-village/web-acccounting-example/blob/0.3.1/templates/index.html
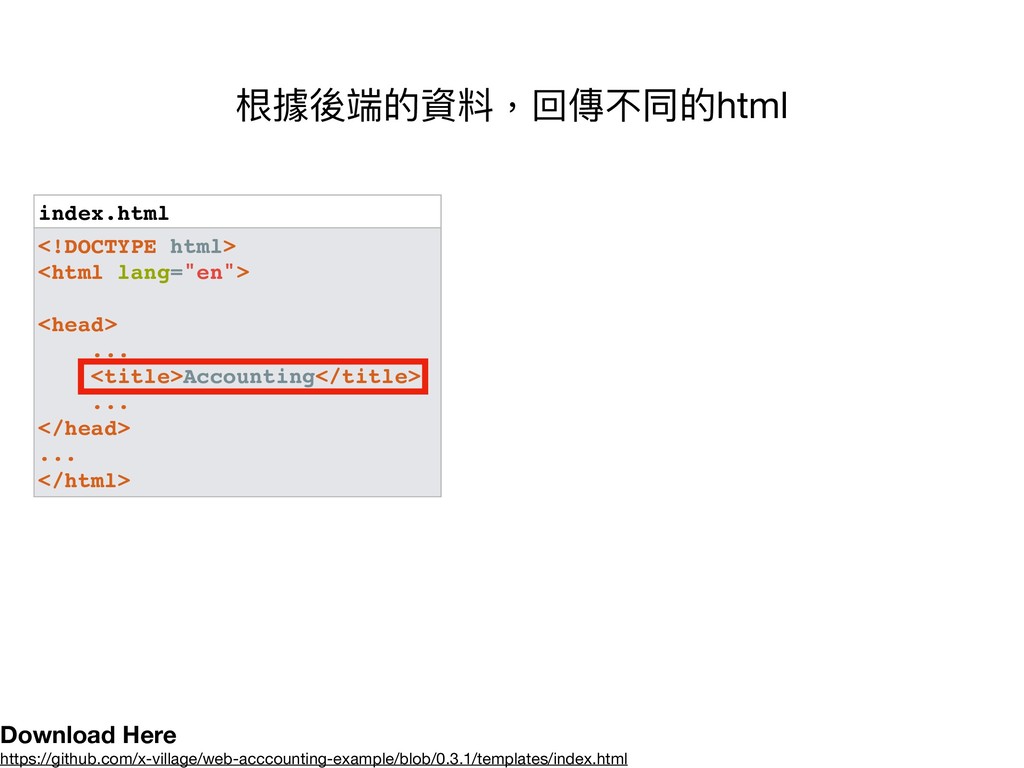
index.html <!DOCTYPE html> <html lang="en"> <head> ... <title>Accounting</title> ... </head>
... </html> 根據後端的資料,回傳不同的html Download Here https://github.com/x-village/web-acccounting-example/blob/0.3.1/templates/index.html
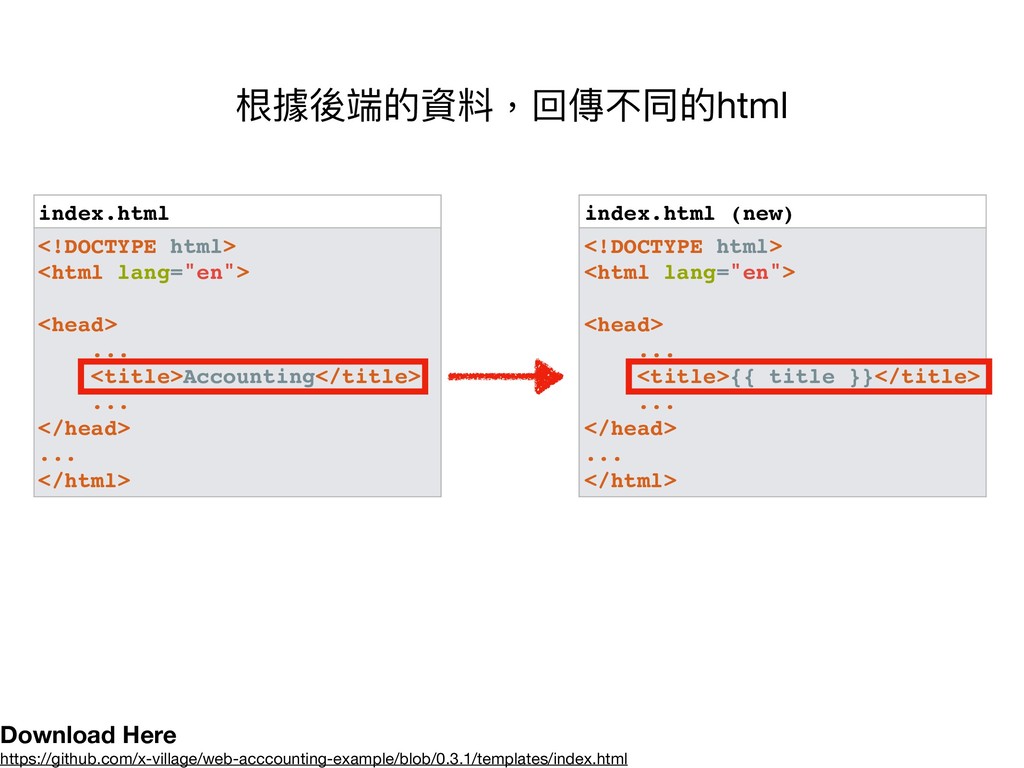
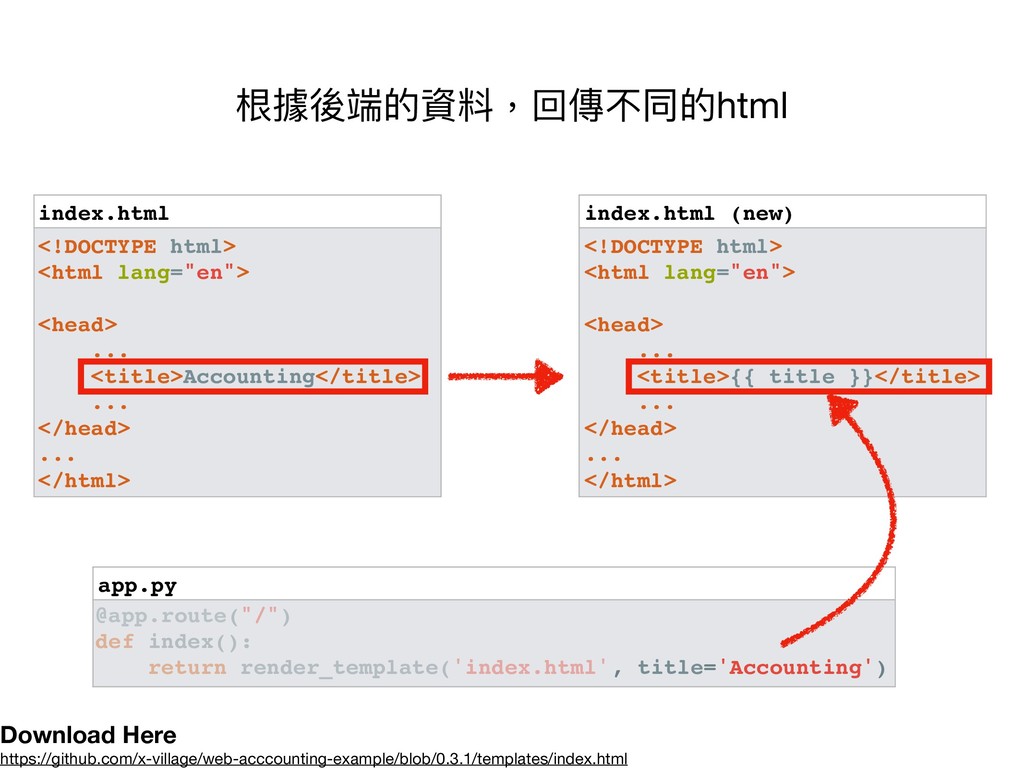
index.html (new) <!DOCTYPE html> <html lang="en"> <head> ... <title>{{ title
}}</title> ... </head> ... </html> index.html <!DOCTYPE html> <html lang="en"> <head> ... <title>Accounting</title> ... </head> ... </html> 根據後端的資料,回傳不同的html Download Here https://github.com/x-village/web-acccounting-example/blob/0.3.1/templates/index.html
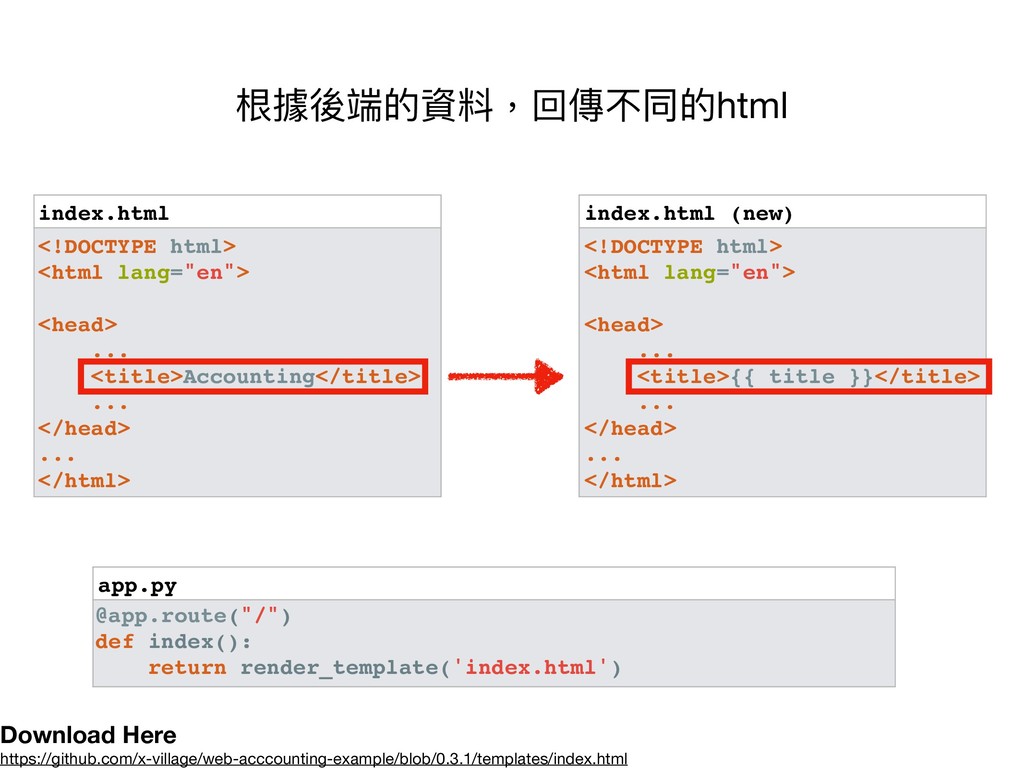
app.py index.html (new) <!DOCTYPE html> <html lang="en"> <head> ... <title>{{
title }}</title> ... </head> ... </html> index.html <!DOCTYPE html> <html lang="en"> <head> ... <title>Accounting</title> ... </head> ... </html> @app.route("/") def index(): return render_template('index.html') 根據後端的資料,回傳不同的html Download Here https://github.com/x-village/web-acccounting-example/blob/0.3.1/templates/index.html
app.py index.html (new) <!DOCTYPE html> <html lang="en"> <head> ... <title>{{
title }}</title> ... </head> ... </html> index.html <!DOCTYPE html> <html lang="en"> <head> ... <title>Accounting</title> ... </head> ... </html> , title='Accounting') @app.route("/") def index(): return render_template('index.html' 根據後端的資料,回傳不同的html Download Here https://github.com/x-village/web-acccounting-example/blob/0.3.1/templates/index.html
@app.route("/record", methods=['POST']) def add_record(): ... @app.route("/record", methods=['GET']) def get_records(): ...
@app.route('/record/<int:record_id>', methods=['GET']) def get_record(record_id): ... @app.route('/record/<int:record_id>', methods=['PUT']) def update_record(record_id): ... @app.route("/record/<int:record_id>", methods=["DELETE"]) def delete_record(record_id): ... 還記得我們先寫好的record API們嗎
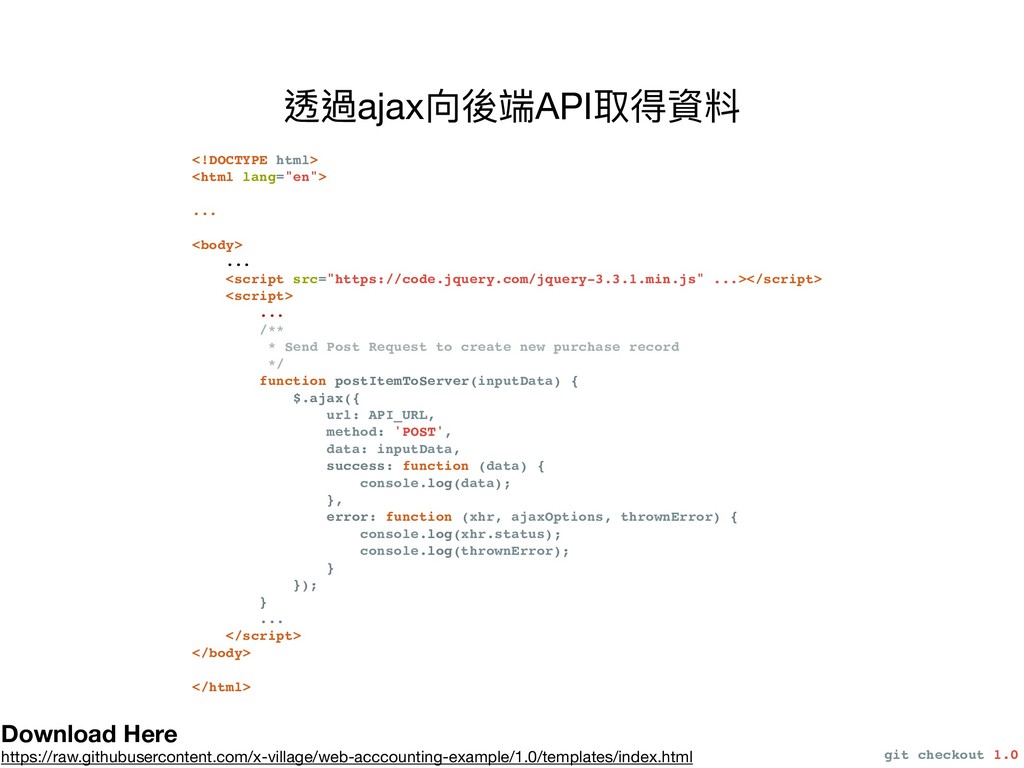
<!DOCTYPE html> <html lang="en"> ... <body> ... <script src="https://code.jquery.com/jquery-3.3.1.min.js" ...></script>
<script> ... /** * Send Post Request to create new purchase record */ function postItemToServer(inputData) { $.ajax({ url: API_URL, method: 'POST', data: inputData, success: function (data) { console.log(data); }, error: function (xhr, ajaxOptions, thrownError) { console.log(xhr.status); console.log(thrownError); } }); } ... </script> </body> </html> 透過ajax向後端API取得資料 git checkout 1.0 Download Here https://raw.githubusercontent.com/x-village/web-acccounting-example/1.0/templates/index.html
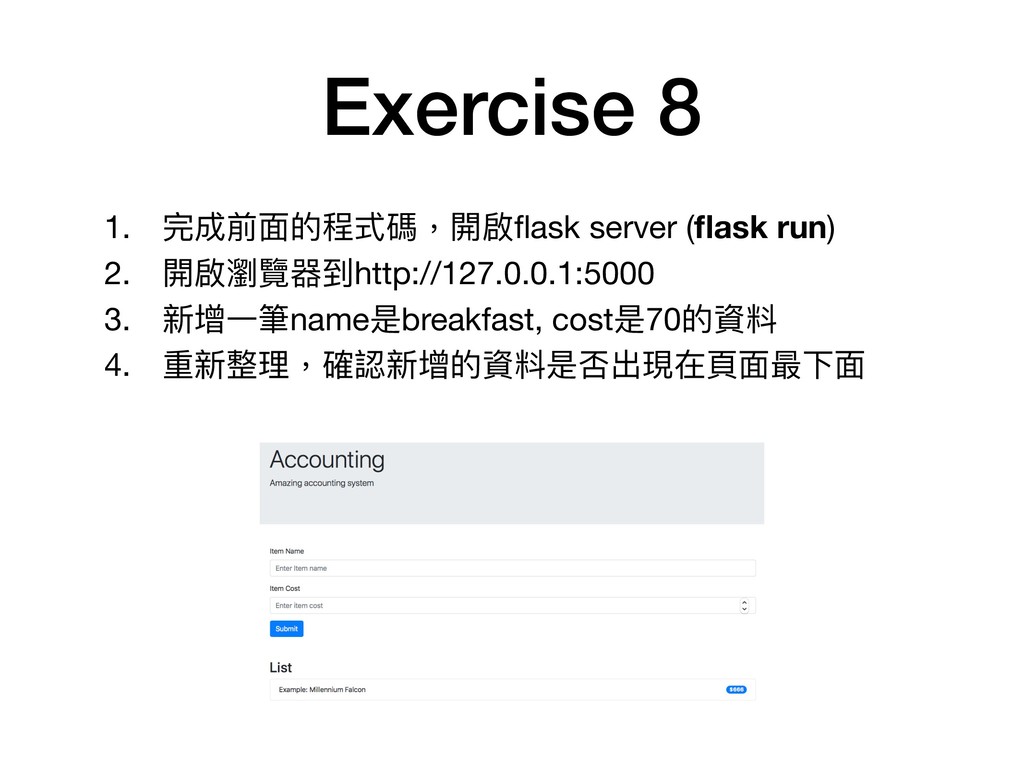
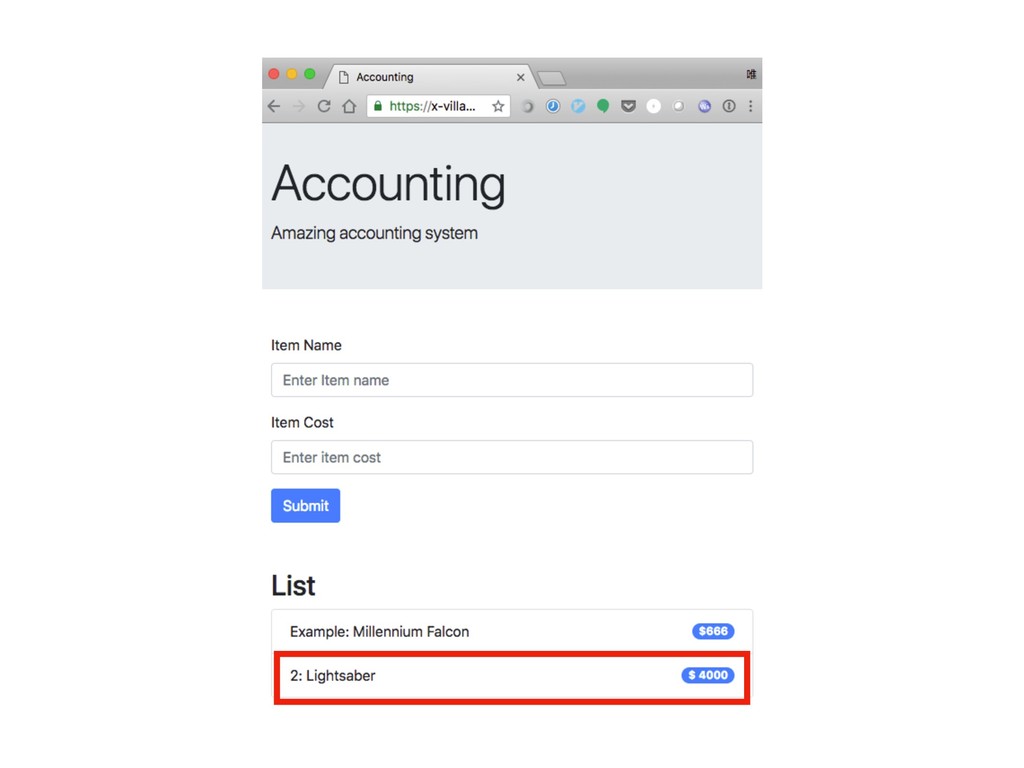
Exercise 8 1. 完成前⾯面的程式碼,開啟flask server (flask run) 2. 開啟瀏覽器到http://127.0.0.1:5000 3.
新增⼀一筆name是breakfast, cost是70的資料 4. 重新整理理,確認新增的資料是否出現在⾴頁⾯面最下⾯面
到這裡 ⼀一個基本的網站就完成了了
Image: https://www.flickr.com/photos/mathoov/4681491052
Image: https://www.flickr.com/photos/mathoov/4681491052
Image: https://www.flickr.com/photos/mathoov/4681491052 Actually, there are two more things
接下來來的內容比較進階 不會深入,只會帶⼀一點基本的概念念
git checkout X.X.X 如果你眼睛比較尖 你也許會發現有些⾴頁⾯面右下⾓角有這個
git checkout X.X.X 如果你眼睛比較尖 你也許會發現有些⾴頁⾯面右下⾓角有這個
git checkout X.X.X 如果你眼睛比較尖 你也許會發現有些⾴頁⾯面右下⾓角有這個 在我的範例例程式碼 透過這個git指令 就能切換到當下內容的程式碼
前⾯面其實還有⼀一個Bug Image: https://www.epicgames.com/unrealtournament/forums/unreal-tournament-discussion/ut-game-general- discussion/7737-what-do-we-want-bright-skins-when-do-we-want-them-in-the-next-patch/page11
前⾯面其實還有⼀一個Bug Image: https://www.epicgames.com/unrealtournament/forums/unreal-tournament-discussion/ut-game-general- discussion/7737-what-do-we-want-bright-skins-when-do-we-want-them-in-the-next-patch/page11
@app.route("/record", methods=['POST']) def add_record(): req_data = request.form name = req_data['name']
cost = req_data['cost'] record = Record(name='breakfast', cost=70) db.session.add(record) db.session.commit() return 'Create Succeeded', 200
@app.route("/record", methods=['POST']) def add_record(): req_data = request.form name = req_data['name']
cost = req_data['cost'] record = Record(name='breakfast', cost=70) db.session.add(record) db.session.commit() return 'Create Succeeded', 200 Client輸入的資訊,根本沒被⽤用來來建立record!
@app.route("/record", methods=['POST']) def add_record(): req_data = request.form name = req_data['name']
cost = req_data['cost'] db.session.add(record) db.session.commit() return 'Create Succeeded', 200 record = Record(name=name, cost=cost) 其實要修改並不困難 但我們是不是有可能在專案發佈前就先發現呢? git checkout 1.0.2
測試
在正式發佈前,多⽤用Postman測試吧
現在只有4個API 如果有400個API要測試呢? Image: https://www.lianan.com.tw/drliananepaper/Article/294-2
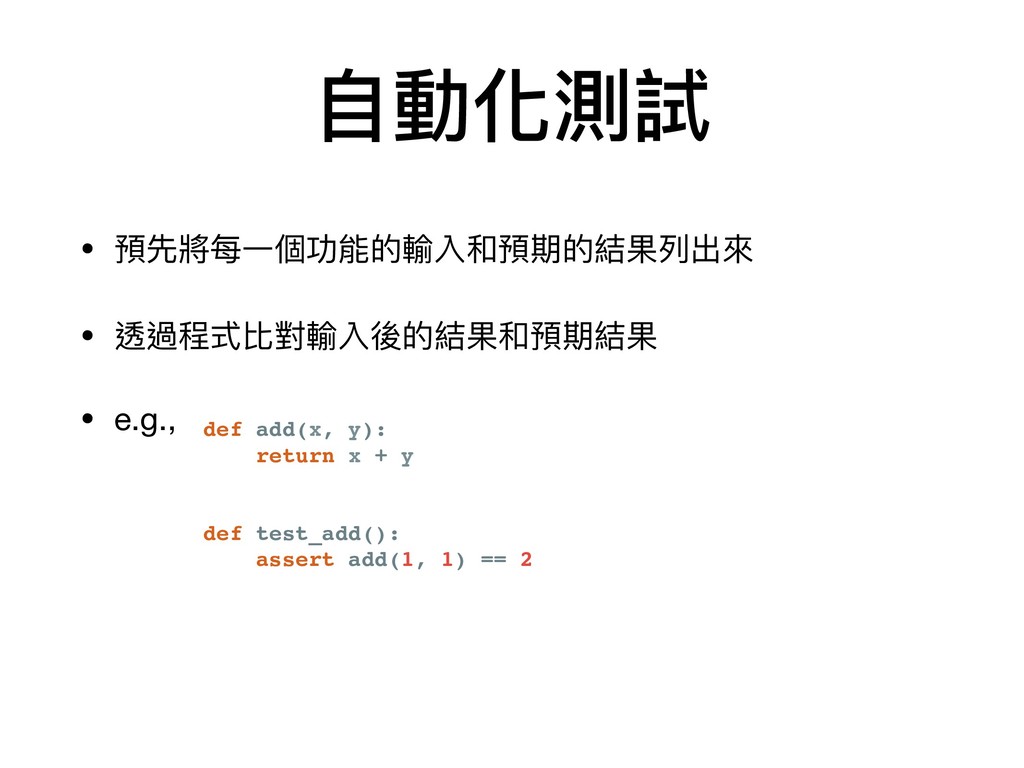
⾃自動化測試
⾃自動化測試 def add(x, y): return x + y def test_add():
assert add(1, 1) == 2 • 預先將每⼀一個功能的輸入和預期的結果列列出來來 • 透過程式比對輸入後的結果和預期結果 • e.g.,
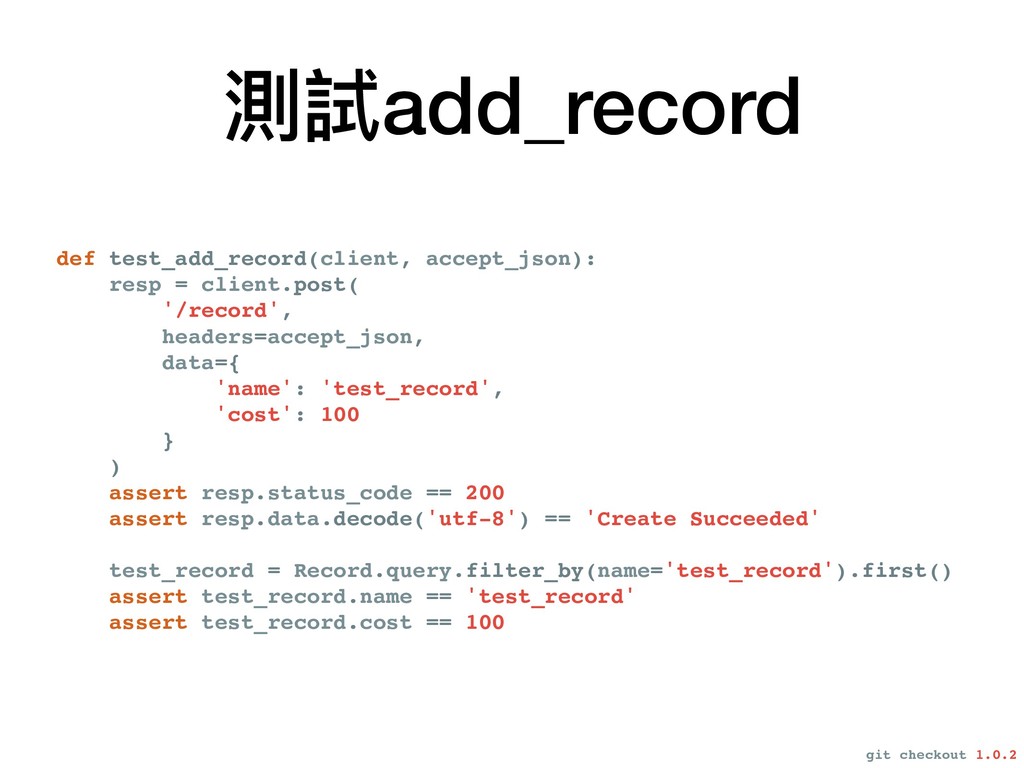
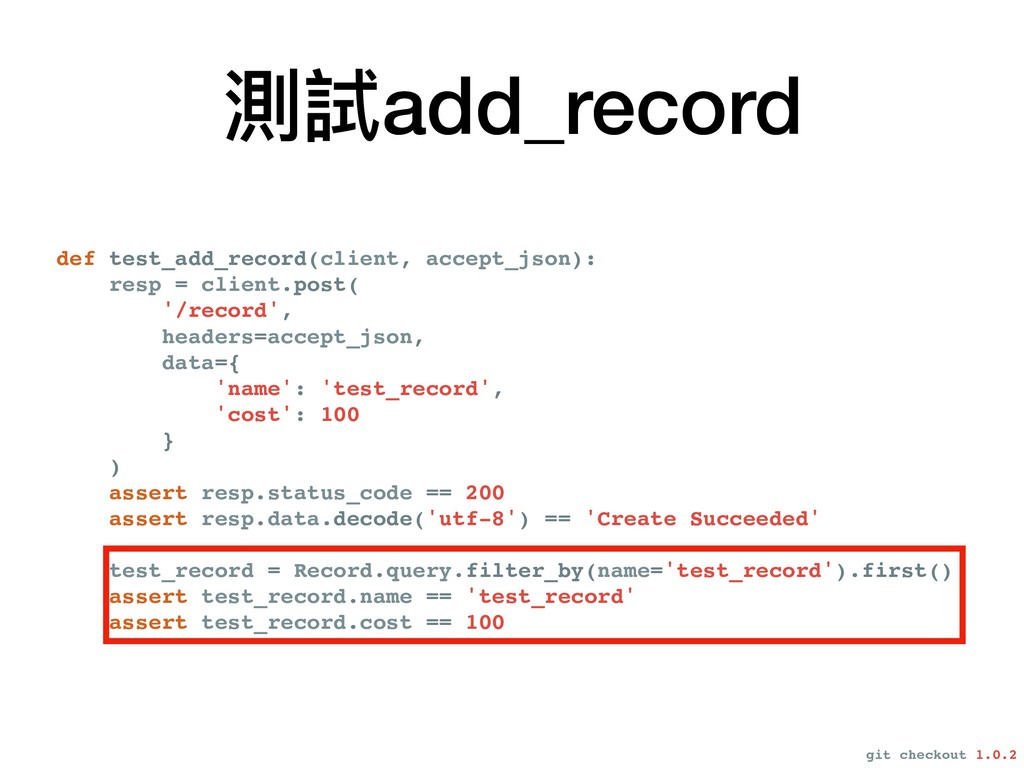
def test_add_record(client, accept_json): resp = client.post( '/record', headers=accept_json, data={ 'name':
'test_record', 'cost': 100 } ) assert resp.status_code == 200 assert resp.data.decode('utf-8') == 'Create Succeeded' test_record = Record.query.filter_by(name='test_record').first() assert test_record.name == 'test_record' assert test_record.cost == 100 測試add_record git checkout 1.0.2
在程式碼亂到無法挽回前 先重整架構吧
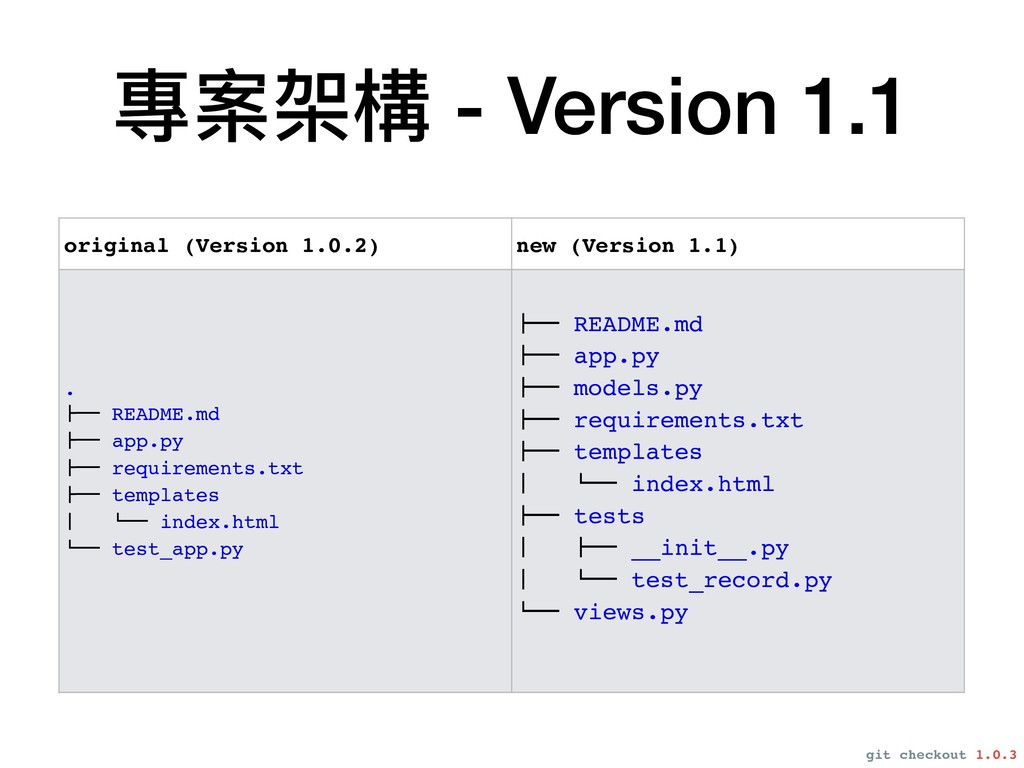
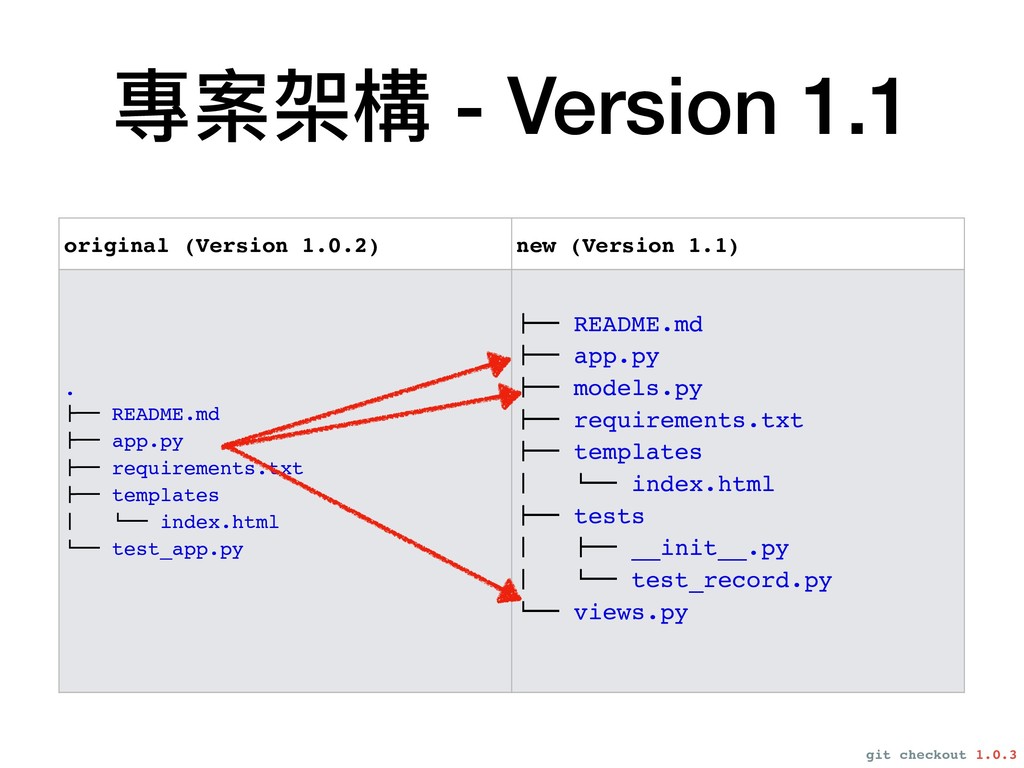
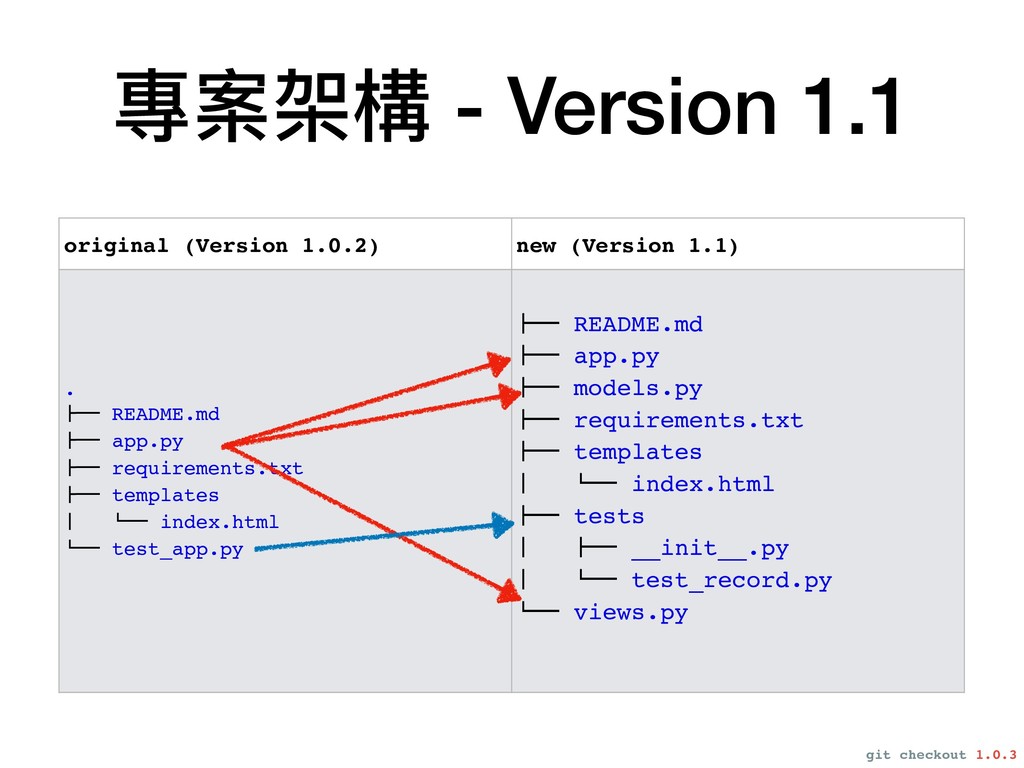
專案架構 - Version 1.1 original (Version 1.0.2) new (Version 1.1)
. #"" README.md #"" app.py #"" requirements.txt #"" templates $ !"" index.html !"" test_app.py #"" README.md #"" app.py #"" models.py #"" requirements.txt #"" templates $ !"" index.html #"" tests $ #"" __init__.py $ !"" test_record.py !"" views.py git checkout 1.0.3
Appendix
Deployment (部署)
接著把我們的網站公開給⼤大家吧 flask run --host=0.0.0.0
接著把我們的網站公開給⼤大家吧 flask run --host=0.0.0.0 設定成0.0.0.0,外⾯面的⼈人就能訪問到你的網站了了
可是這樣...我的電腦就要⼀一直開著了了
丟到雲端上吧
常⾒見見的平台
常⾒見見的平台
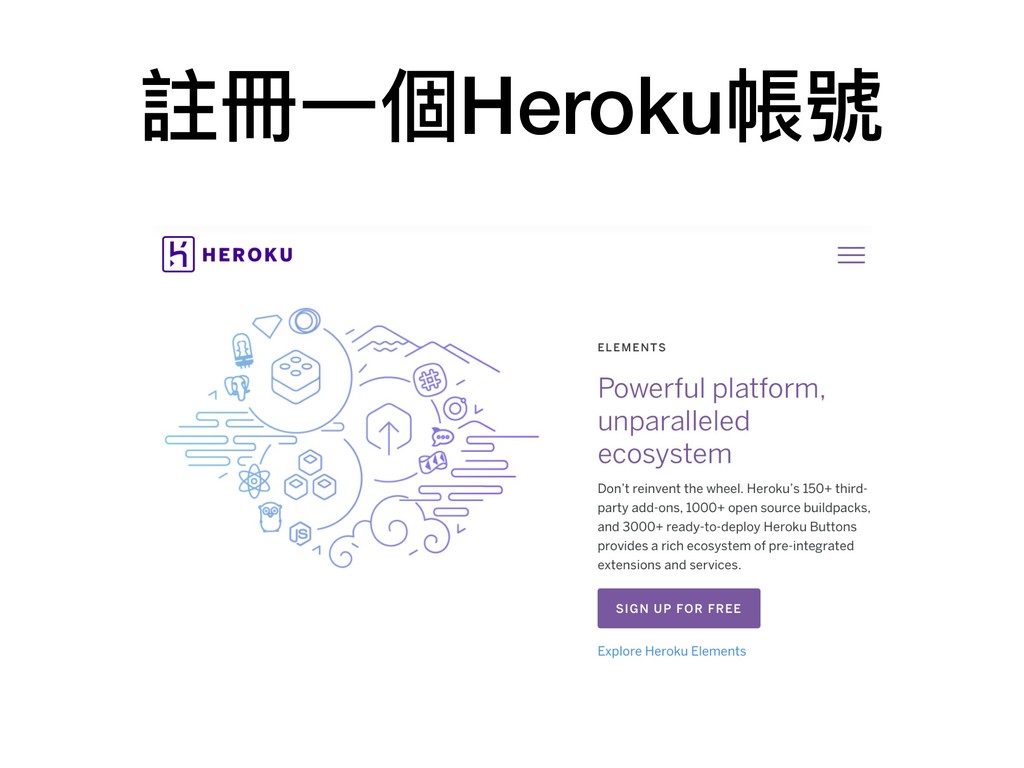
接下來來會⽤用Heroku作為範例例
註冊⼀一個Heroku帳號
註冊⼀一個Heroku帳號
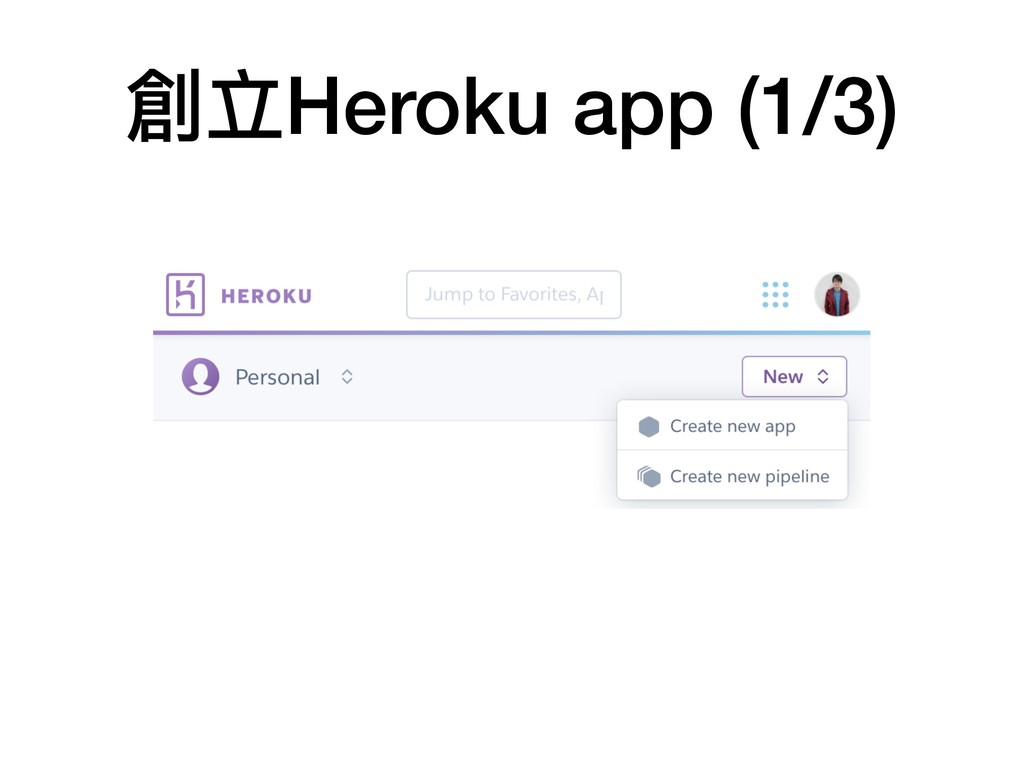
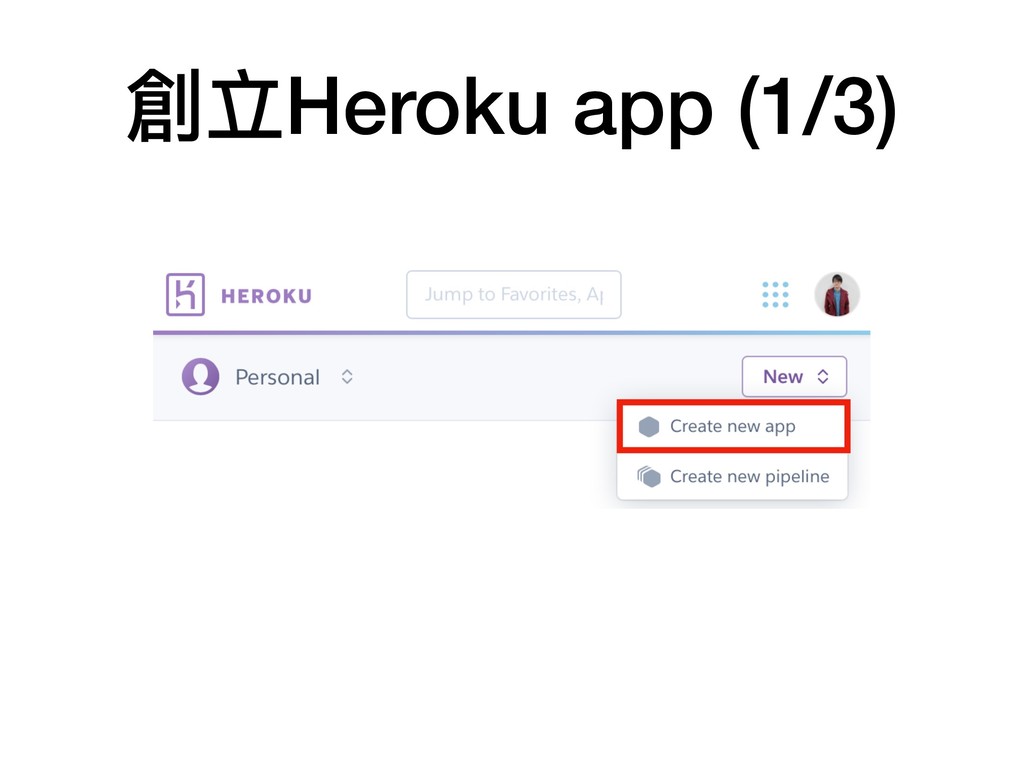
創立Heroku app (1/3)
創立Heroku app (1/3)
創立Heroku app (2/3)
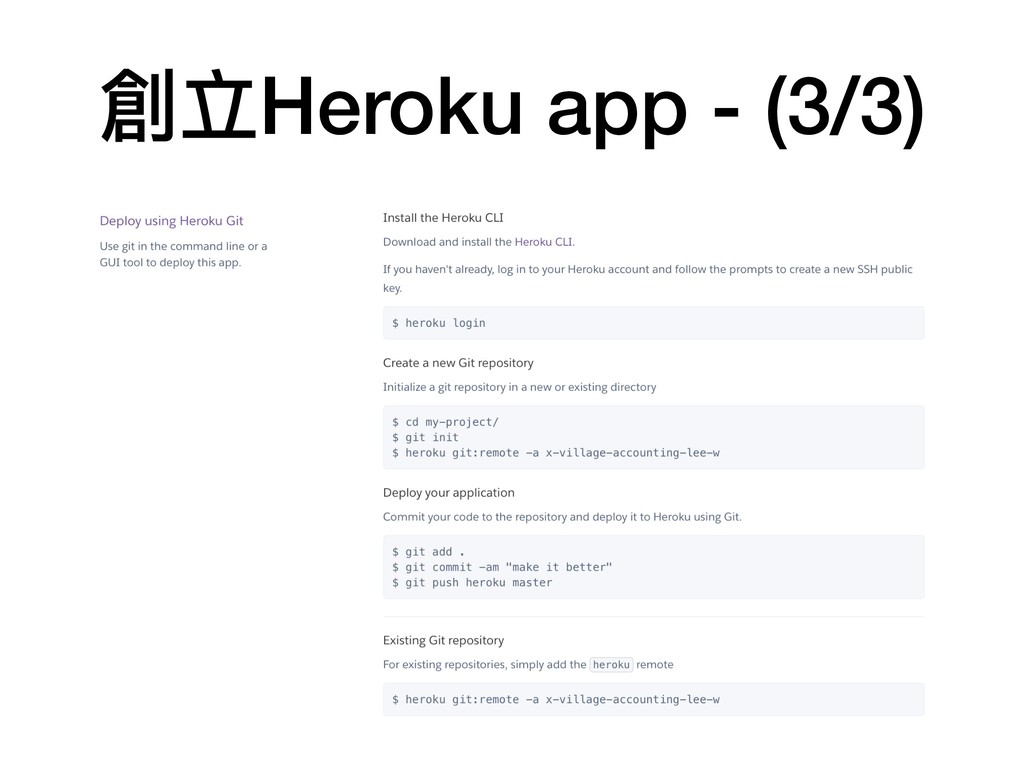
創立Heroku app - (3/3)
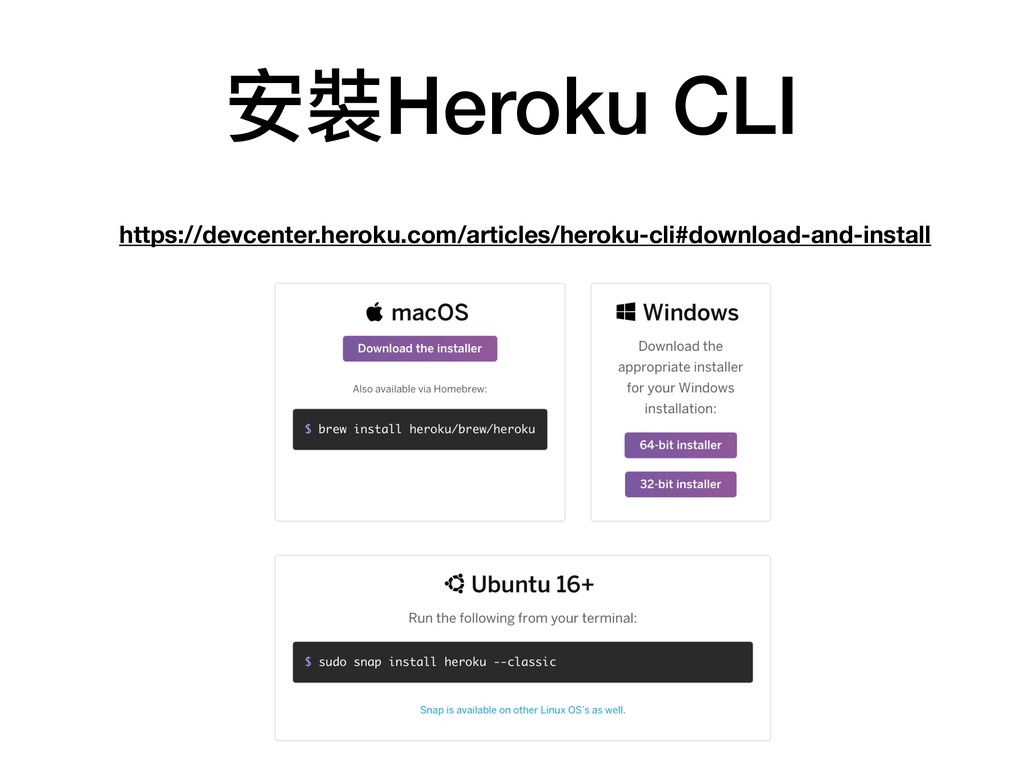
https://devcenter.heroku.com/articles/heroku-cli#download-and-install 安裝Heroku CLI
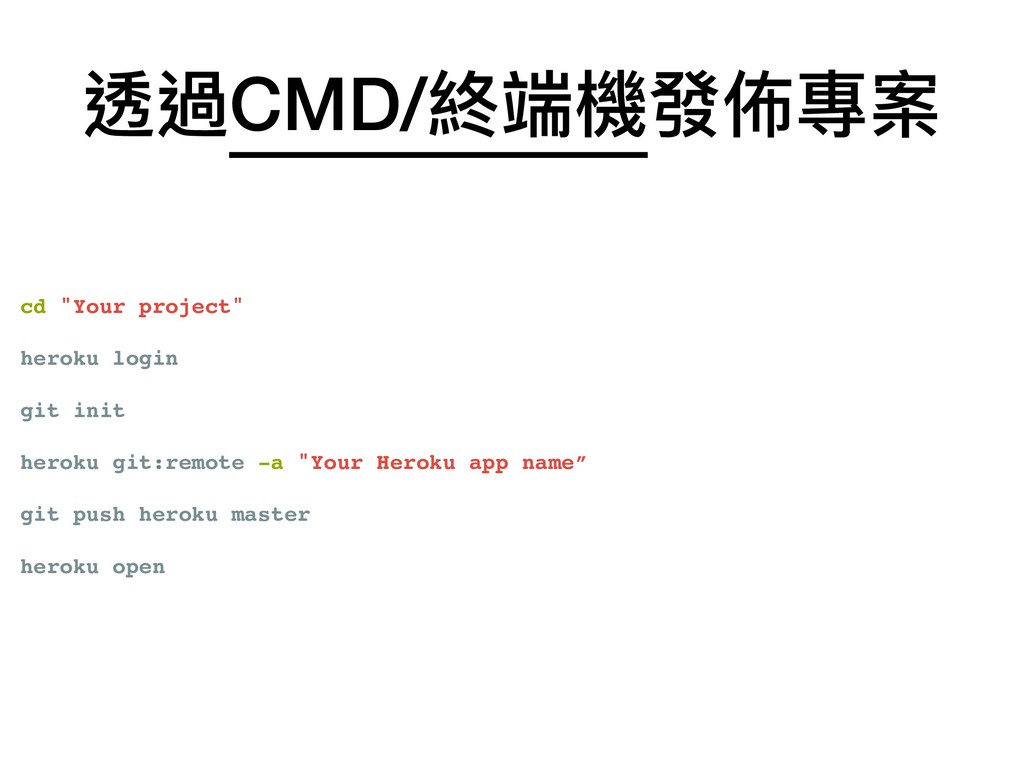
cd "Your project" heroku login git init heroku git:remote -a
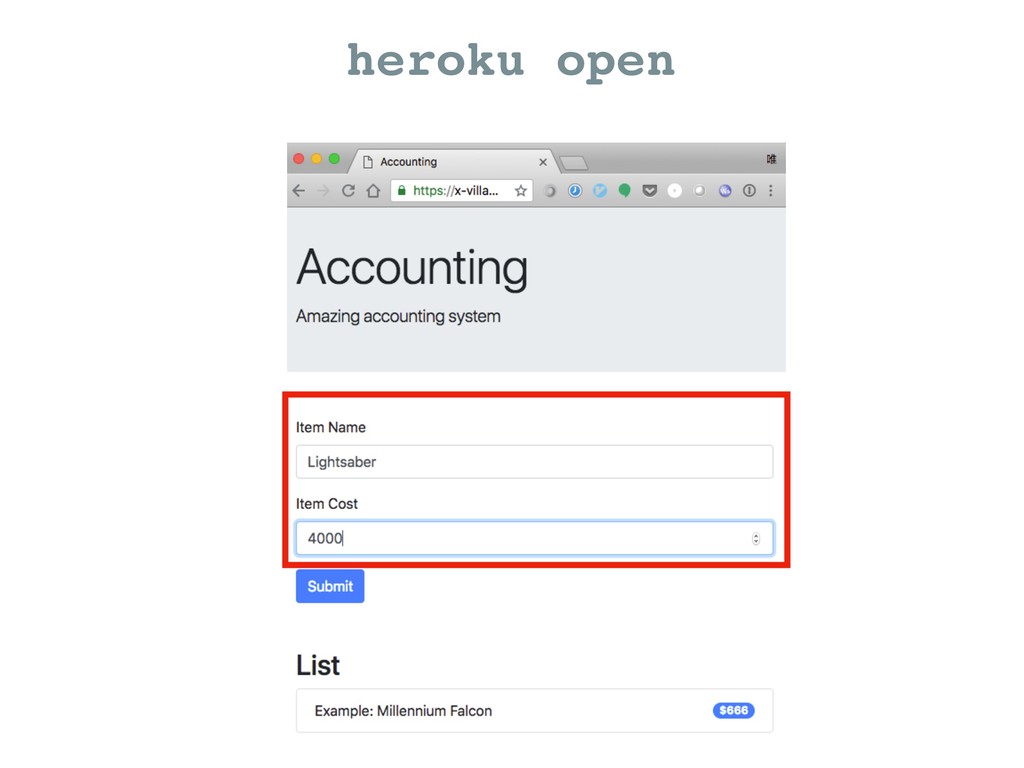
"Your Heroku app name” git push heroku master heroku open 透過CMD/終端機發佈專案
cd "Your project" heroku login git init heroku git:remote -a
"Your Heroku app name” git push heroku master heroku open 透過CMD/終端機發佈專案 登入Heroku
cd "Your project" heroku login git init heroku git:remote -a
"Your Heroku app name” git push heroku master heroku open 透過CMD/終端機發佈專案 如果專案本⾝身就被git追蹤,可以跳過這步
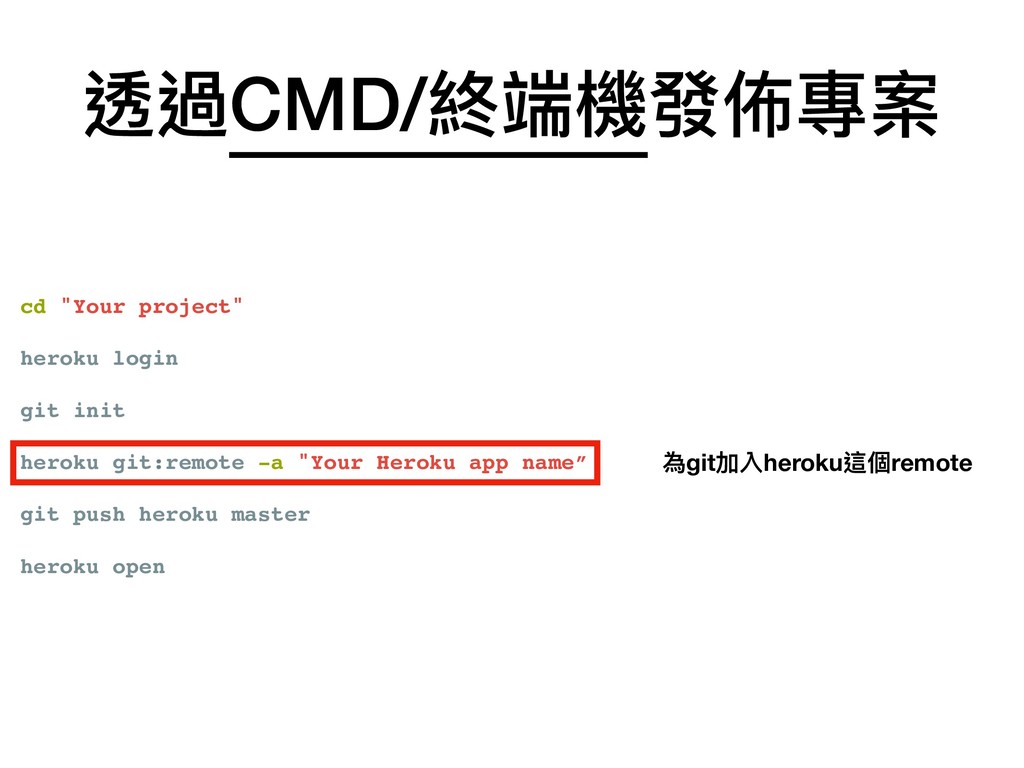
cd "Your project" heroku login git init heroku git:remote -a
"Your Heroku app name” git push heroku master heroku open 透過CMD/終端機發佈專案 為git加入heroku這個remote
cd "Your project" heroku login git init heroku git:remote -a
"Your Heroku app name” git push heroku master heroku open 透過CMD/終端機發佈專案 發佈到Heroku上
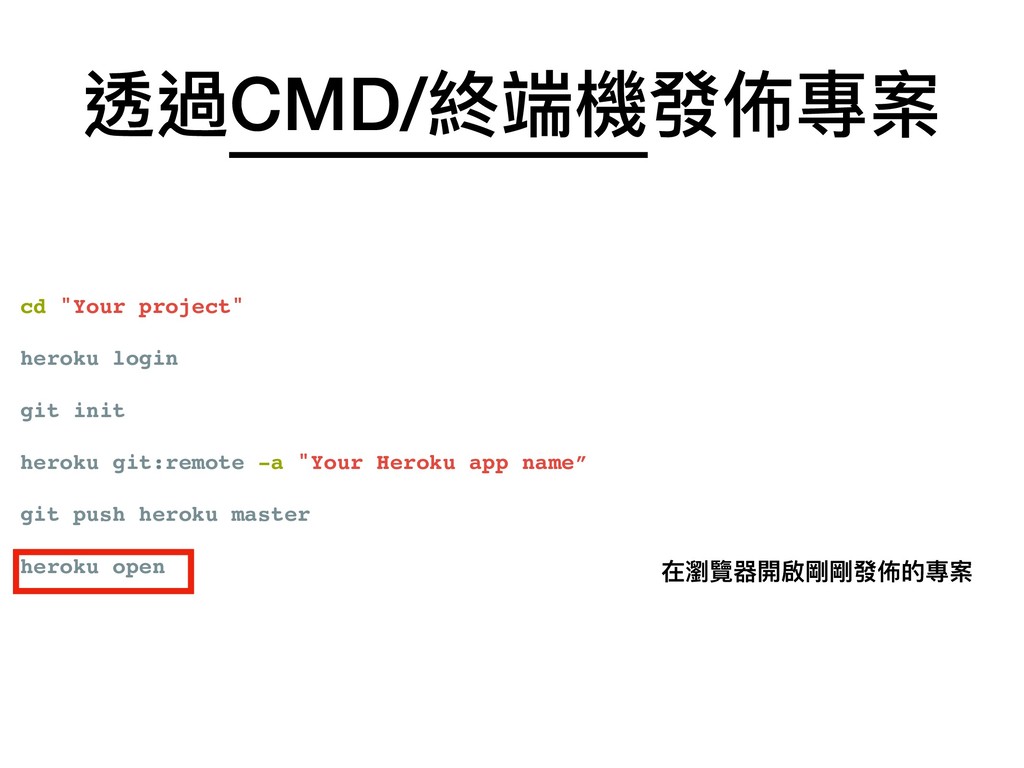
cd "Your project" heroku login git init heroku git:remote -a
"Your Heroku app name” git push heroku master heroku open 透過CMD/終端機發佈專案 在瀏覽器開啟剛剛發佈的專案
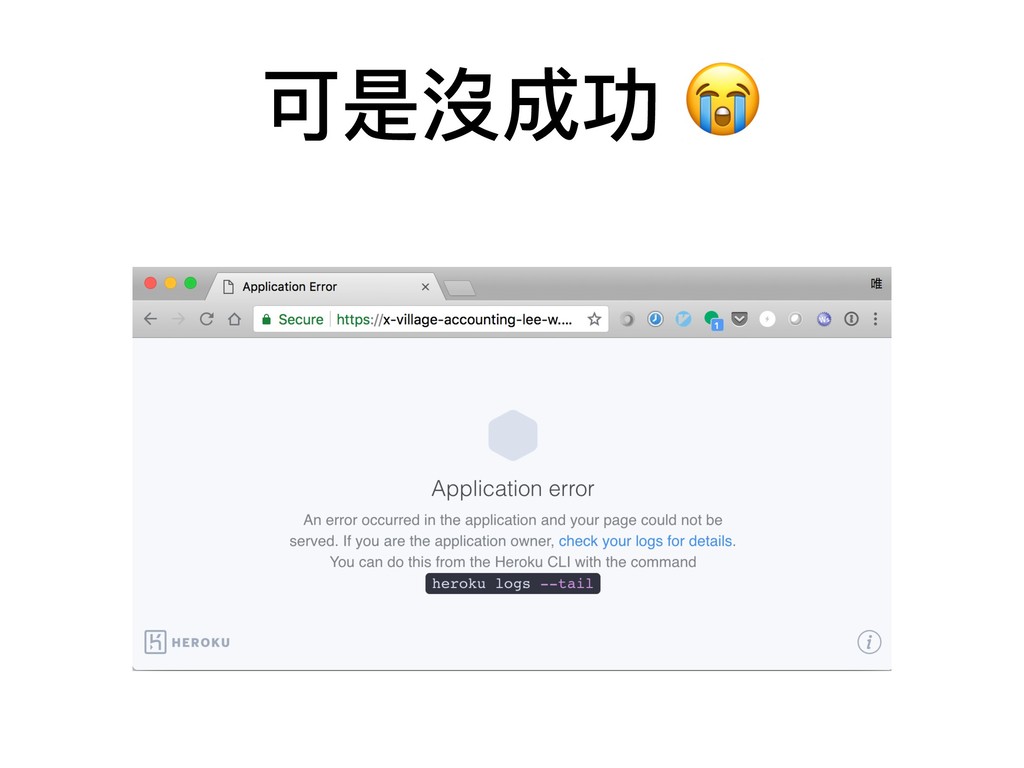
可是沒成功
可是沒成功
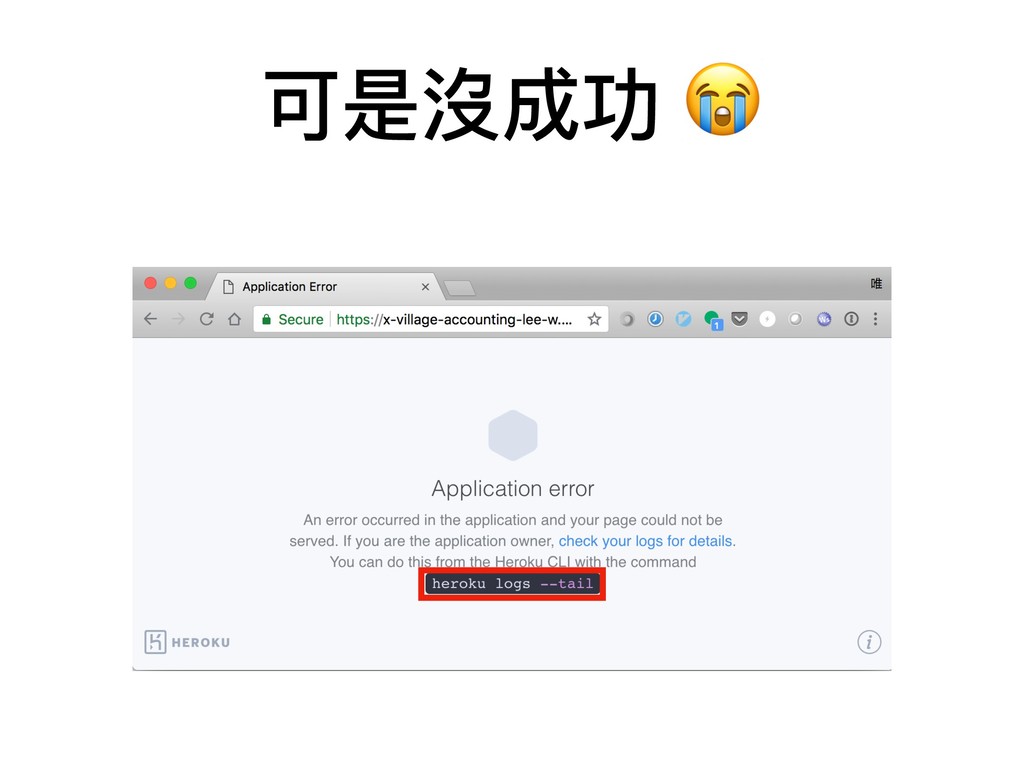
heroku logs --tail 來來看看發⽣生什什麼事 (在CMD/終端機)
None
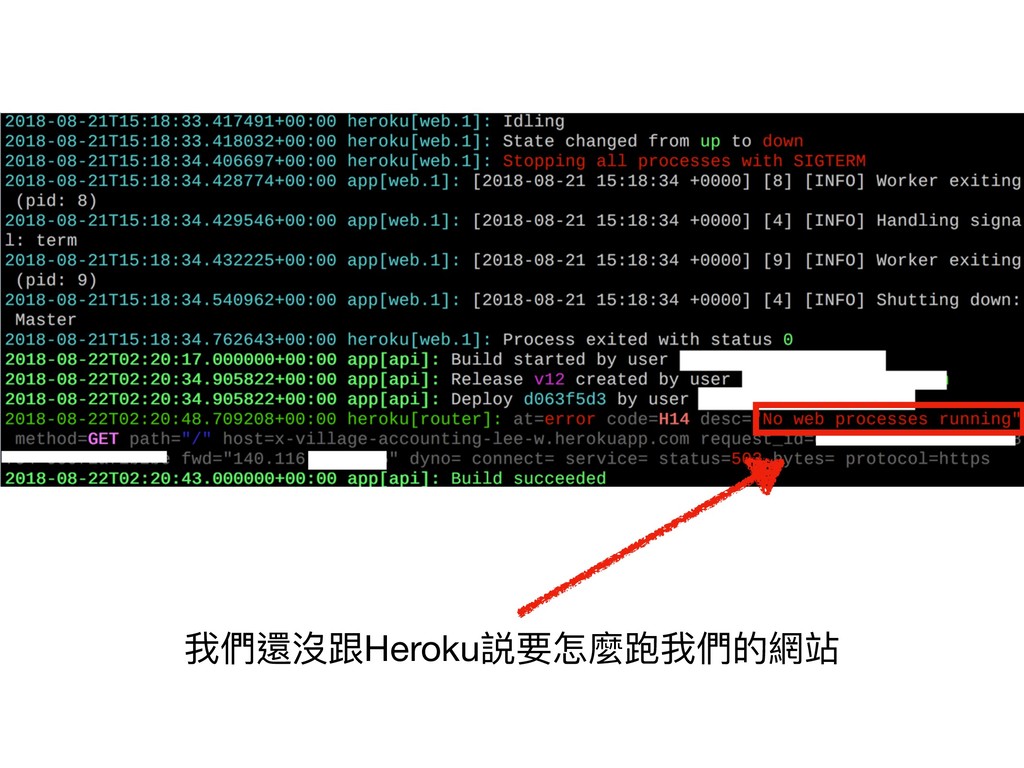
我們還沒跟Heroku説要怎麼跑我們的網站
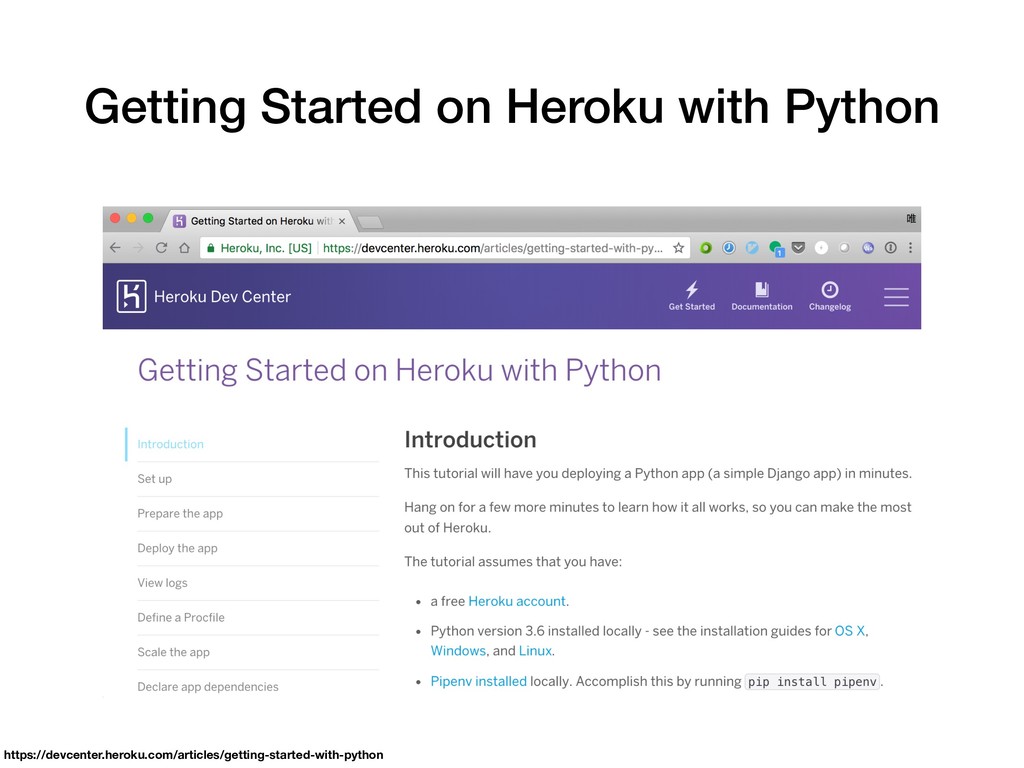
Getting Started on Heroku with Python https://devcenter.heroku.com/articles/getting-started-with-python
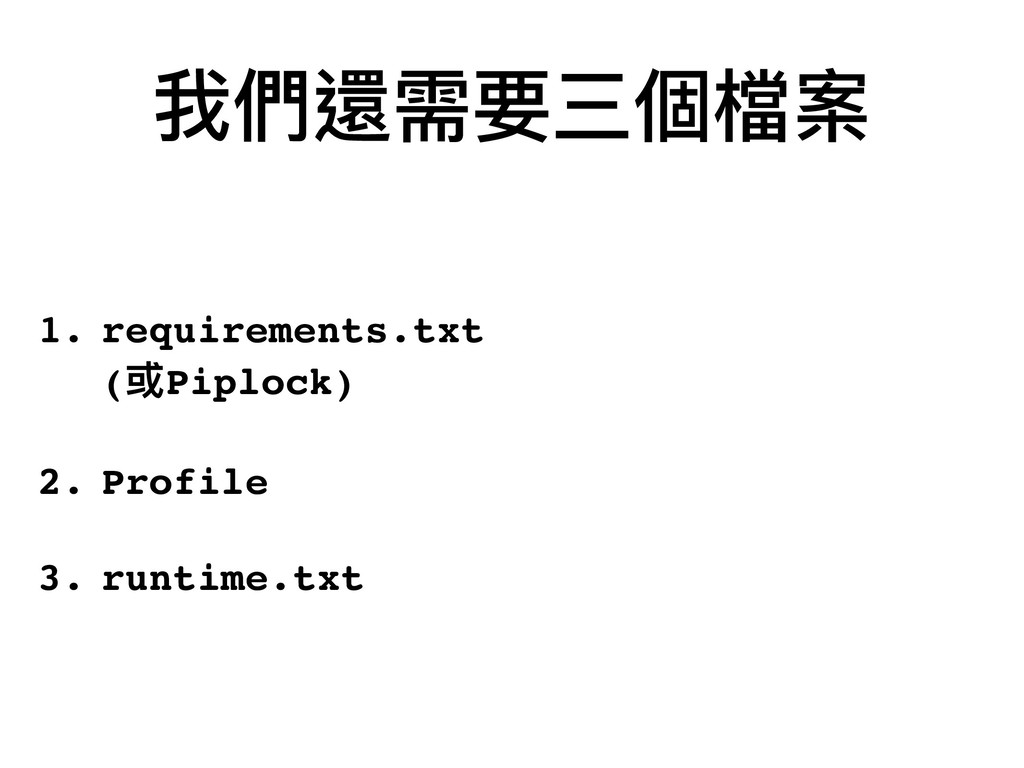
我們還需要三個檔案 1. requirements.txt (或Piplock) 2. Profile 3. runtime.txt
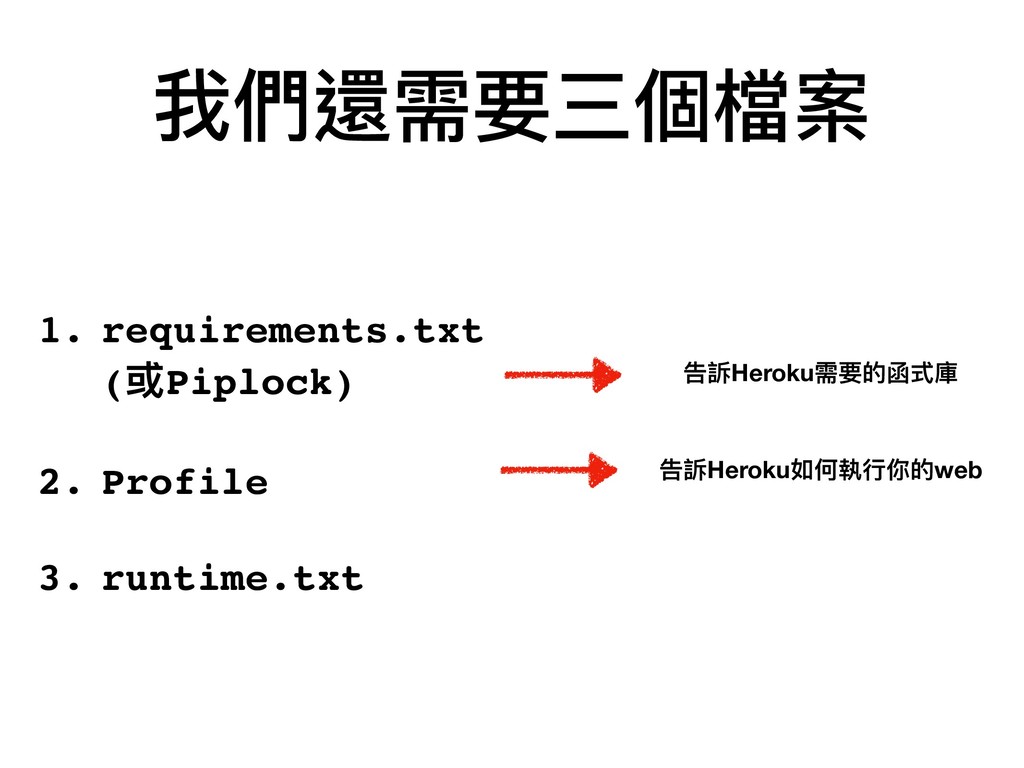
我們還需要三個檔案 1. requirements.txt (或Piplock) 2. Profile 3. runtime.txt 告訴Heroku需要的函式庫
我們還需要三個檔案 1. requirements.txt (或Piplock) 2. Profile 3. runtime.txt 告訴Heroku需要的函式庫 告訴Heroku如何執⾏行行你的web
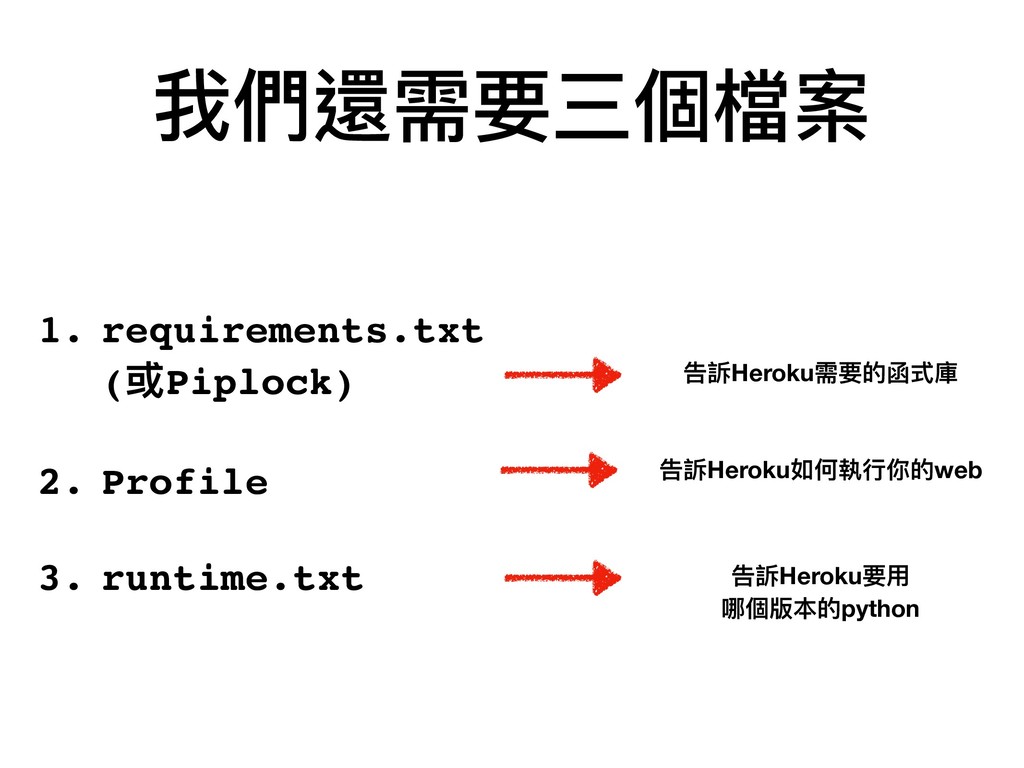
我們還需要三個檔案 1. requirements.txt (或Piplock) 2. Profile 3. runtime.txt 告訴Heroku需要的函式庫 告訴Heroku如何執⾏行行你的web
告訴Heroku要⽤用 哪個版本的python
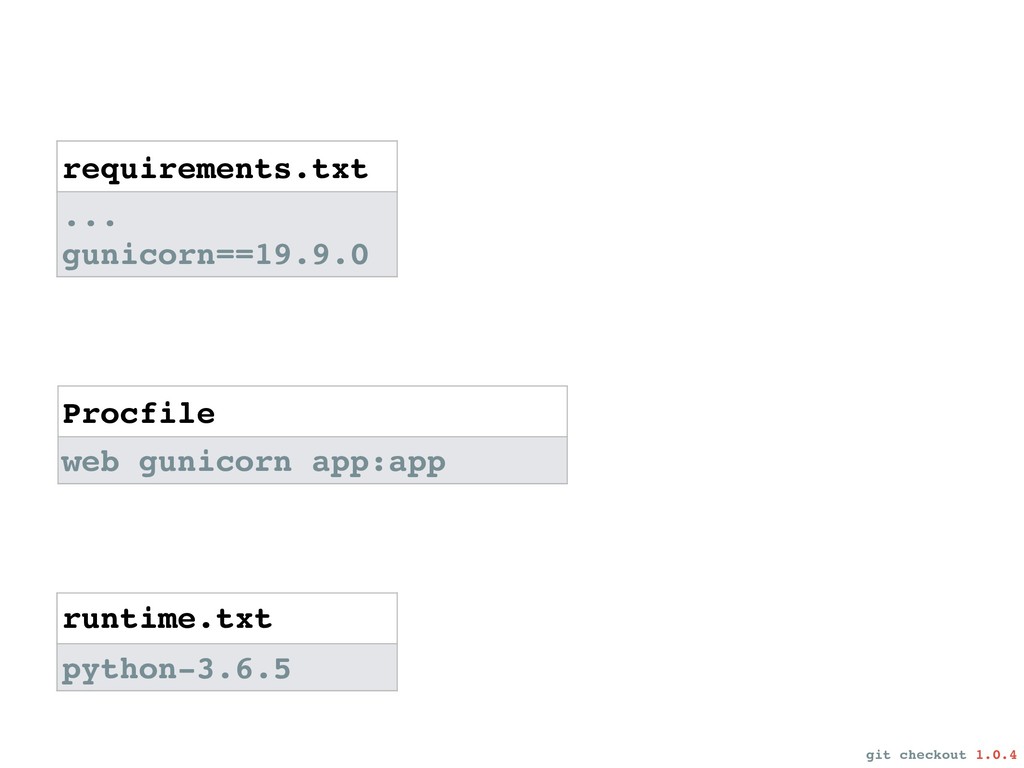
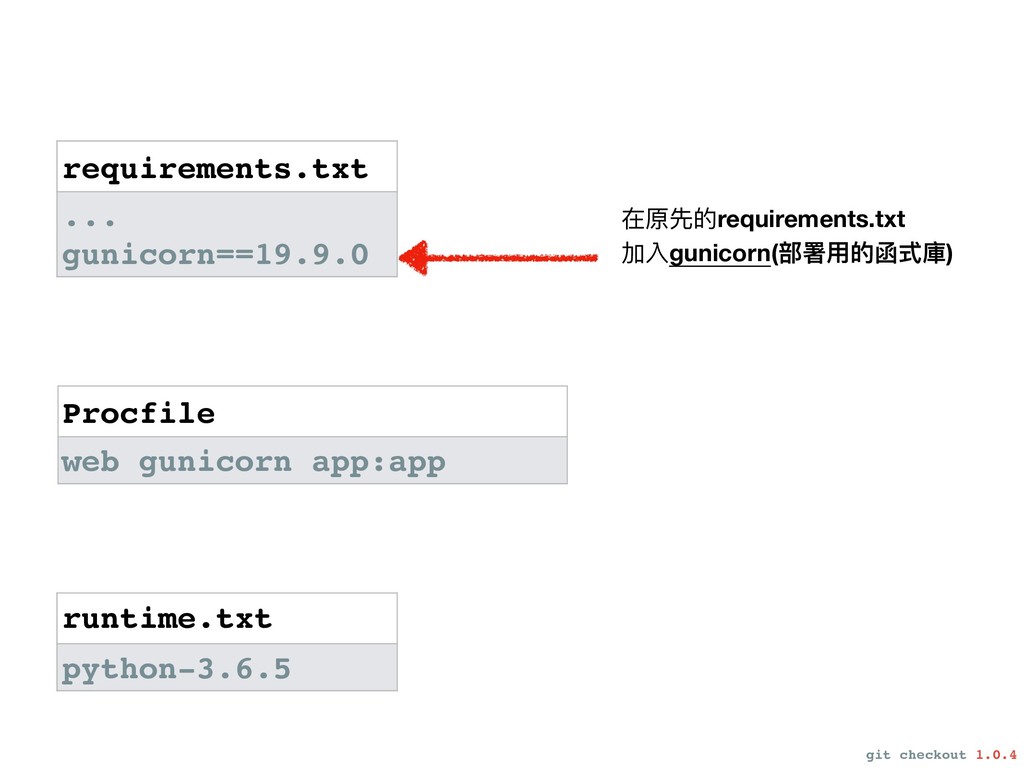
requirements.txt ... gunicorn==19.9.0 Procfile web gunicorn app:app runtime.txt python-3.6.5 git
checkout 1.0.4
requirements.txt ... gunicorn==19.9.0 Procfile web gunicorn app:app runtime.txt python-3.6.5 在原先的requirements.txt
加入gunicorn(部署⽤用的函式庫) git checkout 1.0.4
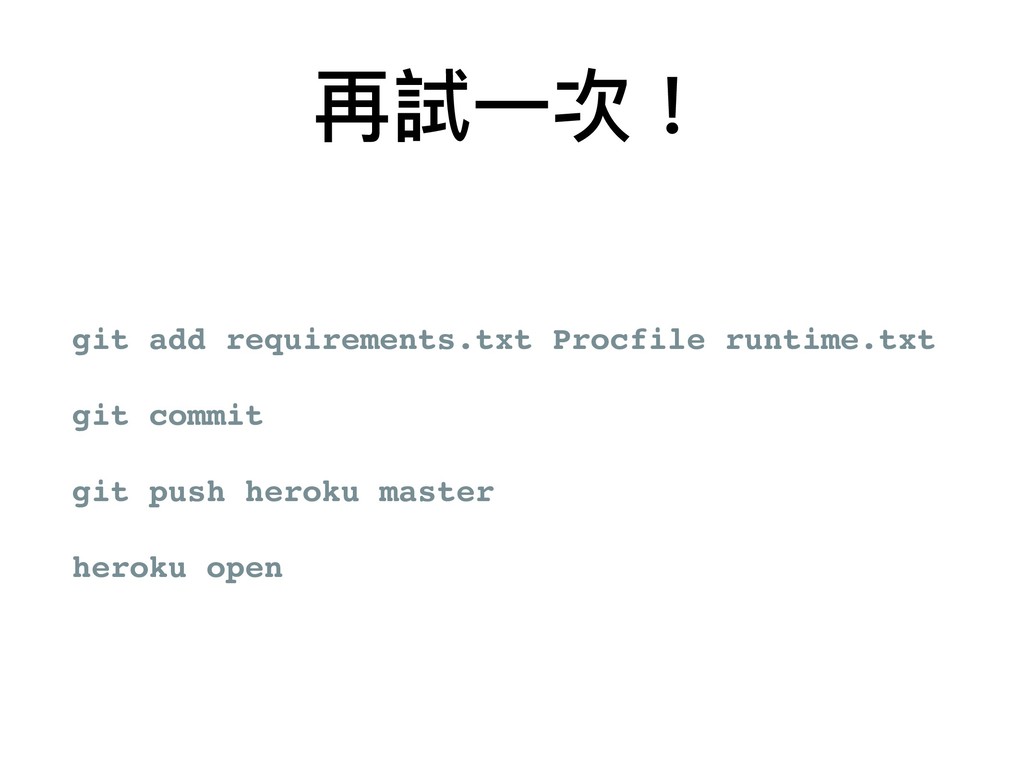
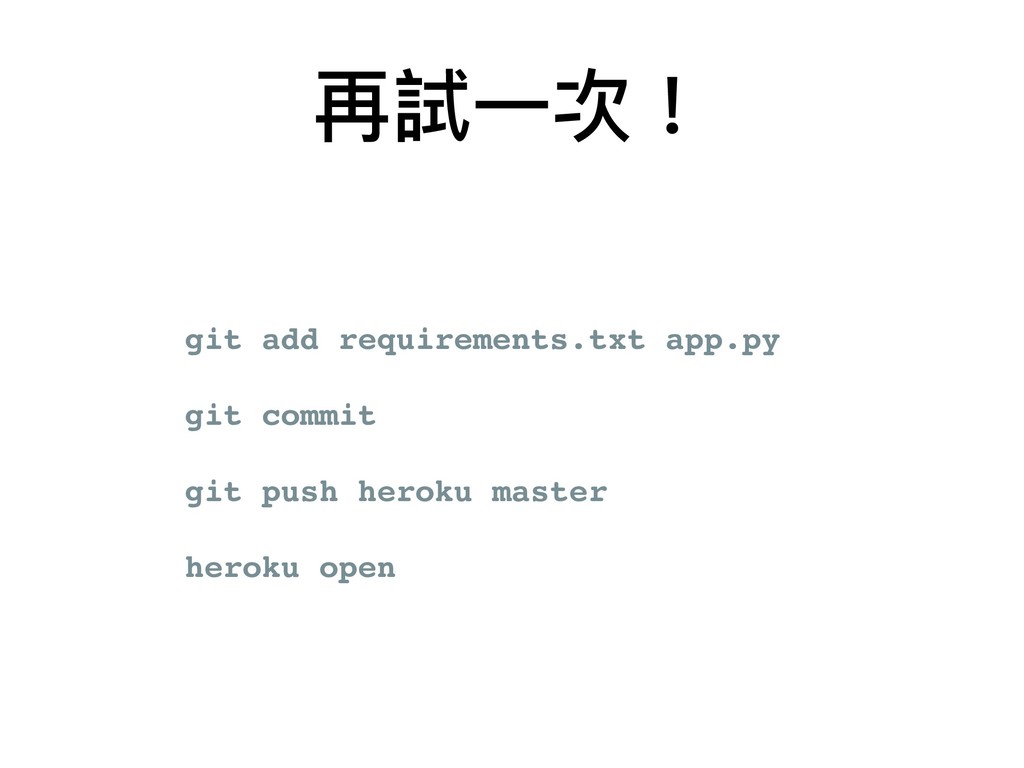
再試⼀一次! git add requirements.txt Procfile runtime.txt git commit git push
heroku master heroku open
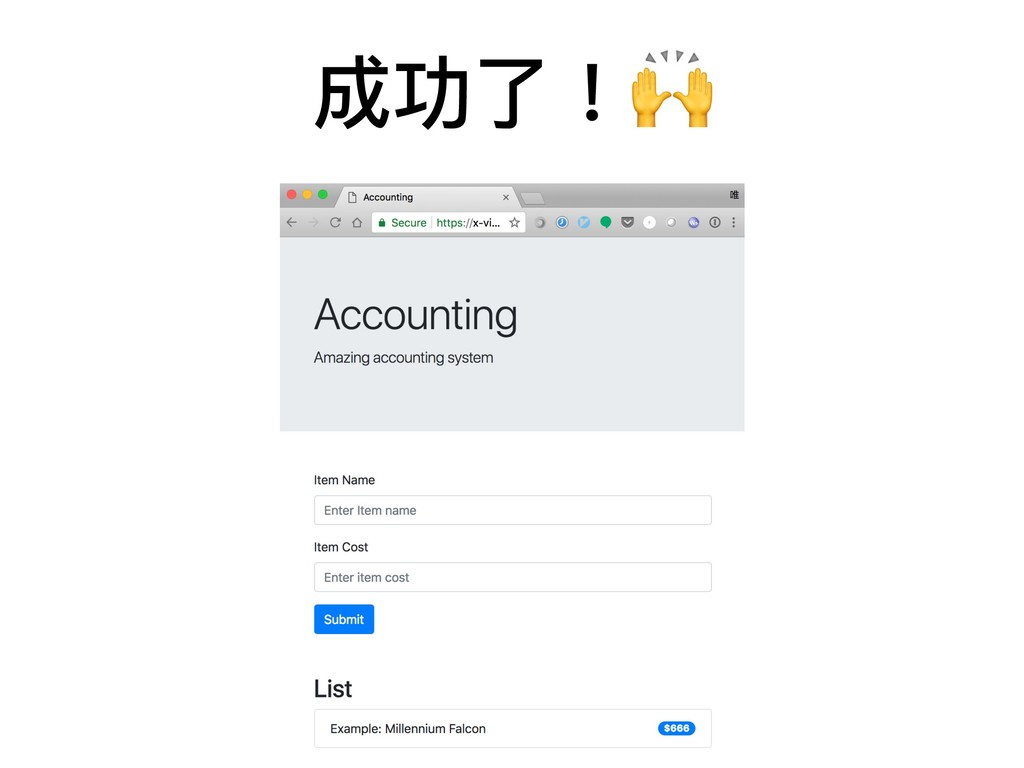
成功了了!
可是...按了了Submit為什什麼沒有⽤用
heroku logs --tail
heroku logs --tail 看起來來是資料庫的問題
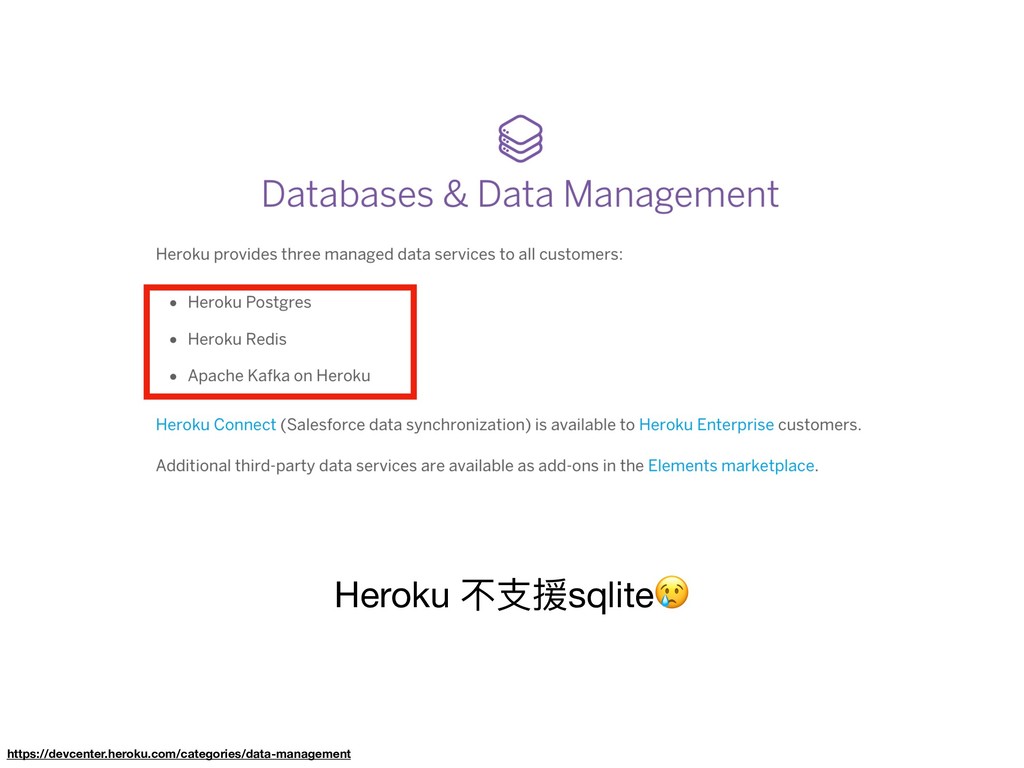
Heroku 不⽀支援sqlite https://devcenter.heroku.com/categories/data-management
資料庫設定
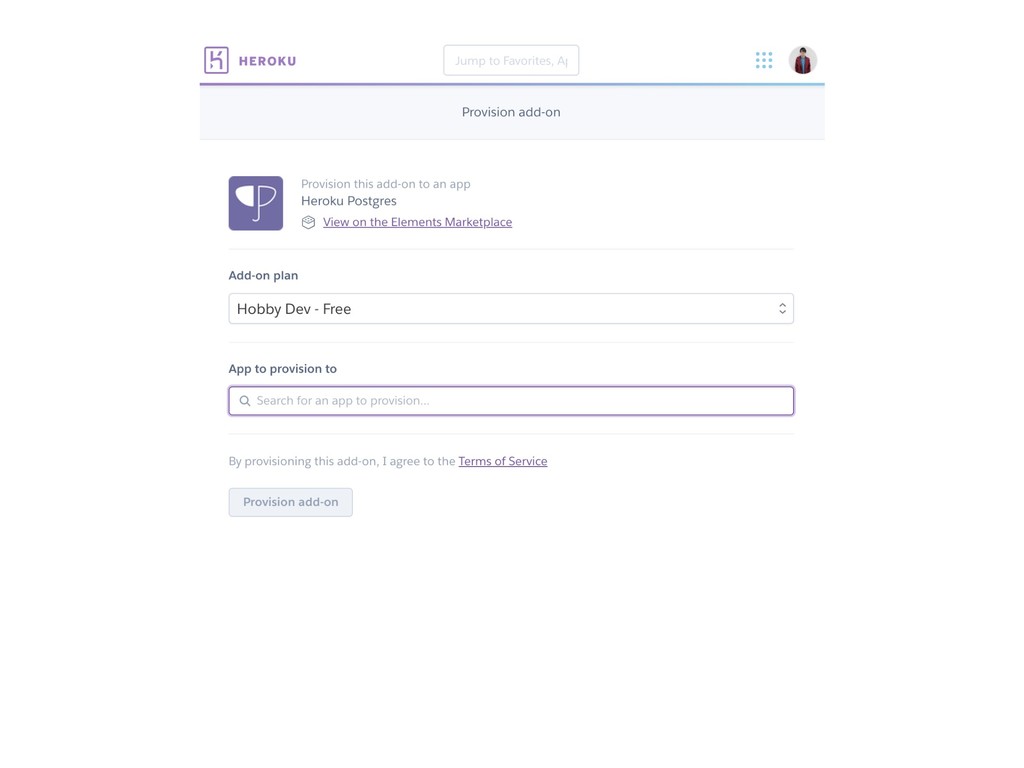
資料庫設定 創建資料庫
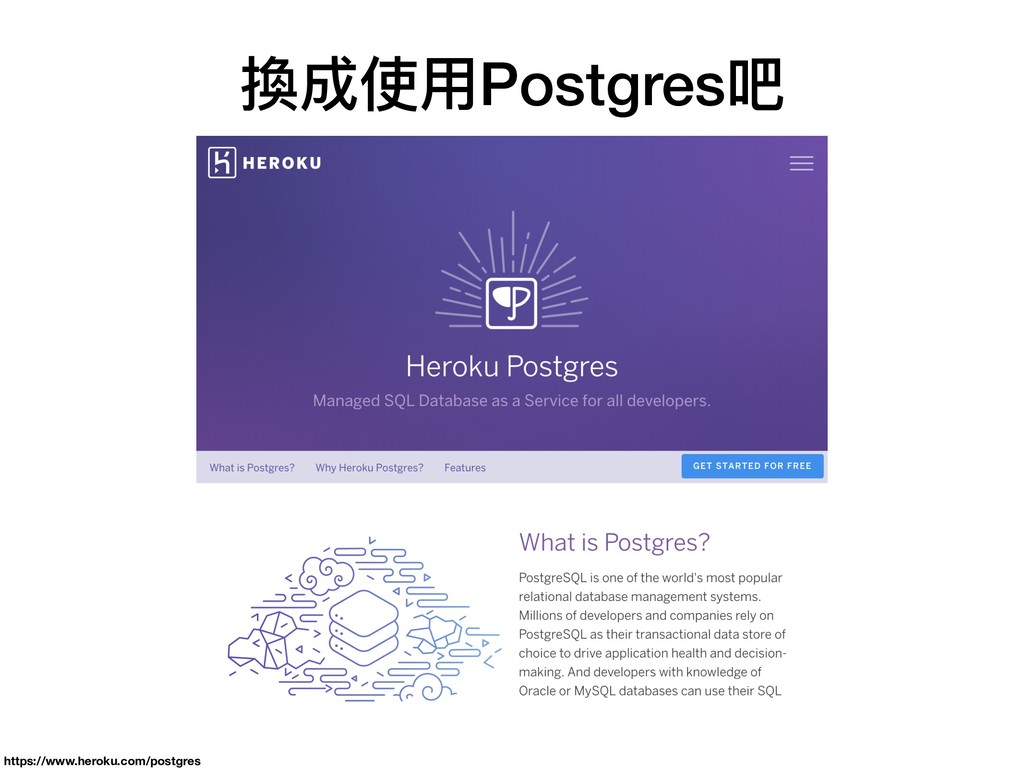
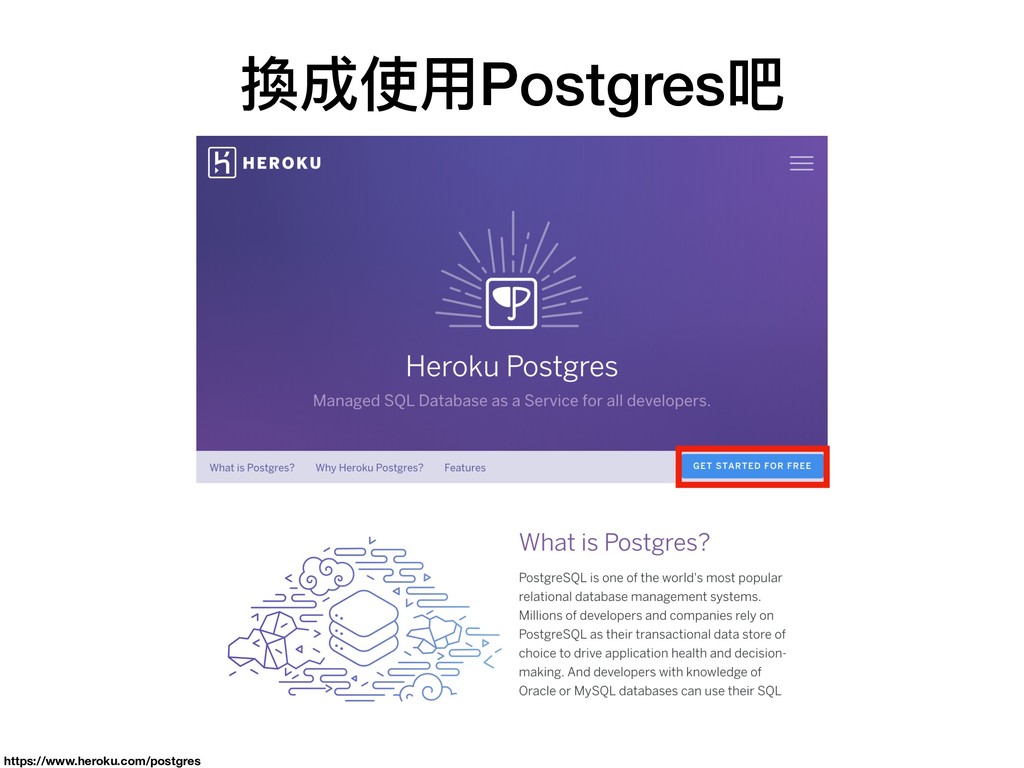
換成使⽤用Postgres吧 https://www.heroku.com/postgres
換成使⽤用Postgres吧 https://www.heroku.com/postgres
None
None
None
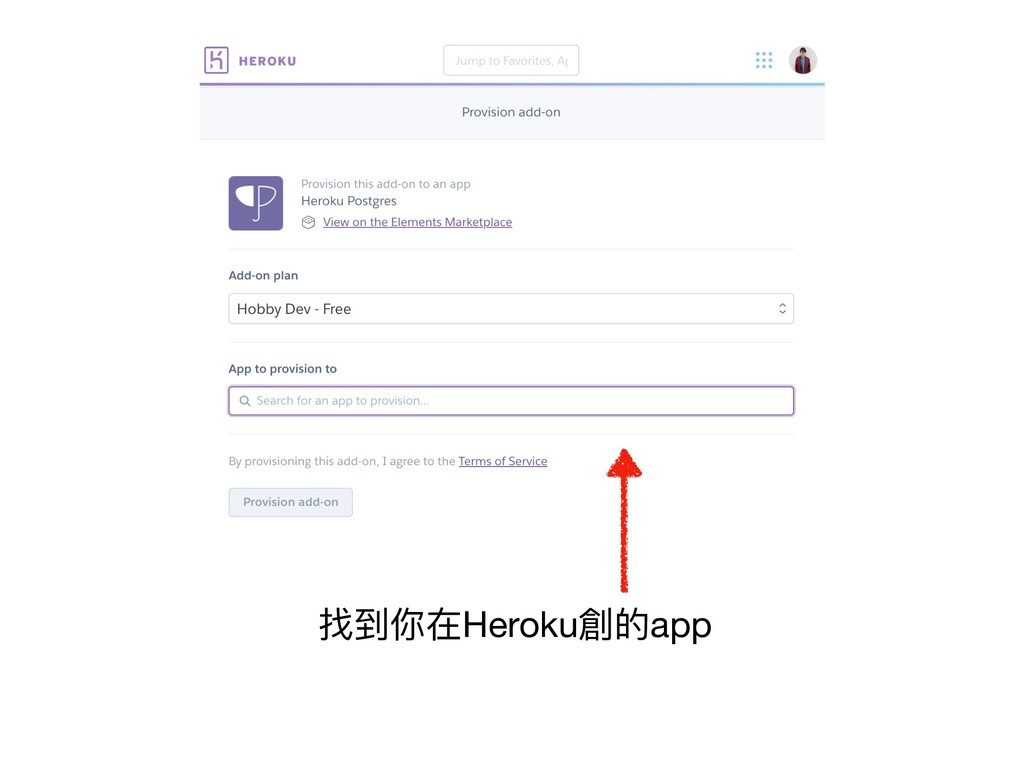
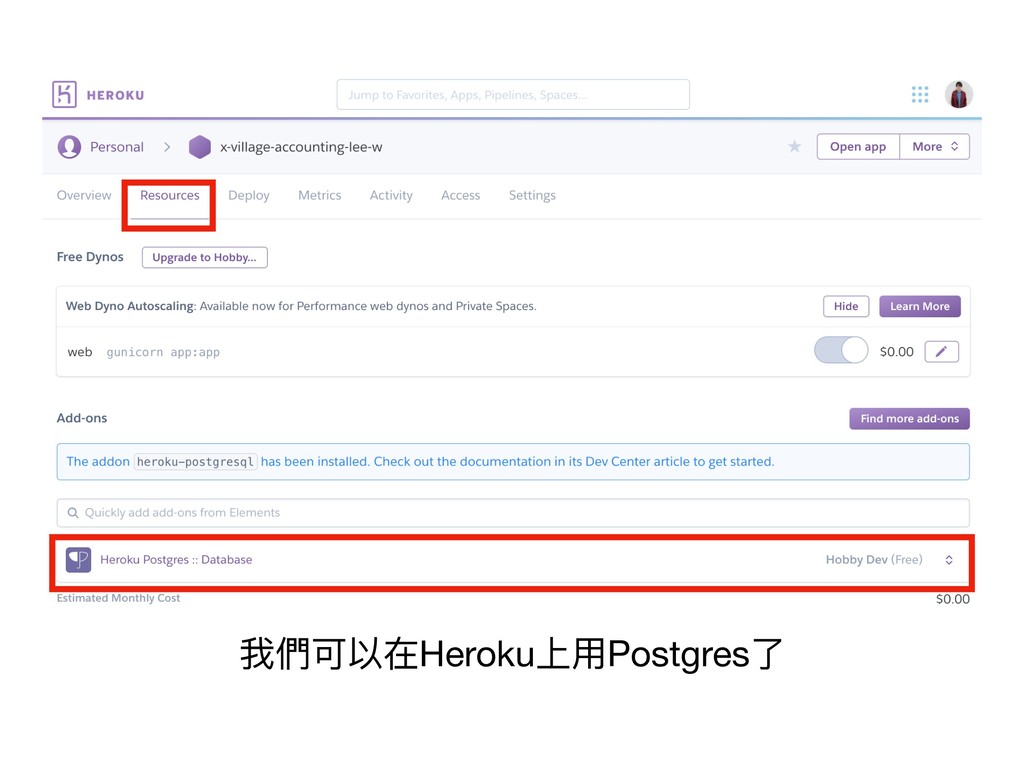
找到你在Heroku創的app
我們可以在Heroku上⽤用Postgres了了
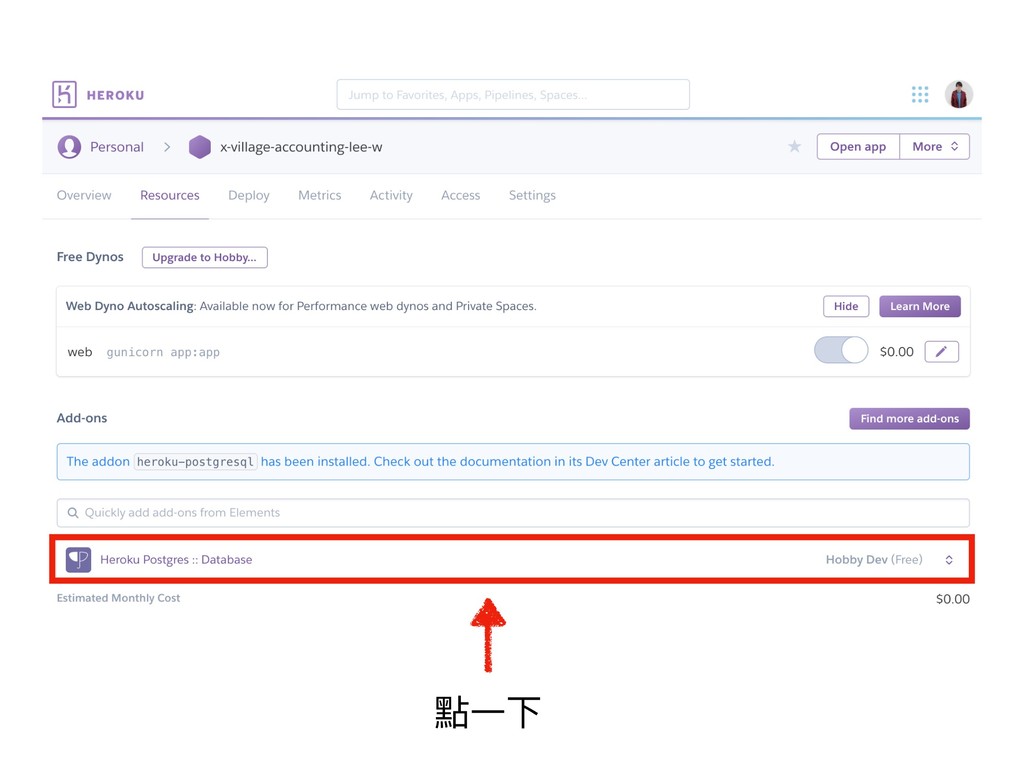
點⼀一下
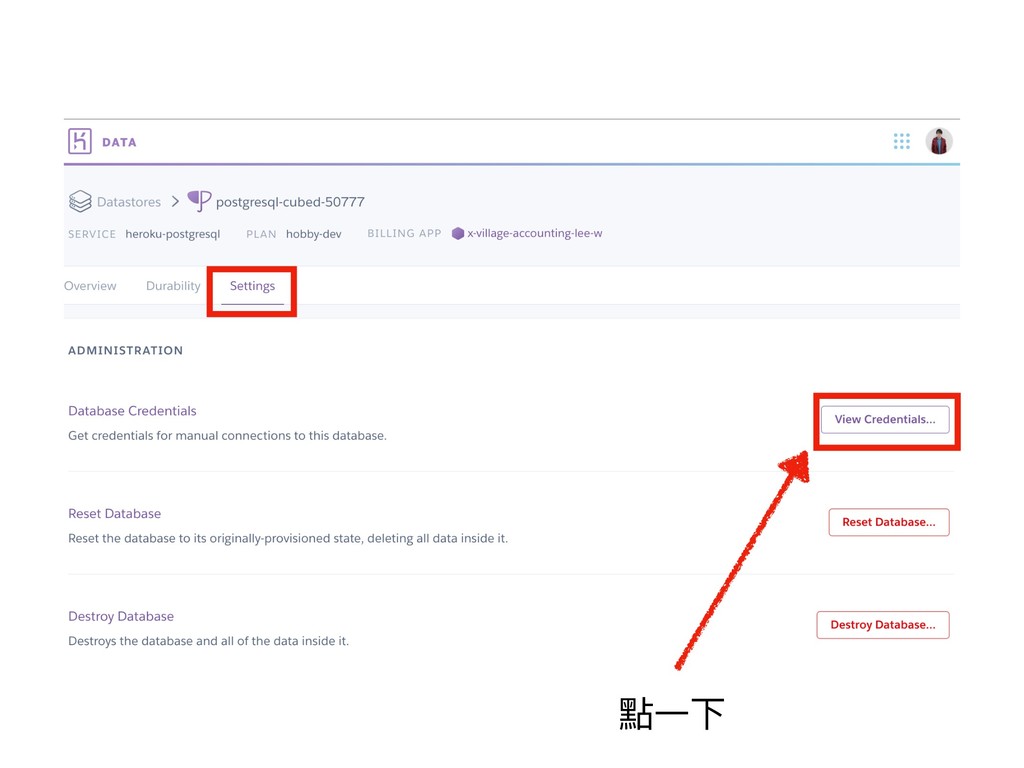
點⼀一下
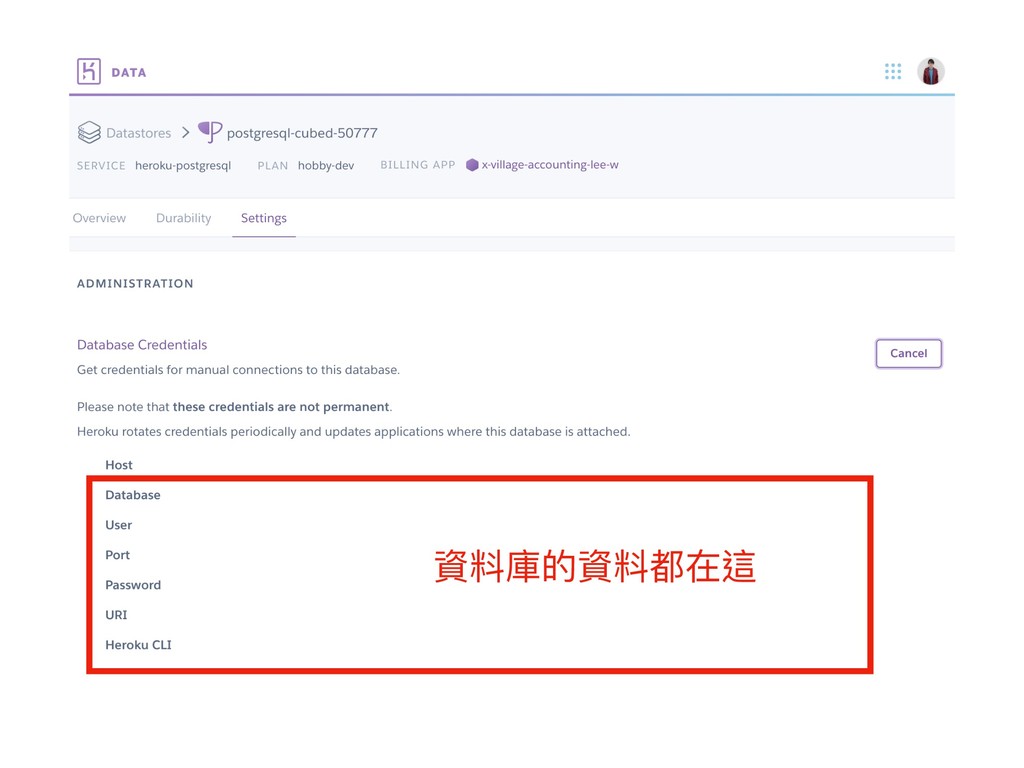
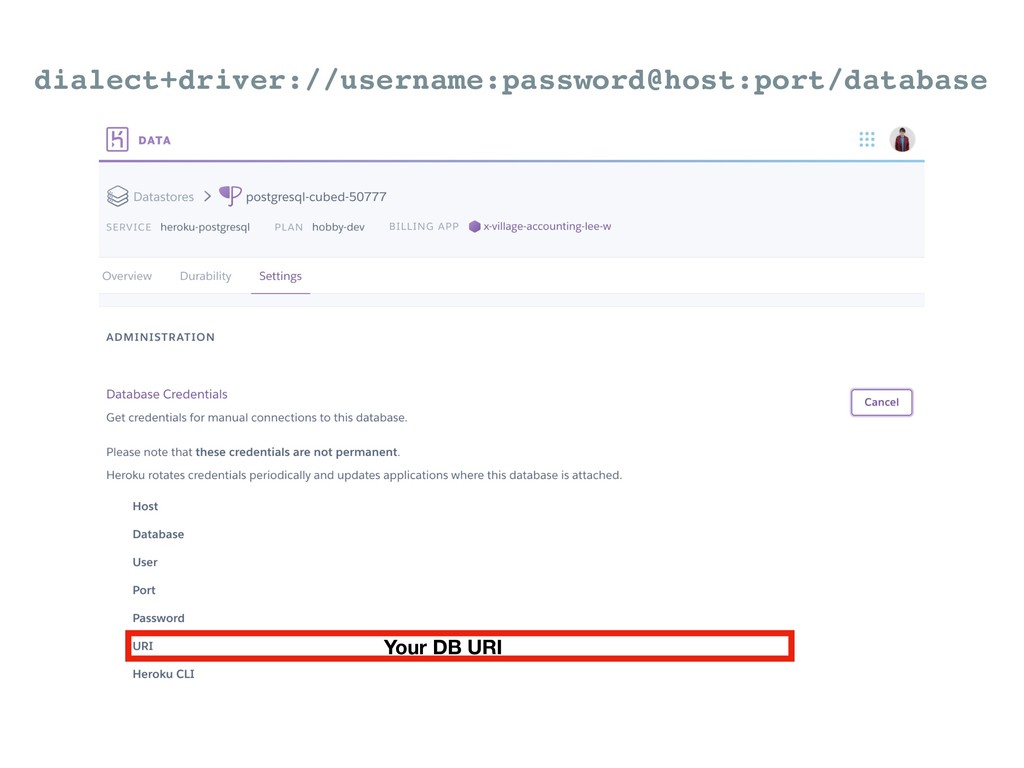
資料庫的資料都在這
資料庫設定 創建資料庫
資料庫設定 創建資料庫
資料庫設定 創建資料庫 連接資料庫
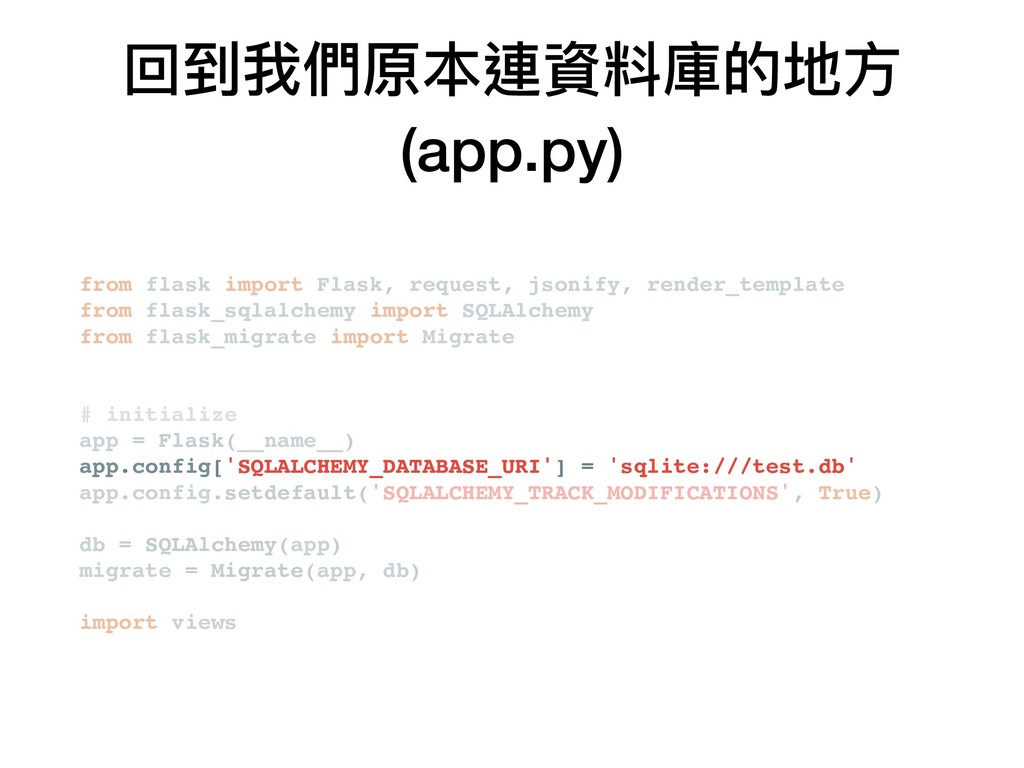
回到我們原本連資料庫的地⽅方 (app.py) from flask import Flask, request, jsonify, render_template from
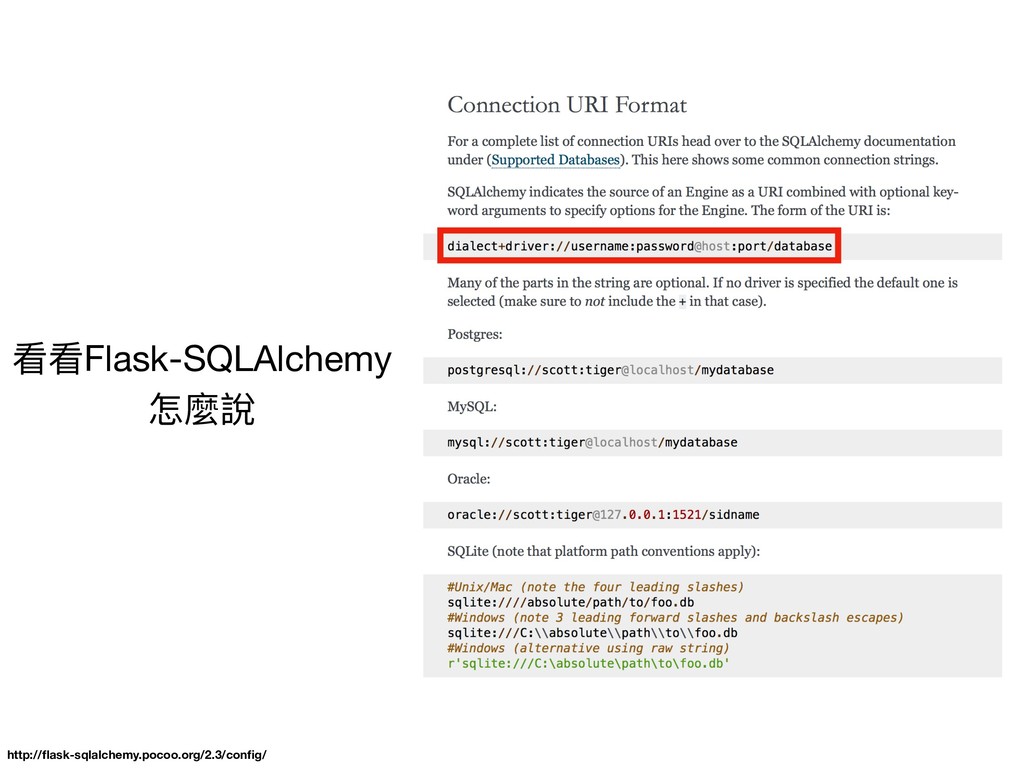
flask_sqlalchemy import SQLAlchemy from flask_migrate import Migrate # initialize app = Flask(__name__) app.config['SQLALCHEMY_DATABASE_URI'] = 'sqlite:///test.db' app.config.setdefault('SQLALCHEMY_TRACK_MODIFICATIONS', True) db = SQLAlchemy(app) migrate = Migrate(app, db) import views app.config['SQLALCHEMY_DATABASE_URI'] = 'sqlite:///test.db'
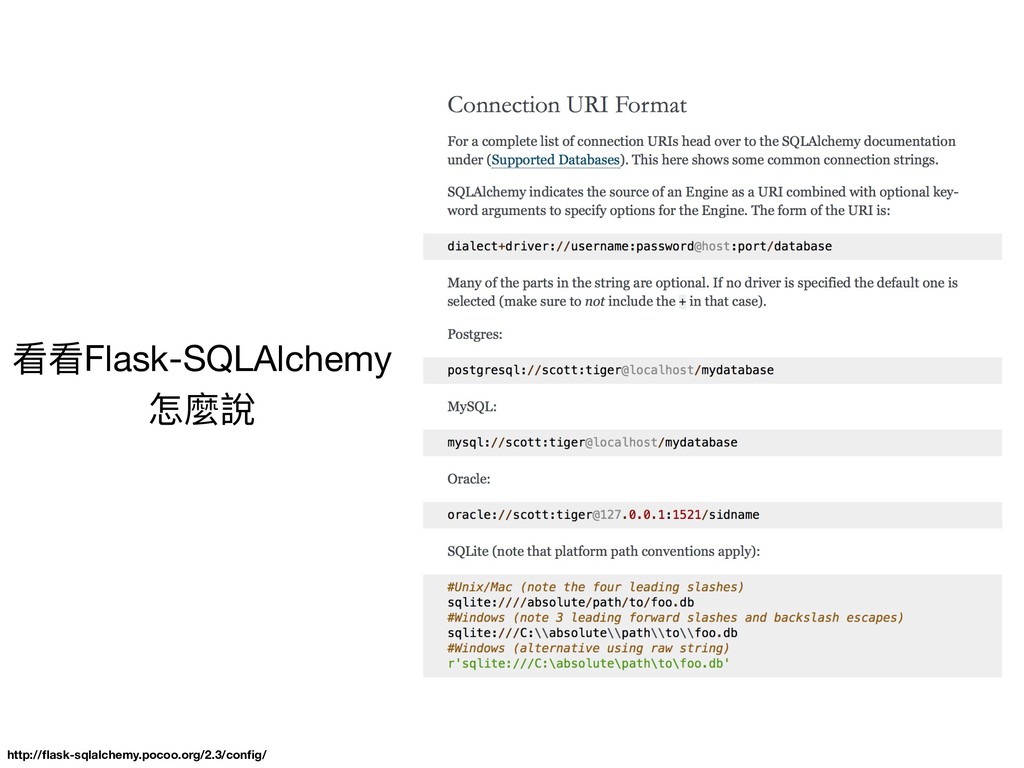
http://flask-sqlalchemy.pocoo.org/2.3/config/ 看看Flask-SQLAlchemy 怎麼說
http://flask-sqlalchemy.pocoo.org/2.3/config/ 看看Flask-SQLAlchemy 怎麼說
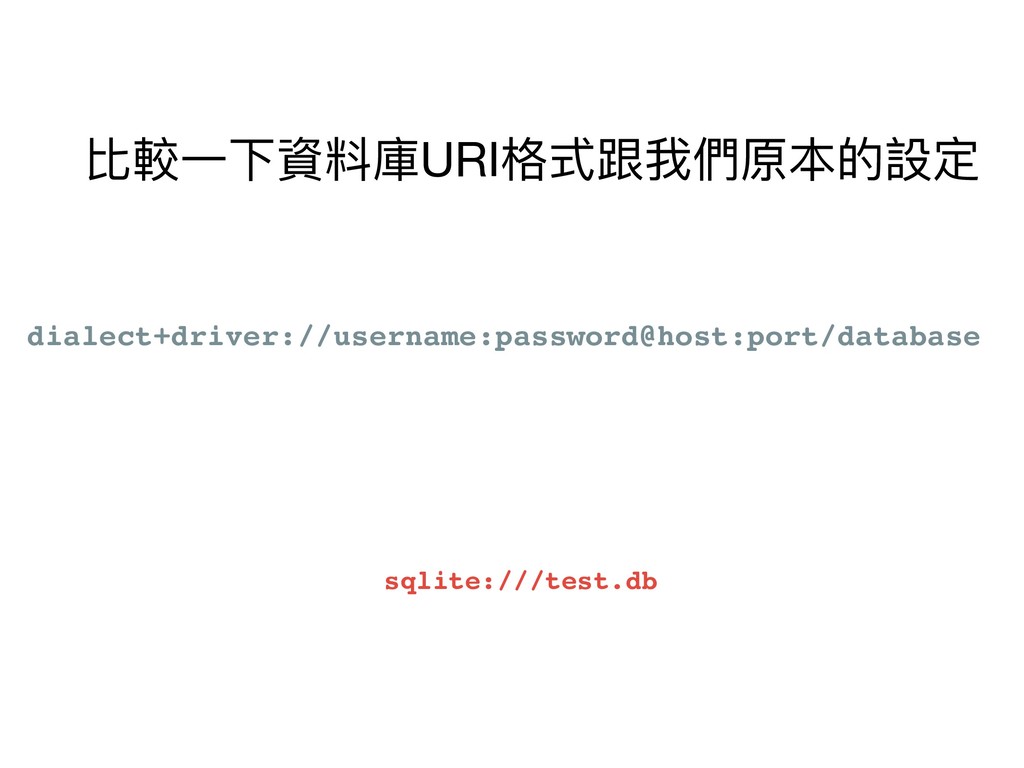
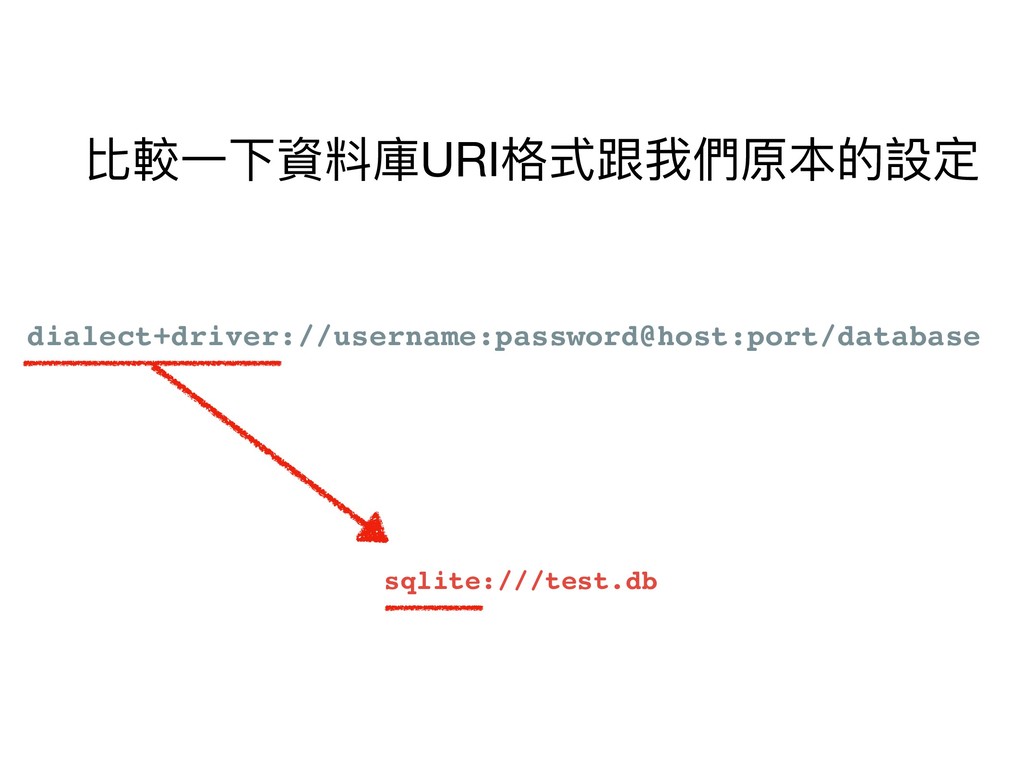
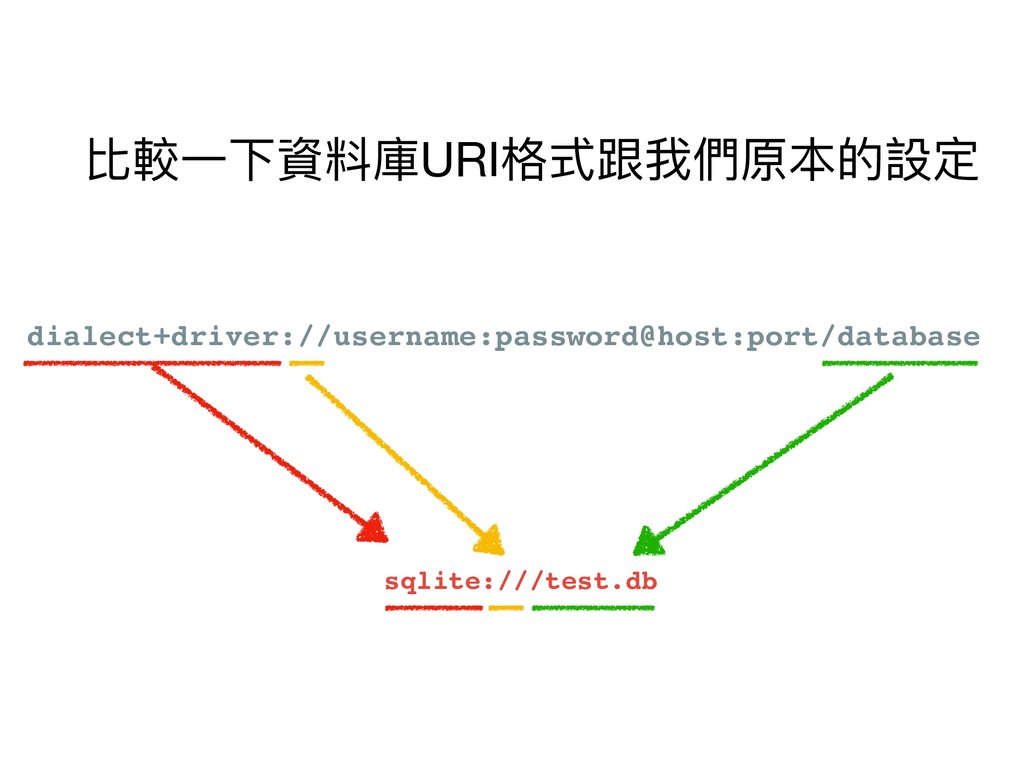
dialect+driver://username:password@host:port/database sqlite:///test.db 比較⼀一下資料庫URI格式跟我們原本的設定
dialect+driver://username:password@host:port/database sqlite:///test.db 比較⼀一下資料庫URI格式跟我們原本的設定
dialect+driver://username:password@host:port/database sqlite:///test.db 比較⼀一下資料庫URI格式跟我們原本的設定
dialect+driver://username:password@host:port/database sqlite:///test.db 比較⼀一下資料庫URI格式跟我們原本的設定
dialect+driver://username:password@host:port/database Your DB URI
app.py 'Your DB URI' app.config['SQLALCHEMY_DATABASE_URI'] = 'Your DB URI' 這樣總該可以跑了了吧‼
app.py 'Your DB URI' app.config['SQLALCHEMY_DATABASE_URI'] = 'Your DB URI' 這樣總該可以跑了了吧‼
但DB URI裡⾯面有包含著帳號密碼 直接把帳號密碼寫在程式碼很危險
app.py 'Your DB URI' app.config['SQLALCHEMY_DATABASE_URI'] = 'Your DB URI' 這樣總該可以跑了了吧‼
但DB URI裡⾯面有包含著帳號密碼 直接把帳號密碼寫在程式碼很危險 這時候我們會⽤用環境變數
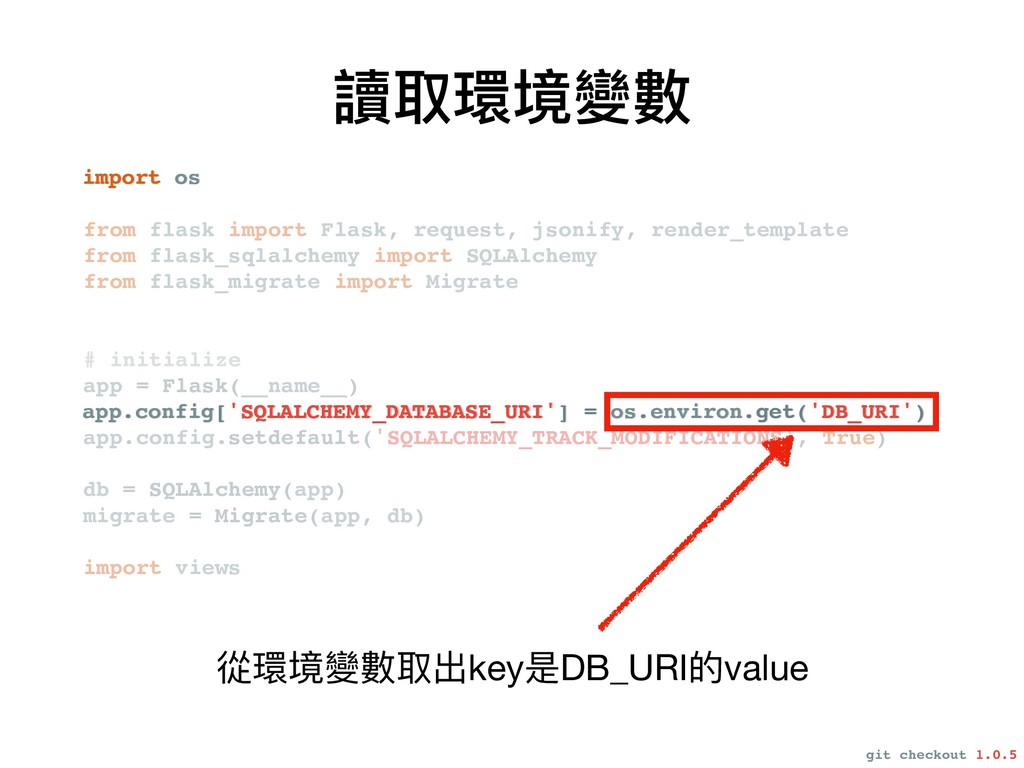
讀取環境變數 git checkout 1.0.5 import os from flask import Flask,
request, jsonify, render_template from flask_sqlalchemy import SQLAlchemy from flask_migrate import Migrate # initialize app = Flask(__name__) app.config['SQLALCHEMY_DATABASE_URI'] = os.environ.get('DB_URI') app.config.setdefault('SQLALCHEMY_TRACK_MODIFICATIONS', True) db = SQLAlchemy(app) migrate = Migrate(app, db) import views import os app.config['SQLALCHEMY_DATABASE_URI'] = os.environ.get('DB_URI') 從環境變數取出key是DB_URI的value
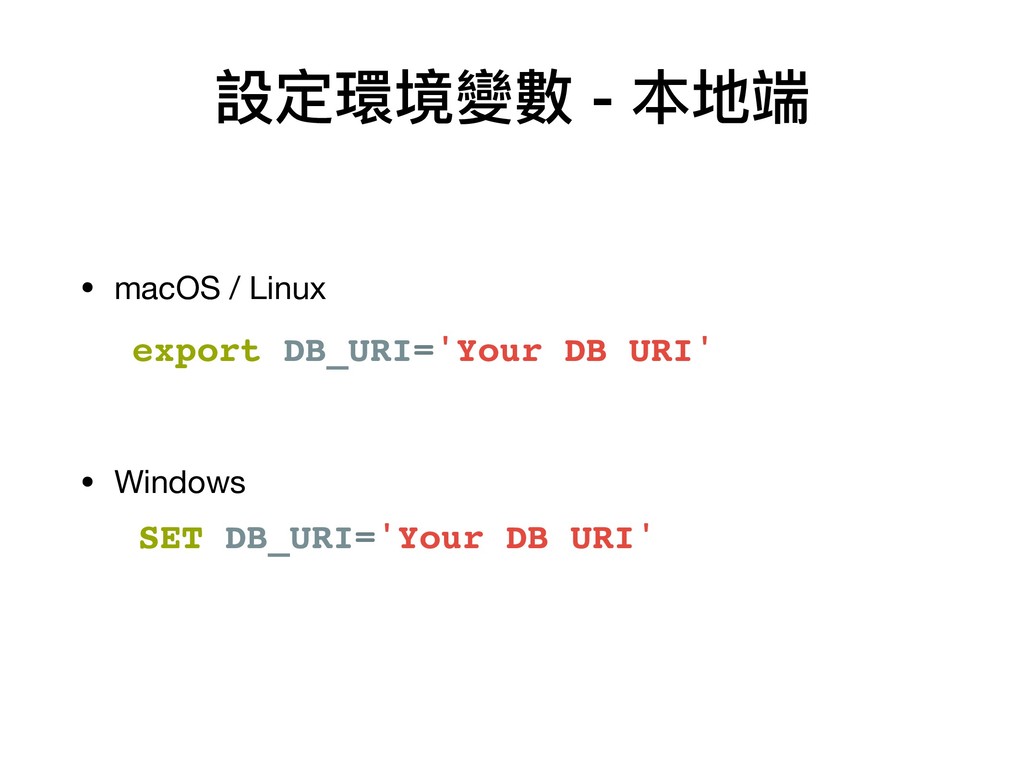
• macOS / Linux • Windows 設定環境變數 -
本地端 export DB_URI='Your DB URI' SET DB_URI='Your DB URI'
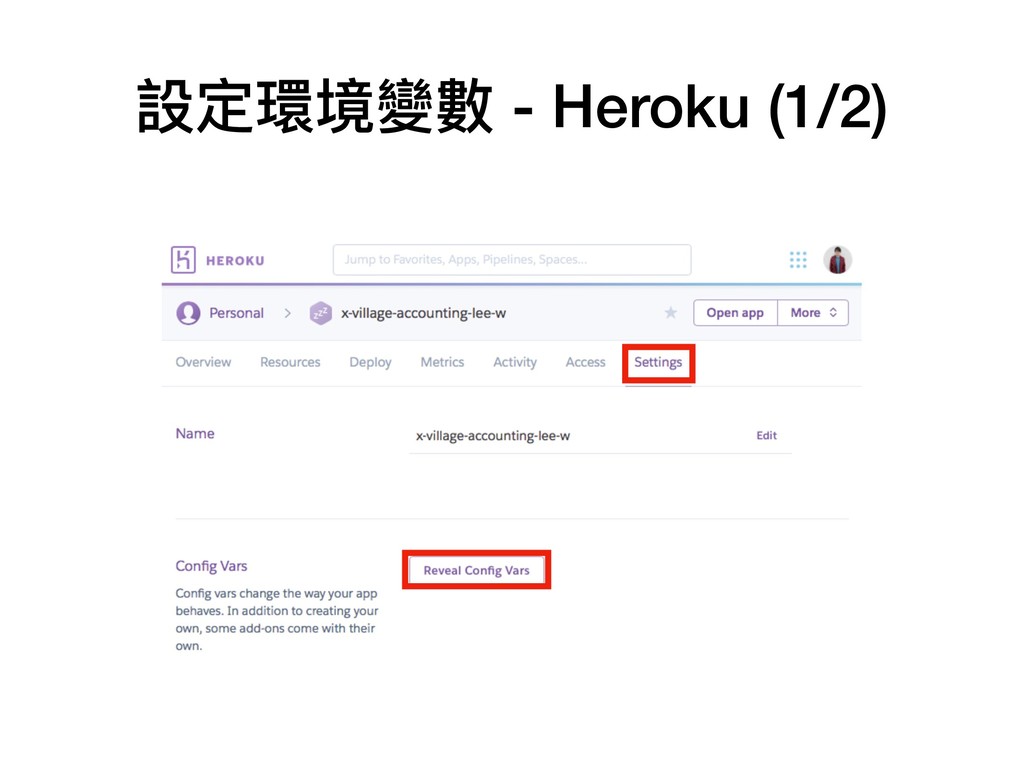
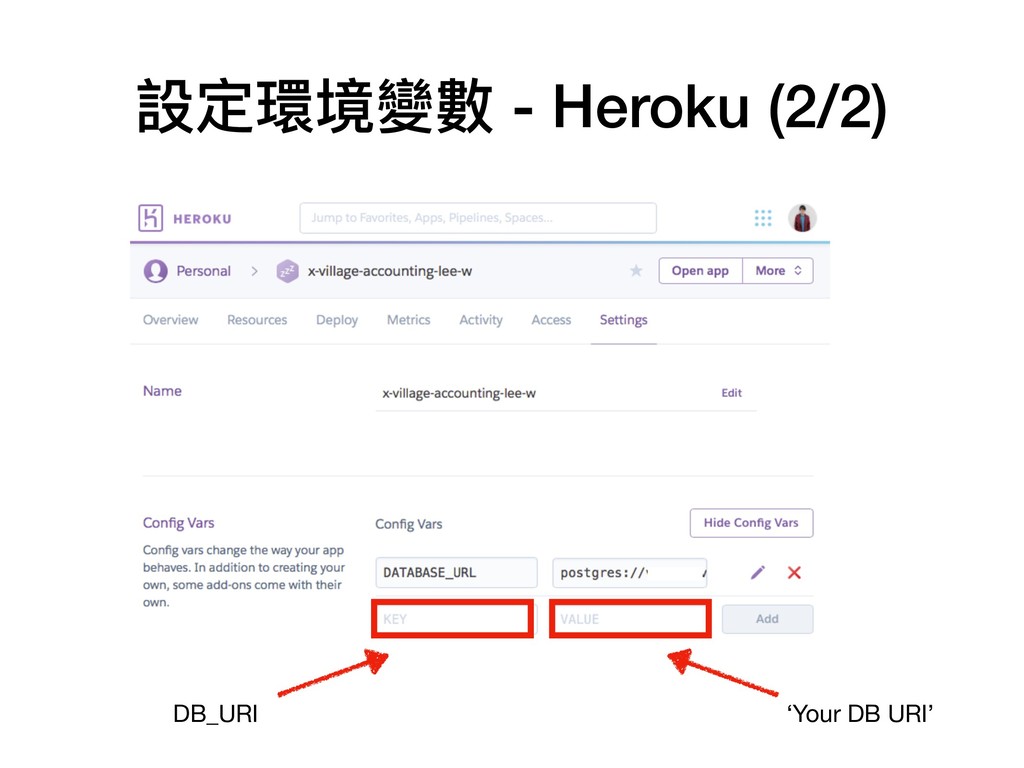
設定環境變數 - Heroku (1/2)
設定環境變數 - Heroku (2/2) DB_URI ‘Your DB URI’
安裝Python連接Postgres的函式庫 requirements.txt ... psycopg2==2.7.5 git checkout 1.0.6
再試⼀一次! git add requirements.txt app.py git commit git push heroku
master heroku open
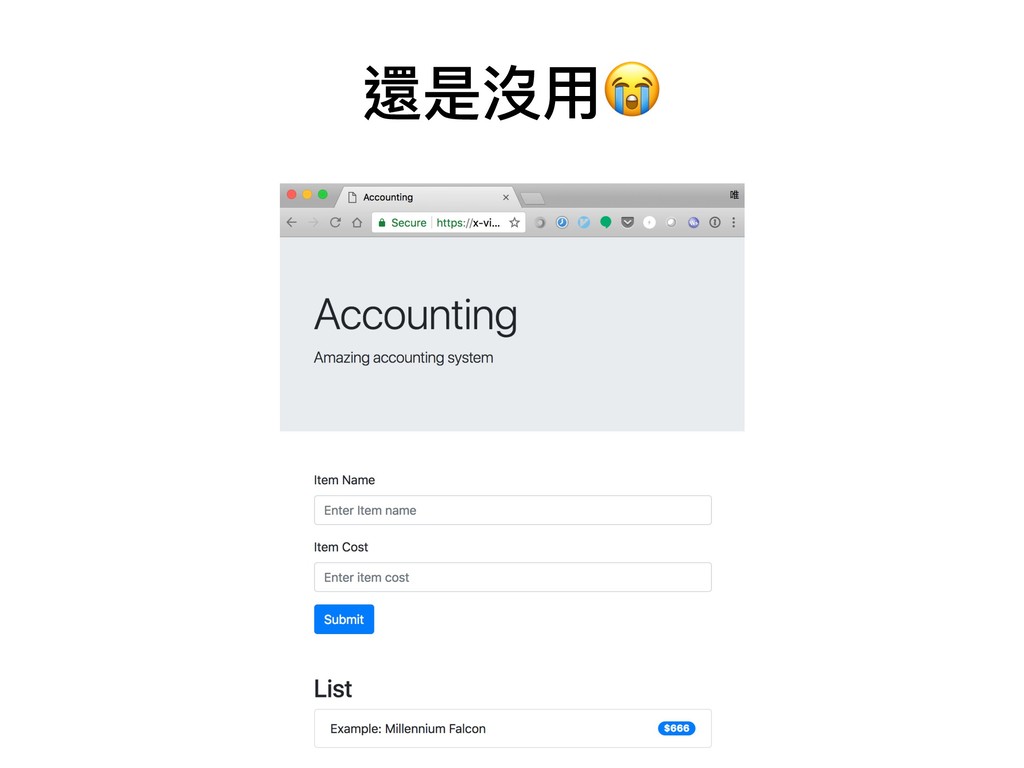
還是沒⽤用
heroku logs --tail 資料表不存在⁉
資料庫設定 創建資料庫 連接資料庫
資料庫設定 創建資料庫 連接資料庫
資料庫設定 創建資料庫 連接資料庫 初始化資料庫
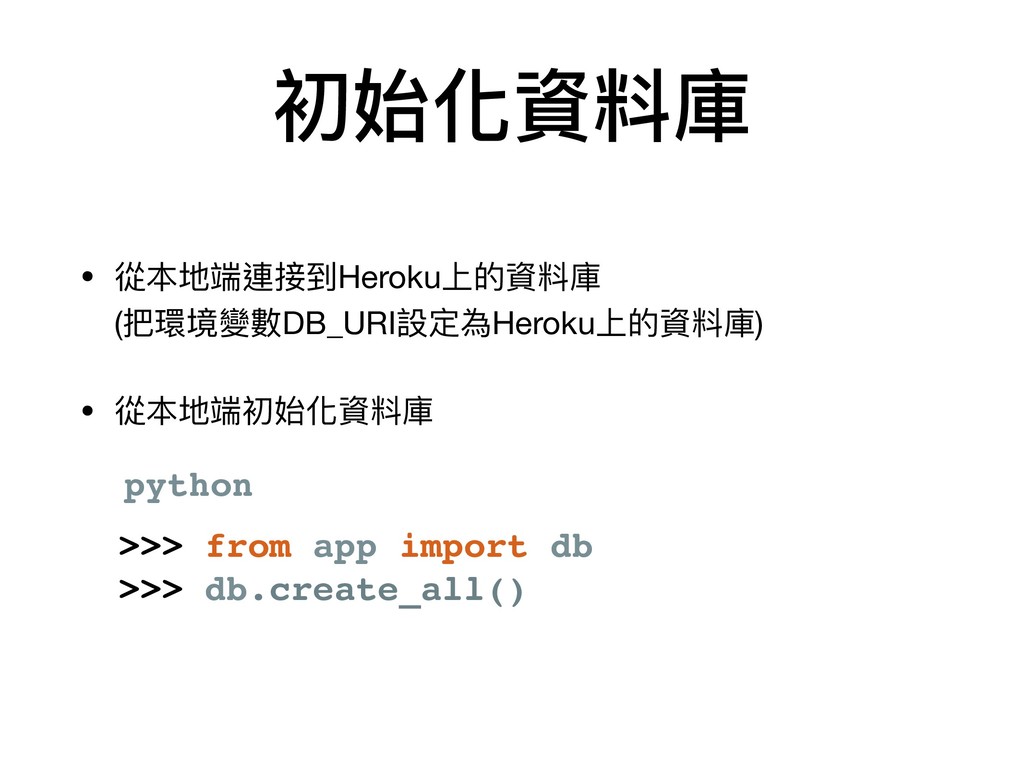
初始化資料庫 >>> from app import db >>> db.create_all() python •
從本地端連接到Heroku上的資料庫 (把環境變數DB_URI設定為Heroku上的資料庫) • 從本地端初始化資料庫
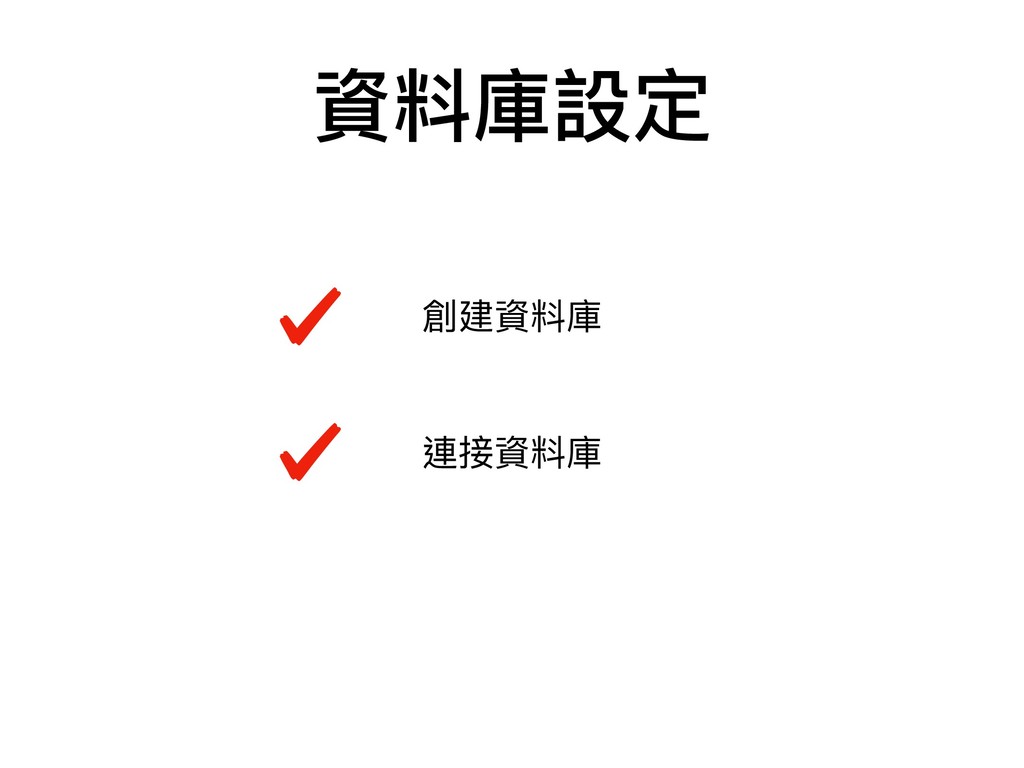
資料庫設定 創建資料庫 連接資料庫 初始化資料庫
資料庫設定 創建資料庫 連接資料庫 初始化資料庫
heroku open
None
終於成功了了
關於如何在Heroku上部署Flask專案的細節 可以參參考Deploying-Flask-To-Heroku
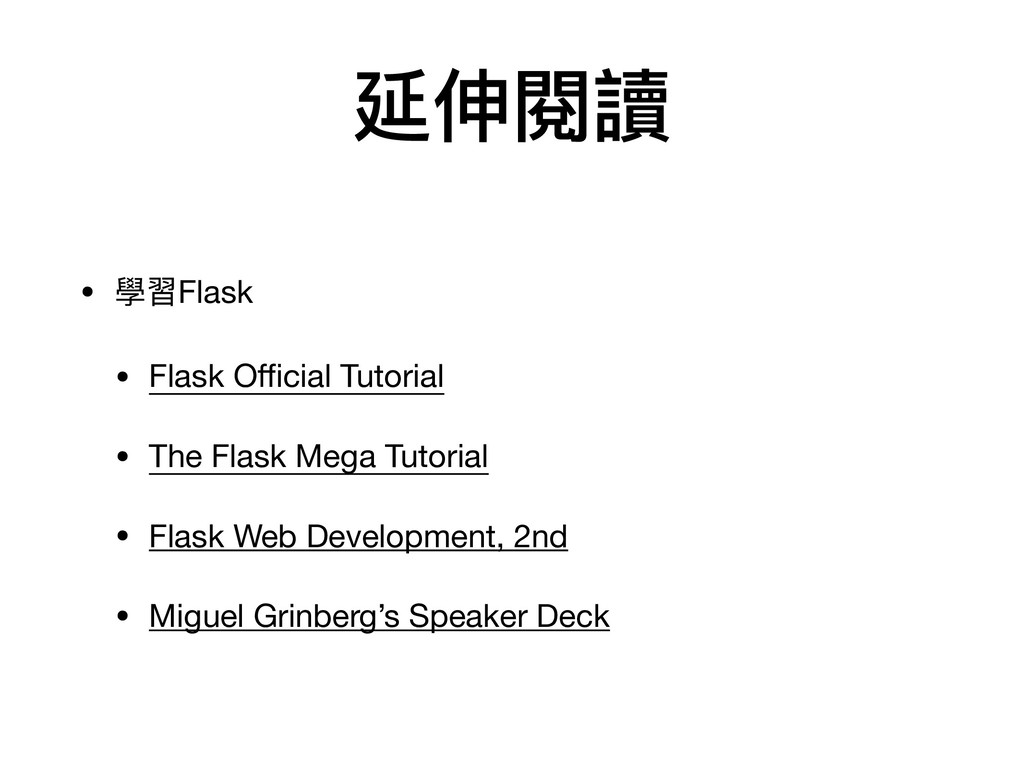
延伸閱讀 • 學習Flask • Flask Official Tutorial • The Flask
Mega Tutorial • Flask Web Development, 2nd • Miguel Grinberg’s Speaker Deck
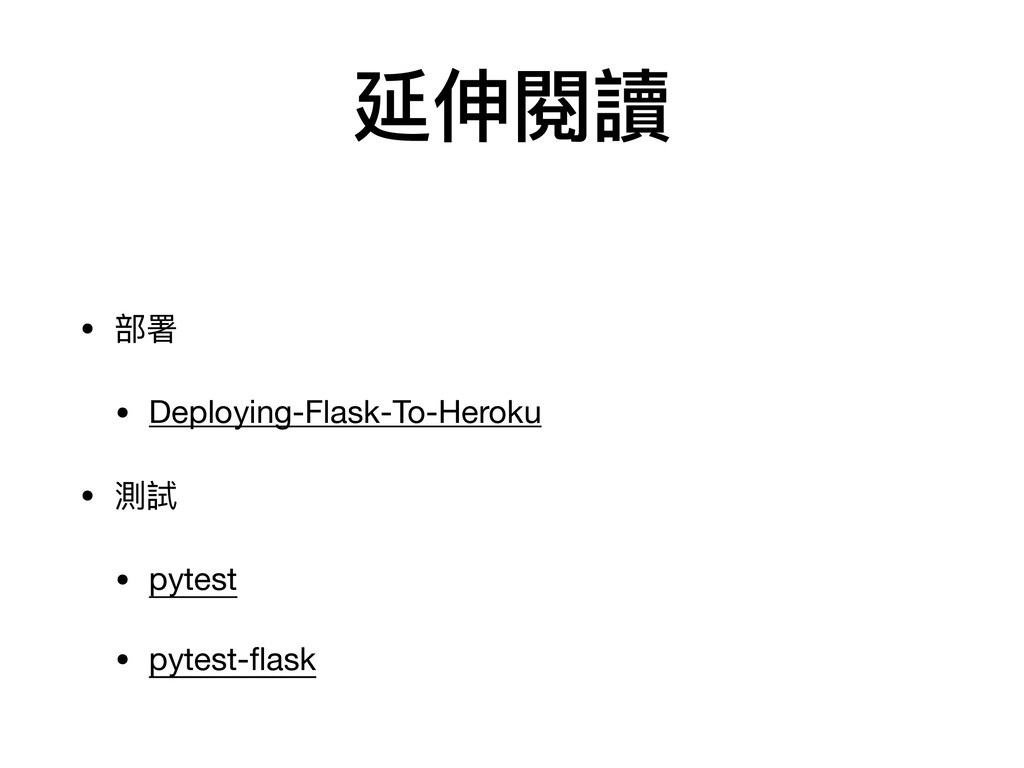
• 部署 • Deploying-Flask-To-Heroku • 測試 • pytest • pytest-flask
延伸閱讀
![CRUD update (修改) UPDATE address_book SET name='Tom', email='[email protected]' WHERE name=‘Tommy';](https://files.speakerdeck.com/presentations/cb70e1c04bf24611b357e39d1b7c7df9/slide_14.jpg)
![CRUD update (修改) UPDATE address_book SET name='Tom', email='[email protected]' WHERE name=‘Tommy';](https://files.speakerdeck.com/presentations/cb70e1c04bf24611b357e39d1b7c7df9/slide_15.jpg)
![Student id [INTEGER] name [STRING(120)] Grade student_id [INTEGER] id [INTEGER]](https://files.speakerdeck.com/presentations/cb70e1c04bf24611b357e39d1b7c7df9/slide_30.jpg)
![Student id [INTEGER] name [STRING(120)] Grade student_id [INTEGER] id [INTEGER]](https://files.speakerdeck.com/presentations/cb70e1c04bf24611b357e39d1b7c7df9/slide_31.jpg)
![Student id [INTEGER] name [STRING(120)] Grade student_id [INTEGER] id [INTEGER]](https://files.speakerdeck.com/presentations/cb70e1c04bf24611b357e39d1b7c7df9/slide_32.jpg)
![Student id [INTEGER] name [STRING(120)] Grade student_id [INTEGER] id [INTEGER]](https://files.speakerdeck.com/presentations/cb70e1c04bf24611b357e39d1b7c7df9/slide_33.jpg)
![Student id [INTEGER] name [STRING(120)] Grade student_id [INTEGER] id [INTEGER]](https://files.speakerdeck.com/presentations/cb70e1c04bf24611b357e39d1b7c7df9/slide_34.jpg)
![Student id [INTEGER] name [STRING(120)] Grade student_id [INTEGER] id [INTEGER]](https://files.speakerdeck.com/presentations/cb70e1c04bf24611b357e39d1b7c7df9/slide_35.jpg)
![補充 - ER diagram (cont.) Student id [INTEGER] name [STRING(120)]](https://files.speakerdeck.com/presentations/cb70e1c04bf24611b357e39d1b7c7df9/slide_36.jpg)
![補充 - ER diagram (cont.) Student id [INTEGER] name [STRING(120)]](https://files.speakerdeck.com/presentations/cb70e1c04bf24611b357e39d1b7c7df9/slide_37.jpg)
![補充 - ER diagram (cont.) Student id [INTEGER] name [STRING(120)]](https://files.speakerdeck.com/presentations/cb70e1c04bf24611b357e39d1b7c7df9/slide_38.jpg)
![補充 - ER diagram (cont.) Student id [INTEGER] name [STRING(120)]](https://files.speakerdeck.com/presentations/cb70e1c04bf24611b357e39d1b7c7df9/slide_39.jpg)
![補充 - ER diagram (cont.) Student id [INTEGER] name [STRING(120)]](https://files.speakerdeck.com/presentations/cb70e1c04bf24611b357e39d1b7c7df9/slide_40.jpg)
![Exercise 4 - Discussion Record cost [INTEGER]](https://files.speakerdeck.com/presentations/cb70e1c04bf24611b357e39d1b7c7df9/slide_42.jpg)
![Exercise 4 - Discussion Record cost [INTEGER] 如果我們新增了了兩兩筆cost都是100的Record, 我們要怎麼分辨他們?](https://files.speakerdeck.com/presentations/cb70e1c04bf24611b357e39d1b7c7df9/slide_43.jpg)
![Exercise 4 - Discussion Record id [INTEGER] cost [INTEGER]](https://files.speakerdeck.com/presentations/cb70e1c04bf24611b357e39d1b7c7df9/slide_44.jpg)
![Exercise 4 - Discussion Record id [INTEGER] cost [INTEGER] 只有cost,之後使⽤用者會知道這筆帳花在什什麼上嗎?](https://files.speakerdeck.com/presentations/cb70e1c04bf24611b357e39d1b7c7df9/slide_45.jpg)
![Exercise 4 - Discussion Record id [INTEGER] name [STRING(120)] cost](https://files.speakerdeck.com/presentations/cb70e1c04bf24611b357e39d1b7c7df9/slide_46.jpg)
![Exercise 4 - Discussion Record id [INTEGER] name [STRING(120)] cost](https://files.speakerdeck.com/presentations/cb70e1c04bf24611b357e39d1b7c7df9/slide_47.jpg)
![app.py (CRUD) 新增帳務紀錄 35 @app.route("/record", methods=['POST']) 36 def add_record(): 37](https://files.speakerdeck.com/presentations/cb70e1c04bf24611b357e39d1b7c7df9/slide_69.jpg)
![app.py (CRUD) 查詢帳務紀錄 61 @app.route("/record", methods=["PUT"]) 62 def update_record(): 63](https://files.speakerdeck.com/presentations/cb70e1c04bf24611b357e39d1b7c7df9/slide_71.jpg)
![app.py (CRUD) 刪除帳務紀錄 67 @app.route("/record", methods=["DELETE"]) 68 def delete_record(): 69](https://files.speakerdeck.com/presentations/cb70e1c04bf24611b357e39d1b7c7df9/slide_72.jpg)
![Router @app.route("/record", methods=['POST']) def add_record(): record = Record(name='breakfast', cost=70) db.session.add(record)](https://files.speakerdeck.com/presentations/cb70e1c04bf24611b357e39d1b7c7df9/slide_90.jpg)
![app.py (CRUD) - (1/4) @app.route("/record", methods=['POST']) def add_record(): record =](https://files.speakerdeck.com/presentations/cb70e1c04bf24611b357e39d1b7c7df9/slide_101.jpg)
![app.py (CRUD) - (1/4) @app.route("/record", methods=['POST']) def add_record(): record =](https://files.speakerdeck.com/presentations/cb70e1c04bf24611b357e39d1b7c7df9/slide_102.jpg)
![app.py (CRUD) - (1/4) @app.route("/record", methods=['POST']) def add_record(): record =](https://files.speakerdeck.com/presentations/cb70e1c04bf24611b357e39d1b7c7df9/slide_103.jpg)
![app.py (CRUD) - (1/4) @app.route("/record", methods=['POST']) def add_record(): record =](https://files.speakerdeck.com/presentations/cb70e1c04bf24611b357e39d1b7c7df9/slide_104.jpg)
![app.py (CRUD) - (1/4) @app.route("/record", methods=['POST']) def add_record(): record =](https://files.speakerdeck.com/presentations/cb70e1c04bf24611b357e39d1b7c7df9/slide_105.jpg)
![@app.route("/record", methods=['POST']) def add_record(): record = Record(name='breakfast', cost=70) db.session.add(record) db.session.commit()](https://files.speakerdeck.com/presentations/cb70e1c04bf24611b357e39d1b7c7df9/slide_107.jpg)
![@app.route("/record", methods=['POST']) def add_record(): record = Record(name='breakfast', cost=70) db.session.add(record) db.session.commit()](https://files.speakerdeck.com/presentations/cb70e1c04bf24611b357e39d1b7c7df9/slide_108.jpg)
![app.py (CRUD) - (1/7) @app.route("/record", methods=['GET']) def get_record(): ... ...](https://files.speakerdeck.com/presentations/cb70e1c04bf24611b357e39d1b7c7df9/slide_116.jpg)
![app.py (CRUD) - (1/7) @app.route("/record", methods=['GET']) def get_record(): ... ...](https://files.speakerdeck.com/presentations/cb70e1c04bf24611b357e39d1b7c7df9/slide_117.jpg)
![app.py (CRUD) - (2/7) import json ... ... @app.route("/record", methods=['GET'])](https://files.speakerdeck.com/presentations/cb70e1c04bf24611b357e39d1b7c7df9/slide_118.jpg)
![app.py (CRUD) - (2/7) import json ... ... @app.route("/record", methods=['GET'])](https://files.speakerdeck.com/presentations/cb70e1c04bf24611b357e39d1b7c7df9/slide_119.jpg)
![app.py (CRUD) - (3/7) import json ... ... @app.route("/record", methods=['GET'])](https://files.speakerdeck.com/presentations/cb70e1c04bf24611b357e39d1b7c7df9/slide_120.jpg)
![app.py (CRUD) - (3/7) import json ... ... @app.route("/record", methods=['GET'])](https://files.speakerdeck.com/presentations/cb70e1c04bf24611b357e39d1b7c7df9/slide_121.jpg)
![app.py (CRUD) - (3/7) import json ... ... @app.route("/record", methods=['GET'])](https://files.speakerdeck.com/presentations/cb70e1c04bf24611b357e39d1b7c7df9/slide_122.jpg)
![import json ... ... @app.route("/record", methods=['GET']) def get_records(): records =](https://files.speakerdeck.com/presentations/cb70e1c04bf24611b357e39d1b7c7df9/slide_126.jpg)
![import json ... ... @app.route("/record", methods=['GET']) def get_records(): records =](https://files.speakerdeck.com/presentations/cb70e1c04bf24611b357e39d1b7c7df9/slide_127.jpg)
![app.py (CRUD) - (7/7) @app.route( ‘/record/<int:record_id>', methods=[‘GET'] ) def get_record(record_id):](https://files.speakerdeck.com/presentations/cb70e1c04bf24611b357e39d1b7c7df9/slide_130.jpg)
![app.py (CRUD) - (7/7) @app.route( ‘/record/<int:record_id>', methods=[‘GET'] ) def get_record(record_id):](https://files.speakerdeck.com/presentations/cb70e1c04bf24611b357e39d1b7c7df9/slide_131.jpg)
![app.py (CRUD) - (7/7) @app.route( ‘/record/<int:record_id>', methods=[‘GET'] ) def get_record(record_id):](https://files.speakerdeck.com/presentations/cb70e1c04bf24611b357e39d1b7c7df9/slide_132.jpg)
![@app.route("/record", methods=["PUT"]) def update_record(): records = Record.query.filter_by(name=‘breakfast') return 'Update Succeeded',](https://files.speakerdeck.com/presentations/cb70e1c04bf24611b357e39d1b7c7df9/slide_133.jpg)
![@app.route("/record", methods=["PUT"]) def update_record(): records = Record.query.filter_by(name=‘breakfast') return 'Update Succeeded',](https://files.speakerdeck.com/presentations/cb70e1c04bf24611b357e39d1b7c7df9/slide_134.jpg)
![app.py (CRUD) - (2/2) @app.route( ‘/record/<int:record_id>', methods=[‘PUT'] ) def update_record(record_id):](https://files.speakerdeck.com/presentations/cb70e1c04bf24611b357e39d1b7c7df9/slide_135.jpg)
![app.py (CRUD) - (2/2) @app.route( ‘/record/<int:record_id>', methods=[‘PUT'] ) def update_record(record_id):](https://files.speakerdeck.com/presentations/cb70e1c04bf24611b357e39d1b7c7df9/slide_136.jpg)
![app.py (CRUD) - (2/2) @app.route( ‘/record/<int:record_id>', methods=[‘PUT'] ) def update_record(record_id):](https://files.speakerdeck.com/presentations/cb70e1c04bf24611b357e39d1b7c7df9/slide_137.jpg)
![app.py (CRUD) - (2/2) @app.route( ‘/record/<int:record_id>', methods=[‘PUT'] ) def update_record(record_id):](https://files.speakerdeck.com/presentations/cb70e1c04bf24611b357e39d1b7c7df9/slide_138.jpg)
![app.py (CRUD) - (2/2) @app.route( ‘/record/<int:record_id>', methods=[‘PUT'] ) def update_record(record_id):](https://files.speakerdeck.com/presentations/cb70e1c04bf24611b357e39d1b7c7df9/slide_139.jpg)
![@app.route("/record", methods=["DELETE"]) def delete_record(): first_record = ( Record.query .filter_by(name=‘breakfast’).first() )](https://files.speakerdeck.com/presentations/cb70e1c04bf24611b357e39d1b7c7df9/slide_140.jpg)
![@app.route("/record", methods=["DELETE"]) def delete_record(): first_record = ( Record.query .filter_by(name=‘breakfast’).first() )](https://files.speakerdeck.com/presentations/cb70e1c04bf24611b357e39d1b7c7df9/slide_141.jpg)
![@app.route("/record", methods=["DELETE"]) def delete_record(): first_record = ( Record.query .filter_by(name=‘breakfast’).first() )](https://files.speakerdeck.com/presentations/cb70e1c04bf24611b357e39d1b7c7df9/slide_142.jpg)
![@app.route("/record", methods=["DELETE"]) def delete_record(): first_record = ( Record.query .filter_by(name=‘breakfast’).first() )](https://files.speakerdeck.com/presentations/cb70e1c04bf24611b357e39d1b7c7df9/slide_143.jpg)
![@app.route("/record", methods=["DELETE"]) def delete_record(): first_record = ( Record.query .filter_by(name=‘breakfast’).first() )](https://files.speakerdeck.com/presentations/cb70e1c04bf24611b357e39d1b7c7df9/slide_144.jpg)
![def delete_record(record_id): db.session.delete(record) db.session.commit() return 'Delete Succeeded', 200 @app.route("/record/<int:record_id>", methods=["DELETE"])](https://files.speakerdeck.com/presentations/cb70e1c04bf24611b357e39d1b7c7df9/slide_145.jpg)
![def delete_record(record_id): db.session.delete(record) db.session.commit() return 'Delete Succeeded', 200 @app.route("/record/<int:record_id>", methods=["DELETE"])](https://files.speakerdeck.com/presentations/cb70e1c04bf24611b357e39d1b7c7df9/slide_146.jpg)
![@app.route("/record", methods=['POST']) def add_record(): ... @app.route("/record", methods=['GET']) def get_records(): ...](https://files.speakerdeck.com/presentations/cb70e1c04bf24611b357e39d1b7c7df9/slide_177.jpg)
![@app.route("/record", methods=['POST']) def add_record(): req_data = request.form name = req_data['name']](https://files.speakerdeck.com/presentations/cb70e1c04bf24611b357e39d1b7c7df9/slide_190.jpg)
![@app.route("/record", methods=['POST']) def add_record(): req_data = request.form name = req_data['name']](https://files.speakerdeck.com/presentations/cb70e1c04bf24611b357e39d1b7c7df9/slide_191.jpg)
![@app.route("/record", methods=['POST']) def add_record(): req_data = request.form name = req_data['name']](https://files.speakerdeck.com/presentations/cb70e1c04bf24611b357e39d1b7c7df9/slide_192.jpg)
![app.py 'Your DB URI' app.config['SQLALCHEMY_DATABASE_URI'] = 'Your DB URI' 這樣總該可以跑了了吧‼](https://files.speakerdeck.com/presentations/cb70e1c04bf24611b357e39d1b7c7df9/slide_269.jpg)
![app.py 'Your DB URI' app.config['SQLALCHEMY_DATABASE_URI'] = 'Your DB URI' 這樣總該可以跑了了吧‼](https://files.speakerdeck.com/presentations/cb70e1c04bf24611b357e39d1b7c7df9/slide_270.jpg)
![app.py 'Your DB URI' app.config['SQLALCHEMY_DATABASE_URI'] = 'Your DB URI' 這樣總該可以跑了了吧‼](https://files.speakerdeck.com/presentations/cb70e1c04bf24611b357e39d1b7c7df9/slide_271.jpg)