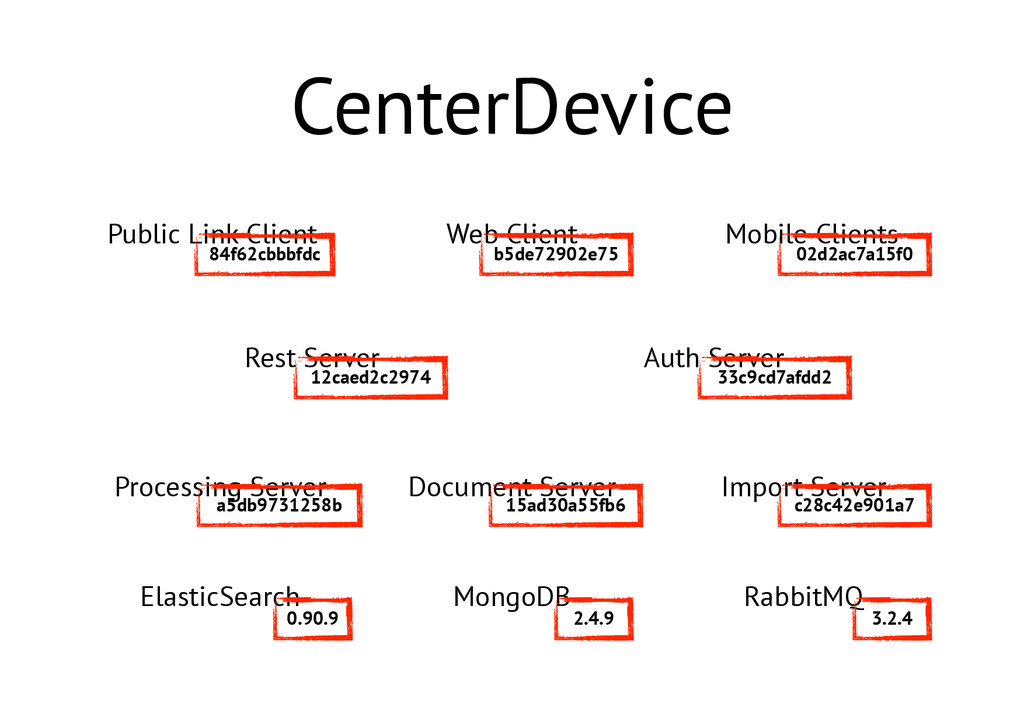
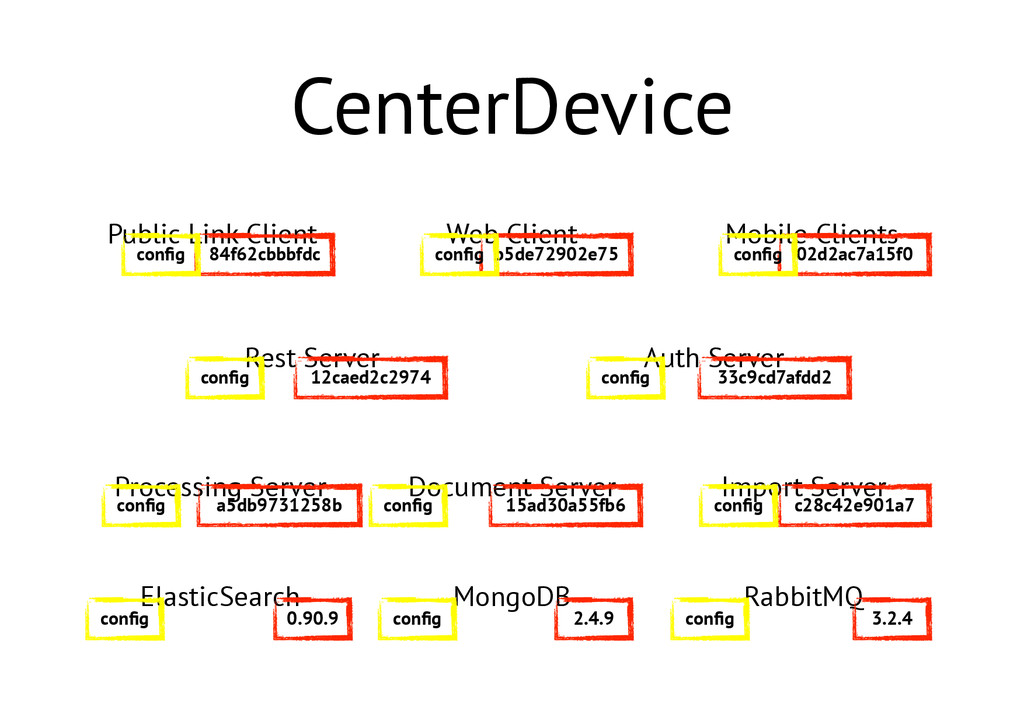
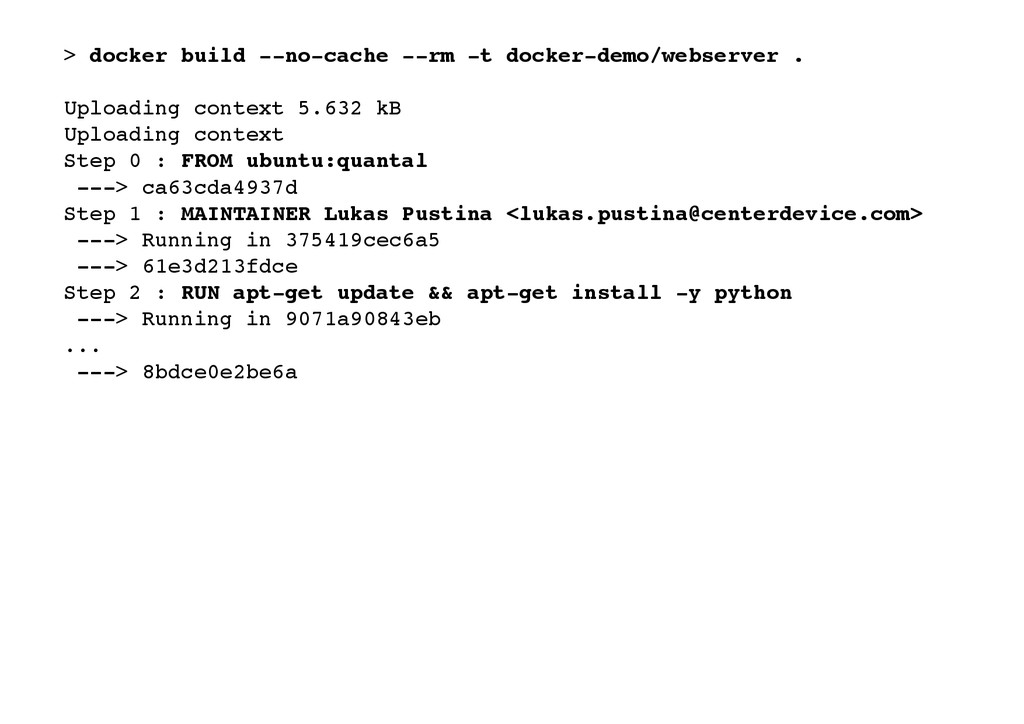
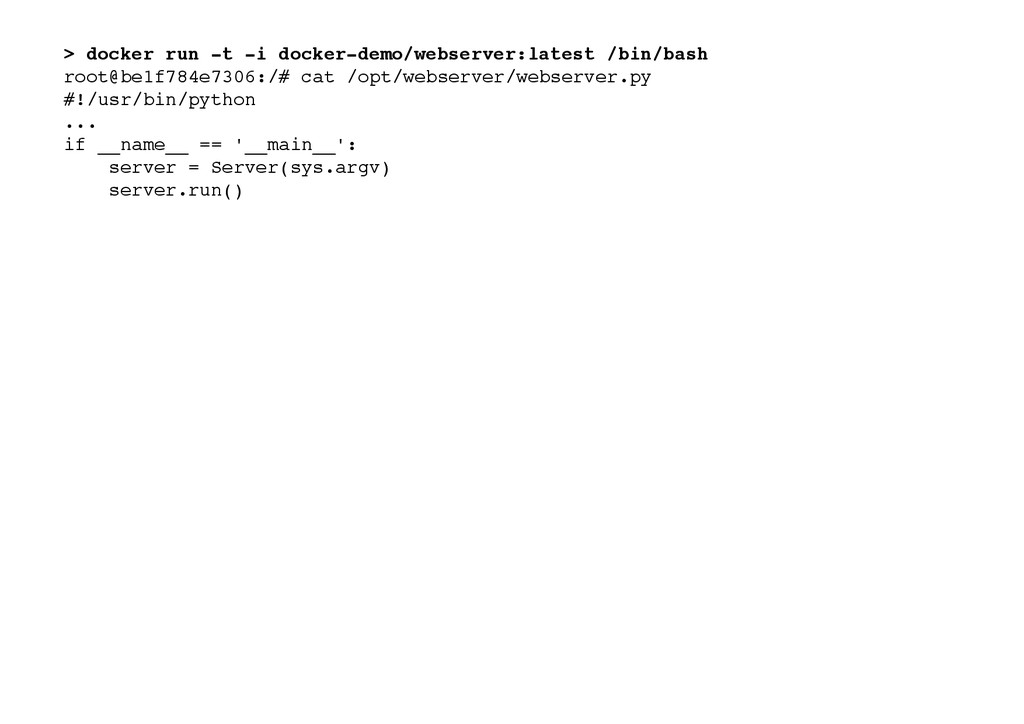
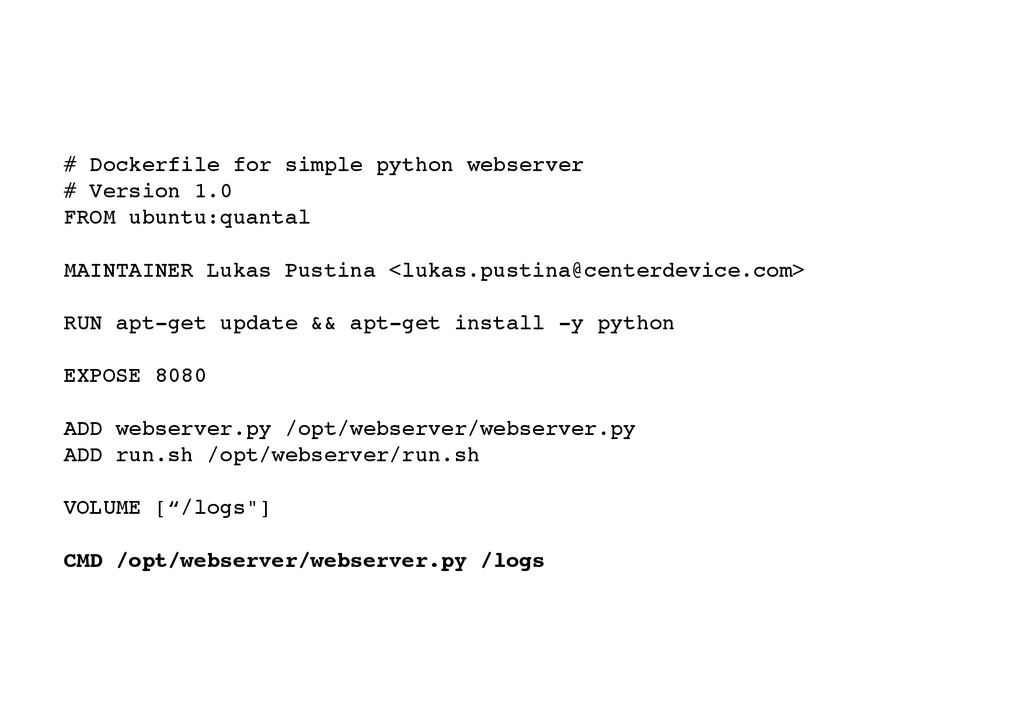
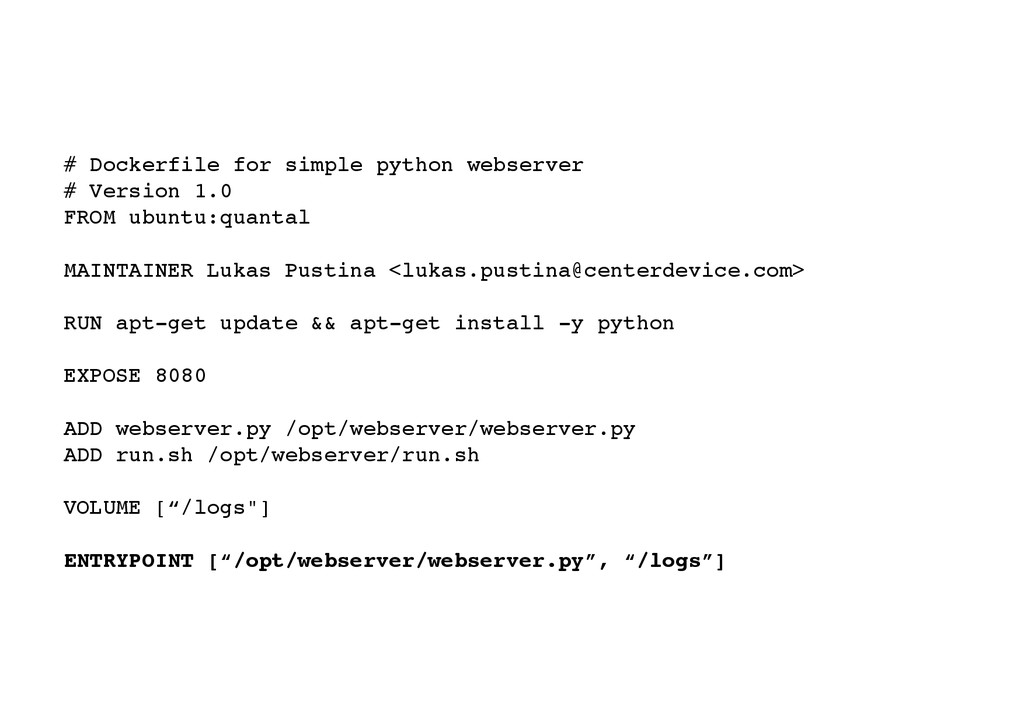
LUKAS PUSTINA codecentric AG ! Running virtuell machines has many benefits. They utilize your hardware much better, are easy to backup and exchange, and isolate services from each other. But running virtuell machines also has downsides. Virtual machine images are clunky. More importantly, virtual machines require a fair amount of resources as they emulate hardware and run a full stack operating sys- tem. Linux Containers is a lightweight alternative to full blown virtual machines while retaining their benefits. ! In this handout, I present Docker, a tool to help you practically apply Linux Containers. To get you started with Docker, I also present fully working examples available on Github. ! What is Docker? ! Docker builds upon Linux Container (LXC) . LXC) has been part of Linux since version 2.6.24 and provides system-level vir 1 - tualization. It uses Linux cgroups and name spaces to isolate processes from each other so they appear to run on their own system. Docker consists of three parts: Docker daemon, Docker images, and the Docker repositories which together make Linux Container easy and fun to use. ! Docker daemon runs as root and orchestrates all running containers. Just as virtual machines are based on images, Docker containers are based on Docker images. These images are tiny compared to virtual machine images and are stackable thanks to AUFS storing only changes — see below. Docker Images can be exchanged with others and versioned like 2 source code in private or public Docker Repositories. ! 100 Virtual Machines on your System ! As an introduction on how to use Docker yourself, I will walk you through an example of how Docker works. In our example, 100 Docker containers run each with an individual IP address serving web requests by a simple Python web server on port 8080. The full code for this example is available from Github so you can make your first steps with Docker right with me. ! From Dockerfile to Docker Image ! A Dockerfile describes how to build a Docker image. For this example, I use two Dockerfiles, one for the Python runtime and another one for the Python script implementing the web server. Listings 1 and 2 show the corresponding files. ! FROM ubuntu:quantal! MAINTAINER Lukas Pustina <
[email protected]>! RUN apt-get install -y python! Listing 1! ! The FROM command defines the base image from which we start. In this example, I use a public Ubuntu image. The images are looked up both locally as well as in the publicly available Docker repository. The RUN command specifies which com- mands to run during the build process. Here, only Python is added to the base image. ! FROM docker-demo/python! MAINTAINER Lukas Pustina <
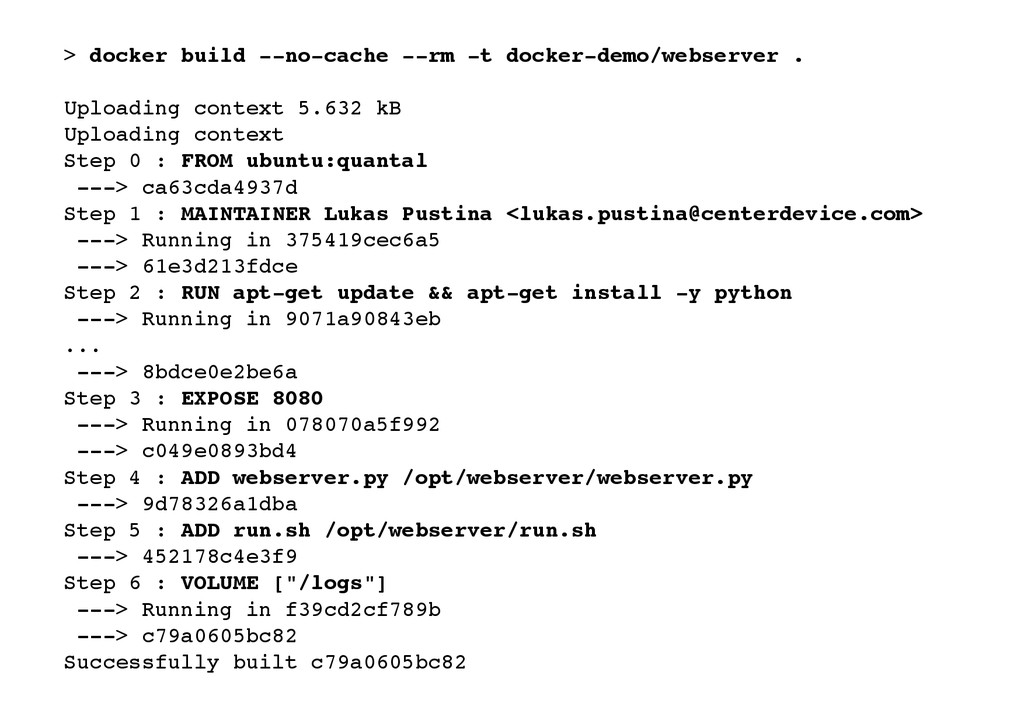
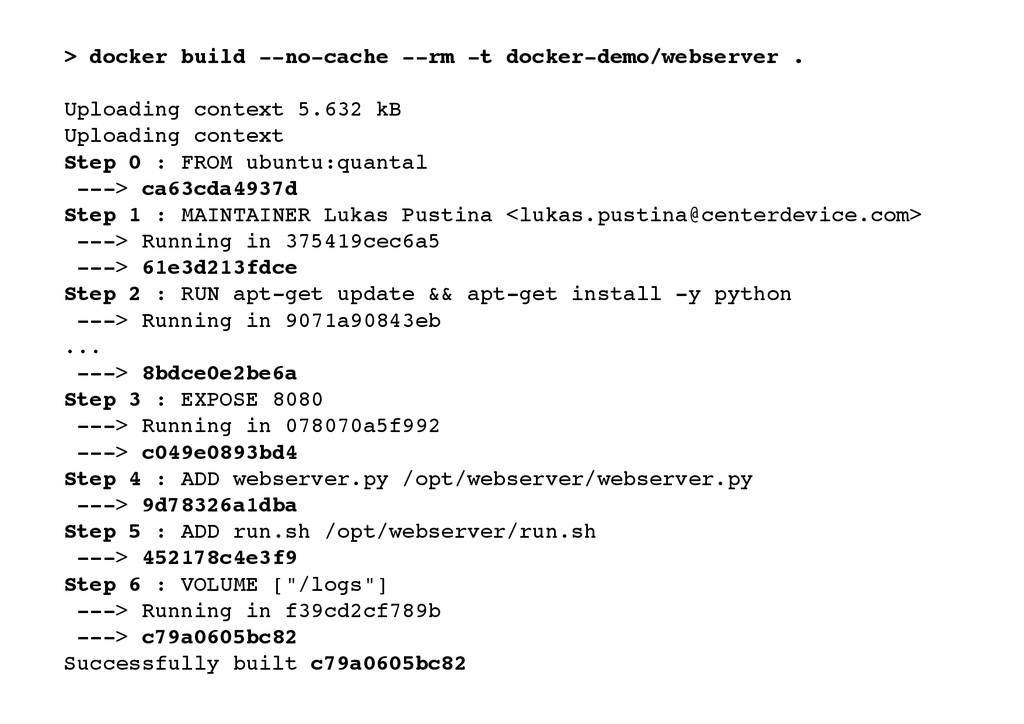
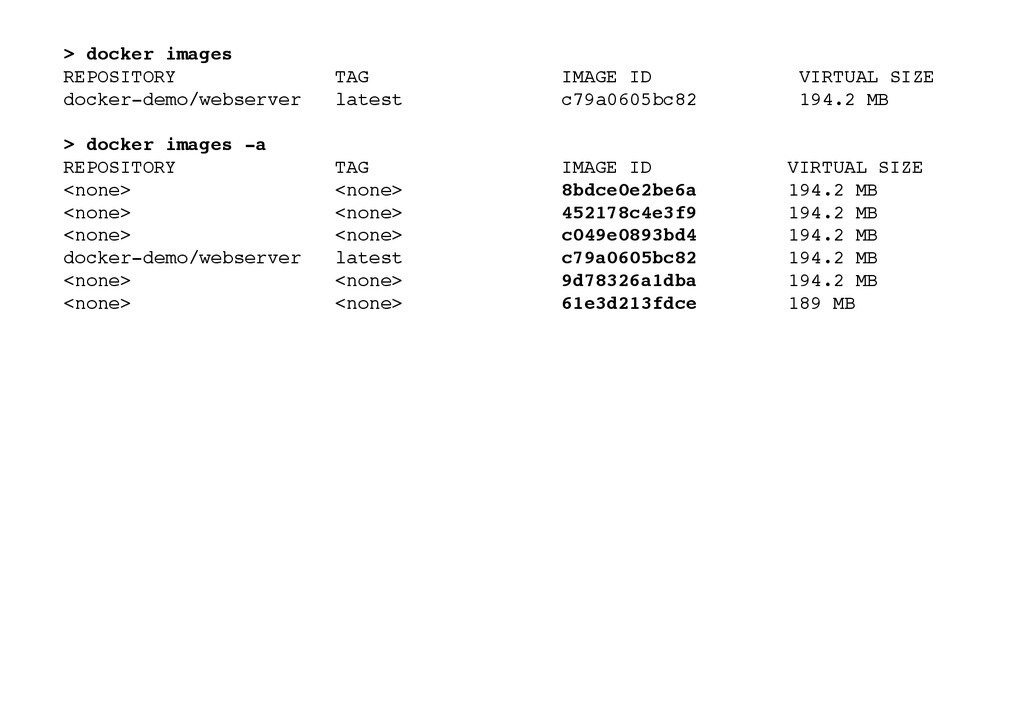
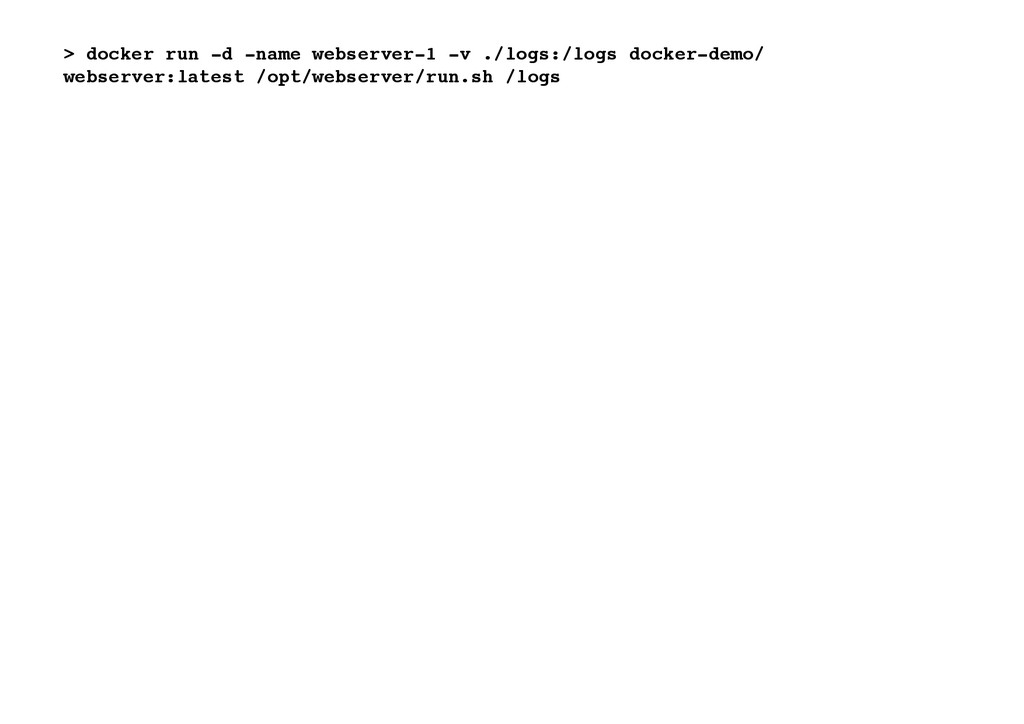
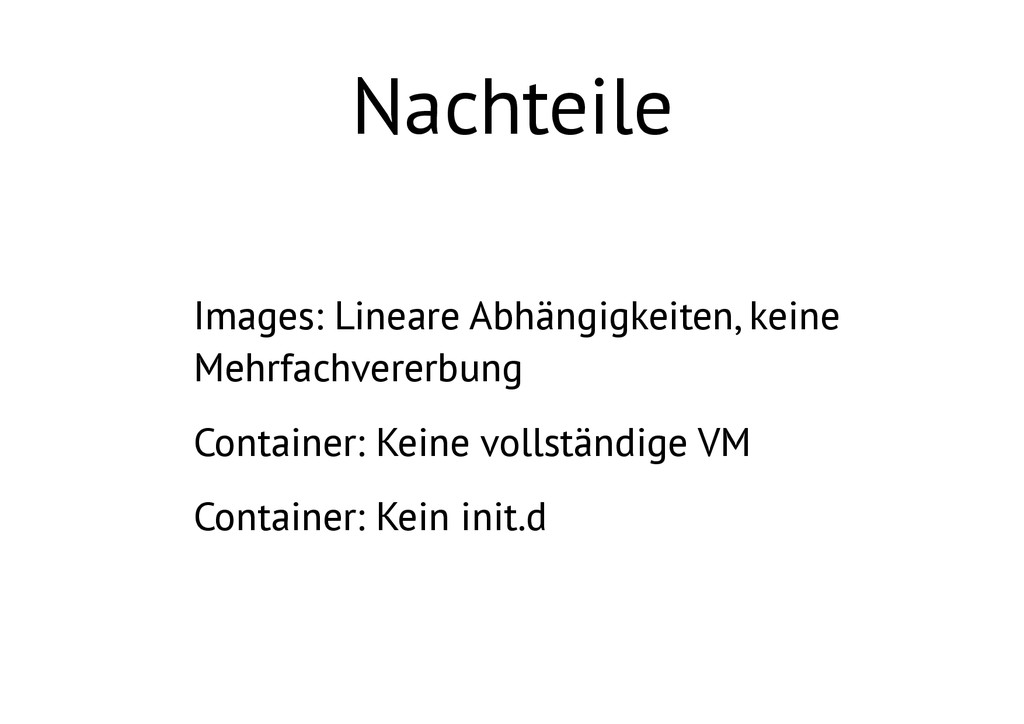
[email protected]>! ADD webserver.py /opt/webserver/webserver.py! ADD run.sh /opt/webserver/run.sh! EXPOSE 8080! VOLUME ["/logs”]! Listing 2! ! Interested in more? Visit me at codecentric.de or Twitter @drivebytesting. © Dr. Lukas Pustina 2014 - Licensed under a Create Commons license. See http://creativecommons.org/licenses/by-nc-nd/3.0/de/ for details. ! Since version 0.9, Docker has been using an own implementation of process isolation built on top of cgroups and namespaces like 1 LXC. Still, LXC is fully supported. When using Docker, it is irrelevant which container driver you use. ! Other filesystems are also supported. 2 System-Level Virtualization with Docker The second Docker Image derives from the Python runtime, and adds the two files webserver.py and run.sh for running the web server. Generally, all Docker containers run isolated from the world with no communication allowed — deny all policy. If there should be communication to the outside world, this must be explicitly defined through the EXPOSE command. In this example, port 8080 is exposed. The VOLUME commands specifies a mount point to which we can bind filesystems from the host operating system or other containers. This allows us to attach globally reusable and shareable mount points (?). ! Building Images: docker build ! From these Dockerfiles, Docker Images are build with each Dockerfile command generating a new Docker Image which can be individually accessed by its id — a git commit-like fingerprint. For our example we build the python runtime container > docker build -rm -t docker-demo/python python! ! in directory “python”, remove all intermediate images (-rm) and tag the final results with “docker-demo/python”. > docker images! ! shows all currently existing images and > docker images -tree! ! shows the hierarchal inheritance and the physical as well as virtual size of the images. In our examples this can be seen in listing 3. ! > docker images! docker-demo/python latest ef489f0186e1 Less than a second ago 210.7 MB! docker-demo/webserver latest b898a85622e4 Less than a second ago 210.7 MB! ubuntu quantal b750fe79269d 9 months ago 175.3 MB! ! > docker images -tree! !"27cf78414709 Size: 175.3 MB (virtual 175.3 MB)! !"b750fe79269d Size: 77 B (virtual 175.3 MB) Tags: ubuntu:quantal! !"7c1926658b21 Size: 0 B (virtual 175.3 MB)! !"ef489f0186e1 Size: 35.43 MB (virtual 210.7 MB) Tags: docker-demo/python:latest! !"90807ce05b64 Size: 0 B (virtual 210.7 MB)! !"d3822b811f4c Size: 0 B (virtual 210.7 MB)! !"380871b22bde Size: 1.454 kB (virtual 210.7 MB)! !"8f5a9cde5ae2 Size: 161 B (virtual 210.7 MB)! !"b898a85622e4 Size: 0 B (virtual 210.7 MB) Tags: docker-demo/web- server:latest! Listing 3! ! As you can see, the physical size changed only by the size of files added. Tagging does not increase the size. Interestingly, a Docker Image running a python web server is only around 180 MB in size. ! Making Changes ! If a change to one image and thus a rebuild is necessary, only the corresponding containers change. In this example, the web server container has been changed and docker images -tree rerun: ! > docker images -tree ! !"27cf78414709 Size: 175.3 MB (virtual 175.3 MB)! !"b750fe79269d Size: 77 B (virtual 175.3 MB) Tags: ubuntu:quantal! !"7c1926658b21 Size: 0 B (virtual 175.3 MB)! !"ef489f0186e1 Size: 35.43 MB (virtual 210.7 MB) Tags: docker-demo/python:latest! !"90807ce05b64 Size: 0 B (virtual 210.7 MB)! |"0e153dd3c547 Size: 0 B (virtual 210.7 MB)! | !"922d6e34d2d5 Size: 1.454 kB (virtual 210.7 MB)! | !"4bfc3d0fb5b2 Size: 161 B (virtual 210.7 MB)! page ! 2 Interested in more? Visit me at codecentric.de or Twitter @drivebytesting. © Dr. Lukas Pustina 2014 - Licensed under a Create Commons license. See http://creativecommons.org/licenses/by-nc-nd/3.0/de/ for details. System-Level Virtualization with Docker | !"abac38e20f27 Size: 0 B (virtual 210.7 MB) Tags: docker-demo/web- server:latest! !"d3822b811f4c Size: 0 B (virtual 210.7 MB)! !"380871b22bde Size: 1.454 kB (virtual 210.7 MB)! !"8f5a9cde5ae2 Size: 161 B (virtual 210.7 MB)! !"b898a85622e4 Size: 0 B (virtual 210.7 MB)! Listing 4! ! As you can see, the base images stay the same and only the changes from the web server Dockerfile are reapplied changing only a few bytes. Not bad for virtual machine images. ! Running Containers: docker run ! To start a Docker Container and run it based on a Docker Image, you use docker run: > docker run -d -cidfile=webserver.cid -name webserver -v `pwd`/logs:/logs docker-demo/ webserver:latest /opt/webserver/run.sh! ! In our example, the Docker’s most recent image tagged “docker-demo/webserver” is run. This means image abac38e20f27 is used instead of b898a85622e4. The container id is written to the file webserver.cid (-cidfile), named “webserver” (-name), the host local directory logs is mapped to the container directory /logs (-v; see Dockerfile above). The process to execute inside the container is /opt/webserver/run.sh which was copied into the image by the second Dockerfile. ! You can also run several containers: > for i in `seq 1 10`; do
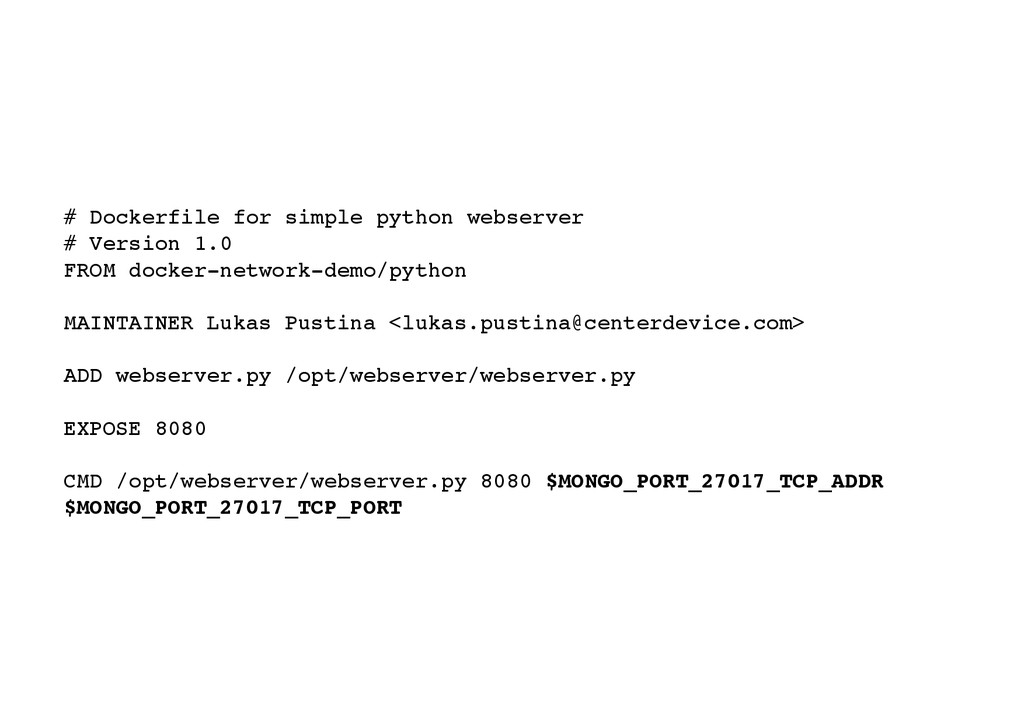
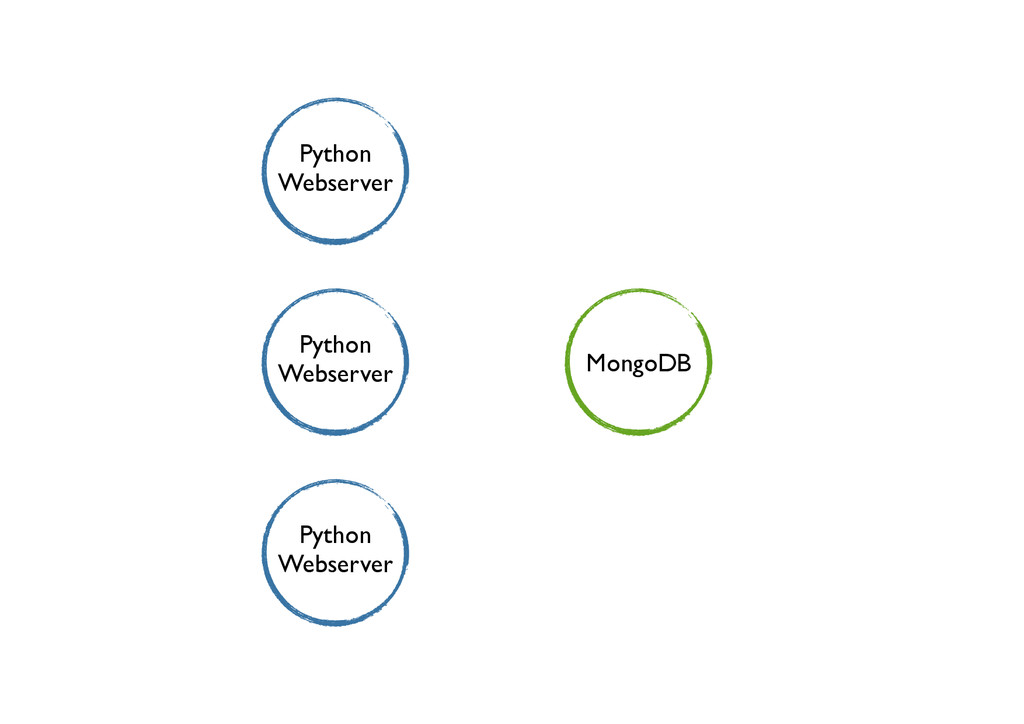
docker run -d -cidfile=webserver-$i.cid -name webserver-$i -v `pwd`/logs:/logs docker- demo/webserver:latest /opt/webserver/run.sh /logs;
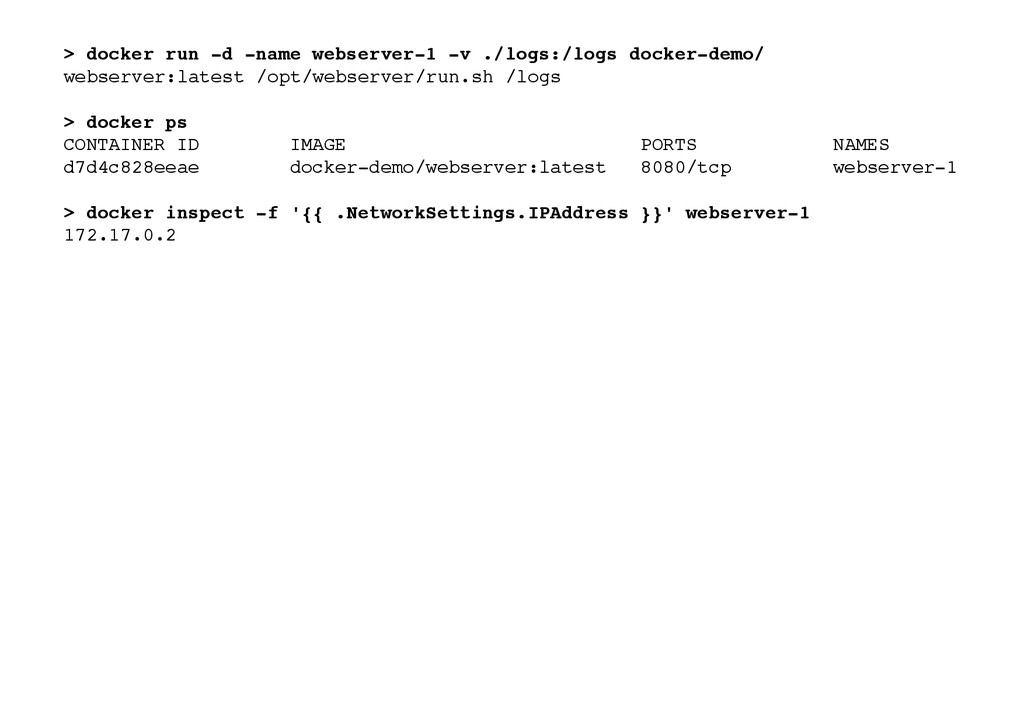
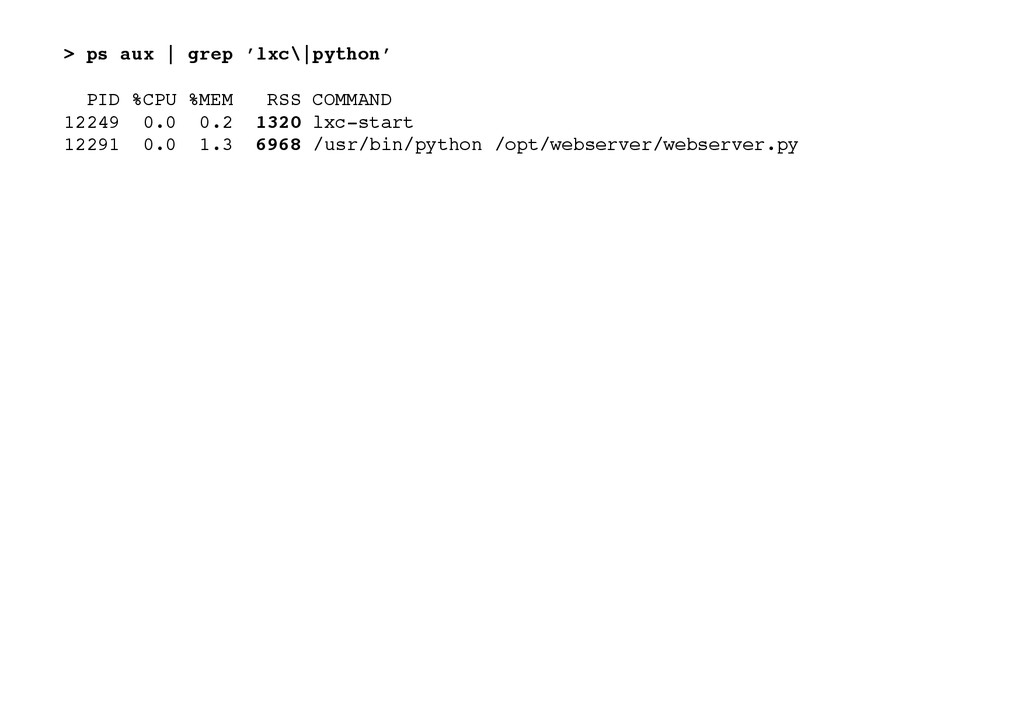
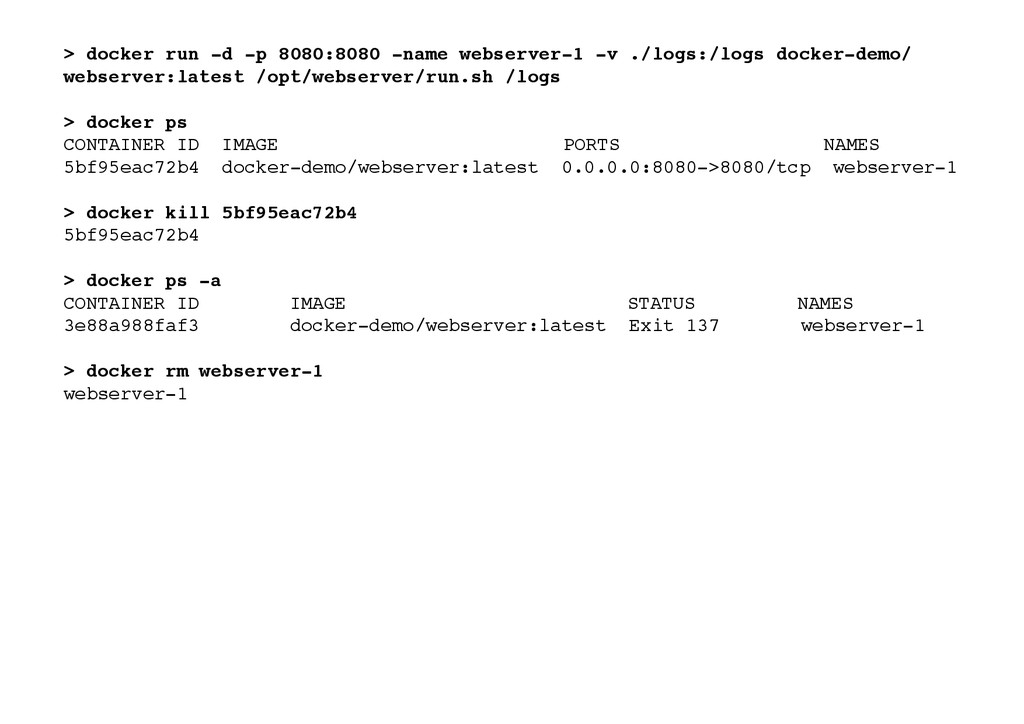
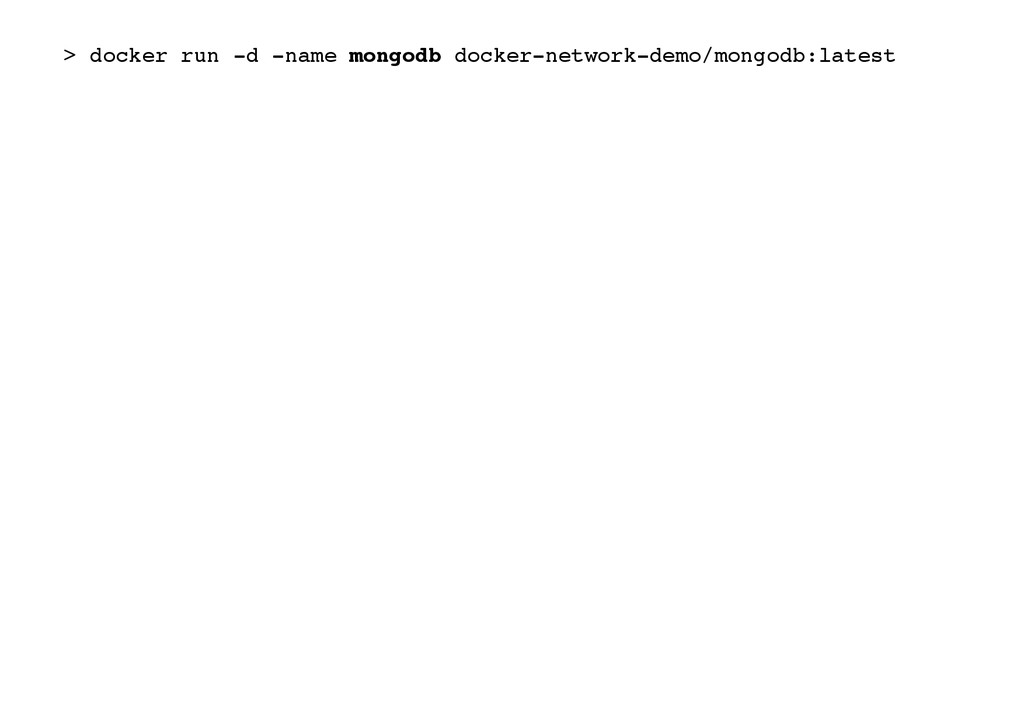
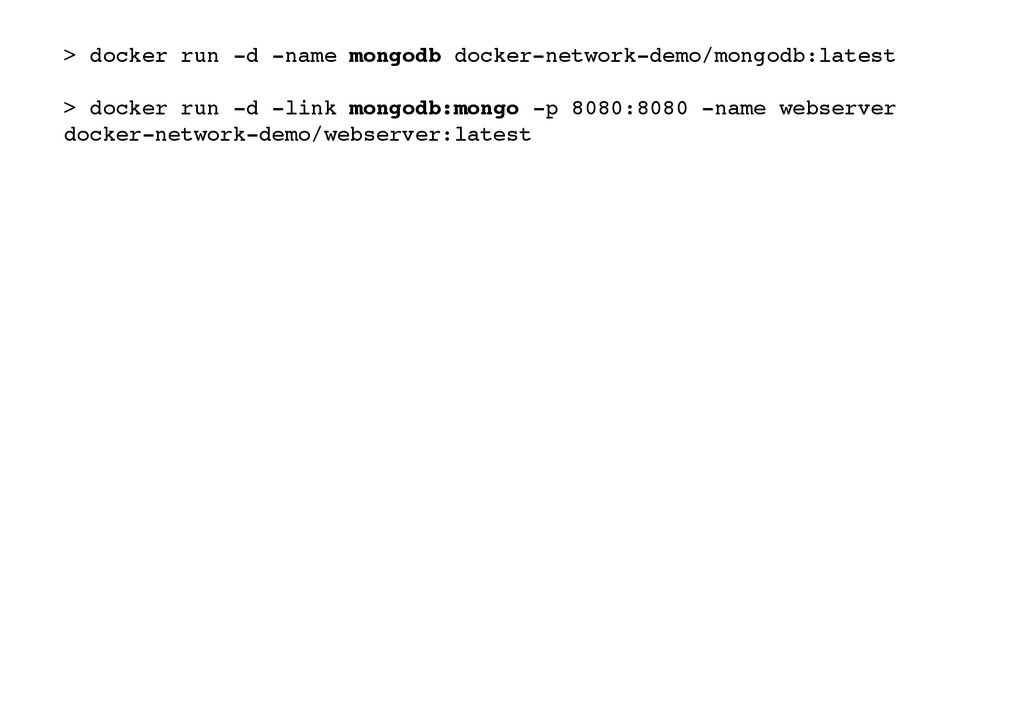
done! ! The full examples on Github runs 100 machines with ease in a Vagrant Box. ! Showing Running Containers: docker ps ! Similar to ps, docker ps shows the running containers: ! CONTAINER ID IMAGE COMMAND PORTS NAMES! 63120c069662 docker-demo/webserver:latest /opt/webserver/run.s 8080/tcp webserver-10! 5af293d56a0b docker-demo/webserver:latest /opt/webserver/run.s 8080/tcp webserver-9! a4a44f159658 docker-demo/webserver:latest /opt/webserver/run.s 8080/tcp webserver-8! 40b35ff10aa2 docker-demo/webserver:latest /opt/webserver/run.s 8080/tcp webserver-7! 6e9127f8a113 docker-demo/webserver:latest /opt/webserver/run.s 8080/tcp webserver-6! 4623905191d2 docker-demo/webserver:latest /opt/webserver/run.s 8080/tcp webserver-5! e57def12fe25 docker-demo/webserver:latest /opt/webserver/run.s 8080/tcp webserver-4! c352eccb21de docker-demo/webserver:latest /opt/webserver/run.s 8080/tcp webserver-3! f65e43115864 docker-demo/webserver:latest /opt/webserver/run.s 8080/tcp webserver-2! 111c936c2763 docker-demo/webserver:latest /opt/webserver/run.s 8080/tcp webserver-1! Listing 5! ! As you can see, there are 10 containers running with the names webserver-* and TCP port 8080 exposed. All nicely isolated from each other. ! Getting additional Information: docker inspect ! docker inspect gives additional information as a JSON document for a container id. This includes the hostname, host direc- tory the images resides in, the IP addresses and more. To show the IP addresses of the above started containers, we grep for IPAddress: > docker ps -q | xargs docker inspect -f '{{ .NetworkSettings.IPAddress }}'! 172.17.0.12! 172.17.0.11! …! page ! 3 Interested in more? Visit me at codecentric.de or Twitter @drivebytesting. © Dr. Lukas Pustina 2014 - Licensed under a Create Commons license. See http://creativecommons.org/licenses/by-nc-nd/3.0/de/ for details. System-Level Virtualization with Docker As you can see, each container runs with a different network interface and IP address forming a network of isolated system- level virtual machines. ! Resource Usage ! Running “ps aux | grep ‘lxc-start\|python’” to inspect the resources used by these 10 Linux Containers, you see that for each machine the container process takes around 1.3 MB; the Python instance takes around 7 MB. That is less than 8.5 MB in total per virtual machine – quite an impressive figure as compared to real virtual machines. ! PID %CPU %MEM RSS COMMAND (warum hier über ganze Breite?)! 12197 0.0 0.2 1316 lxc-start! 12249 0.0 0.2 1320 lxc-start! 12291 0.0 1.3 6968 /usr/bin/python /opt/webserver/webserver.py! 12296 0.0 0.2 1320 lxc-start! 12346 0.0 1.3 6960 /usr/bin/python /opt/webserver/webserver.py! 12348 0.0 0.2 1316 lxc-start! 12399 0.0 1.3 6964 /usr/bin/python /opt/webserver/webserver.py! 12400 0.0 0.2 1316 lxc-start! 12450 0.0 0.2 1316 lxc-start! 12496 0.0 1.3 6964 /usr/bin/python /opt/webserver/webserver.py! 12497 0.0 0.2 1316 lxc-start! 12546 0.0 0.2 1316 lxc-start! 12594 0.0 0.2 1320 lxc-start! 12648 0.0 1.3 6968 /usr/bin/python /opt/webserver/webserver.py! 12649 0.0 0.2 1316 lxc-start! 12700 0.0 1.3 6968 /usr/bin/python /opt/webserver/webserver.py! 12701 0.0 1.3 6968 /usr/bin/python /opt/webserver/webserver.py! 12707 0.0 1.3 6960 /usr/bin/python /opt/webserver/webserver.py! 12711 0.0 1.3 6968 /usr/bin/python /opt/webserver/webserver.py! 12712 0.0 1.3 6964 /usr/bin/python /opt/webserver/webserver.py! Listing 6! ! docker stop, kill, remove ! In order to stop a container, it is sufficient to stop the process that the containers executes by sending SIGTERM or SIGKILL. docker stop tries to send SIGTERM first and SIGKILL after a timeout. docker kill sends SIGKILL immediately. ! Like in stopped virtual machines, stopped Linux Containers still exist. To remove them, docker rm <container id> is used. ! Docker Networking ! Now we dig a bit deeper and cover advanced topics regarding Docker networking and how to connect containers with each other as well as the outside world. As an example, I use a web service that processes birthdays of famous physicists served by three concurrently running Python web servers backed by a MongoDB. This example is also available on GitHub as a fully working Vagrant box. In general, there are three ways to configure networking for Docker containers that complement each other: Link, Port, and Pipework. ! Link – Automatically Connect Services ! Docker links automatically propagate exposed ports of one container as shell variables to another container. In this way, the second container can dynamically adjust network settings upon startup without the need to modify an image nor configura- tions. In order to start a container, run > docker run -name <name> <image id | image repository:tag>! ! The name denotes a symbolic name the running container instance should be identified by. For example, the MongoDB con- tainer: > docker run -d -name mongodb docker-network-demo/mongodb:latest! ! ! page ! 4 Interested in more? Visit me at codecentric.de or Twitter @drivebytesting. © Dr. Lukas Pustina 2014 - Licensed under a Create Commons license. See http://creativecommons.org/licenses/by-nc-nd/3.0/de/ for details. System-Level Virtualization with Docker Each container gets a dynamic IP address automatically assigned upon start. You can query it by name: > docker inspect -f '{{ .NetworkSettings.IPAddress }}'! 172.17.0.2! ! In the following Dockerfile, port 27017 is exposed for the MongoDB’s container image making it accessible from outside the container. 3 ! VOLUME ["/data/mongodb"]! EXPOSE 27017! ENTRYPOINT ["/usr/bin/mongod"]! CMD ["--port", "27017", "--dbpath", "/data/mongodb", “--smallfiles"]! Listing 7! ! By using the additional parameter -link <name:alias> to the run command, a link is established to the container <name> and called <alias>. For a web server from our example: > docker run -d -name webserver1 -link mongodb:mongo docker-network-demo/webserver:latest! ! This link connects the web server to the MongoDB and automatically creates environment variables in the web server con- tainer passing IP address and exposed port from the MongoDB to the web server container. The environment variables are prefix with the alias name capitalized and the exposed port number. To show these variables run ! > vagrant@docker-network-demo:/vagrant$ docker run -t -i -link mongodb:mongo ! docker-network-demo/webserver env! HOME=/! PATH=/usr/local/sbin:/usr/local/bin:/usr/sbin:/usr/bin:/sbin:/bin! HOSTNAME=04a4ee4470e1! TERM=xterm! MONGO_PORT=tcp://172.17.0.2:27017! MONGO_PORT_27017_TCP=tcp://172.17.0.2:27017! MONGO_PORT_27017_TCP_ADDR=172.17.0.2! MONGO_PORT_27017_TCP_PORT=27017! MONGO_PORT_27017_TCP_PROTO=tcp! MONGO_NAME=/insane_albattani/mongo! container=lxc! Listing 8! ! As you can see, $MONGO_PORT_27017_TCP_ADDR and $MONGO_PORT_27017_TCP_PORT contain the necessary infor- mation to connect to the MongoDB instance. These environment variables can also be used in other Dockerfiles like our web server: ! ADD webserver.py /opt/webserver/webserver.py! EXPOSE 8080! CMD /opt/webserver/webserver.py 8080 $MONGO_PORT_27017_TCP_ADDR $MONGO_PORT_27017_TCP_PORT! Listing 9! ! In this way, the MongoDB connection parameters are automatically passed to the Python script webserver.py without any external dependency management. It is important to note here that there are several syntax forms of the CMD command and only this one allows us to use the environment variables; cf. [1] and [2]. As result, let’s start our full example: ! > docker run -d -name mongodb docker-network-demo/mongodb:latest! > docker run -d -name webserver1 -link mongodb:mongo docker-network-demo/webserver:latest! > docker run -d -name webserver2 -link mongodb:mongo docker-network-demo/webserver:latest! > docker run -d -name webserver3 -link mongodb:mongo docker-network-demo/webserver:latest! Listing 10! ! page ! 5 Interested in more? Visit me at codecentric.de or Twitter @drivebytesting. © Dr. Lukas Pustina 2014 - Licensed under a Create Commons license. See http://creativecommons.org/licenses/by-nc-nd/3.0/de/ for details. ! By default, only exposed ports of a container are accessible 3 System-Level Virtualization with Docker For a demo, we define a shell function to retrieve a container’s IP address by name: function getWebserverIP() {! docker inspect $1 | grep IPAddress | awk '{print $2}' | tr -d '",\n'}! ! Now we can post birthdays to the three web servers which are persisted to MongoDB: ! > curl -X POST -H "Content-Type: application/json" -d '{"name":"James Clerk Maxwell",! "birthday":"13.06.1831"}' http://$(getWebserverIP webserver1):8080! > curl -X POST -H "Content-Type: application/json" -d '{"name":"Albert Einstein",! "birthday":"14.03.1879"}' http://$(getWebserverIP webserver2):8080! > curl -X POST -H "Content-Type: application/json" -d '{"name":"Werner Heisenberg",! "birthday":"05.12.1901”}' http://$(getWebserverIP webserver3):8080! Listing 11! ! And retrieve these birthdays ! > curl http://$(getWebserverIP webserver1)! name = James Clerk Maxwell, birthday = 13.06.1831! name = Albert Einstein, birthday = 14.03.1879! name = Werner Heisenberg, birthday = 05.12.1901! Listing 12! ! As you can see, no parameterization is necessary to connect the web servers to the MongoDB as docker run -link automati- cally passes the correct network connection information. ! Port – Expose Services to Host Port ! Docker links interconnect containers. But how do we connect containers to the outside world? There are two different ap- proaches here that are complementary. Docker port and pipework. ! The docker run -port parameter serves another purpose to enable networking with Docker containers. It comes in three syn- tax flavors -p=[]: Publish a container’s port to the host (format: ip:hostPort:containerPort | ip::containerPort | hostPort:containerPort)! ! and specifies on which host IP address and port an exposed container port should be provided. In case the host IP address or port are omitted, all host interfaces or the same port as exposed are used, respectively. In this way, a connection to the host port is forwarded to the container. ! In our example, we expose the web server container’s port to the same port of the host: > docker run -d -name webserver -link mongodb:mongo -p 8080:8080
docker-network-demo/webserver:latest ! ! In order to check to which IP addresses and port an exposed port — so called private port — is mapped to, run > docker port webserver 8080! 0.0.0.0:8080! ! In this case, the port is exposed to the same host port as desired and is listening on all host interfaces. Now you can access the example web service by the host IP address (see Vagrantfile on GitHub): > curl -X POST -H "Content-Type: application/json" -d '{"name":"Albert Einstein",
"birthday":"14.03.1879"}' http://10.2.0.10:8080 ! ! Pipework – More Networks for your Containers ! Docker creates a special Linux bridge called docker0 on startup. All containers are automatically connected to this bridge and the IP subnet for all containers is randomly set by Docker. Currently, it is not possible to directly influence the particular IP address of a Docker container. Luckily, there is a shell script pipework which you can use to add another interface to a page ! 6 Interested in more? Visit me at codecentric.de or Twitter @drivebytesting. © Dr. Lukas Pustina 2014 - Licensed under a Create Commons license. See http://creativecommons.org/licenses/by-nc-nd/3.0/de/ for details. System-Level Virtualization with Docker container with a specified IP address. I contributed to the script, so as to allow adding arbitrary numbers of interfaces. For example > sudo ./pipework docker0 -i eth1 $(docker ps -q -l) 10.2.0.11/16! ! adds the interface eth1 with IP address 10.2.0.11 to the last started container. ! Integrate Docker Containers into your Host Network ! In addition to specifying additional interfaces, you can even put all containers on the same network as the host with some Linux networking tricks. Let’s suppose for the following that your host is connected to the local network by interface eth1 with IP address 10.2.0.10/16 as it is configured in the Vagrantfile on GitHub. ! First, we need to place the Docker bridge interface into the same network as our host for which the -bip parameter of the Docker daemon is intended. On Ubunutu, you can change this parameter by modifying the file /etc/default/docker: DOCKER_OPTS=-bip=10.2.0.10/16! ! Second, since this leads to two interfaces on the same IP network on your host (docker0 as well as the eth1), the TCP/IP stack does not know which hosts of that network can be reached via which interface. Therefore, we need to help the stack with its routing decisions. The easiest way to connected these two network segments is to make use of the Docker bridge which is already configured. In this way, we don’t need additional routing information but solely rely on the network level 2 mechanism. ! First, we unbind the network address of eth1 and then, we attach eth1 as another interface to the docker0 bridge: ! > ip addr del 10.2.0.10/16 dev eth1! > ip link set eth1 master docker0! > ifconfig docker0! docker0 Link encap:Ethernet HWaddr 08:00:27:09:bc:ad! inet addr:10.2.0.10 Bcast:0.0.0.0 Mask:255.255.0.0! inet6 addr: fe80::b023:75ff:fead:c70e/64 Scope:Link! UP BROADCAST RUNNING MULTICAST MTU:1500 Metric:1! RX packets:59816 errors:0 dropped:0 overruns:0 frame:0! TX packets:126844 errors:0 dropped:0 overruns:0 carrier:0! collisions:0 txqueuelen:0! RX bytes:2491020 (2.4 MB) TX bytes:112308729 (112.3 MB)! ! > ifconfig eth1! eth1 Link encap:Ethernet HWaddr 08:00:27:09:bc:ad! inet6 addr: fe80::a00:27ff:fe09:bcad/64 Scope:Link! UP BROADCAST RUNNING MULTICAST MTU:1500 Metric:1! RX packets:646 errors:0 dropped:0 overruns:0 frame:0! TX packets:159 errors:0 dropped:0 overruns:0 carrier:0! collisions:0 txqueuelen:1000! RX bytes:111487 (111.4 KB) TX bytes:11220 (11.2 KB)! Listing 13! ! In the Vagrant box example on GitHub, I added these two commands to /etc/rc.local so that they are executed automatical- ly after each boot. ! When using this mode of networking, it is important to avoid IP address conflicts, because Docker still randomly assigns IP address to started containers. But now (when now?) these IP addresses are coming from a real IP network. Therefore, I usu- ally complement this setup with pipework to set static IP addresses for my containers which I know will not create an IP ad- dress conflict. ! Docker Registry ! Docker allows to bundle artifacts and configurations in a single image. These images run as light weight system-level virtual machines. Let me show you how to manage images in a private Docker registry — basically a git repository for images — page ! 7 Interested in more? Visit me at codecentric.de or Twitter @drivebytesting. © Dr. Lukas Pustina 2014 - Licensed under a Create Commons license. See http://creativecommons.org/licenses/by-nc-nd/3.0/de/ for details. System-Level Virtualization with Docker and run a production grade registry. A fully working example is available on Github to get you started with your own private Docker registry. ! Every single command in a Dockerfile yields a new Docker image with an individual id similar to a commit in git. This commit can be tagged for easy reference with a Docker Tag. In addition, tags are the means to share images on public and private repositories. ! Tags ! When you build a Docker image using a Dockerfile, you can set a tag for the final image by passing the parameter -t <tag>. You can also tag any other image with docker tag <image> <tag>. The expression tag has evolved in Docker quite a lot and its meaning has blurred. The syntax for a tag is repository:[tag]. ! In general, a repository is a collection of images which are hosted in a registry. When you use the public Docker.io repository — also called the Docker Index —, your repository is <username>/<repo_name> — cf [1]. ! For example, I shared the registry-demo container to the Docker Index by first tagging and then pushing it: 4 > docker build -tag lukaspustina/registry-demo registry! > docker push lukaspustina/registry-demo! ! In case you want to use a private registry, you need to set the URL to your private registry as the username. First tag it ac- cordingly and the push it — assuming your registry is listing on localhost port 5000: > docker tag lukaspustina/registry-demo localhost:5000/registry-demo! > docker push localhost:5000/registry-demo! ! Registry ! You can download the docker registry from here. The configuration of a registry is straight forward and described in the cor- responding Readme. You can define different modes a registry should run called flavors, e.g. for debugging, different storage backend etc. Docker registry supports multiple storage backend. You can choose from local file system, Amazon S3, Open- Stack Glance etc. ! If you run a production registry with multiple workers, it is crucial to set a “secret_key” in the configuration file config/con- fig.yml to a 64 characters long value. Otherwise, you will get very confusing errors if you run more than one worker thread. In order to retrieve an image from a repository, run docker pull <name> where name denotes the repo_name given above. If you want to select a specifically tagged version, you can supply the tag with the -t option. ! For an image from the Docker Index, run > docker pull lukaspustina/registry-demo:latest! ! and for a private registry, run > docker pull localhost:5000/registry-demo! ! You can find my demo project on GitHub. You can either run it directly on a Docker compatible OS like Linux and OS X or use Vagrantfile to setup a Virtual Box — see the Readme on GitHib for details. ! The demo consists of two steps. The first step builds a production-ready Docker image containing the Docker registry and two Python images for 2.7 and 3.3 which are pushed to the registry. For this demo, the two Python version are used as two 5 versions of the same artifact ‘python’ to demonstrate how to use tags for versioning images of the same repository. > make build! ! ! ! page ! 8 Interested in more? Visit me at codecentric.de or Twitter @drivebytesting. © Dr. Lukas Pustina 2014 - Licensed under a Create Commons license. See http://creativecommons.org/licenses/by-nc-nd/3.0/de/ for details. ! You can run my shared registry directly: 4 > docker run --name registry -d -p 5000:5000 -v <absolute local path>:/docker-registry- storage lukaspustina/registry-demo. ! Please be patient as the build process takes quite some time. 5 System-Level Virtualization with Docker You can see how the docker layers are uploaded to the registry: ! Pushing repository localhost:5000/python (2 tags)! Image 511136ea3c5a Image successfully pushed! Image cc7385a89304 Image successfully pushed! Image 24ba2ee5d982 Image successfully pushed! Image a49658c12a4f Image successfully pushed! Image 7adcddf9f908 Image successfully pushed! Image 818c514e00c0 Image successfully pushed! Image 480cb1b9f62c Image successfully pushed! Image 9eeddd8616b7 Image successfully pushed! Image c26adcc0bc2a Image successfully pushed! Pushing tag for rev [c26adcc0bc2a] on! {http://localhost:5000/v1/repositories/python/tags/python-2}! Image c04e8b52daba Image successfully pushed! Image 1ebdf4e79ef1 Image successfully pushed! Pushing tag for rev [1ebdf4e79ef1] on! {http://localhost:5000/v1/repositories/python/tags/python-3}! Listing 14! ! You can also see that tags for the two Python versions are transmitted as well allowing a user to pull only a specific version. ! The second step pulls the Python images and runs them demonstrating the whole life cycle of build, pushing, pulling, and running image with your own, private Docker registry. > make start-registry pull run-python-2 run-python-3 stop-registry! ! You can see how the individual layers of the Python images are gathered and afterwards run: ! docker pull localhost:5000/python! Pulling repository localhost:5000/python! 1ebdf4e79ef1: Download complete! c26adcc0bc2a: Download complete! 511136ea3c5a: Download complete! cc7385a89304: Download complete! 24ba2ee5d982: Download complete! a49658c12a4f: Download complete! 7adcddf9f908: Download complete! 818c514e00c0: Download complete! 480cb1b9f62c: Download complete! c04e8b52daba: Download complete! 9eeddd8616b7: Download complete! ...! docker run localhost:5000/python:python-2! Python version is 2.7.5+! docker run localhost:5000/python:python-3! Python version is 3.3.2+! Listing 15! ! Running a Production Registry ! At CenterDevice we are running a Docker registry on our Jenkins CI server. The main command line to run the registry is > SETTINGS_FLAVOR=prod DOCKER_REGISTRY_CONFIG=/etc/docker/config.yml gunicorn -k gevent - b localhost:5000 --max-requests 100 --graceful-timeout 3600 -t 3600 -w 8 wsgi:application ! ! which sets the flavor and the location of the configuration file. In addition, it starts 8 worker threads and listens only on local- host. Since the current version of Docker registry has no authentication, we use ssh tunnels for this purpose. The registry instance only listens on localhost. If you want to connect to the registry, you need to create a tunnel first with > ssh -N -L 5000:localhost:5000 user@server! page ! 9 Interested in more? Visit me at codecentric.de or Twitter @drivebytesting. © Dr. Lukas Pustina 2014 - Licensed under a Create Commons license. See http://creativecommons.org/licenses/by-nc-nd/3.0/de/ for details.