Slides for a talk that I gave at the TalkJS Singapore June Meetup: https://www.meetup.com/Singapore-JS/events/240521034/
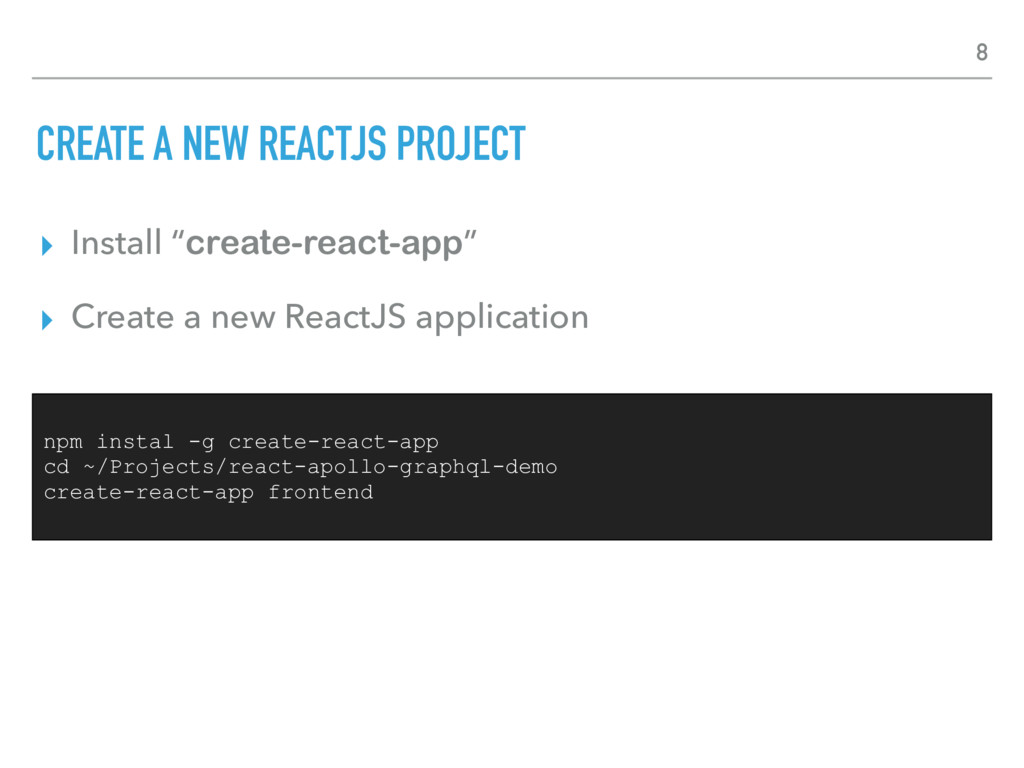
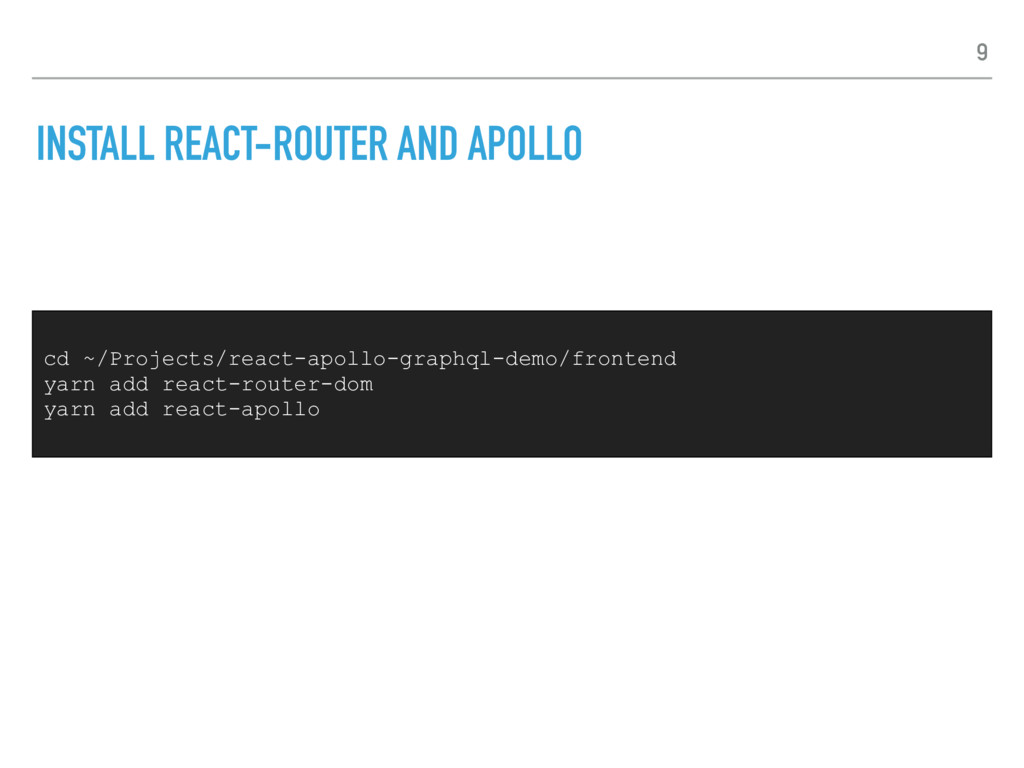
Code can be found here: https://github.com/mbrochh/react-apollo-graphql-demo
Video can be found here: https://engineers.sg/video/using-apollo-with-reactjs-and-graphql-singaporejs--1821
![CLONE REPOSITORY cd ~/Projects/ git clone [email protected]:mbrochh/react-apollo-graphql-demo.git cd react—apollo—graphql-demo/backend mkvirtualenv](https://files.speakerdeck.com/presentations/41e104b856ac49f3b274b350dfa50357/slide_5.jpg)