Upgrade to Pro — share decks privately, control downloads, hide ads and more …

Pixel Perfect Graphics Pipeline in Unity – Desi...

Pixel Perfect Graphics Pipeline in Unity – Design to Dev Handoff Guide

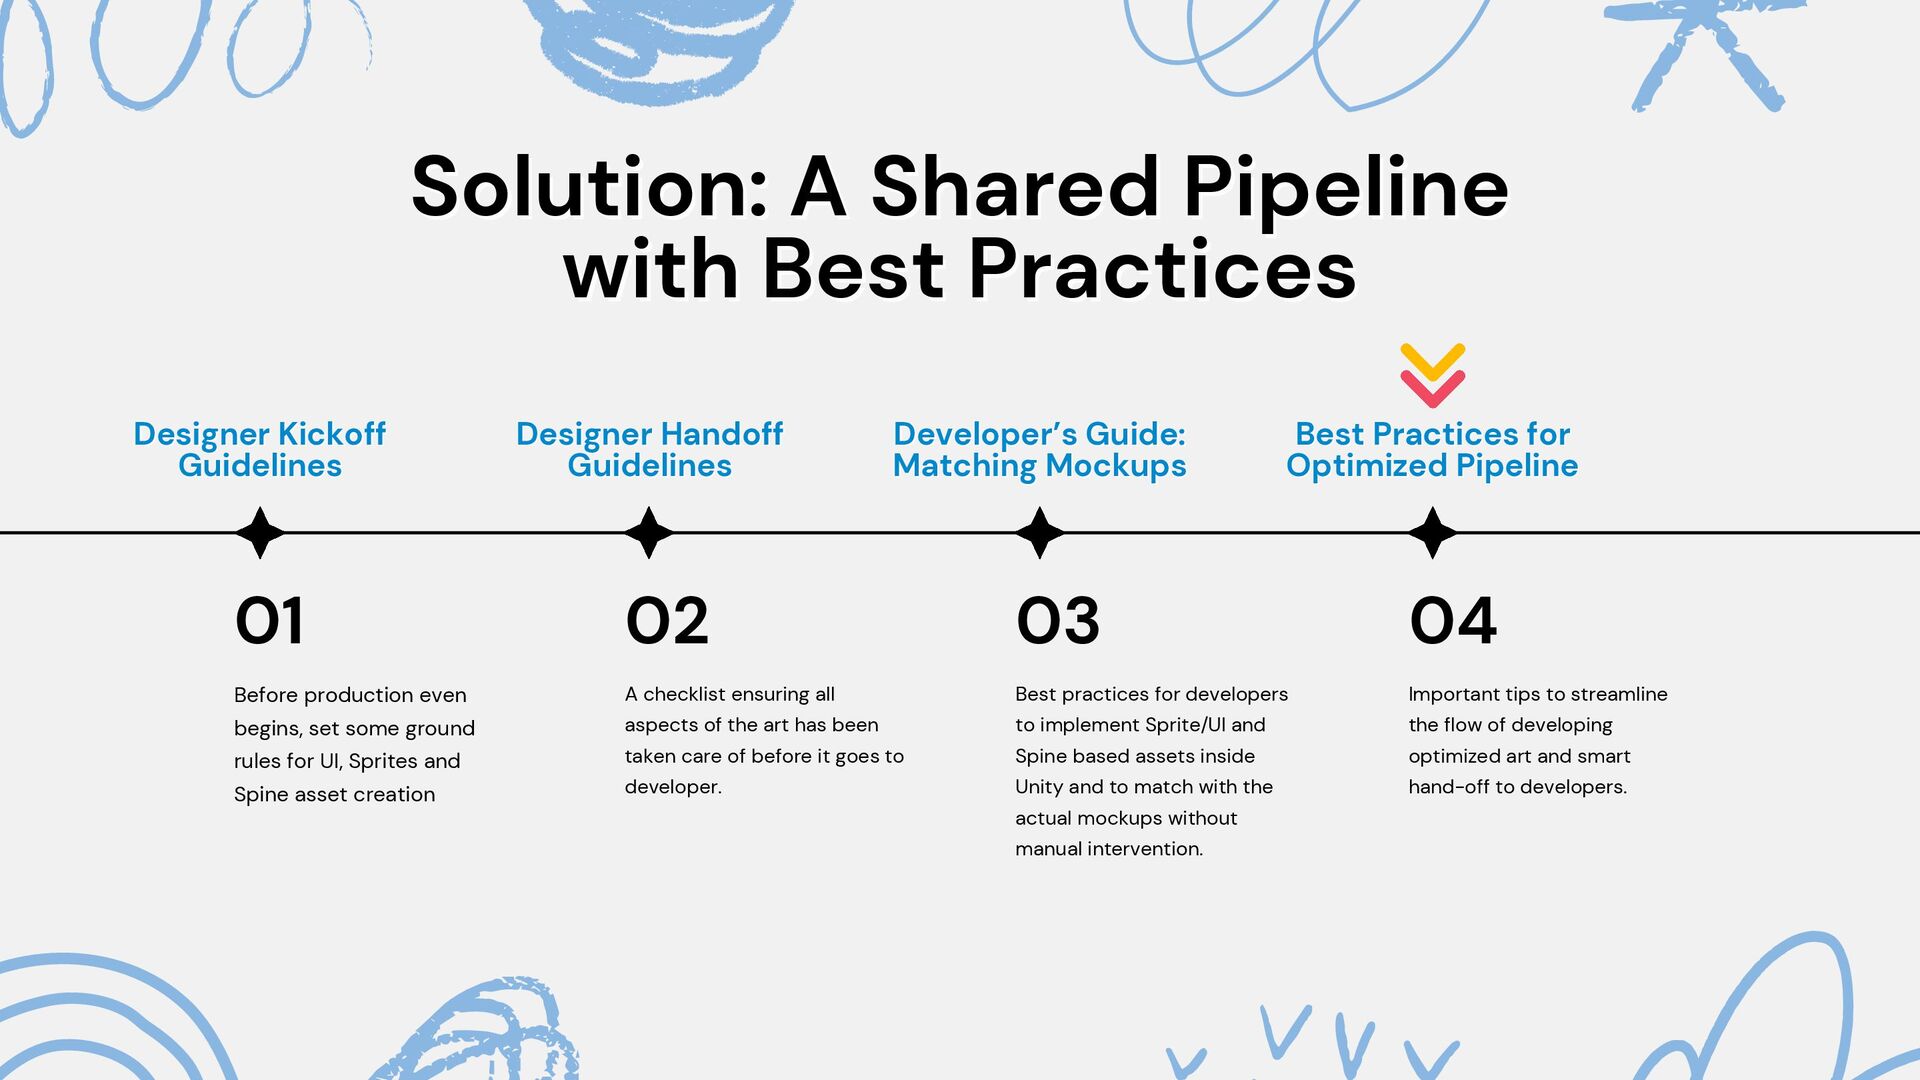
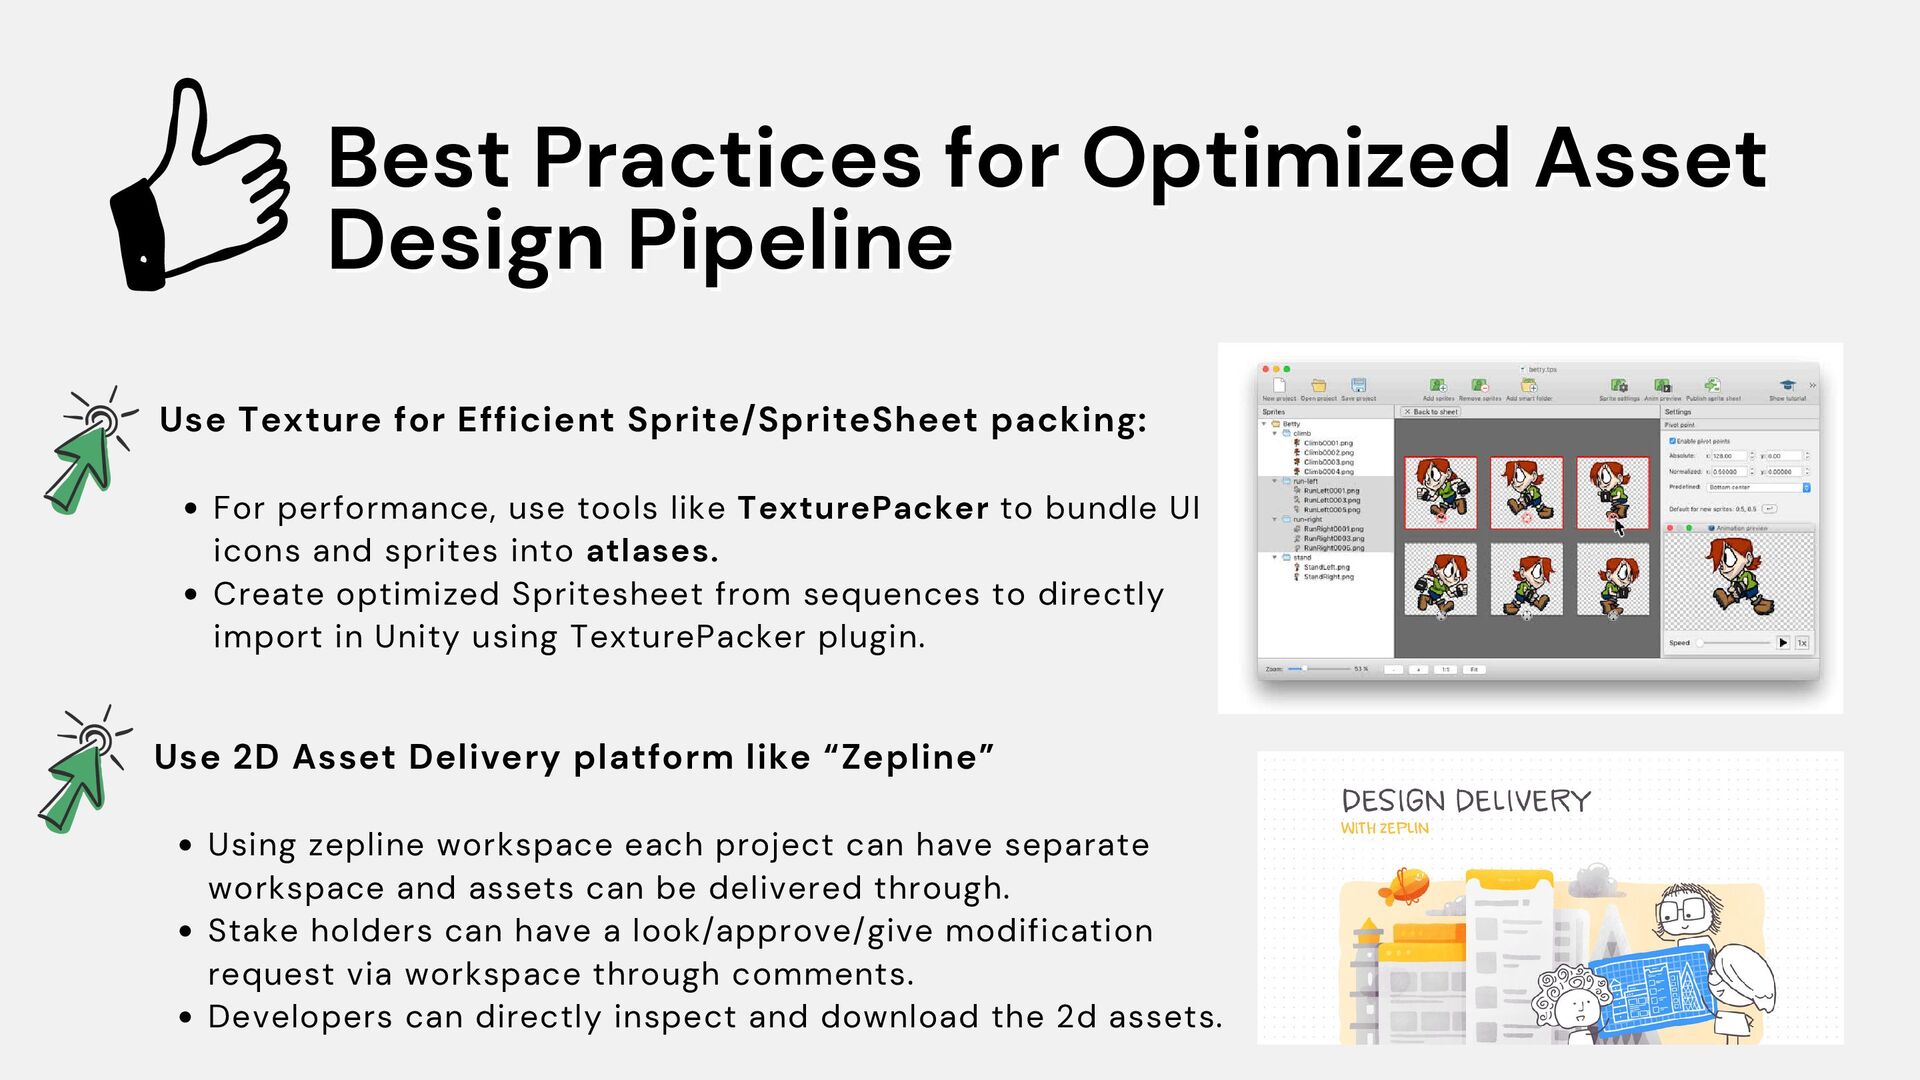
Presenting the ultimate guide for a seamless handoff between UI/UX designers and Unity developers, covering everything you need to create pixel-perfect UIs and animations in Unity 2D and Canvas systems.

Whether you're a designer using Figma, Photoshop, or Spine, or a Unity developer building UI with Canvas or world-space sprites, this tutorial walks through all the best practices, pitfalls to avoid, and technical tips to ensure your game or app looks exactly like the mockup — no guesswork, no manual scaling.

Avatar for Niraj Vishwakarma

Niraj Vishwakarma

July 01, 2025
Tweet

More Decks by Niraj Vishwakarma

Other Decks in Programming

Transcript

  1. “The Designer/Developer Guide to Design “The Designer/Developer Guide to Design

    Handoff and Implementation in Unity” Handoff and Implementation in Unity” Ensuring Pixel-Perfect Unity Implementation of Designer Mockups Without Guesswork by: Niraj Vishwakarma
  2. Objective of This Objective of This Guide Guide Our objective

    is simple: to make sure what designers create is exactly what shows up inside Unity — with zero guesswork, zero pixel drift, and zero last-minute rescaling.
  3. Who Should Who Should Watch Watch "This guide is for:

    Designers making UI mockups or 2D assets Developers implementing them in Unity And Project Managers connecting both sides."
  4. Designer’s Dilemma vs Developer’s Designer’s Dilemma vs Developer’s Struggle Struggle

    Here’s the problem: "Designers export beautiful screens… but when developers bring them into Unity, things don’t line up." "The UI gets blurry, the Spine animations are too big, text looks off, and it takes hours to fix — usually by eyeballing." "Why? Because there’s no shared agreement on how to hand over, import, or scale assets."
  5. Solution: A Shared Pipeline Solution: A Shared Pipeline with Best

    Practices with Best Practices 01 02 Before production even begins, set some ground rules for UI, Sprites and Spine asset creation A checklist ensuring all aspects of the art has been taken care of before it goes to developer. 03 Best practices for developers to implement Sprite/UI and Spine based assets inside Unity and to match with the actual mockups without manual intervention. 04 Important tips to streamline the flow of developing optimized art and smart hand-off to developers. Designer Kickoff Designer Kickoff Guidelines Guidelines Designer Handoff Designer Handoff Guidelines Guidelines Developer’s Guide: Developer’s Guide: Matching Mockups Matching Mockups Best Practices for Best Practices for Optimized Pipeline Optimized Pipeline
  6. PPU (Pixels Per Unit) tells Unity how many pixels in

    an image equal 1 Unity world unit. Default PPU is 100. So 1 Unit = 100 Pixels in Unity. Example: If an image is 200x200 pixels, And PPU is set to 100 in Unity. Then the image will be 2 units wide and 2 units tall in Unity Understanding What matters in Unity Understanding What matters in Unity when rendering UI/Sprites/Spine assets when rendering UI/Sprites/Spine assets Getting the design-to-Unity visual match right starts with understanding how PPU (Pixels Per Unit) works in Unity. If PPU is not set properly or consistently: UI elements won’t match the designer’s intended size You’ll get misaligned graphics or wrong aspect ratios Textures can look blurry or pixelated Different screen sizes will scale UI incorrectly Important: PPI (Pixels Per Inch) in Photoshop ≠ Unity's PPU
  7. Solution: A Shared Pipeline Solution: A Shared Pipeline with Best

    Practices with Best Practices 01 02 Before production even begins, set some ground rules for UI, Sprites and Spine asset creation A checklist ensuring all aspects of the art has been taken care of before it goes to developer. 03 Best practices for developers to implement Sprite/UI and Spine based assets inside Unity and to match with the actual mockups without manual intervention. 04 Important tips to streamline the flow of developing optimized art and smart hand-off to developers. Designer Kickoff Designer Kickoff Guidelines Guidelines Designer Handoff Designer Handoff Guidelines Guidelines Developer’s Guide: Developer’s Guide: Matching Mockups Matching Mockups Best Practices for Best Practices for Optimized Pipeline Optimized Pipeline
  8. 01) Designer Kickoff Guidelines 01) Designer Kickoff Guidelines UI/Sprite Design

    Guidelines: ✅ Use a fixed design resolution Always design for one fixed resolution like 1080x1920 or 1920x1080 This becomes the Reference Resolution in Unity ✅ Design at 1x scale (100%) Avoid 2x, 3x scaling unless required for Retina/HD exports ✅ Export in actual pixel size Example: If button is 200x80 px in design, export as 200x80 PNG No need to scale up/down during export
  9. 01) Designer Kickoff Guidelines (Continues...) 01) Designer Kickoff Guidelines (Continues...)

    ✅ UI Assets: Use slice guides (9-slice) for scalable items like buttons/panels Stick to sRGB color profile, no embedded profiles in exports ✅ World-space Sprites/SpriteSheets: Create sprite-sheet for animations using TexturePacker software Use Power-of-Two sizes: 32x32, 64x64, 128x128, 256x256, 512,512 etc. Spine Asset Design Guidelines: ✅ Spine Assets: Base your Spine project on the same resolution used in the UI mockup (e.g., 1080x1920) Keep a reference screen frame (e.g., 1080x1920 background guide) inside Spine to match Unity scale later Export at 1x scale
  10. Solution: A Shared Pipeline Solution: A Shared Pipeline with Best

    Practices with Best Practices 01 02 Before production even begins, set some ground rules for UI, Sprites and Spine asset creation A checklist ensuring all aspects of the art has been taken care of before it goes to developer. 03 Best practices for developers to implement Sprite/UI and Spine based assets inside Unity and to match with the actual mockups without manual intervention. 04 Important tips to streamline the flow of developing optimized art and smart hand-off to developers. Designer Kickoff Designer Kickoff Guidelines Guidelines Designer Handoff Designer Handoff Guidelines Guidelines Developer’s Guide: Developer’s Guide: Matching Mockups Matching Mockups Best Practices for Best Practices for Optimized Pipeline Optimized Pipeline
  11. UI/Sprite/Spine Design Handoff Guidelines: Export assets at 1x scale Use

    9-slice guides for buttons or panels 02) Designer Handoff Guidelines 02) Designer Handoff Guidelines Use Design Delivery tool like Zeplin Zeplin is primarily used as a design delivery platform to streamline the process of sharing and collaborating on UI/UX designs between designers and developers. It helps bridge the gap between design and development by providing a structured and organized workspace where teams can access design specifications, assets, and style guides.
  12. Solution: A Shared Pipeline Solution: A Shared Pipeline with Best

    Practices with Best Practices 01 02 Before production even begins, set some ground rules for UI, Sprites and Spine asset creation A checklist ensuring all aspects of the art has been taken care of before it goes to developer. 03 Best practices for developers to implement Sprite/UI and Spine based assets inside Unity and to match with the actual mockups without manual intervention. 04 Important tips to streamline the flow of developing optimized art and smart hand-off to developers. Designer Kickoff Designer Kickoff Guidelines Guidelines Designer Handoff Designer Handoff Guidelines Guidelines Developer’s Guide: Developer’s Guide: Matching Mockups Matching Mockups Best Practices for Best Practices for Optimized Pipeline Optimized Pipeline
  13. Canvas based UI/Sprite implementation 1. Set Canvas Scaler: UI Scale

    Mode: Scale with Screen Size Reference Resolution: same as design (e.g., 1080x1920) Match: 0.5 (for balanced width & height) Set Reference Pixel Per Unity = 100 2. Import each sprite: Texture Type: Sprite (2D and UI) Pixels Per Unit: 100 Disable Mip Maps (for UI) Filter Mode: Point or Bilinear (depends on art style) 3. Drop into Canvas and ensure size in RectTransform matches original pixel size 03) Developer’s Guide: 03) Developer’s Guide: Matching Matching Mockups Mockups
  14. 4. Set Camera as Orthographic. 5. Match anchors and layout

    groups for responsiveness 6. Use Sprite Packer / Atlas if needed — but maintain same PPU If the designer creates a 100px-wide icon, it should appear as exactly 100 units in size inside Unity UI Canvas — if and only if the PPU, reference resolution, and canvas scaler match. 03) Developer’s Guide: 03) Developer’s Guide: Matching Mockups Matching Mockups (Continues...) (Continues...)
  15. 03) Developer’s Guide: 03) Developer’s Guide: Matching Mockups Matching Mockups

    (Continues...) (Continues...) Non- Canvas based Sprite implementation 1. Import each sprite: Texture Type: Sprite (2D and UI) Pixels Per Unit: 100 Disable Mip Maps (for UI) Filter Mode: Point or Bilinear (depends on art style) 2. Set Camera Orthograhic: Orthographic Camera setup in Unity is absolutely critical if you're working with world-space sprites (not UI Canvas) and want them to visually match a mockup designed at 1920x1080 or 1080x1920 pixels.
  16. 3. Camera Orthographic Size Formula A 1920x1080 px mockup to

    appear as 19.2 × 10.8 Unity units in size, assuming PPU = 100 (i.e., 100 pixels = 1 Unity unit). To achieve this, your camera must be configured so that the visible screen area in Unity units matches the mockup size in pixels ÷ PPU. orthographicSize = (target screen height in pixels / PPU) ÷ 2 So if: Resolution = 1920 × 1080 px PPU = 100 orthographicSize = (1080 / 100) ÷ 2 = 5.4 (assign this as size of orthogonal camera in Unity) 03) Developer’s Guide: 03) Developer’s Guide: Matching Mockups Matching Mockups (Continues...) (Continues...)
  17. Spine Asset implementation: For World-Space: Use SkeletonAnimation Set SkeletonDataAsset →

    Scale = 1 / PPU (e.g., 0.01 for PPU 100) For Canvas UI: Use SkeletonGraphic (integrates into Canvas) Parent to UI hierarchy Set size/position using RectTransform 03) Developer’s Guide: 03) Developer’s Guide: Matching Mockups Matching Mockups (Continues...) (Continues...)
  18. Setting Correct Color Space in Unity : Color space defines

    how colors and brightness are interpreted. The two main ones in Unity: Gamma Color Space: Brighter, non-physically accurate Doesn't account for how human eyes perceive brightness Simple and fast Often used in 2D/UI-only games or mobile games Linear Color Space: Physically accurate Matches real-world lighting Ideal for realistic shading, PBR materials, 3D rendering 03) Developer’s Guide: 03) Developer’s Guide: Matching Mockups Matching Mockups (Continues...) (Continues...)
  19. Solution: A Shared Pipeline Solution: A Shared Pipeline with Best

    Practices with Best Practices 01 02 Before production even begins, set some ground rules for UI, Sprites and Spine asset creation A checklist ensuring all aspects of the art has been taken care of before it goes to developer. 03 Best practices for developers to implement Sprite/UI and Spine based assets inside Unity and to match with the actual mockups without manual intervention. 04 Important tips to streamline the flow of developing optimized art and smart hand-off to developers. Designer Kickoff Designer Kickoff Guidelines Guidelines Designer Handoff Designer Handoff Guidelines Guidelines Developer’s Guide: Developer’s Guide: Matching Mockups Matching Mockups Best Practices for Best Practices for Optimized Pipeline Optimized Pipeline
  20. Use Texture for Efficient Sprite/SpriteSheet packing: For performance, use tools

    like TexturePacker to bundle UI icons and sprites into atlases. Create optimized Spritesheet from sequences to directly import in Unity using TexturePacker plugin. Best Practices for Optimized Asset Best Practices for Optimized Asset Design Pipeline Design Pipeline Use 2D Asset Delivery platform like “Zepline” Using zepline workspace each project can have separate workspace and assets can be delivered through. Stake holders can have a look/approve/give modification request via workspace through comments. Developers can directly inspect and download the 2d assets.