Upgrade to Pro — share decks privately, control downloads, hide ads and more …

CI for the Rails Guy (or Gal)

CI for the Rails Guy (or Gal)

(WARNING: This presentation is from 2008, and very outdated!)

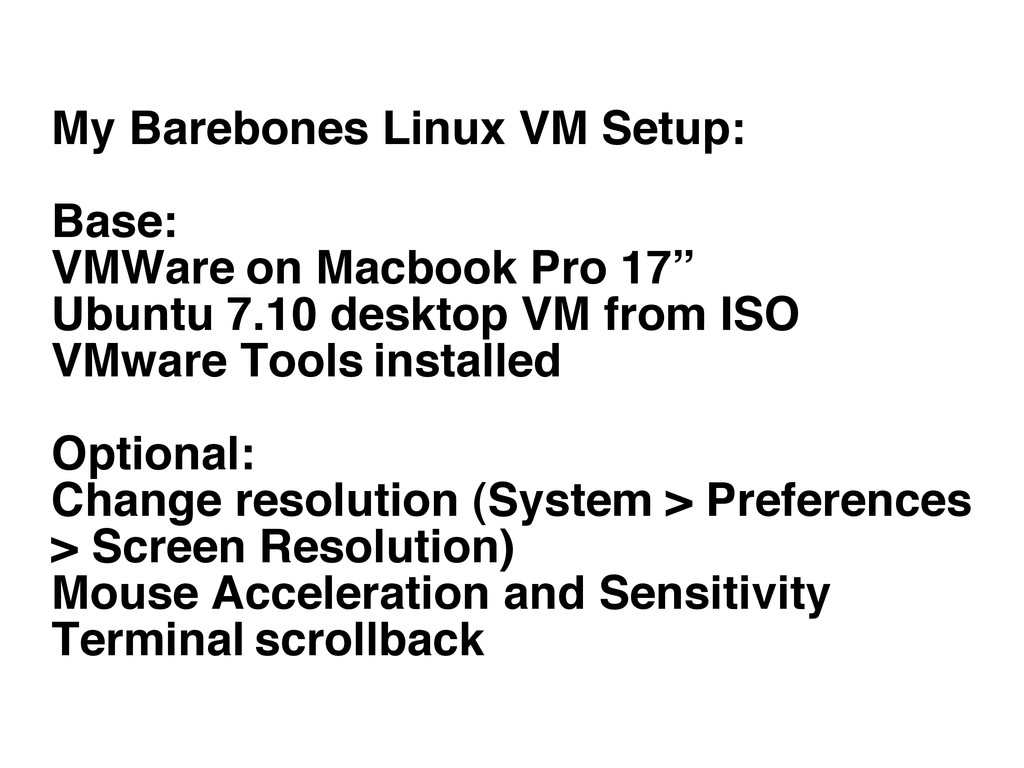
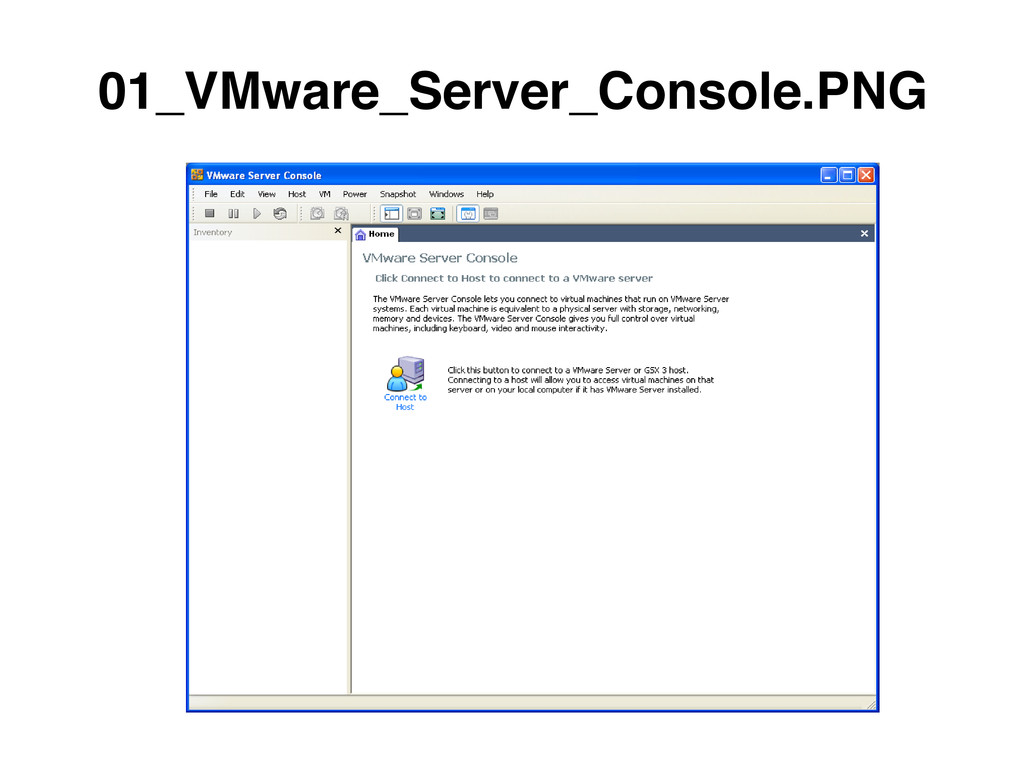
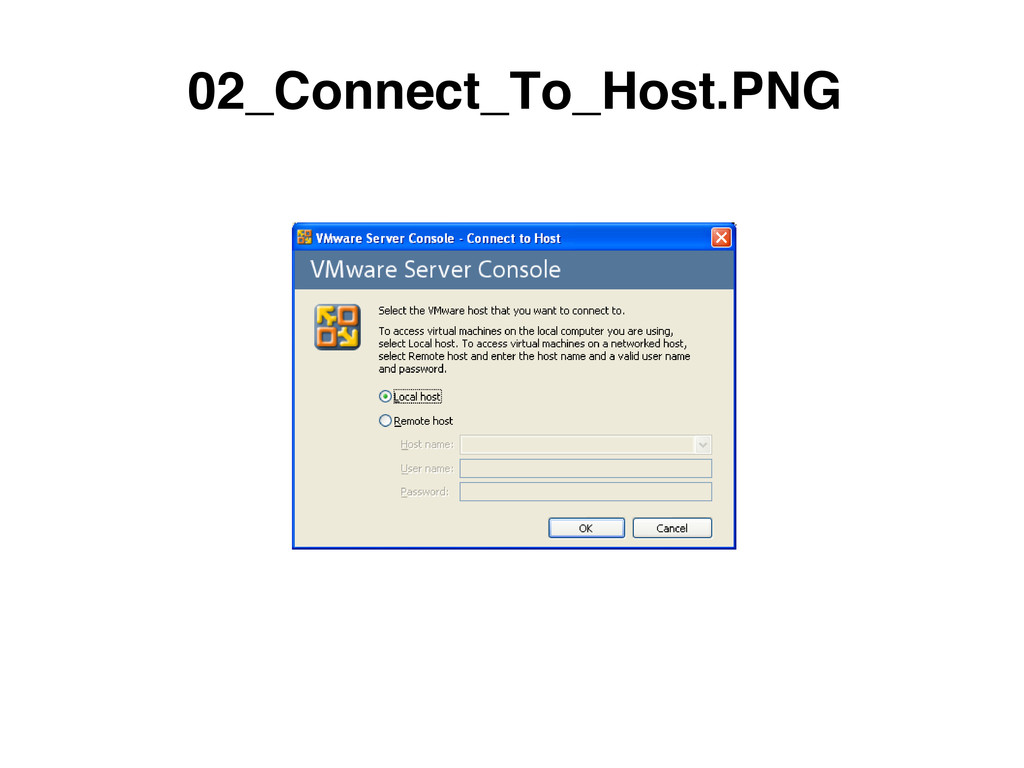
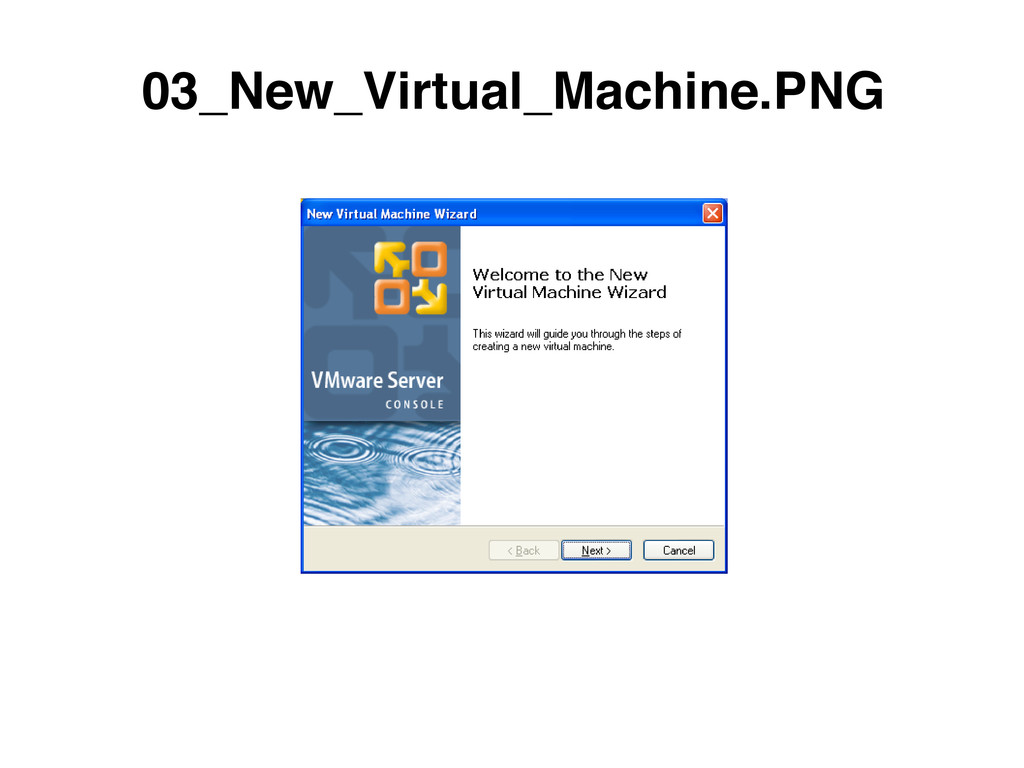
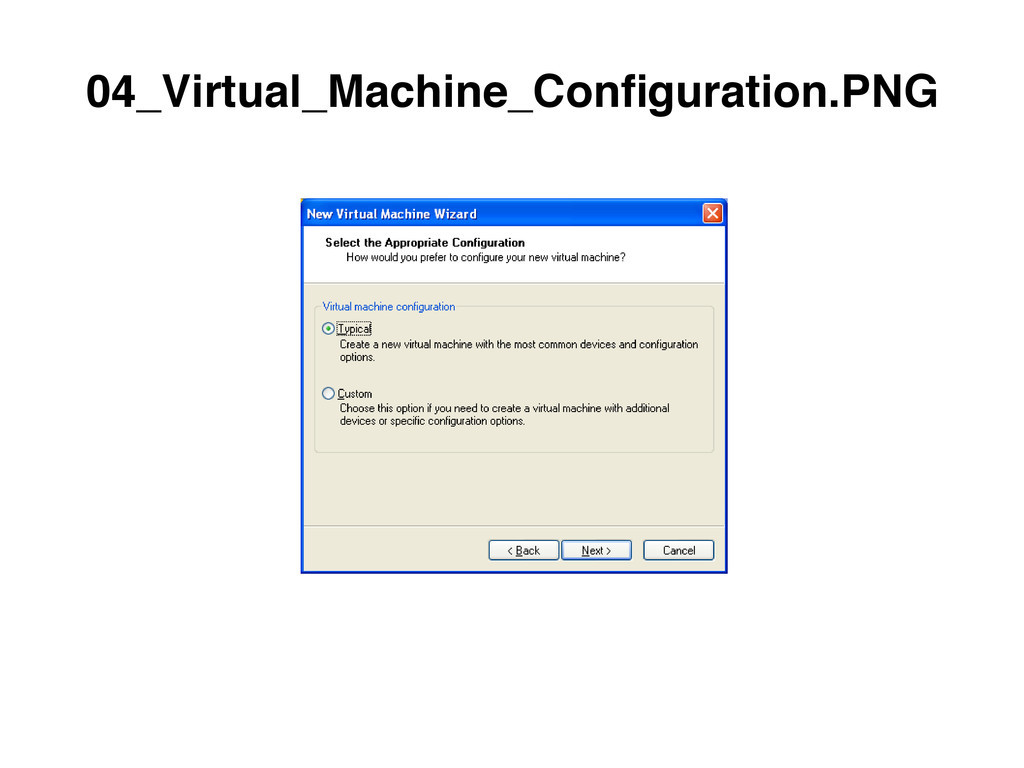
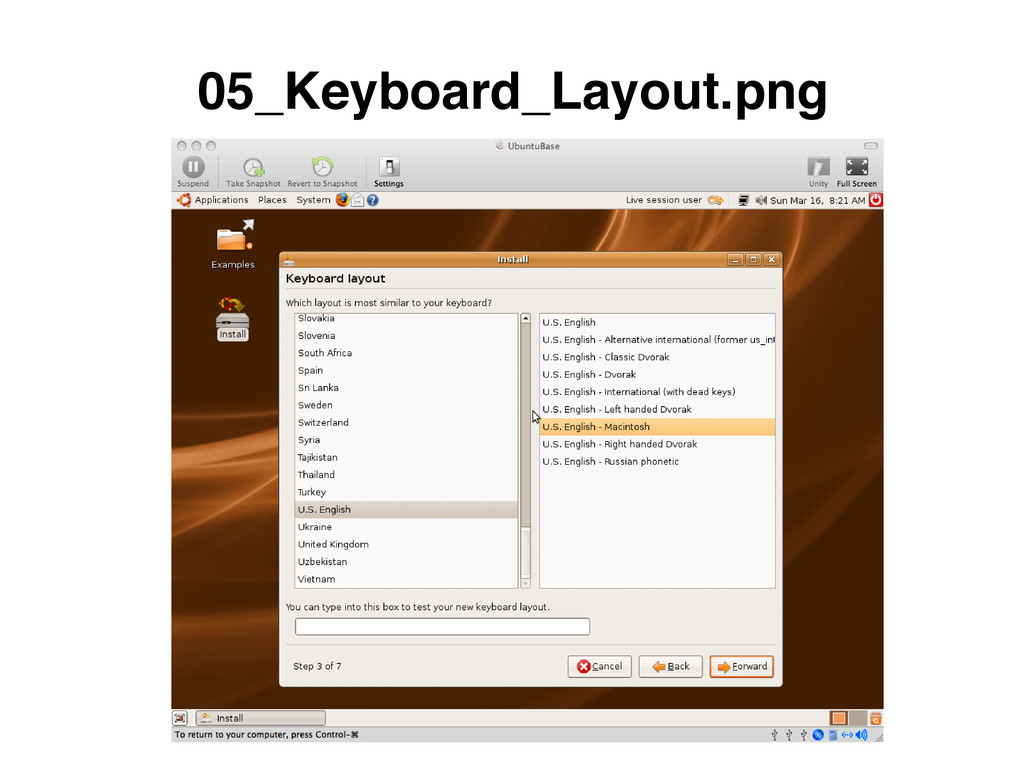
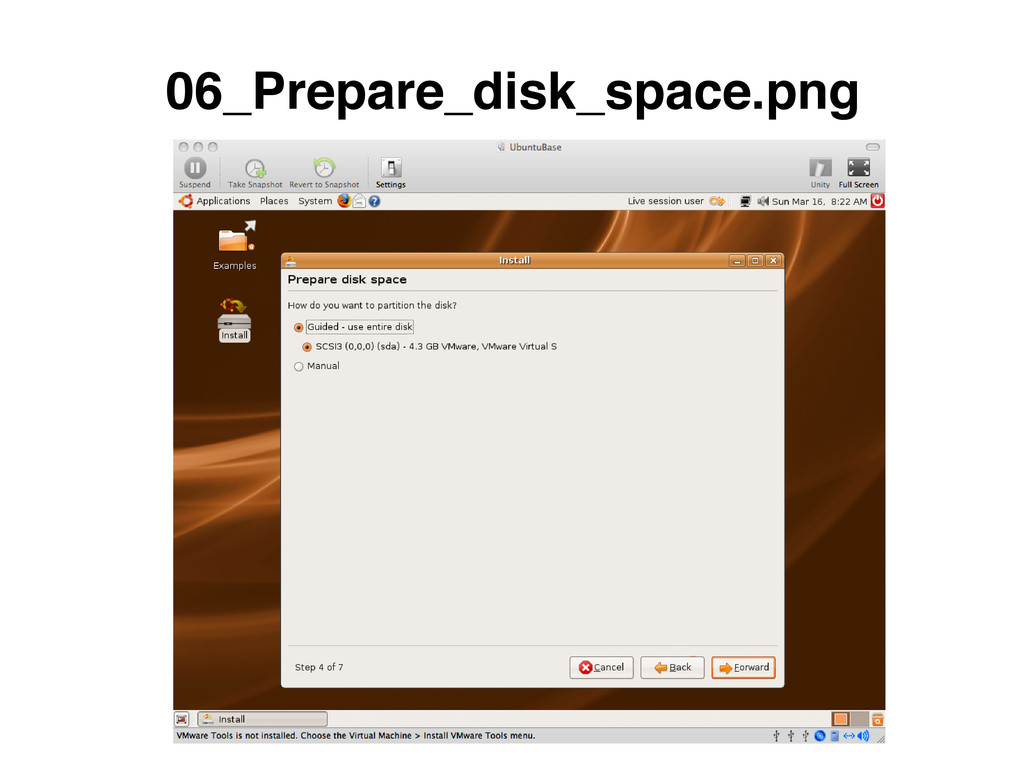
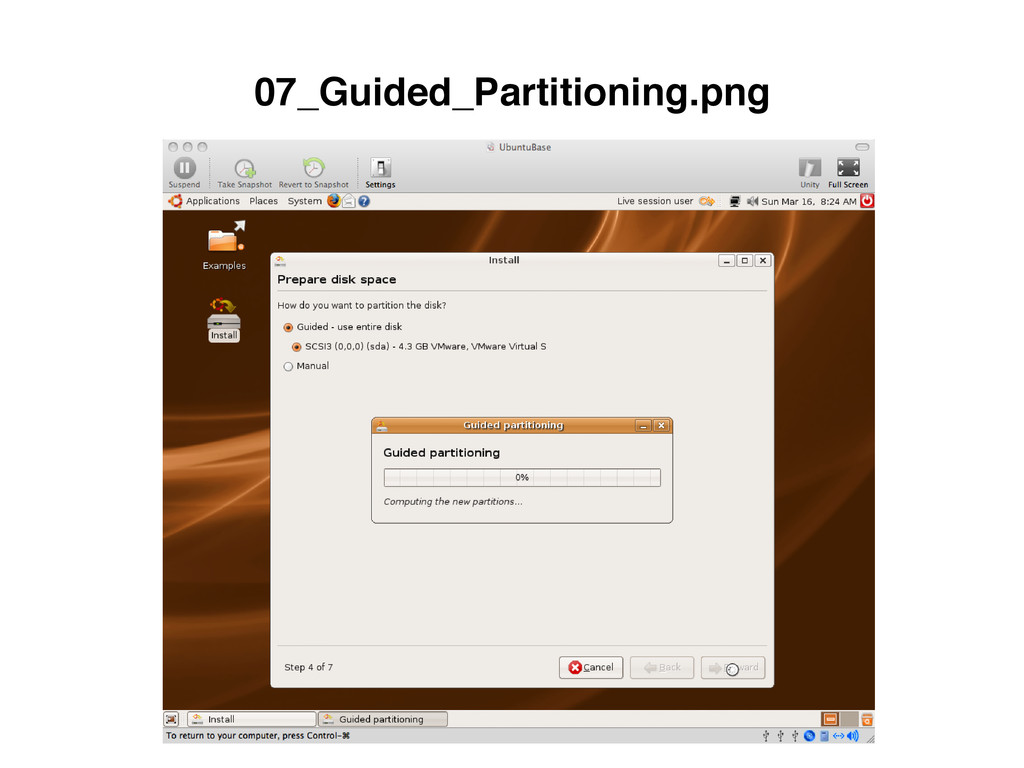
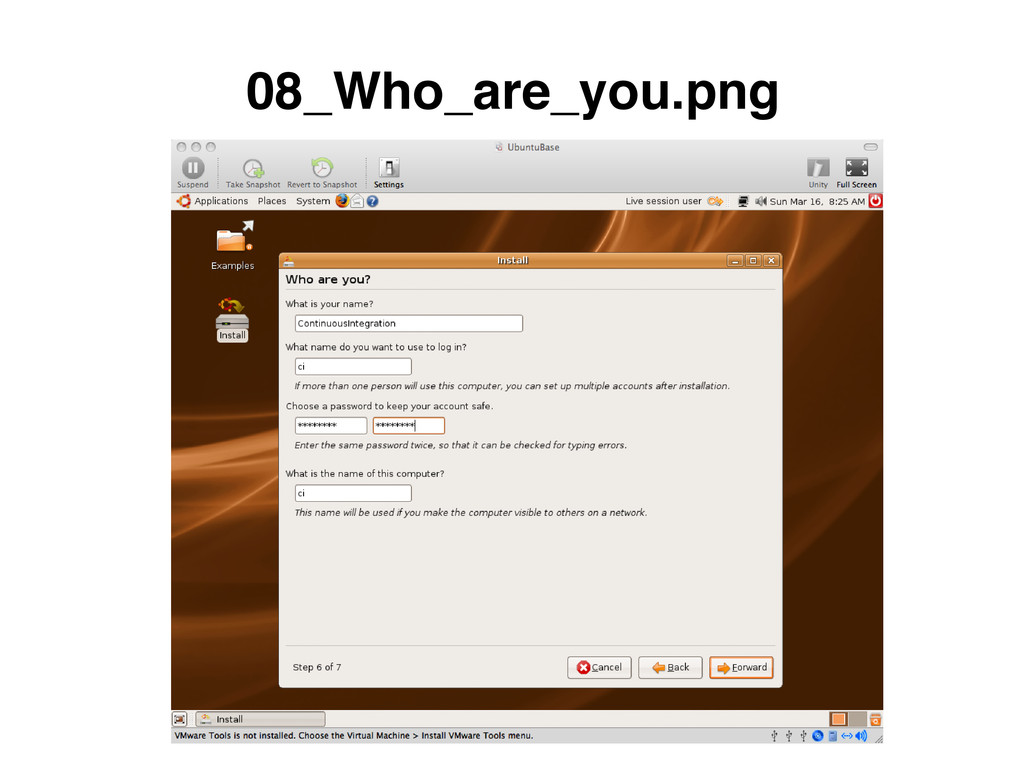
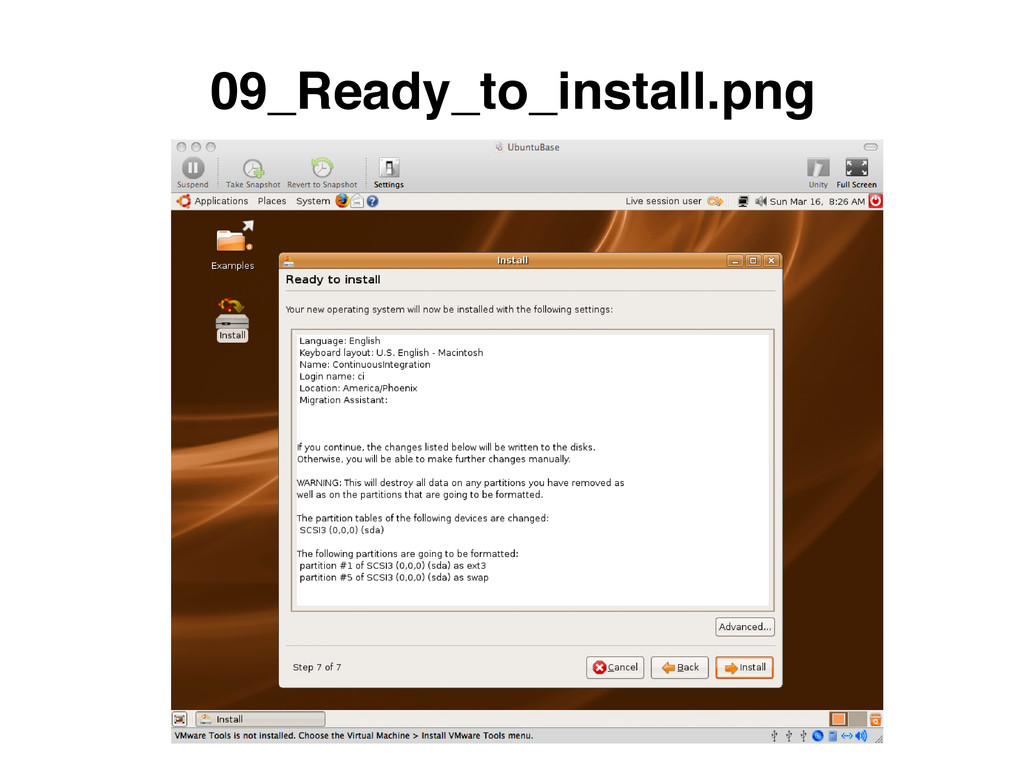
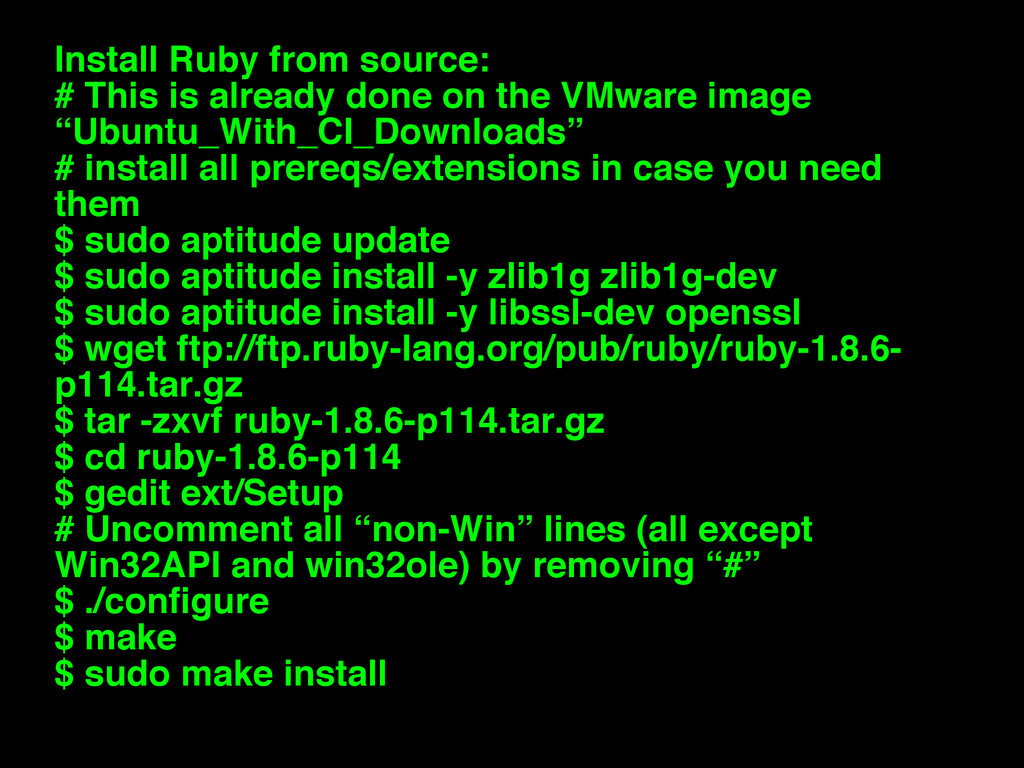
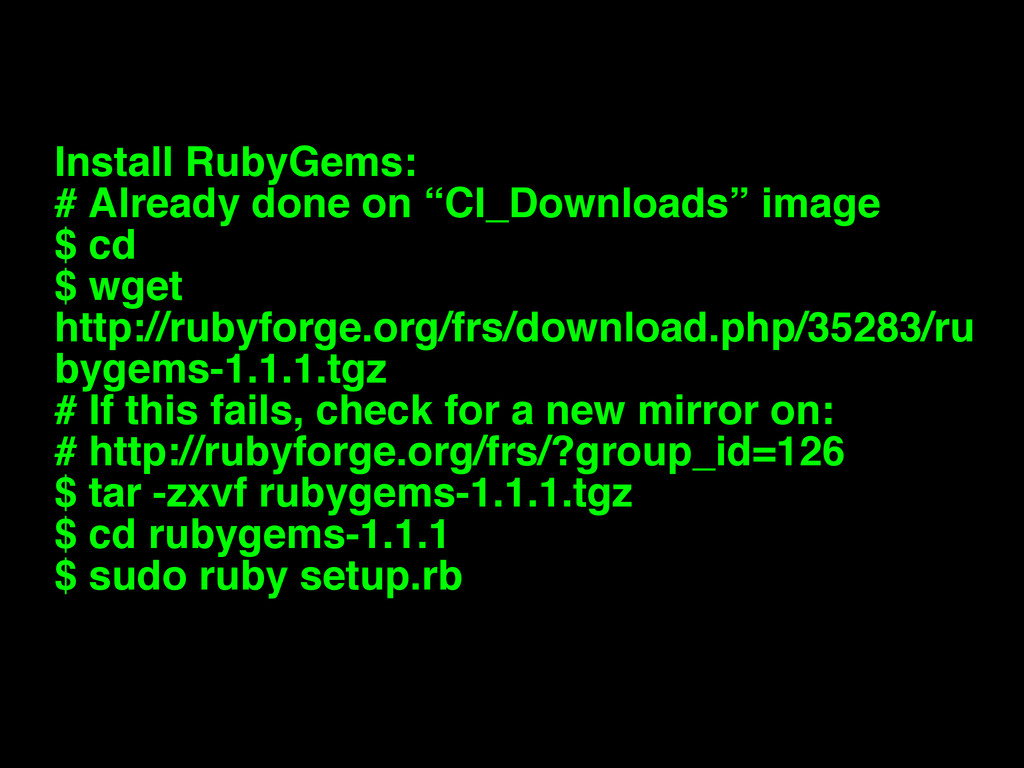
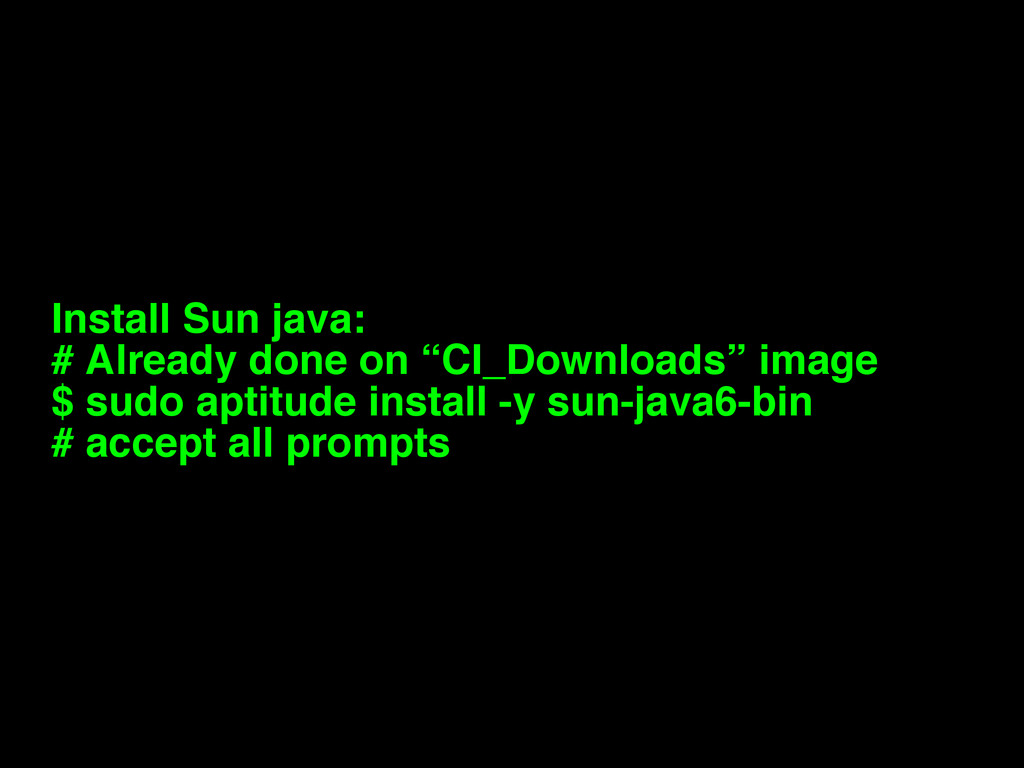
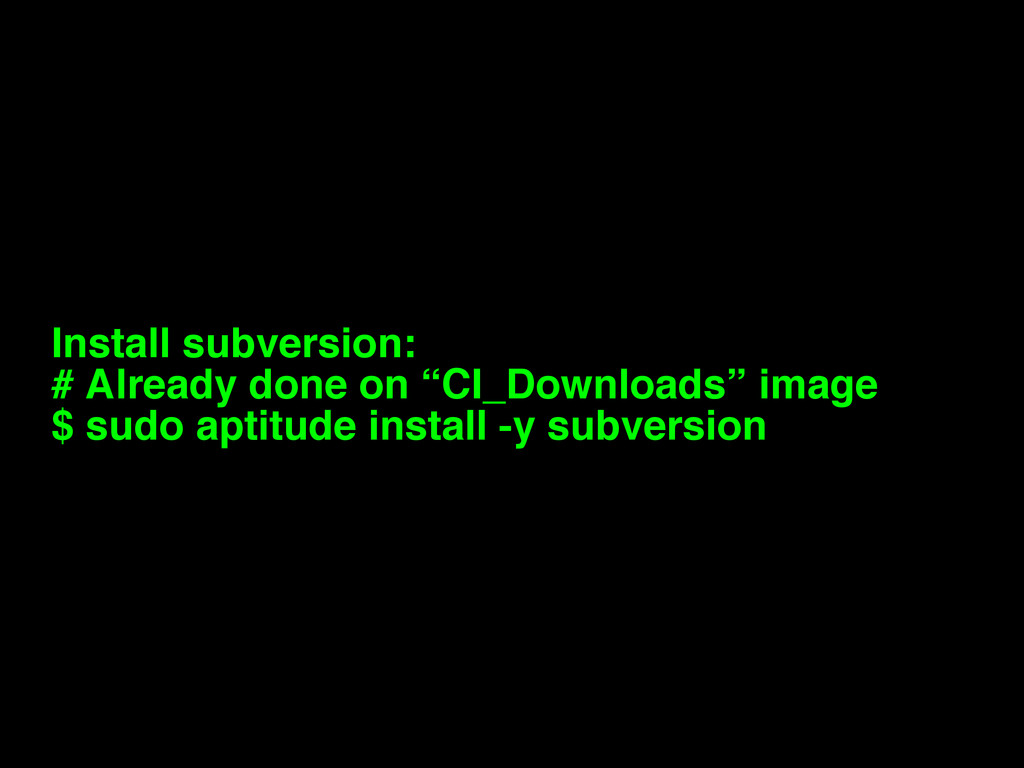
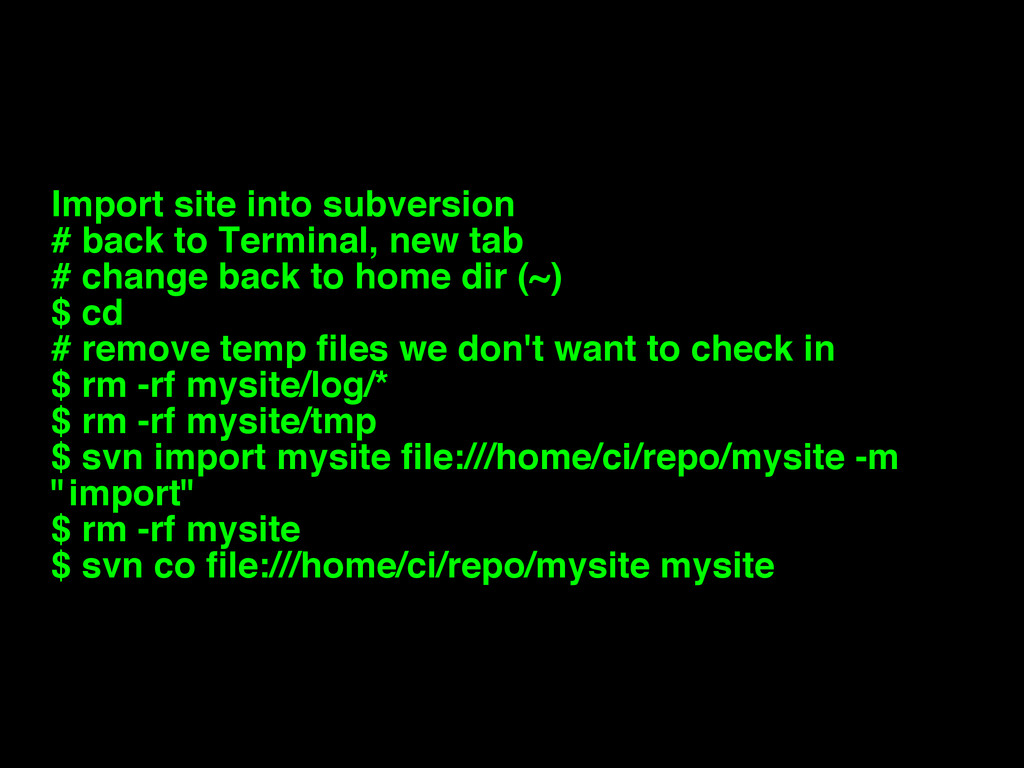
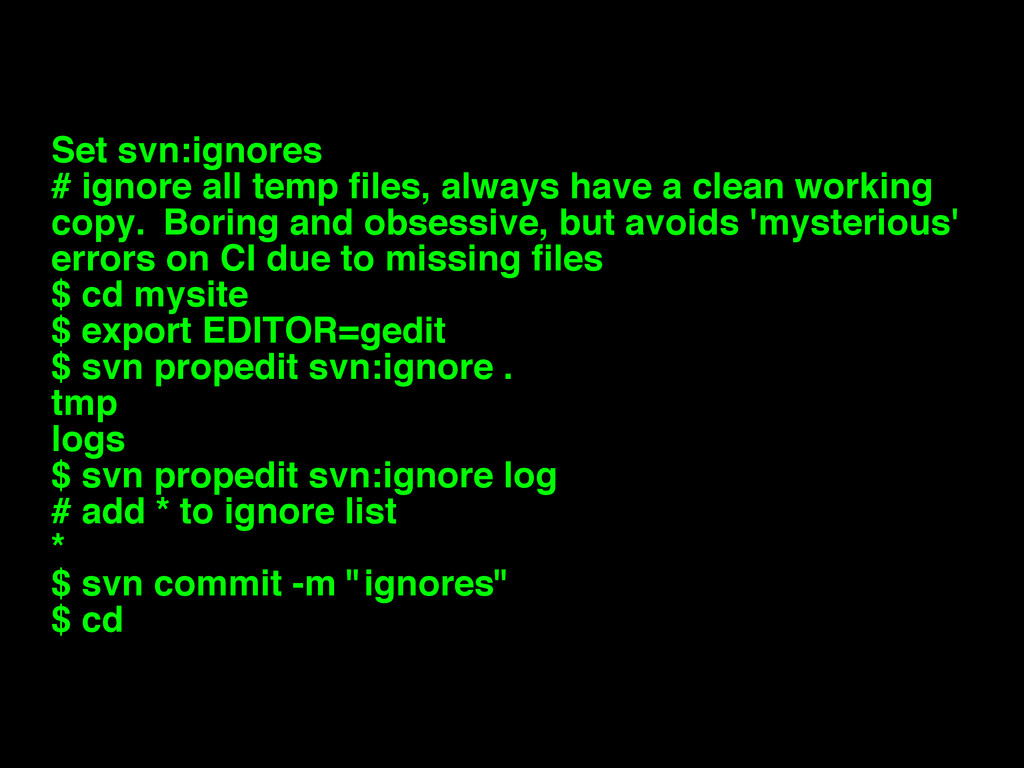
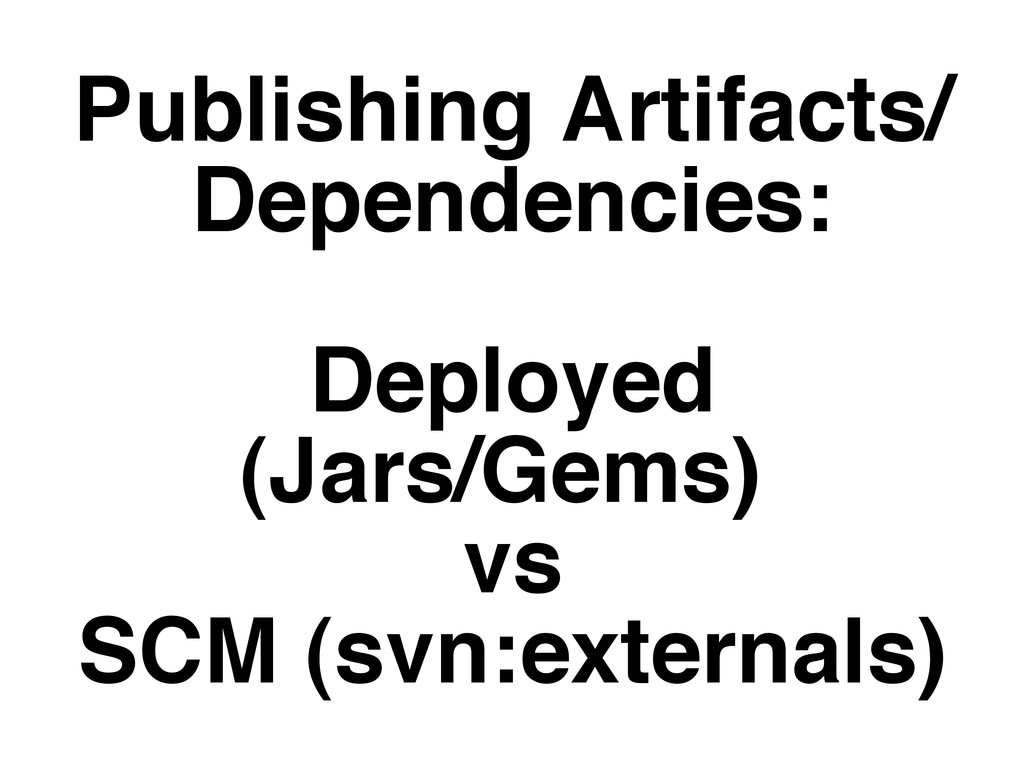
This is a detailed step-by-step tutorial on quickly setting up a Continuous Integration (CI) environment for automated Rails testing with Test::Unit, JsUnit, and Selenium. All software and instructions are downloadable, including instructions for running everything in a VmWare VM. With these materials, anyone can set up a their own CI environment, regardless of their skill or access to hardware.
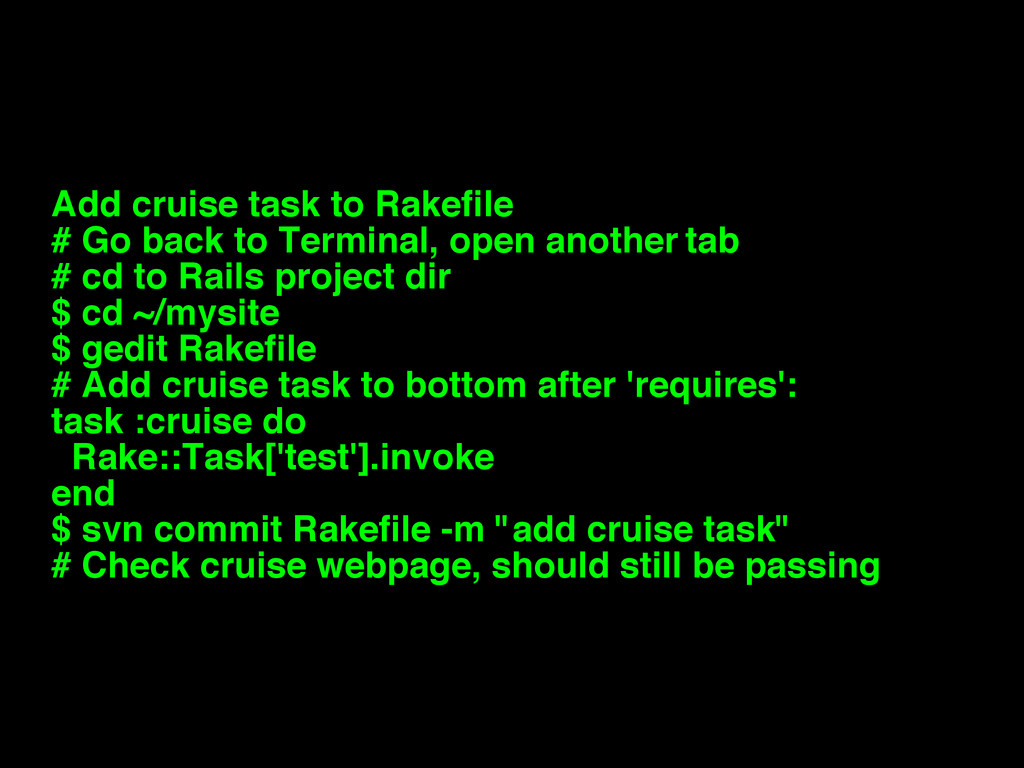
Avatar for Chad Woolley

Chad Woolley

April 10, 2012
Tweet

Other Decks in Programming

Transcript

  1. Welcome! If you want to follow along, borrow a flash

    drive, copy the contents to your drive, and see the README. Or, download from: thewoolleyweb.com/ ci_for_the_rails_guy_or_gal
  2. Warning: If you are reading this from a handout or

    virtual machine, it may be outdated. See latest at: thewoolleyweb.com/ ci_for_the_rails_guy_or_gal
  3. OpenOffice Font Twiddling: For portability, this preso uses Helvetica Bold,

    which works fine on NeoOffice/mac. If this makes the text too big (and it probably will on OpenOffice/linux) use FreeSans Bold (which I've provided in tools/font): Outline Tab, Edit > Select All, change font to FreeSans Bold.
  4. Who

  5. How

  6. Focused on how to install and make everything work together,

    not on details of how to use the tools
  7. Just the basics, no obtuse shell tricks, won't use the

    latest extensions, wrappers, libraries, or plugins
  8. But I encourage you to look into them, useful additions/

    extensions will be mentioned later.
  9. Or, you can skip Virtualization and install Ubuntu directly on

    a spare PC. Just burn the ISO image to a CD.
  10. * “everything” except the stuff that doesn't work on your

    project or environment or latest versions. Error messages and Google are your friend :)
  11. As a matter of fact, it almost certainly won't work

    perfectly for you. Integrating this stuff is hard, and new problems arise as tools and libraries evolve. Embrace the bleeding cutting edge, keep a positive attitude, and help fix bugs.
  12. You can try it on a mac, but slides target

    an Ubuntu VM for maximum portability and repeatability
  13. You know, “That Guy” who stands up and wants to

    expound on irrelevant minutiae during the middle of a presentation...
  14. ...but seriously, if you are a bit OCDish, you might

    make a good CI G(uy|al) - because there's a lot of moving parts that all have to integrate...
  15. WARNING: If you try to cut and paste commands from

    the presentation (and you can, they're all there), use the OpenOffice doc. Pasting from PDF inserts bad line breaks
  16. My Barebones Linux VM Setup: Base: VMWare on Macbook Pro

    17” Ubuntu 7.10 desktop VM from ISO VMware Tools installed Optional: Change resolution (System > Preferences > Screen Resolution) Mouse Acceleration and Sensitivity Terminal scrollback
  17. We will skip them for now, but you can use

    them as a guide when you try it later
  18. At this point, you may need to reboot (System ->

    Quit -> Restart) in order for the VMware Tools CD image to mount correctly, especially if you already have the Ubuntu ISO image mounted.
  19. In fact, with Leopard/ VMWare Fusion 1.1.1/Ubuntu 7.10, the VMWare

    Tools image was corrupt until VM reboot. This didn't happen with Tiger/VMWare Fusion Beta/Ubuntu 7.04
  20. Install VMware Tools (Optional): $ cd $ tar -zxvf /media/cdrom0/VMwareTools-7.6.2-

    72241.tar.gz $ cd ~/vmware-tools-distrib $ sudo ./vmware-install.pl # enter password for sudo # hit enter repeatedly to accept defaults for all prompts, override display size if desired # reboot (System -> Quit -> Restart)
  21. By default on Ubuntu 7.10, the virtual wired network connection

    was set to “enable roaming mode”. I had to manually disable this and enable DHCP to get network access.
  22. Other Ubuntu Tweaks (Optional): * System -> Preferences -> Screen

    Resolution * System -> Preferences -> Mouse * Drag Applications -> Accessories -> Terminal icon to quick launch area * Terminal -> Edit -> Current Profile -> Scrolling -> Scrollback = 99999 * Ctrl +, Ctrl - in Terminal to change font size
  23. Legend $ == shell input # == comment or instructions

    (nothing) == editor input or stdin Example: # sudo should prompt for a password unless you've sudo'd recently $ sudo ls password # should get file list
  24. We will keep everything in the home dir, or "~"

    You can put it wherever you want
  25. You can install ruby via aptitude, I will build from

    source to make the instructions more portable.
  26. Install Ruby from source: # This is already done on

    the VMware image “Ubuntu_With_CI_Downloads” # install all prereqs/extensions in case you need them $ sudo aptitude update $ sudo aptitude install -y zlib1g zlib1g-dev $ sudo aptitude install -y libssl-dev openssl $ wget ftp://ftp.ruby-lang.org/pub/ruby/ruby-1.8.6- p114.tar.gz $ tar -zxvf ruby-1.8.6-p114.tar.gz $ cd ruby-1.8.6-p114 $ gedit ext/Setup # Uncomment all “non-Win” lines (all except Win32API and win32ole) by removing “#” $ ./configure $ make $ sudo make install
  27. Install RubyGems: # Already done on “CI_Downloads” image $ cd

    $ wget http://rubyforge.org/frs/download.php/35283/ru bygems-1.1.1.tgz # If this fails, check for a new mirror on: # http://rubyforge.org/frs/?group_id=126 $ tar -zxvf rubygems-1.1.1.tgz $ cd rubygems-1.1.1 $ sudo ruby setup.rb
  28. Install Sun java: # Already done on “CI_Downloads” image $

    sudo aptitude install -y sun-java6-bin # accept all prompts
  29. Install ant: # Already done on “CI_Downloads” image # All

    remaining downloads are in that image too, but won't be specifically pointed out $ sudo aptitude install -y ant $ sudo aptitude install -y ant-optional # By default, this installs Gnu java, not Sun's...
  30. Install “Galeon” as an alternate browser # because jsunit will

    kill the browser it is testing $ sudo aptitude install -y galeon
  31. Install sqlite3 and gem (default database for Rails) $ sudo

    aptitude install -y libsqlite3-dev sqlite3 $ sudo gem install sqlite3-ruby
  32. Install Rails $ sudo gem install rails # version used

    in this tutorial is 2.0.2 # later versions may behave differently
  33. Remove default index.html and create a page $ rm public/index.html

    $ script/generate scaffold User name:string $ rake db:migrate
  34. Test rails site $ rake # should pass all tests

    $ script/server # New Terminal Tab: File -> Open Tab or Ctrl-Shift-T # should be in mysite dir $ firefox http://localhost:3000/users # create a user
  35. Import site into subversion # back to Terminal, new tab

    # change back to home dir (~) $ cd # remove temp files we don't want to check in $ rm -rf mysite/log/* $ rm -rf mysite/tmp $ svn import mysite file:///home/ci/repo/mysite -m "import" $ rm -rf mysite $ svn co file:///home/ci/repo/mysite mysite
  36. Set svn:ignores # ignore all temp files, always have a

    clean working copy. Boring and obsessive, but avoids 'mysterious' errors on CI due to missing files $ cd mysite $ export EDITOR=gedit $ svn propedit svn:ignore . tmp logs $ svn propedit svn:ignore log # add * to ignore list * $ svn commit -m "ignores" $ cd
  37. cruisecontrol.rb is still in active development. We will use the

    1.3.0 release, but there are new features in trunk, like Git support
  38. Check http://cruisecontrolrb.thought works.com/projects for a recent, successfully building revision if

    you want to use trunk - as soon as they have their new Git repo building there ;)
  39. Download and unzip cruisecontrol.rb: $ wget http://rubyforge.org/frs/download.php/36026/cruisecontrolrb- 1.3.0.tgz # If

    this fails, check for a new mirror on: # http://rubyforge.org/frs/?group_id=2918 $ tar -zxvf cruisecontrolrb-1.3.0.tgz # rename cruise dir to cc $ mv cruisecontrolrb-1.3.0 cc
  40. Set up project in cruisecontrol $ cd cc $ ./cruise

    add MySite --url file:///home/ci/repo/mysite $ ./cruise start
  41. View cruisecontrol web page # Go to Galeon browser #

    Applications -> Internet -> Galeon to start # open http://localhost:3333 # click MySite # Should be passing # Remember, this can be any non-firefox browser, we are just using a different one that won't get killed by jsunit
  42. Take this opportunity to familiarize yourself with cruisecontrol.rb. It's not

    covered here ;) http://cruisecontrolrb .thoughtworks.com/
  43. Add cruise task to Rakefile # Go back to Terminal,

    open another tab # cd to Rails project dir $ cd ~/mysite $ gedit Rakefile # Add cruise task to bottom after 'requires': task :cruise do Rake::Task['test'].invoke end $ svn commit Rakefile -m "add cruise task" # Check cruise webpage, should still be passing
  44. Tweak firefox for automation # open or switch to firefox,

    navigate to 'about:config' # search for 'browser.sessionstore.resume_from_crash' # toggle to false # Edit - Preferences - Tabs - uncheck all warnings # Advanced - Update - turn off automatic updates # Note – sometimes this doesn't “take”... # Exit firefox
  45. Download and Unzip JsUnit $ cd $ wget http://easynews.dl.sourceforge.net/sourceforge/jsuni t/jsunit2.2alpha11.zip

    $ unzip jsunit2.2alpha11.zip # copy junit.jar file to Ant lib dir (required by Ant) $ sudo cp jsunit/java/lib/junit.jar /usr/share/ant/lib/
  46. Copy jsunit to your app and check in $ cd

    ~/mysite/public/javascripts $ mv ~/jsunit . $ svn add jsunit $ export EDITOR=gedit $ svn propedit svn:ignore jsunit/logs # add * to ignore list * $ svn propedit svn:executable jsunit/bin/unix/start- firefox.sh # enter “true” $ svn commit -m "add jsunit"
  47. Create a jsunit test $ mkdir test_pages $ gedit test_pages/prototype_test.html

    <html> <head> <script language="JavaScript" type="text/javascript" src="../jsunit/app/jsUnitCore.js"></script> <script language="JavaScript" type="text/javascript" src="../prototype.js"></script> <script language="javascript"> function testPrototypeWordSplit() { string = 'one two three'; assertEquals('one', ($w(string))[0]); } </script> </head> <body></body> </html>
  48. Run the jsunit test manually from browser and commit $

    cd ~/mysite $ ruby script/server # unless you still have it running $ firefox http://localhost:3000/javascripts/jsunit/testRunner.ht ml # Enter this in the "Run" field and click “Run”: http://localhost:3000/javascripts/test_pages/prototyp e_test.html # exit Firefox, go back to terminal $ svn add public/javascripts/test_pages $ svn commit -m "jsunit test"
  49. Take this opportunity to familiarize yourself with JsUnit and JsUnit

    Server. It's not covered here ;) http://jsunit.net/
  50. "Punt" and make a manual jsunit_start_server script # Because automated

    process management is not TSTTCPW for this tutorial, and it's hard # This is also easily ported to a batch file on windows $ cd ~/mysite $ gedit script/jsunit_start_server.sh ant -f /home/ci/mysite/public/javascripts/jsunit/build.xml -DbrowserFileNames= /home/ci/mysite/public/javascripts/jsunit/bin/unix/star t-firefox.sh -Dport=8081 start_server
  51. Check in jsunit_start_server script and leave it running $ svn

    add script/jsunit_start_server.sh $ svn propedit svn:executable script/jsunit_start_server.sh # add 'true' line $ script/jsunit_start_server.sh # ignore warning about tools.jar # make sure it starts and leave it running # (ctrl-c when you want to kill it later) # open a new terminal tab $ cd ~/mysite $ svn ci -m "add jsunit start script"
  52. Add jsunit task $ gedit Rakefile task :cruise do Rake::Task['test'].invoke

    Rake::Task['jsunit_distributed_test'].invoke end task :jsunit_distributed_test do output = `ant -f public/javascripts/jsunit/build.xml -Durl=http: //localhost:8080/jsunit/jsunit/testRunner.html?testPa ge=/jsunit/test_pages/prototype_test.html -DremoteMachineURLs=http://localhost:8081 -DresourceBase=public/javascripts distributed_test` raise "JsUnit Failed:\n" + output unless $?.success? puts "JsUnit tests passed" end
  53. Commit jsunit task and check cruise # Open cruise webpage

    under galeon, if not open # jsunit will kill firefox, so we need a different browser # Applications - Internet – Galeon, open http://localhost:3333 $ svn commit Rakefile -m "add jsunit_distributed_test task" # Check cruise webpage, should still be passing # You will see jsunit pop up Firefox automatically as the build is running
  54. Install Selenium Gem # WARNING: use capital “S” Selenium –

    there is another rubyforge lowercase “s” selenium project, and a dozen other similarly-named ones. WhatEVER... $ sudo gem install Selenium --version=1.0.7 # NOTE: Version 1.0.7 currently has some mirror issue on RubyForge, if it doesn't download, try to pull from my gem server: $ sudo gem install Selenium -- source=http://gems.thewoolleyweb.com
  55. Start selenium using command from Selenium gem $ selenium #

    make sure it starts and leave it running, ctrl-c to kill it # Open new terminal tab
  56. Create selenium test stub $ gedit test/selenium/user_test.rb require 'test/unit' require

    'rubygems' require 'selenium' class UserTest < Test::Unit::TestCase def setup @browser = Selenium::SeleniumDriver.new("localhost", 4444, "*firefox /usr/lib/firefox/firefox-bin", "http://localhost:3001", 10000) @browser.start end def teardown @browser.stop end def test_user_add_flow end end
  57. Fill in selenium test stub $ gedit test/selenium/user_test.rb def test_user_add_flow

    timestamp = Time.new.to_s user_name = 'joe ' + timestamp @browser.open "http://localhost:3001/users" @browser.click "link=New user" @browser.wait_for_page_to_load @browser.type "id=user_name", user_name @browser.click "commit" @browser.wait_for_page_to_load assert @browser.is_text_present(user_name) end
  58. Create selenium_test rake task including start and stop of server

    $ gedit Rakefile task :cruise do ... Rake::Task['selenium_test'].invoke end task :selenium_test do begin process = IO.popen("ruby /home/ci/.cruise/projects/MySite/work/script/server -- port=3001") output = `ruby test/selenium/user_test.rb` raise "Selenium Failed:\n" + output unless $?.success? puts "Selenium tests passed" ensure Process.kill(9,process.pid) end end
  59. Check in and check cruise $ svn add test/selenium $

    svn commit -m "selenium test" # check cruise, it should run everything and be green
  60. Break tests and fix them! # cause ruby/jsunit/selenium failures, and

    check them in # see cruise go red, then fix them # click links for ruby/selenium failures # there's a test bug! (next page after too many tests) # good to drop DB before each CI run... # This naive implementation has return code bugs (crash if webrick already running)
  61. Install Git: # For some reason, Ubuntu/aptitude wanted to install

    git off the Ubuntu CD, so disable that $ sudo gedit /etc/apt/sources.list # comment first 'cdrom' line and save $ sudo aptitude install -y git-core git-svn
  62. Clone and run trunk of ccrb, which has Git support:

    $ git clone git://rubyforge.org/cruisecontrolrb.git ~/cc-git # find tab currently running cc 1.3.0, ctrl-c to stop it (look for localhost:3333 in console) $ cd ~/cc-git $ ./cruise start # go to a new tab
  63. Create and run ccrb project for the mysite git project:

    $ cd ~/cc-git $ ./cruise add MySiteGit -s git -r /home/ci/mysite-git # open/refresh Galeon for new project Applications -> Internet -> Galeon -> localhost:3333 Click “Start Builder” # Watch for jsunit and selenium to run # should get a successful build! # Notice truncated GUID as build ID instead of svn revision
  64. Nirvana: Green tags/artifacts instantly used across all dev environments, all

    deploys have known, green, stable, baselined dependencies
  65. RSS

  66. IM

  67. Suggested audio for first failure, continued failure, fixed: Homer Simpson

    & Arnold Schwarzenegger Doh!, You Lack Discipline!, WooHoo! (The Louder the Better)
  68. Random Gotchas / Mantras: * “It's not easy being Green”

    * Broken Windows are Bad (“Who cares, it's always red...”) * False Negatives are Bad * Crying Wolf (“it failed for no reason”) * “Intermittent” failures (but it's not intermittent after you can reproduce it) * “Works Locally” (is your local environment the same as CI? Which one is Prod closer to???) * You can always “temporarily” disable a test in CI * One disabled test is better than a red CI * Browser Settings (autoupdate, etc) Preventing Browser Close
  69. More Random Gotchas: * False Positives are Bad too -

    being Green, when return code (echo $?) from some step is not 0 * Tricks to avoid false positives: * Use rake task exec * system(“cmd”) || raise(“cmd failed) * Test::Unit had return code bugs for a long time due to not handling entire Exception class hierarchy correctly (Finally fixed in Ruby 1.8.6/1.9???)