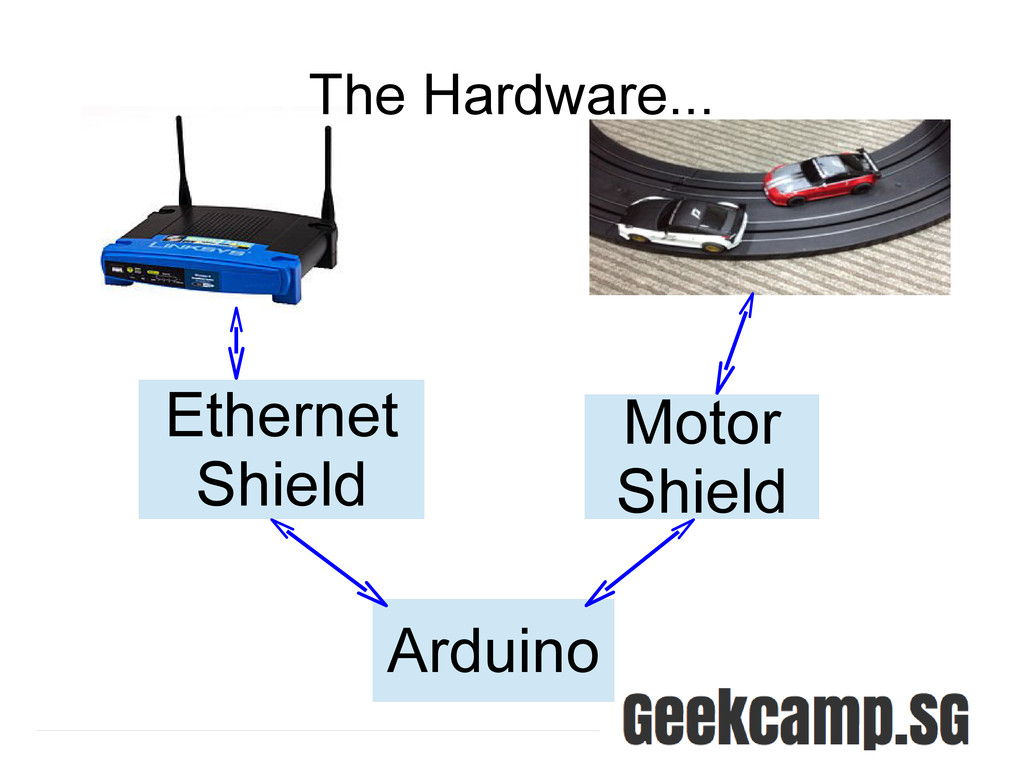
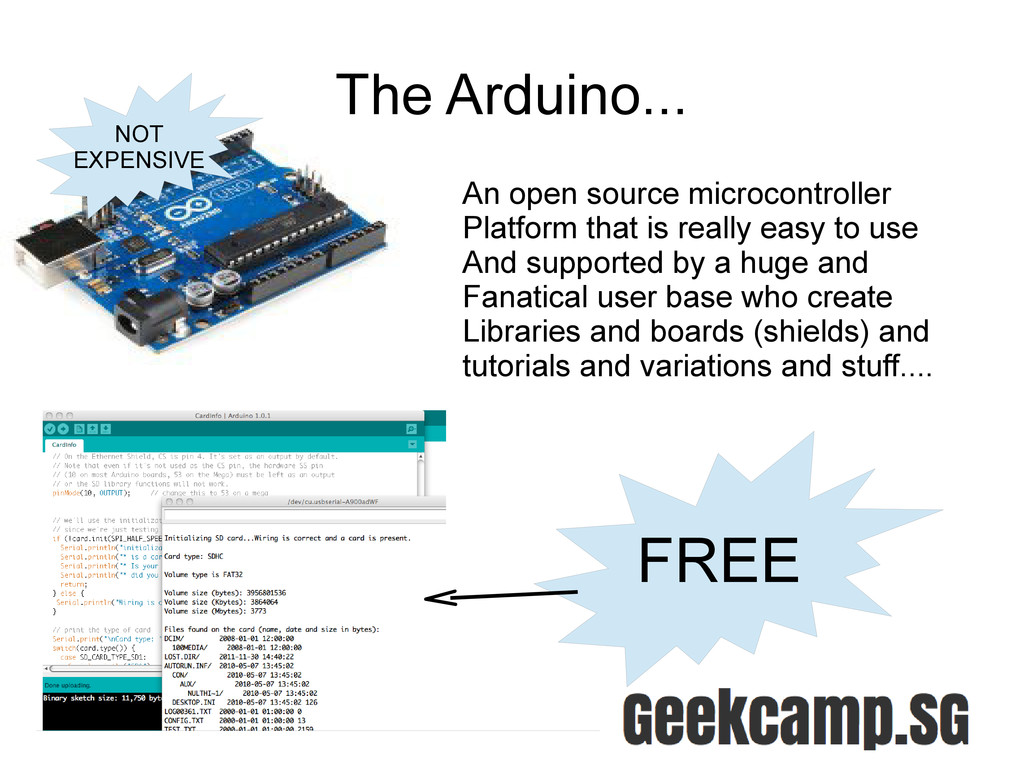
use And supported by a huge and Fanatical user base who create Libraries and boards (shields) and tutorials and variations and stuff.... FREE NOT EXPENSIVE The Arduino...
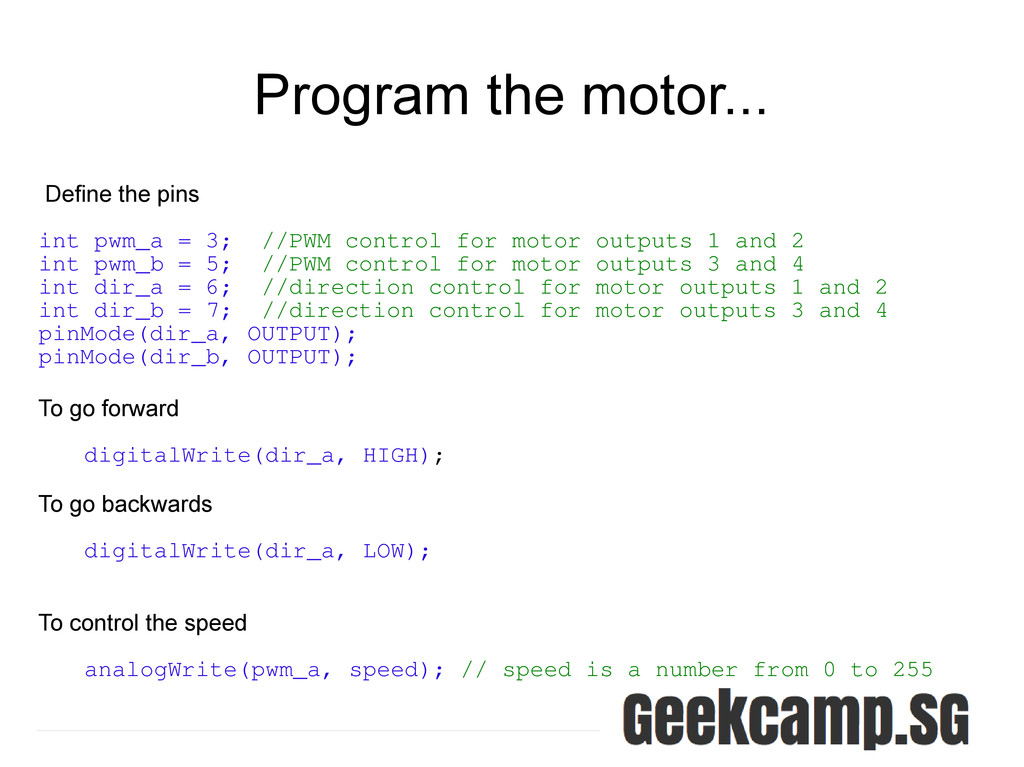
//PWM control for motor outputs 1 and 2 int pwm_b = 5; //PWM control for motor outputs 3 and 4 int dir_a = 6; //direction control for motor outputs 1 and 2 int dir_b = 7; //direction control for motor outputs 3 and 4 pinMode(dir_a, OUTPUT); pinMode(dir_b, OUTPUT); To go forward digitalWrite(dir_a, HIGH); To go backwards digitalWrite(dir_a, LOW); To control the speed analogWrite(pwm_a, speed); // speed is a number from 0 to 255
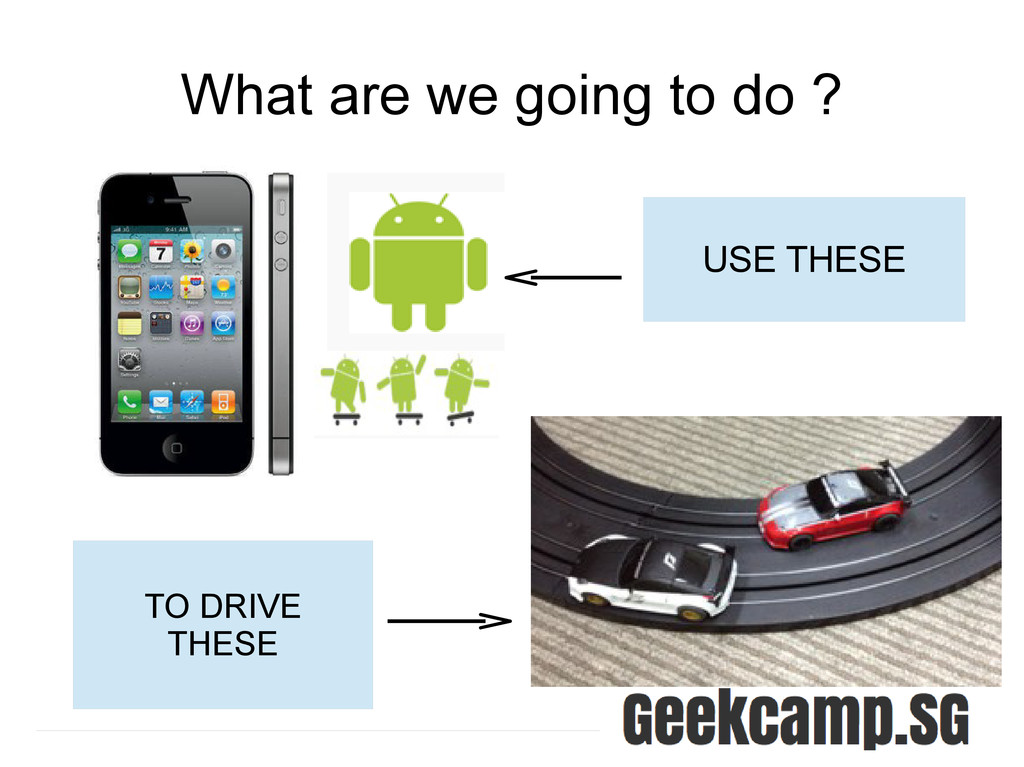
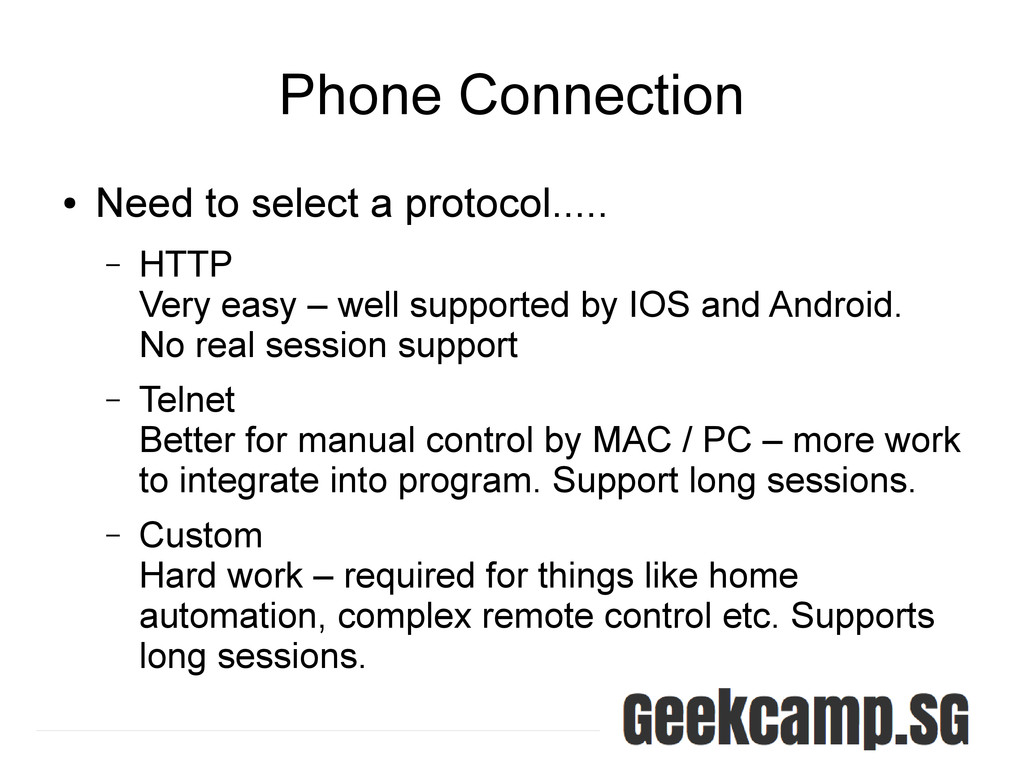
Very easy – well supported by IOS and Android. No real session support – Telnet Better for manual control by MAC / PC – more work to integrate into program. Support long sessions. – Custom Hard work – required for things like home automation, complex remote control etc. Supports long sessions.
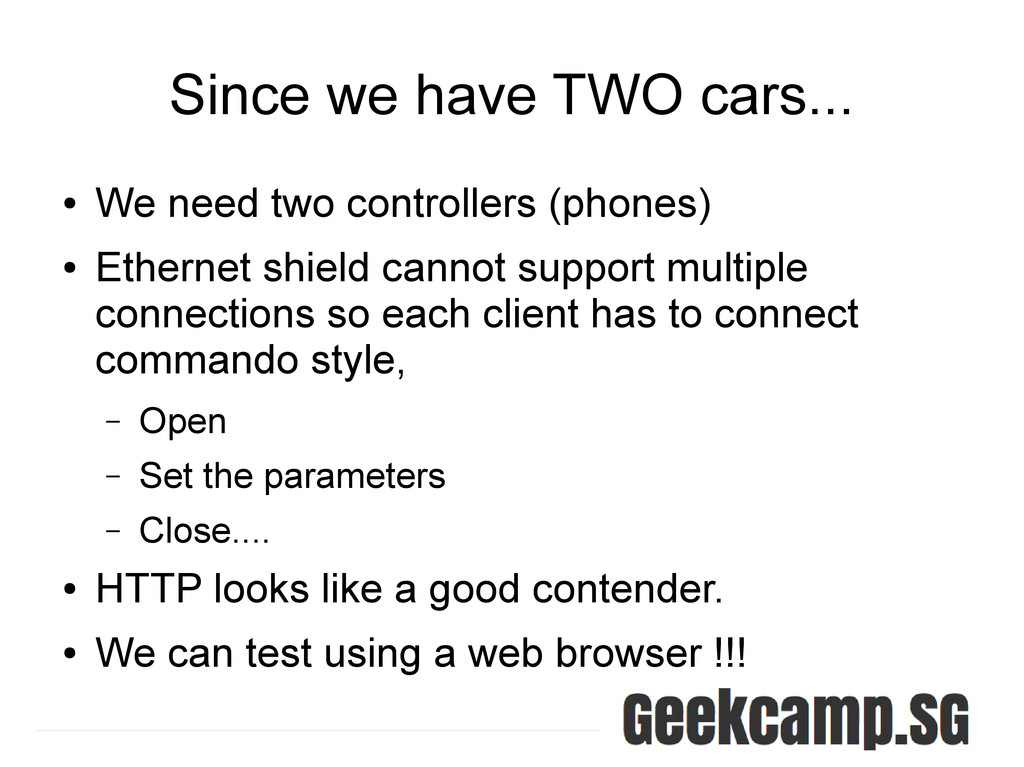
(phones) • Ethernet shield cannot support multiple connections so each client has to connect commando style, – Open – Set the parameters – Close.... • HTTP looks like a good contender. • We can test using a web browser !!!
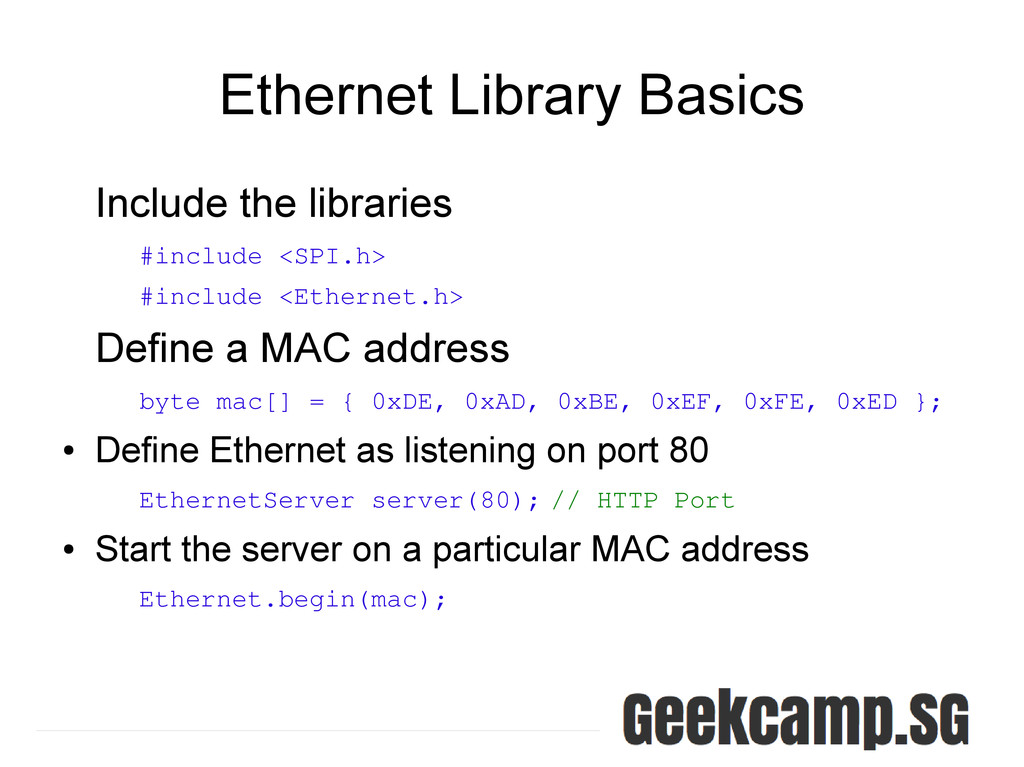
Define a MAC address byte mac[] = { 0xDE, 0xAD, 0xBE, 0xEF, 0xFE, 0xED }; • Define Ethernet as listening on port 80 EthernetServer server(80); // HTTP Port • Start the server on a particular MAC address Ethernet.begin(mac);
= server.available(); if (client) { while (client.connected()) { if (!client.available()) break; // Do something... e.g. char c = client.read(); // on char from input client.println(“Hello”); // send stuff back } } client.stop();
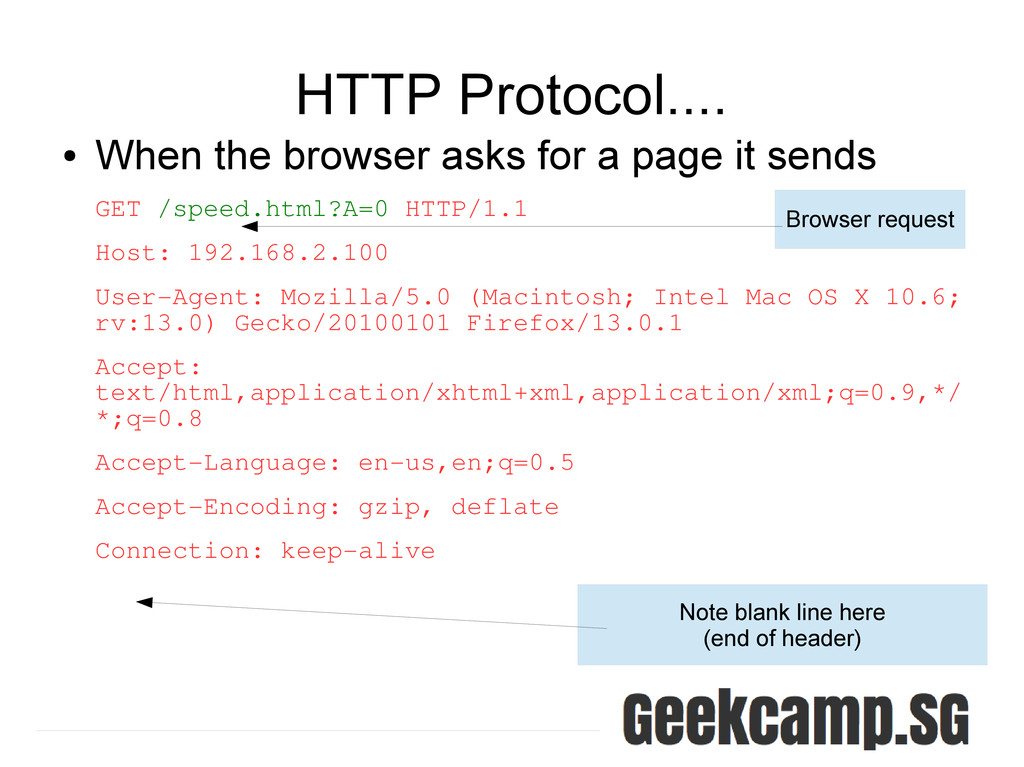
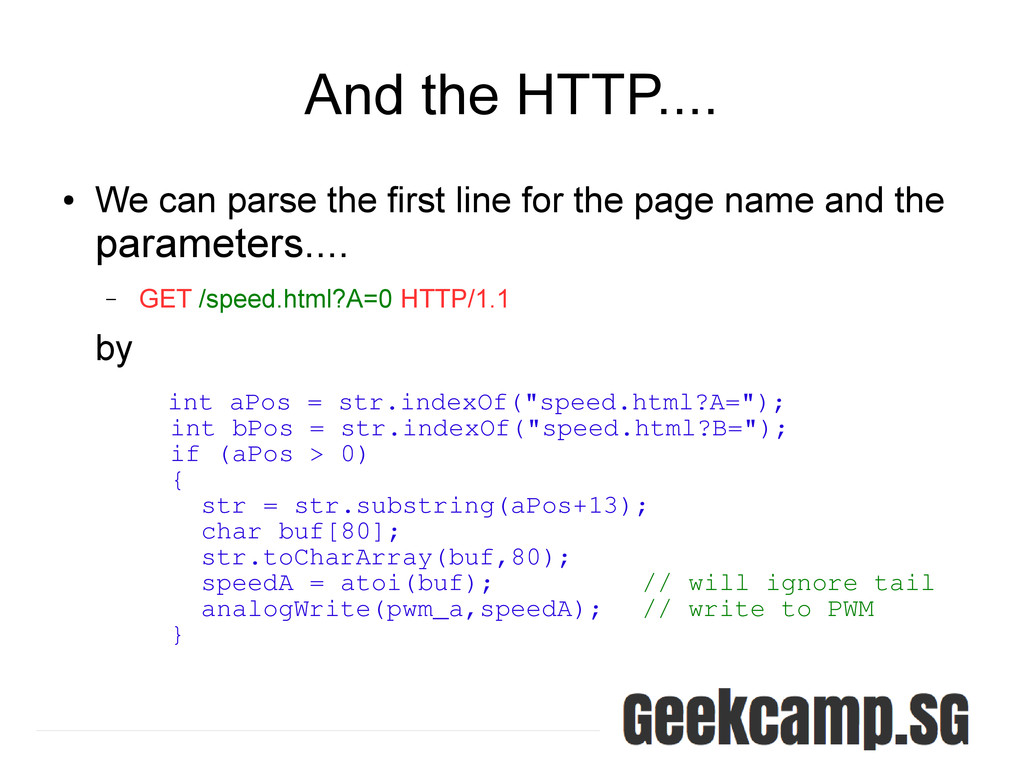
it sends GET /speed.html?A=0 HTTP/1.1 Host: 192.168.2.100 User-Agent: Mozilla/5.0 (Macintosh; Intel Mac OS X 10.6; rv:13.0) Gecko/20100101 Firefox/13.0.1 Accept: text/html,application/xhtml+xml,application/xml;q=0.9,*/ *;q=0.8 Accept-Language: en-us,en;q=0.5 Accept-Encoding: gzip, deflate Connection: keep-alive Browser request Note blank line here (end of header)
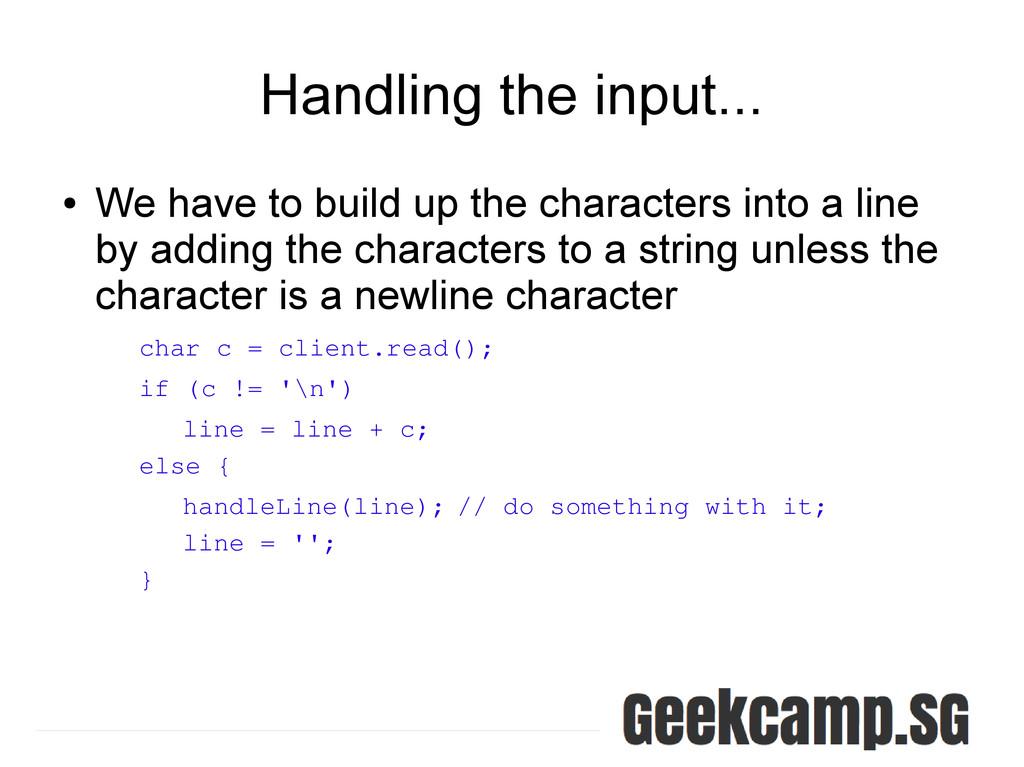
characters into a line by adding the characters to a string unless the character is a newline character char c = client.read(); if (c != '\n') line = line + c; else { handleLine(line); // do something with it; line = ''; }
for the page name and the parameters.... – GET /speed.html?A=0 HTTP/1.1 by int aPos = str.indexOf("speed.html?A="); int bPos = str.indexOf("speed.html?B="); if (aPos > 0) { str = str.substring(aPos+13); char buf[80]; str.toCharArray(buf,80); speedA = atoi(buf); // will ignore tail analogWrite(pwm_a,speedA); // write to PWM }