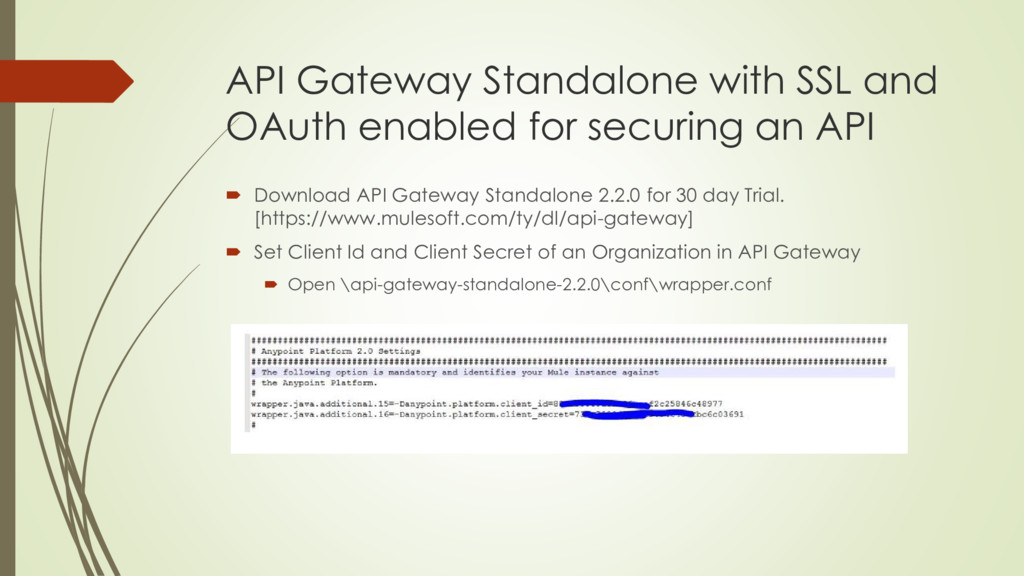
an API Download API Gateway Standalone 2.2.0 for 30 day Trial. [https://www.mulesoft.com/ty/dl/api-gateway] Set Client Id and Client Secret of an Organization in API Gateway Open \api-gateway-standalone-2.2.0\conf\wrapper.conf
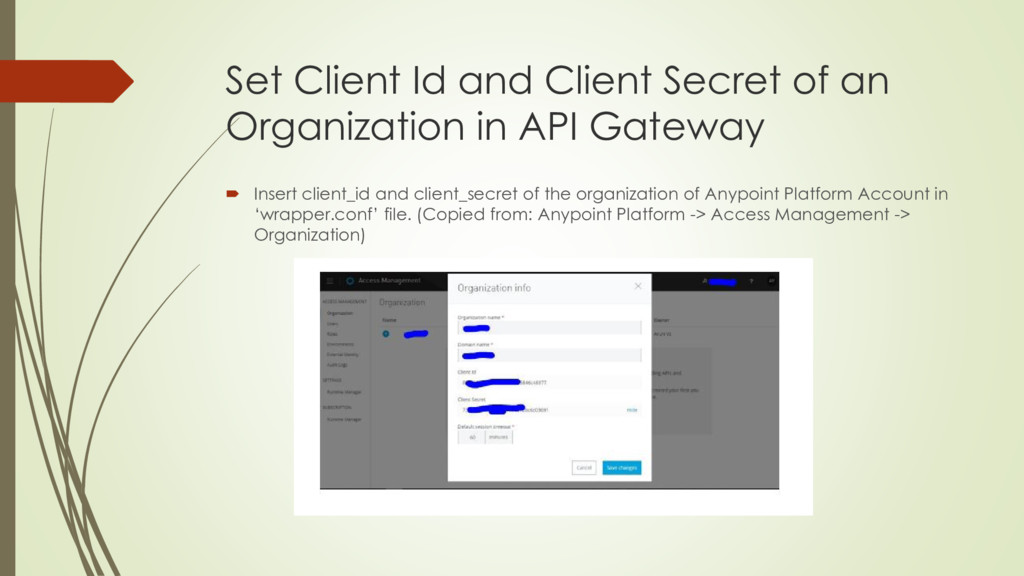
API Gateway Insert client_id and client_secret of the organization of Anypoint Platform Account in ‘wrapper.conf’ file. (Copied from: Anypoint Platform -> Access Management -> Organization)
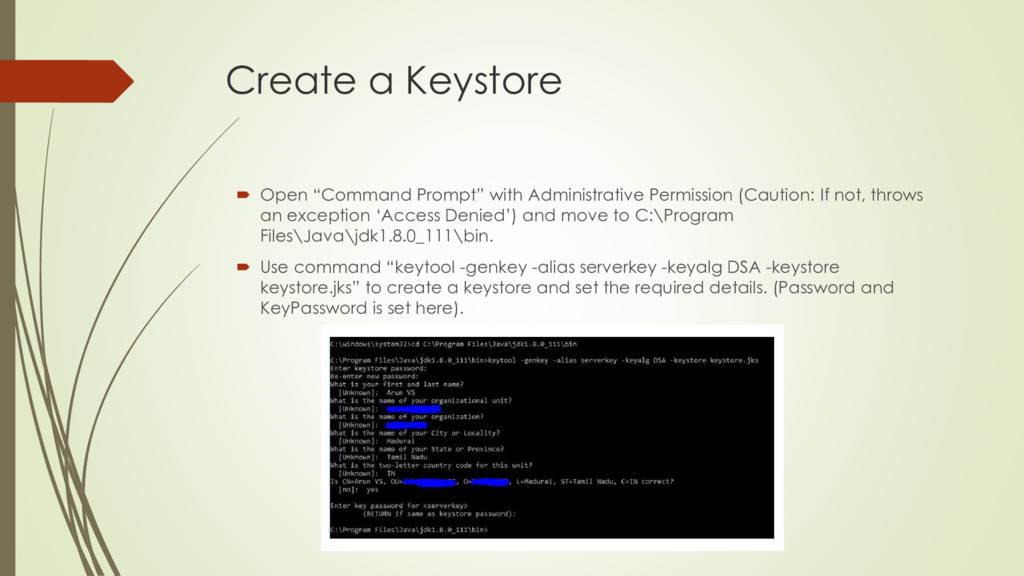
(Caution: If not, throws an exception ‘Access Denied’) and move to C:\Program Files\Java\jdk1.8.0_111\bin. Use command “keytool -genkey -alias serverkey -keyalg DSA -keystore keystore.jks” to create a keystore and set the required details. (Password and KeyPassword is set here).
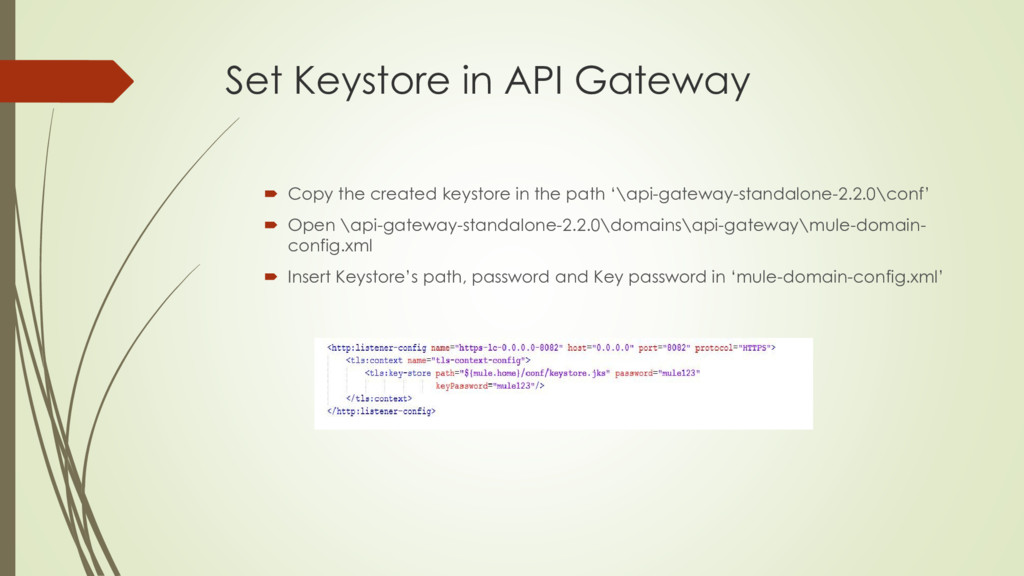
in the path ‘\api-gateway-standalone-2.2.0\conf’ Open \api-gateway-standalone-2.2.0\domains\api-gateway\mule-domain- config.xml Insert Keystore’s path, password and Key password in ‘mule-domain-config.xml’
sample Mule Project developed cannot be directly deployed to standalone API Gateway. It will throw “Config not found” error. When deploying to cloud, it internally converts to the required format. Right click the project folder at Anypoint Studio and click Anypoint Platform->Deploy to Cloud From Anypoint Platform, download the zip file and extract it. Now, it will be in the acceptable format of Standalone API Gateway. Copy the downloaded project to ‘\api-gateway-standalone-2.2.0\apps’. Move to ‘\api-gateway-standalone-2.2.0’ & execute the command ‘.\bin\gateway’. Now our app will be deployed.
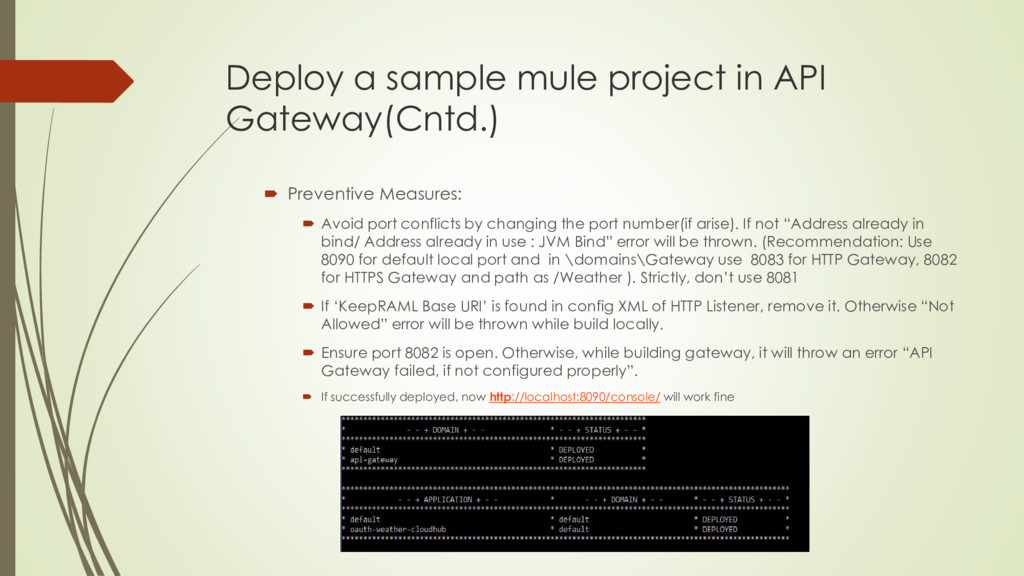
Measures: Avoid port conflicts by changing the port number(if arise). If not “Address already in bind/ Address already in use : JVM Bind” error will be thrown. (Recommendation: Use 8090 for default local port and in \domains\Gateway use 8083 for HTTP Gateway, 8082 for HTTPS Gateway and path as /Weather ). Strictly, don’t use 8081 If ‘KeepRAML Base URI’ is found in config XML of HTTP Listener, remove it. Otherwise “Not Allowed” error will be thrown while build locally. Ensure port 8082 is open. Otherwise, while building gateway, it will throw an error “API Gateway failed, if not configured properly”. If successfully deployed, now http://localhost:8090/console/ will work fine
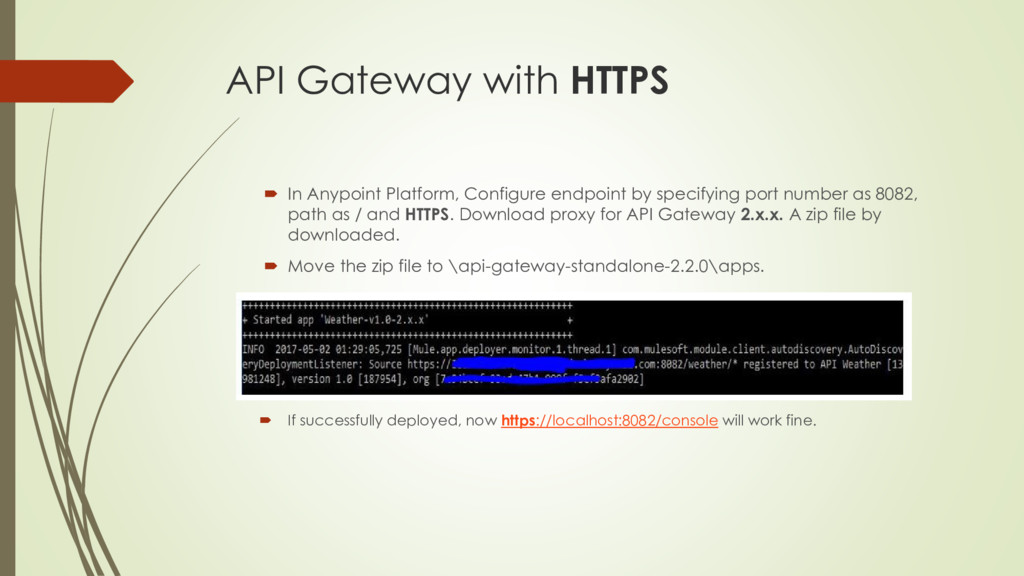
by specifying port number as 8082, path as / and HTTPS. Download proxy for API Gateway 2.x.x. A zip file by downloaded. Move the zip file to \api-gateway-standalone-2.2.0\apps. If successfully deployed, now https://localhost:8082/console will work fine.
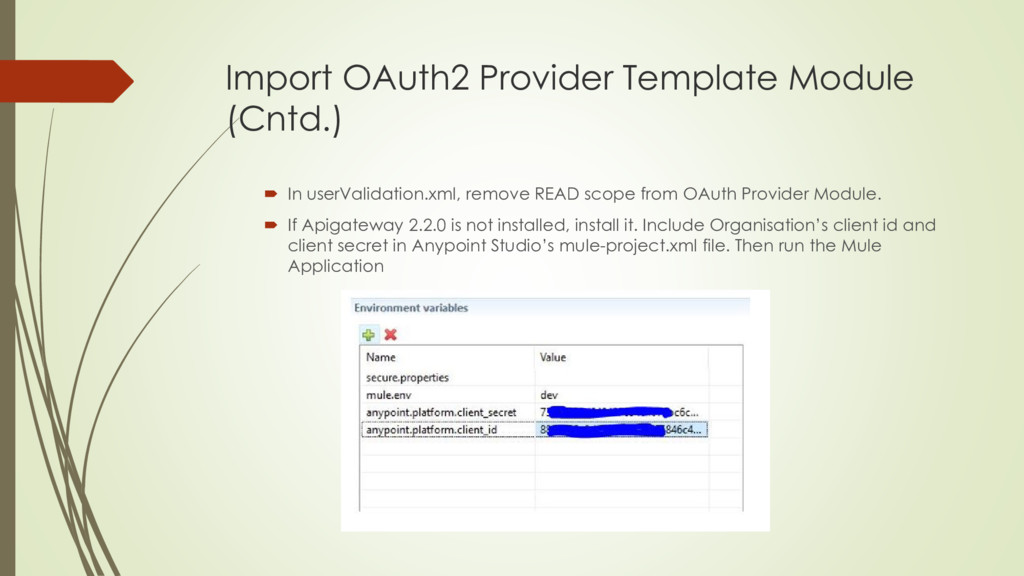
READ scope from OAuth Provider Module. If Apigateway 2.2.0 is not installed, install it. Include Organisation’s client id and client secret in Anypoint Studio’s mule-project.xml file. Then run the Mule Application
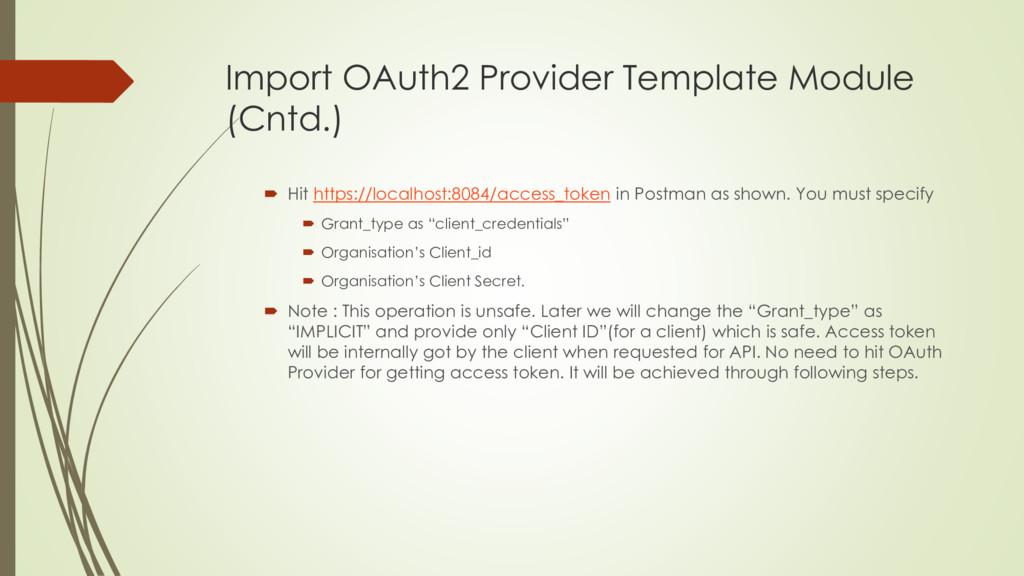
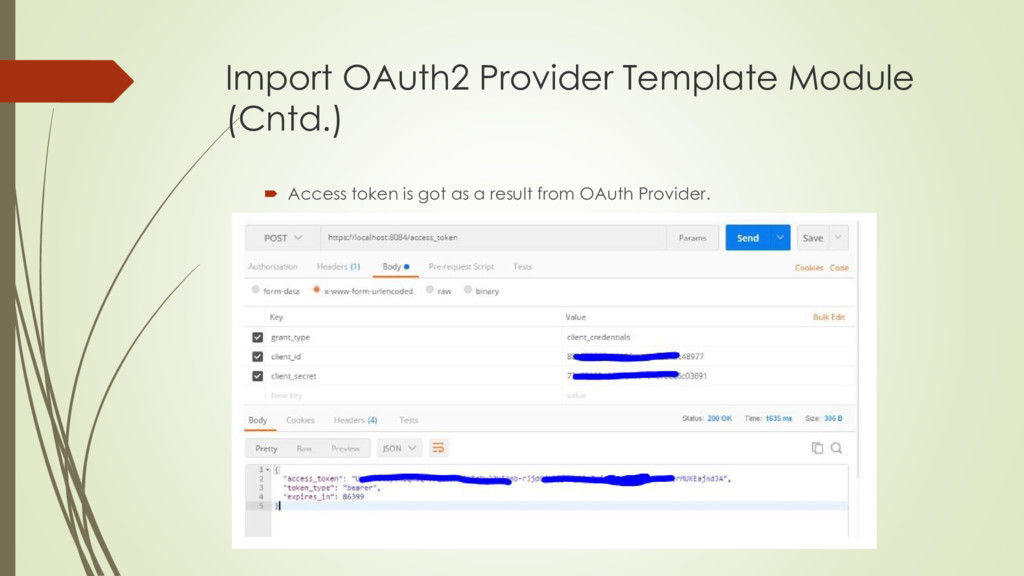
Postman as shown. You must specify Grant_type as “client_credentials” Organisation’s Client_id Organisation’s Client Secret. Note : This operation is unsafe. Later we will change the “Grant_type” as “IMPLICIT” and provide only “Client ID”(for a client) which is safe. Access token will be internally got by the client when requested for API. No need to hit OAuth Provider for getting access token. It will be achieved through following steps.
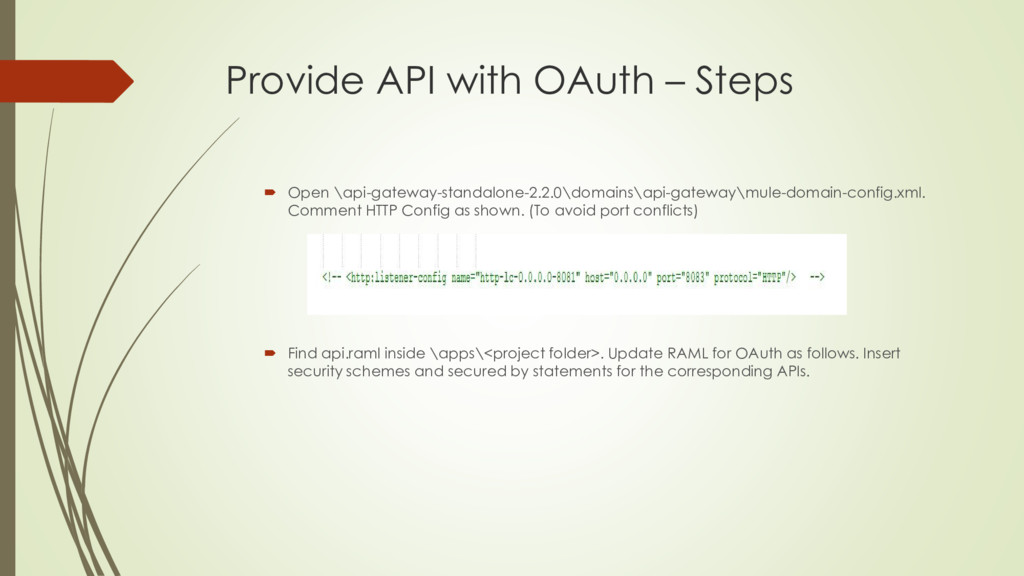
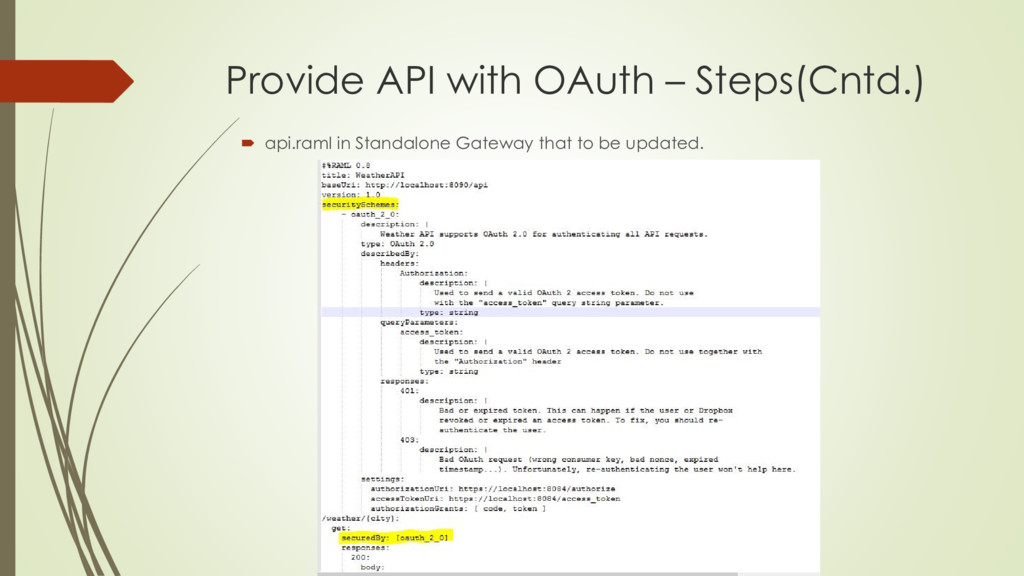
HTTP Config as shown. (To avoid port conflicts) Find api.raml inside \apps\<project folder>. Update RAML for OAuth as follows. Insert security schemes and secured by statements for the corresponding APIs.
.\bin\gateway. In Anypoint Platform, apply policies such as CORS OAuth 2.0 Access Token Enforcement using external provider (Here, use endpoint : https://localhost:8084/validate)
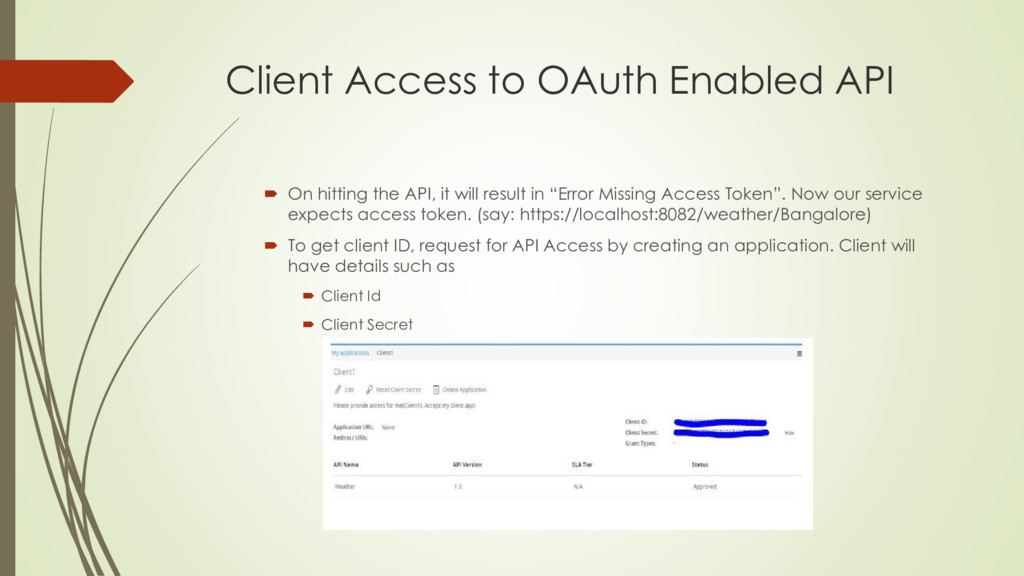
API, it will result in “Error Missing Access Token”. Now our service expects access token. (say: https://localhost:8082/weather/Bangalore) To get client ID, request for API Access by creating an application. Client will have details such as Client Id Client Secret
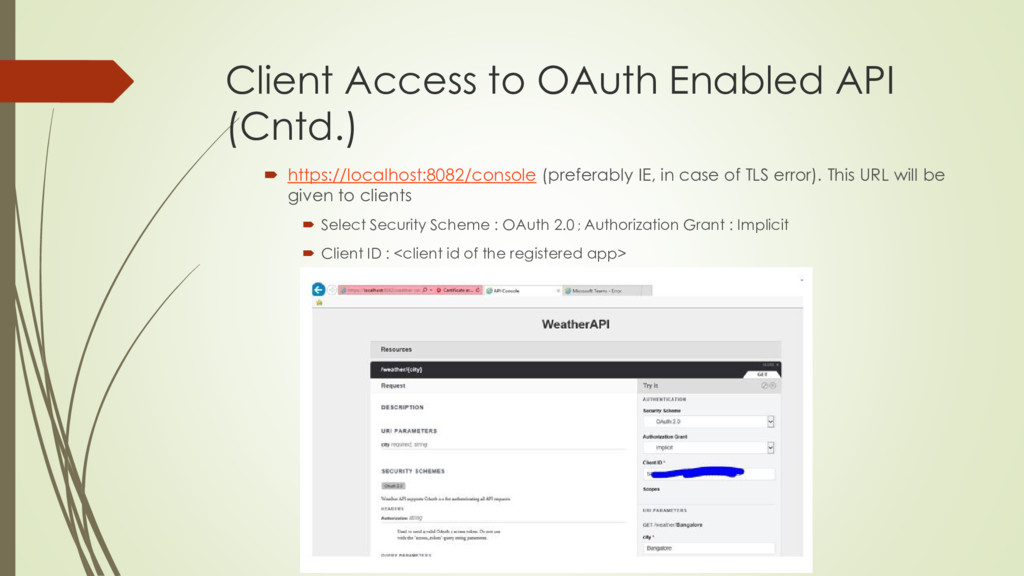
IE, in case of TLS error). This URL will be given to clients Select Security Scheme : OAuth 2.0 ; Authorization Grant : Implicit Client ID : <client id of the registered app>
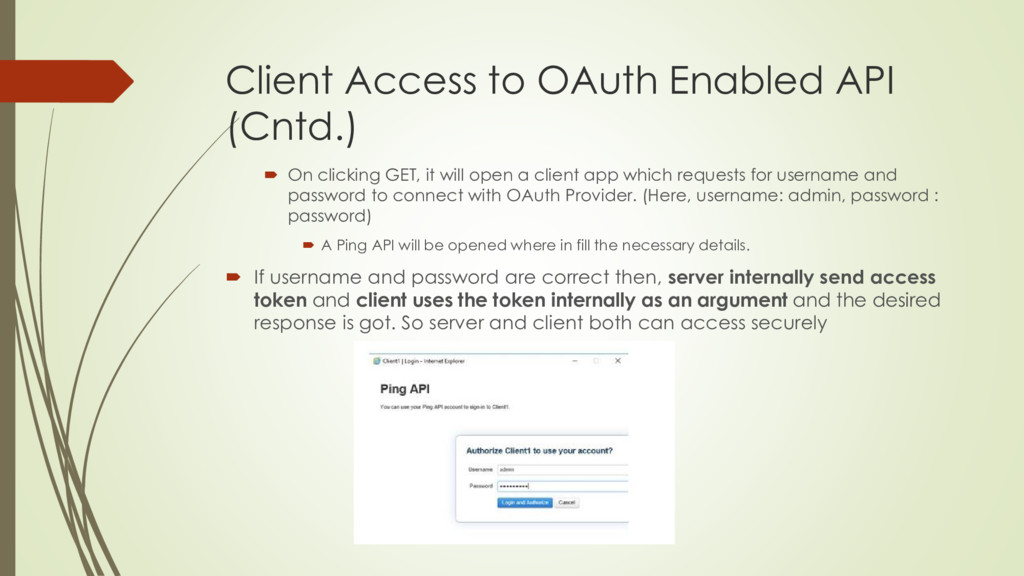
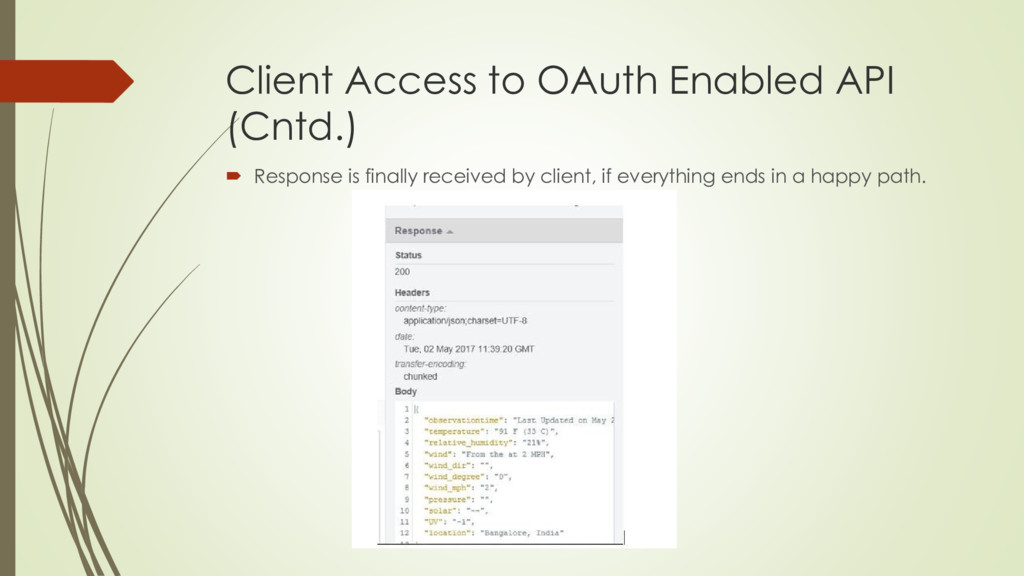
GET, it will open a client app which requests for username and password to connect with OAuth Provider. (Here, username: admin, password : password) A Ping API will be opened where in fill the necessary details. If username and password are correct then, server internally send access token and client uses the token internally as an argument and the desired response is got. So server and client both can access securely
Client gives its client id, server’s username and password. By this, authentication (Using server’s username and password) authorization (Using registered client id) both are achieved. (Assuming, Server is trusted source)