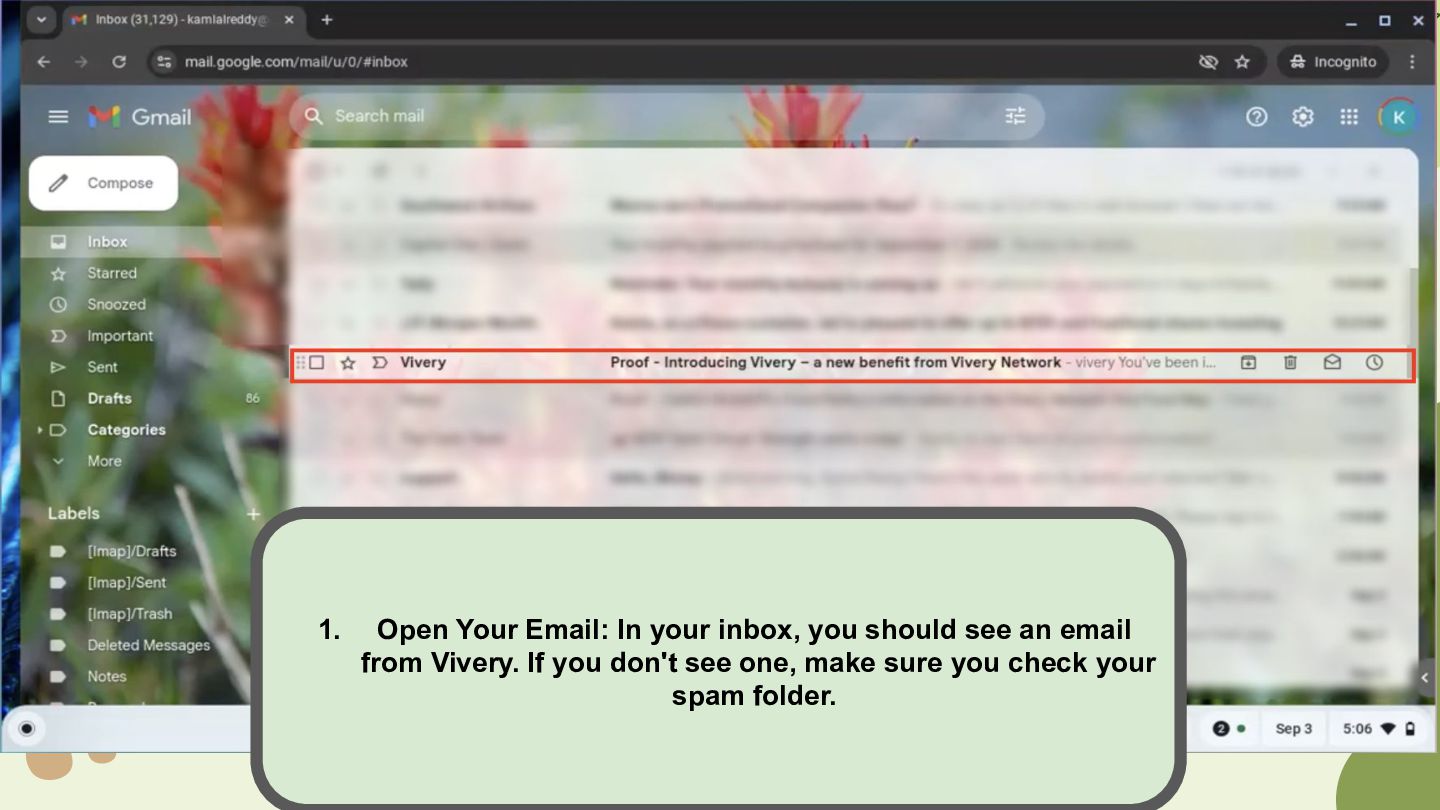
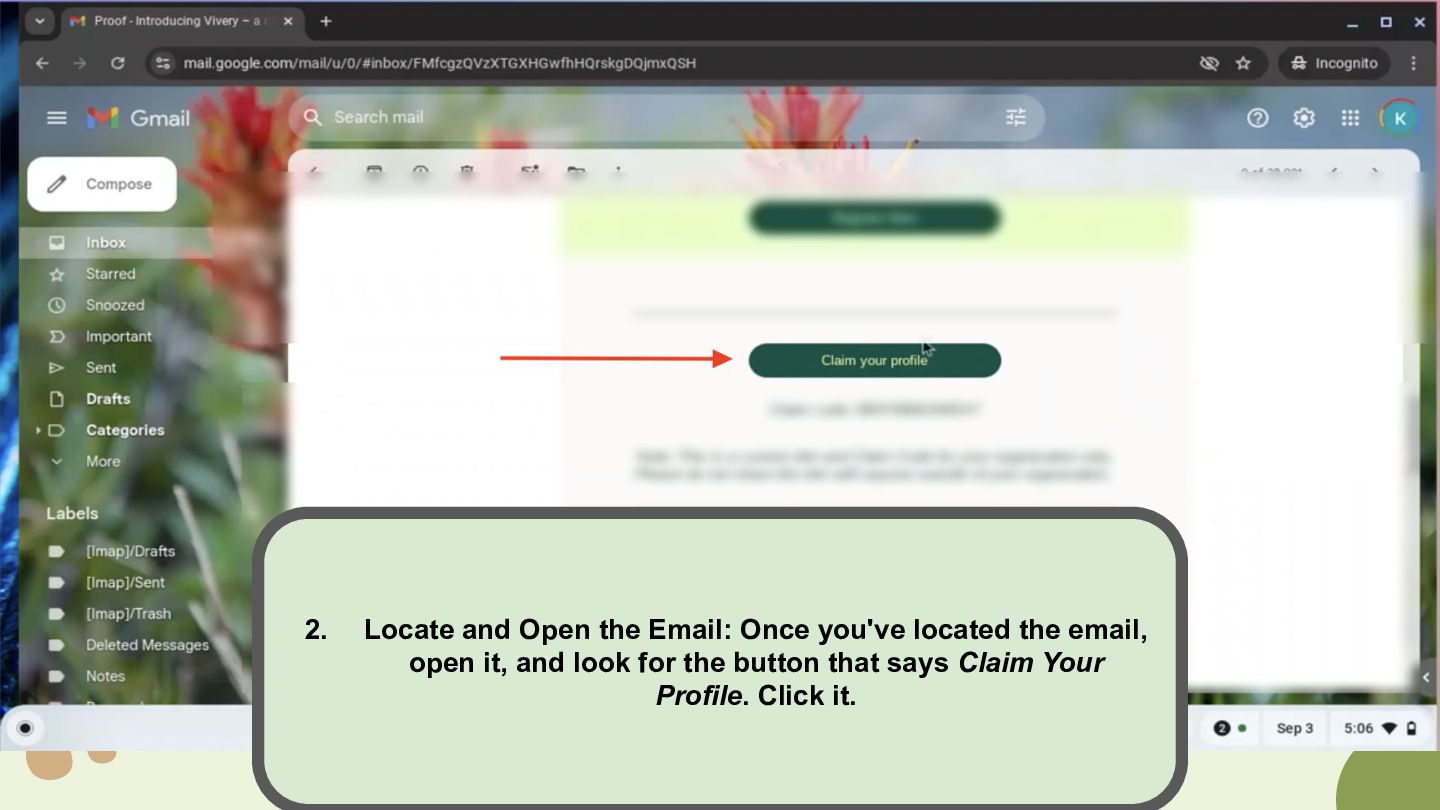
Your food bank's new Vivery-powered Find Food map has gone live, and now it's time to claim your profile. The good news is, this only takes a few minutes to do. Follow these steps to get started:
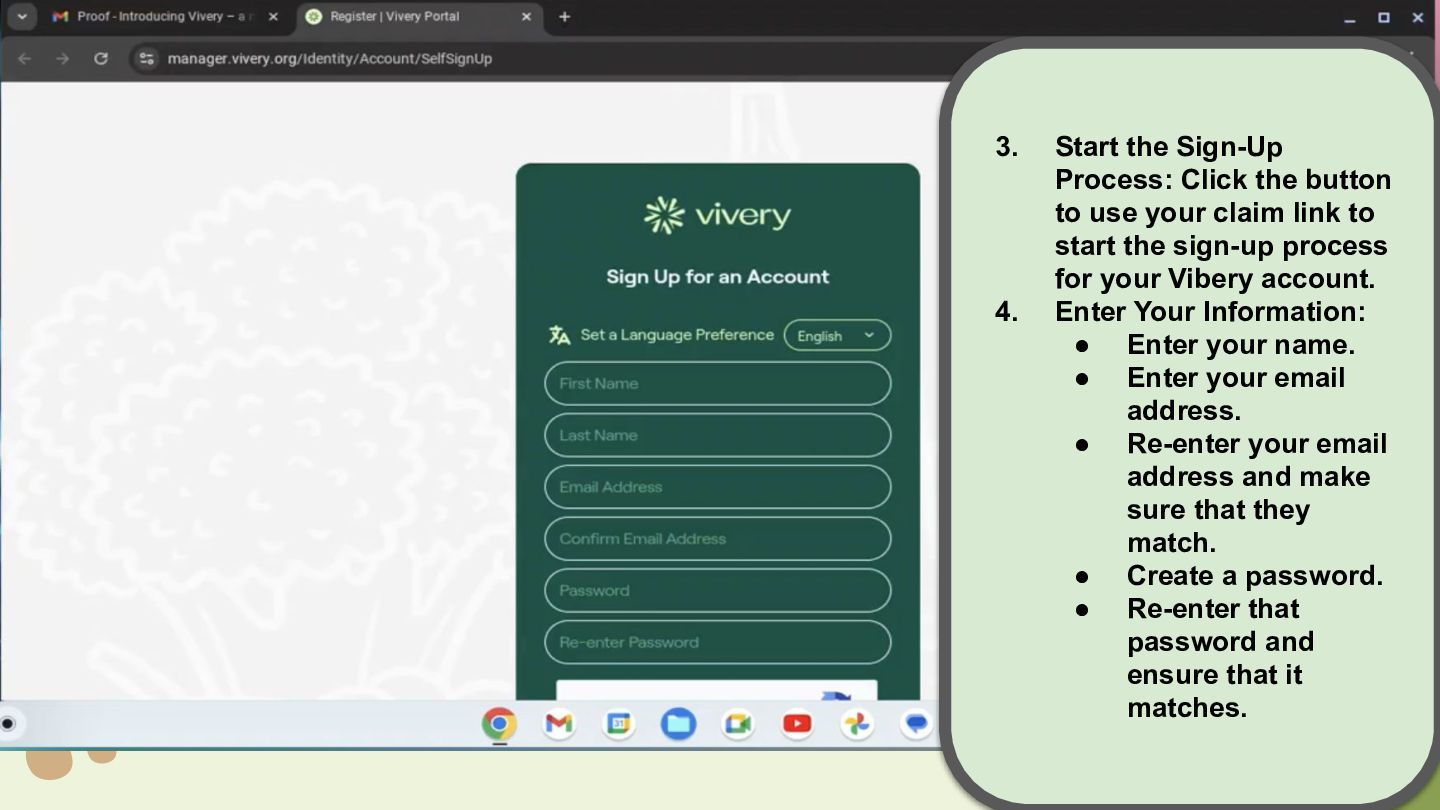
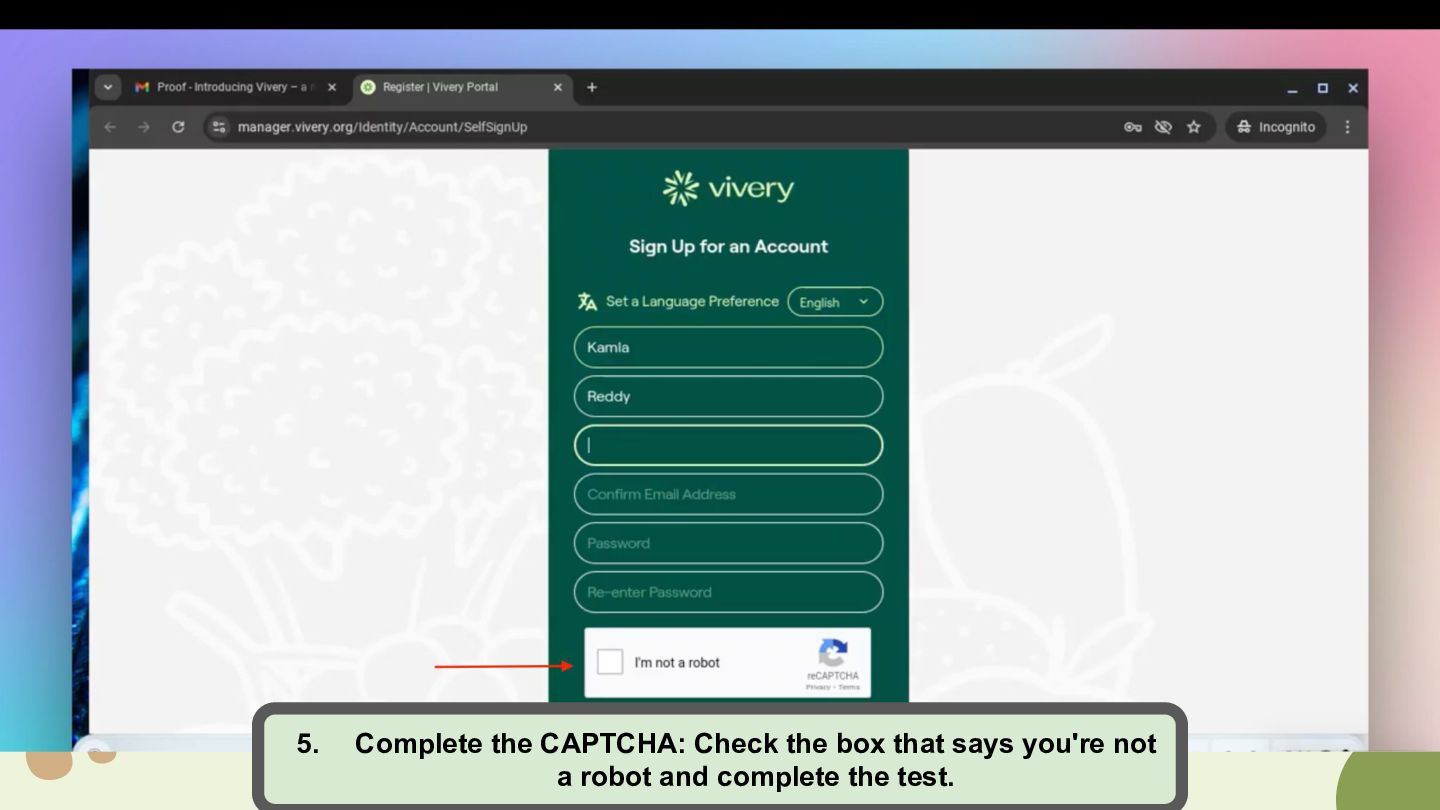
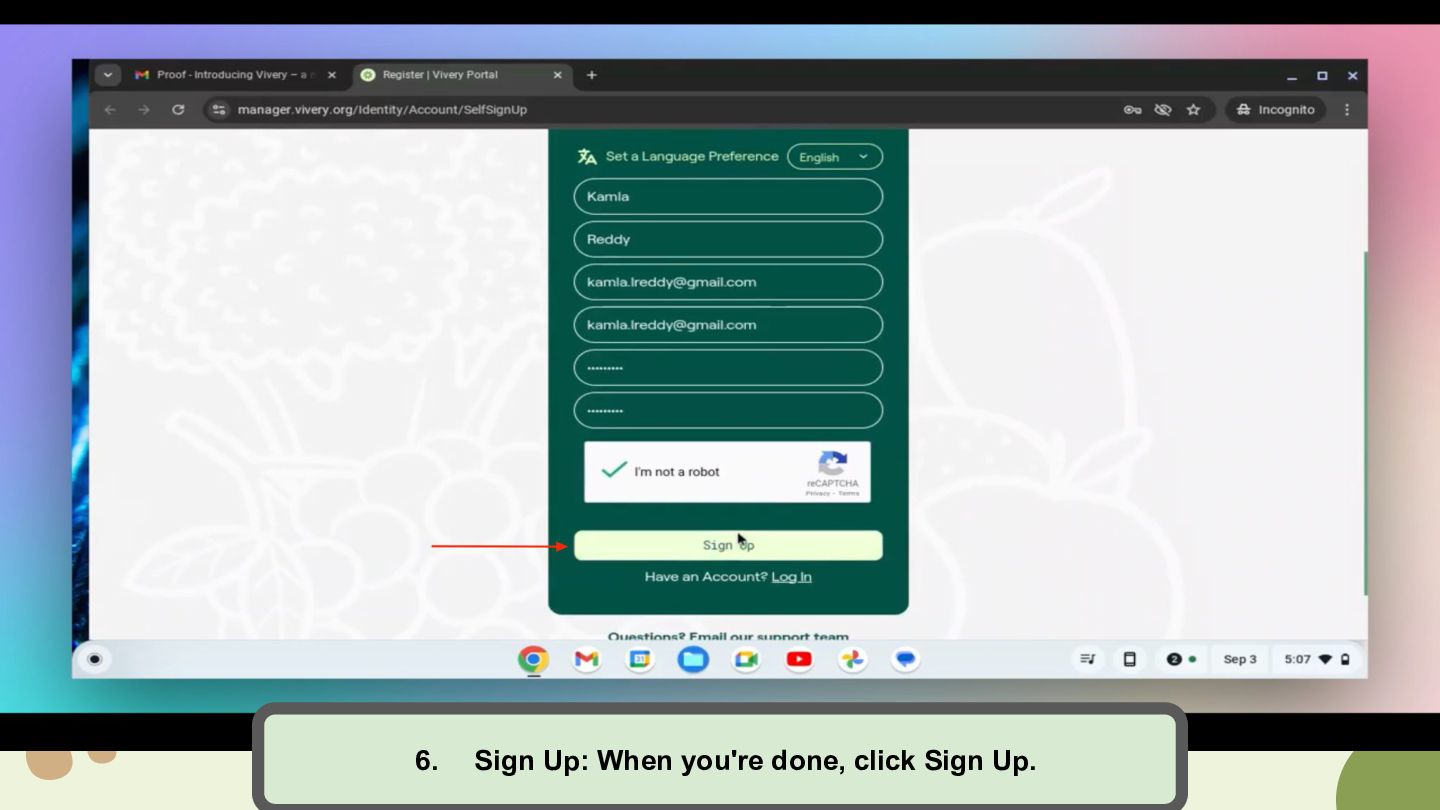
your claim link to start the sign-up process for your Vibery account. 4. Enter Your Information: • Enter your name. • Enter your email address. • Re-enter your email address and make sure that they match. • Create a password. • Re-enter that password and ensure that it matches.
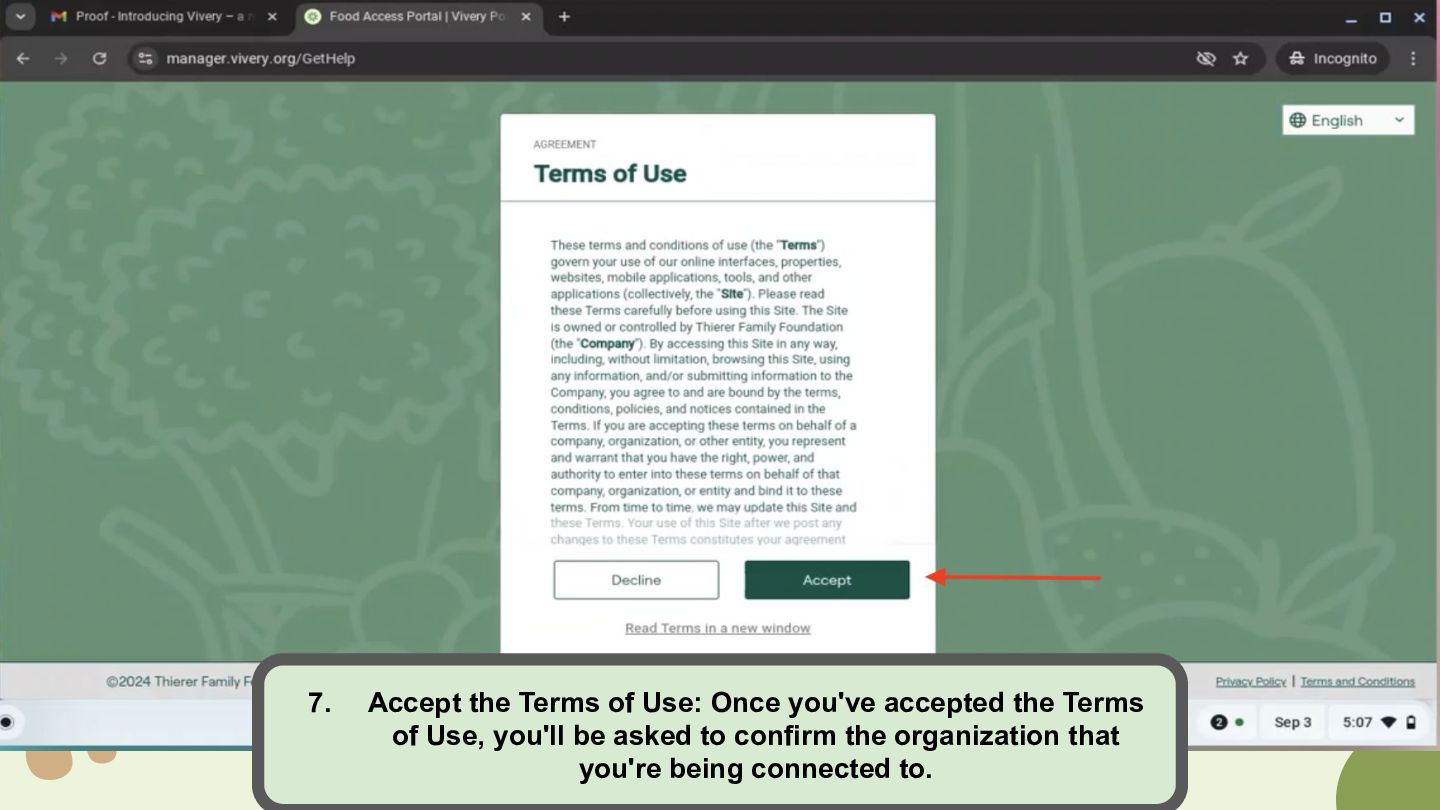
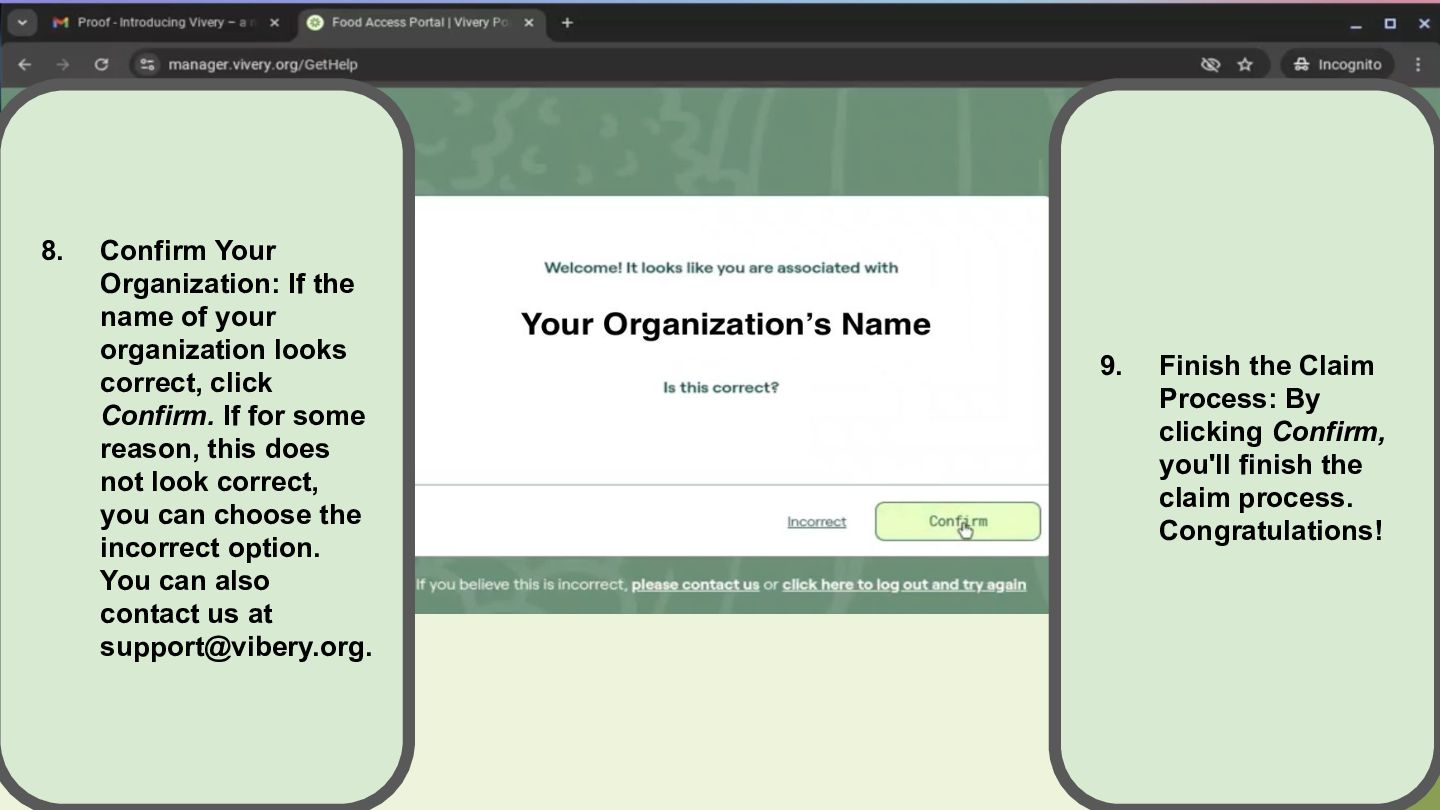
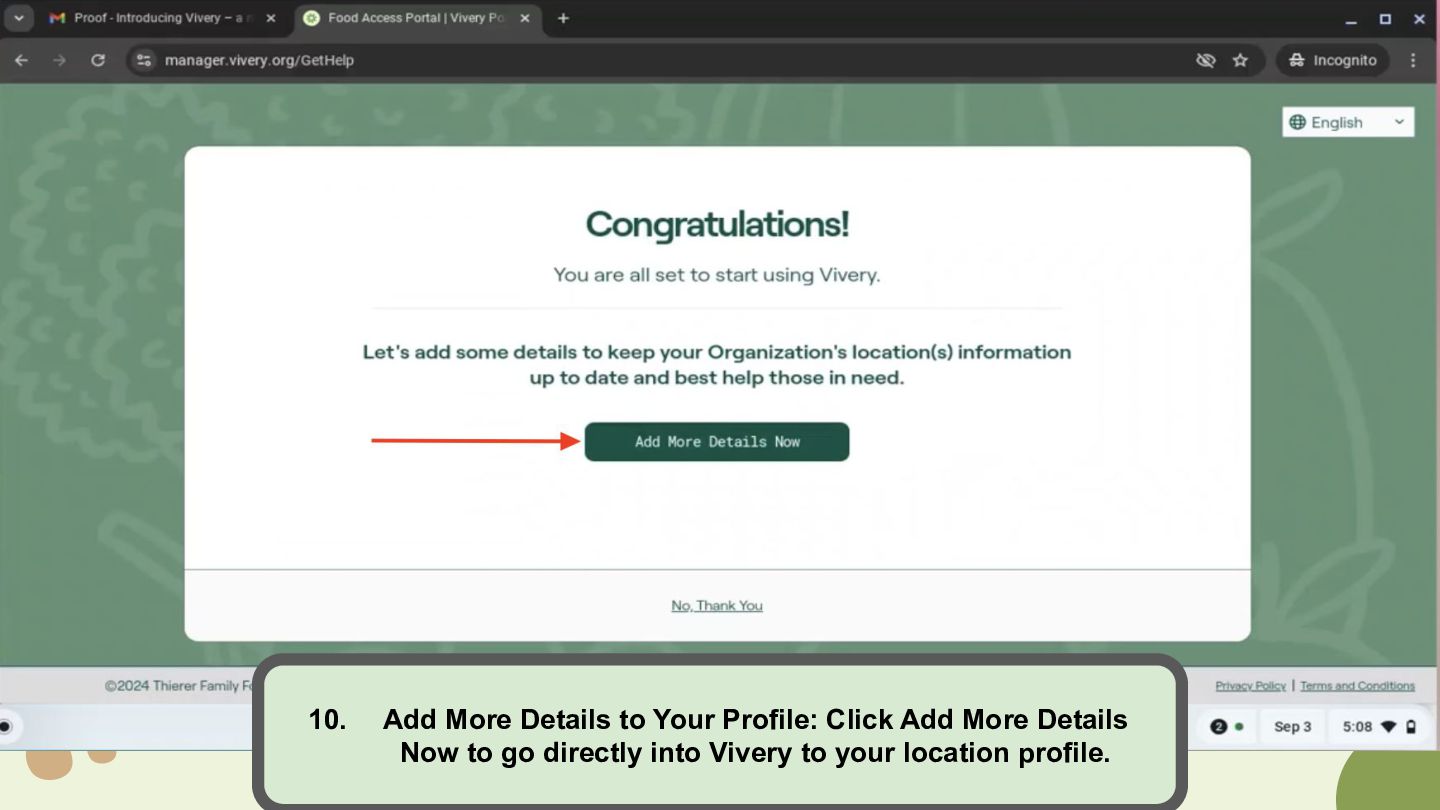
looks correct, click Confirm. If for some reason, this does not look correct, you can choose the incorrect option. You can also contact us at [email protected]. 9. Finish the Claim Process: By clicking Confirm, you'll finish the claim process. Congratulations!
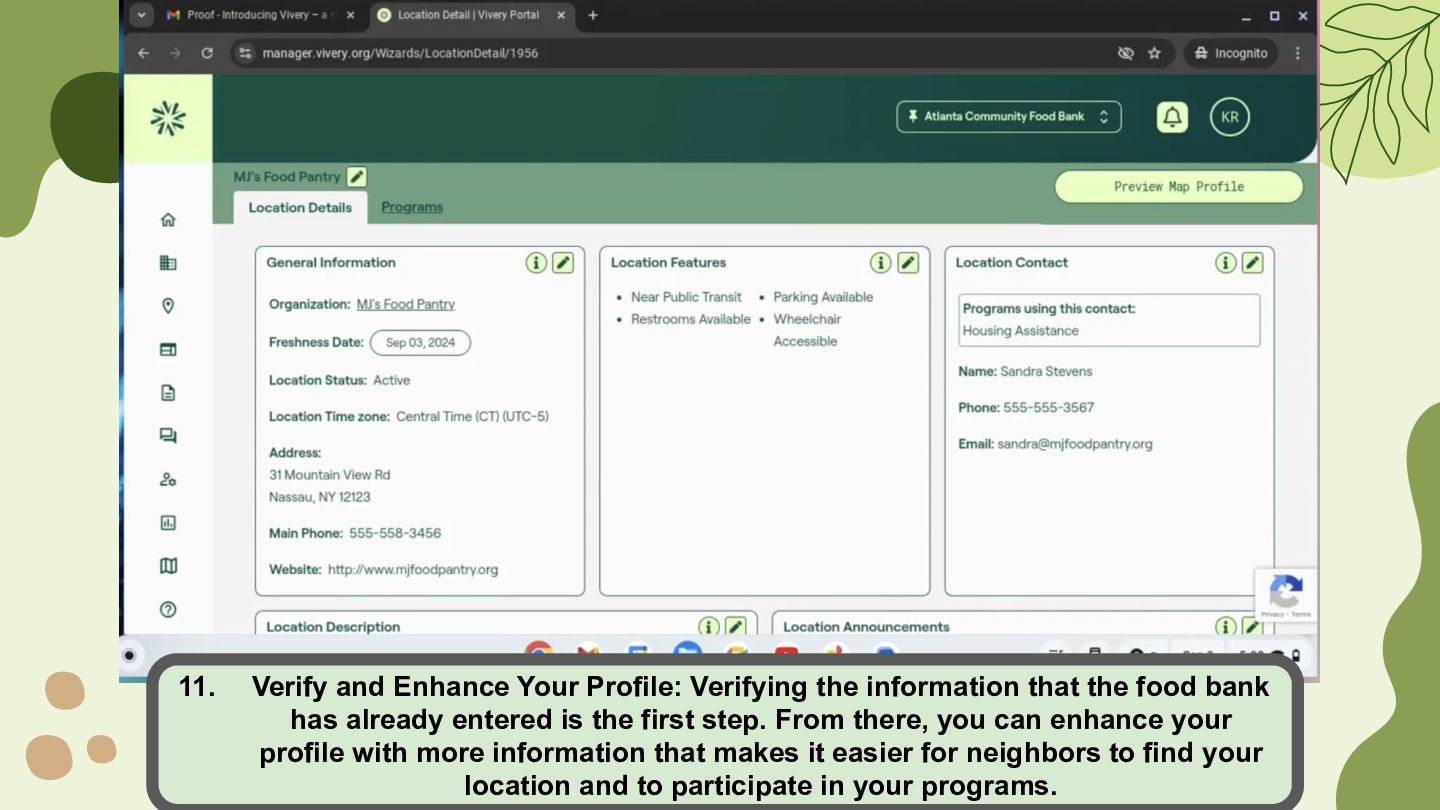
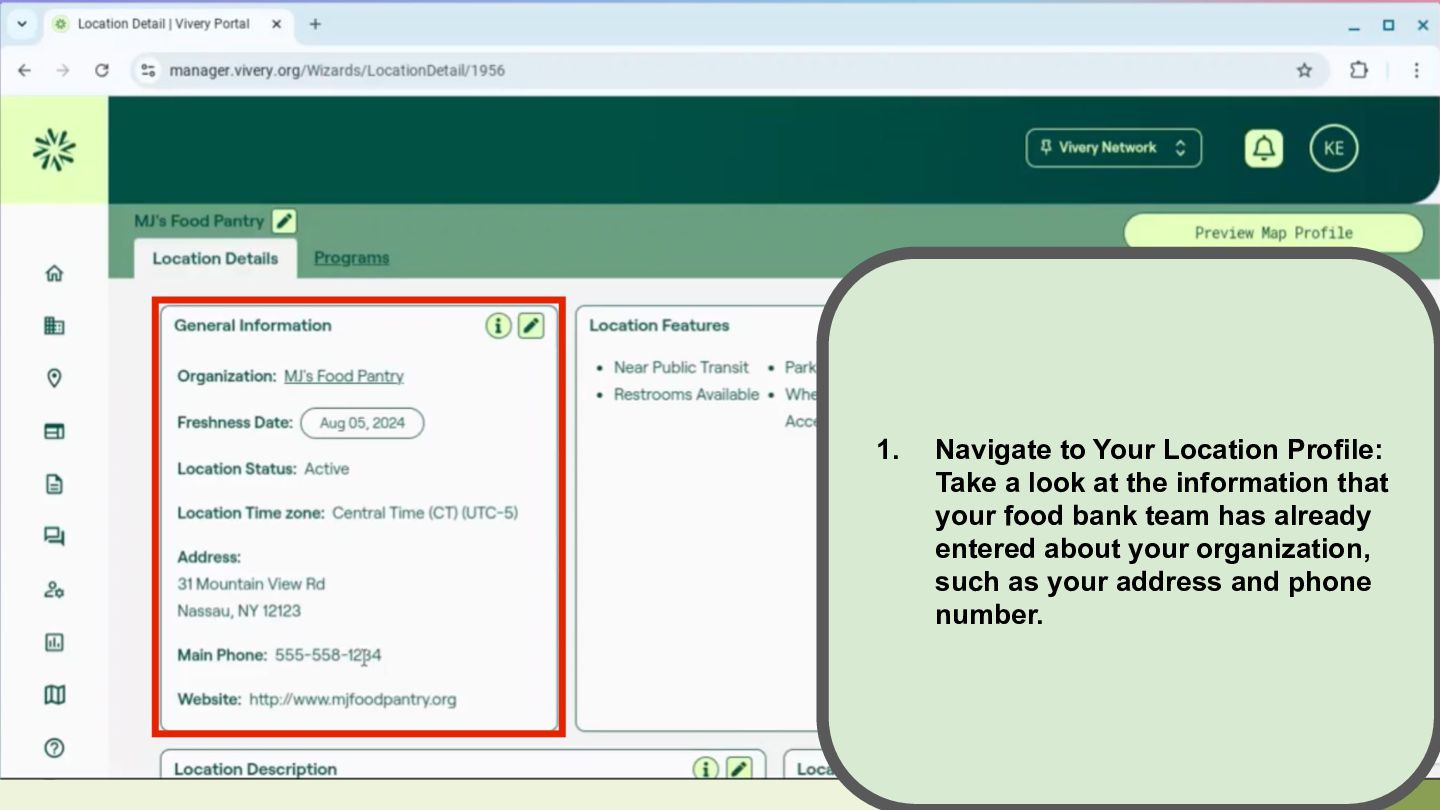
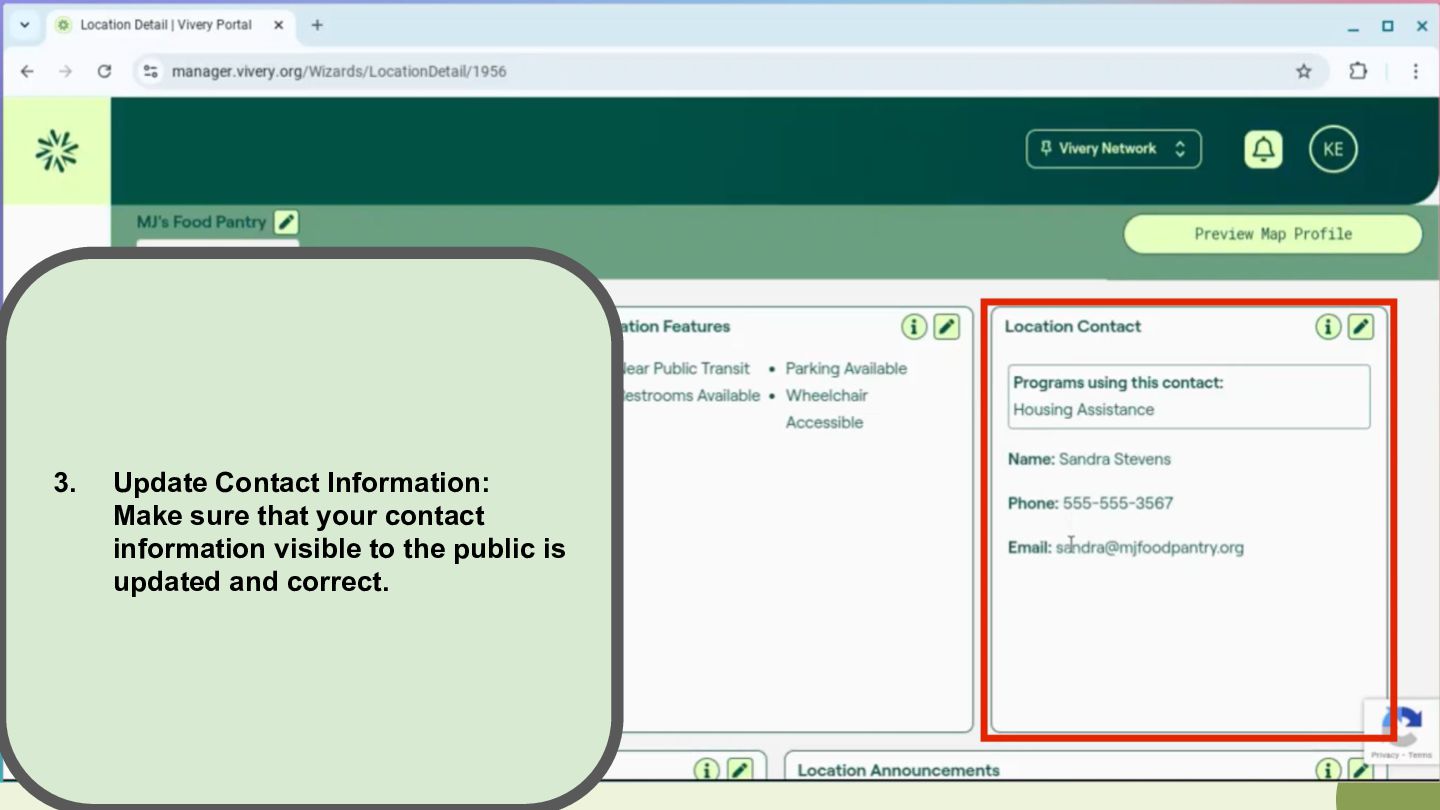
the food bank has already entered is the first step. From there, you can enhance your profile with more information that makes it easier for neighbors to find your location and to participate in your programs.
when you first claim your profile is an important step. It ensures that your community has access to accurate information about your location and programs.
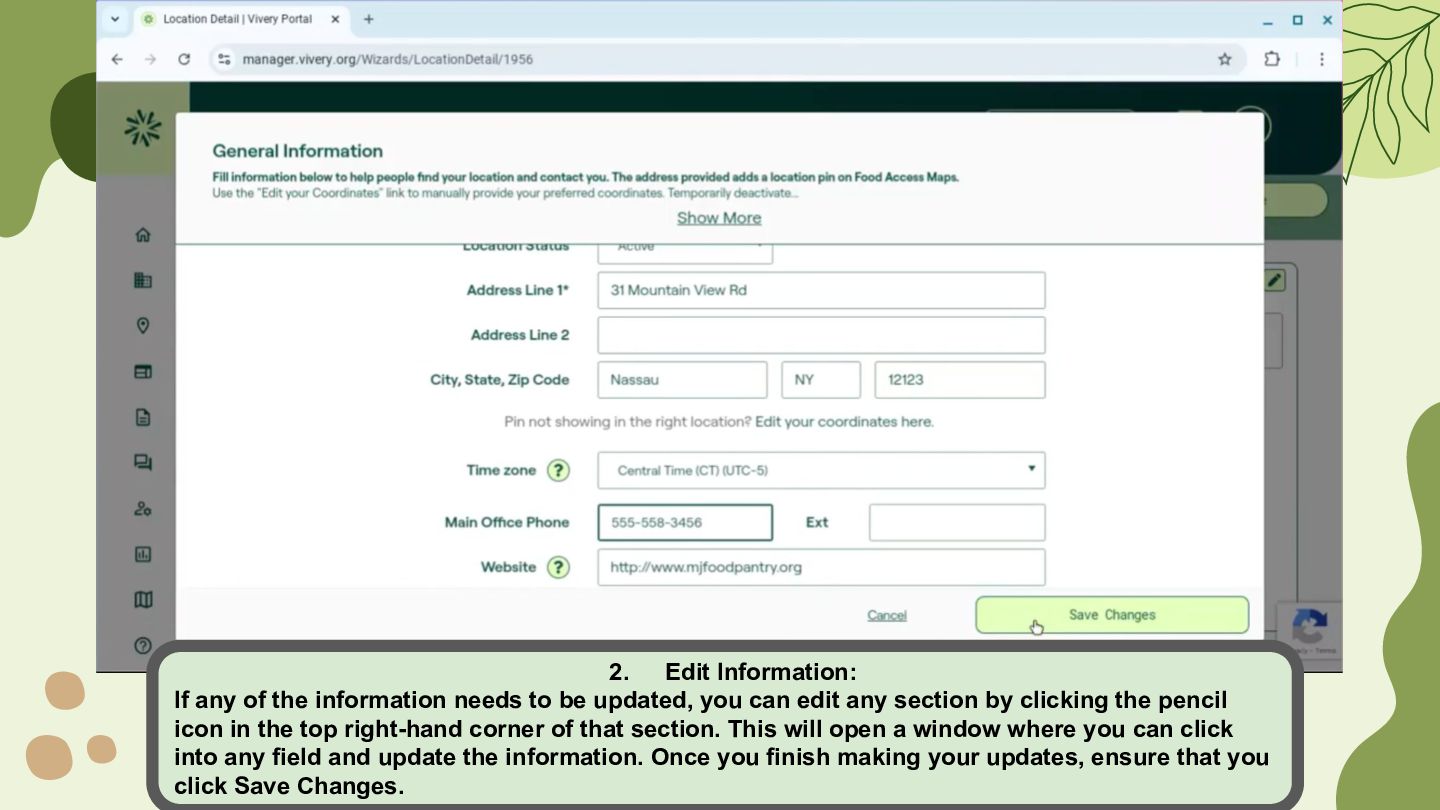
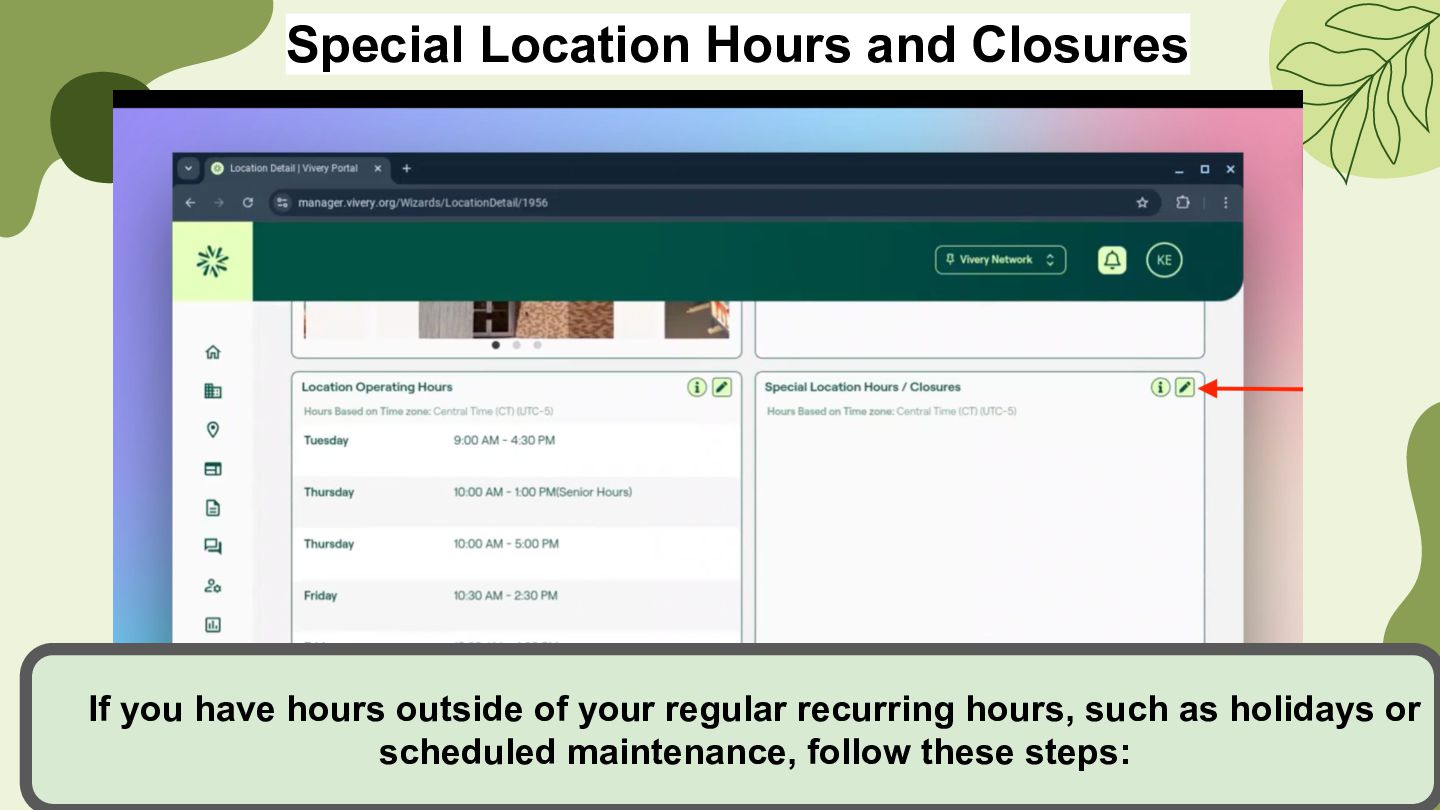
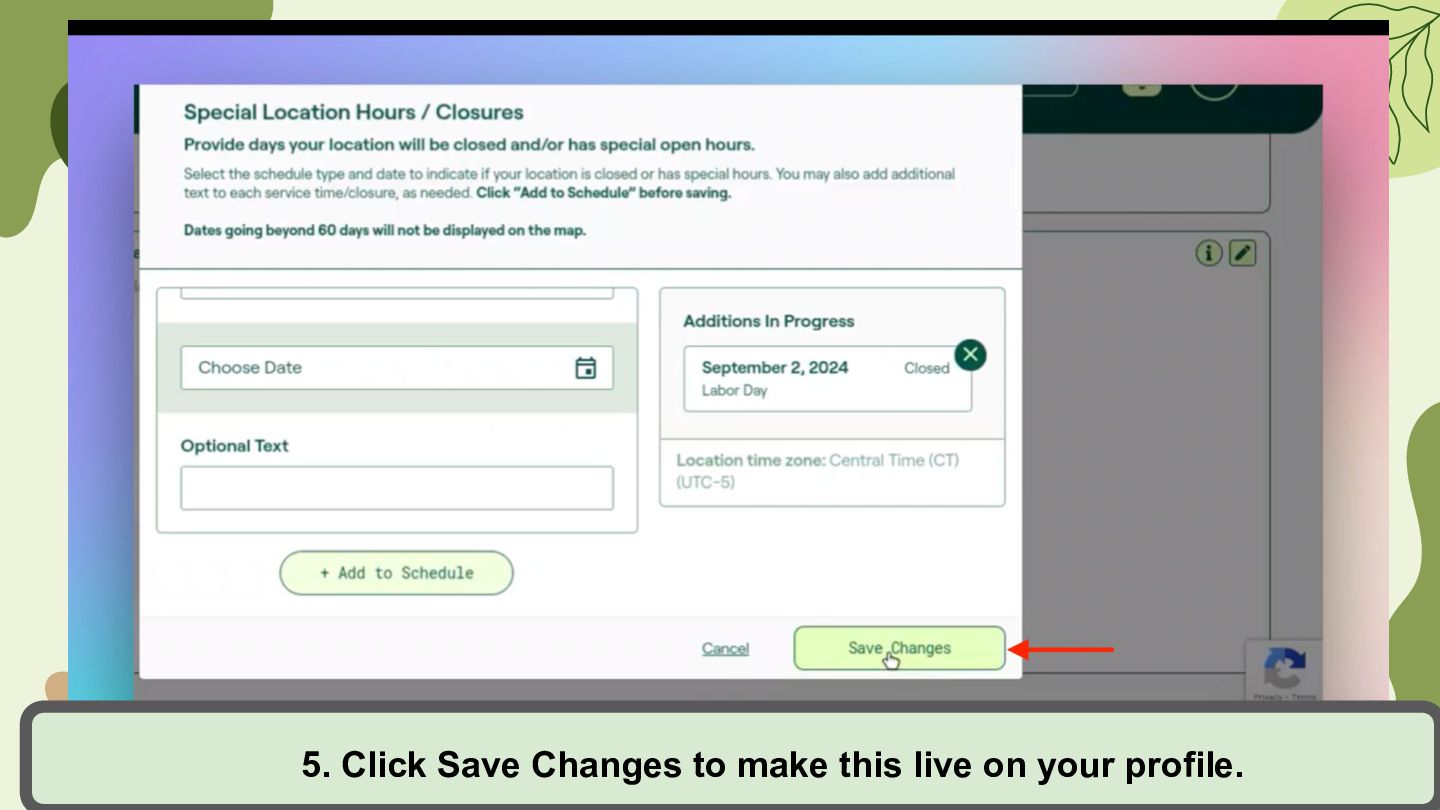
be updated, you can edit any section by clicking the pencil icon in the top right-hand corner of that section. This will open a window where you can click into any field and update the information. Once you finish making your updates, ensure that you click Save Changes.
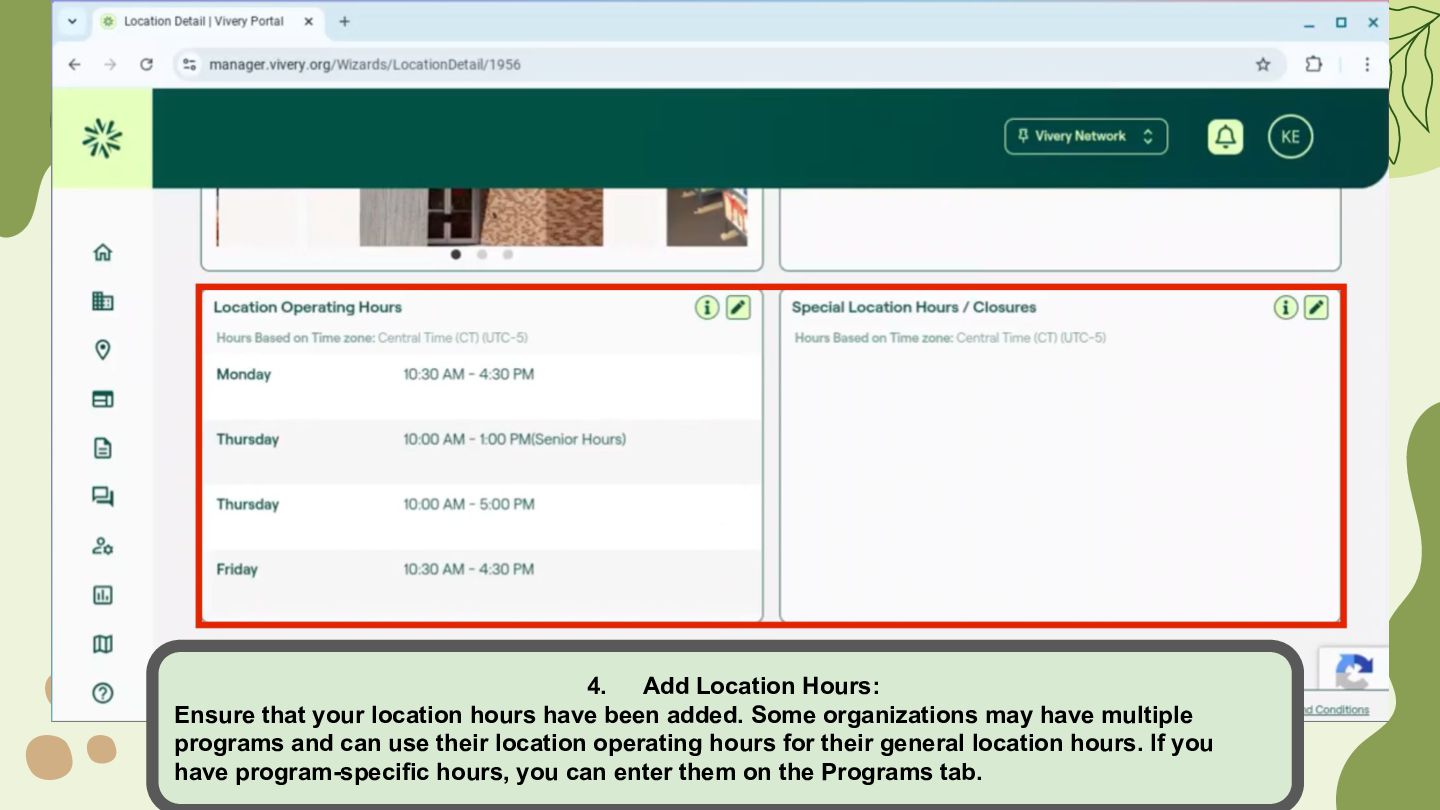
been added. Some organizations may have multiple programs and can use their location operating hours for their general location hours. If you have program-specific hours, you can enter them on the Programs tab.
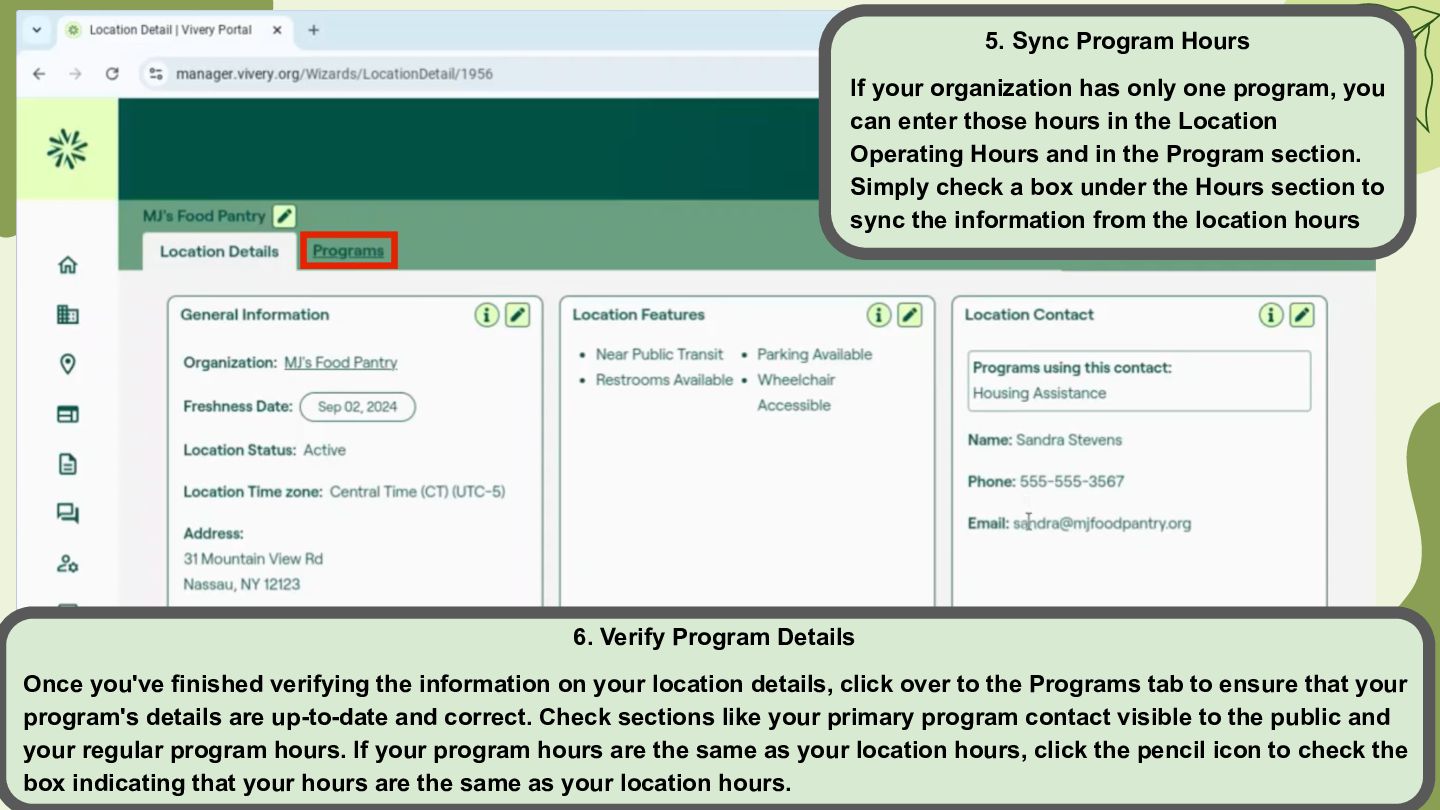
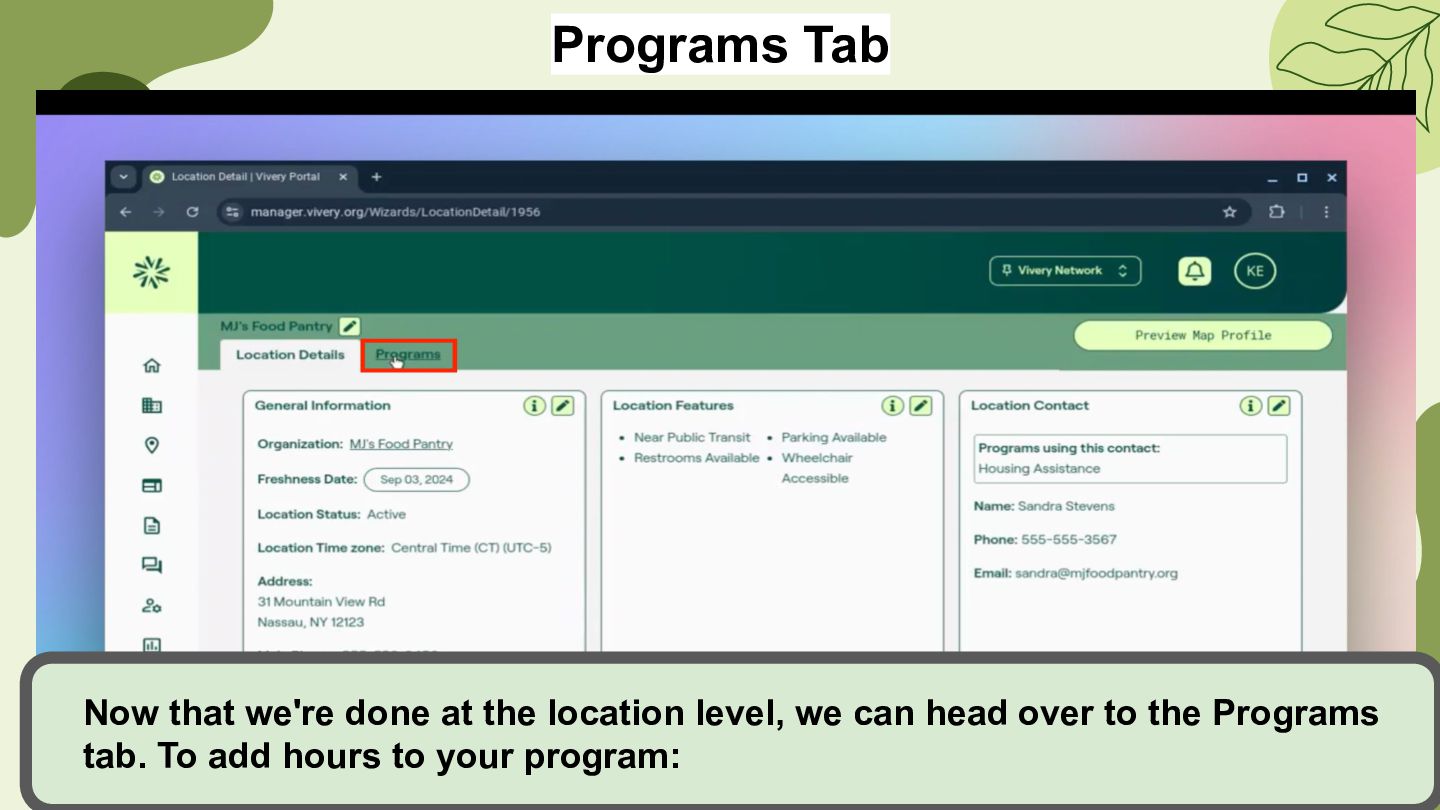
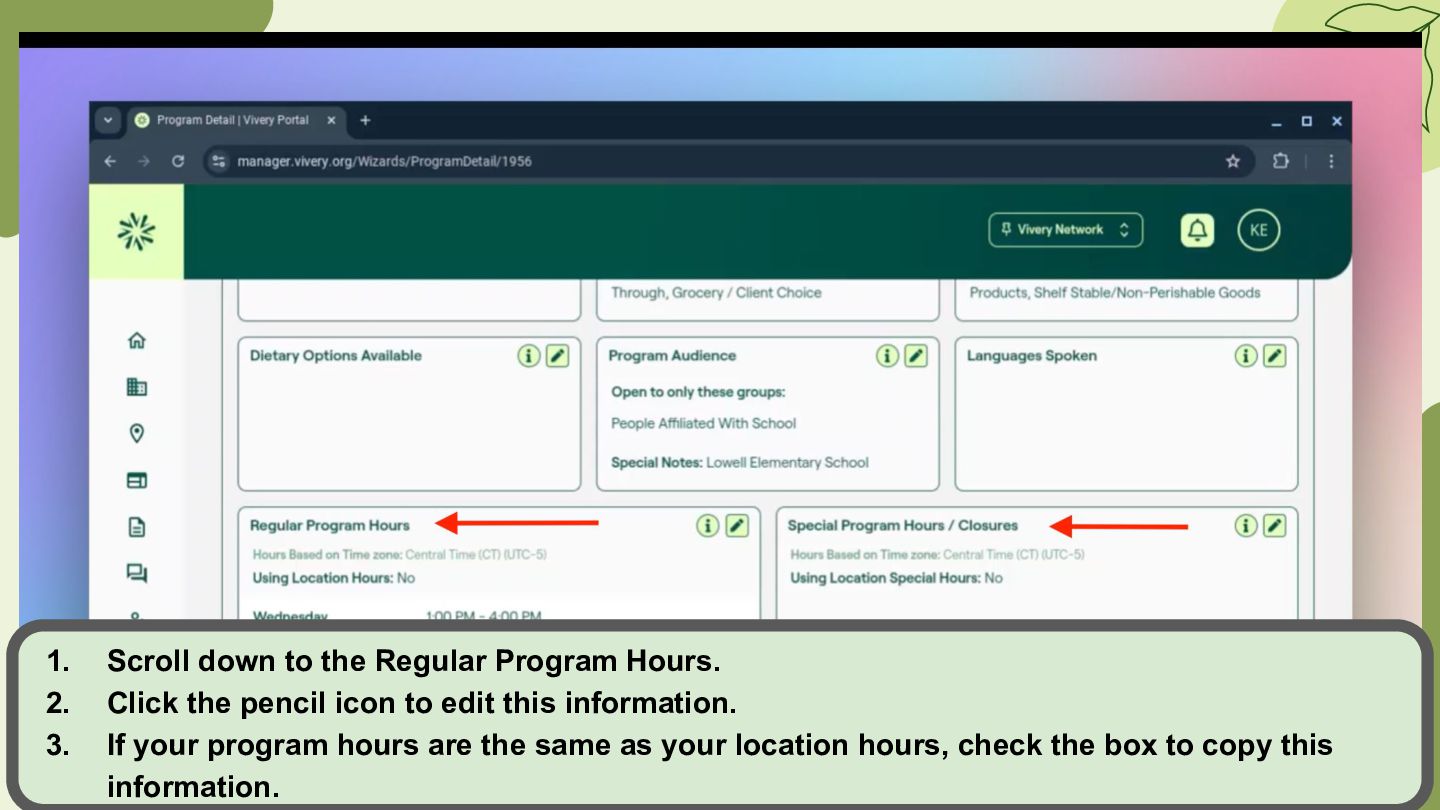
program, you can enter those hours in the Location Operating Hours and in the Program section. Simply check a box under the Hours section to sync the information from the location hours 6. Verify Program Details Once you've finished verifying the information on your location details, click over to the Programs tab to ensure that your program's details are up-to-date and correct. Check sections like your primary program contact visible to the public and your regular program hours. If your program hours are the same as your location hours, click the pencil icon to check the box indicating that your hours are the same as your location hours.
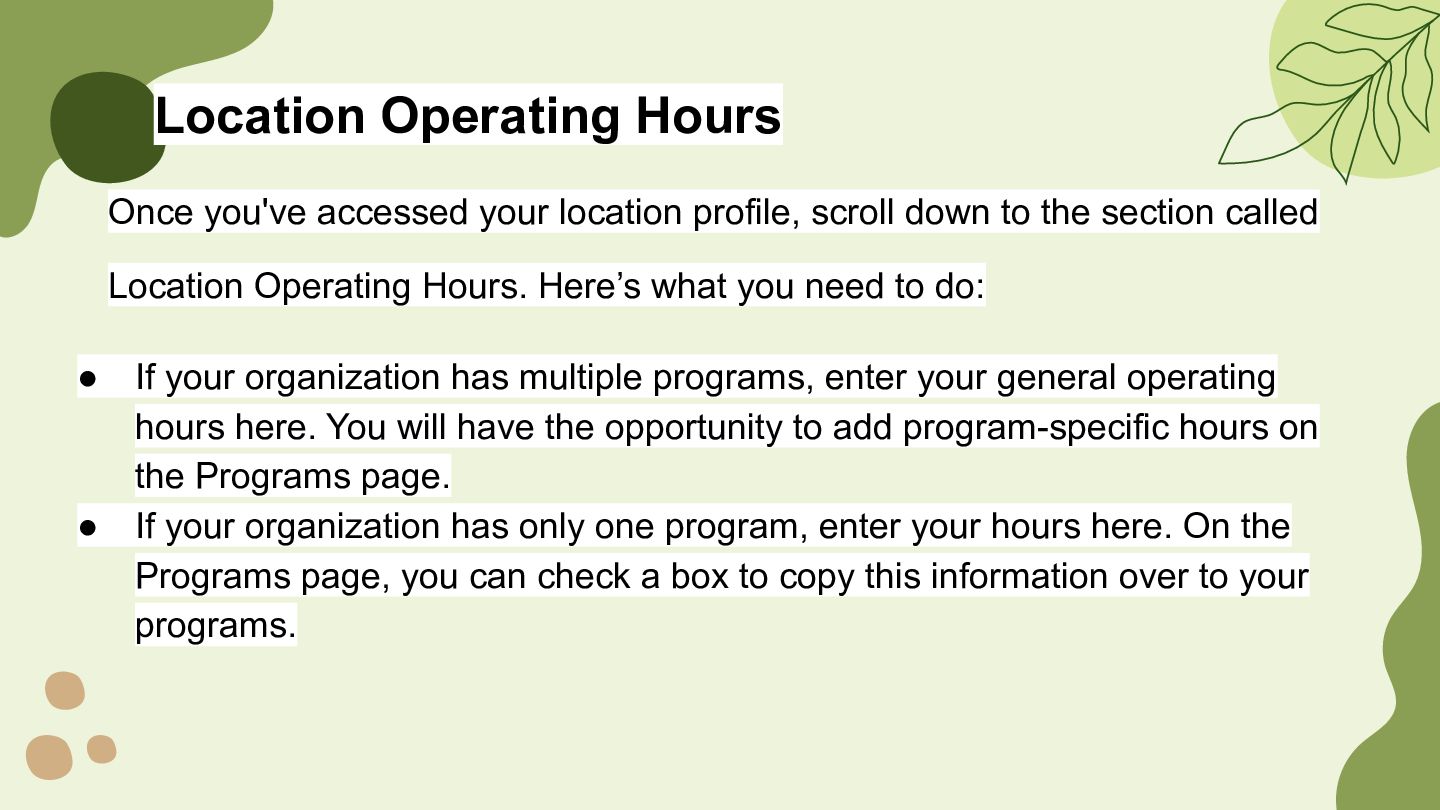
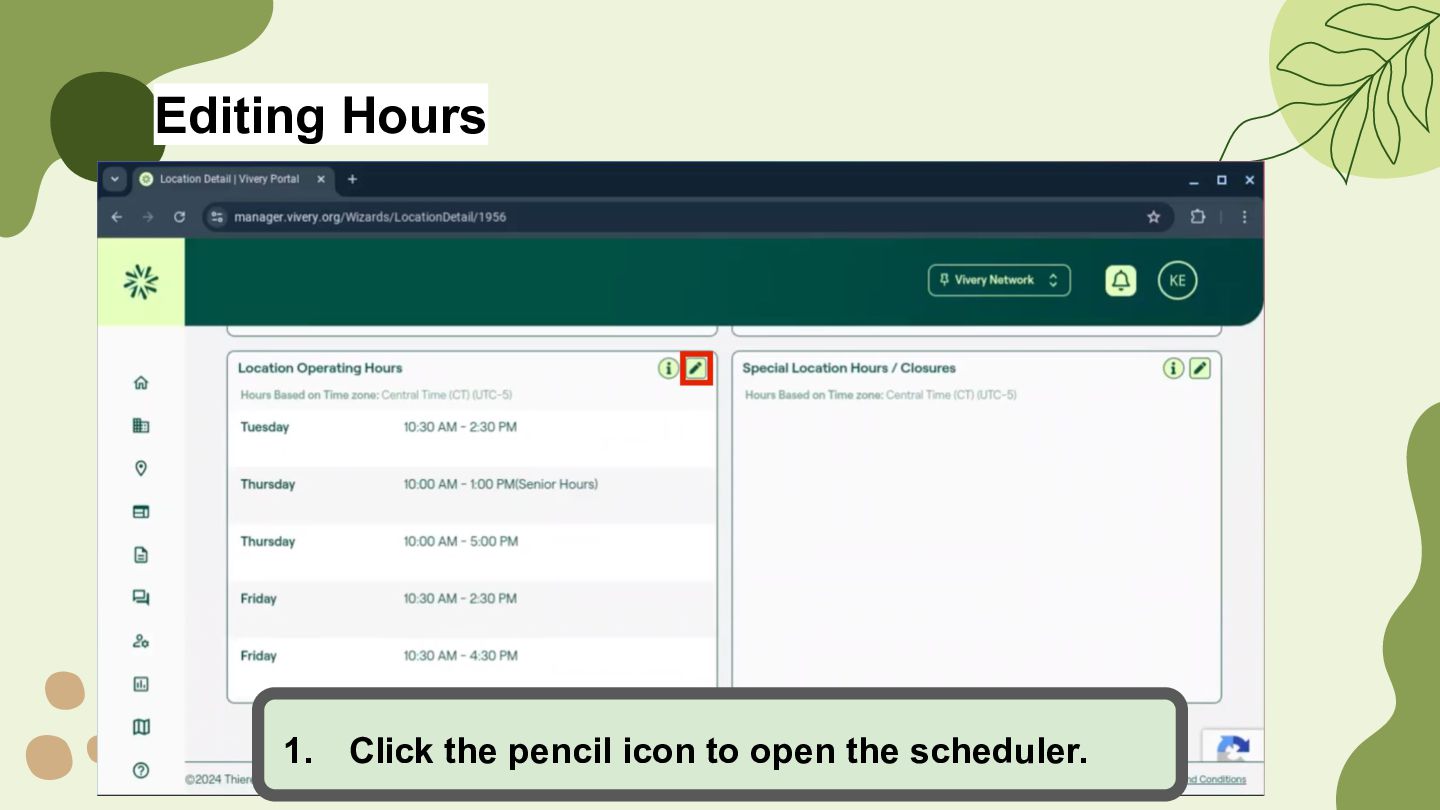
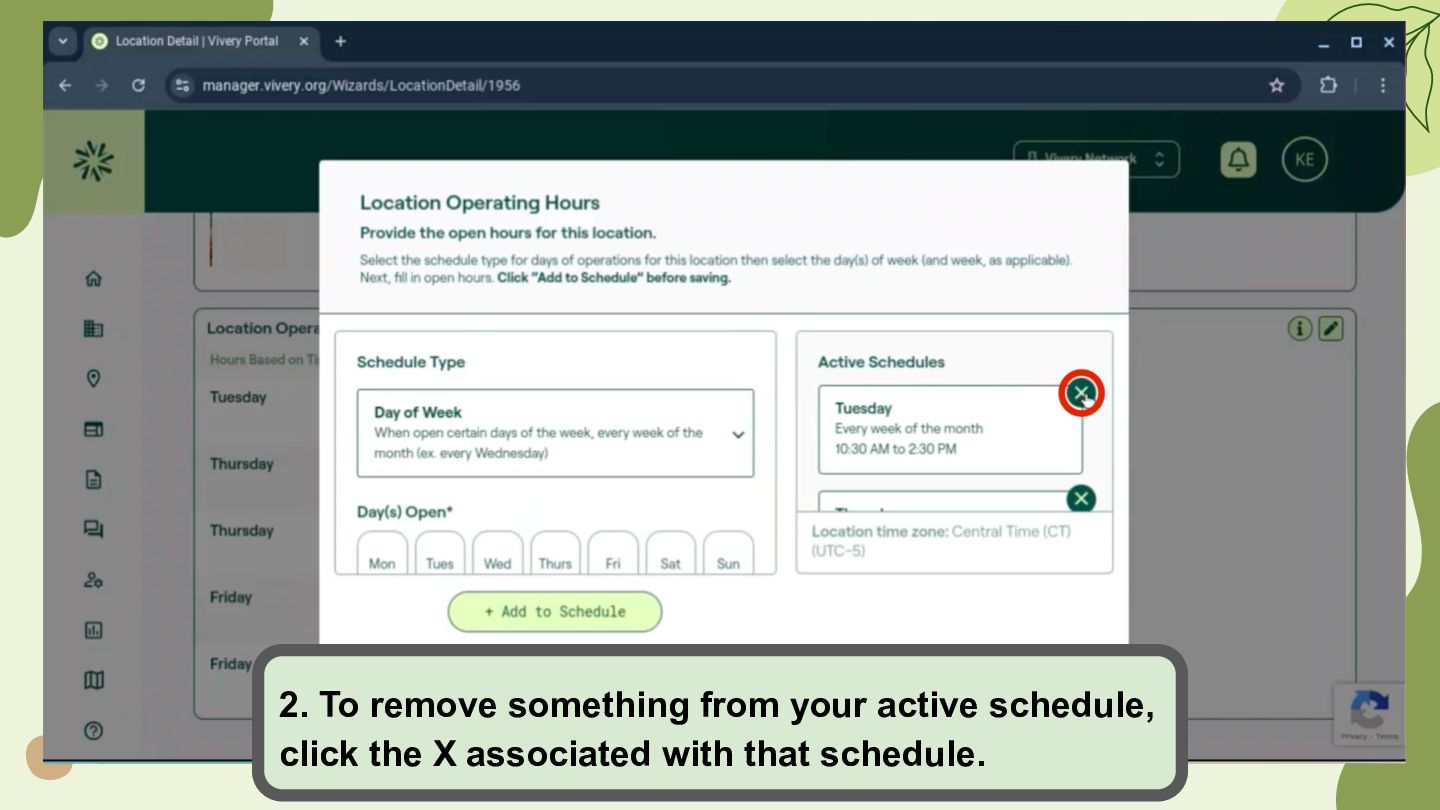
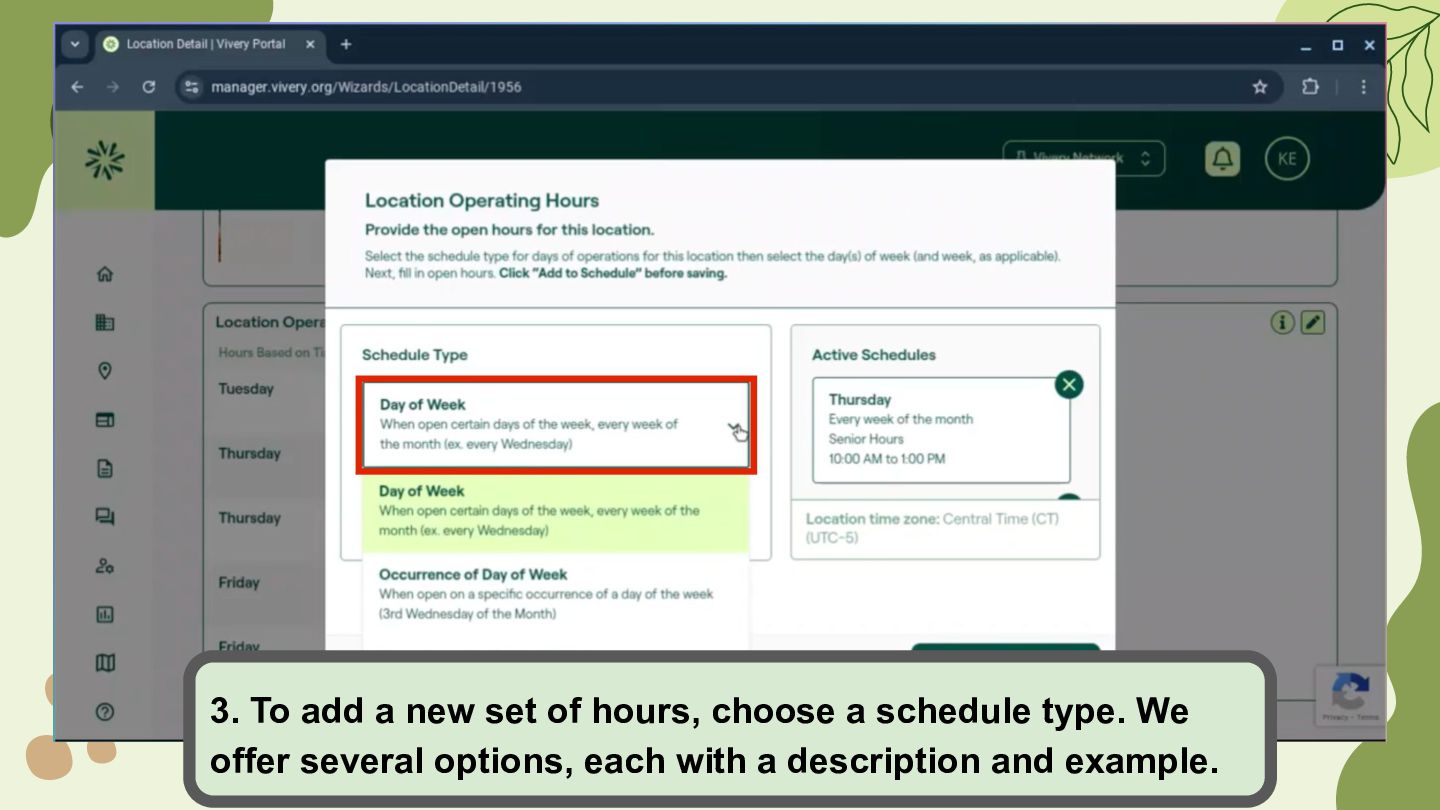
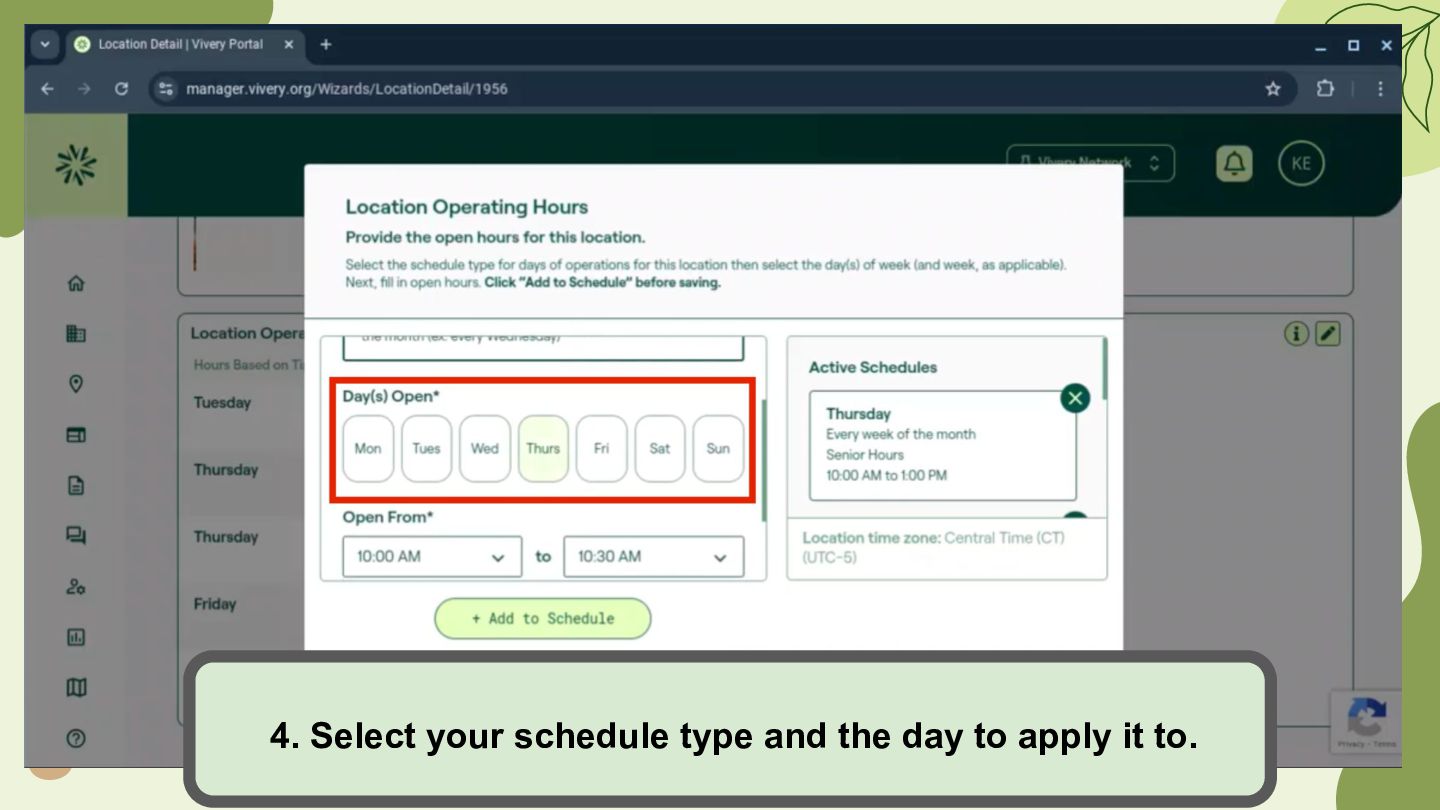
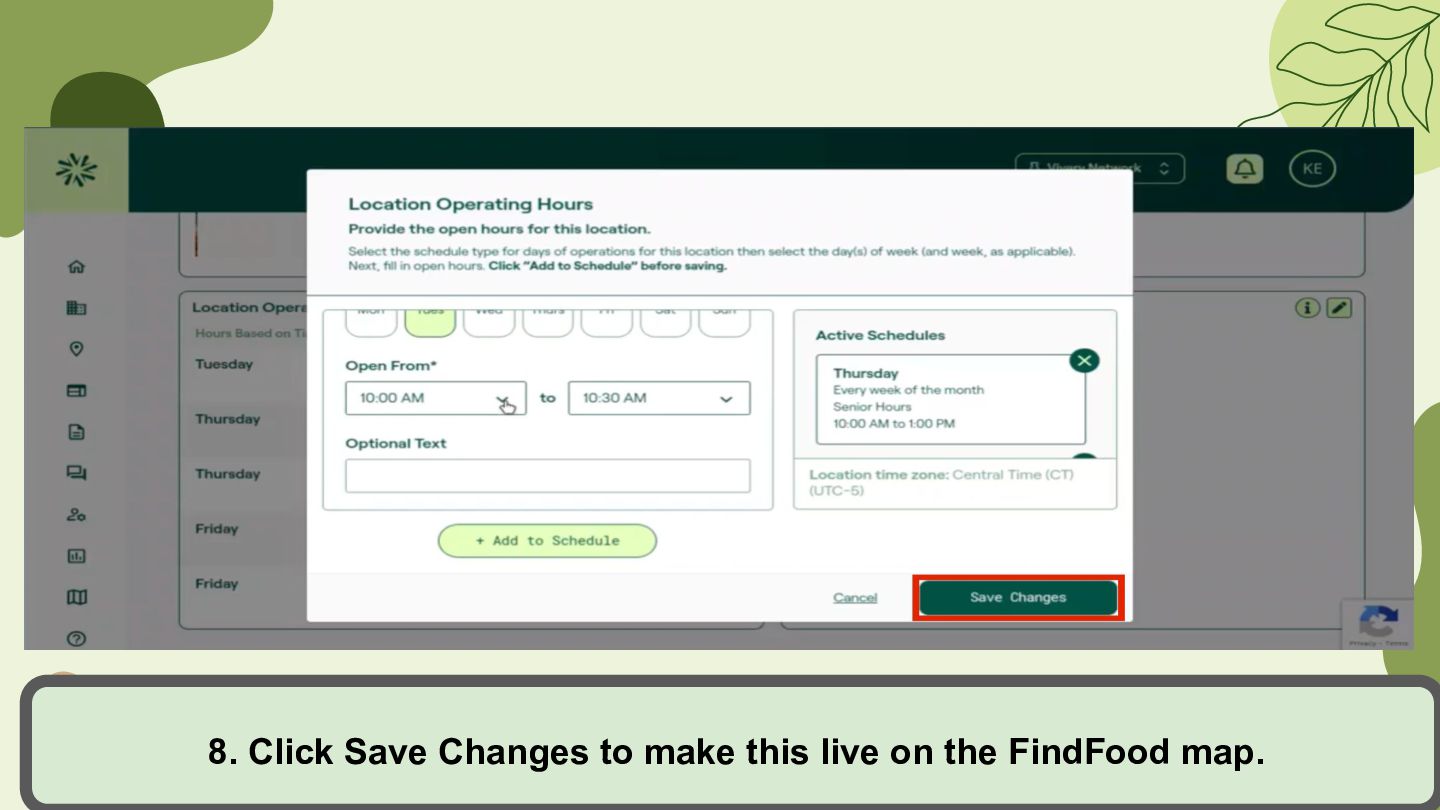
down to the section called Location Operating Hours. Here’s what you need to do: • If your organization has multiple programs, enter your general operating hours here. You will have the opportunity to add program-specific hours on the Programs page. • If your organization has only one program, enter your hours here. On the Programs page, you can check a box to copy this information over to your programs.
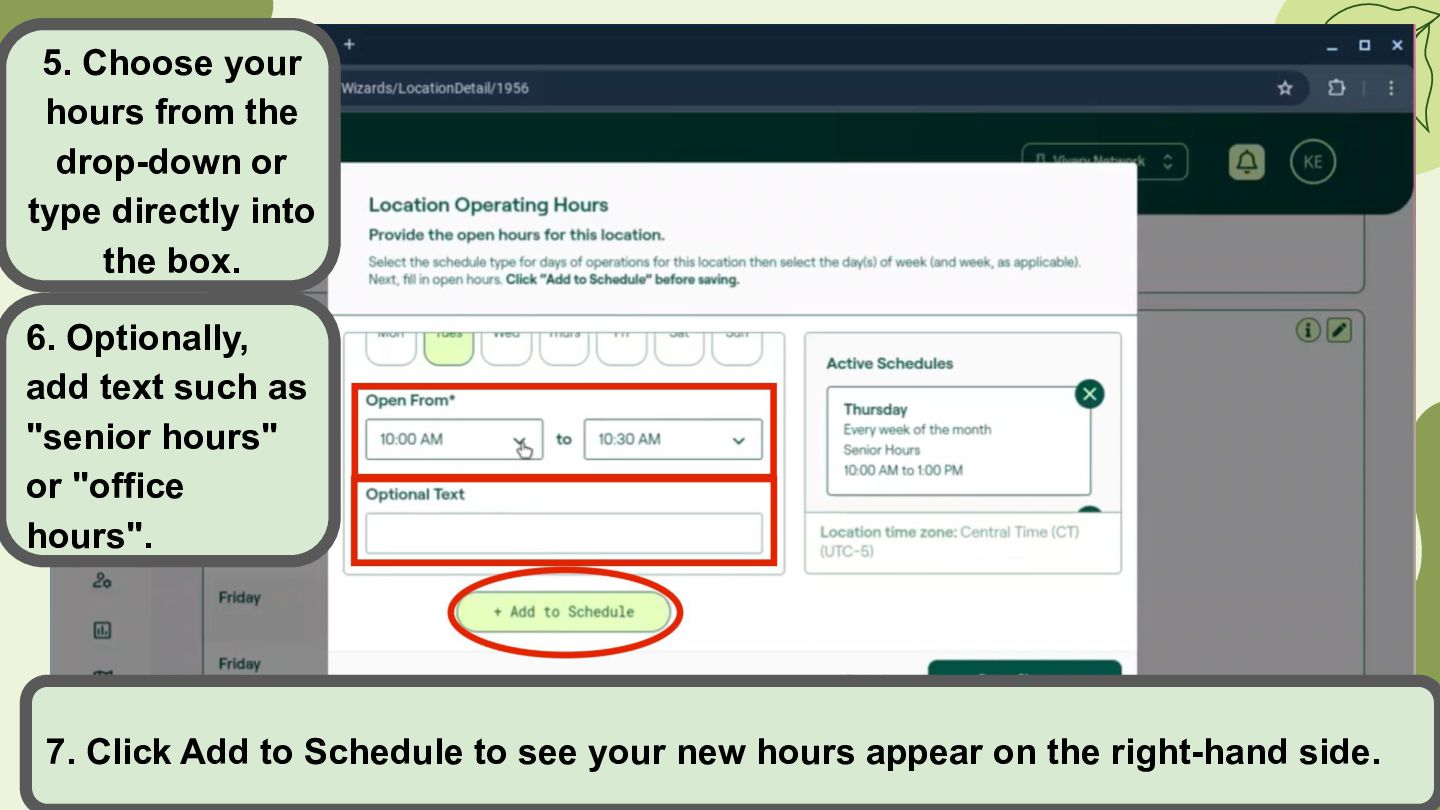
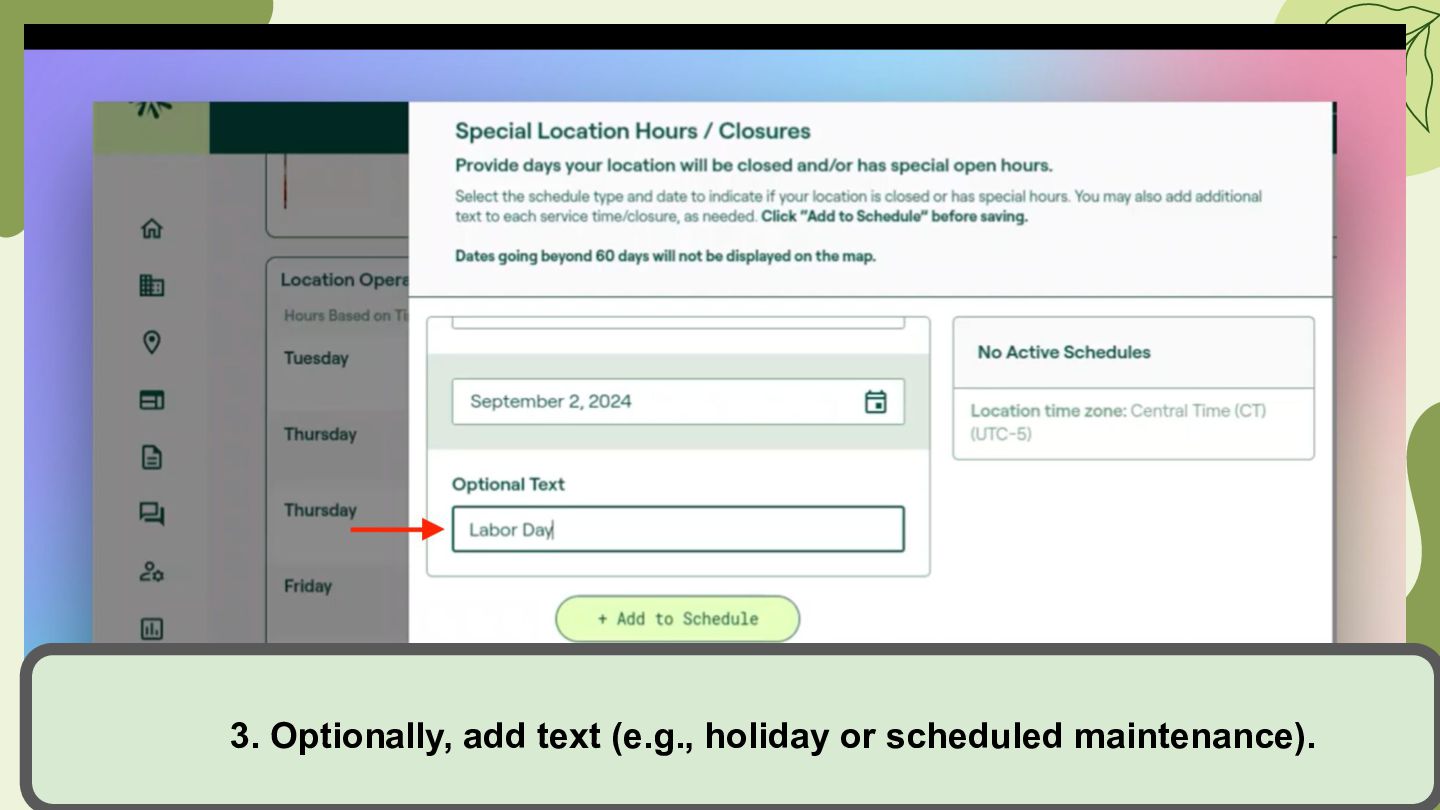
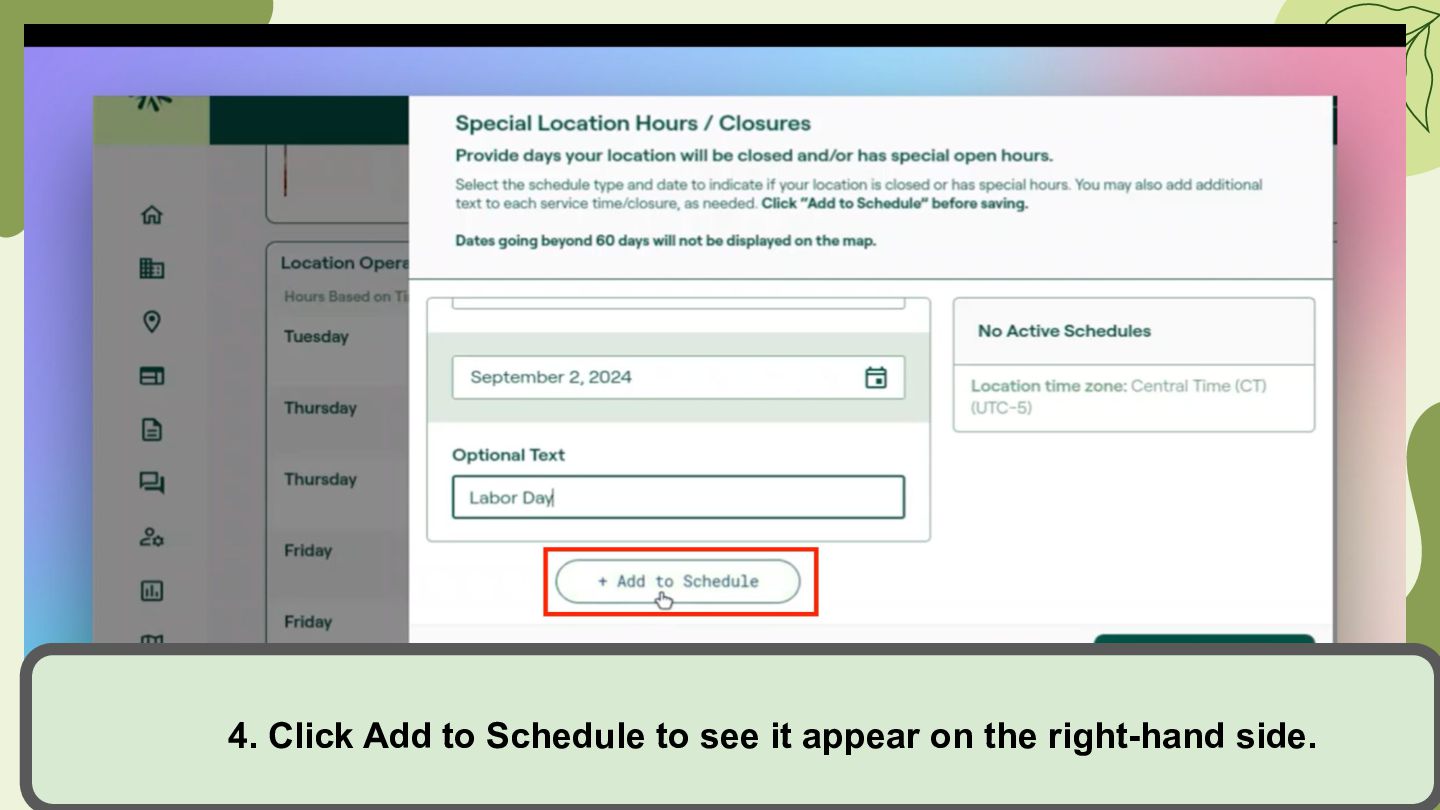
into the box. 6. Optionally, add text such as "senior hours" or "office hours". 7. Click Add to Schedule to see your new hours appear on the right-hand side.
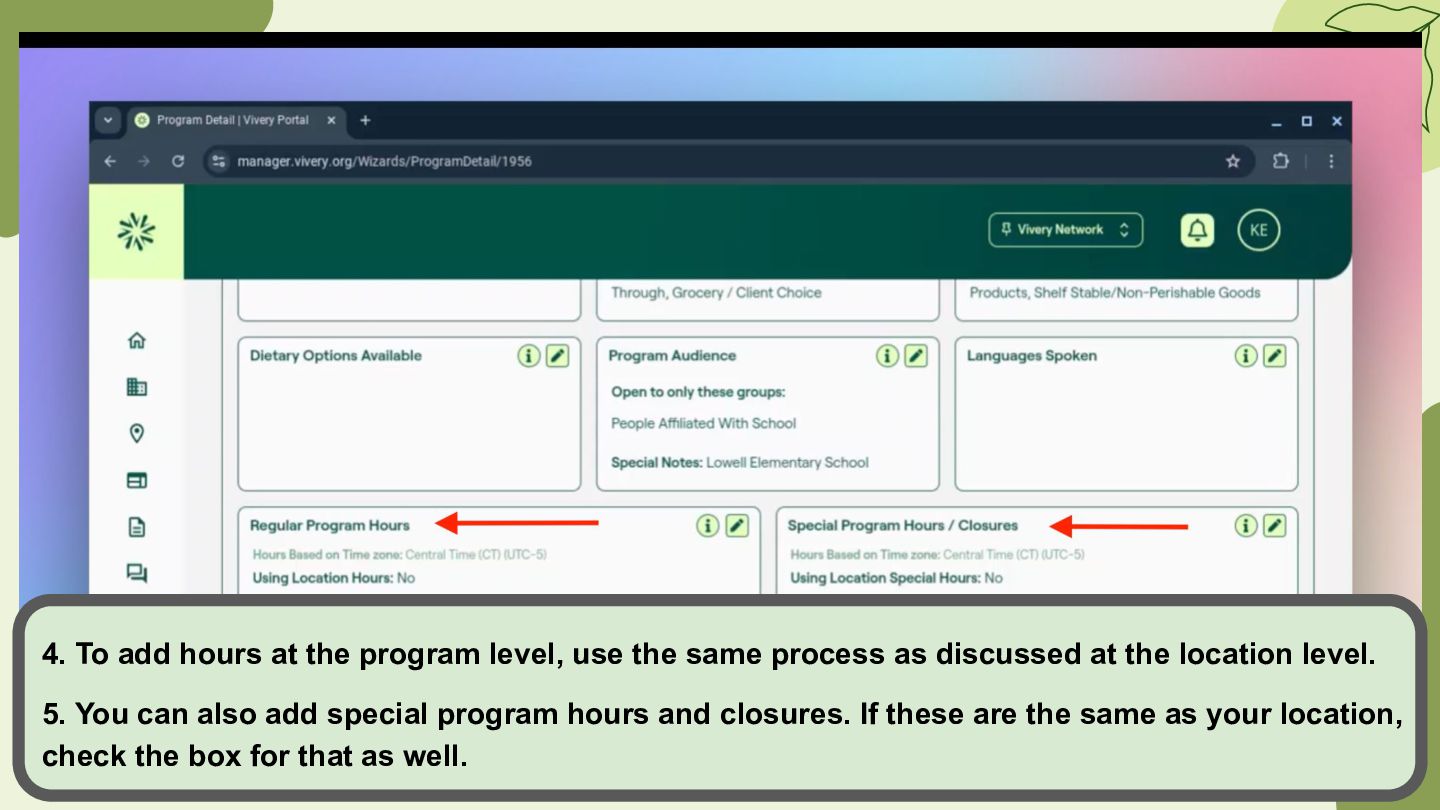
same process as discussed at the location level. 5. You can also add special program hours and closures. If these are the same as your location, check the box for that as well.
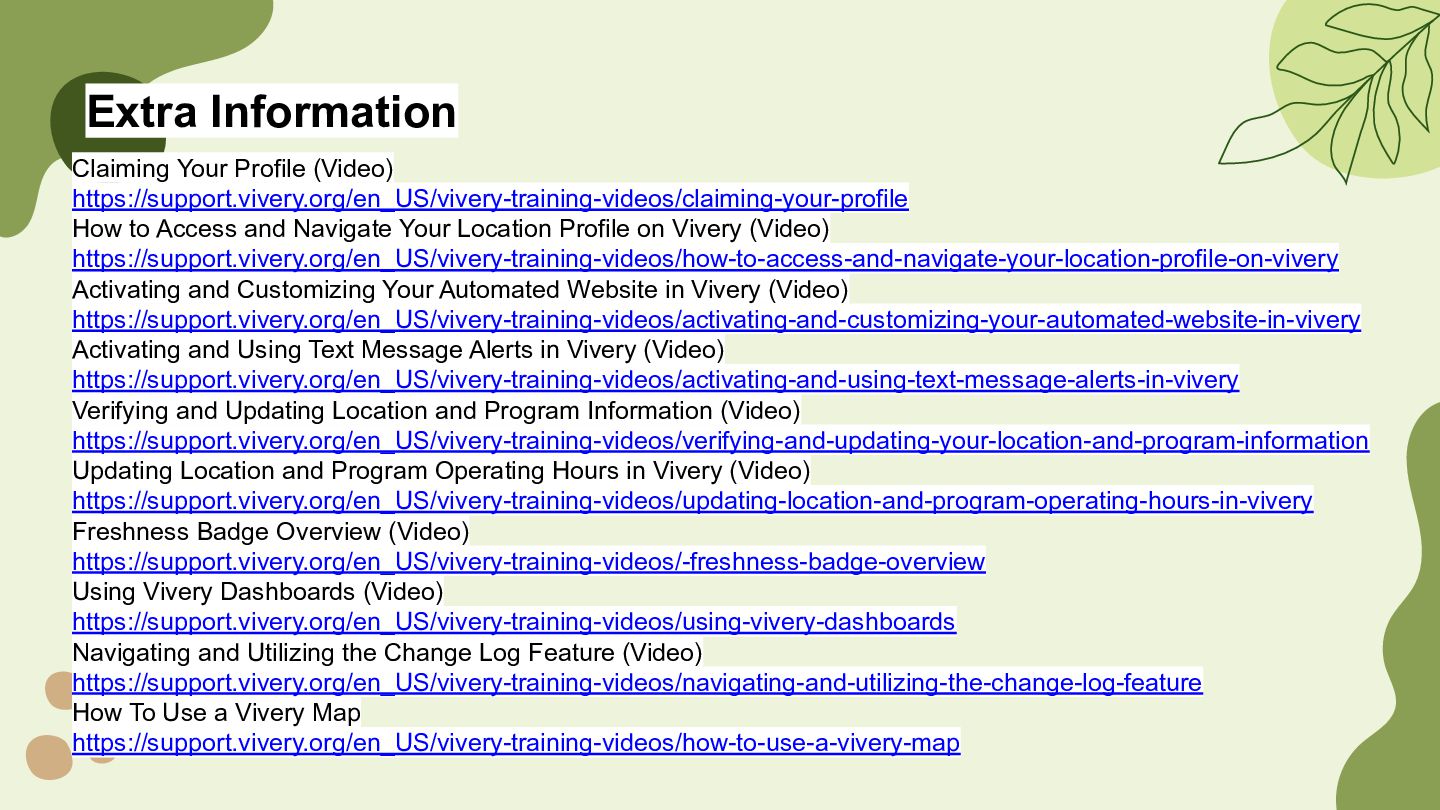
and Navigate Your Location Profile on Vivery (Video) https://support.vivery.org/en_US/vivery-training-videos/how-to-access-and-navigate-your-location-profile-on-vivery Activating and Customizing Your Automated Website in Vivery (Video) https://support.vivery.org/en_US/vivery-training-videos/activating-and-customizing-your-automated-website-in-vivery Activating and Using Text Message Alerts in Vivery (Video) https://support.vivery.org/en_US/vivery-training-videos/activating-and-using-text-message-alerts-in-vivery Verifying and Updating Location and Program Information (Video) https://support.vivery.org/en_US/vivery-training-videos/verifying-and-updating-your-location-and-program-information Updating Location and Program Operating Hours in Vivery (Video) https://support.vivery.org/en_US/vivery-training-videos/updating-location-and-program-operating-hours-in-vivery Freshness Badge Overview (Video) https://support.vivery.org/en_US/vivery-training-videos/-freshness-badge-overview Using Vivery Dashboards (Video) https://support.vivery.org/en_US/vivery-training-videos/using-vivery-dashboards Navigating and Utilizing the Change Log Feature (Video) https://support.vivery.org/en_US/vivery-training-videos/navigating-and-utilizing-the-change-log-feature How To Use a Vivery Map https://support.vivery.org/en_US/vivery-training-videos/how-to-use-a-vivery-map


 mongonta0716
 subroh0508
 blue_goheimochi
 iwashi86
 masafumi_ohta
 awsjcpm
 sakopon
 east_takumi
 2bo
2bo
 covao
covao
 coloredviolet
 aarron
 keavy
keavy
 livdayseo
 jonoalderson
 jcasabona
 nmsamuel
 gurzu
gurzu
 lfama
lfama
 baasie
 rkaga
rkaga
 keathley