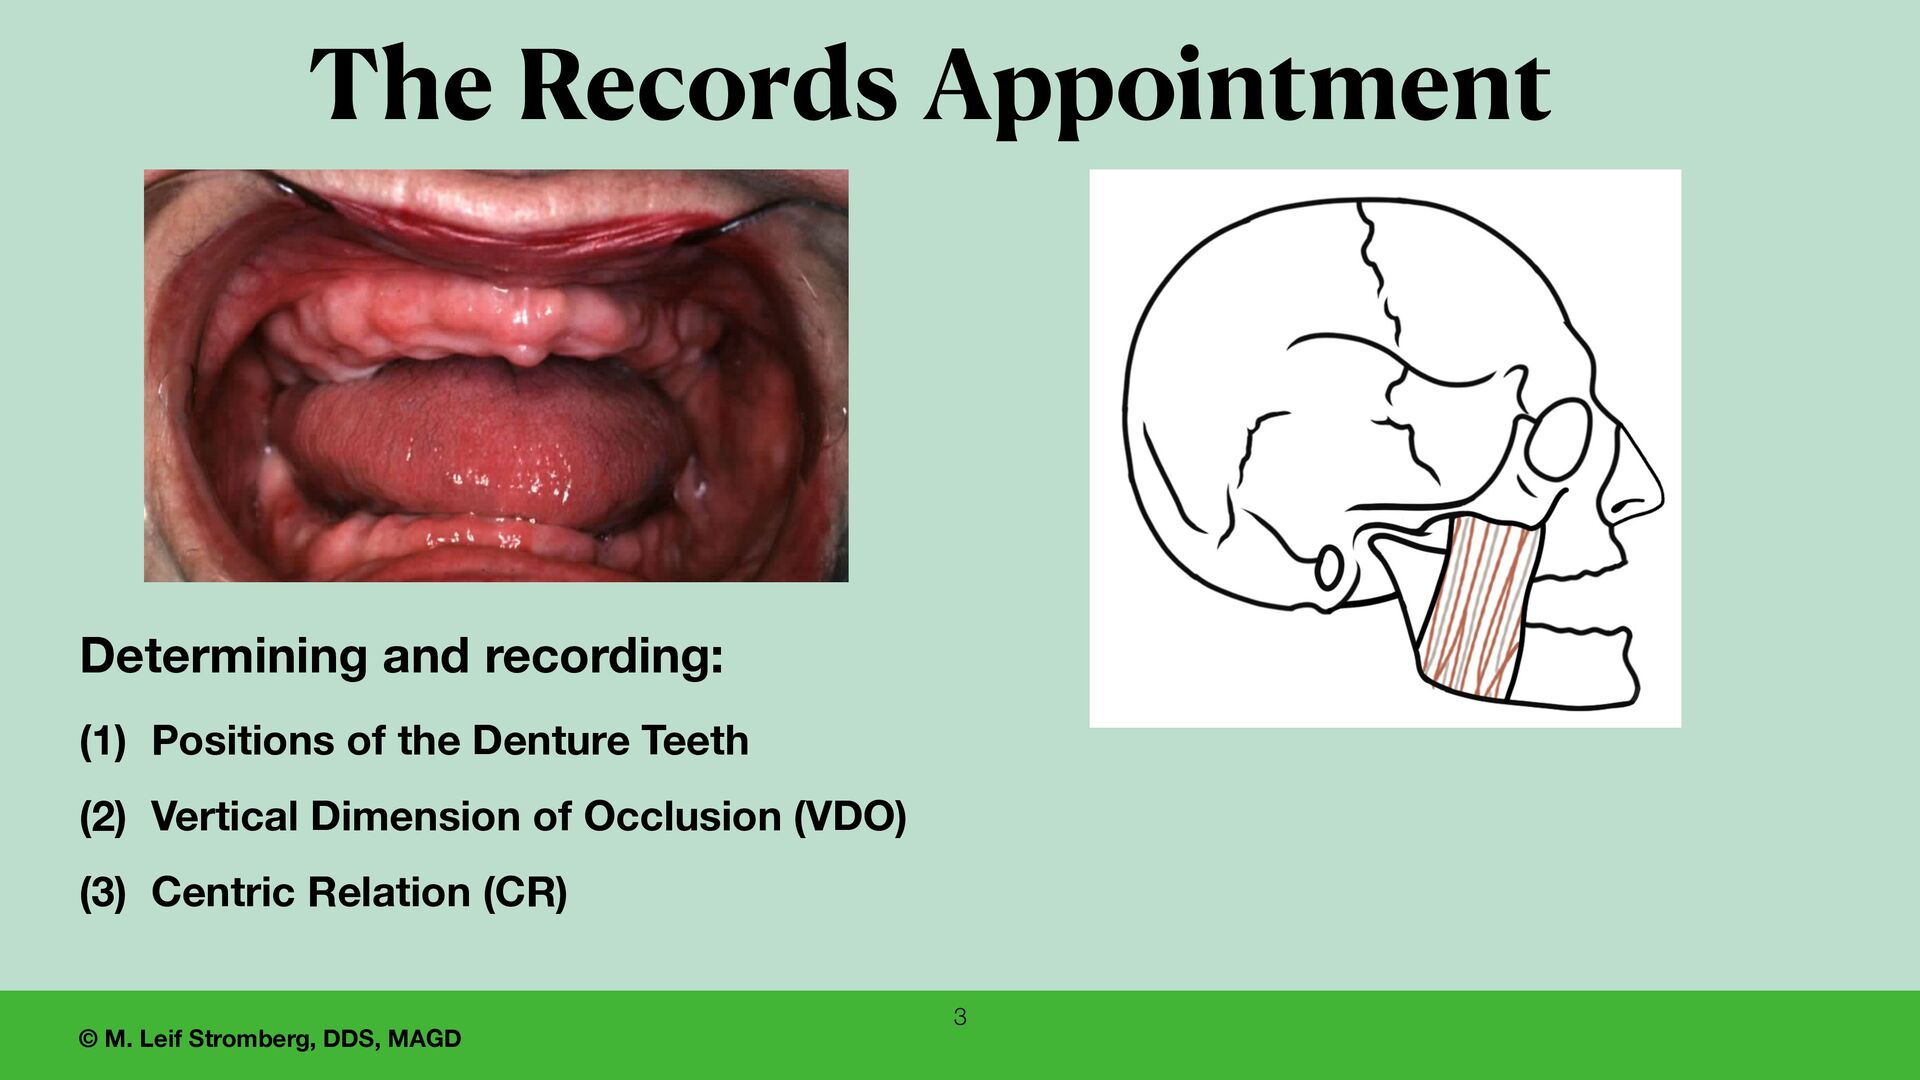
of Complete Denture Fabrication — the Records Appointment Module 3 Complete Dentures: Simplifying the Determination and Recording of The Vertical Dimension of Occlusion, Centric Relation, and The Positions of Teeth
3 — PARTICIPANTS WILL BE ABLE TO: 1. Clinically re fi ne the contours of the maxillary esthetic wax rim as a guide for denture teeth positions. 2. Determine an acceptable vertical dimension of occlusion for edentulous restorations. 3. Locate centric relation for an edentulous person. 4. Accurately record the vertical dimension of occlusion and centric relation for edentulous restorations using simpli fi ed procedures. 2
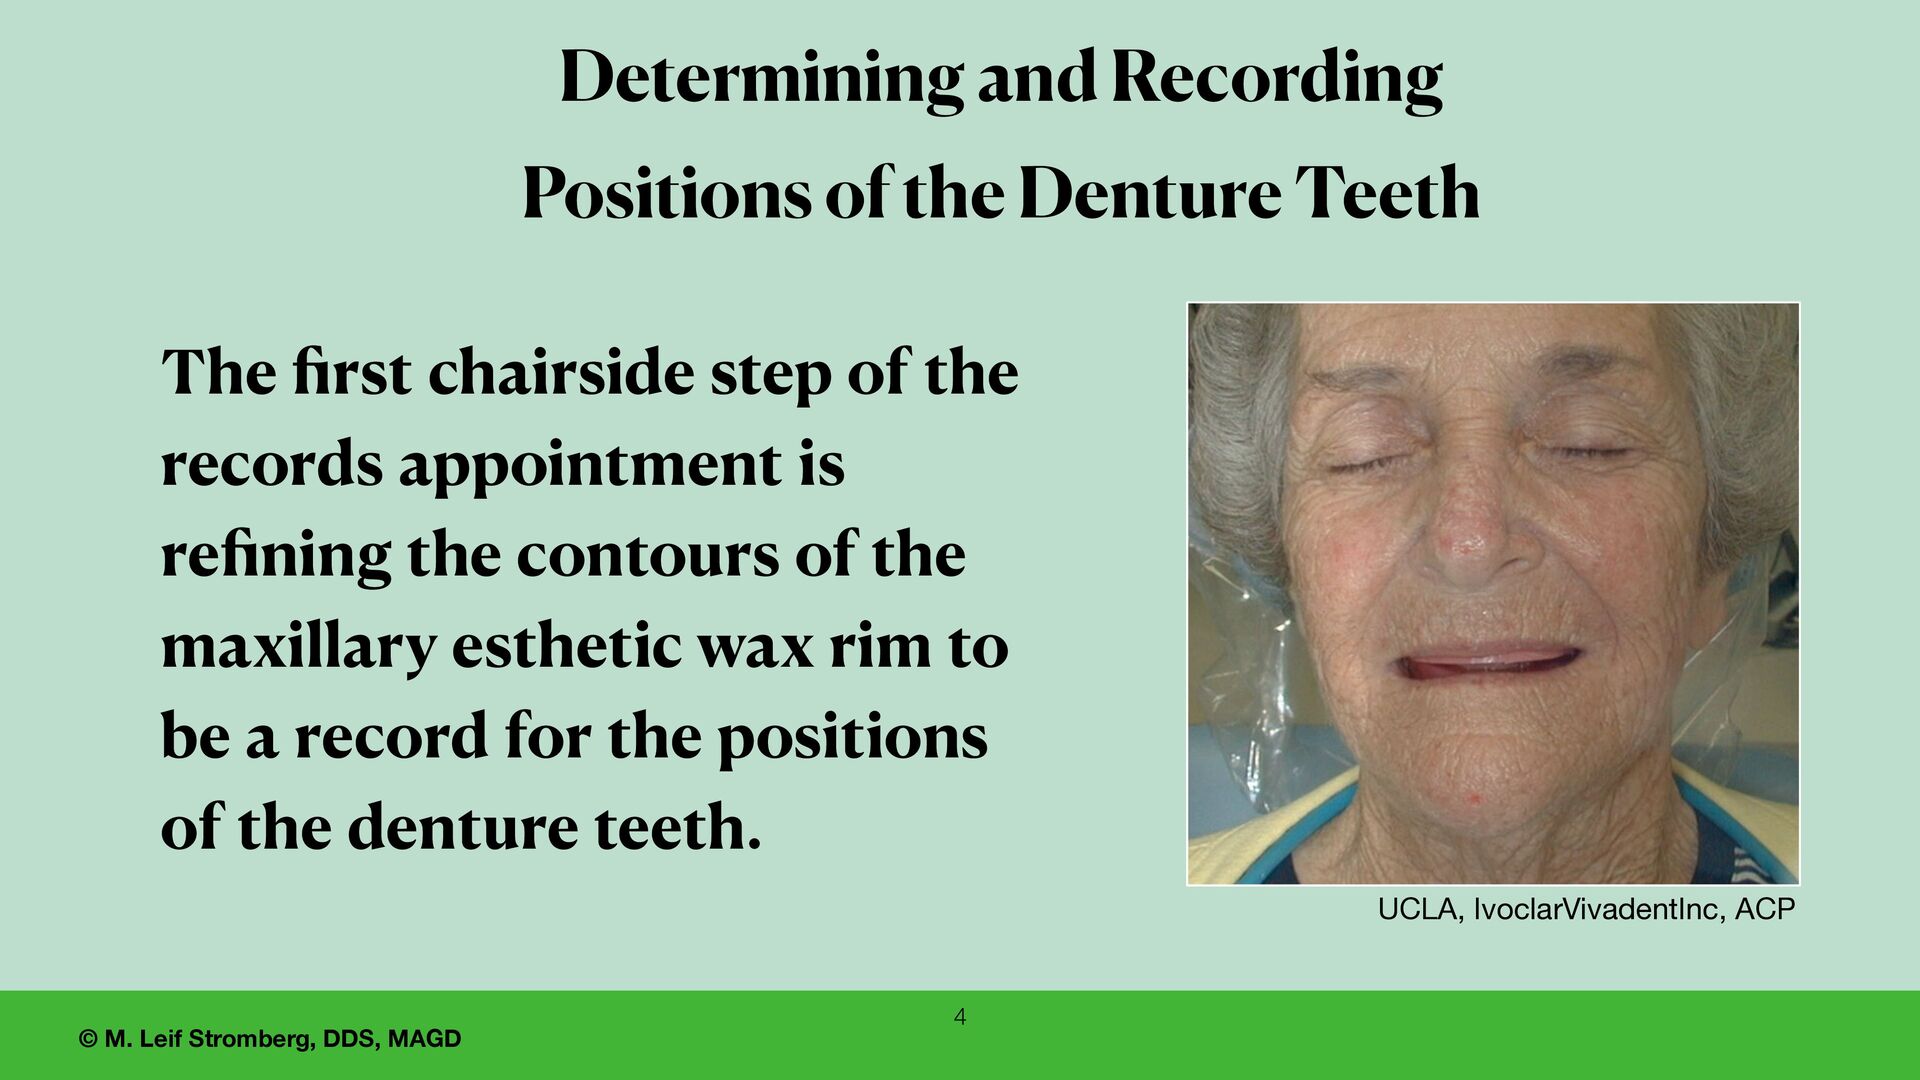
step of the records appointment is re fi ning the contours of the maxillary esthetic wax rim to be a record for the positions of the denture teeth. 4 UCLA, IvoclarVivadentInc, ACP Determining and Recording Positions of the Denture Teeth
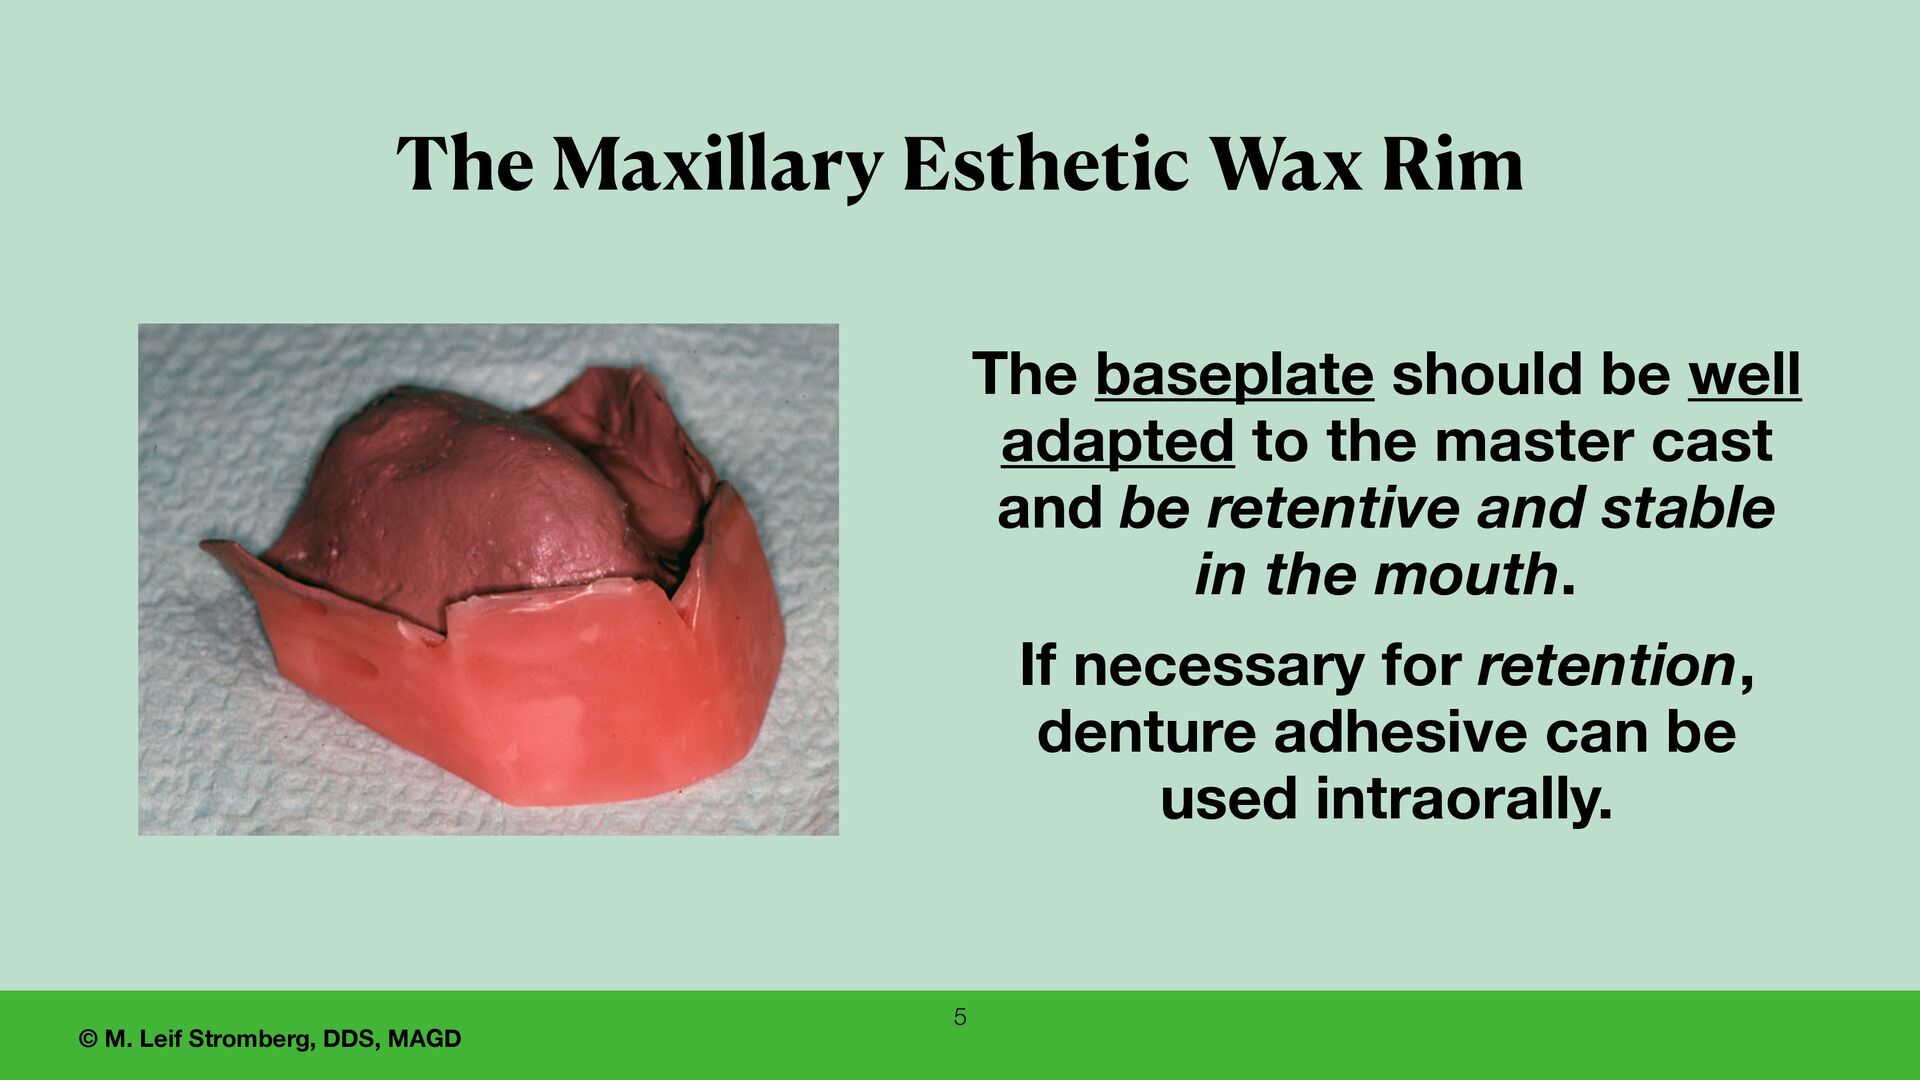
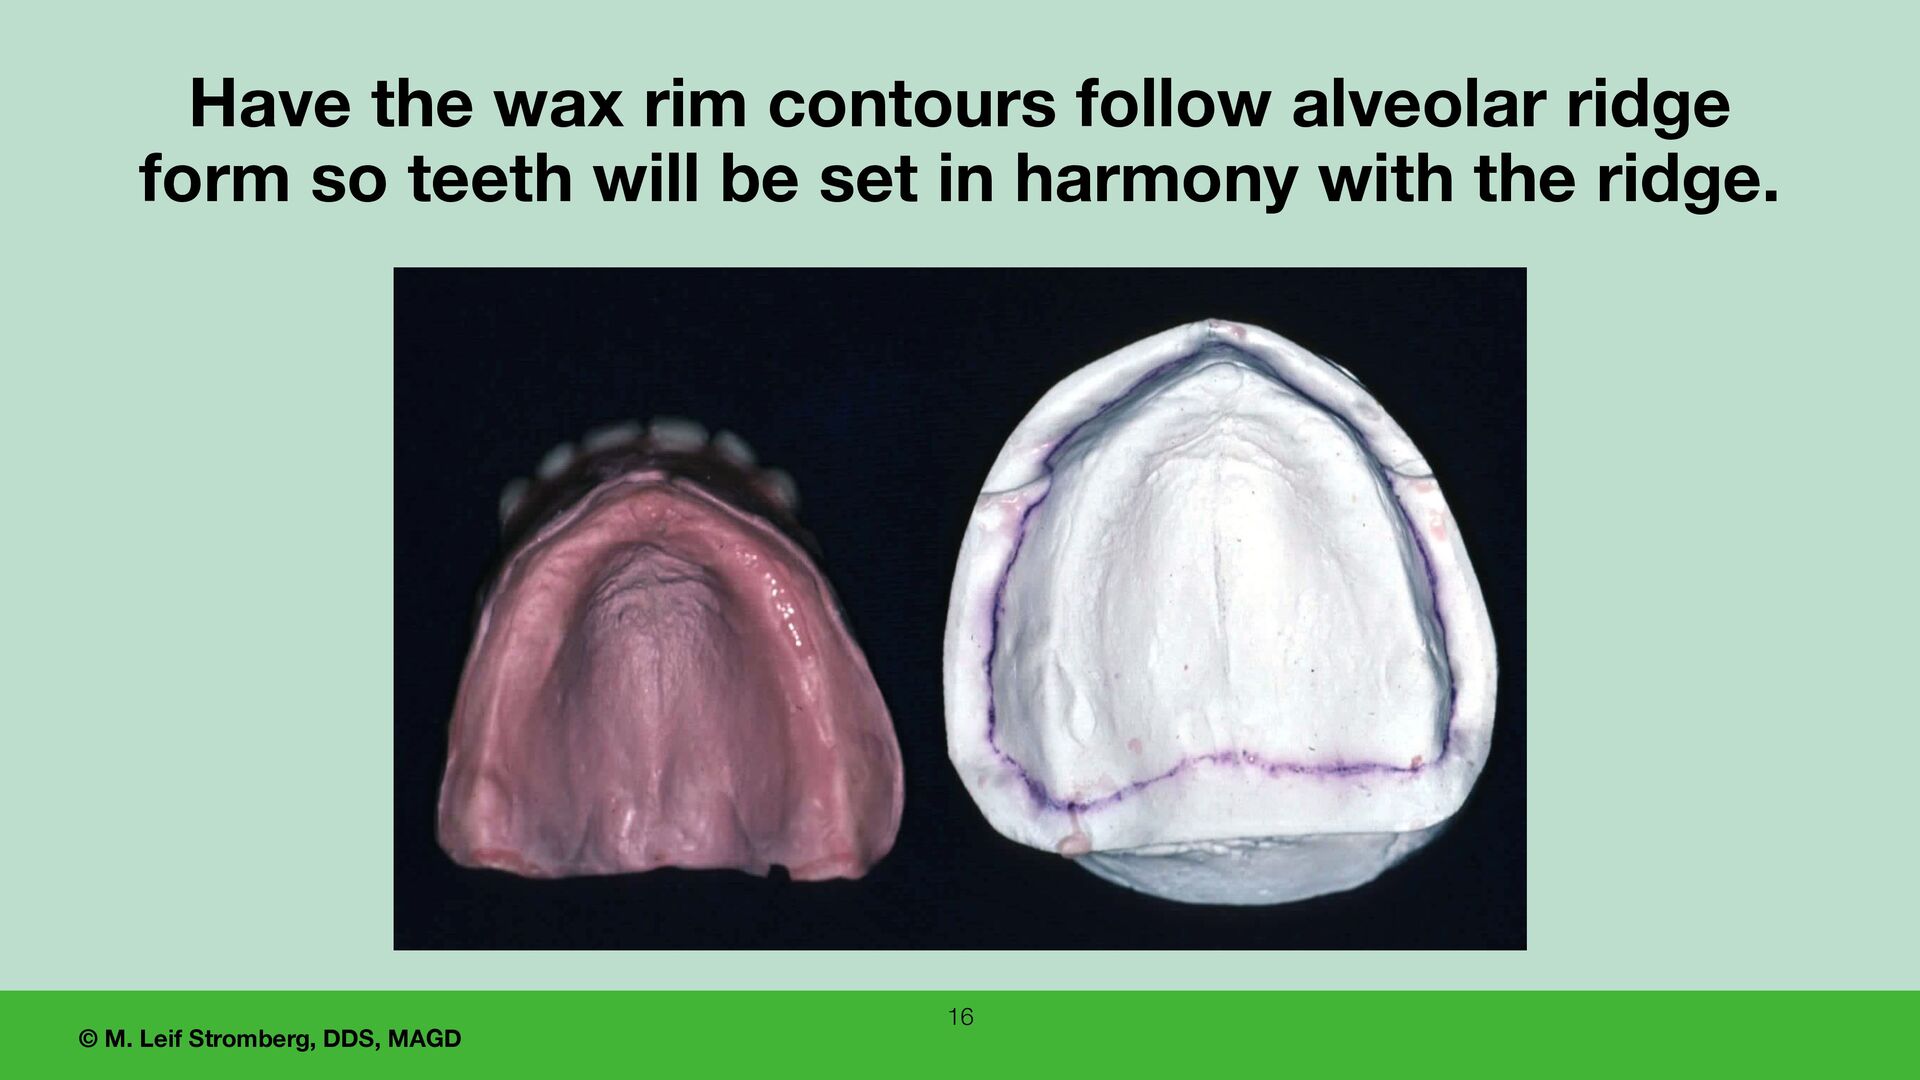
well adapted to the master cast and be retentive and stable in the mouth. If necessary for retention, denture adhesive can be used intraorally. The Maxillary Esthetic Wax Rim 5
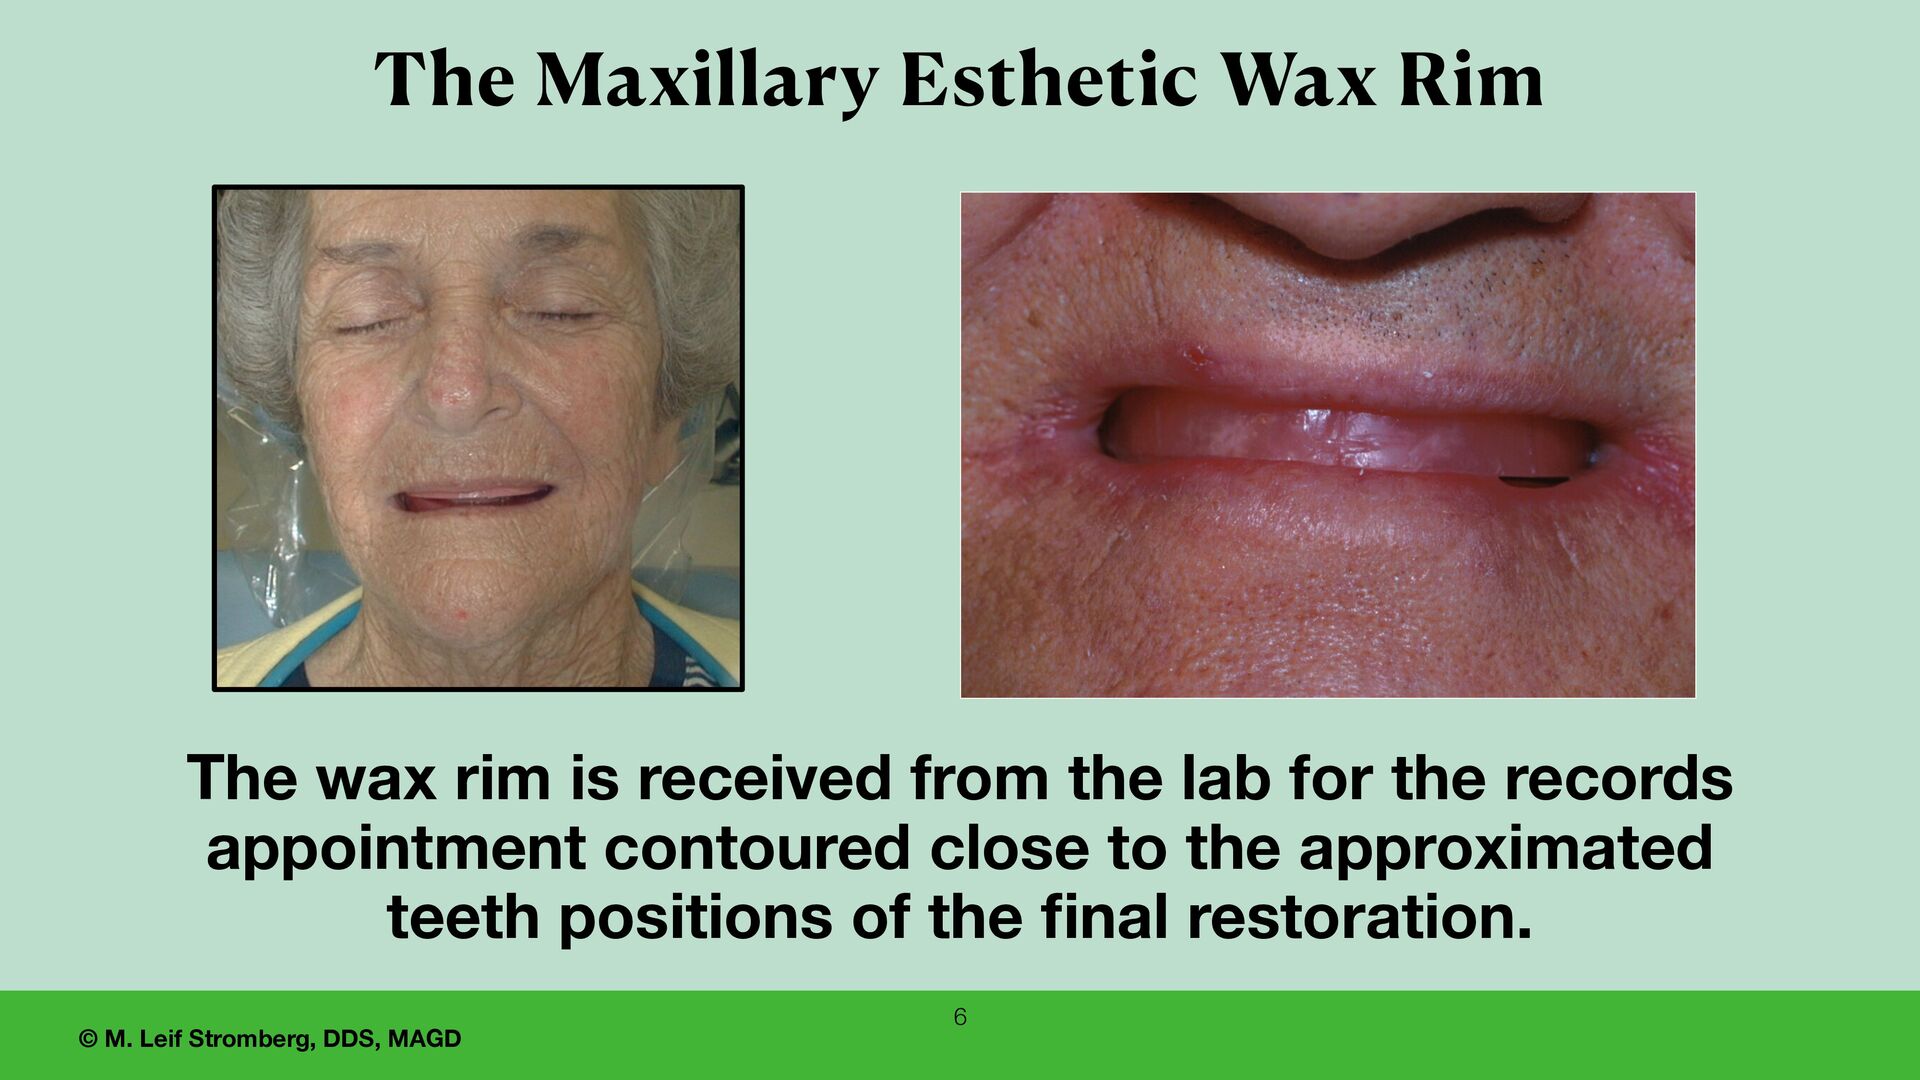
received from the lab for the records appointment contoured close to the approximated teeth positions of the fi nal restoration. The Maxillary Esthetic Wax Rim 6
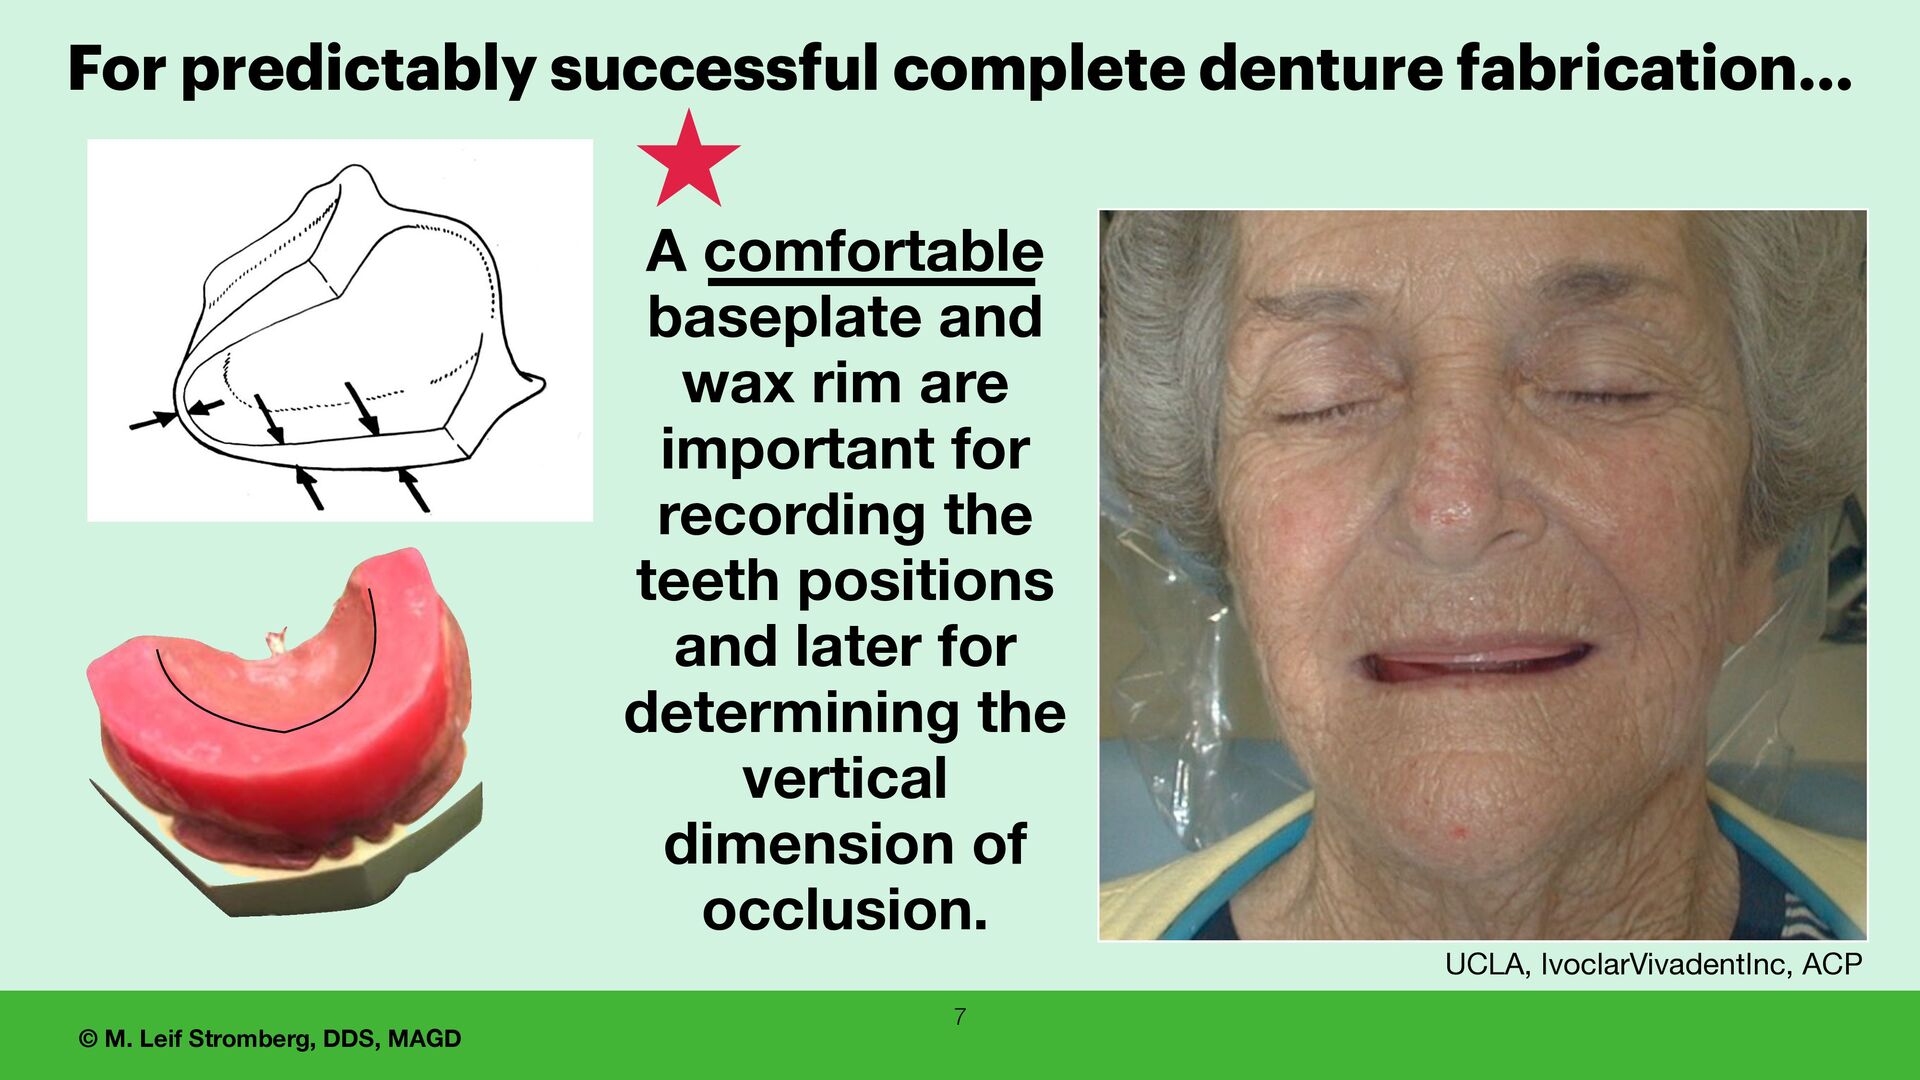
and wax rim are important for recording the teeth positions and later for determining the vertical dimension of occlusion. UCLA, IvoclarVivadentInc, ACP For predictably successful complete denture fabrication…
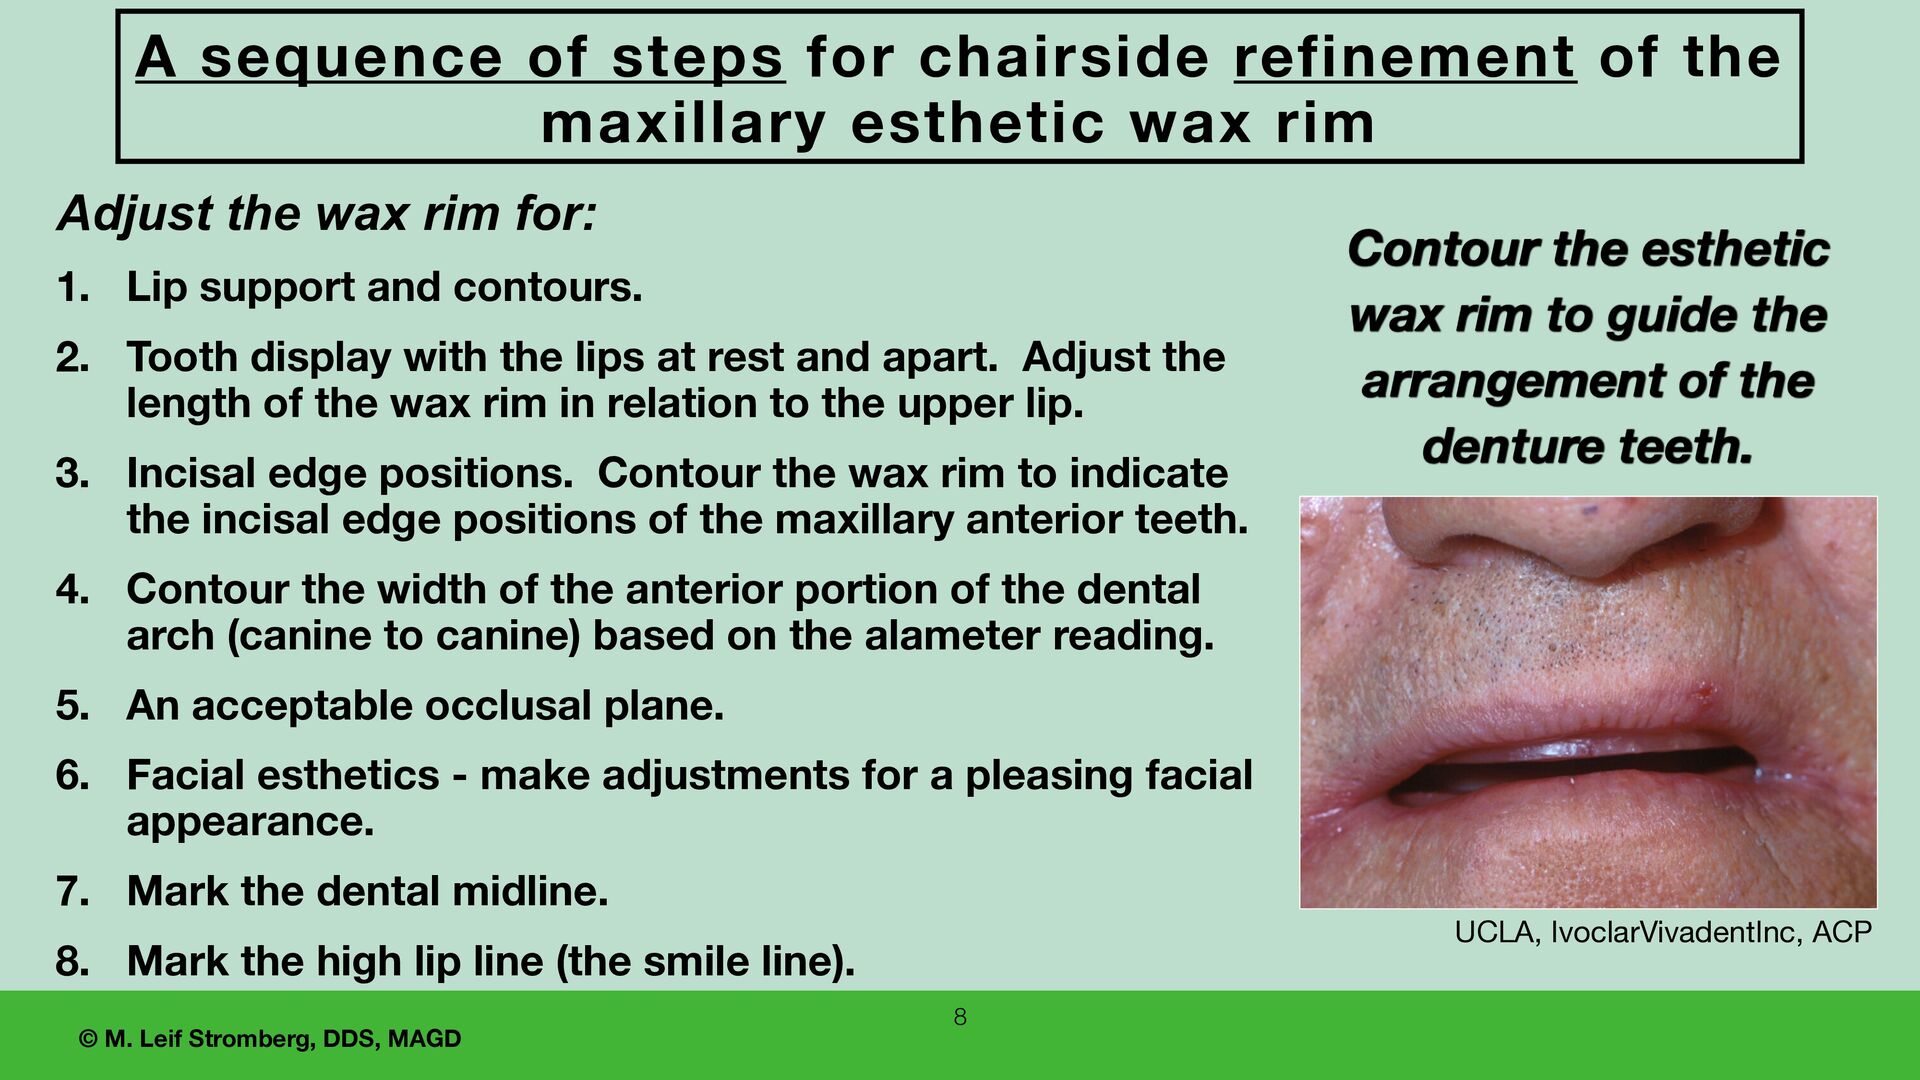
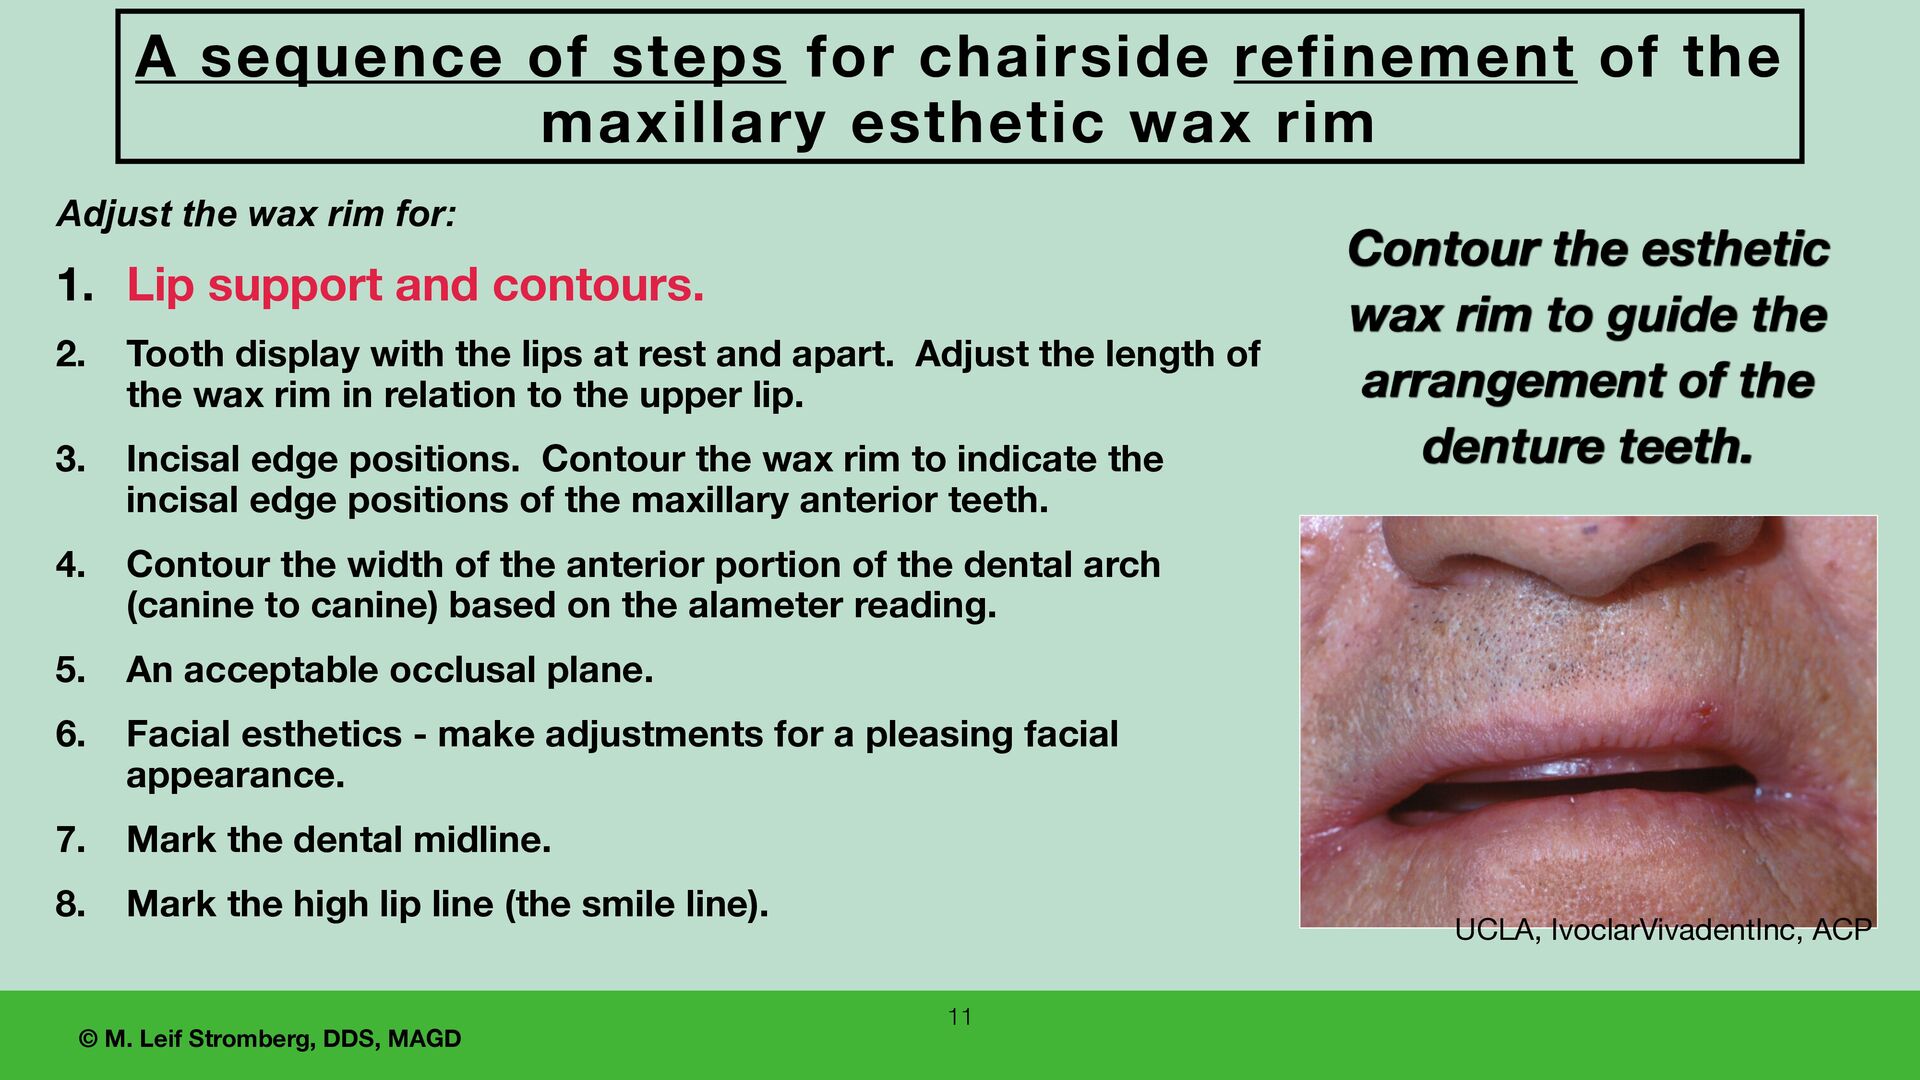
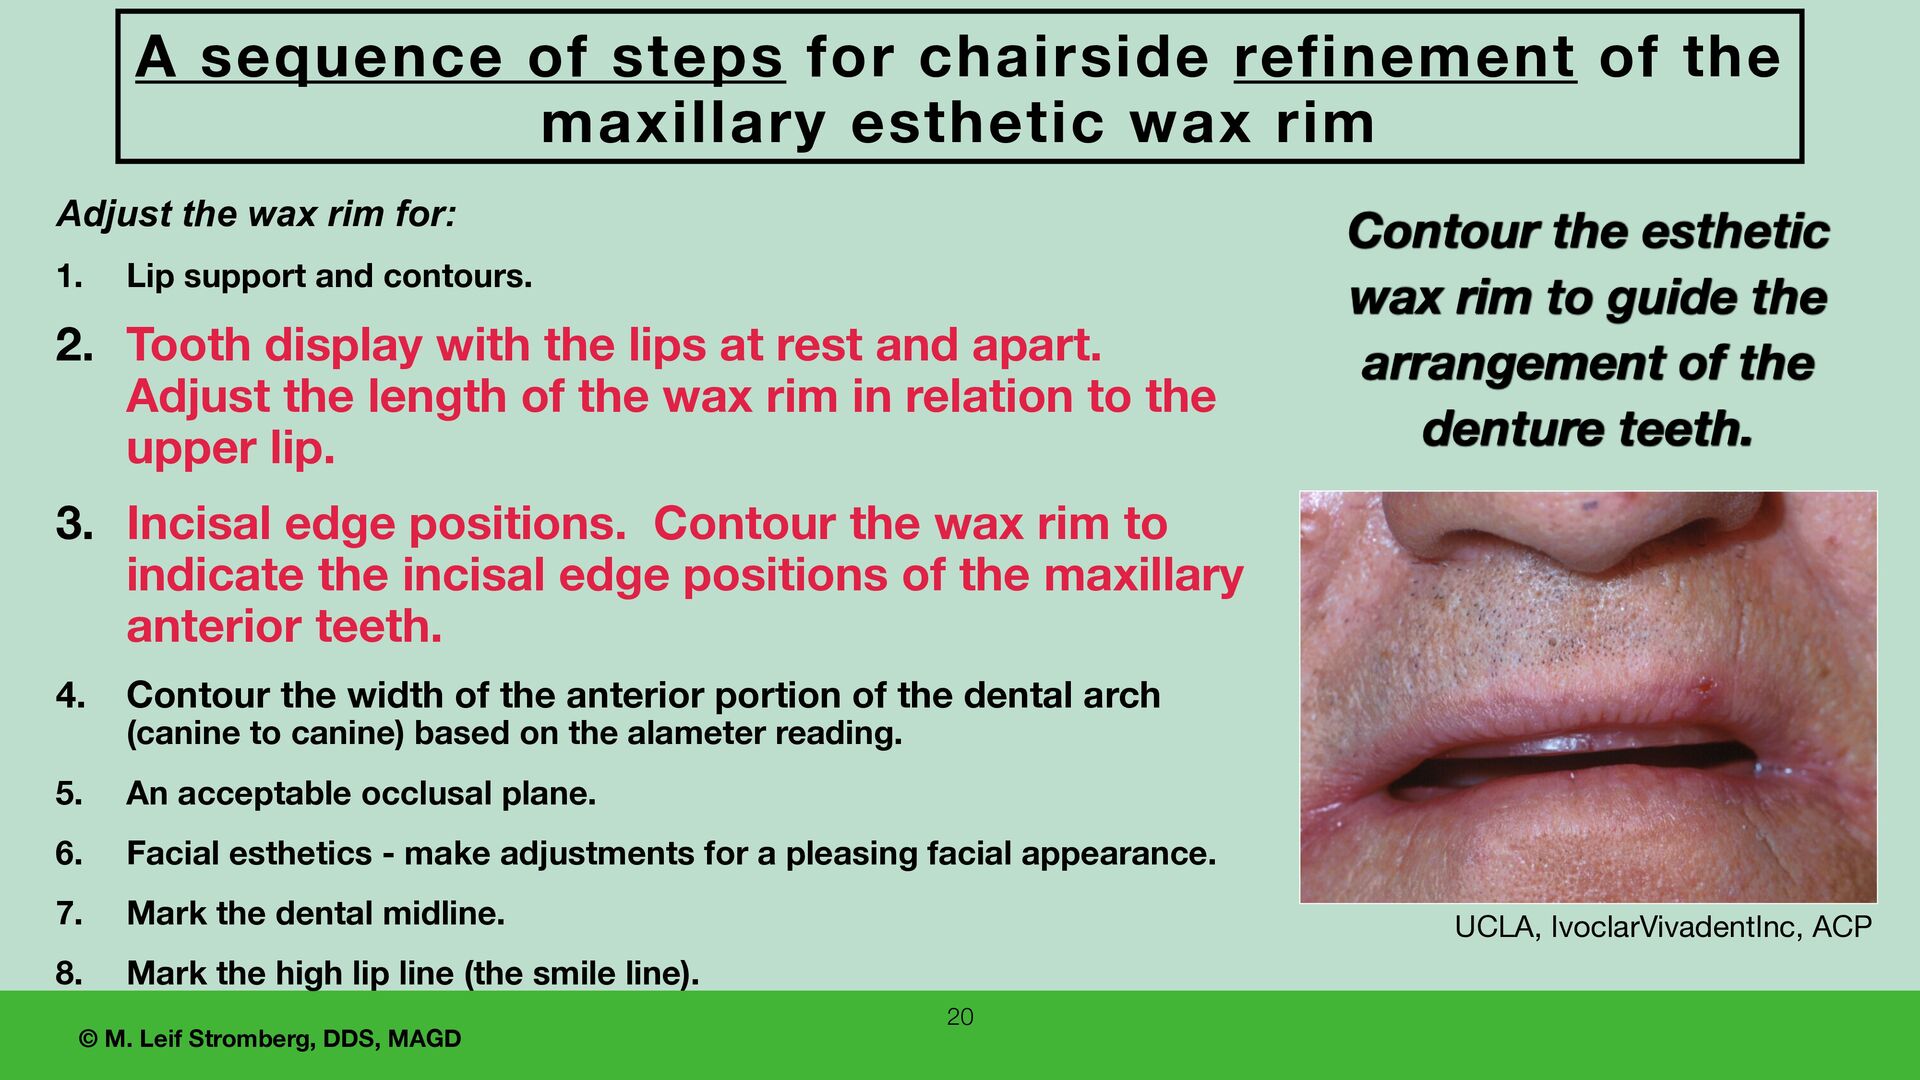
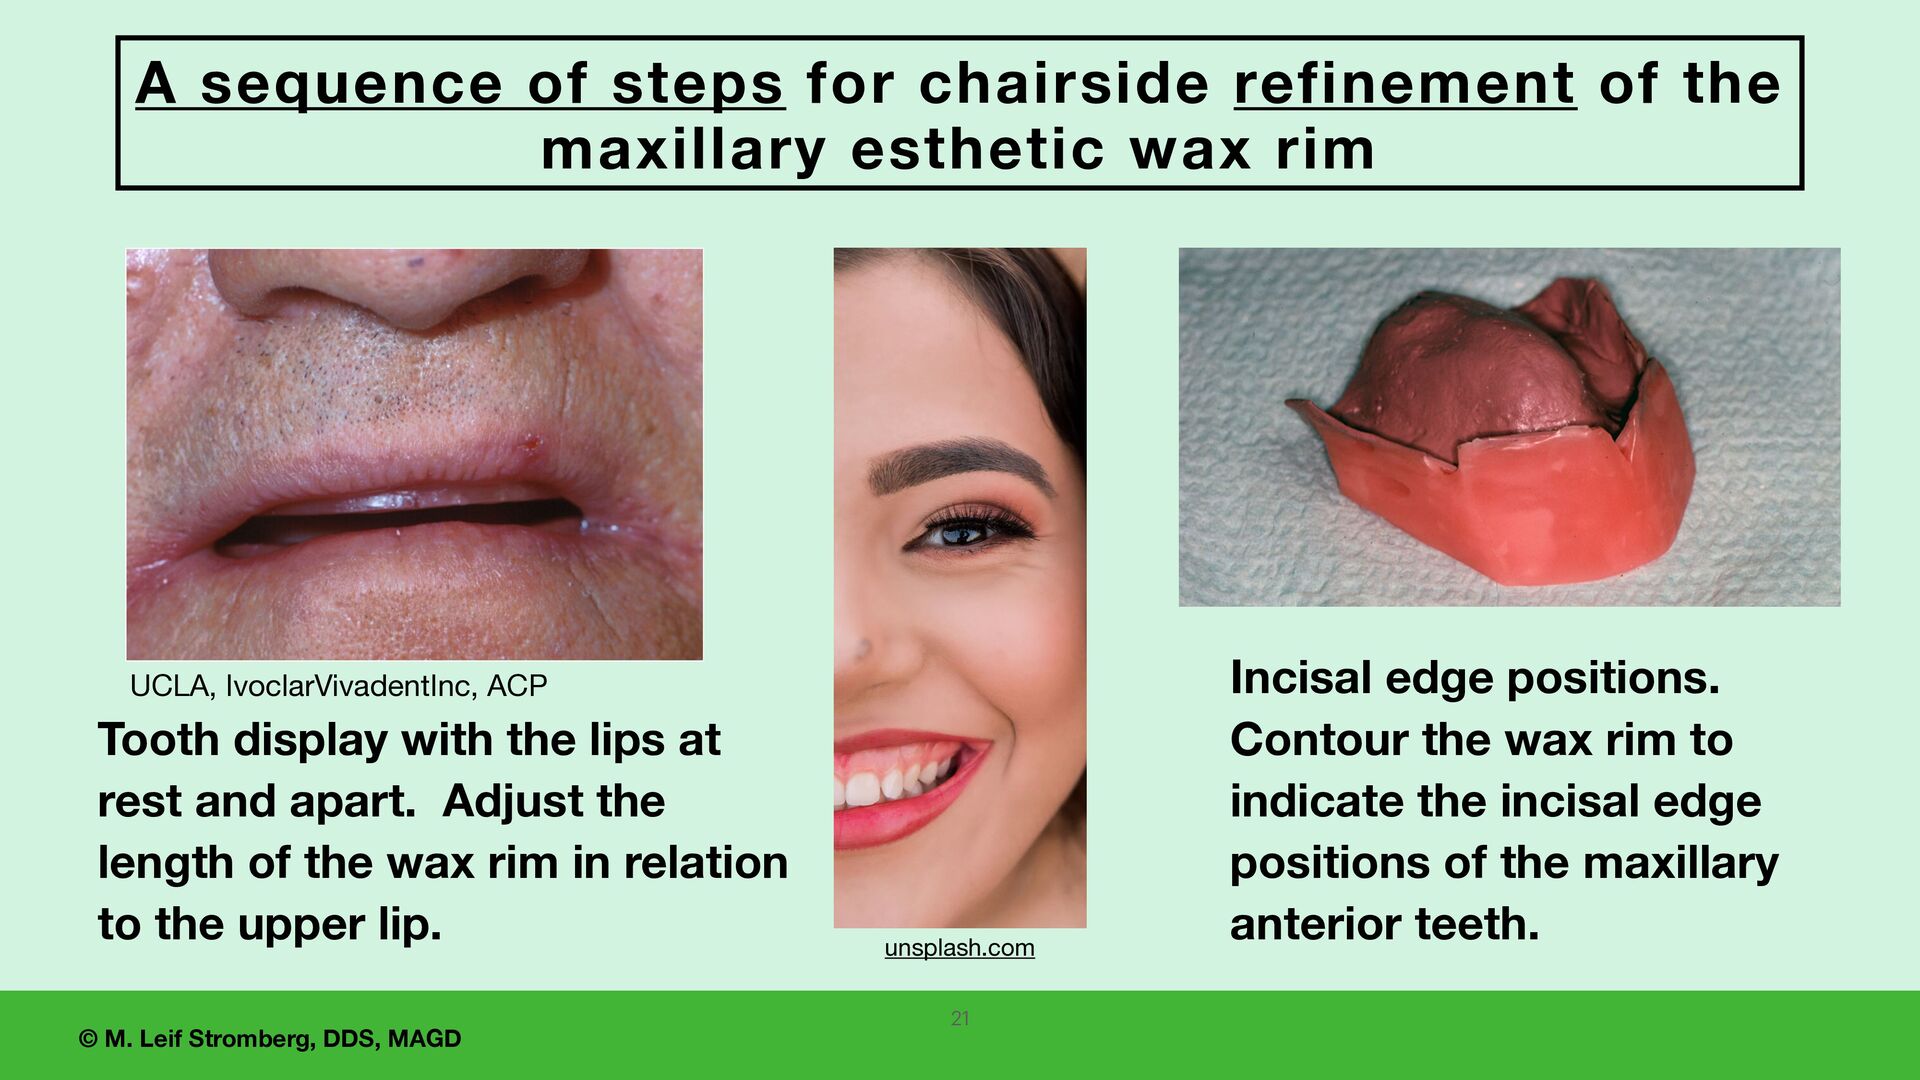
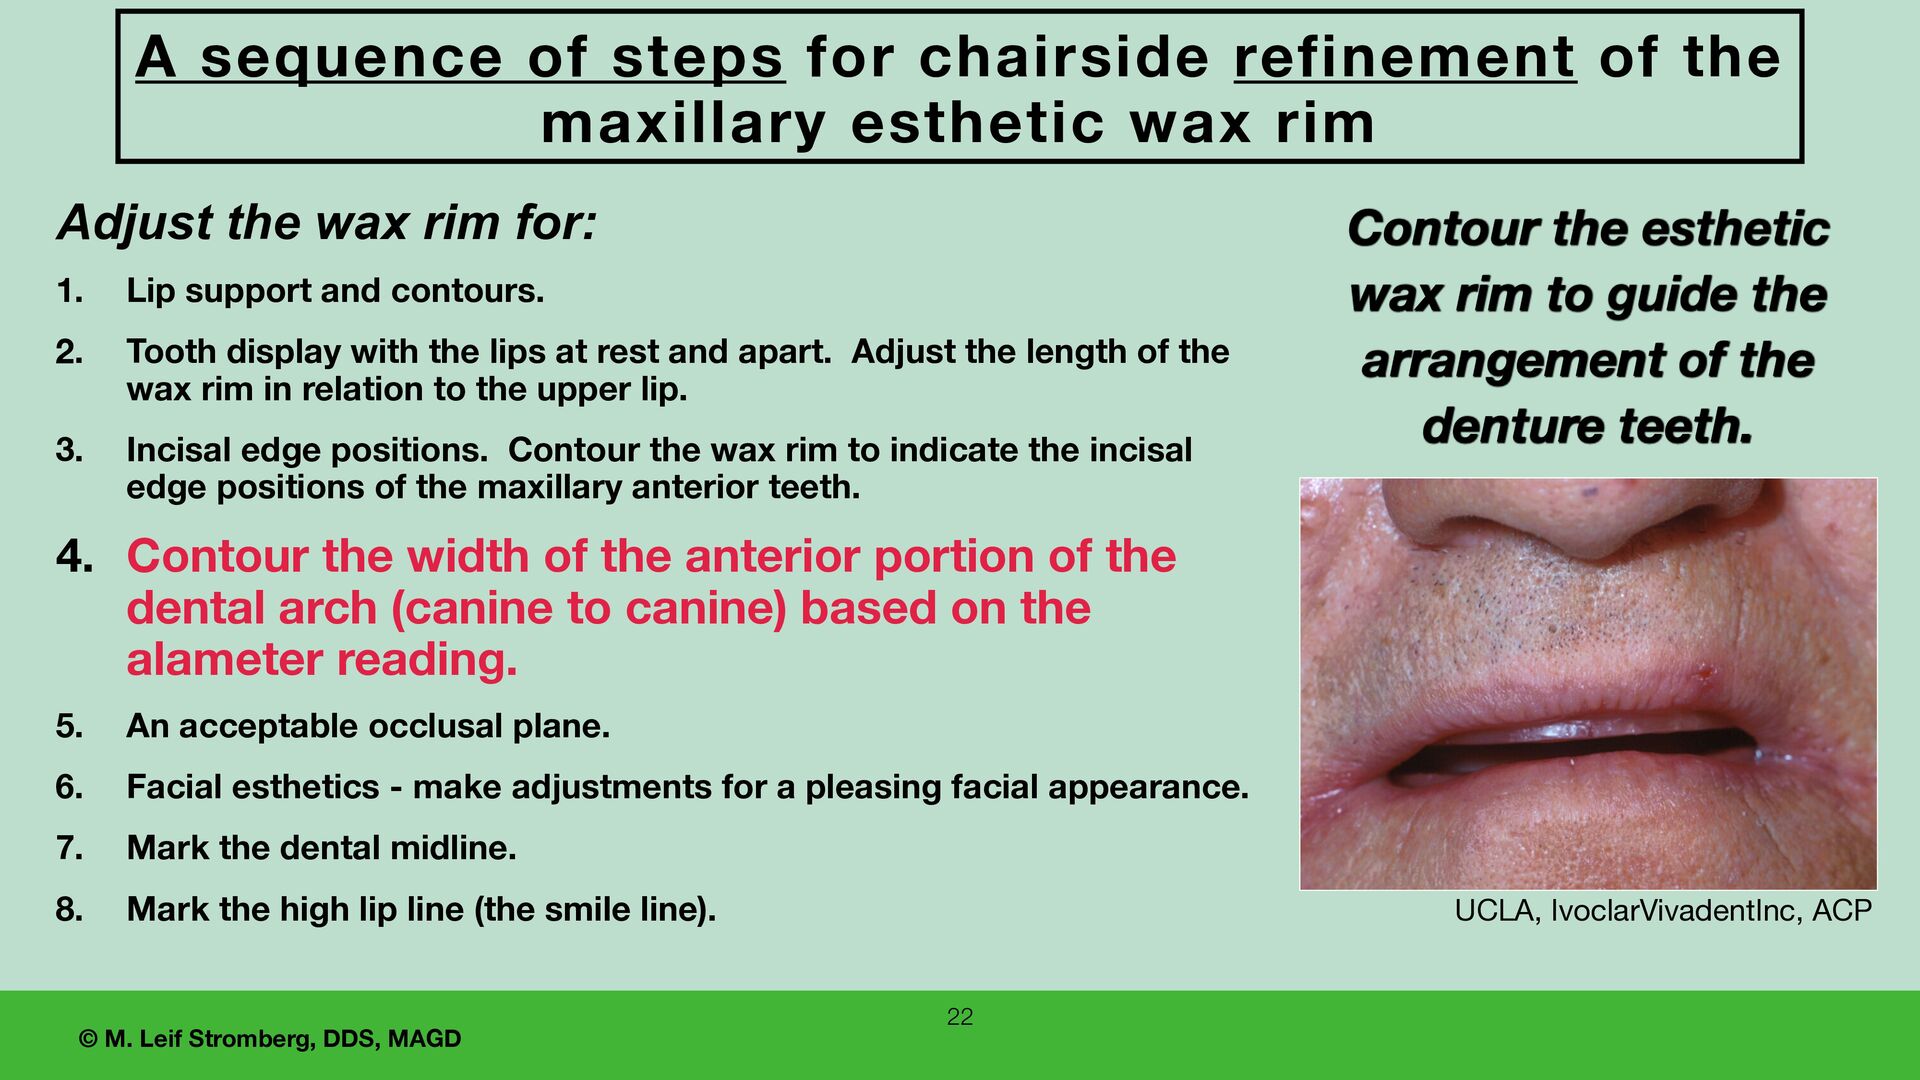
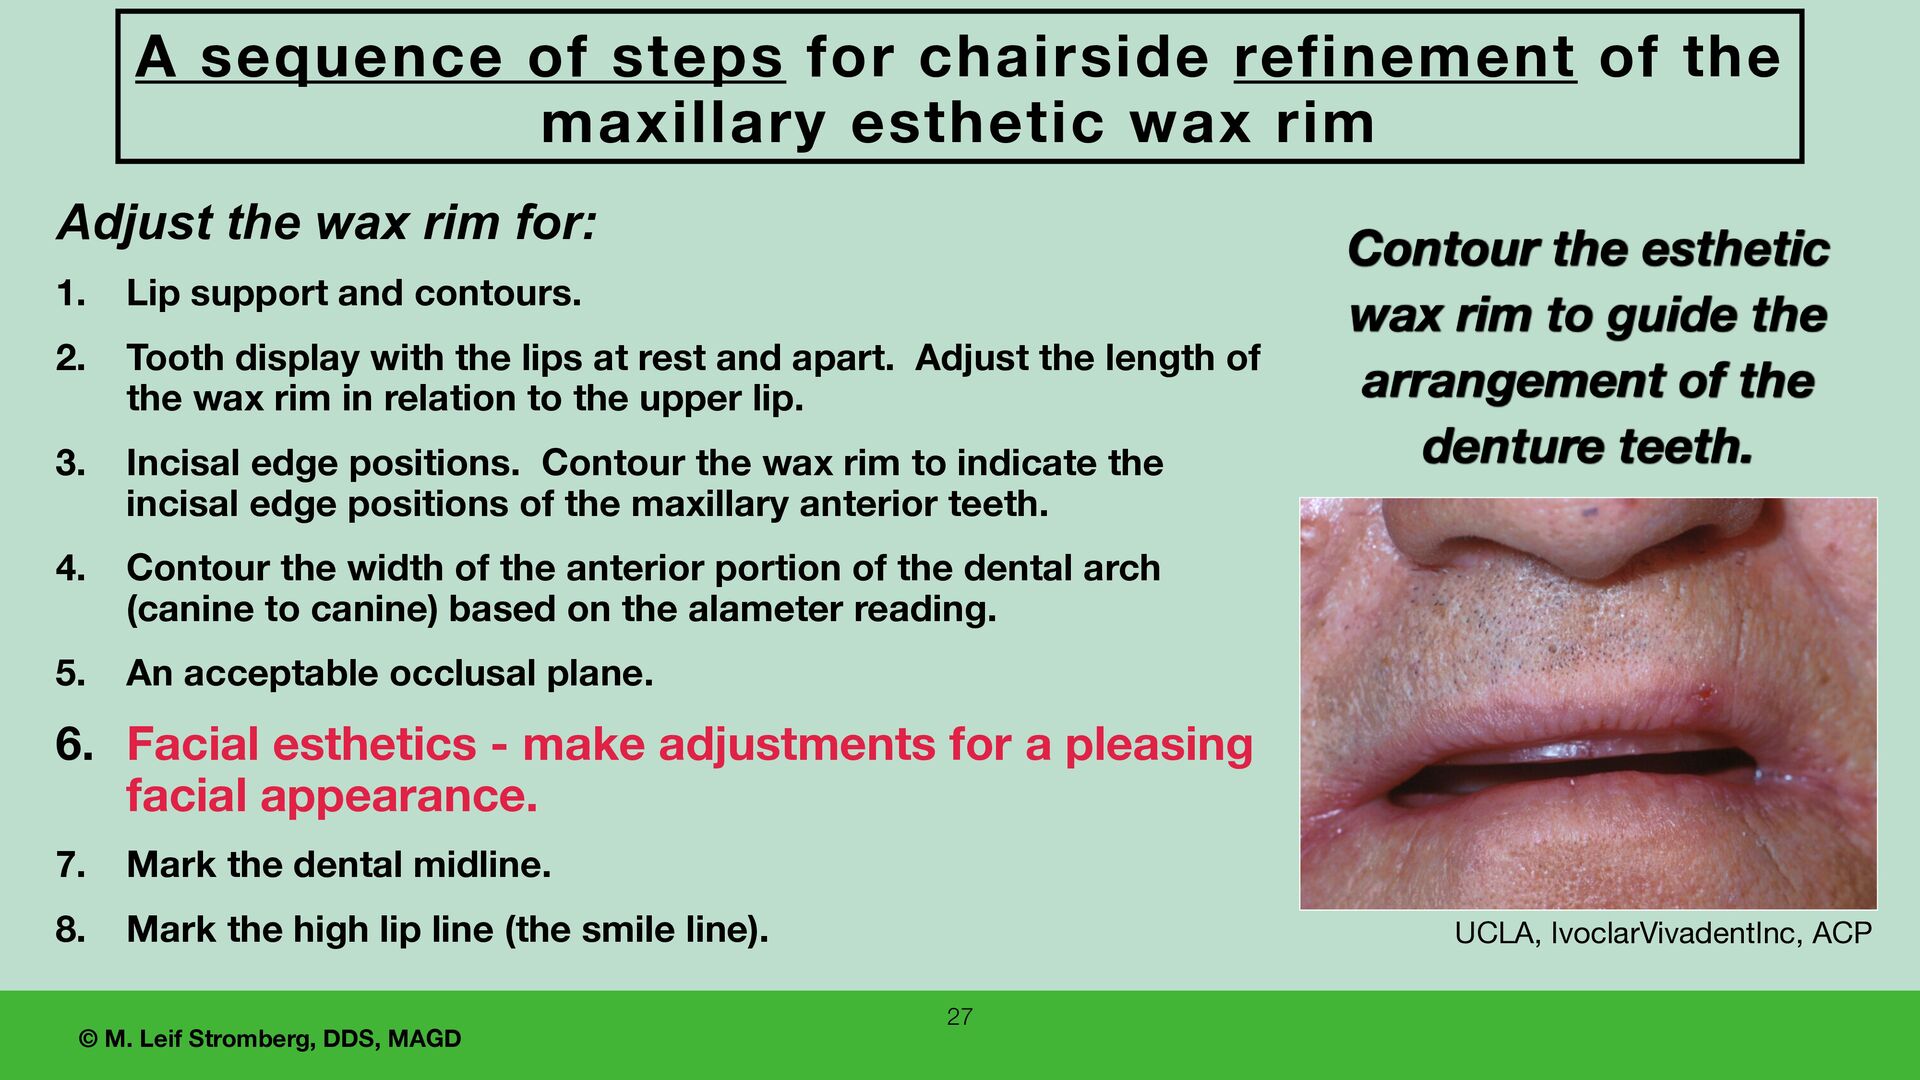
rim to guide the arrangement of the denture teeth. UCLA, IvoclarVivadentInc, ACP Adjust the wax rim for: 1. Lip support and contours. 2. Tooth display with the lips at rest and apart. Adjust the length of the wax rim in relation to the upper lip. 3. Incisal edge positions. Contour the wax rim to indicate the incisal edge positions of the maxillary anterior teeth. 4. Contour the width of the anterior portion of the dental arch (canine to canine) based on the alameter reading. 5. An acceptable occlusal plane. 6. Facial esthetics - make adjustments for a pleasing facial appearance. 7. Mark the dental midline. 8. Mark the high lip line (the smile line). 8 A sequence of steps for chairside refinement of the maxillary esthetic wax rim
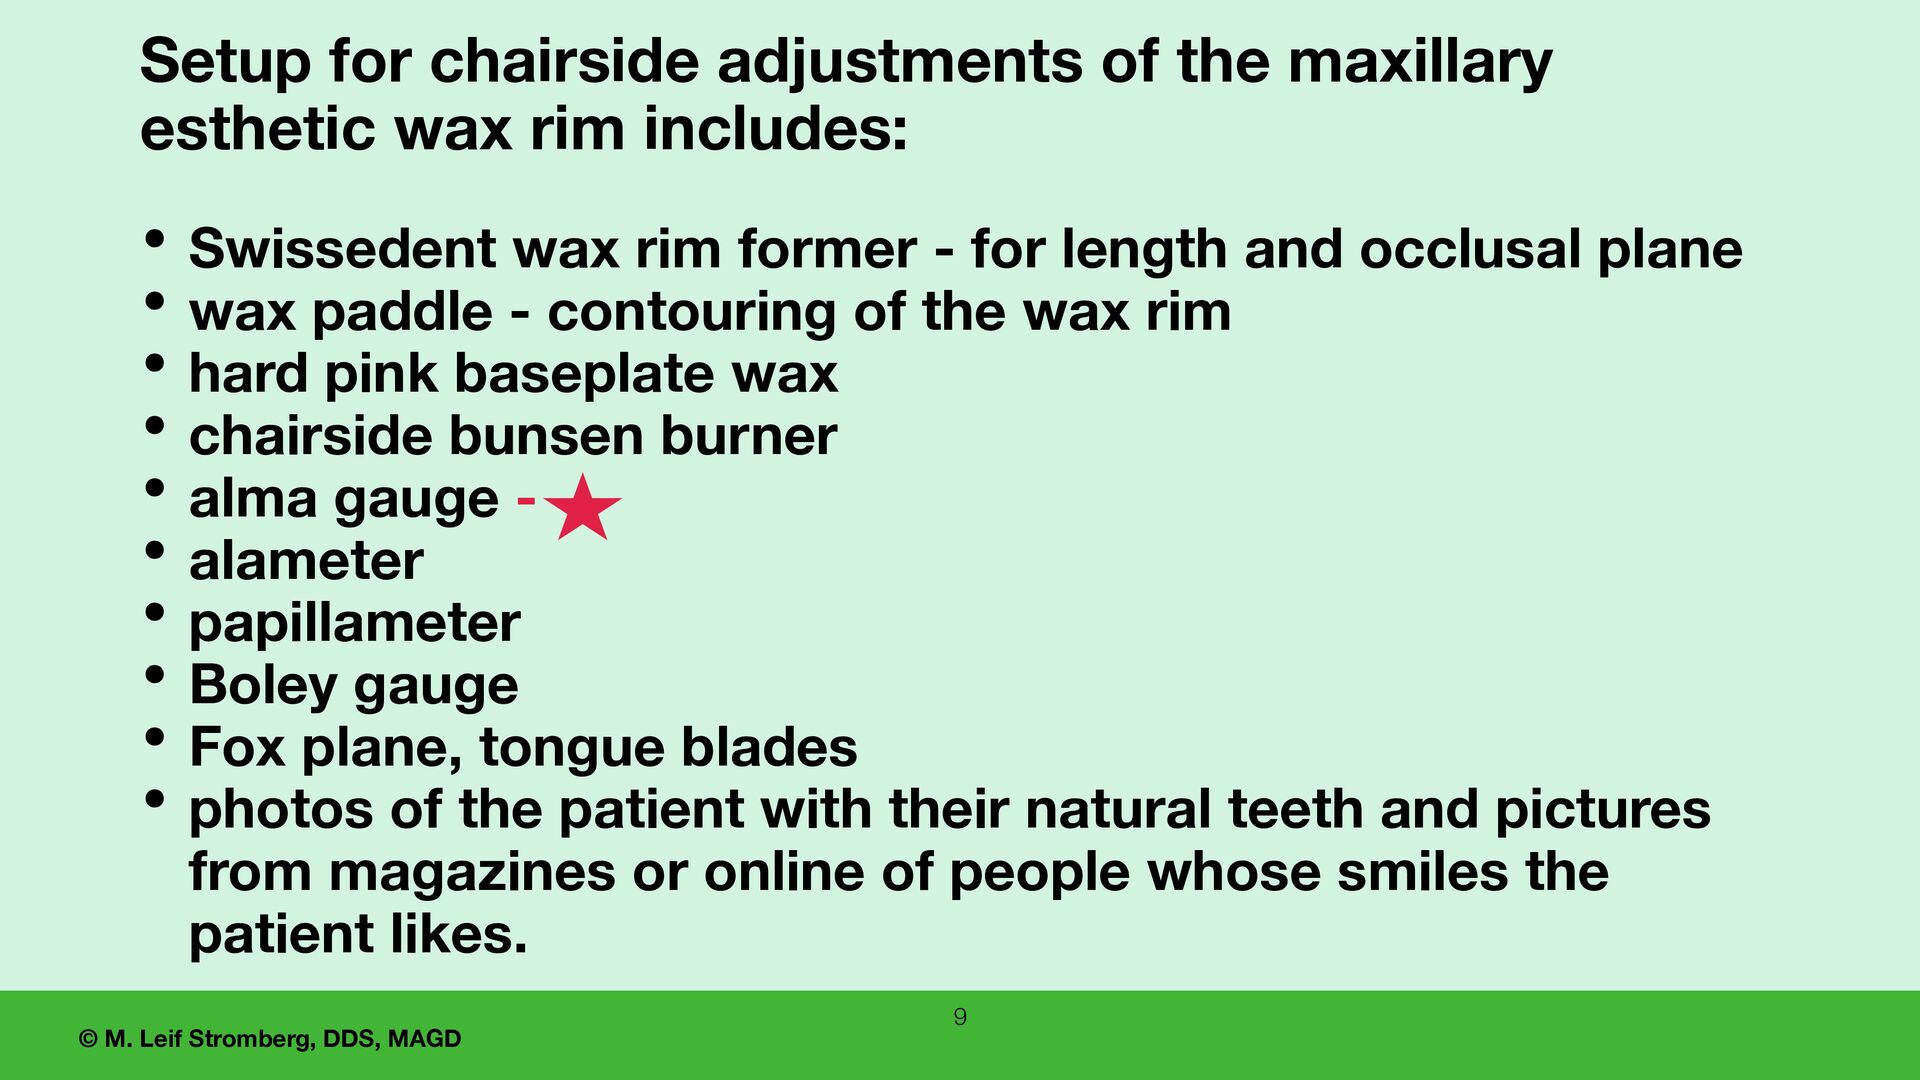
adjustments of the maxillary esthetic wax rim includes: • Swissedent wax rim former - for length and occlusal plane • wax paddle - contouring of the wax rim • hard pink baseplate wax • chairside bunsen burner • alma gauge - • alameter • papillameter • Boley gauge • Fox plane, tongue blades • photos of the patient with their natural teeth and pictures from magazines or online of people whose smiles the patient likes.
the wax rim for: 1. Lip support and contours. 2. Tooth display with the lips at rest and apart. Adjust the length of the wax rim in relation to the upper lip. 3. Incisal edge positions. Contour the wax rim to indicate the incisal edge positions of the maxillary anterior teeth. 4. Contour the width of the anterior portion of the dental arch (canine to canine) based on the alameter reading. 5. An acceptable occlusal plane. 6. Facial esthetics - make adjustments for a pleasing facial appearance. 7. Mark the dental midline. 8. Mark the high lip line (the smile line). 11 A sequence of steps for chairside refinement of the maxillary esthetic wax rim Contour the esthetic wax rim to guide the arrangement of the denture teeth.
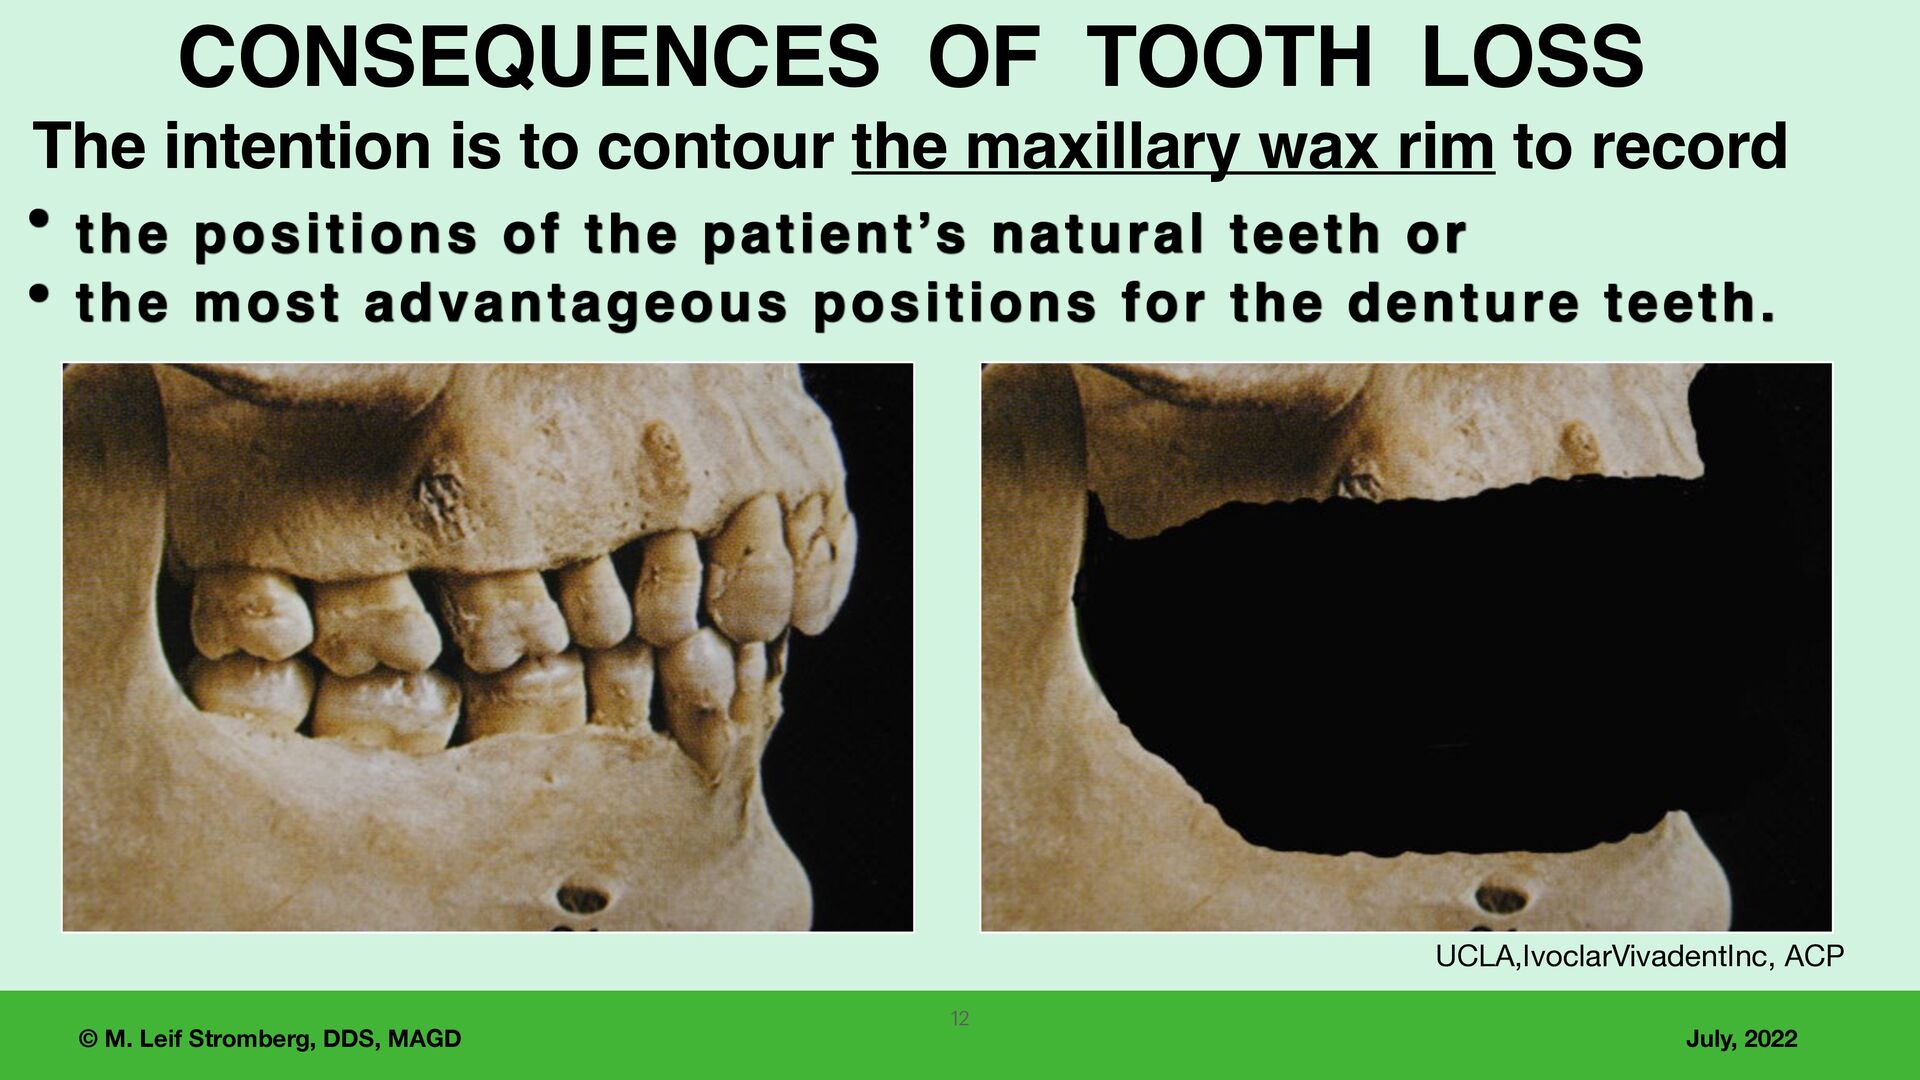
TOOTH LOSS The intention is to contour the maxillary wax rim to record • the positions of the patient’s natural teeth or • the most advantageous positions for the denture teeth. UCLA,IvoclarVivadentInc, ACP 12
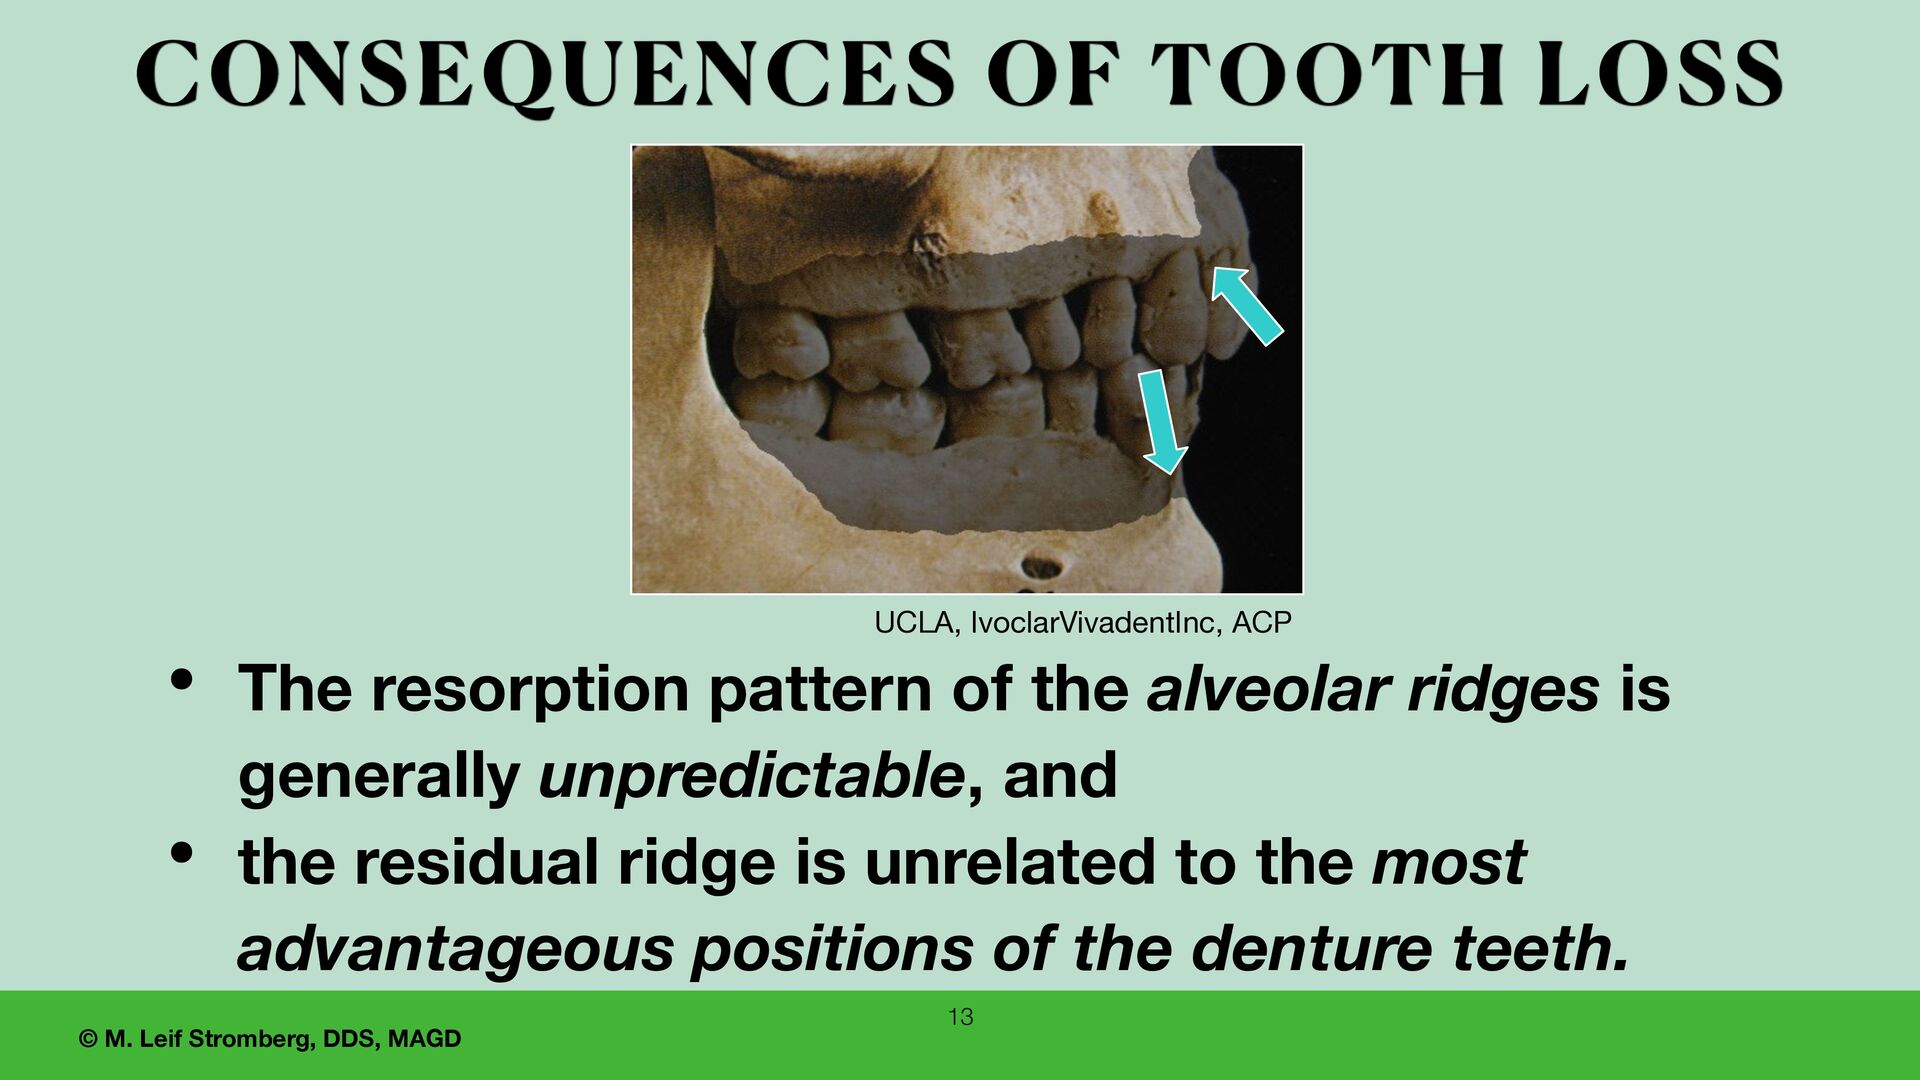
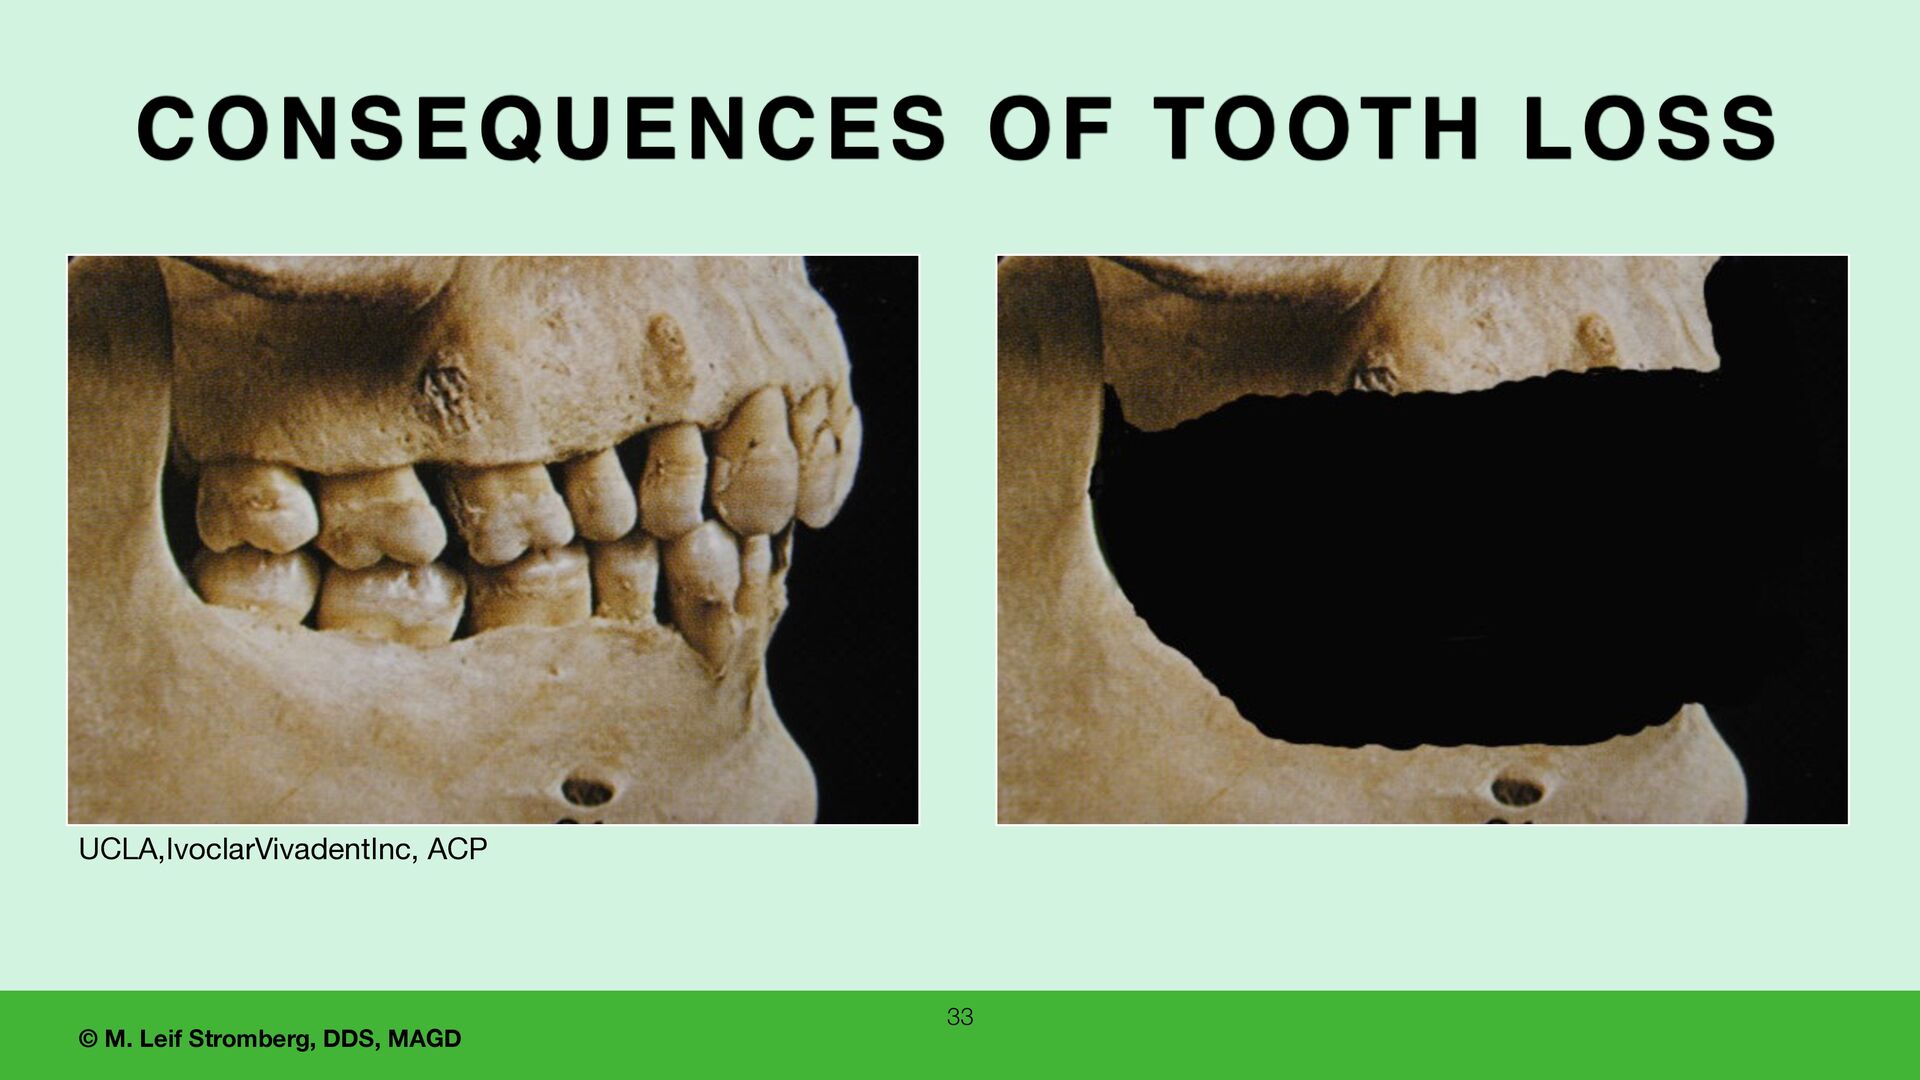
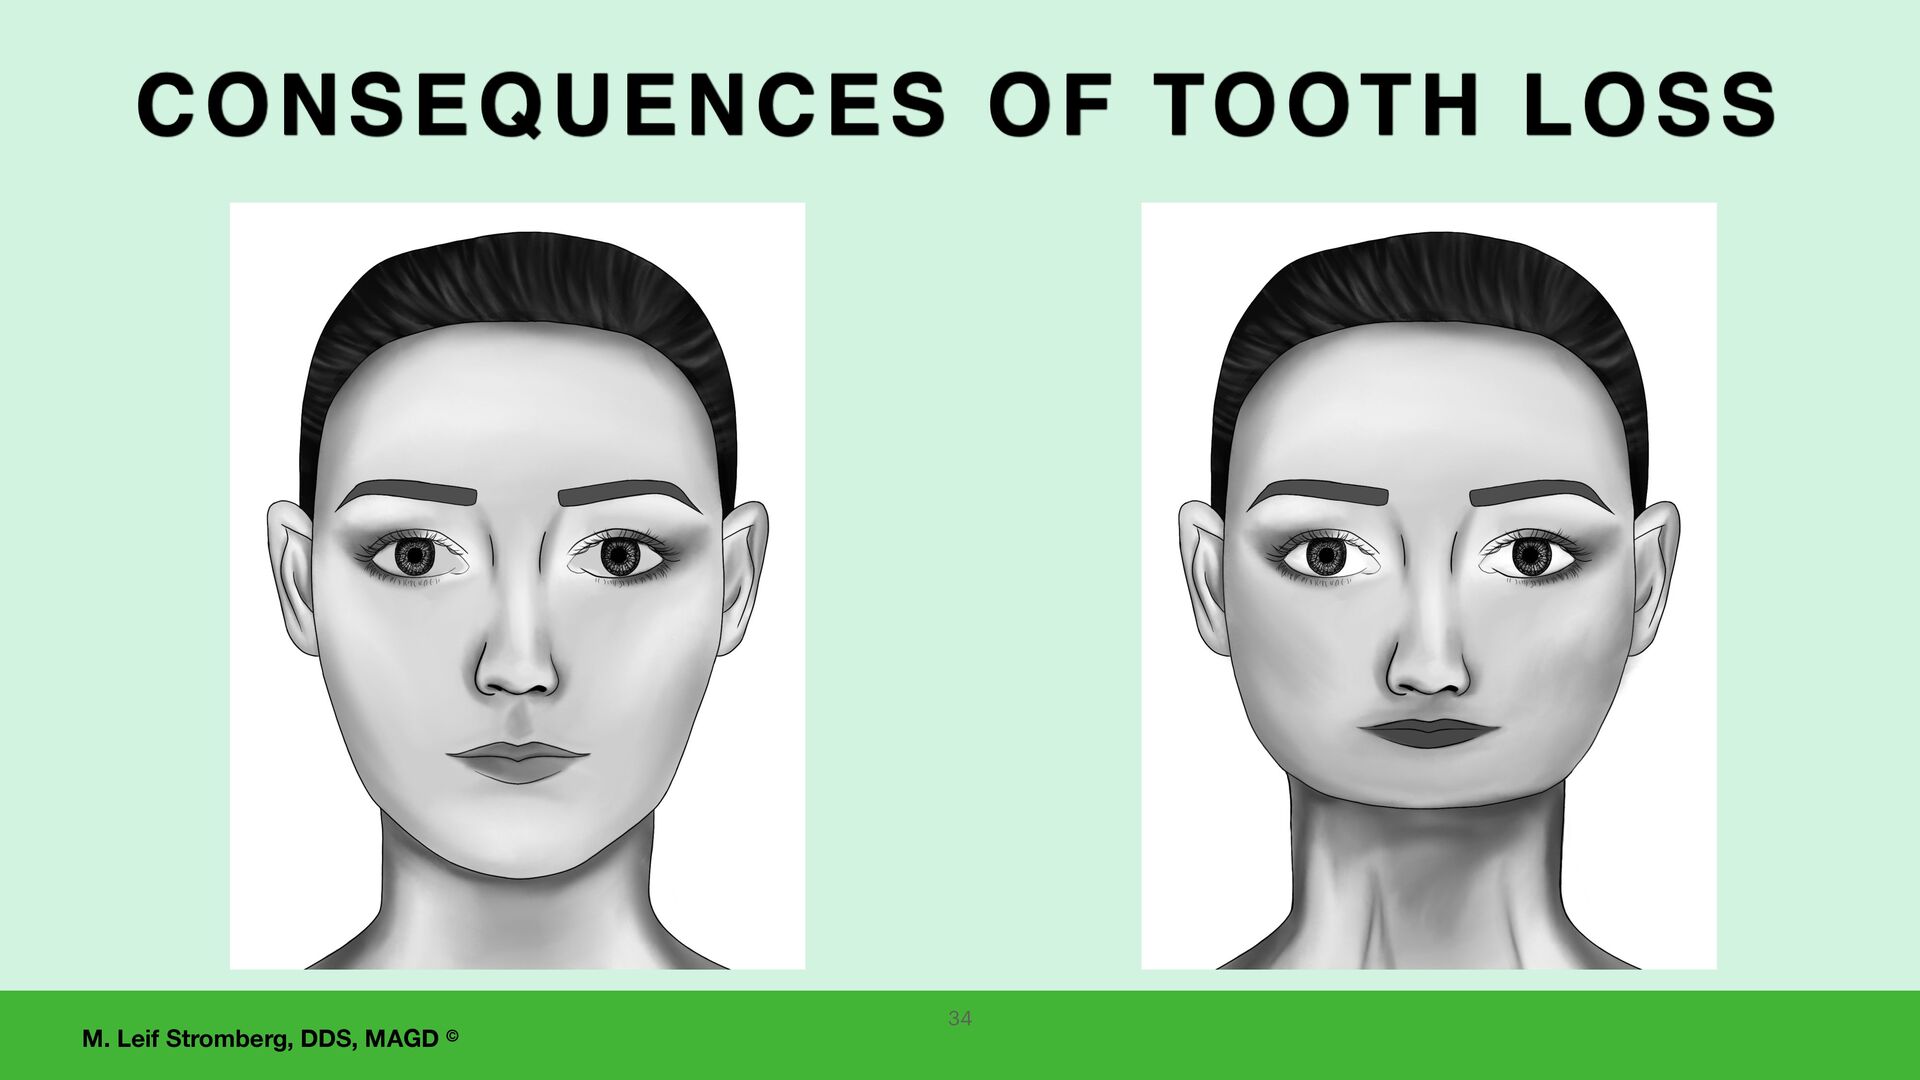
CONSEQUENCES OF TOOTH LOSS • The resorption pattern of the alveolar ridges is generally unpredictable, and • the residual ridge is unrelated to the most advantageous positions of the denture teeth.
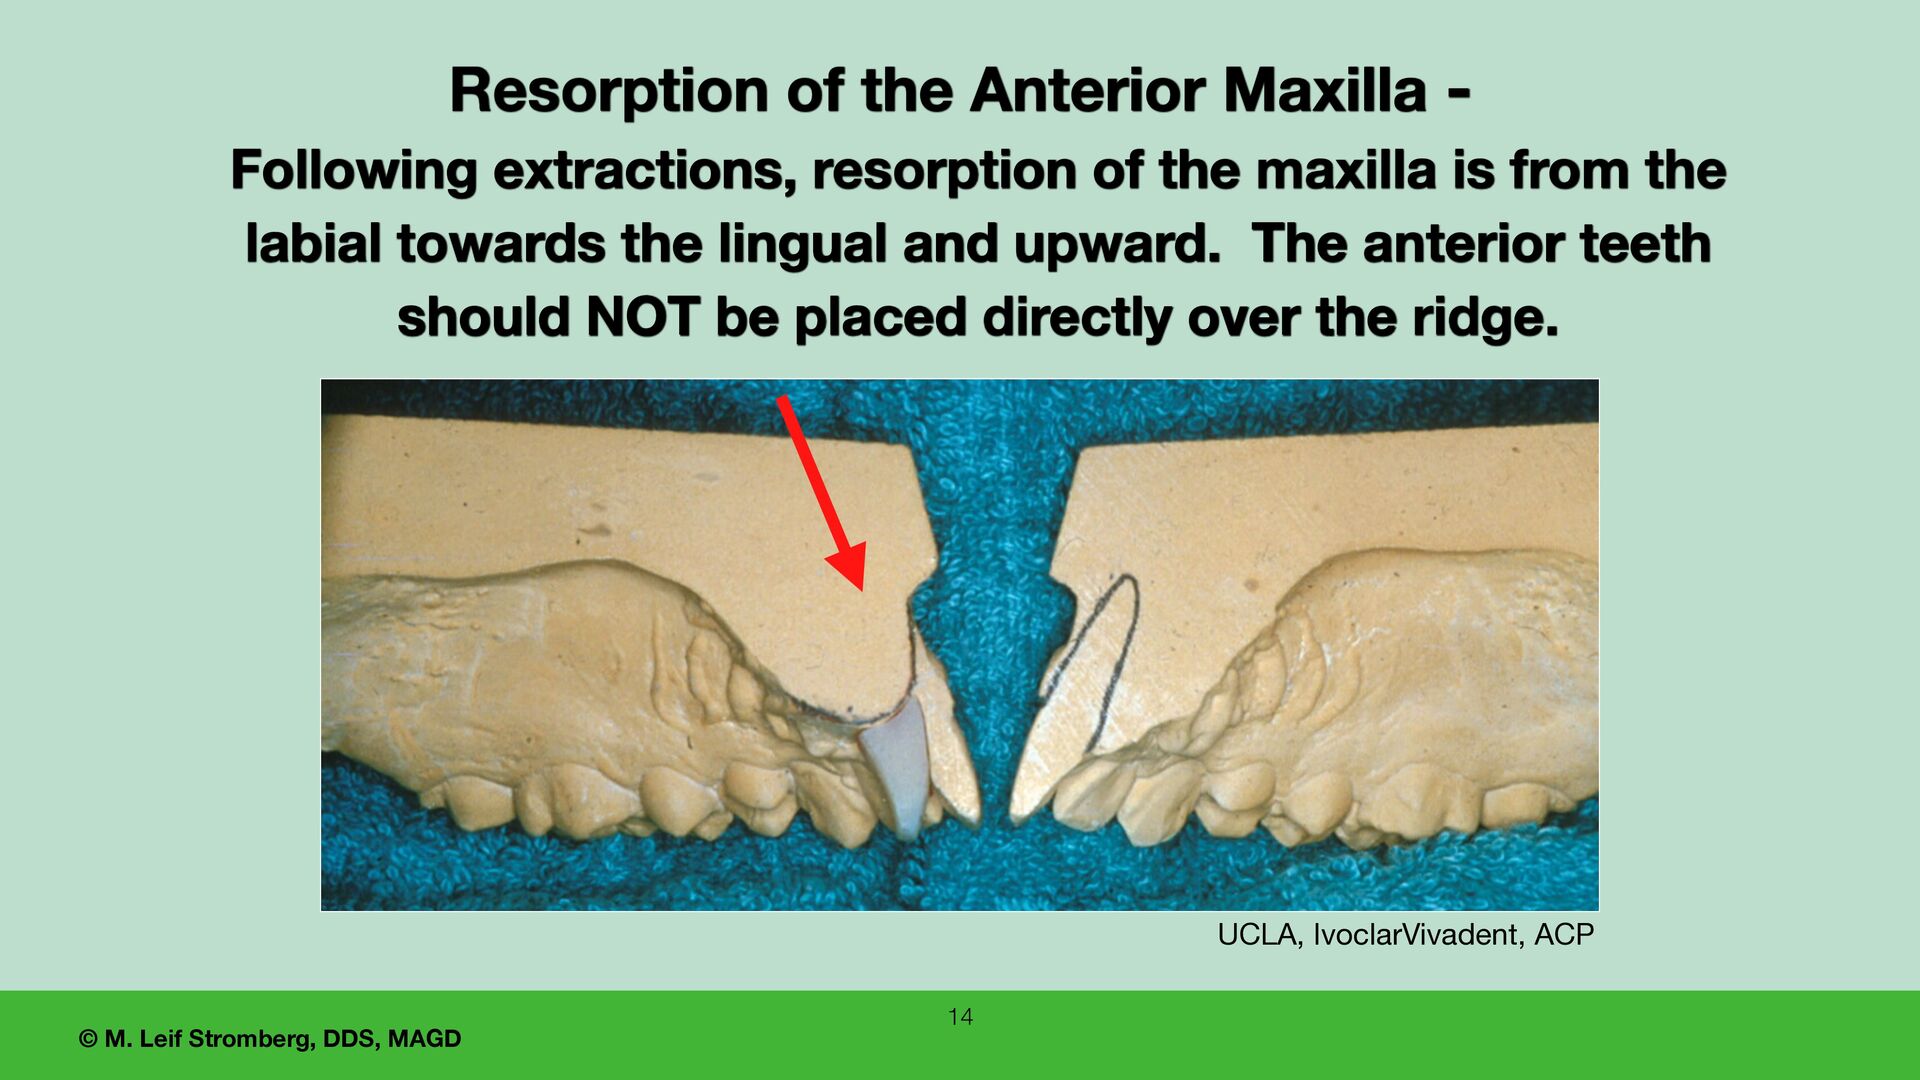
Maxilla - Following extractions, resorption of the maxilla is from the labial towards the lingual and upward. The anterior teeth should NOT be placed directly over the ridge. UCLA, IvoclarVivadent, ACP 14
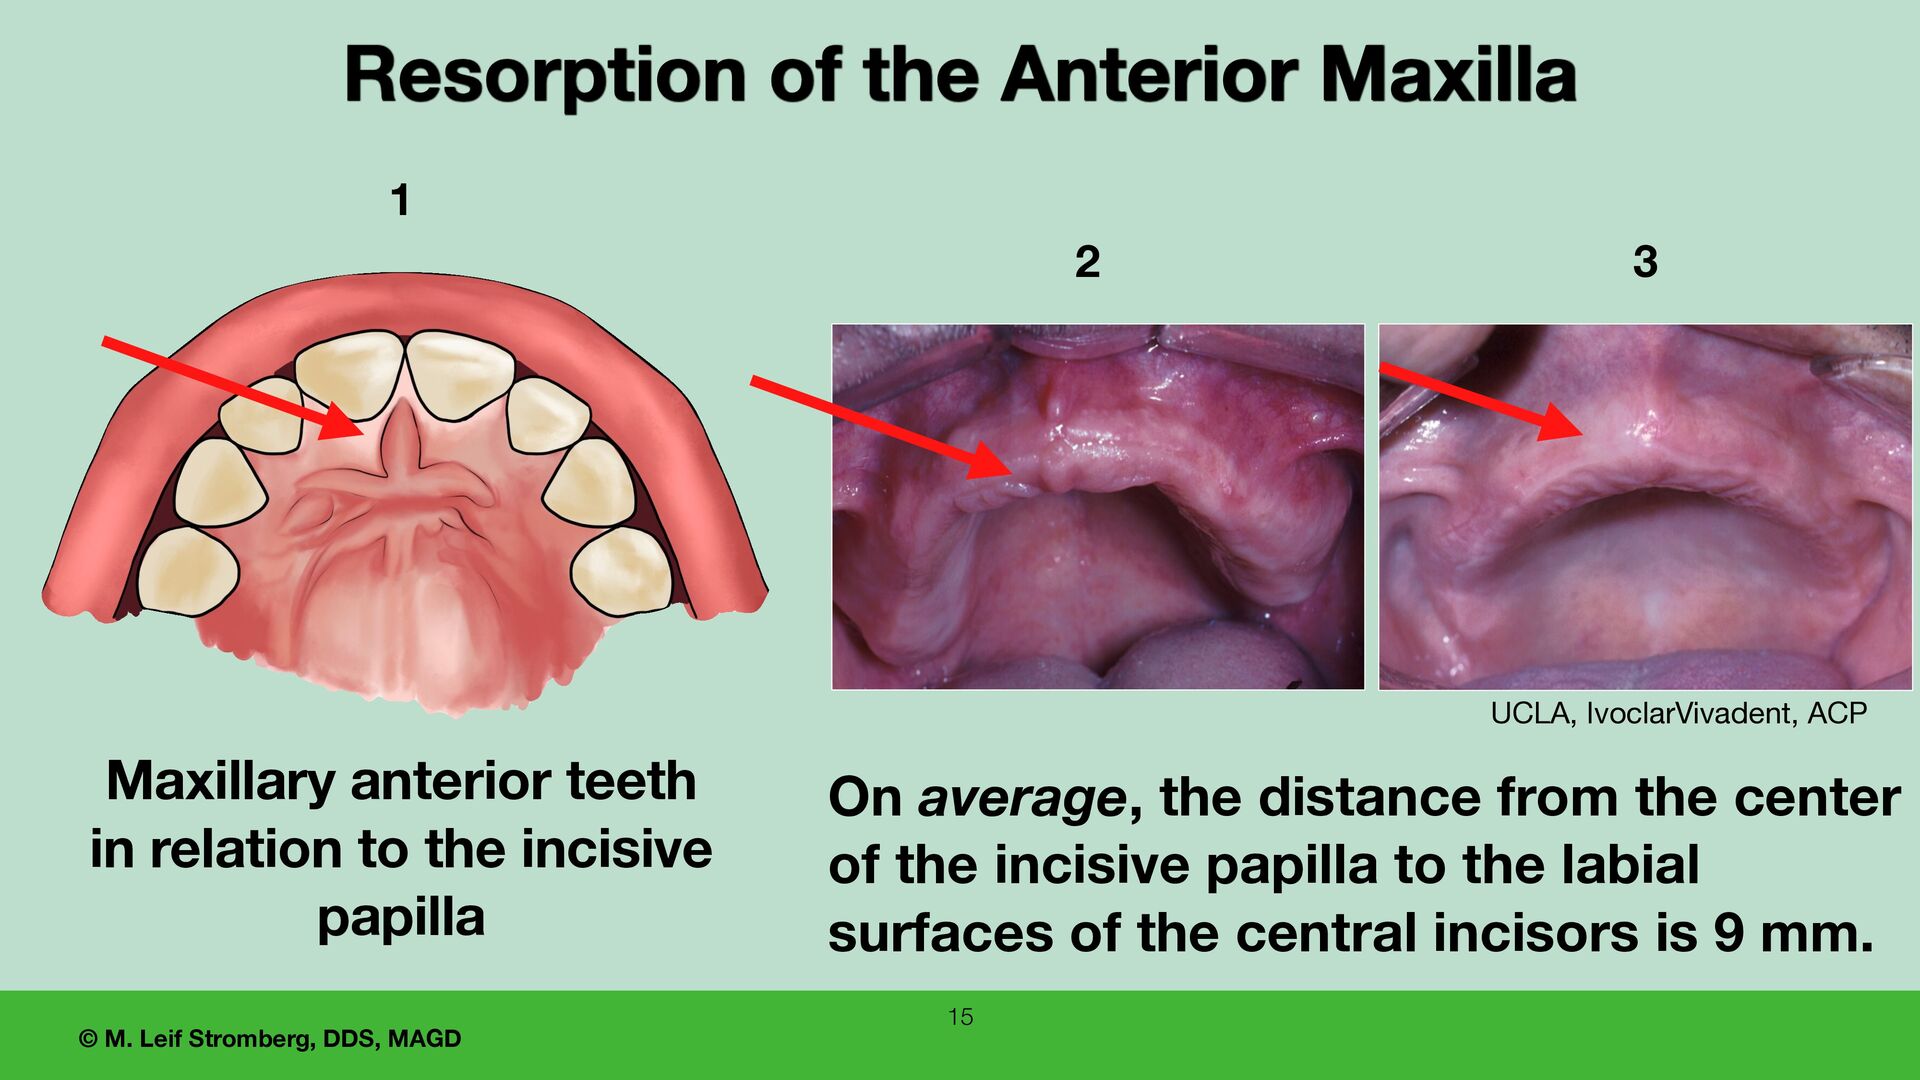
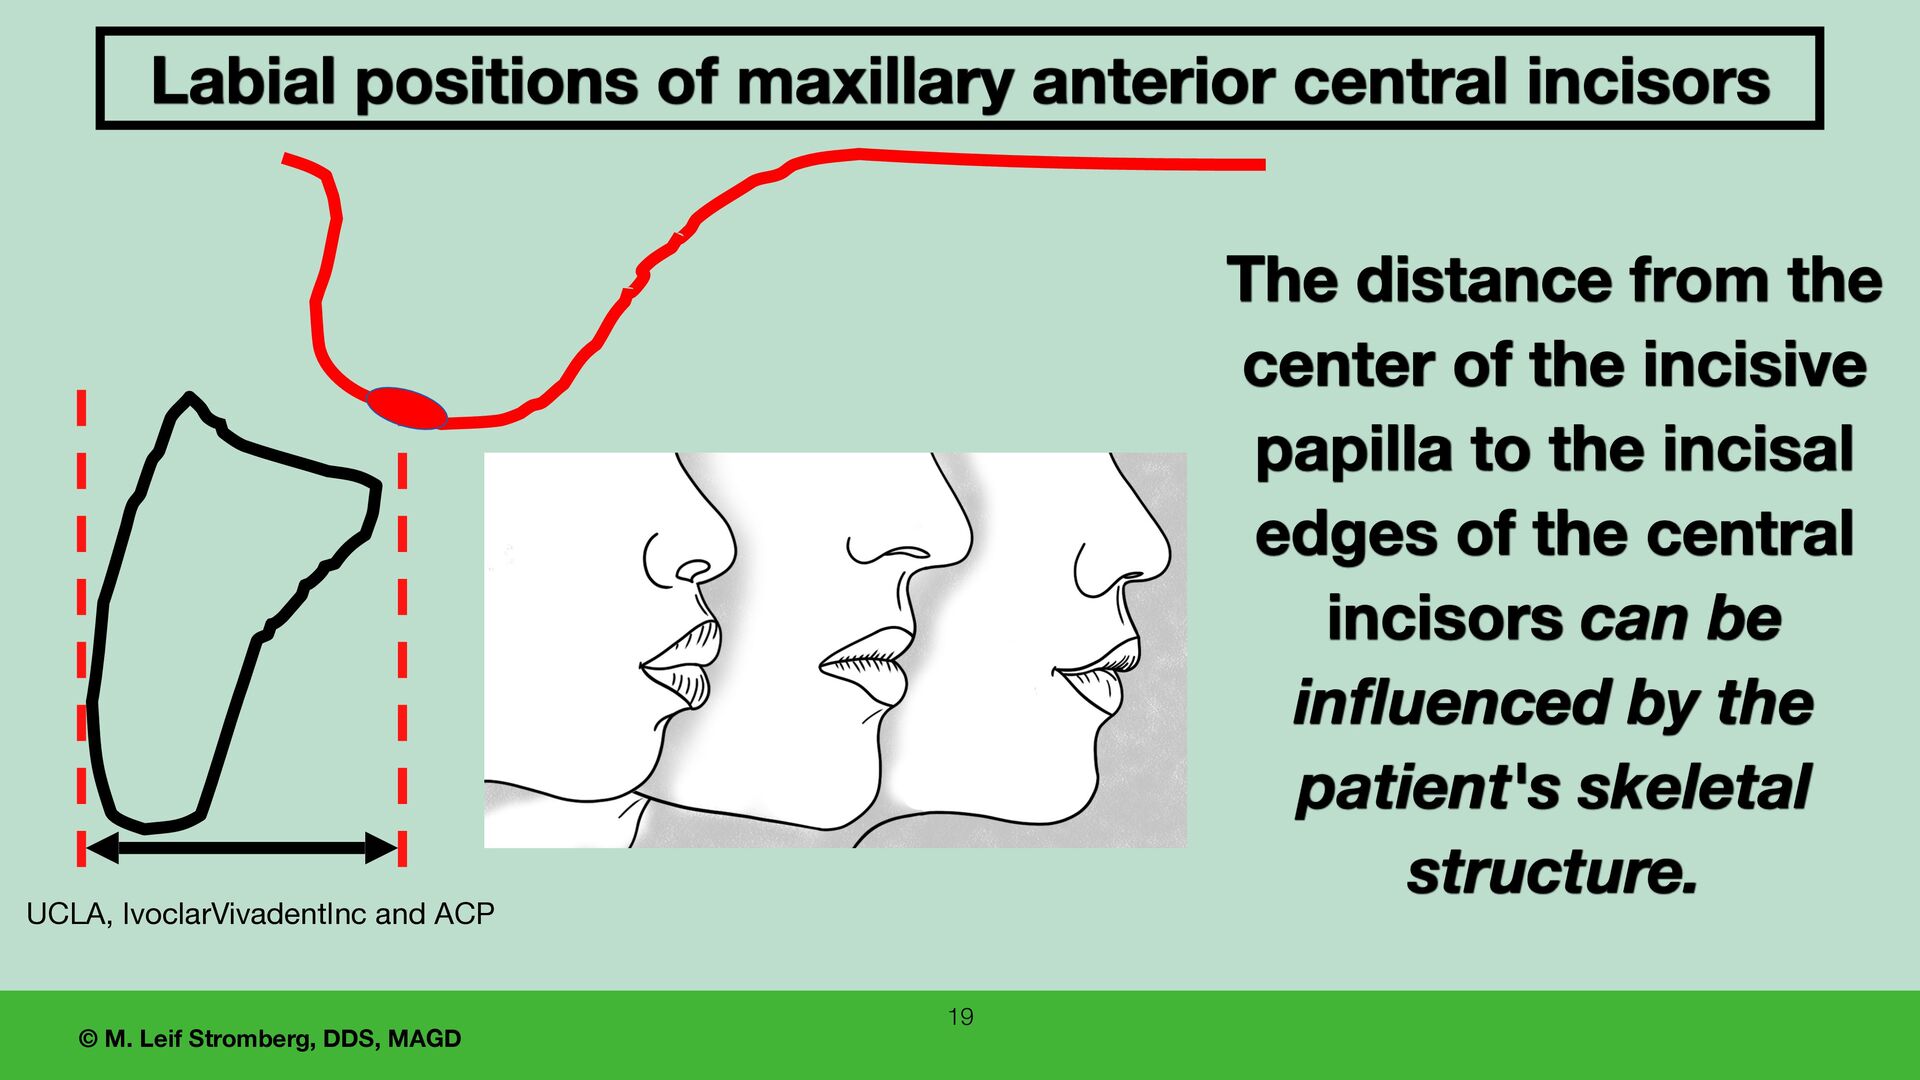
Maxillary anterior teeth in relation to the incisive papilla 1 2 3 Resorption of the Anterior Maxilla On average, the distance from the center of the incisive papilla to the labial surfaces of the central incisors is 9 mm.
device to determine the horizontal relationship of the incisal edges of the maxillary central incisors to the incisive papilla and communicating this to the dental laboratory. UCLA, IvoclarVivadent Inc and ACP Alma Gauge
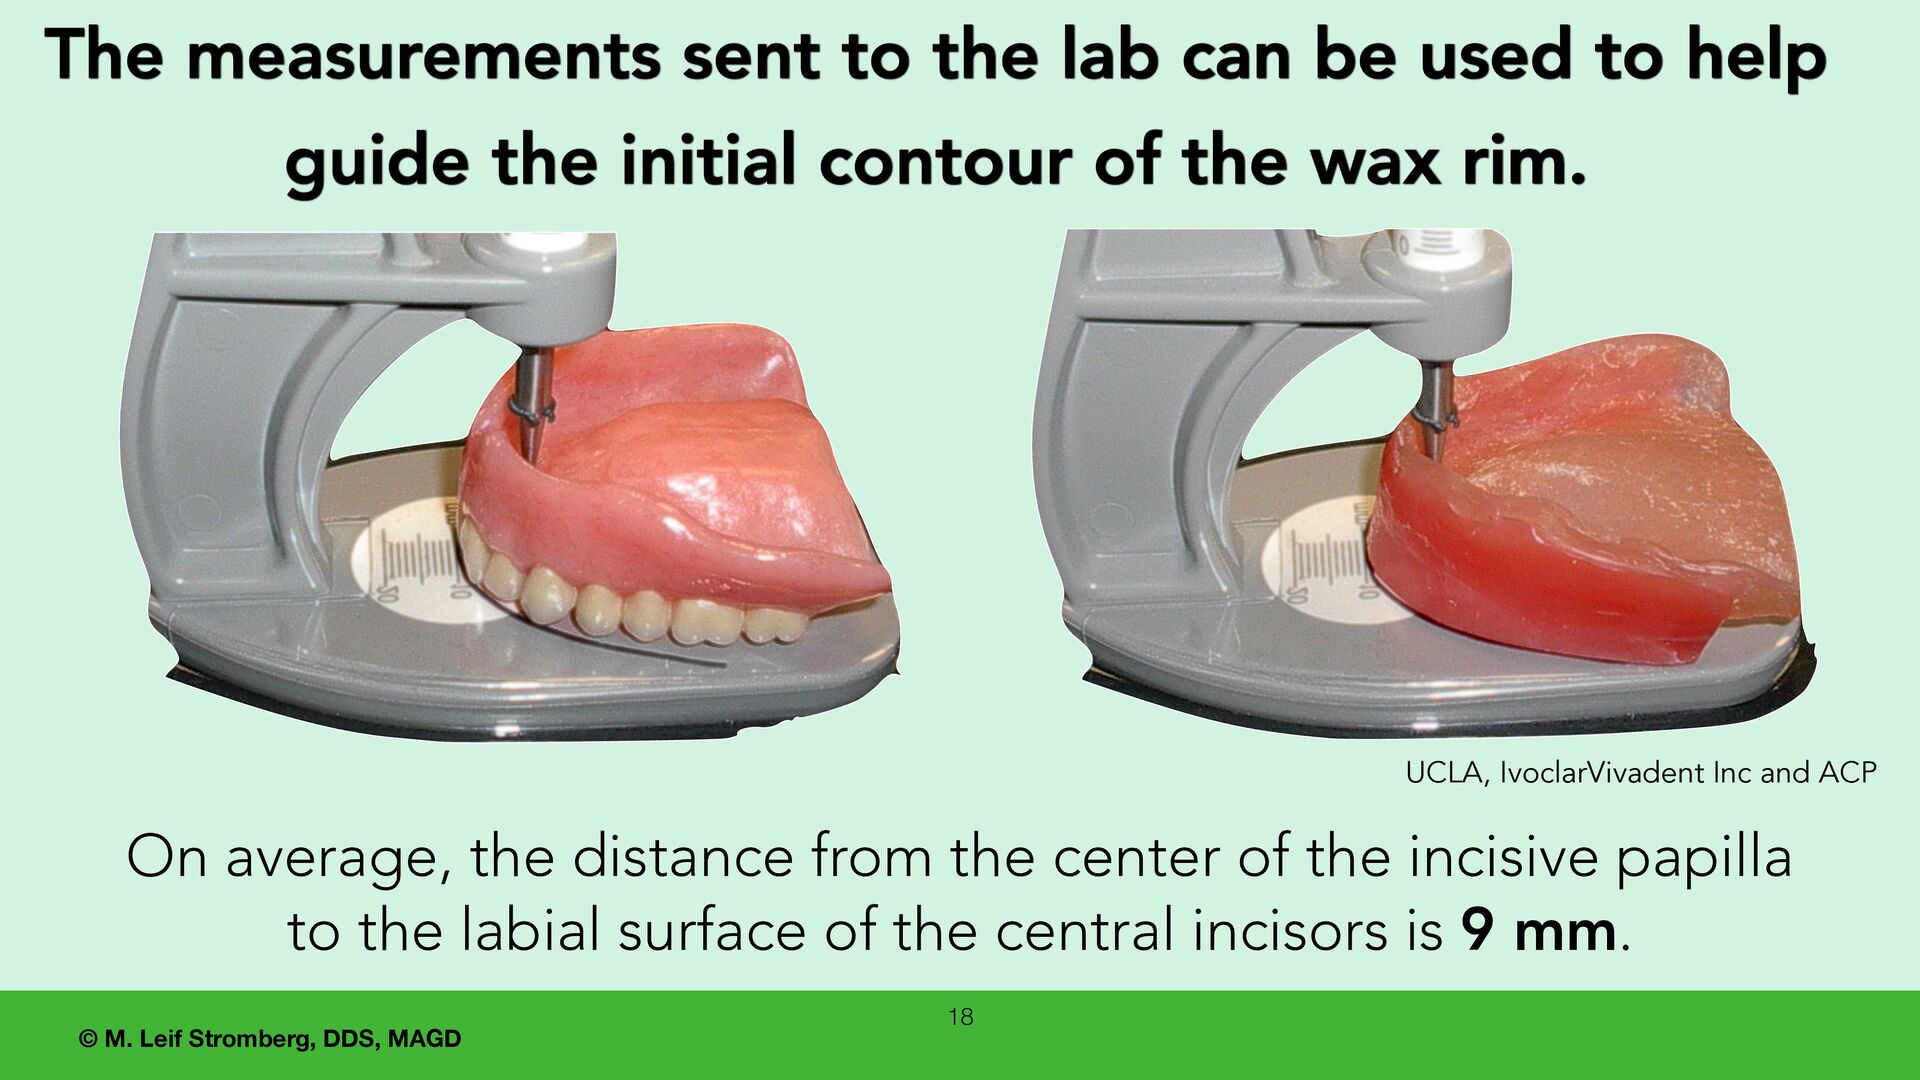
to the lab can be used to help guide the initial contour of the wax rim. On average, the distance from the center of the incisive papilla to the labial surface of the central incisors is 9 mm. UCLA, IvoclarVivadent Inc and ACP
center of the incisive papilla to the incisal edges of the central incisors can be influenced by the patient's skeletal structure. Labial positions of maxillary anterior central incisors 19 UCLA, IvoclarVivadentInc and ACP
the wax rim for: 1. Lip support and contours. 2. Tooth display with the lips at rest and apart. Adjust the length of the wax rim in relation to the upper lip. 3. Incisal edge positions. Contour the wax rim to indicate the incisal edge positions of the maxillary anterior teeth. 4. Contour the width of the anterior portion of the dental arch (canine to canine) based on the alameter reading. 5. An acceptable occlusal plane. 6. Facial esthetics - make adjustments for a pleasing facial appearance. 7. Mark the dental midline. 8. Mark the high lip line (the smile line). 20 A sequence of steps for chairside refinement of the maxillary esthetic wax rim Contour the esthetic wax rim to guide the arrangement of the denture teeth.
the lips at rest and apart. Adjust the length of the wax rim in relation to the upper lip. Incisal edge positions. Contour the wax rim to indicate the incisal edge positions of the maxillary anterior teeth. A sequence of steps for chairside refinement of the maxillary esthetic wax rim UCLA, IvoclarVivadentInc, ACP unsplash.com
the wax rim for: 1. Lip support and contours. 2. Tooth display with the lips at rest and apart. Adjust the length of the wax rim in relation to the upper lip. 3. Incisal edge positions. Contour the wax rim to indicate the incisal edge positions of the maxillary anterior teeth. 4. Contour the width of the anterior portion of the dental arch (canine to canine) based on the alameter reading. 5. An acceptable occlusal plane. 6. Facial esthetics - make adjustments for a pleasing facial appearance. 7. Mark the dental midline. 8. Mark the high lip line (the smile line). 22 A sequence of steps for chairside refinement of the maxillary esthetic wax rim Contour the esthetic wax rim to guide the arrangement of the denture teeth.
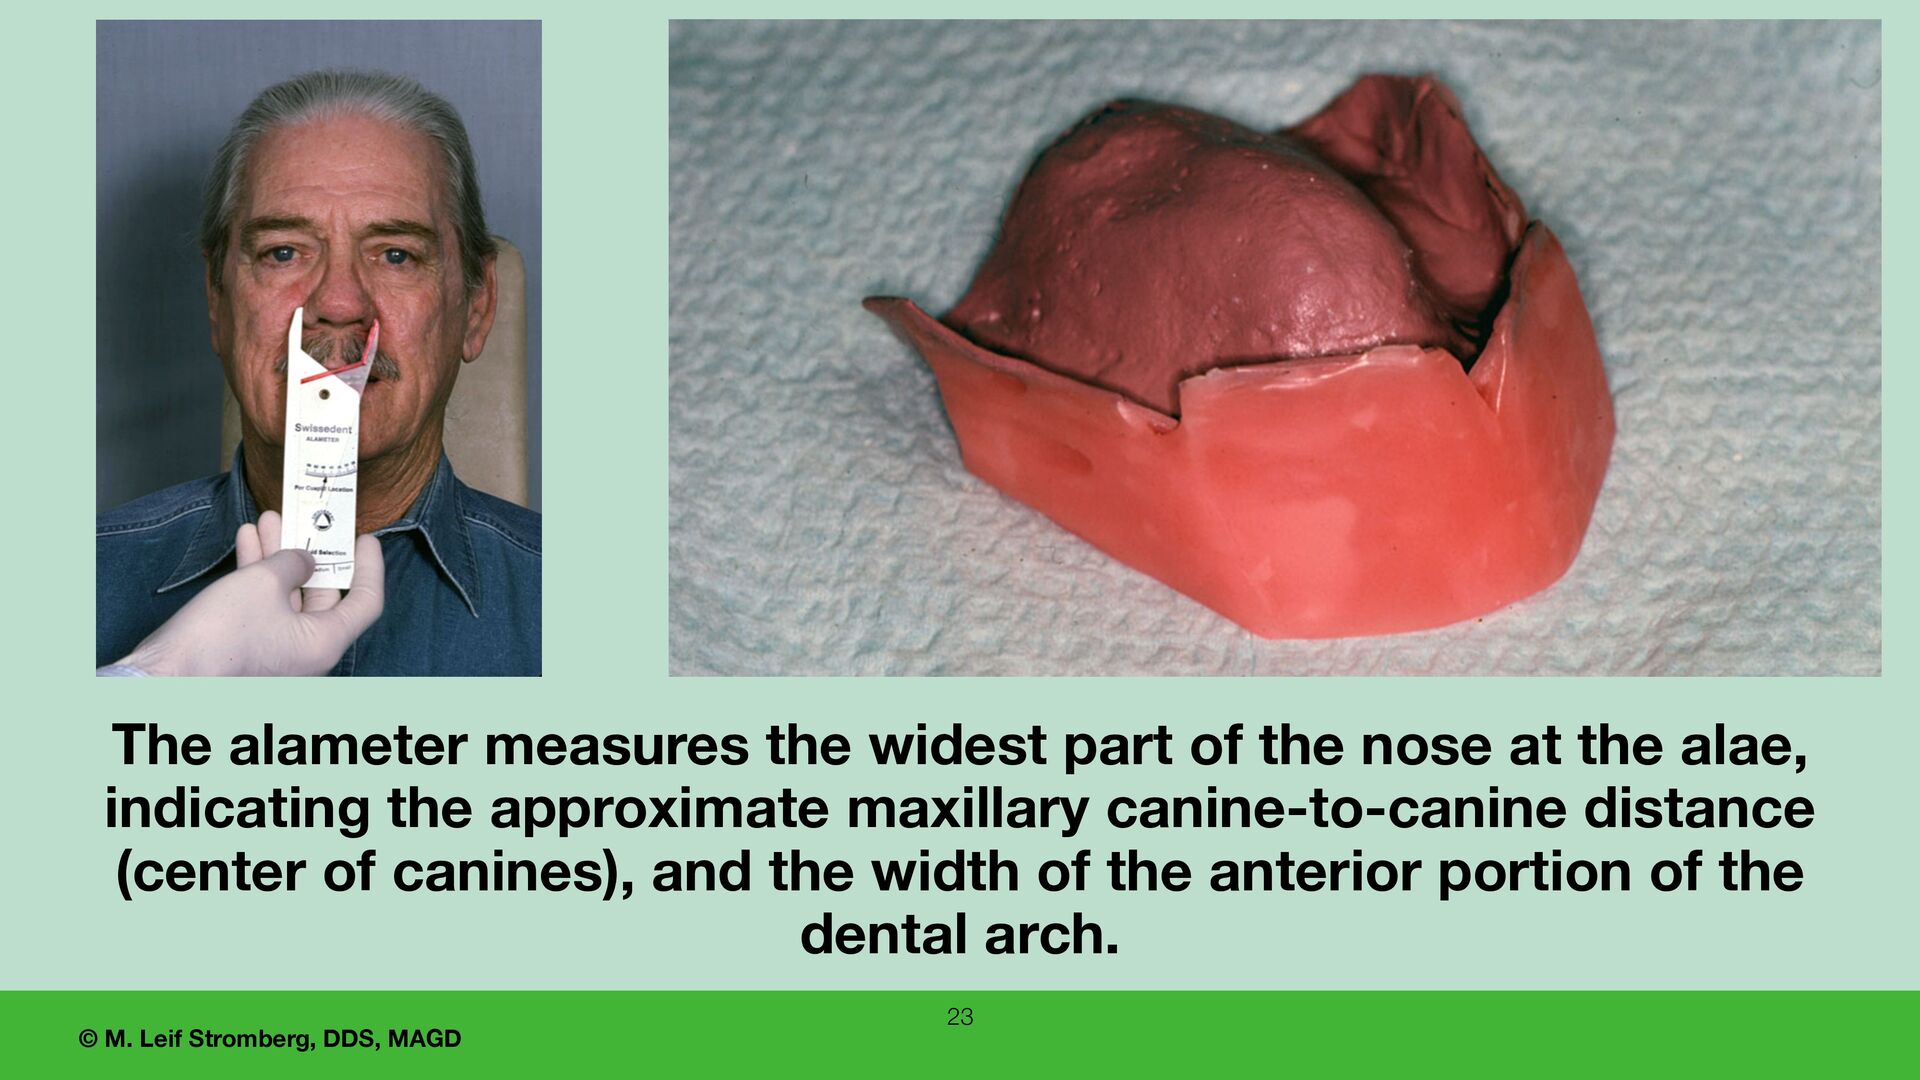
widest part of the nose at the alae, indicating the approximate maxillary canine-to-canine distance (center of canines), and the width of the anterior portion of the dental arch. 23
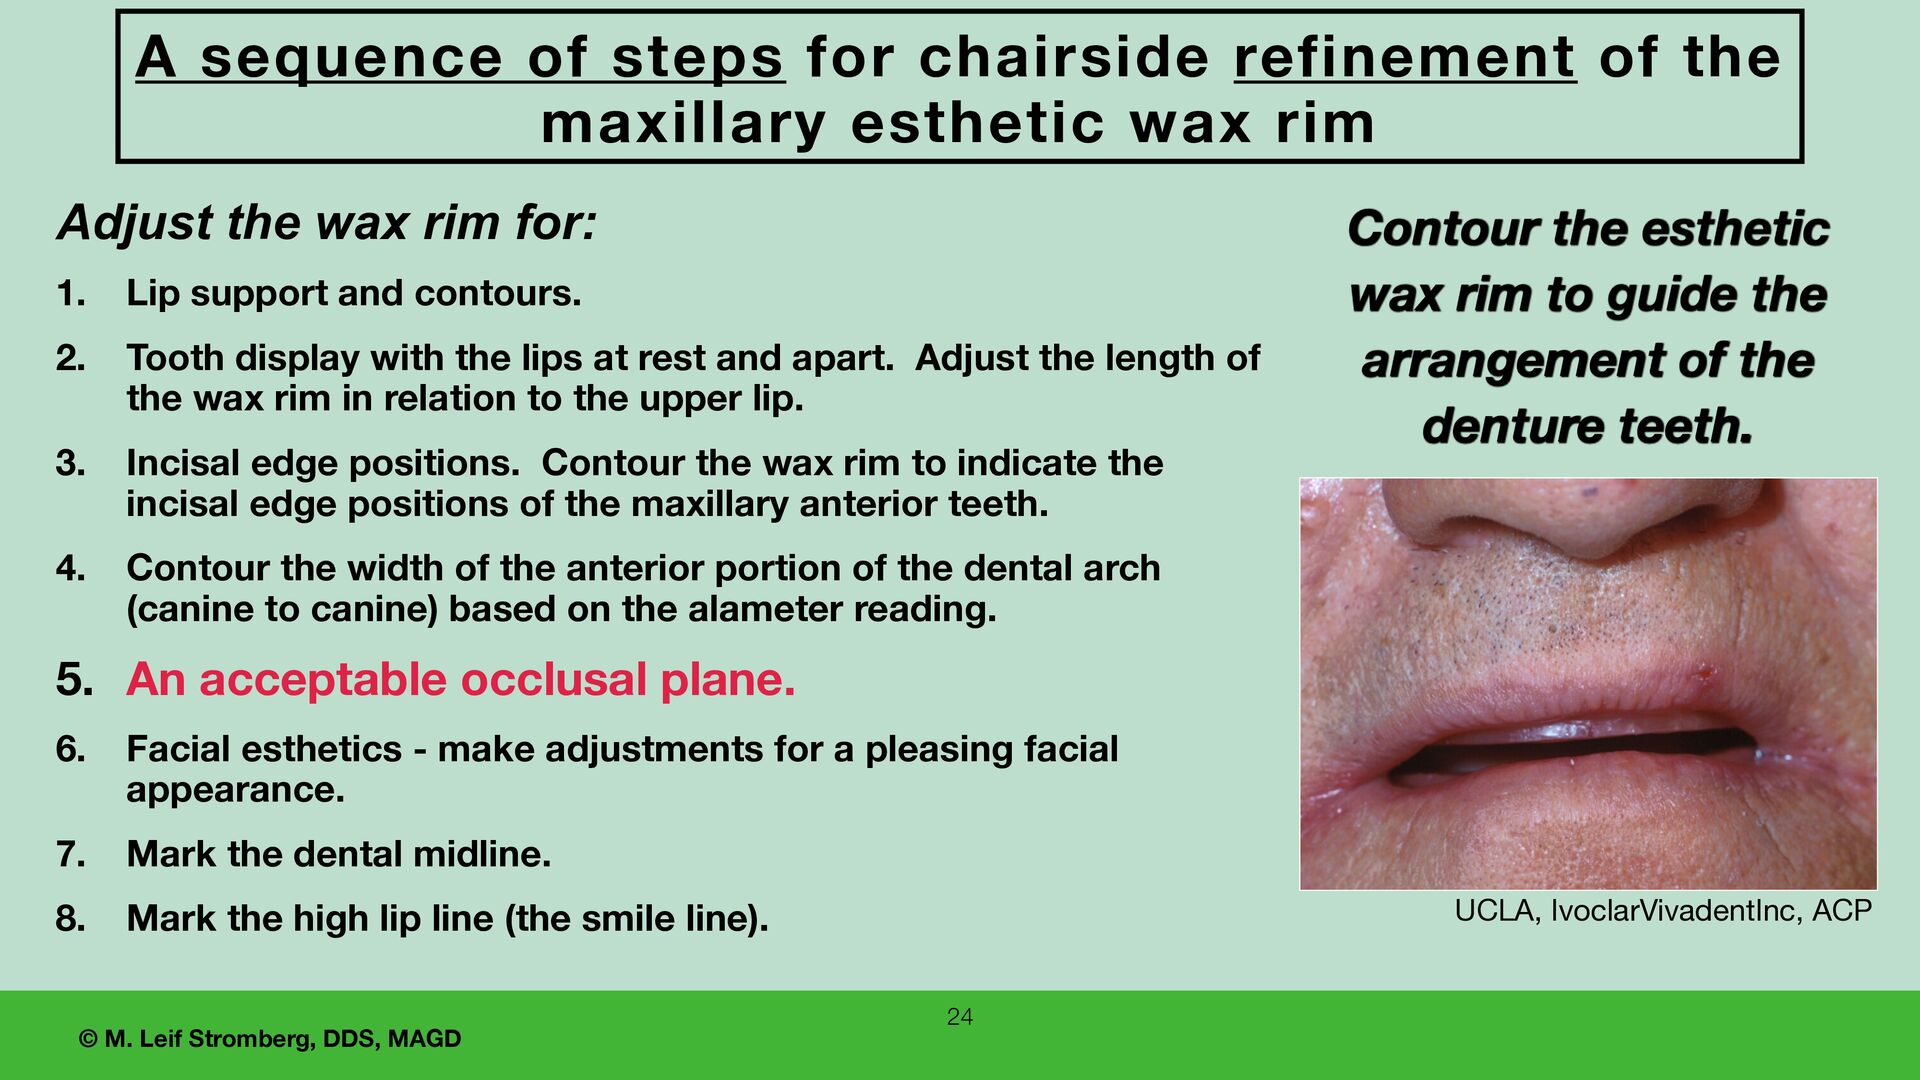
the wax rim for: 1. Lip support and contours. 2. Tooth display with the lips at rest and apart. Adjust the length of the wax rim in relation to the upper lip. 3. Incisal edge positions. Contour the wax rim to indicate the incisal edge positions of the maxillary anterior teeth. 4. Contour the width of the anterior portion of the dental arch (canine to canine) based on the alameter reading. 5. An acceptable occlusal plane. 6. Facial esthetics - make adjustments for a pleasing facial appearance. 7. Mark the dental midline. 8. Mark the high lip line (the smile line). 24 A sequence of steps for chairside refinement of the maxillary esthetic wax rim Contour the esthetic wax rim to guide the arrangement of the denture teeth.
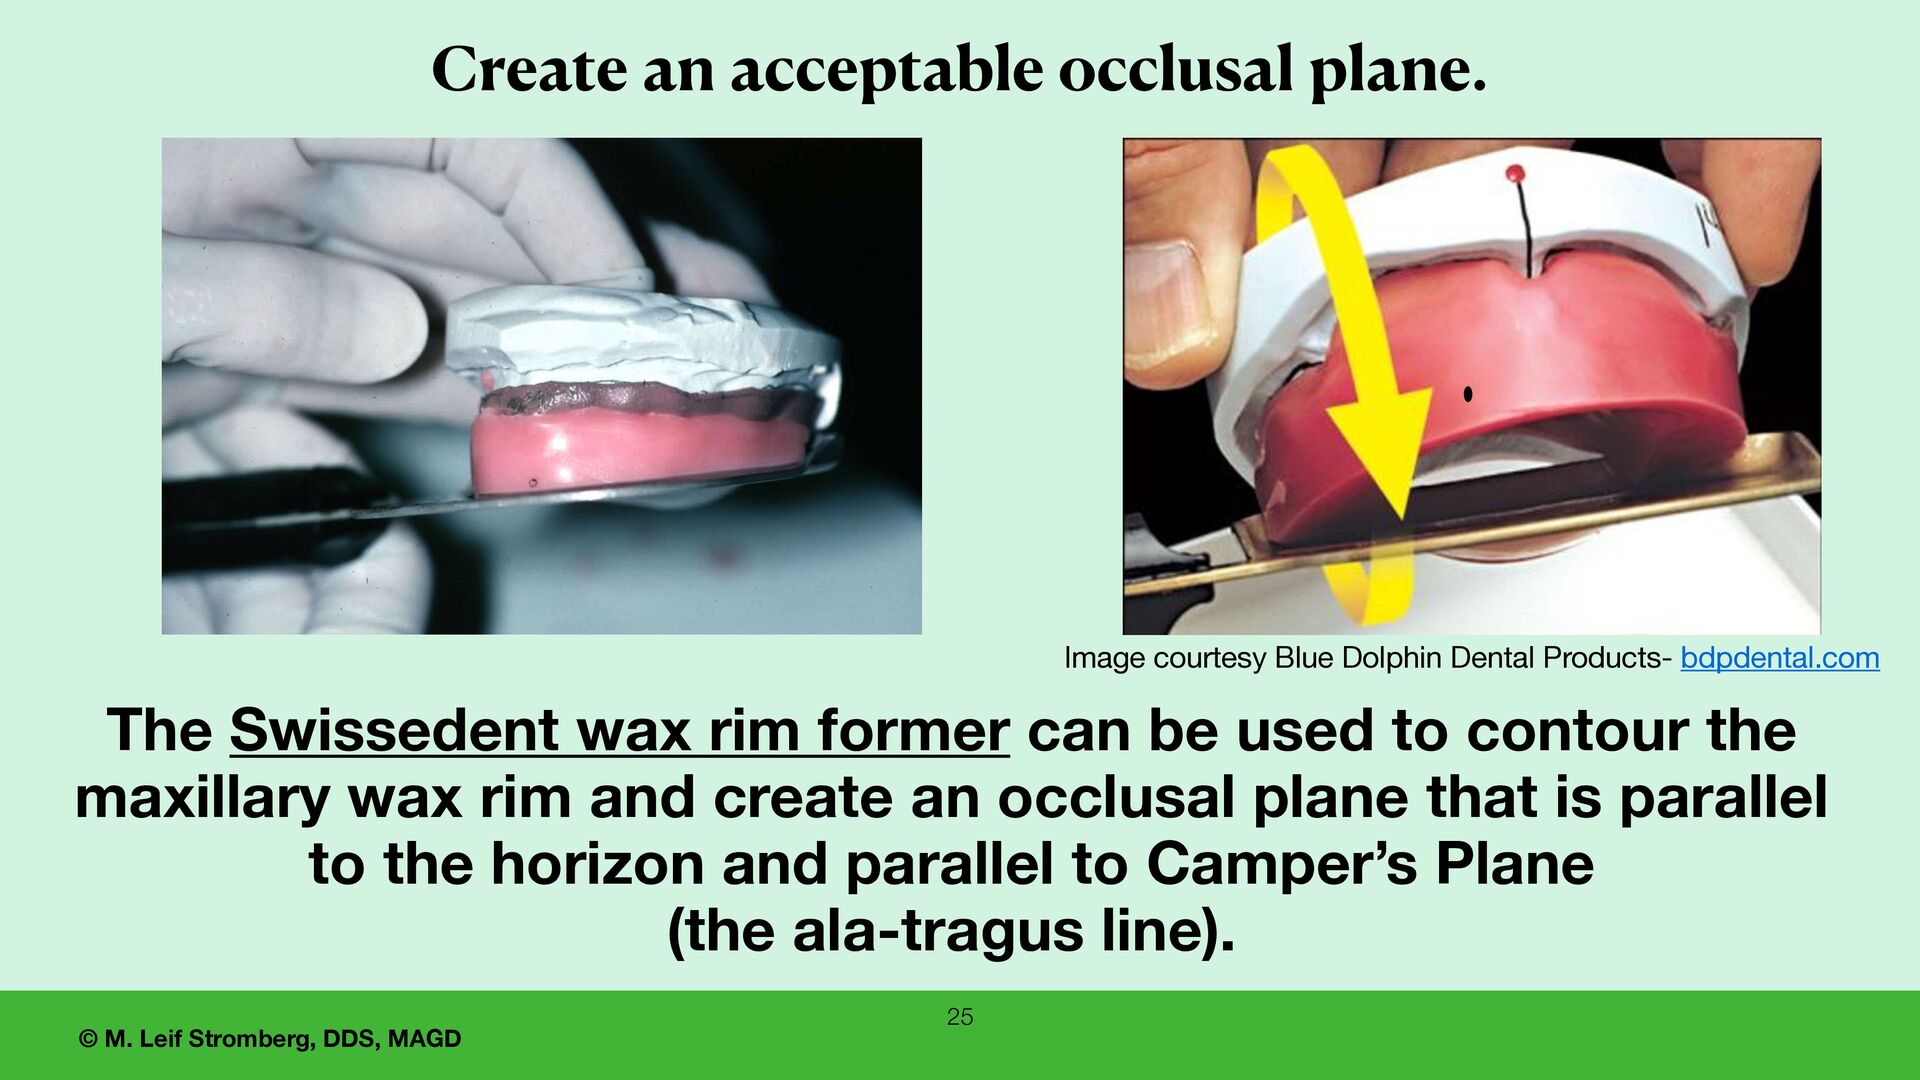
rim former can be used to contour the maxillary wax rim and create an occlusal plane that is parallel to the horizon and parallel to Camper’s Plane (the ala-tragus line). Image courtesy Blue Dolphin Dental Products- bdpdental.com Create an acceptable occlusal plane.
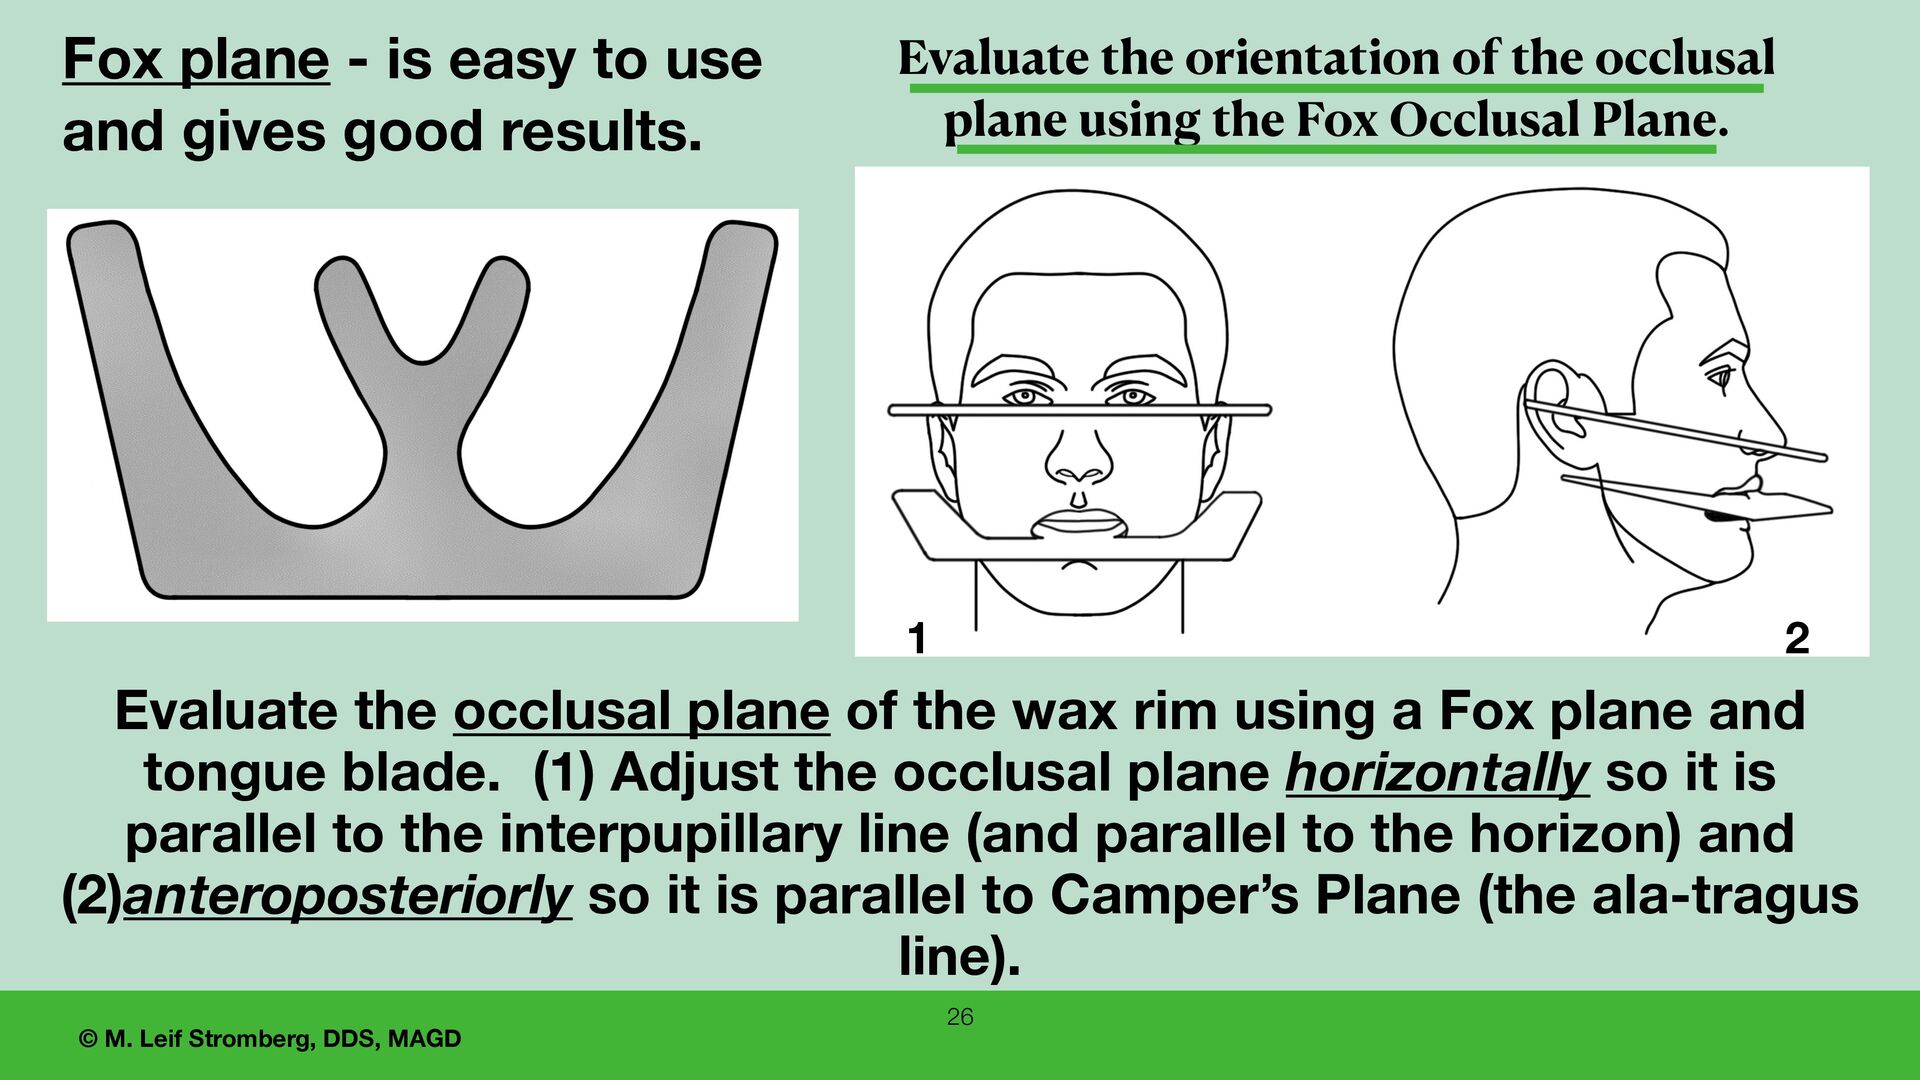
of the wax rim using a Fox plane and tongue blade. (1) Adjust the occlusal plane horizontally so it is parallel to the interpupillary line (and parallel to the horizon) and (2)anteroposteriorly so it is parallel to Camper’s Plane (the ala-tragus line). 1 2 Fox plane - is easy to use and gives good results. 26 Evaluate the orientation of the occlusal plane using the Fox Occlusal Plane.
the wax rim for: 1. Lip support and contours. 2. Tooth display with the lips at rest and apart. Adjust the length of the wax rim in relation to the upper lip. 3. Incisal edge positions. Contour the wax rim to indicate the incisal edge positions of the maxillary anterior teeth. 4. Contour the width of the anterior portion of the dental arch (canine to canine) based on the alameter reading. 5. An acceptable occlusal plane. 6. Facial esthetics - make adjustments for a pleasing facial appearance. 7. Mark the dental midline. 8. Mark the high lip line (the smile line). 27 A sequence of steps for chairside refinement of the maxillary esthetic wax rim Contour the esthetic wax rim to guide the arrangement of the denture teeth.
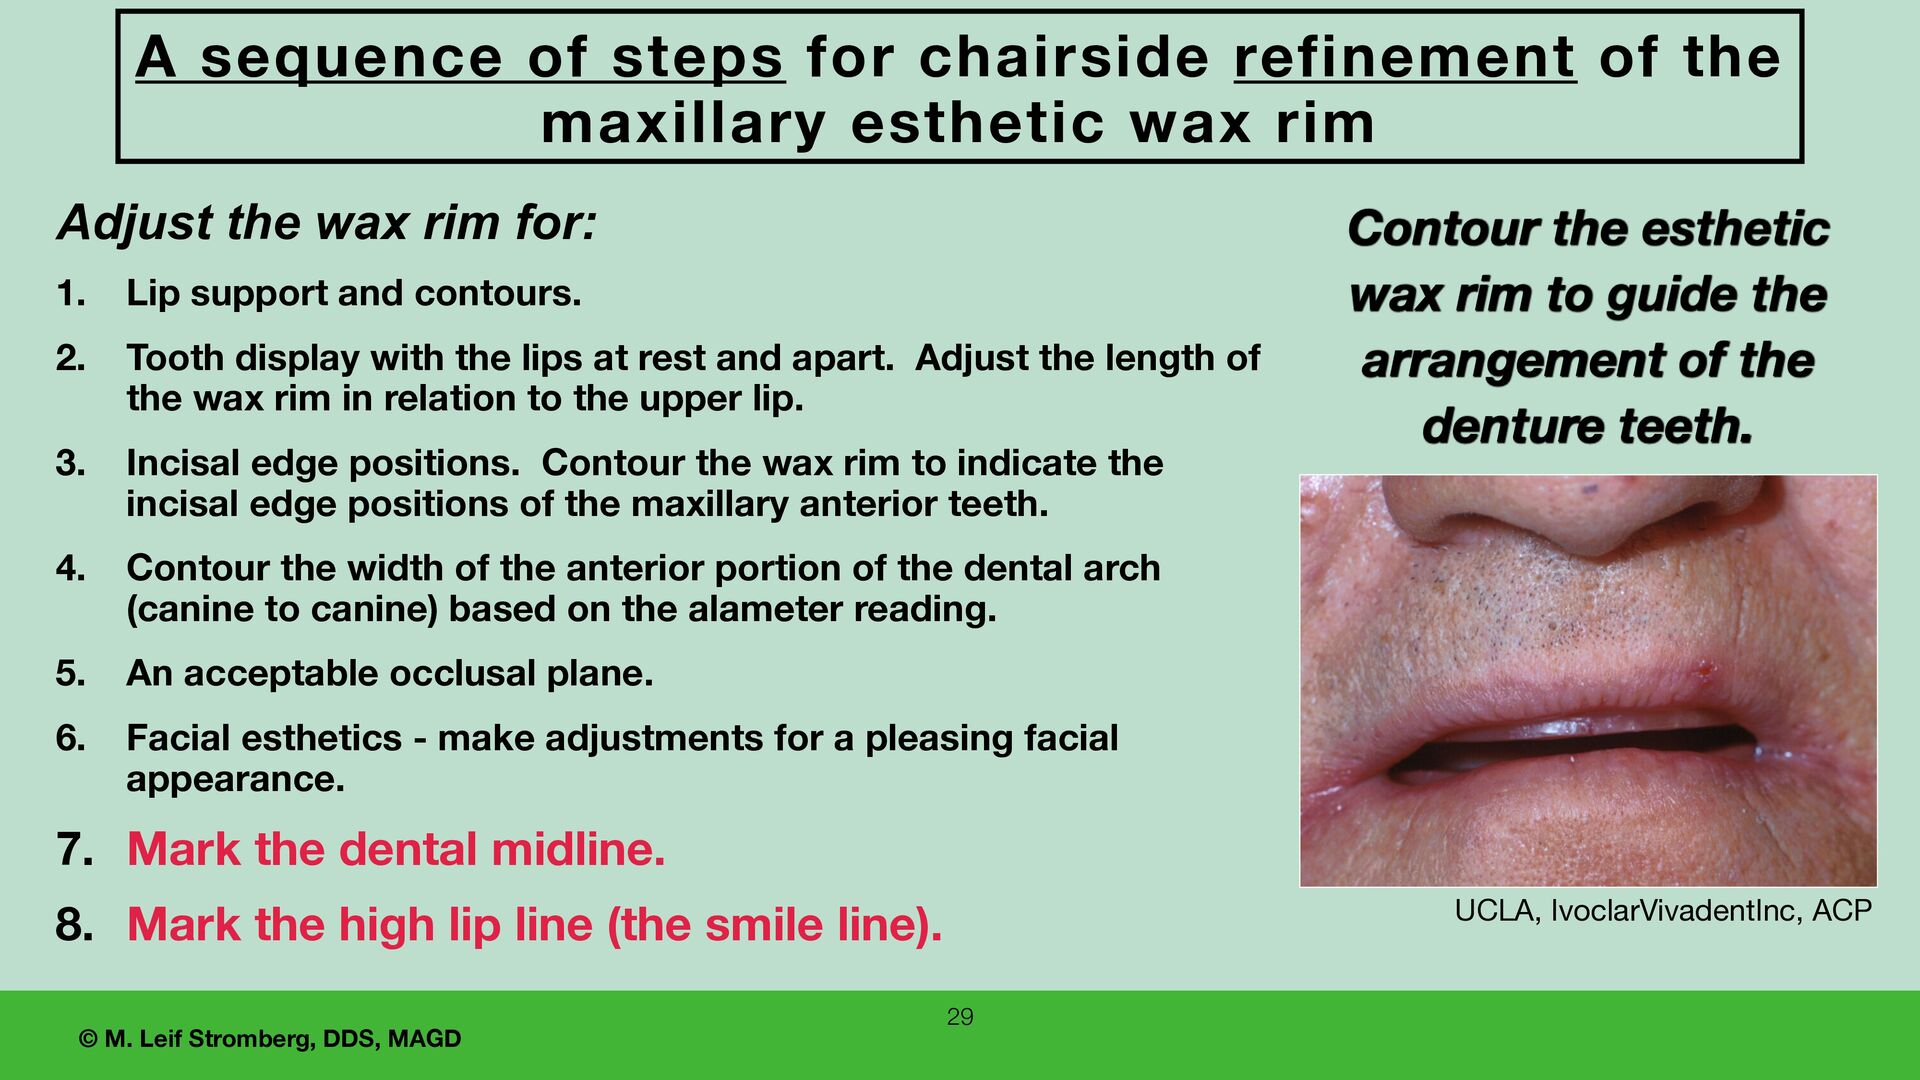
the wax rim for: 1. Lip support and contours. 2. Tooth display with the lips at rest and apart. Adjust the length of the wax rim in relation to the upper lip. 3. Incisal edge positions. Contour the wax rim to indicate the incisal edge positions of the maxillary anterior teeth. 4. Contour the width of the anterior portion of the dental arch (canine to canine) based on the alameter reading. 5. An acceptable occlusal plane. 6. Facial esthetics - make adjustments for a pleasing facial appearance. 7. Mark the dental midline. 8. Mark the high lip line (the smile line). 29 A sequence of steps for chairside refinement of the maxillary esthetic wax rim Contour the esthetic wax rim to guide the arrangement of the denture teeth.
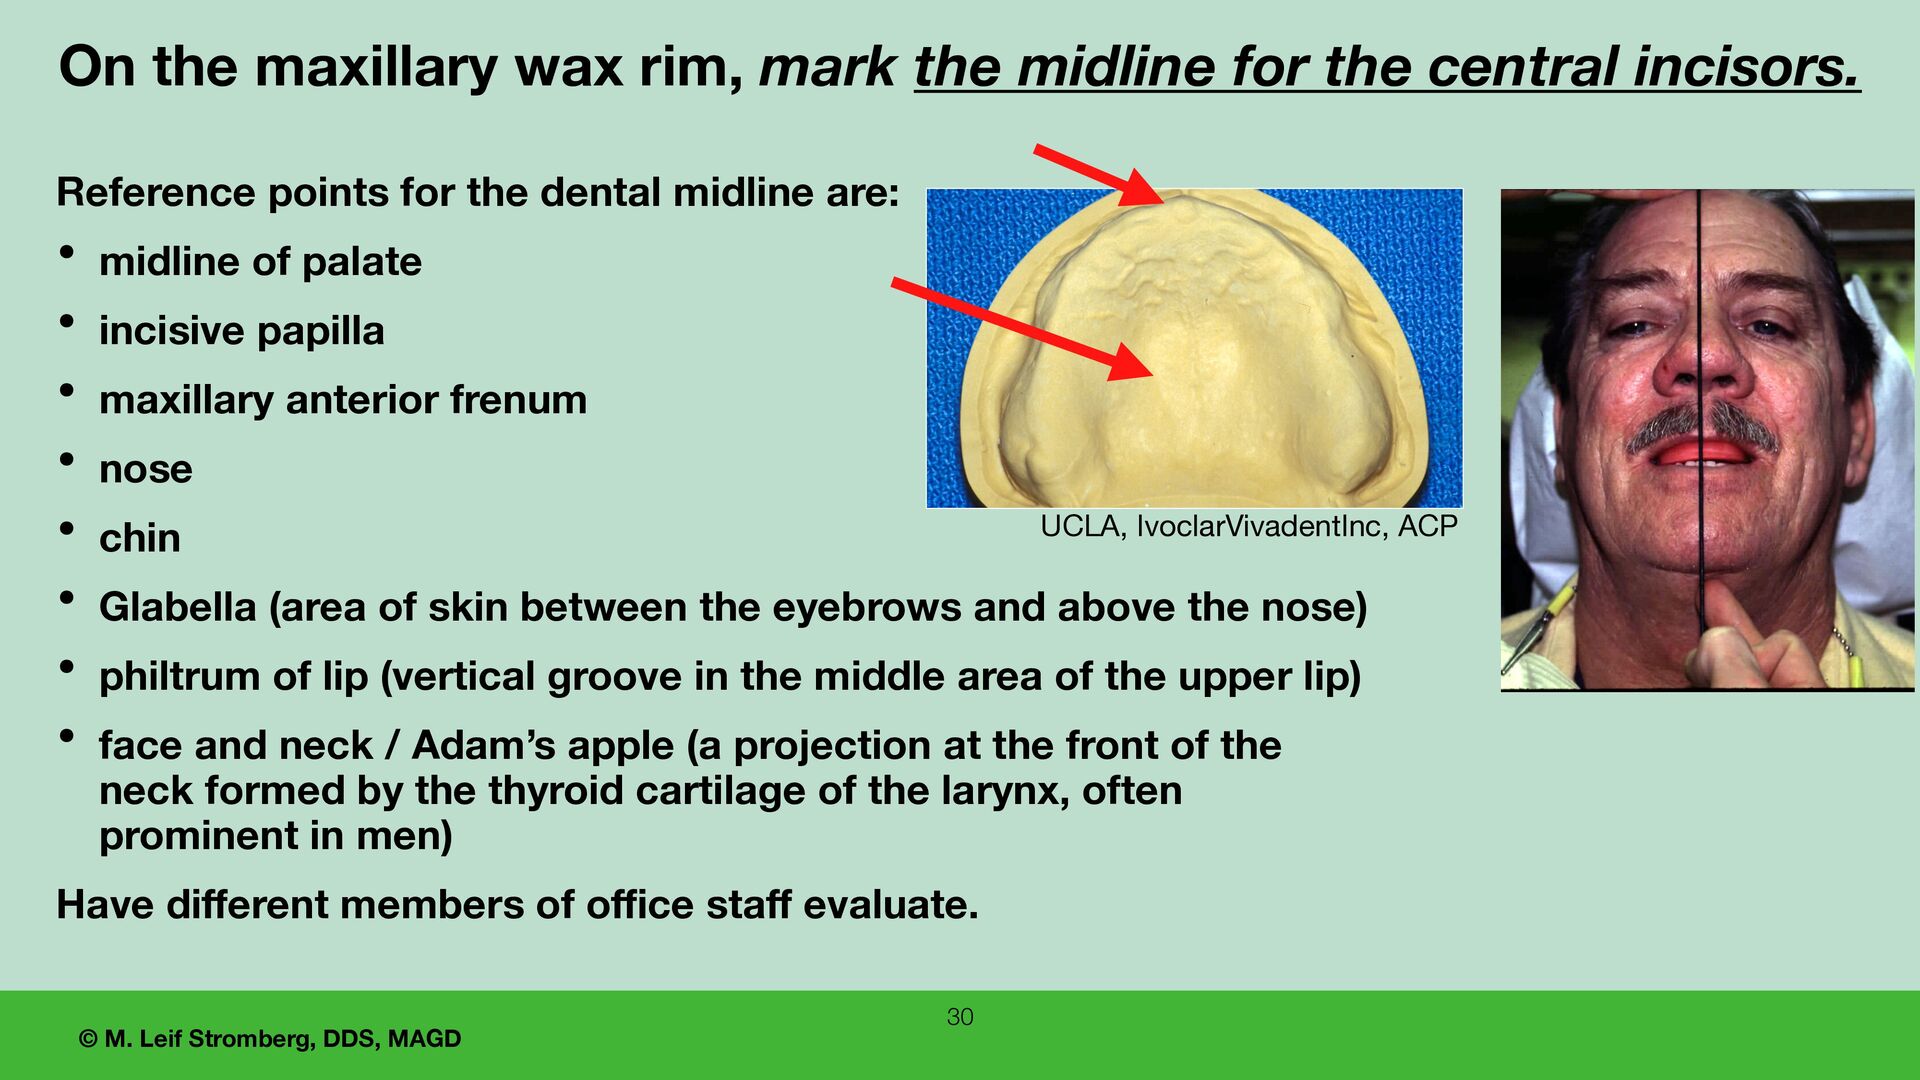
dental midline are: • midline of palate • incisive papilla • maxillary anterior frenum • nose • chin • Glabella (area of skin between the eyebrows and above the nose) • philtrum of lip (vertical groove in the middle area of the upper lip) • face and neck / Adam’s apple (a projection at the front of the neck formed by the thyroid cartilage of the larynx, often prominent in men) Have di ff erent members of o ff i ce sta ff evaluate. On the maxillary wax rim, mark the midline for the central incisors. 30 UCLA, IvoclarVivadentInc, ACP
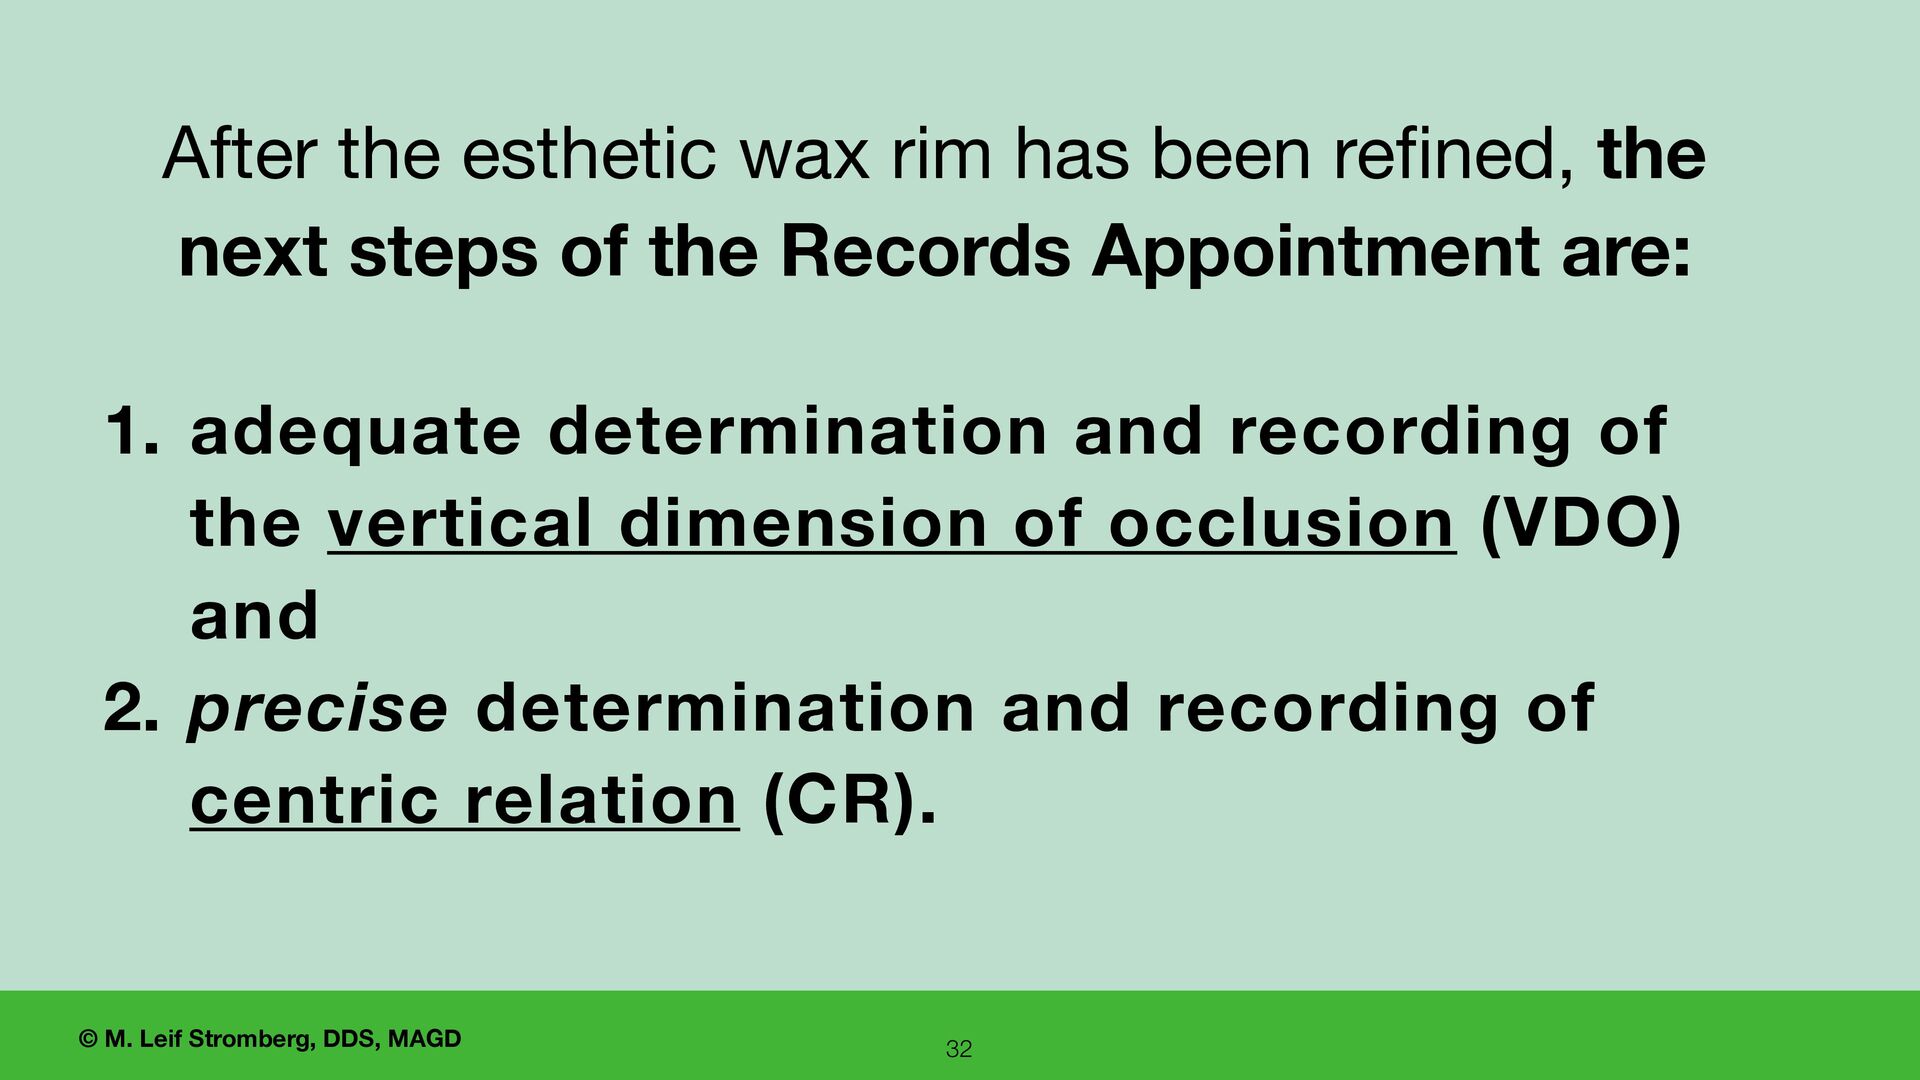
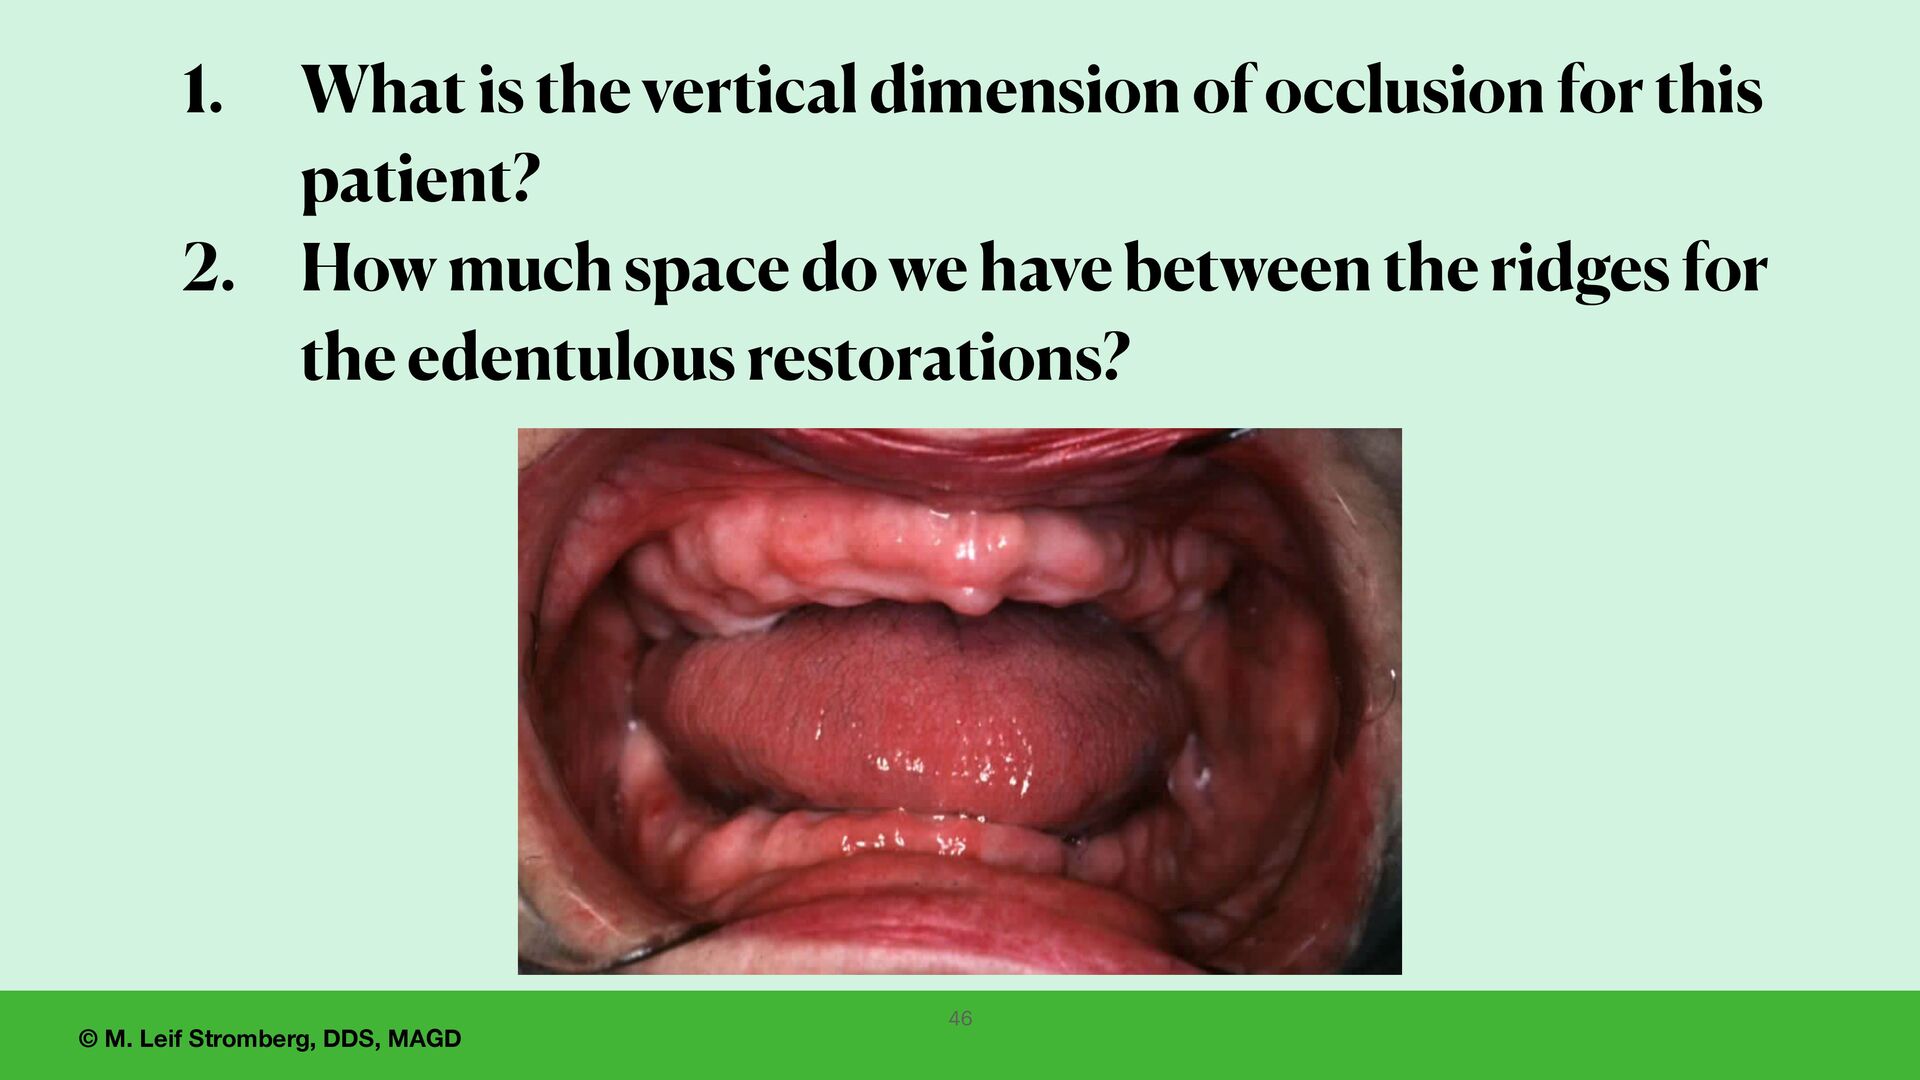
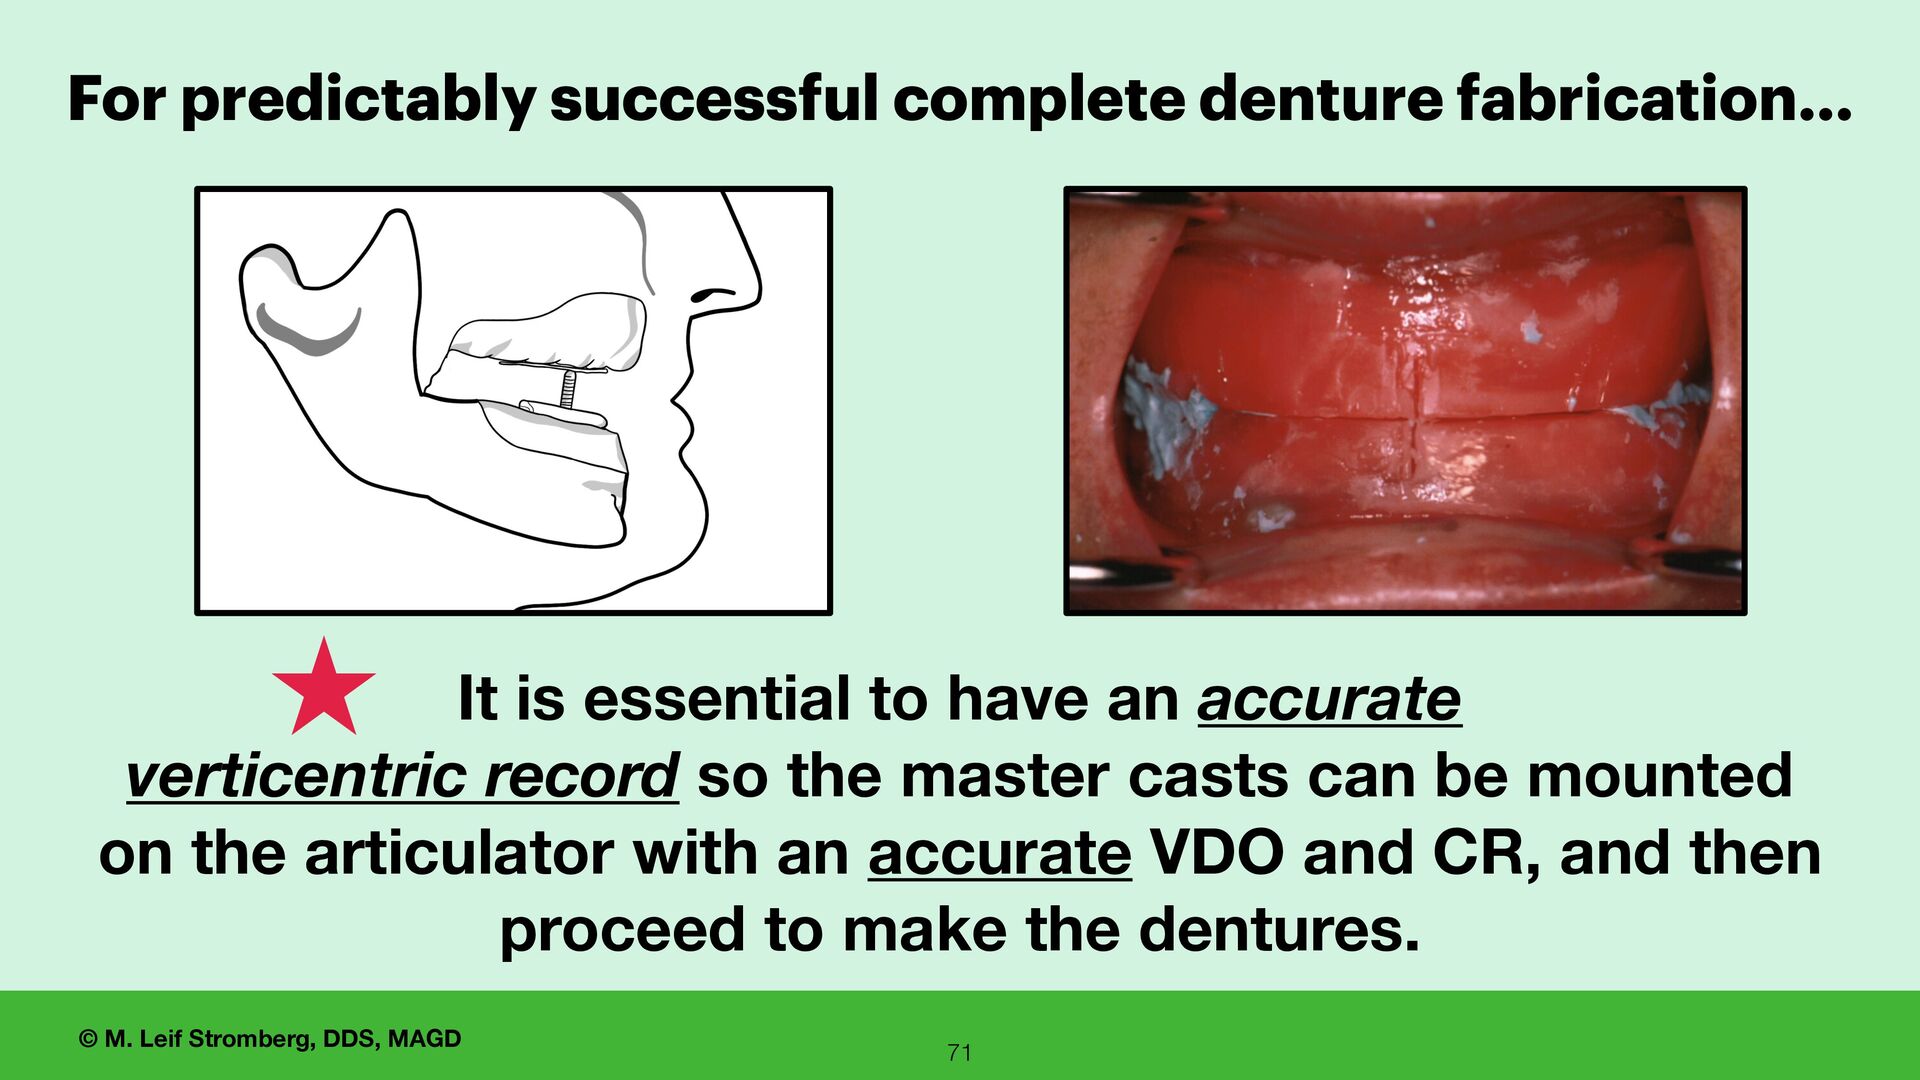
rim has been re fi ned, the next steps of the Records Appointment are: 1. adequate determination and recording of the vertical dimension of occlusion (VDO) and 2. precise determination and recording of centric relation (CR). 32
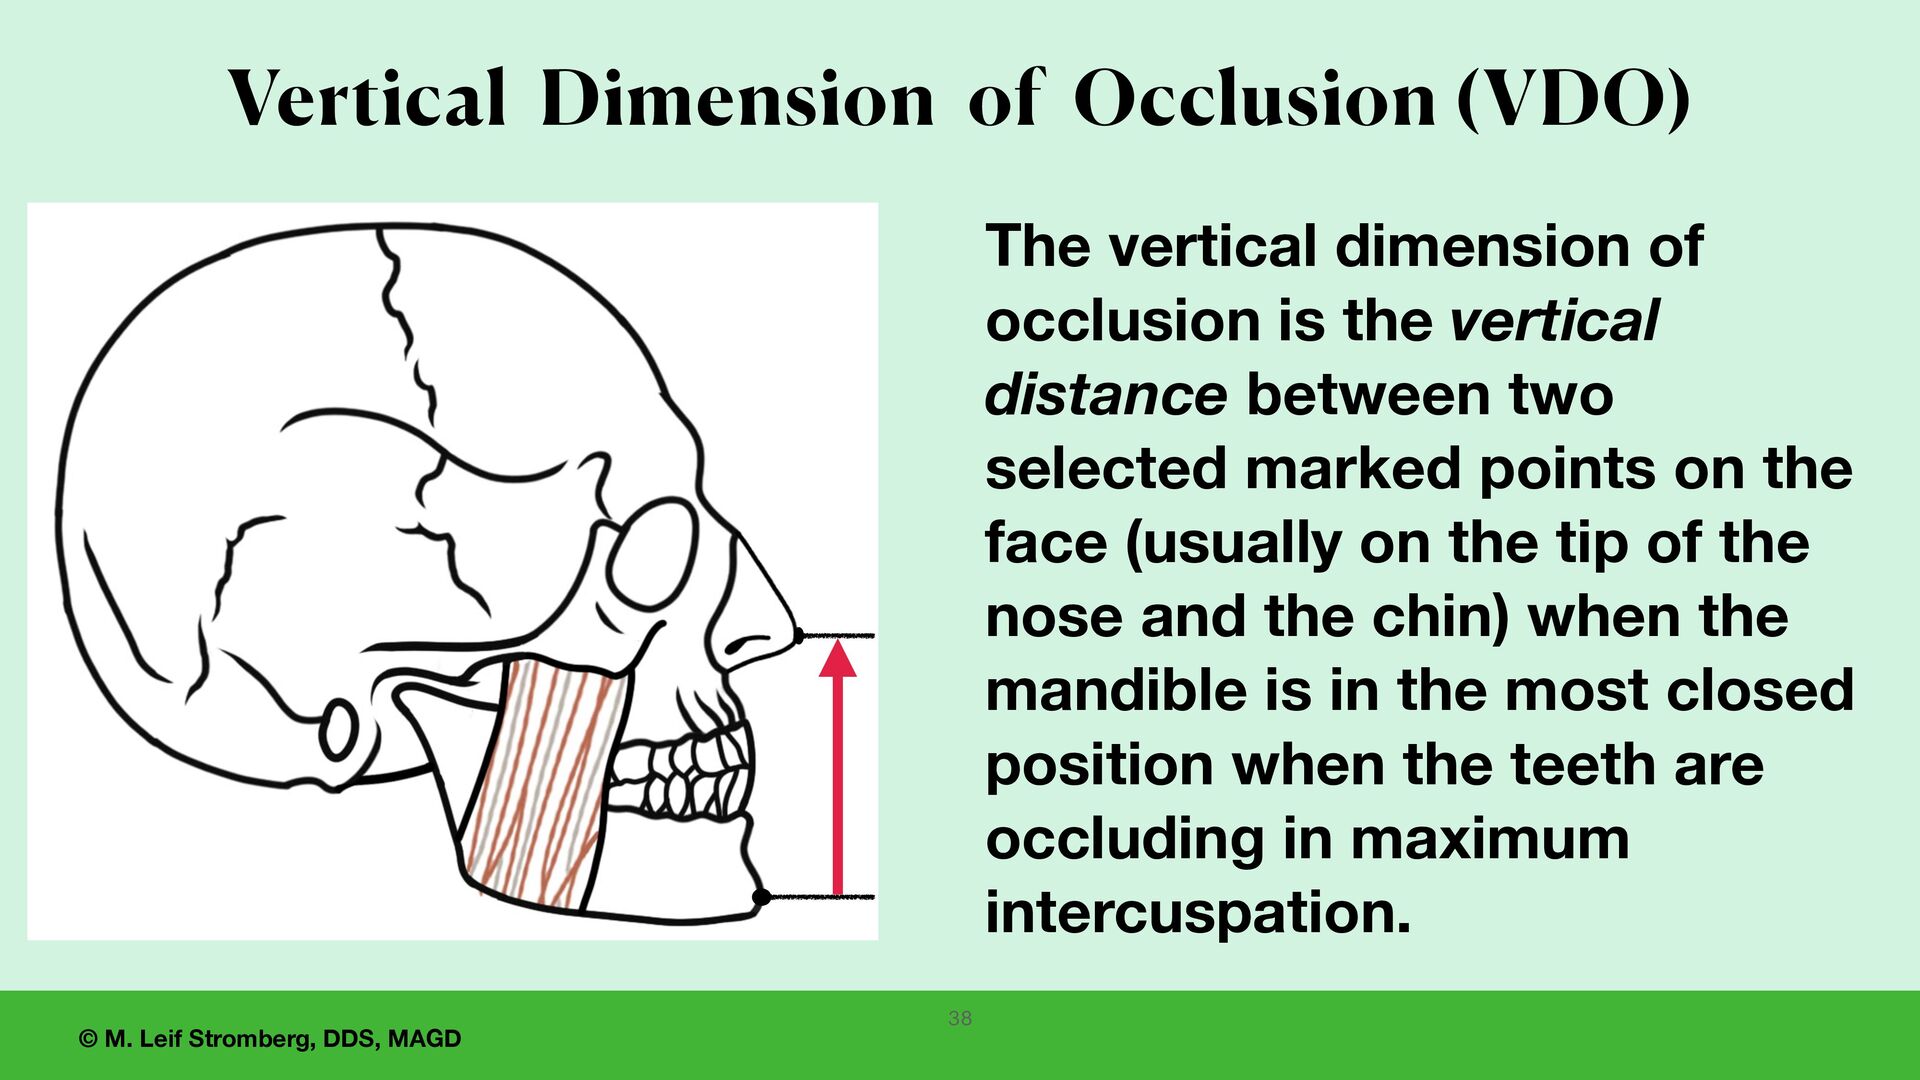
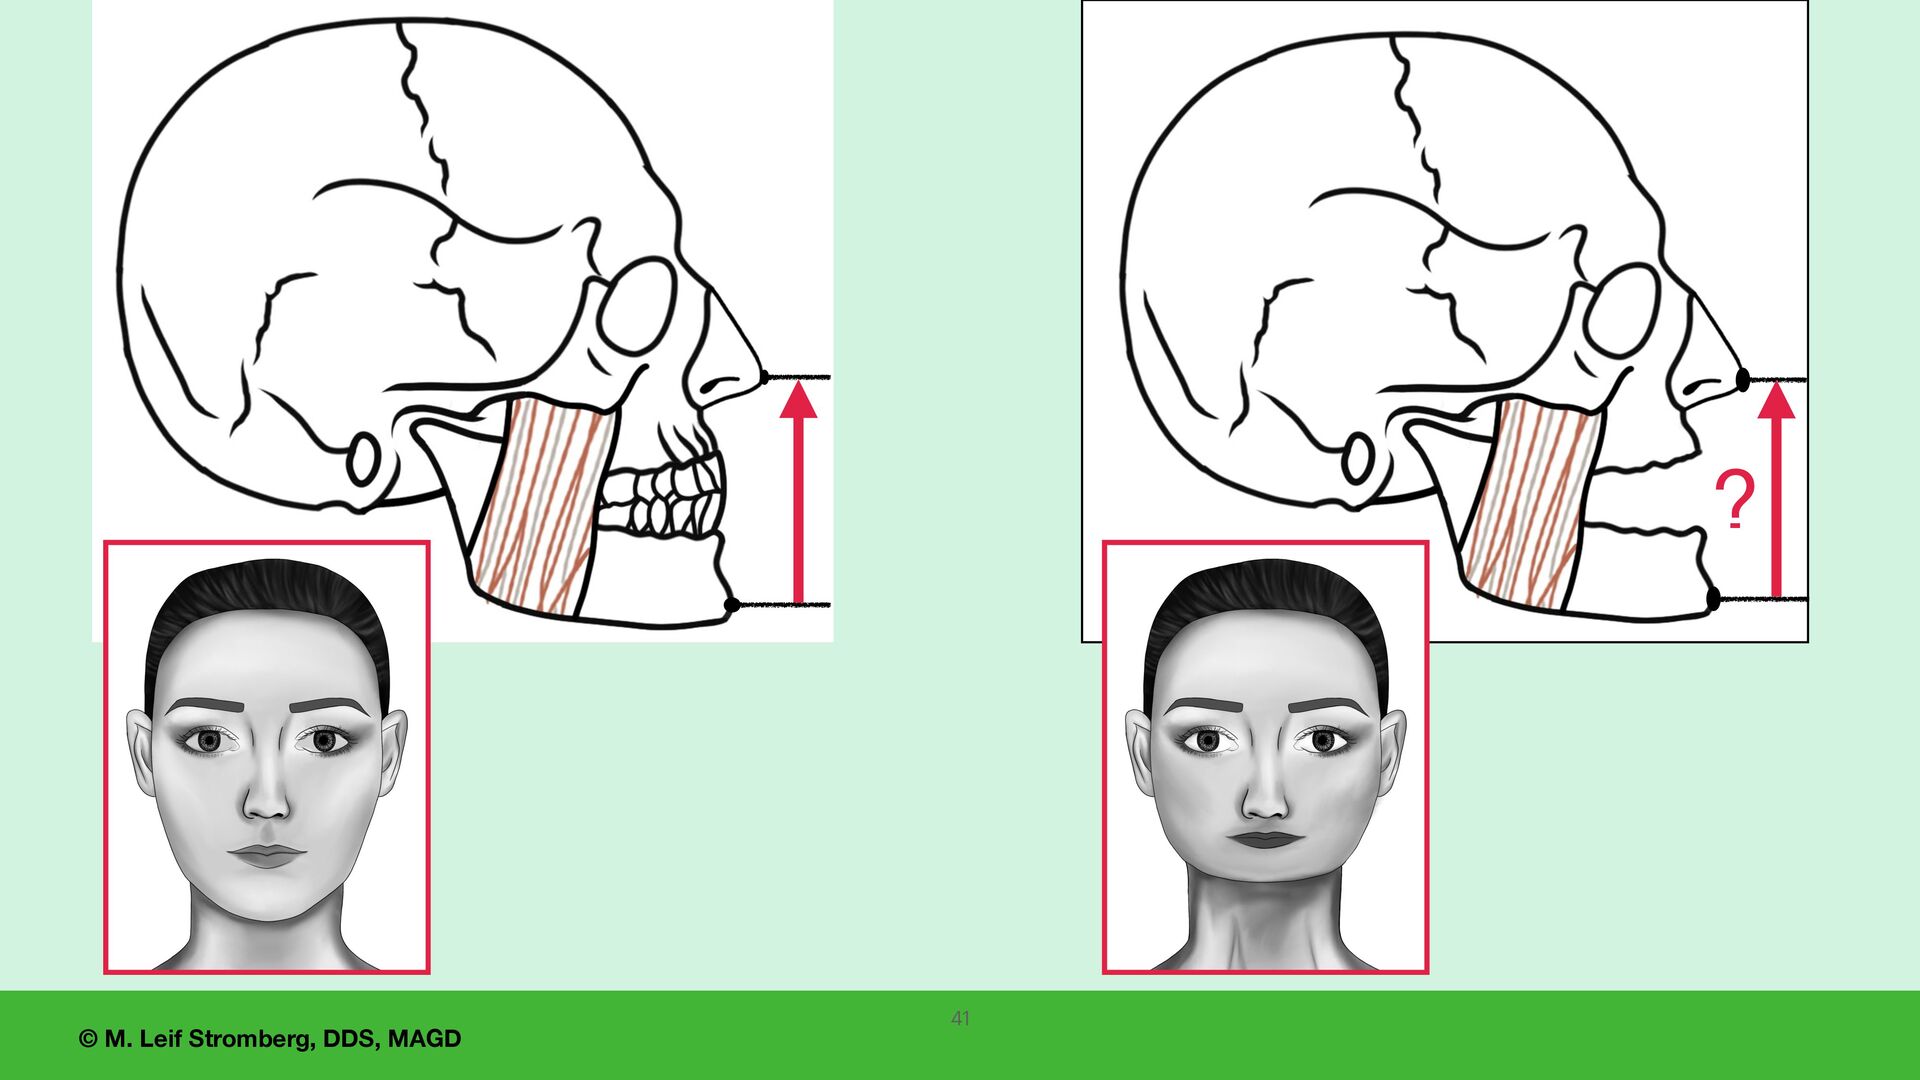
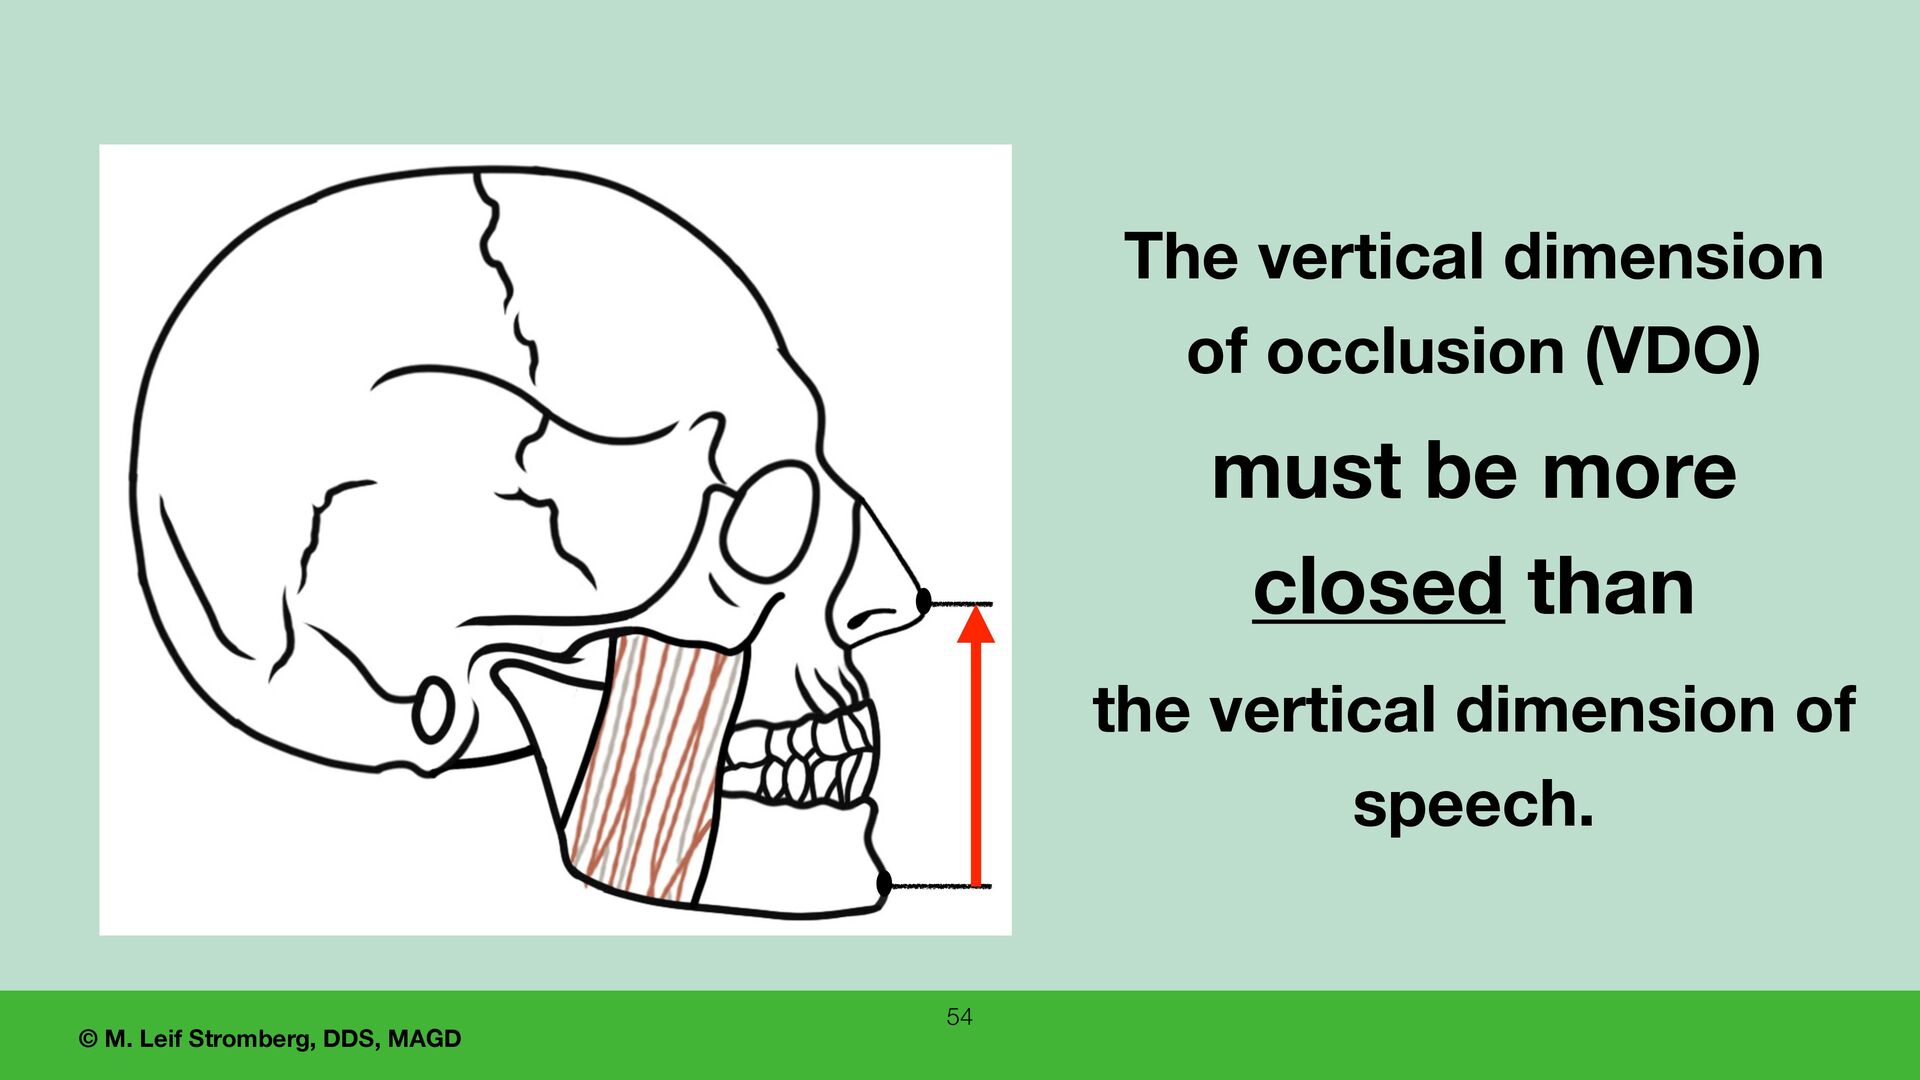
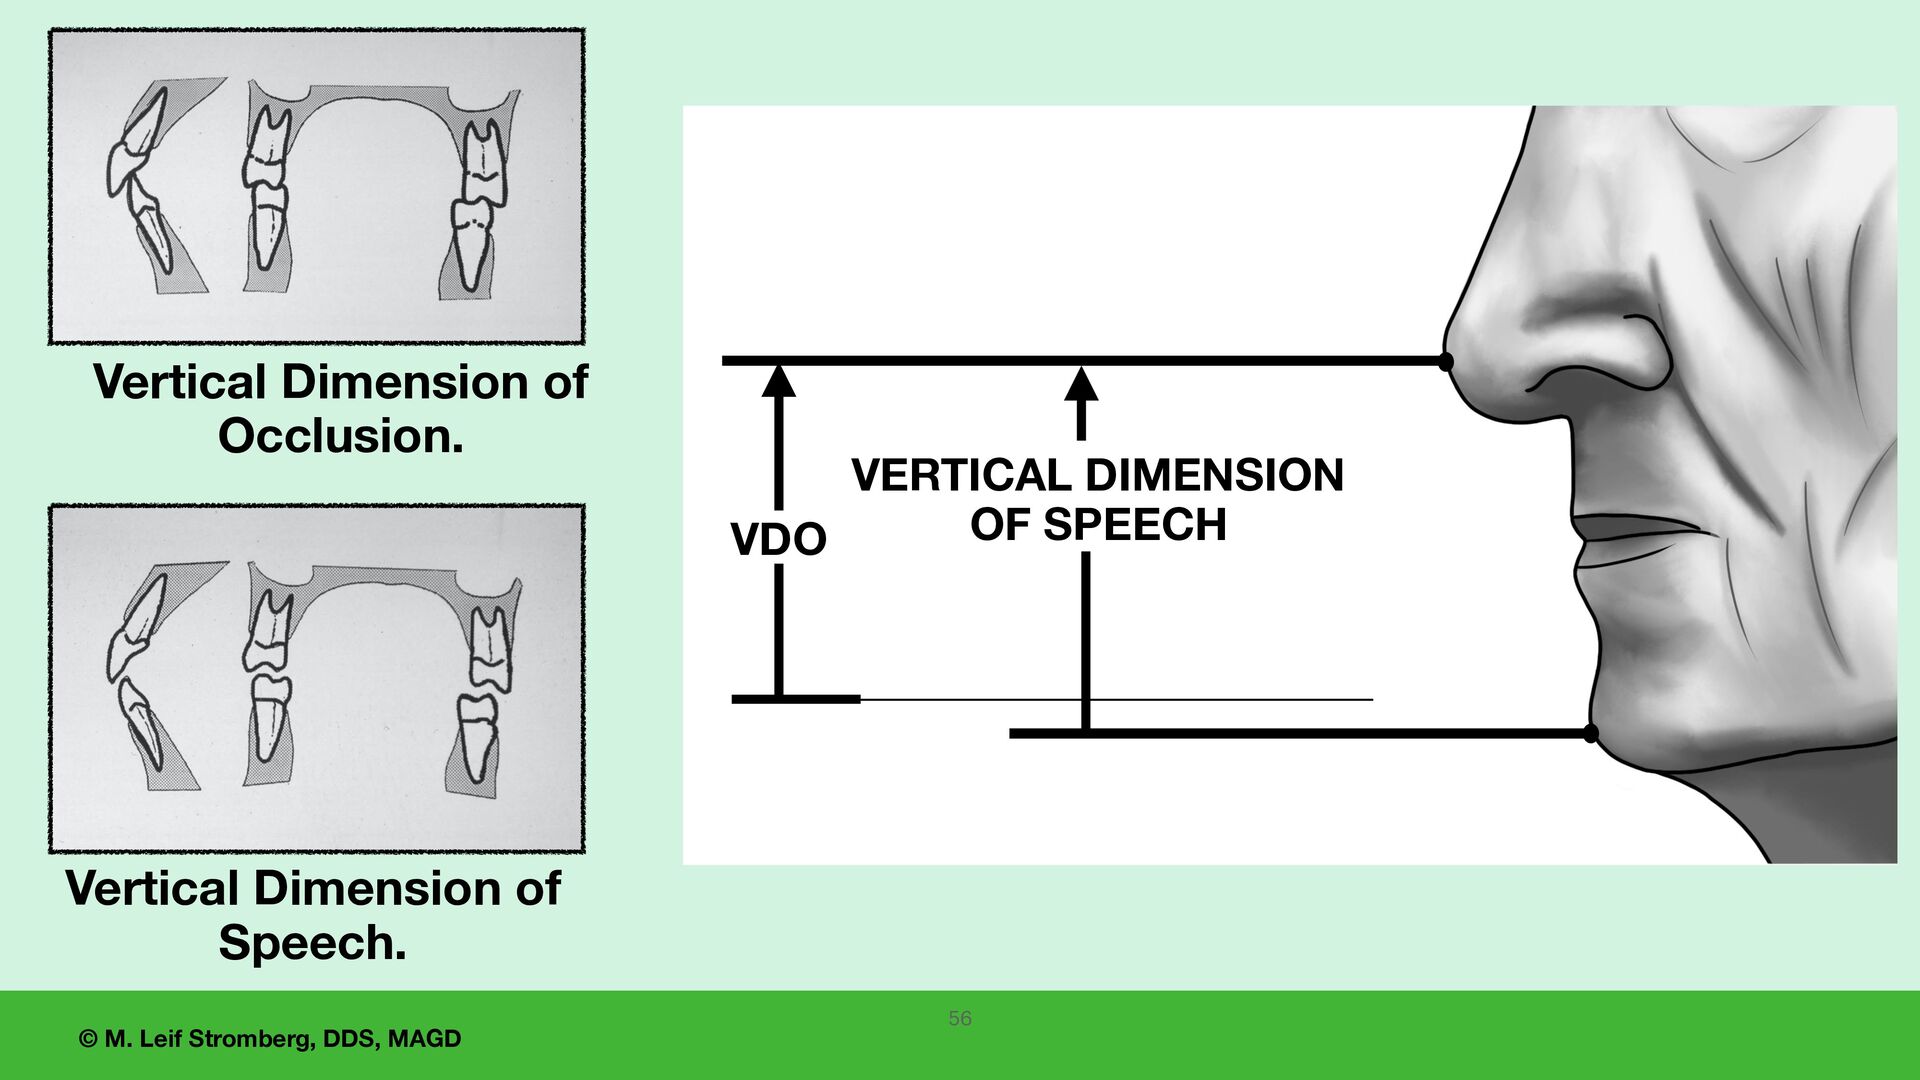
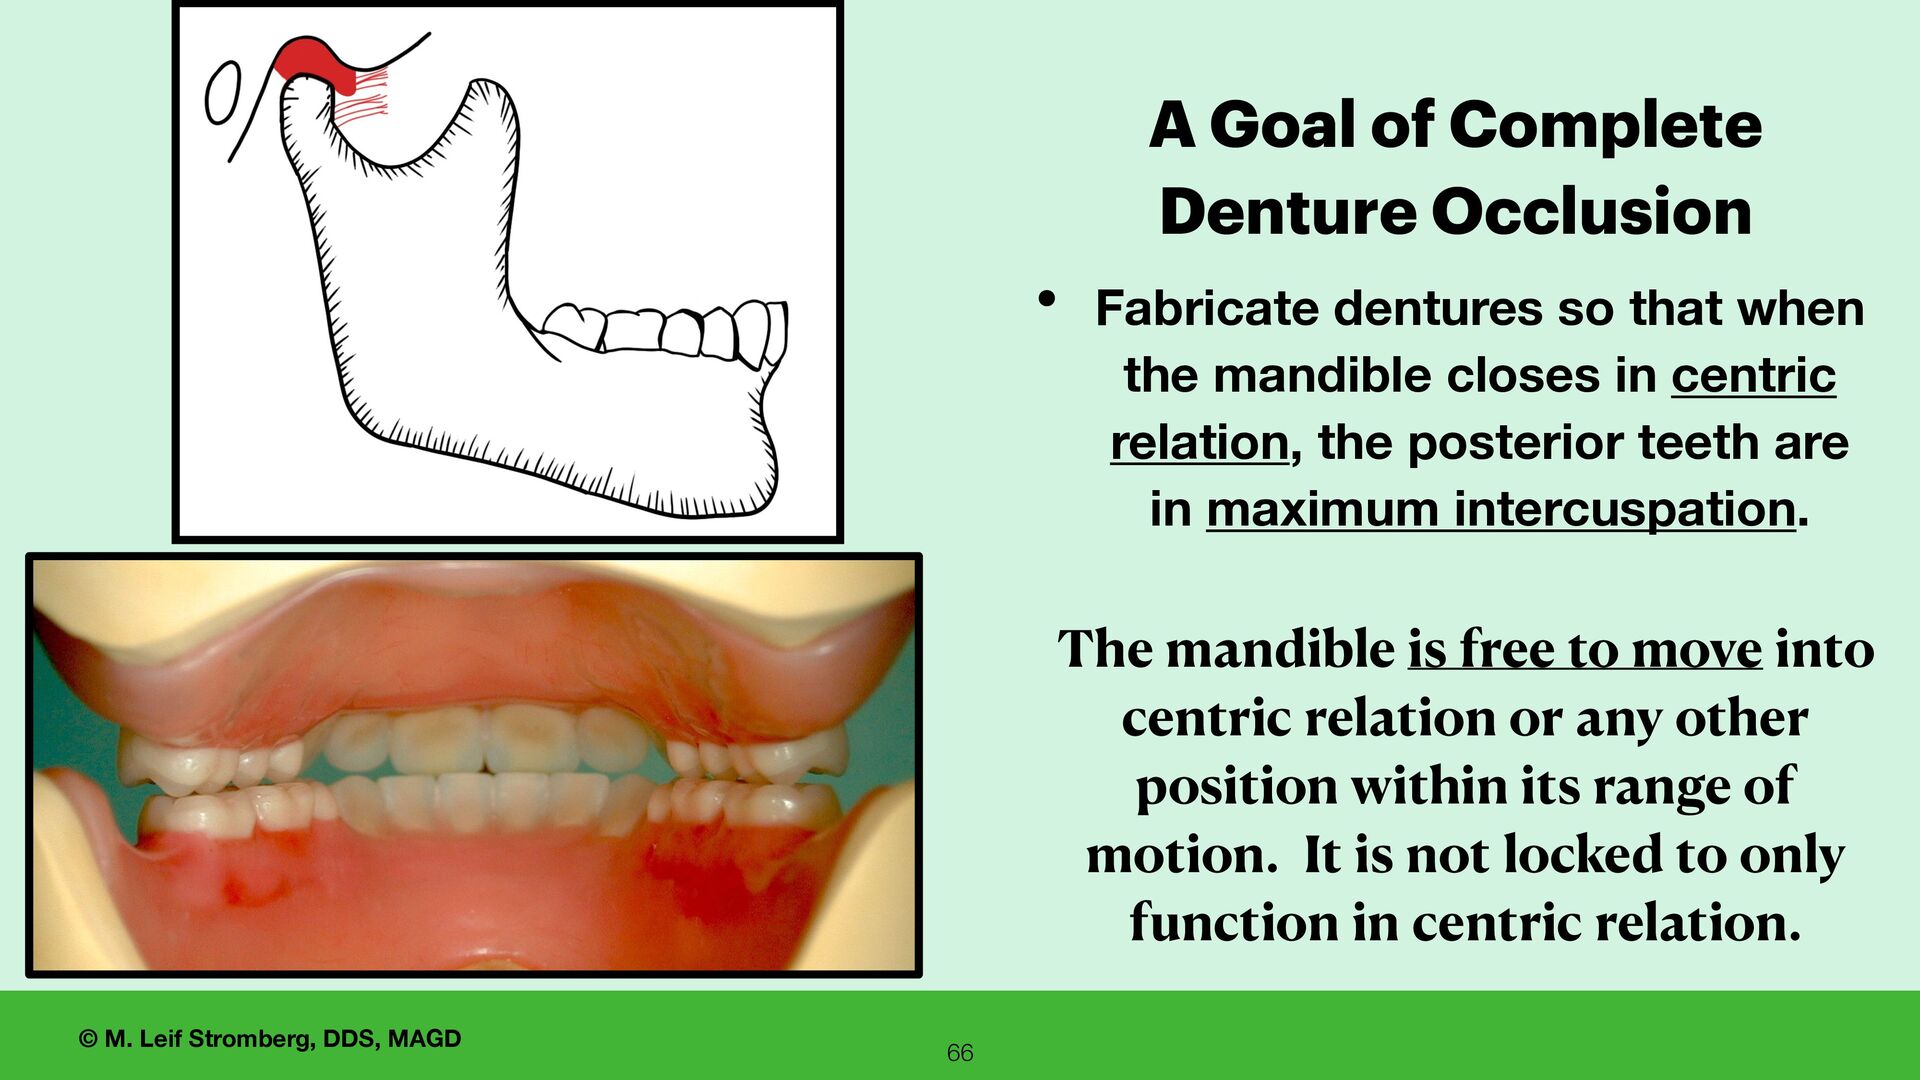
of occlusion is the vertical distance between two selected marked points on the face (usually on the tip of the nose and the chin) when the mandible is in the most closed position when the teeth are occluding in maximum intercuspation. Vertical Dimension of Occlusion (VDO)
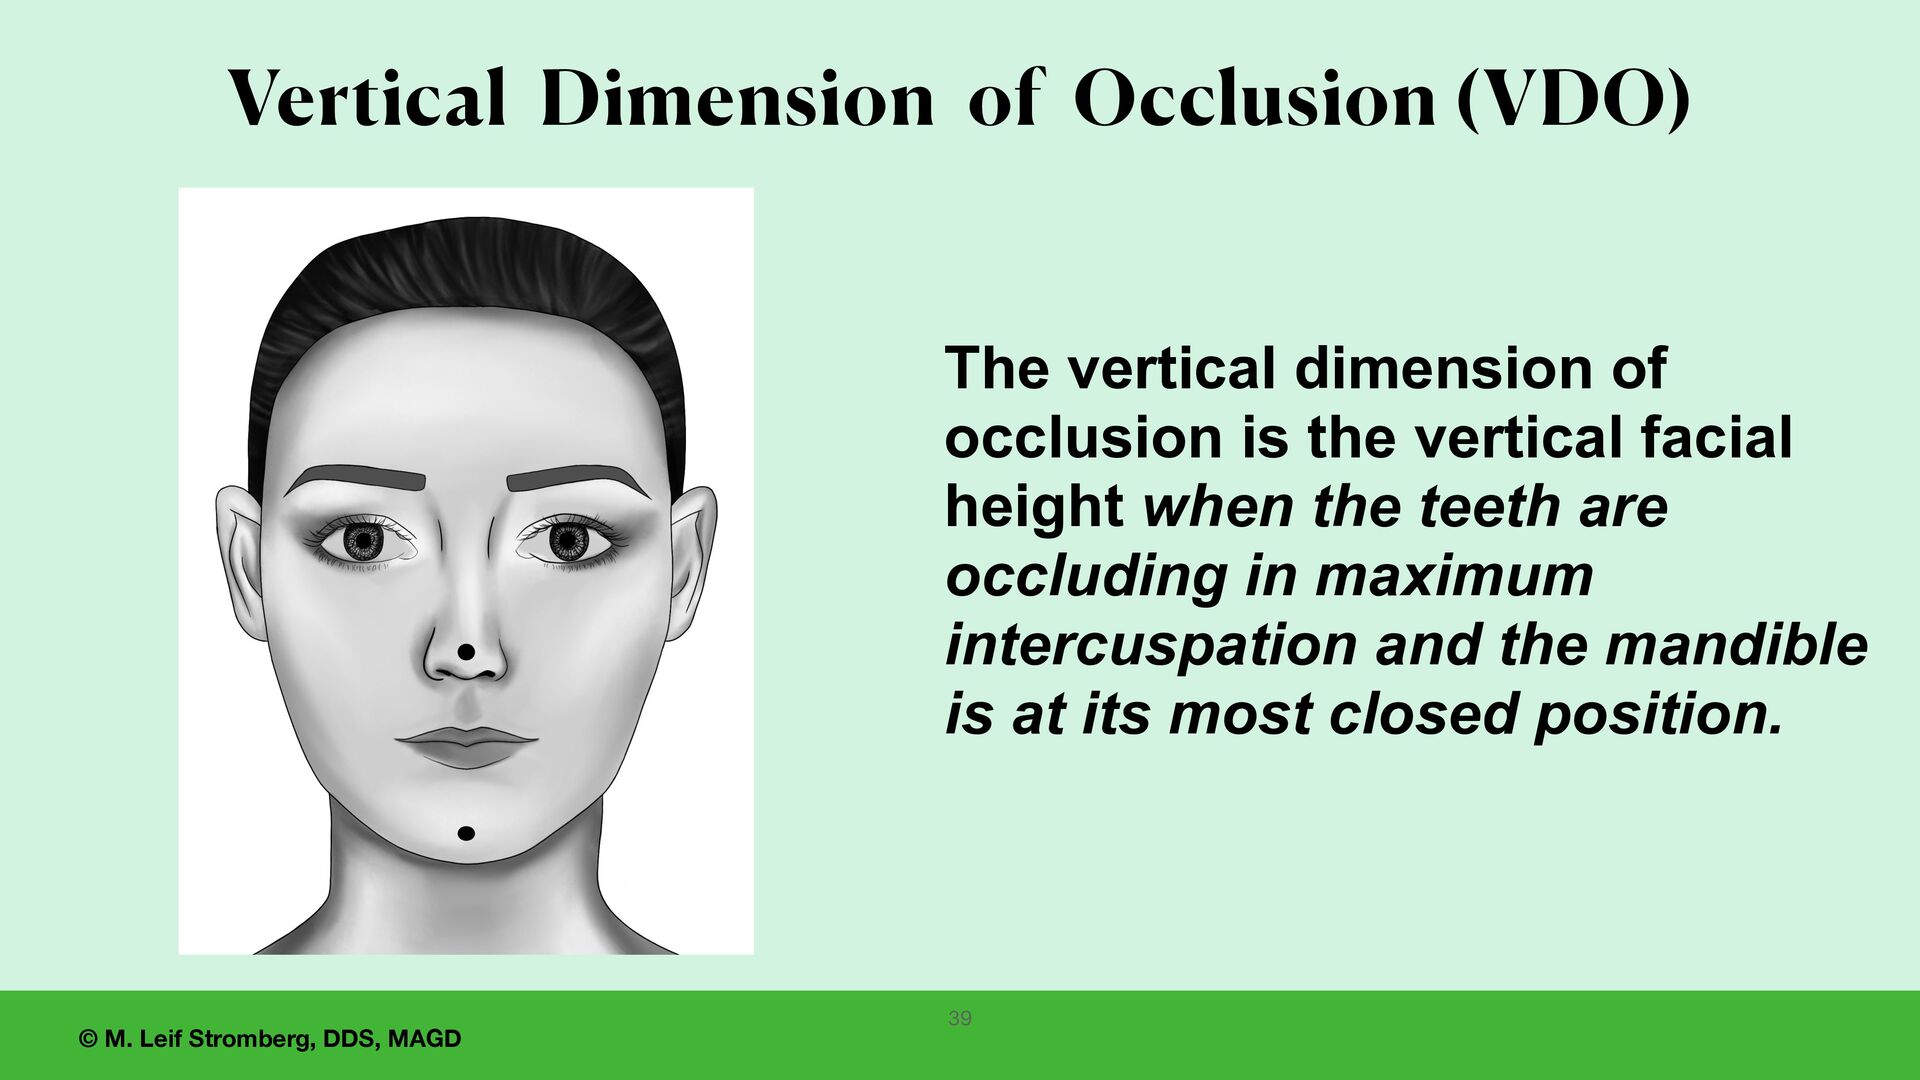
Occlusion (VDO) The vertical dimension of occlusion is the vertical facial height when the teeth are occluding in maximum intercuspation and the mandible is at its most closed position.
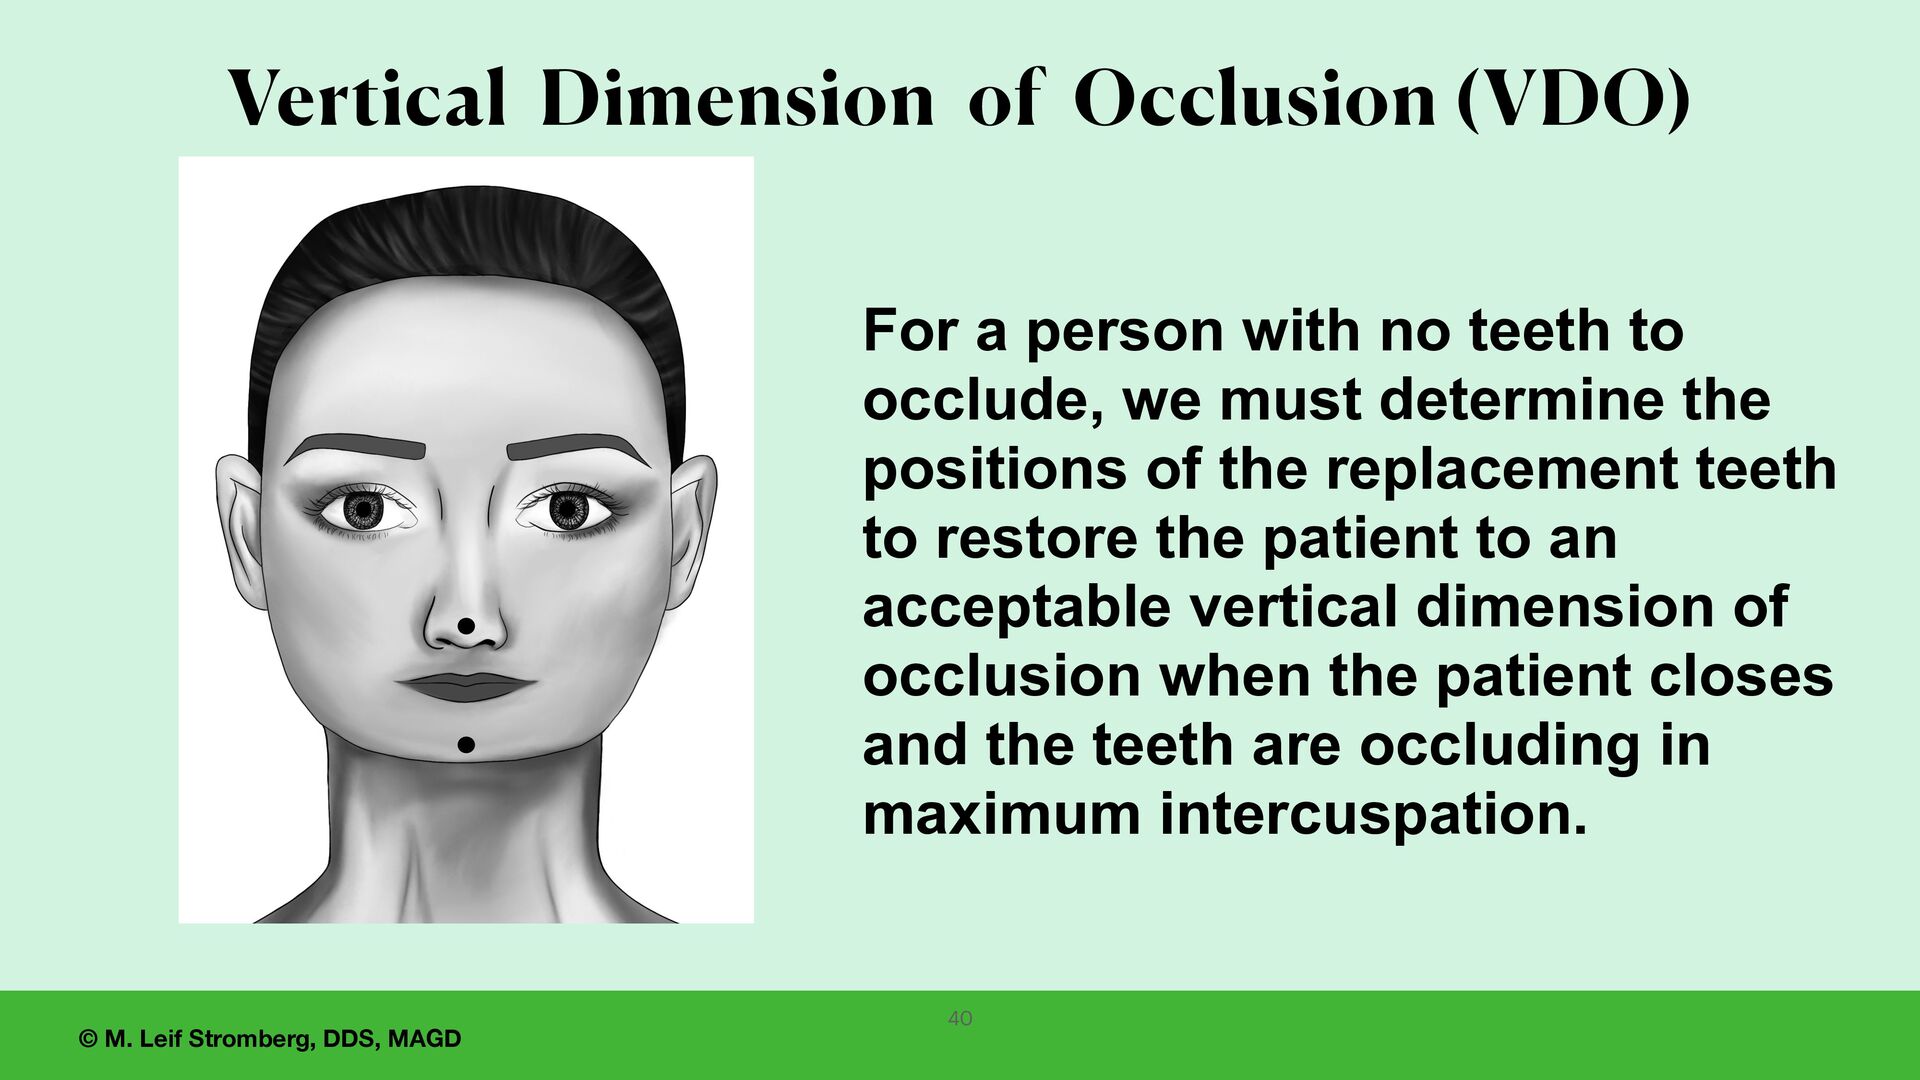
Occlusion (VDO) For a person with no teeth to occlude, we must determine the positions of the replacement teeth to restore the patient to an acceptable vertical dimension of occlusion when the patient closes and the teeth are occluding in maximum intercuspation.
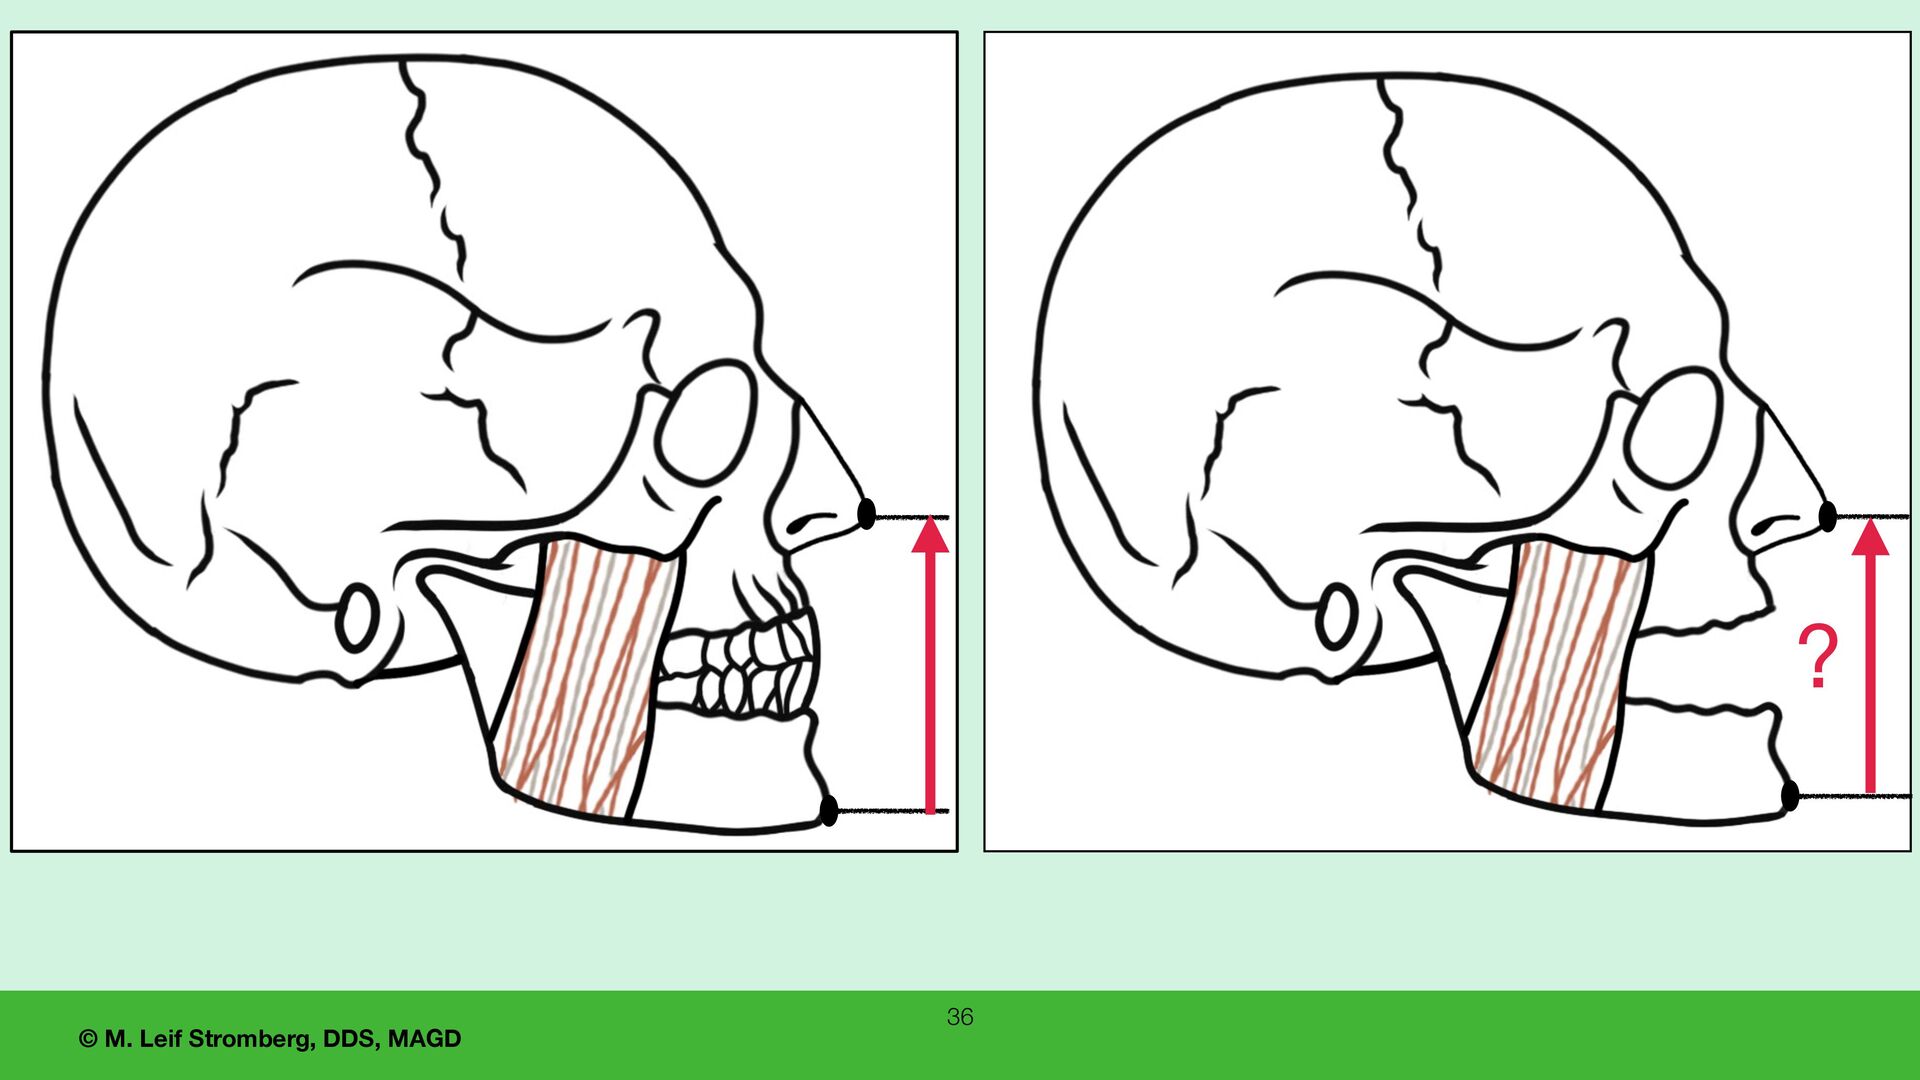
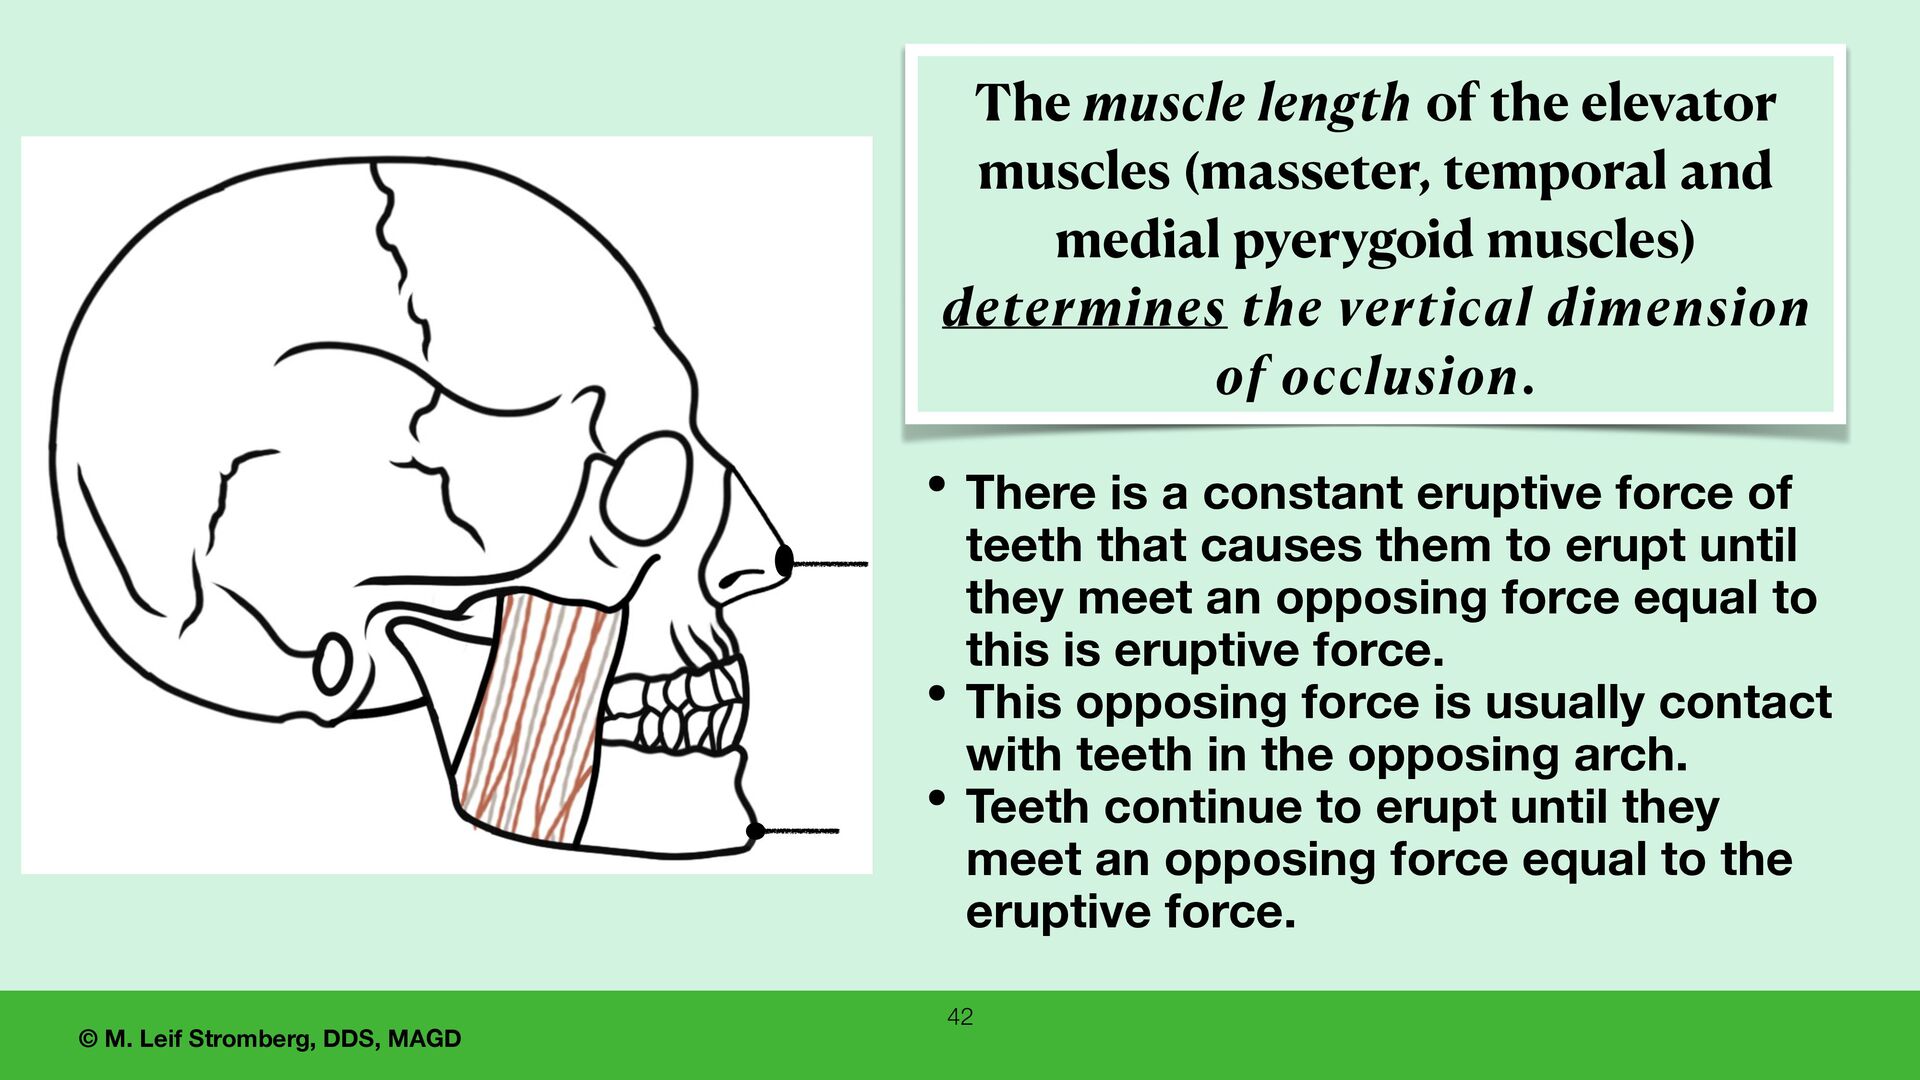
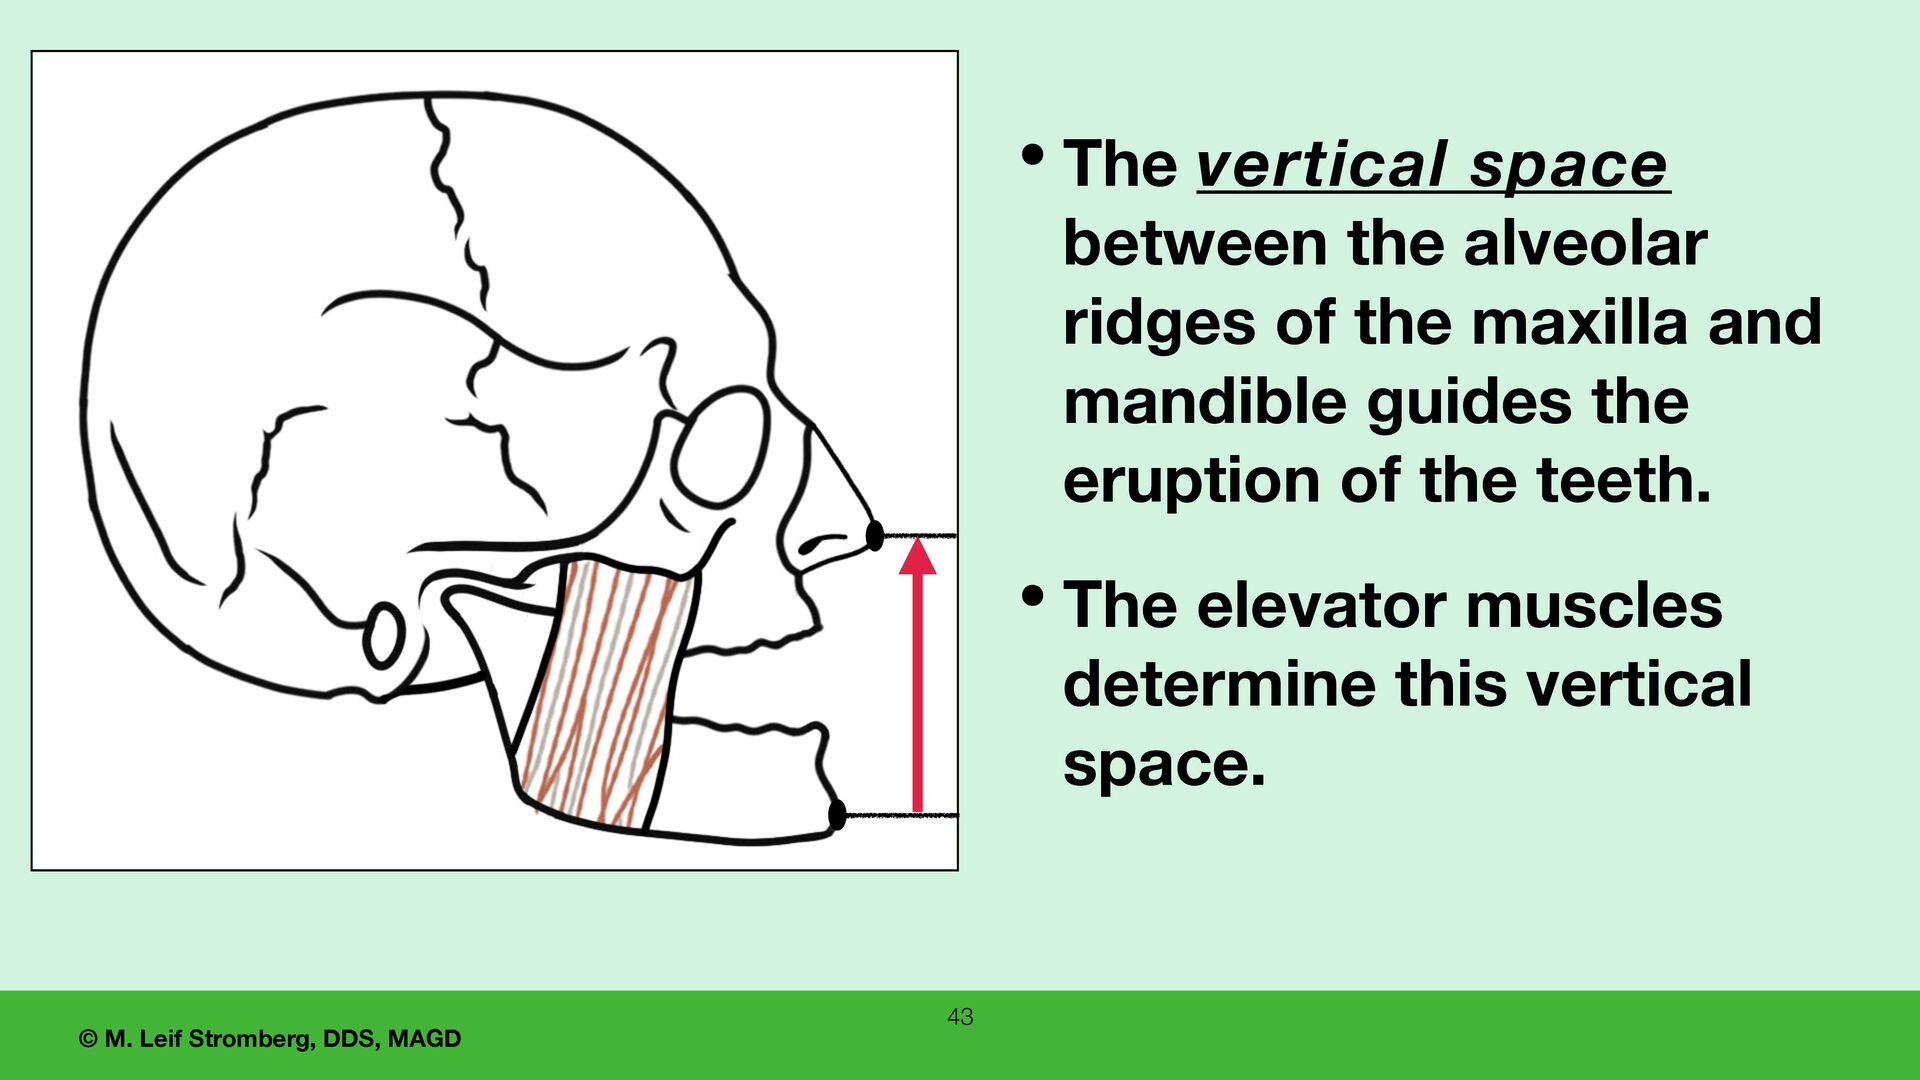
a constant eruptive force of teeth that causes them to erupt until they meet an opposing force equal to this is eruptive force. • This opposing force is usually contact with teeth in the opposing arch. • Teeth continue to erupt until they meet an opposing force equal to the eruptive force. The muscle length of the elevator muscles (masseter, temporal and medial pyerygoid muscles) determines the vertical dimension of occlusion.
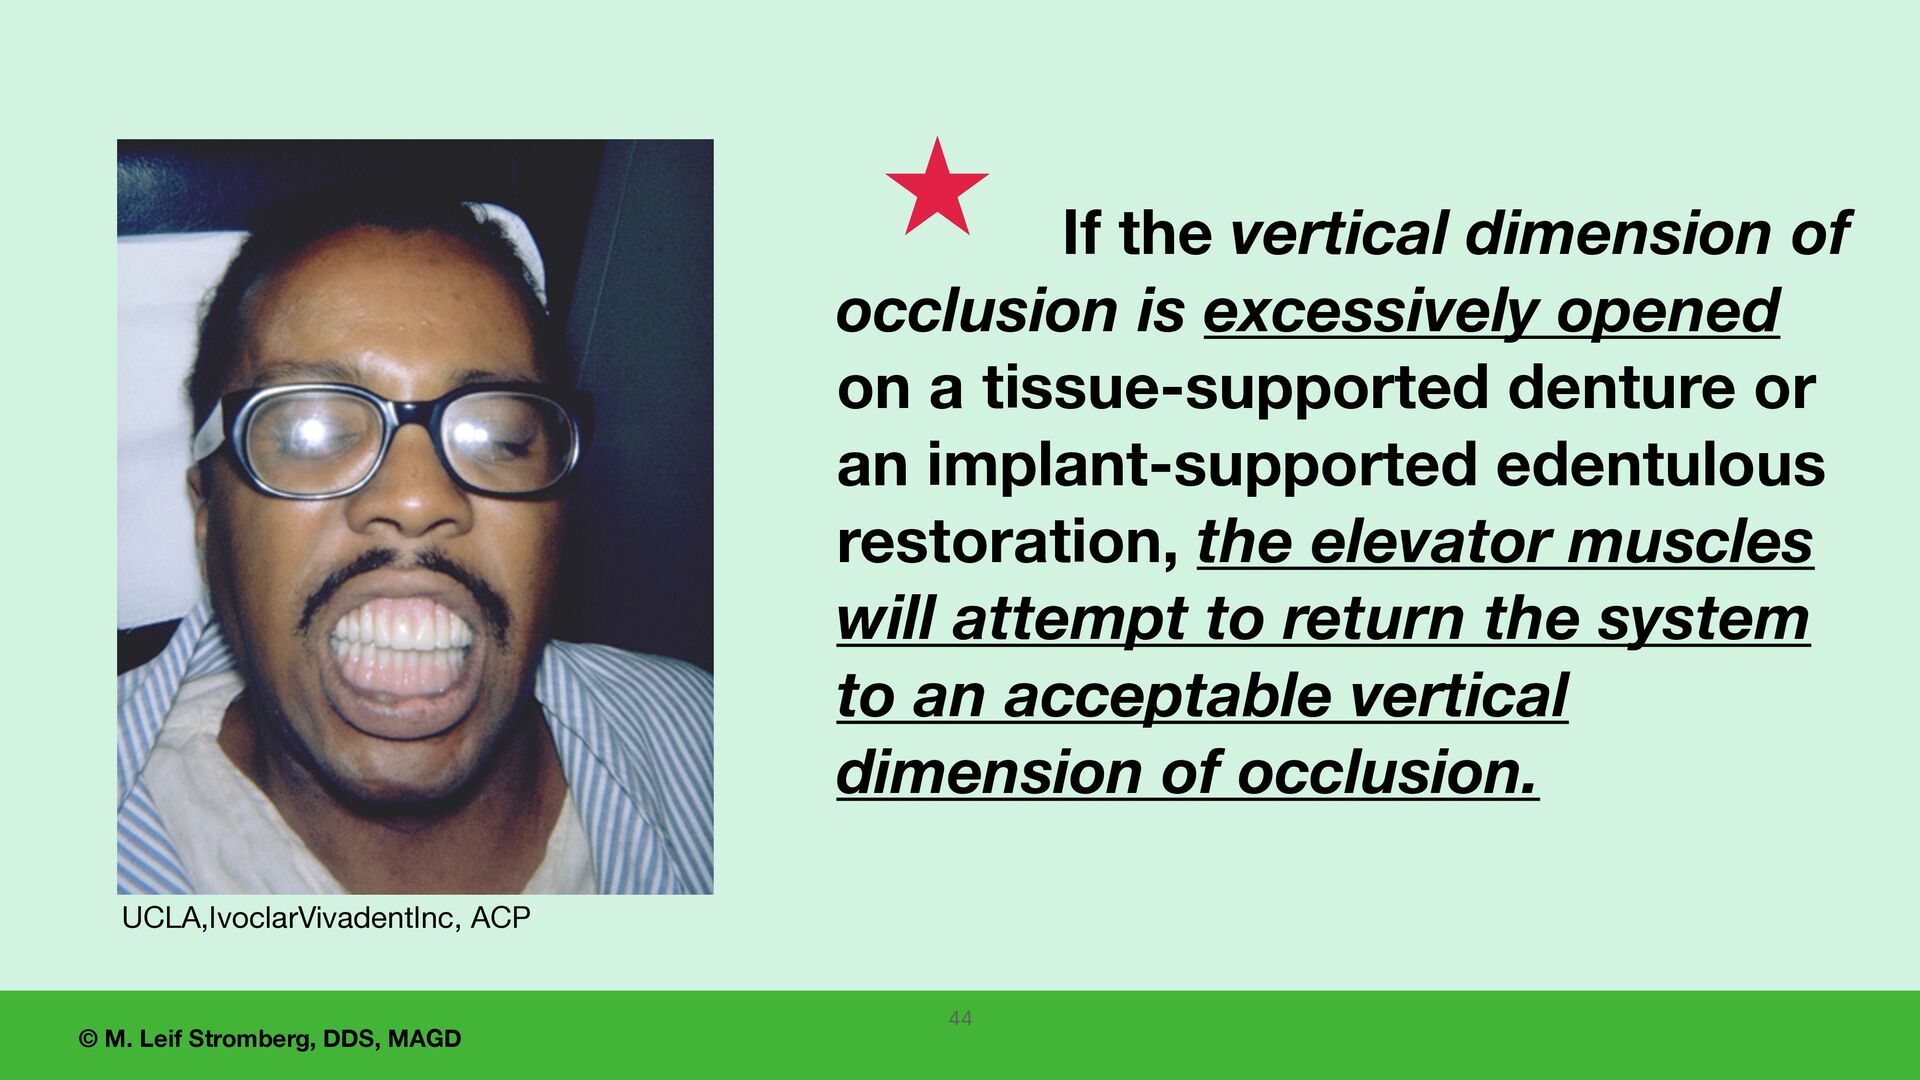
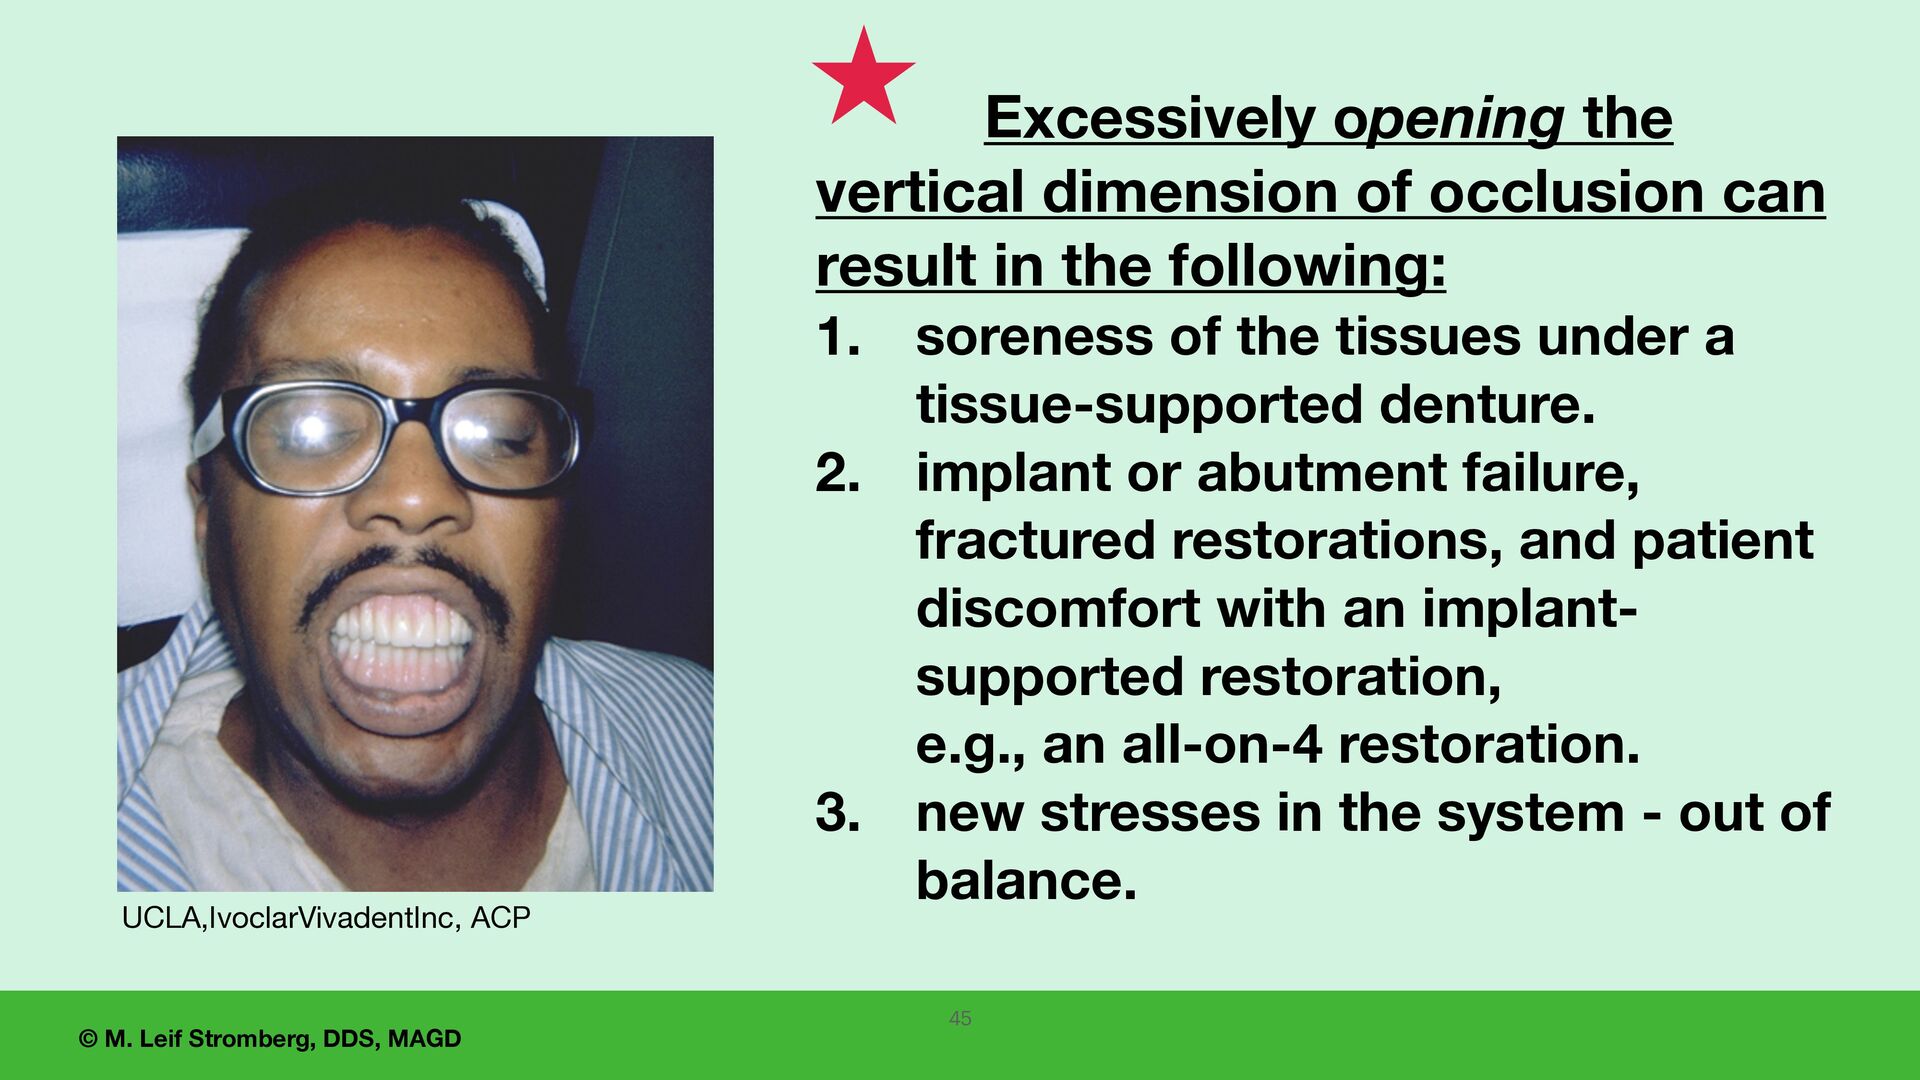
dimension of occlusion is excessively opened on a tissue-supported denture or an implant-supported edentulous restoration, the elevator muscles will attempt to return the system to an acceptable vertical dimension of occlusion. UCLA,IvoclarVivadentInc, ACP
vertical dimension of occlusion can result in the following: 1. soreness of the tissues under a tissue-supported denture. 2. implant or abutment failure, fractured restorations, and patient discomfort with an implant- supported restoration, e.g., an all-on-4 restoration. 3. new stresses in the system - out of balance. UCLA,IvoclarVivadentInc, ACP
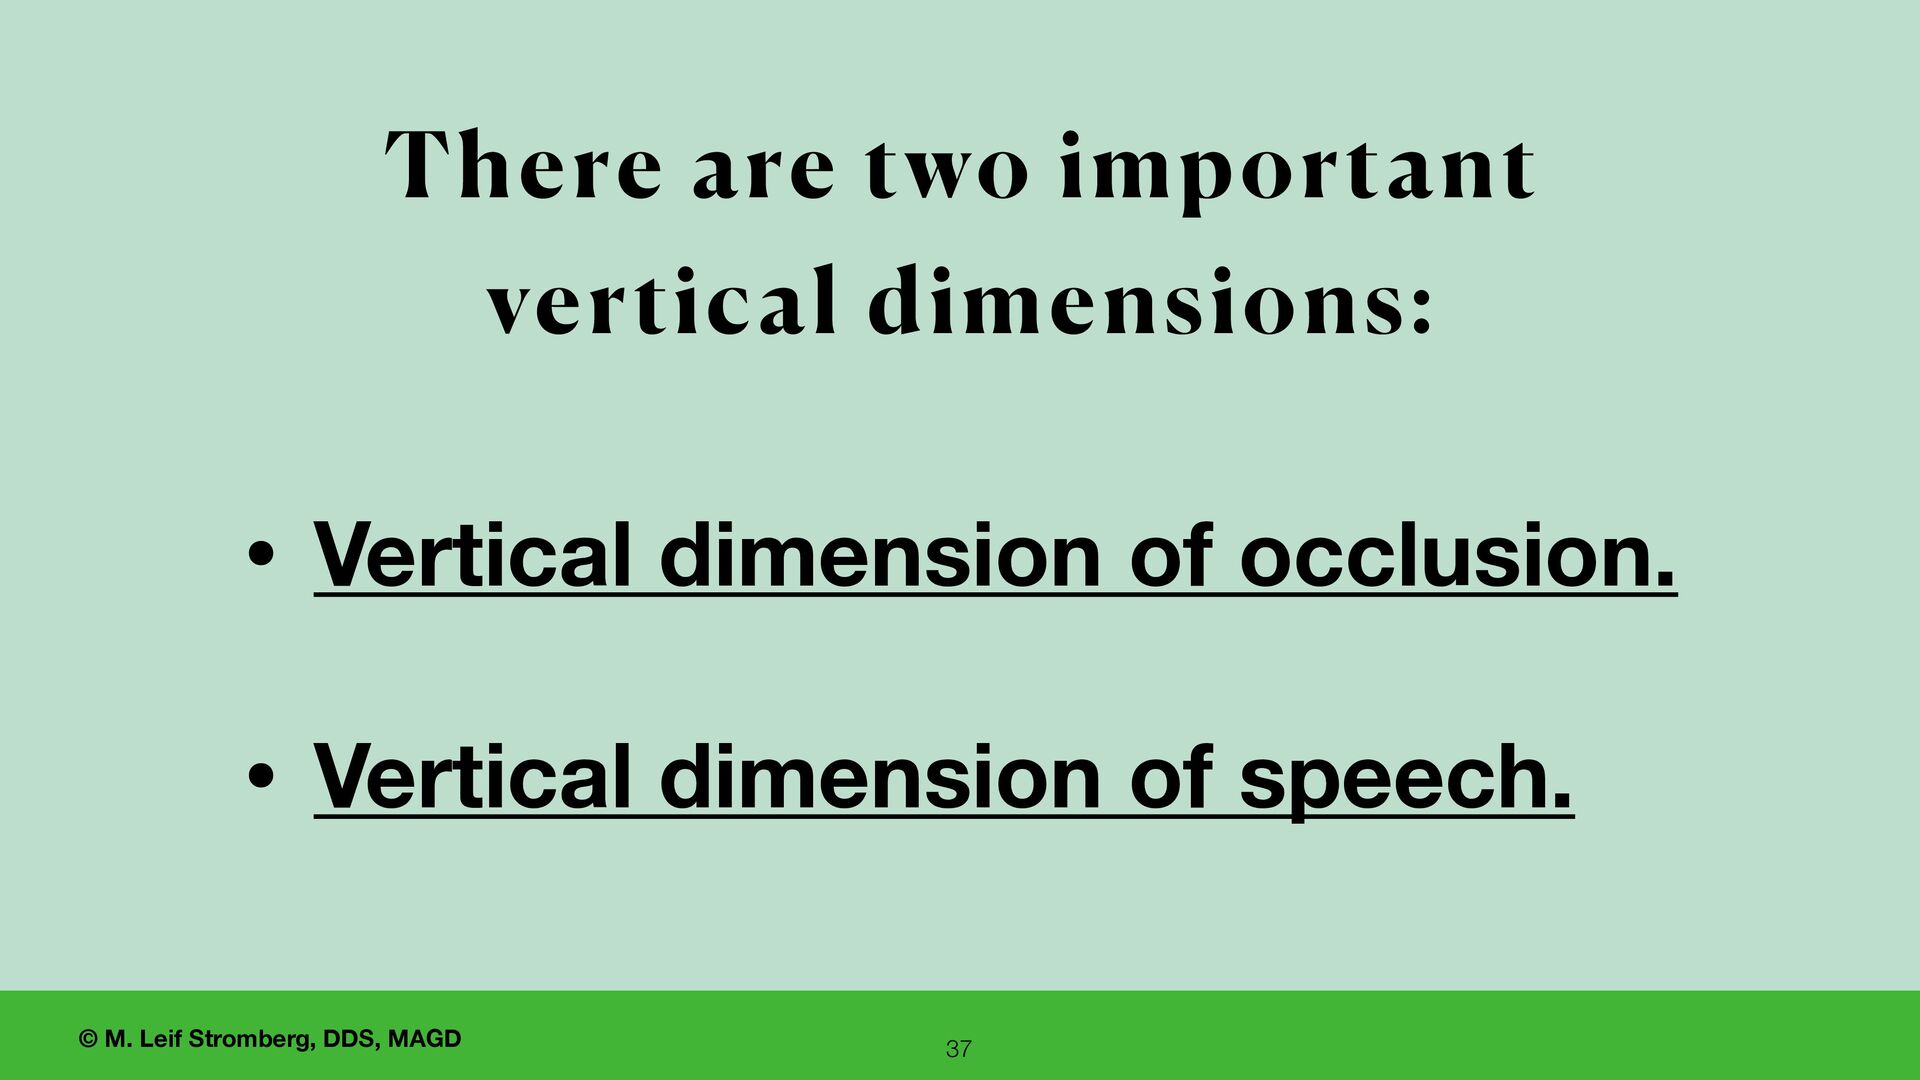
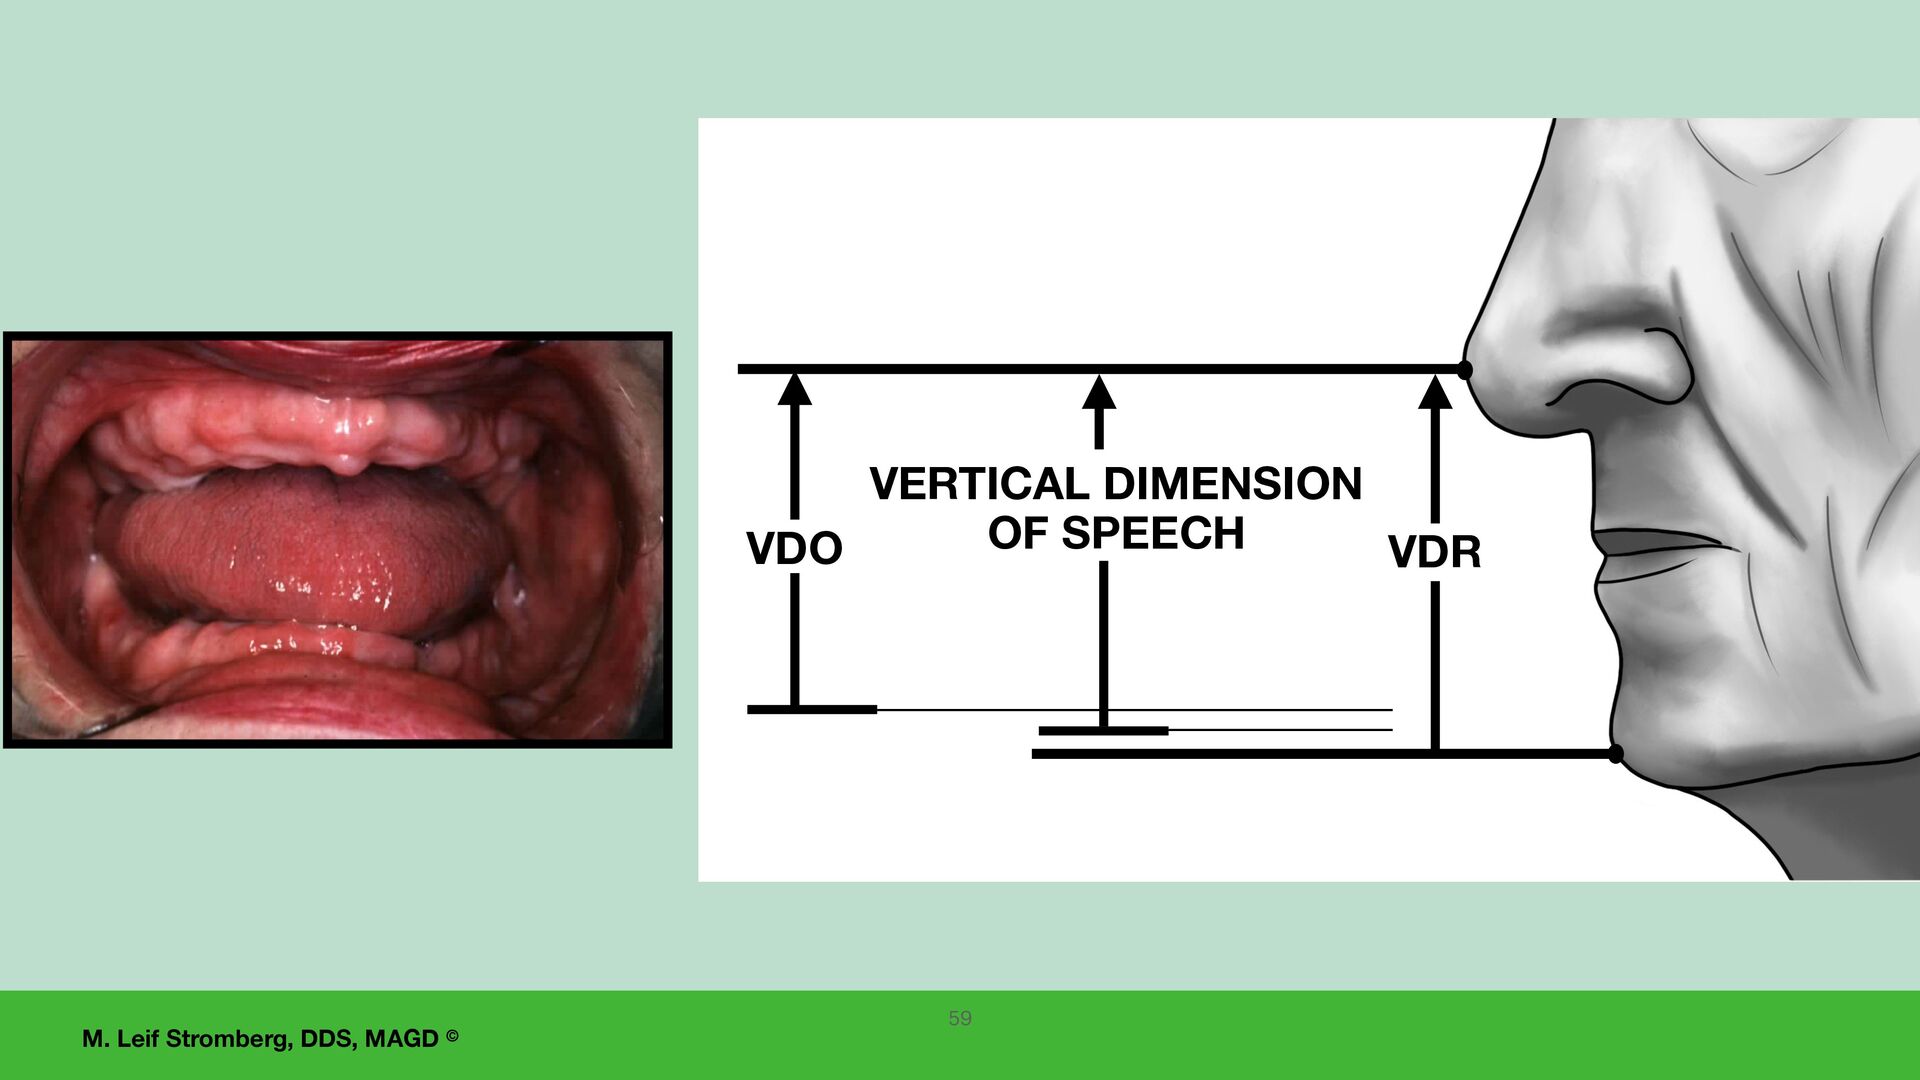
of occlusion- the vertical facial height when the teeth are occluding in maximum intercuspation and the mandible is at its most closed position. 2. Vertical dimension of speech. There are two important vertical dimensions:
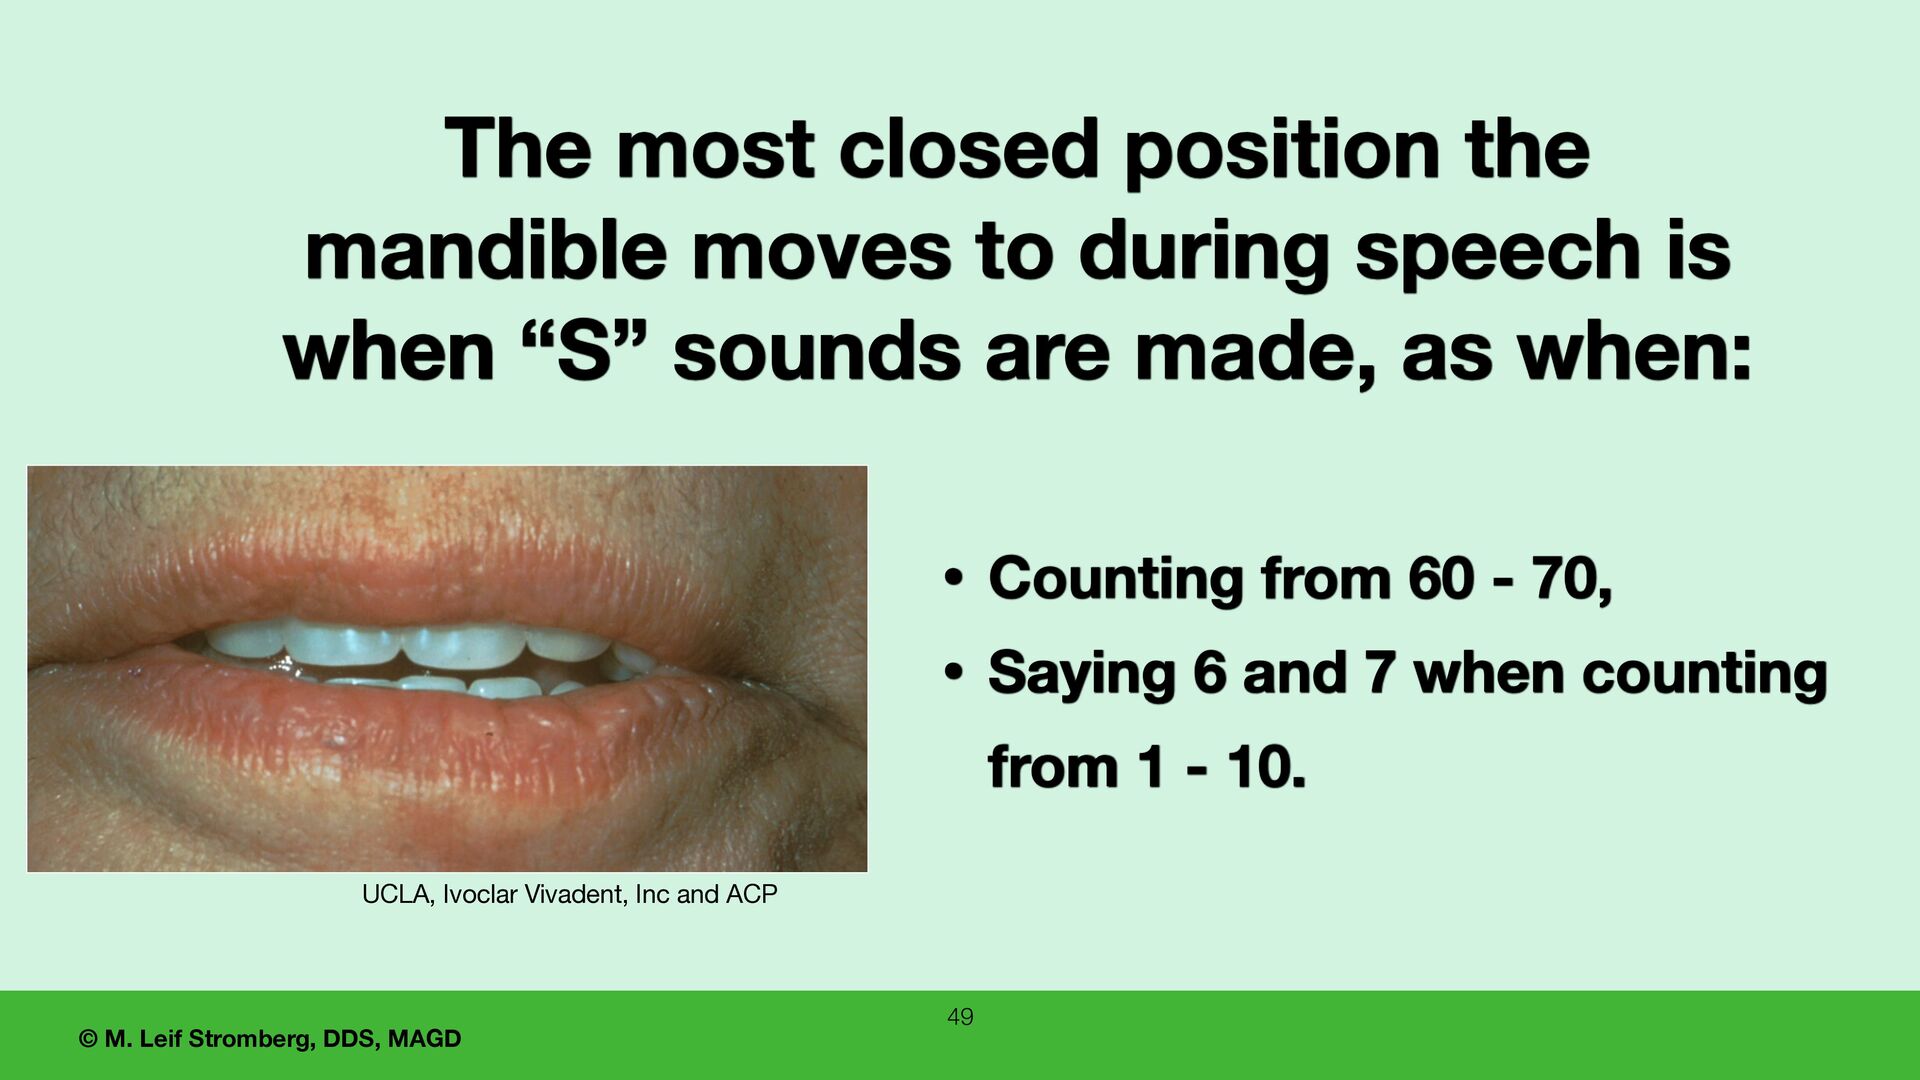
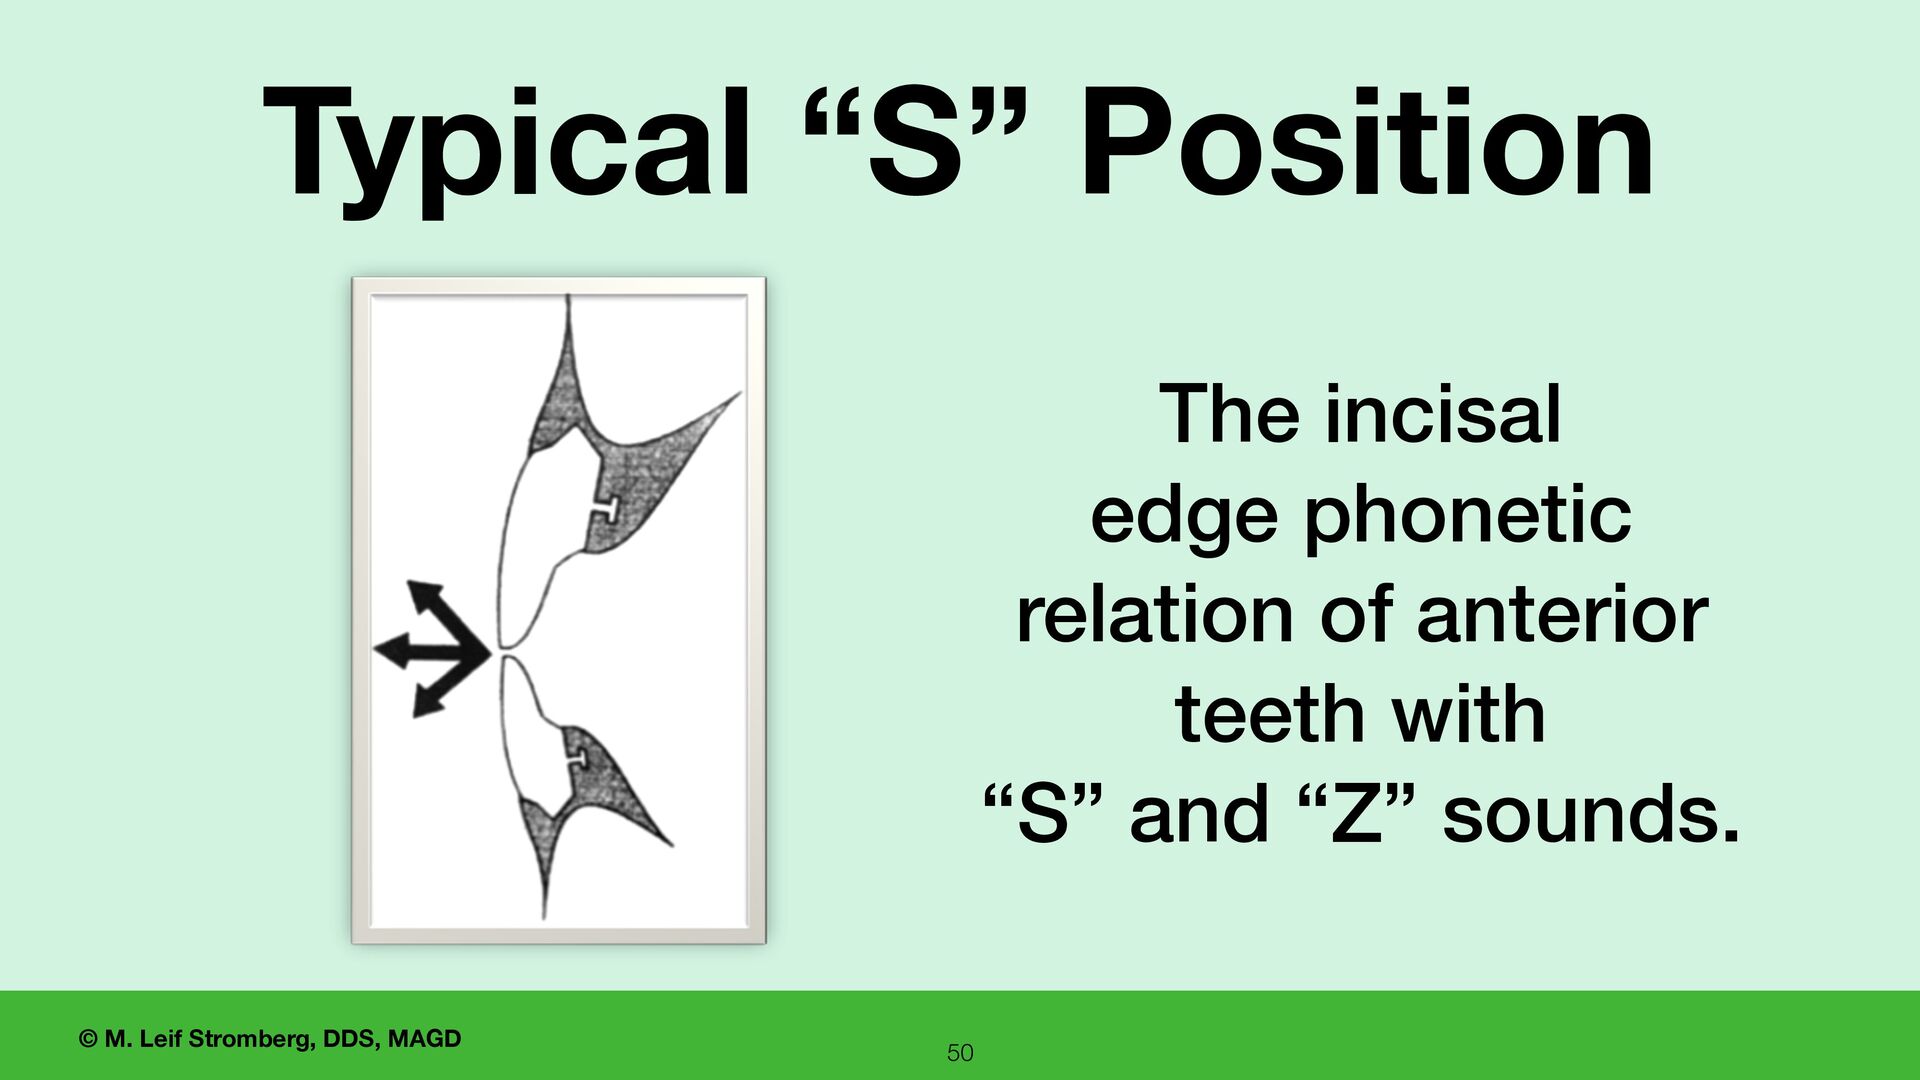
60 - 70, • Saying 6 and 7 when counting from 1 - 10. The most closed position the mandible moves to during speech is when “S” sounds are made, as when: UCLA, Ivoclar Vivadent, Inc and ACP
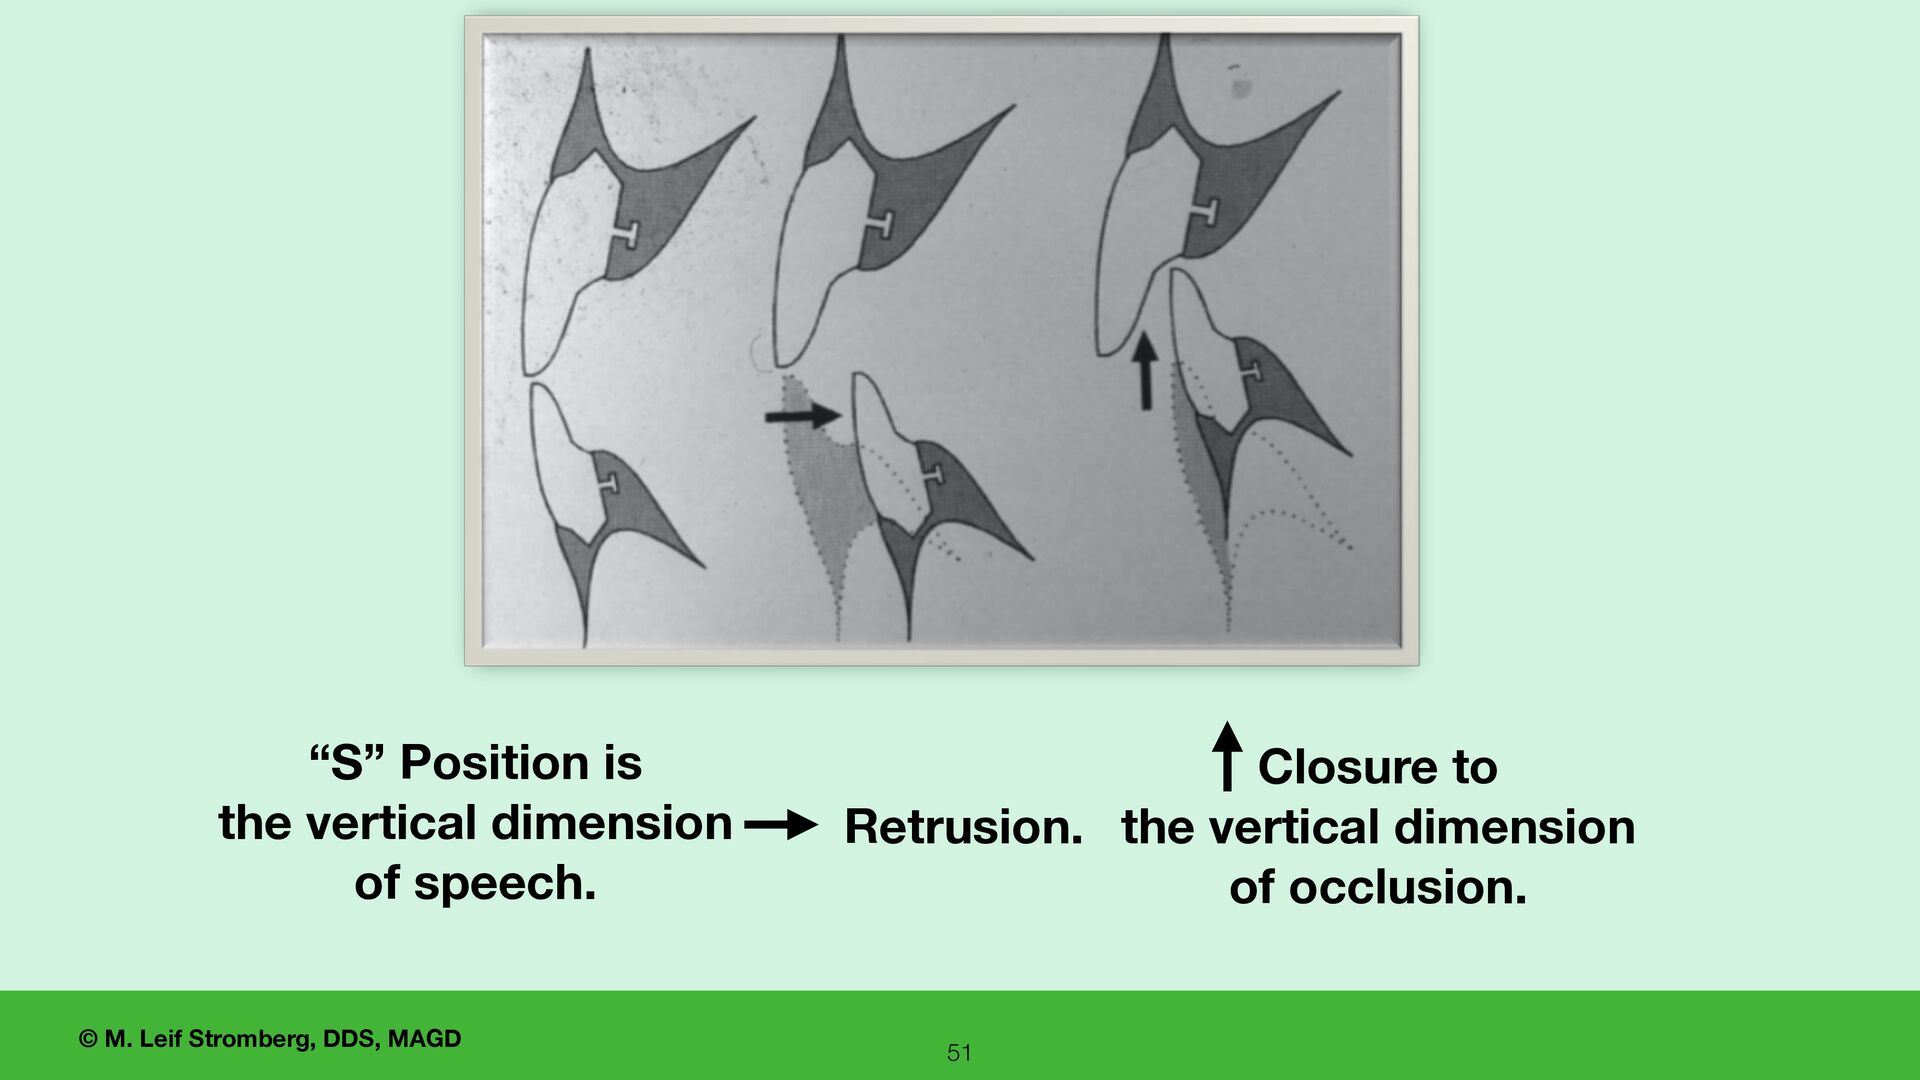
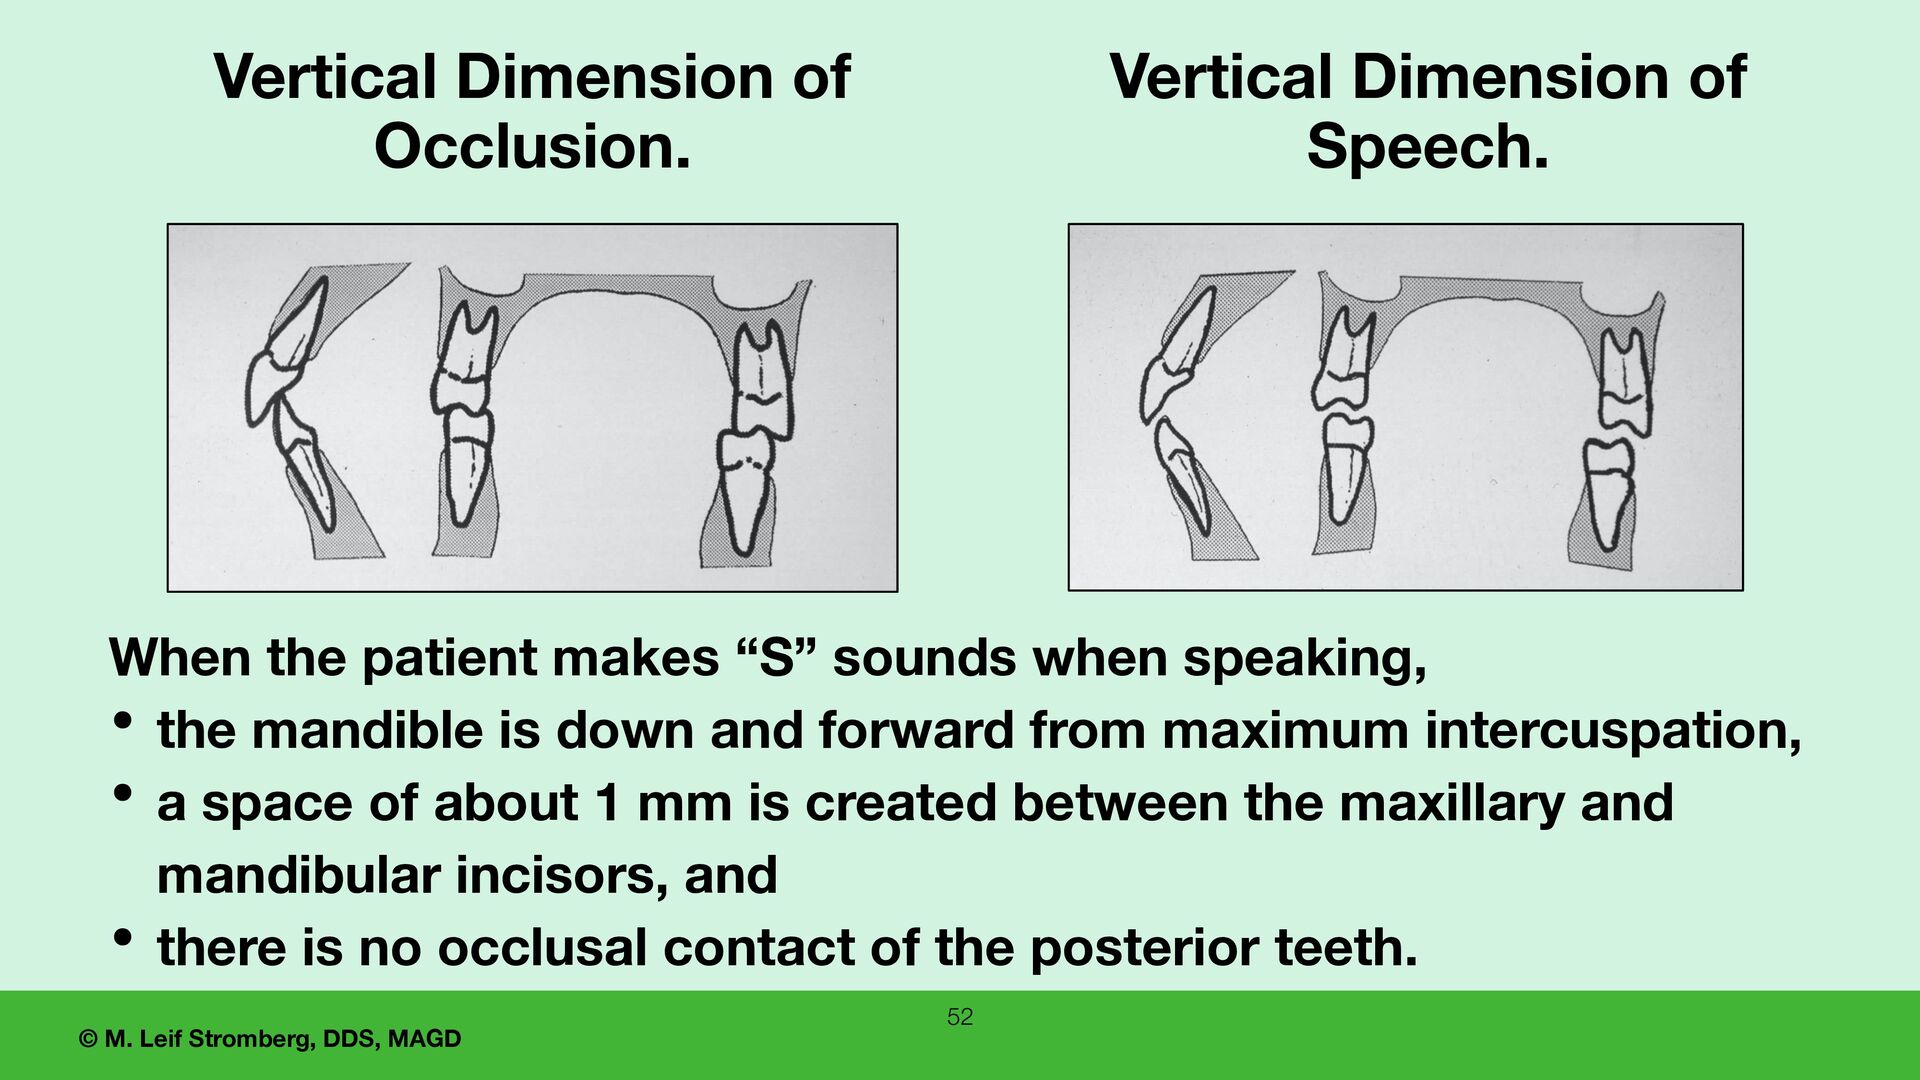
Speech. Vertical Dimension of Occlusion. When the patient makes “S” sounds when speaking, • the mandible is down and forward from maximum intercuspation, • a space of about 1 mm is created between the maxillary and mandibular incisors, and • there is no occlusal contact of the posterior teeth.
closed position the mandible assumes during speech and is the closest to contact that the mandibular teeth ever assume to the upper teeth in speech. “S” Position 53
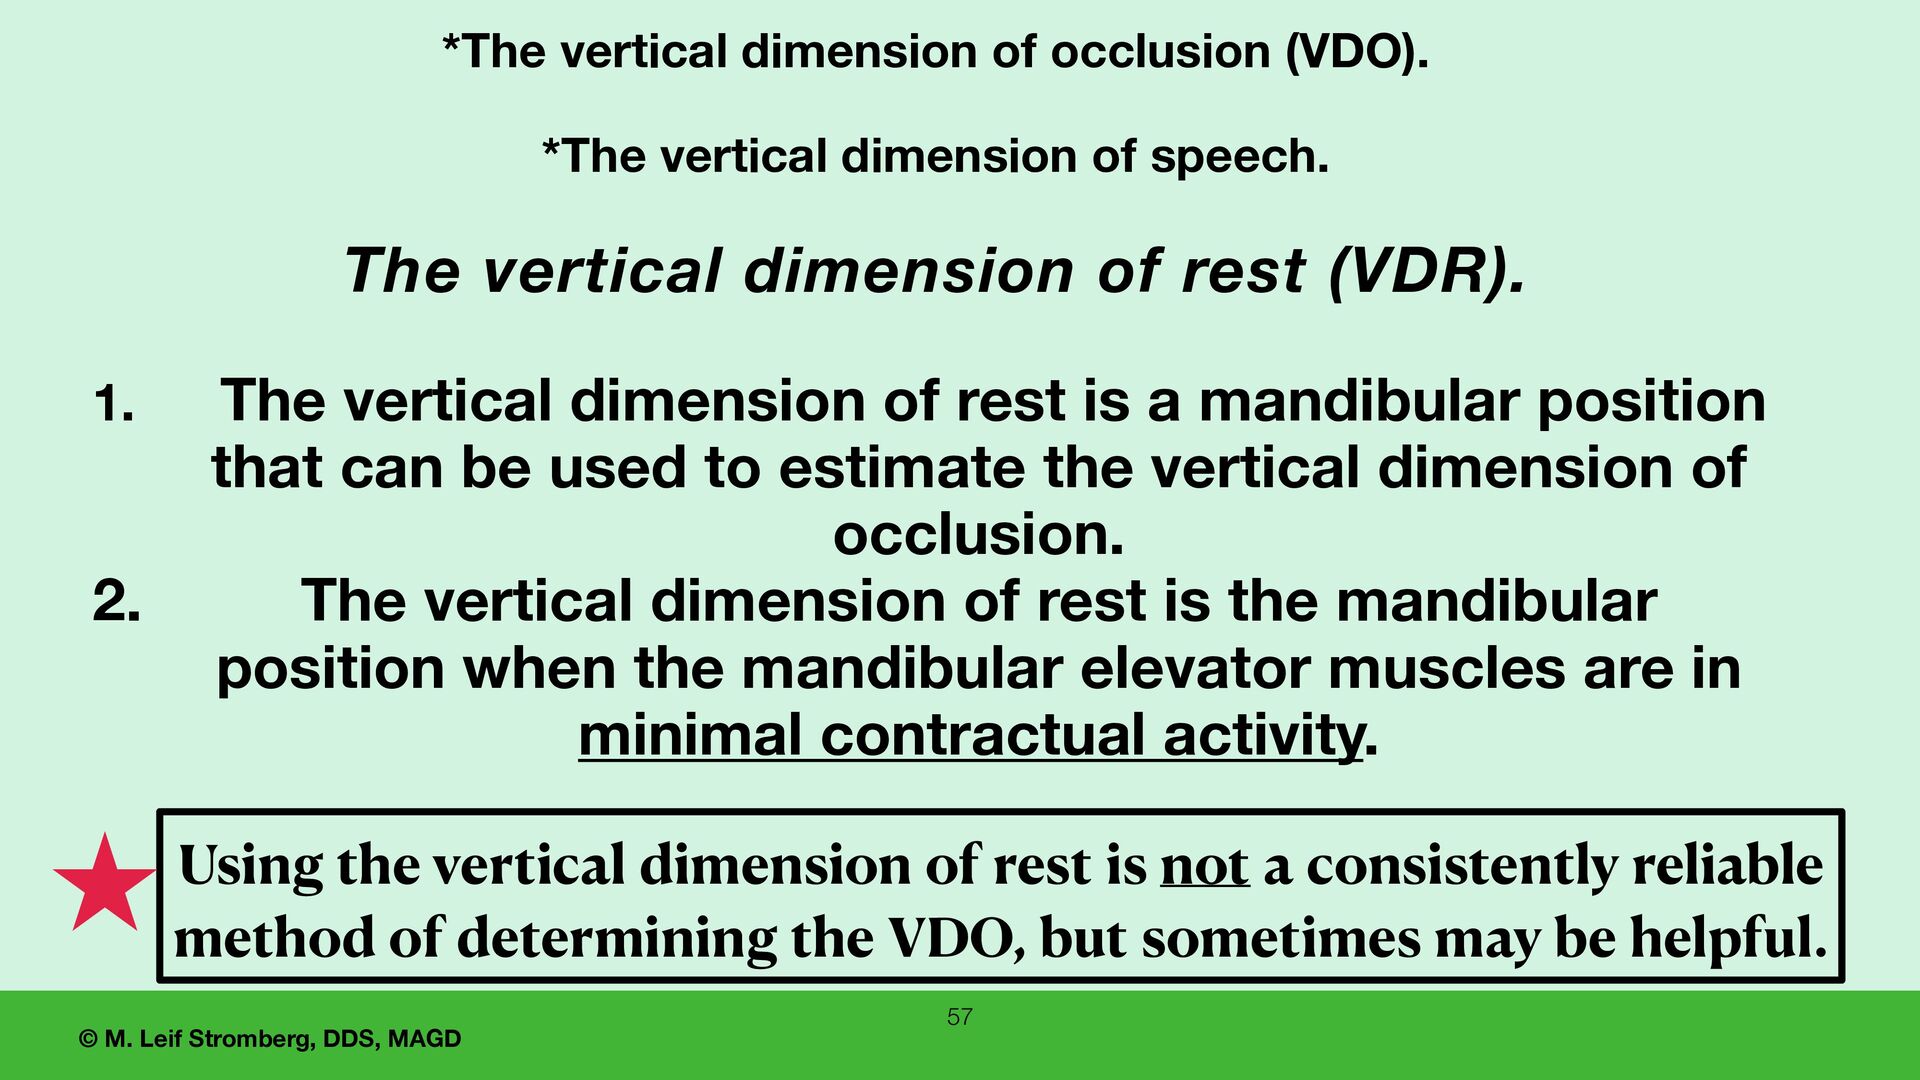
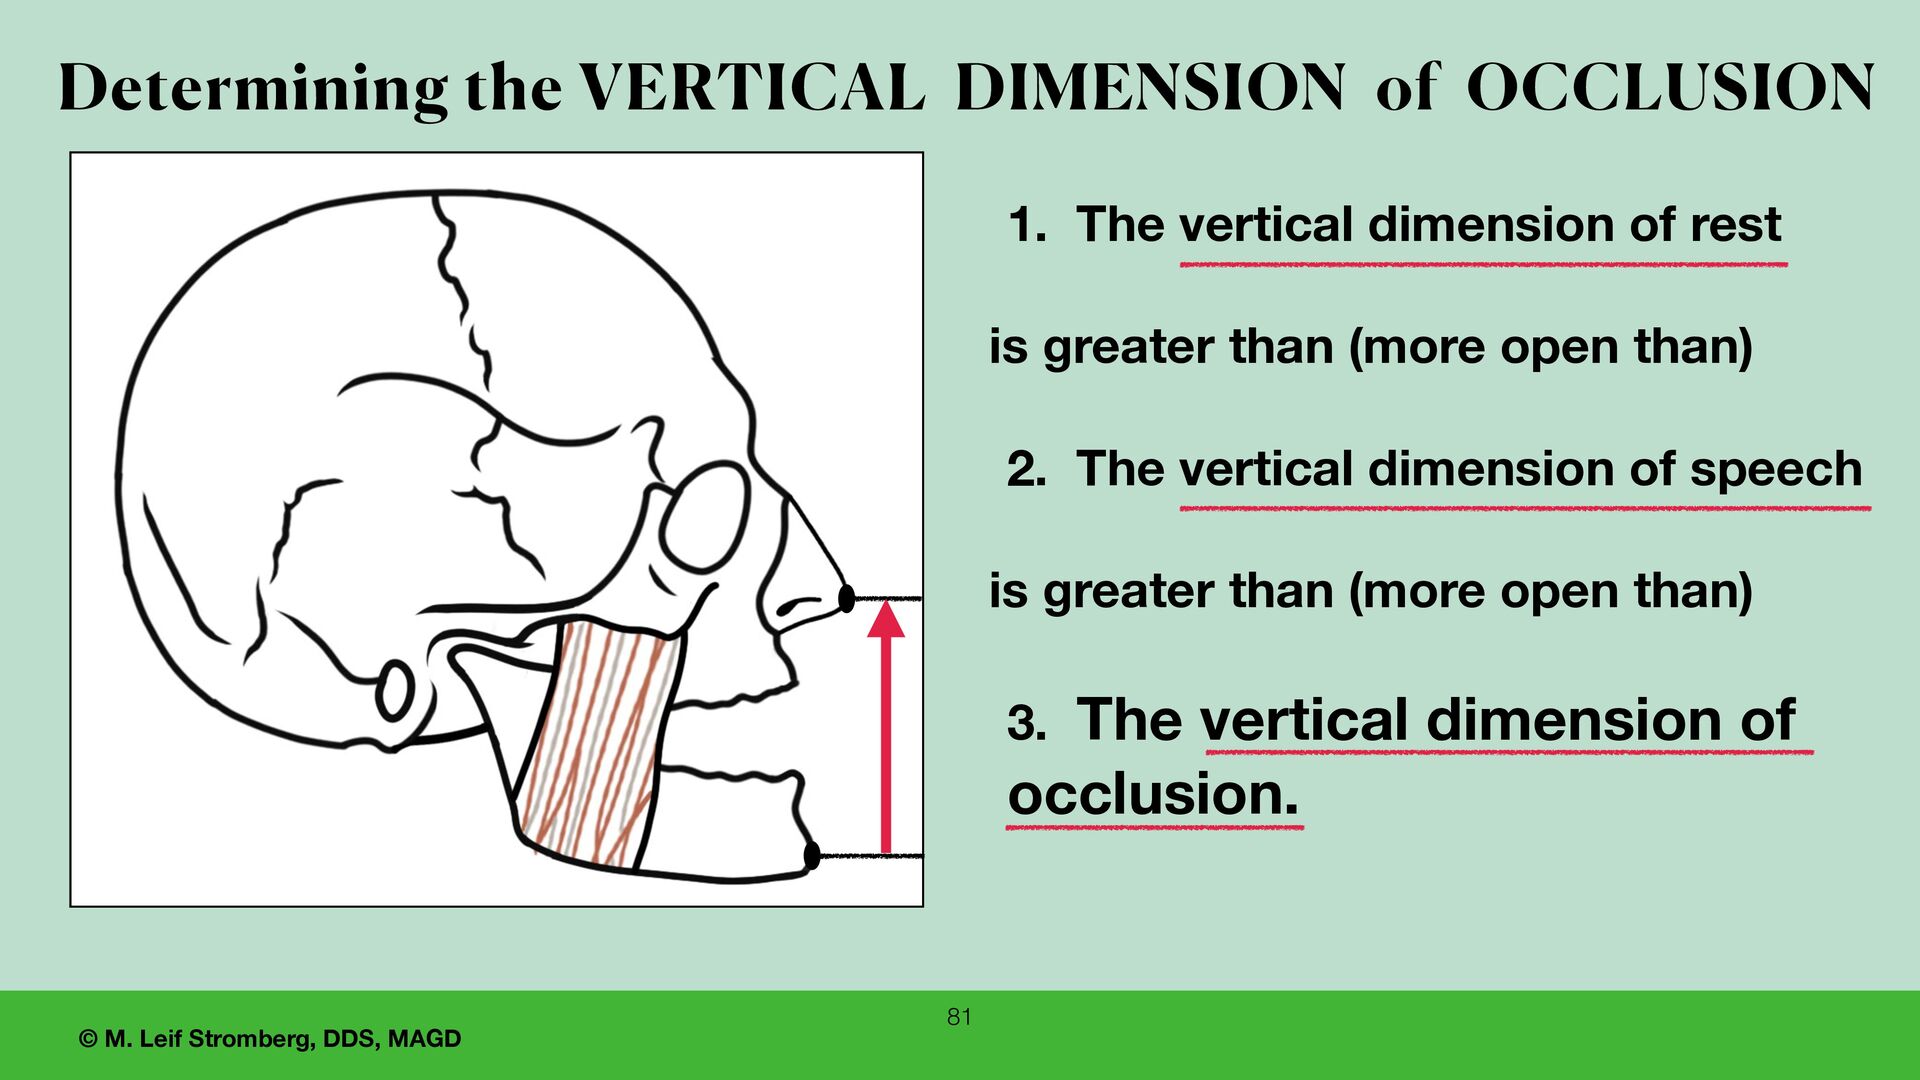
of occlusion (VDO). *The vertical dimension of speech. The vertical dimension of rest (VDR). 1. The vertical dimension of rest is a mandibular position that can be used to estimate the vertical dimension of occlusion. 2. The vertical dimension of rest is the mandibular position when the mandibular elevator muscles are in minimal contractual activity. Using the vertical dimension of rest is not a consistently reliable method of determining the VDO, but sometimes may be helpful.
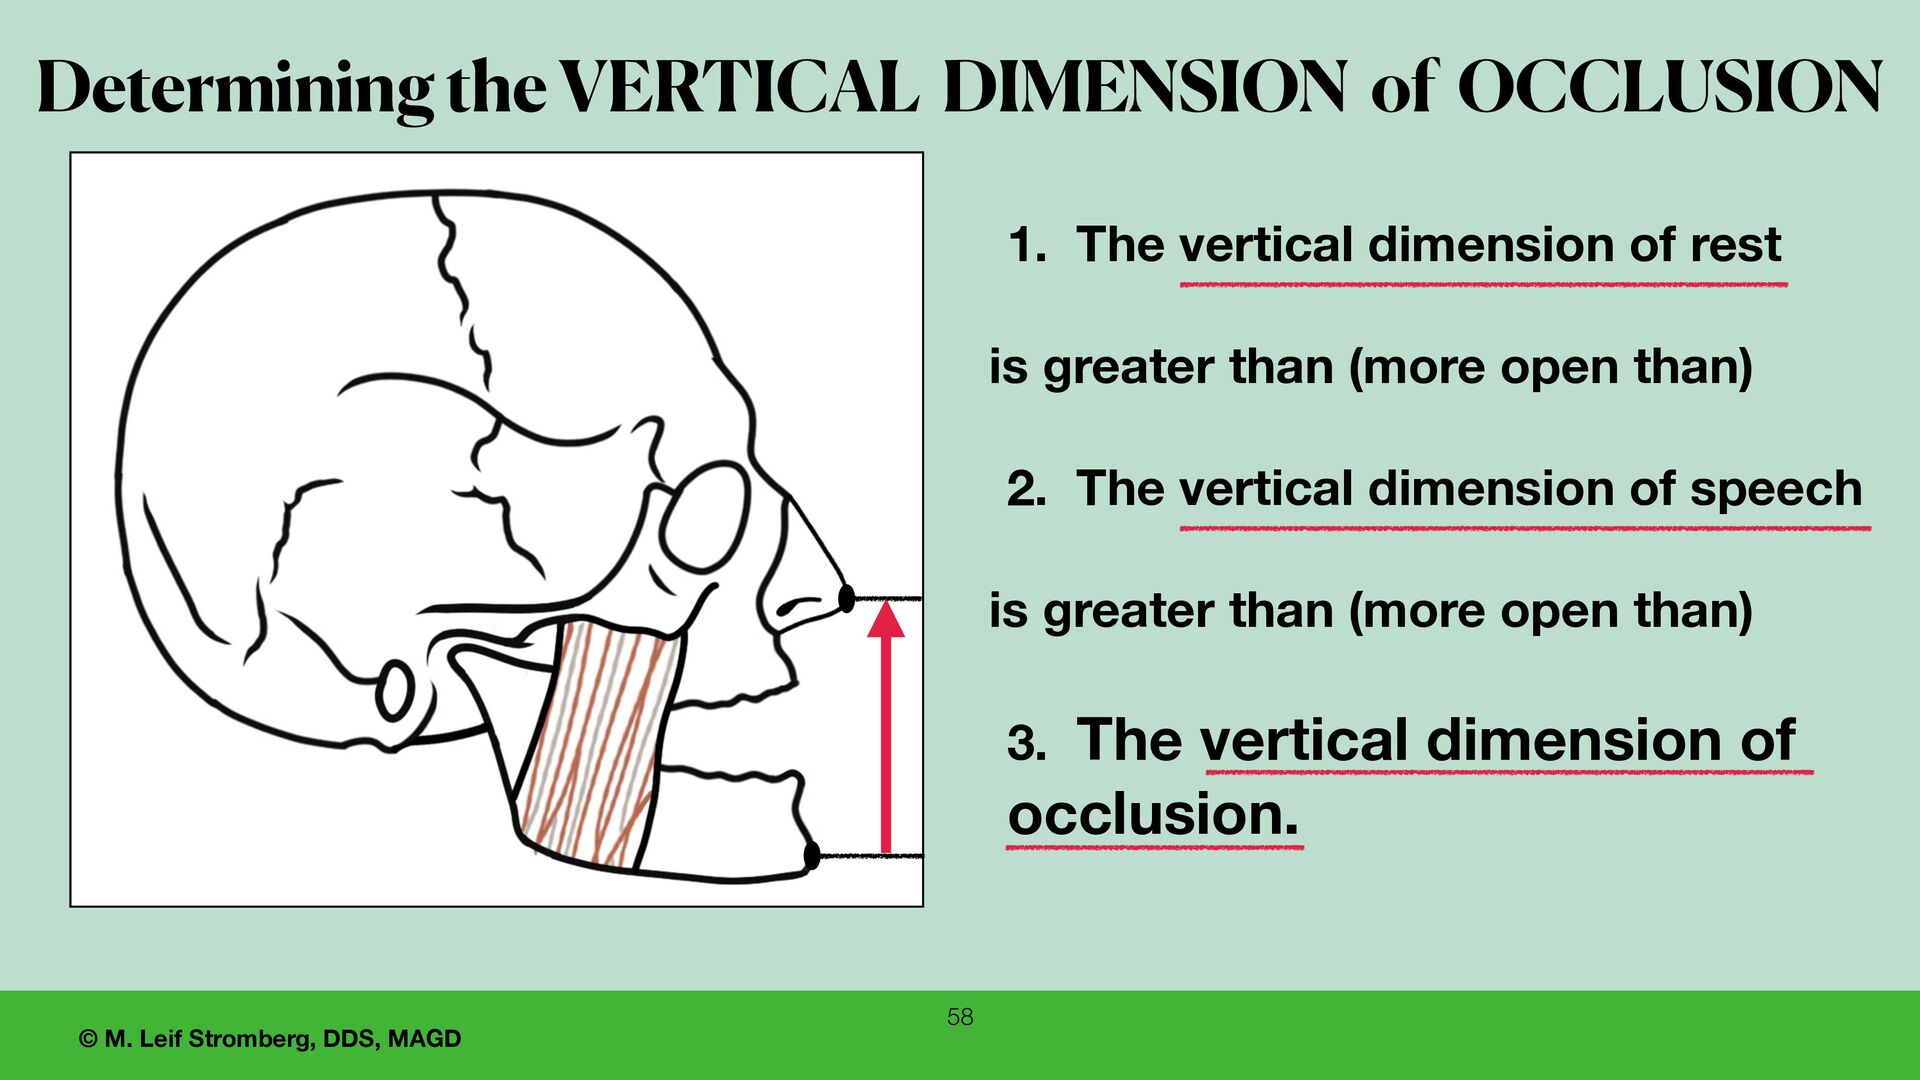
dimension of rest is greater than (more open than) 2. The vertical dimension of speech is greater than (more open than) 3. The vertical dimension of occlusion. Determining the VERTICAL DIMENSION of OCCLUSION
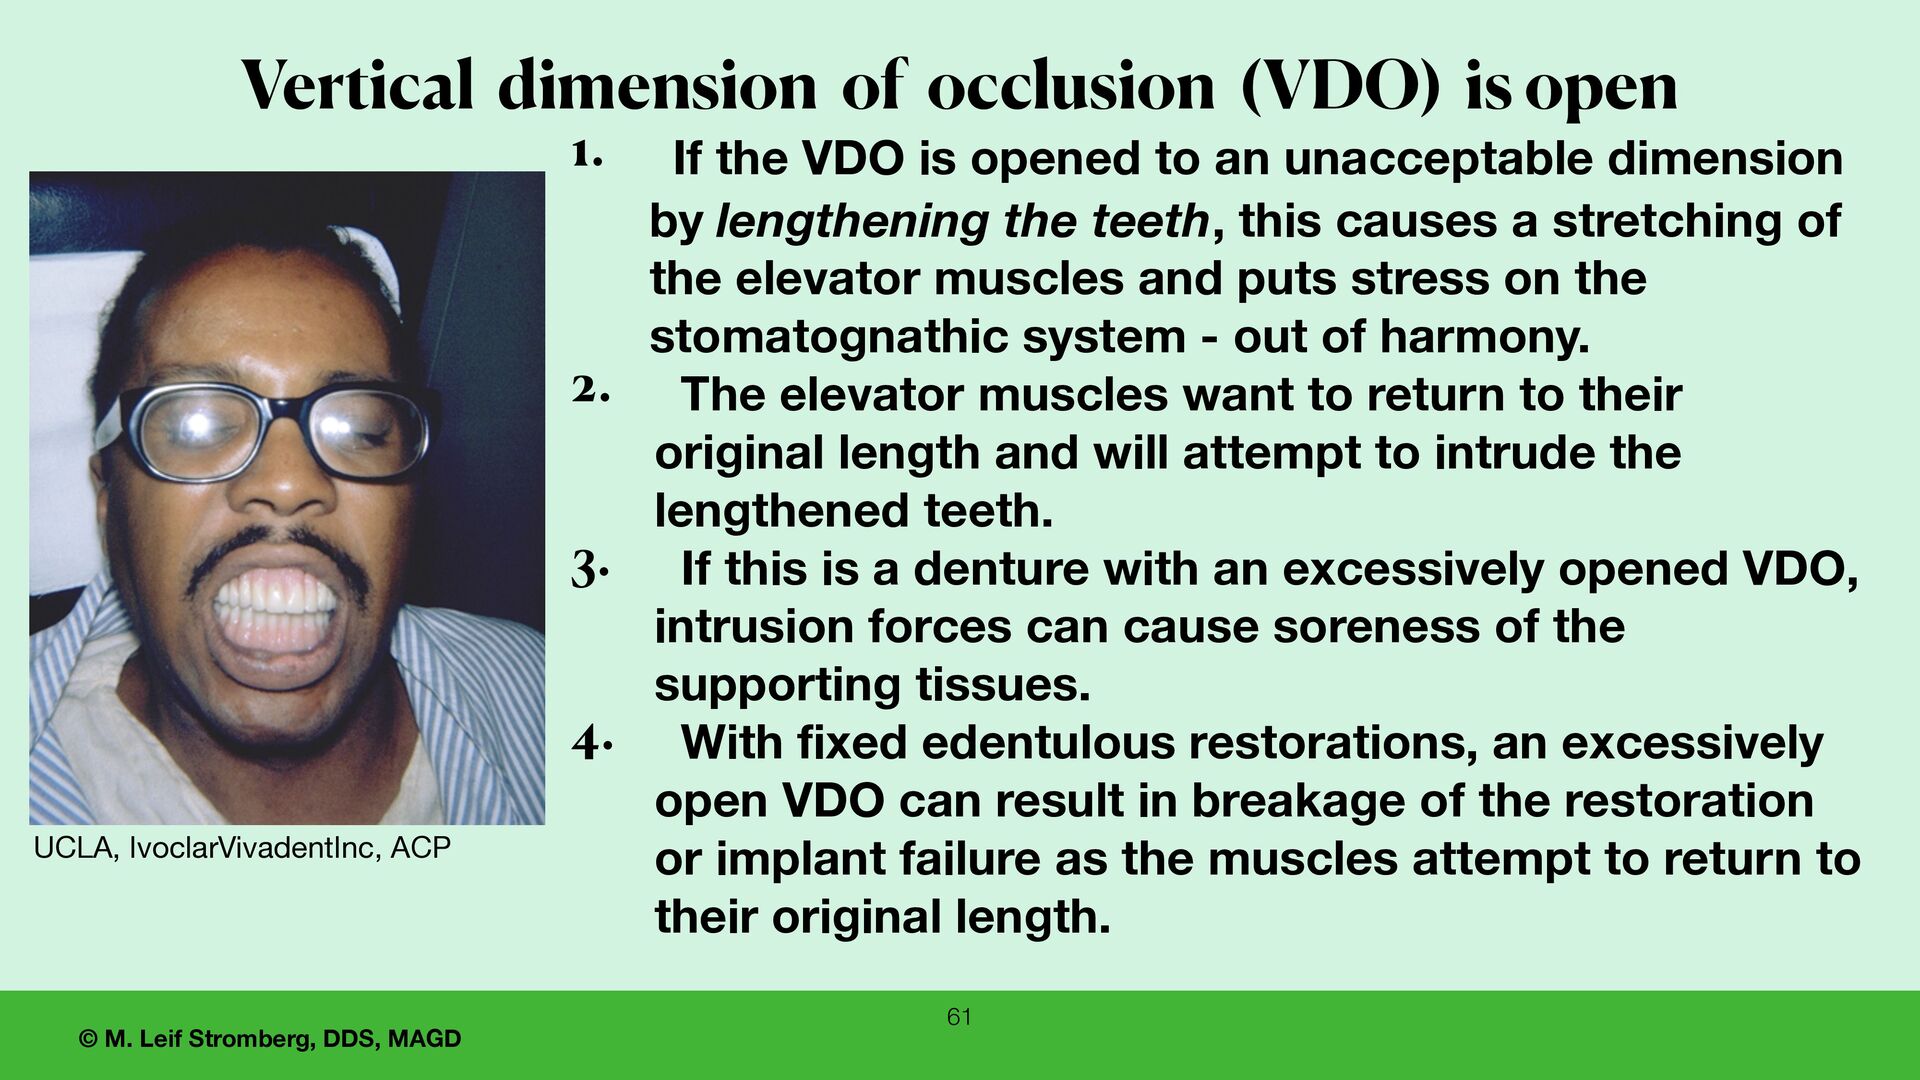
VDO is opened to an unacceptable dimension by lengthening the teeth, this causes a stretching of the elevator muscles and puts stress on the stomatognathic system - out of harmony. 2. The elevator muscles want to return to their original length and will attempt to intrude the lengthened teeth. 3. If this is a denture with an excessively opened VDO, intrusion forces can cause soreness of the supporting tissues. 4. With fixed edentulous restorations, an excessively open VDO can result in breakage of the restoration or implant failure as the muscles attempt to return to their original length. Vertical dimension of occlusion (VDO) is open UCLA, IvoclarVivadentInc, ACP
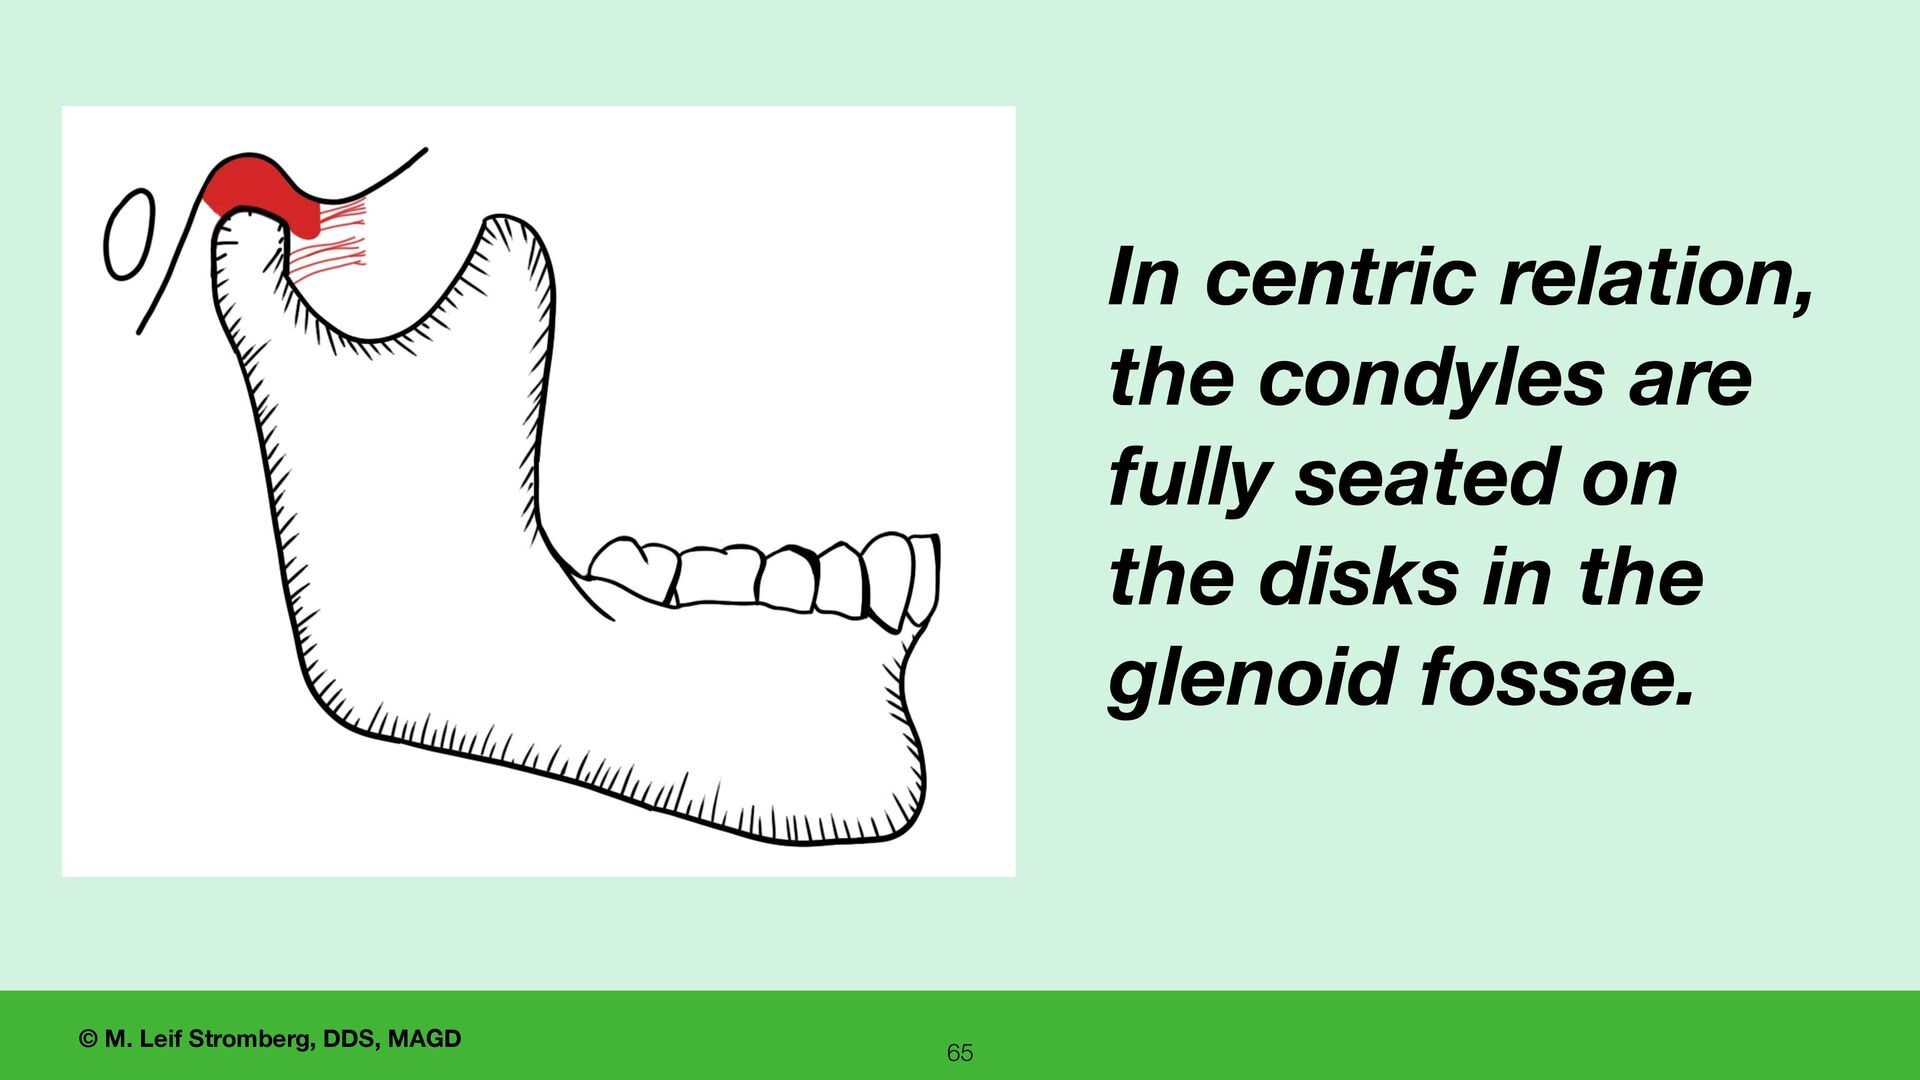
Complete Denture Occlusion • Fabricate dentures so that when the mandible closes in centric relation, the posterior teeth are in maximum intercuspation. The mandible is free to move into centric relation or any other position within its range of motion. It is not locked to only function in centric relation.
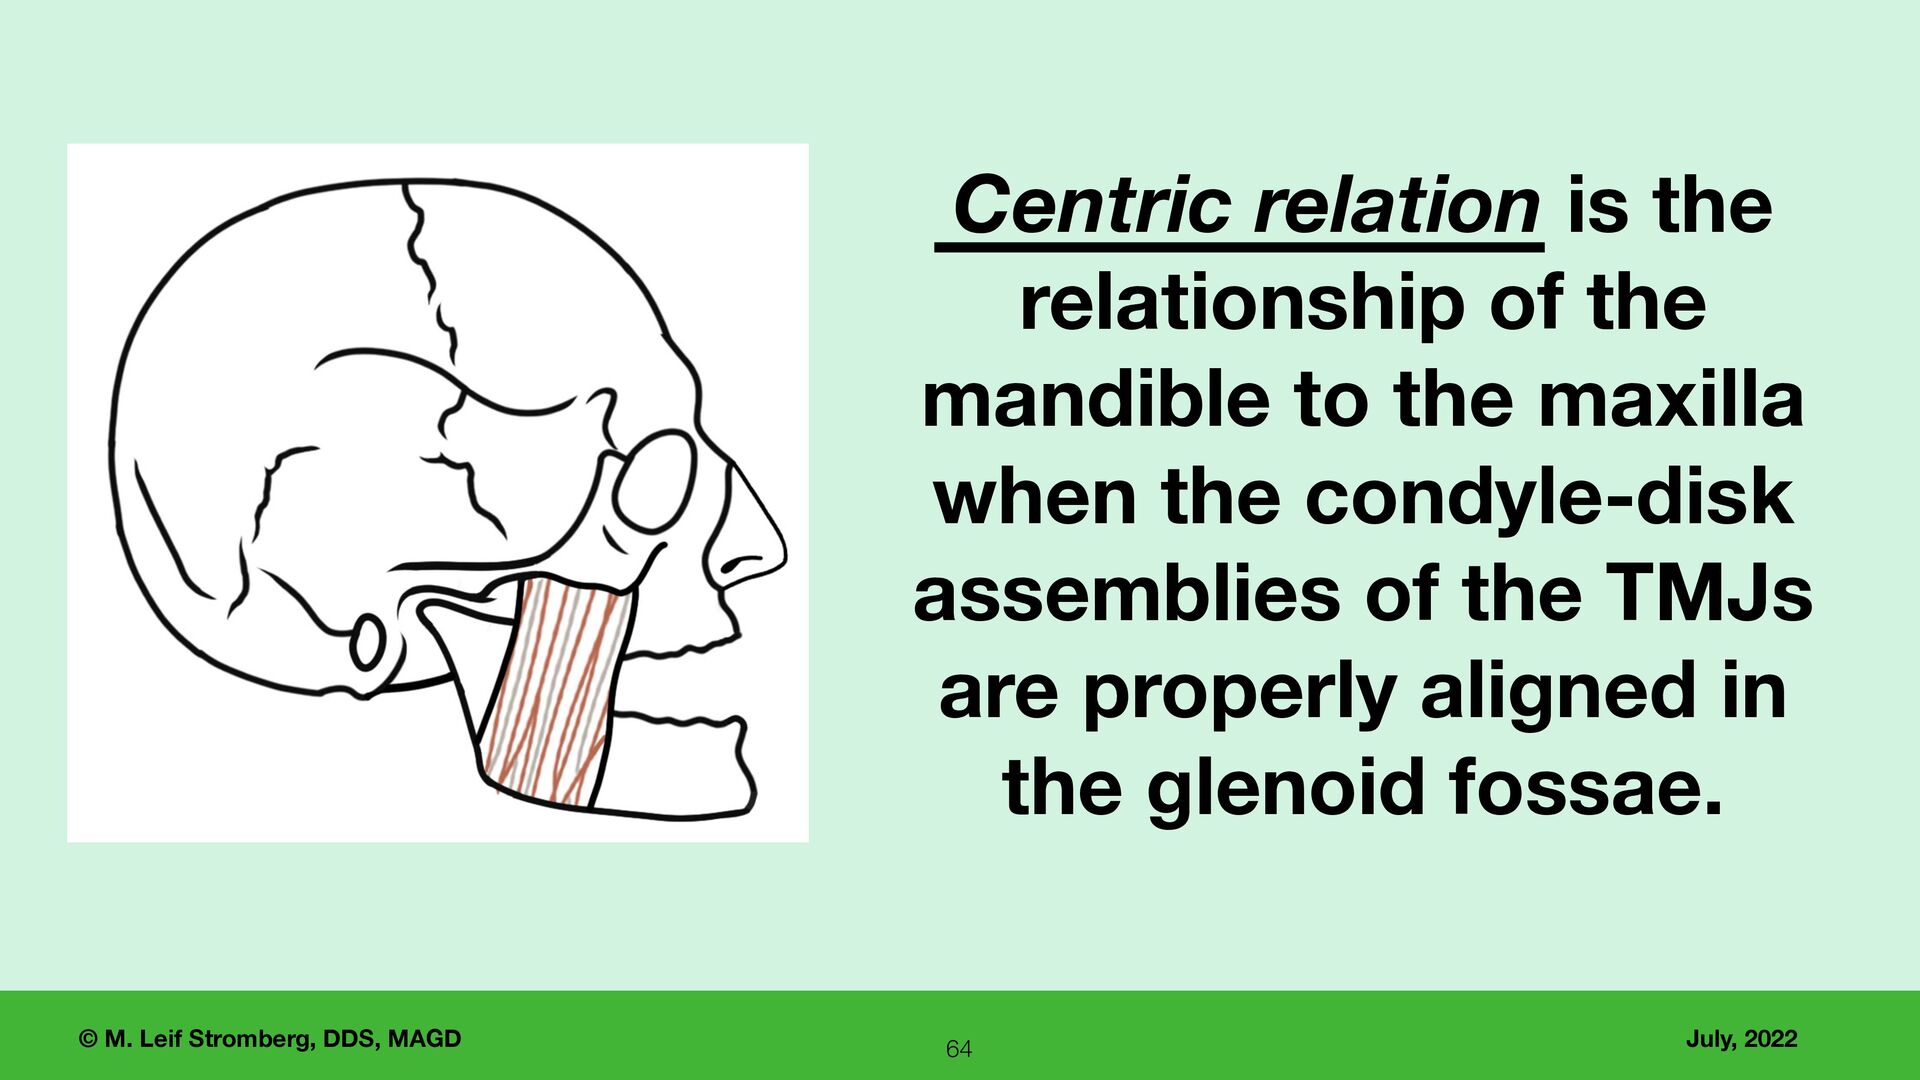
is an unstrained, normal, physiologic maxillomandibular relationship. • Centric relation is a clinically useful, repeatable position. Why is centric relation very important for complete dentures ?
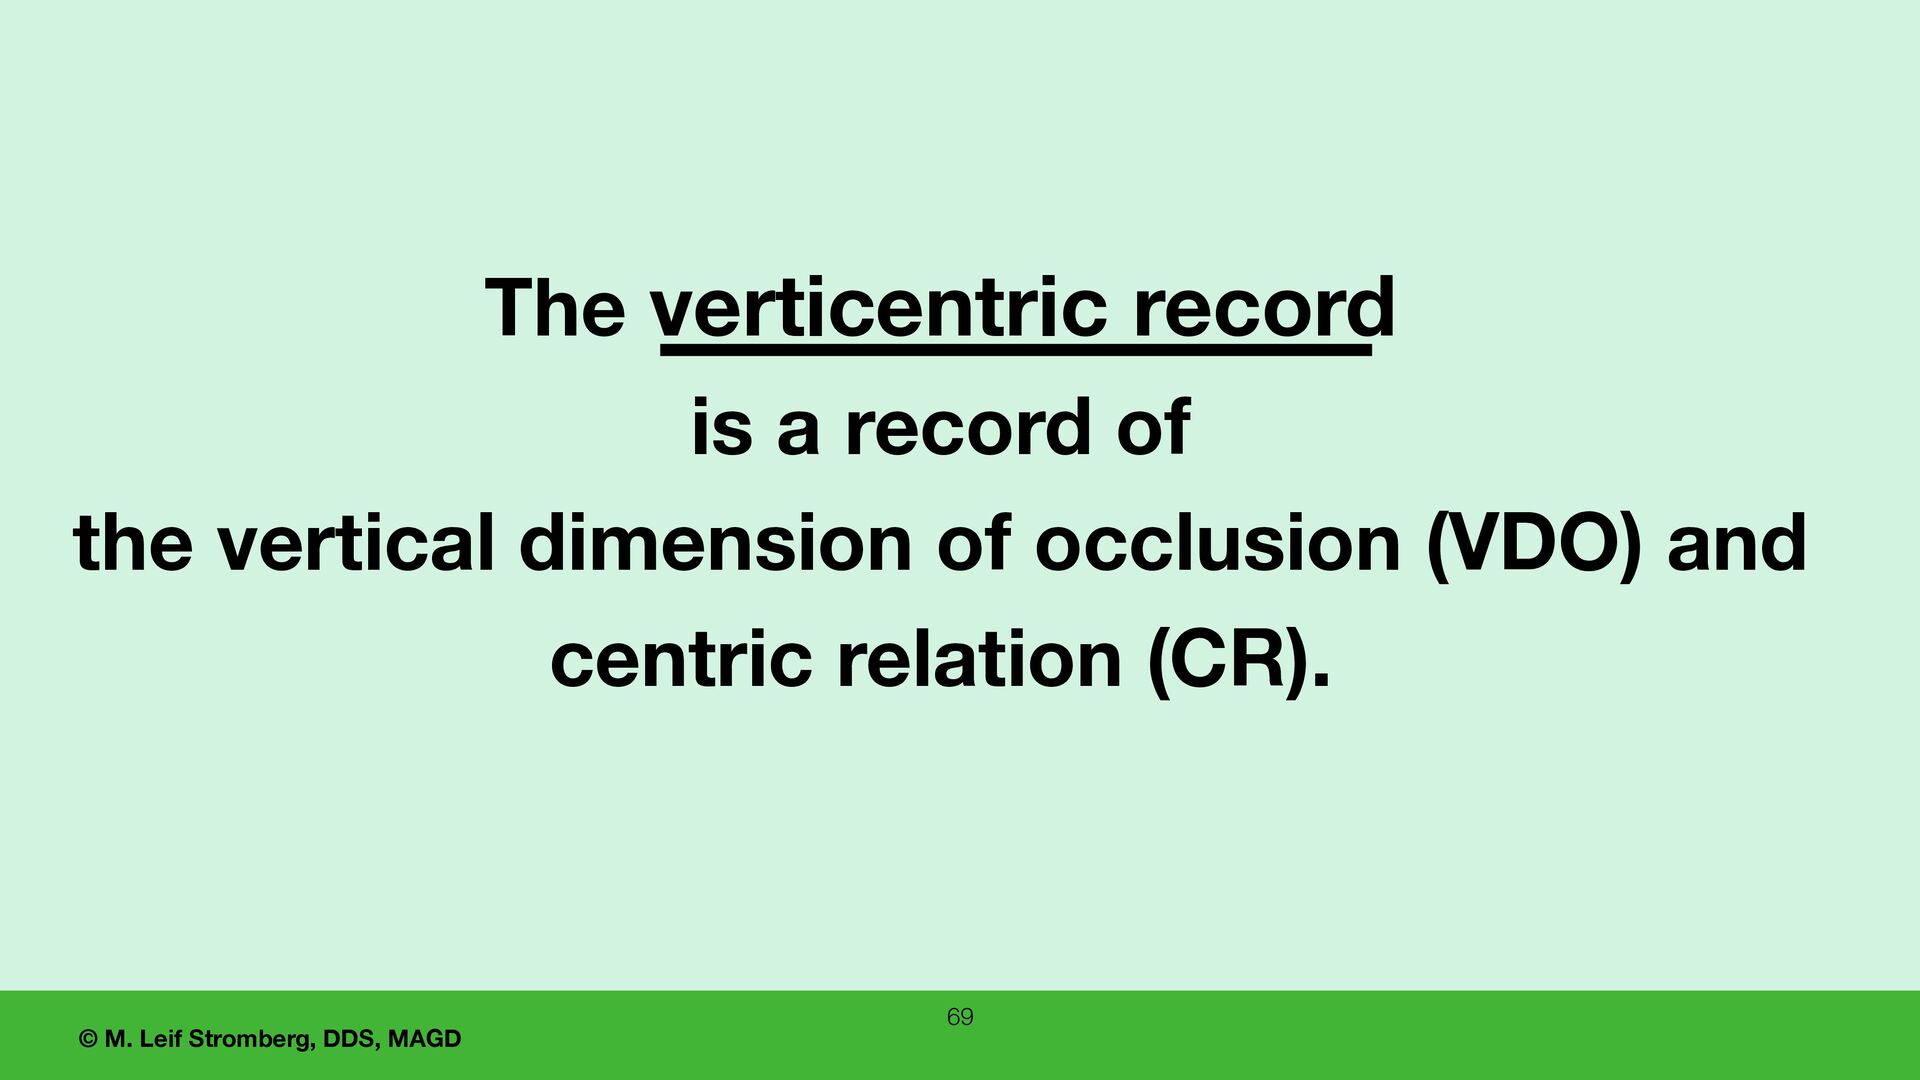
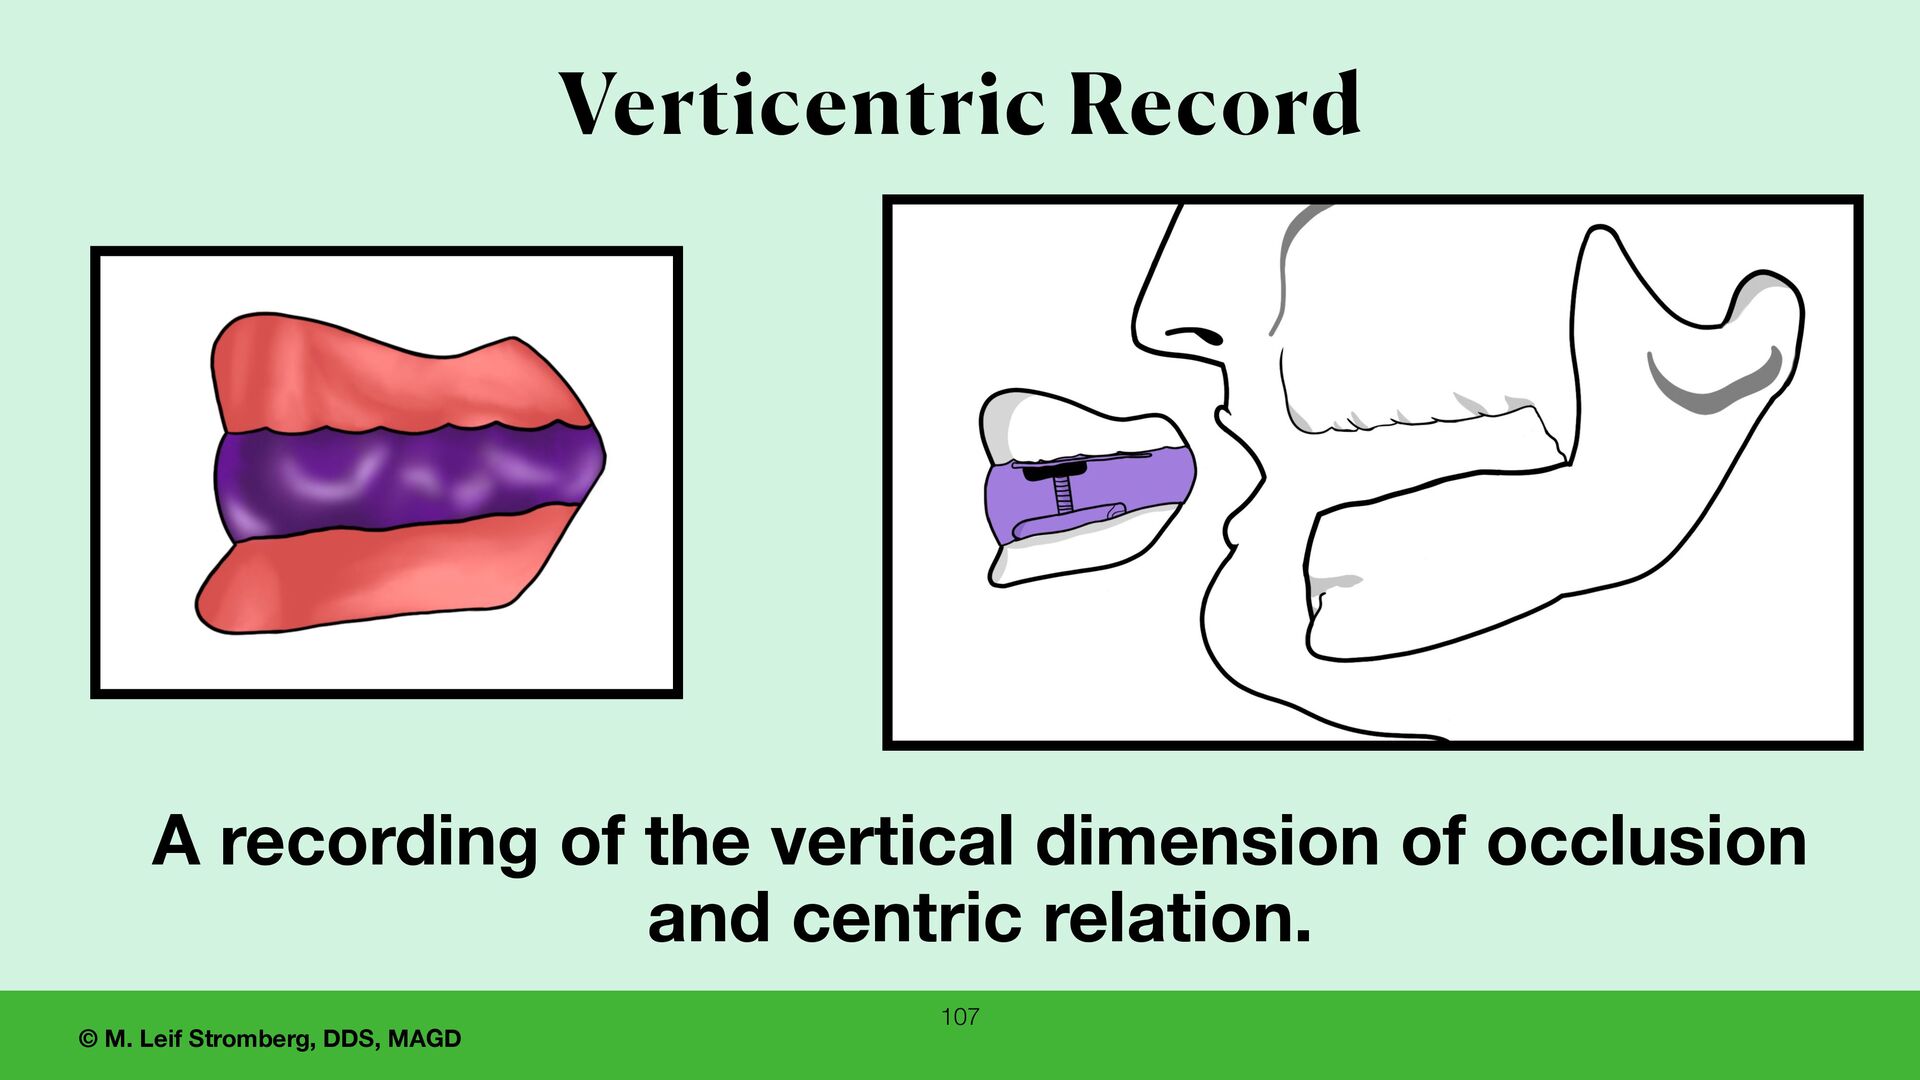
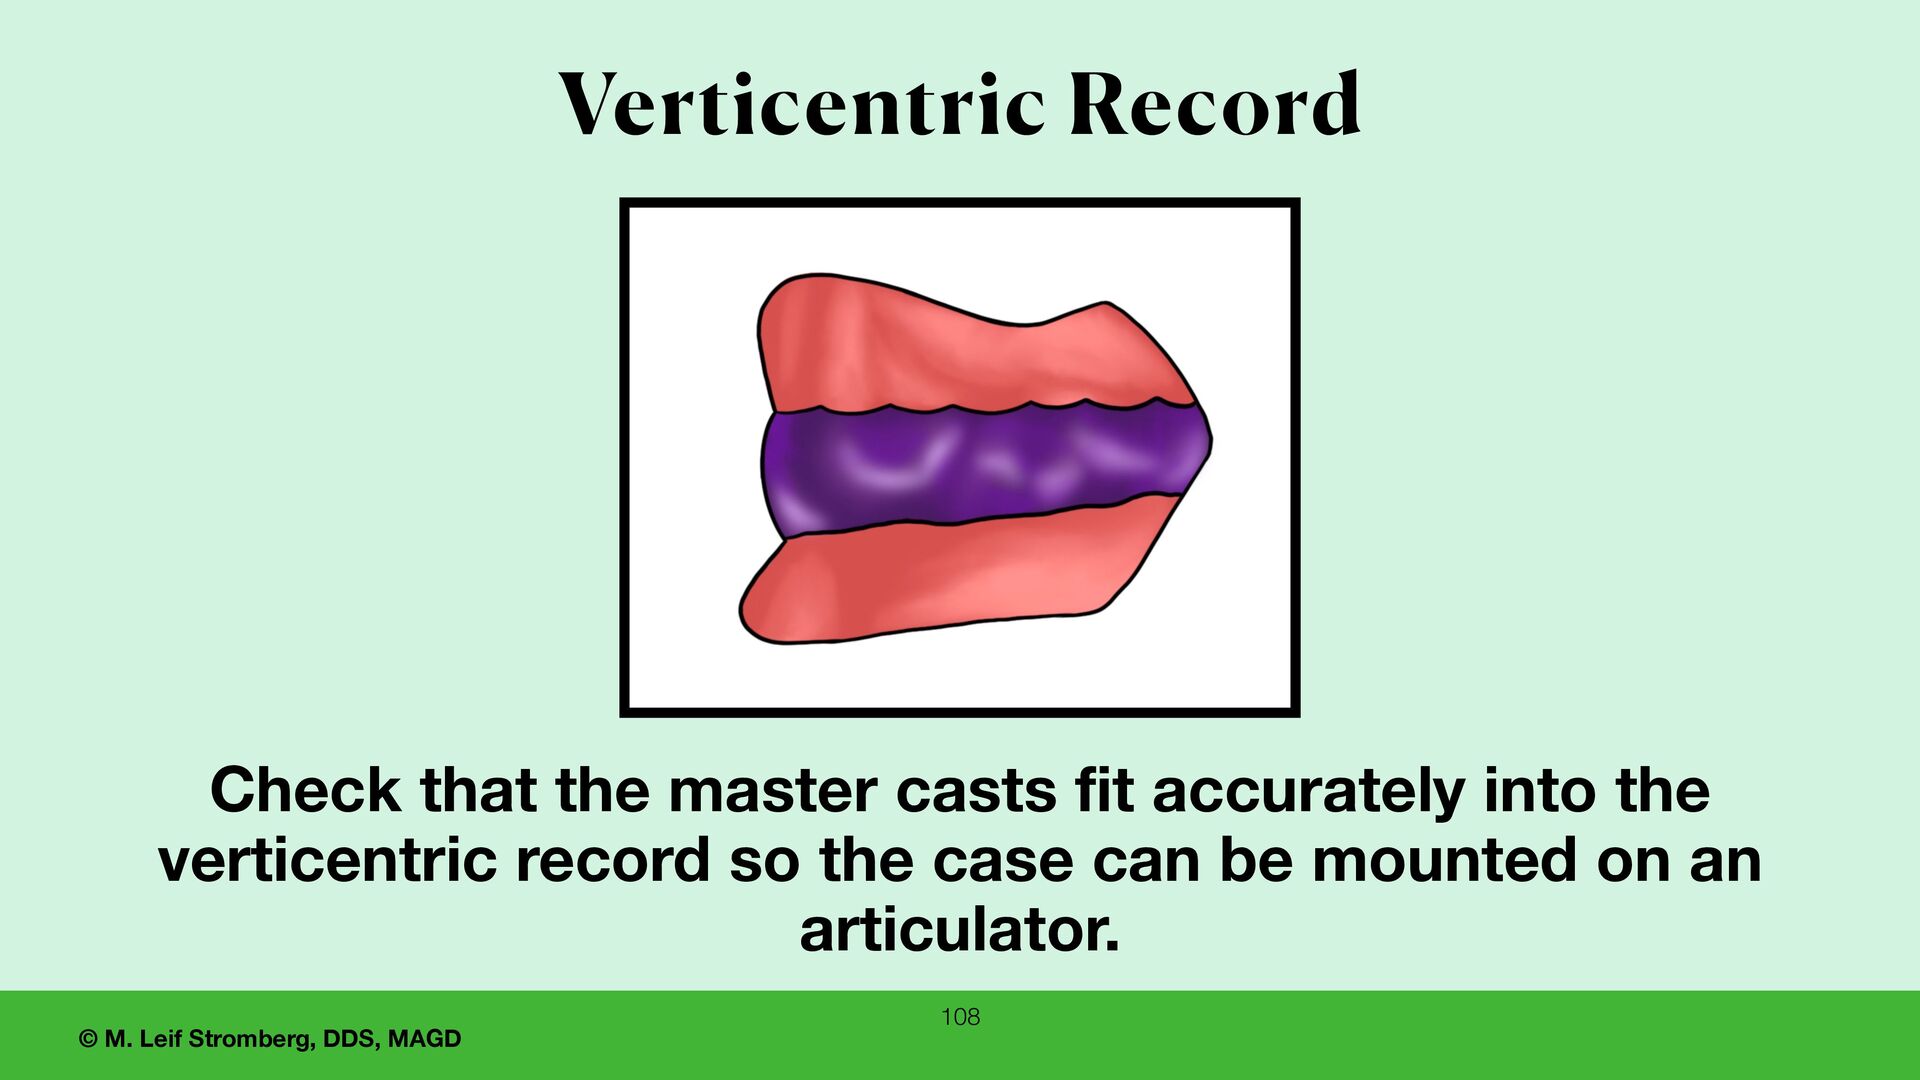
to have an accurate verticentric record so the master casts can be mounted on the articulator with an accurate VDO and CR, and then proceed to make the dentures. For predictably successful complete denture fabrication…
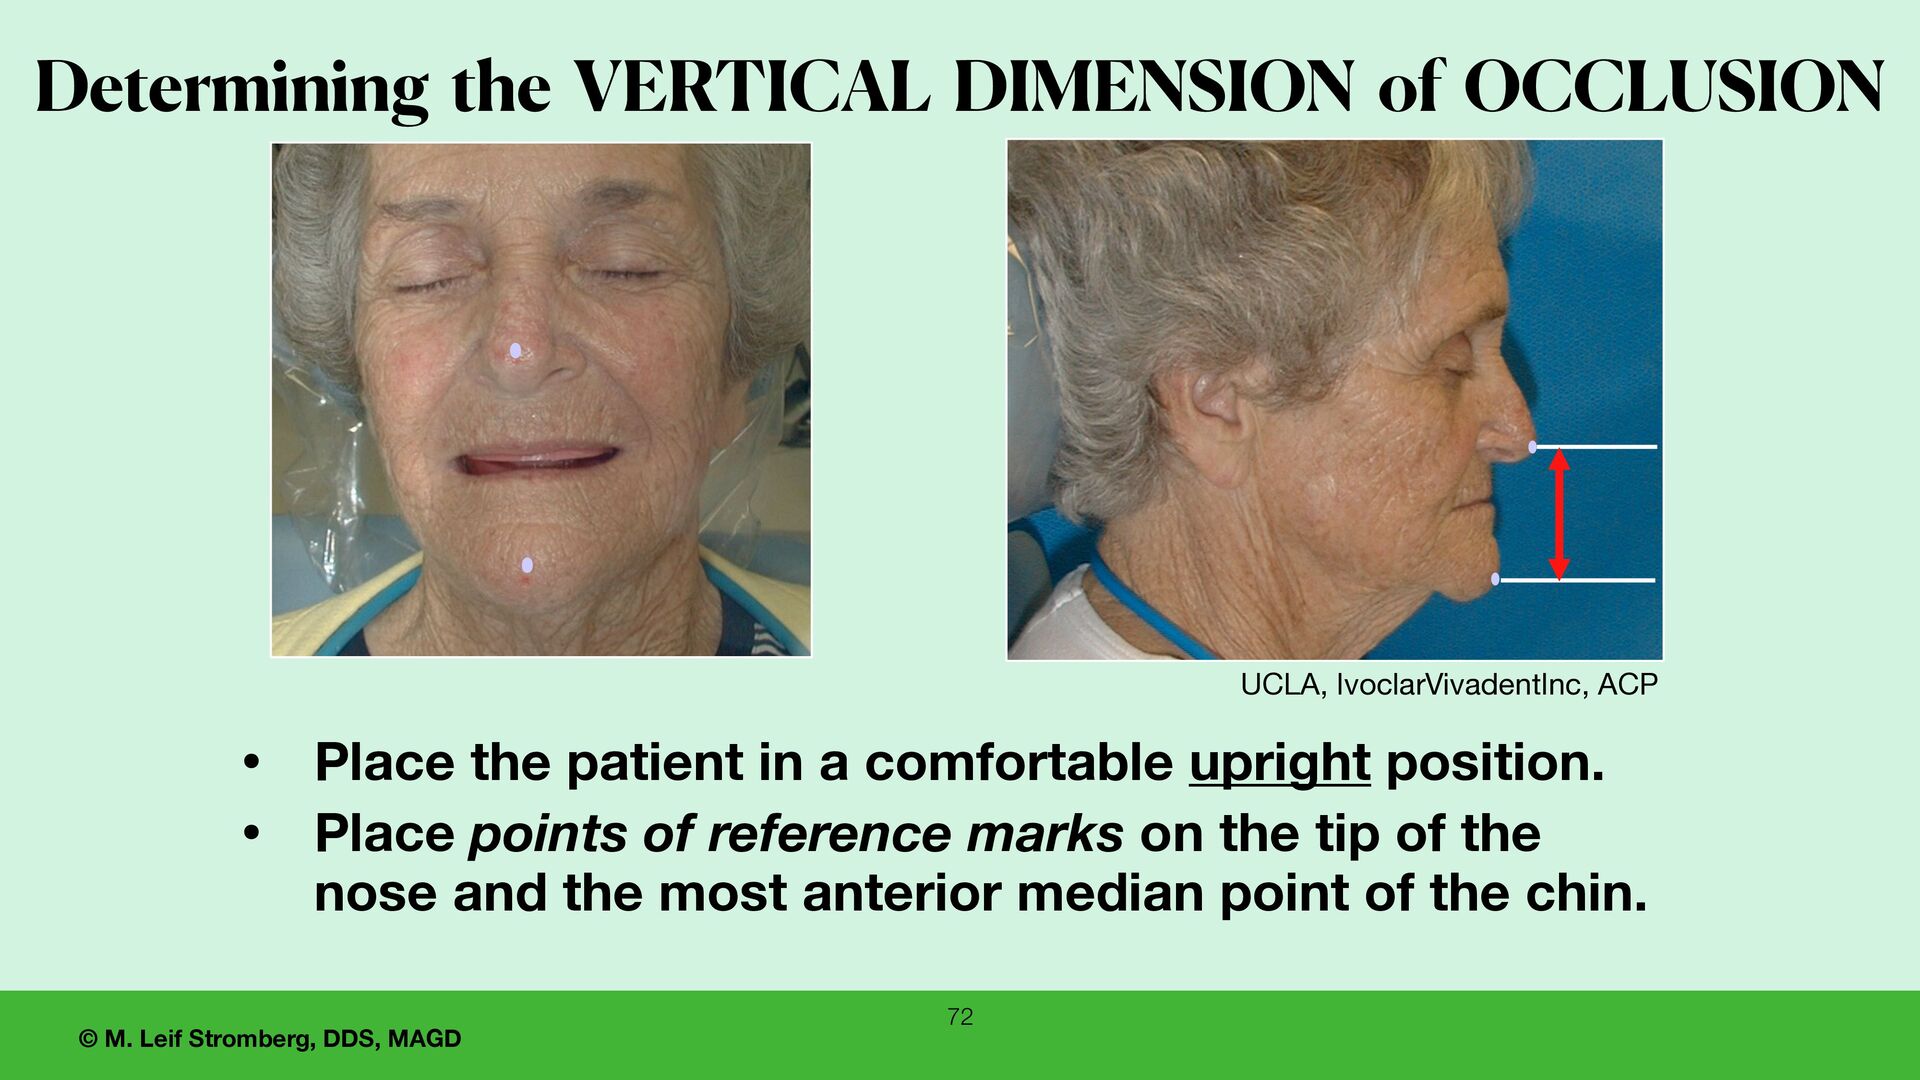
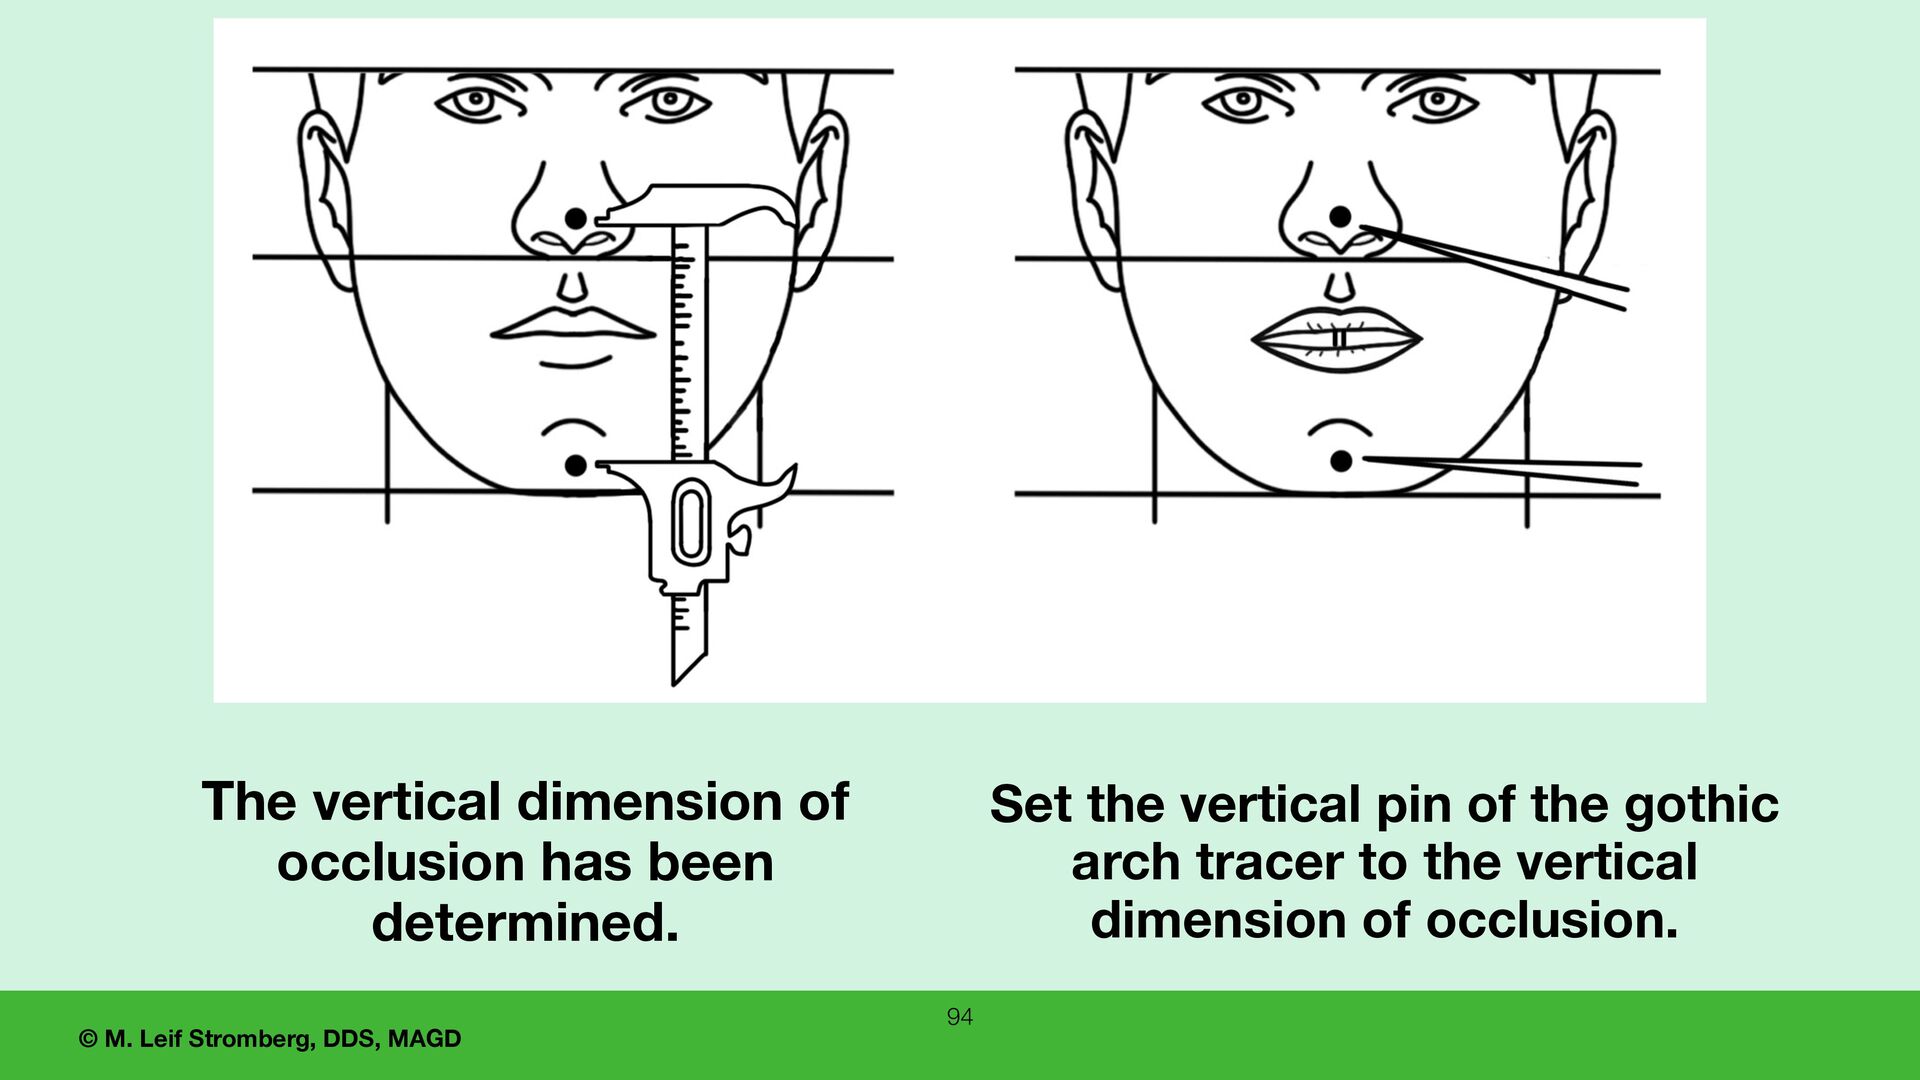
DIMENSION of OCCLUSION • Place the patient in a comfortable upright position. • Place points of reference marks on the tip of the nose and the most anterior median point of the chin. UCLA, IvoclarVivadentInc, ACP
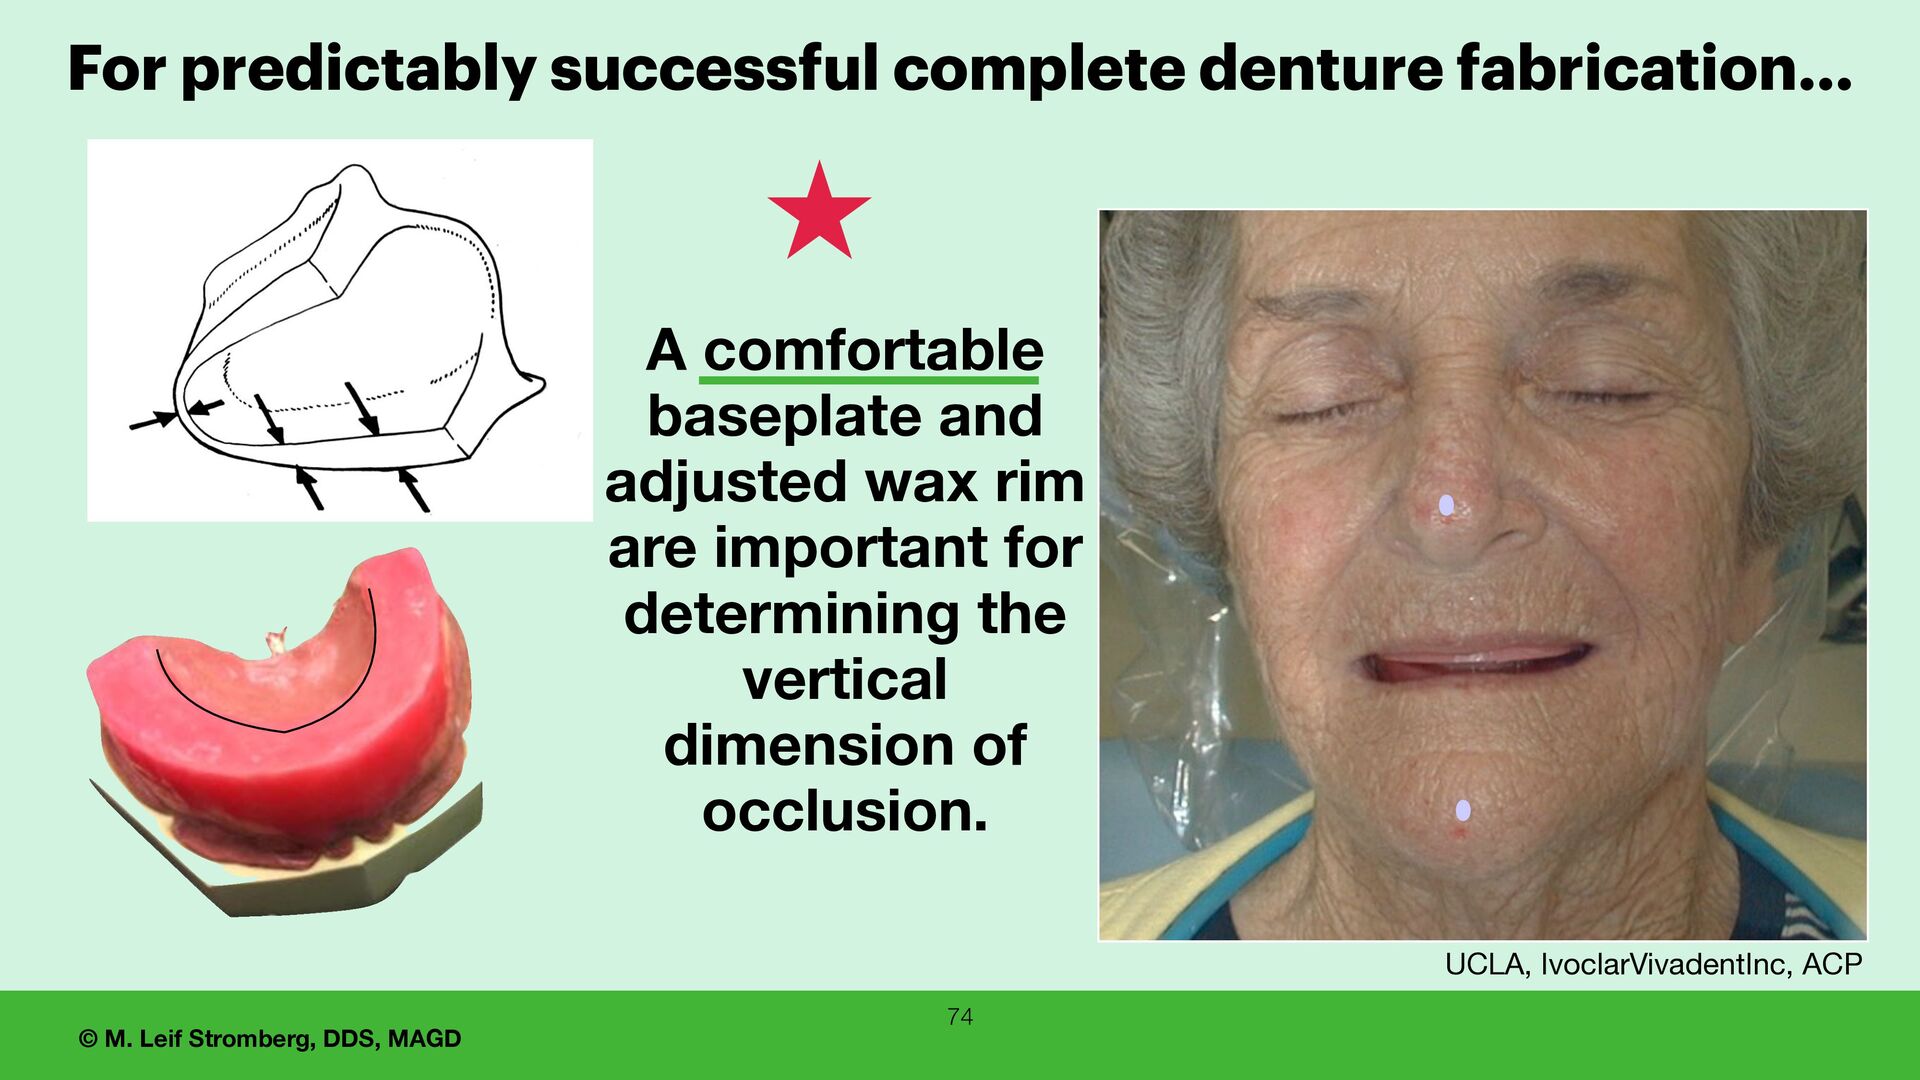
For predictably successful complete denture fabrication… A comfortable baseplate and adjusted wax rim are important for determining the vertical dimension of occlusion.
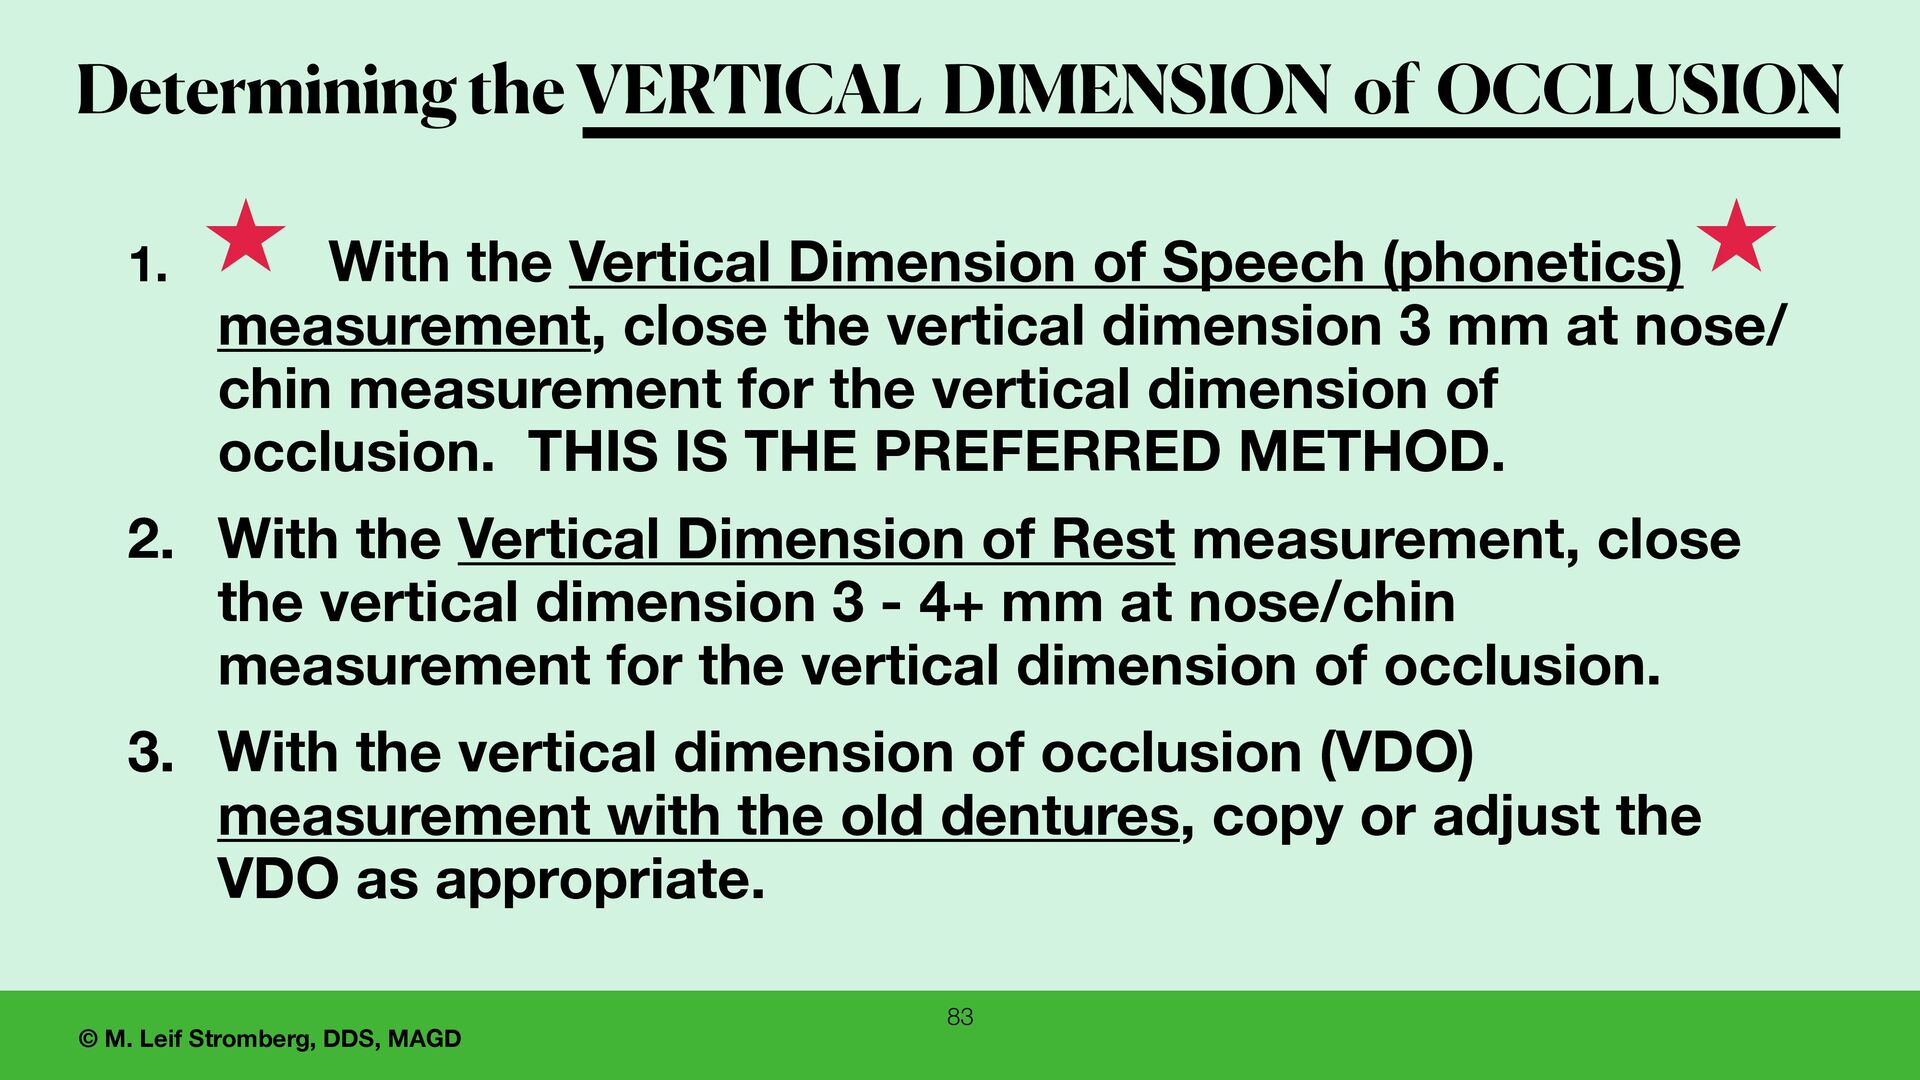
not one method for determining the vertical dimension of occlusion that can be used for all patients. • Therefore, it is advisable to use several methods and compare the results. • Using phonetics (the vertical dimension of speech) is the preferred method for determining the VDO. Determining the VERTICAL DIMENSION of OCCLUSION
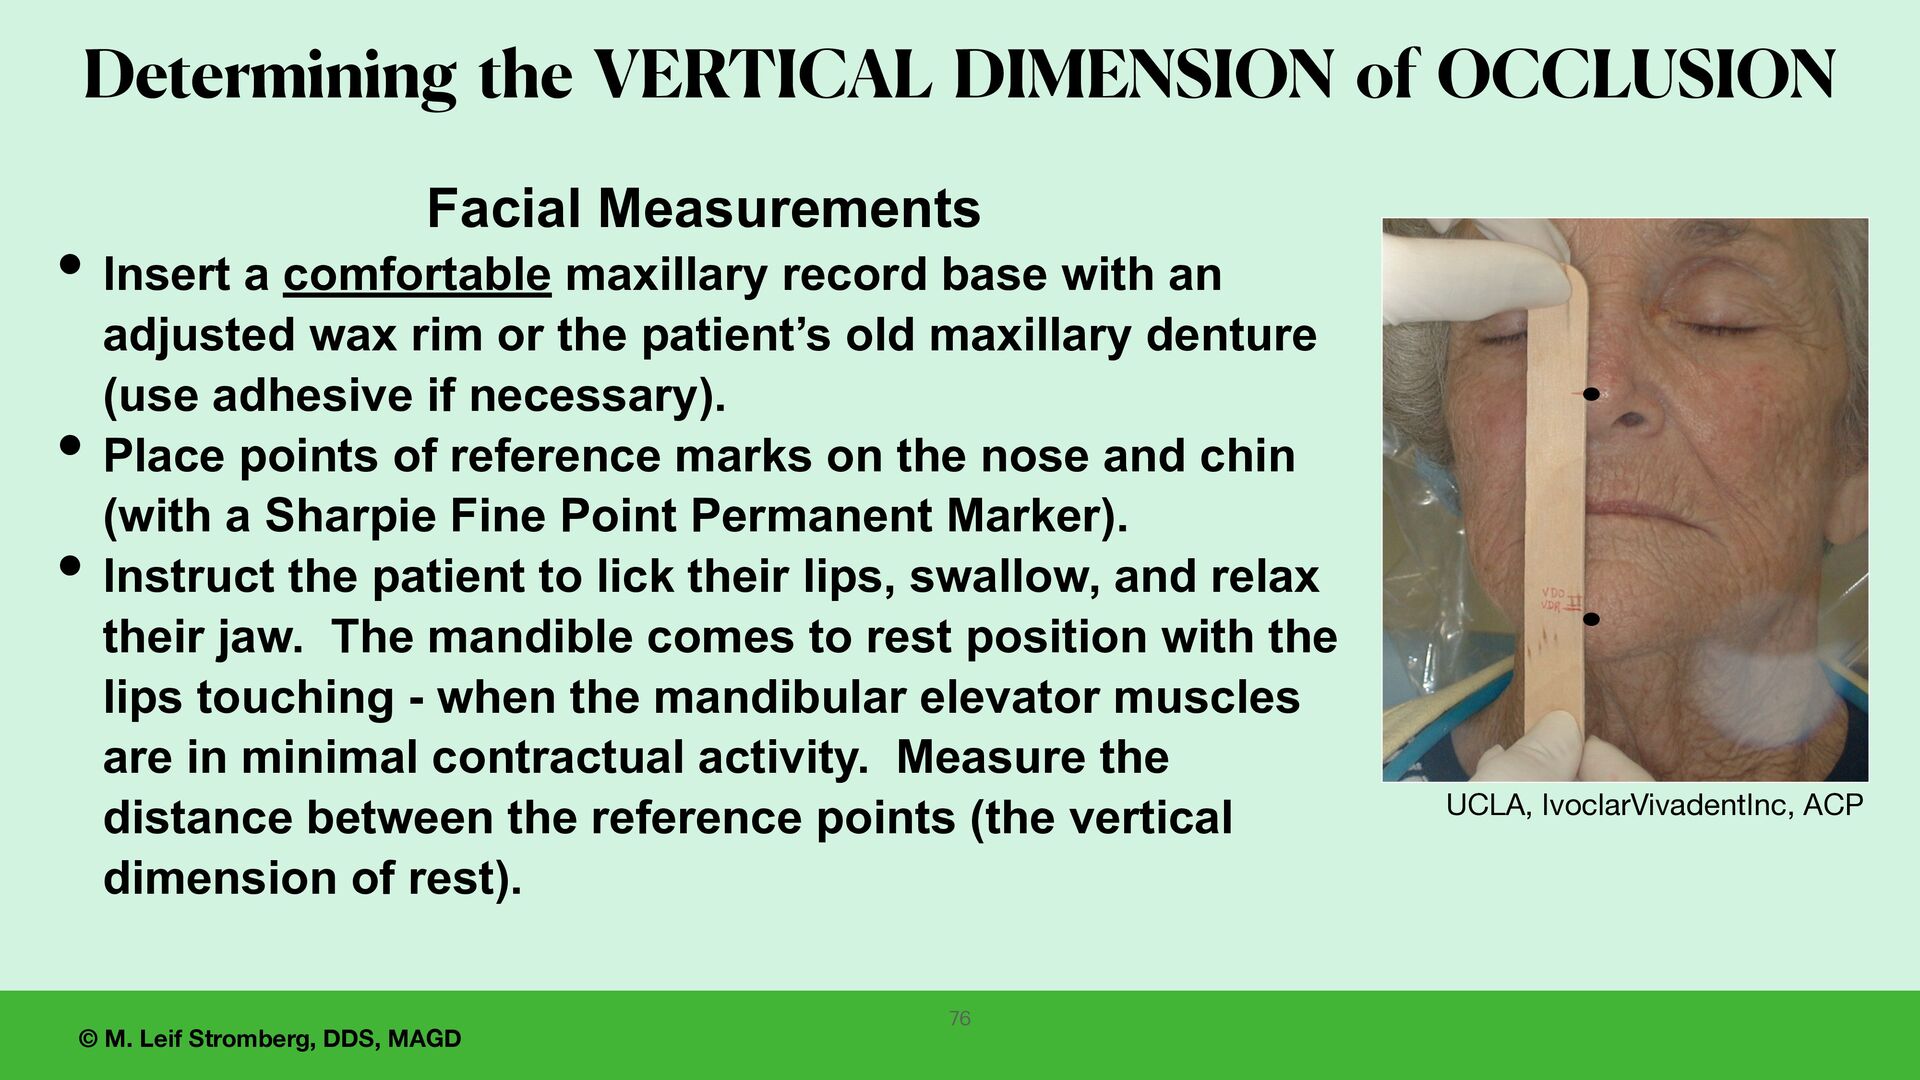
Determining the VERTICAL DIMENSION of OCCLUSION Facial Measurements • Insert a comfortable maxillary record base with an adjusted wax rim or the patient’s old maxillary denture (use adhesive if necessary). • Place points of reference marks on the nose and chin (with a Sharpie Fine Point Permanent Marker). • Instruct the patient to lick their lips, swallow, and relax their jaw. The mandible comes to rest position with the lips touching - when the mandibular elevator muscles are in minimal contractual activity. Measure the distance between the reference points (the vertical dimension of rest).
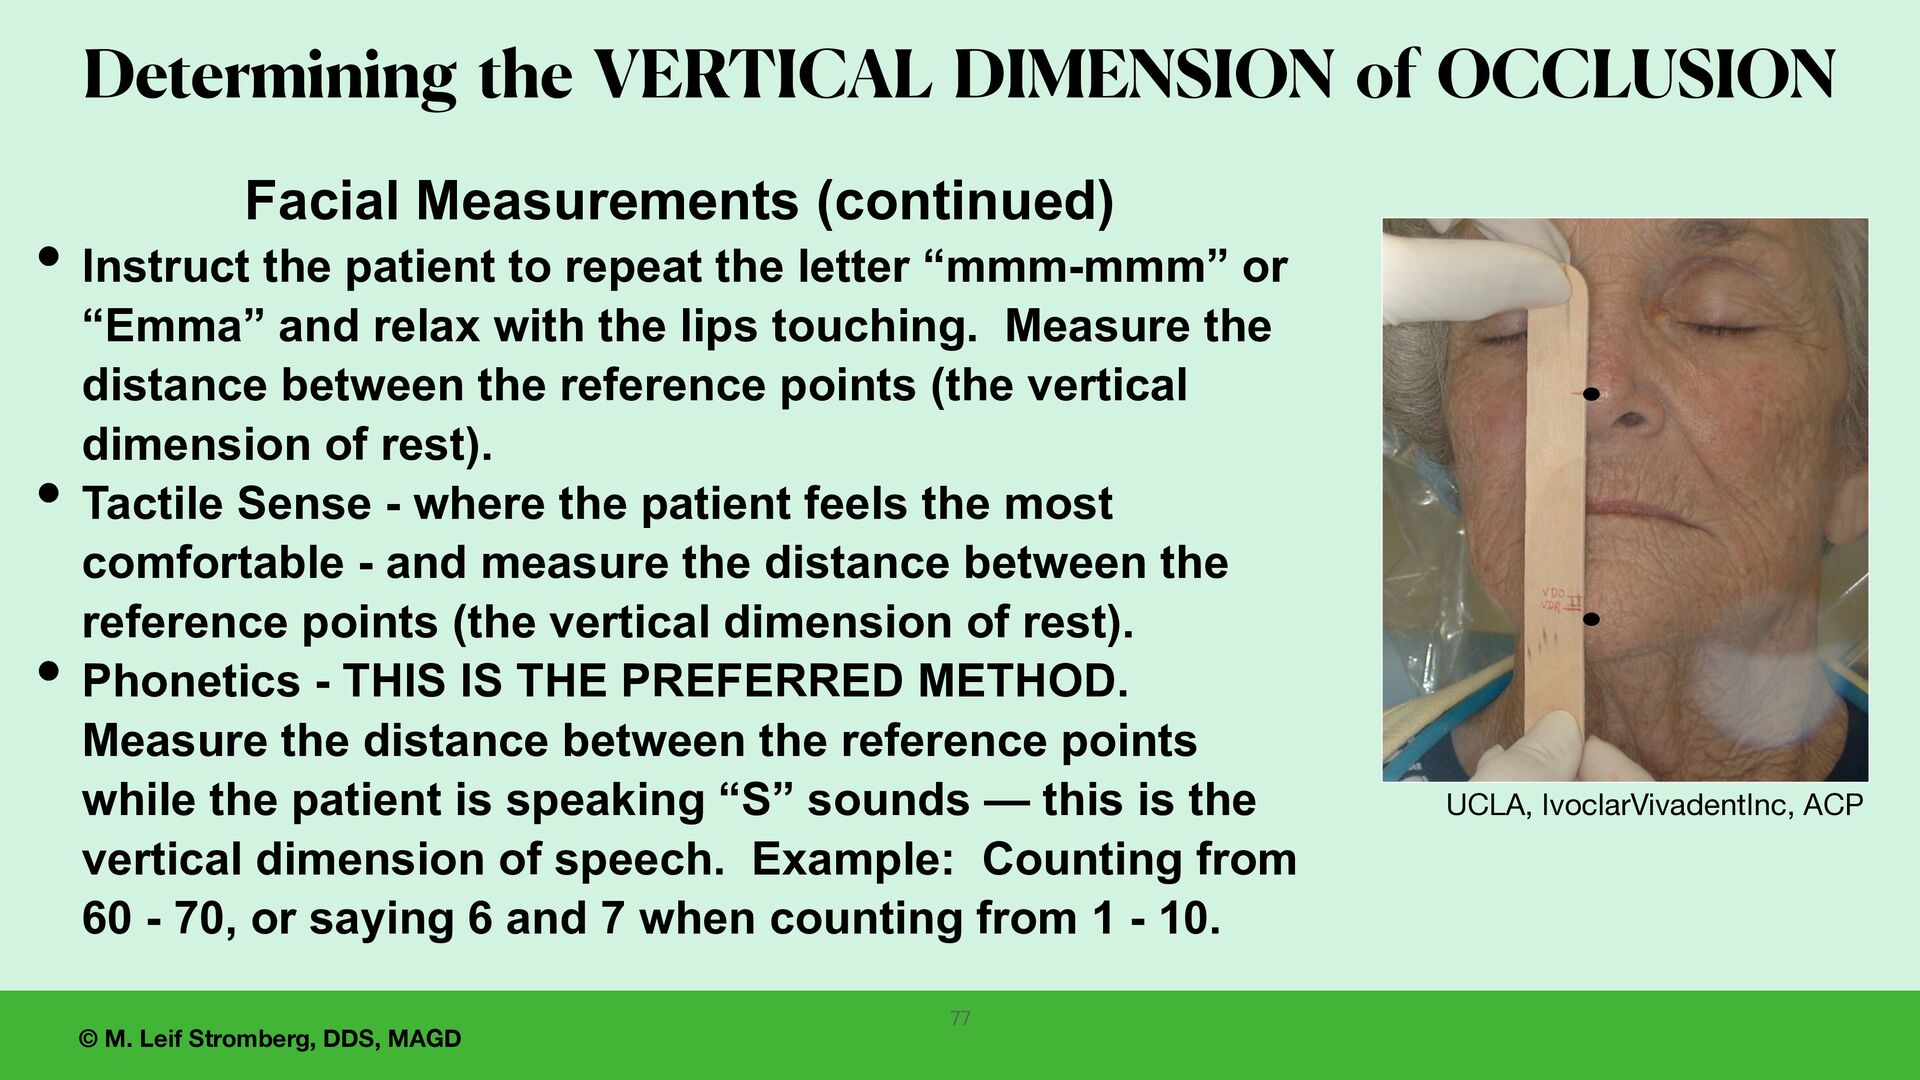
DIMENSION of OCCLUSION UCLA, IvoclarVivadentInc, ACP Facial Measurements (continued) • Instruct the patient to repeat the letter “mmm-mmm” or “Emma” and relax with the lips touching. Measure the distance between the reference points (the vertical dimension of rest). • Tactile Sense - where the patient feels the most comfortable - and measure the distance between the reference points (the vertical dimension of rest). • Phonetics - THIS IS THE PREFERRED METHOD. Measure the distance between the reference points while the patient is speaking “S” sounds — this is the vertical dimension of speech. Example: Counting from 60 - 70, or saying 6 and 7 when counting from 1 - 10.
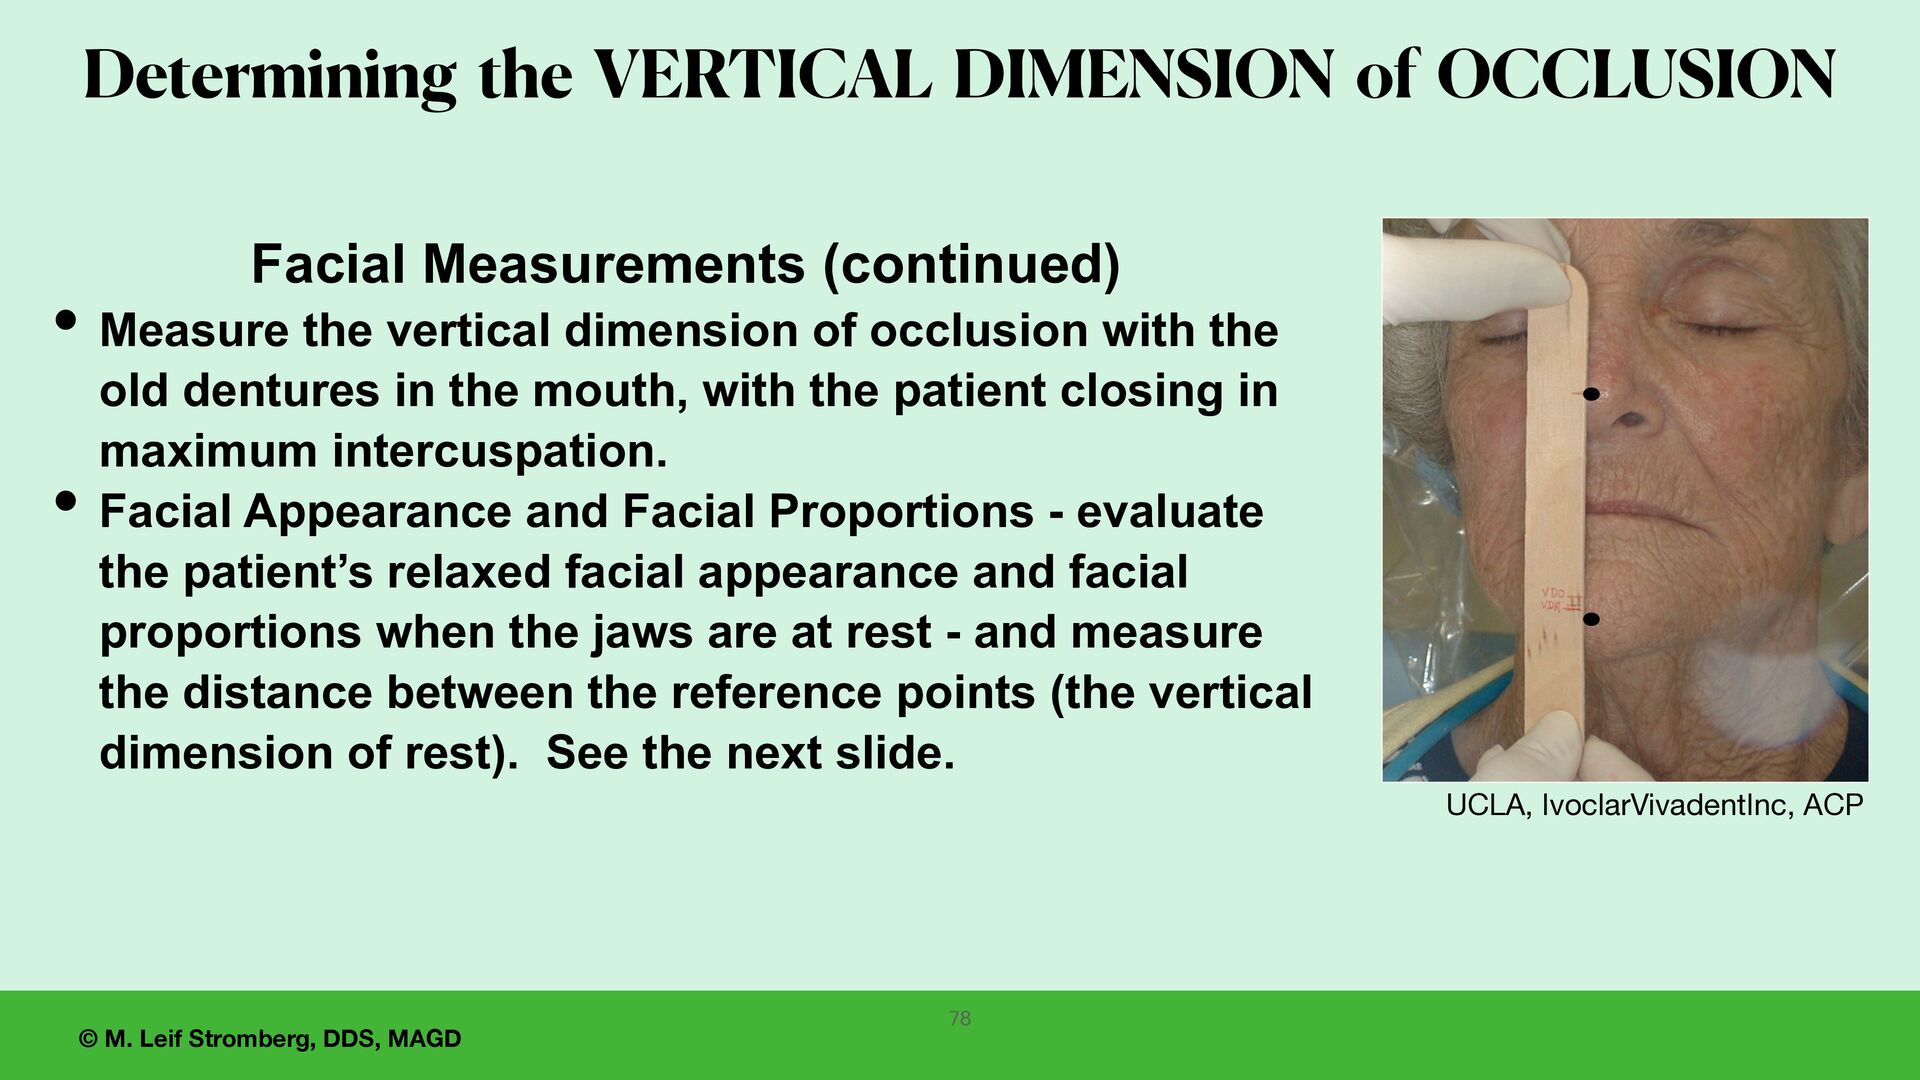
DIMENSION of OCCLUSION UCLA, IvoclarVivadentInc, ACP Facial Measurements (continued) • Measure the vertical dimension of occlusion with the old dentures in the mouth, with the patient closing in maximum intercuspation. • Facial Appearance and Facial Proportions - evaluate the patient’s relaxed facial appearance and facial proportions when the jaws are at rest - and measure the distance between the reference points (the vertical dimension of rest). See the next slide.
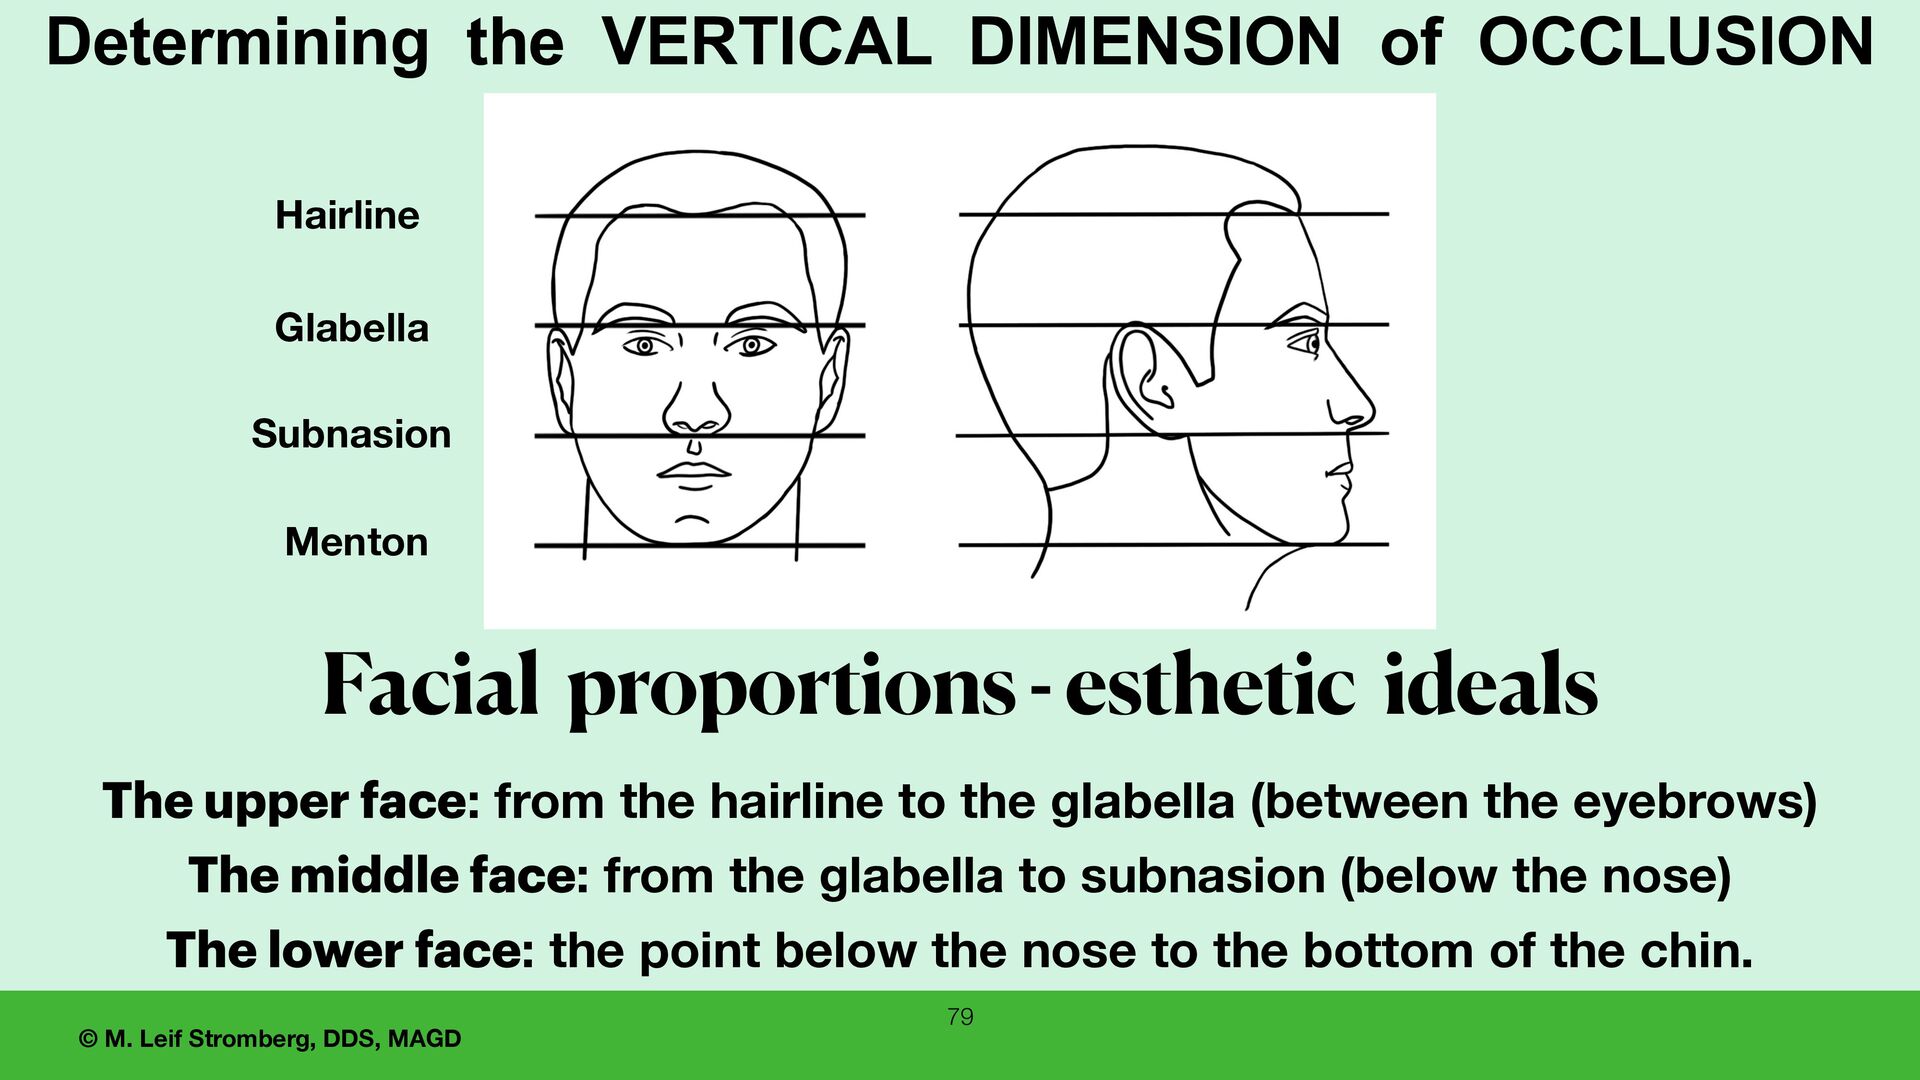
from the hairline to the glabella (between the eyebrows) The middle face: from the glabella to subnasion (below the nose) The lower face: the point below the nose to the bottom of the chin. Hairline Menton Subnasion Glabella Facial proportions - esthetic ideals Determining the VERTICAL DIMENSION of OCCLUSION
DIMENSION of OCCLUSION 1. The vertical dimension of rest is greater than (more open than) 2. The vertical dimension of speech is greater than (more open than) 3. The vertical dimension of occlusion.
Vertical Dimension of Speech (phonetics) measurement, close the vertical dimension 3 mm at nose/ chin measurement for the vertical dimension of occlusion. THIS IS THE PREFERRED METHOD. 2. With the Vertical Dimension of Rest measurement, close the vertical dimension 3 - 4+ mm at nose/chin measurement for the vertical dimension of occlusion. 3. With the vertical dimension of occlusion (VDO) measurement with the old dentures, copy or adjust the VDO as appropriate. Determining the VERTICAL DIMENSION of OCCLUSION
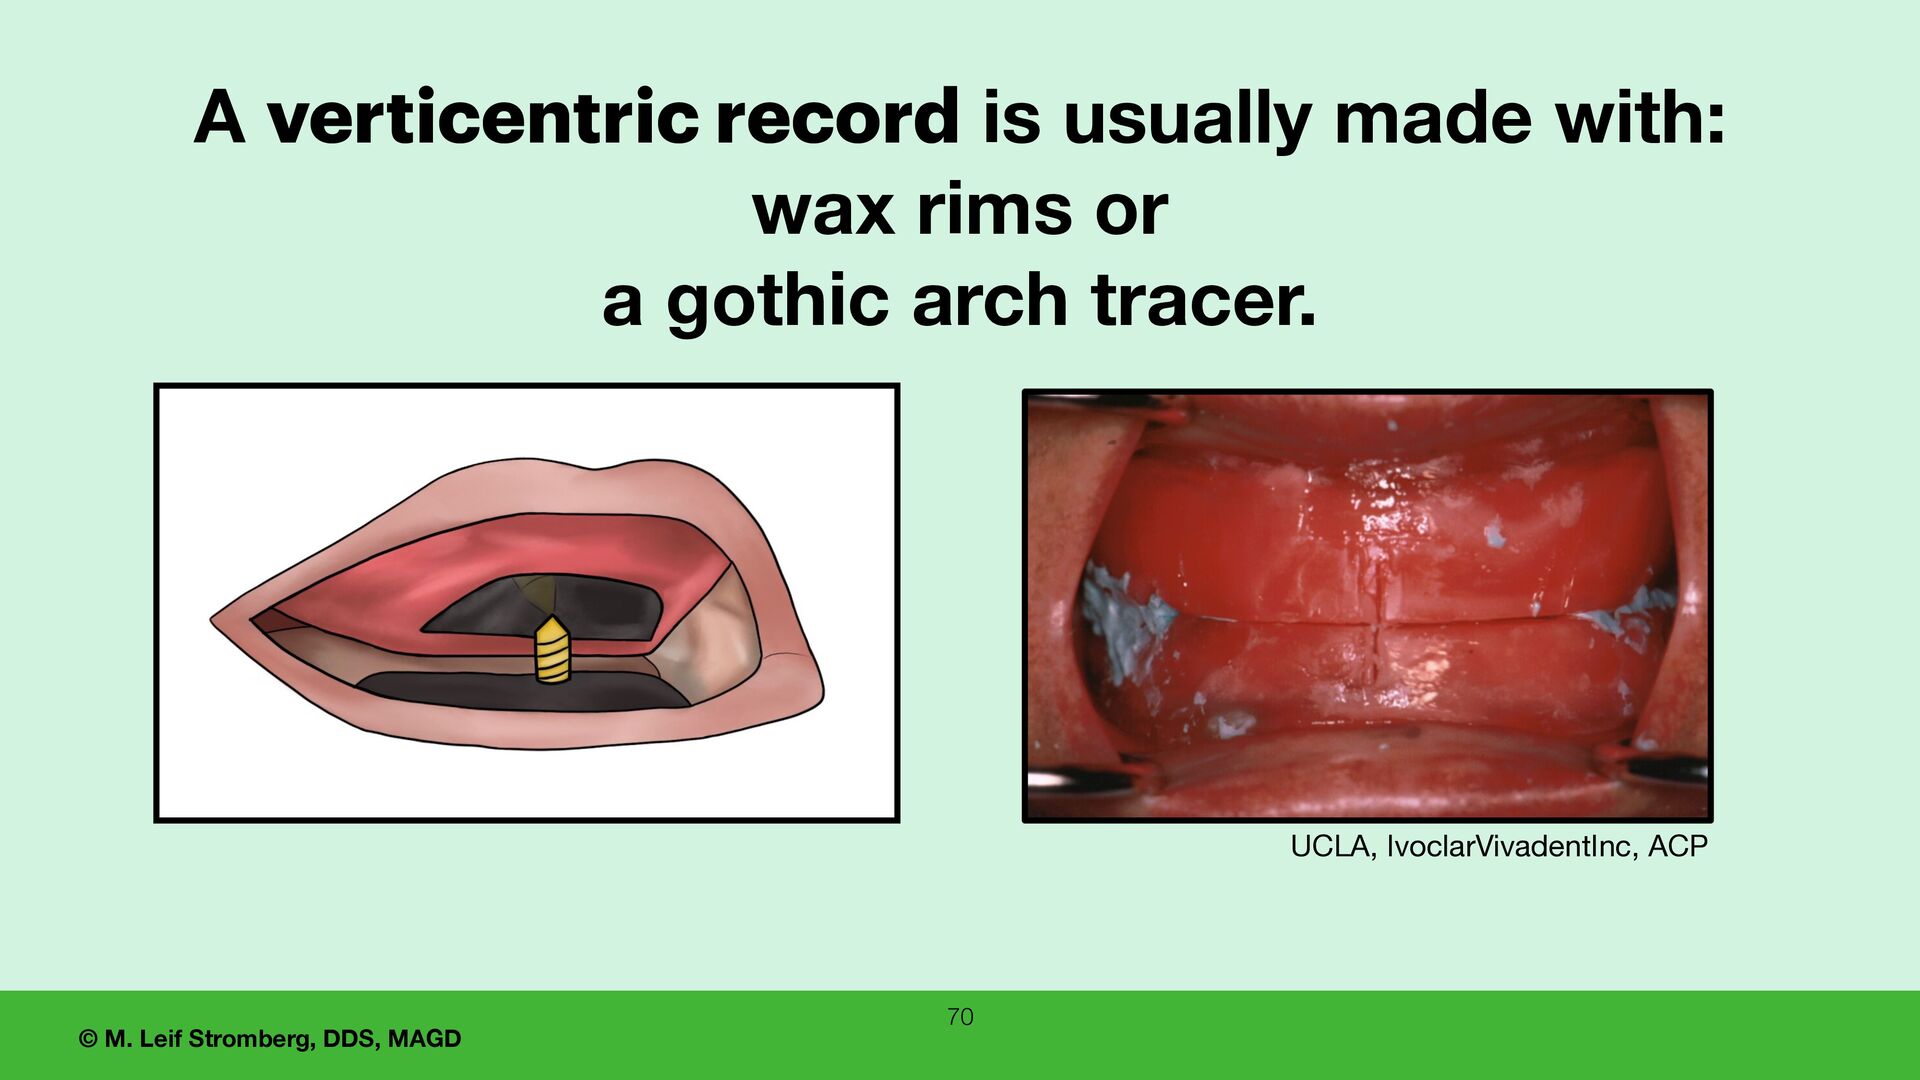
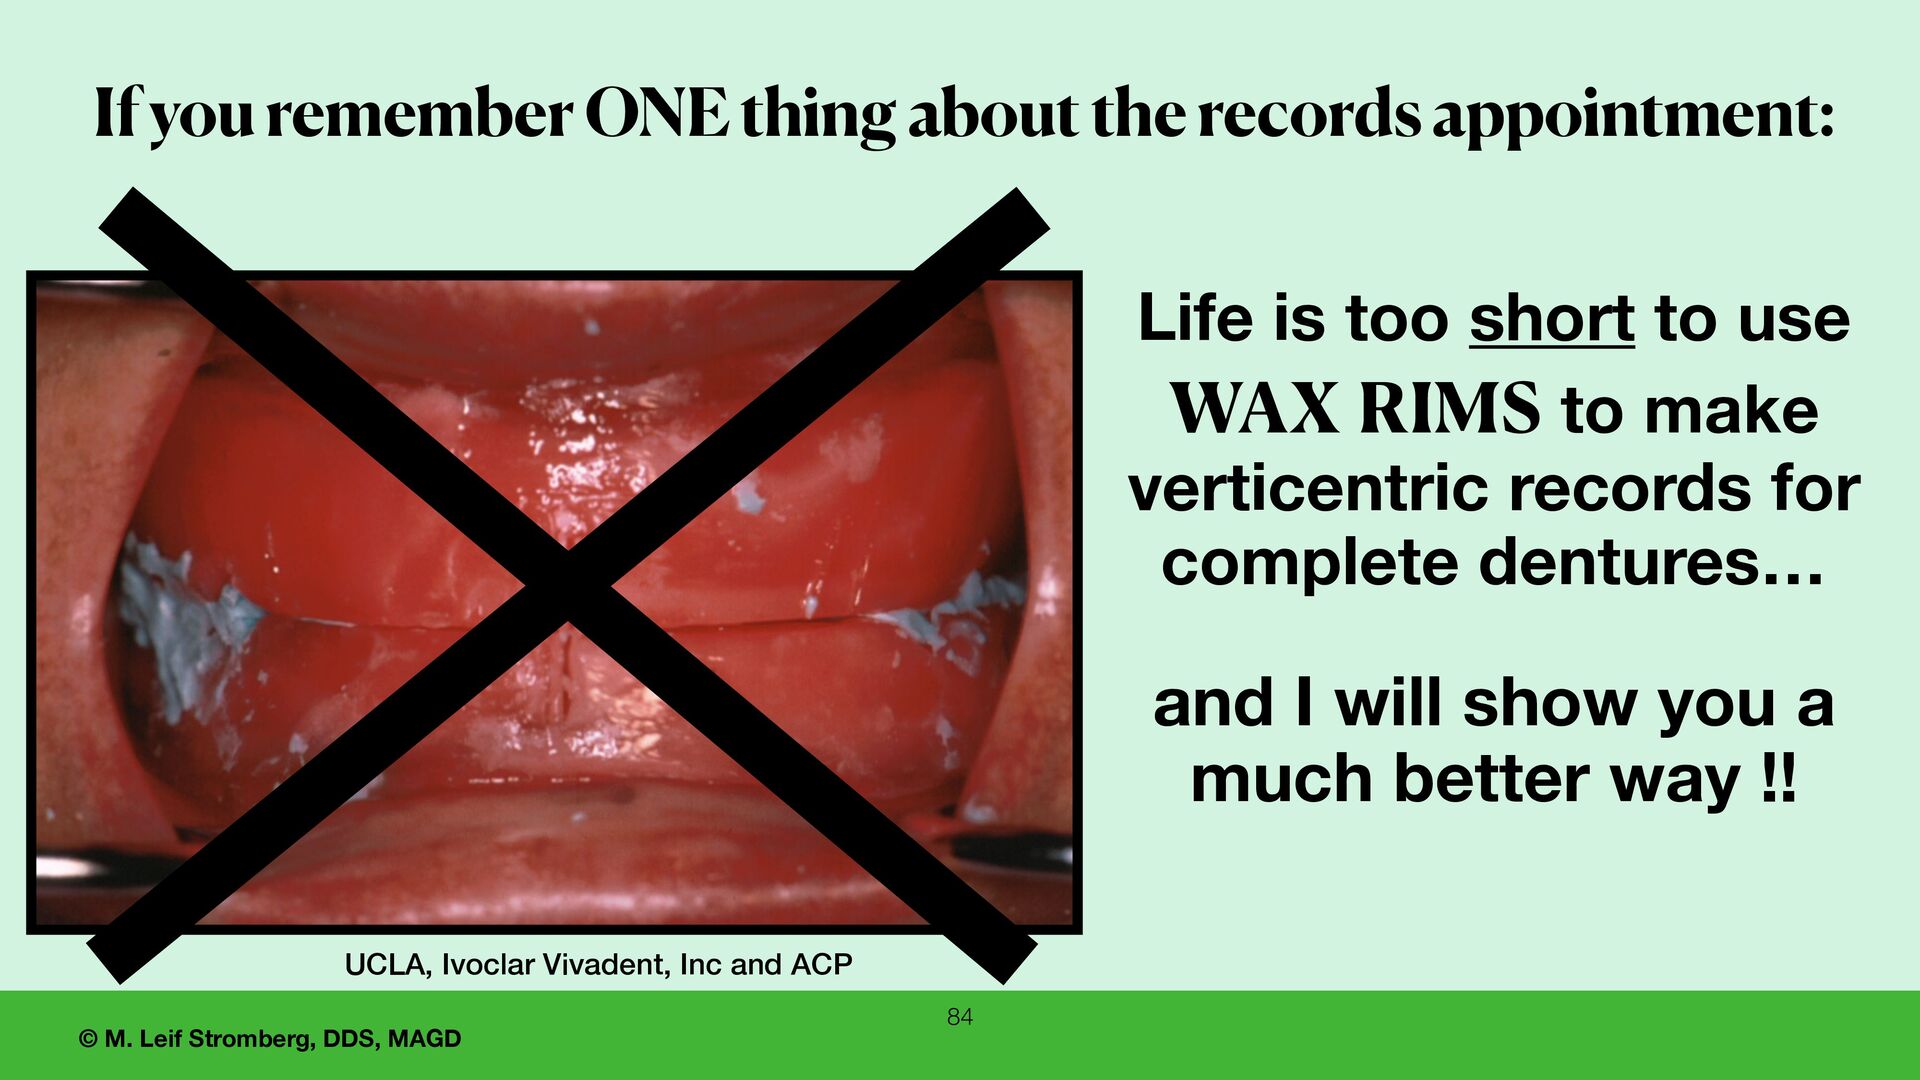
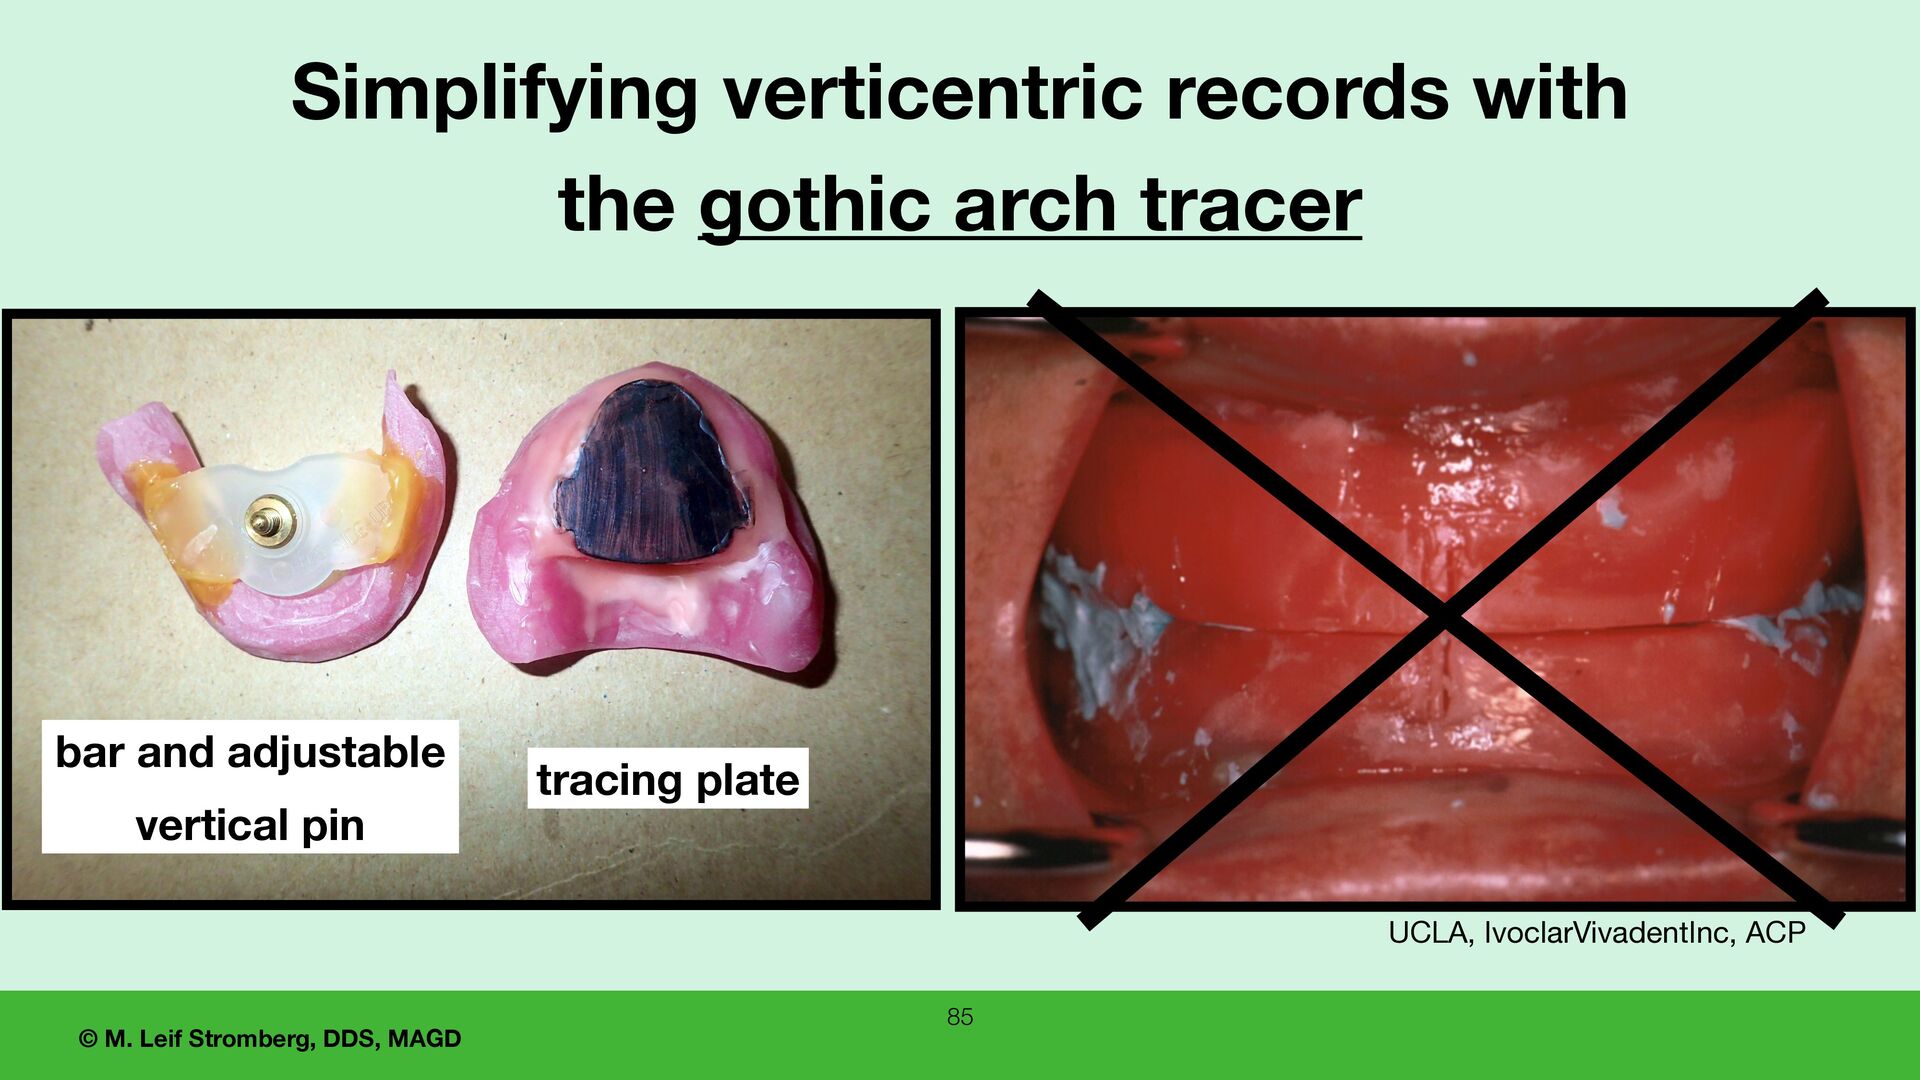
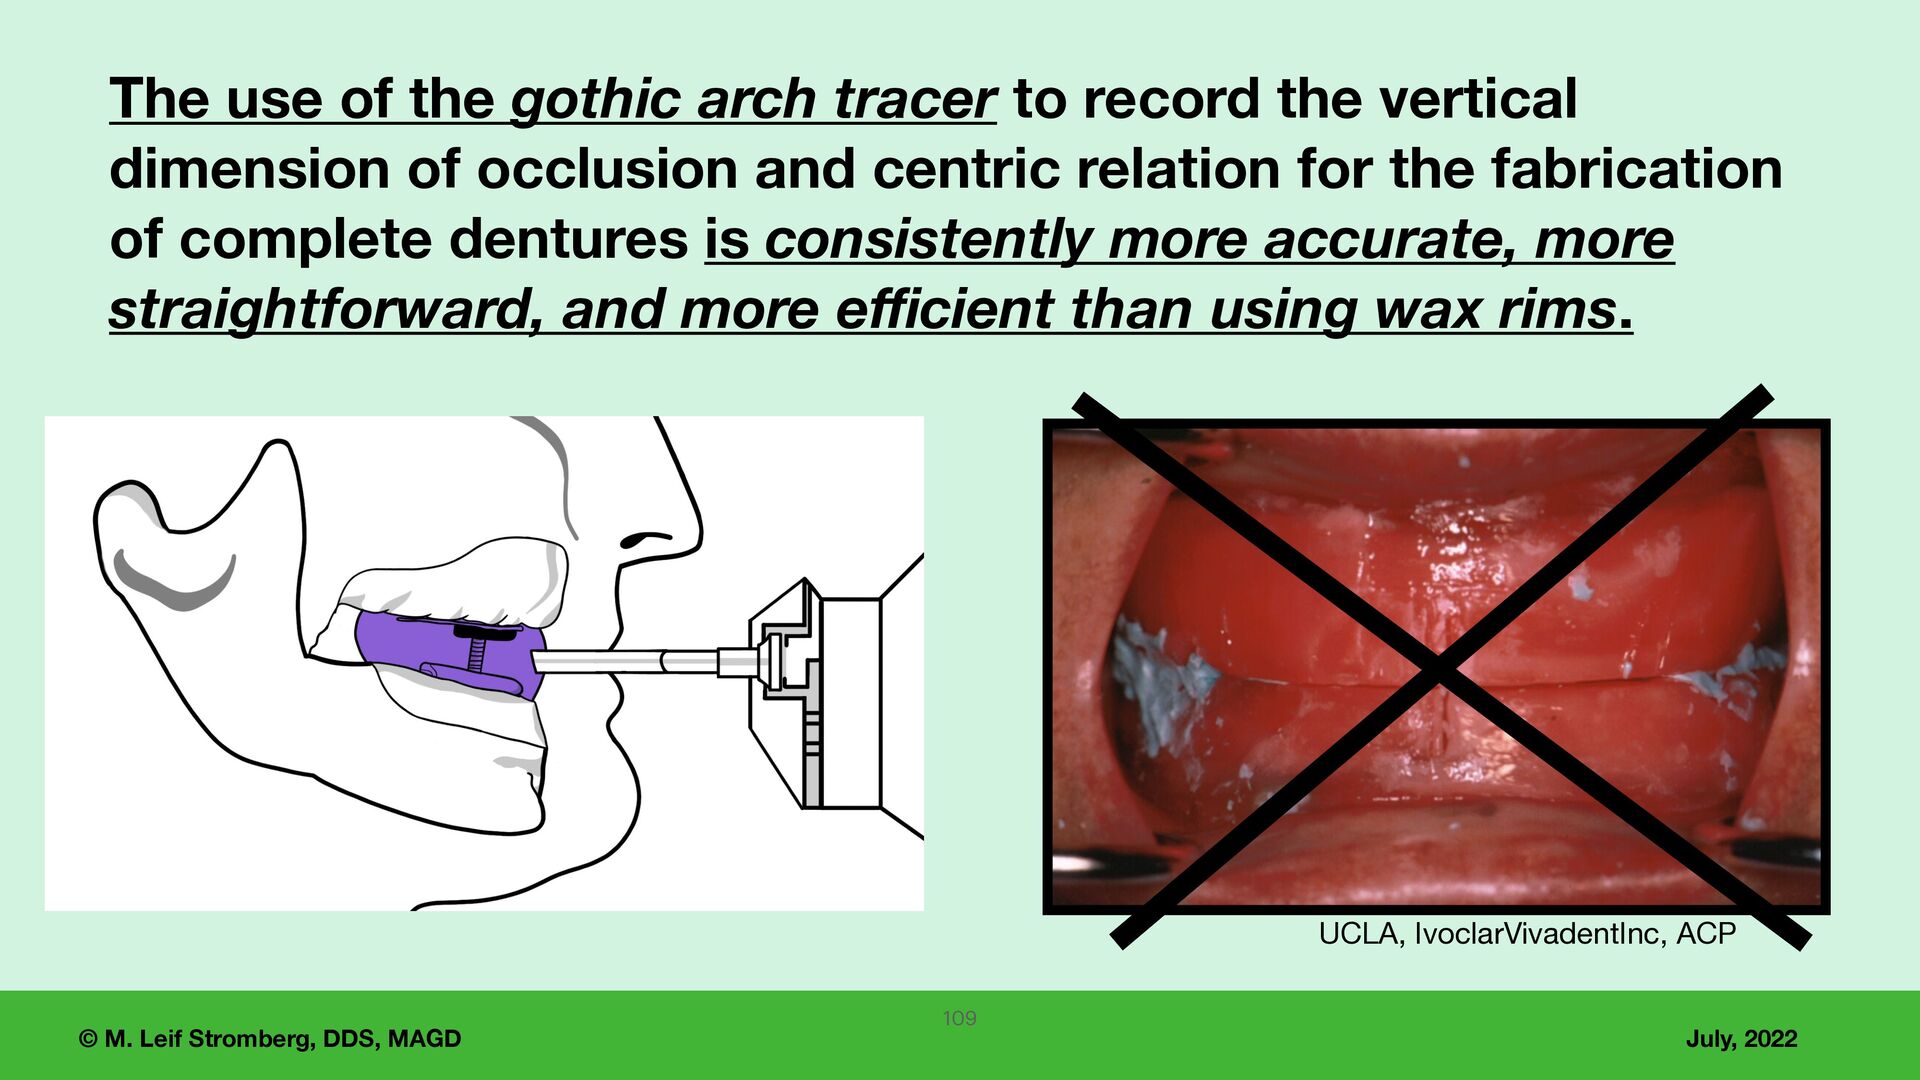
short to use WAX RIMS to make verticentric records for complete dentures… and I will show you a much better way !! If you remember ONE thing about the records appointment: UCLA, Ivoclar Vivadent, Inc and ACP
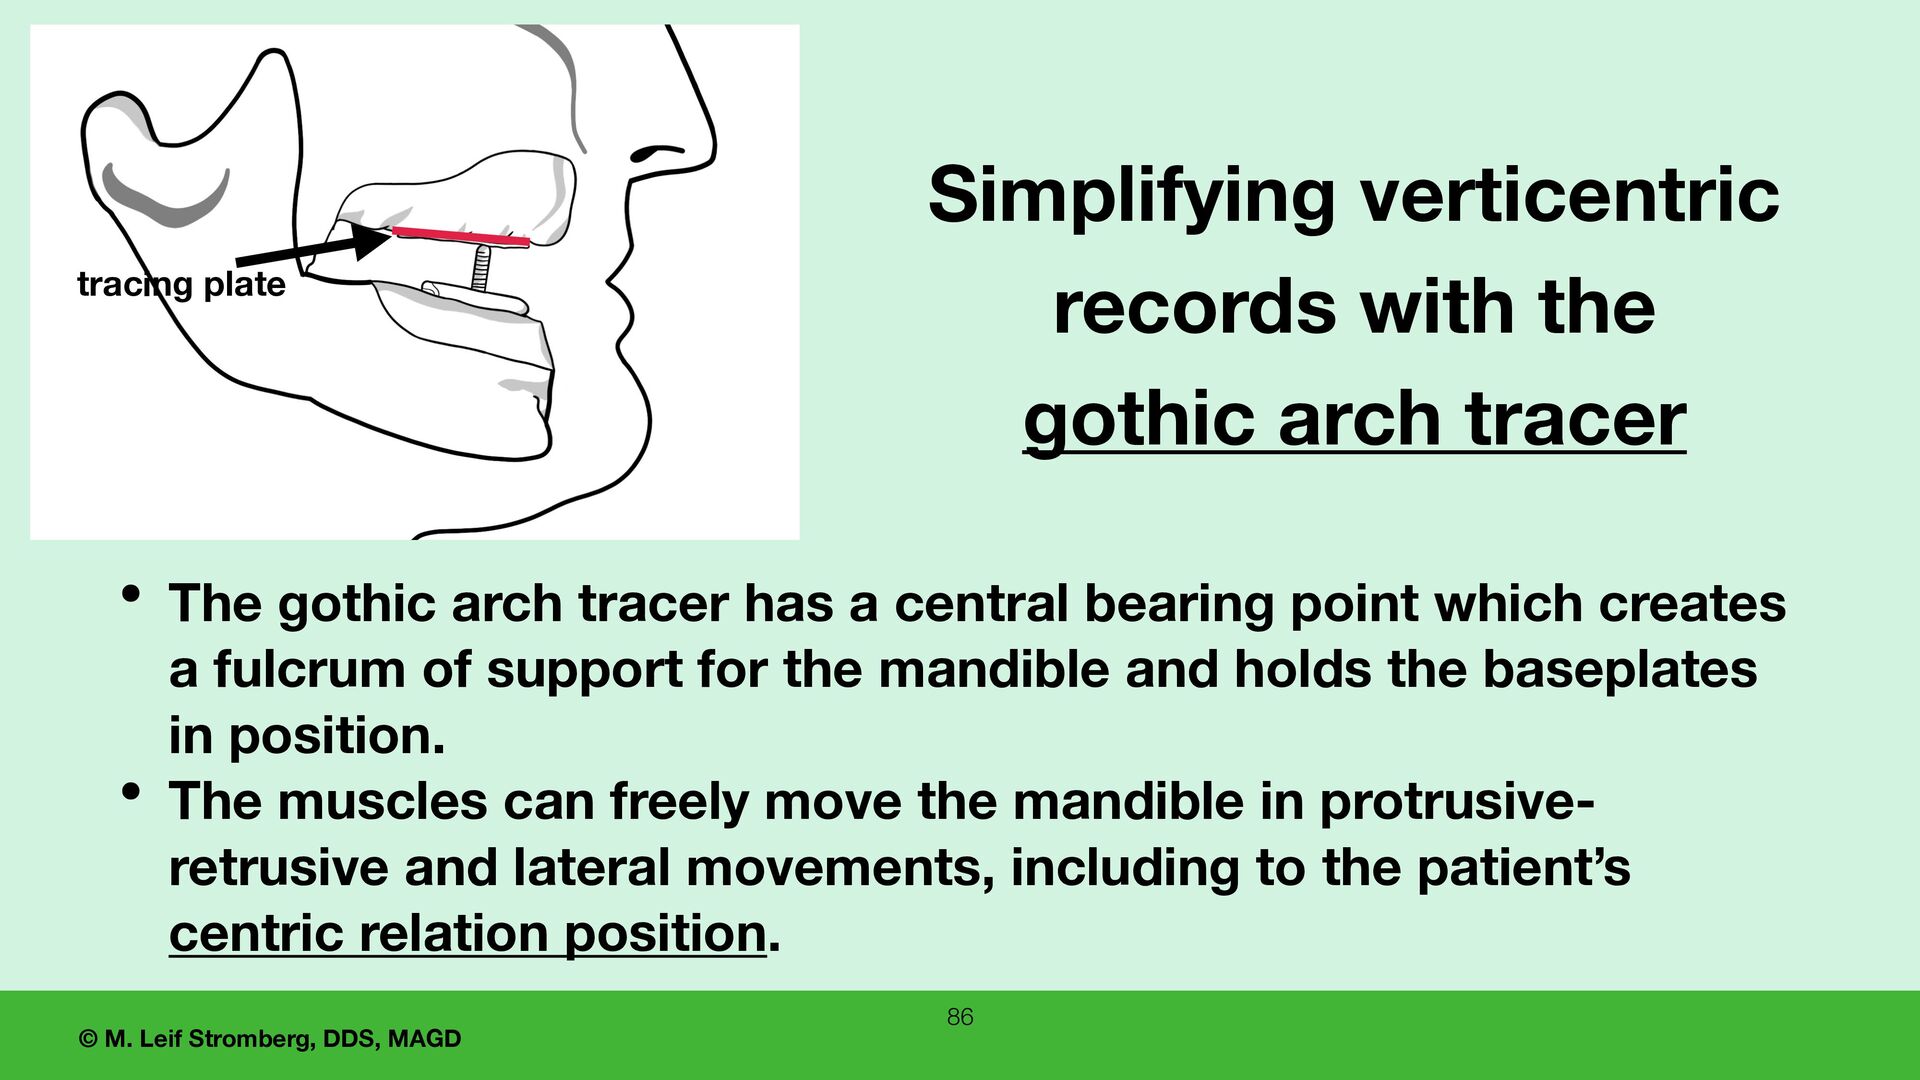
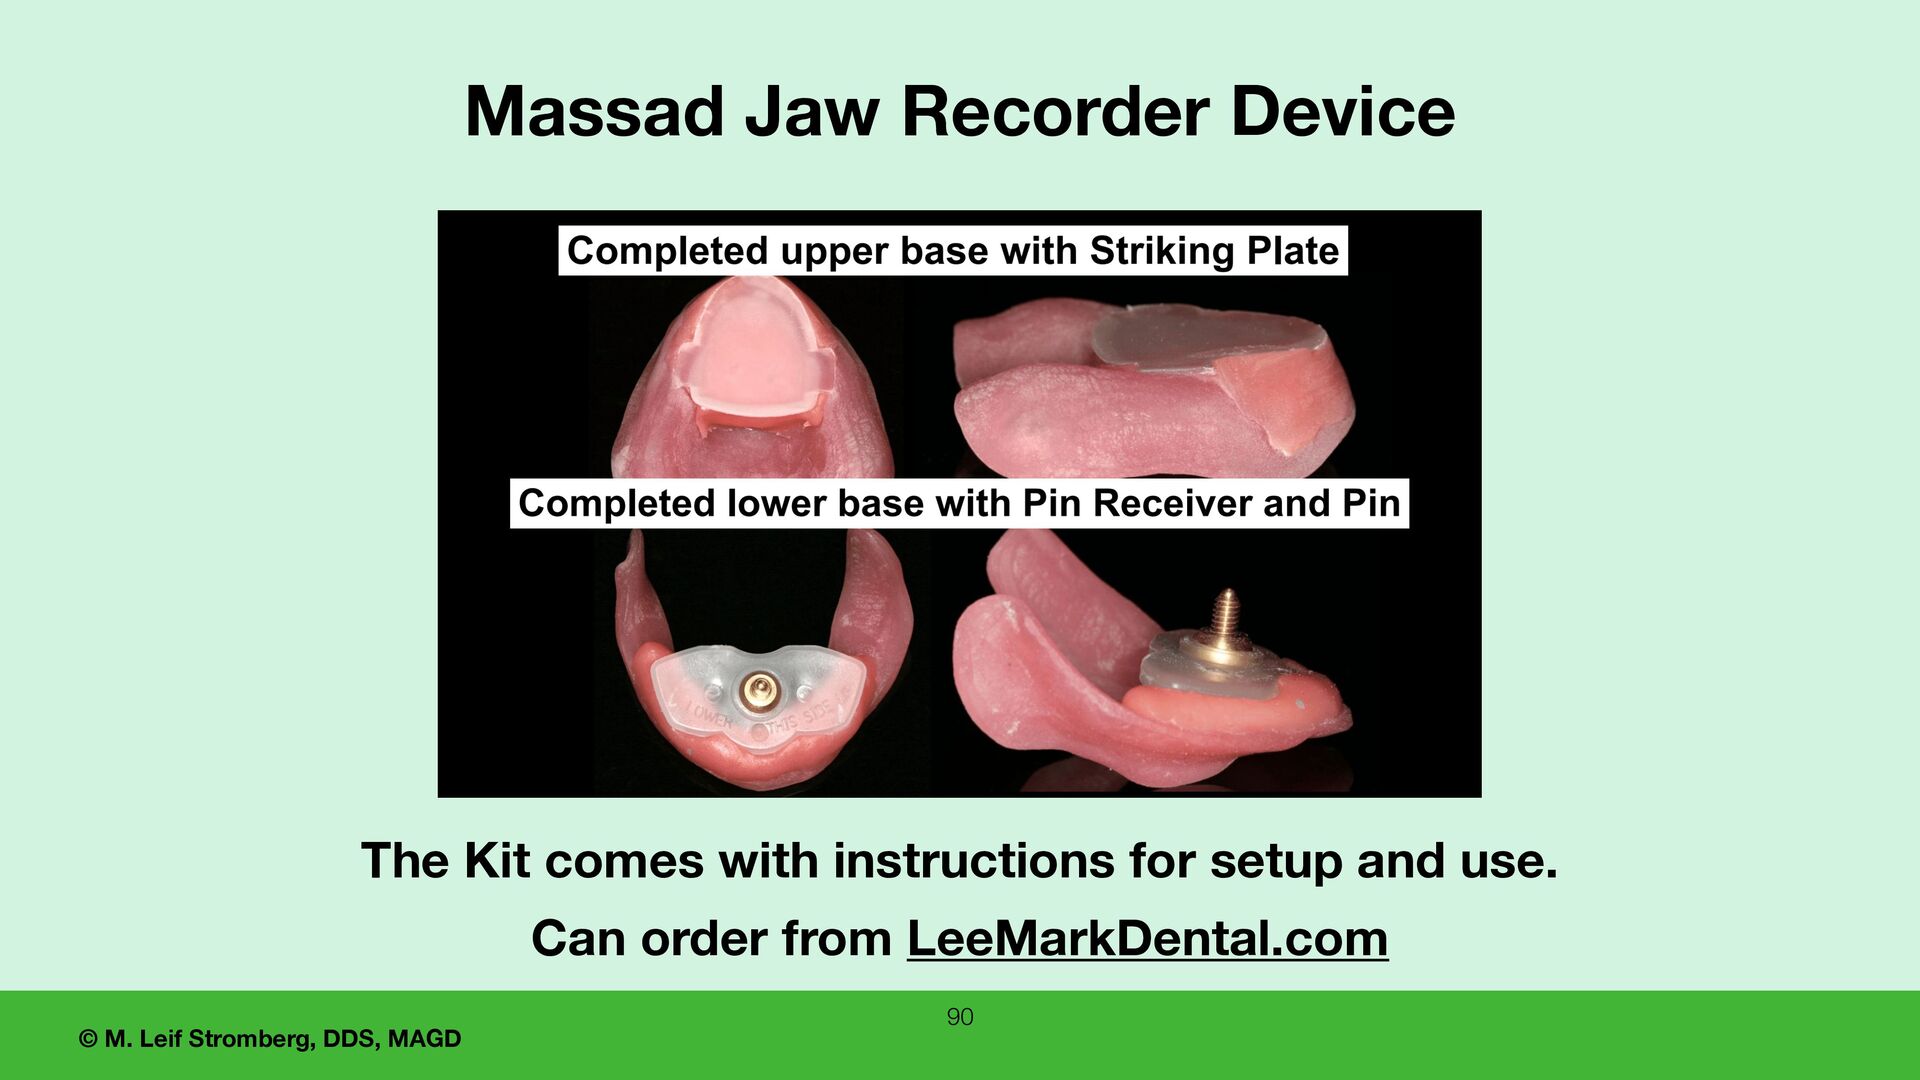
arch tracer has a central bearing point which creates a fulcrum of support for the mandible and holds the baseplates in position. • The muscles can freely move the mandible in protrusive- retrusive and lateral movements, including to the patient’s centric relation position. tracing plate Simplifying verticentric records with the gothic arch tracer
a gothic arch tracer kit • Sometimes, the dental laboratory will supply the kit for the case. • Swissedent Ball Bearing Bite Recorder Kit is available through LeeMarkDental.com • The Dr. Joe Massad recorder device can be ordered from LeeMarkDental.com • or a gothic arch tracing kit can be purchased online from amazon.com or eBay 91
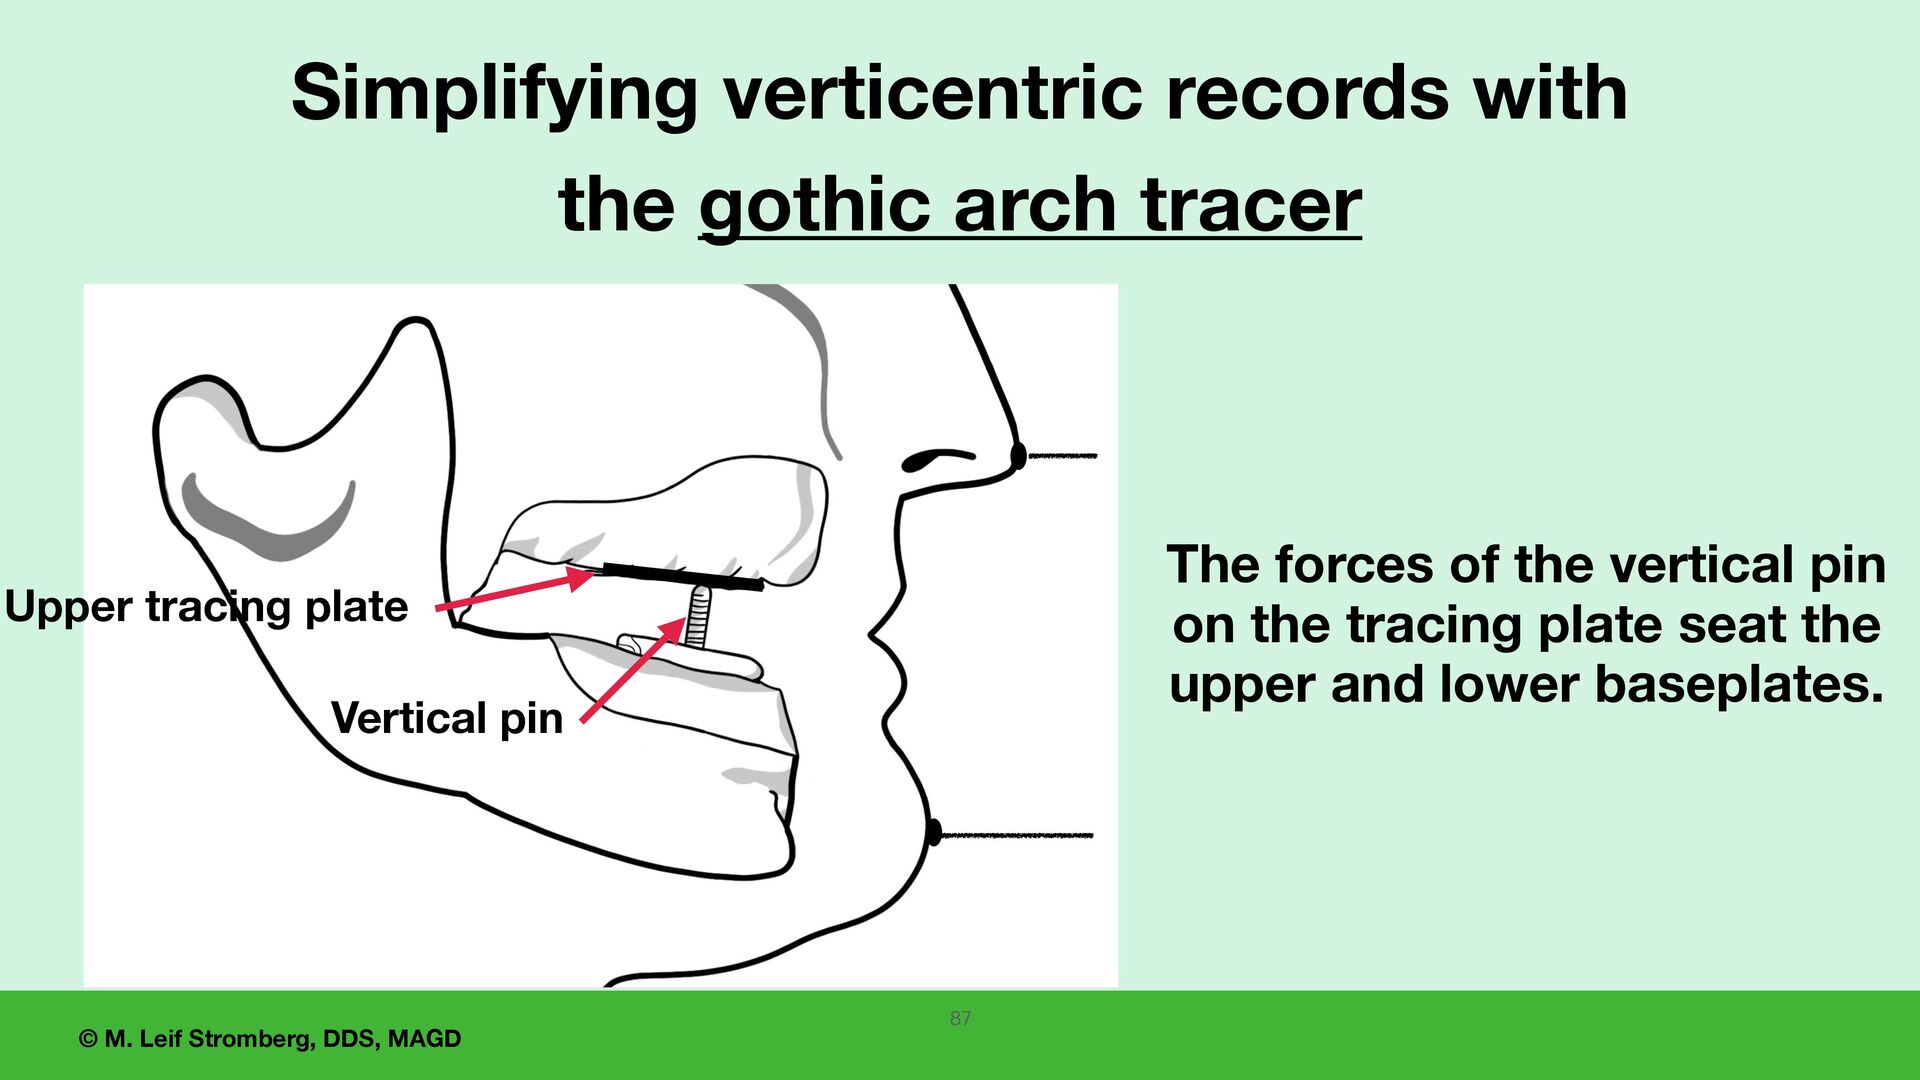
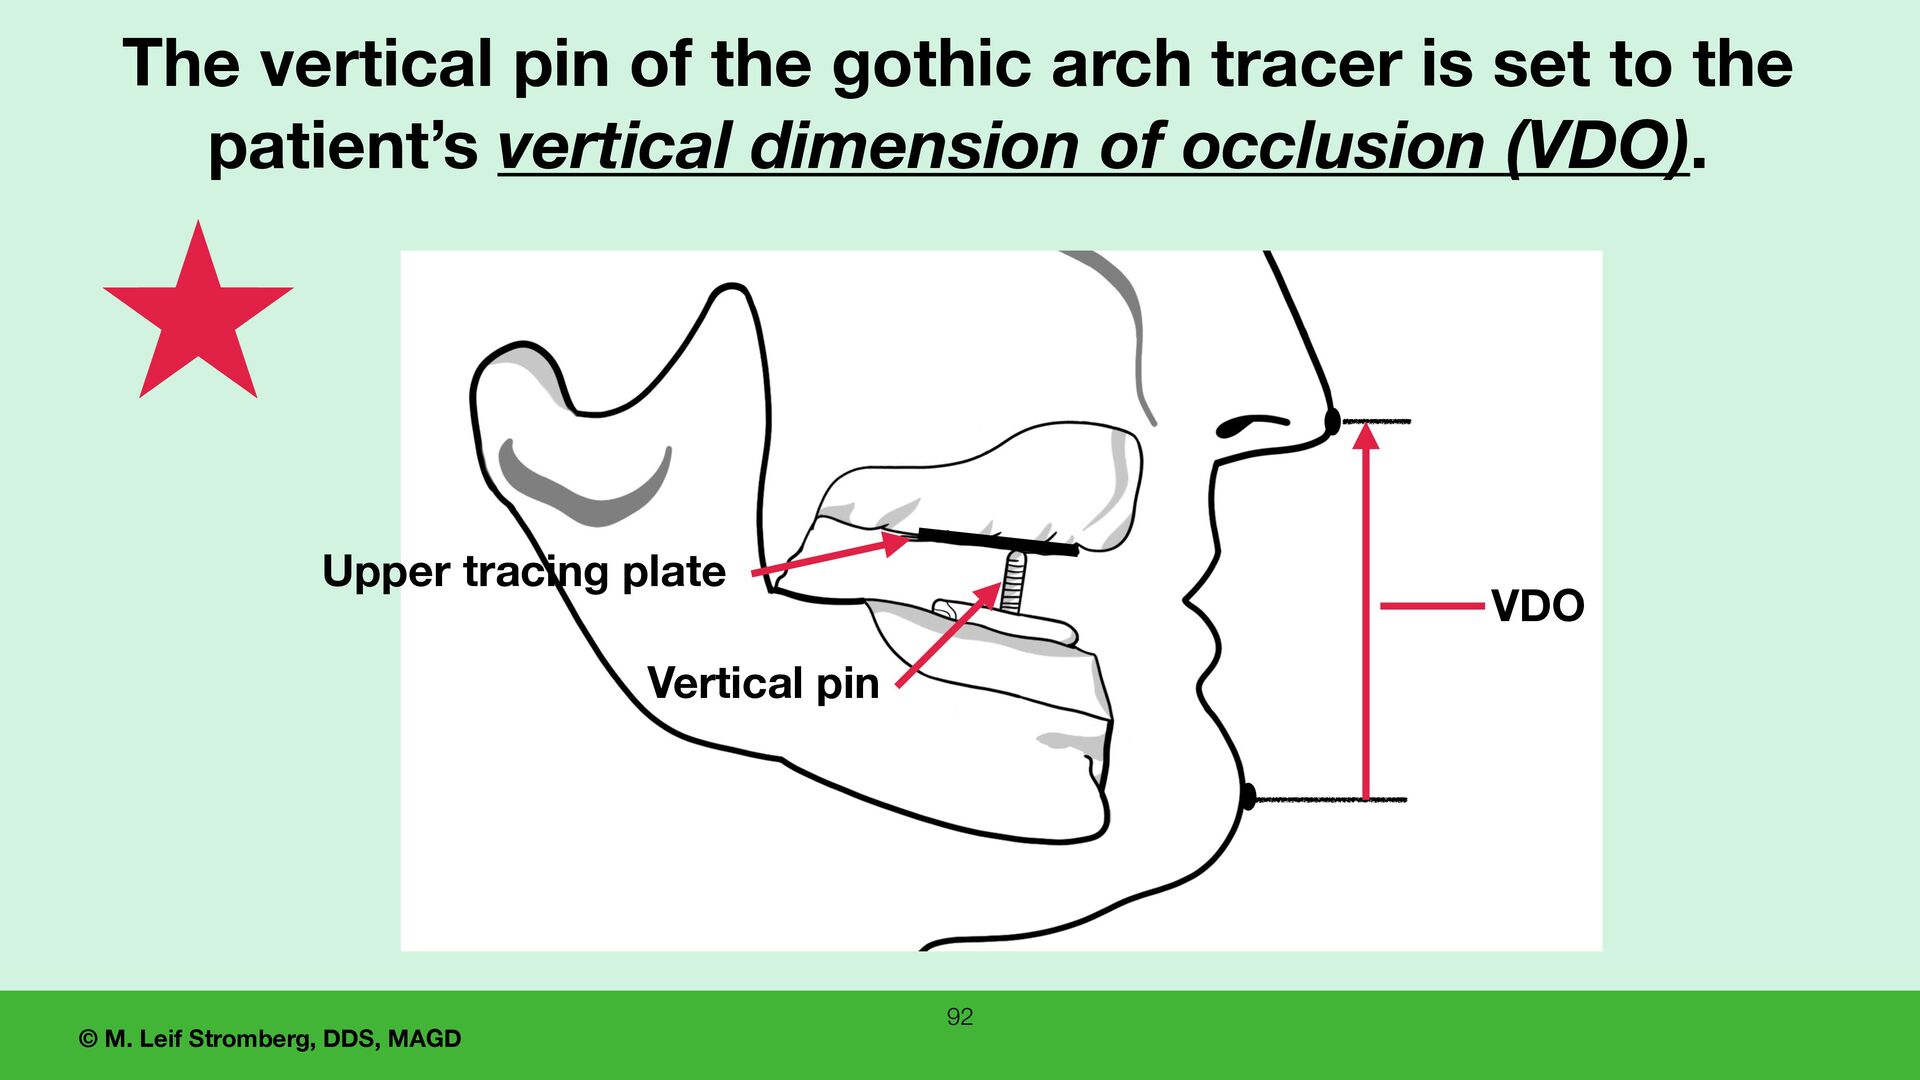
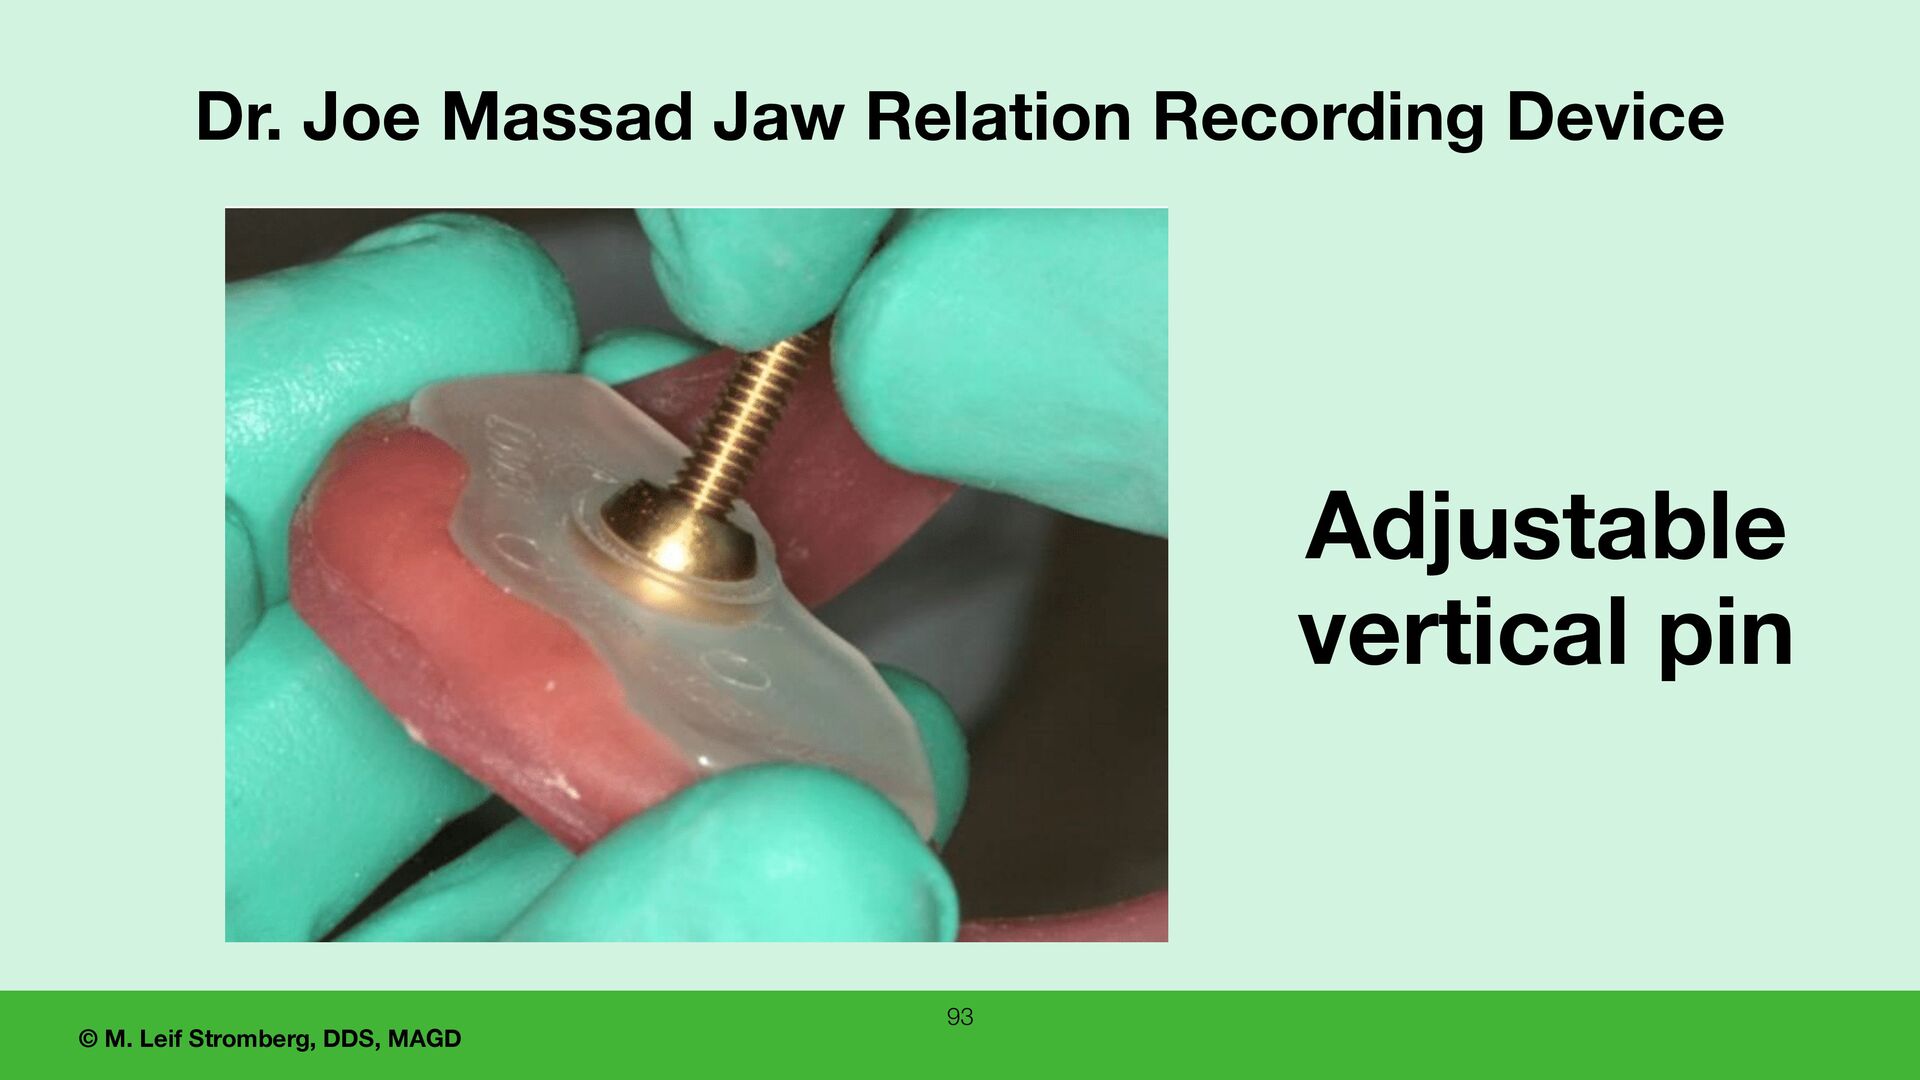
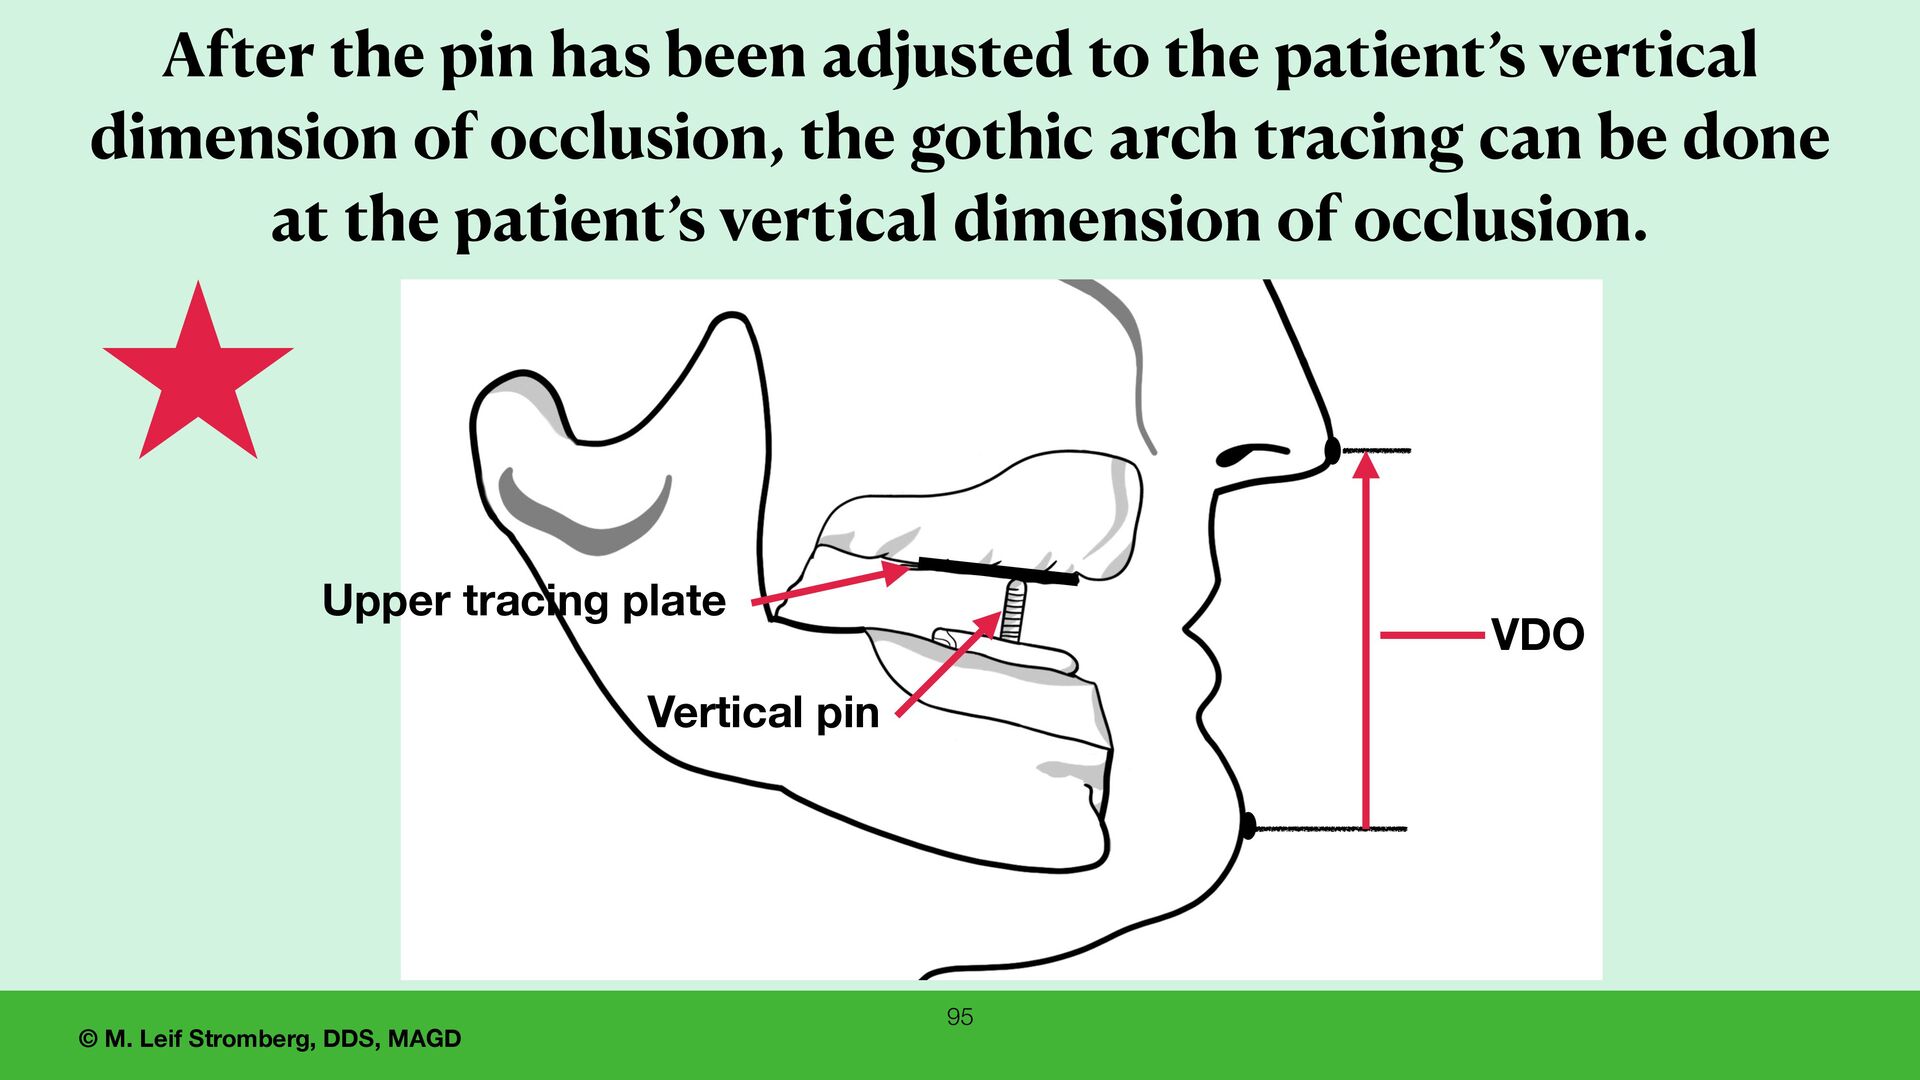
Vertical pin VDO After the pin has been adjusted to the patient’s vertical dimension of occlusion, the gothic arch tracing can be done at the patient’s vertical dimension of occlusion.
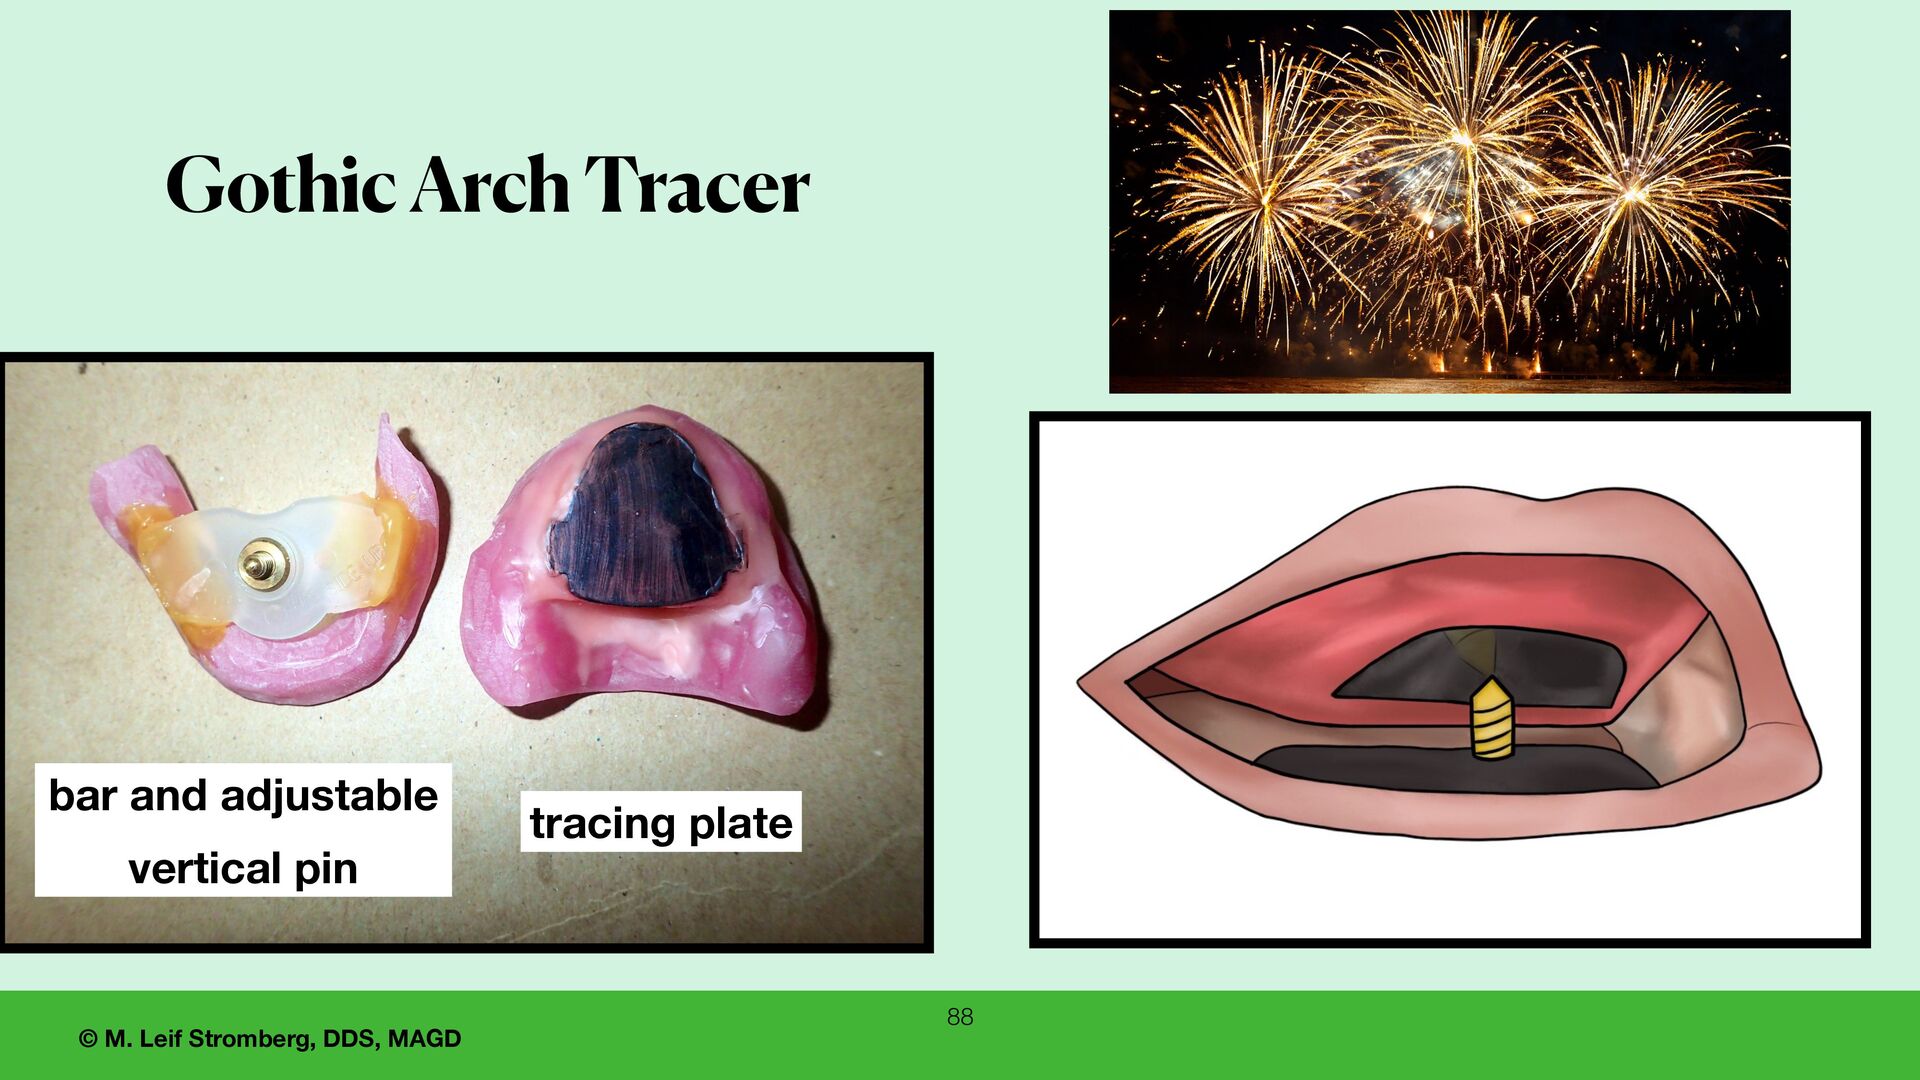
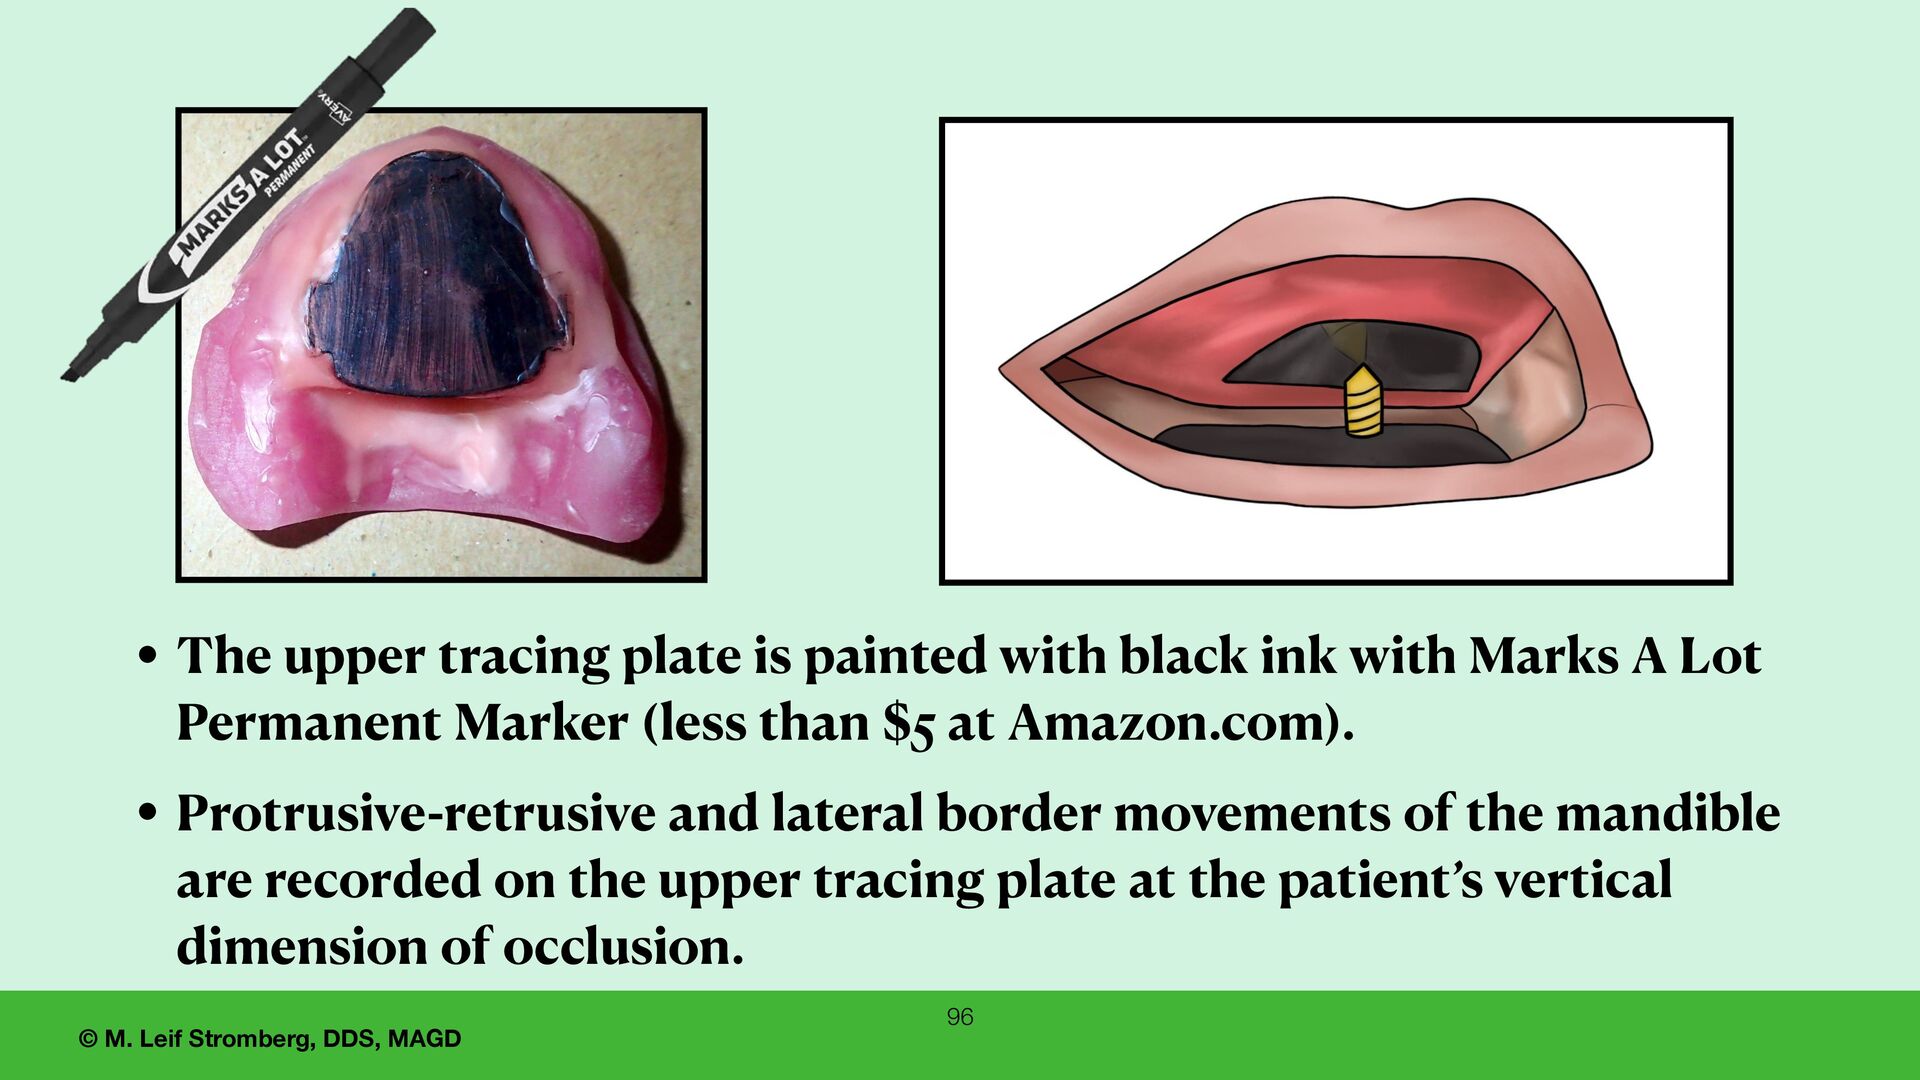
tracing plate is painted with black ink with Marks A Lot Permanent Marker (less than $5 at Amazon.com). • Protrusive-retrusive and lateral border movements of the mandible are recorded on the upper tracing plate at the patient’s vertical dimension of occlusion.
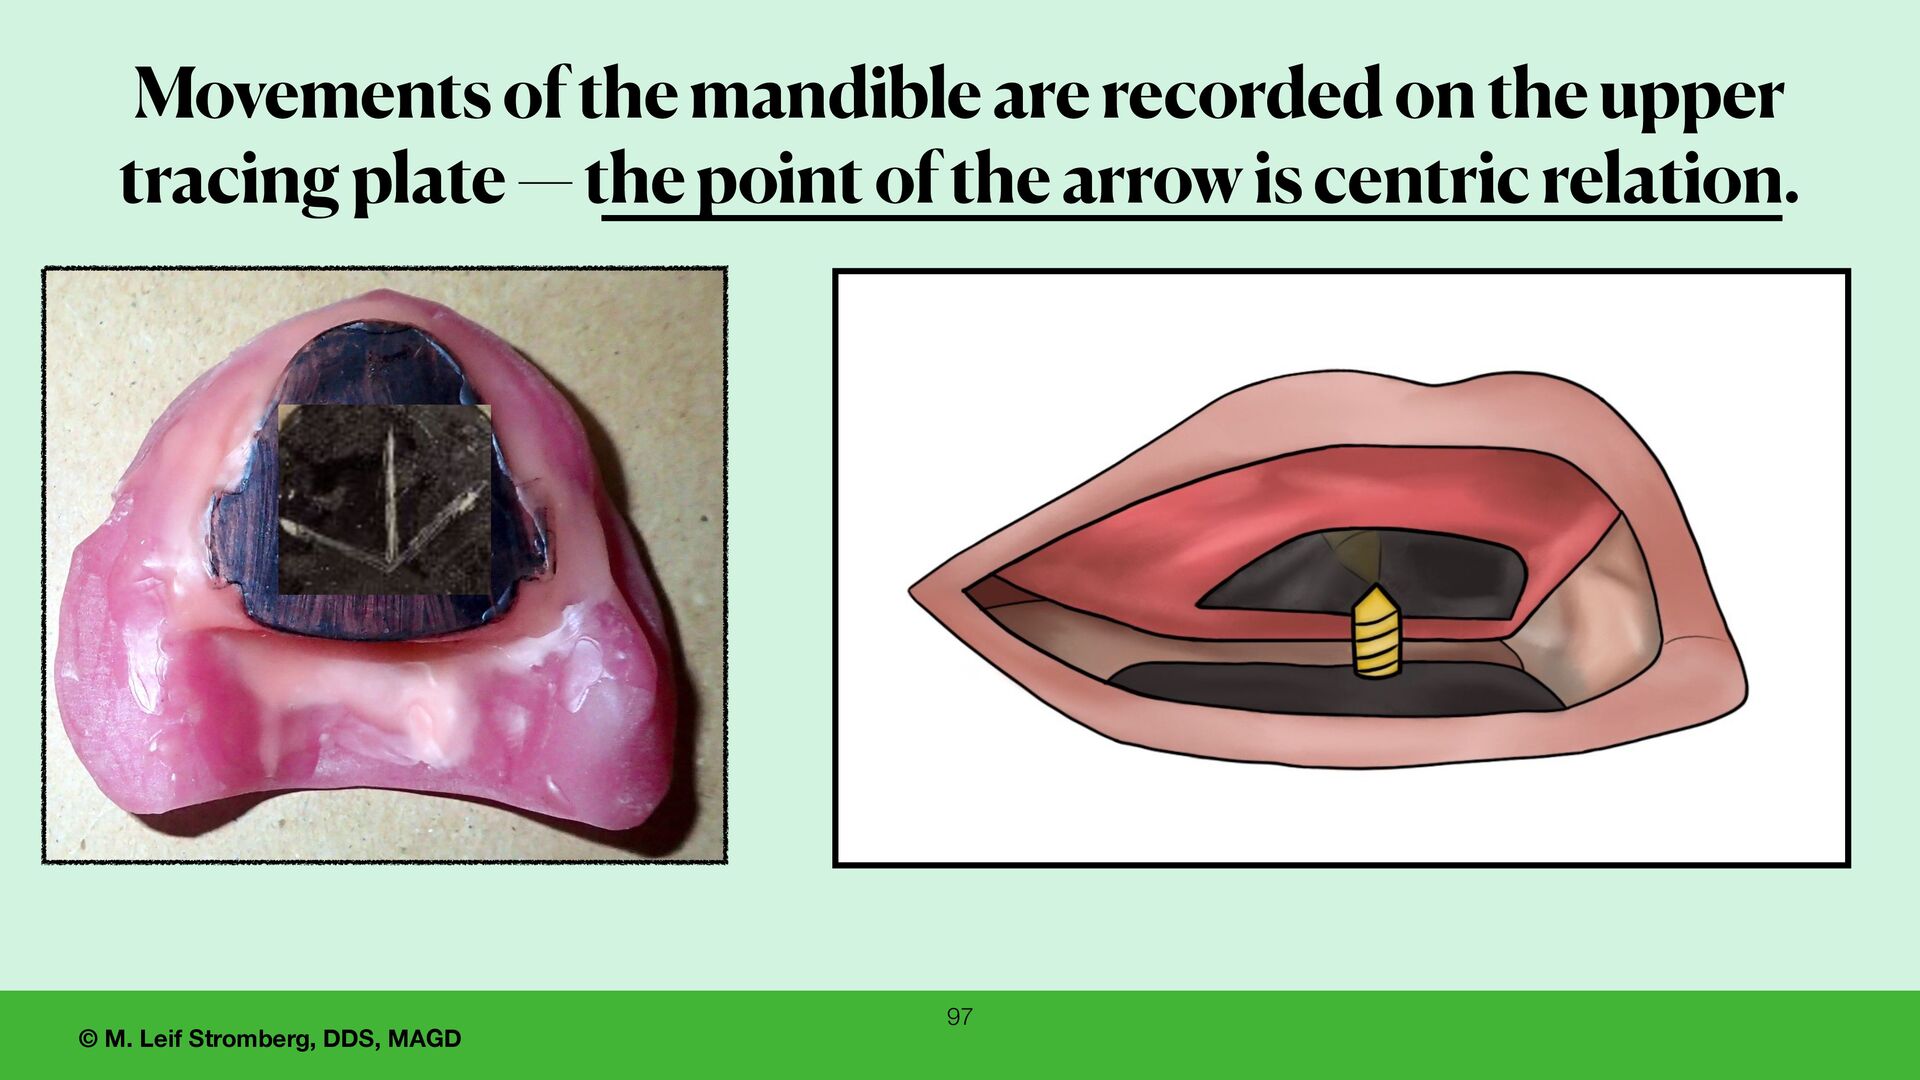
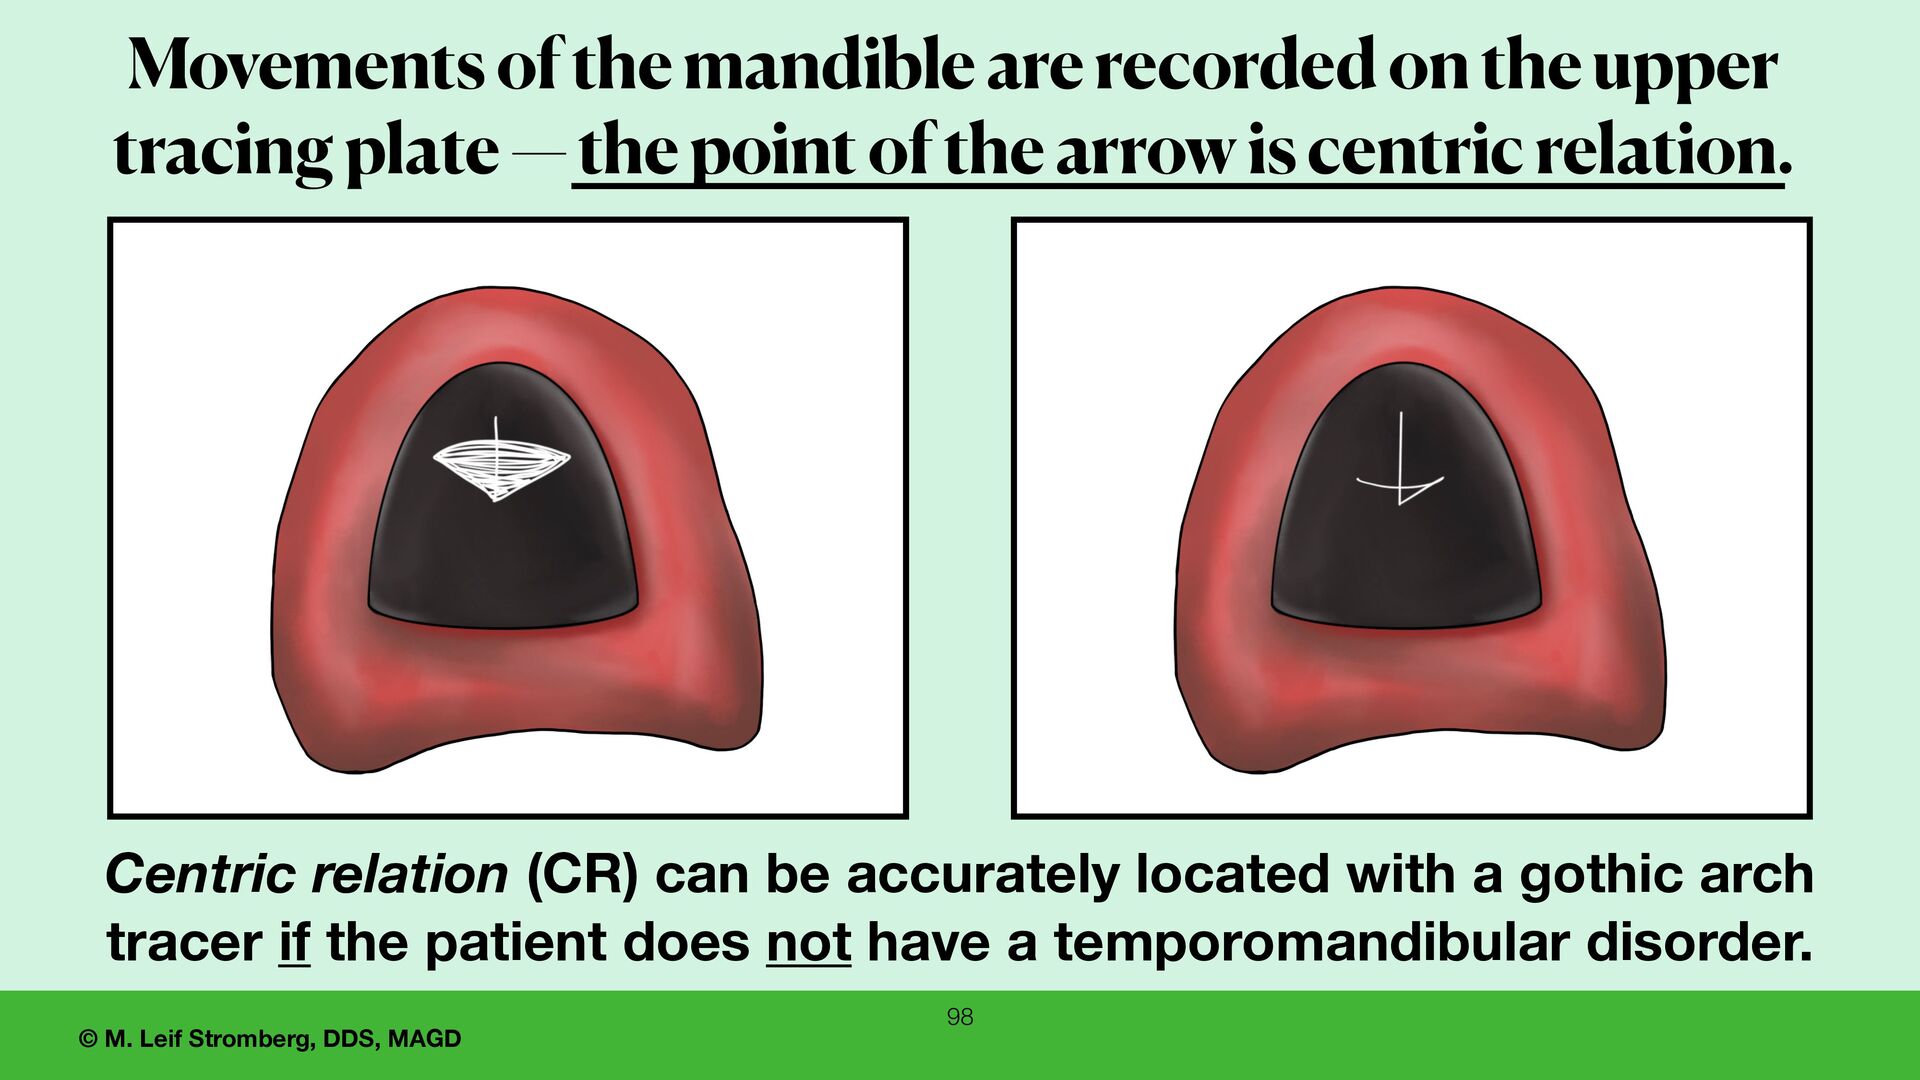
mandible are recorded on the upper tracing plate — the point of the arrow is centric relation. Centric relation (CR) can be accurately located with a gothic arch tracer if the patient does not have a temporomandibular disorder.
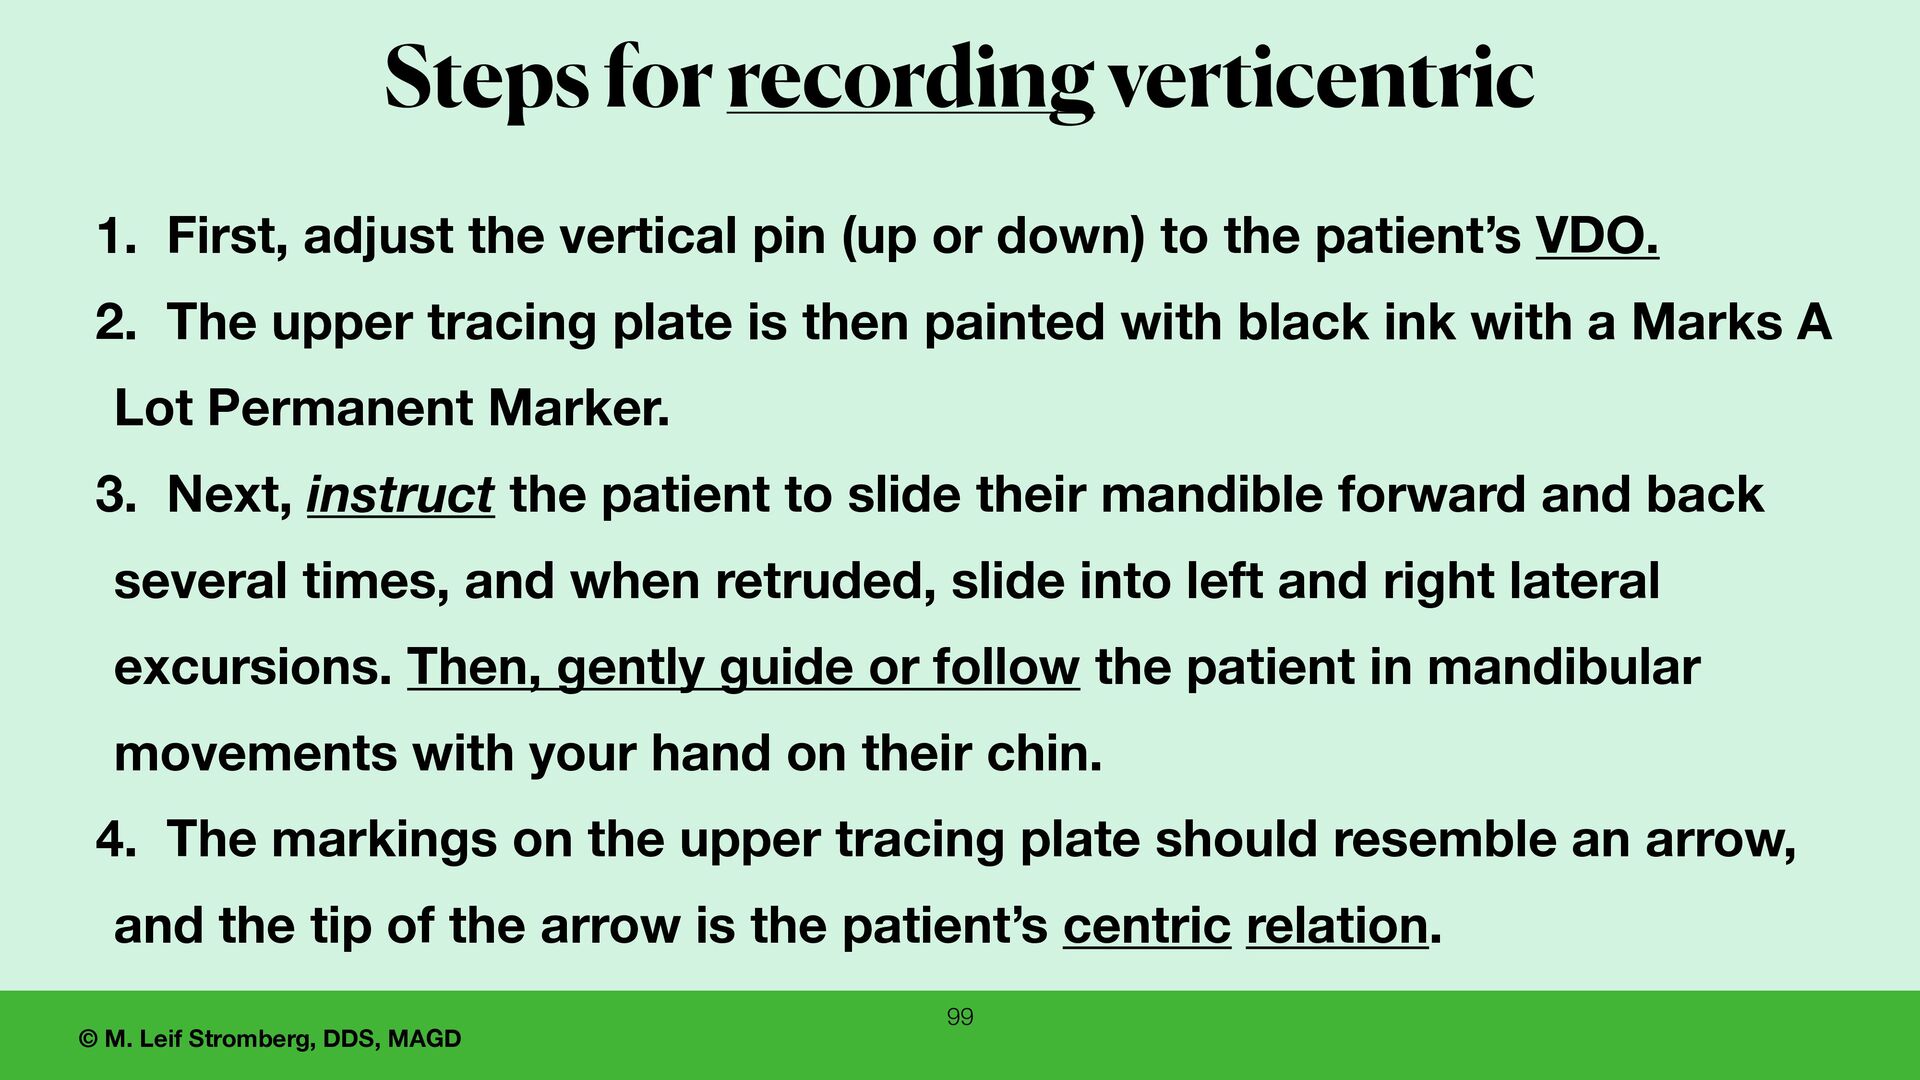
the vertical pin (up or down) to the patient’s VDO. 2. The upper tracing plate is then painted with black ink with a Marks A Lot Permanent Marker. 3. Next, instruct the patient to slide their mandible forward and back several times, and when retruded, slide into left and right lateral excursions. Then, gently guide or follow the patient in mandibular movements with your hand on their chin. 4. The markings on the upper tracing plate should resemble an arrow, and the tip of the arrow is the patient’s centric relation. Steps for recording verticentric
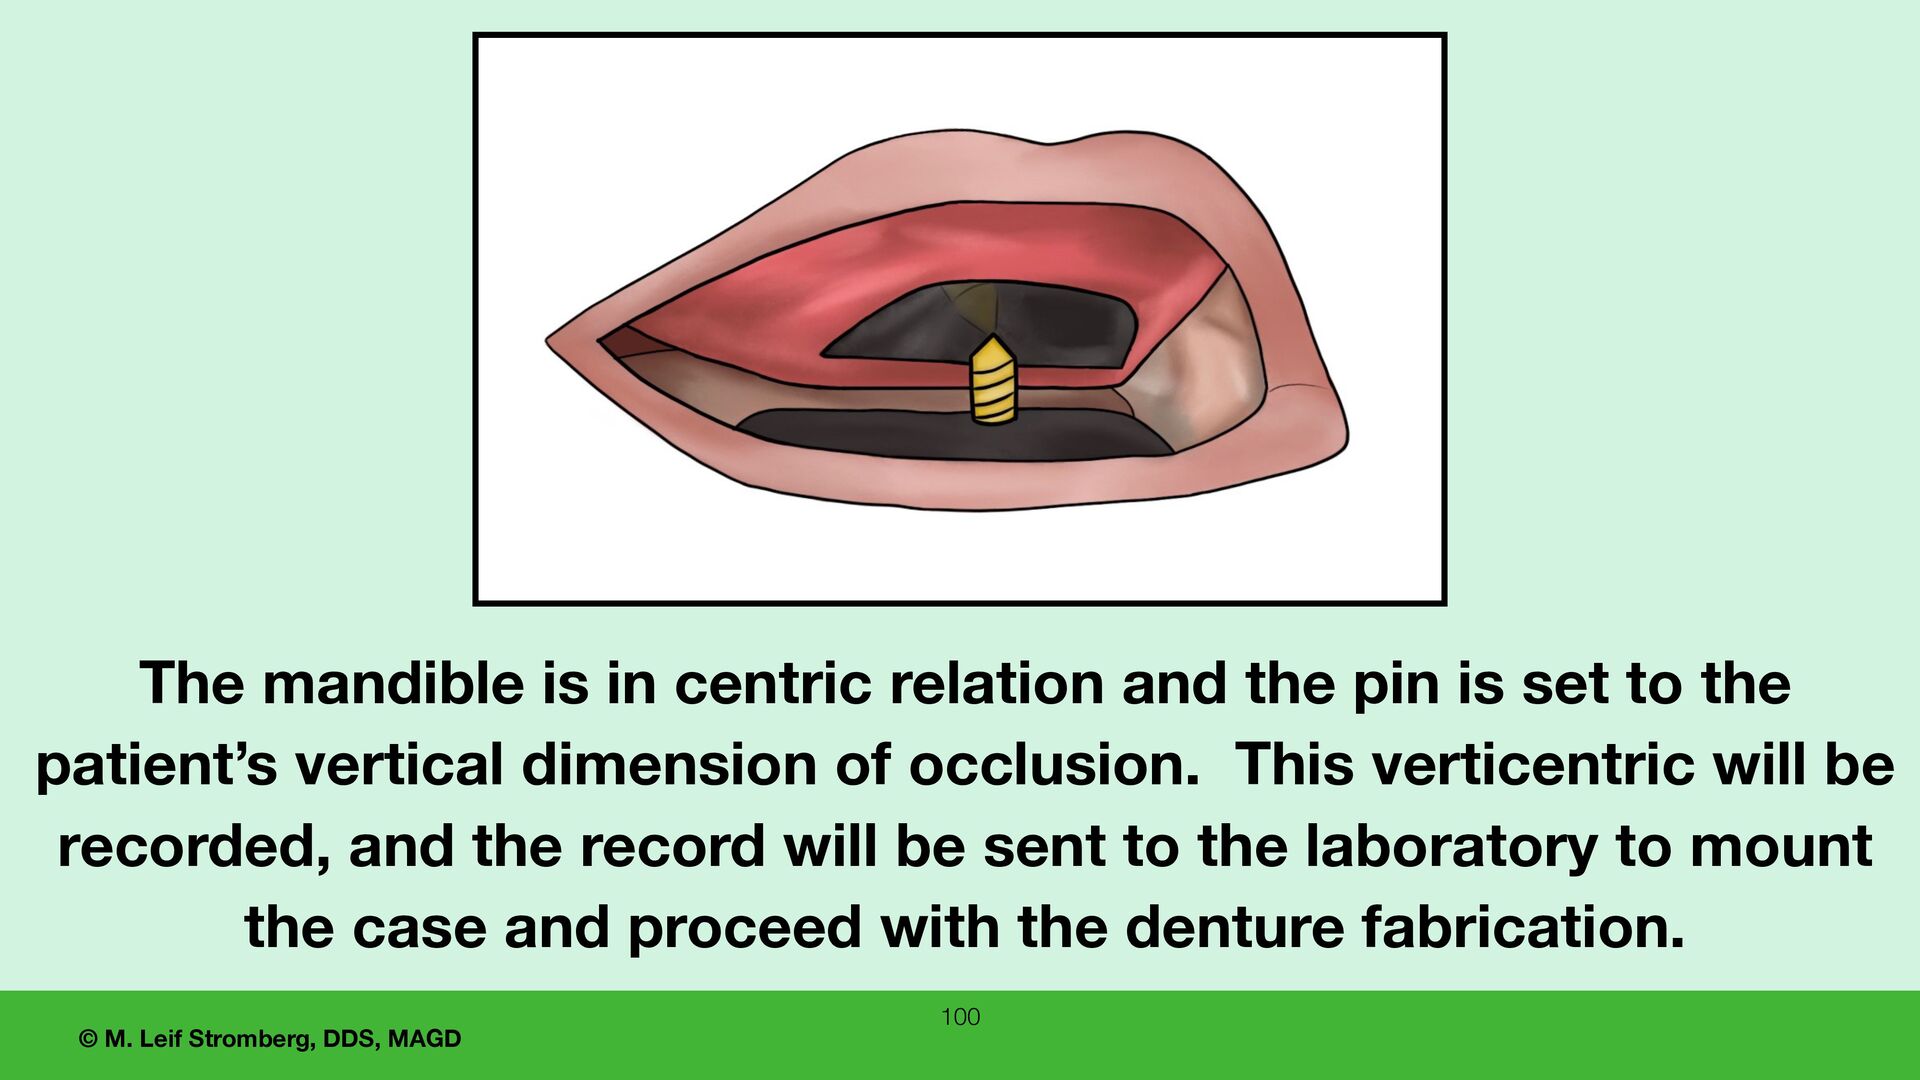
in centric relation and the pin is set to the patient’s vertical dimension of occlusion. This verticentric will be recorded, and the record will be sent to the laboratory to mount the case and proceed with the denture fabrication.
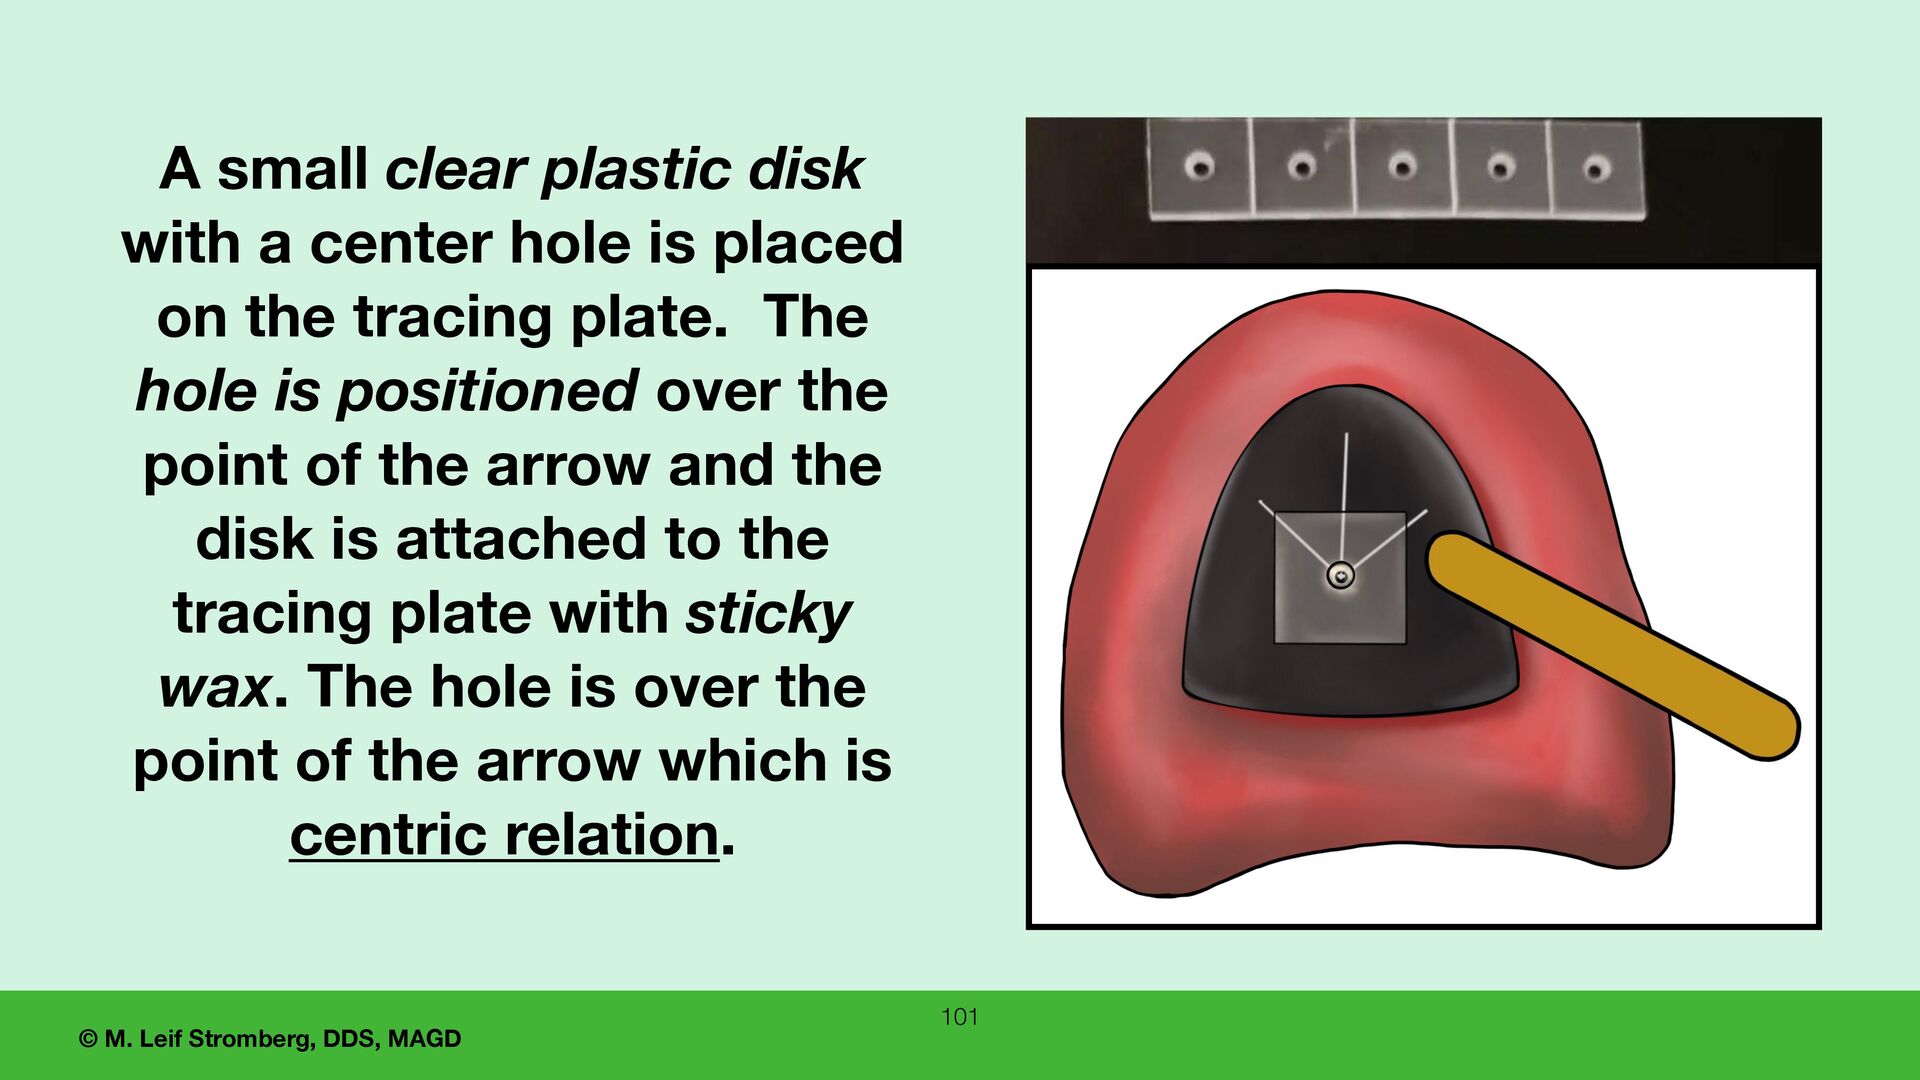
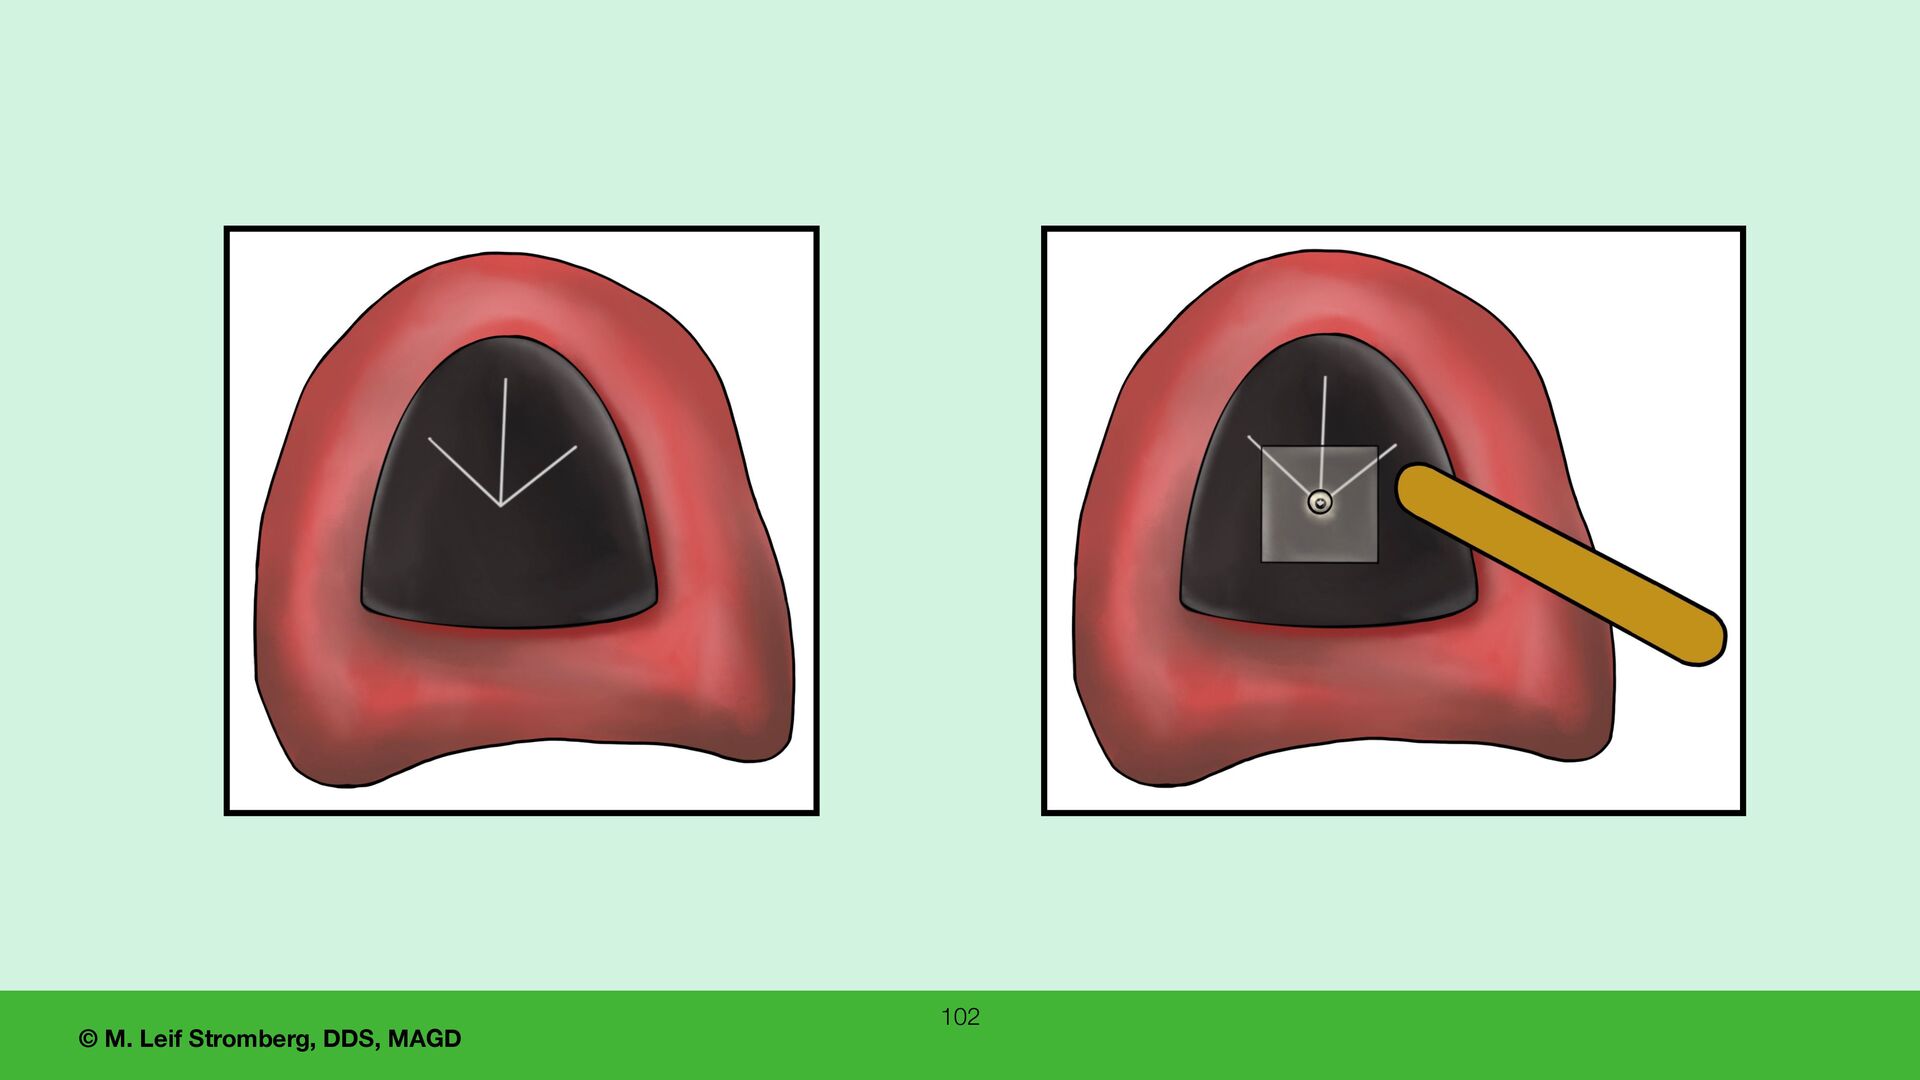
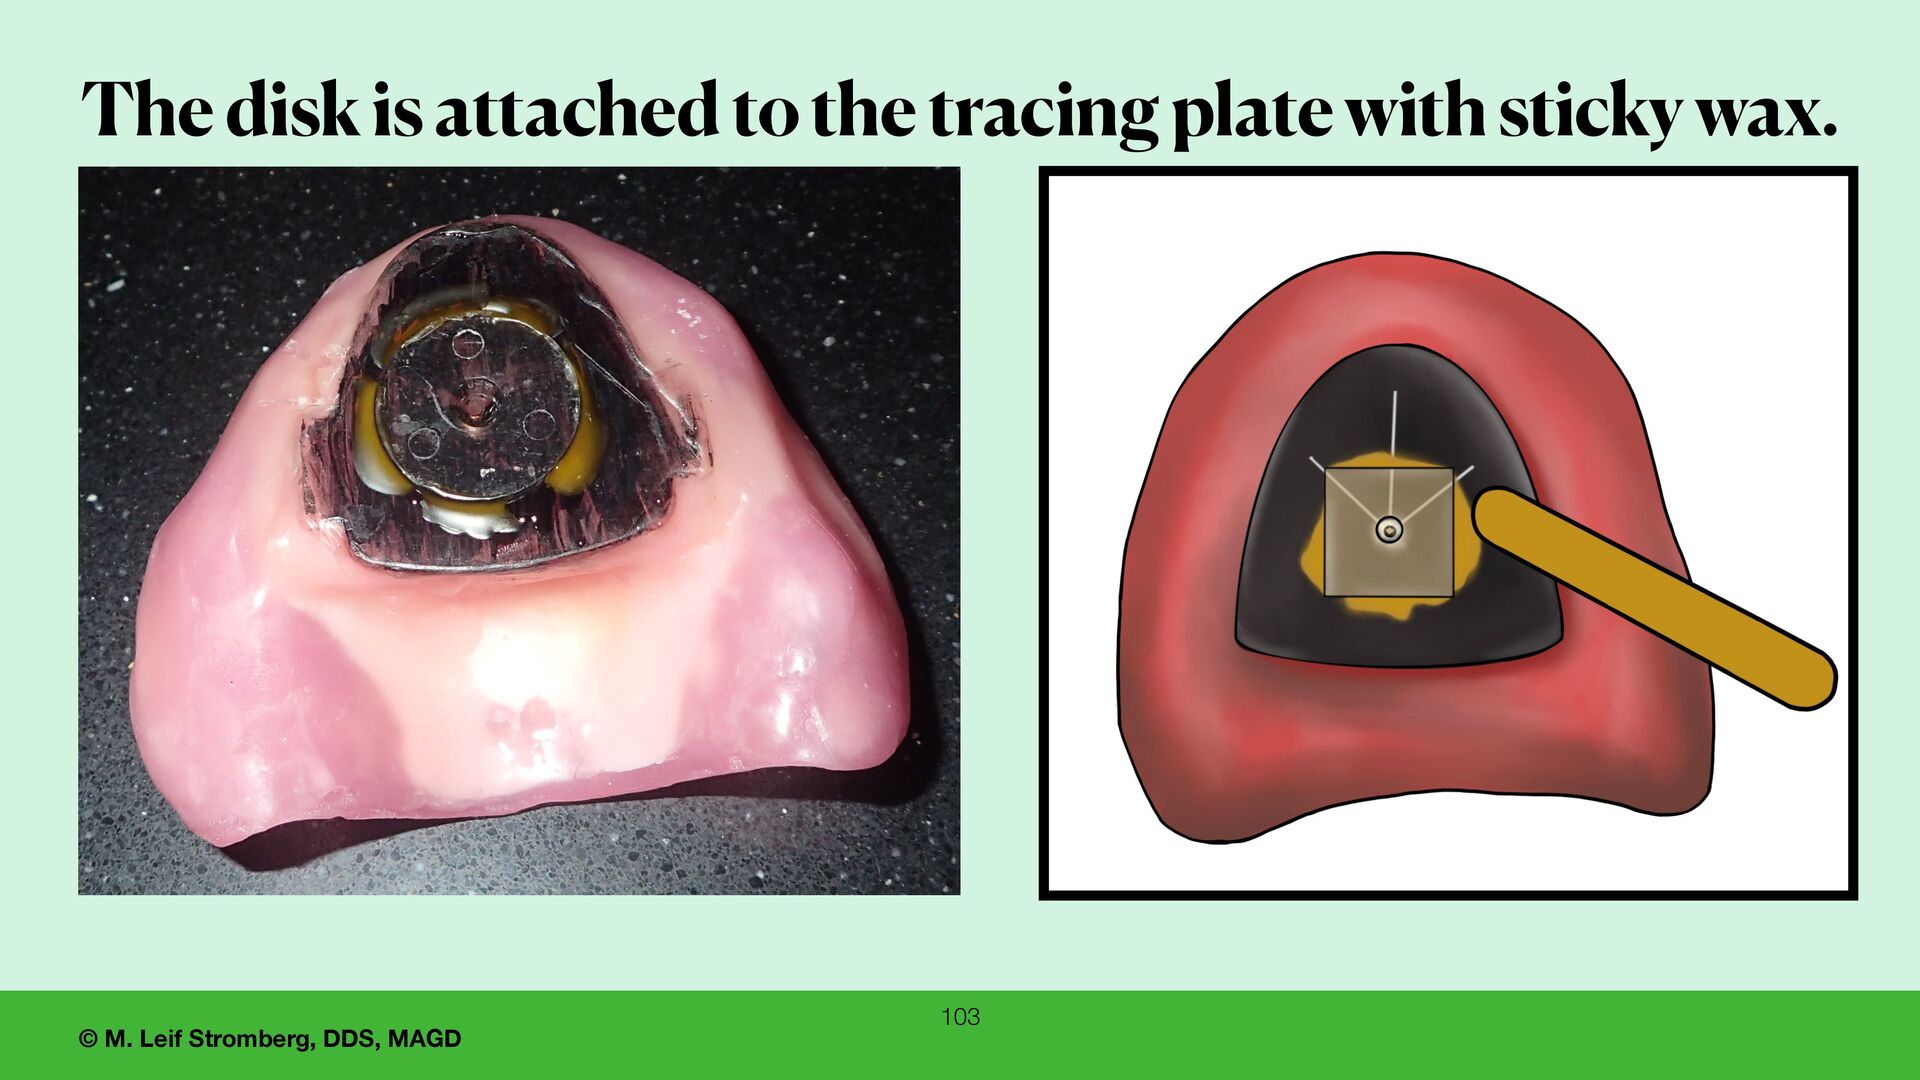
plastic disk with a center hole is placed on the tracing plate. The hole is positioned over the point of the arrow and the disk is attached to the tracing plate with sticky wax. The hole is over the point of the arrow which is centric relation.
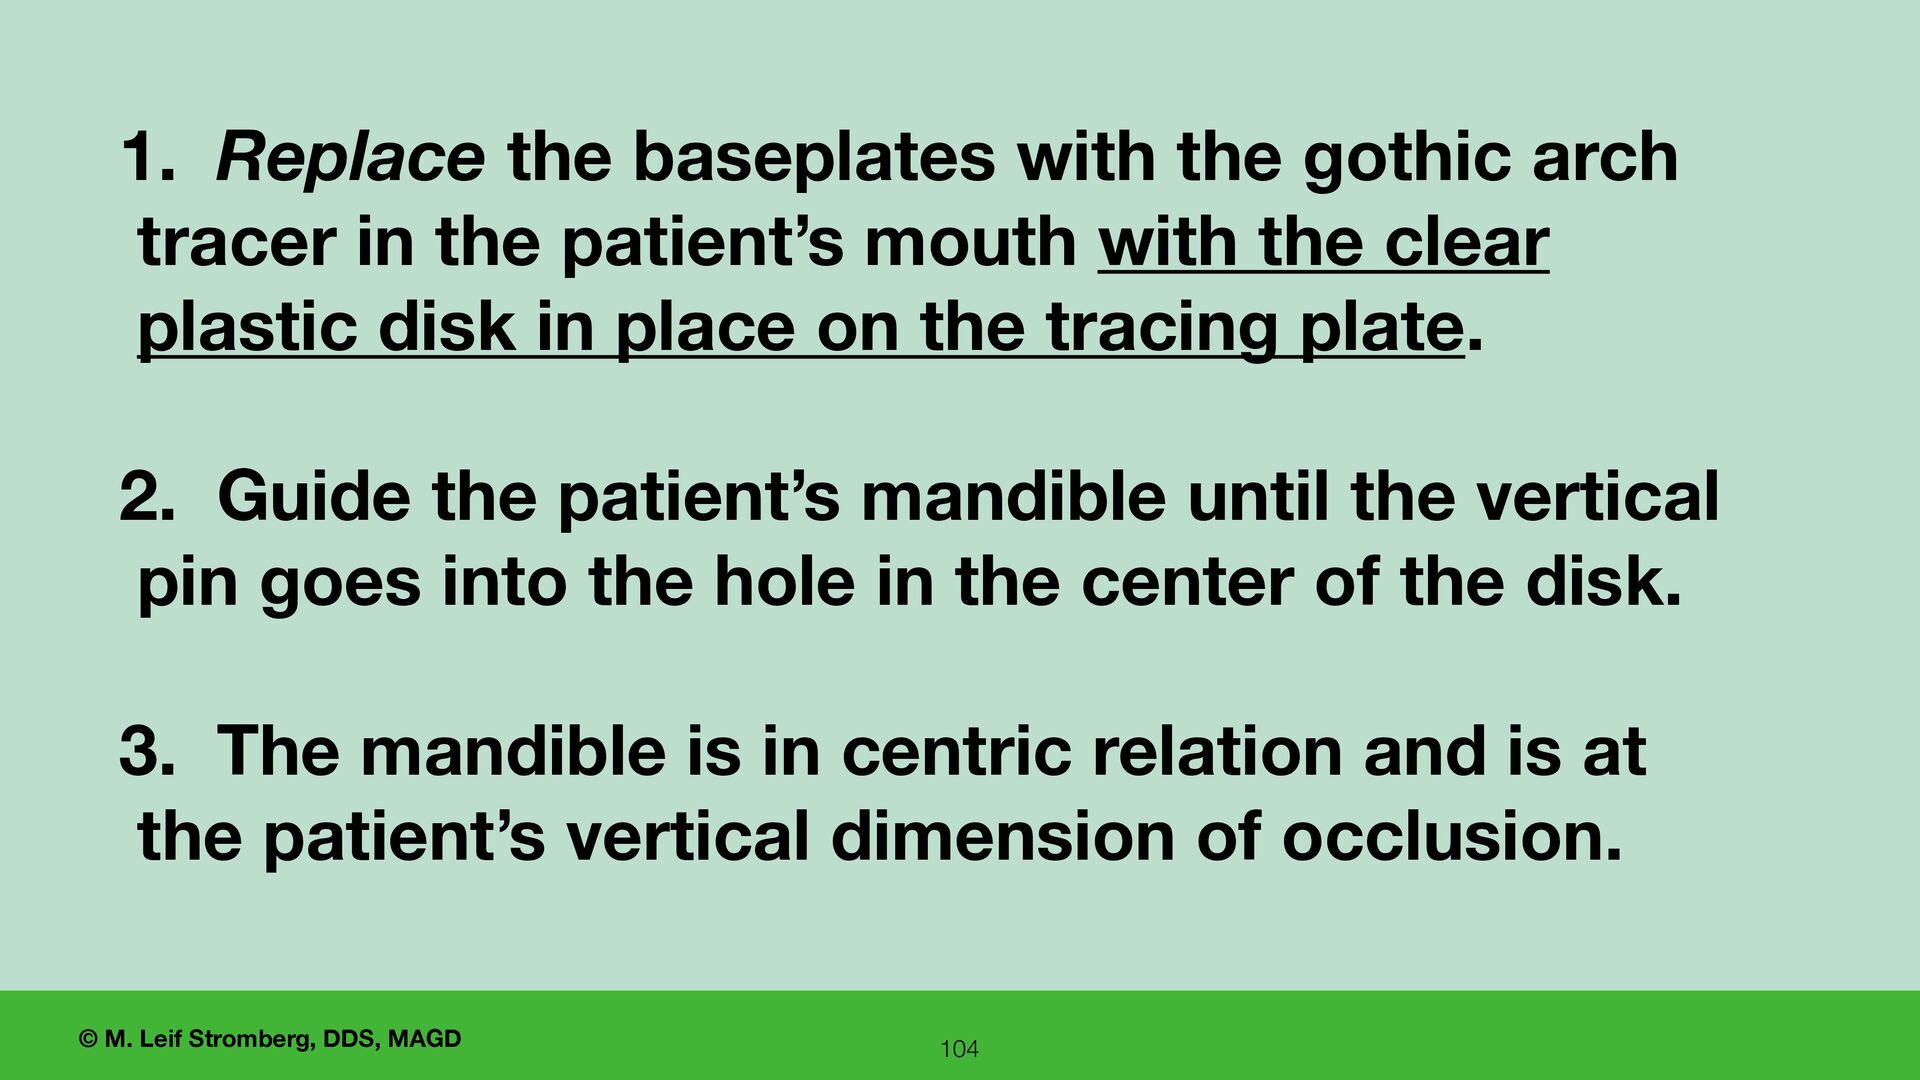
baseplates with the gothic arch tracer in the patient’s mouth with the clear plastic disk in place on the tracing plate. 2. Guide the patient’s mandible until the vertical pin goes into the hole in the center of the disk. 3. The mandible is in centric relation and is at the patient’s vertical dimension of occlusion.
of the gothic arch tracer to record the vertical dimension of occlusion and centric relation for the fabrication of complete dentures is consistently more accurate, more straightforward, and more e ffi cient than using wax rims. 109 UCLA, IvoclarVivadentInc, ACP
4 — Simplifying the Determination and Recording of the Vertical Dimension of Occlusion, Centric Relation, and Positions of the Teeth 1. Re fi ne the contours of the esthetic wax rim as a guide for the teeth positions. 2. No one method for determining the vertical dimension of occlusion (VDO) will be best for all patients. It is advisable to use several methods and compare the results, including speech, rest position, facial proportions, and evaluation of the VDO of the old dentures. 3. Centric relation (CR) can be accurately located with a gothic arch tracer if the patient does not have TM disorder. 4. The gothic arch tracer can accurately record VDO and CR for restorations for edentulous patients.