preparation for the complete denture delivery appointment 1. Discuss the importance of e ff ective communication between the dentist and the dental laboratory technician. 2. Discuss creating relief (carving away dental stone in the posterior palatal seal area) of the maxillary cast for making the post dam for the maxillary denture. 3. Explain the importance of controlling the polymerization shrinkage of acrylic resin when processing tissue-supported complete dentures. LEARNING OBJECTIVES OF THIS SECTION — PARTICIPANTS WILL BE ABLE TO:
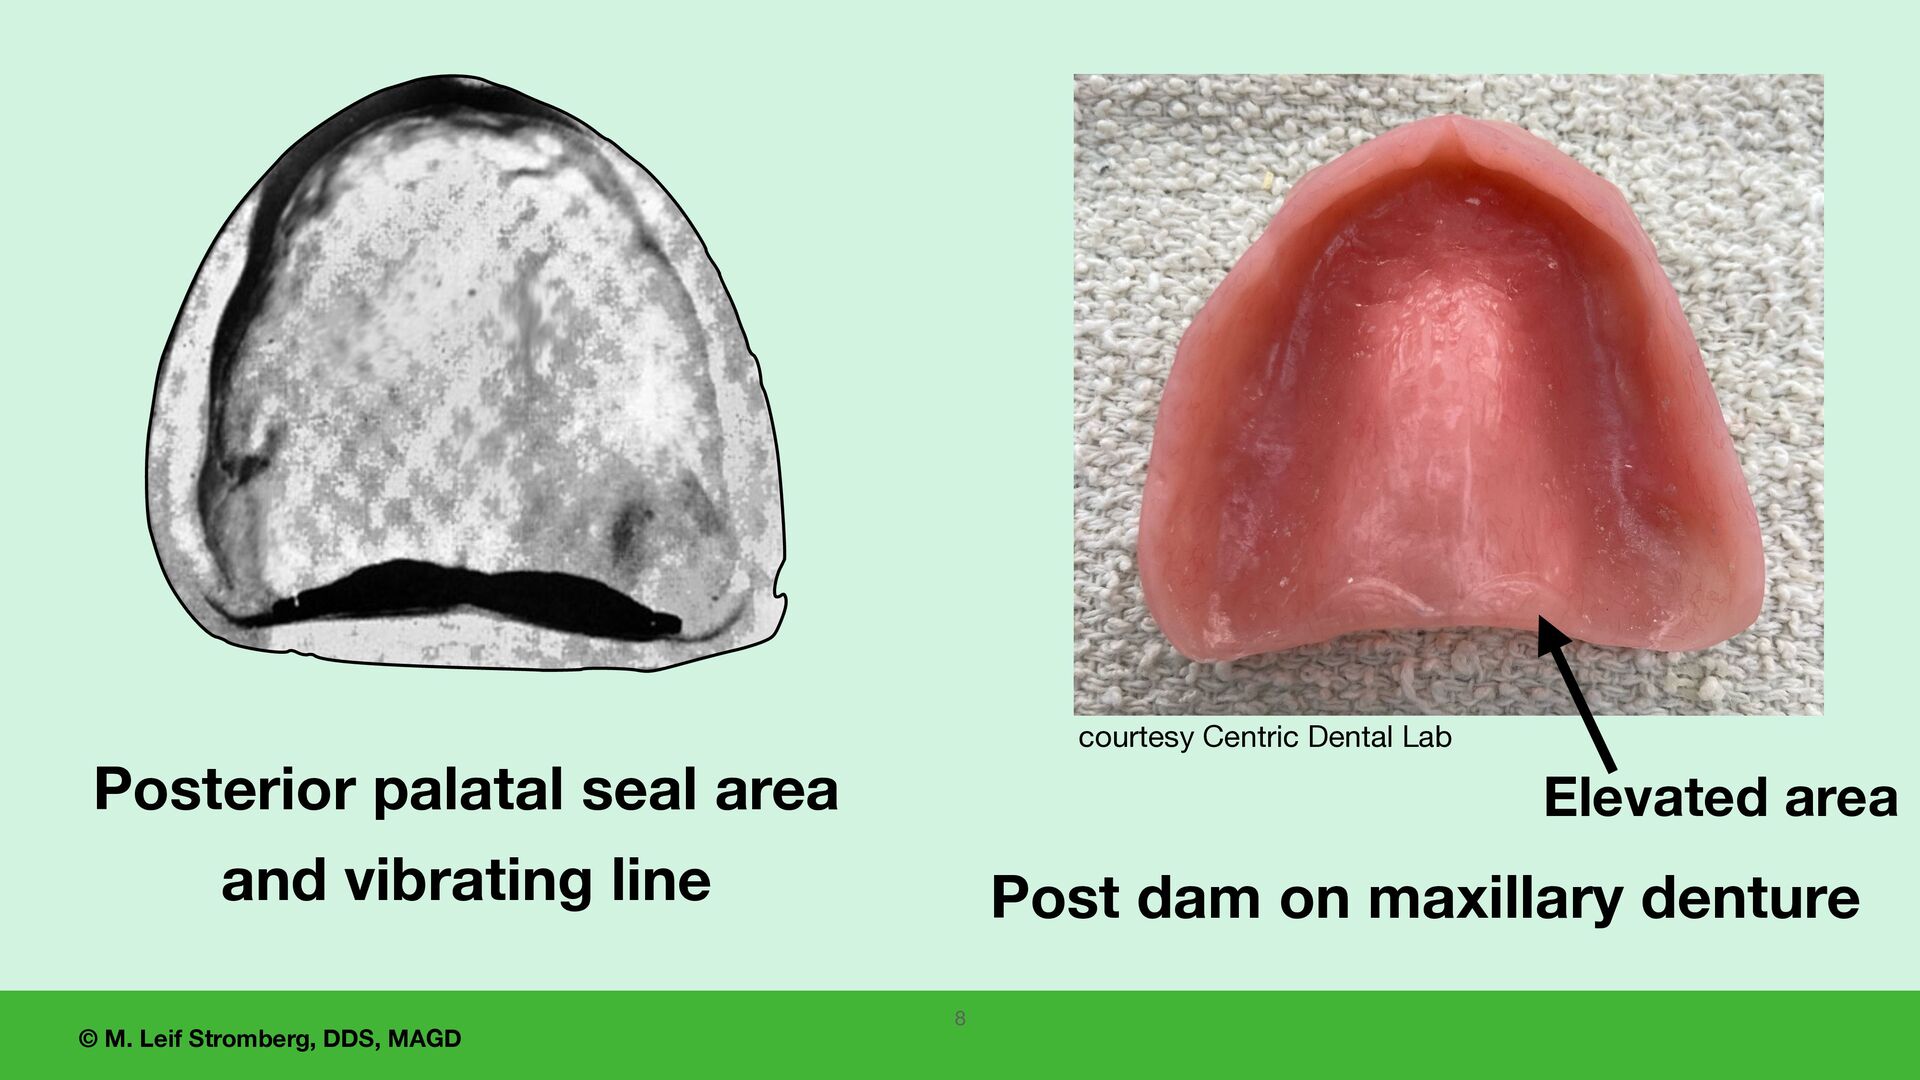
nishing and processing the dentures: 1. Before processing the dentures, the laboratory should check and adjust the occlusion of the wax-up in centric relation on the articulator so each lingual cusp of the posterior maxillary teeth contacts the central groove of the opposing tooth (lingualized occlusion with 5 contacts on each side) with no contact of the anterior teeth. 2. The palate of the denture base is to be approximately 3 mm thick in all areas (including over a torus). A torus can enlarge, and a denture can settle, requiring adjustment of the denture base over the torus. A torus is covered with a very thin layer of mucosa. 3. Create the post dam on the maxillary denture by relieving the cast in the posterior palatal seal area to a depth of 1/2 mm at midline, 1 mm in the hamular notches, and 1 1/2 mm in the soft compressible glandular area between midline and hamular notches. The post dam is generally 6 to 7 mm wide anteroposteriorly in the area between the midline and the hamular notches. 4 continued on the next slide
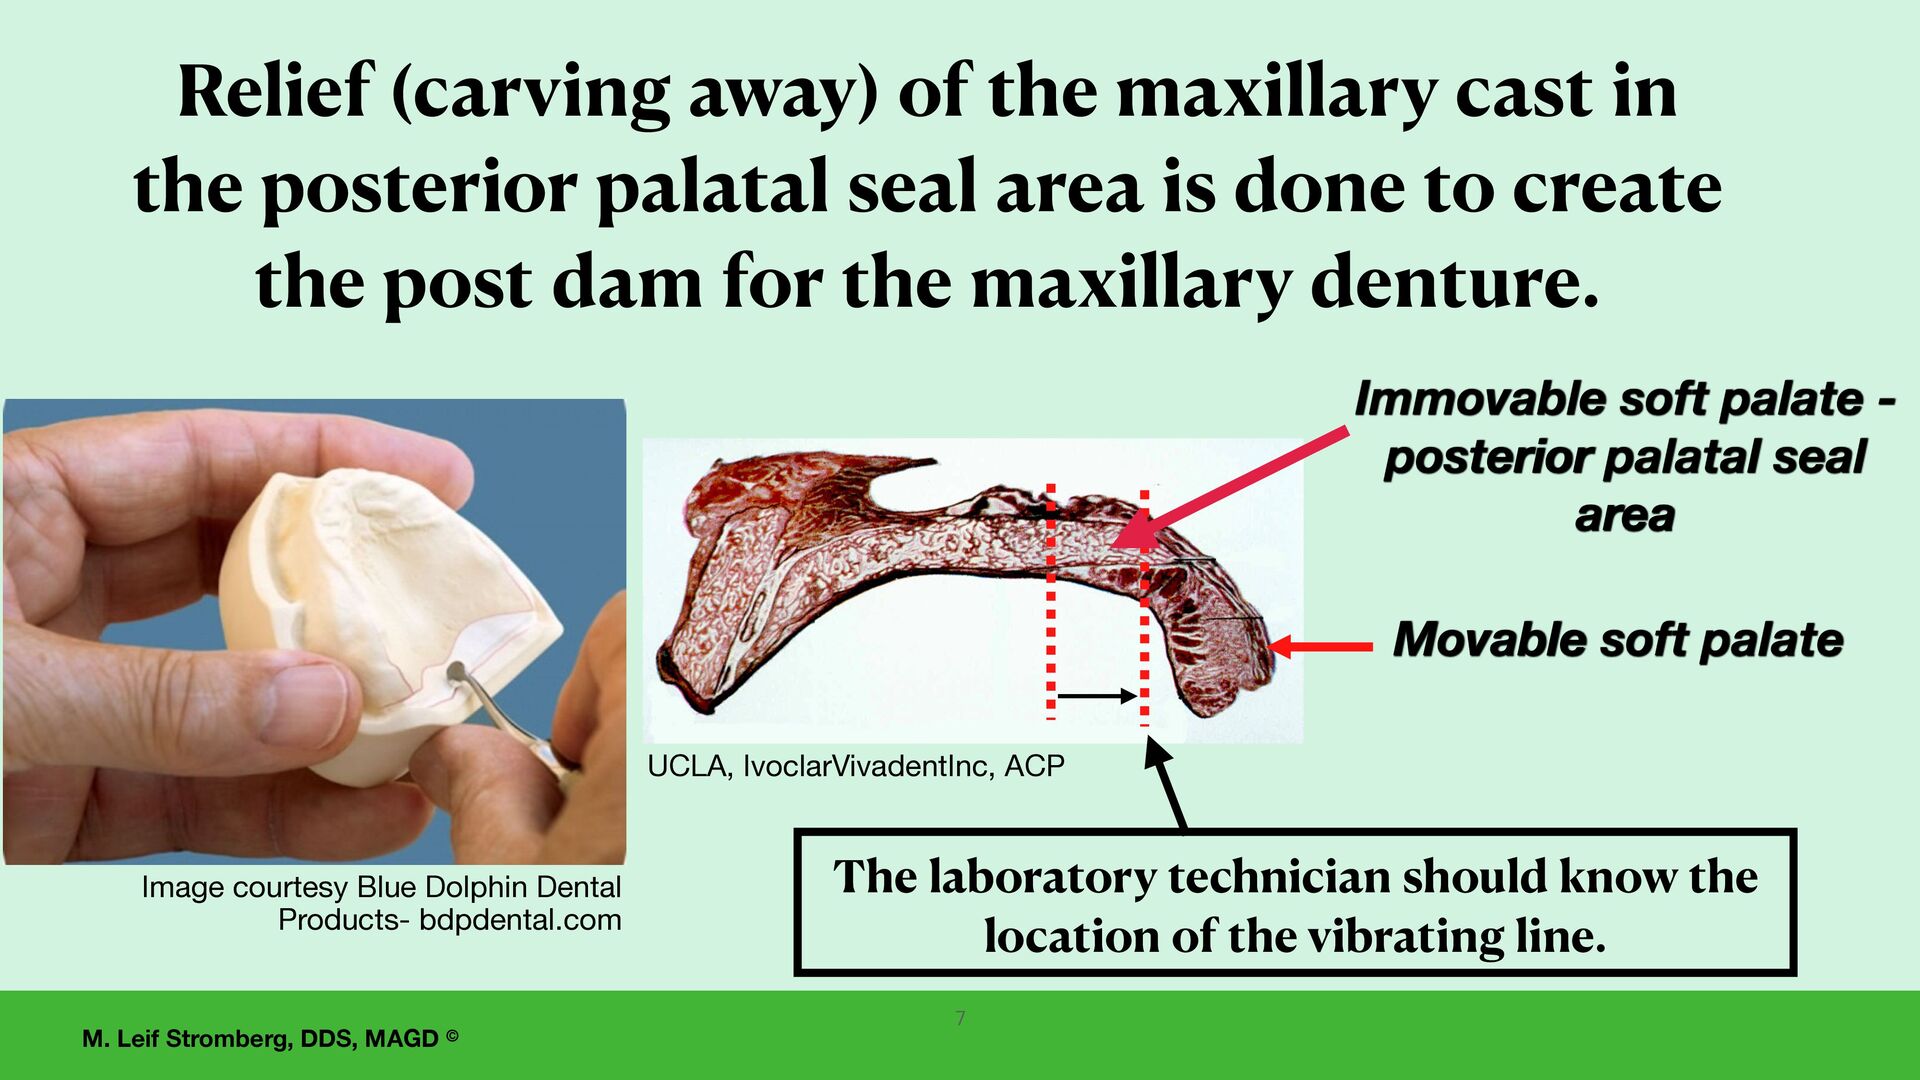
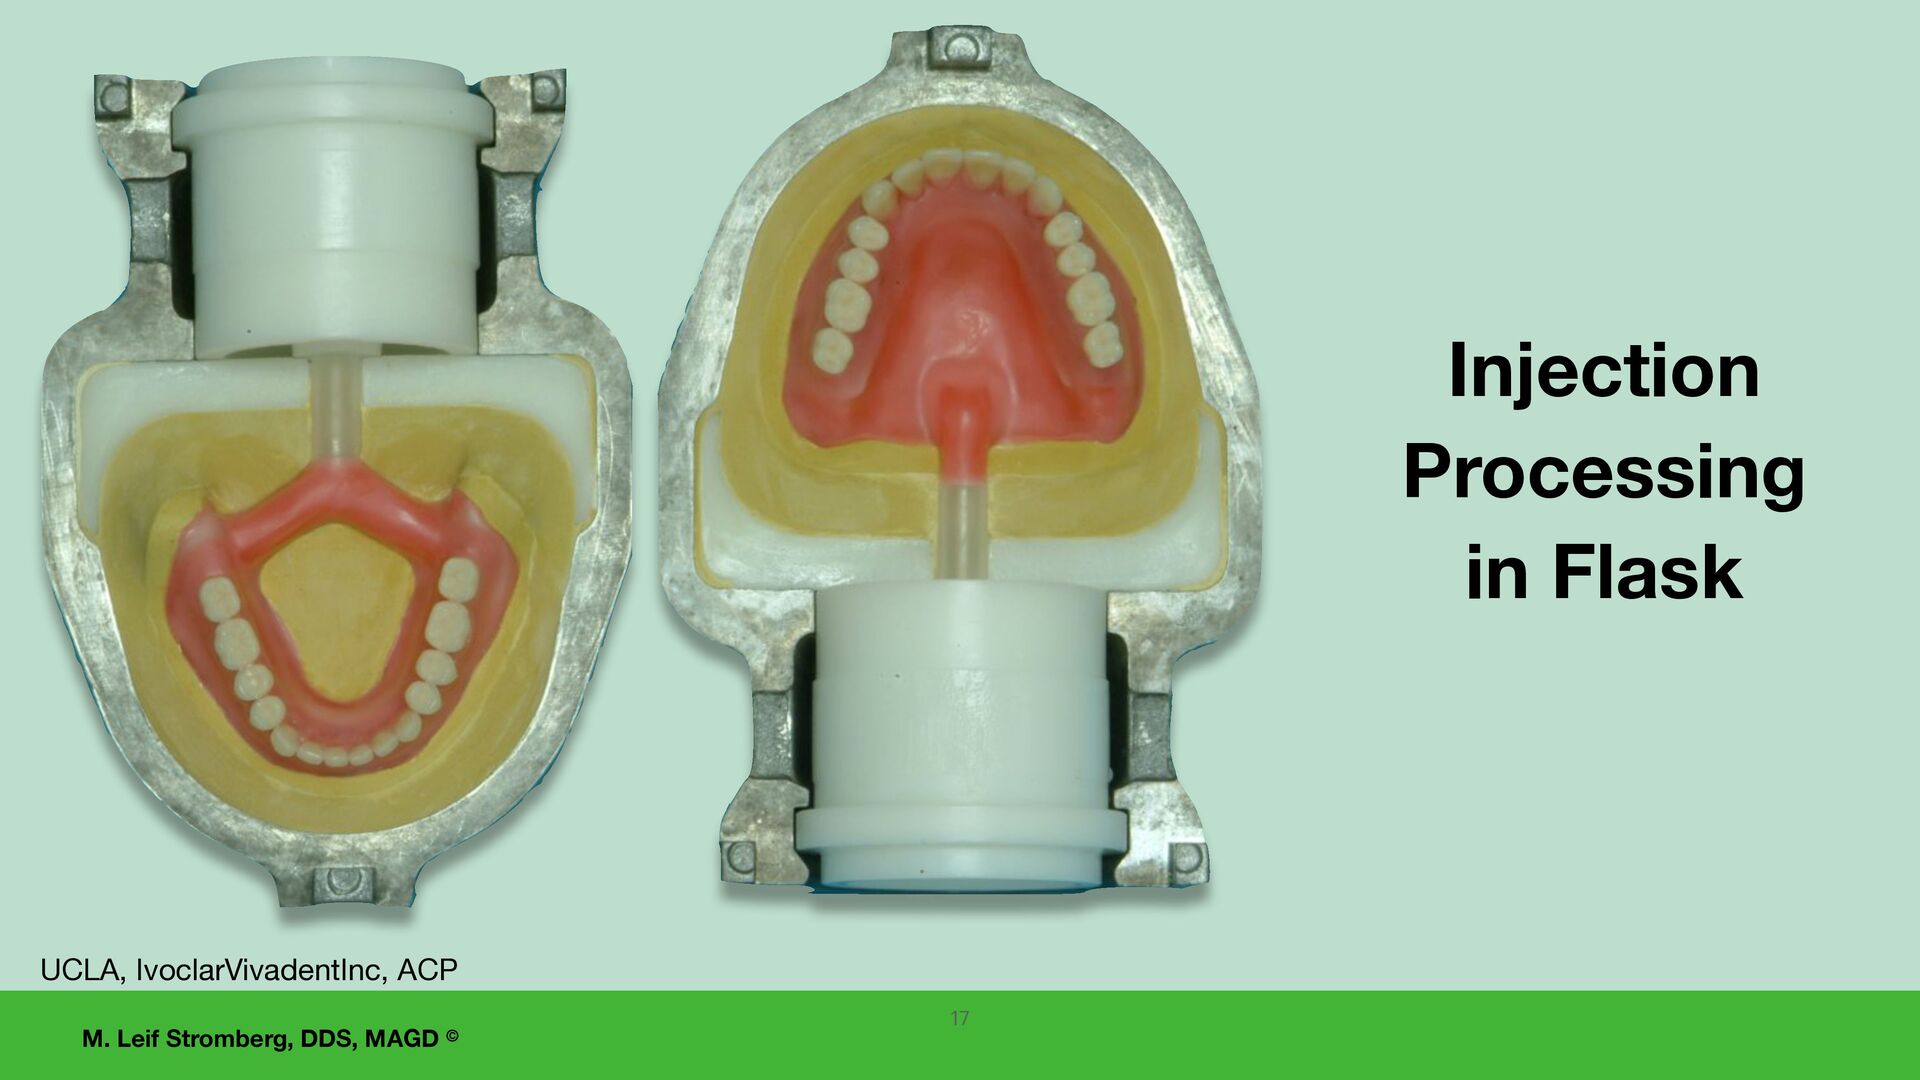
mandibular denture covers the retromolar pads. 5. Smooth and fi nish the wax denture bases in all areas. 6. Process dentures with injection technique processing to control polymerization shrinkage and warping of the denture bases. 7. After processing, remount the case on THE SAME articulator to re fi ne posterior occlusal contacts so all posterior teeth contact opposing teeth evenly and have no contact of anterior teeth in centric relation. 8. Polish the dentures and return them for delivery. Instruct the lab technician not to contour or polish the denture closer than 3-4 mm from the vestibular borders. Lab prescription for fi nishing and processing the dentures (continued): 5
COMPLETE DENTURE PREDICTABILITY, SUCCESS, and enjoyment is e ff ective communication 1. It is essential to continually work on creating and maintaining dentist- technician communication that is e ff ective, supportive, friendly, and trusting to promote con fi dence and mutual understanding, and increase consistency for higher-quality dental restorations. 2. This includes developing CLEAR lines of communication among all dental team members. 3. This leads to more enjoyment and success for the dental team, including the dental o ffi ce and laboratory.
the maxillary cast in the posterior palatal seal area is done to create the post dam for the maxillary denture. Movable soft palate Immovable soft palate - posterior palatal seal area UCLA, IvoclarVivadentInc, ACP Image courtesy Blue Dolphin Dental Products- bdpdental.com 7 The laboratory technician should know the location of the vibrating line.
for the maxillary denture UCLA, IvoclarVivadentInc, ACP 1. On the cast, draw a line at the posterior extension of the denture (at the vibrating line extending through the hamular notches). 2. Draw a second line anterior to the posterior extension in what is referred to as a butter fl y pattern to mark the posterior palatal seal area. 3. Relieve (carve away) the area between these lines to create the post dam with a depth of: A. 1/2 mm at the midline. B. 1 1/2 mm in the soft compressible glandular area between the midline and hamular notches. C. 1 mm in the hamular notches. 9
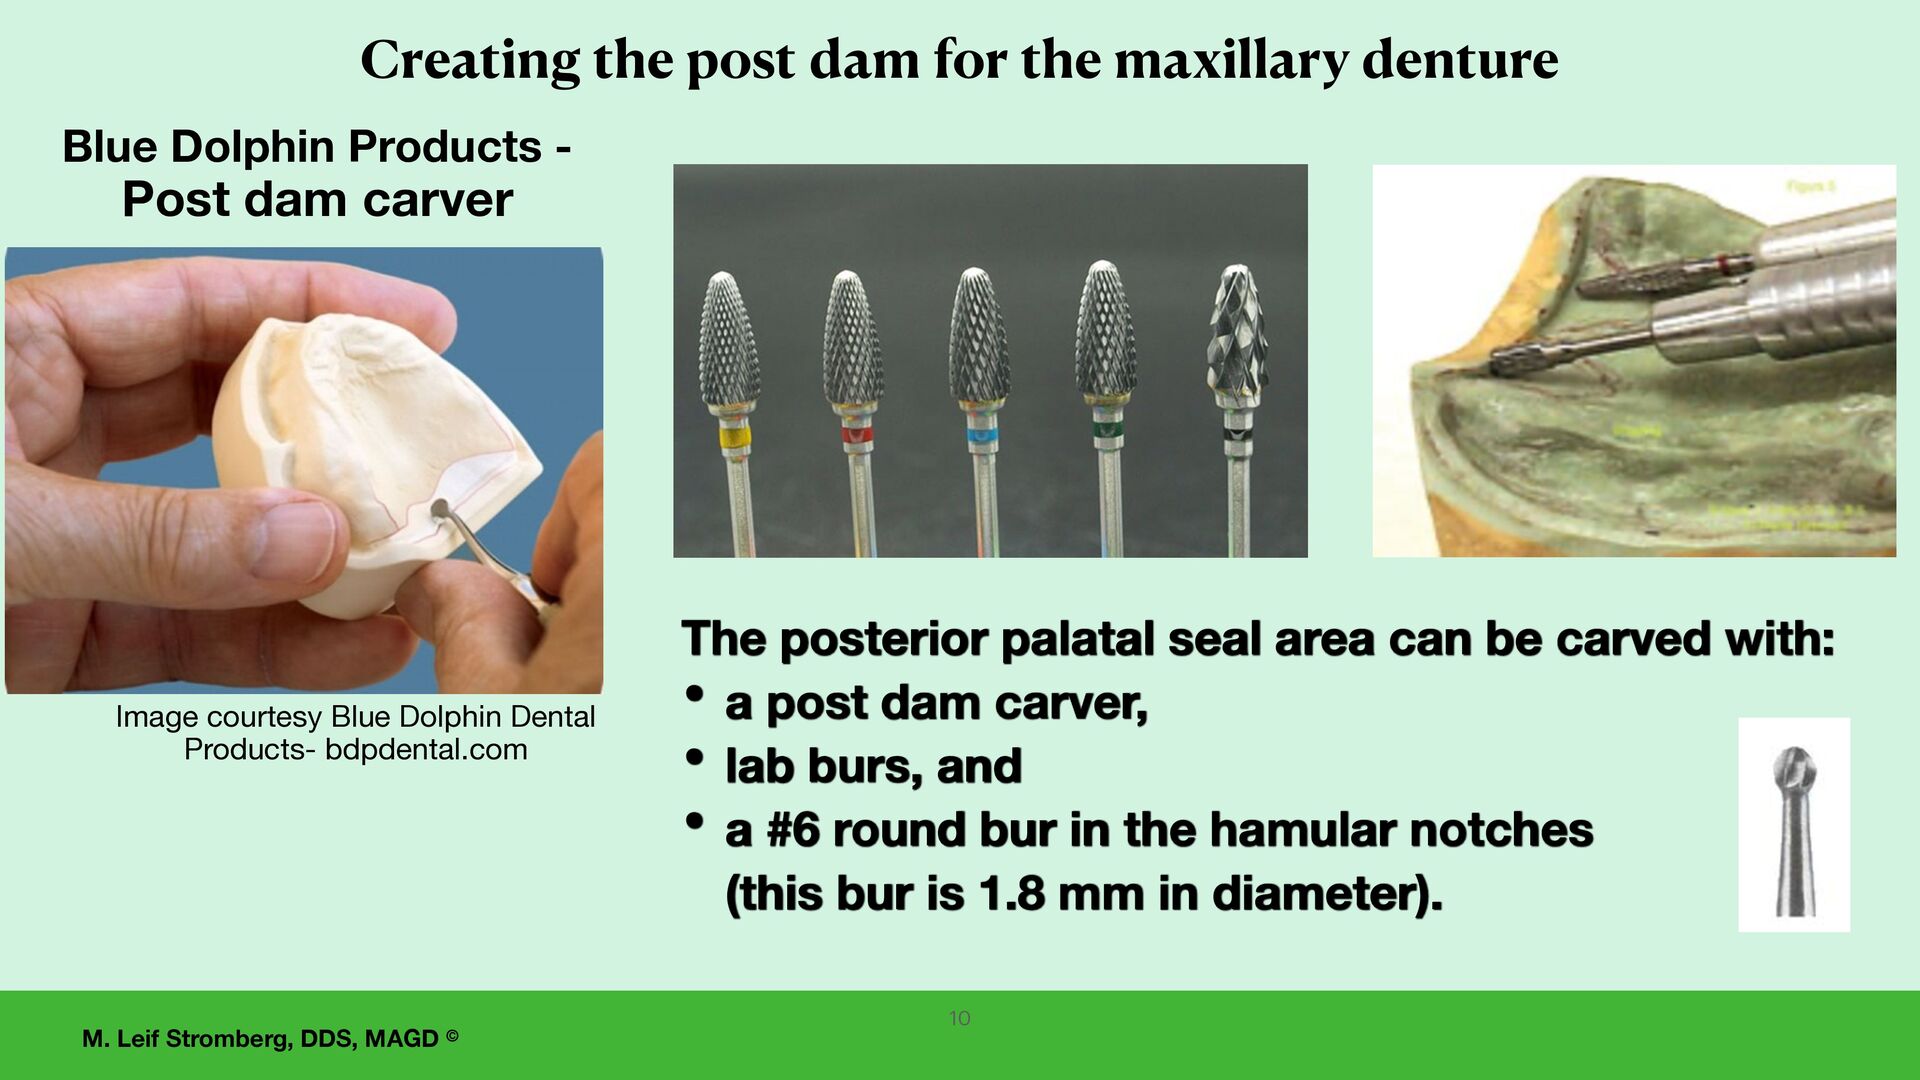
for the maxillary denture Image courtesy Blue Dolphin Dental Products- bdpdental.com The posterior palatal seal area can be carved with: • a post dam carver, • lab burs, and • a #6 round bur in the hamular notches (this bur is 1.8 mm in diameter). Blue Dolphin Products - Post dam carver 10
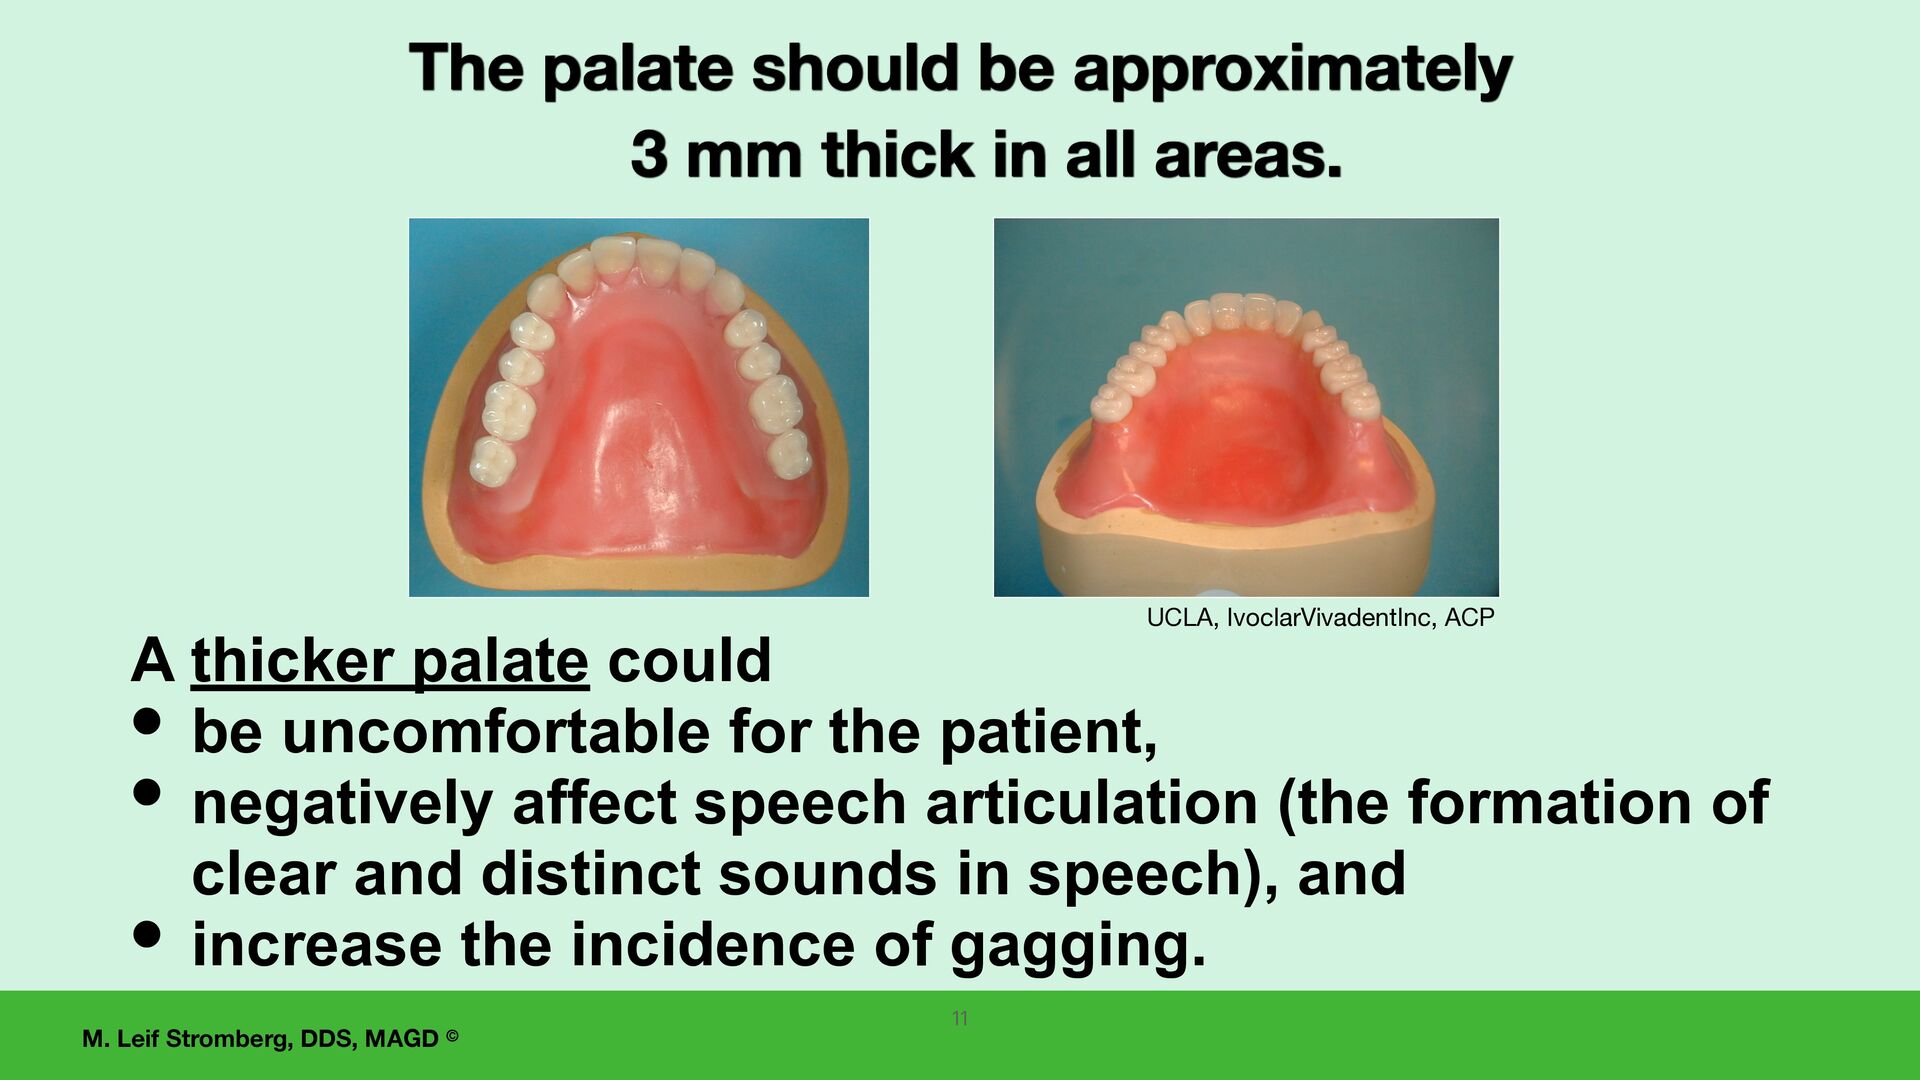
approximately 3 mm thick in all areas. UCLA, IvoclarVivadentInc, ACP 11 A thicker palate could • be uncomfortable for the patient, • negatively affect speech articulation (the formation of clear and distinct sounds in speech), and • increase the incidence of gagging.
polymerization of denture base resins for the complete dentures The two main processing options are: 1. Injection processing, 2. Conventional processing. 12
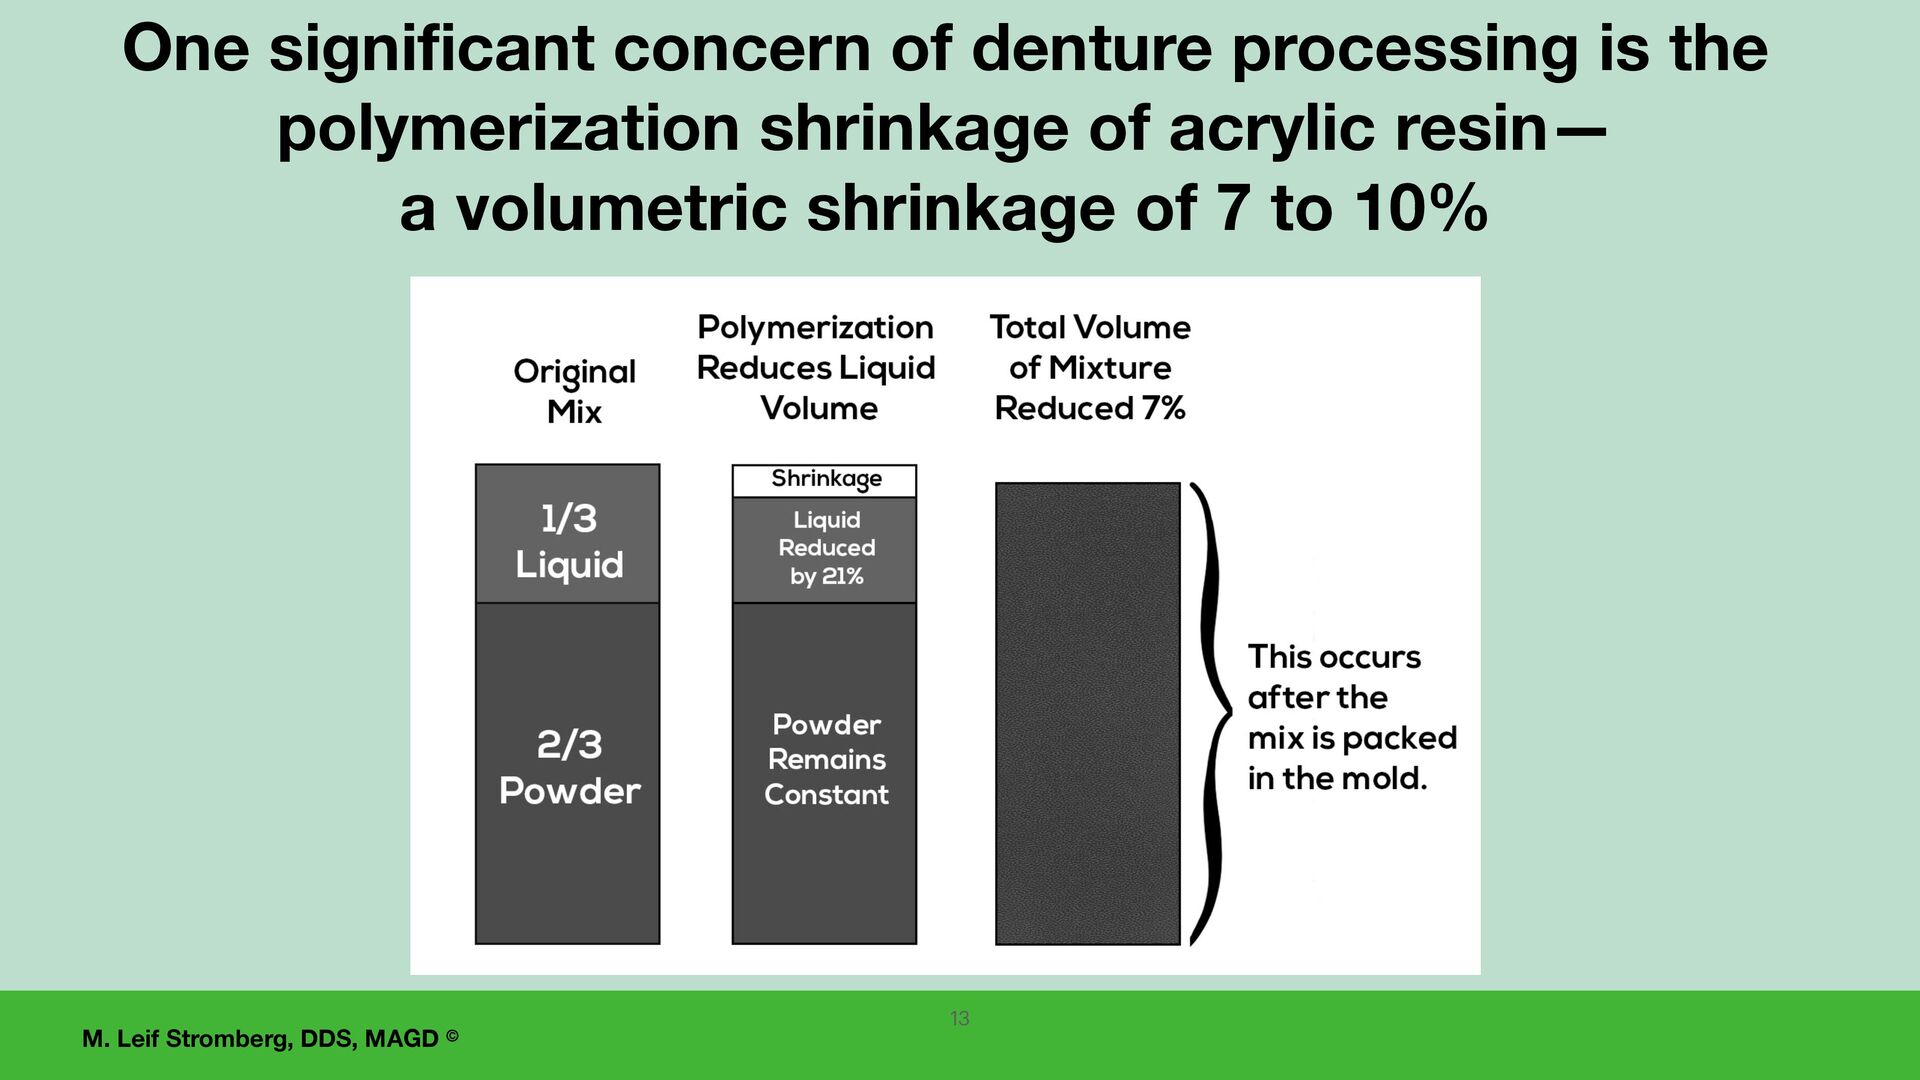
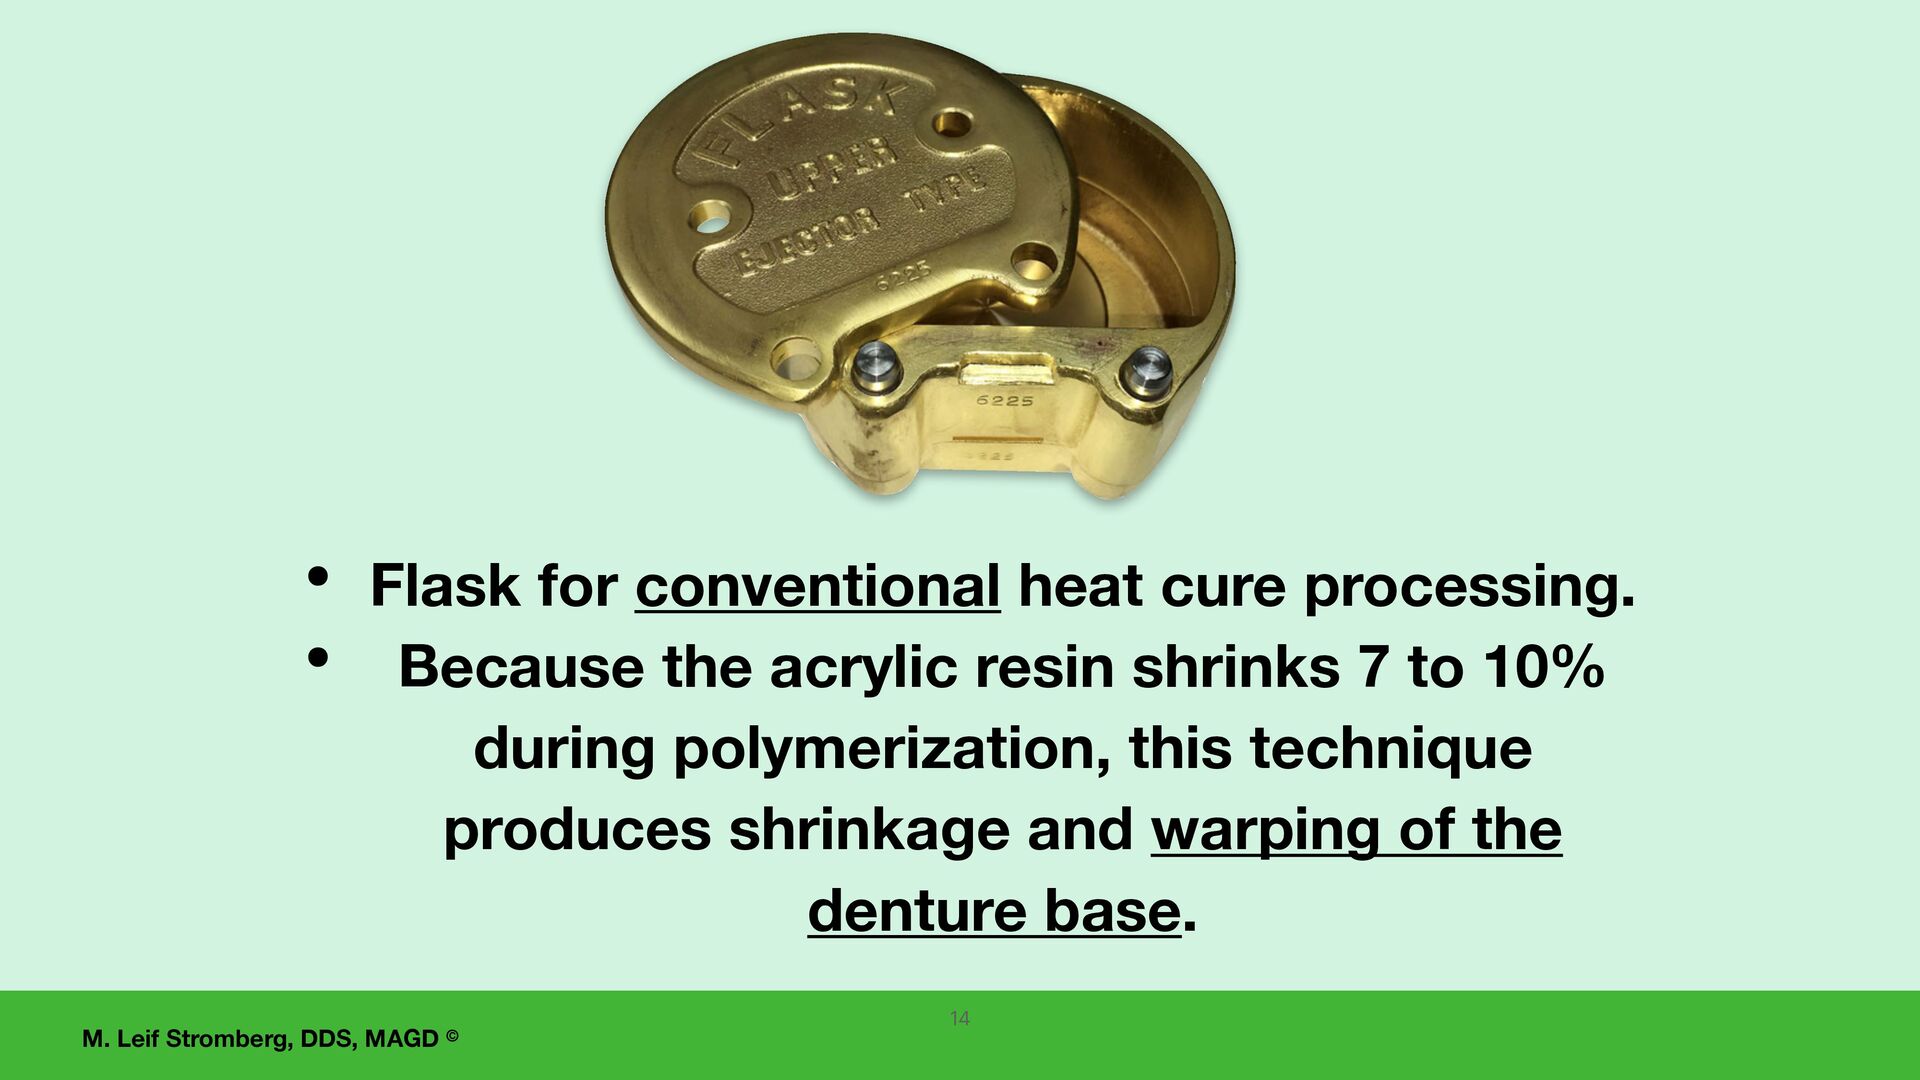
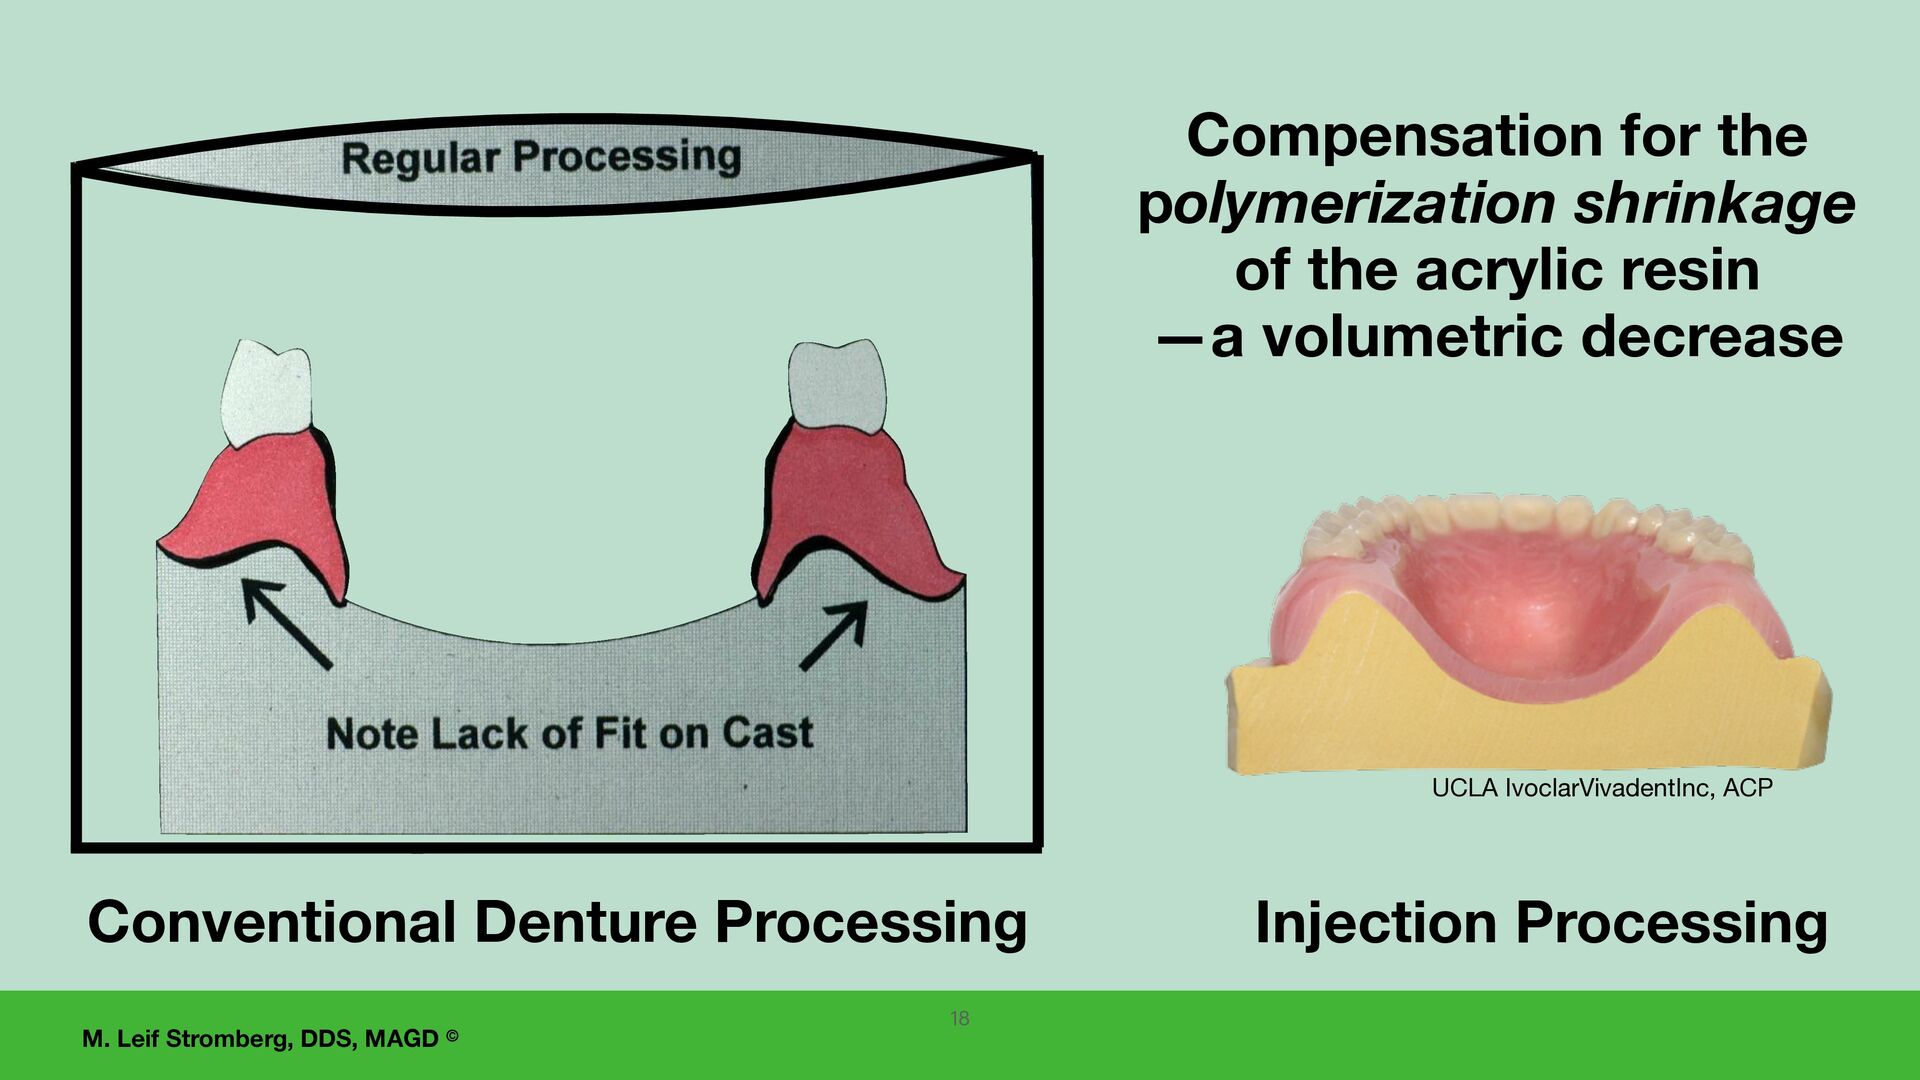
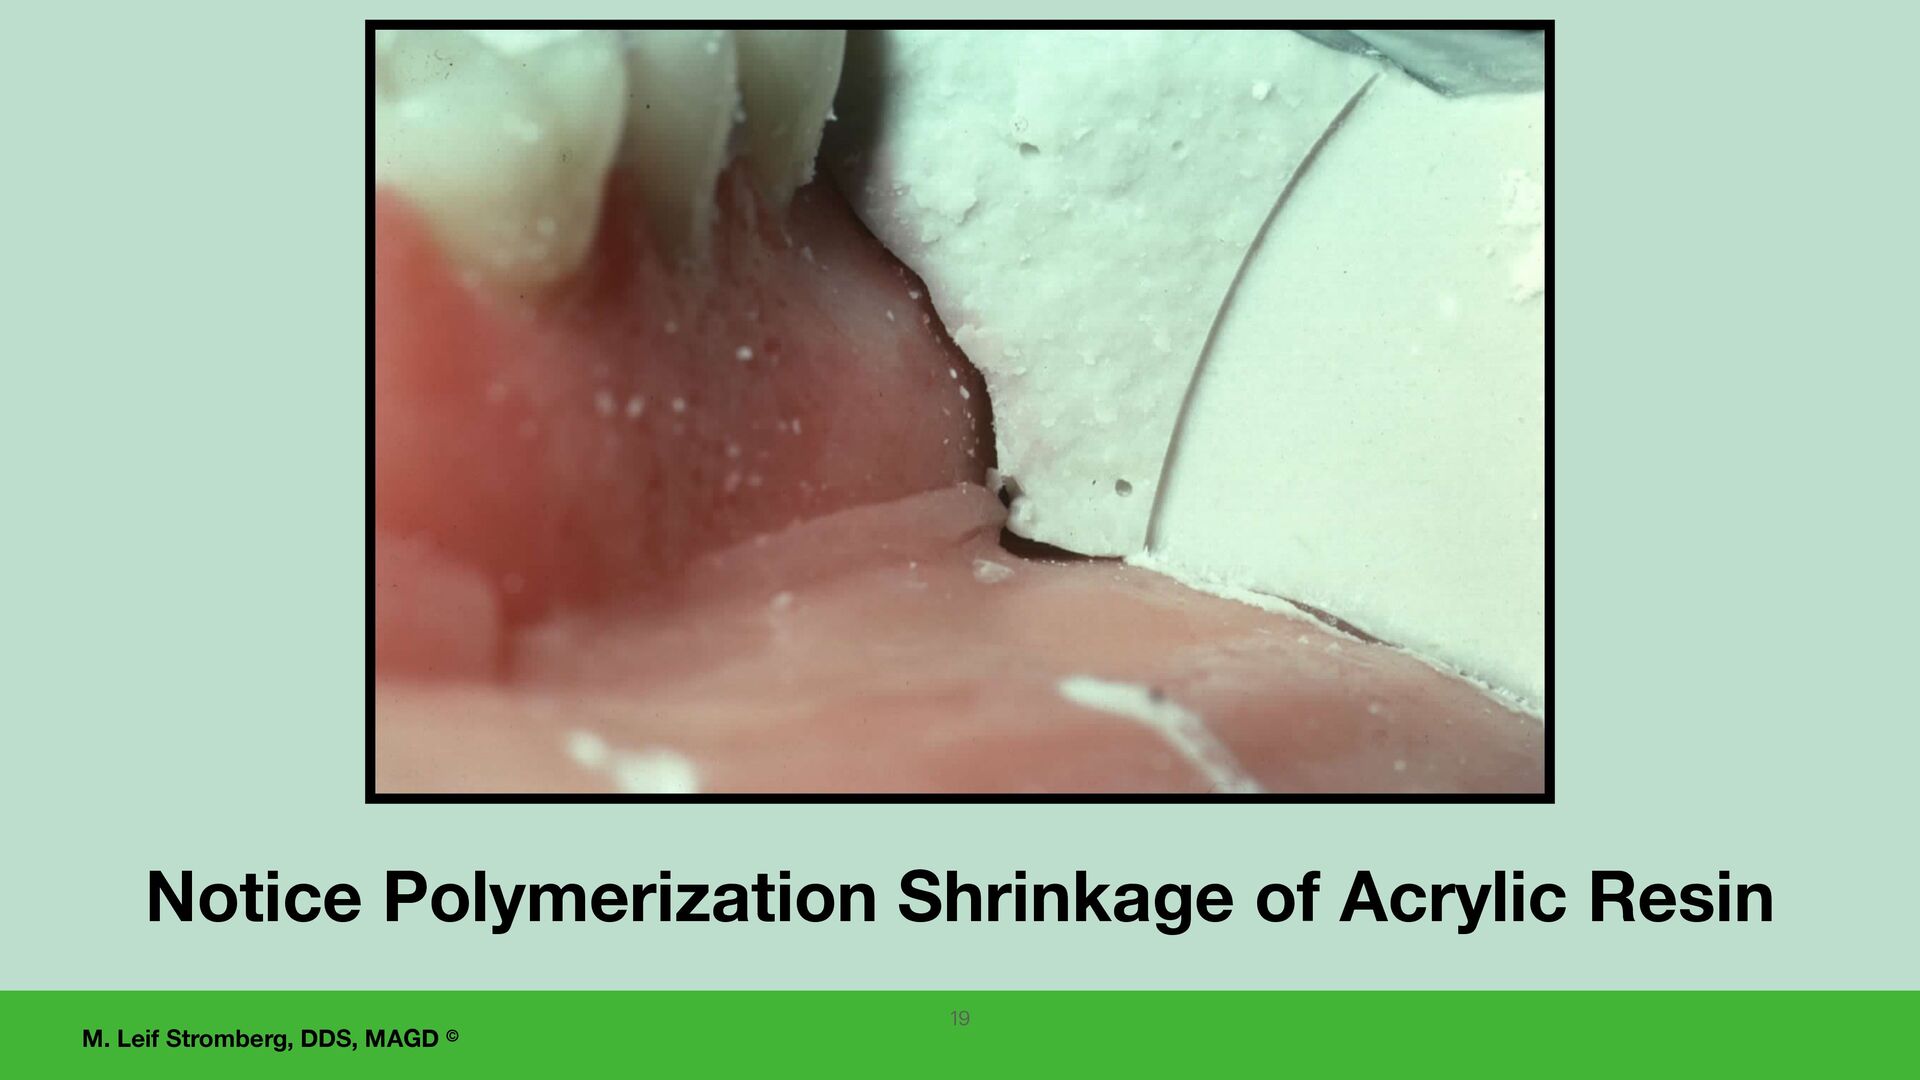
heat cure processing. • Because the acrylic resin shrinks 7 to 10% during polymerization, this technique produces shrinkage and warping of the denture base. 14
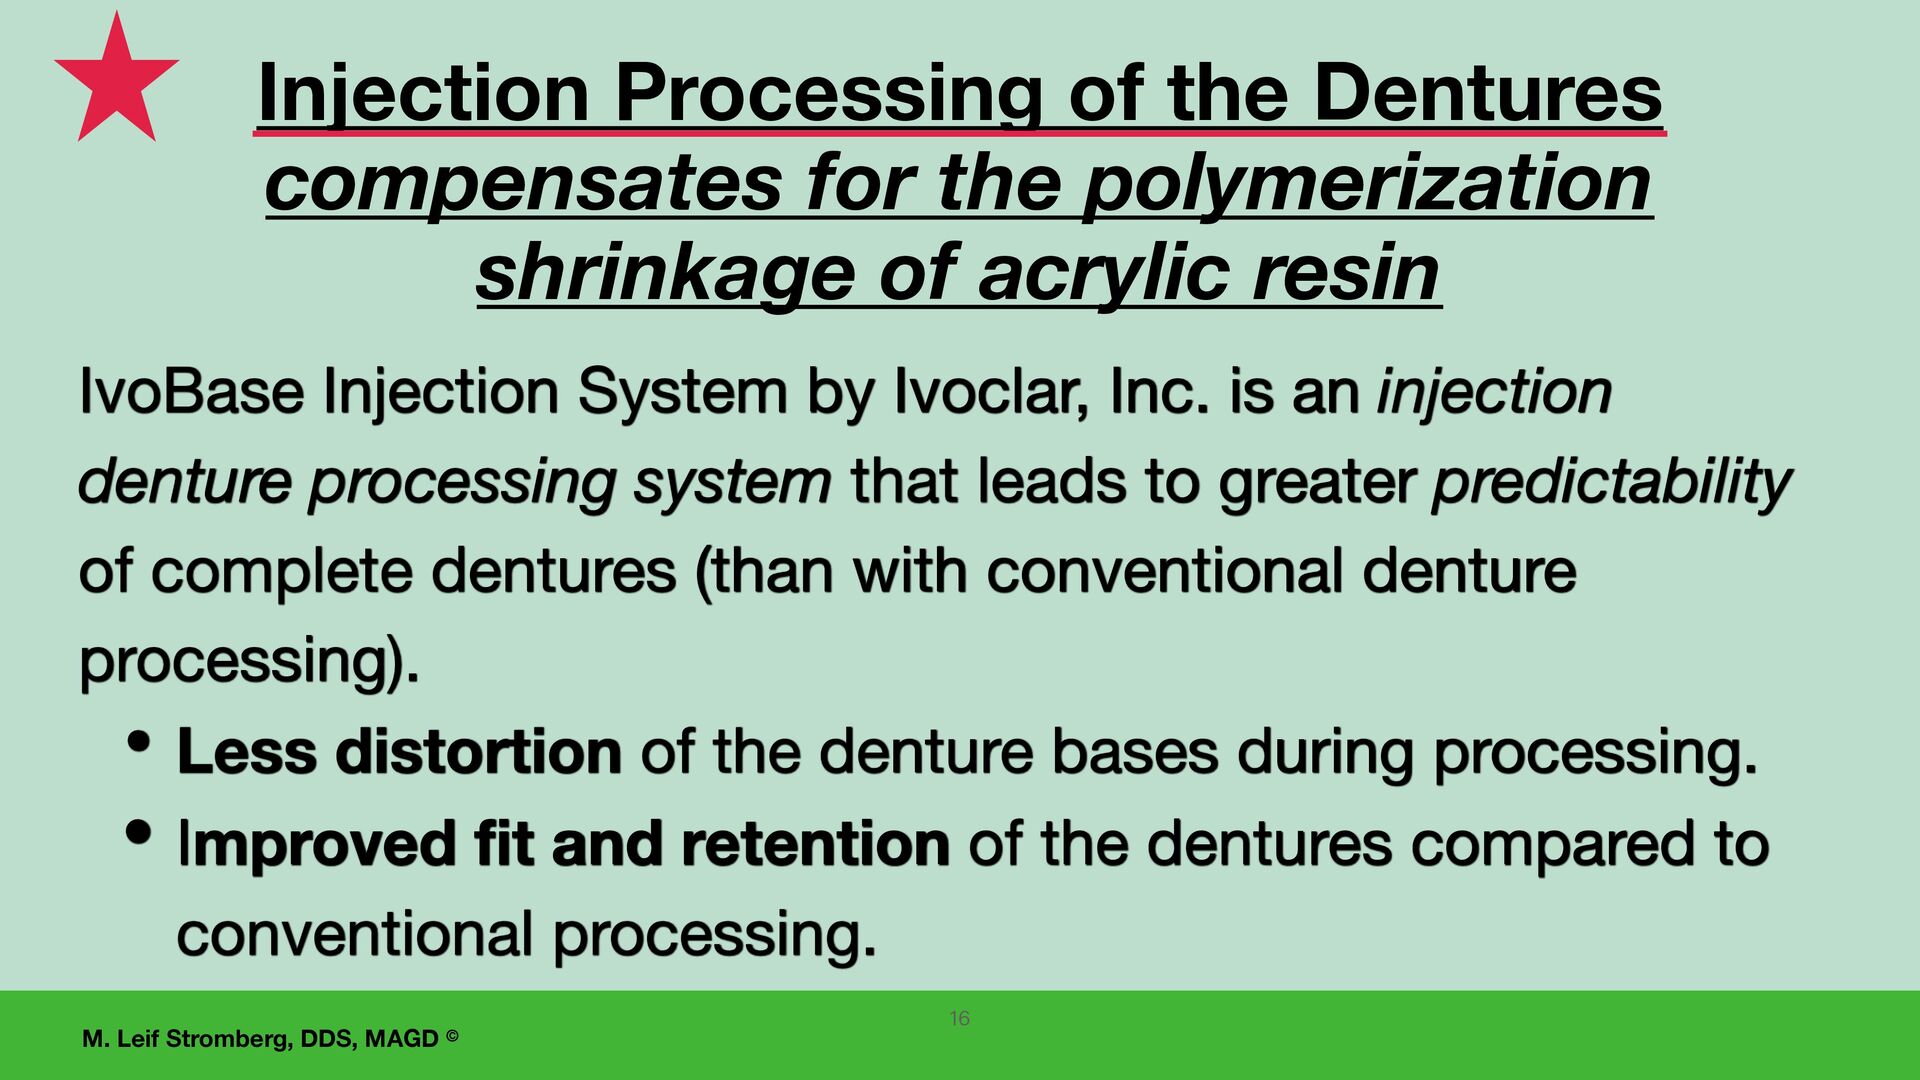
Ivoclar, Inc. is an injection denture processing system that leads to greater predictability of complete dentures (than with conventional denture processing). • Less distortion of the denture bases during processing. • Improved fit and retention of the dentures compared to conventional processing. Injection Processing of the Dentures compensates for the polymerization shrinkage of acrylic resin 16
remount the case on the same articulator before removing the dentures from the master casts after processing: • To correct changes in the occlusion that have occurred during processing. • To restore and refine centric relation occlusal contacts (and bilateral balance). 21
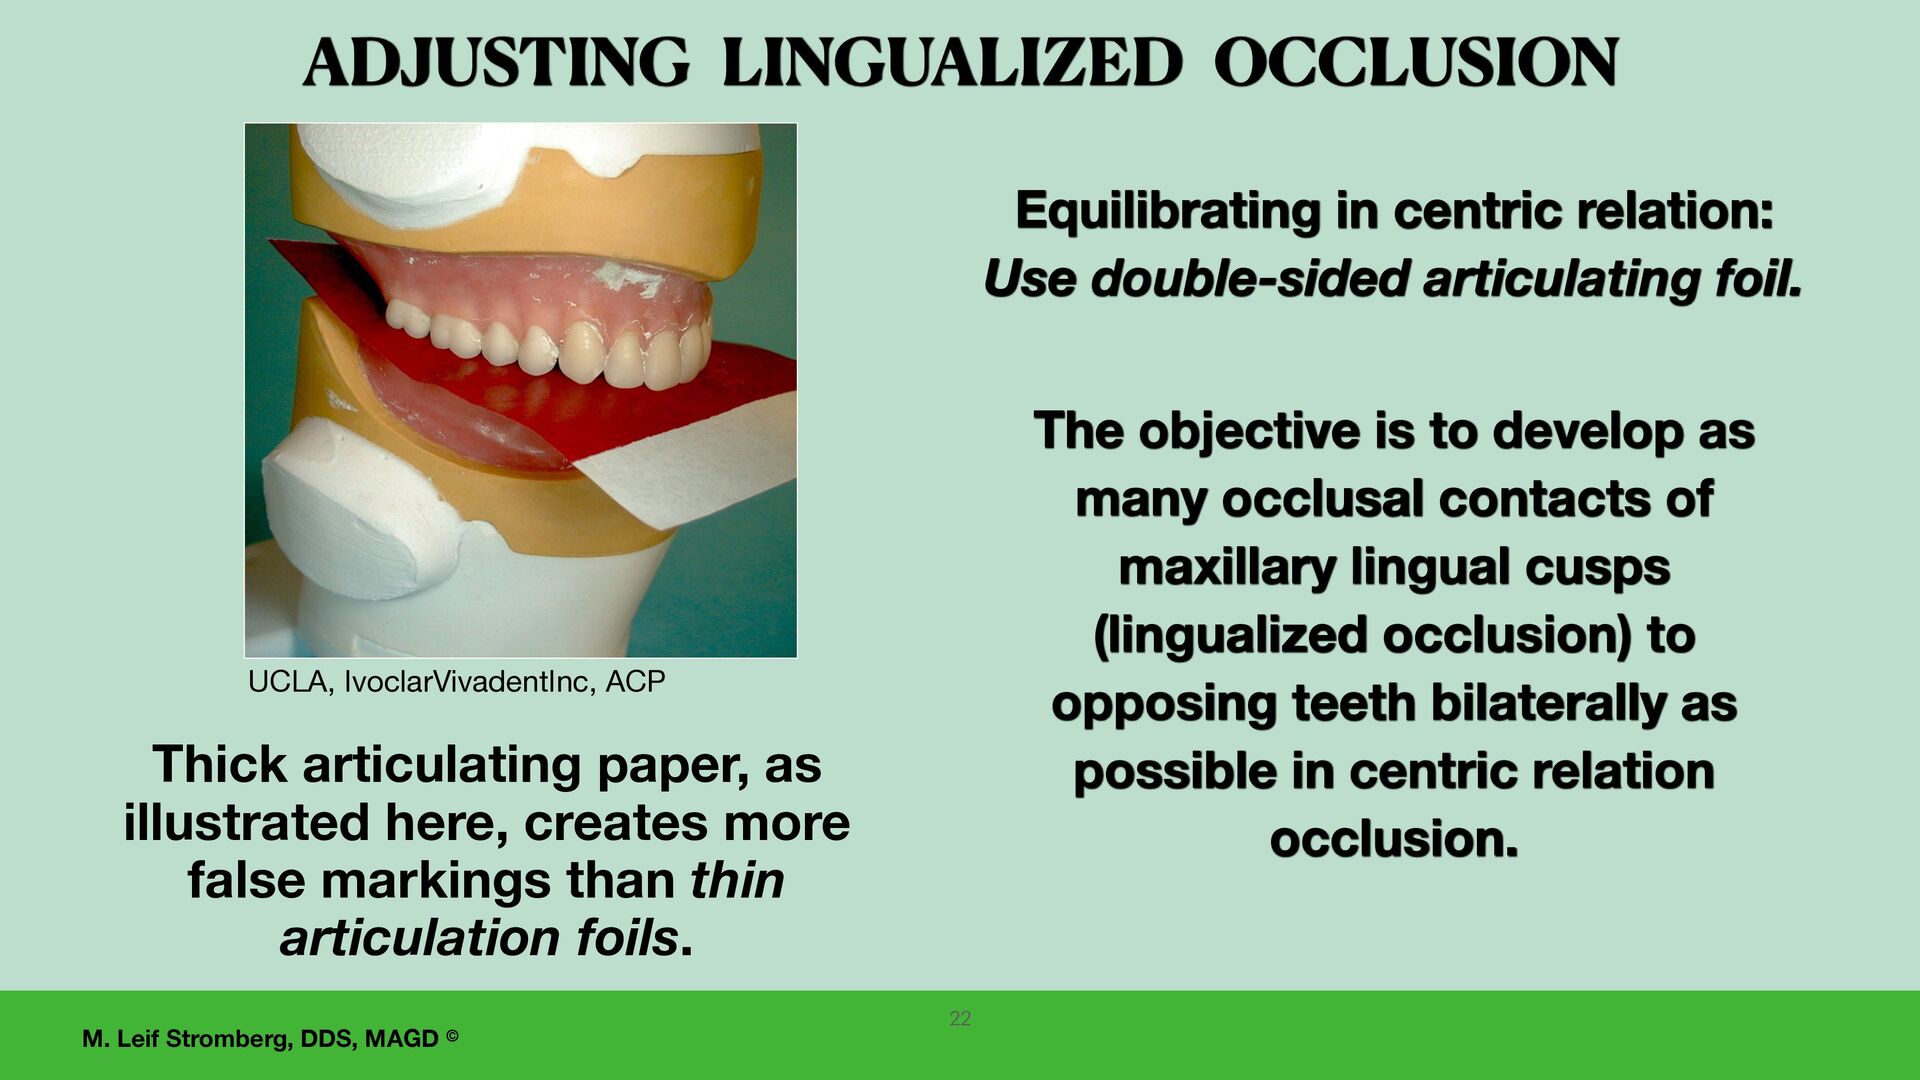
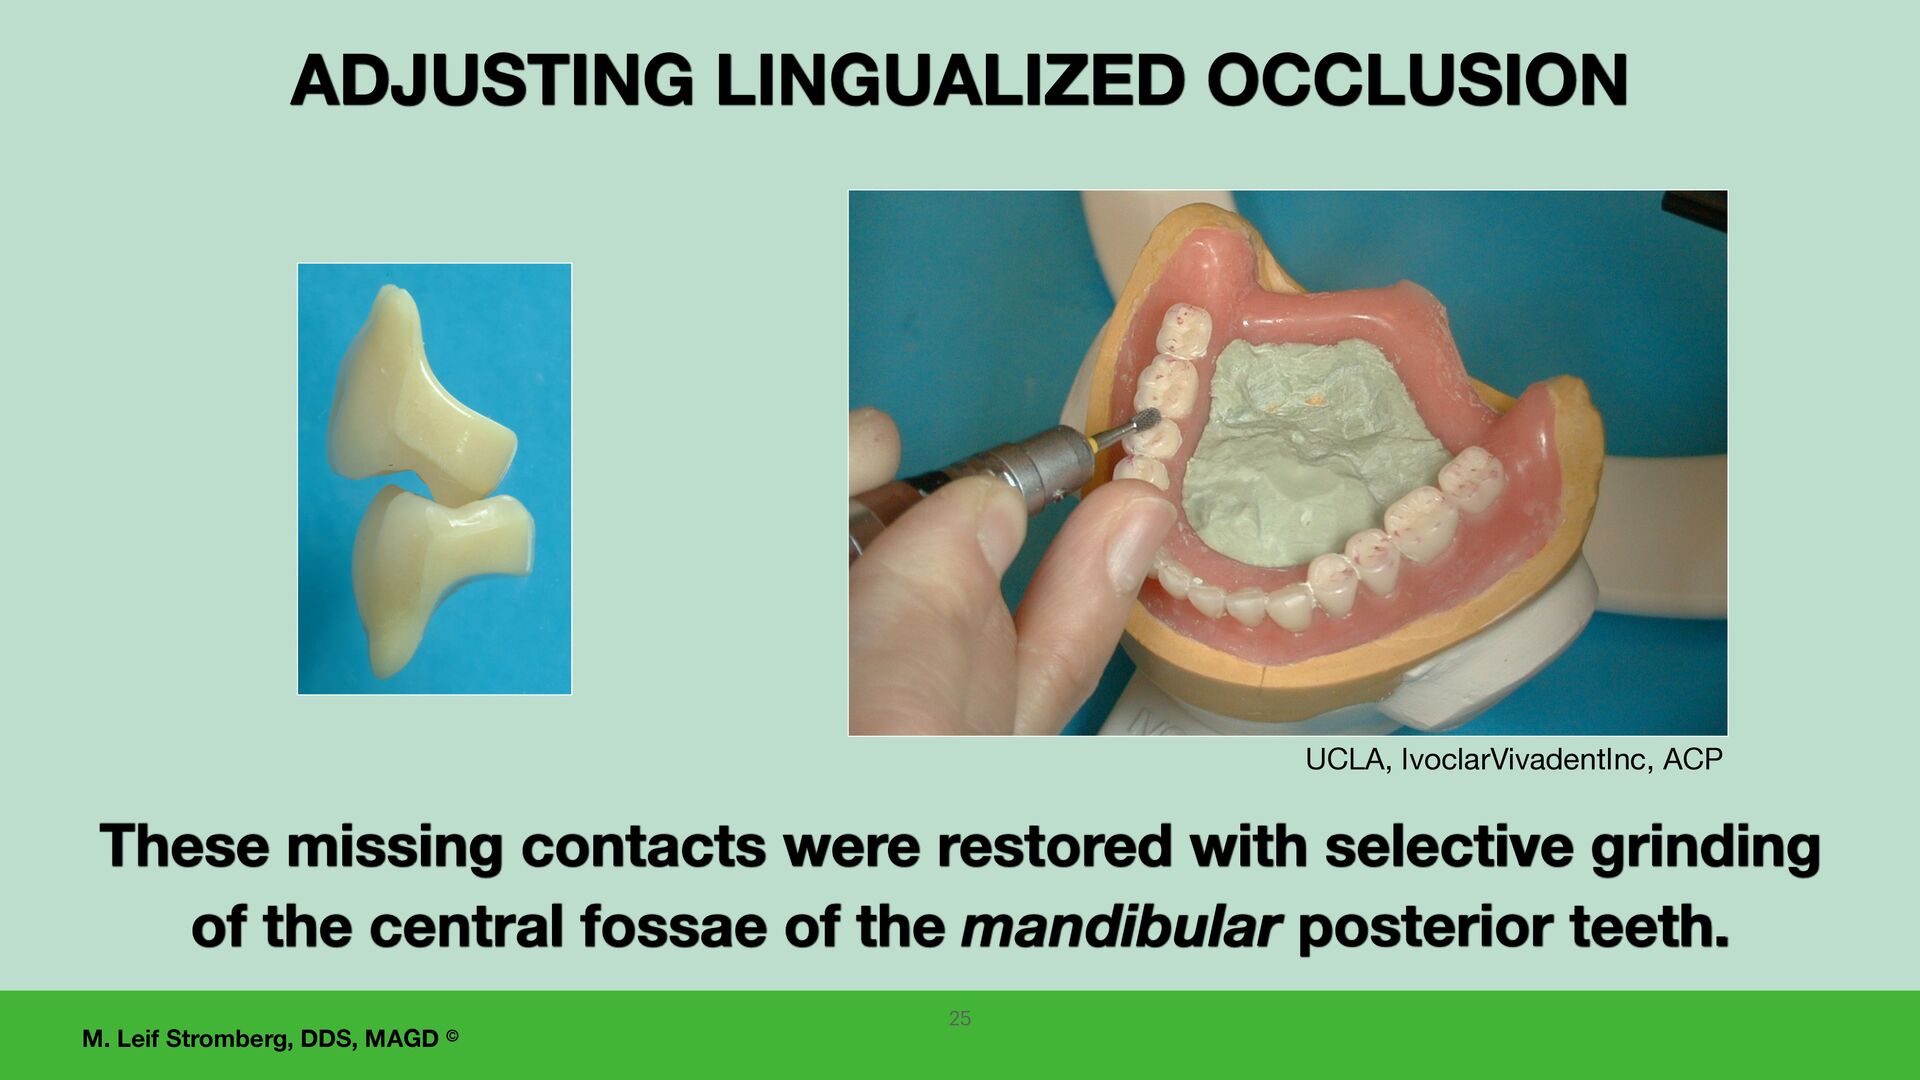
develop as many occlusal contacts of maxillary lingual cusps (lingualized occlusion) to opposing teeth bilaterally as possible in centric relation occlusion. Equilibrating in centric relation: Use double-sided articulating foil. ADJUSTING LINGUALIZED OCCLUSION Thick articulating paper, as illustrated here, creates more false markings than thin articulation foils. 22 UCLA, IvoclarVivadentInc, ACP
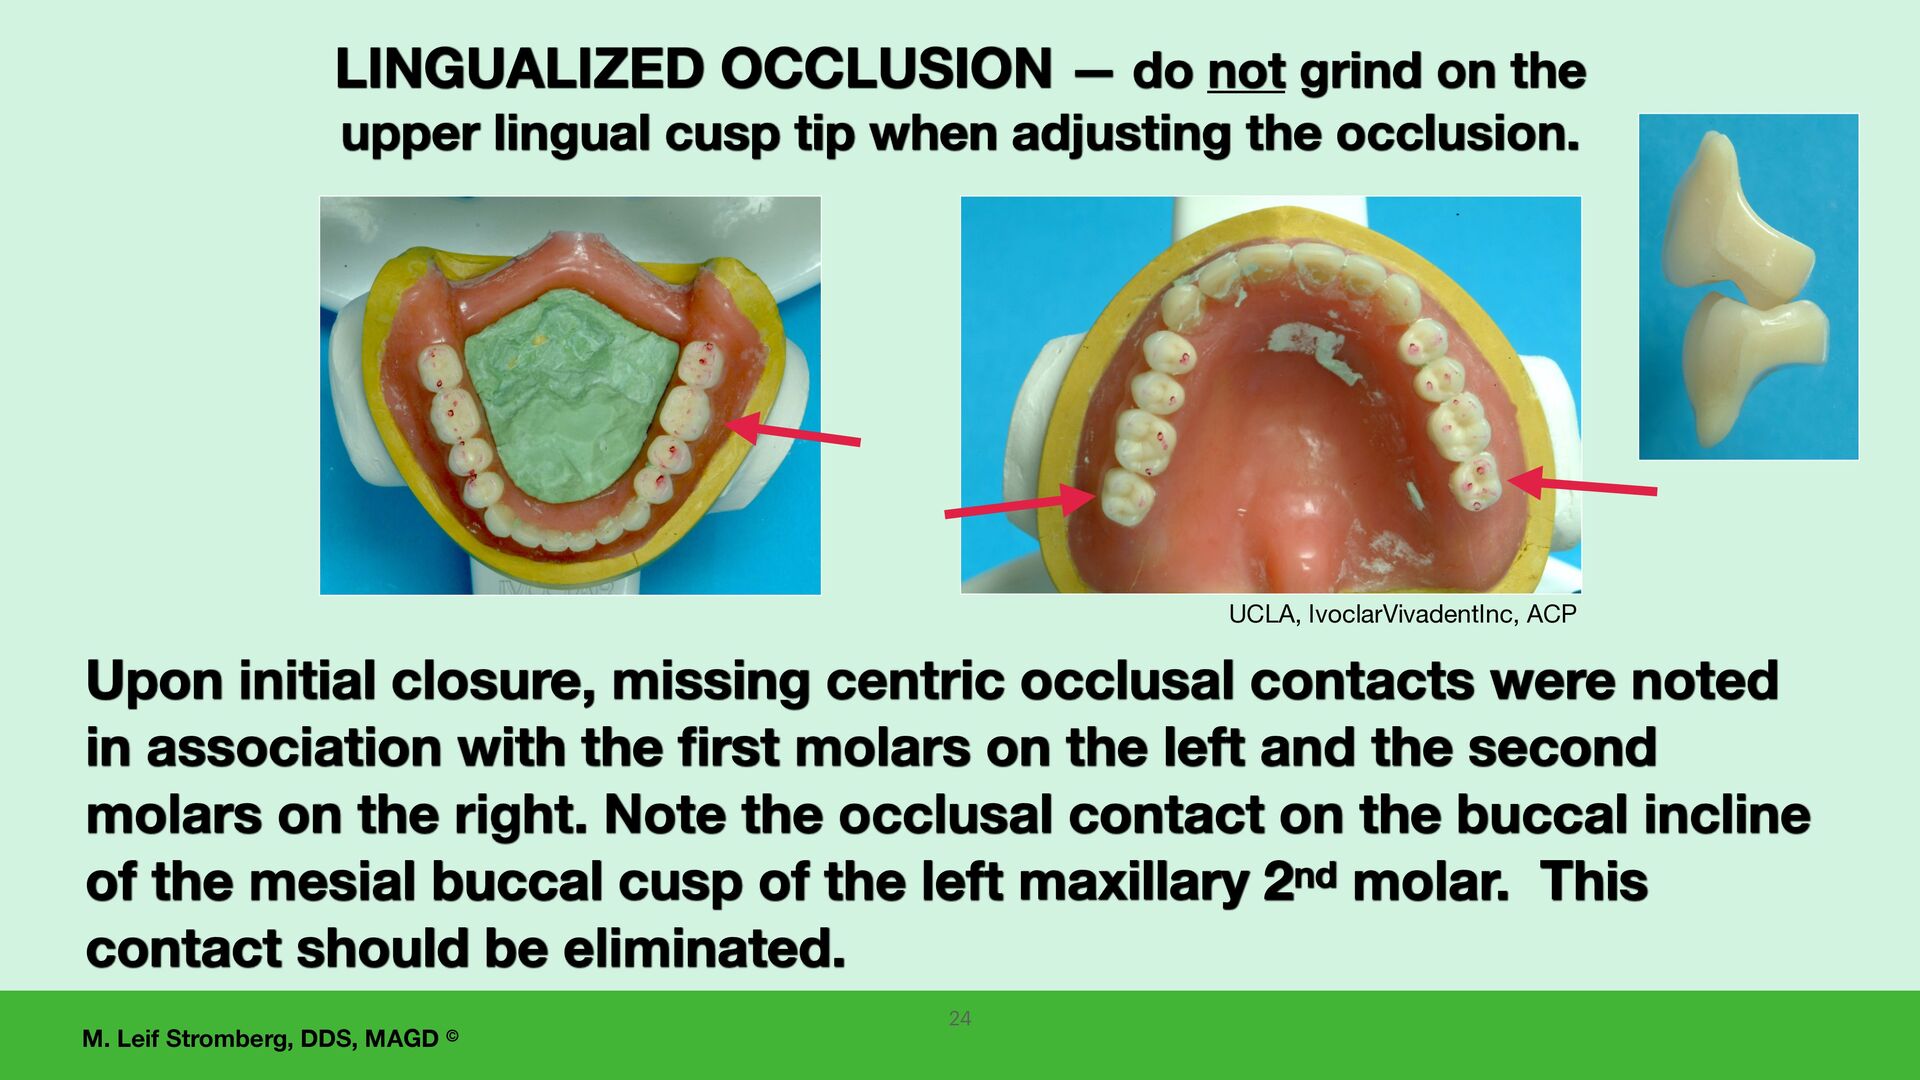
missing centric occlusal contacts were noted in association with the first molars on the left and the second molars on the right. Note the occlusal contact on the buccal incline of the mesial buccal cusp of the left maxillary 2nd molar. This contact should be eliminated. LINGUALIZED OCCLUSION — do not grind on the upper lingual cusp tip when adjusting the occlusion. UCLA, IvoclarVivadentInc, ACP
SECTION— PARTICIPANTS WILL BE ABLE TO: 1. Explain how to use a white silicone paste for detecting and adjusting areas of excessive pressure on the denture-supporting tissues. 2. Discuss how to adjust occlusion accurately on tissue- supported complete dentures and 3. Incorporate these steps into practice. 27 Delivering successful new dentures to the patient
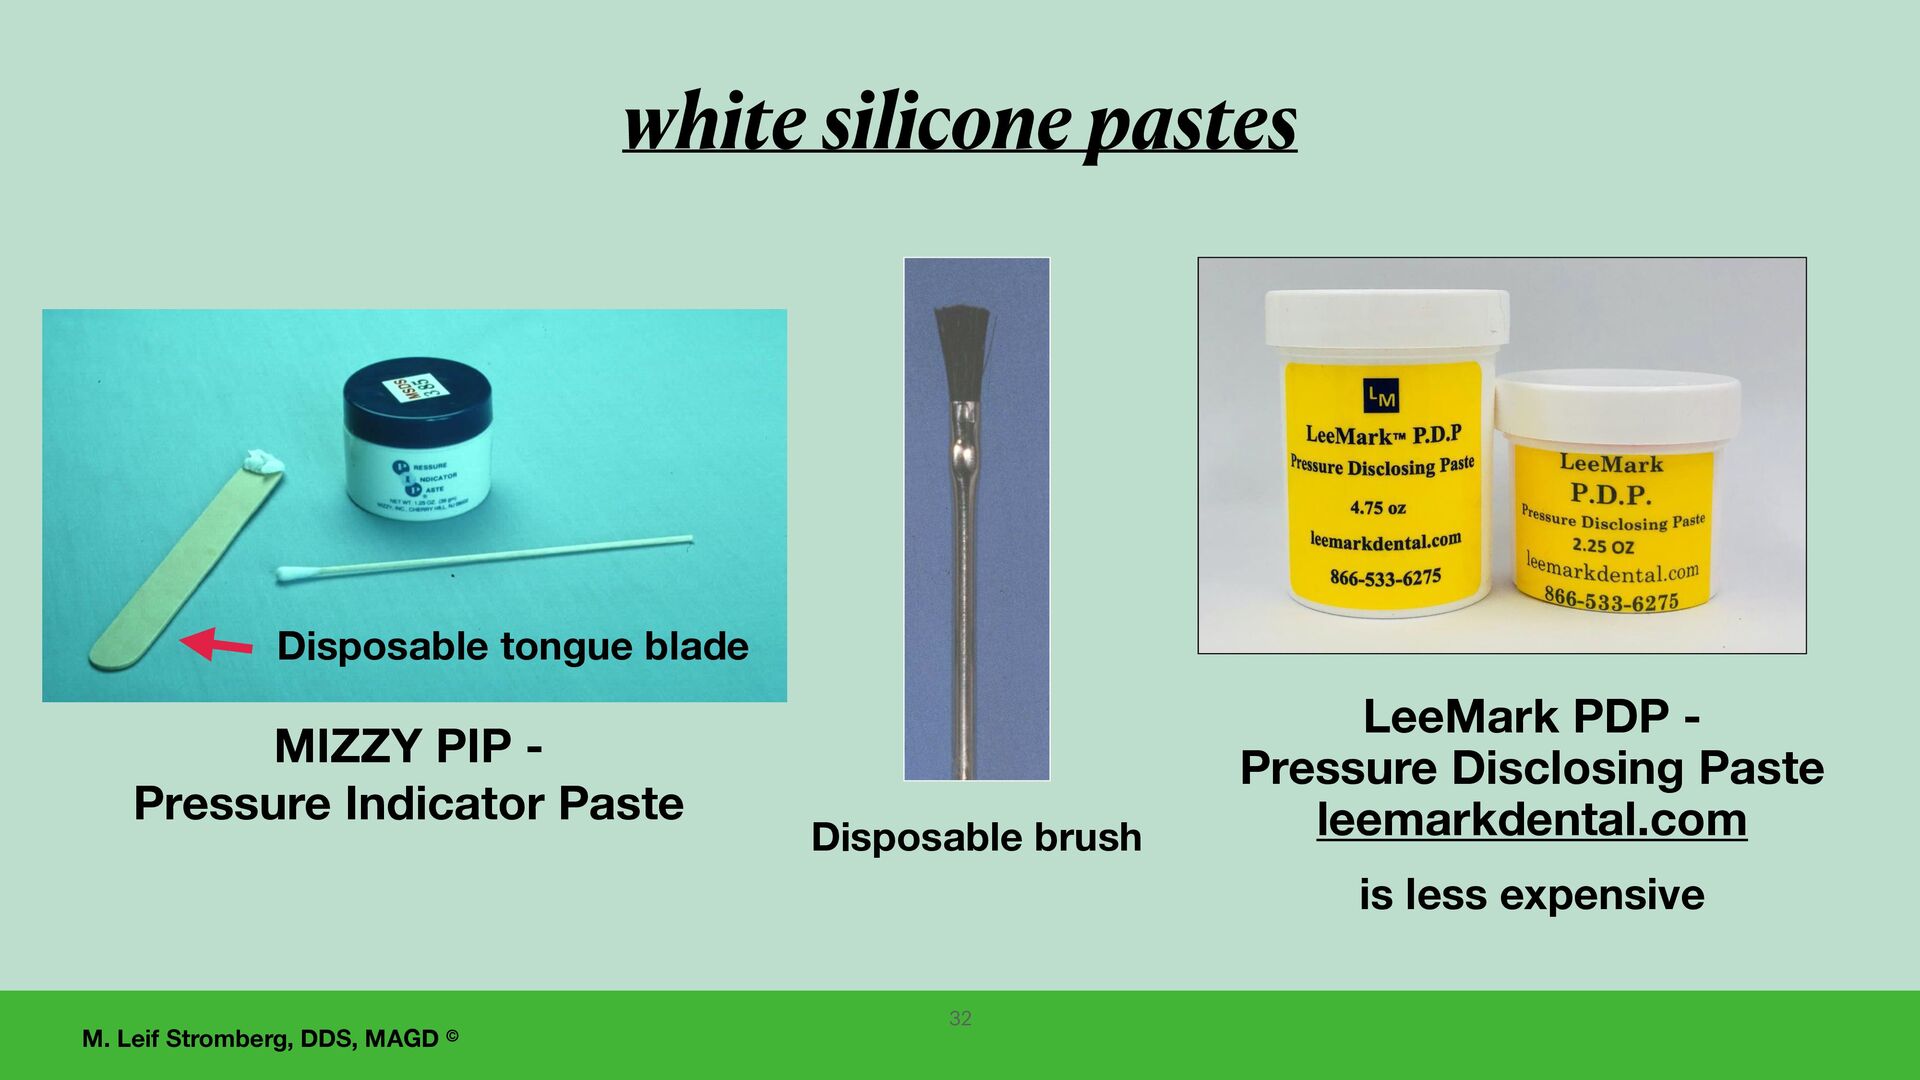
silicone paste are: 1. MIZZY PIP (Pressure Indicator Paste) 2. LeeMark PDP (Pressure Disclosing Paste) 3. and there are others. When adjusting dentures for delivery, always use a white silicone paste to detect areas of excessive pressure on the denture-supporting tissues. 30
using a white silicone paste for detecting areas of excessive pressure on the denture supporting tissues, the GOALS ARE TO: 1. Eliminate potential sore areas AND 2. Achieve maximum even tissue contact of the denture base to the supporting tissues! These adjustments should be carefully done before adjusting the denture occlusion.
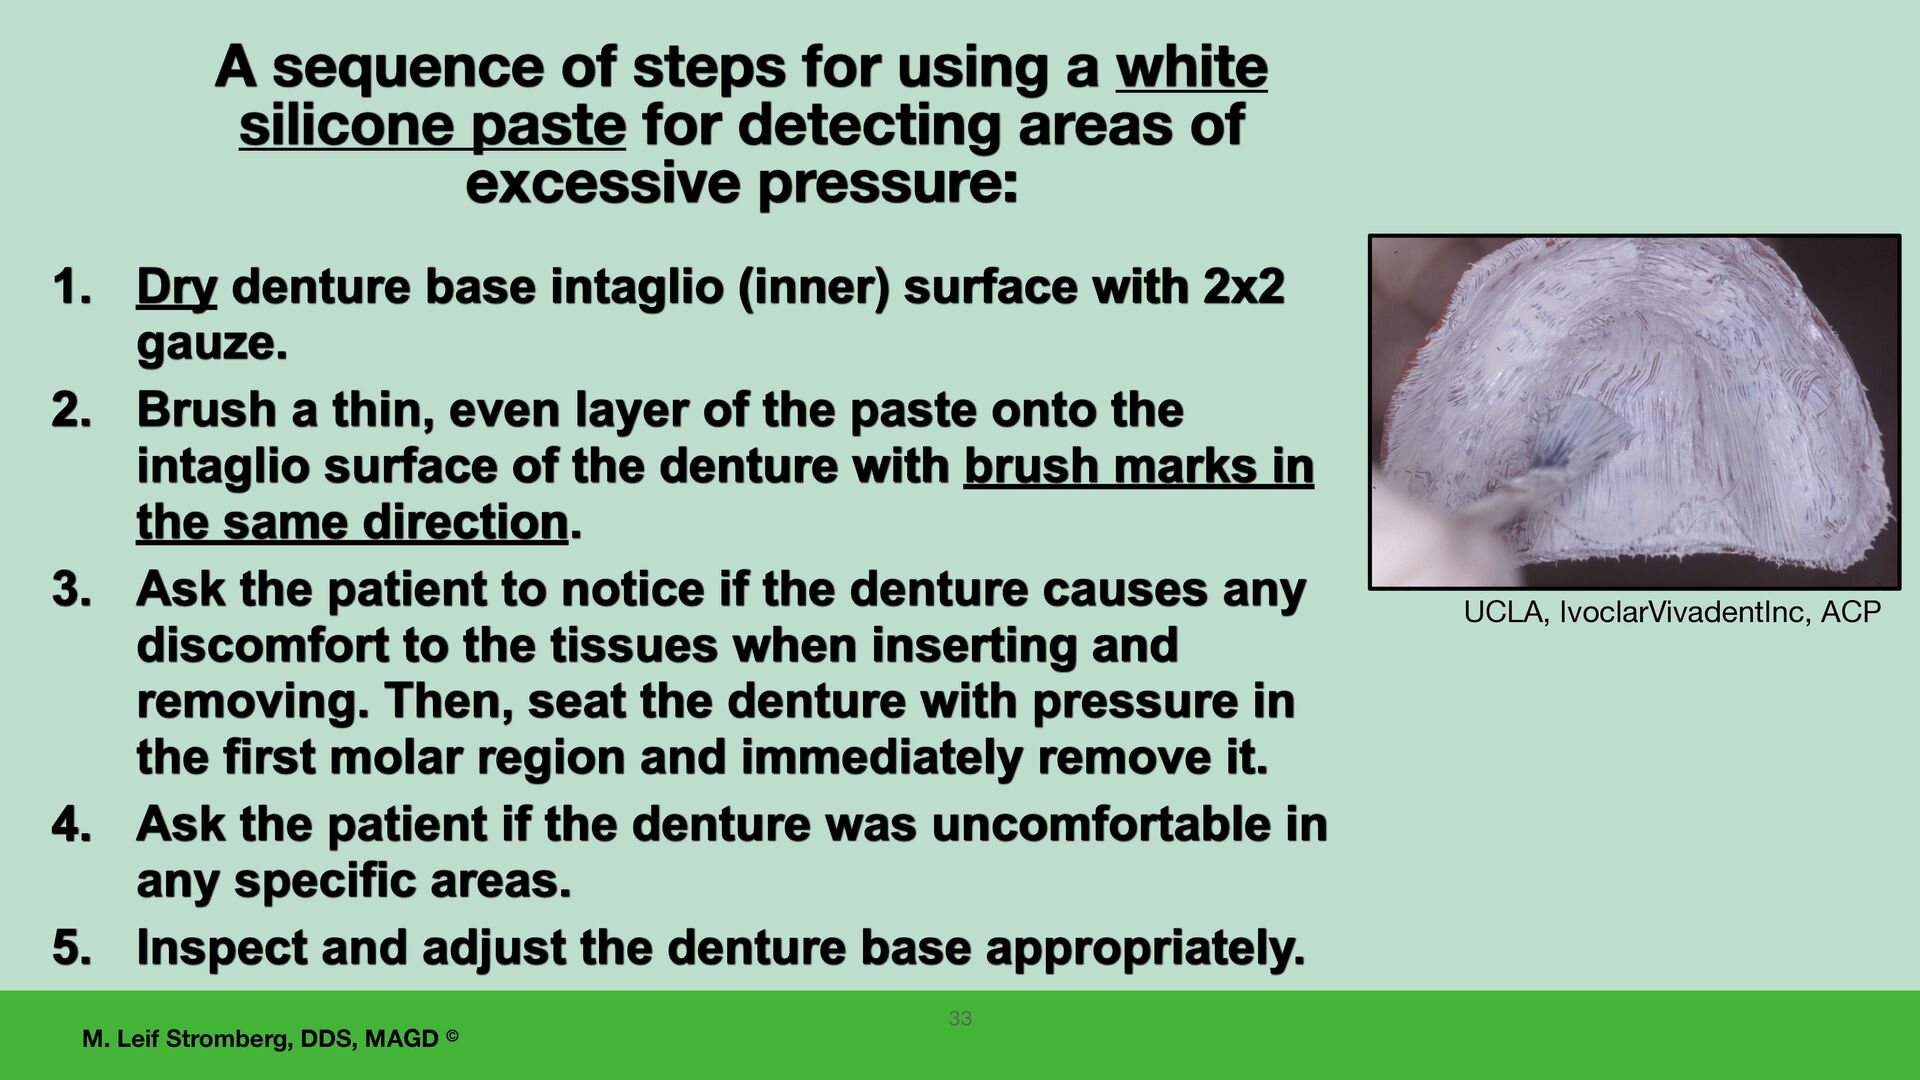
sequence of steps for using a white silicone paste for detecting areas of excessive pressure: 1. Dry denture base intaglio (inner) surface with 2x2 gauze. 2. Brush a thin, even layer of the paste onto the intaglio surface of the denture with brush marks in the same direction. 3. Ask the patient to notice if the denture causes any discomfort to the tissues when inserting and removing. Then, seat the denture with pressure in the first molar region and immediately remove it. 4. Ask the patient if the denture was uncomfortable in any specific areas. 5. Inspect and adjust the denture base appropriately. 33
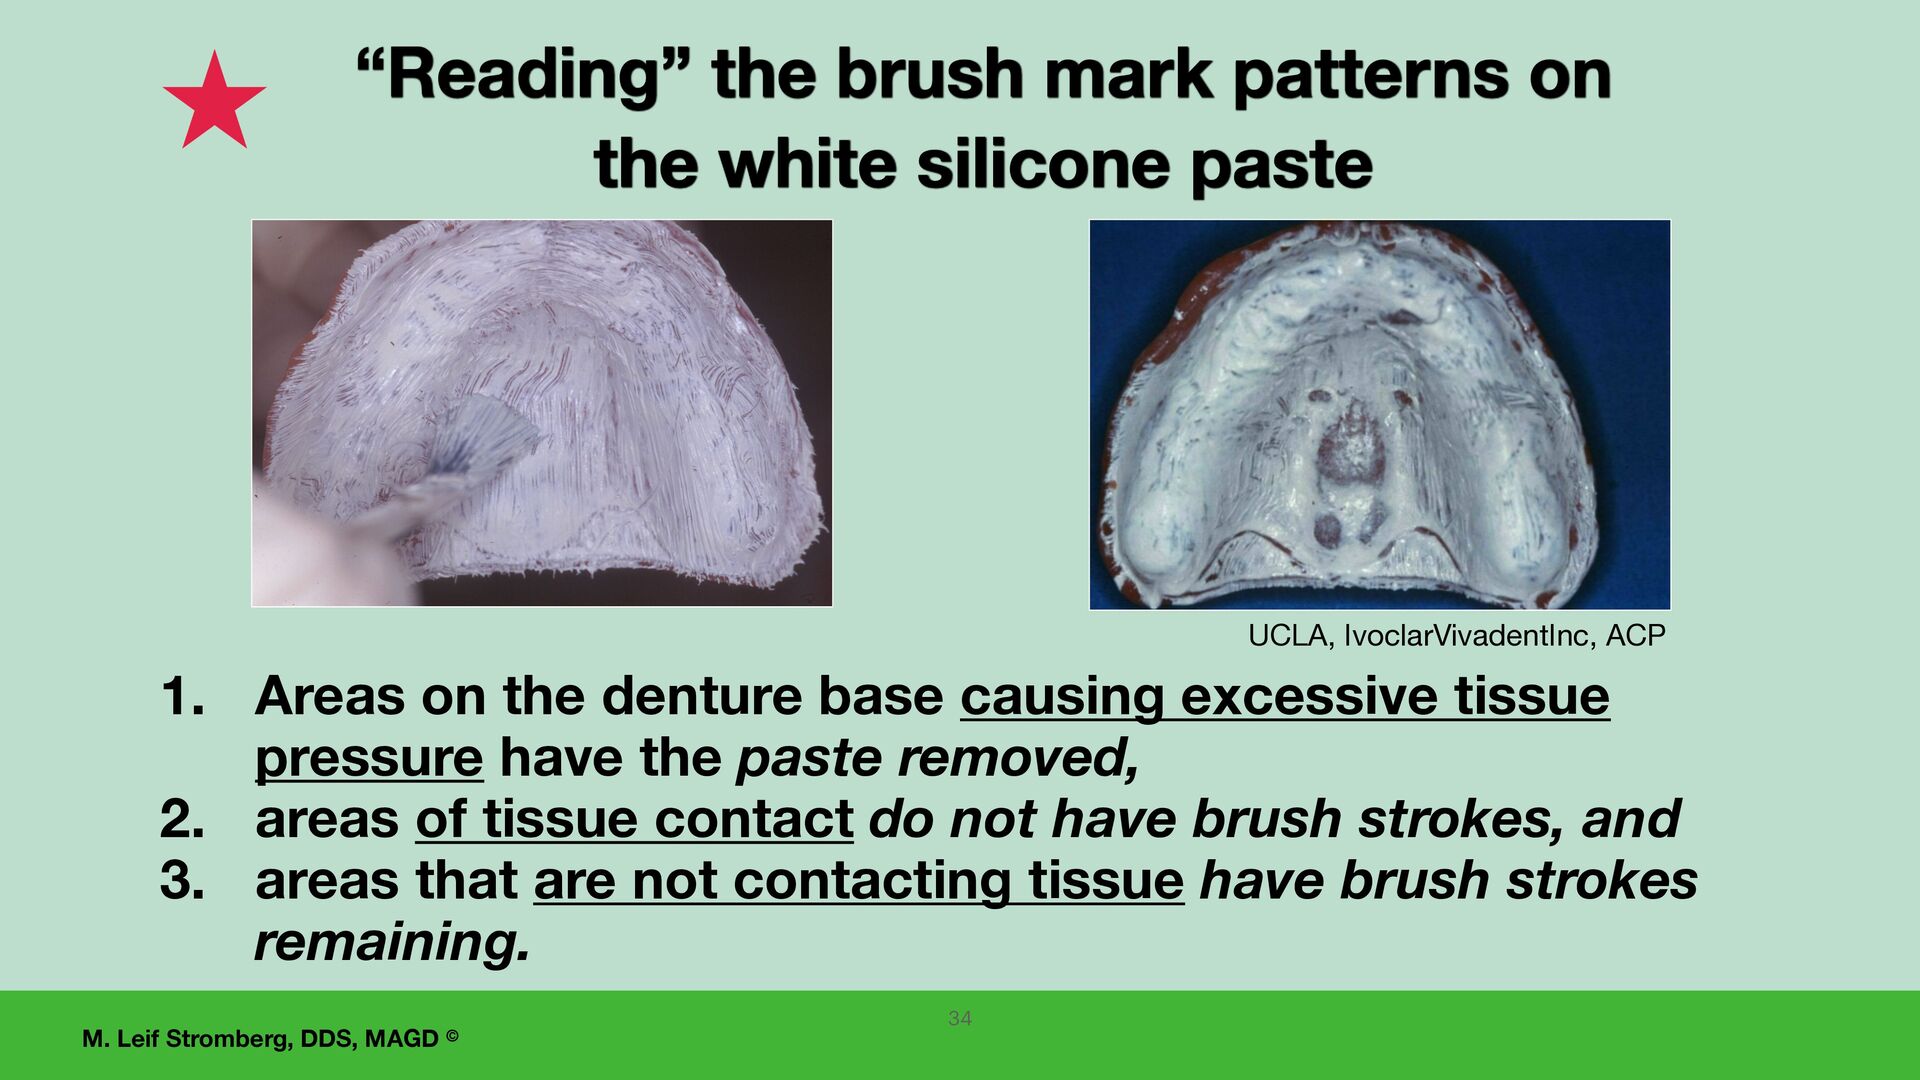
the brush mark patterns on the white silicone paste 34 1. Areas on the denture base causing excessive tissue pressure have the paste removed, 2. areas of tissue contact do not have brush strokes, and 3. areas that are not contacting tissue have brush strokes remaining.
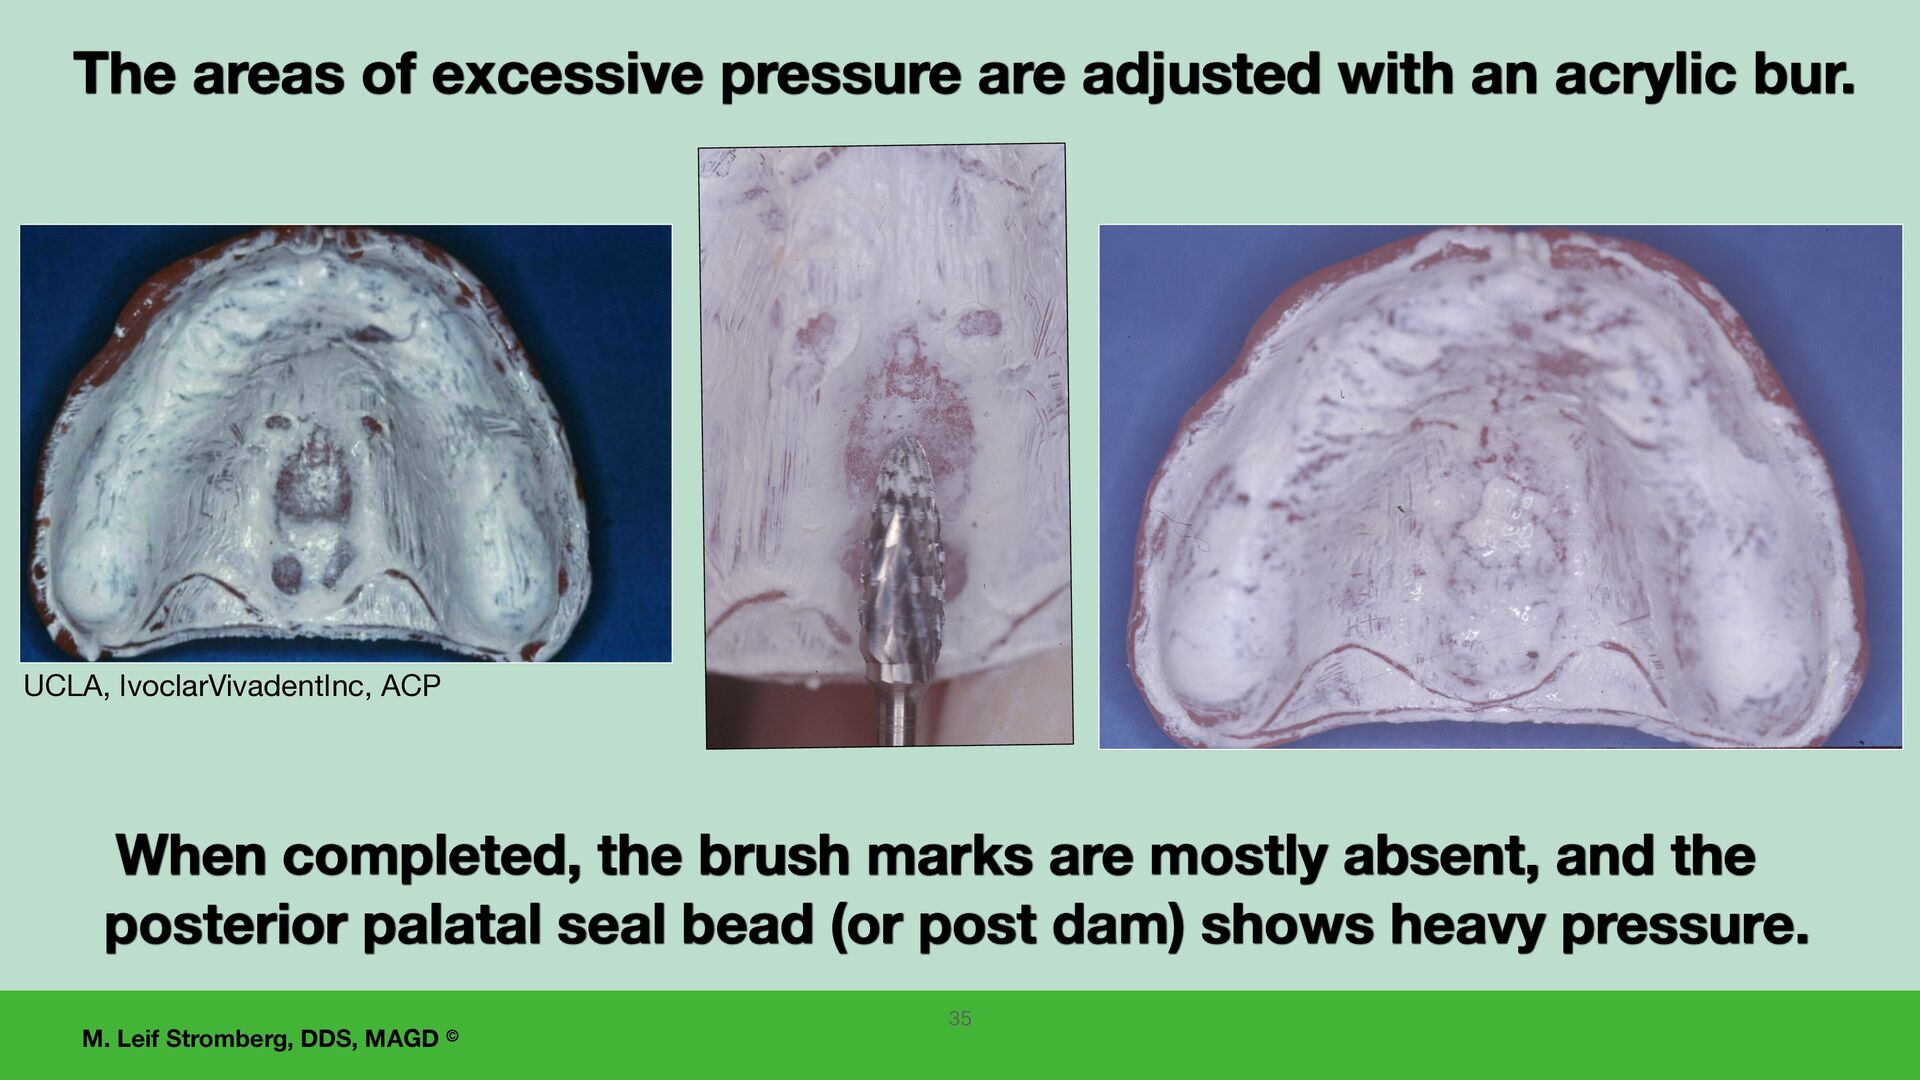
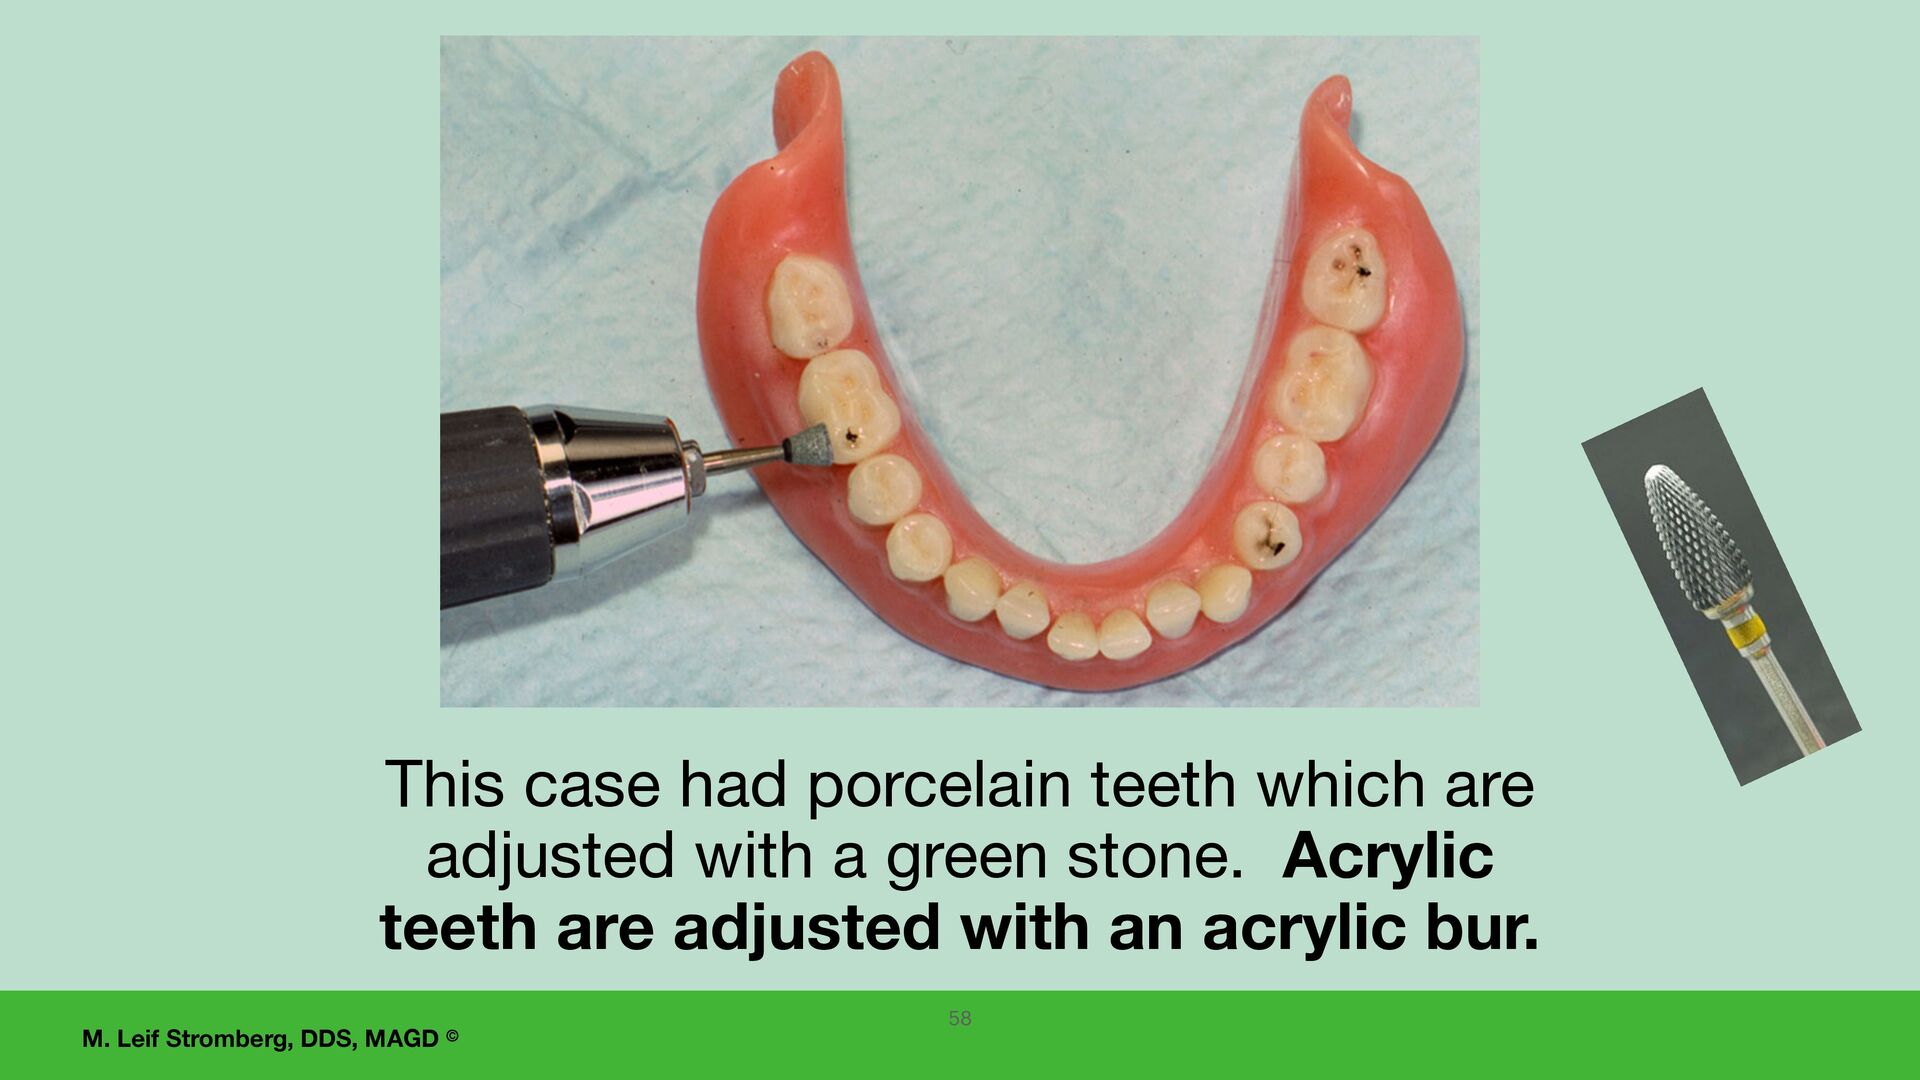
completed, the brush marks are mostly absent, and the posterior palatal seal bead (or post dam) shows heavy pressure. The areas of excessive pressure are adjusted with an acrylic bur. 35
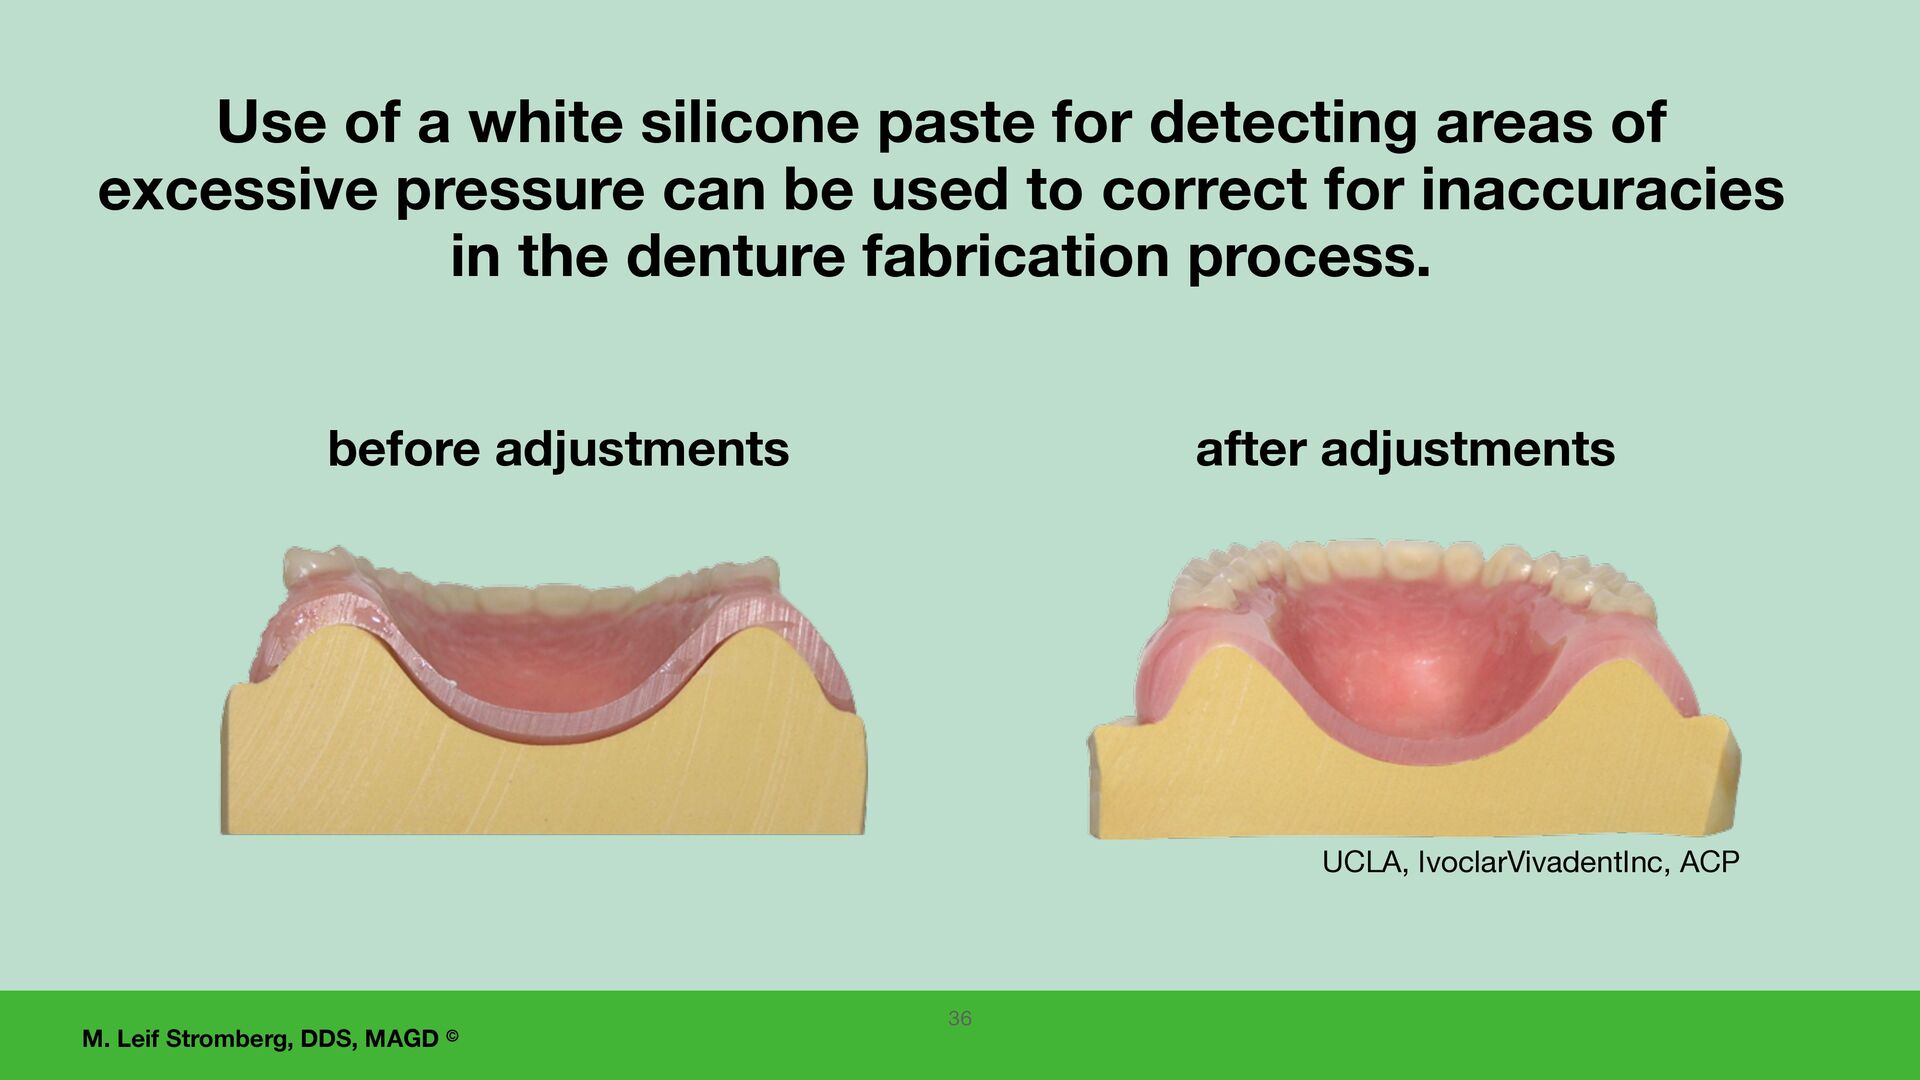
Use of a white silicone paste for detecting areas of excessive pressure can be used to correct for inaccuracies in the denture fabrication process. 36 UCLA, IvoclarVivadentInc, ACP
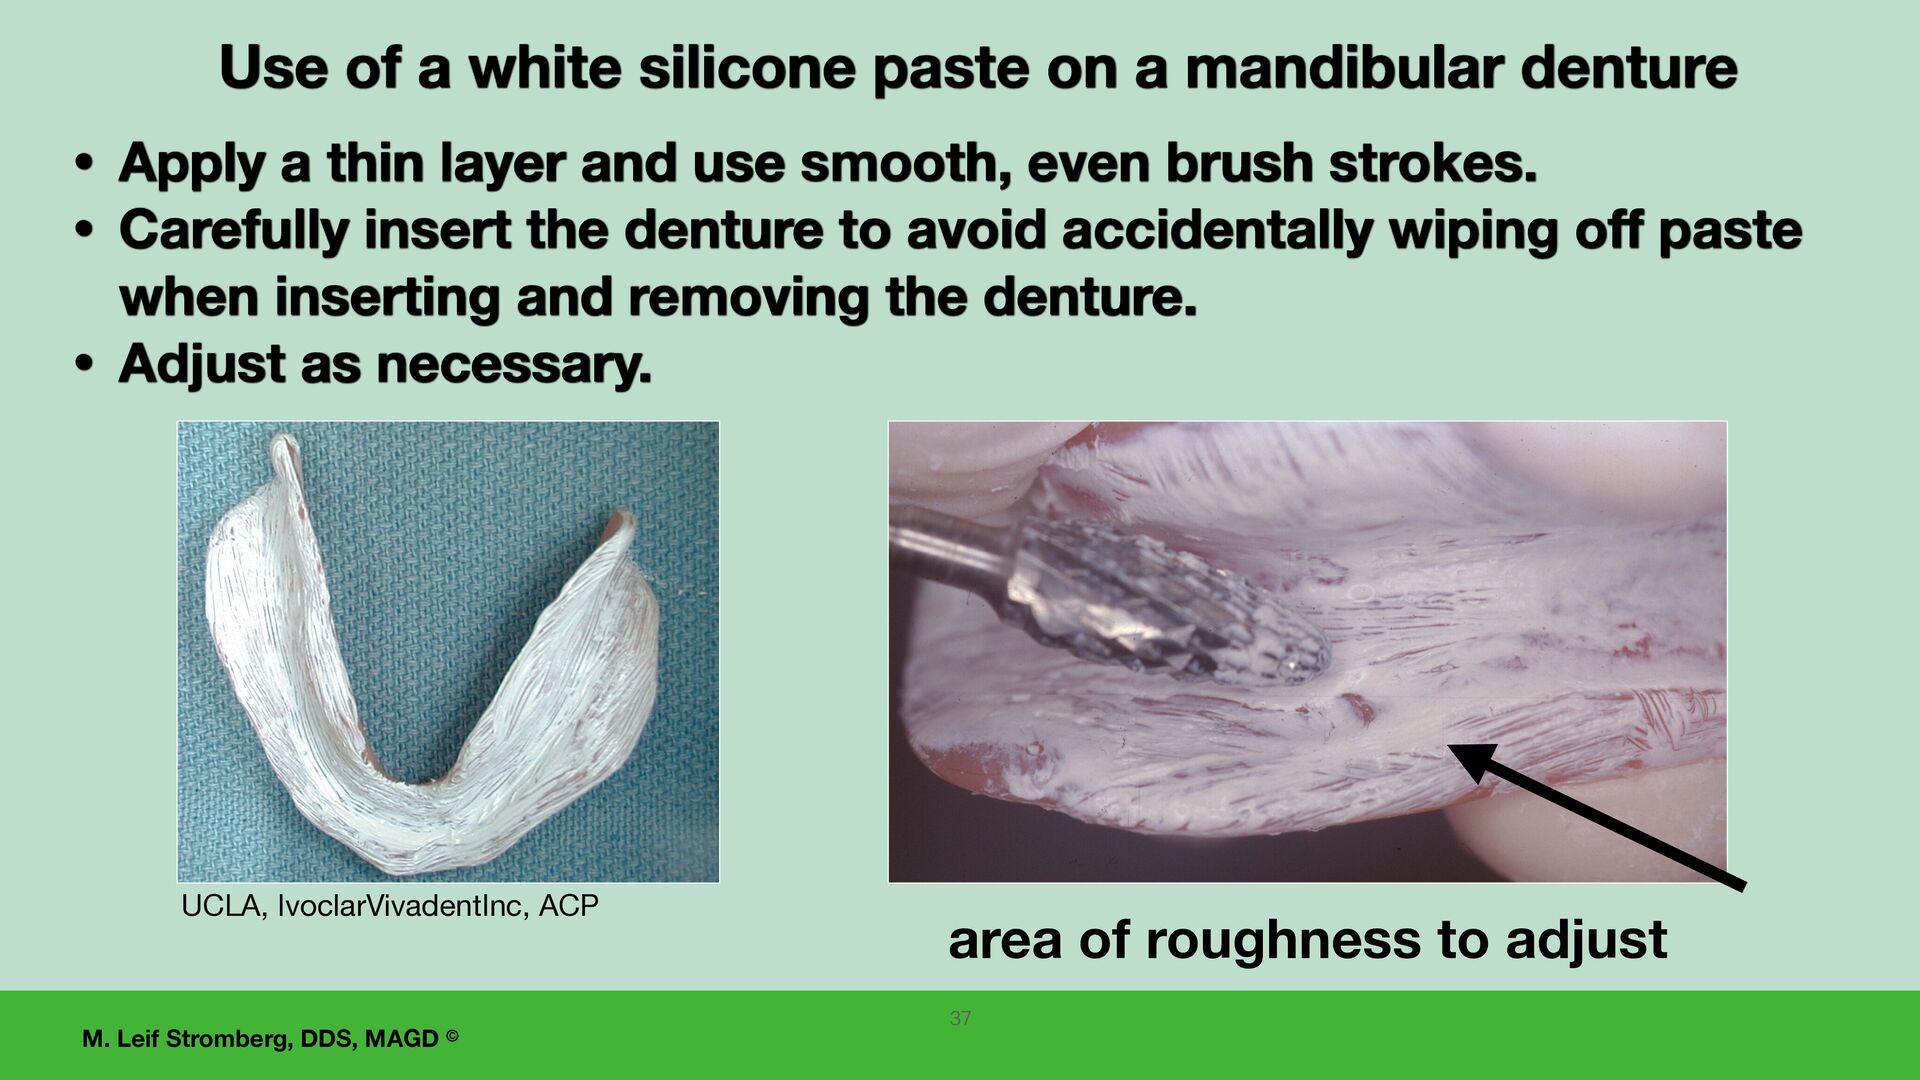
of a white silicone paste on a mandibular denture • Apply a thin layer and use smooth, even brush strokes. • Carefully insert the denture to avoid accidentally wiping off paste when inserting and removing the denture. • Adjust as necessary. area of roughness to adjust 37
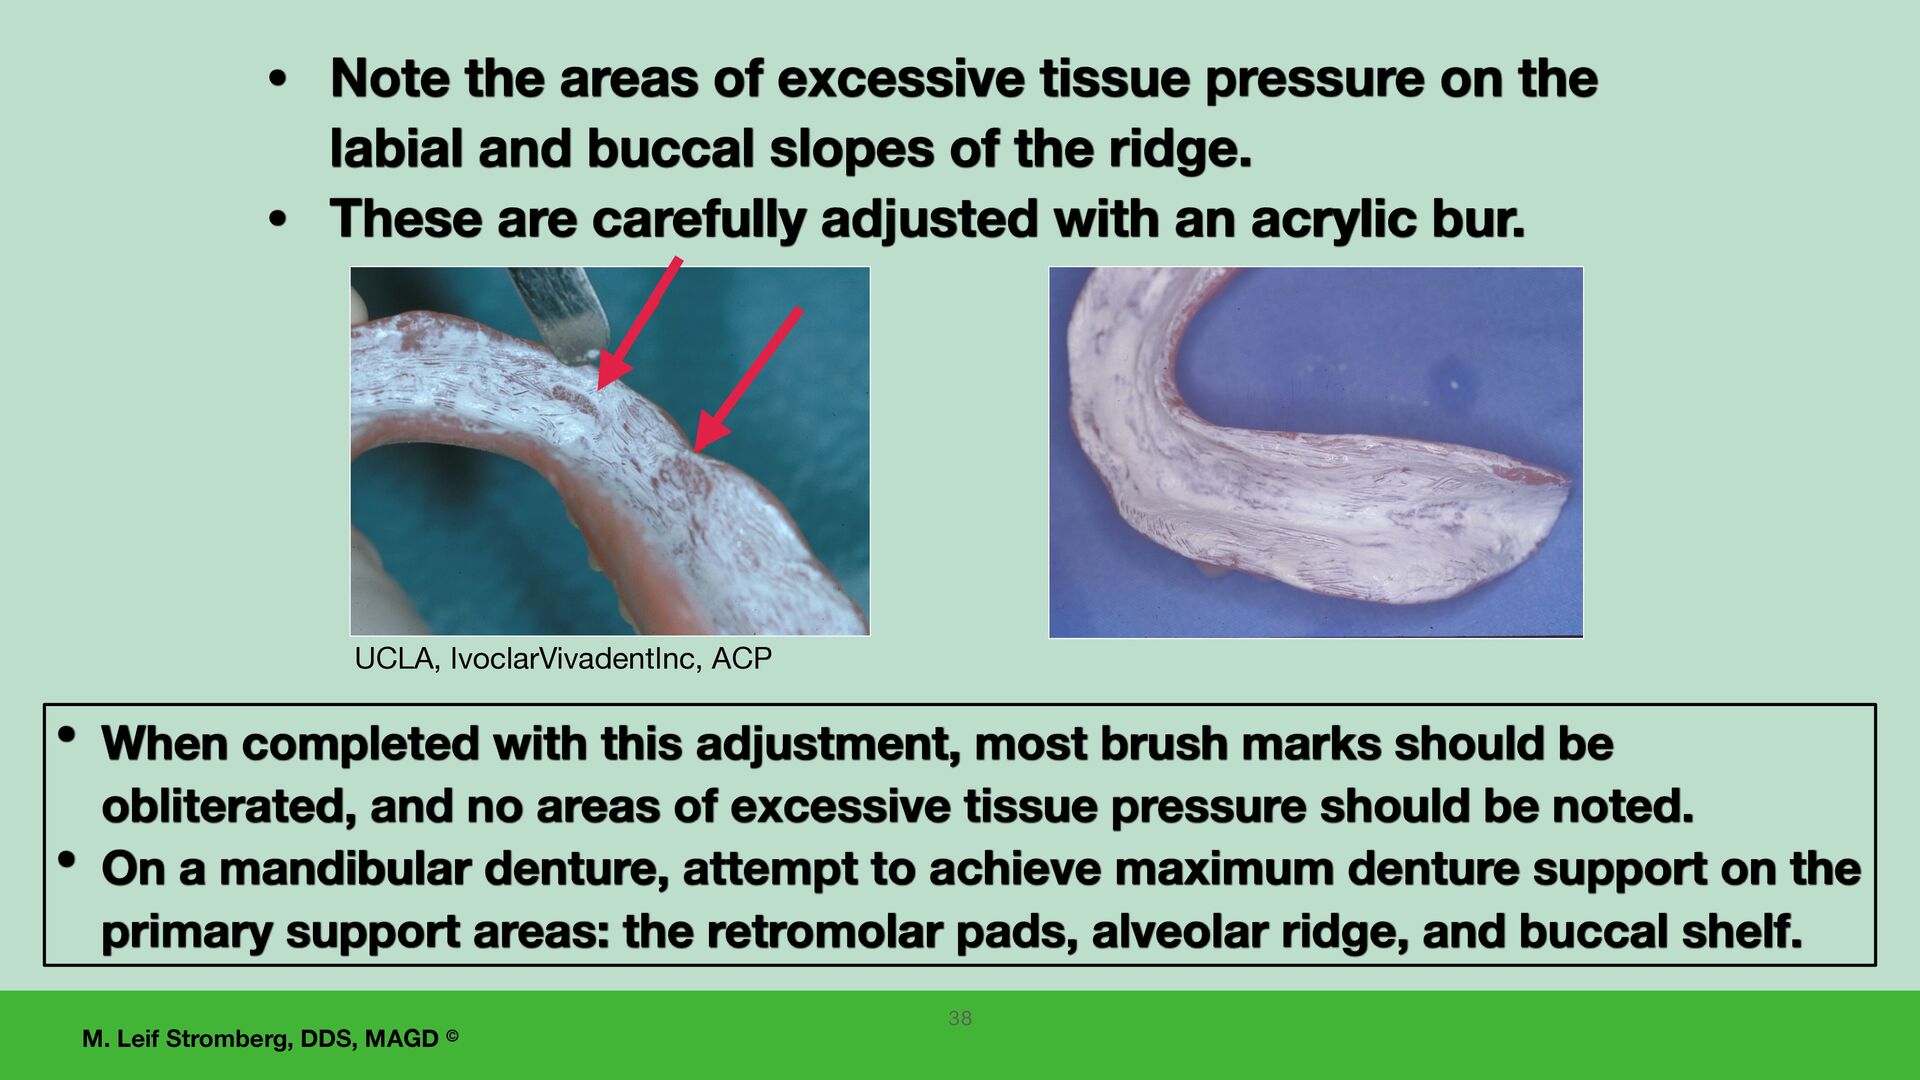
When completed with this adjustment, most brush marks should be obliterated, and no areas of excessive tissue pressure should be noted. • On a mandibular denture, attempt to achieve maximum denture support on the primary support areas: the retromolar pads, alveolar ridge, and buccal shelf. • Note the areas of excessive tissue pressure on the labial and buccal slopes of the ridge. • These are carefully adjusted with an acrylic bur. 38
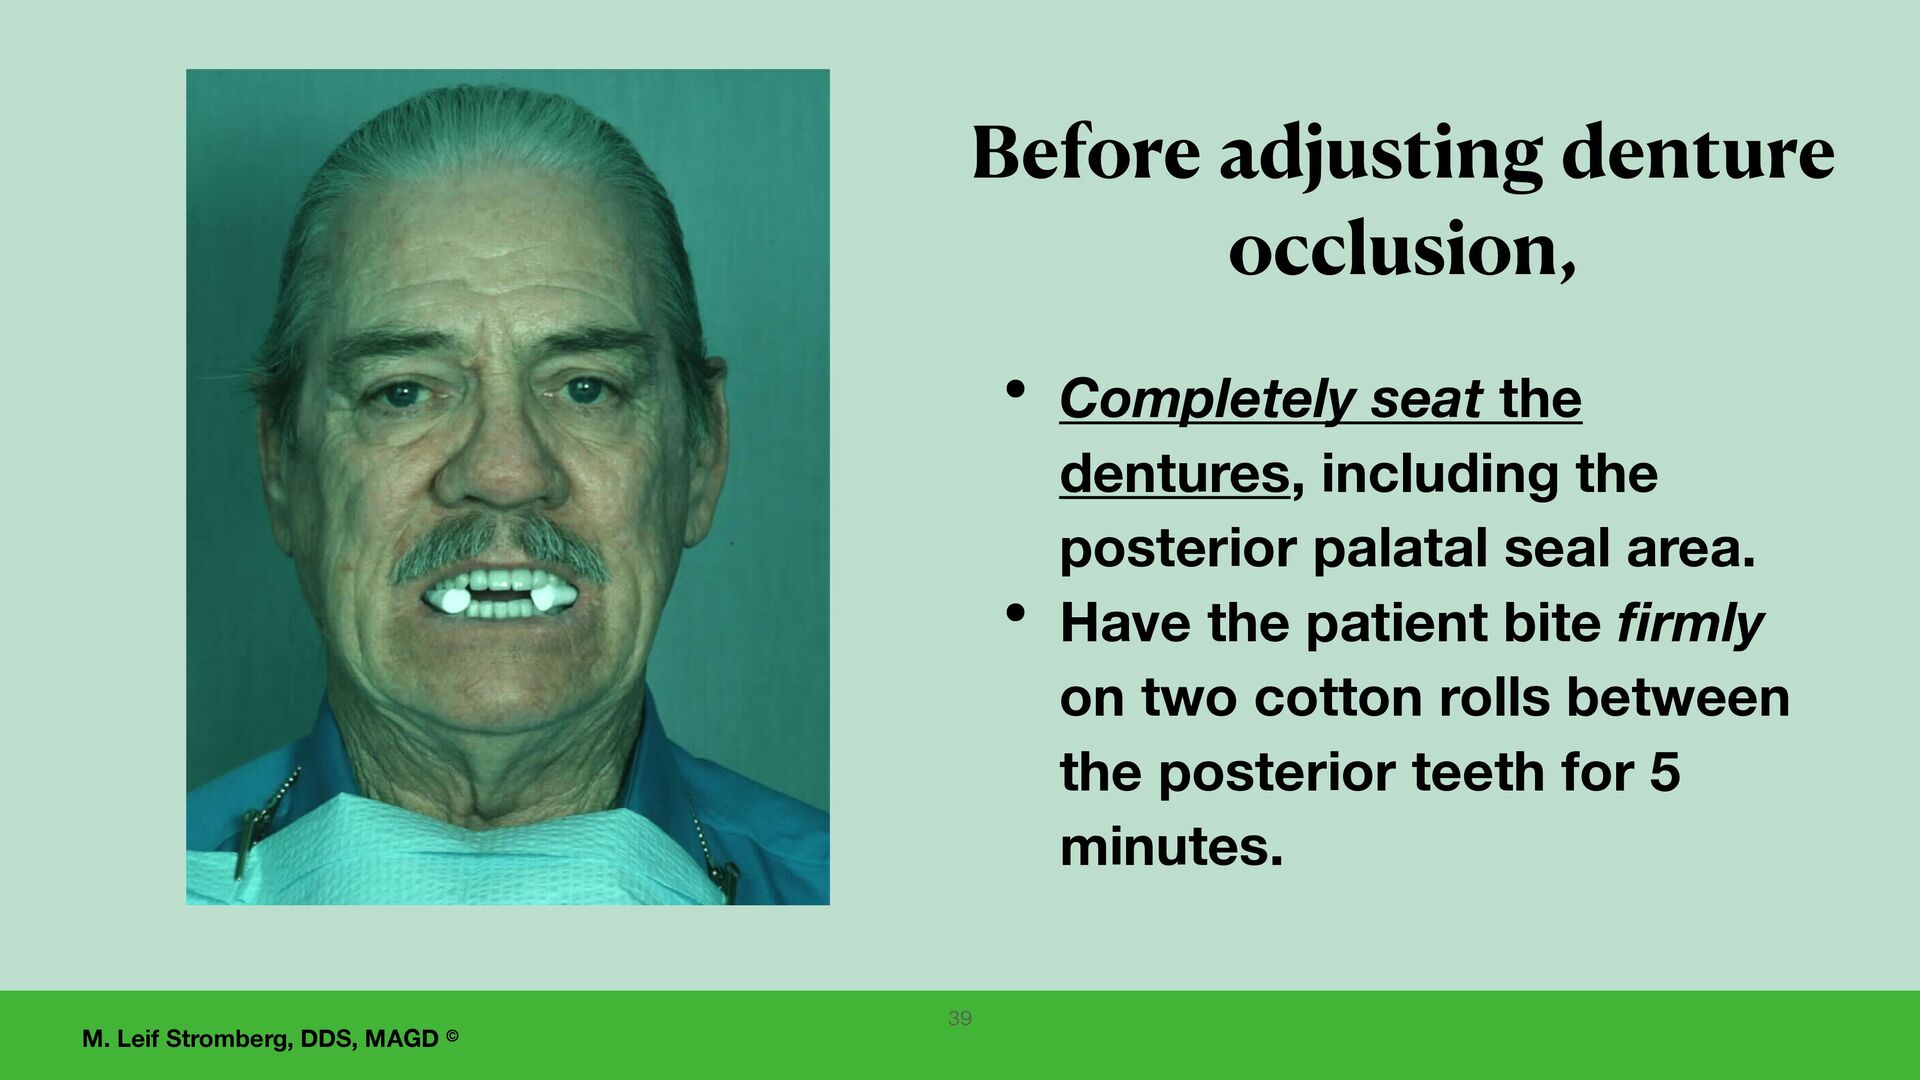
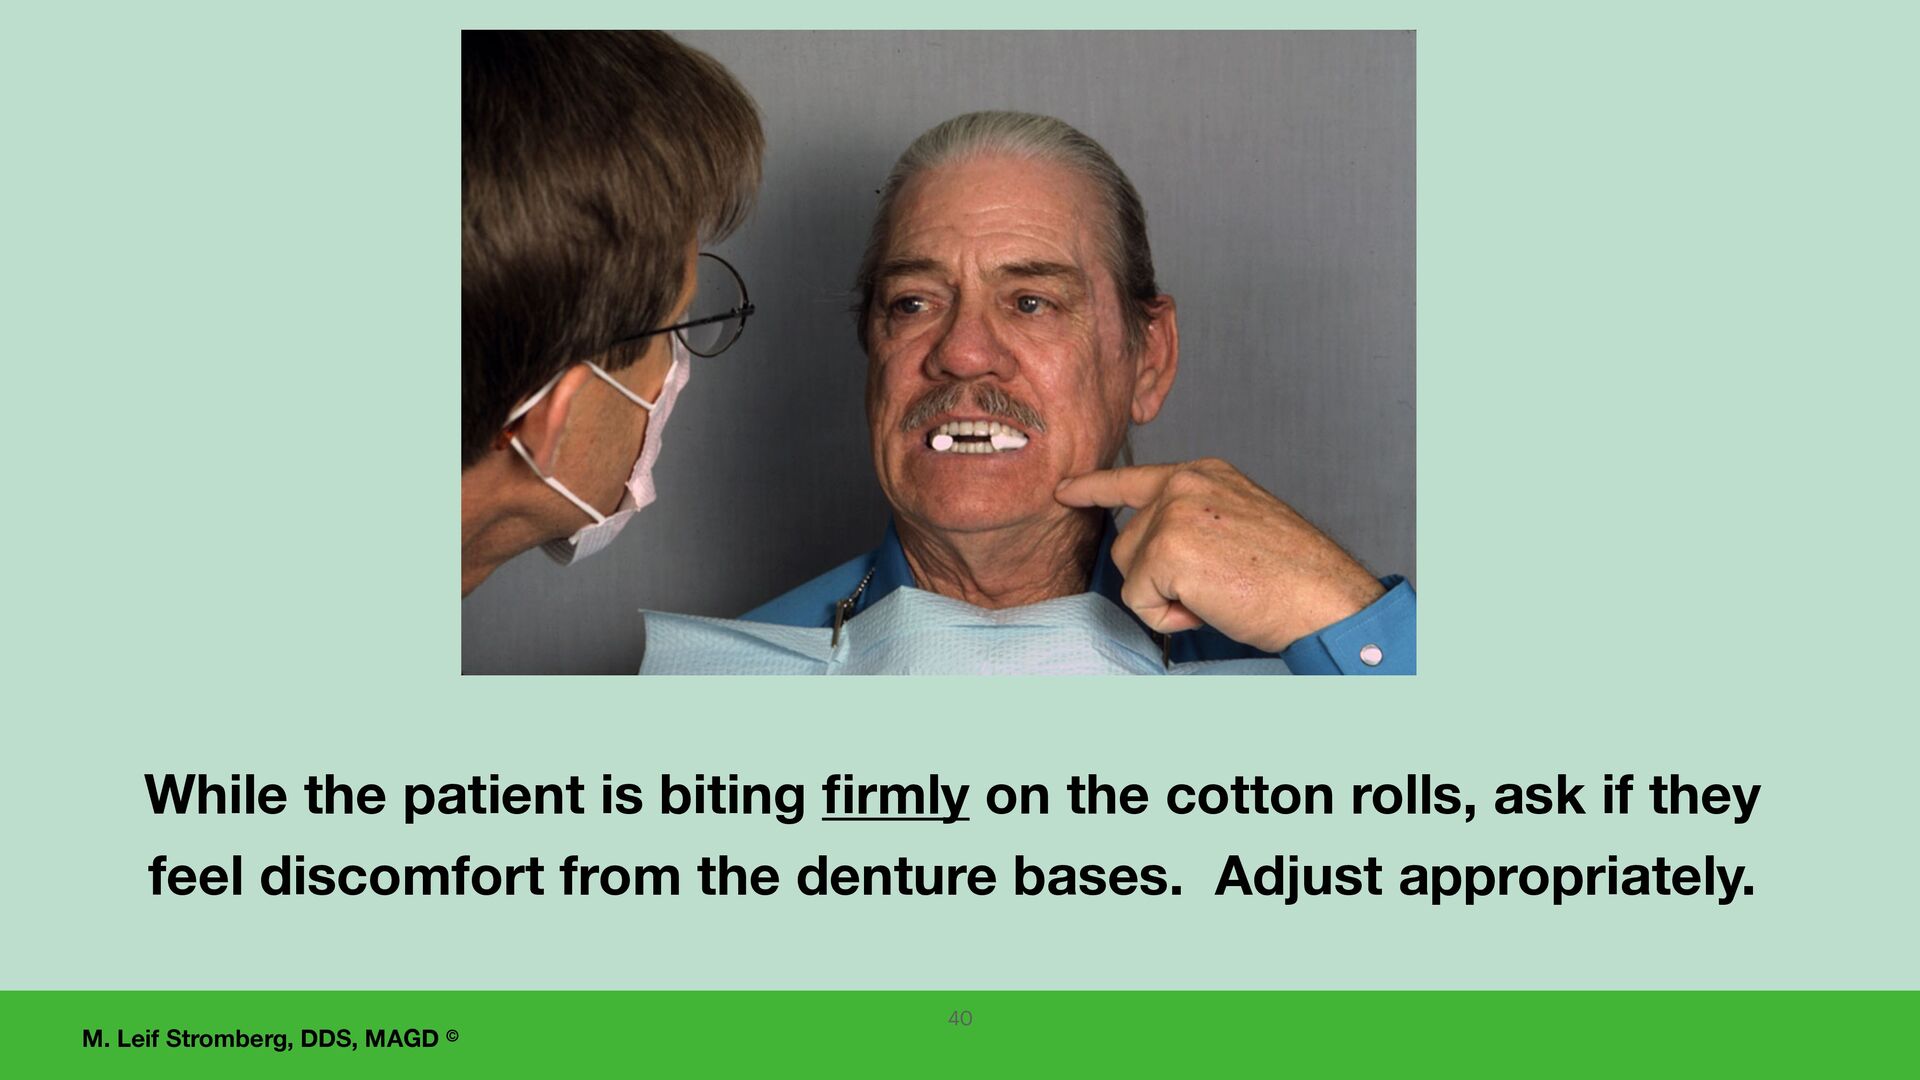
dentures, including the posterior palatal seal area. • Have the patient bite firmly on two cotton rolls between the posterior teeth for 5 minutes. Before adjusting denture occlusion, 39
complete dentures requires the denture bases to be stable and completely seated. This is very important!! Two options for accurate occlusal adjustment are: (1) Remounting the dentures and adjusting the occlusion on an articulator, (2) Using Kerr Occlusal Indicator Wax intraorally for adjustment of the occlusion. 41
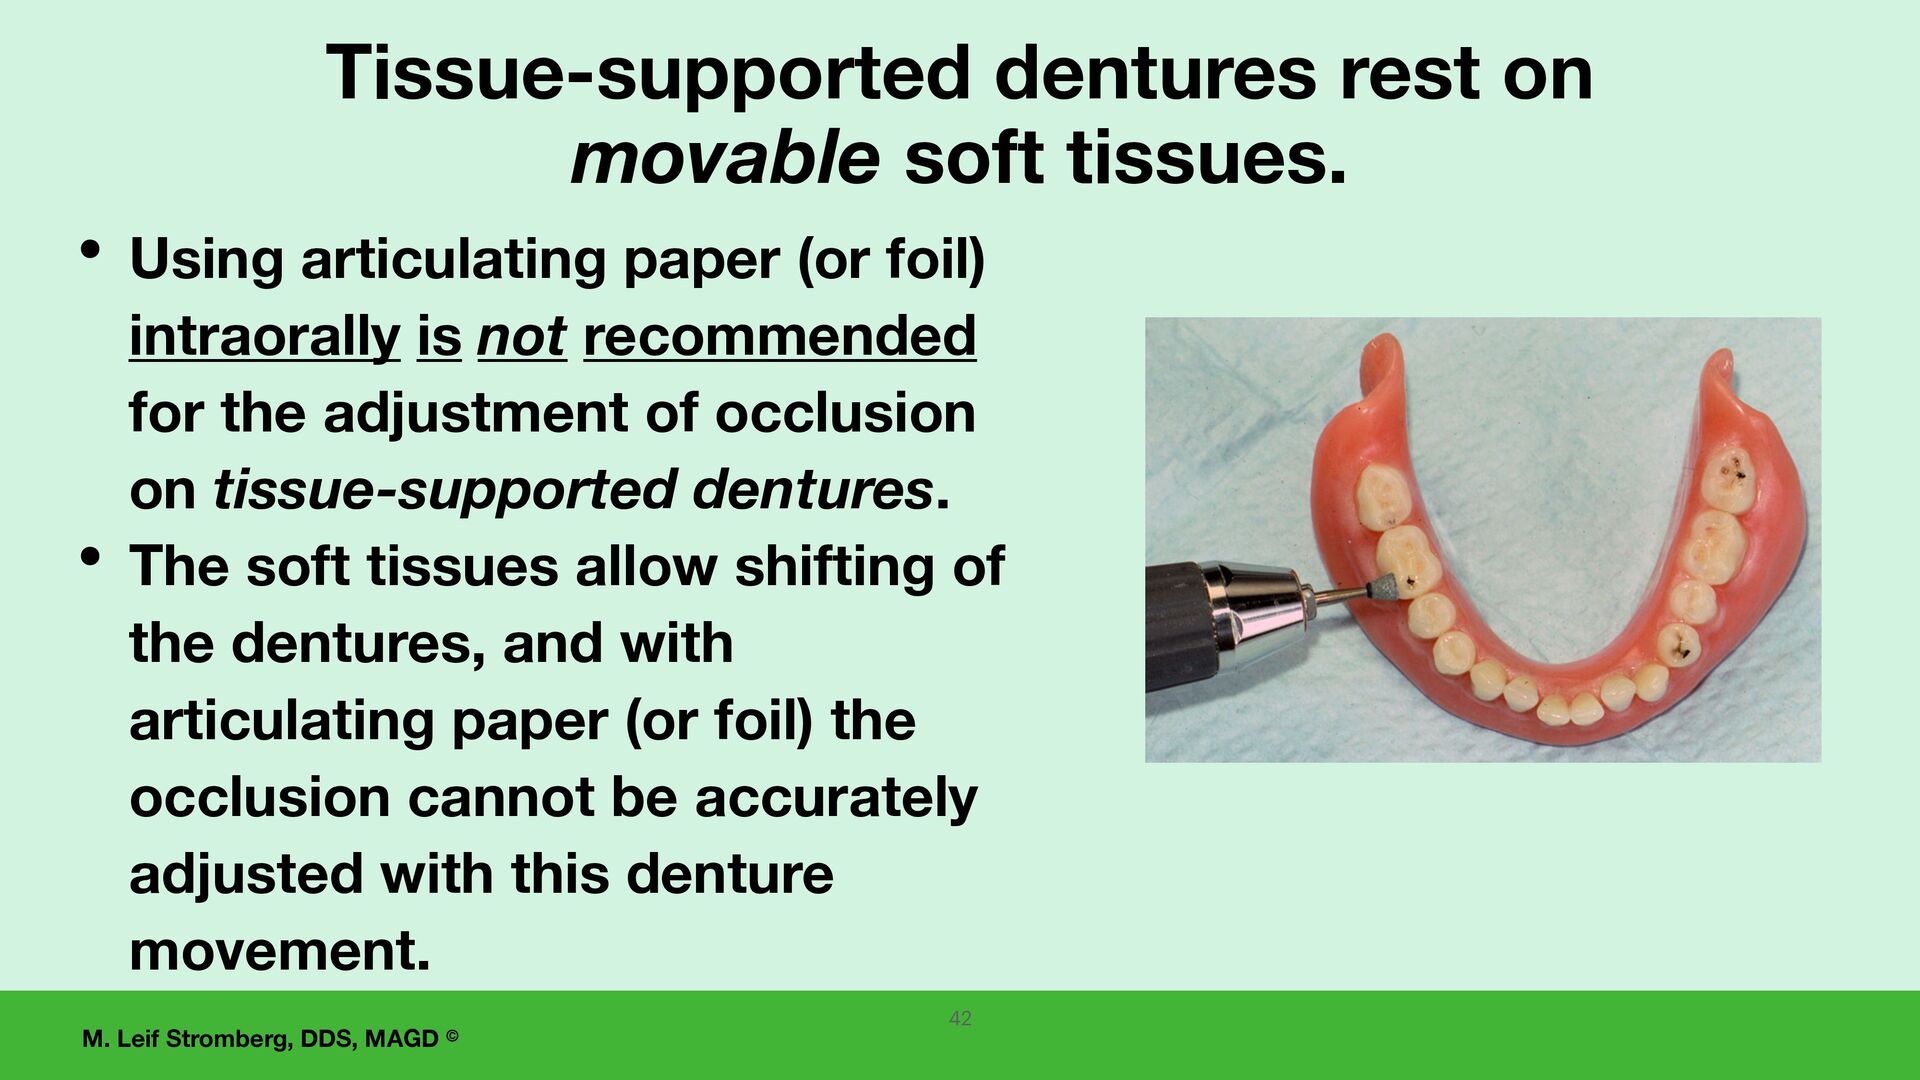
movable soft tissues. • Using articulating paper (or foil) intraorally is not recommended for the adjustment of occlusion on tissue-supported dentures. • The soft tissues allow shifting of the dentures, and with articulating paper (or foil) the occlusion cannot be accurately adjusted with this denture movement. 42
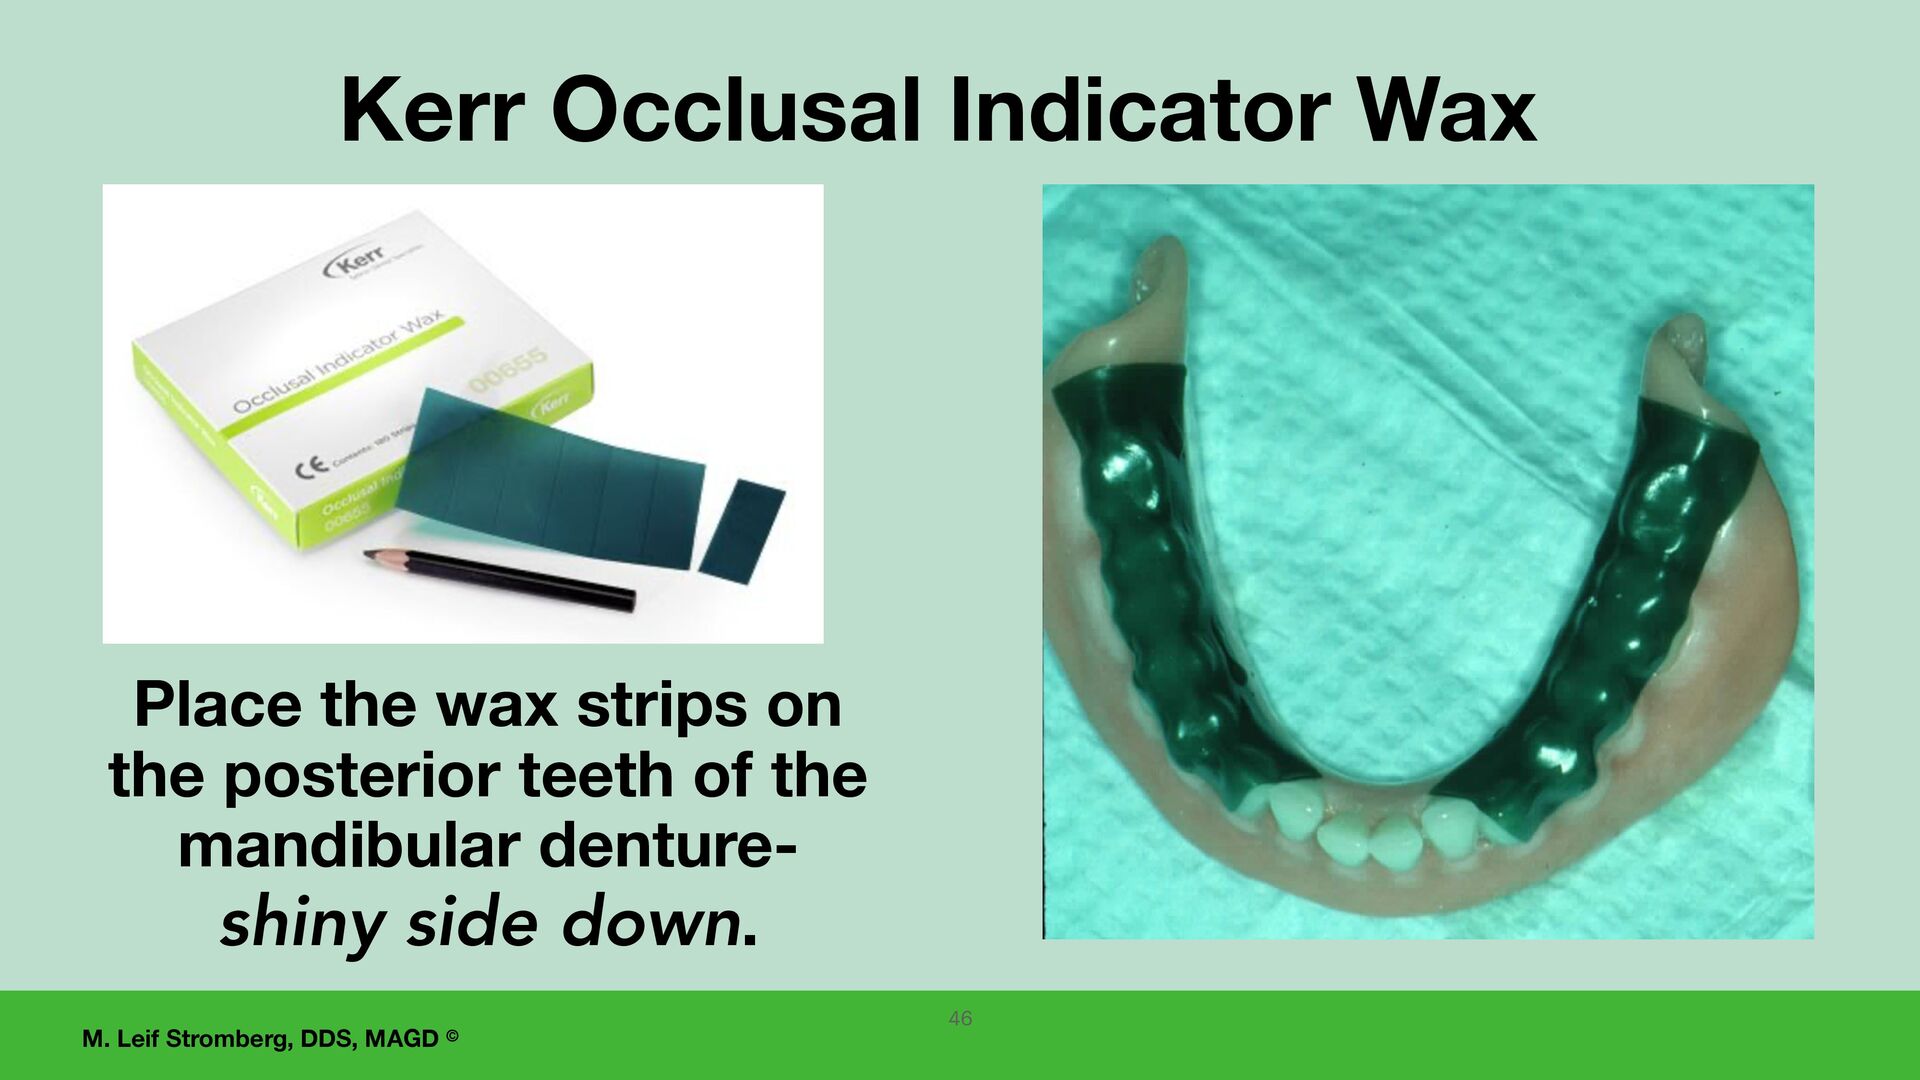
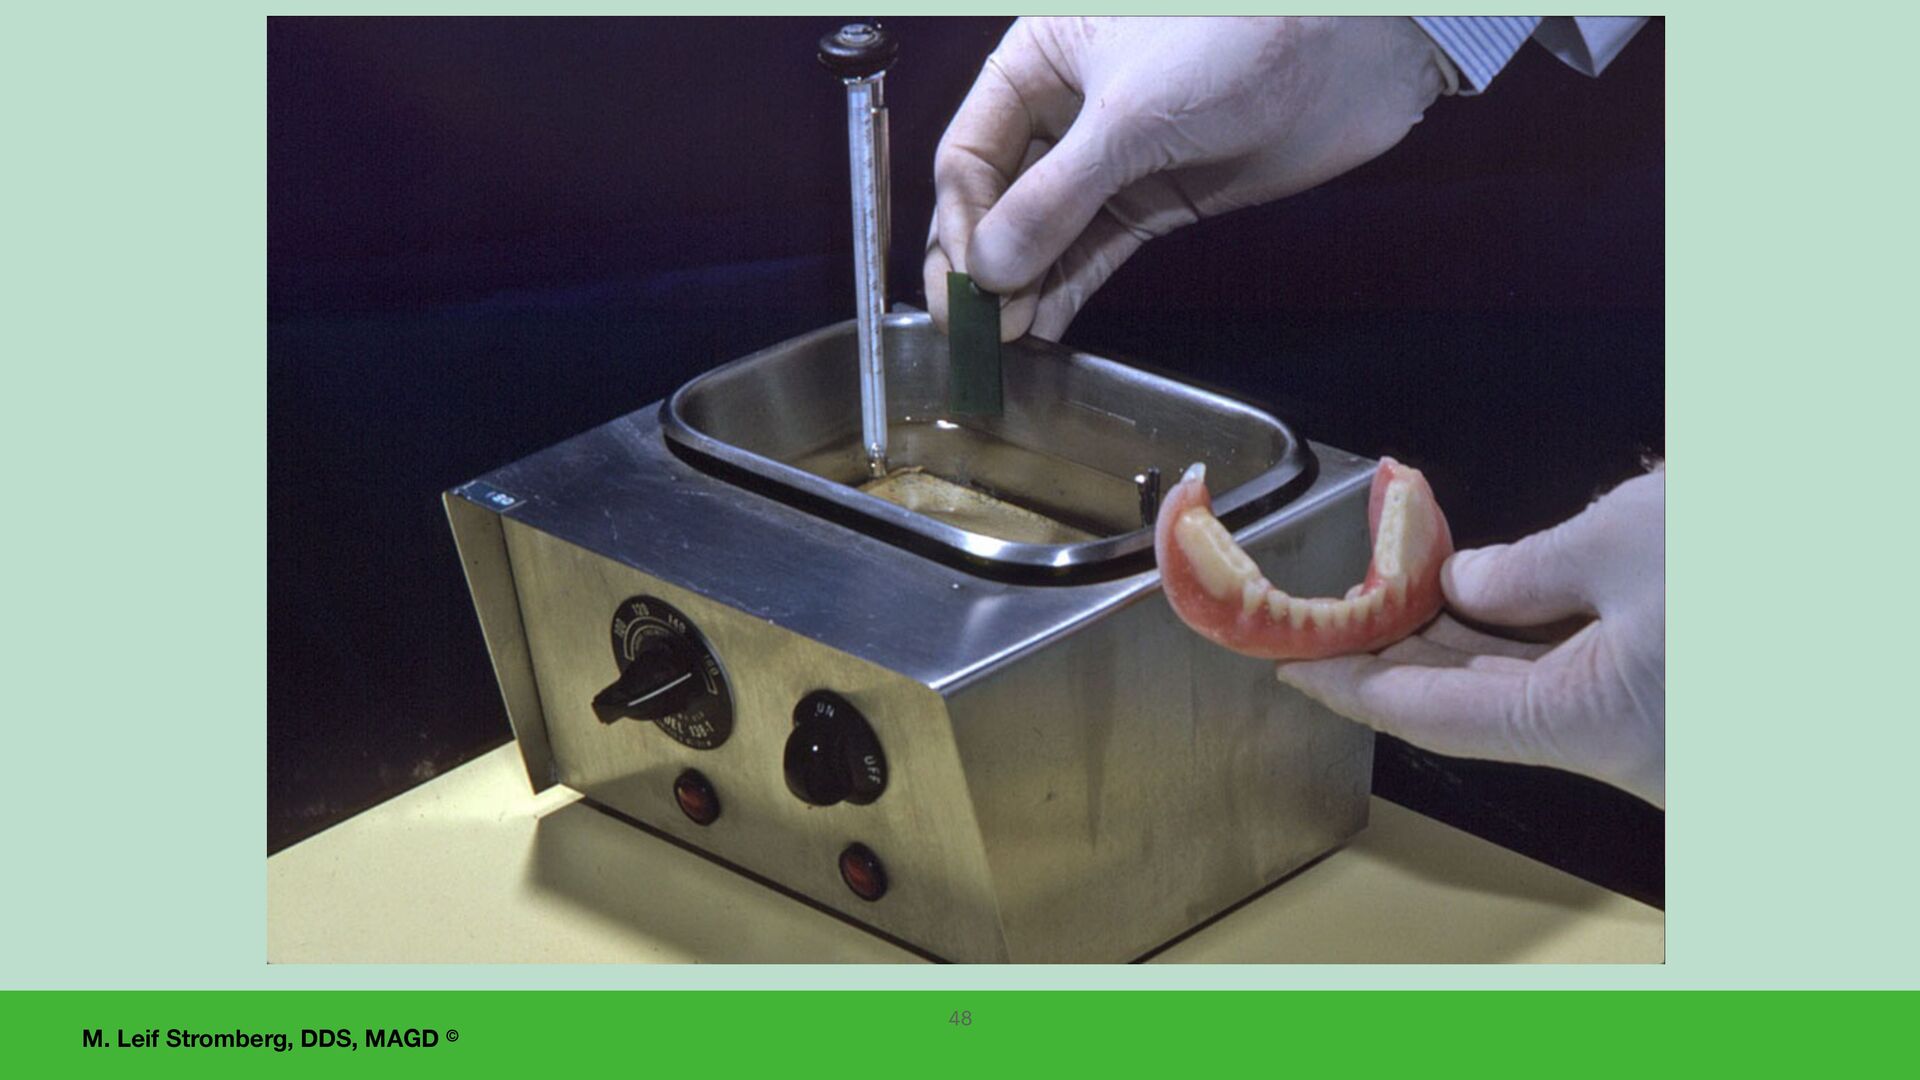
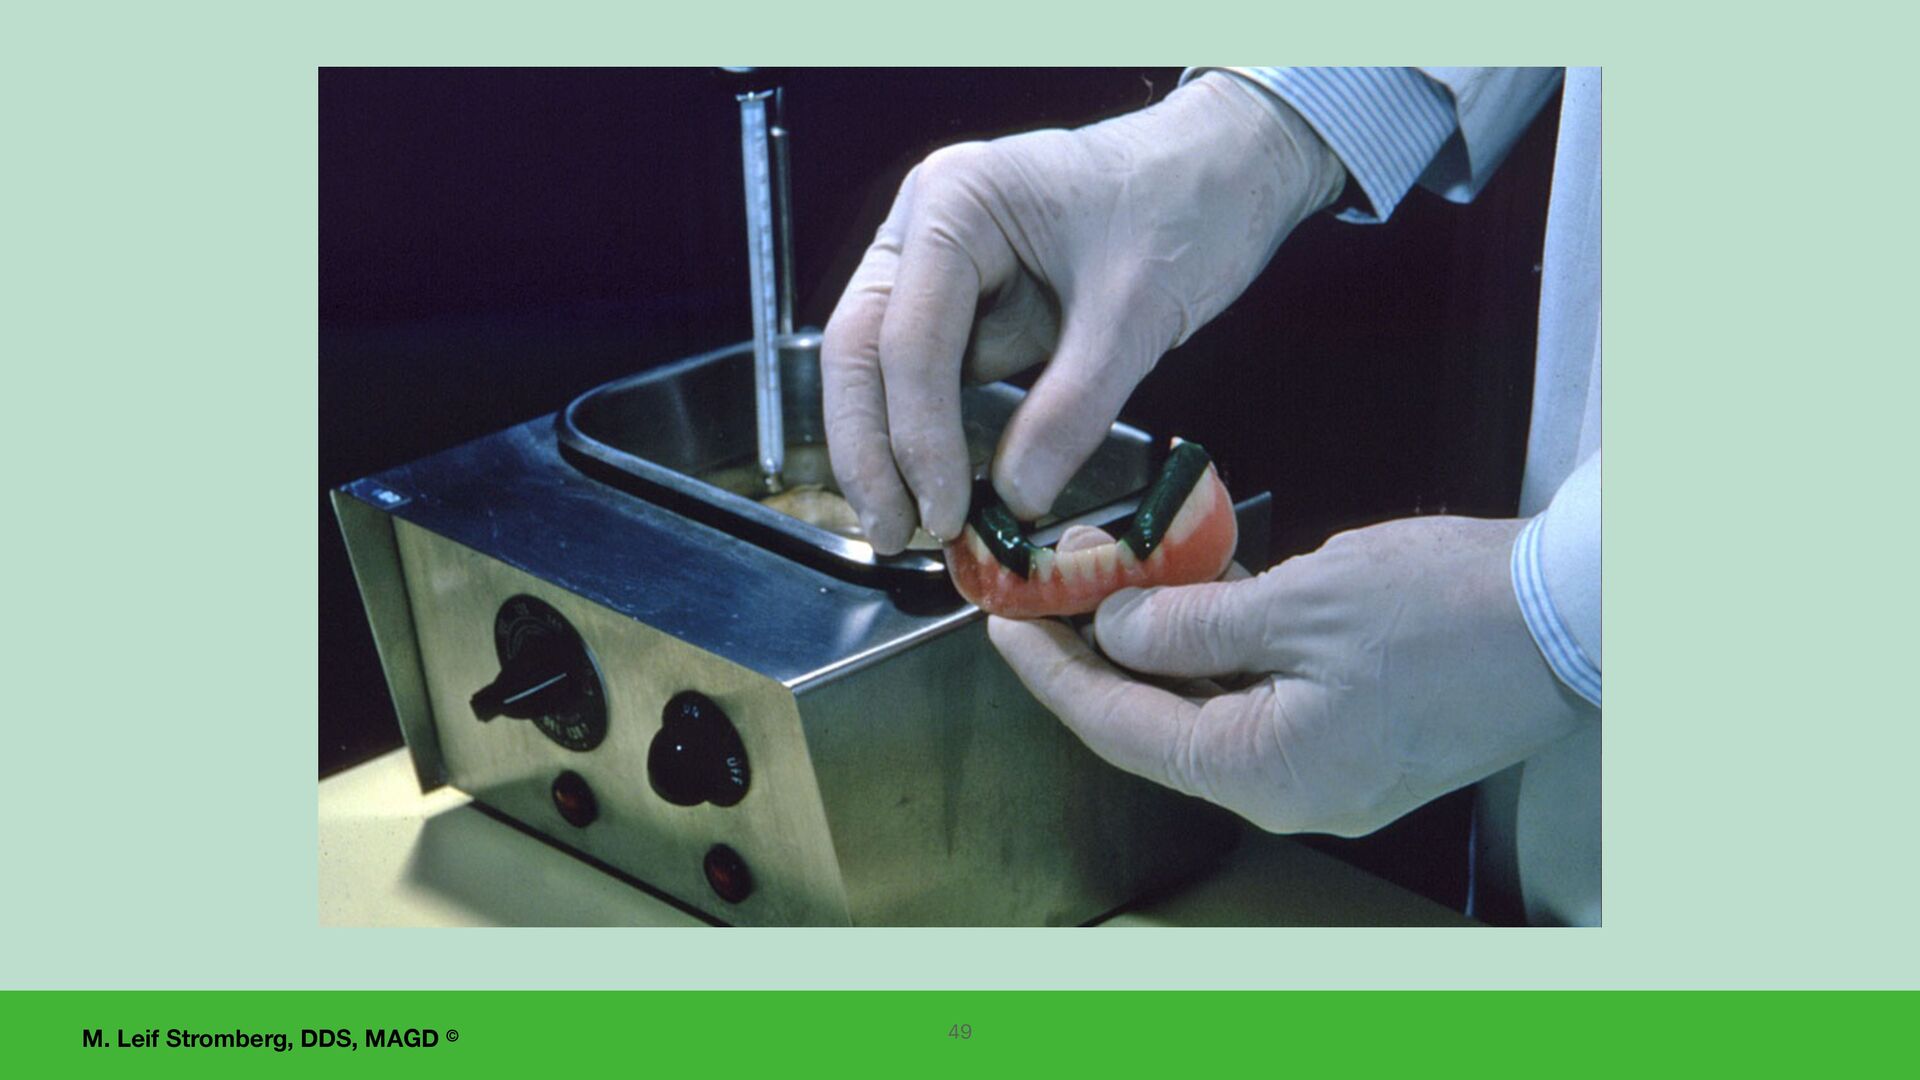
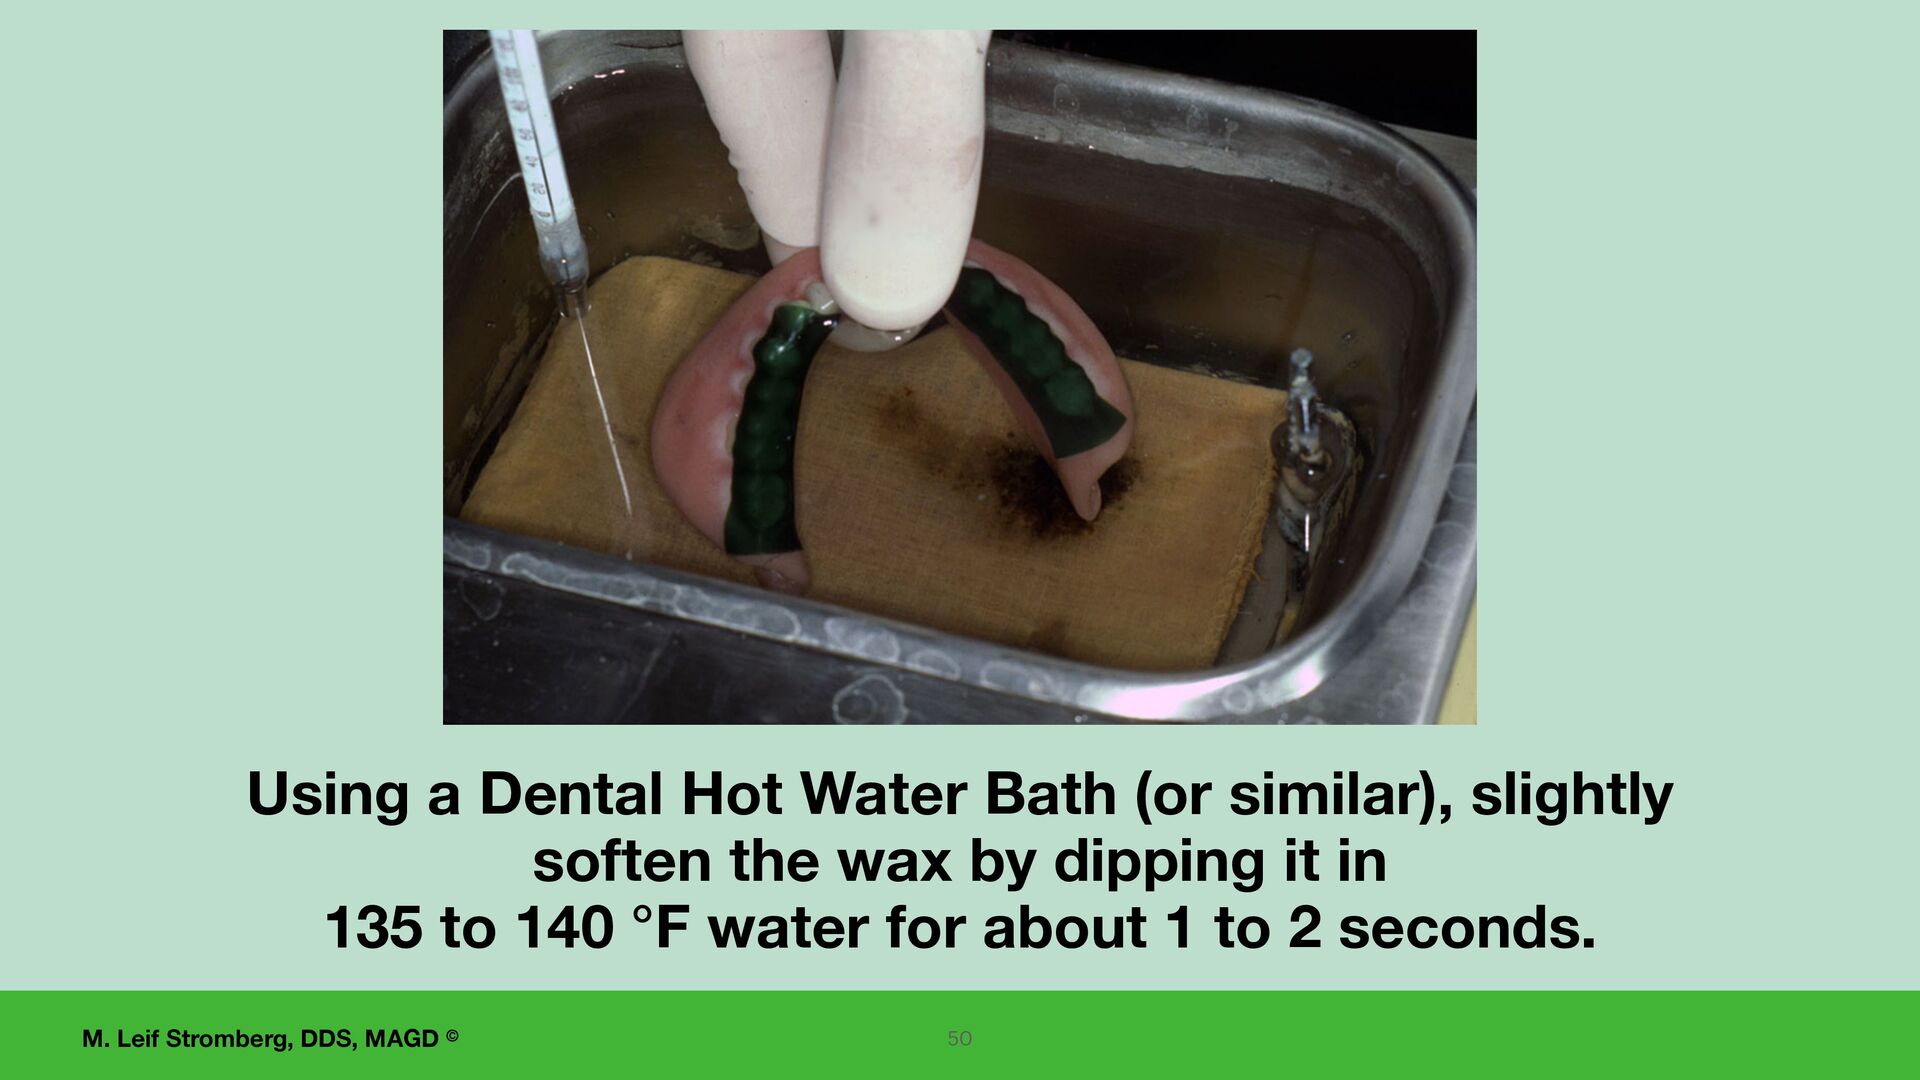
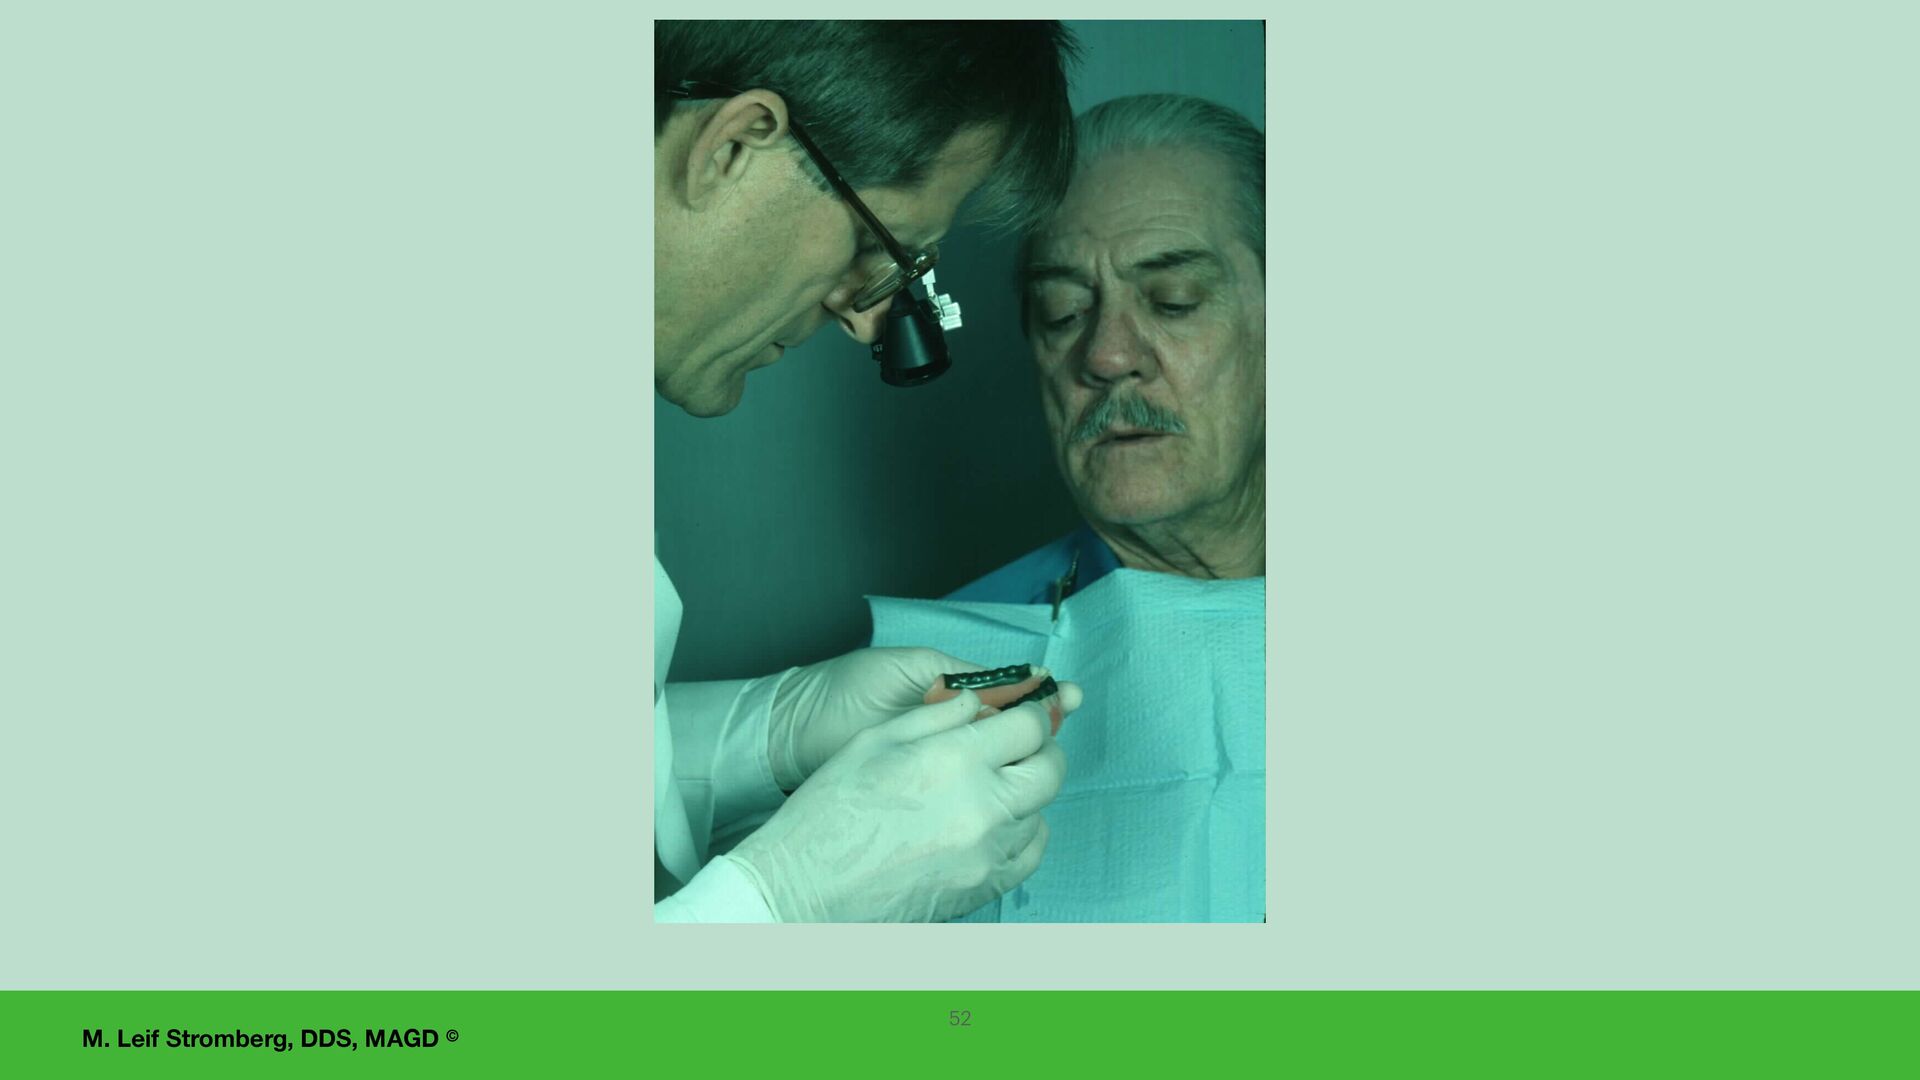
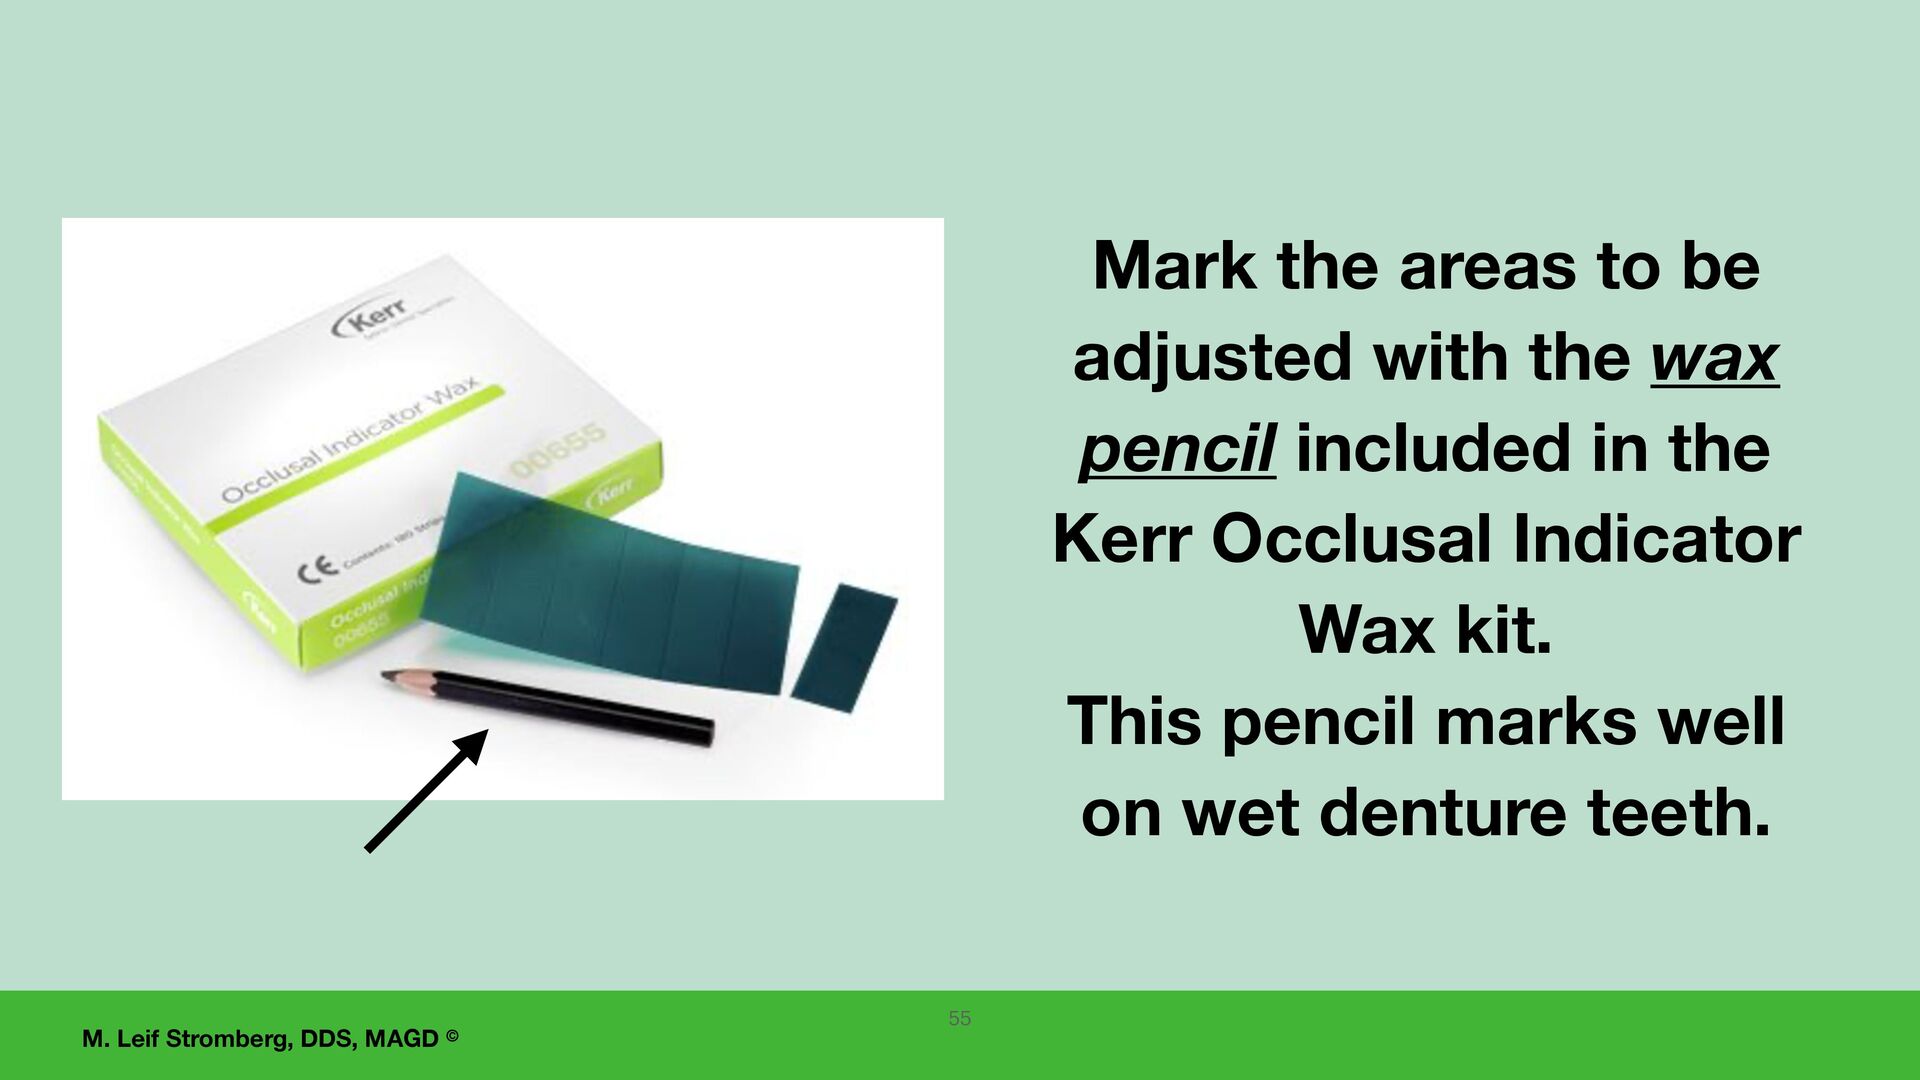
seating of the dentures with a white silicone paste, and 2. After completely seating dentures with the patient biting fi rmly on cotton rolls for 5 minutes, 3. The denture occlusion can be accurately adjusted intraorally using Kerr Occlusal Indicator Wax. Intraorally Kerr Occlusal Indicator Wax can be used for occlusal adjustments. 43
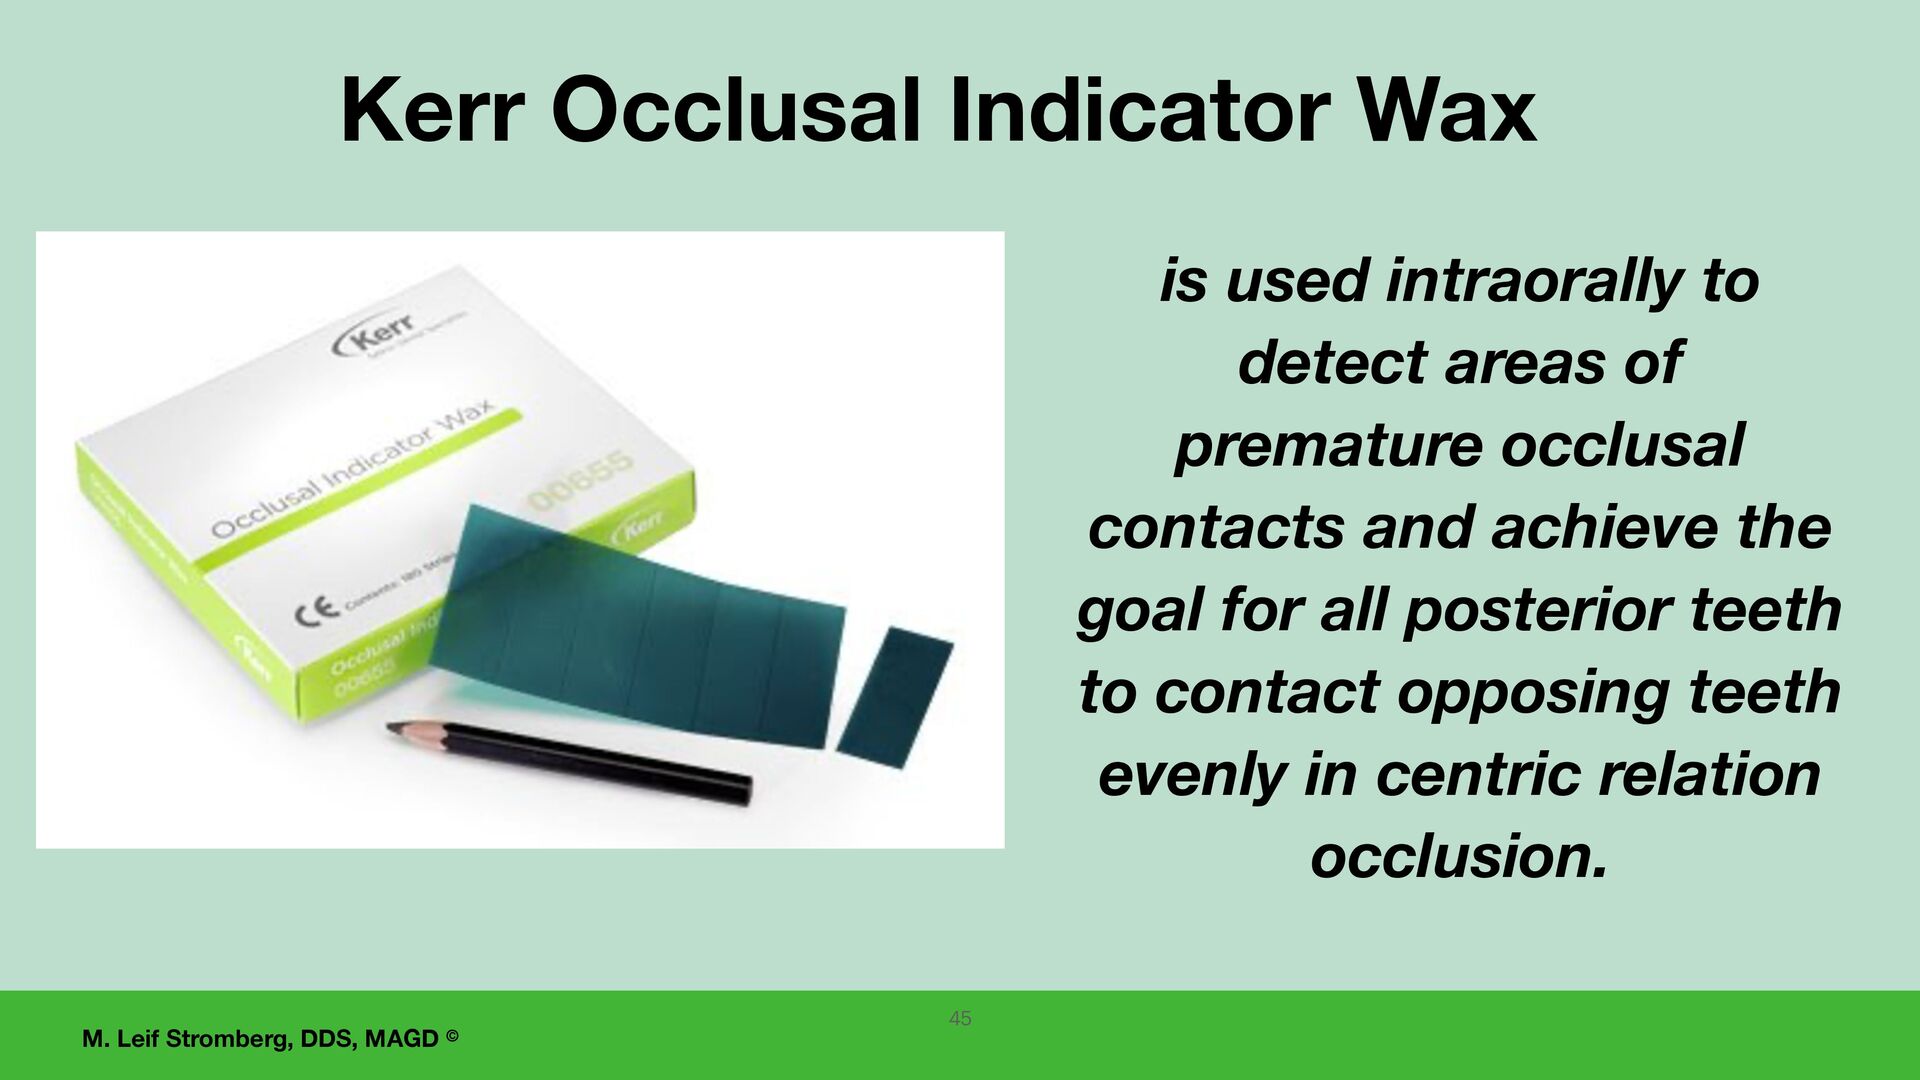
intraorally, Kerr Occlusal Indicator Wax is recommended as it puts equal pressure on all posterior denture teeth bilaterally, resulting in uniform seating of the denture bases on the supporting tissues and preventing denture tipping and shifting. 44
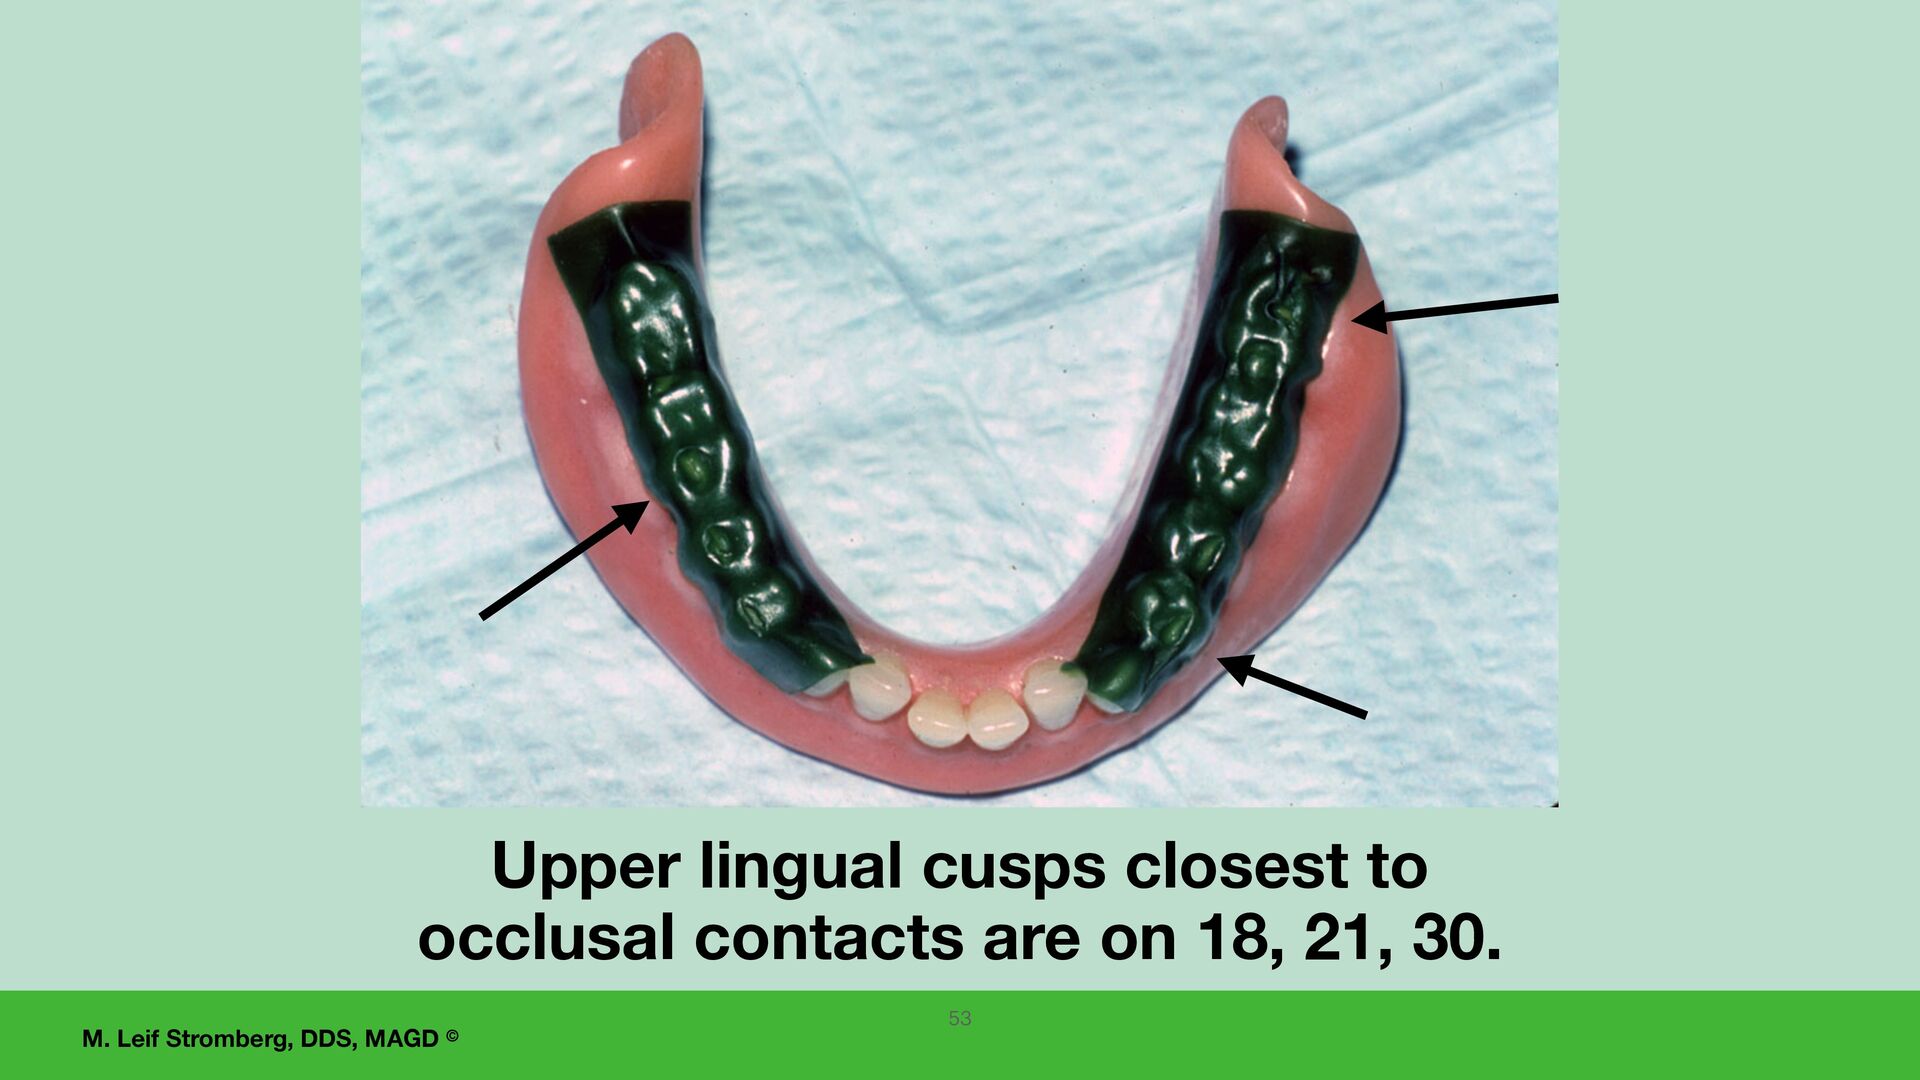
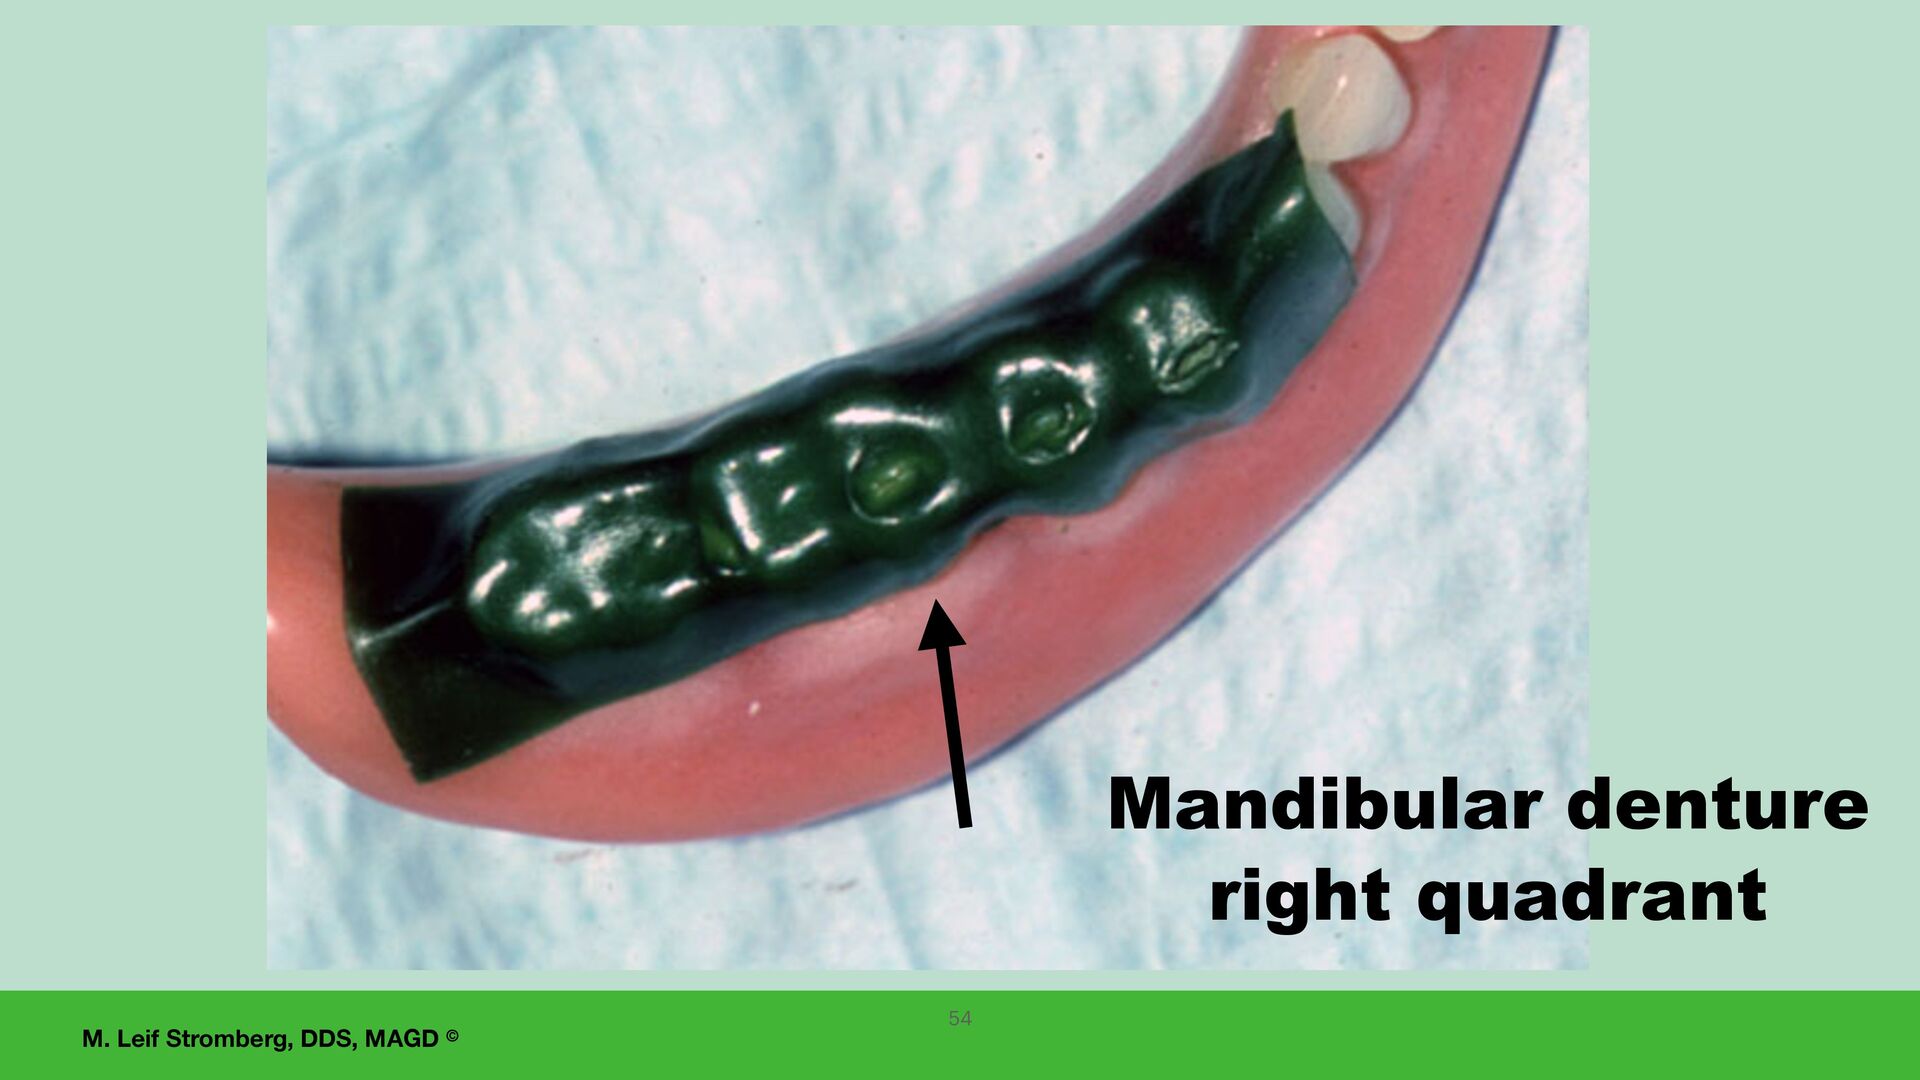
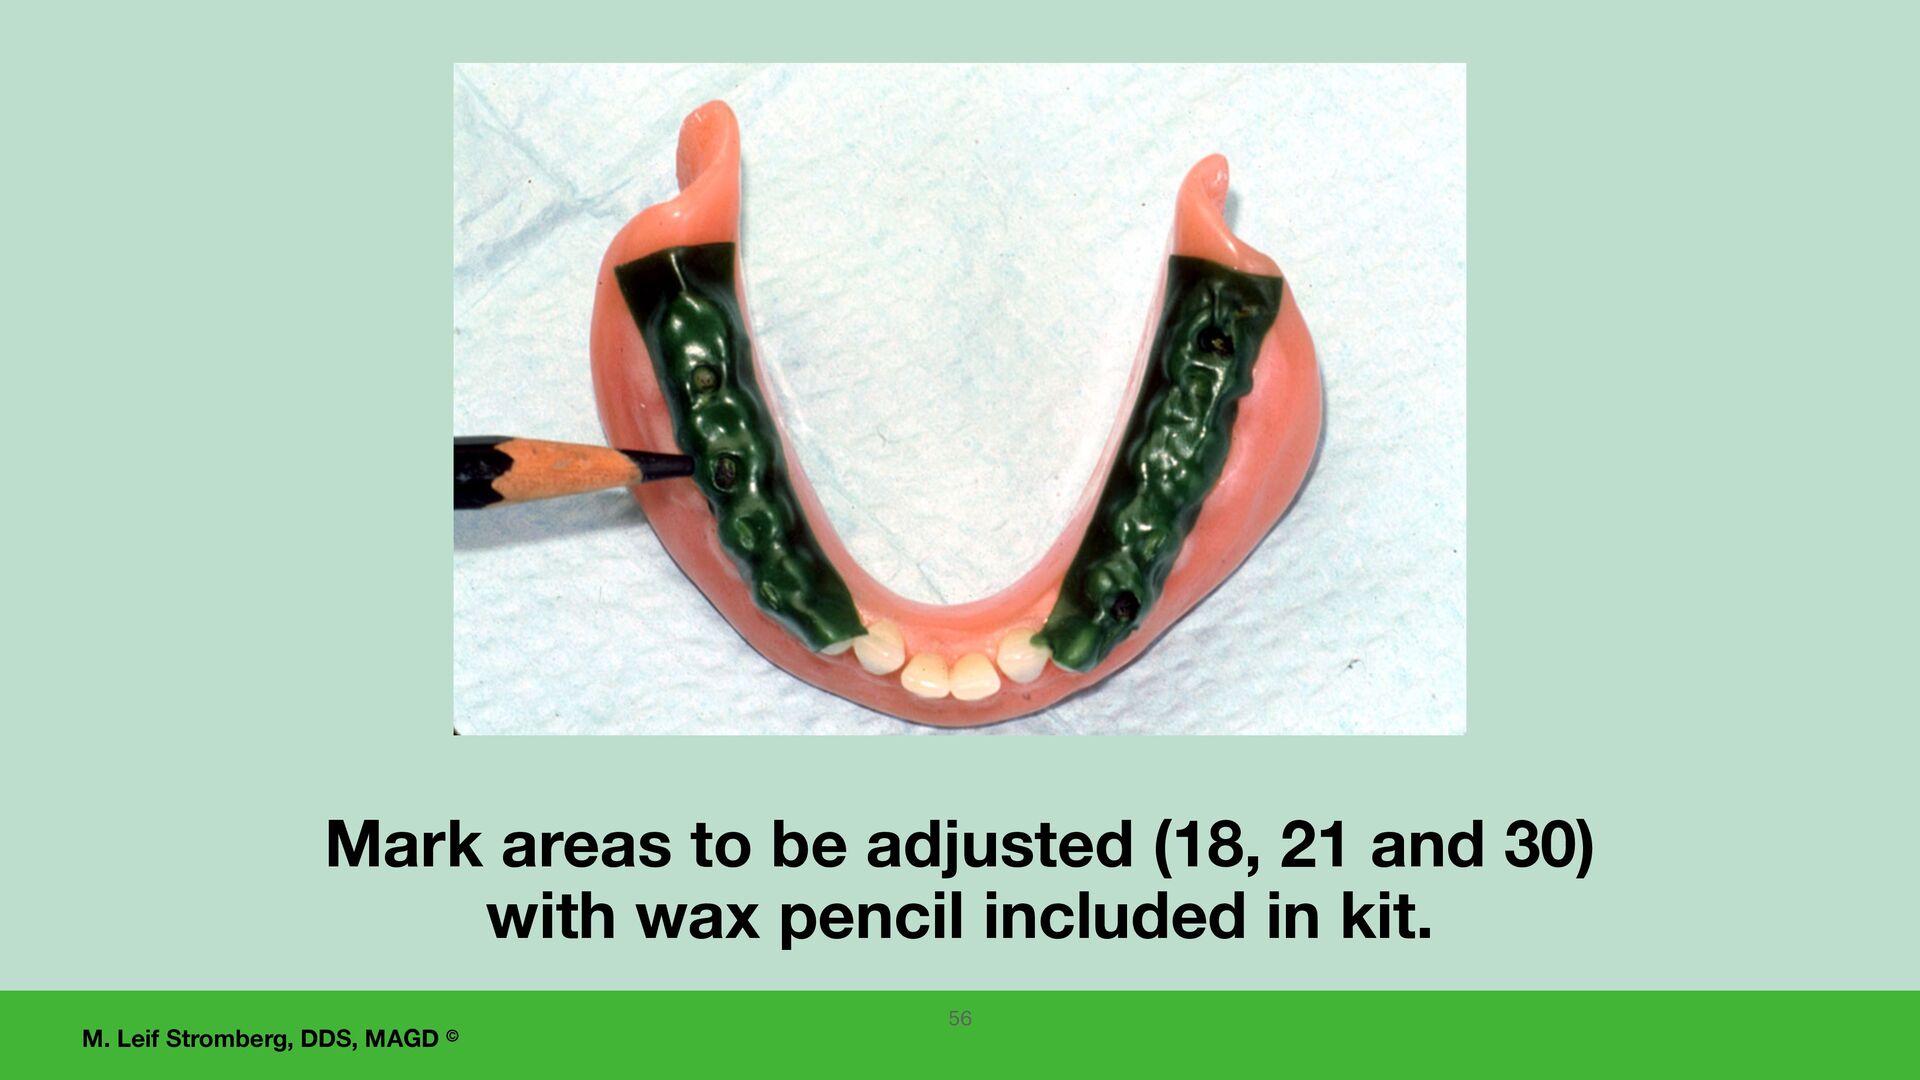
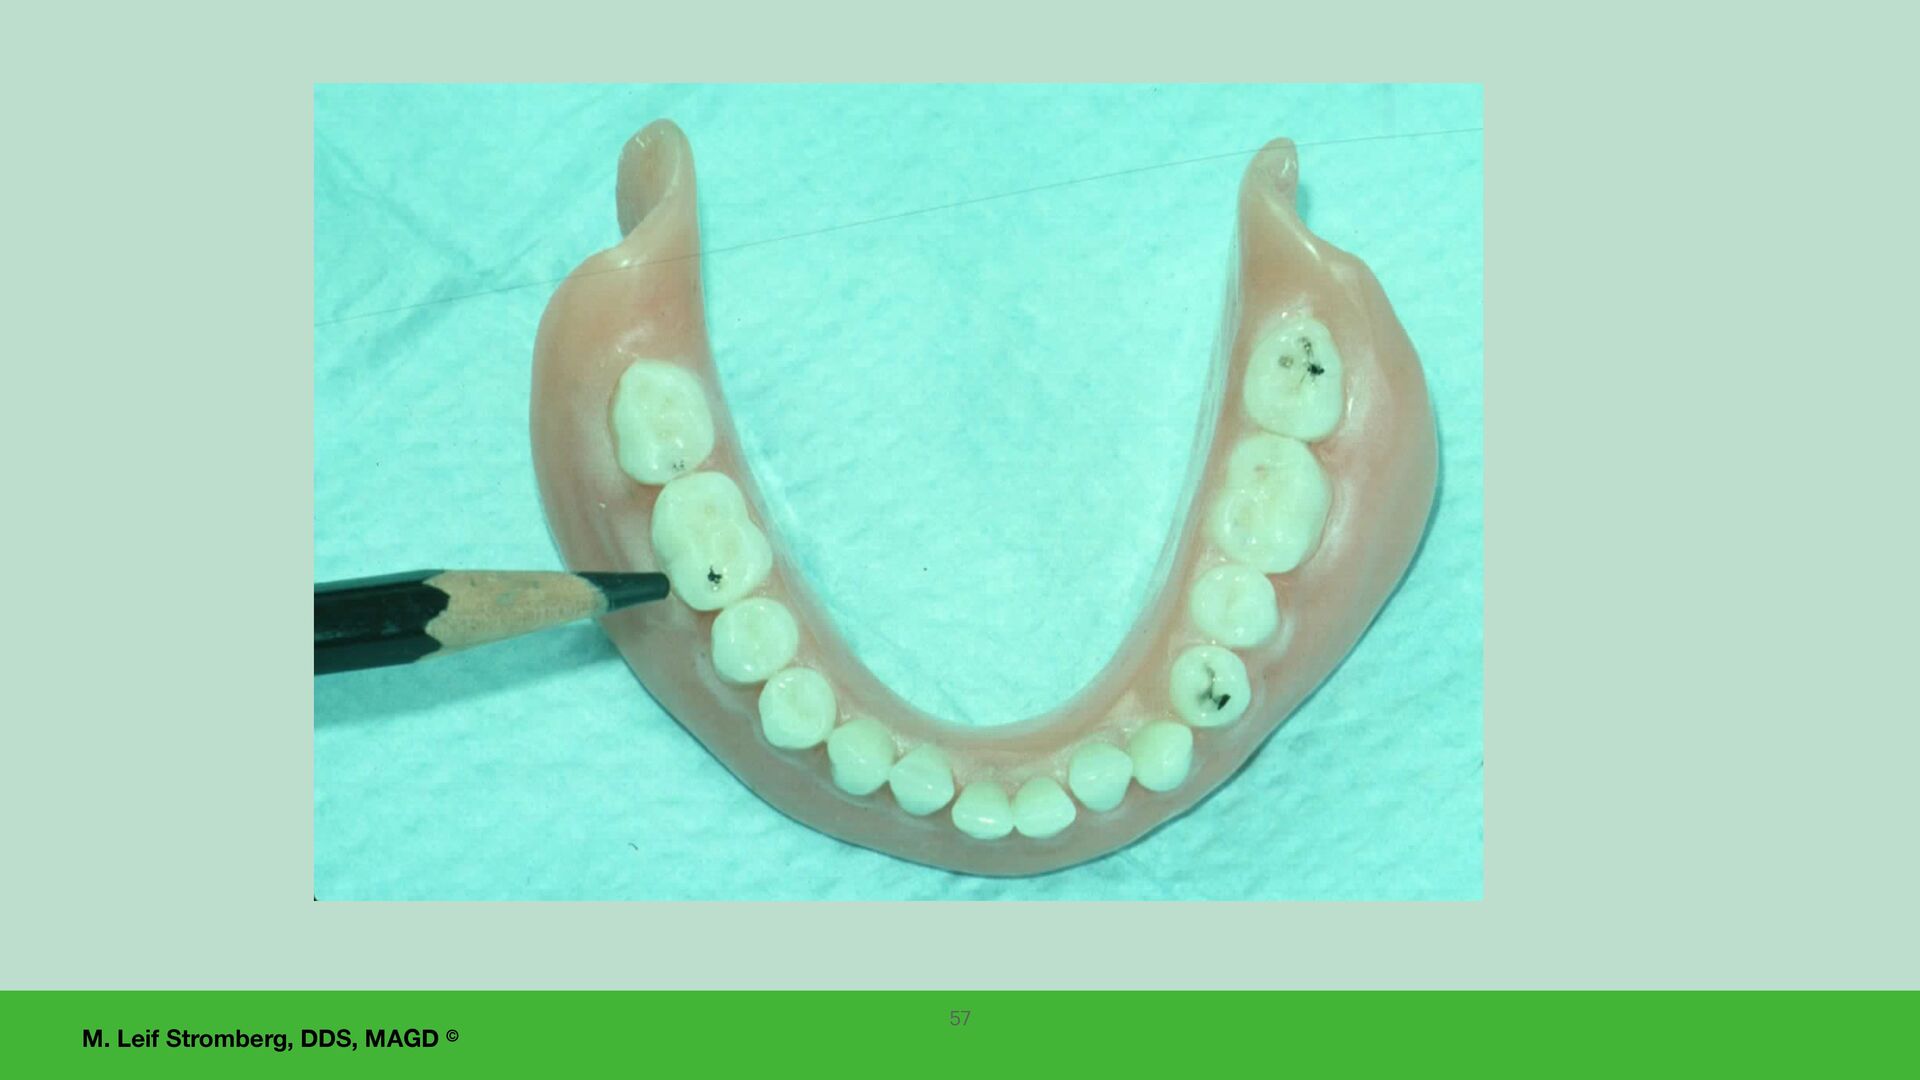
is used intraorally to detect areas of premature occlusal contacts and achieve the goal for all posterior teeth to contact opposing teeth evenly in centric relation occlusion. 45
the anterior denture teeth that would restrict the envelope of function, the patient's mandibular movement: • in centric relation occlusion, • during speech, or • when chewing. A patient with a class 3 occlusion can have contact of their anterior teeth in centric relation occlusion, and when delivering the fi nal dentures, evaluate if the anterior teeth are interfering with the envelope of function. A FUNDAMENTAL OF COMPLETE DENTURE FABRICATION FOR INCREASED PREDICTABILITY
SECTION— PARTICIPANTS WILL BE ABLE TO: 1. Discuss denture adjustments at post-delivery appointments. 2. If needed, create a reline impression in a fi nal denture for added retention and stability. 60 Post-delivery appointments
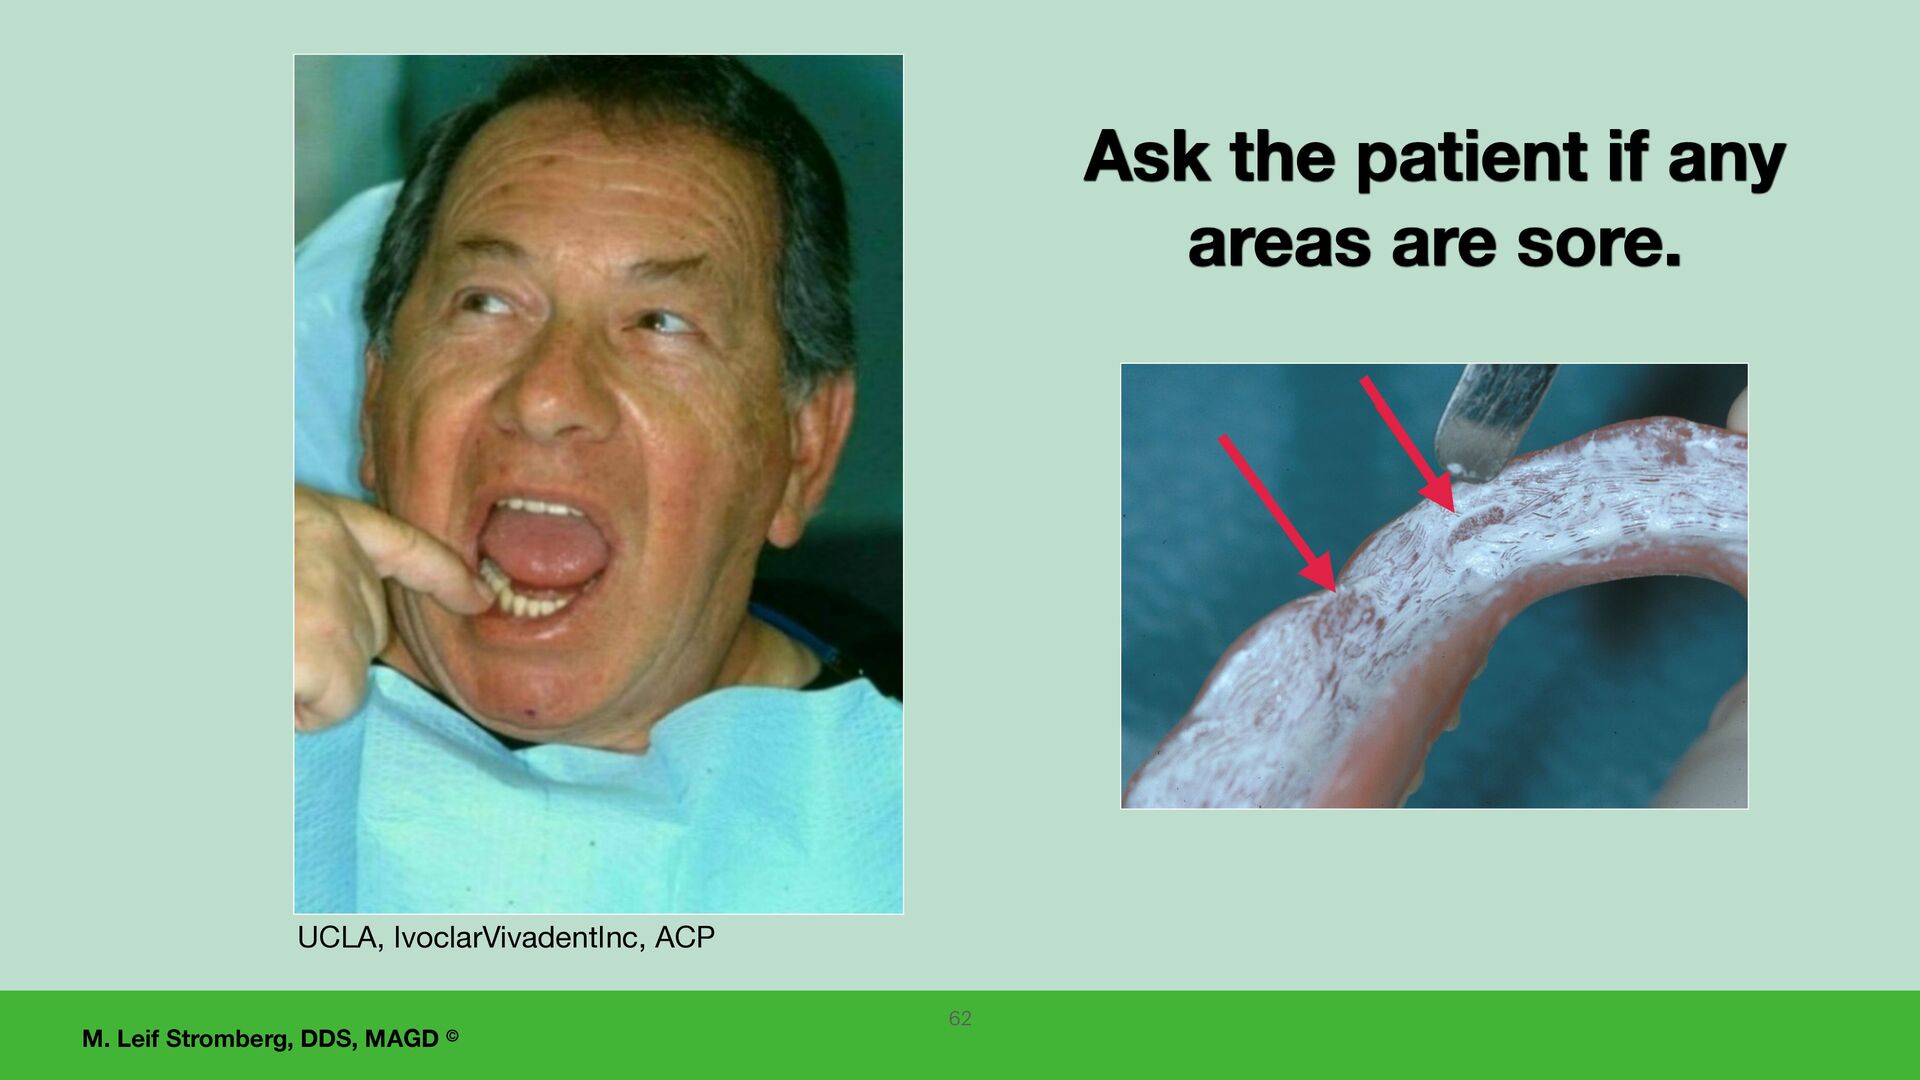
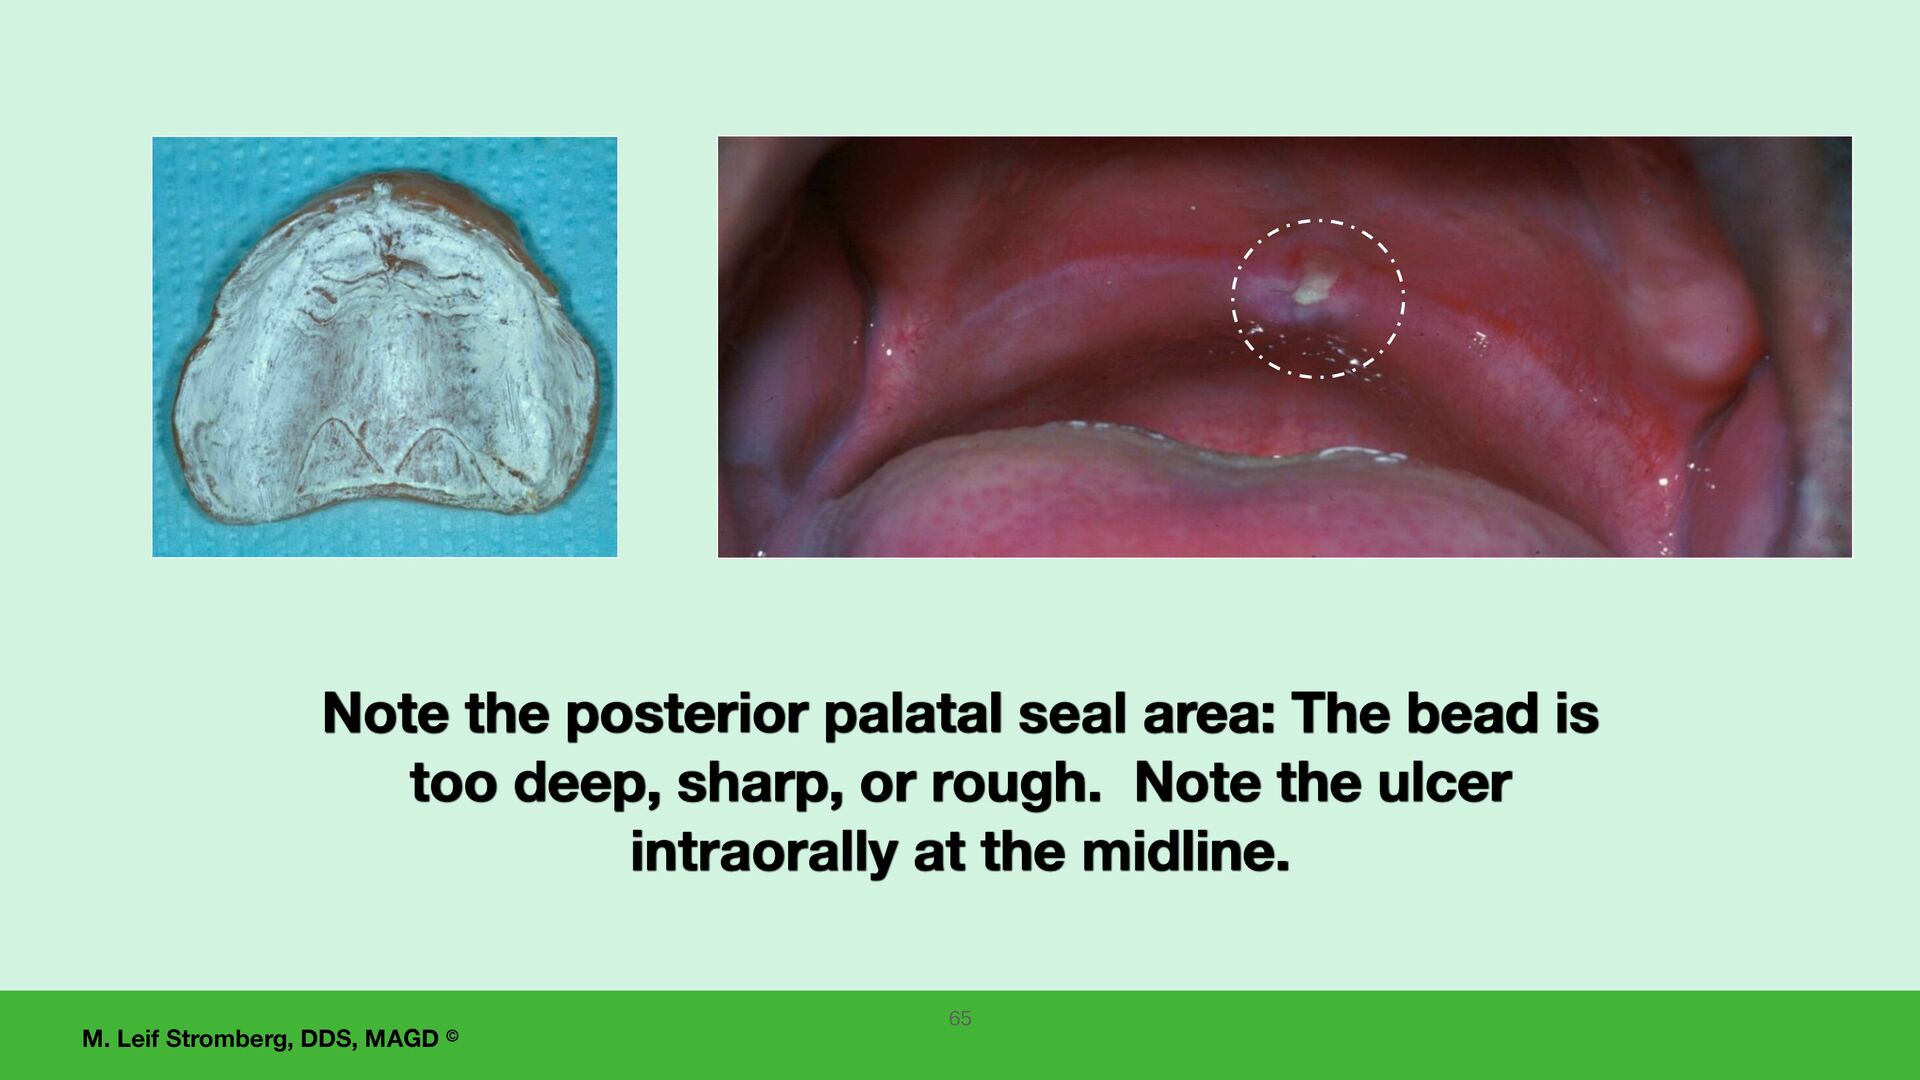
Appointment 1. Inquire about any patient problems and conduct an oral examination checking for any tissue soreness or ulcerated areas, indicating a denture adjustment is needed (including an exam of the posterior palatal seal area). Adjust as needed. 2. Using a white silicone paste, check the dentures to detect areas of excessive pressure on the supporting tissues and adjust the denture appropriately. 3. Check the denture borders for over-extensions and adjust as needed. 4. Evaluate the occlusion using Kerr Occlusal Indicator Wax and equilibrate as necessary. 61
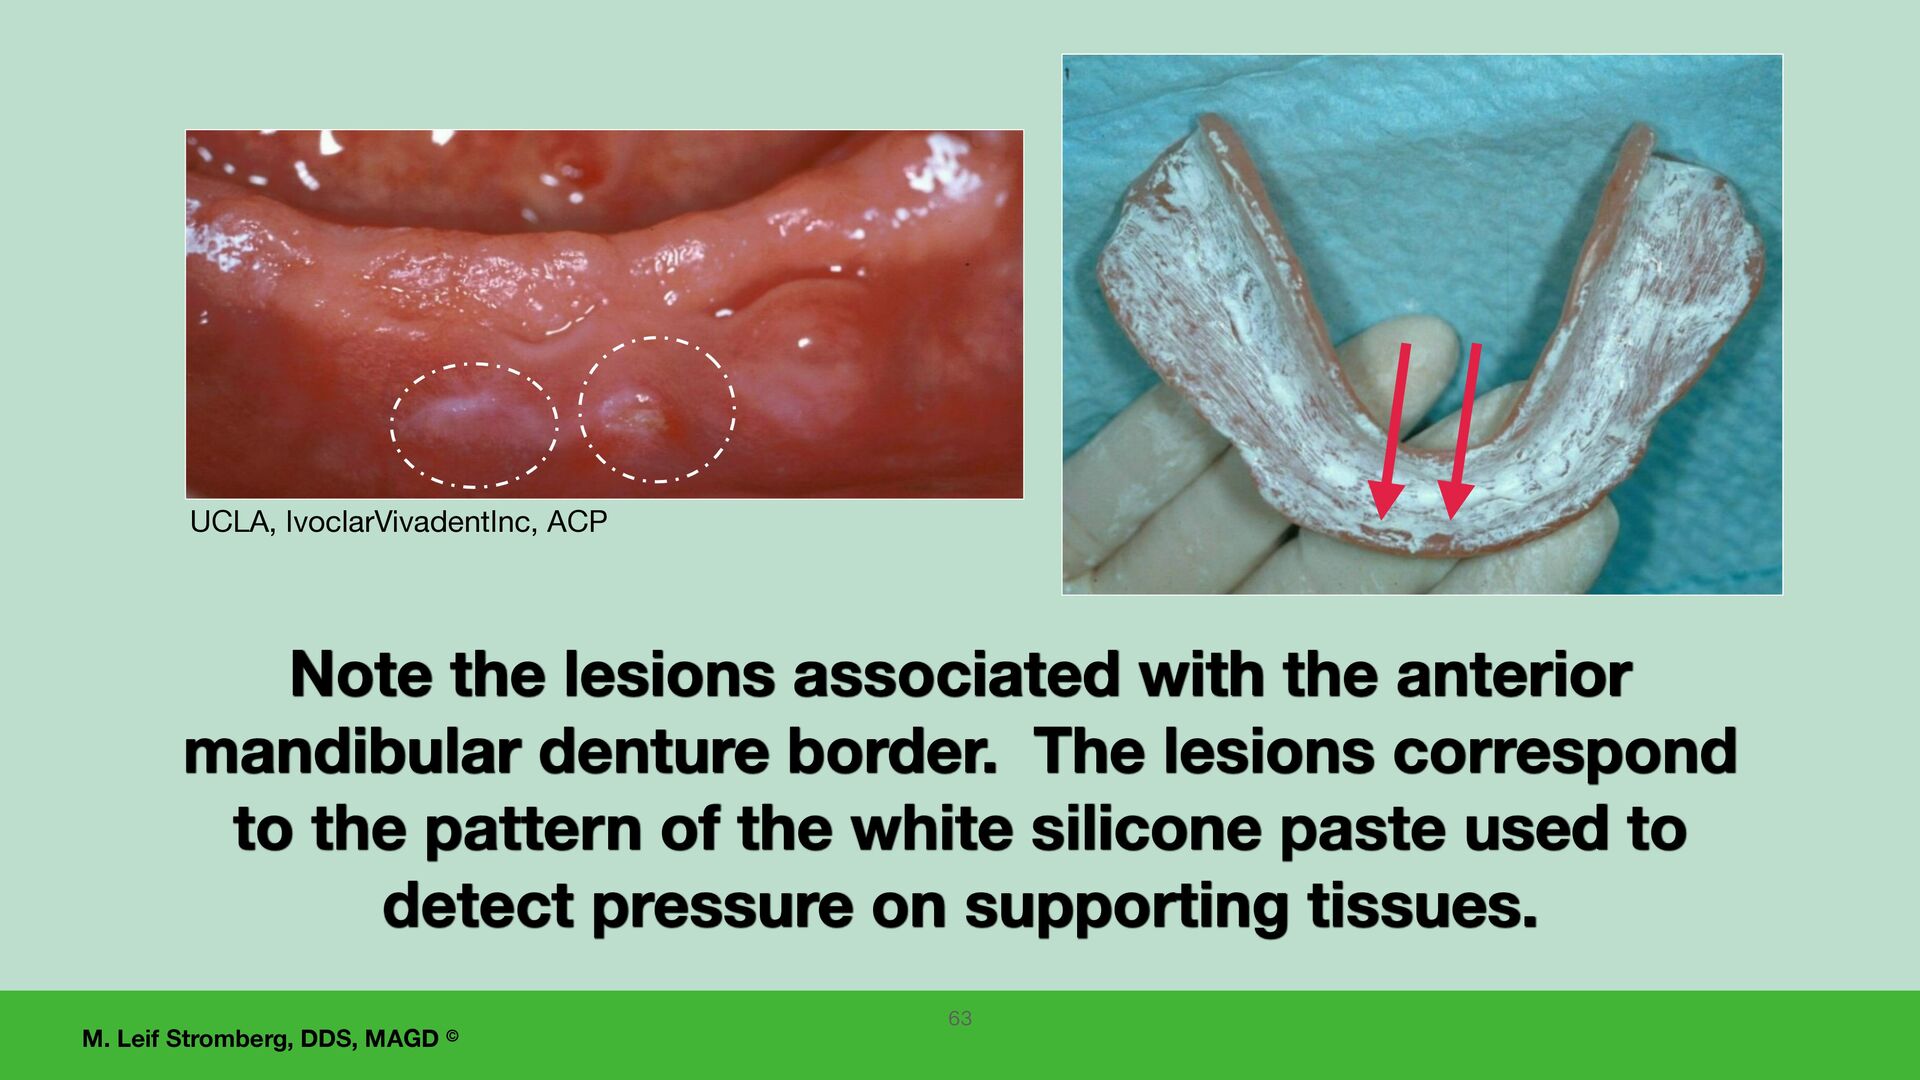
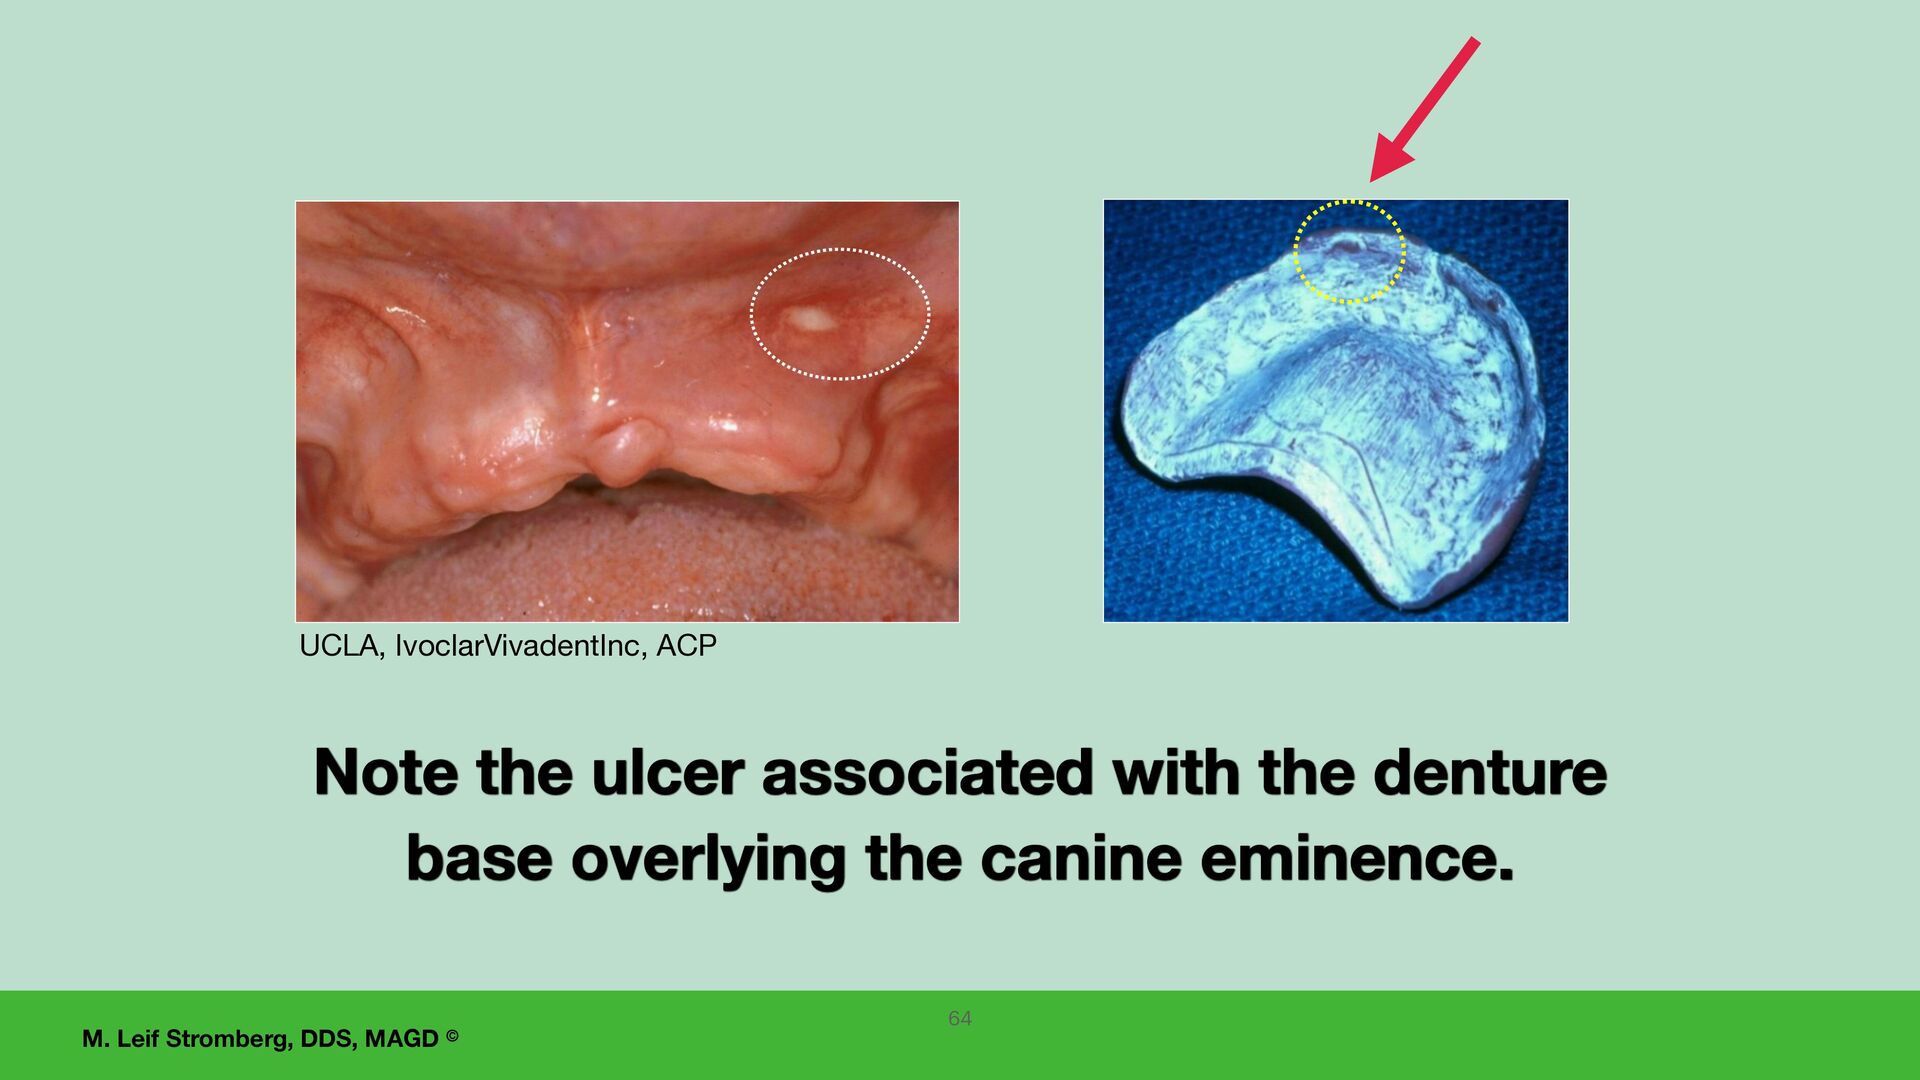
the lesions associated with the anterior mandibular denture border. The lesions correspond to the pattern of the white silicone paste used to detect pressure on supporting tissues. 63
occlusal contact If you observe a significant change in the occlusion, a clinical remount procedure may be necessary. This could be from a “shift of a condyle.” 67 Evaluate the occlusion • Visual evaluation
relation record. 1. Remount the case, and 2. adjust the occlusion or reposition the teeth on the dentures. 3. If the teeth are repositioned in wax on the dentures, a wax try-in is recommended to con fi rm even occlusal contacts before processing the teeth in place. Remount procedure 68
patient having issues using their mandibular tissue-supported complete denture: 1. Osseointegrated implants to retain and/or support the denture. 2. Denture adhesives. 3. Check and adjust the denture base for over-extensions of borders. 4. Relining the lower denture may help retention and fit. 5. “Permanent” (long-term) soft liners. 6. Eating soft foods at first, simultaneously putting food on the right and left sides, and practicing having the tongue support the mandibular denture. 7. Help the patient understand the limitations of a mandibular denture. 69
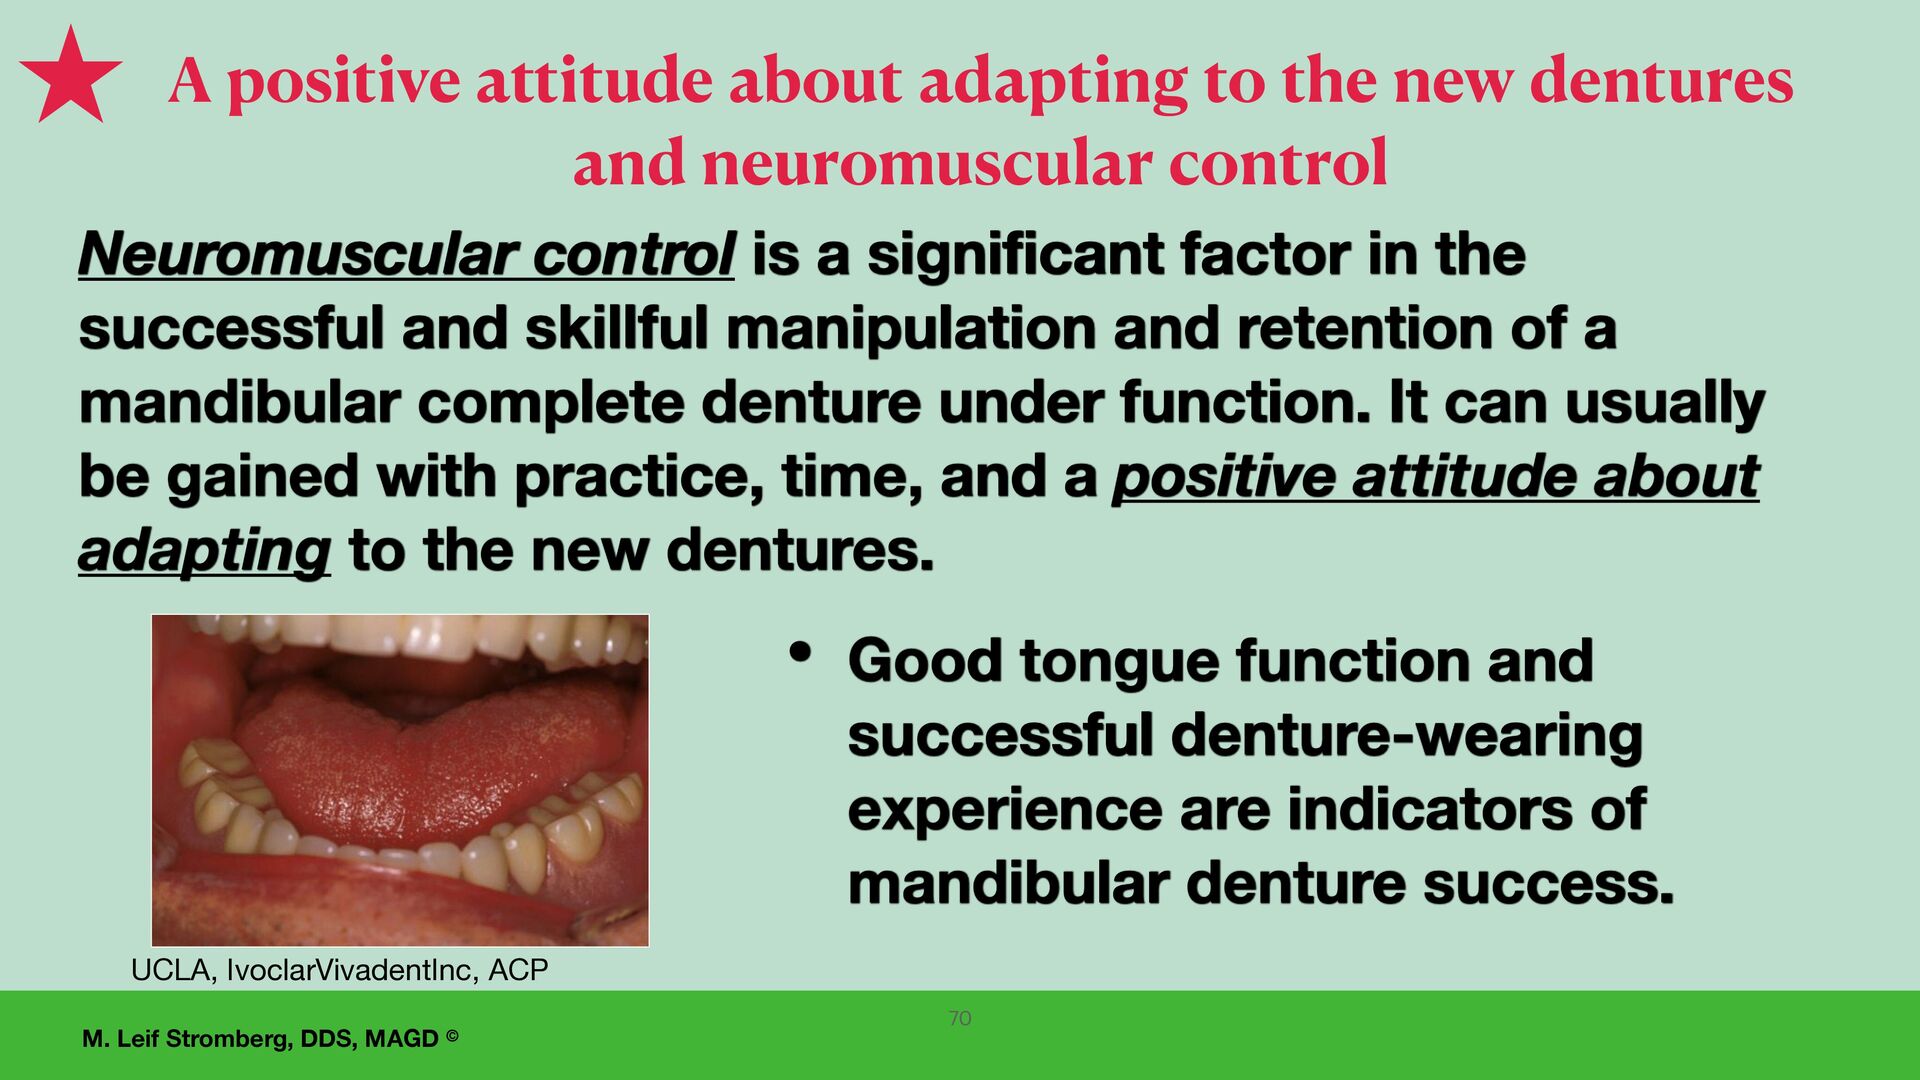
Good tongue function and successful denture-wearing experience are indicators of mandibular denture success. Neuromuscular control is a significant factor in the successful and skillful manipulation and retention of a mandibular complete denture under function. It can usually be gained with practice, time, and a positive attitude about adapting to the new dentures. 70 A positive attitude about adapting to the new dentures and neuromuscular control
of dentures • Allow and encourage the patient to wear the dentures for a period of time after adjustments have been made. • If the patient is unhappy with their appearance, the anterior teeth can occasionally be replaced or repositioned, achieving patient satisfaction. 71
maxillary denture causing Gagging • The palate is excessively thick. • The posterior border of the denture base is excessively thick. • The palate of the denture base extends too far posteriorly (be sure not to remove the posterior palatal seal). • Lack of tongue space (maxillary teeth are set too far to the lingual). • Consider an implant-supported or -retained plateless maxillary prosthesis. 72
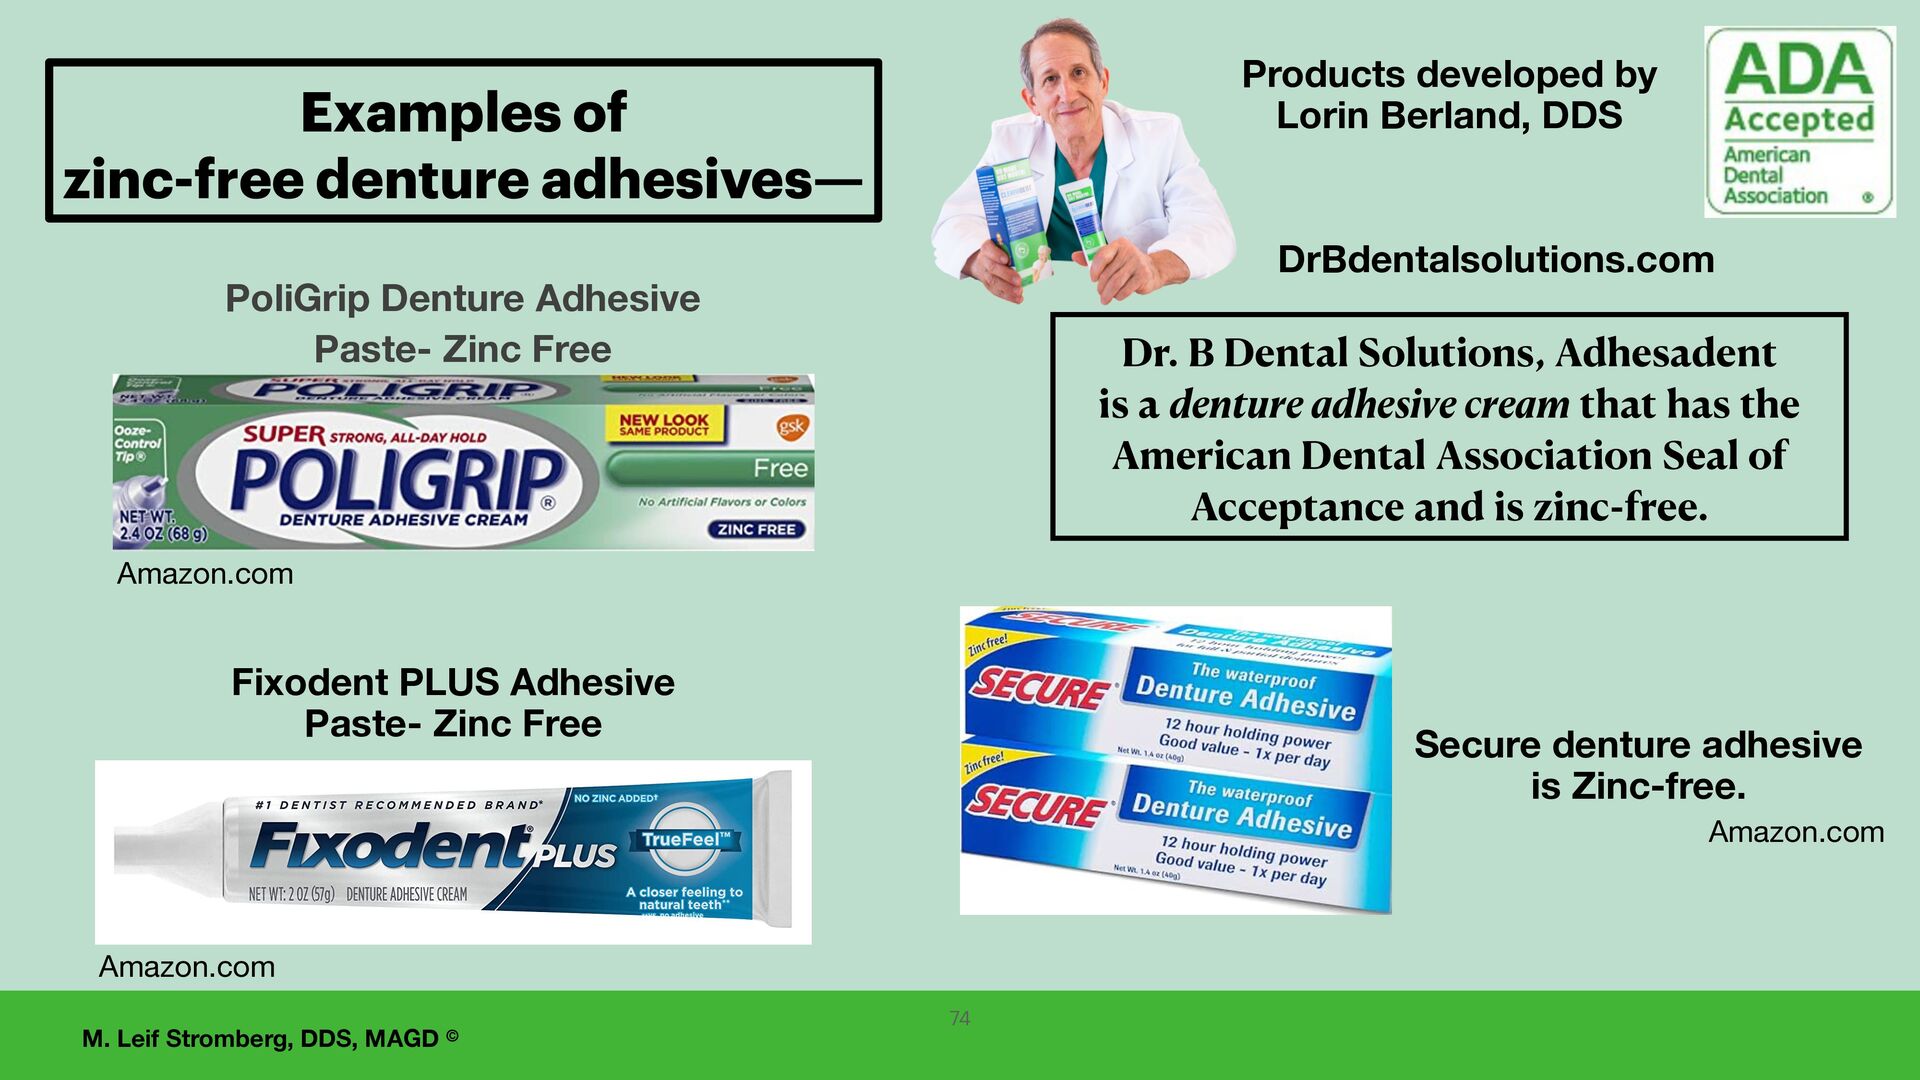
use minimal amounts of denture adhesive. • In some cases, for the first few weeks after delivery of new dentures, an adhesive may help keep the dentures in place. • Sometimes daily long-term use of adhesives is needed. • The American College of Prosthodontists recommends avoiding zinc-containing denture adhesives as a precautionary measure. Denture adhesives which are zinc- free are recommended • Cream (paste) • Powder Adhesives with zinc may be more retentive. Denture adhesives to temporarily increase retention 73
Zinc Free Amazon.com Fixodent PLUS Adhesive Paste- Zinc Free Amazon.com Products developed by Lorin Berland, DDS DrBdentalsolutions.com Dr. B Dental Solutions, Adhesadent is a denture adhesive cream that has the American Dental Association Seal of Acceptance and is zinc-free. Examples of zinc-free denture adhesives— 74 Secure denture adhesive is Zinc-free. Amazon.com
soft liners — Silicone-based heat-cured material for mandibular tissue-supported dentures. Indications for “permanent” soft liners: • Limited to mandibular tissue-supported dentures • Chronic soreness • One who bruxes or grinds their teeth • Minimal keratinized attached tissue on the mandibular tissue-bearing area. Contraindications for “permanent” soft liners: • Poor oral hygiene • Patients with dryness of the mouth, decreased mucousy salivary flow • Must be replaced more frequently - should be changed approximately every three years with additional fees. • Special burs are usually required for adjustments. • The “permanent” soft liner should be at least 2 mm thick for cushioning, and this weakens the denture base because the acrylic resin base is thinner. Do not use a long-term soft liner if the hard acrylic resin of the denture base will have 2 mm or less thickness.
Some products have been removed from the market, and new ones have been added. A good product available now is Permasoft (manufactured by Myerson). 2. Good products in the past included Molloplast B and Dentsply Luci-Sof. 3. Discuss the best current options with your dental laboratory. “Permanent” (long-term) resilient soft liners — Silicone-based heat-cured material for mandibular tissue-supported dentures.
that needs an indirect hard reline (not a chairside direct hard reline), • how to make a final impression using a tissue conditioning material for the indirect hard reline, • and reasons not to do a direct chairside hard reline for a complete denture. Laboratory (Indirect) Denture Hard Relines 77
with a complete denture reline service, do not reline a denture with the following: 1. Inadequate borders. (Evaluate if the borders can be corrected with a reline procedure. After the reline, want border seal in all vestibules, do not want over-extended borders, do not want under-extended borders, want the lower denture to cover retromolar pads, and want the posterior extension of the upper denture to cover the posterior palatal seal area and extend into the hamular notches and have a post dam.) 2. Excessively worn denture teeth. 3. Uneven centric relation occlusal contacts (want even bilateral centric relation occlusal contacts). 4. Unhealthy in fl amed denture supporting tissues. 5. TMD - if the patient has temporomandibular disorder. 6. Unacceptable vertical dimension of occlusion. 79
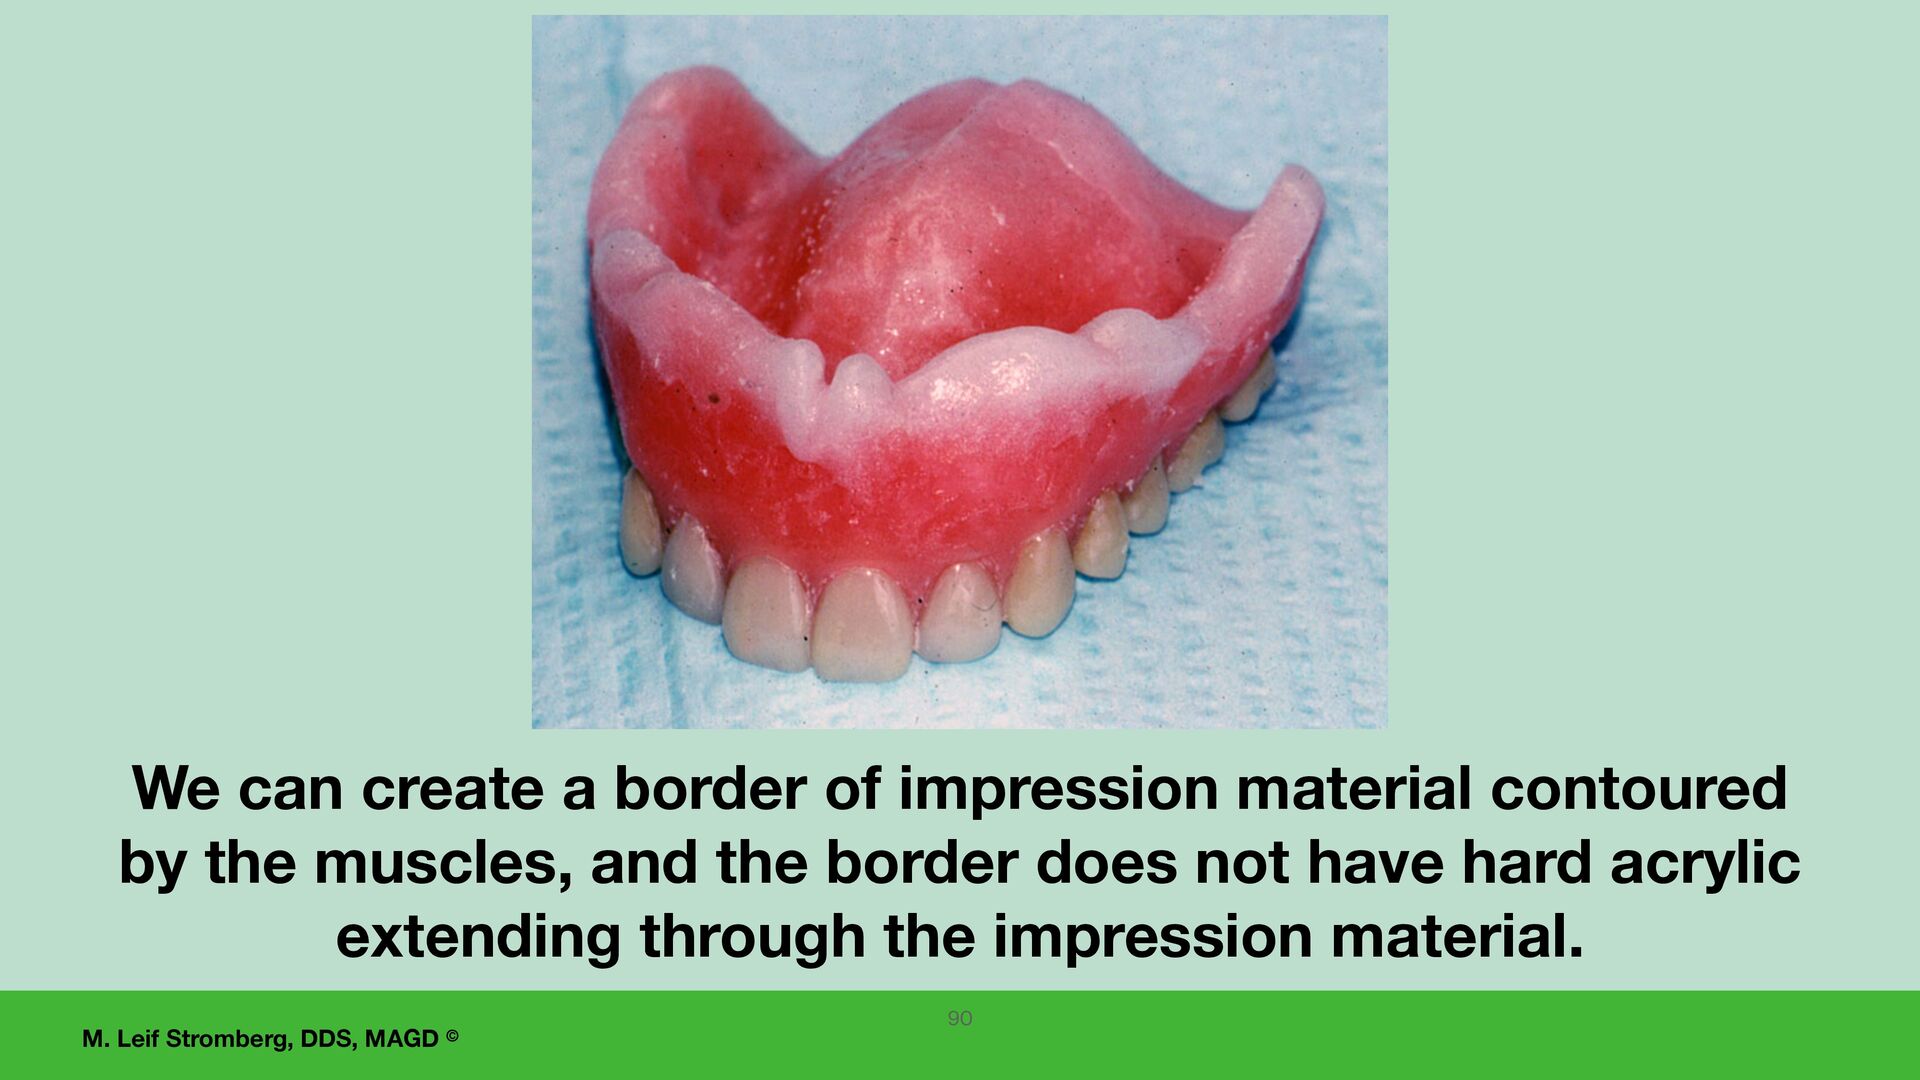
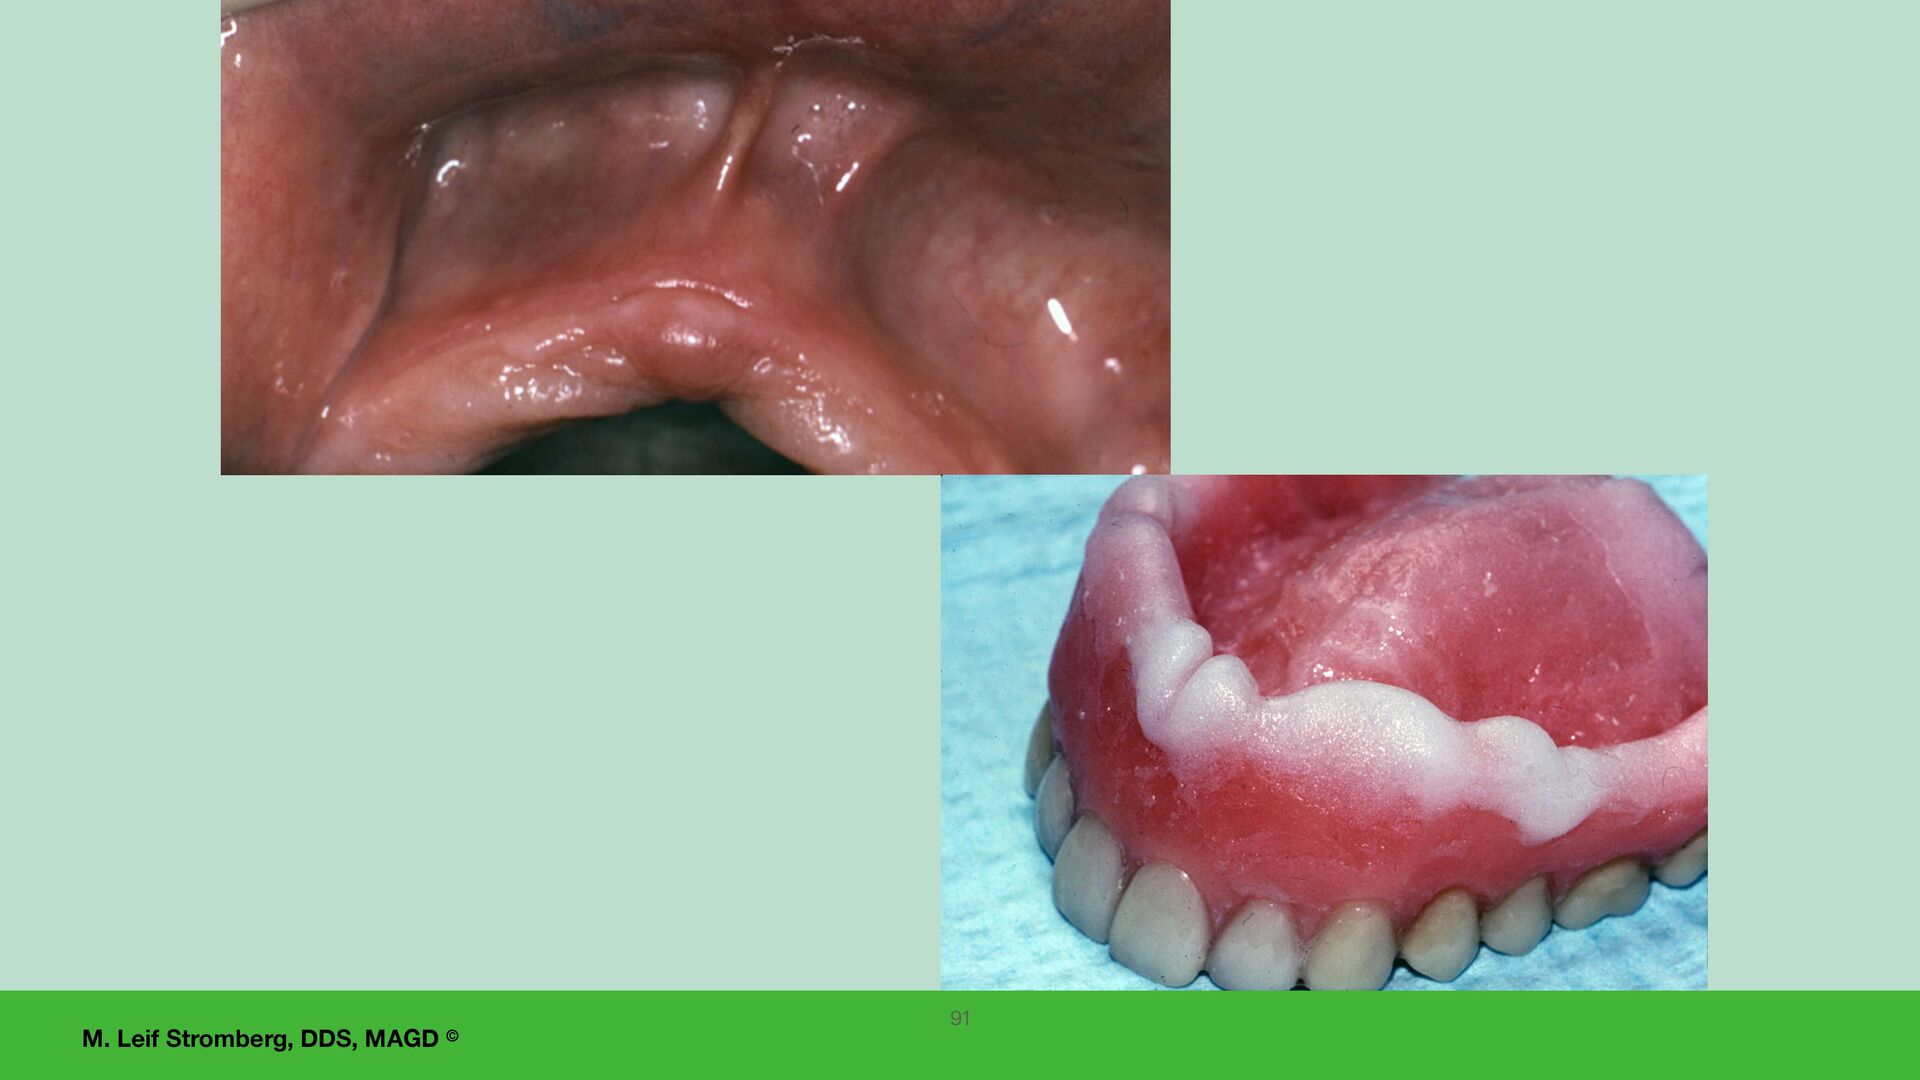
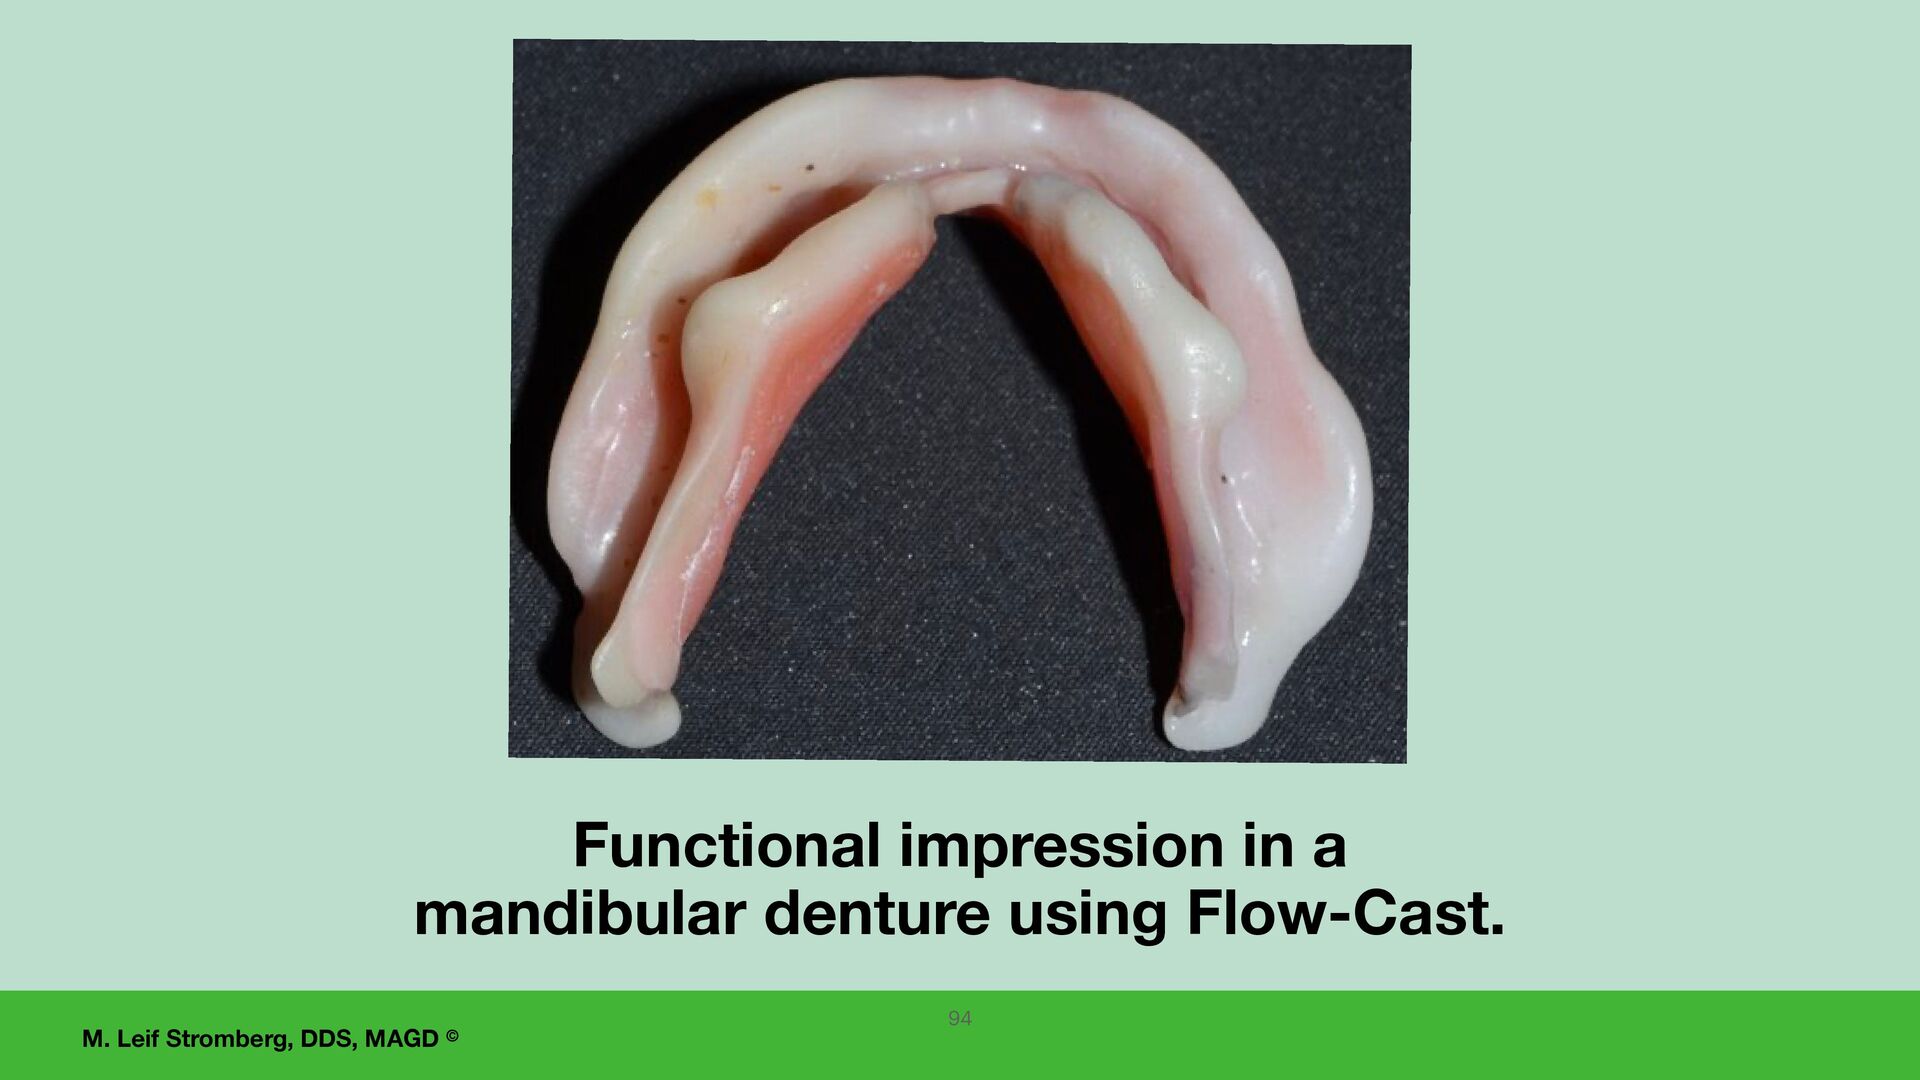
If a denture reline is indicated after a denture has been fabricated, the dentist can make a reline impression in the denture with a tissue conditioning material using the denture base as a custom impression tray and reline the denture indirectly. Product examples of tissue conditioners for a complete denture reline impression: • Flow-Cast functional impression material and tissue treatment- For more information: fl ow-cast.supply • Perfect-Fit functional impression material and tissue conditioner. Their website states that this is the ONLY Non-Phthalate and FDA-Compliant functional dental impression material. For more information: www.advancedmaterialsengineering.com • Lynal Tissue Conditioner and Temporary Reliner. • COE-COMFORT is a tissue conditioner and functional impression material. 80
complete denture, •What are the patient’s wants, needs, and expectations? •Will they accept the relined denture? •Tell them that relined dentures will feel di ff erent and alter their speech patterns. •Hopefully, conditions will be improved, and the patient will adapt to the relined dentures. •Do you think you can satisfy the patient’s wants and expectations, and do you want to try? 81
complete dentures, the dentist and the laboratory should be meticulous not to change the: • Centric relation occlusal scheme or • The vertical dimension of occlusion. 82
hard reline is not recommended. • If a denture is relined chairside with a direct hard reline material and if the reline material thickens the palate, this can (and often does) change the vertical dimension of occlusion and centric relation occlusion • and the dentist may be in a challenging and troublesome situation that cannot be easily resolved. 83
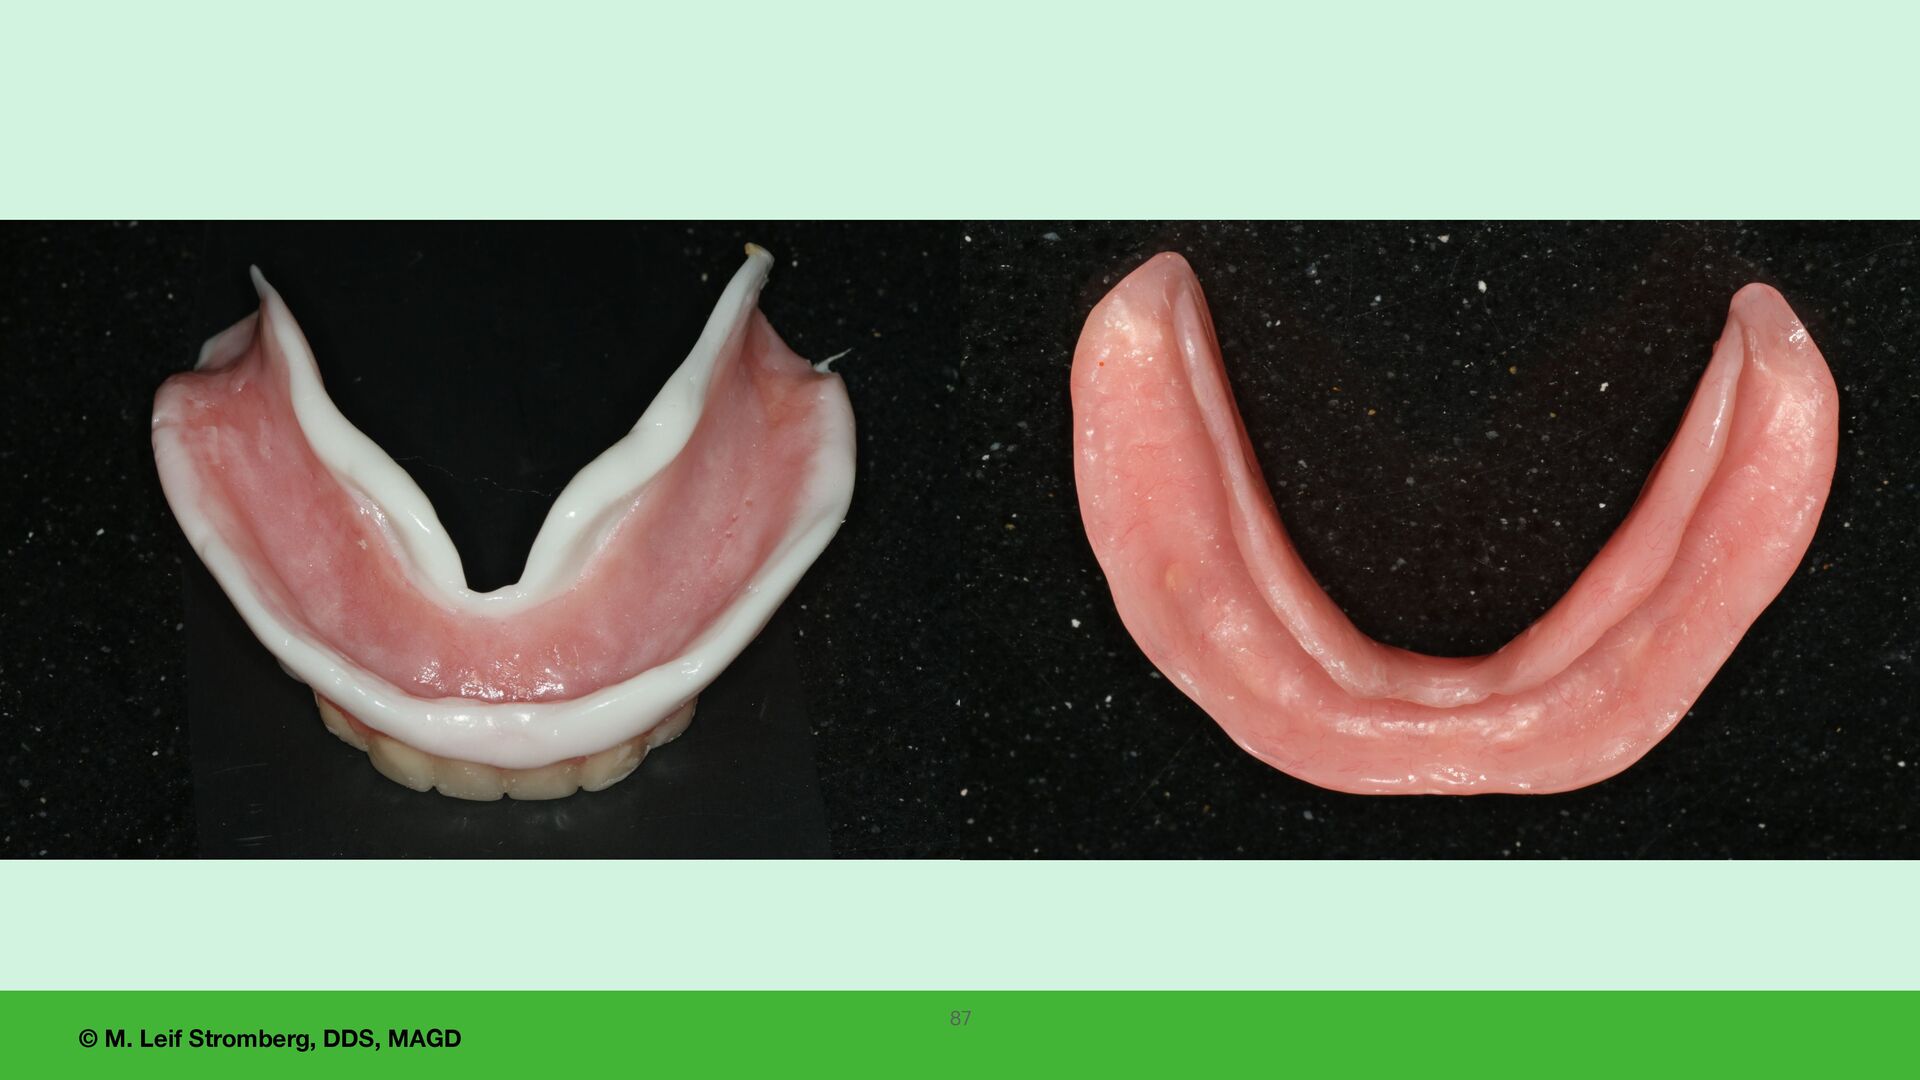
are no undercuts in the dentures before making reline impressions. Do not want the dental stone of the cast to lock into dentures. 2. Eliminate undercuts in the dentures and then border mold denture fl anges in vestibules with functional impression material to get a good border seal of dentures. 3. Only add impression material to the denture-bearing areas after border molding is complete because you do not want to change the occlusion or vertical dimension of occlusion. 4. After border molding, add functional impression material to the denture-bearing areas of the dentures, careful not to change the centric relation occlusal scheme or vertical dimension of occlusion. For indirect laboratory complete denture relines 84
fl ow-cast.supply For tissue conditioning and functional impressions. Follow directions for mixing and use. This product contains phthalates, which are possibly a health concern. 89
material has set, 1. remove the denture and remove excess material, 2. evaluate centric relation occlusion and vertical dimension of occlusion, 3. evaluate retention and stability, and 4. assess the patient's comfort with the denture reline impression in the denture. 5. If the patient is comfortable with the denture with the reline impression and if the reline impression is adequate, pour the impression with a dental stone and do an indirect hard reline of the denture. 6. Also, can have the patient wear the denture with the functional impression material for 24 hours and return to evaluate, pour the impression, and send the denture on the cast to the laboratory for the indirect hard reline. 92
impression material or Perfect-Fit functional impression material and tissue conditioner, have the patient wear the denture for 24 hours, creating a functional impression. When the patient returns in 24 hours, evaluate the impression and, if adequate, pour the impression and send the denture on the cast to the laboratory for a hard acrylic denture reline. 93
(fundamentals) this course covers and implement them into your work fl ow. If desired, take more continuing education and apply the knowledge and techniques you learn to improve your edentulous restoration service further. 95 You can elevate your success with all tissue-supported edentulous restorations by learning and implementing KEYS to complete denture SUCCESS.
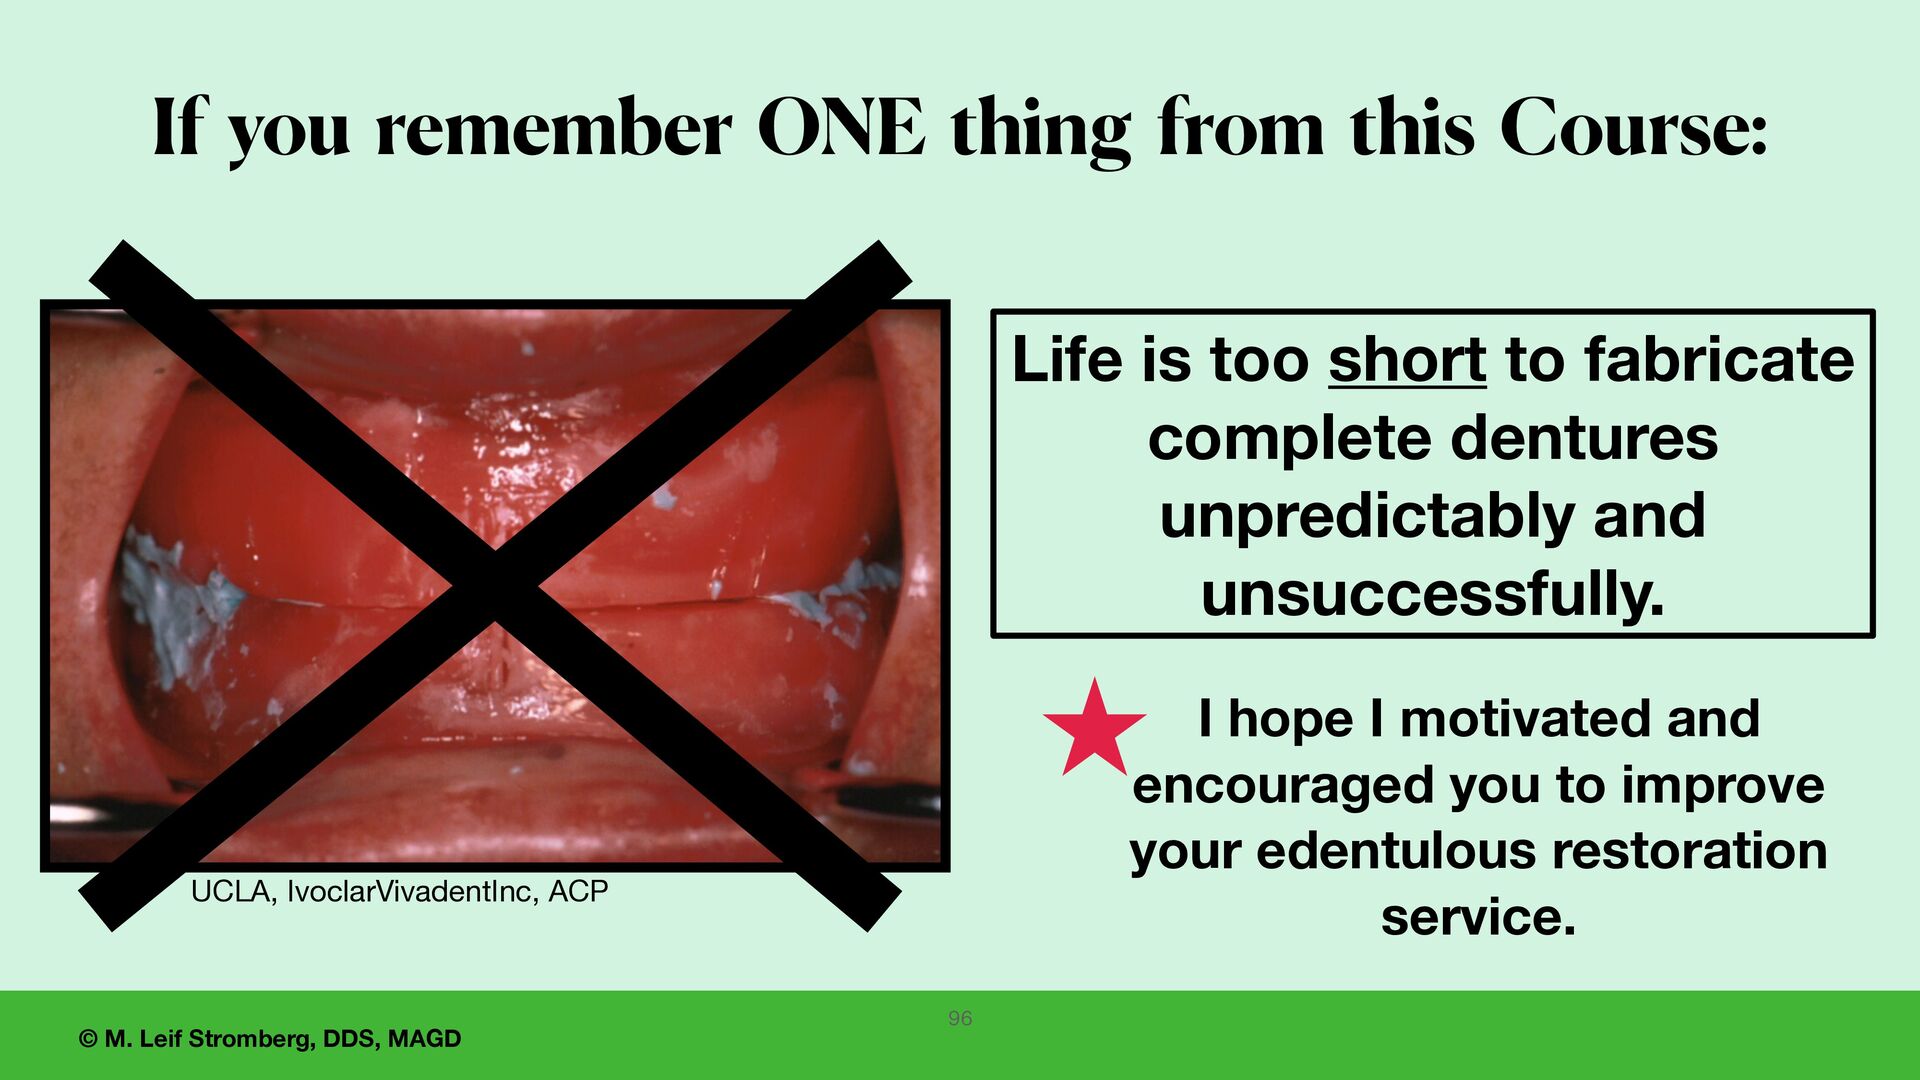
to fabricate complete dentures unpredictably and unsuccessfully. If you remember ONE thing from this Course: 96 I hope I motivated and encouraged you to improve your edentulous restoration service. UCLA, IvoclarVivadentInc, ACP
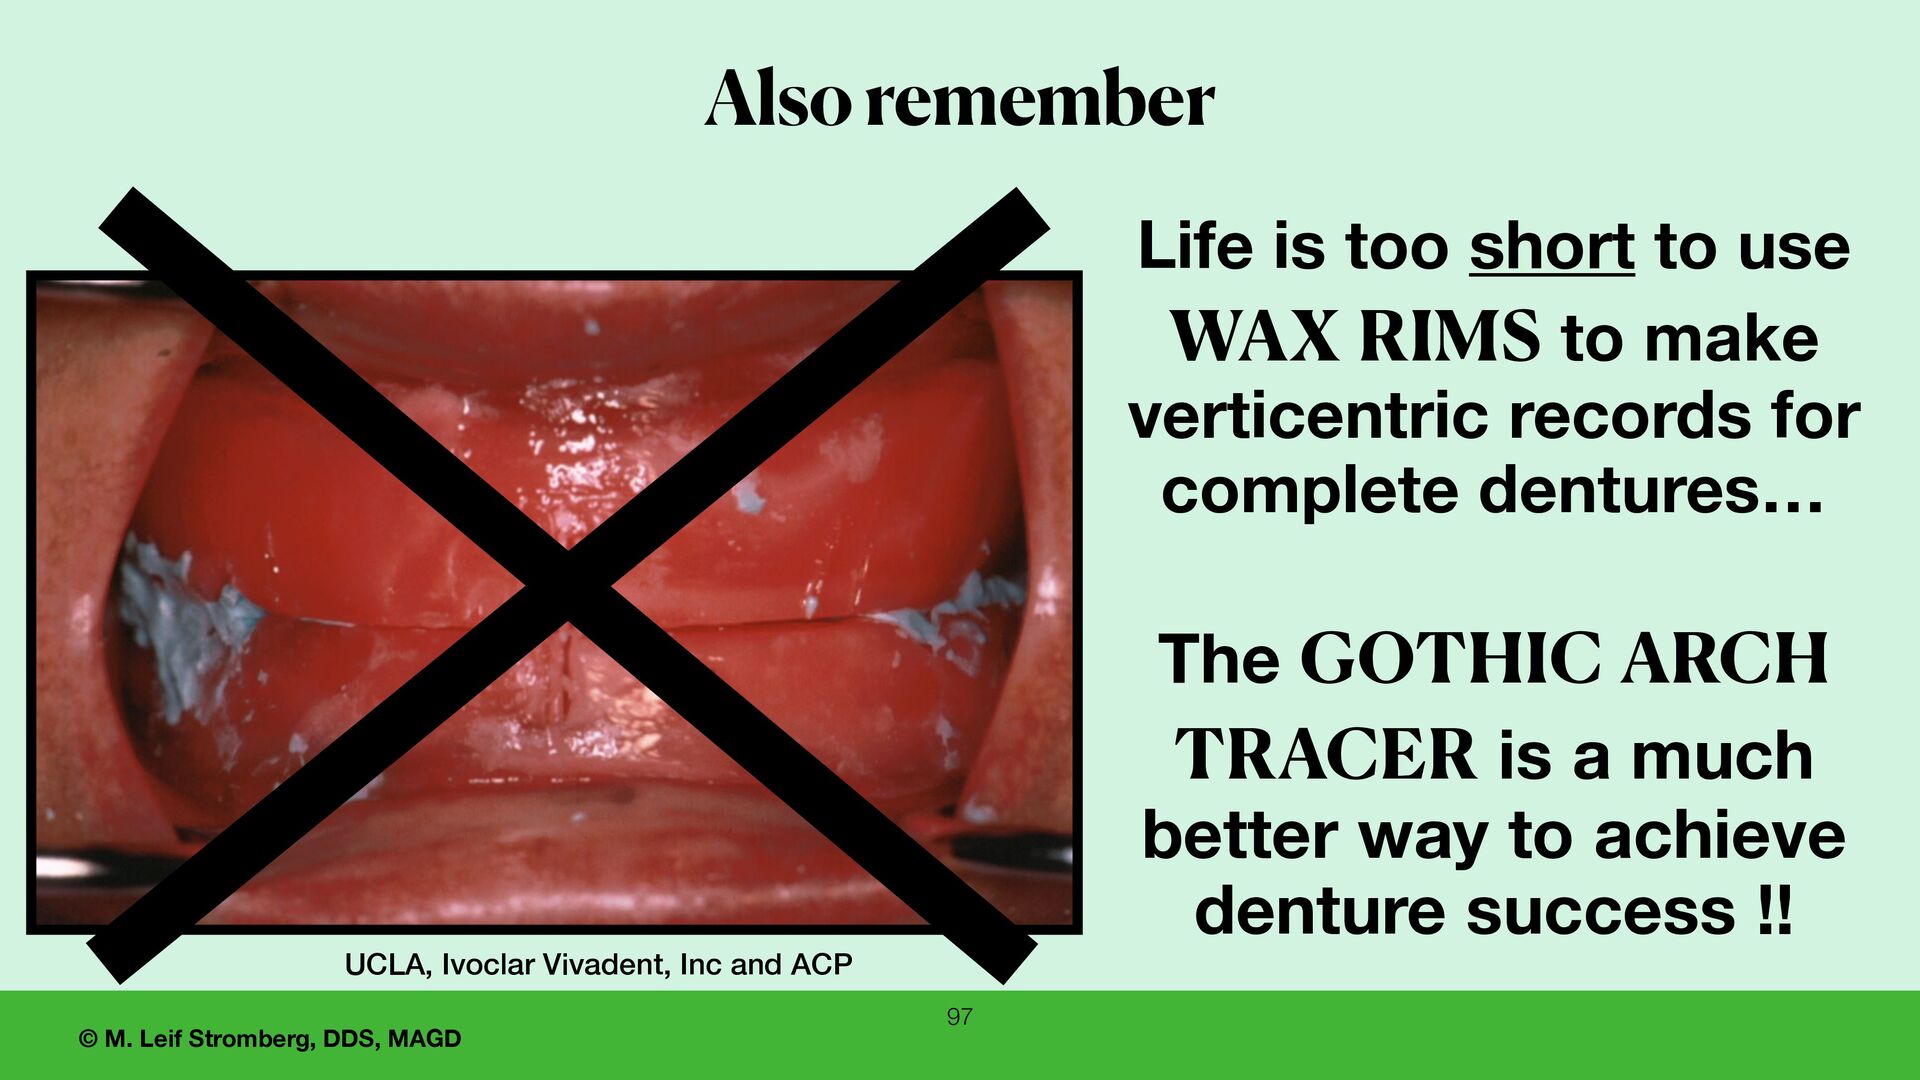
short to use WAX RIMS to make verticentric records for complete dentures… The GOTHIC ARCH TRACER is a much better way to achieve denture success !! Also remember UCLA, Ivoclar Vivadent, Inc and ACP
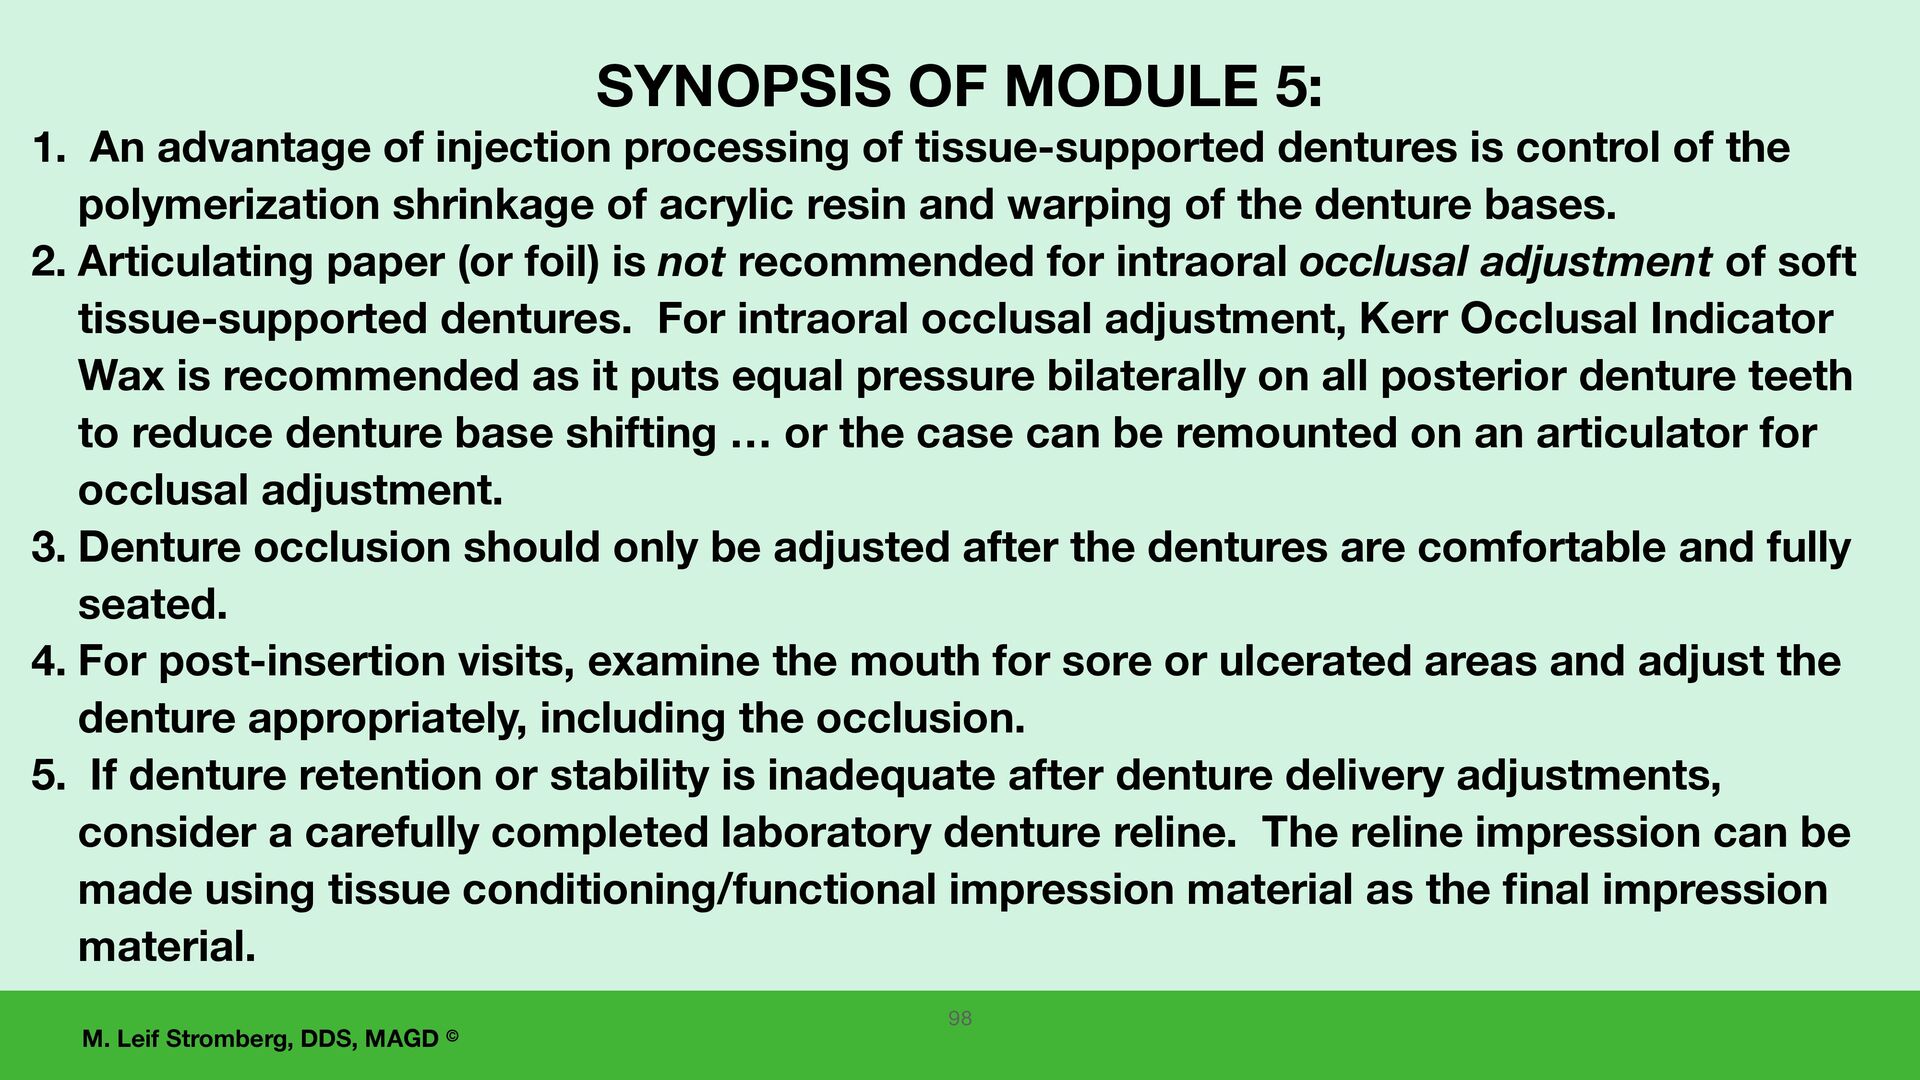
1. An advantage of injection processing of tissue-supported dentures is control of the polymerization shrinkage of acrylic resin and warping of the denture bases. 2. Articulating paper (or foil) is not recommended for intraoral occlusal adjustment of soft tissue-supported dentures. For intraoral occlusal adjustment, Kerr Occlusal Indicator Wax is recommended as it puts equal pressure bilaterally on all posterior denture teeth to reduce denture base shifting … or the case can be remounted on an articulator for occlusal adjustment. 3. Denture occlusion should only be adjusted after the dentures are comfortable and fully seated. 4. For post-insertion visits, examine the mouth for sore or ulcerated areas and adjust the denture appropriately, including the occlusion. 5. If denture retention or stability is inadequate after denture delivery adjustments, consider a carefully completed laboratory denture reline. The reline impression can be made using tissue conditioning/functional impression material as the fi nal impression material. 98
the KEYS for predictability and success with tissue-supported edentulous restorations Treat a healthy stomatognathic system Understand the patient’s desires and expectations Does the patient have the ability and desire to adapt to wearing new tissue-supported complete dentures? Positive relationship and communication of dentist and dental laboratory technician and competent work by each Posterior extension of the maxillary complete denture at vibrating line and hamular notches Peripheral extension of maxillary complete denture to muscle function Lower complete denture to rest on retromolar pads Good, accurate fi nal impressions Record verticentric accurately (vertical dimension of occlusion and centric relation) Accurate mounting of master casts on the articulator Mounting the case, setting the teeth, evaluating the case at the wax tryin appointment(s), and all adjustments made on the same articulator Determine adequate vertical dimension of occlusion Wax tryin - careful dentist evaluation and approval Wax tryin - patient acceptance When delivering complete dentures, use a white silicone paste to adjust for even contact of the denture base to all supporting tissues. Centric relation occlusion with bilateral and simultaneous contact of all posterior teeth Adjust denture occlusion intraorally with Kerr Occlusal Indicator Wax. Lingualized occlusion. Lingual control lines. Controlling polymerization shrinkage of acrylic resin.
• Accudent XD System - 2 alginates, tray adhesive, syringe, vial, 2 fl exibowls, and two spatulas • Impression trays and have a technique to record the retromolar pads in the lower impression and on the lower master cast. • Dr. Thompson’s Color Transfer Applicators • Supplies for preliminary verticentric record - Fast setting putty and bite registration tray • Alameter, papillameter, Alma Gauge, Swissedent wax rim former • Chairside bunsen burner, fl at wax paddle • Gothic arch tracer kit • Use the same articulator for all steps - mounting case, wax set up, have articulator at wax tryin appointment, and occlusal adjustments. • White silicone paste • Hot water bath • Kerr Occlusal Indicator Wax • Acrylic burs • Six-inch ruler to verify positions of lower posterior denture teeth relative to the lingual control lines. Suggested contacts for denture supplies: • Blue Dolphin Dental Products- bdpdental.com • LeeMarkDental.com • DrBdentalsolutions.com
say this before we go into the question-and-answer time… I hope you • enjoy your journey of learning and implementing KEYS to Complete Denture Success and • look forward to edentulous patients seeking your help.