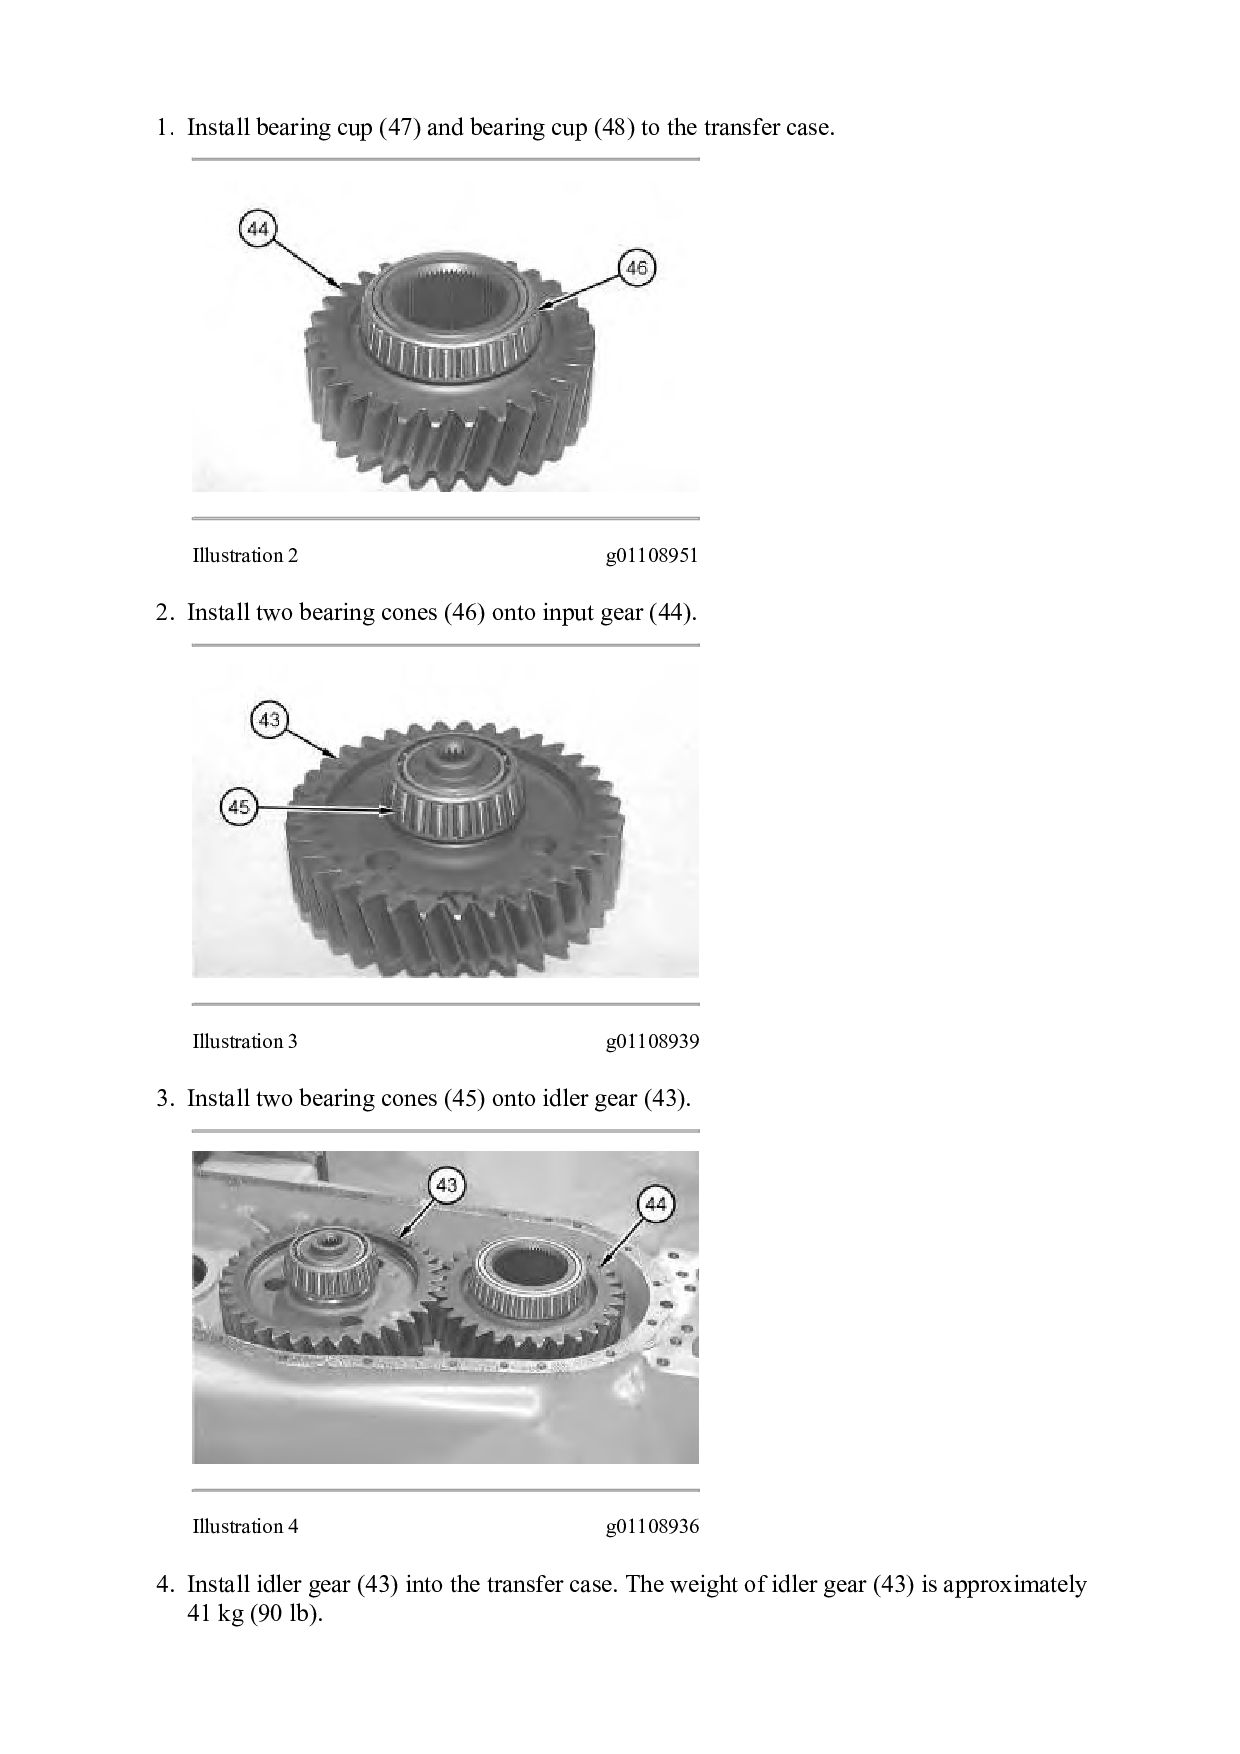
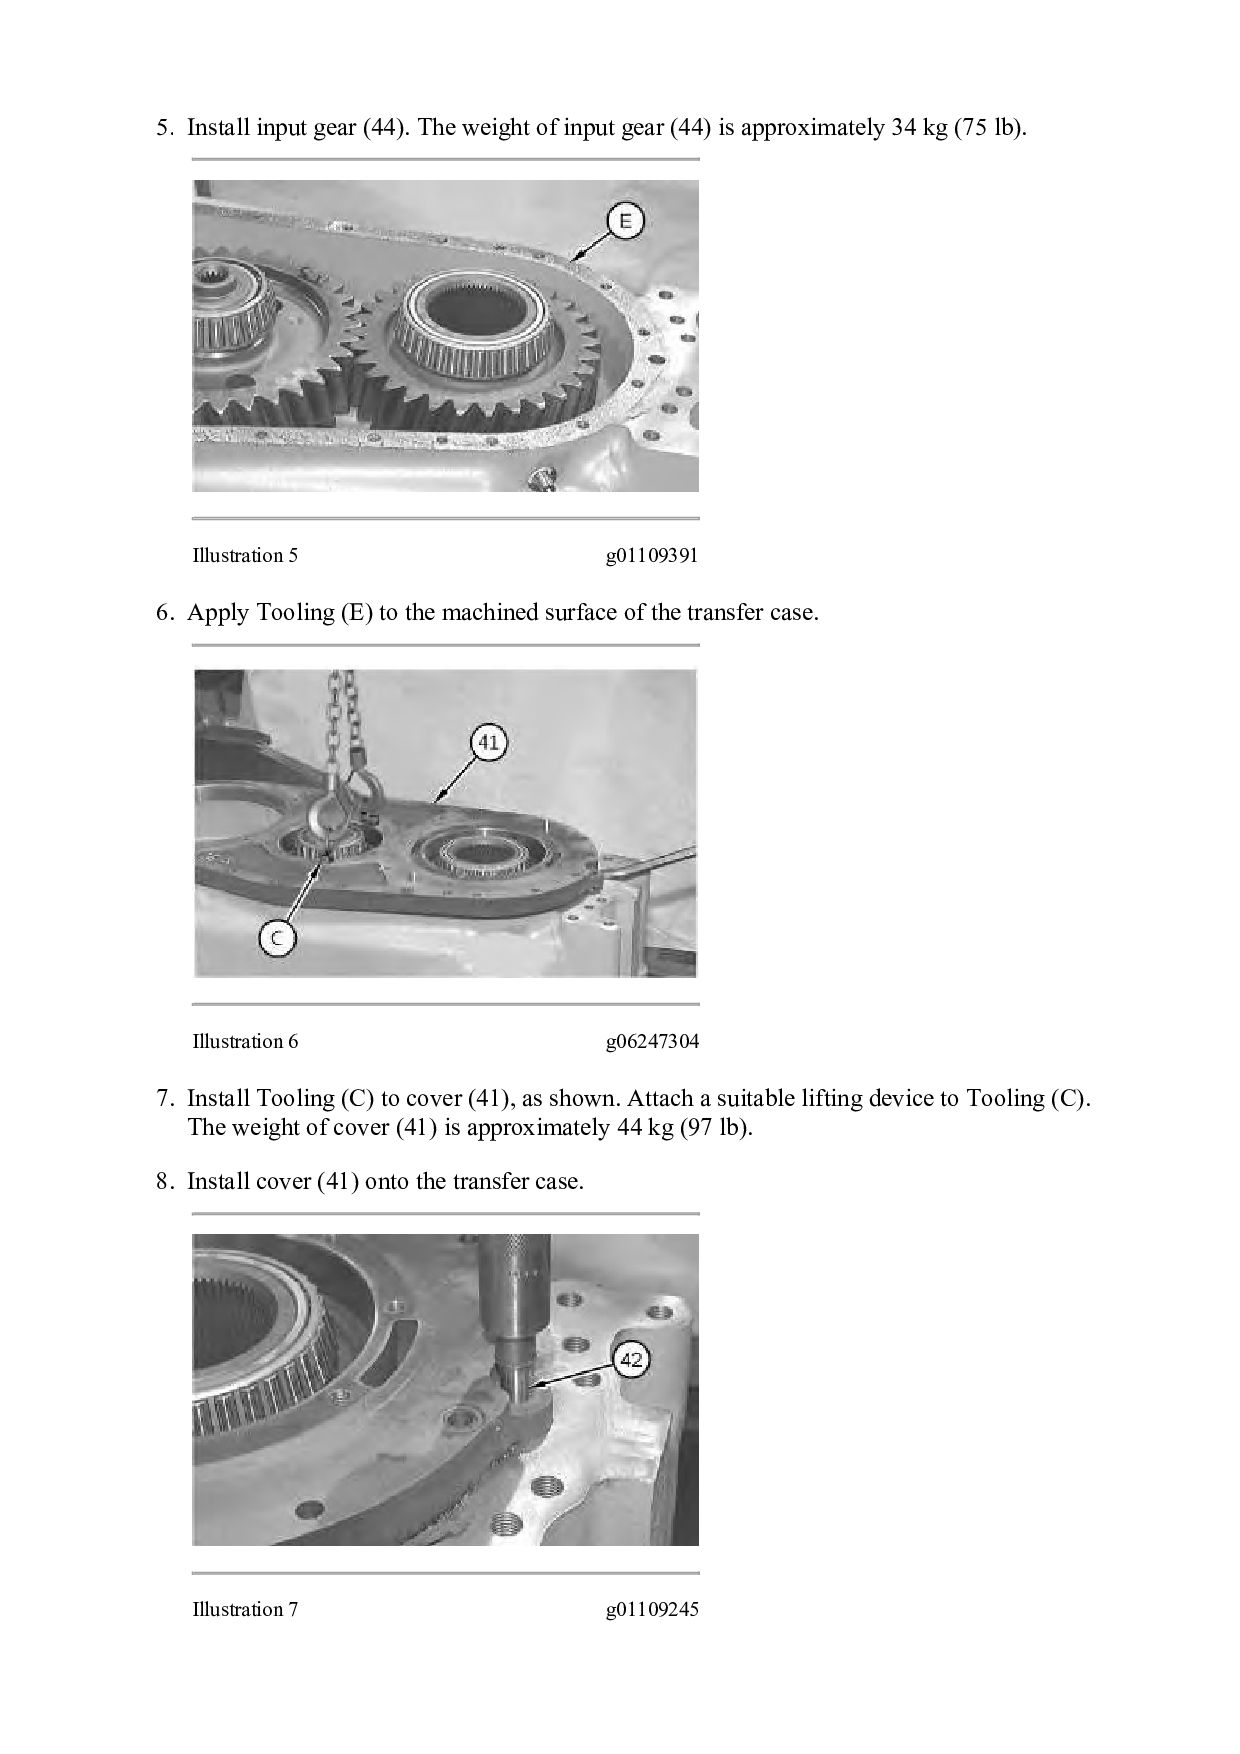
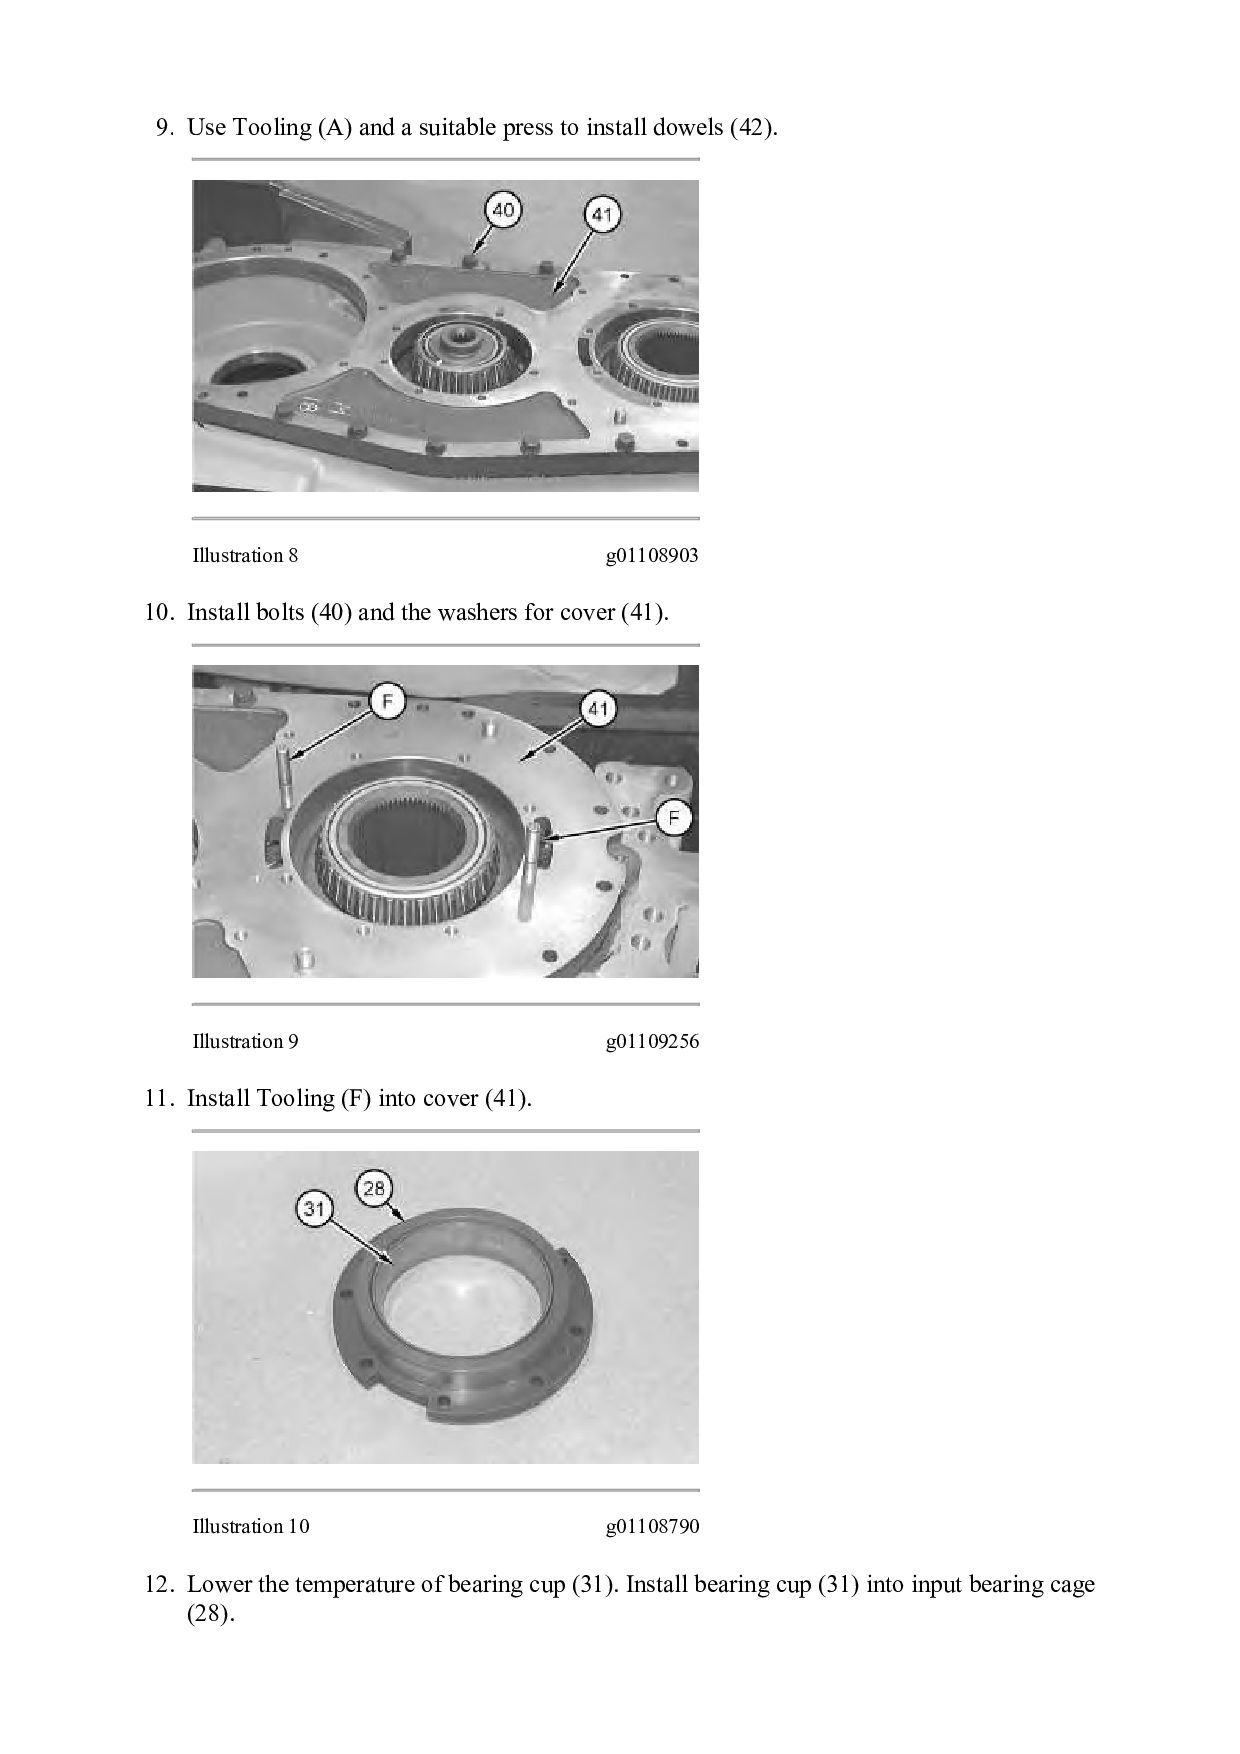
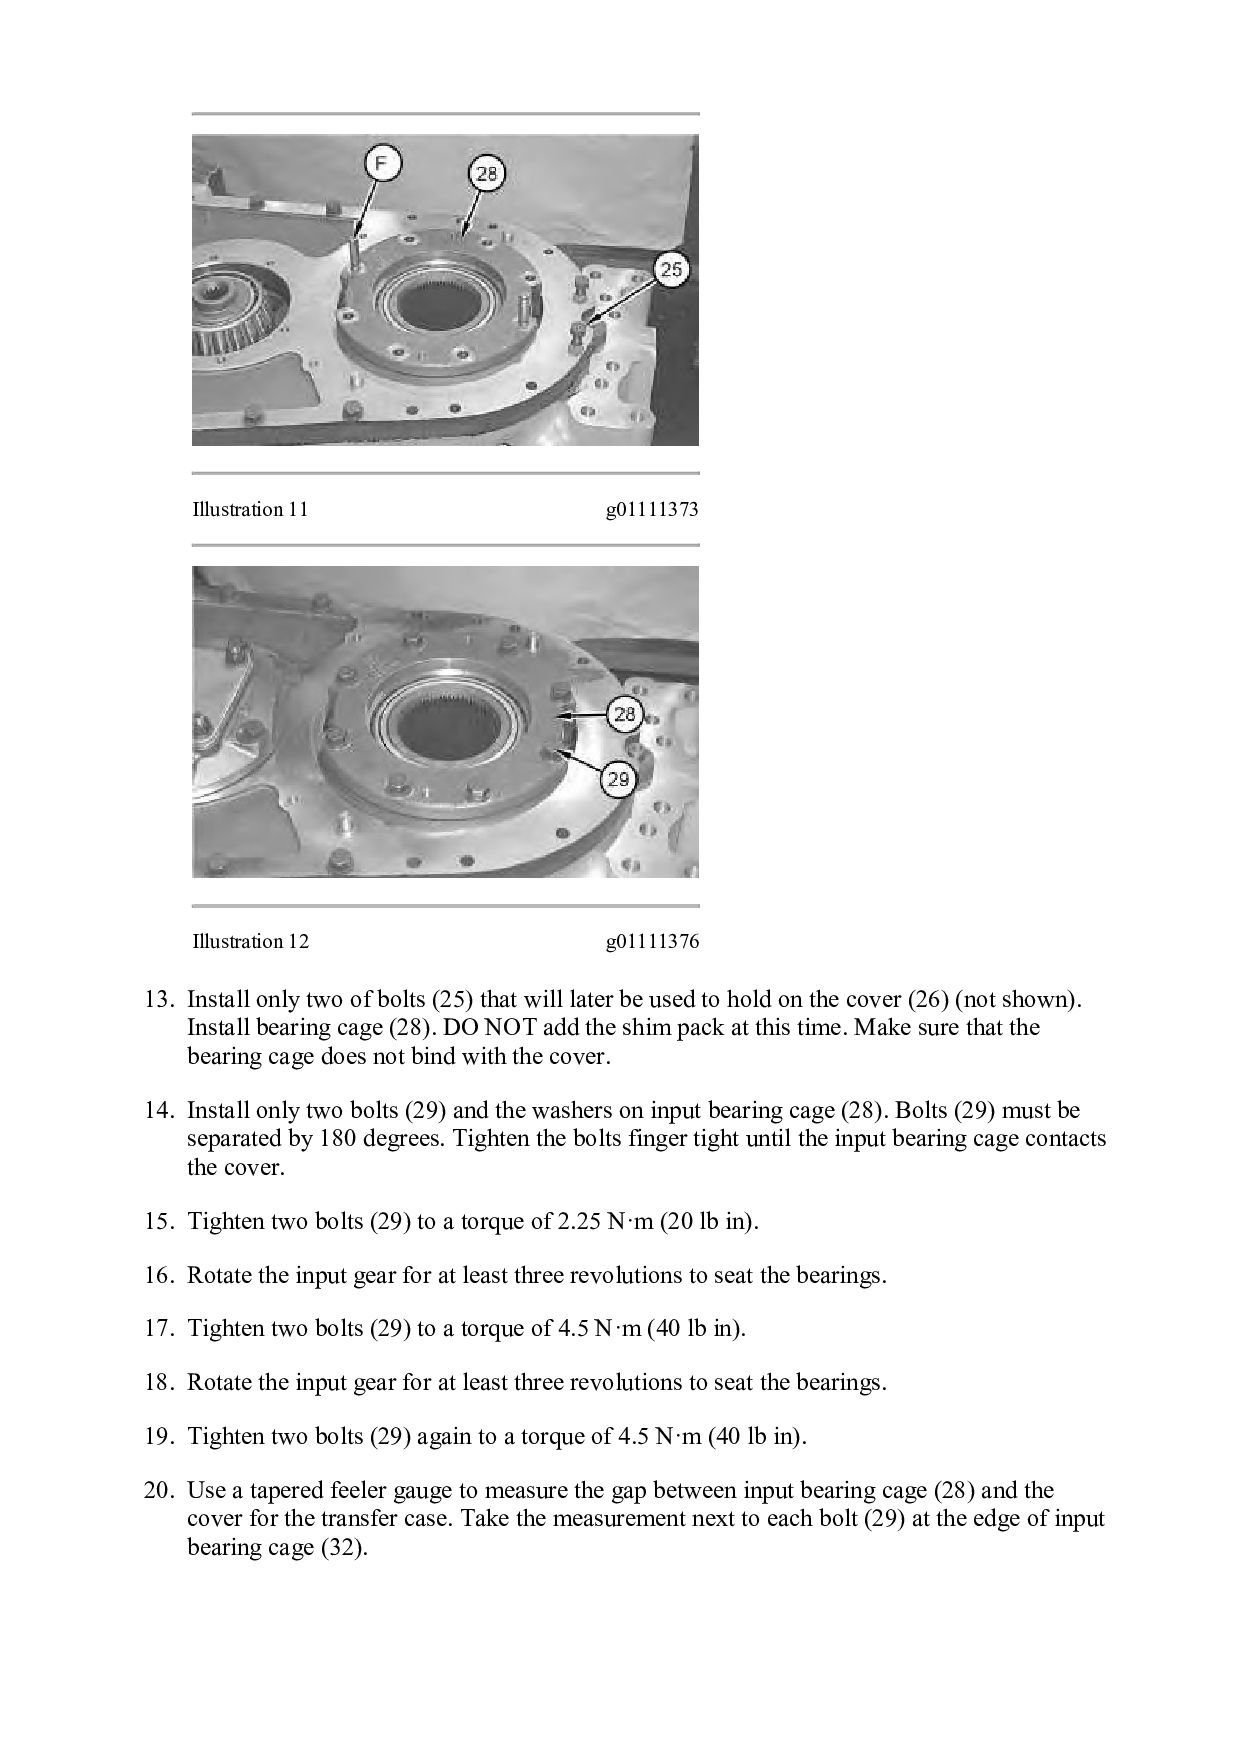
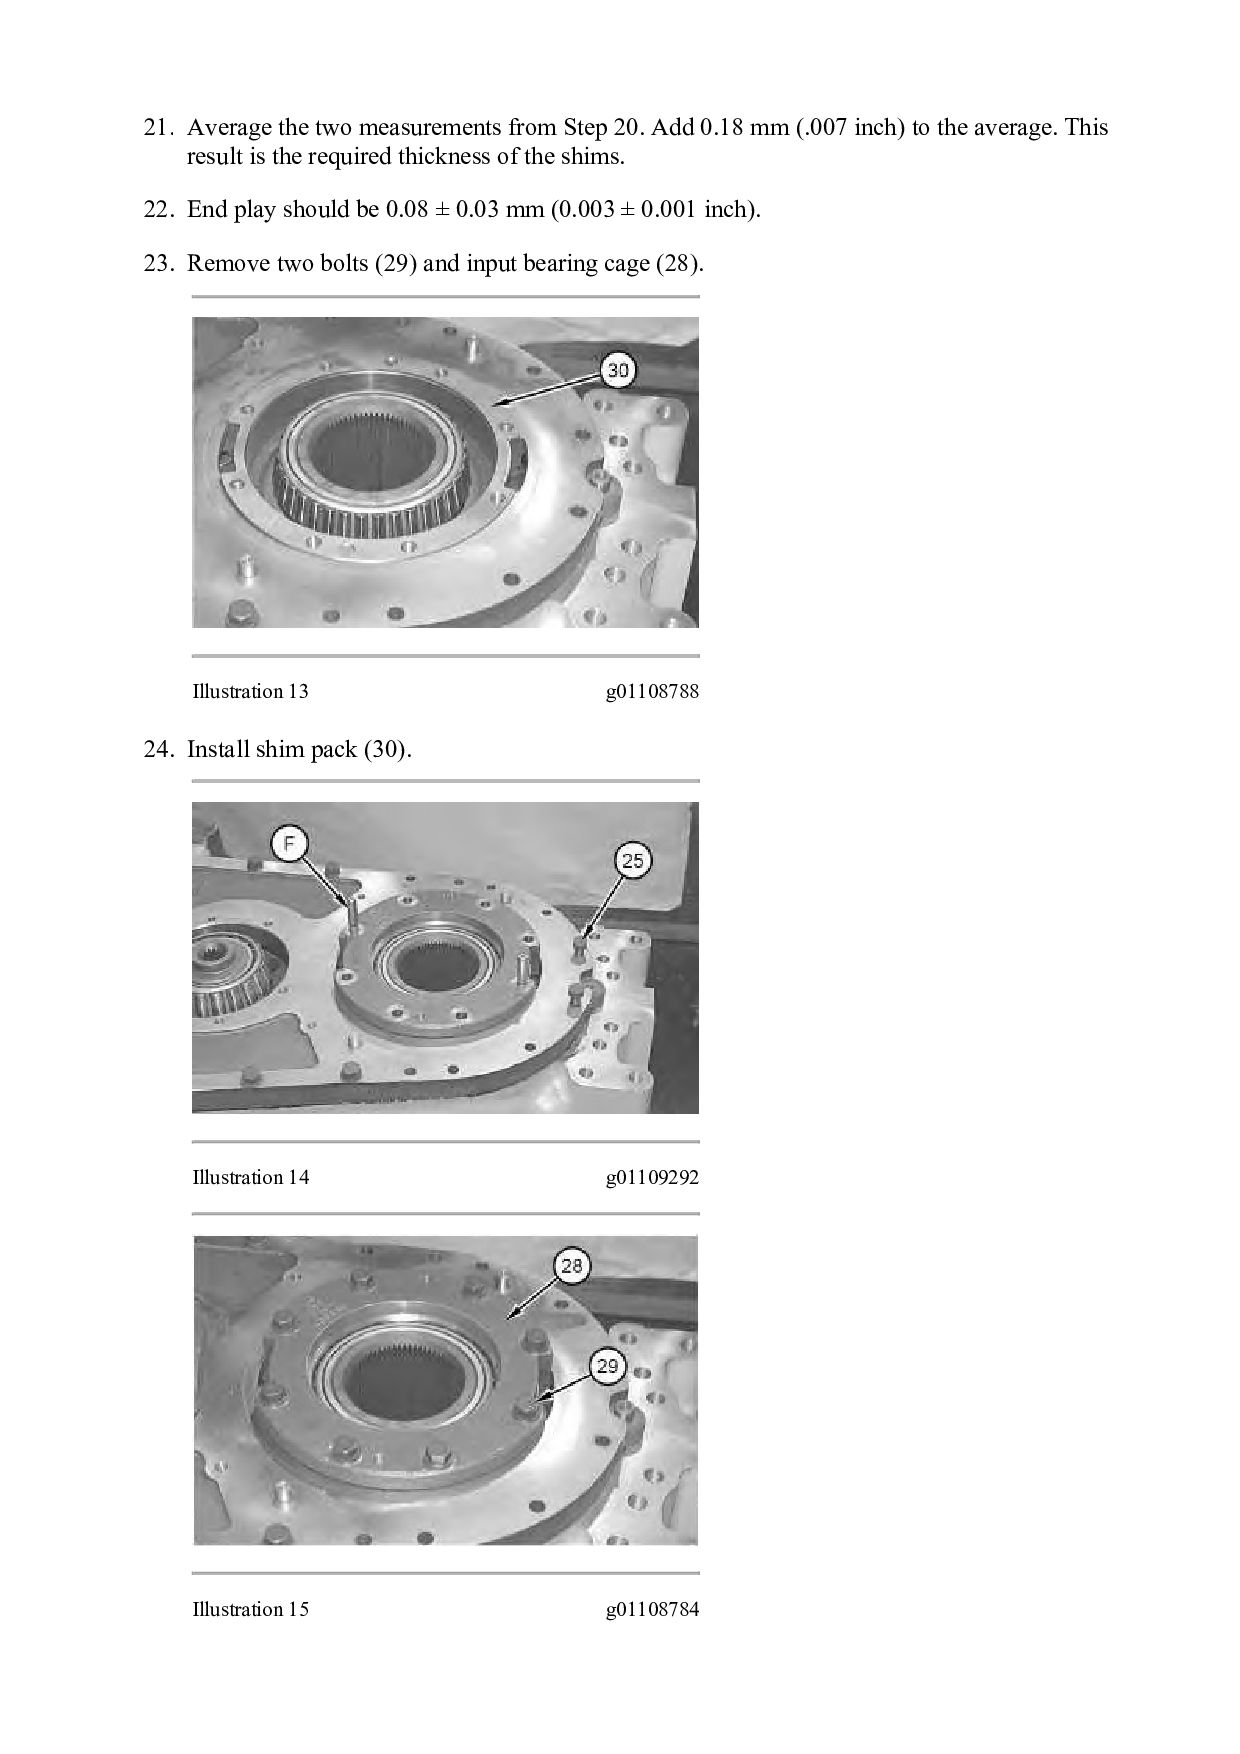
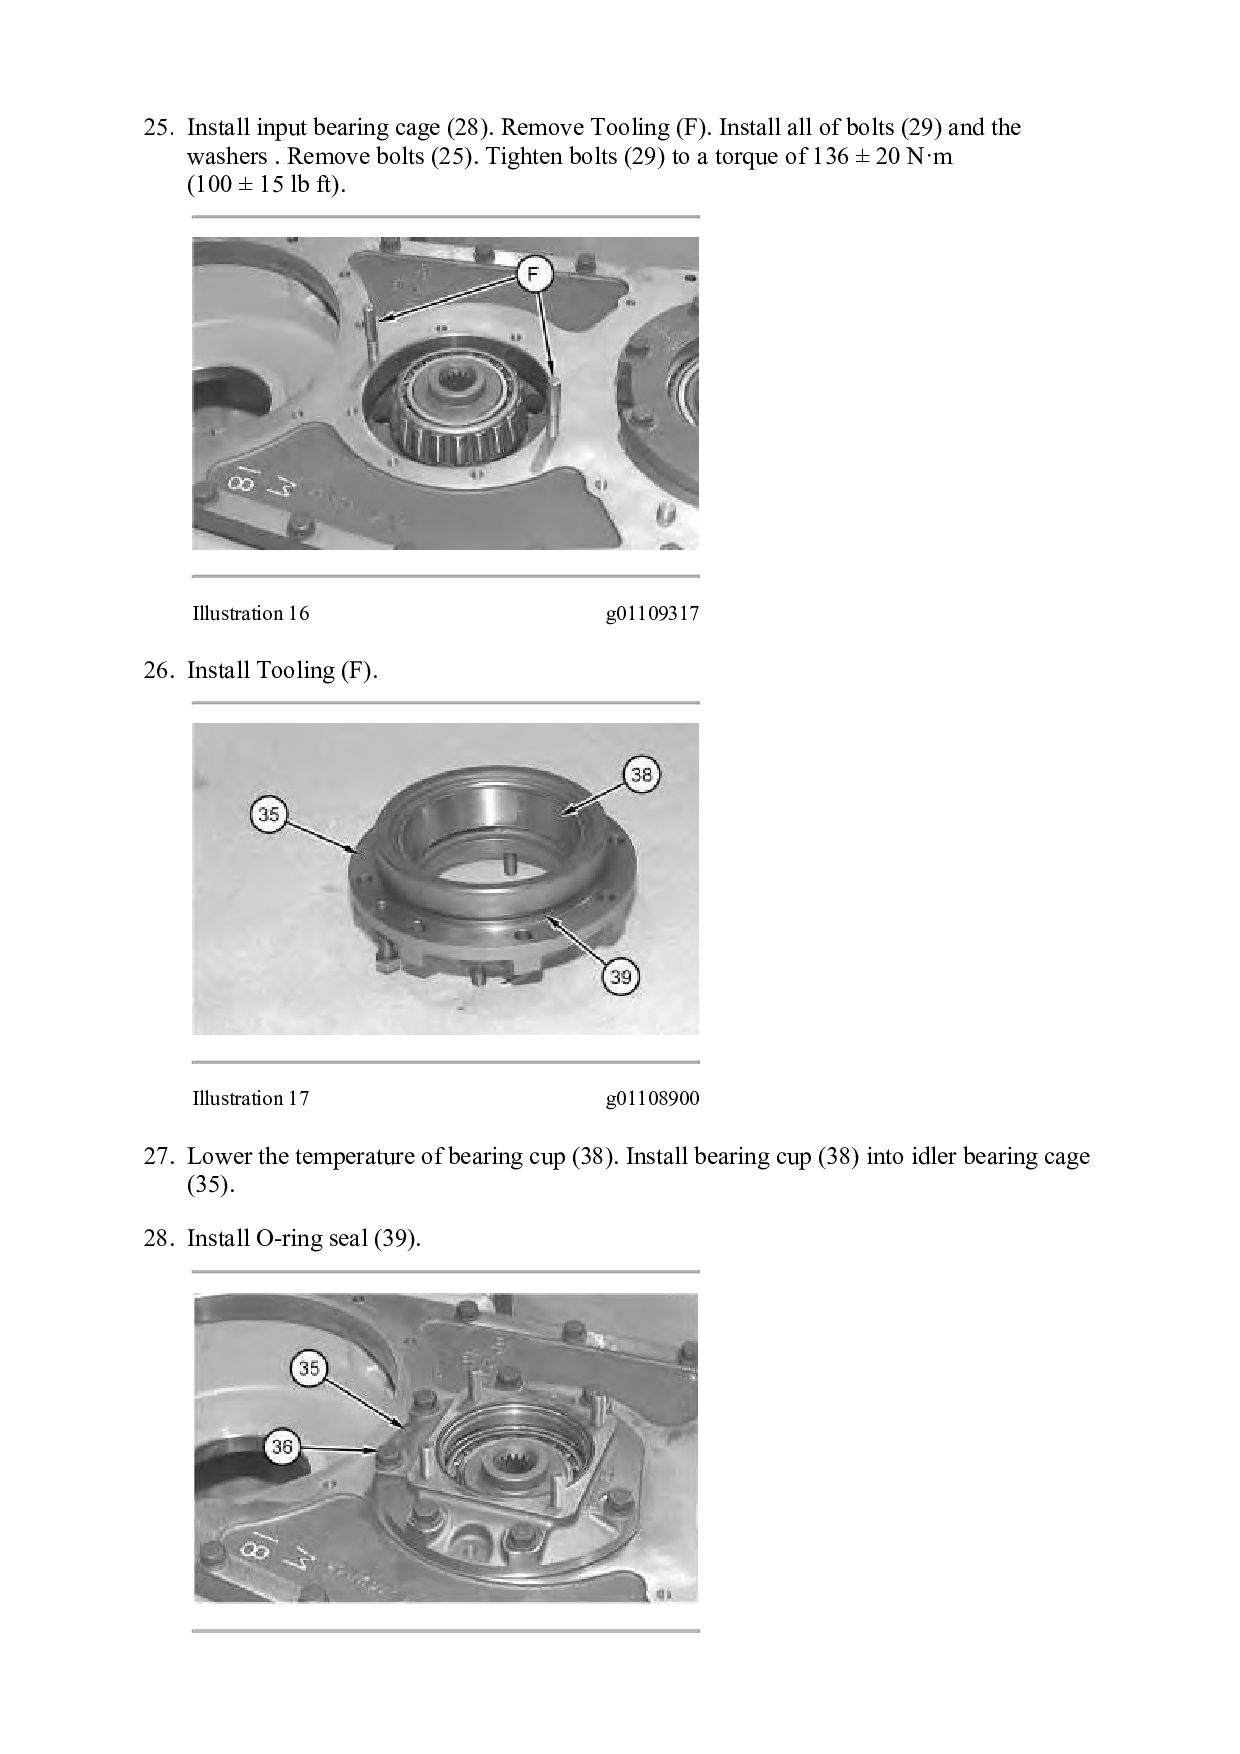
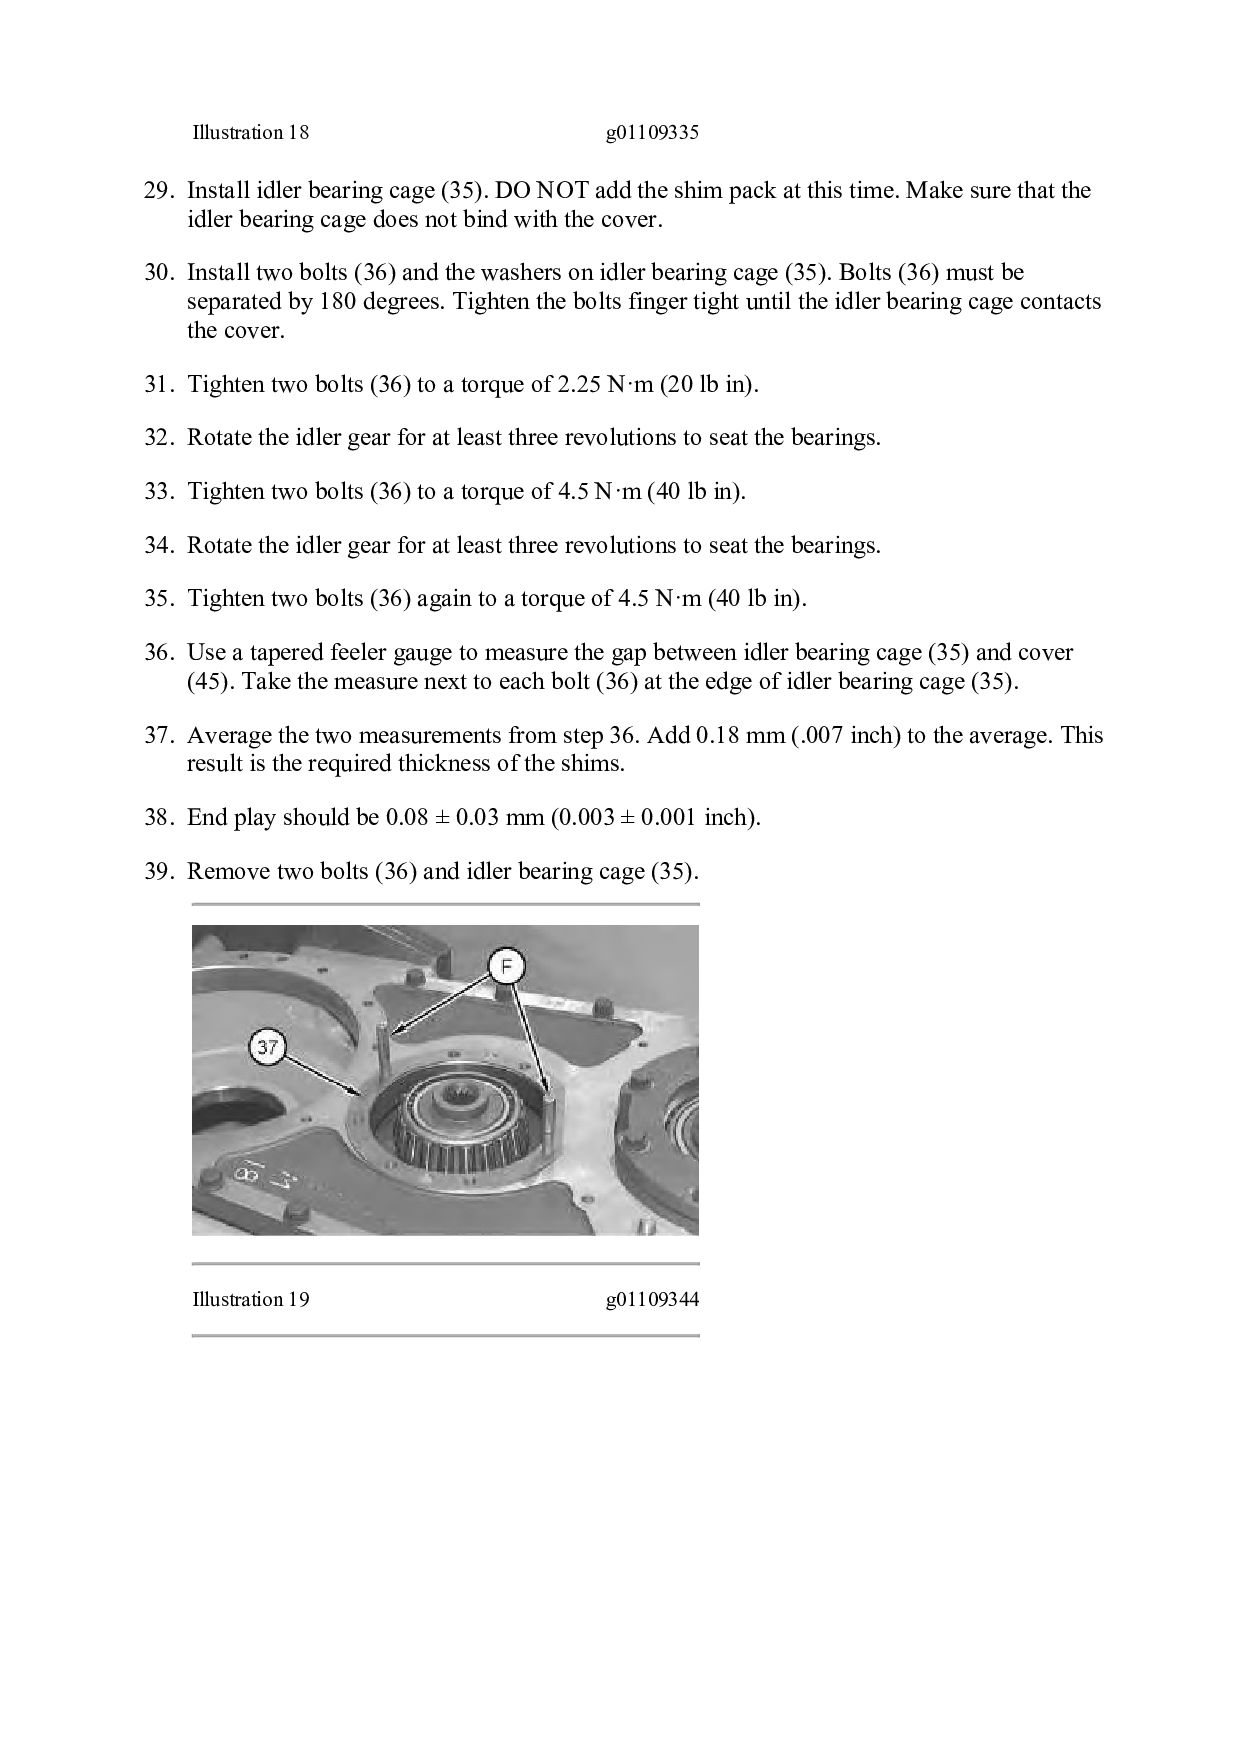
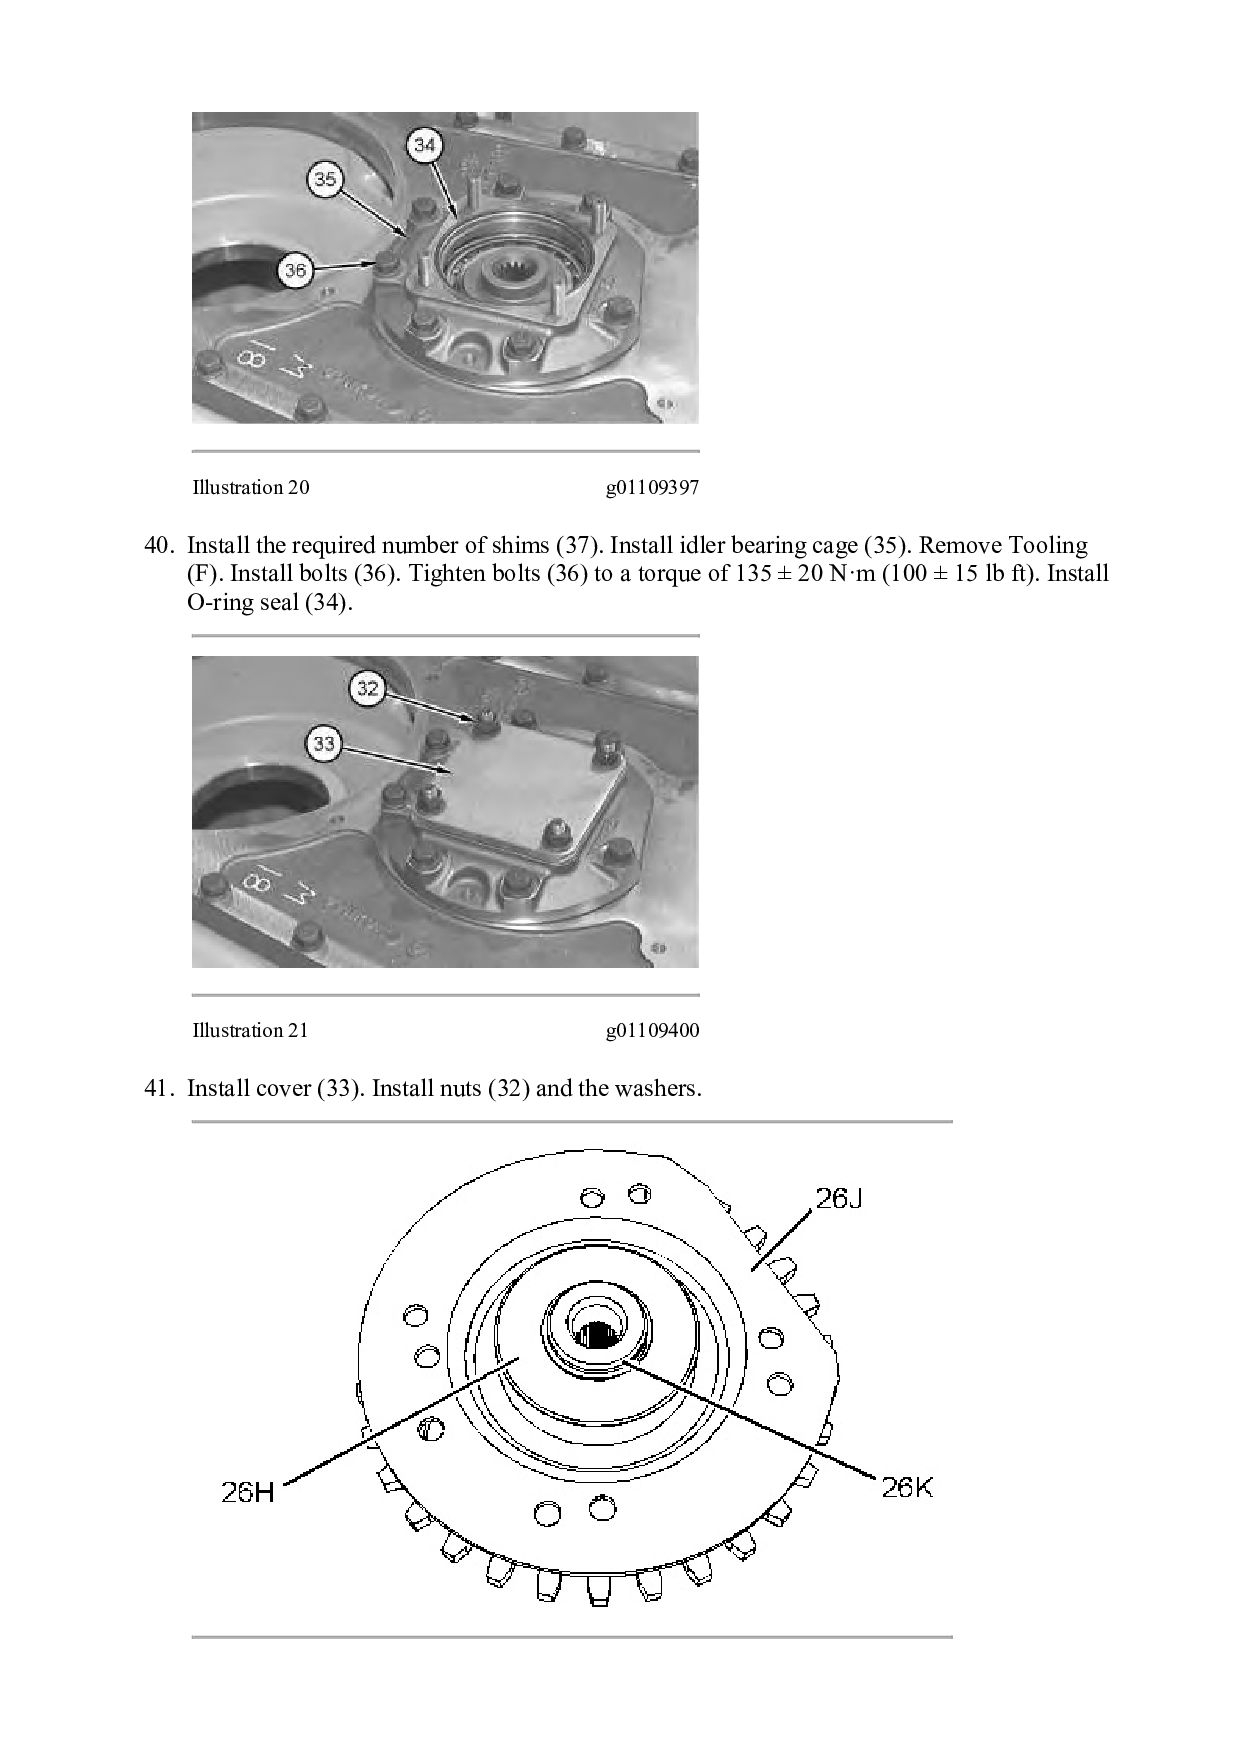
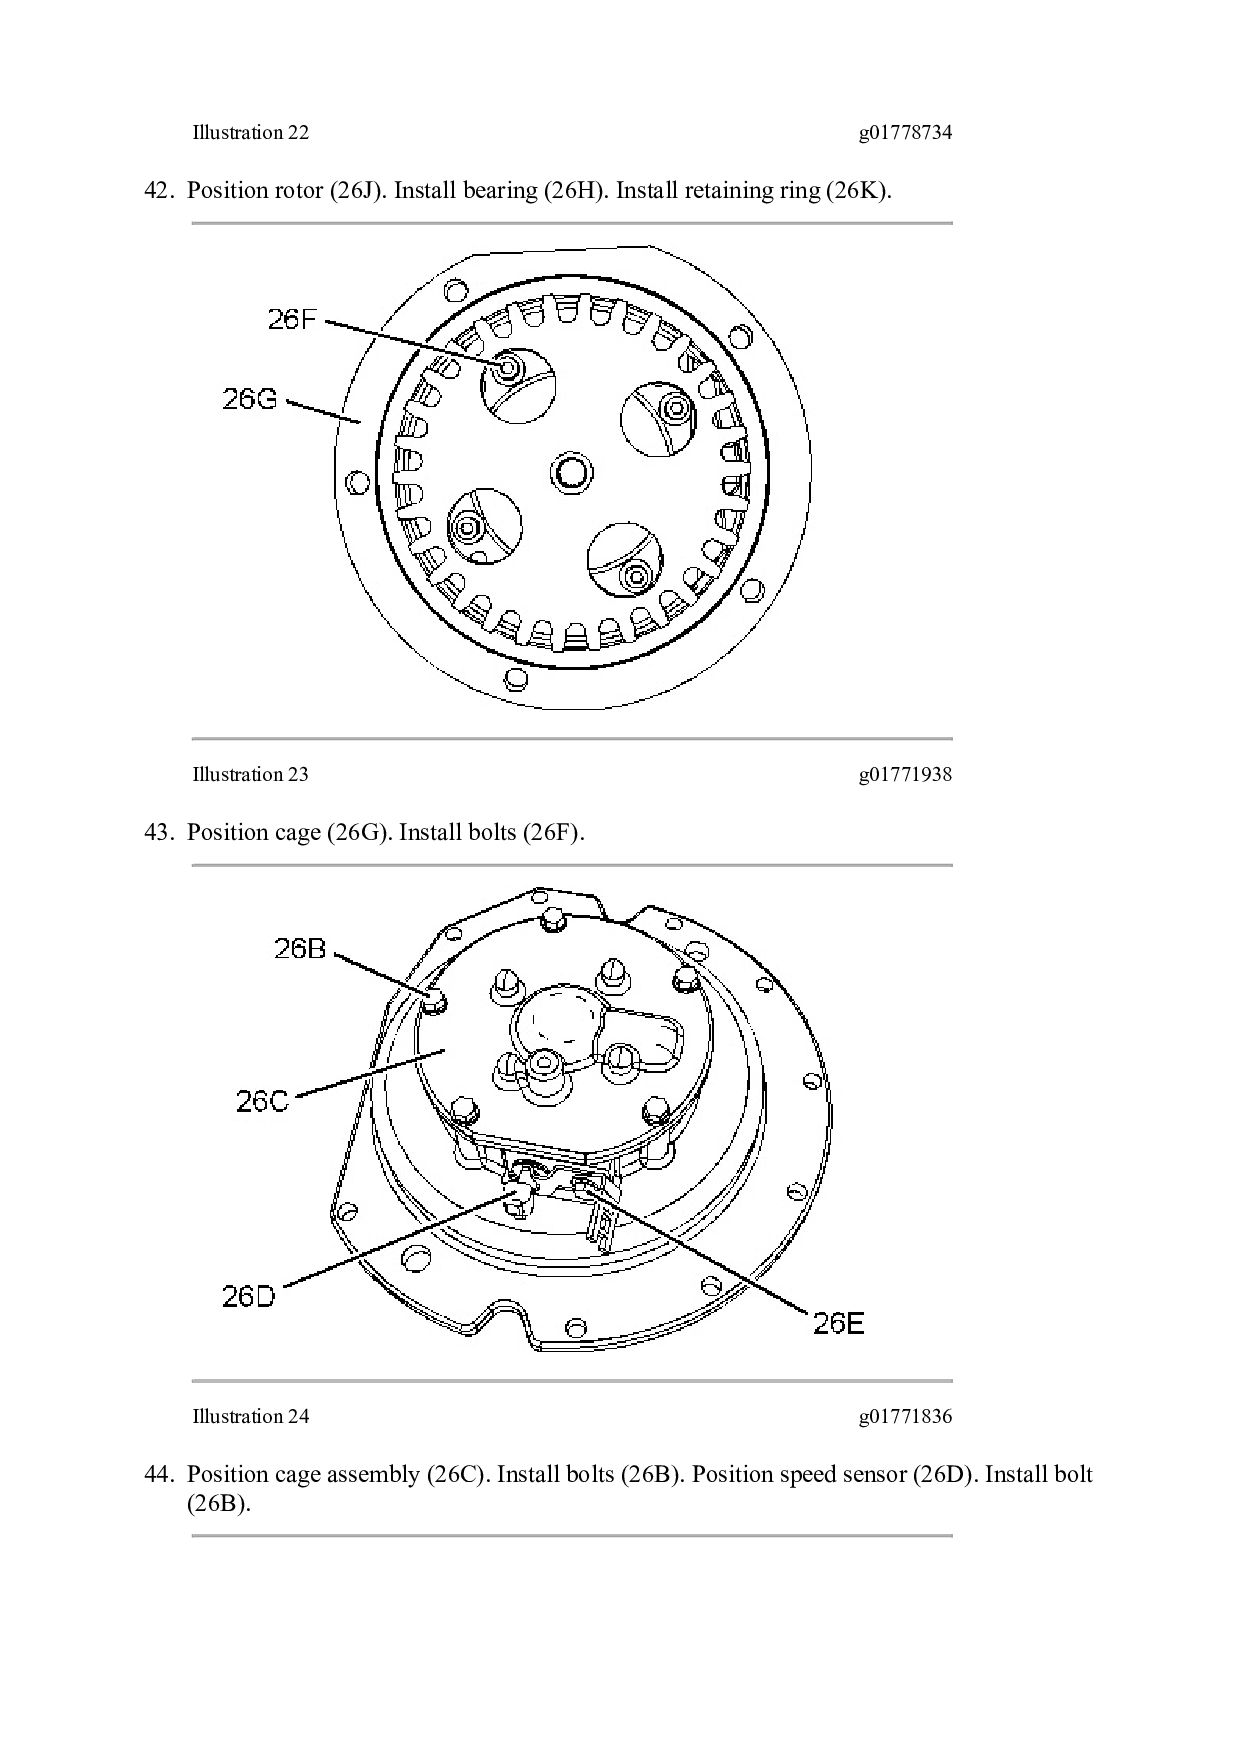
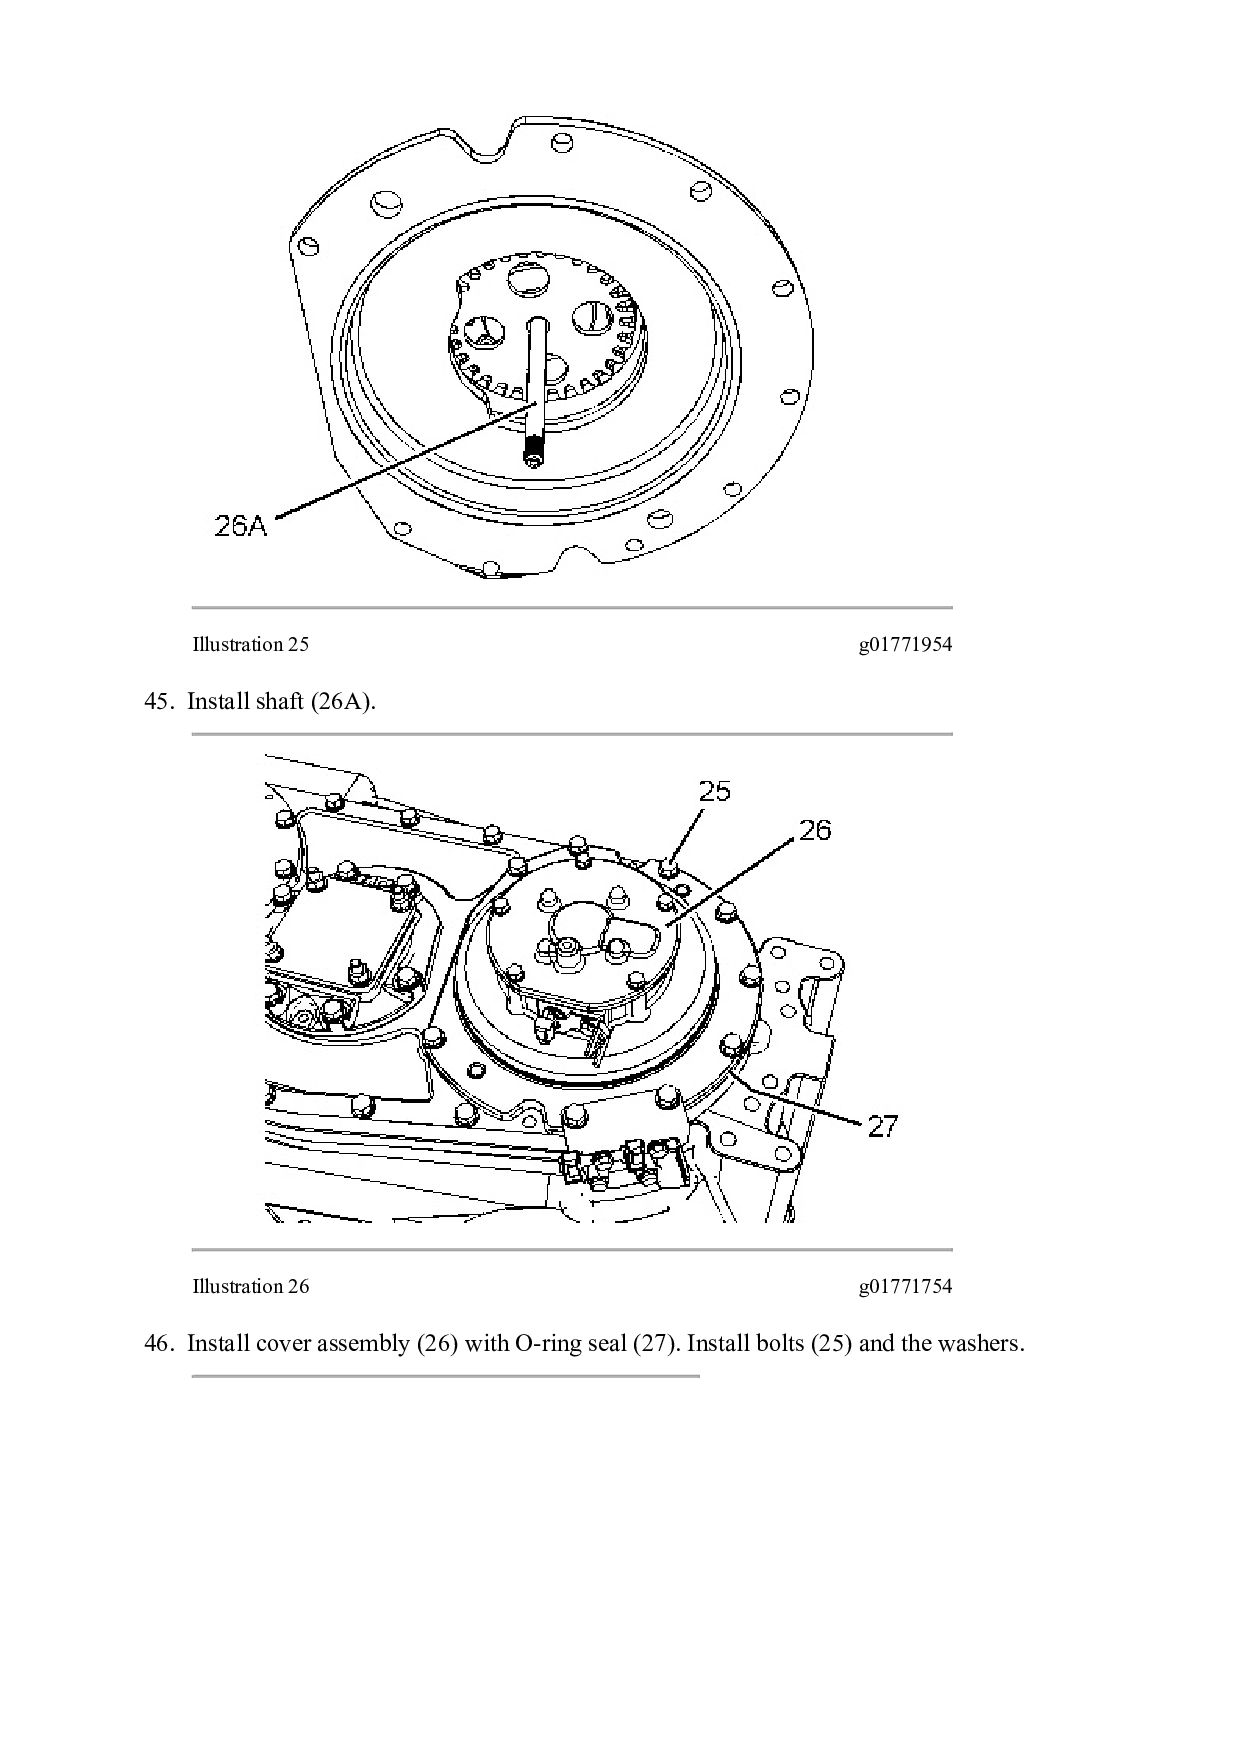
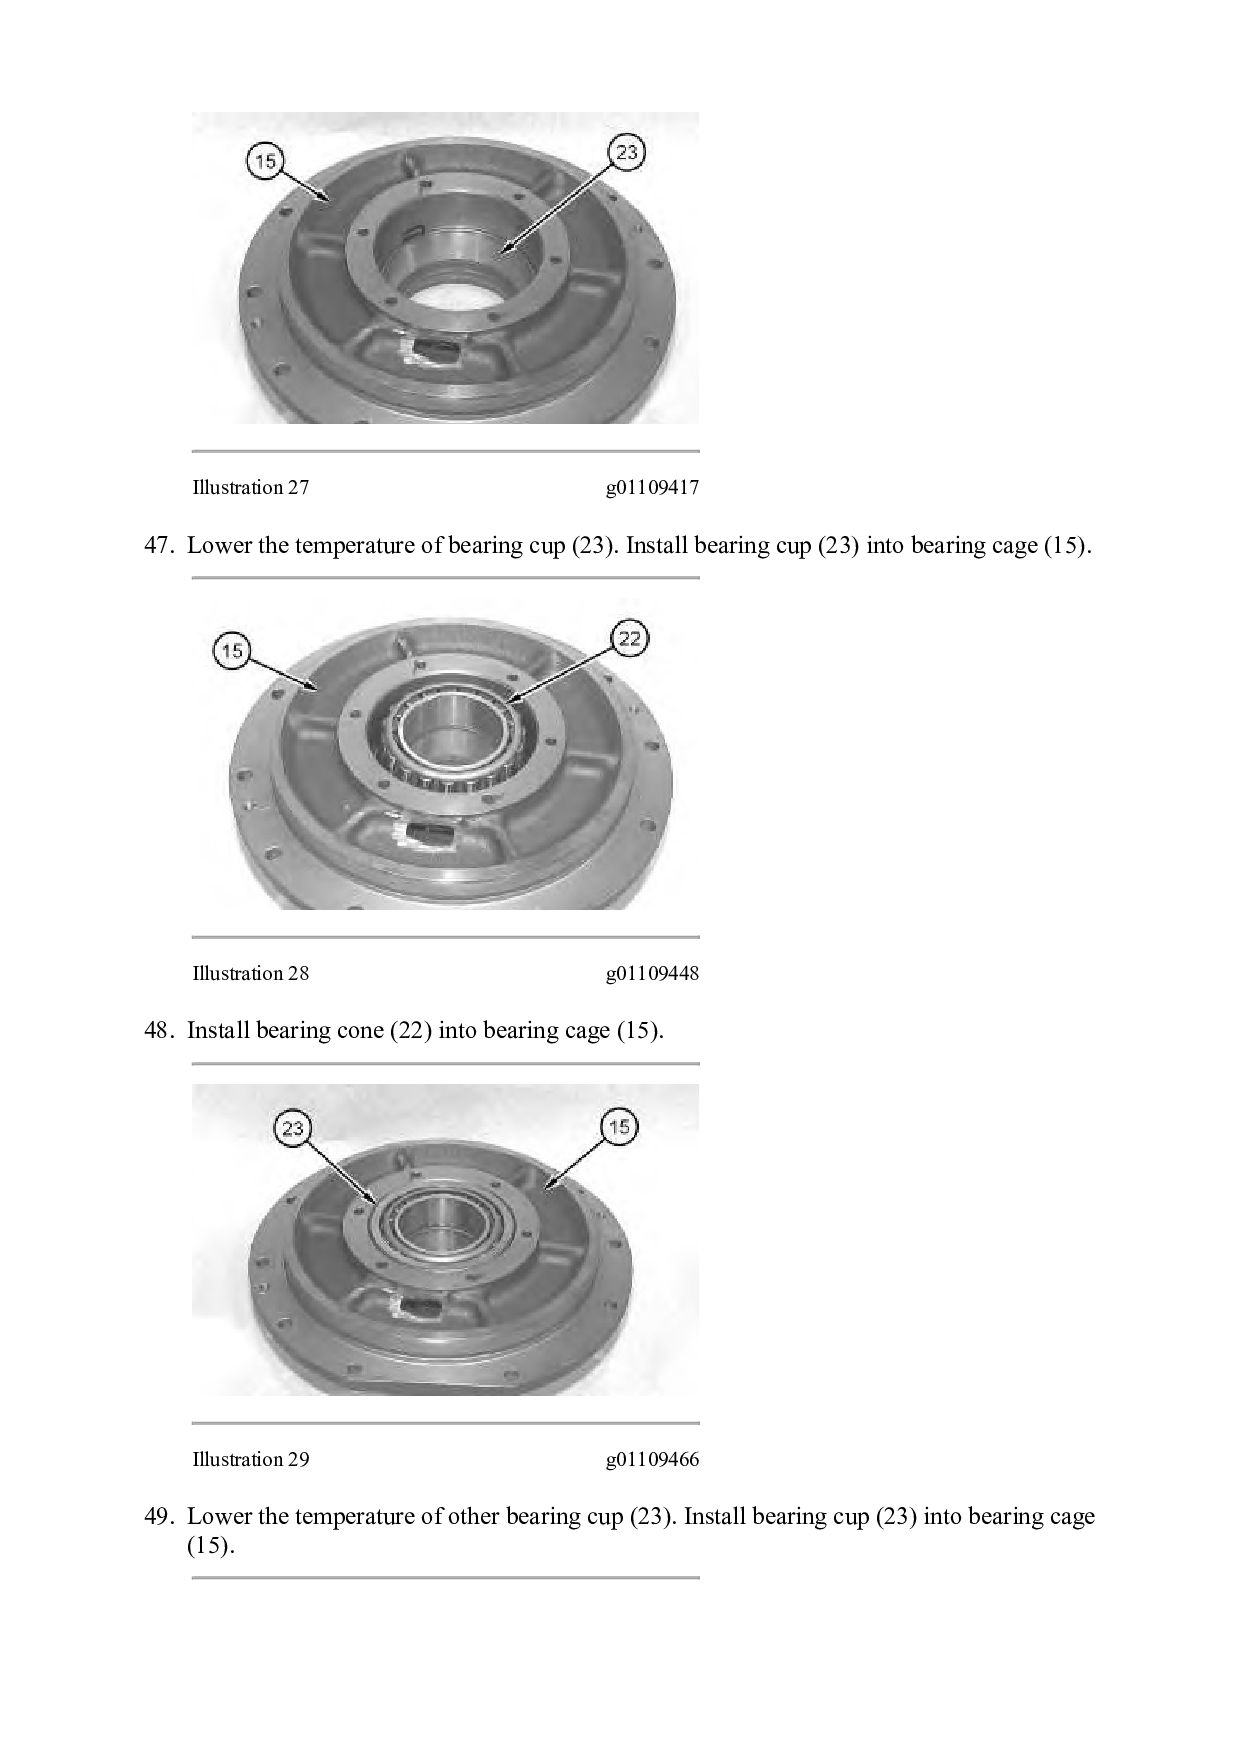
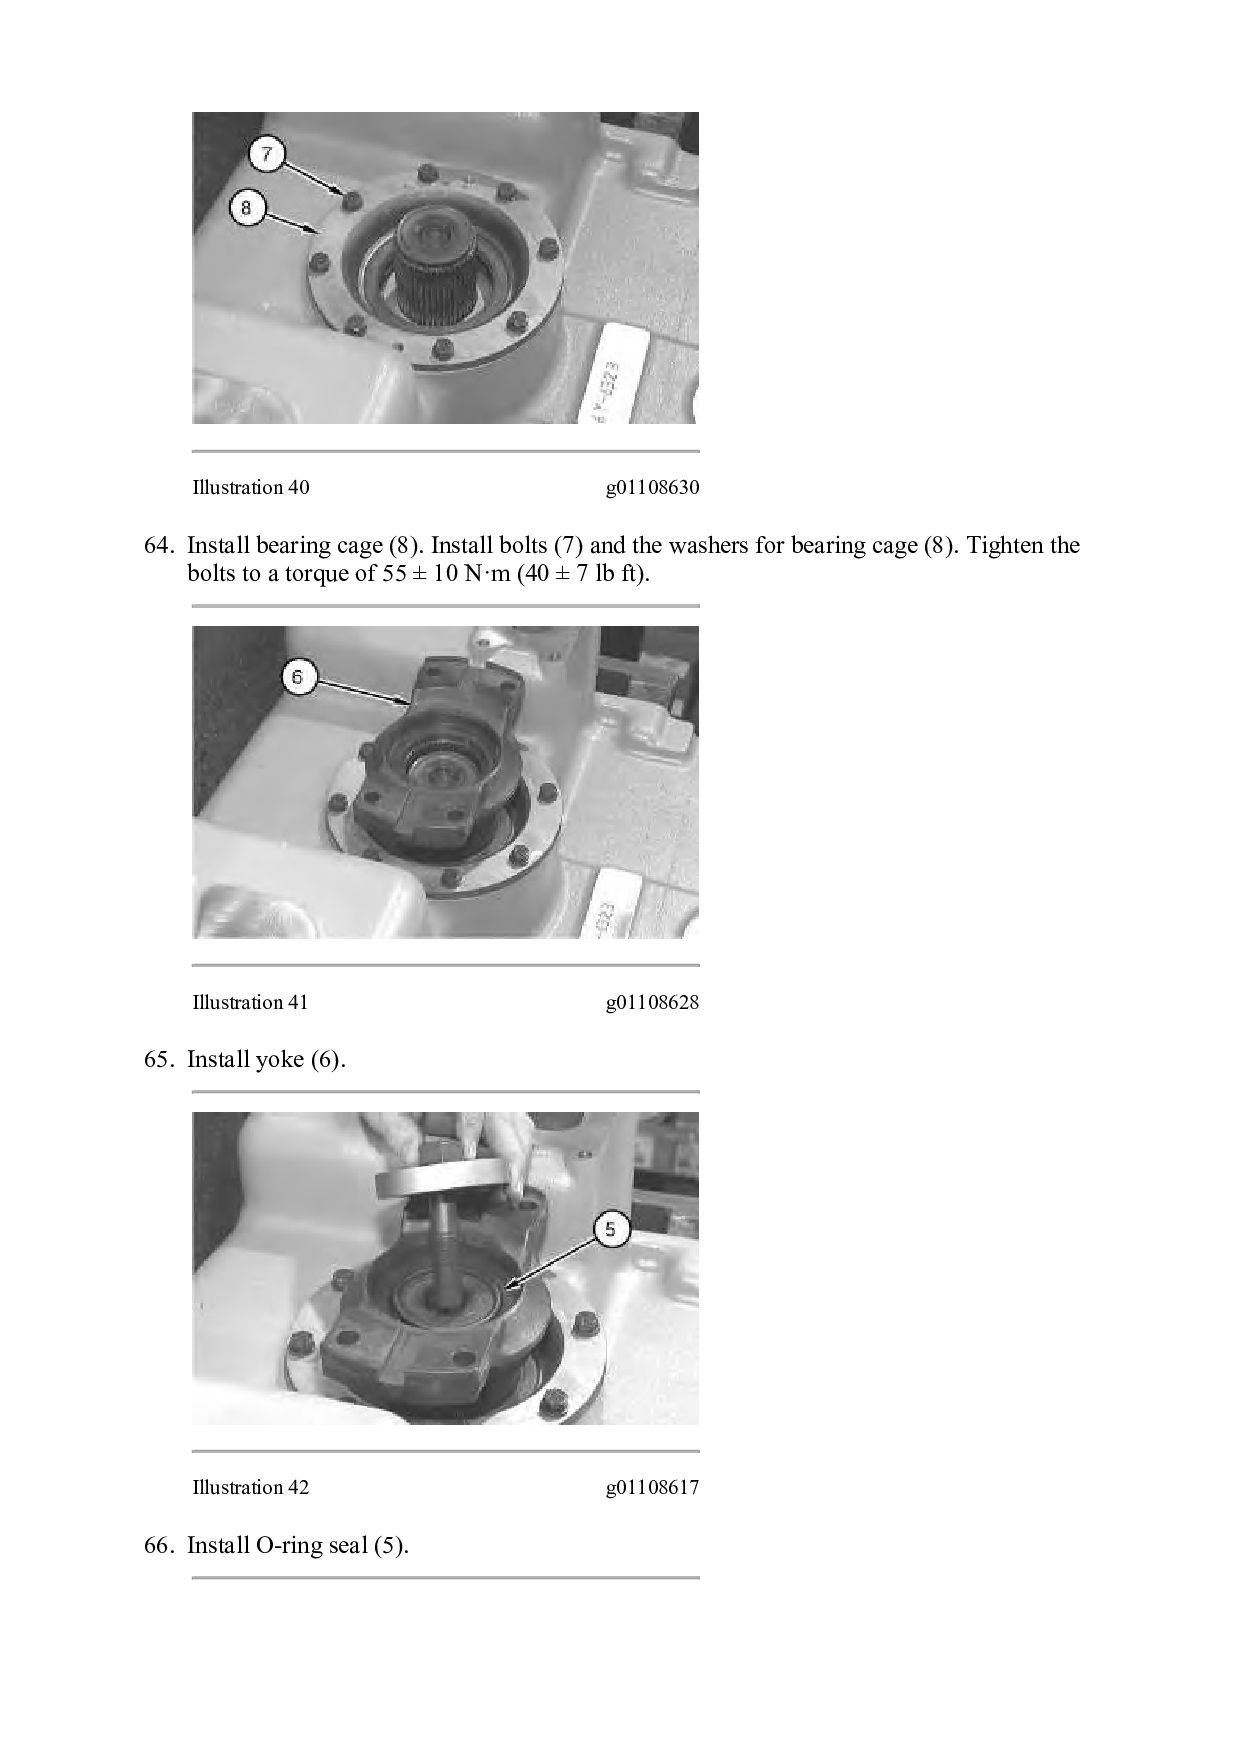
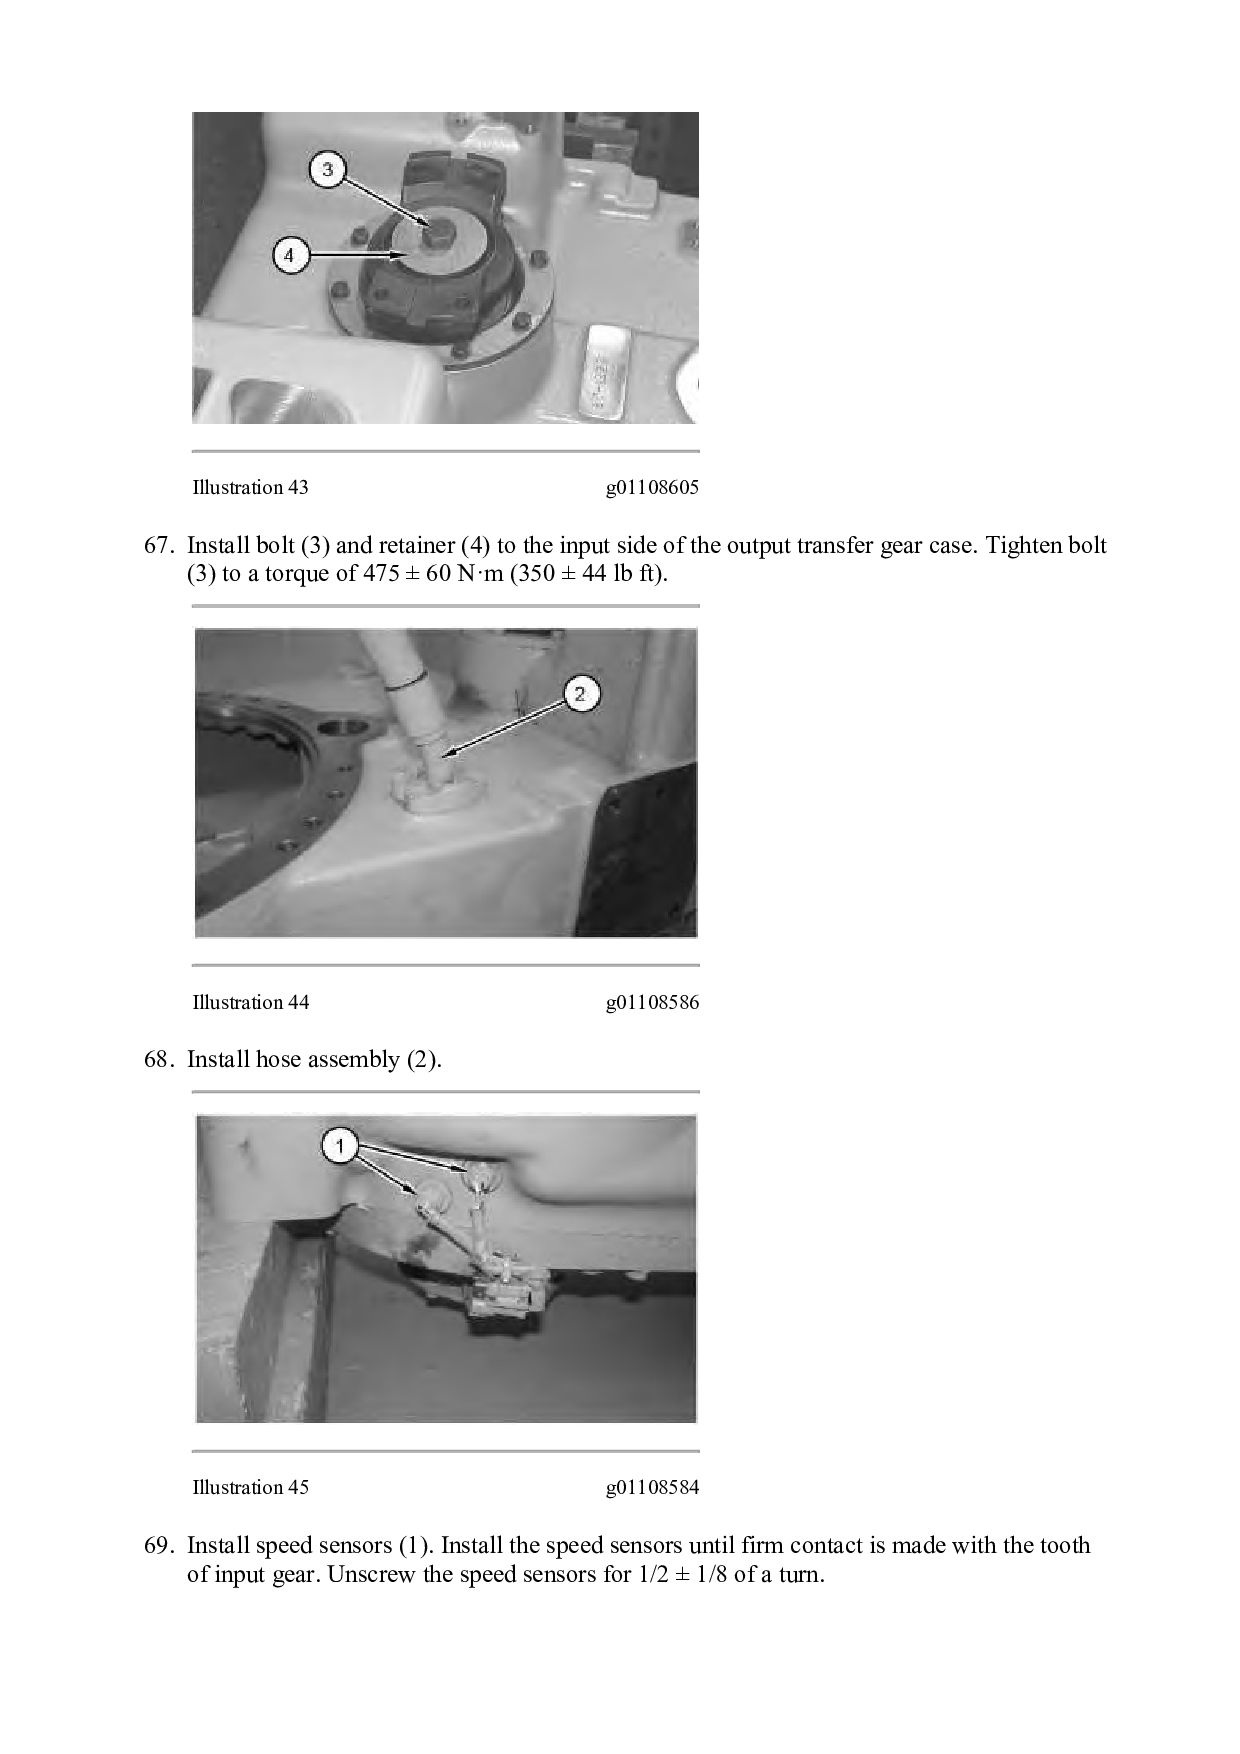
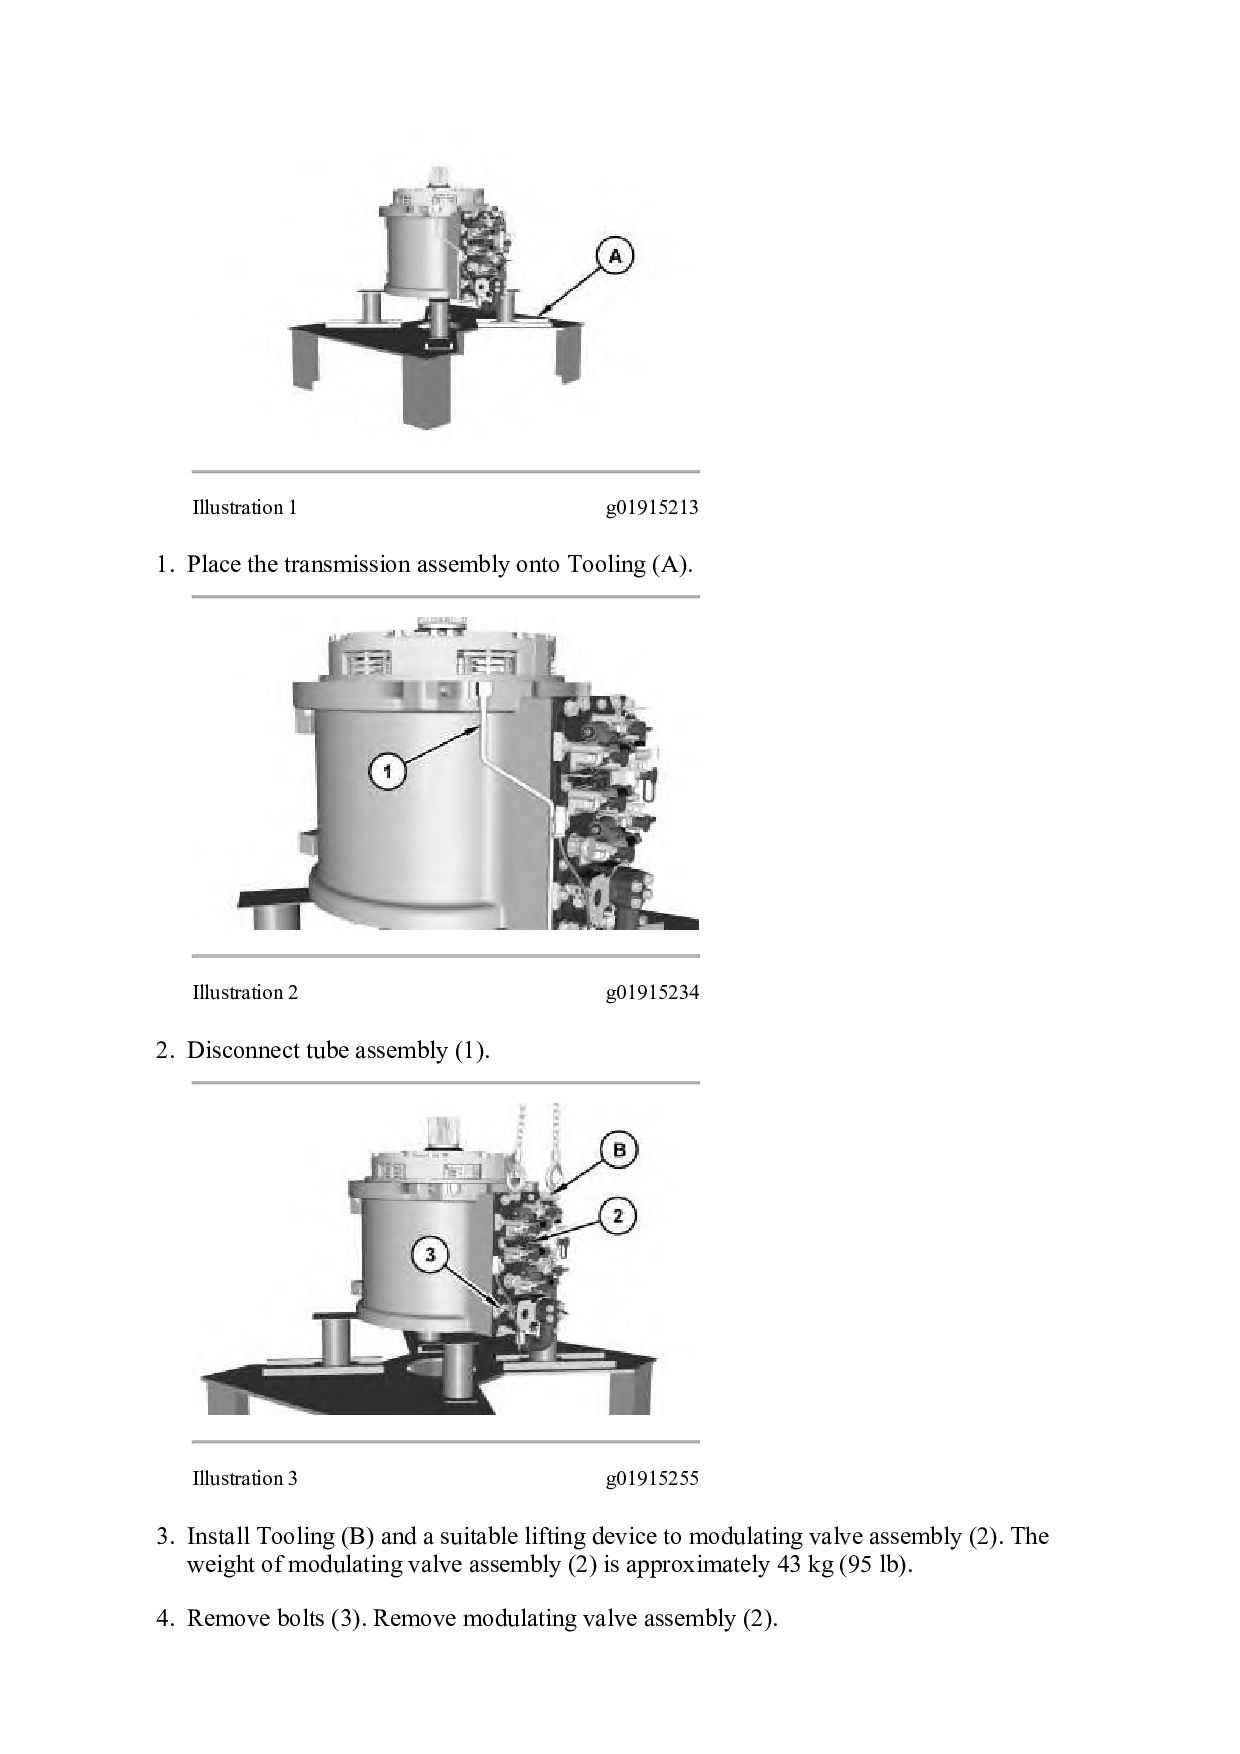
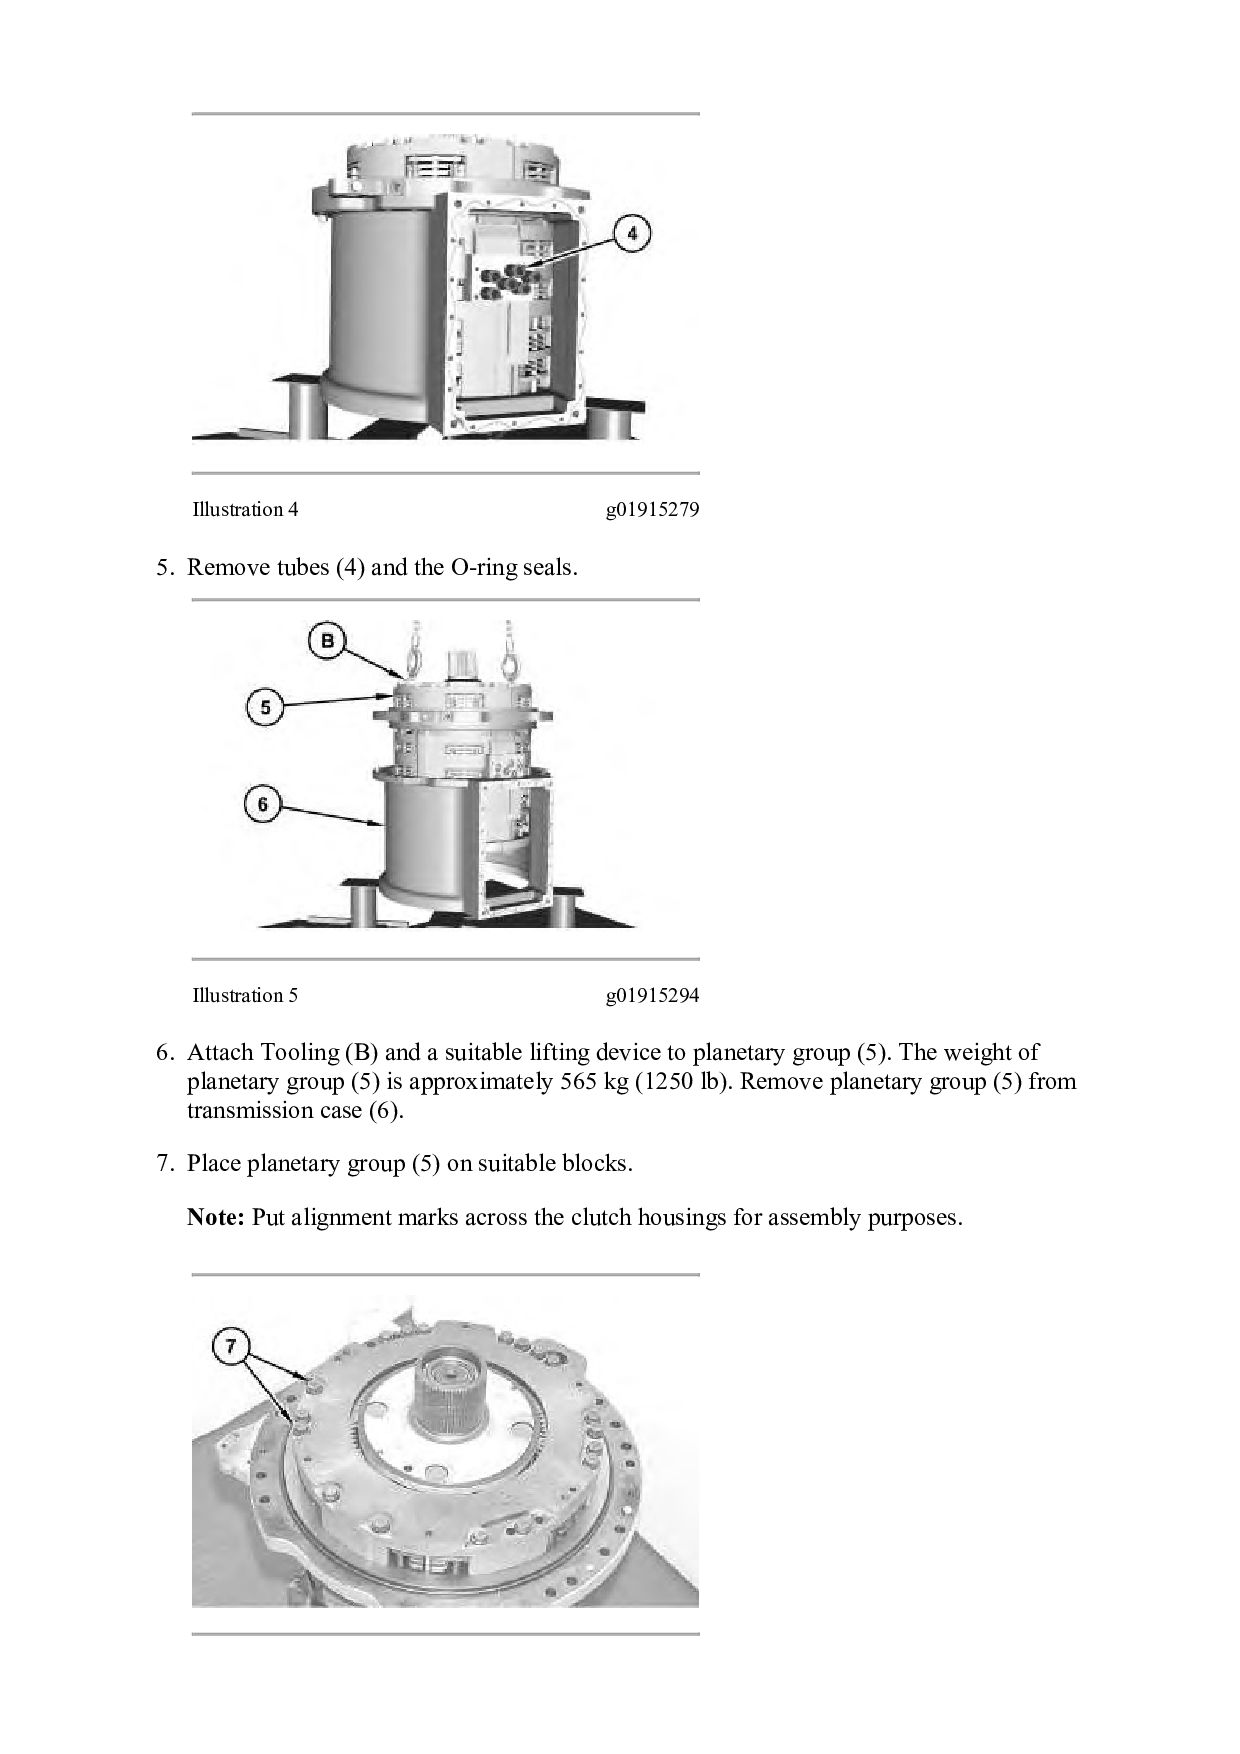
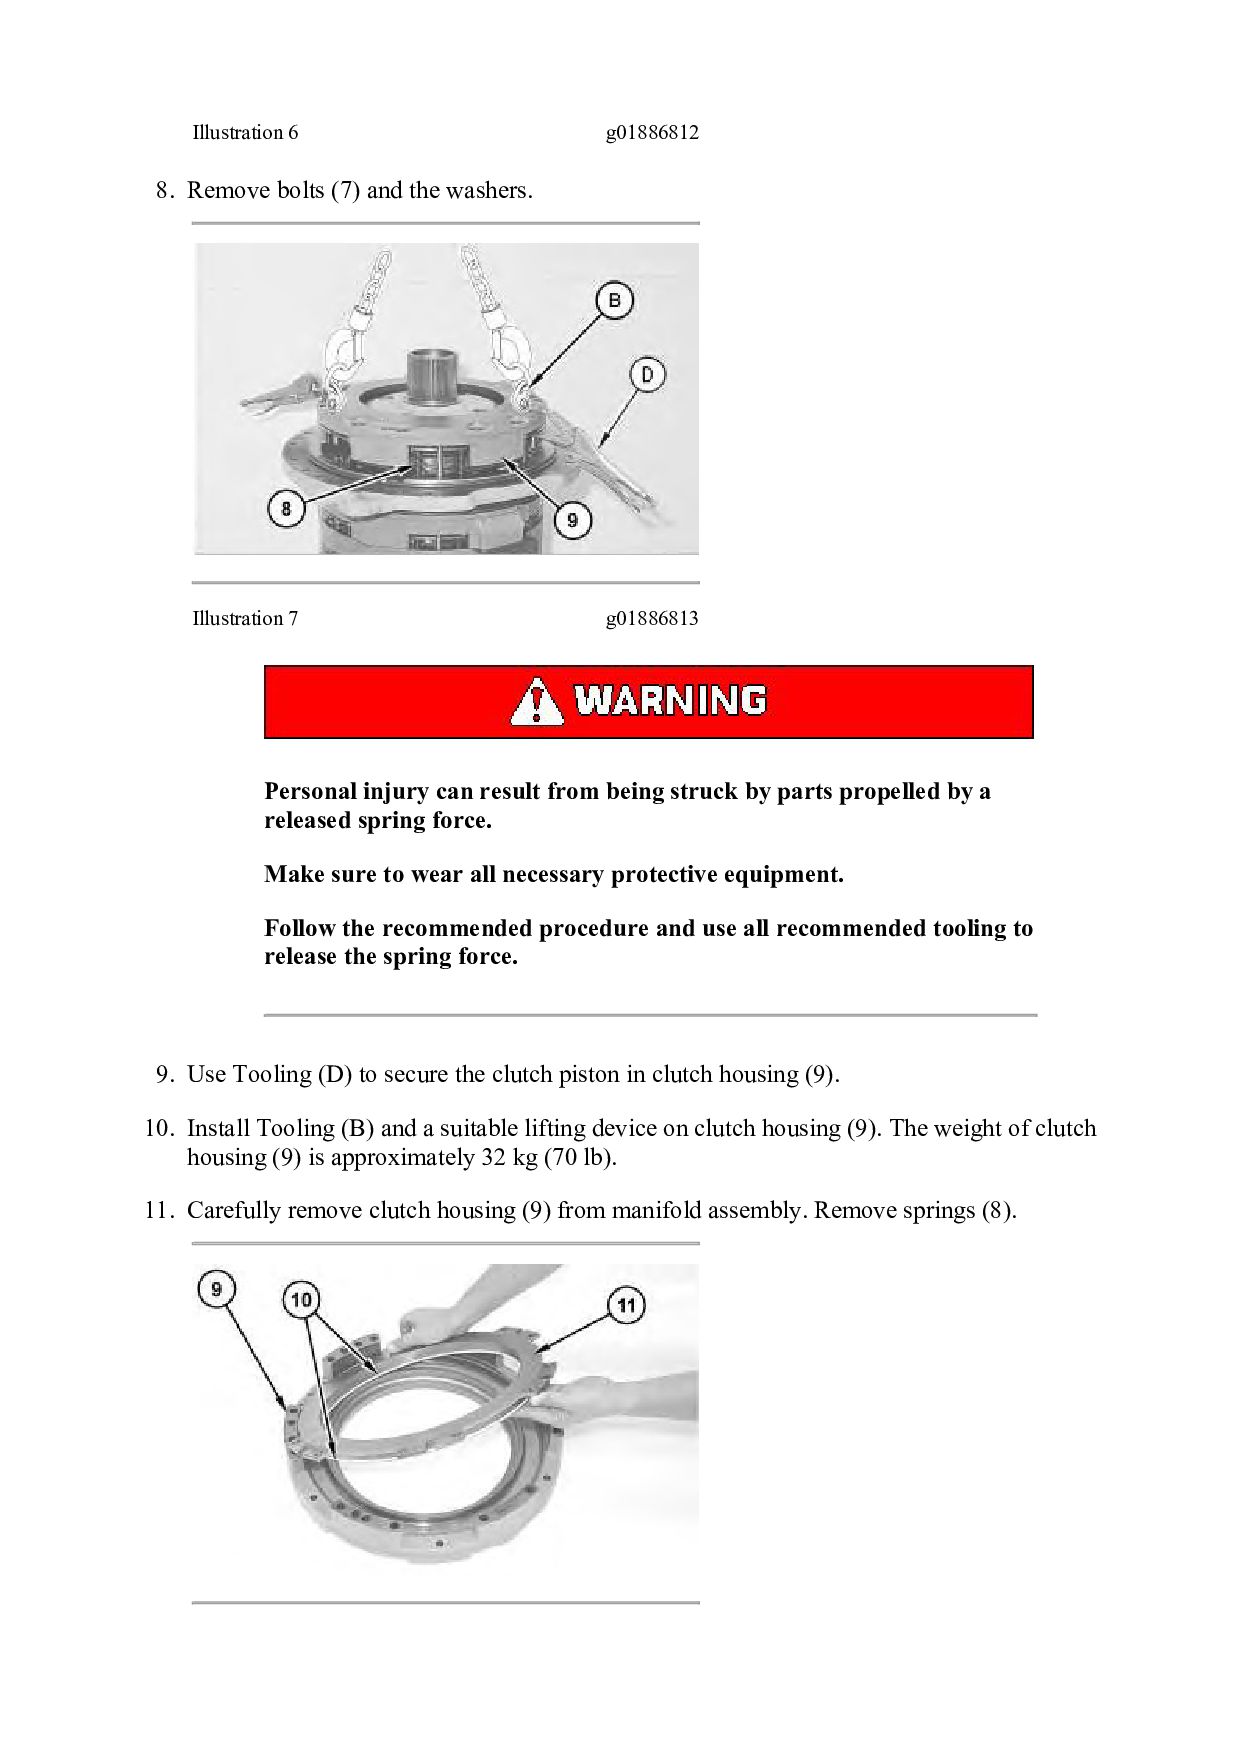
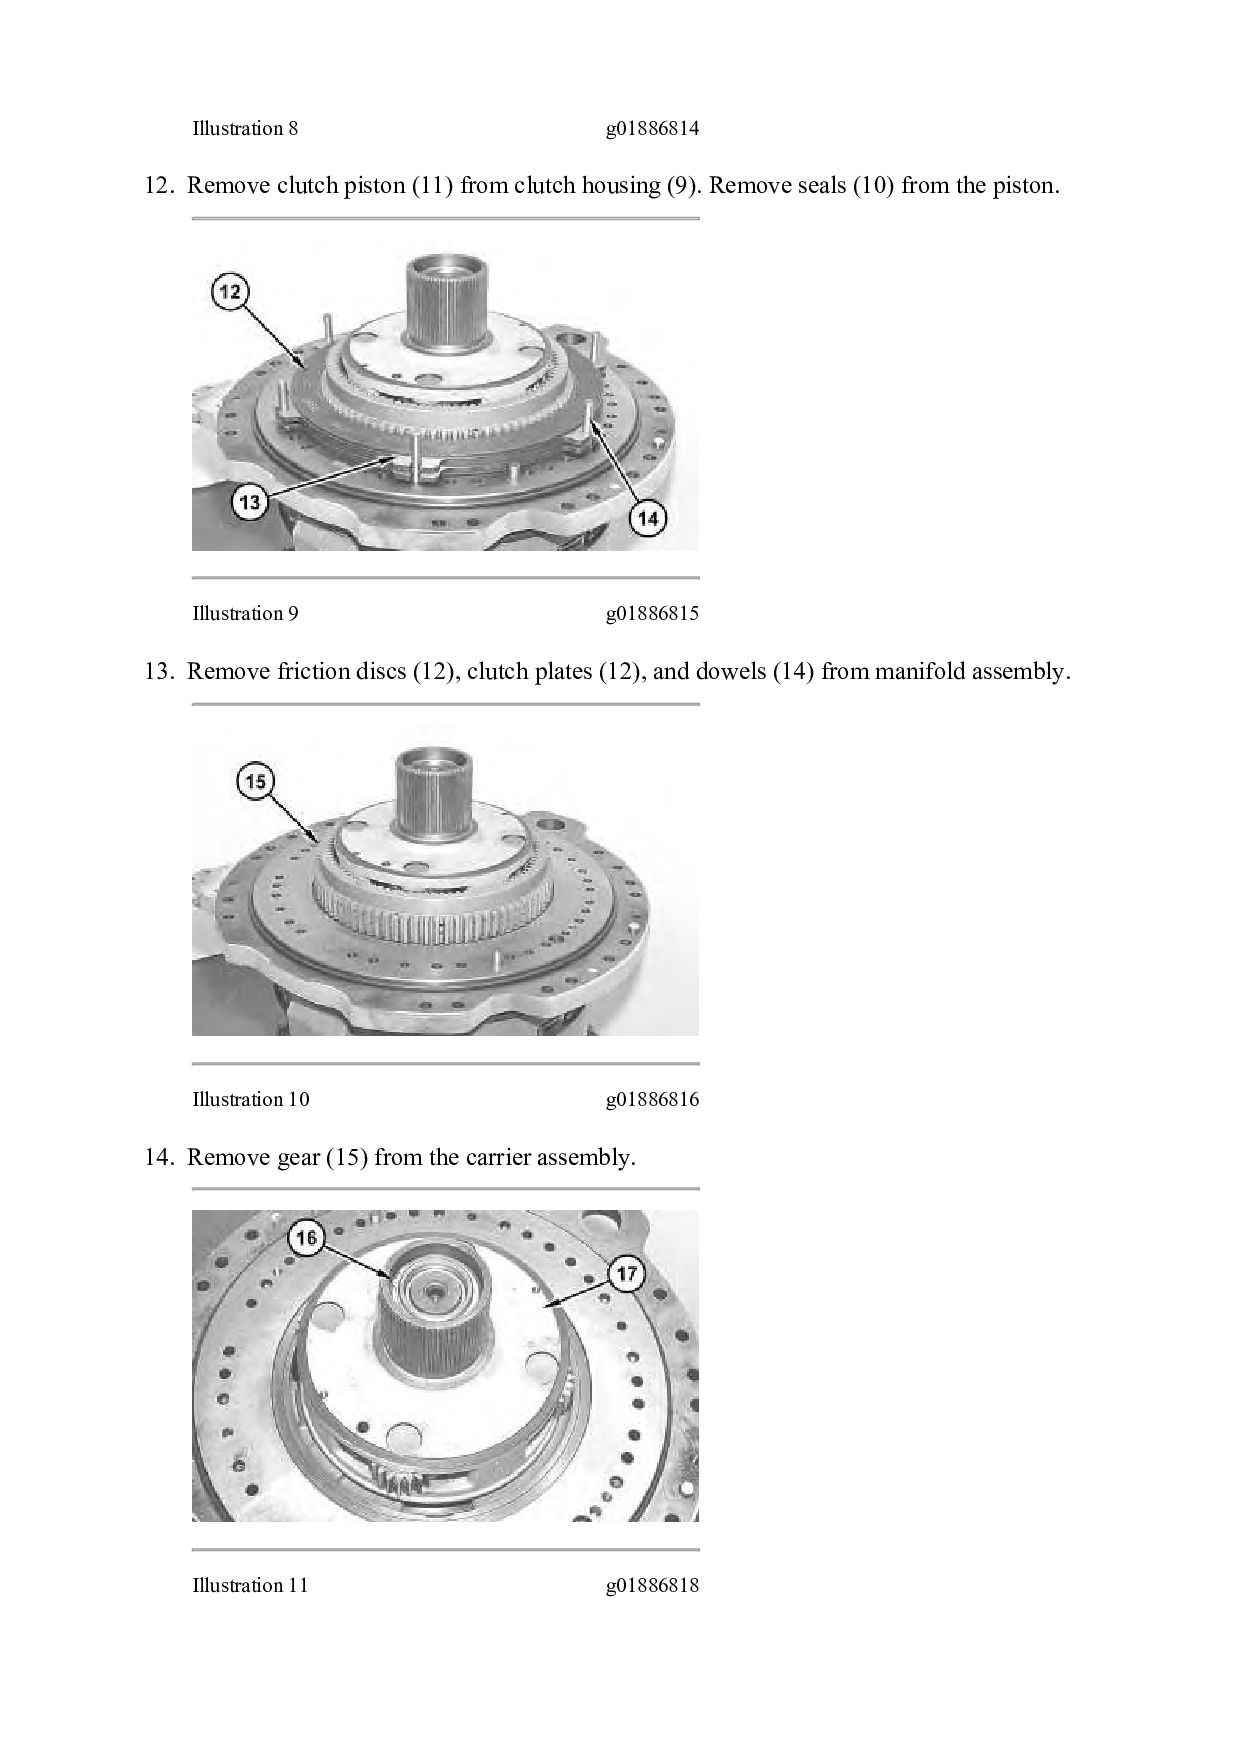
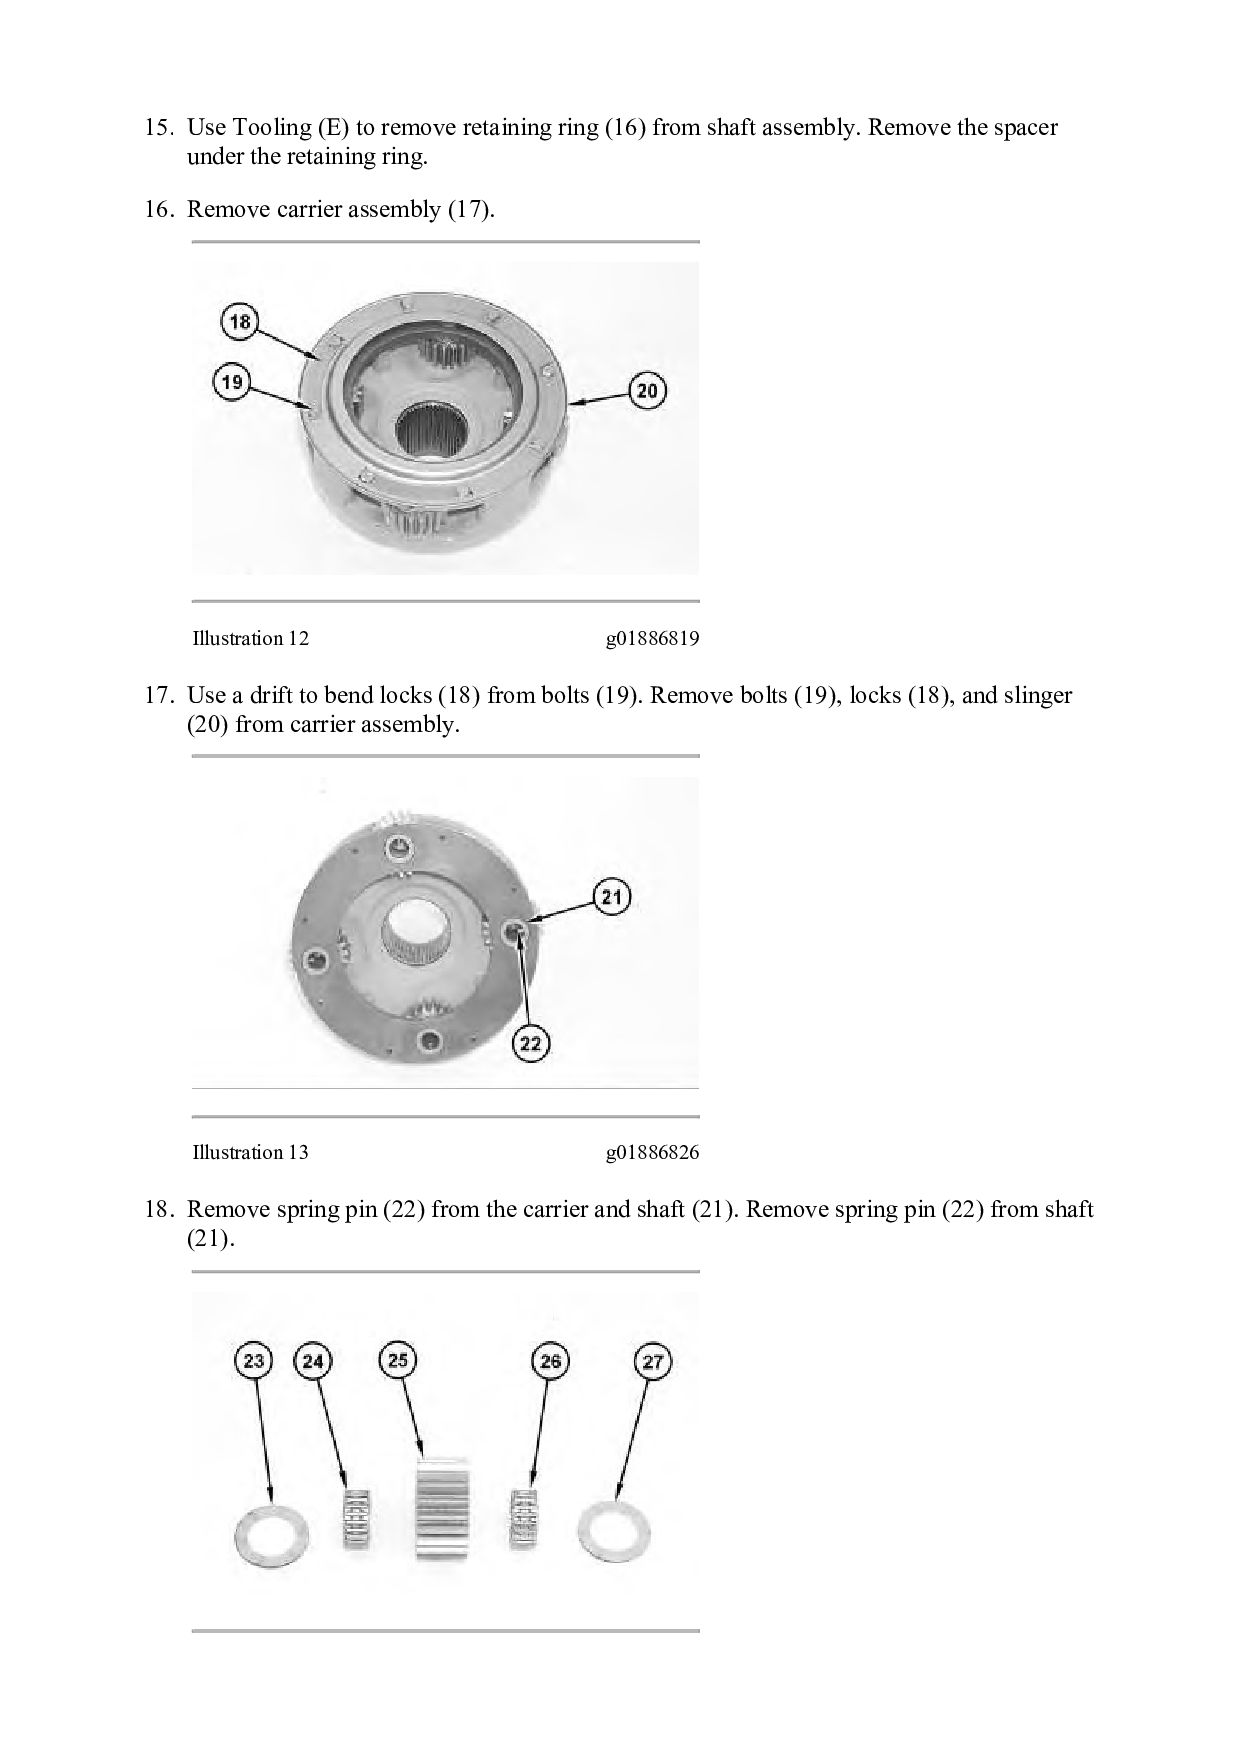
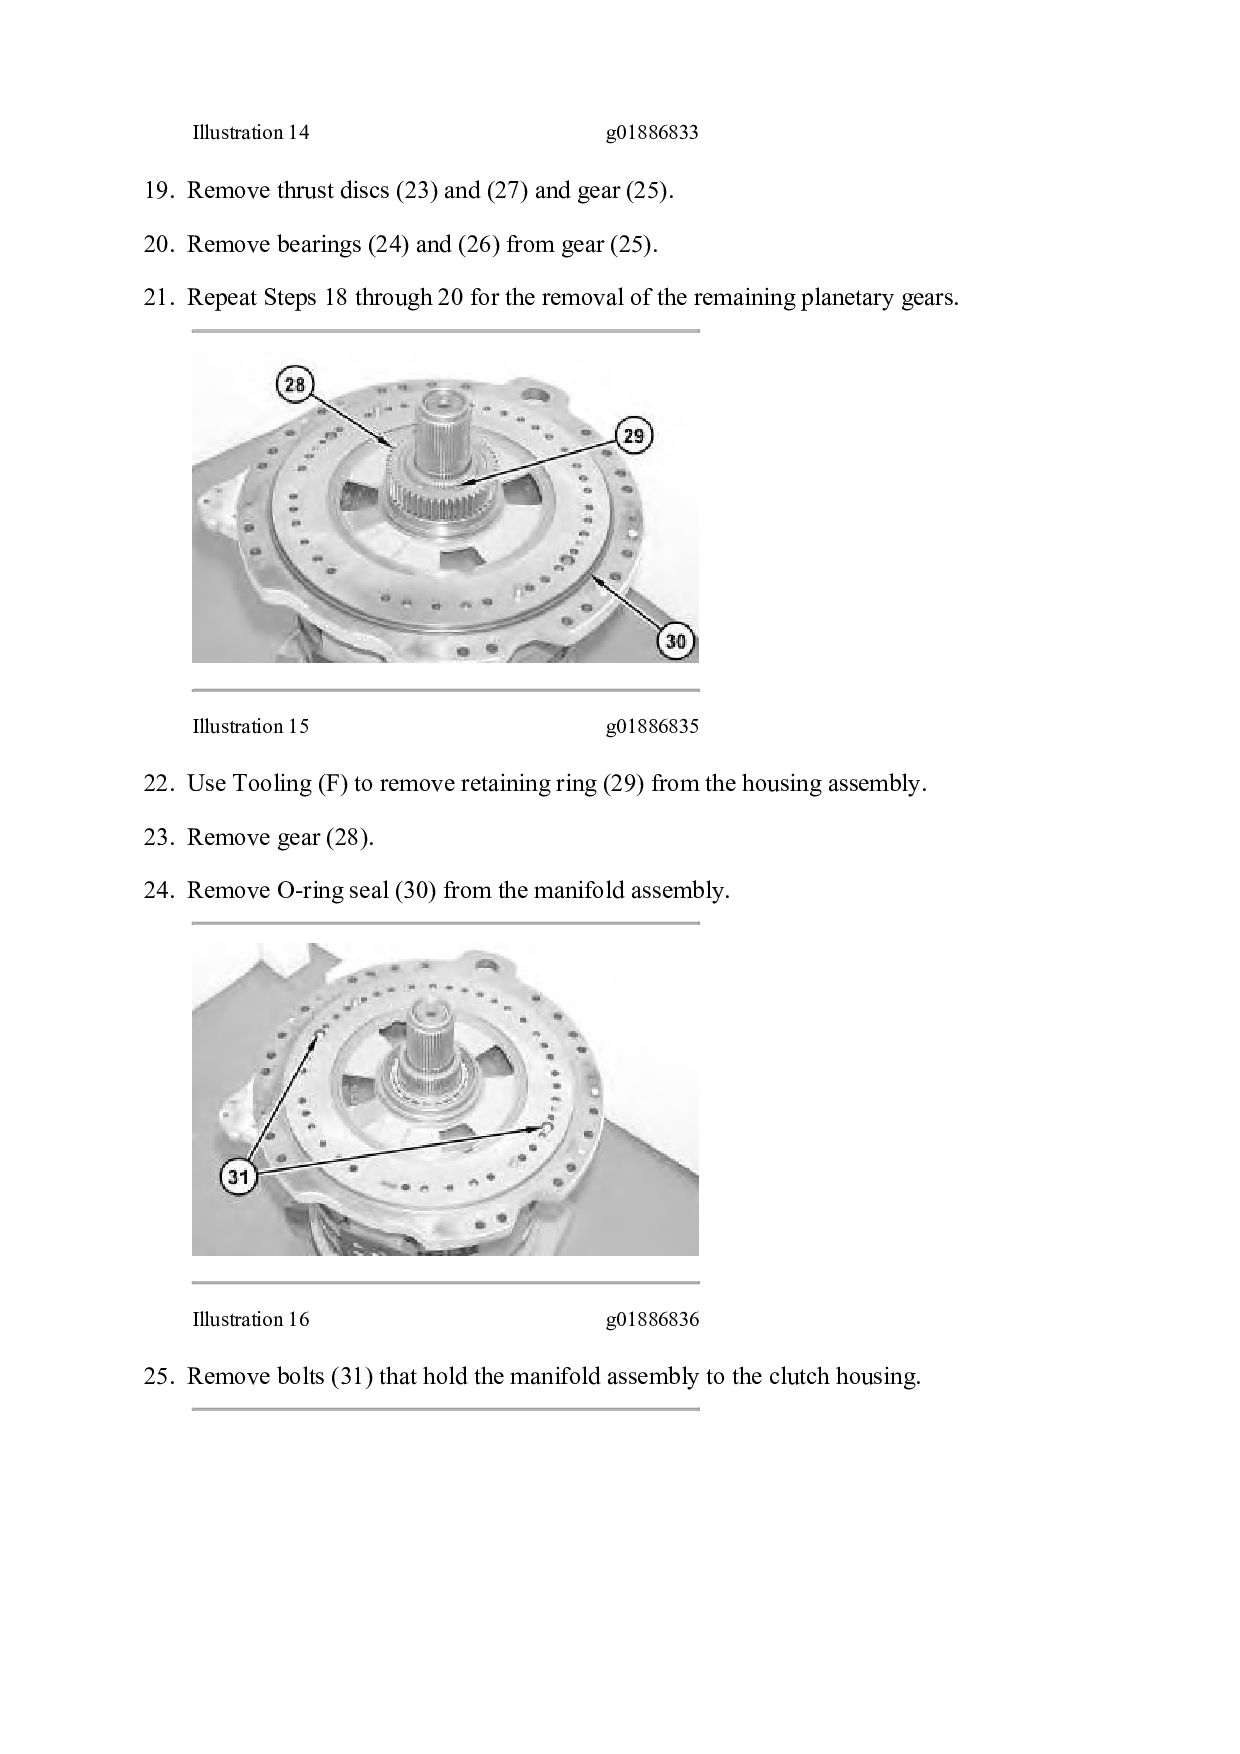
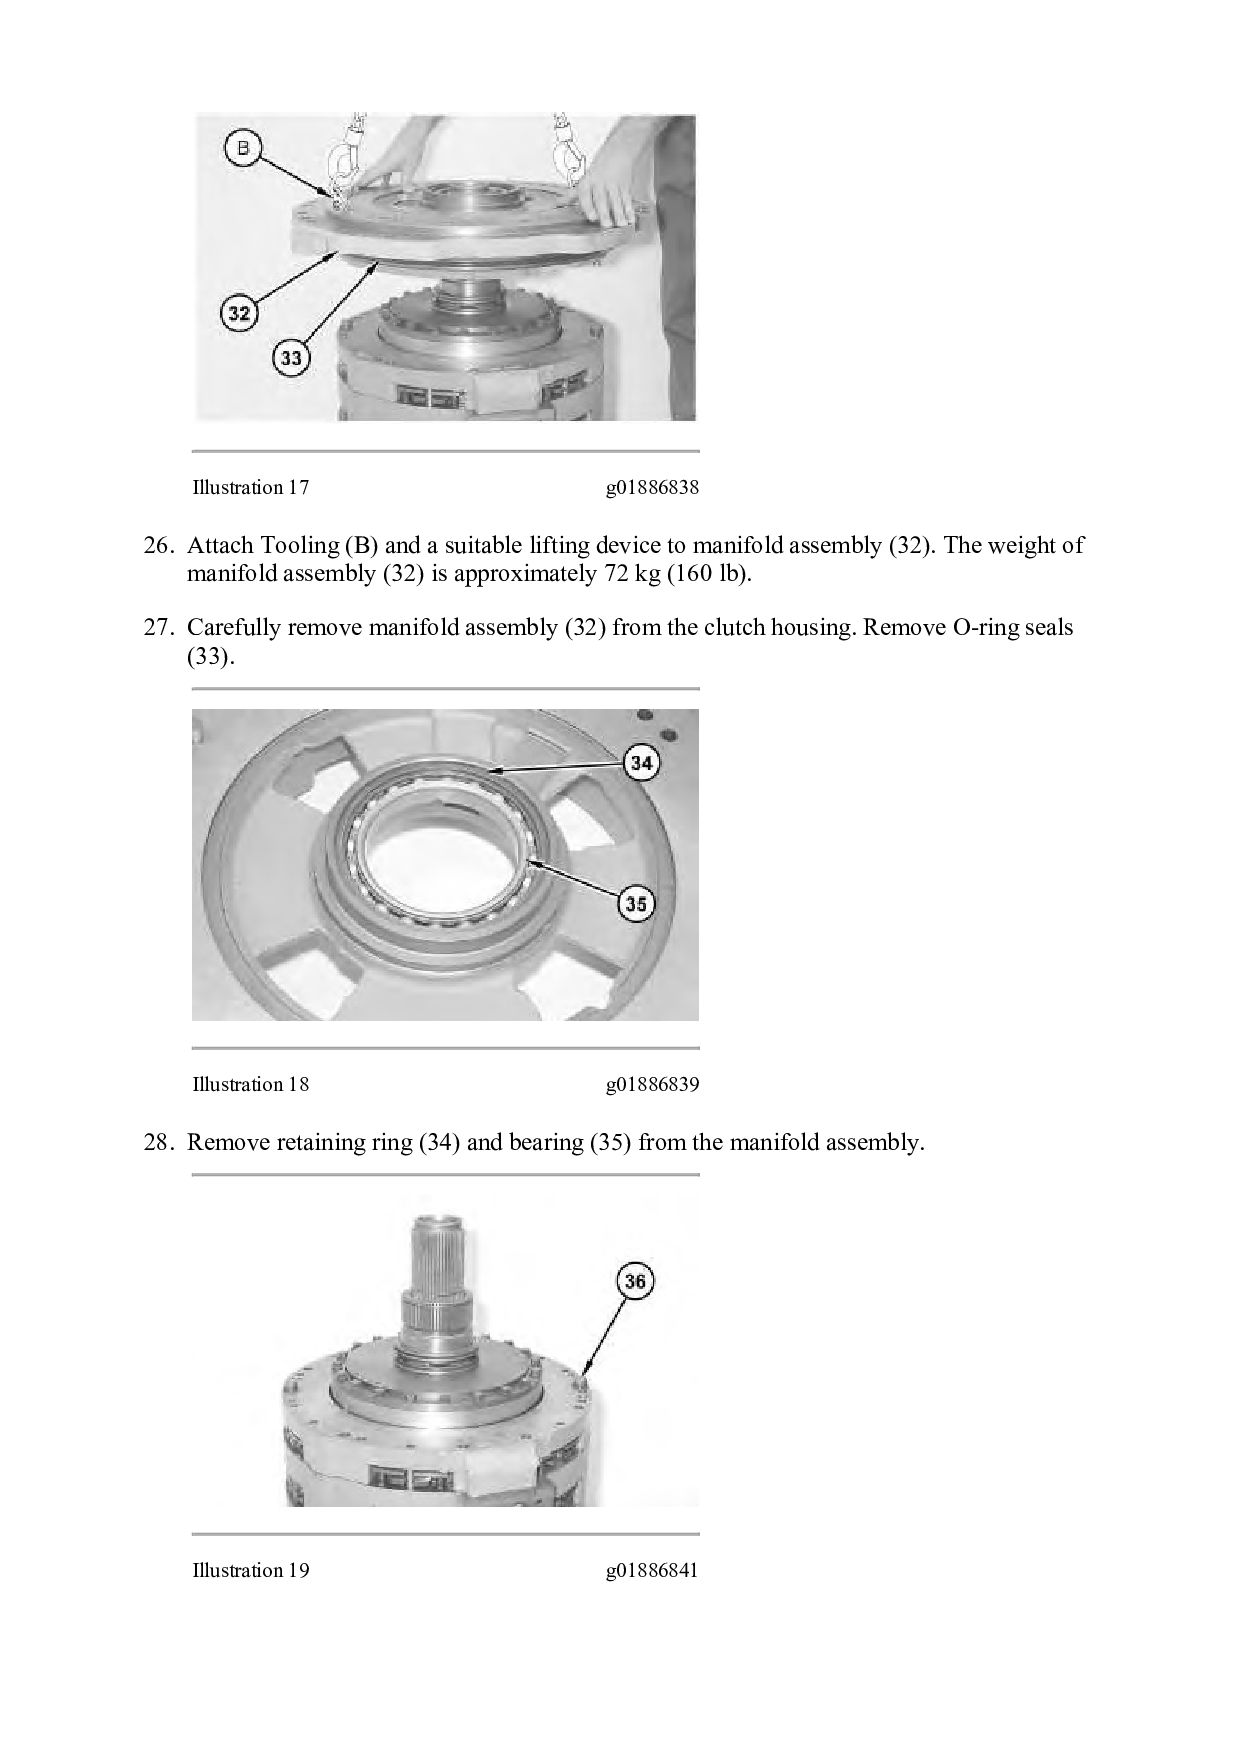
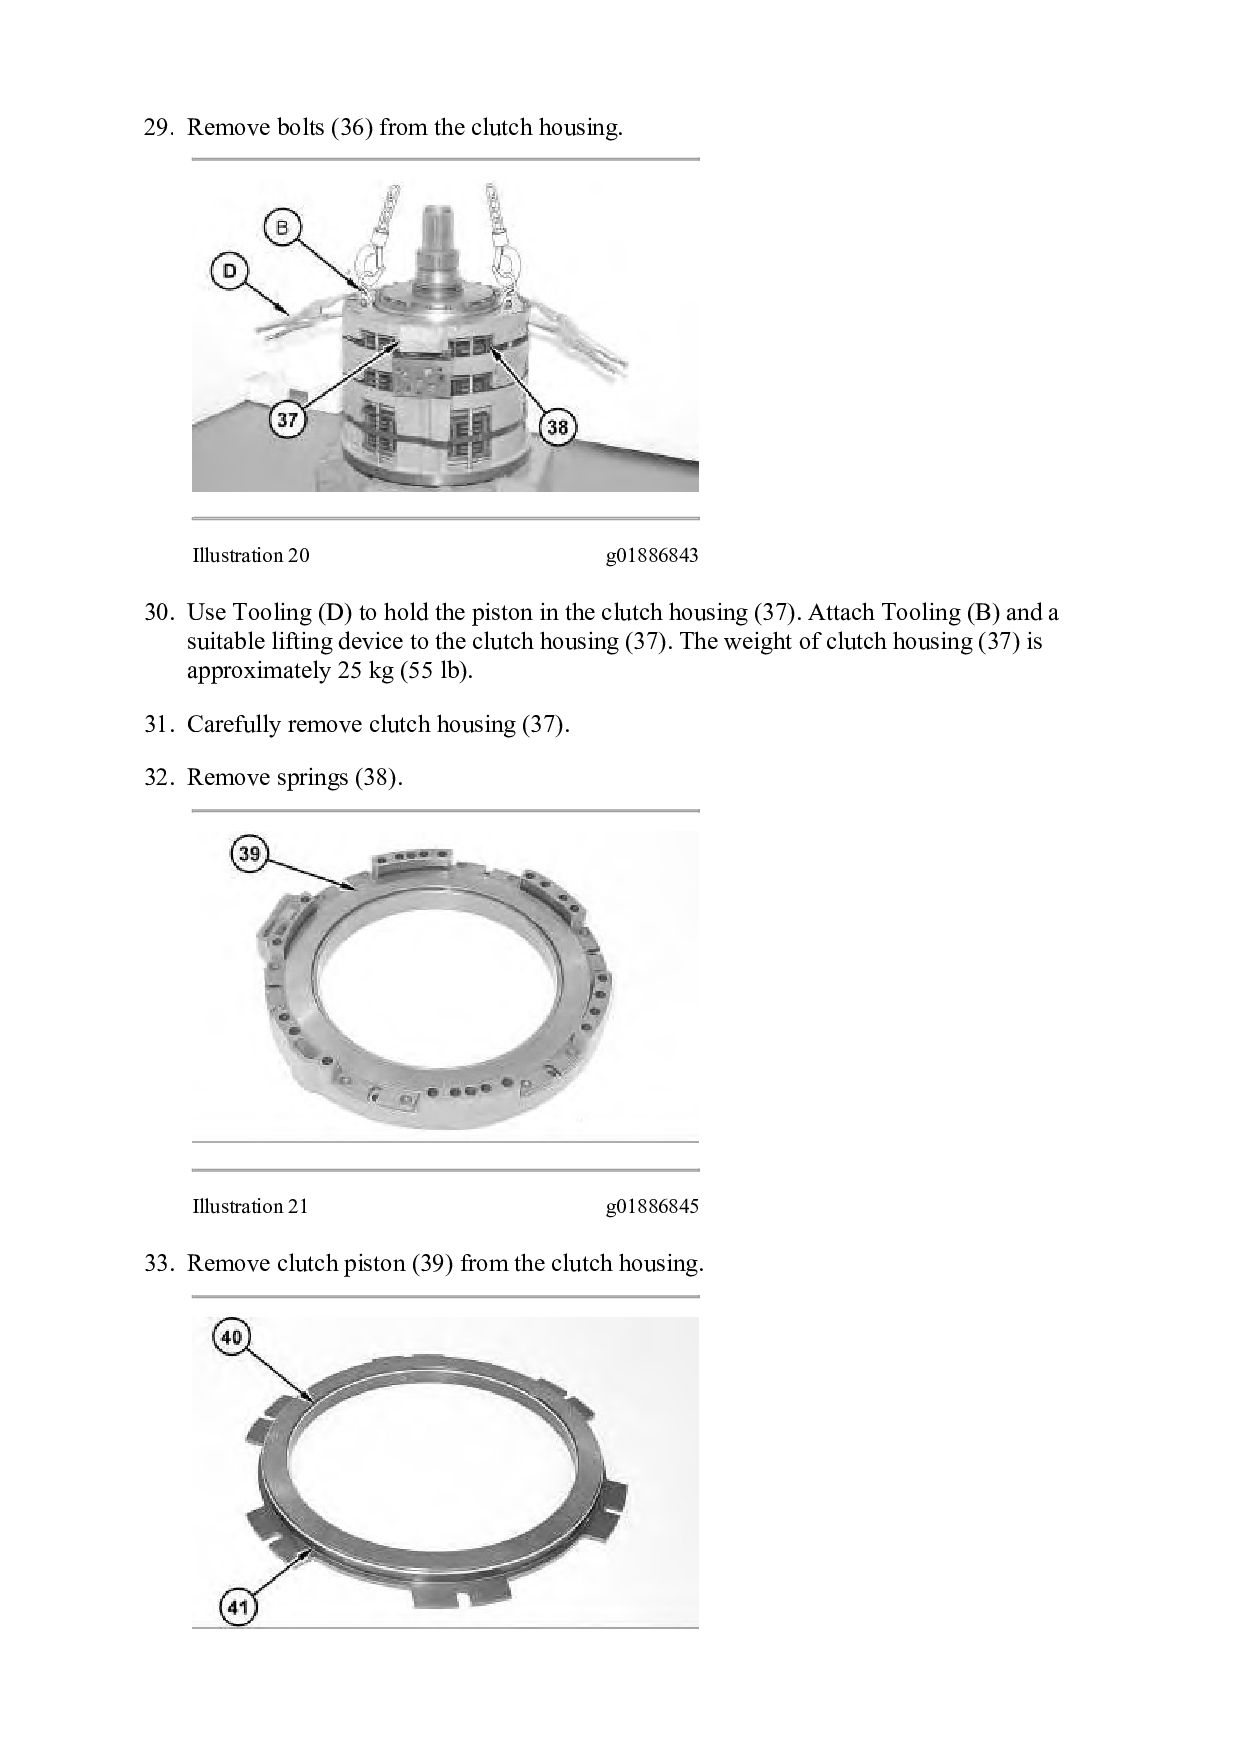
LOADER KZL Configuration: 980H Wheel Loader KZL00001-UP (MACHINE) POWERED BY C15 Engine Disassembly and Assembly 980H Wheel Loader Power Train Media Number -RENR8667-08 Publication Date -01/09/2018 Date Updated -04/09/2018 i03565130 Transmission Planetary - Disassemble - Heavy Duty SMCS - 3160-015 Disassembly Procedure Table 1 Required Tools Tool Part Number Part Description Qty A 1P-2420 Transmission Repair Stand 1 B 138-7575 Link Bracket 3 C 1P-7407 Eyebolt 1 D FT-0833 Clamp 3 E 1P-1863 Retaining Ring Pliers 1 F 5P-5197 External Pliers 1 G 1P-0520 Driver Group 1 H 1P-0510 Drive Group 1 L 1P-0074 Slide Hammer Puller Gp 1 Start By: a. Separate the transmission and the output transfer gears. Refer to Disassembly and Assembly, "Transmission to Output Transfer Gears - Separate". Note: Cleanliness is an important factor. Before the disassembly procedure, the exterior of the component should be thoroughly cleaned. This will help to prevent dirt from entering the internal mechanism.