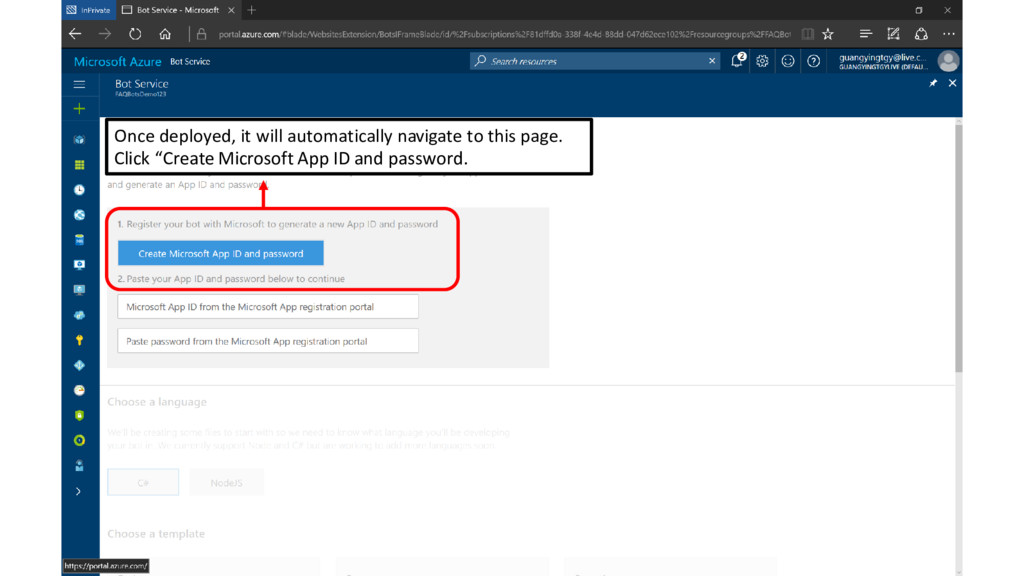
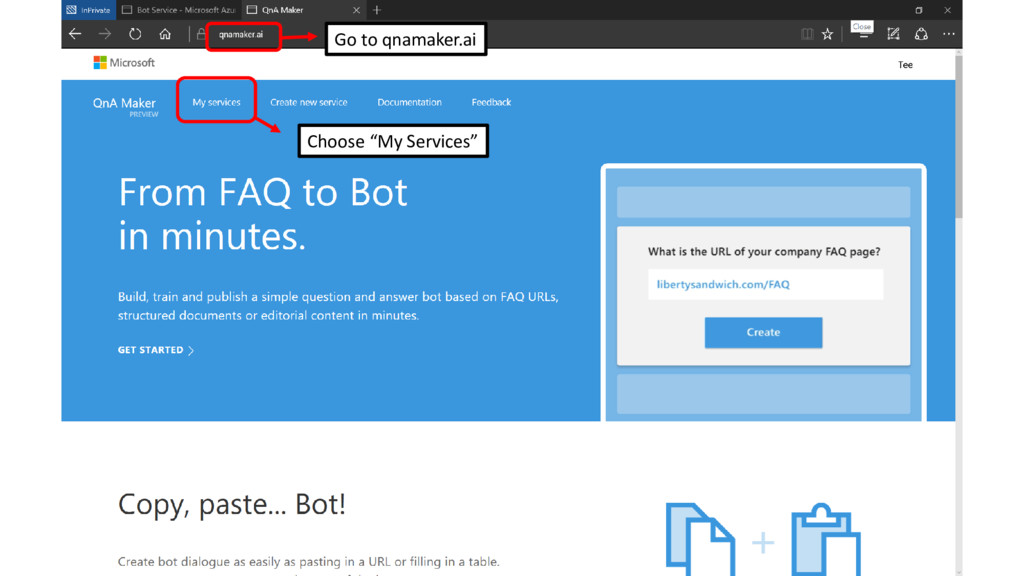
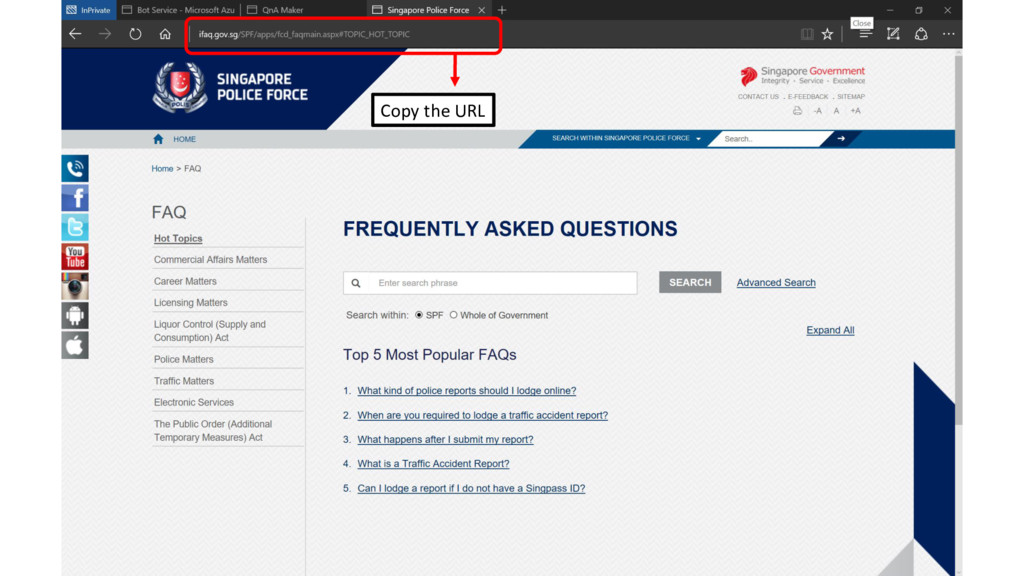
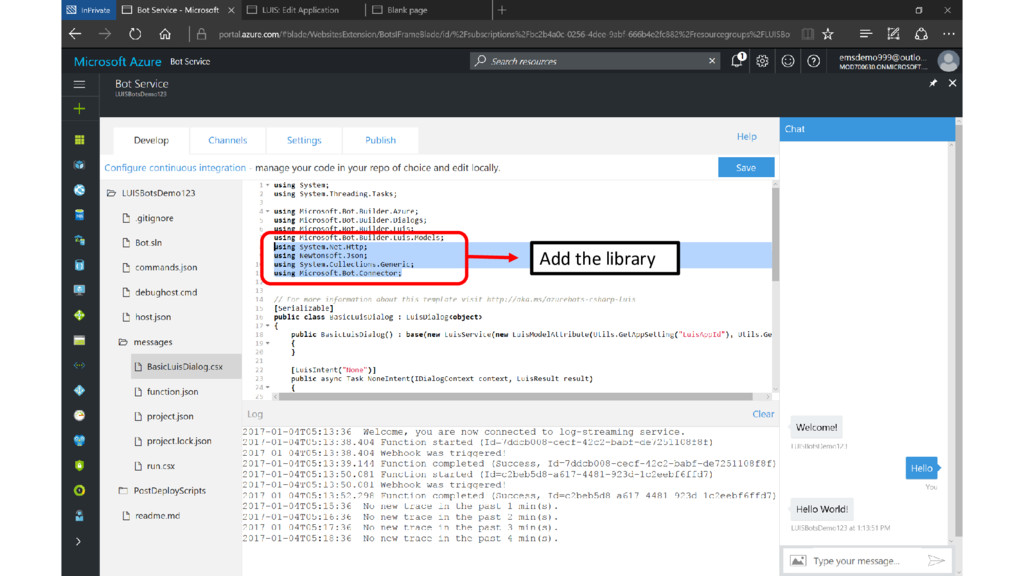
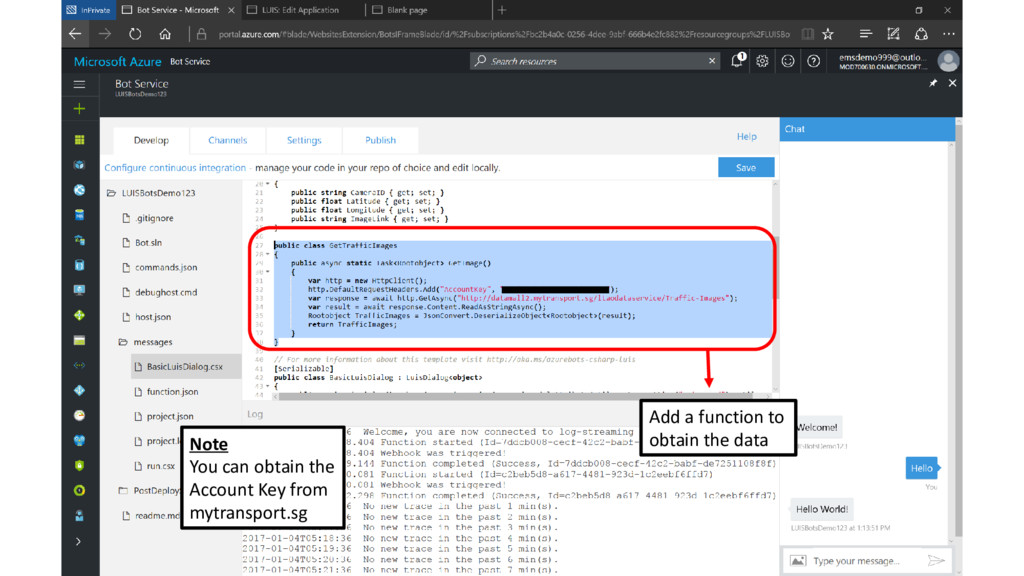
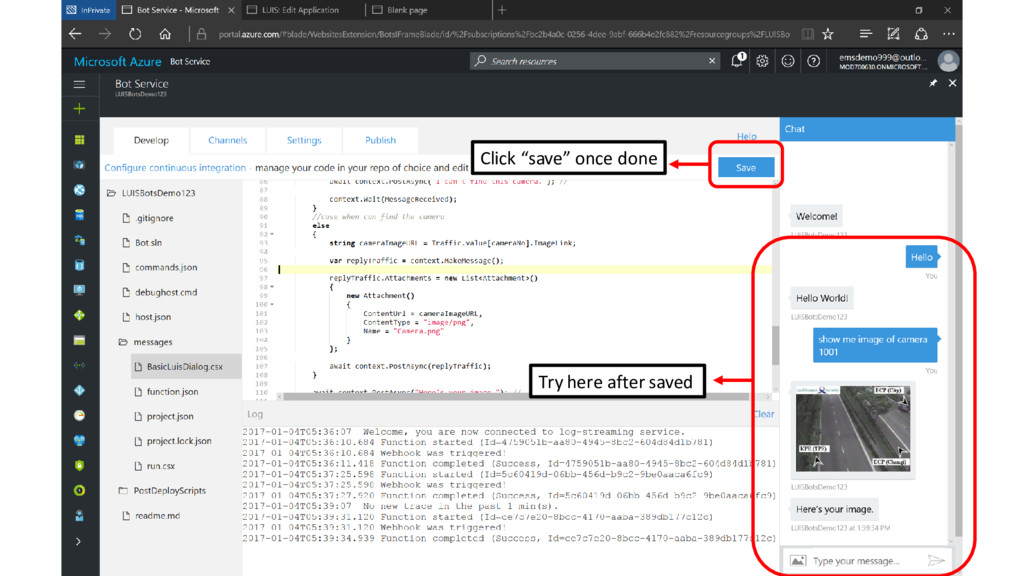
reply to users the image of traffic camera in Singapore. Data are obtained from mytransport.sg, provided by LTA. In order to proceed this tutorial, please obtain the Account Key from LTA by registering in mytransport.sg.
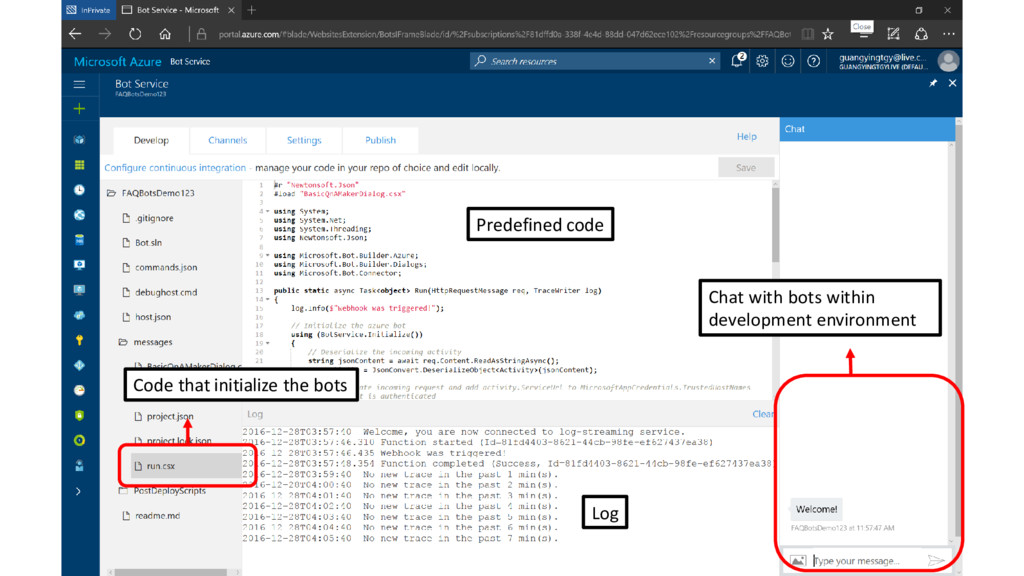
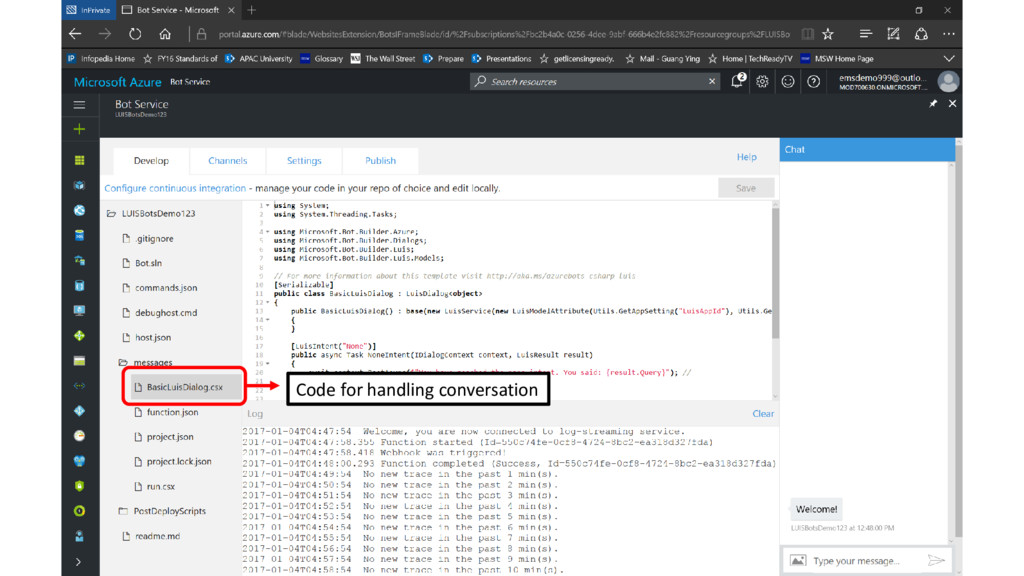
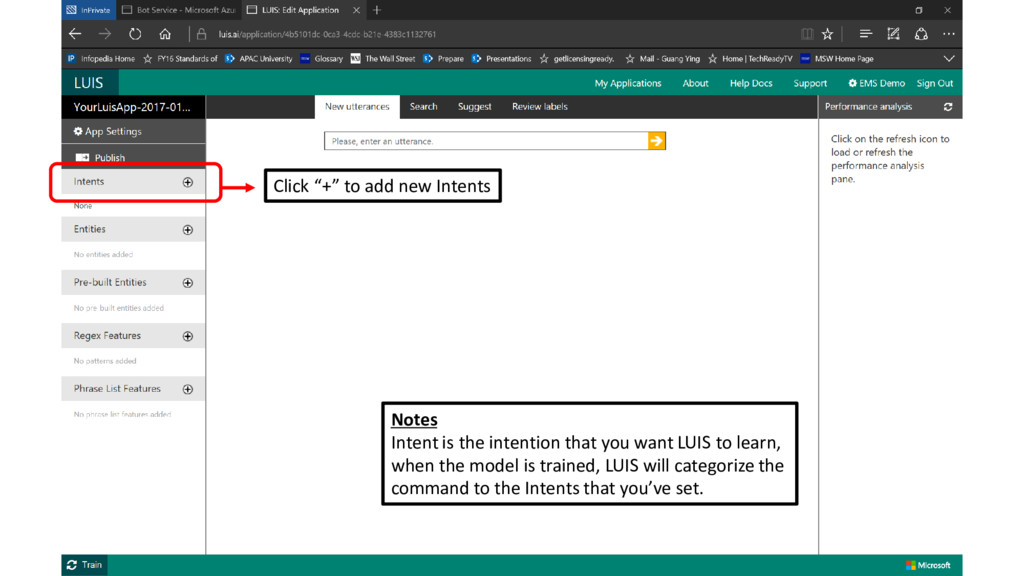
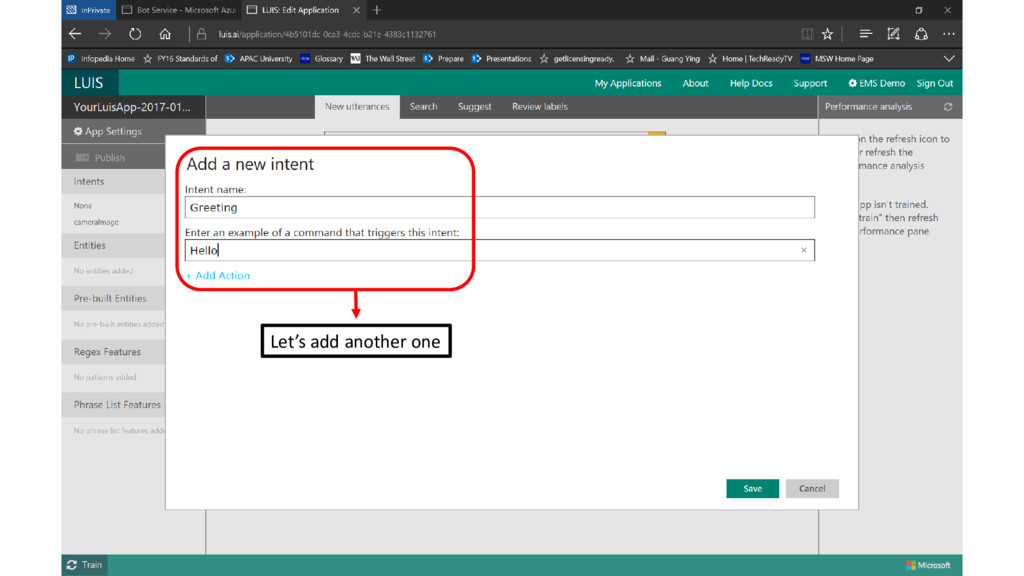
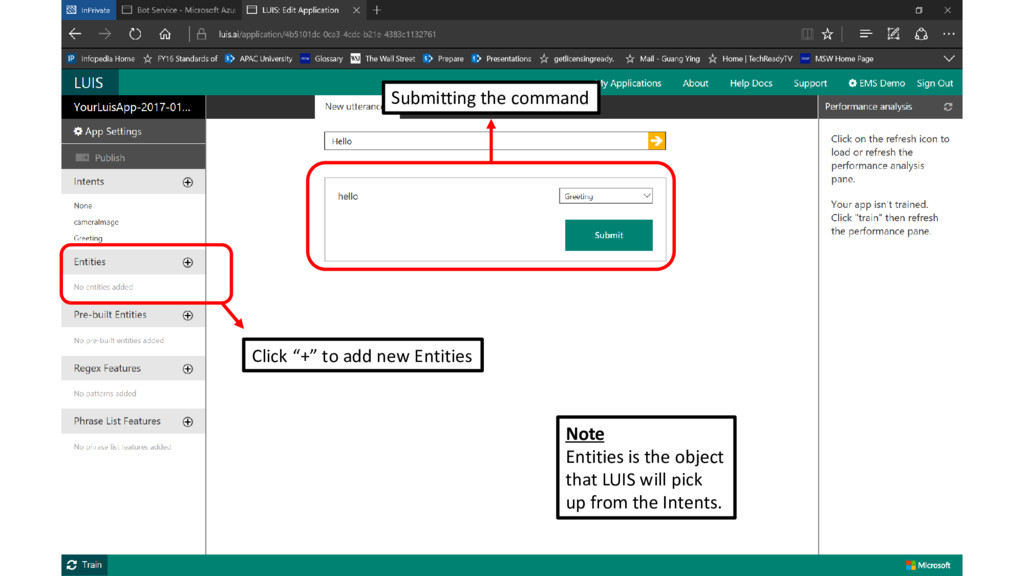
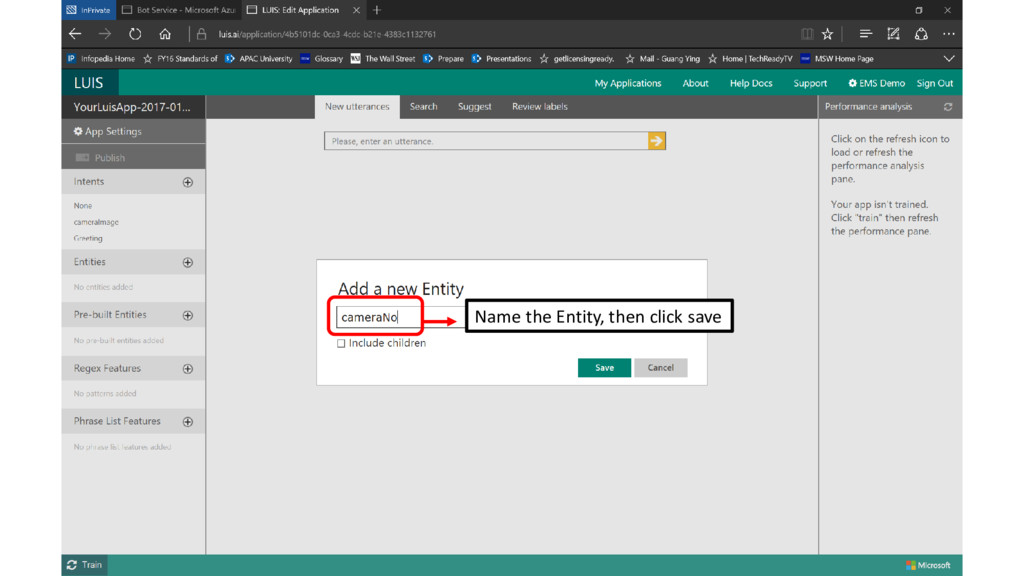
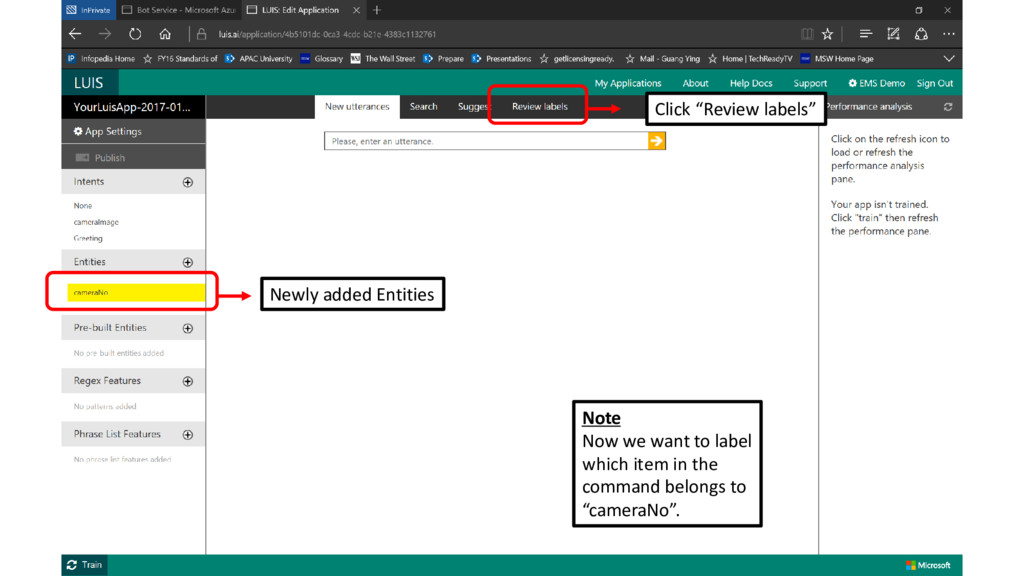
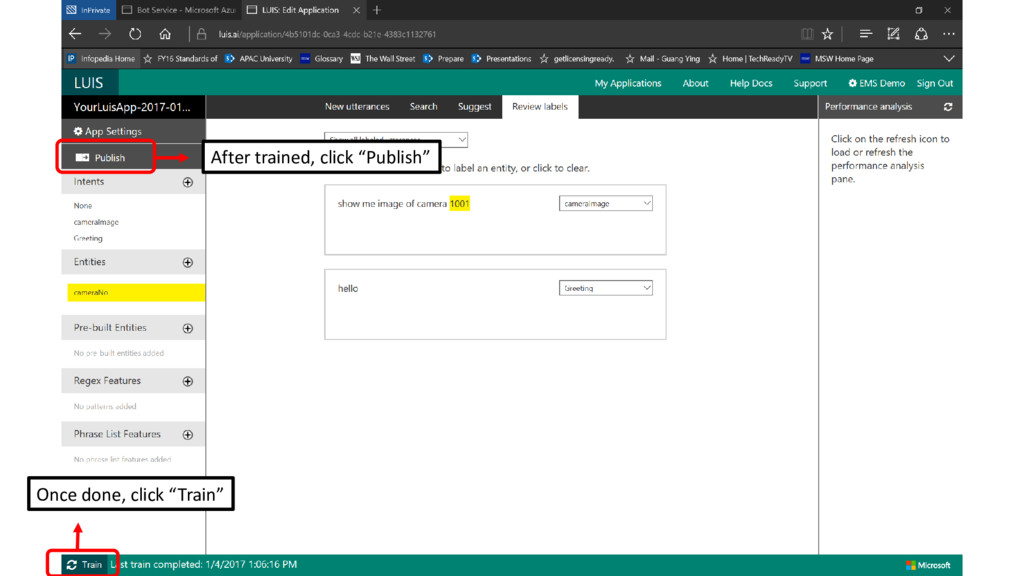
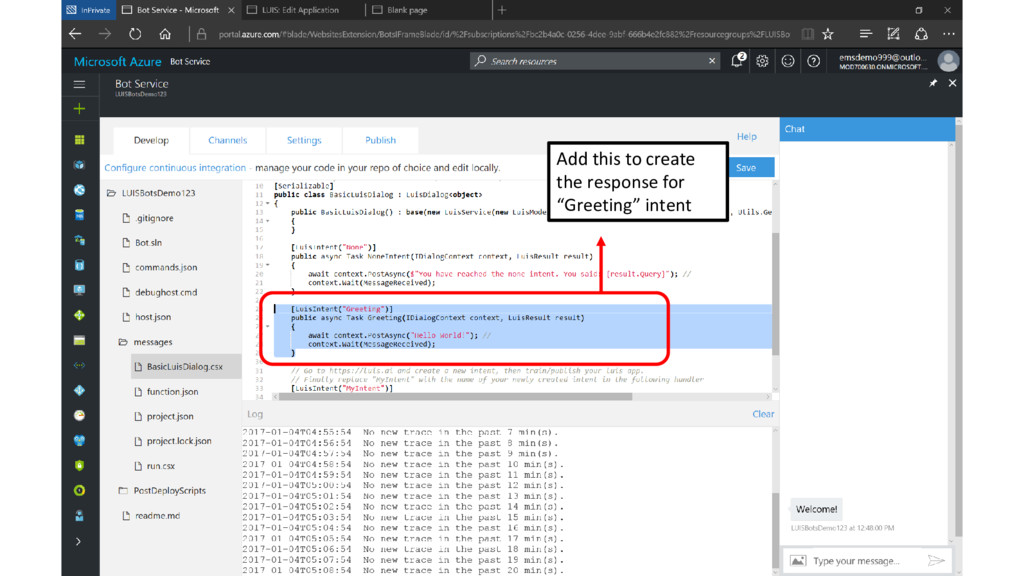
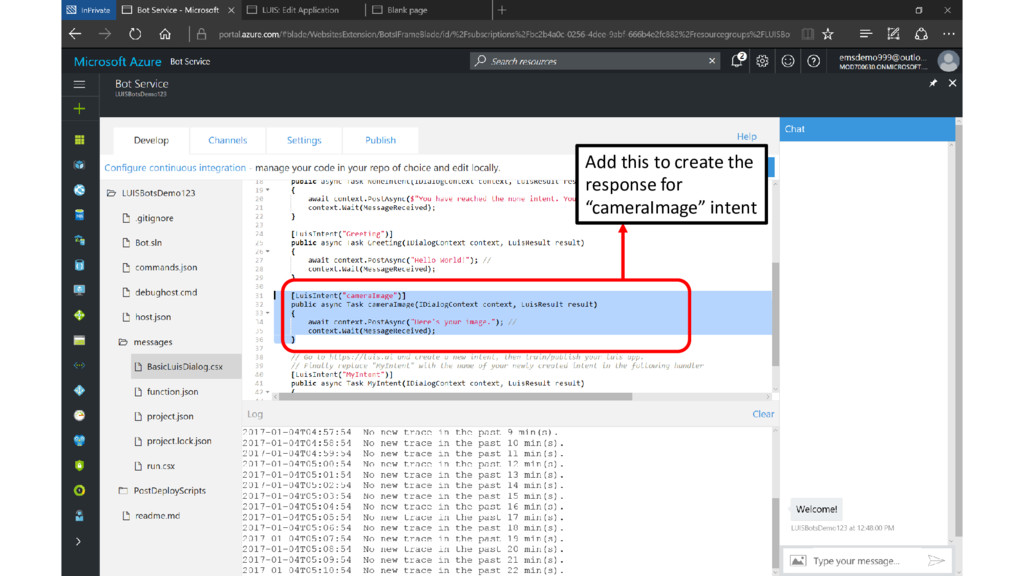
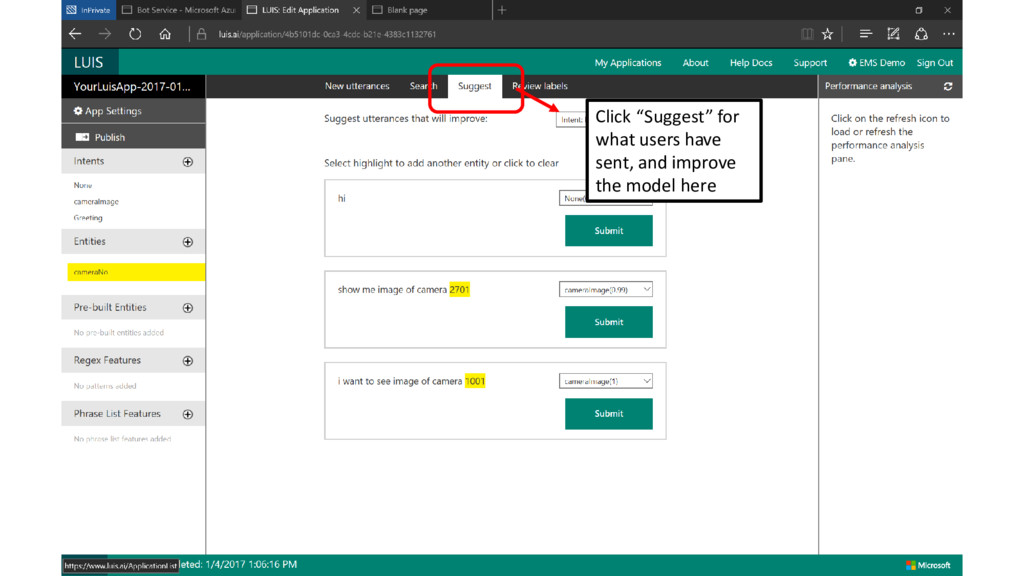
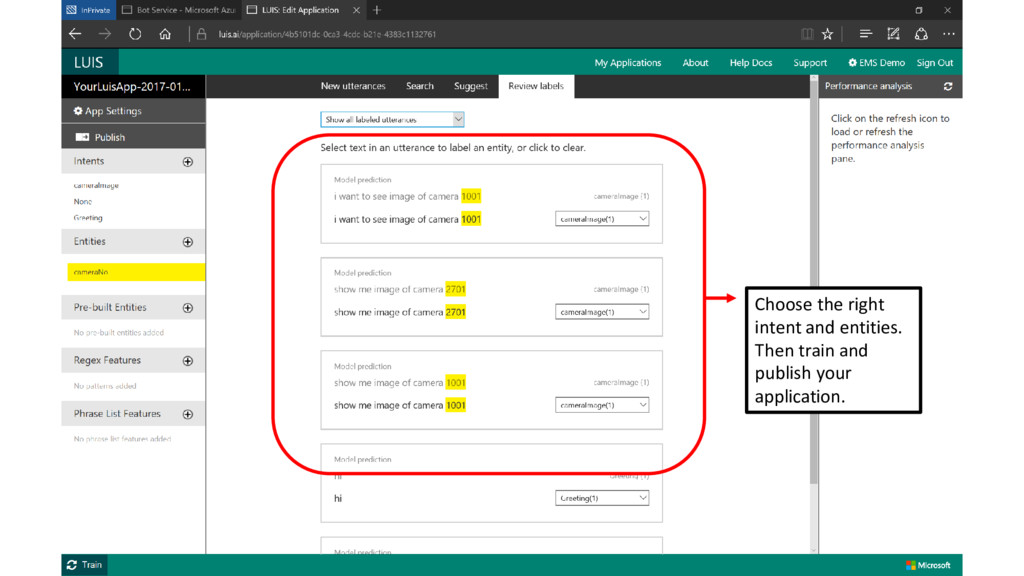
to understand the natural language. Users don’t have to deal with the machine learning model, just have to define the intents and entities for the particular bots. In next section, we will move into coding.
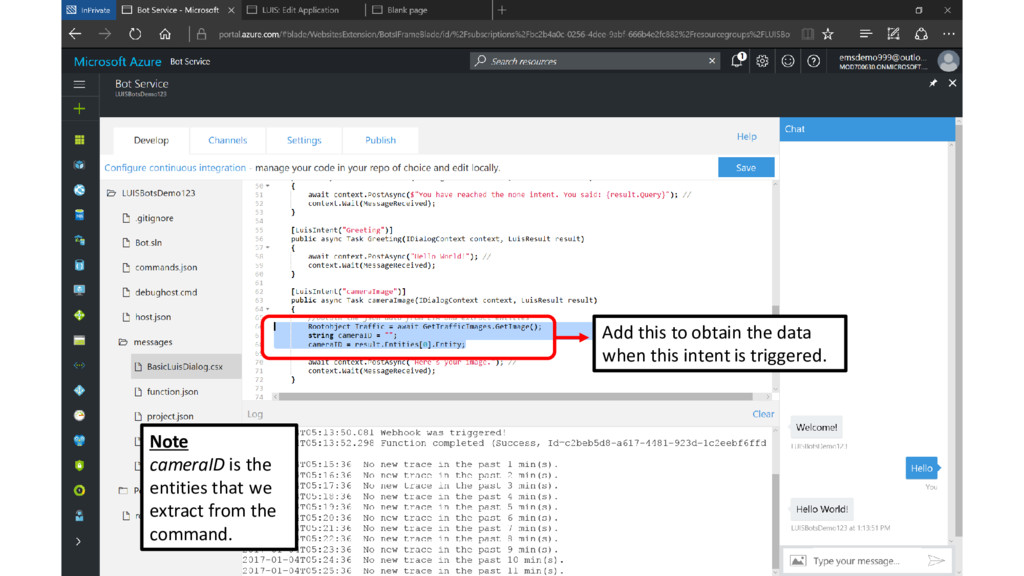
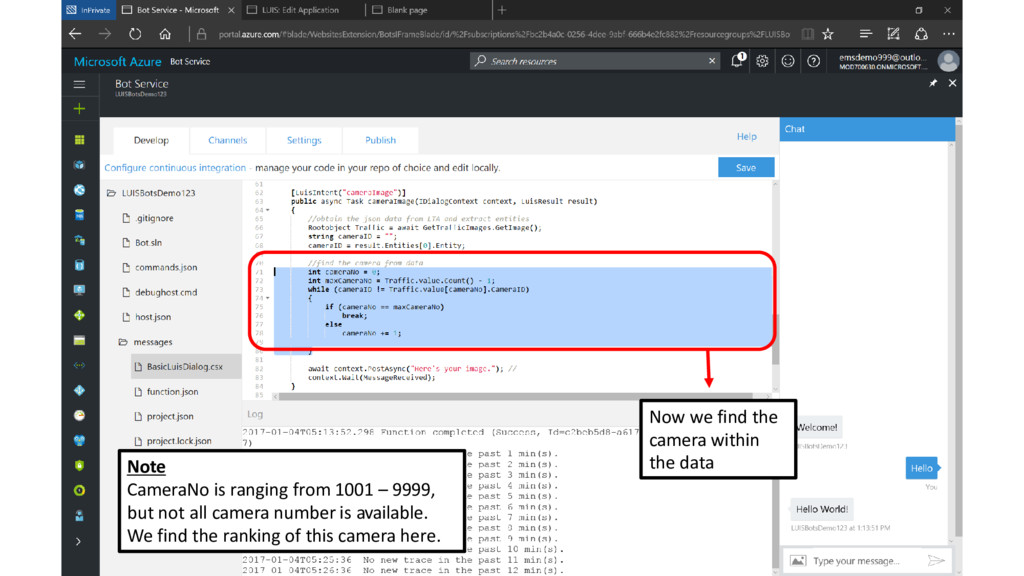
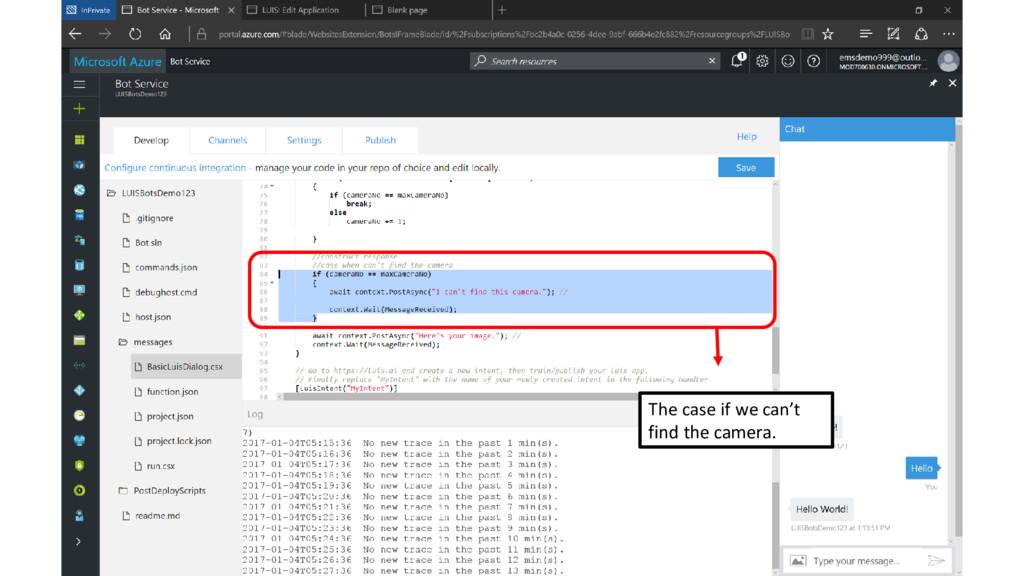
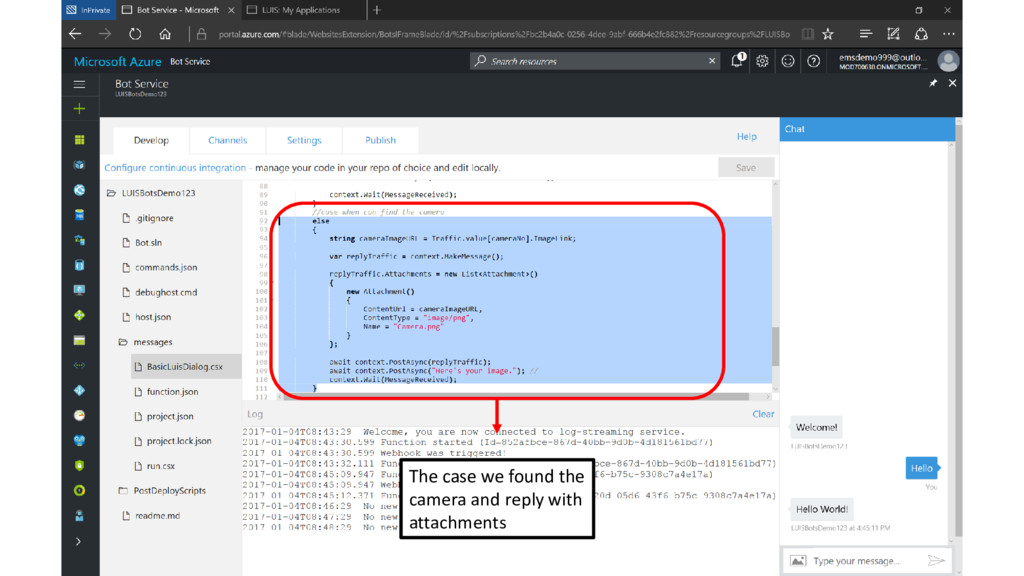
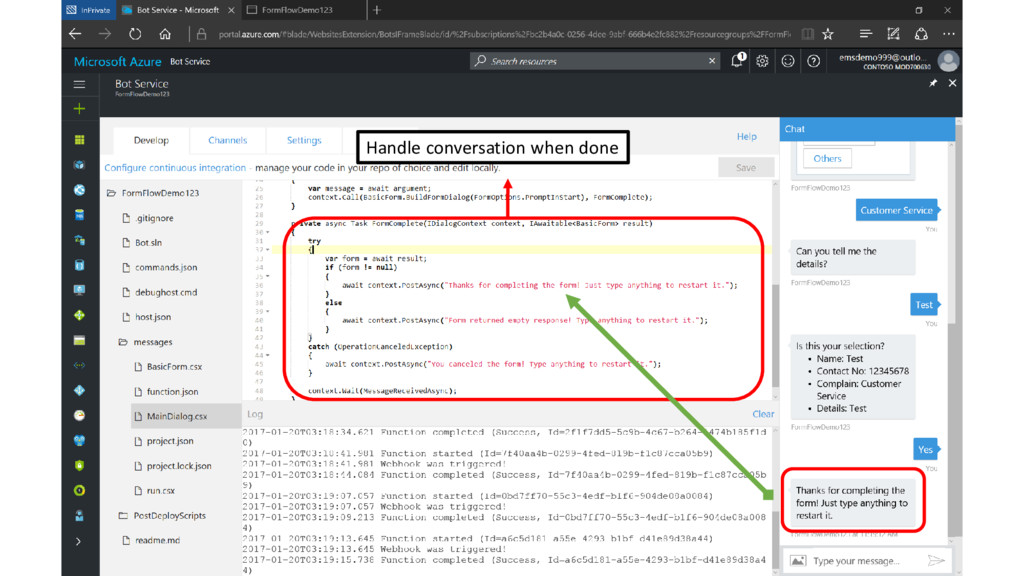
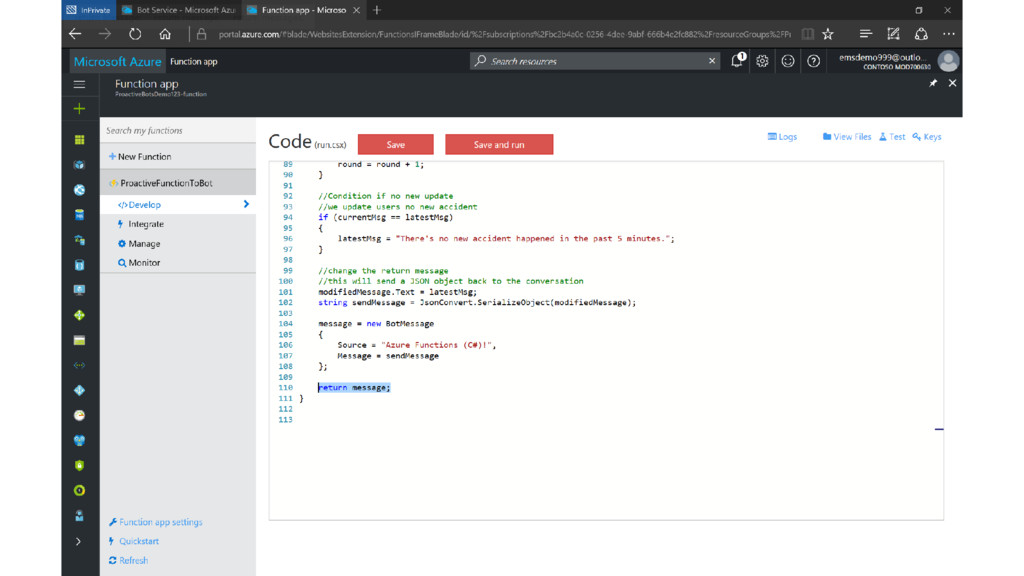
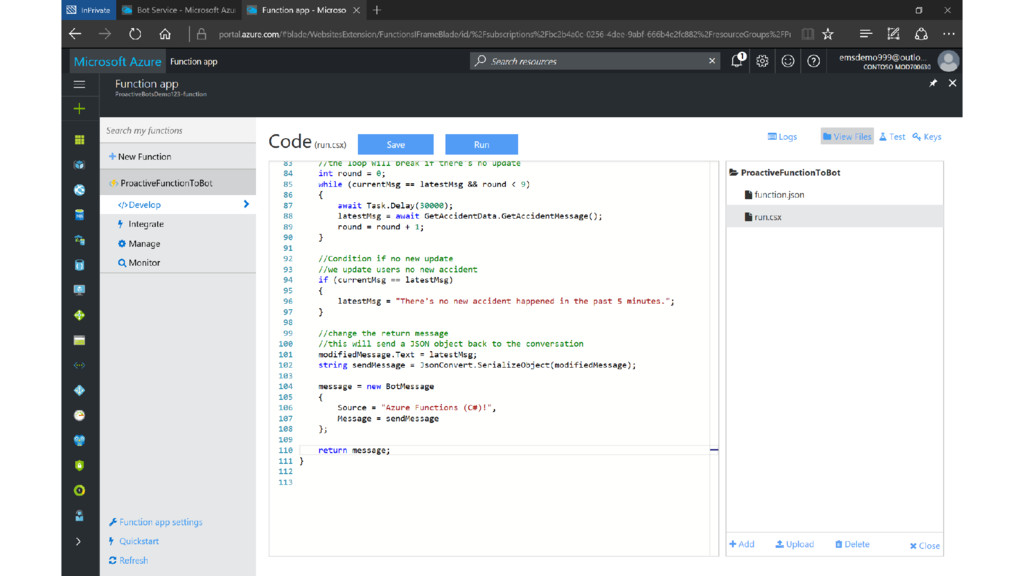
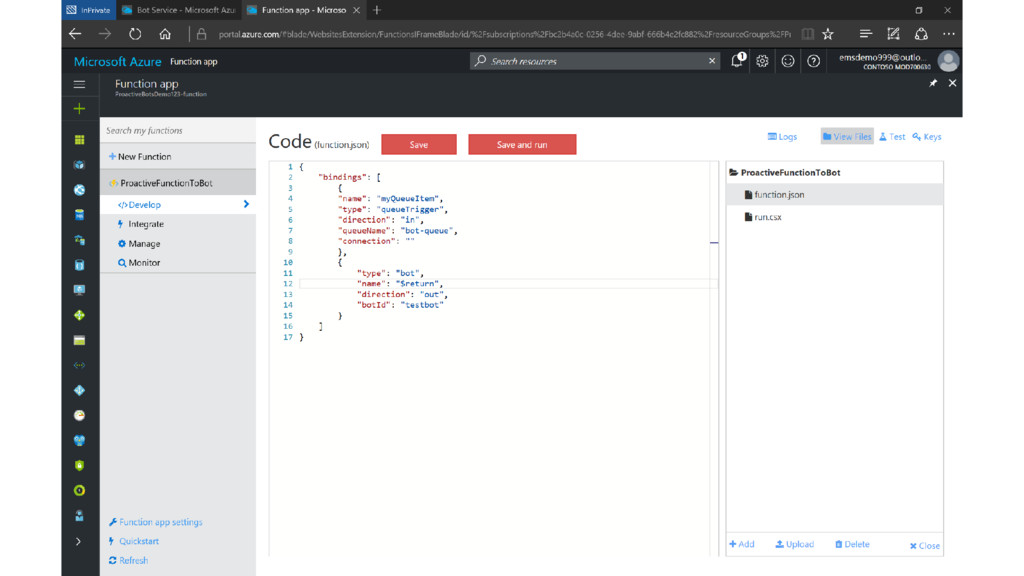
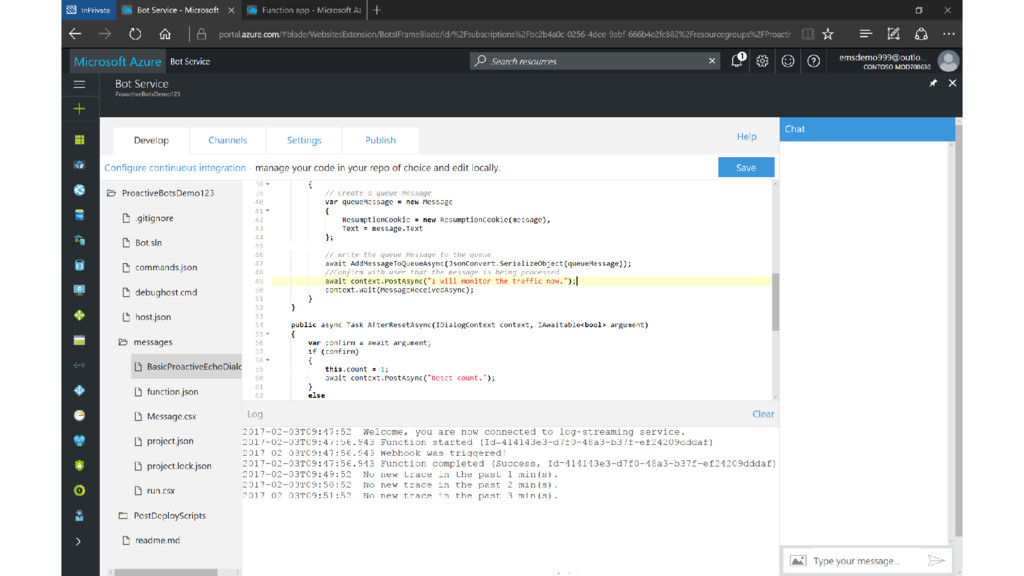
context, LuisResult result) { //obtain the json data from LTA and extract entities Rootobject Traffic = await GetTrafficImages.GetImage(); string cameraID = ""; cameraID = result.Entities[0].Entity; //find the camera from data int cameraNo = 0; int maxCameraNo = Traffic.value.Count() - 1; while (cameraID != Traffic.value[cameraNo].CameraID) { if (cameraNo == maxCameraNo) break; else cameraNo += 1; } //construct response //case when can't find the camera if (cameraNo == maxCameraNo) { await context.PostAsync("I can't find this camera."); // context.Wait(MessageReceived); } //case when can find the camera else { string cameraImageURL = Traffic.value[cameraNo].ImageLink; var replyTraffic = context.MakeMessage(); replyTraffic.Attachments = new List<Attachment>() { new Attachment() { ContentUrl = cameraImageURL, ContentType = "image/png", Name = "Camera.png" } }; await context.PostAsync(replyTraffic); await context.PostAsync("Here's your image."); // context.Wait(MessageReceived); } }
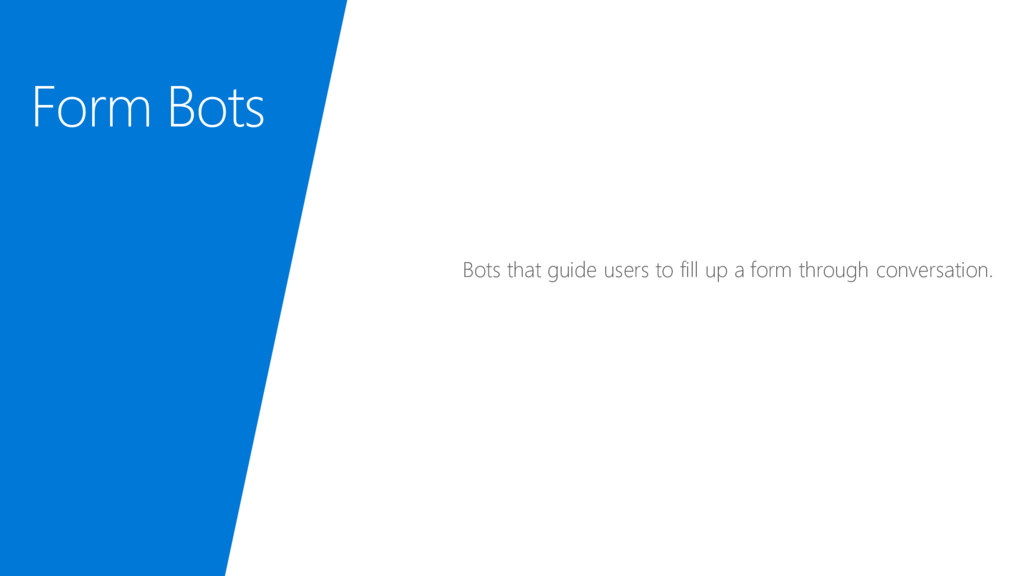
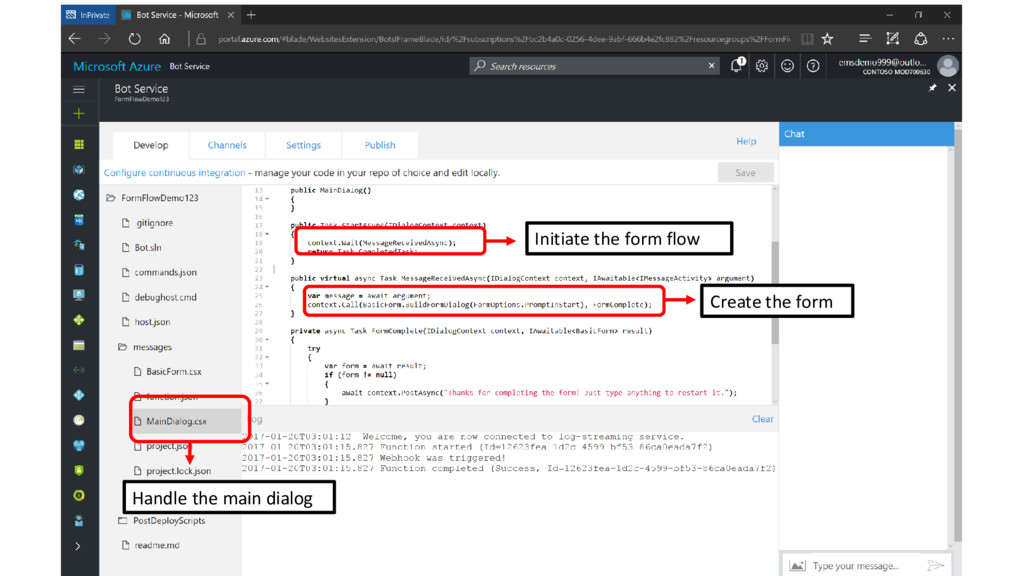
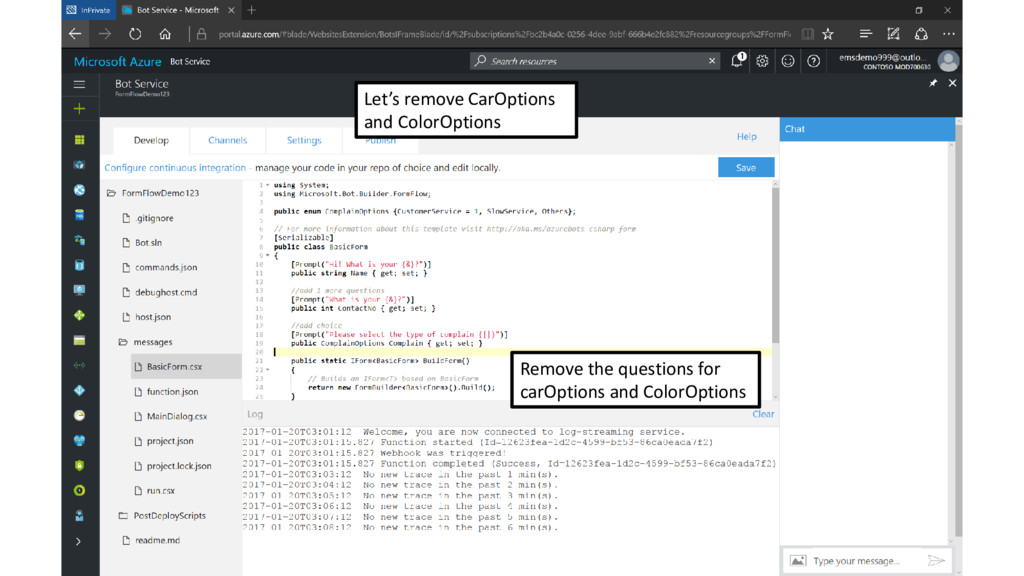
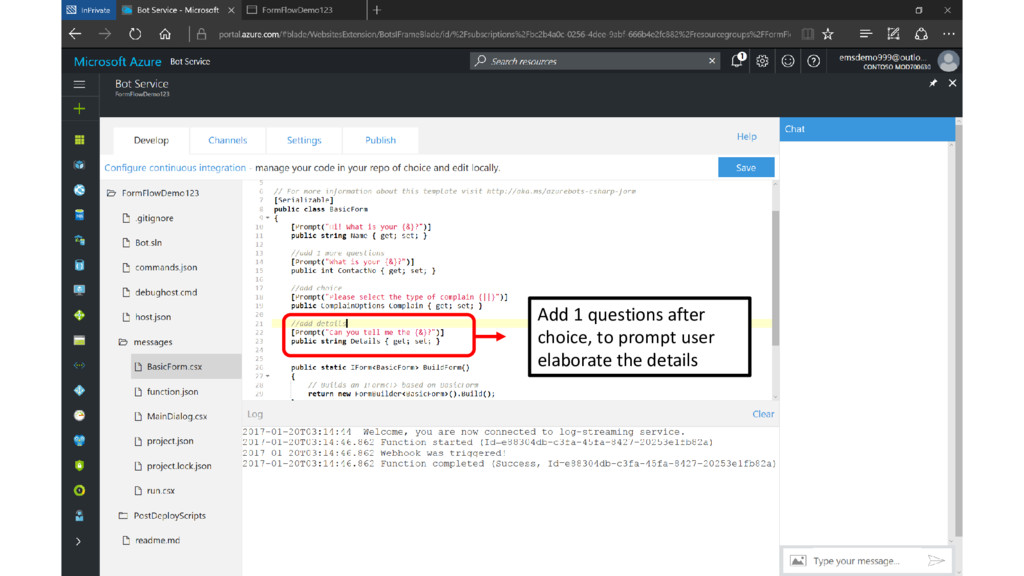
of performing a guided conversation with the users. Typically, this guided conversation is used when you need the users to answer a series of questions.
![Complete code for the intent [LuisIntent("cameraImage")] public async Task cameraImage(IDialogContext](https://files.speakerdeck.com/presentations/40b2d8bcd95e4dd0b730d97c64b513e2/slide_87.jpg)