Share
Embed
Strategic Autovacuum
This talk describes how to tune autovacuum in PostgreSQL

Jim Mlodgenski
October 03, 2017
Transcript
54 slides
-
Who am I? • Jim Mlodgenski • [email protected] • @jim_mlodgenski
• Co-Chair • PGConf US • Director • United States PostgreSQL (www.postgresql.us) • Co-organizer of • Philly PUG (www.phlpug.org) • NYC PUG (www.nycpug.org) • CTO, OpenSCG • www.openscg.com -
ACID • Atomicity • All or nothing (COMMIT / ROLLBACK)
• Consistency • A transaction brings the database from one valid state to another • Isolation • Concurrent transactions execute isolated from each other • Tunable with ‘transaction_isolation’ • Durability • Once a COMMIT has completed, the data is safe, even in the event of power loss or crash. -
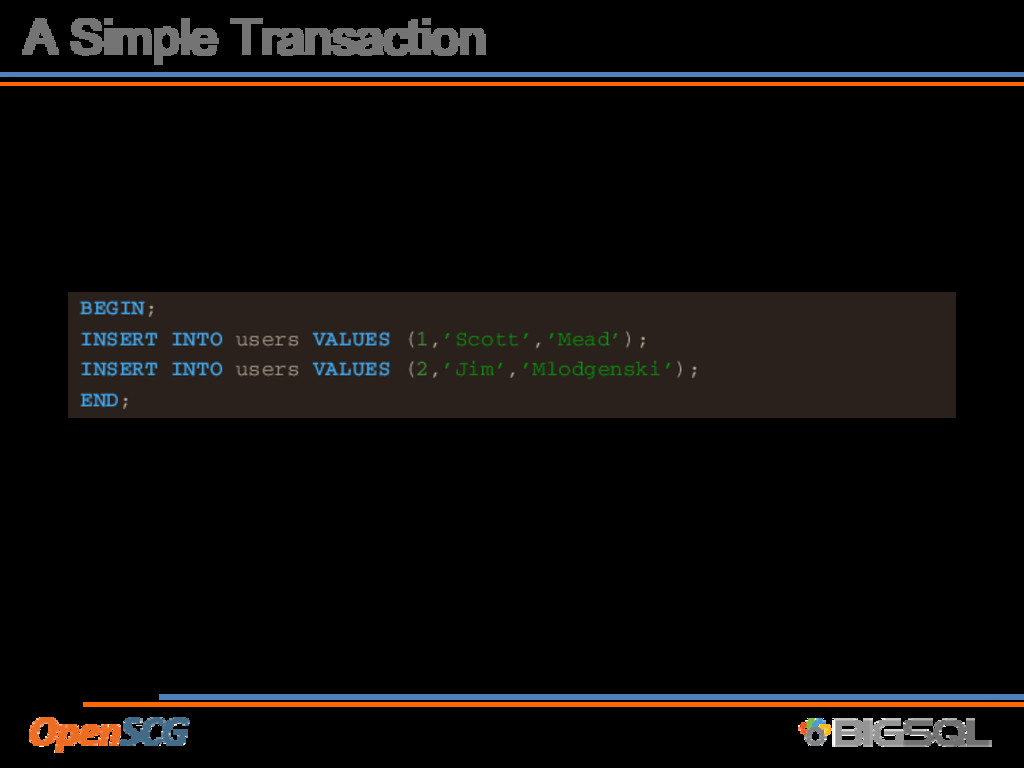
A Simple Transaction BEGIN; INSERT INTO users VALUES (1,’Scott’,’Mead’); INSERT
INTO users VALUES (2,’Jim’,’Mlodgenski’); END; -
Transactions • The ACID properties apply to every postgres transaction
• To satisfy these properties, PostgreSQL implements MVCC • Multi-Version Concurrency Control -
MVCC • Gurantees that Postgres is ACID compliant • Readers
never block writers and vice-versa • This has implications down to the storage manager -
Data Modification • The Isolation rule requires that concurrent xacts
are isolated • UPDATE / DELETE statements change data • What happens while concurrent transactions are executing ? -
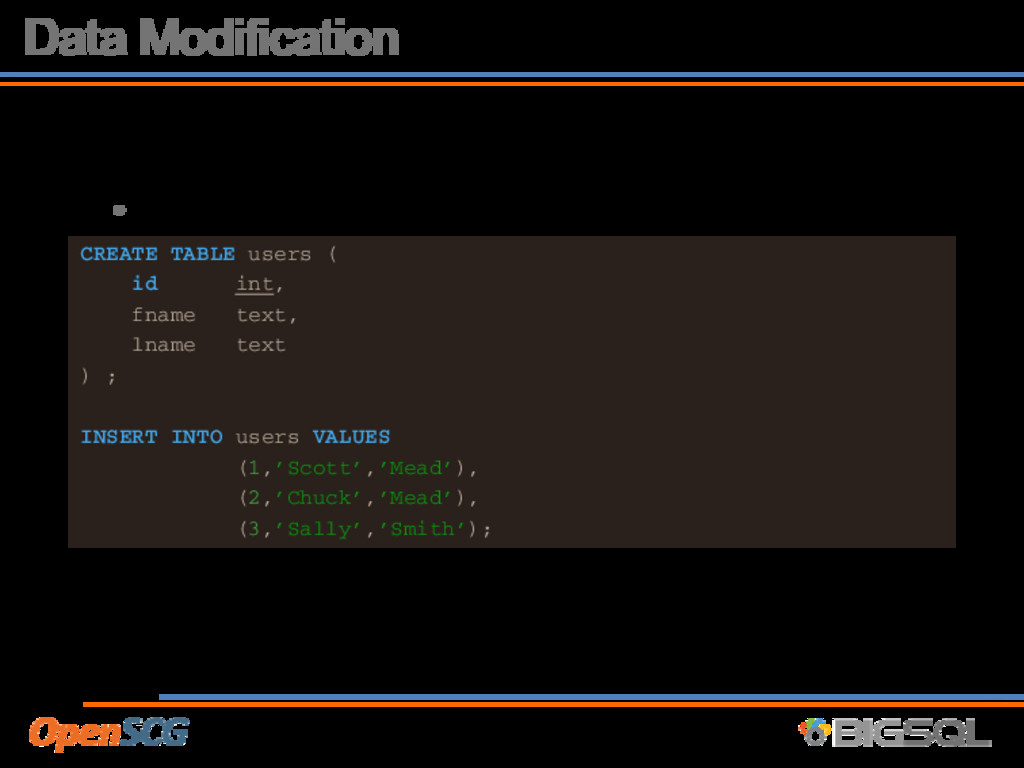
Data Modification • Setup our ‘users’ table and bulk load
the data CREATE TABLE users ( id int, fname text, lname text ) ; INSERT INTO users VALUES (1,’Scott’,’Mead’), (2,’Chuck’,’Mead’), (3,’Sally’,’Smith’); -
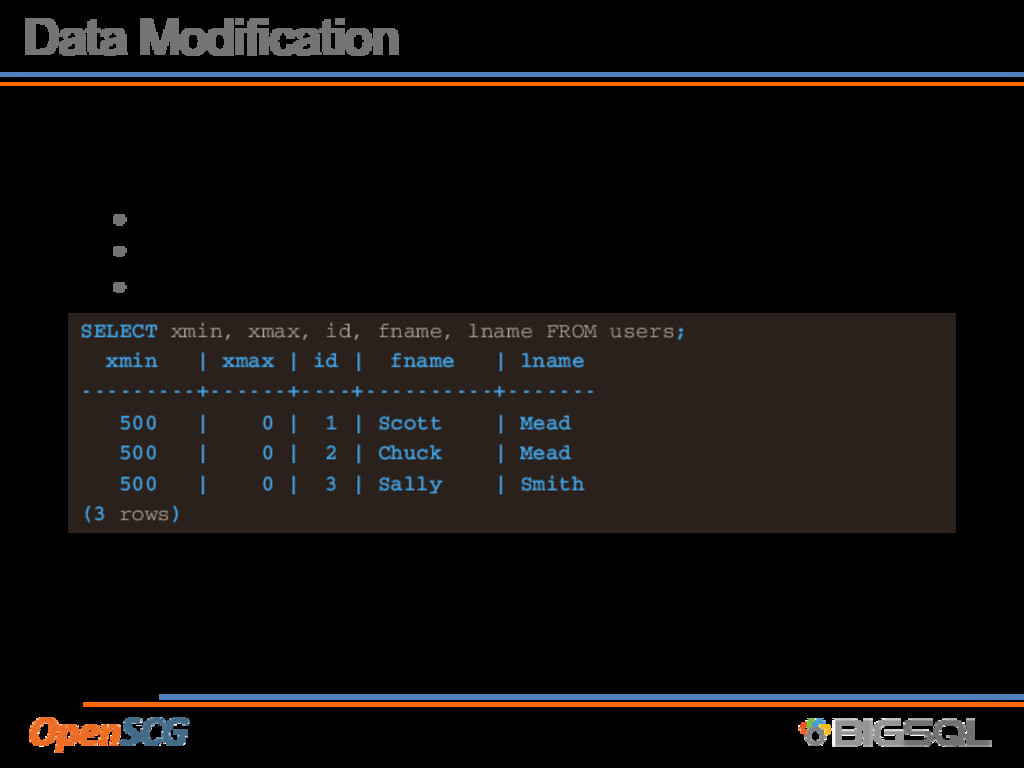
Data Modification • xid = Transaction ID • xmin =
xid that placed row in DB • xmax = xid that changed row in DB SELECT xmin, xmax, id, fname, lname FROM users; xmin | xmax | id | fname | lname ---------+------+----+----------+------- 500 | 0 | 1 | Scott | Mead 500 | 0 | 2 | Chuck | Mead 500 | 0 | 3 | Sally | Smith (3 rows) -
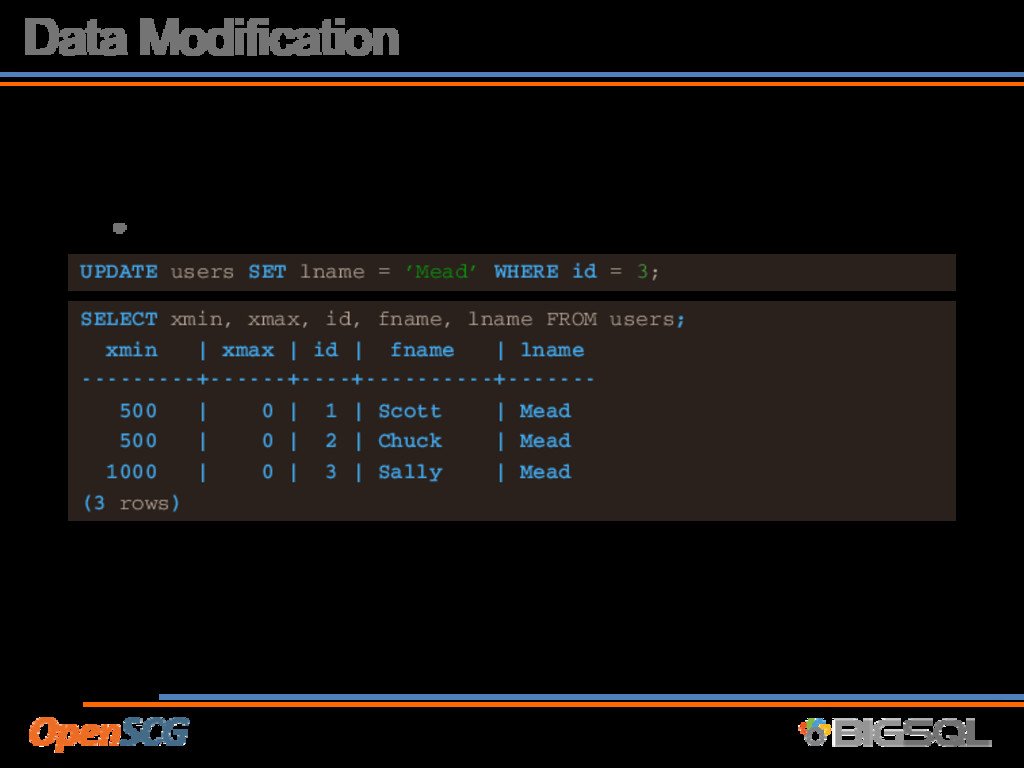
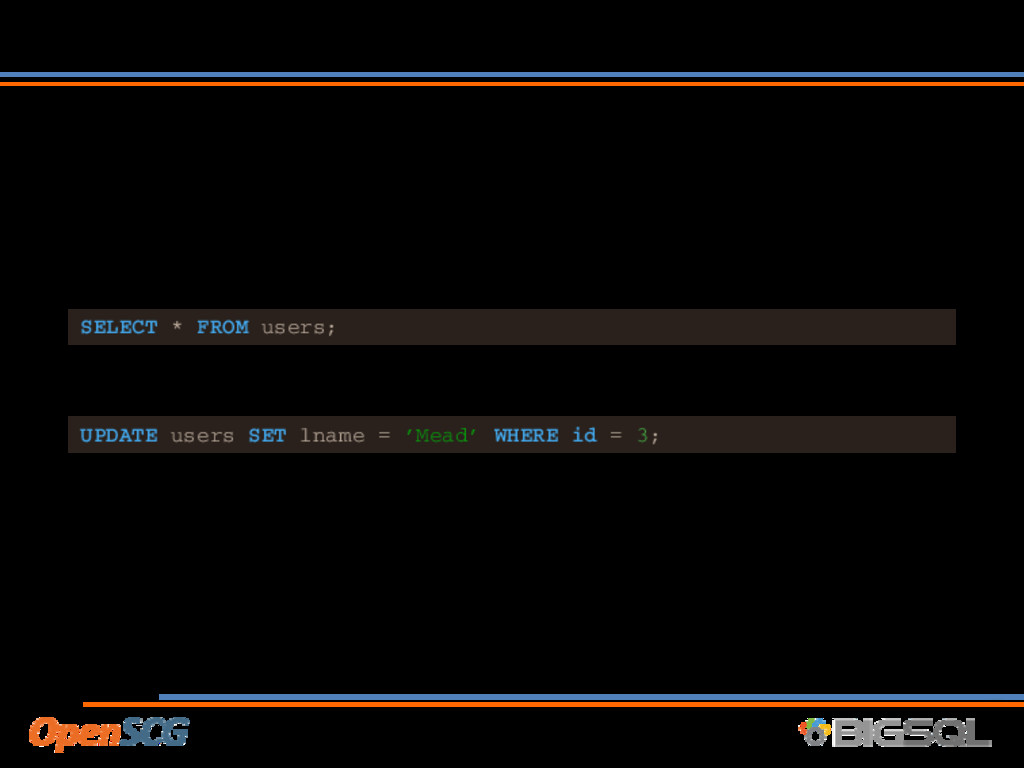
Data Modification • Marry Me? UPDATE users SET lname =
’Mead’ WHERE id = 3; SELECT xmin, xmax, id, fname, lname FROM users; xmin | xmax | id | fname | lname ---------+------+----+----------+------- 500 | 0 | 1 | Scott | Mead 500 | 0 | 2 | Chuck | Mead 1000 | 0 | 3 | Sally | Mead (3 rows) -
Data Modification • Postgres doesn’t overwrite the old row •
xmax = xid of UPDATE ing / DELETE ing transaction SELECT xmin, xmax, id, fname, lname FROM users; xmin | xmax | id | fname | lname ---------+------+----+----------+------- 500 | 0 | 1 | Scott | Mead 500 | 0 | 2 | Chuck | Mead ~~ 500 | 1000 | 3 | Sally | Smith ~~ old row version 1000 | 0 | 3 | Sally | Mead (3 rows) Why leave the old data? -
2 Transactions A. Read all users SELECT * FROM users;
B. Marry Me? UPDATE users SET lname = ’Mead’ WHERE id = 3; -
Concurrent transactions A - xid = 600 |-----------------------------------| <-------+-----+---+-------------------------+------> |---|
B xid=1000 • Transaction A will see • xmin <= xid < xmax • So in this case, A sees Sally Smith ~~ 500 | 1000 | 3 | Sally | Smith ~~ old row version 1000 | 0 | 3 | Sally | Mead Ummm… Why VACUUM? -
Dead Rows • In order to satisfy isolation & consistency
of ACID, postgres leaves multiple row versions • After some time, these row versions are not visible to anybody • Typically referred to as ‘bloat’ or ‘fragmentation’ -
XID Wrap-Around • Data visibility depends on sequential XIDs •
Postgres uses unsigned 32 bit int as XID • What happens when I hit 4,294,967,295 XID? -
VACUUM • Remember, as DBA’s, we love free space. •
Allocated space that we can re-use • Too much can be a problem • Find these old rows and mark them as available • FSM (Free Space Map) • Future transactions can re-use the space • VACUUM can also: • Update Planner statistics • Protect against xid wrap-around (FREEZE) That’s VACUUM… what about AUTOvacuum? -
Autovacuum • Autovacuum daemon kicks off VACUUM tasks based on
thresholds • Quite a few configuration options available • Defaults: • autovacuum = on • 3 background workers -
Issues with Autovacuum • “Saw a performance problem, noticed autovacuum,
killed it” • “When Autovacuum runs, performance sucks, I kill it” • “Slow! -> Outage (full dump / restore).” • Things run GREAT after that! • For a while… • “I see autovacuum running for days at a time” • “After I purge my logging table, autovacuum runs for days” • “Autovacuum is constantly running on table X,Y,Z” -
Autovacuum is your friend • Maintains a database • Uses
usage metrics to maintain relations • Throttled to avoid I/O penalty • Updates planner stats as tables change • Protects against wrap around -
A note on contention • Autovacuum doesn’t take exclusive locks
• Autovacuum will prevent others from taking exclusive locks • Does contend for I/O bandwidth -
We are not • Talking about compaction! • DBAs love
freespace • Autovacuum does not VACUUM FULL • Recommend pg_repack for online compaction -
DBA in a box • Autovacuum grew from a few
basic algorithms • A DBA would examine your workload and build a strategy • It’s still a machine, and operates based on conservative defaults • Workload defaults • vacuum_threshold = 50 • vacuum_scale_factor = 0.2 (20%) • vacuum_cost_delay = 20 (ms) -
Configuration • When to VACUUM? • How many changes before
we consider a VACUUM • How to VACUUM? • # of Simultaneous vacuums • How aggressively to VACUUM? • i.e. Throttling • Logging Autovacuum -
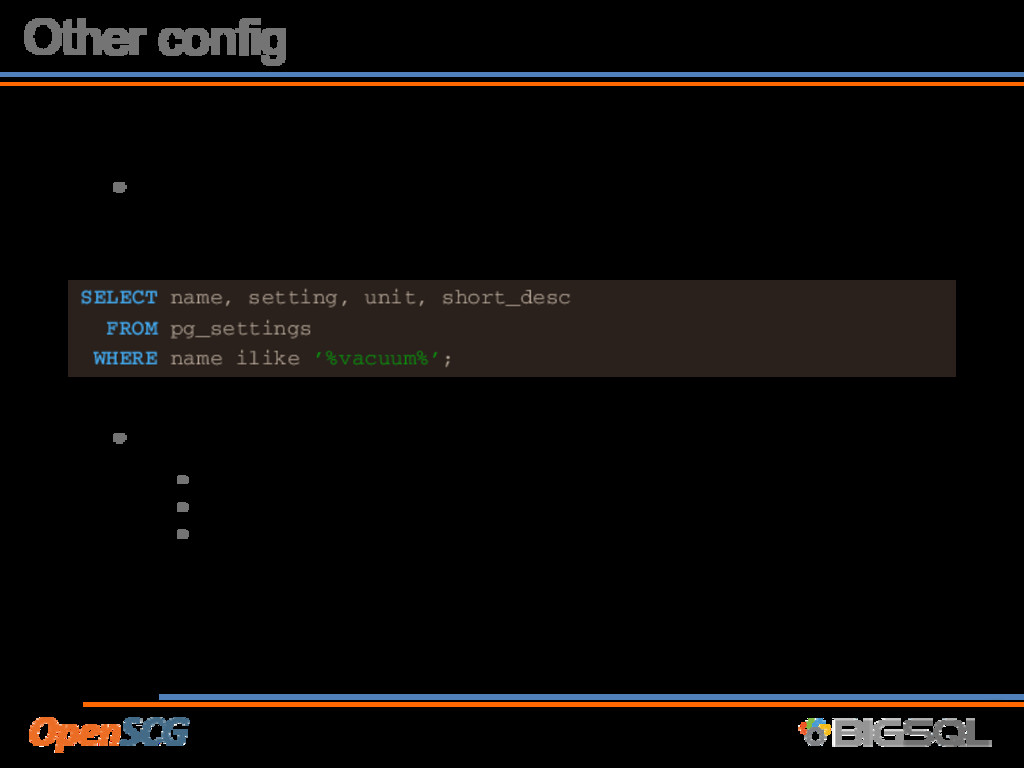
Other config • There are many other config options for
autovacuum SELECT name, setting, unit, short_desc FROM pg_settings WHERE name ilike ’%vacuum%’; • Controls are available for: • ANALYZE • FREEZE • Memory Utilization -
How aggressively to vacuum? • Vacuum isn’t free. How much
does it cost? • vacuum_cost_page_hit = 1 • vacuum_cost_page_miss = 10 • vacuum_cost_page_dirty = 20 • After accumulating cost, what to do? • autovacuum_vacuum_cost_limit = 200 • autovacuum_vacuum_cost_delay = 20 (ms) • sleep for this many milliseconds -
Logging Autovacuum • log_autovacuum_min_duration = xx (ms) • Recommend: 0
(zero), logs all autovacuum activity • Easily parsed from the logs with pgBadger -
Strategy Start with Autovacuum defaults 1. Monitor workloads for tables
with heavy UPDATE + DELETE 2. Adjust per-table vacuum thresholds 3. Monitor workload, vacuum and bloat 4. Adjust autovacuum throttle / threshold further GOTO 1. -
Monitor workload • Monitor UPDATE & DELETE workloads on all
tables • Single out heaviest modified tables • These tables monopolize autovacuum processes -
Adjust per-table vacuum thresholds • Look for tables with 10
- 100x the next largest workload • Tuning autovacuum: 1. Increase the number of autovacuum_max_workers • Adds capacity to vacuum • Provides ‘dedicated’ workers for busy tables 2. Increase the ‘vacuum_threshold’ • Prevents autovacuum from constantly tending to a table • Allows other tables a chance to be vacuumed -
Monitor workload, vacuum and bloat • Continue workload monitoring •
Monitor for tables not vacuumed within 7 days • 7 days is somewhat arbitrary, but a good start • This shows both starvation and the quietest tables • Monitor logs for VACUUM times / behavior • Configure • log_line_prefix • log_autovacuum_min_duration • Use pgbadger to visualize autovacuum behavior • Look at length of vacuums and # of them -
Monitor workload, vacuum and bloat … • Monitor bloat •
A number of ways to monitor • Typically complex queries, but give good insight • Monitor for long-running vacuum • Too long between vacuum (high threshold) • Throttle is too high • Monitor I/O subsystem • Vacuum demands I/O bandwidth, monitor and throughput to avoid starving the database server’s query activity -
Adjust autovacuum throttle / threshold further • Choose tables with
high bloat and/or long-running vacuums • Marry the data to your workload analysis • If the thresholds are normal, lower the throttle • If the thresholds are high, lower them -
Other Considerations • Ultra-high change tables may require special attention
• custom vacuum cron-job for ultra-high fliers • Logging tables like special attention • Typical logging tables have high INSERT with perdiodic, large bulk DELETE • Partition • Use ‘truncate table ’ instead of DELETE • No VACUUM required -
Other Considerations • Modify globals • By now, you know
the impact of modifying your settings • Adjusting the global threshold can spread vacuums out • Adjusting the global throttle can speed vacuums up -
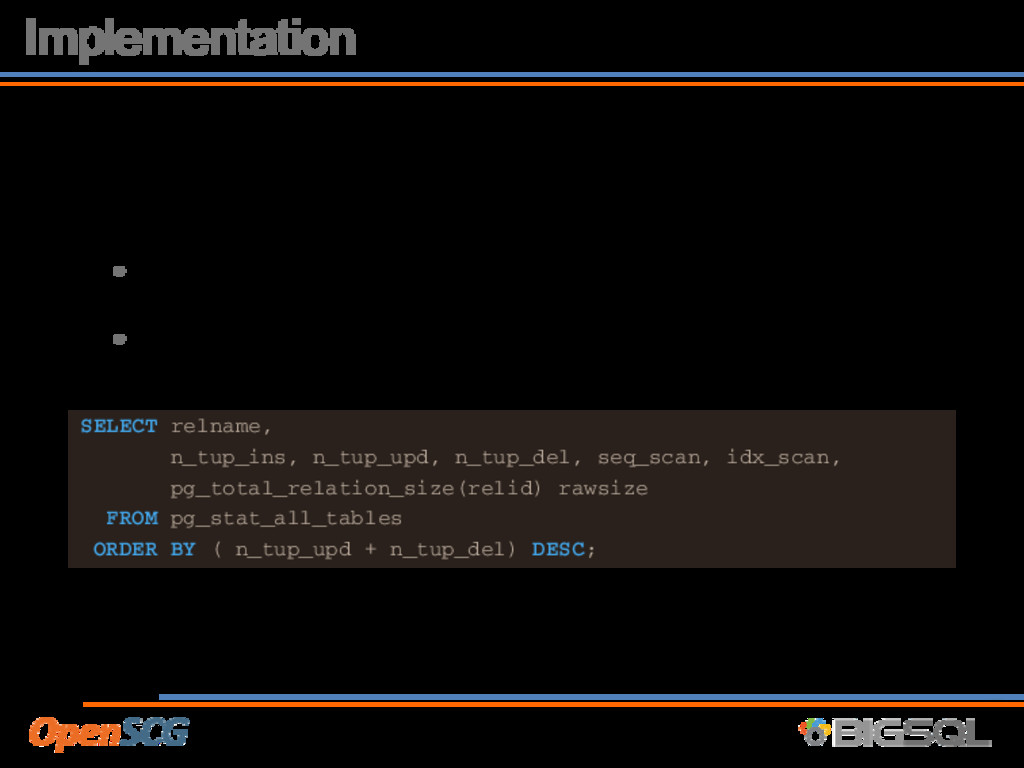
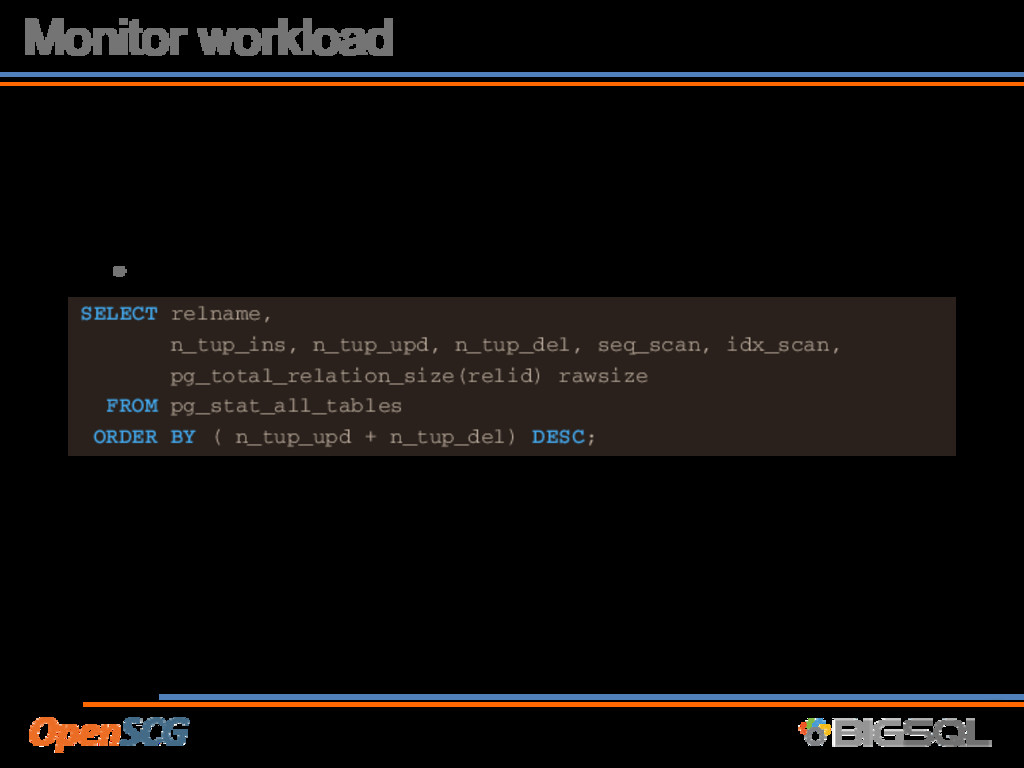
Implementation Monitor workload • VACUUM matters most for heavy UPDATE
and DELETE workloads • Look at table usage by most updated + deleted SELECT relname, n_tup_ins, n_tup_upd, n_tup_del, seq_scan, idx_scan, pg_total_relation_size(relid) rawsize FROM pg_stat_all_tables ORDER BY ( n_tup_upd + n_tup_del) DESC; -
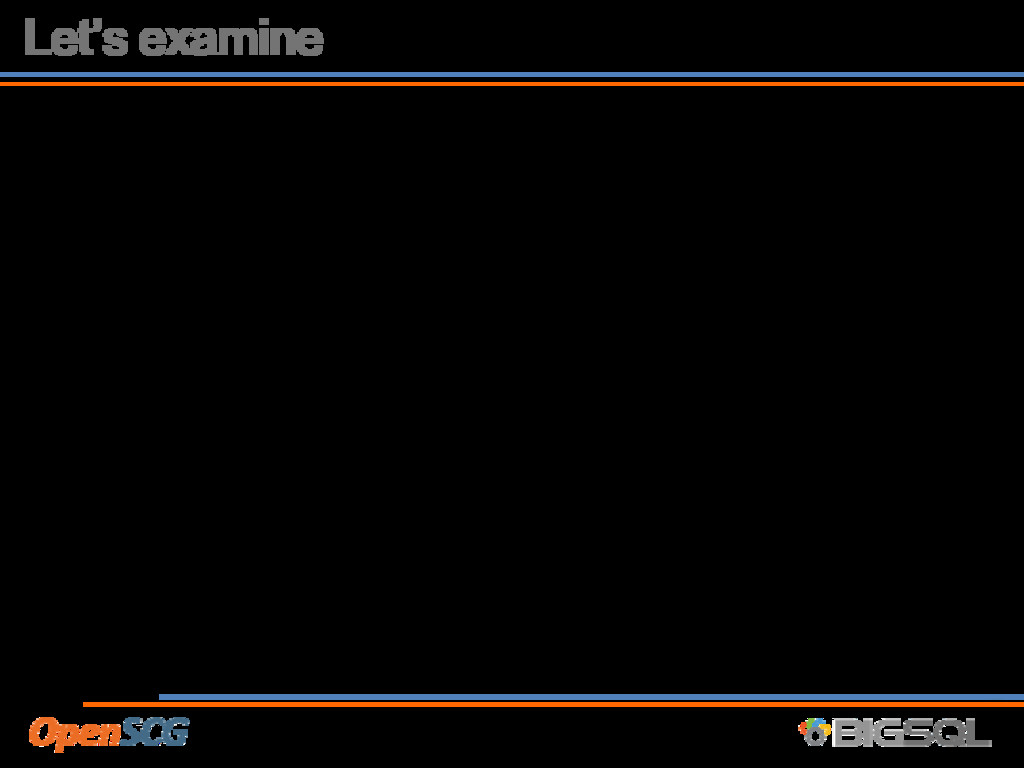
Let’s examine relname | n_tup_ins | n_tup_upd | n_tup_del -------------------+-----------+-----------+-----------
pgbench_branches | 100 | 10000 | 0 pgbench_accounts | 10000000 | 10000 | 0 pgbench_tellers | 1000 | 10000 | 0 pg_attribute | 104 | 2 | 44 pg_statistic | 17 | 7 | 17 pg_depend | 37 | 0 | 18 pg_class | 14 | 5 | 7 pg_type | 15 | 0 | 8 users | 3 | 6 | 0 hosts | 2 | 4 | 0 -
Analysis? • The pgbench_branches, accounts and tellers tables took 4
orders magnitude higher updates than the next table • If this traffic continues around the clock, then the pgbench tables will require all 3 of our autovacuum workers, all the time • Since only a few tables are demanding time, let’s optimize those away -
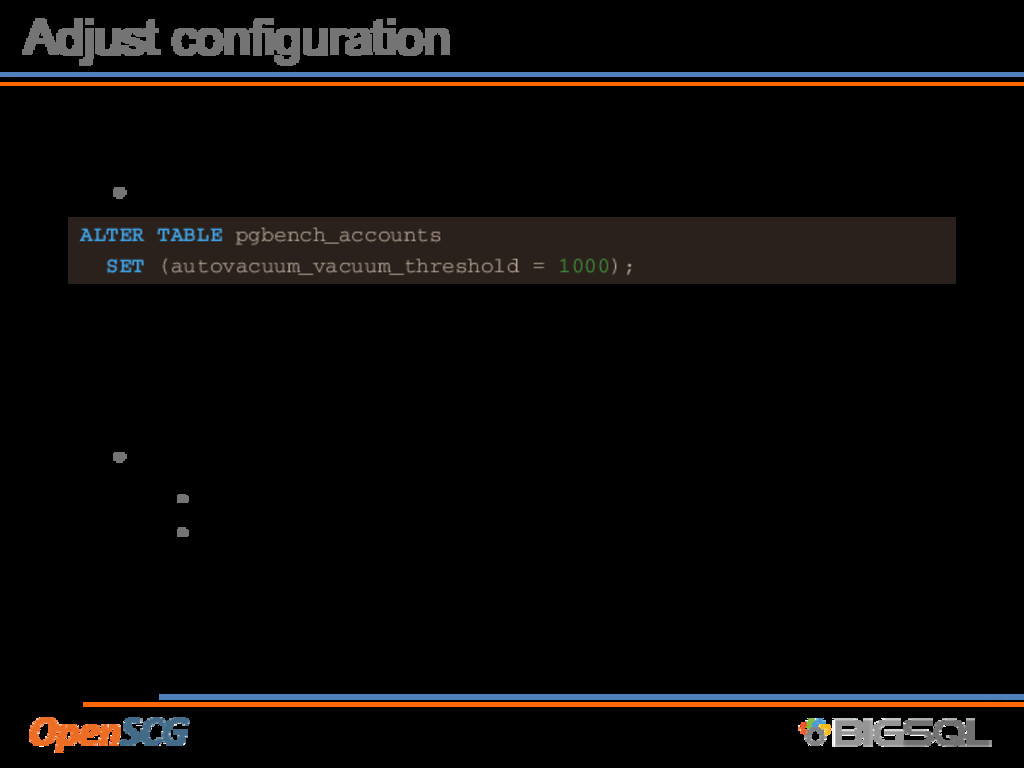
Adjust configuration • Threshold ALTER TABLE pgbench_accounts SET (autovacuum_vacuum_threshold =
1000); We want to pick a threshold that will allow other tables to be vacuumed without ignoring our critical tables too long. • Number of workers • Add to the pool of available vacuum processes • We need to be mindful of I/O -
Monitor workload, vacuum and bloat • Adjusting thresholds and workers
impacts the system • Increased demand on I/O subsystem • Increased time between table vacuums -
What to monitor • Workload • Tables not vacuumed within
7 days • Autovacuum Logs • Long-running vacuum • Bloat -
Monitor workload • Use the same query as before SELECT
relname, n_tup_ins, n_tup_upd, n_tup_del, seq_scan, idx_scan, pg_total_relation_size(relid) rawsize FROM pg_stat_all_tables ORDER BY ( n_tup_upd + n_tup_del) DESC; -
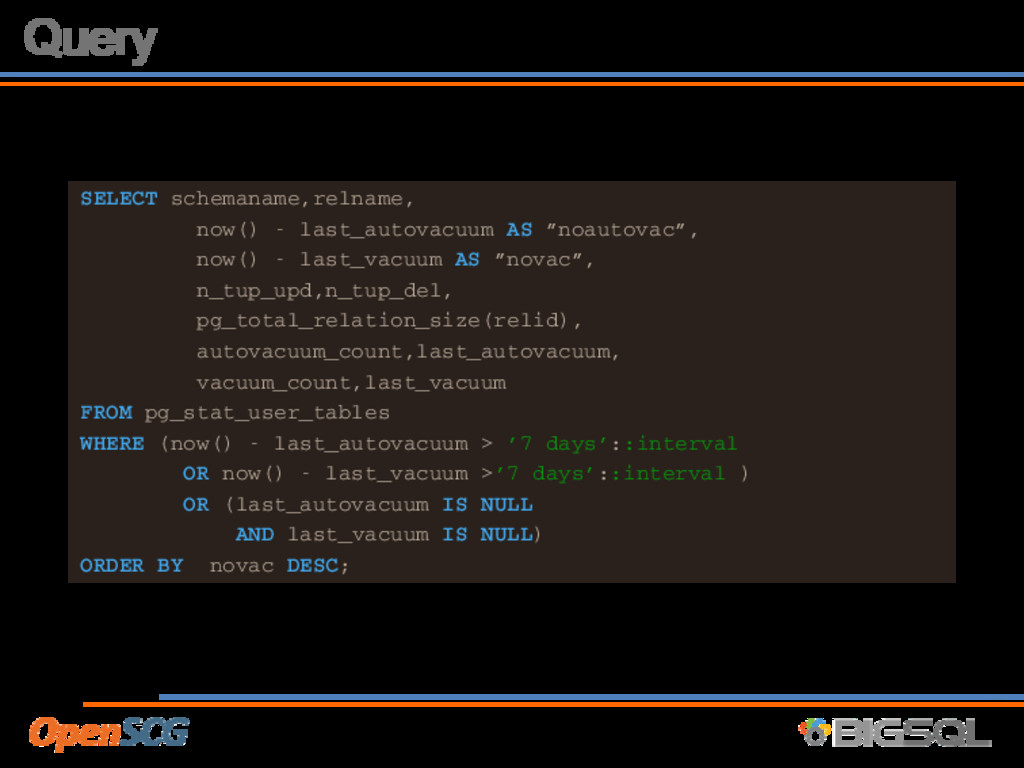
Monitor We want to see all tables that: • Have
not been vacuumed in 7 days • Have not been autovacuumed in 7 days • Have never been vacuumed or autovacuumed • 7 days is a starting point, adjust as necessary -
Query SELECT schemaname,relname, now() - last_autovacuum AS ”noautovac”, now() -
last_vacuum AS ”novac”, n_tup_upd,n_tup_del, pg_total_relation_size(relid), autovacuum_count,last_autovacuum, vacuum_count,last_vacuum FROM pg_stat_user_tables WHERE (now() - last_autovacuum > ’7 days’::interval OR now() - last_vacuum >’7 days’::interval ) OR (last_autovacuum IS NULL AND last_vacuum IS NULL) ORDER BY novac DESC; -
Autovacuum logs 1. Set your log_line_prefix correctly 2. use pgBadger
to parse your logs pgbadger provides rich and detailed graphs and ta- bles around autovacuum behavior in an easy-to-read HTML report. -
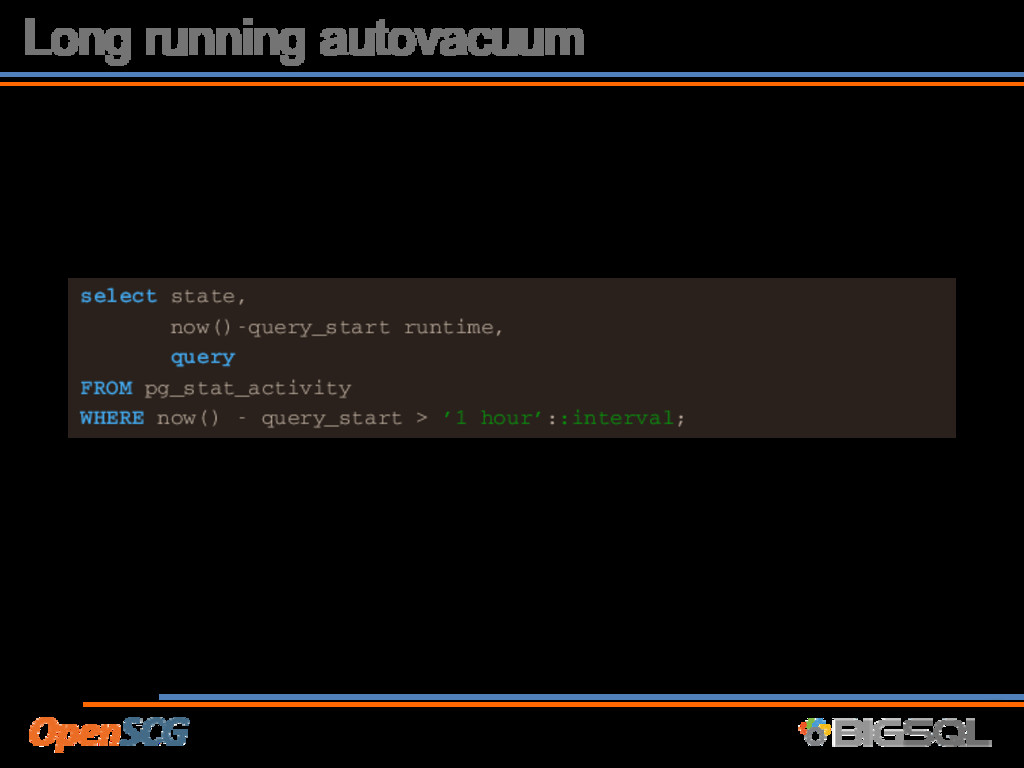
Long running autovacuum select state, now()-query_start runtime, query FROM pg_stat_activity
WHERE now() - query_start > ’1 hour’::interval; -
Bloat • Estimate (recommended) • https://github.com/ioguix/pgsql-bloat-estimation • https://bucardo.org/wiki/Check_postgres • Calculate
(Takes longer, more accurate) • pg_stattuple • https://www.postgresql.org/docs/9.5/static/pgstattuple.h -
Adjust autovacuum throttle / threshold Tables not vacuumed in 7
days • Table traffic too low to warrant vacuum • Lower thresholds for specific tables • Starvation (heavy tables need higher thresholds) • Raise thresholds for busiest tables -
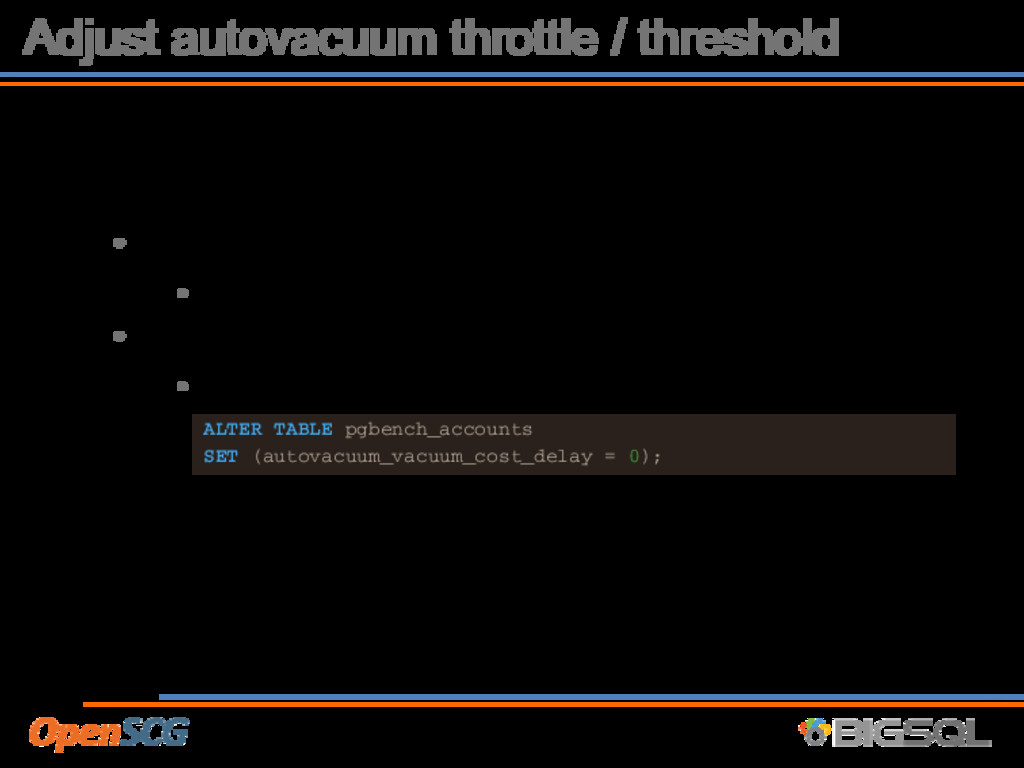
Adjust autovacuum throttle / threshold Long-running Autovacuums • Time between
vacuums high • Lower thresholds • Autovacuum heavily throttled • Lower throttle per-table ALTER TABLE pgbench_accounts SET (autovacuum_vacuum_cost_delay = 0); Note: The ‘cost_delay’ setting is effective in 10ms increments, 0 means unthrottled -
4. Adjust autovacuum throttle / threshold further… • High Bloat
• Typcially workload dependent • High UPDATE / DELETE, new rows don’t fit freespace • Ultra-high rate of change • VACUUM can’t complete fast enough for new rows • Remediation • Change workload • Lower throttles on these • Move to separate disk • Disable autovacuum, move to ‘cron-based’ vacuum • Partition -
Other considerations • Ultra-high change tables may require special attention
• Disable autovacuum & run manual vacuum • Logging tables like special attention • Typical logging tables have high INSERT with perdiodic, large bulk DELETE • Partition • Use ‘truncate table ’ instead of DELETE • No VACUUM required • Modify globals • If you’ve made it this far, you’ll have an understanding for the impact of lowering the thresholds or the throttle. In many cases, it does make sense to modify these conservative defaults. Again, use your workload analysis. -
Autovacuum Strategy Start with Autovacuum defaults 1. Monitor workloads for
tables with heavy UPDATE + DELETE 2. Adjust per-table vacuum thresholds 3. Monitor workload and vacuum behavior 4. Adjust autovacuum throttle / threshold further GOTO 1.
 inariku
 wadayusuke
 ham0215
 tkazuaki0820
 takuros
 yahonda
 yappli_developers
 masu_mi
 optim
 oracle4engineer
 sansantech
 orimanabu
 sergeychernyshev
 szymonslowik
 malarkey
 tammyeverts
 cargoodrich
 jacobtomlinson
 skipperchong
 mfonobong
 eileencodes
 lara
 bermonpainter
 maggiecrowley