Upgrade to Pro — share decks privately, control downloads, hide ads and more …

Intro to Blender for Unity

LD Smith
January 12, 2020

Intro to Blender for Unity

Presented at the January 2020 Knox Game Design meeting - http://www.knoxgamedesign.org/1290/blender-for-unity-knoxville-game-design-january-2020/

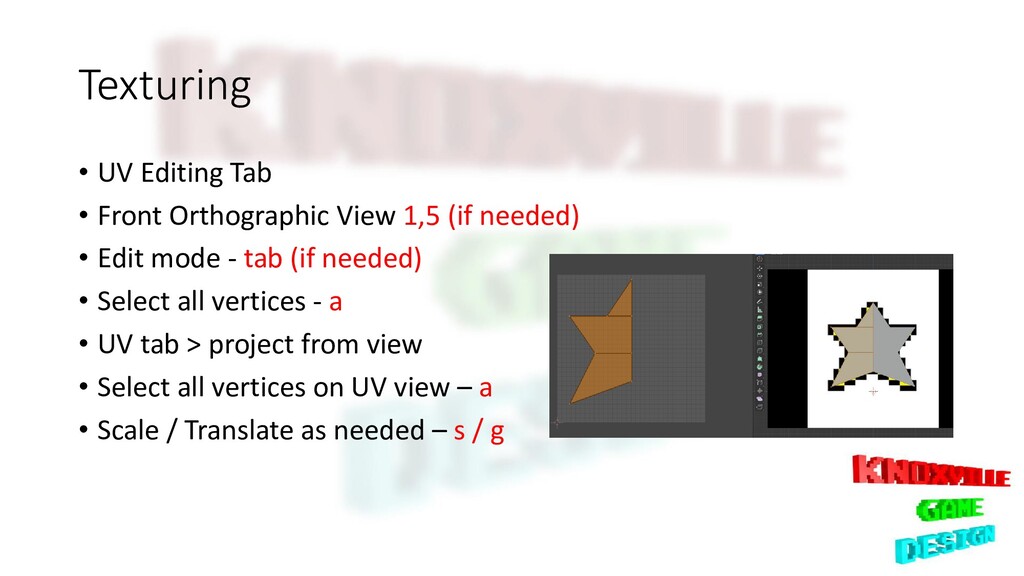
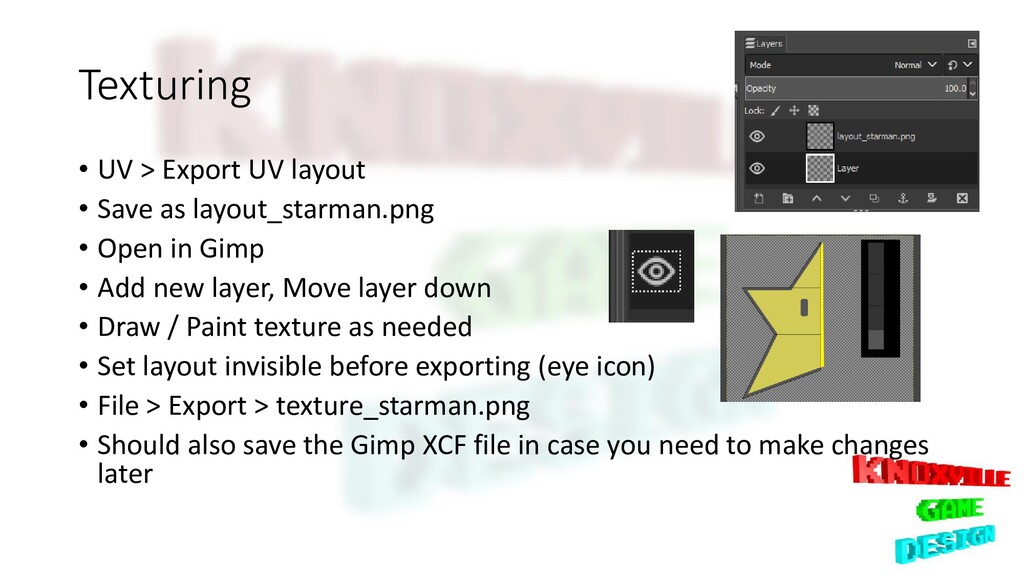
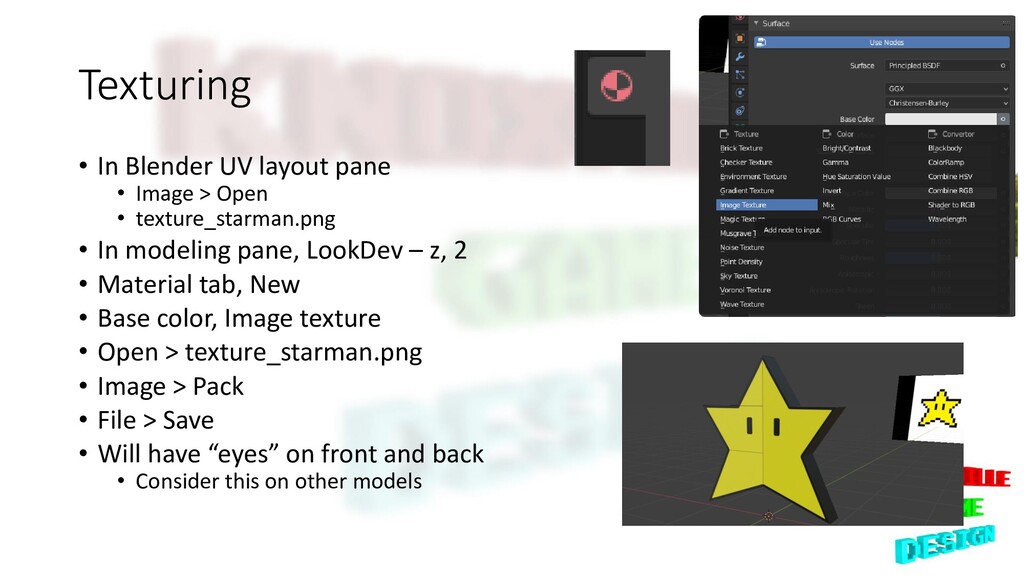
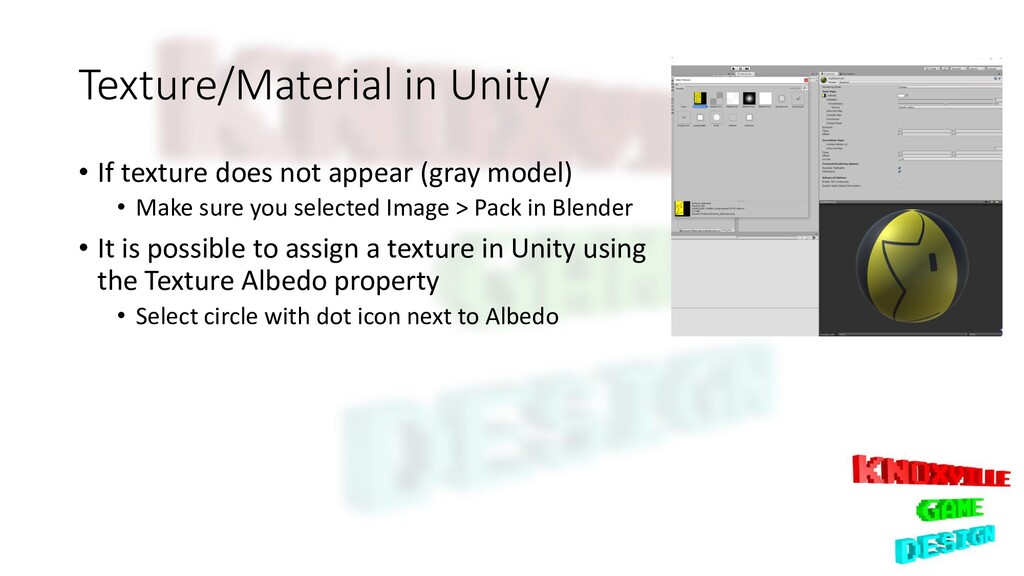
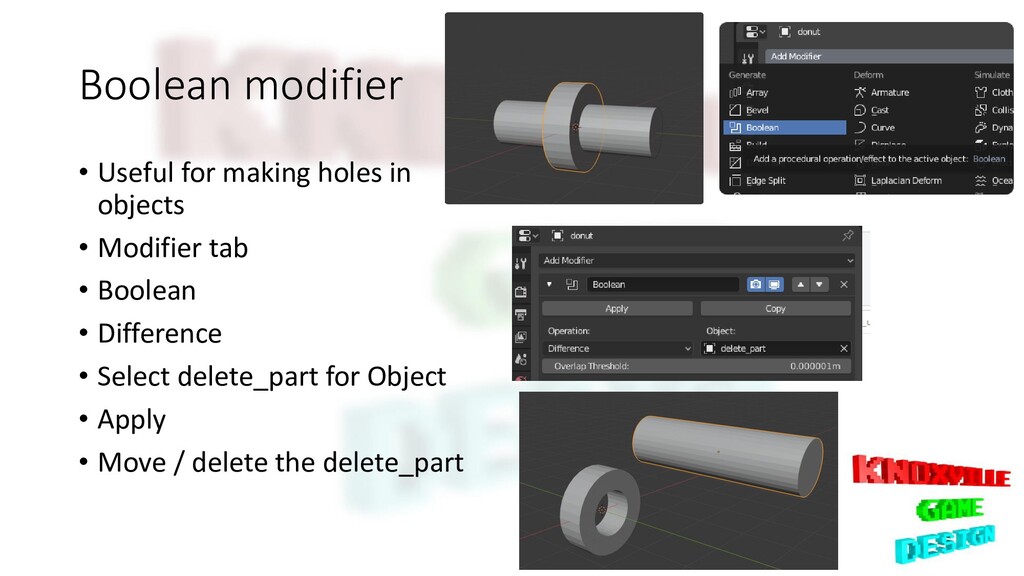
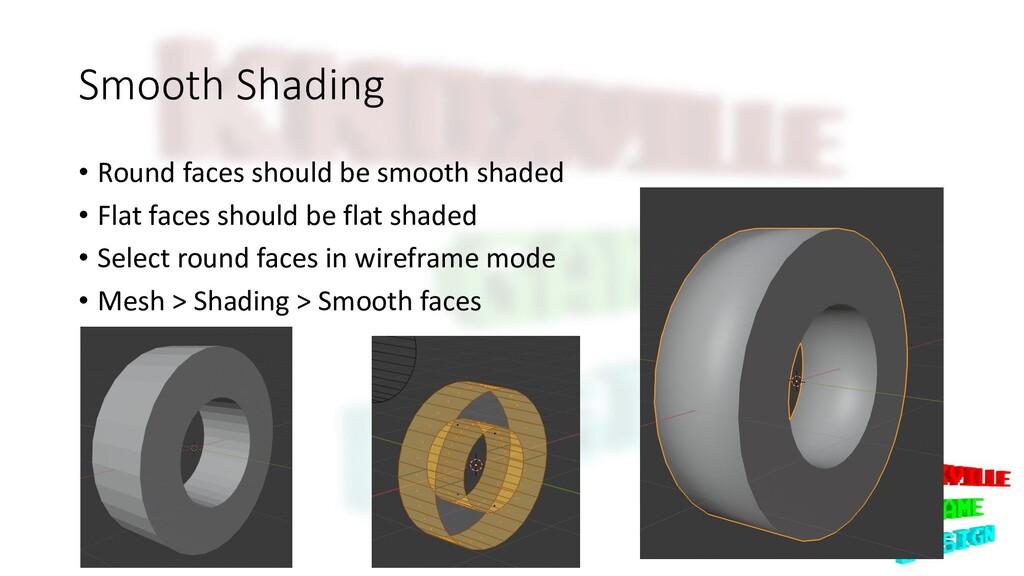
This month’s topic is Blender for Unity. We will go over the basics of modeling and texturing an object in Blender. Then we will import that model into Unity and add behaviors through C# code.

LD Smith

January 12, 2020
Tweet

More Decks by LD Smith

Other Decks in Technology

Transcript

  1. Basics • Z up coordinate system • Only model half

    and mirror • Tools used • Blender 2.80 • Gimp 2.10 • Unity 2019.2.11f1
  2. Modeling • Delete camera and light source x • Unity

    now tries to import light sources and cameras • Center orthographic camera 1,5 • Set guide image • Layout tab • Add > Image > Reference • Object tab – move and scale as needed • g,z | g,x | s
  3. Modeling • Add > Mesh > Cube • Edit Mode

    tab • Loop Cut Vertically down center Ctrl + R, Left Click, Escape/Enter • Wireframe z,4 • Delete right side vertices b, Left click and drag, x • Modifiers tab, Generate column, Mirror • Box select vertices • Translate (outer vertices only) b,g,z • Deselect vertices Alt+A • Add more loop cuts as needed Ctrl+R, Left Click, Move vertically, Enter
  4. Modeling • Set vertices to same z location s,z,0,Enter •

    Select All, Scale on Y Axis a,s,y • Delete vertices • Delete x, Dissolve Vertices • Mesh > Cleanup > Merge by Distance • Reset X position on Transform tab • Save • File > Save
  5. Texturing • UV Editing Tab • Front Orthographic View 1,5

    (if needed) • Edit mode - tab (if needed) • Select all vertices - a • UV tab > project from view • Select all vertices on UV view – a • Scale / Translate as needed – s / g
  6. Texturing • Side orthographic – 3, 5 (if needed) •

    Select faces option • Select no faces – Alt +A • Select side faces – b, left click and drag down center • Should see outline of star in UV pane • UV tab > Project from view • Move / Scale in UV tab as needed • Try not to overlap the front UV vertices • Select all vertices to see the UV layout
  7. Texturing • UV > Export UV layout • Save as

    layout_starman.png • Open in Gimp • Add new layer, Move layer down • Draw / Paint texture as needed • Set layout invisible before exporting (eye icon) • File > Export > texture_starman.png • Should also save the Gimp XCF file in case you need to make changes later
  8. Texturing • In Blender UV layout pane • Image >

    Open • texture_starman.png • In modeling pane, LookDev – z, 2 • Material tab, New • Base color, Image texture • Open > texture_starman.png • Image > Pack • File > Save • Will have “eyes” on front and back • Consider this on other models
  9. Import into Unity • Create Models folder under Assets •

    Drag and drop the Blender file into the Models folder • Suggest creating a new GameObject, and parenting the model to it • 3D Object > Cube • Rename to Starman • Remove the Mesh Renderer component – Gear Icon, Remove Component • Import texture • Create Textures folder • Drag texture_starman.png into it • Create Materials folder • Create Material, Rename matStarman
  10. Texture/Material in Unity • If texture does not appear (gray

    model) • Make sure you selected Image > Pack in Blender • It is possible to assign a texture in Unity using the Texture Albedo property • Select circle with dot icon next to Albedo
  11. Adding Unity Behaviors • Create Scripts folder • Create C#

    Script • Name Starman.cs • Add simple rotation code • Drag script onto parent Starman object in Hierarchy • Press play button in Unity editor to see it moving
  12. Boolean modifier • Useful for making holes in objects •

    Modifier tab • Boolean • Difference • Select delete_part for Object • Apply • Move / delete the delete_part
  13. Smooth Shading • Round faces should be smooth shaded •

    Flat faces should be flat shaded • Select round faces in wireframe mode • Mesh > Shading > Smooth faces