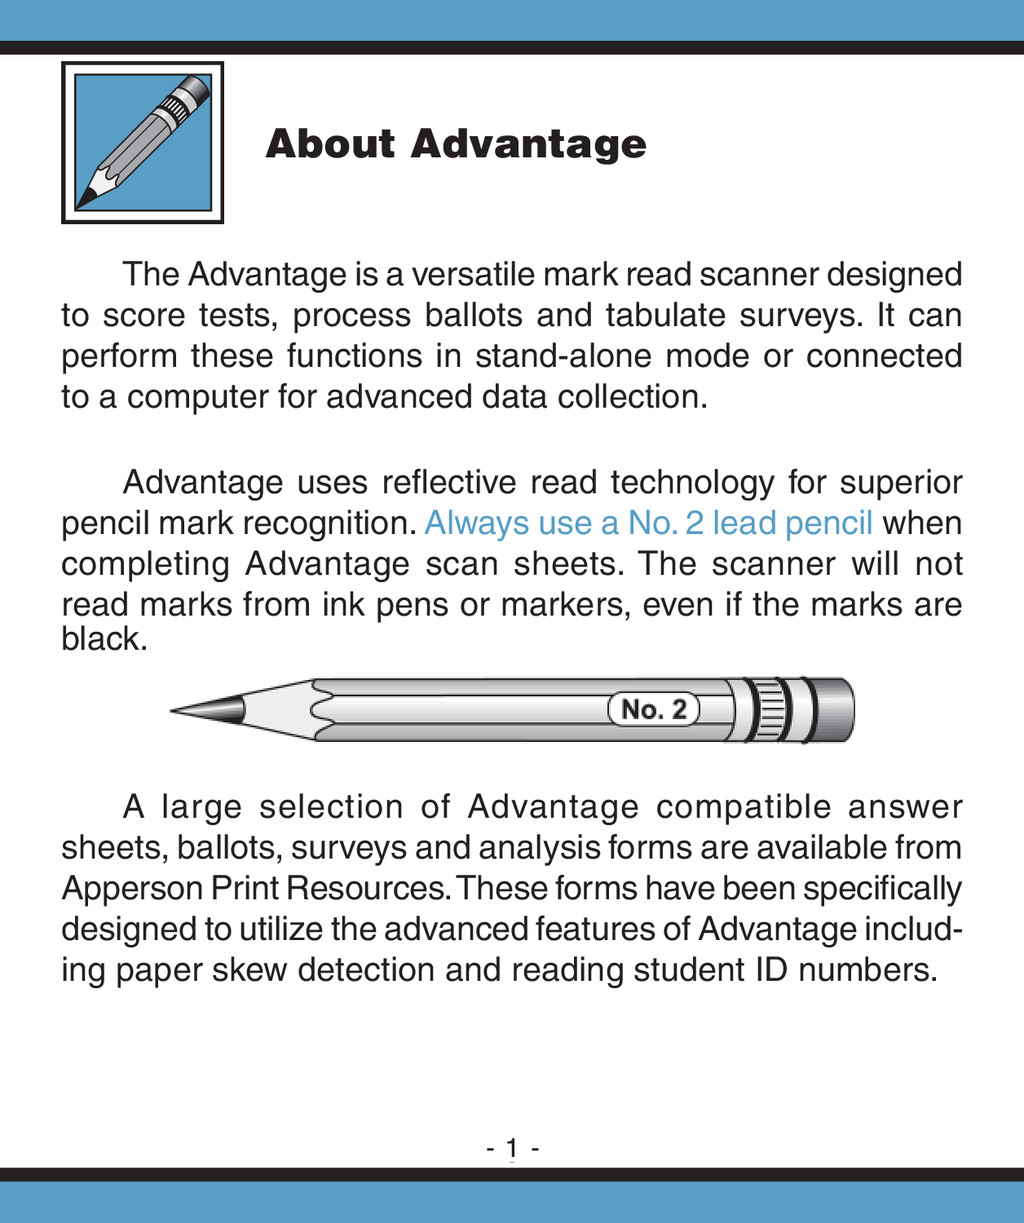
scanner designed to score tests, process ballots and tabulate surveys. It can perform these functions in stand-alone mode or connected to a computer for advanced data collection. Advantage uses refl ective read technology for superior pencil mark recognition. Always use a No. 2 lead pencil when completing Advantage scan sheets. The scanner will not read marks from ink pens or markers, even if the marks are black. A large selection of Advantage compatible answer sheets, ballots, surveys and analysis forms are available from Apperson Print Resources. These forms have been specifi cally designed to utilize the advanced features of Advantage includ- ing paper skew detection and reading student ID numbers. About Advantage - 1 -
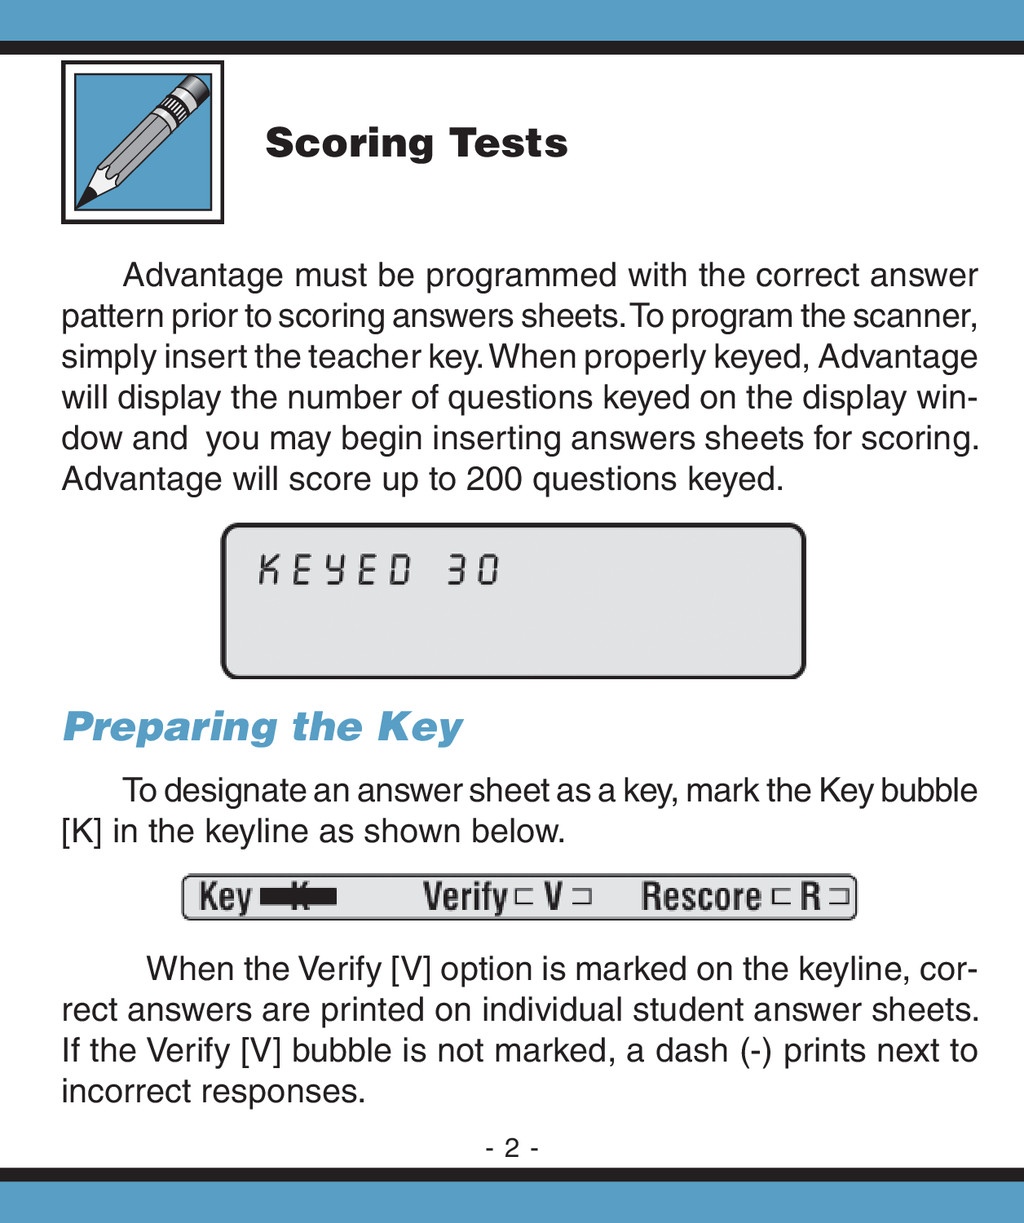
answer pattern prior to scoring answers sheets. To program the scanner, simply insert the teacher key. When properly keyed, Advantage will display the number of questions keyed on the display win- dow and you may begin inserting answers sheets for scoring. Advantage will score up to 200 questions keyed. Preparing the Key To designate an answer sheet as a key, mark the Key bubble [K] in the keyline as shown below. When the Verify [V] option is marked on the keyline, cor- rect answers are printed on individual student answer sheets. If the Verify [V] bubble is not marked, a dash (-) prints next to incorrect responses. Scoring Tests - 2 -
keyline to rescore a previously scored test. Rescoring a test automatically enables the verify option. After marking the keyline, fi ll in the correct answer pattern for each question on the test. Multiple marks may be keyed as the correct answer for a question. Questions keyed with multiple marks will be indicated with an ‘X’ printed next to the question for verifi cation purposes. Key Reset Options There are two key reset options available for test scor- ing. When Advantage is powered on it automatically enters into the Score Mode option. Pressing the Reset Options button will put the scanner in Rescore Mode. Rescore Mode Continued on page 4 - 3 -
Rescore [R] bubble in the keyline. The scanner must be in either Score Mode or Rescore Mode to score answer sheets. Scoring When the key has been marked with the correct answers, insert it through the scanner. Always verify the key has been properly recorded before inserting student answer sheets. Once keyed, begin processing student answer sheets. Up to 9,999 answer sheets can be processed in a single batch. If the test includes questions from both sides of the answer sheet, fi rst process side 1 of the key immediately followed by side 2 (the Key [K] bubble must be marked on each side of the key in order to key multiple sides). When scoring multiple sides, each side of a test answer sheet must be processed before processing another answer sheet. You may score up to 200 questions in this manner. As student forms are fed through Advantage, the total number of correct answers for each student appears in the window display and is also printed inside the Score box at the bottom of the form, or inside the Rescore box if the Rescore [R] bubble was marked. Scoring Tests . . . - 4 -
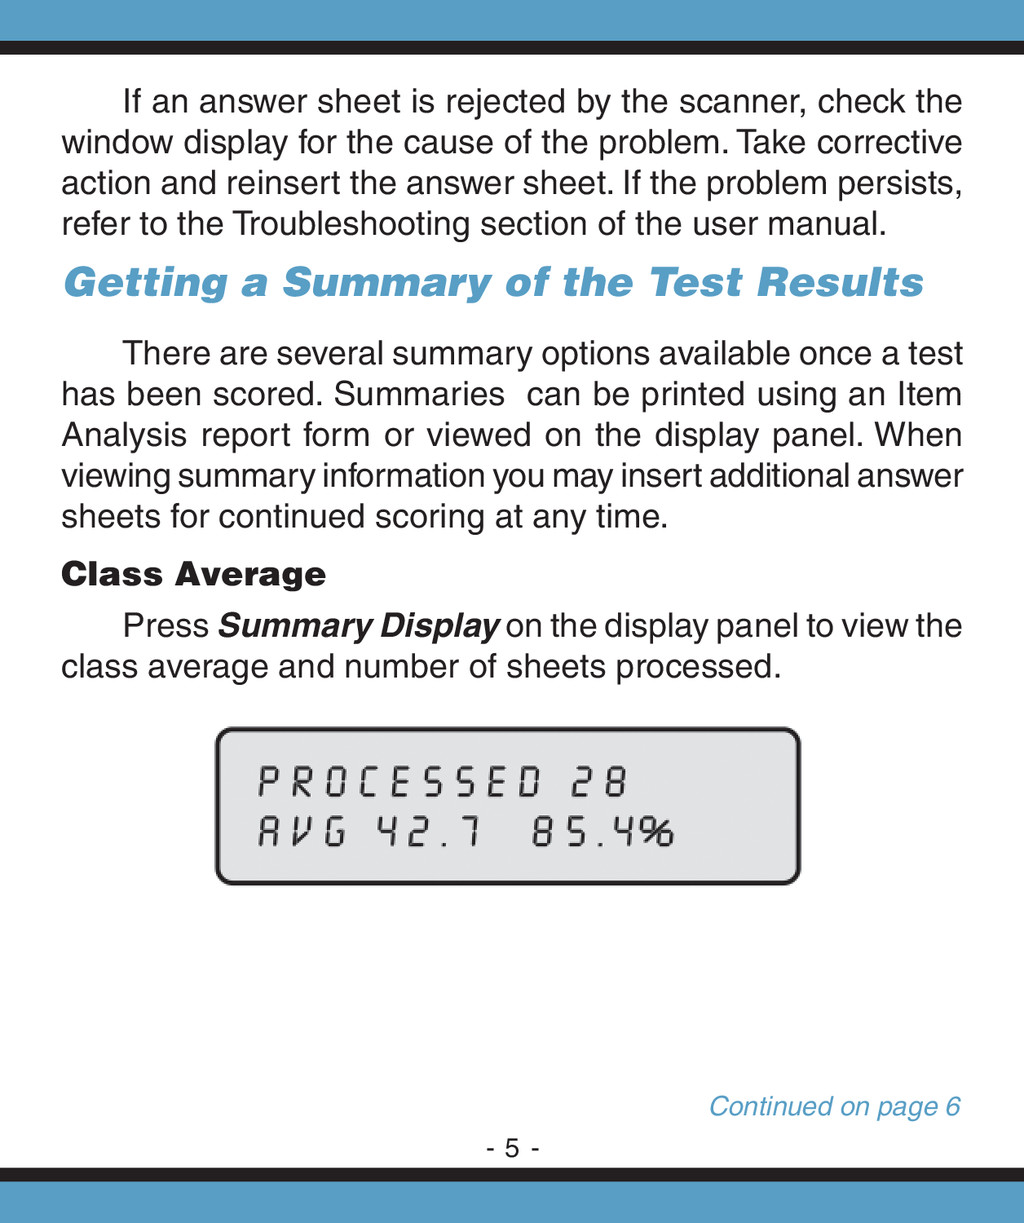
the scanner, check the window display for the cause of the problem. Take corrective action and reinsert the answer sheet. If the problem persists, refer to the Troubleshooting section of the user manual. Getting a Summary of the Test Results There are several summary options available once a test has been scored. Summaries can be printed using an Item Analysis report form or viewed on the display panel. When viewing summary information you may insert additional answer sheets for continued scoring at any time. Class Average Press Summary Display on the display panel to view the class average and number of sheets processed. Continued on page 6 - 5 -
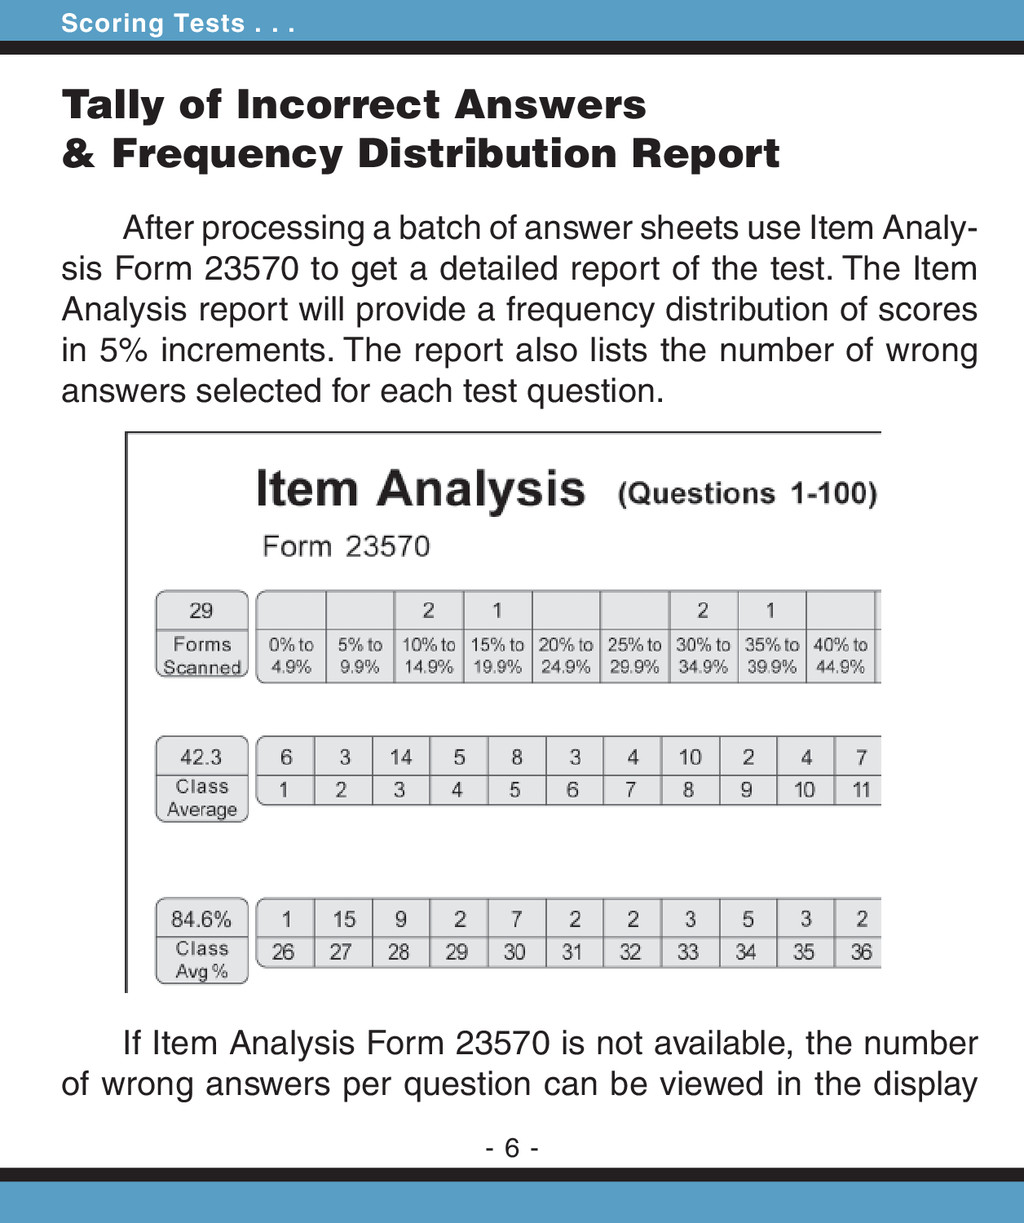
Report After processing a batch of answer sheets use Item Analy- sis Form 23570 to get a detailed report of the test. The Item Analysis report will provide a frequency distribution of scores in 5% increments. The report also lists the number of wrong answers selected for each test question. If Item Analysis Form 23570 is not available, the number of wrong answers per question can be viewed in the display Scoring Tests . . . - 6 -
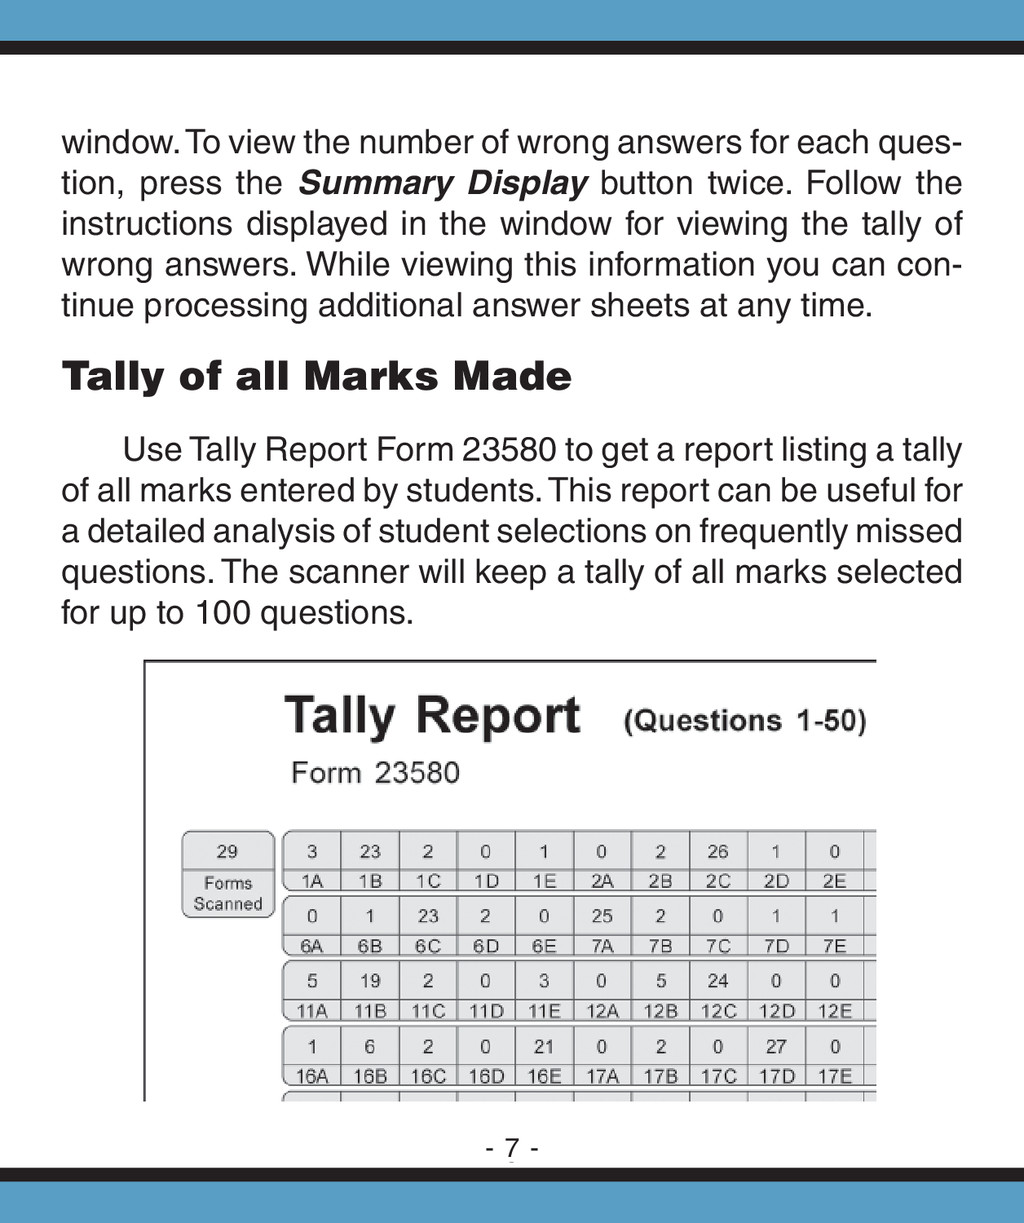
answers for each ques- tion, press the Summary Display button twice. Follow the instructions displayed in the window for viewing the tally of wrong answers. While viewing this information you can con- tinue processing additional answer sheets at any time. Tally of all Marks Made Use Tally Report Form 23580 to get a report listing a tally of all marks entered by students. This report can be useful for a detailed analysis of student selections on frequently missed questions. The scanner will keep a tally of all marks selected for up to 100 questions. - 7 -
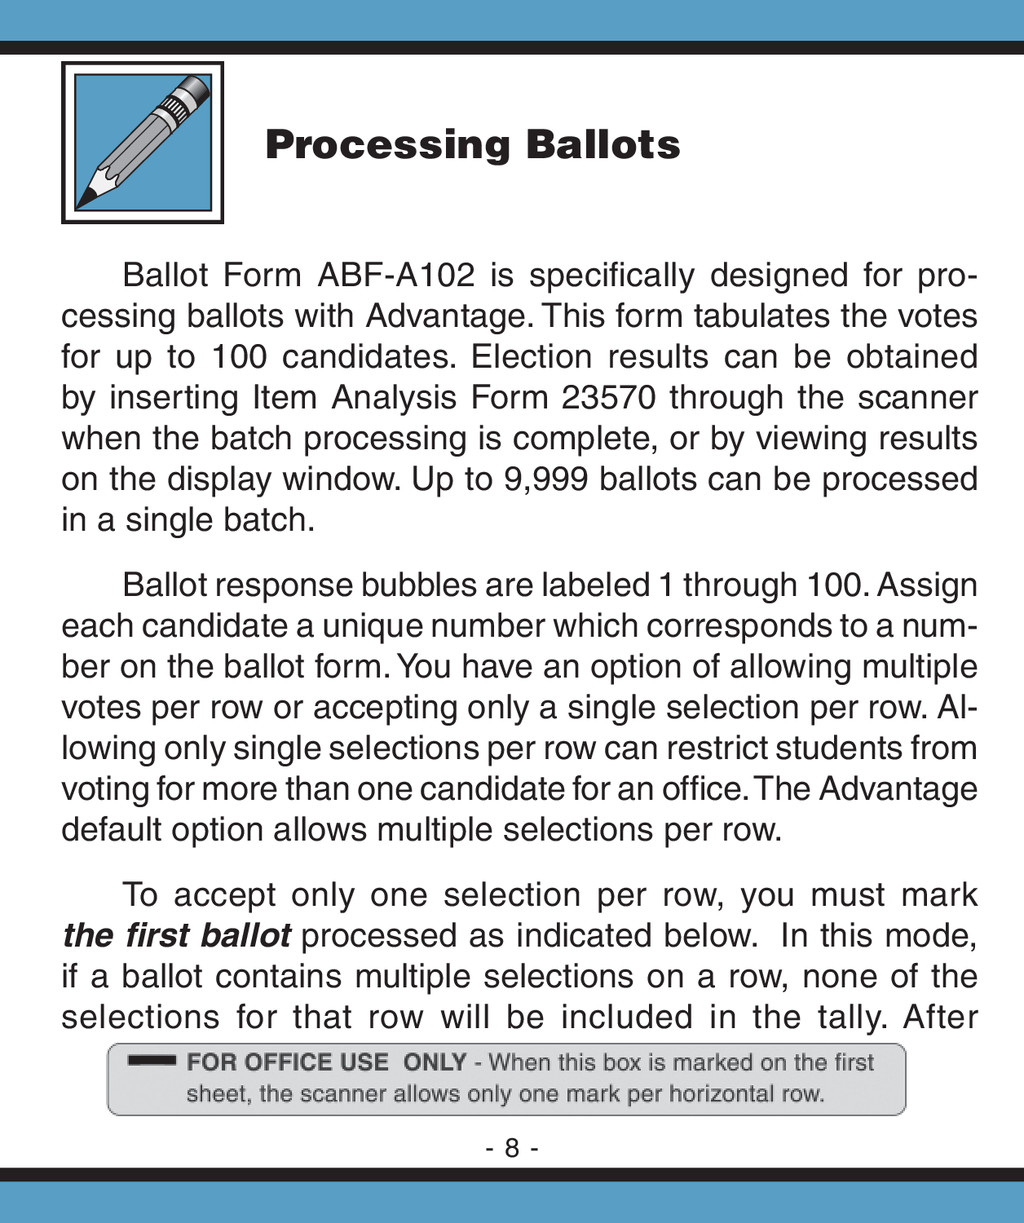
for pro- cessing ballots with Advantage. This form tabulates the votes for up to 100 candidates. Election results can be obtained by inserting Item Analysis Form 23570 through the scanner when the batch processing is complete, or by viewing results on the display window. Up to 9,999 ballots can be processed in a single batch. Ballot response bubbles are labeled 1 through 100. Assign each candidate a unique number which corresponds to a num- ber on the ballot form. You have an option of allowing multiple votes per row or accepting only a single selection per row. Al- lowing only single selections per row can restrict students from voting for more than one candidate for an offi ce. The Advantage default option allows multiple selections per row. To accept only one selection per row, you must mark the fi rst ballot processed as indicated below. In this mode, if a ballot contains multiple selections on a row, none of the selections for that row will be included in the tally. After Processing Ballots - 8 -
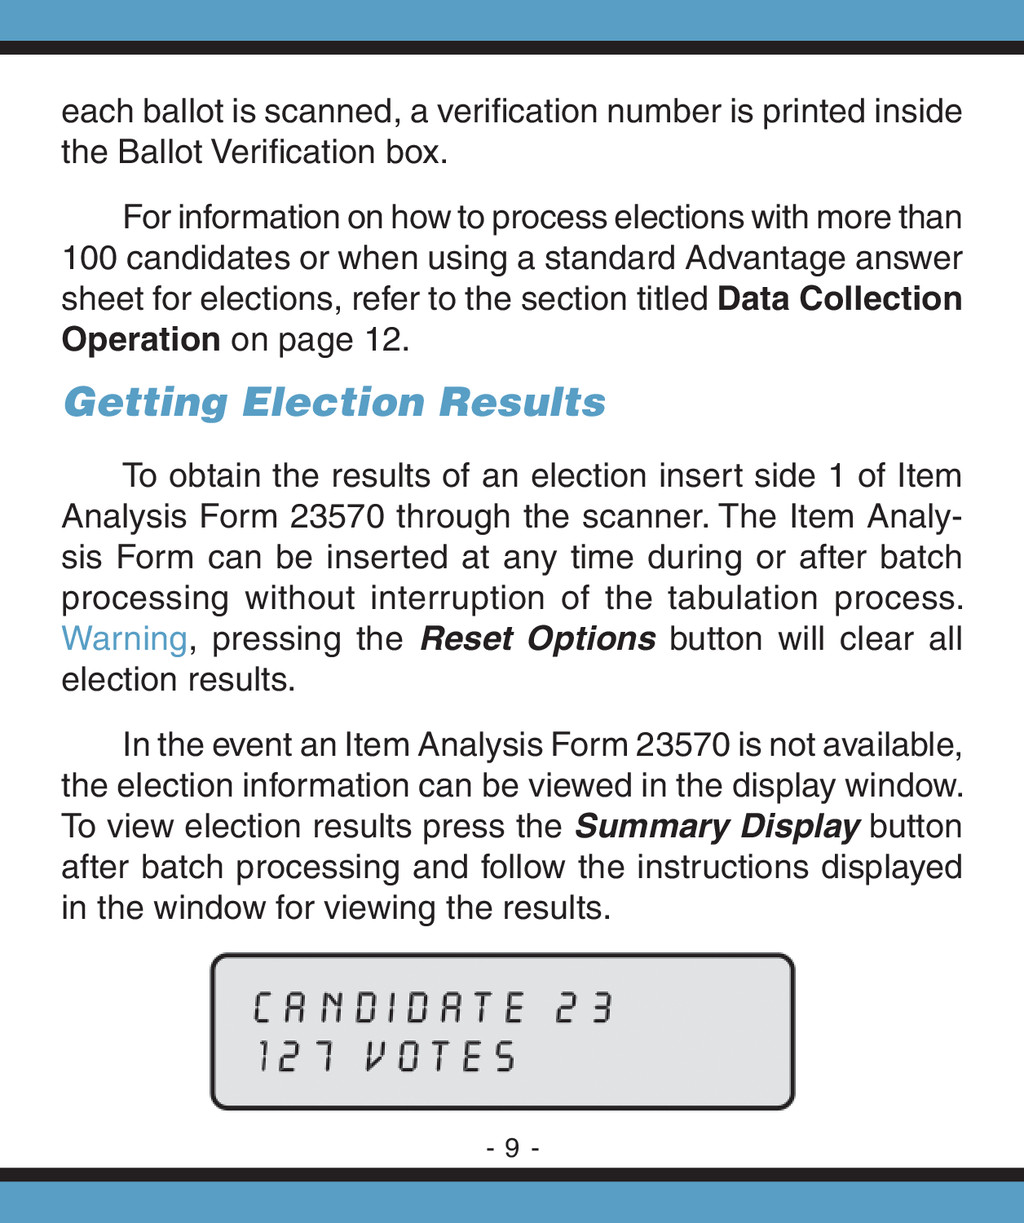
number is printed inside the Ballot Verifi cation box. For information on how to process elections with more than 100 candidates or when using a standard Advantage answer sheet for elections, refer to the section titled Data Collection Operation on page 12. Getting Election Results To obtain the results of an election insert side 1 of Item Analysis Form 23570 through the scanner. The Item Analy- sis Form can be inserted at any time during or after batch processing without interruption of the tabulation process. Warning, pressing the Reset Options button will clear all election results. In the event an Item Analysis Form 23570 is not available, the election information can be viewed in the display window. To view election results press the Summary Display button after batch processing and follow the instructions displayed in the window for viewing the results. - 9 -
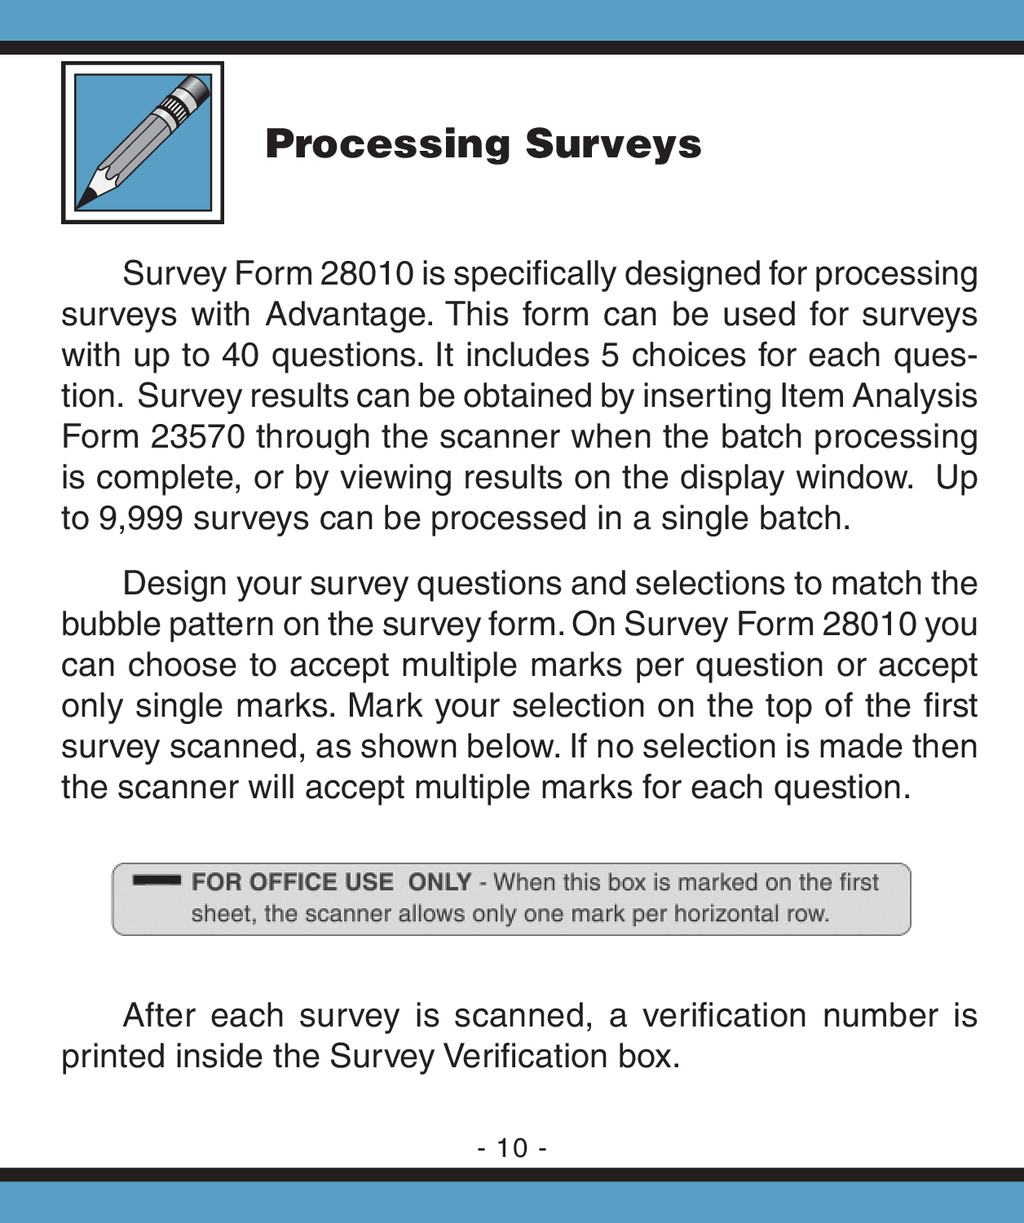
for processing surveys with Advantage. This form can be used for surveys with up to 40 questions. It includes 5 choices for each ques- tion. Survey results can be obtained by inserting Item Analysis Form 23570 through the scanner when the batch processing is complete, or by viewing results on the display window. Up to 9,999 surveys can be processed in a single batch. Design your survey questions and selections to match the bubble pattern on the survey form. On Survey Form 28010 you can choose to accept multiple marks per question or accept only single marks. Mark your selection on the top of the fi rst survey scanned, as shown below. If no selection is made then the scanner will accept multiple marks for each question. After each survey is scanned, a verifi cation number is printed inside the Survey Verifi cation box. Processing Surveys - 10 -
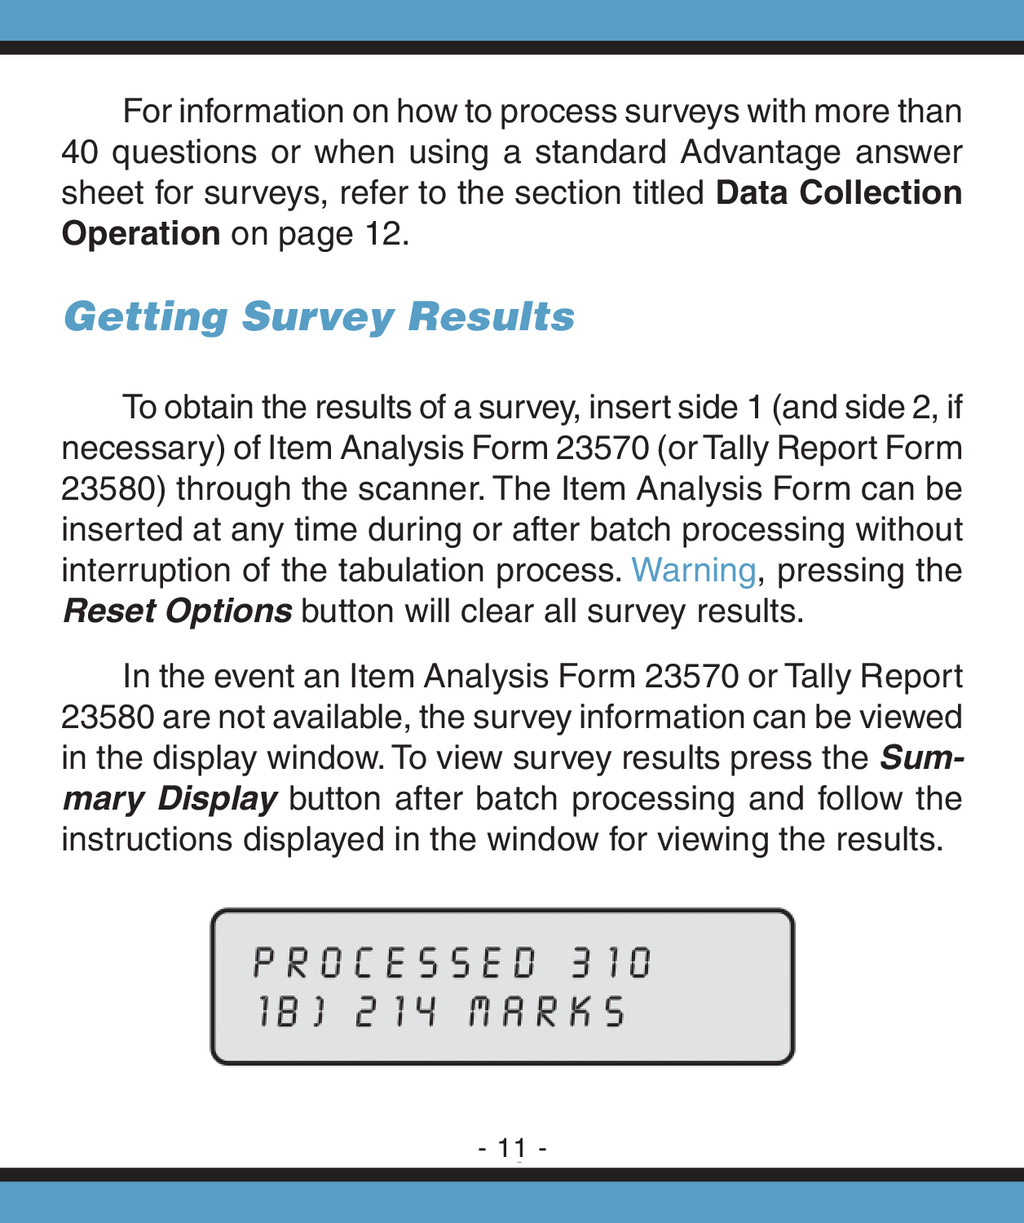
with more than 40 questions or when using a standard Advantage answer sheet for surveys, refer to the section titled Data Collection Operation on page 12. Getting Survey Results To obtain the results of a survey, insert side 1 (and side 2, if necessary) of Item Analysis Form 23570 (or Tally Report Form 23580) through the scanner. The Item Analysis Form can be inserted at any time during or after batch processing without interruption of the tabulation process. Warning, pressing the Reset Options button will clear all survey results. In the event an Item Analysis Form 23570 or Tally Report 23580 are not available, the survey information can be viewed in the display window. To view survey results press the Sum- mary Display button after batch processing and follow the instructions displayed in the window for viewing the results. - 11 -
stan- dard test scoring operations. This can be useful when process- ing surveys, evaluations or ballots with standard Advantage test answer sheets or customized scan forms. When in data collection mode, the scanner will create a tally of all marks made on the sheets. The tabulation results can be obtained by inserting Tally Report Form 23580 through the scanner when the batch processing is complete, or by viewing results on the display window. Up to 9,999 scan sheets can be processed in a single batch. To enter into Data Collection Mode press the Reset Op- tions button 2 or 3 times until Data Collection appears in the display window. In this mode, all selections for each question will be tabu- lated. Up to 100 questions can be tabulated in Data Collection mode. When tabulating questions which are on both sides of an answer sheet, scan side 1 of a sheet followed by side 2 before continuing onto the next sheet. The following data collection options can be enabled by making the appropriate selection on the keyline of the fi rst sheet scanned. Data Collection Operation - 12 -
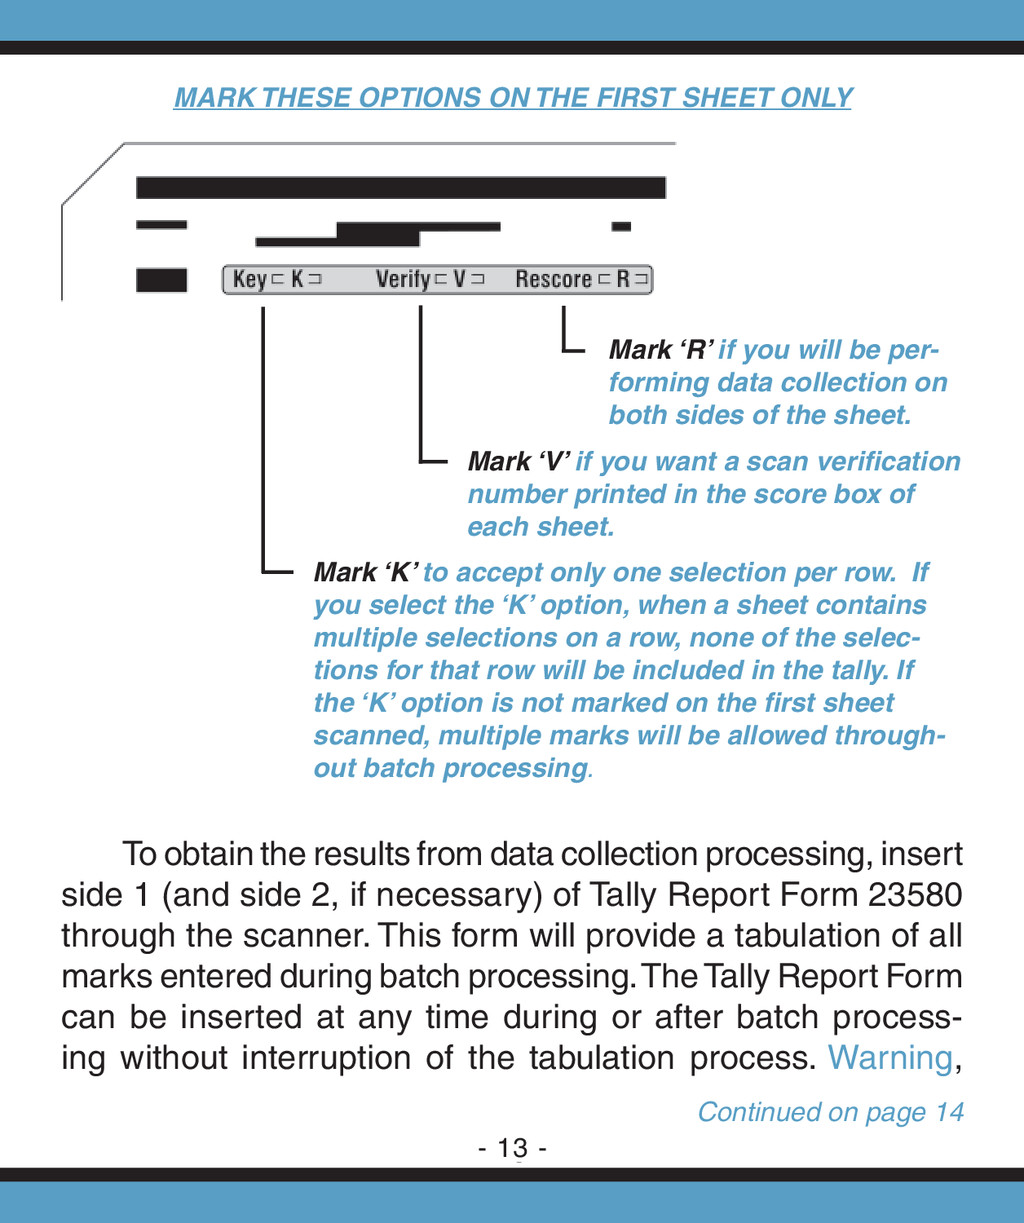
processing, insert side 1 (and side 2, if necessary) of Tally Report Form 23580 through the scanner. This form will provide a tabulation of all marks entered during batch processing. The Tally Report Form can be inserted at any time during or after batch process- ing without interruption of the tabulation process. Warning, Continued on page 14 Mark ‘R’ if you will be per- forming data collection on both sides of the sheet. Mark ‘V’ if you want a scan verifi cation number printed in the score box of each sheet. Mark ‘K’ to accept only one selection per row. If you select the ‘K’ option, when a sheet contains multiple selections on a row, none of the selec- tions for that row will be included in the tally. If the ‘K’ option is not marked on the fi rst sheet scanned, multiple marks will be allowed through- out batch processing. MARK THESE OPTIONS ON THE FIRST SHEET ONLY - 13 -
all data collection information. In the event an Tally Report Form 23580 is not available, the results can be viewed in the display window. To view the results press the Summary Display button after batch processing and follow the instructions displayed in the window for viewing the tabulated results. Data Collection Operation . . . - 14 -
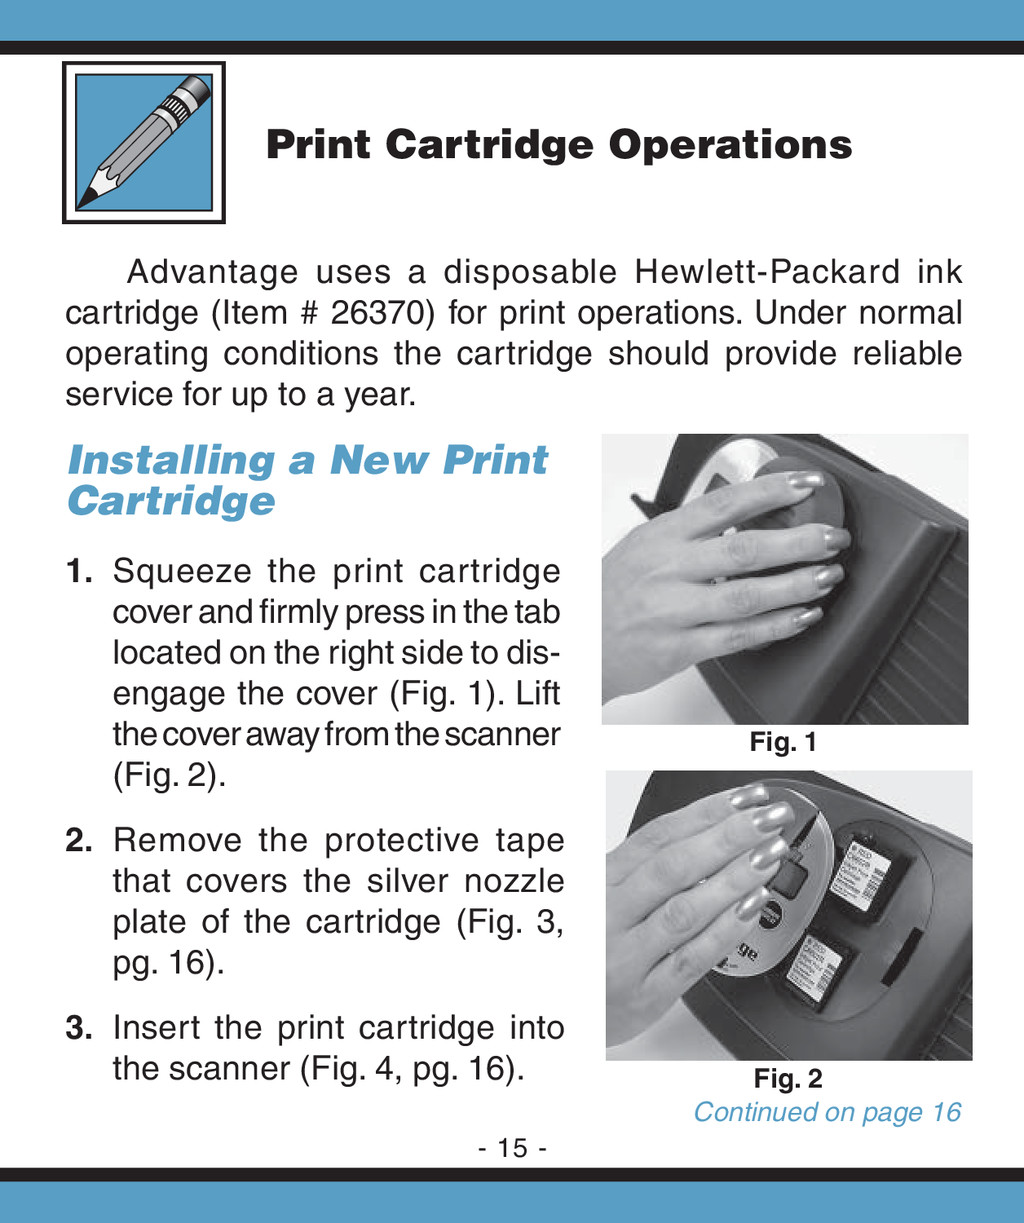
(Item # 26370) for print operations. Under normal operating conditions the cartridge should provide reliable service for up to a year. Installing a New Print Cartridge 1. Squeeze the print cartridge cover and fi rmly press in the tab located on the right side to dis- engage the cover (Fig. 1). Lift the cover away from the scanner (Fig. 2). 2. Remove the protective tape that covers the silver nozzle plate of the cartridge (Fig. 3, pg. 16). 3. Insert the print cartridge into the scanner (Fig. 4, pg. 16). Continued on page 16 Print Cartridge Operations Fig. 1 - 15 - Fig. 2
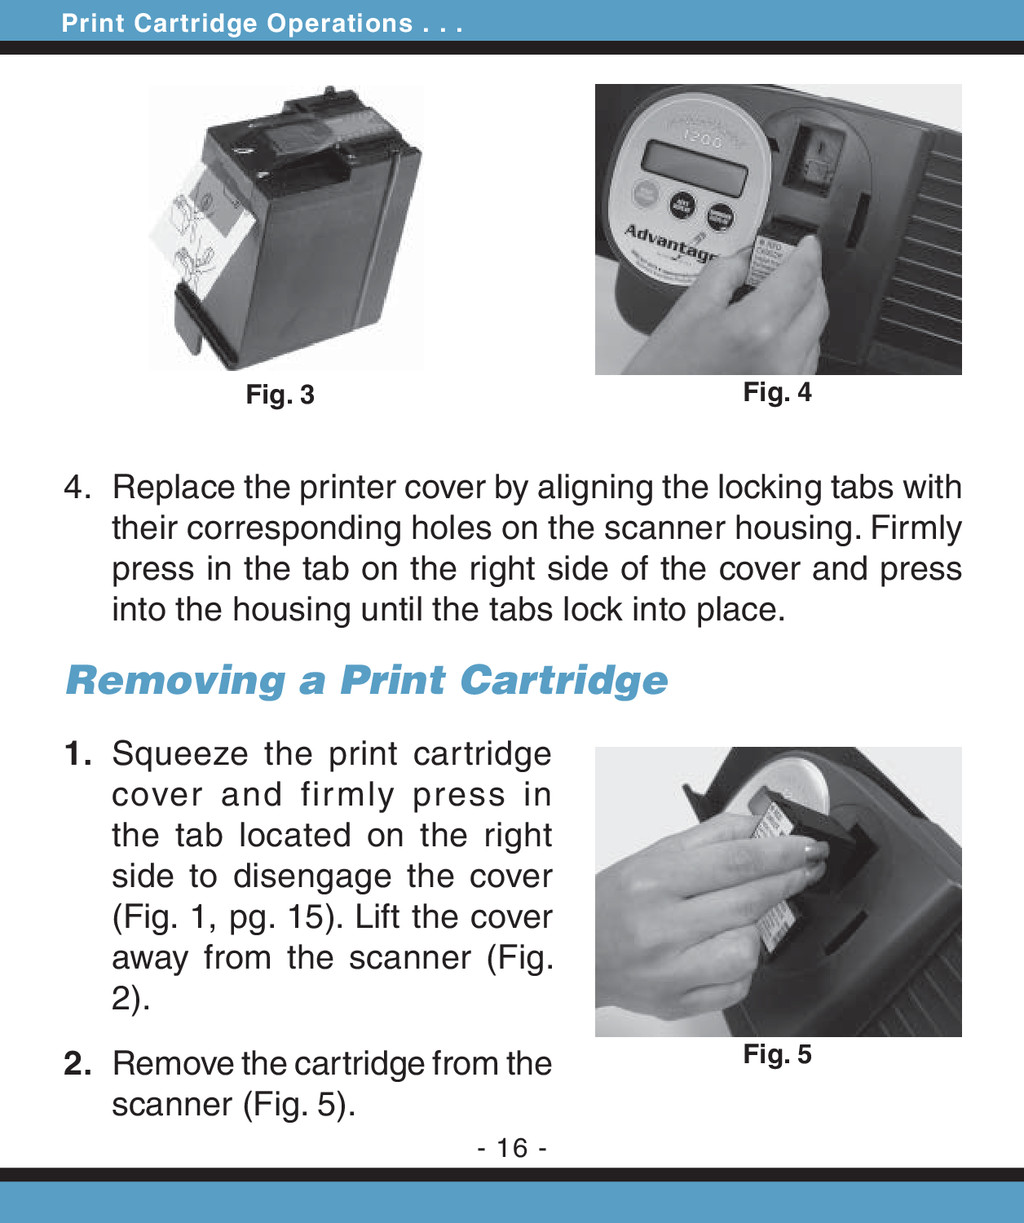
4 4. Replace the printer cover by aligning the locking tabs with their corresponding holes on the scanner housing. Firmly press in the tab on the right side of the cover and press into the housing until the tabs lock into place. Removing a Print Cartridge 1. Squeeze the print cartridge cover and firmly press in the tab located on the right side to disengage the cover (Fig. 1, pg. 15). Lift the cover away from the scanner (Fig. 2). 2. Remove the cartridge from the scanner (Fig. 5). Fig. 3 - 16 - Fig. 5
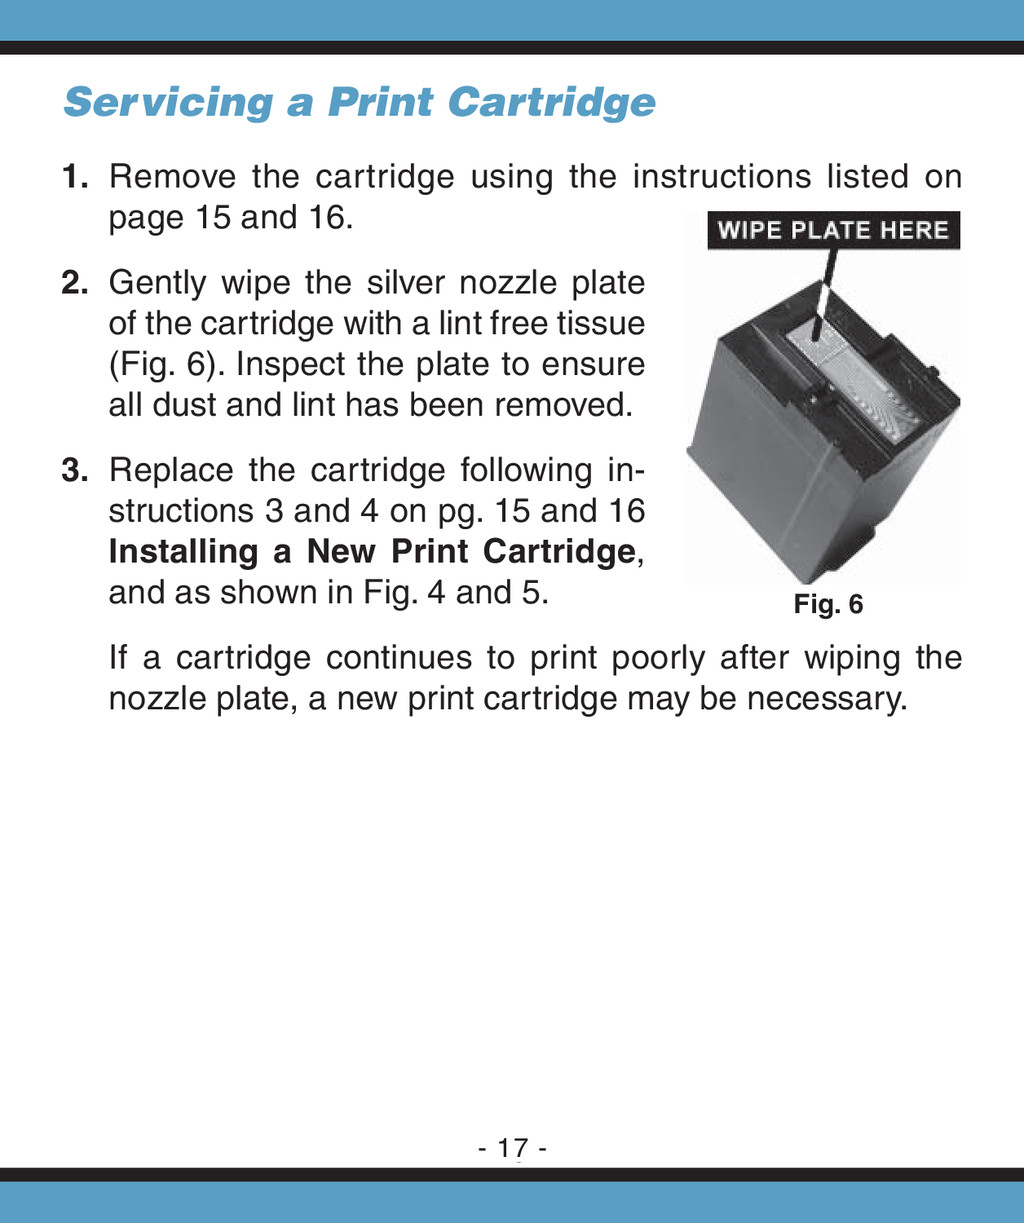
Remove the cartridge using the instructions listed on page 15 and 16. 2. Gently wipe the silver nozzle plate of the cartridge with a lint free tissue (Fig. 6). Inspect the plate to ensure all dust and lint has been removed. 3. Replace the cartridge following in- structions 3 and 4 on pg. 15 and 16 Installing a New Print Cartridge, and as shown in Fig. 4 and 5. If a cartridge continues to print poorly after wiping the nozzle plate, a new print cartridge may be necessary. - 17 -
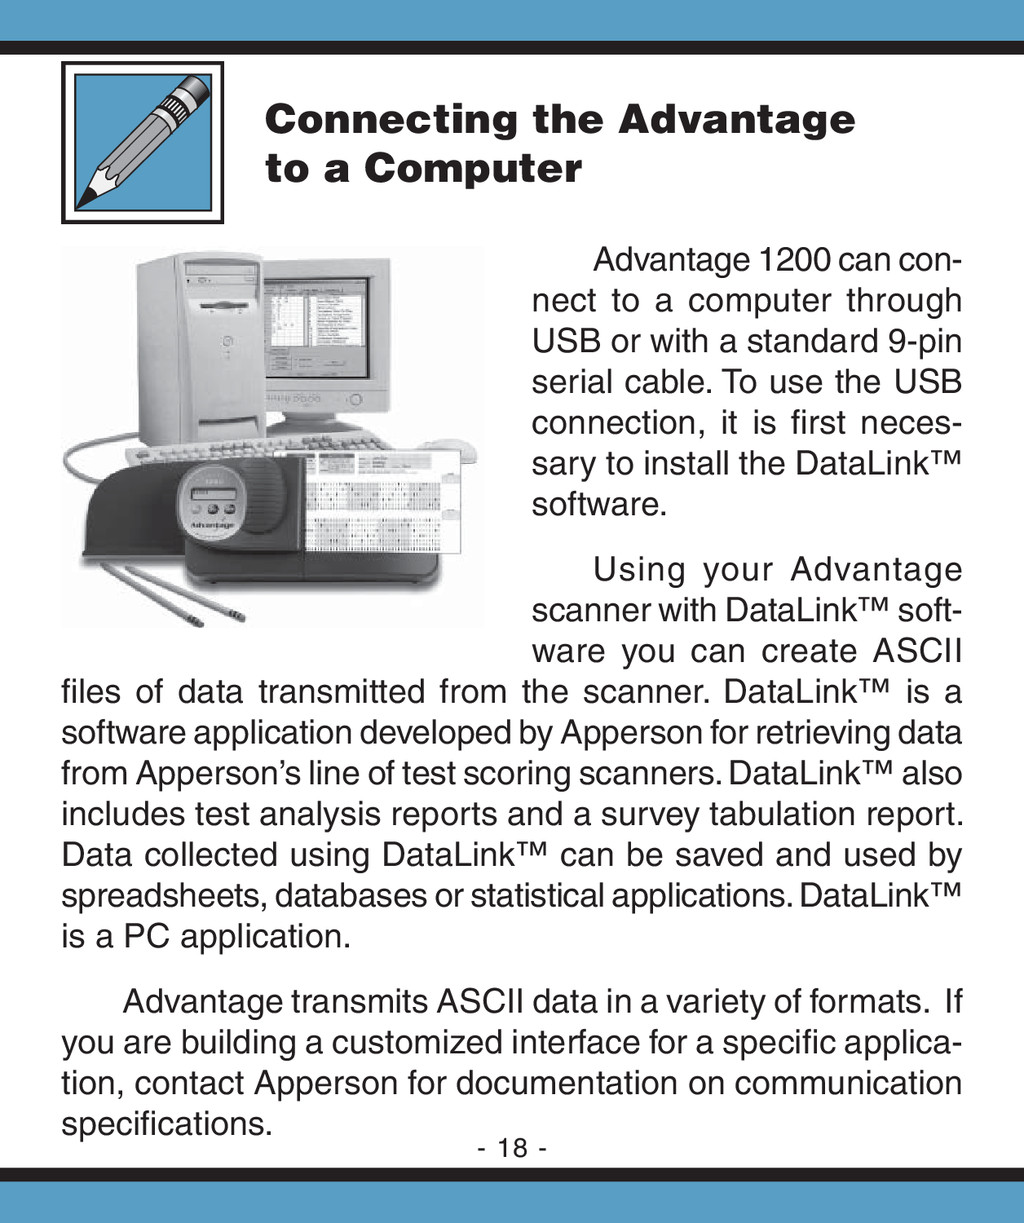
computer through USB or with a standard 9-pin serial cable. To use the USB connection, it is fi rst neces- sary to install the DataLink™ software. Using your Advantage scanner with DataLink™ soft- ware you can create ASCII fi les of data transmitted from the scanner. DataLink™ is a software application developed by Apperson for retrieving data from Apperson’s line of test scoring scanners. DataLink™ also includes test analysis reports and a survey tabulation report. Data collected using DataLink™ can be saved and used by spreadsheets, databases or statistical applications. DataLink™ is a PC application. Advantage transmits ASCII data in a variety of formats. If you are building a customized interface for a specifi c applica- tion, contact Apperson for documentation on communication specifi cations. Connecting the Advantage to a Computer - 18 -
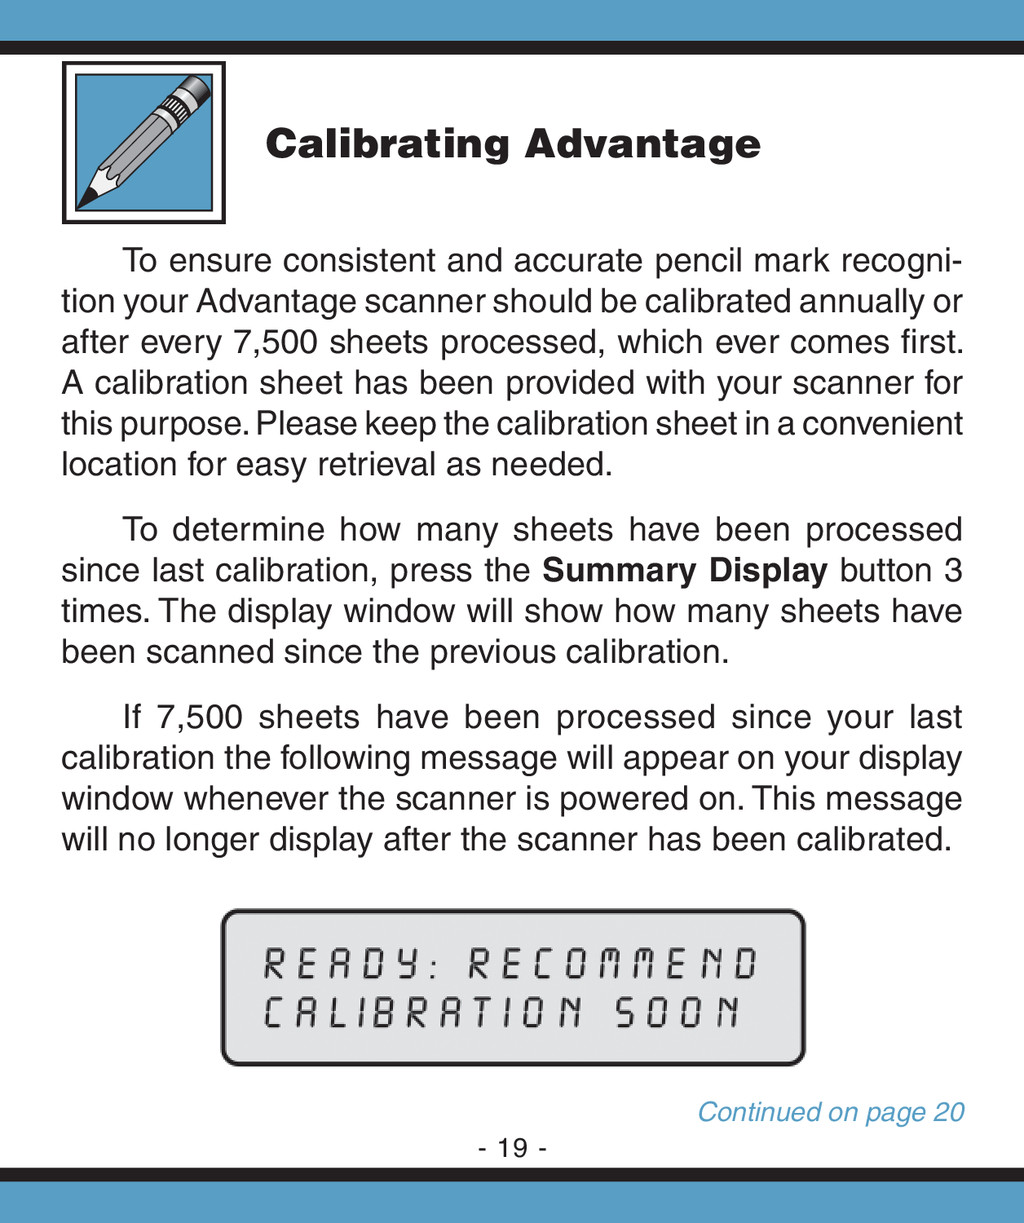
recogni- tion your Advantage scanner should be calibrated annually or after every 7,500 sheets processed, which ever comes fi rst. A calibration sheet has been provided with your scanner for this purpose. Please keep the calibration sheet in a convenient location for easy retrieval as needed. To determine how many sheets have been processed since last calibration, press the Summary Display button 3 times. The display window will show how many sheets have been scanned since the previous calibration. If 7,500 sheets have been processed since your last calibration the following message will appear on your display window whenever the scanner is powered on. This message will no longer display after the scanner has been calibrated. Continued on page 20 Calibrating Advantage - 19 -
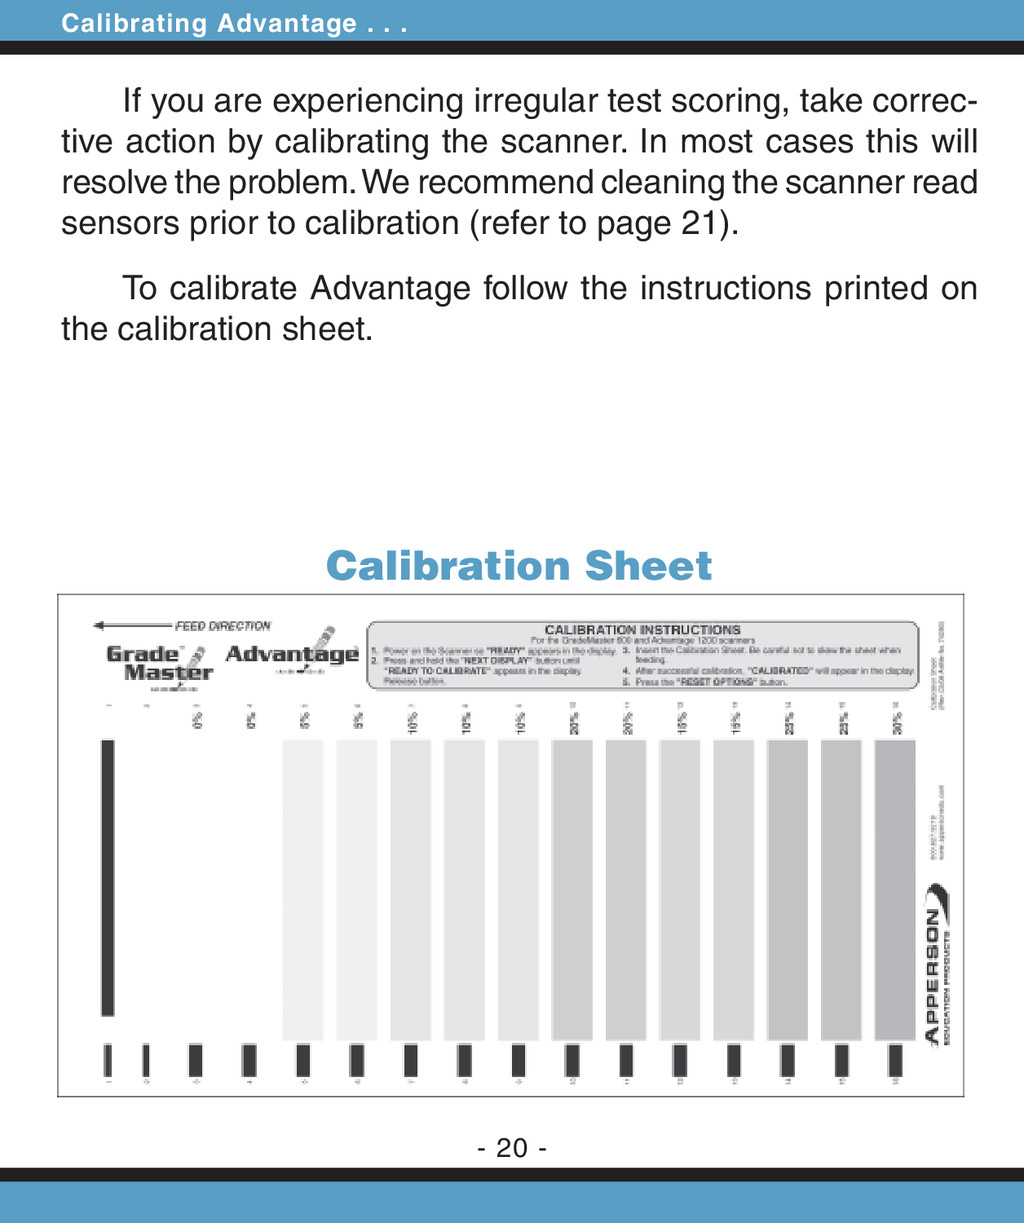
take correc- tive action by calibrating the scanner. In most cases this will resolve the problem. We recommend cleaning the scanner read sensors prior to calibration (refer to page 21). To calibrate Advantage follow the instructions printed on the calibration sheet. Calibrating Advantage . . . Calibration Sheet - 20 -
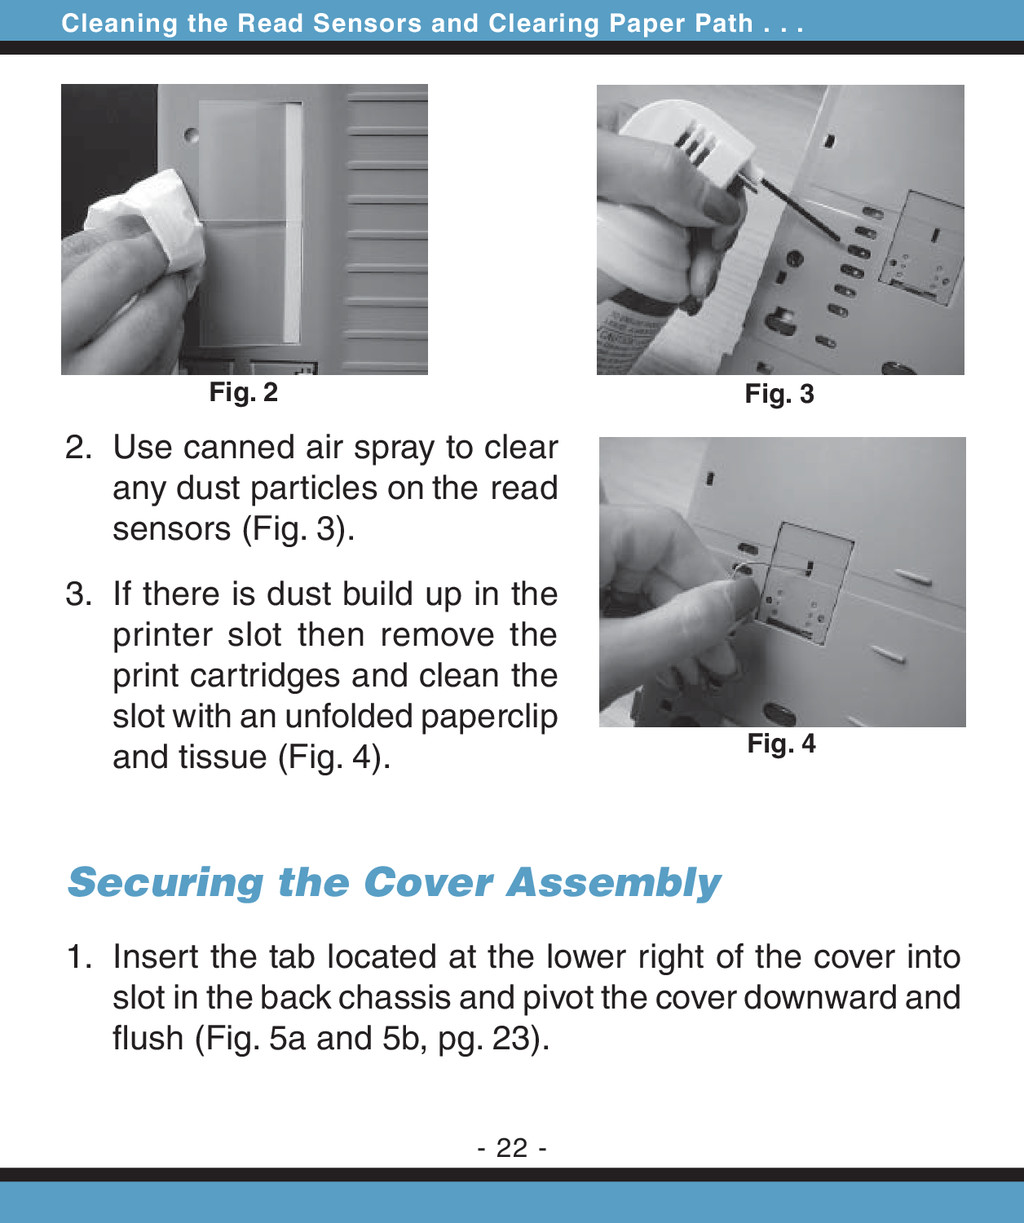
with normal operation of the read sensors. If you are experiencing incon- sistent scoring or a blocked paper path, take the following steps to correct the problem. After cleaning, always calibrate the scanner (refer to page 19). Removing Cover Assembly 1. Unscrew the thumbscrew on the backside of the scanner (Fig. 1). 2. Remove the cover assembly from the back chassis. Cleaning the Scanner 1. Using a slightly damp tissue clean any paper dust or ink spray on the back chassis (Fig. 2, pg. 22). Cleaning the Read Sensors and Clearing Paper Path Fig. 1 Continued on page 22 - 21 -
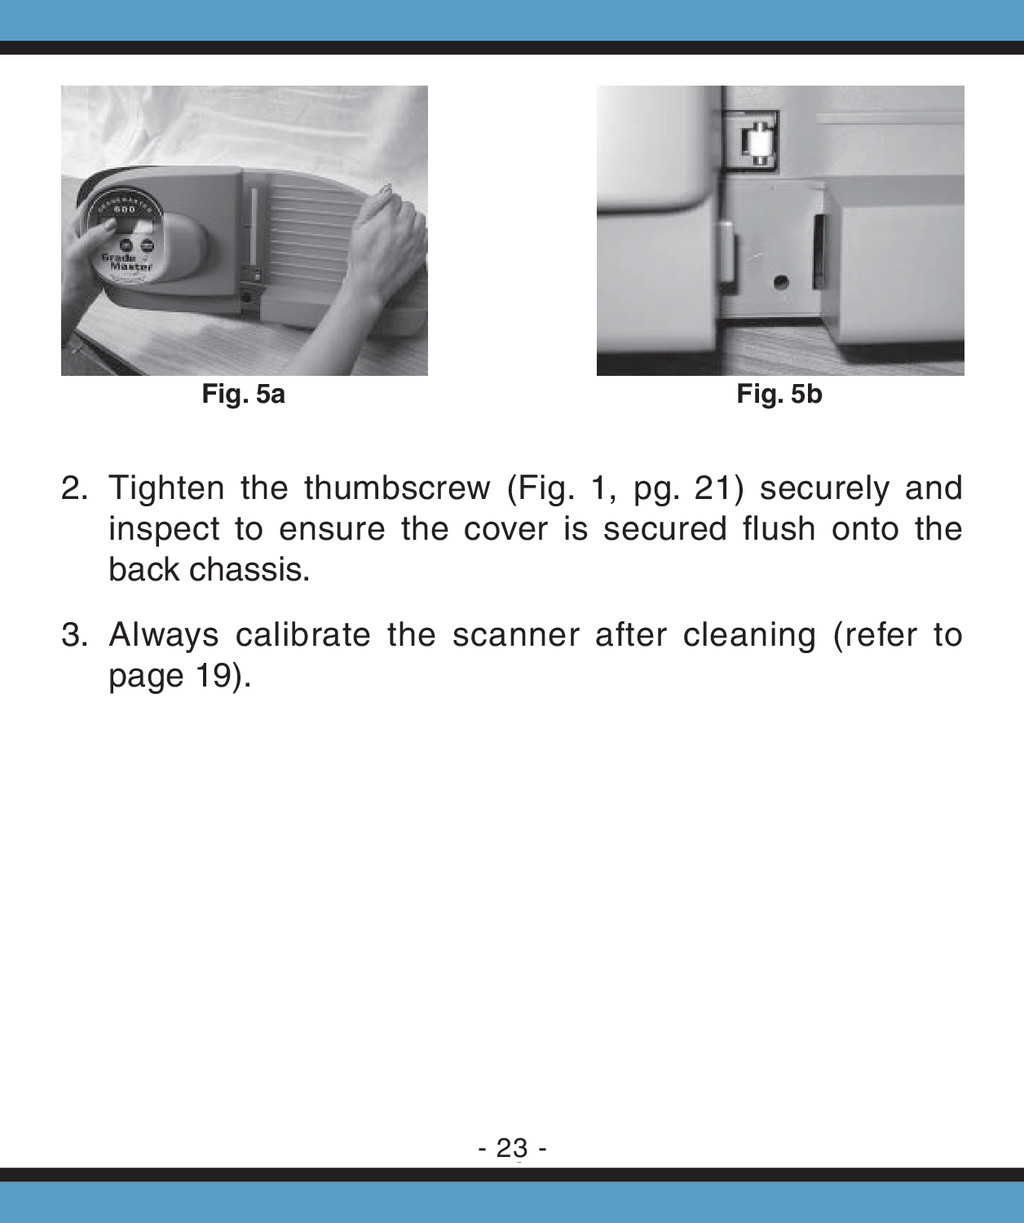
any dust particles on the read sensors (Fig. 3). 3. If there is dust build up in the printer slot then remove the print cartridges and clean the slot with an unfolded paperclip and tissue (Fig. 4). Securing the Cover Assembly 1. Insert the tab located at the lower right of the cover into slot in the back chassis and pivot the cover downward and fl ush (Fig. 5a and 5b, pg. 23). Fig. 2 Fig. 3 Fig. 4 Cleaning the Read Sensors and Clearing Paper Path . . . - 22 -
1, pg. 21) securely and inspect to ensure the cover is secured fl ush onto the back chassis. 3. Always calibrate the scanner after cleaning (refer to page 19). Fig. 5a - 23 -
power on the scanner and press the Summary Display button. Successively pressing Summary Display will show additional information. The following information will be displayed: The machine serial number The Advantage firmware version of your scanner The total number of sheets processed The number of sheets processed since the last calibration The number of sheets processed since the last factory service Displaying Machine Information - 24 -
Print Resources. General supplies available from Apperson in- clude: Standard Advantage compatible forms Customized Advantage compatible forms Print cartridges Serial or USB computer cables DataLink™ software Calibration sheets For a detailed description of test answer sheets, ballots, surveys and supporting forms, call your Apperson representa- tive, or visit our web site at www.appersonedu.com. Advantage Supplies 800.827.9219 www.appersonedu.com Ordering Supplies - 25 -
experiencing inconsistent operation or irregulari- ties with Advantage, try re-calibrating the scanner using the calibration sheet provided with the machine. In many cases a simple calibration will resolve the problem. Use the following guide to troubleshoot basic operational problems that you have encountered. If you are unable to re- solve the problem or have service questions, please call the number below and ask for Technical Support. For Service and Repair, call... 800.827.9219 Troubleshooting - 26 -
Poor Print Quality Refer to page 15 — Print Cartridge Operations 1. Remove the print cartridge cover. 2. Remove the print cartridge from the scanner. 3. Gently wipe the silver nozzle plate of the cartridge with a lint free tissue. Inspect the plate to ensure all dust and lint has been removed. 4. Replace the print cartridge and the print cartridge cover. Make sure the print cartridge cover is securely seated and locks into place. Marks are Not Detected Very light or thin pencil marks may not be recognized by the sensors. If the marks are made in ink (blue, black or other color) the scanner will not detect the marks. Mark over the intended marks with a No. 2 pencil. If the marks appear to be valid but are not recognized, try cleaning the read sensors and re-calibrating the scanner (refer to page 19 — Calibrat- ing Advantage). Inconsistent Scoring Check the marks that are being scored inconsistently. Make sure the marks are dark and fi ll in the entire bubble area. - 27 -
continue to expe- rience inconsistencies, clean the read sensors and re-calibrate the scanner (refer to page 19 — Calibrating Advantage). Paper Jams Check the paper path for materials that may be lodged between the plates. If you see an object blocking the pathway, carefully remove it by inserting a stiff sheet of paper through the plates. If you are unable to remove the object, remove the cover assembly (refer to page 21 — Removing Cover Assembly). Invalid ID Number Check the ID number marked by the student for accuracy. An invalid ID number message will appear if a row totals greater than 9. If you receive an invalid ID message for a form that does not have an ID grid try re-calibrating the scanner (refer to page 19 — Calibrating Advantage). Paper Misfed There may be an object interfering with the paper path which is causing the scan sheet to skew. If there is an object blocking the paper path, carefully remove it with a stiff sheet of paper. If you are unable to remove the object, refer to page 21 to remove the front cover. Always make sure the guide edge of the scan sheet is laying fl at in the insertion channel. If scan sheets are fed crooked a paper misfed message will appear. If this error message continues, try re-calibrating the scanner. If this error message persists even though the sheet is being fed prop erly, you can press the Next Display button after the error occurs to override the error on the next sheet. Pressing Next Troubleshooting . . . - 28 -
the remaining batch. Take care to insert sheets properly after disabling this error detection. Advantage Will Not Power On Check the power supply to ensure it is fi rmly inserted into the scanner’s power socket and into the electrical outlet. Make sure the power supply is labeled with the Advantage logo. The power supply should be rated as 24 volts DC, 400mA. Rows in Sheet Differs from Key This error generally occurs when the student answer sheet does not match the form used as a key. If the answer sheets differ from the key either remark the answer sheets onto forms which match the key or remark the key to match the form used on the answer sheets. If the sheets are identical, erase any extraneous marks made on the answer sheet or the key that appear near the black timing marks on the left edge or the black markings at the top of the sheets. If the problem persists try cleaning the read sensors and re-calibrating the scanner (refer to page 19 — Calibrating Advantage). Motor Runs Continuously Power off the scanner, by unplugging the power supply. Wait 5 seconds and replug the power supply. If the motor continues to run, call 800.827.9219 and ask for the Technical Support Department. - 29 -
and found to comply with the limits for a Class A digital device, pursuant to Part 15 of the FCC Rules. Operation is subject to the following two conditions: (1) This device may not cause harmful interference, and (2) This device must accept any interference received, including interference that may cause undesired operation. Industry Canada Regulations This Class A digital apparatus meets all requirements of the Canadian Interference Causing Equipment Regulations. Cet appareil numérique de la classe A respecte toutes les exigences du Règlement sur le matériel brouilleur du Canada. FCC Compliance Statement - 30 -
MY SCANNER? Your Scanner is covered by a 1 year limited warranty. You are entitled to the following services while your scanner is under warranty coverage. Unlimited telephone support. Free parts and labor for repair work. If necessary, a loaner machine will be provided while your scanner is being repaired. Loaner machines are subject to availability and freight charges. WHAT ARE THE TERMS OF THIS LIMITED WARRANTY? Apperson warrants that the Scanner you have purchased is free from defects in materi- als or workmanship under normal use during the warranty period. The warranty period commences on the 1st of the month following the shipping date for 1 year. During the warranty period, Apperson will repair or replace defective parts with new parts, or with service able used parts that are equivalent or superior to new parts in performance. Warranty service may be fulfi lled by shipping user-replaceable parts, such as power transformer, print cartridge cover, and similar components directly to you. HOW DO I OBTAIN WARRANTY SERVICE OR TECHNICAL SUPPORT? To arrange for warranty services or to receive free technical support during your warranty period, call the Apperson Technical Support Center at 800.827.9219. In the event your scanner needs factory repair you will receive instructions on packaging and shipping. WHAT IS NOT COVERED BY THIS LIMITED WARRANTY? Routine cleaning, or normal cosmetic and mechanical wear. Damage from acts of God. Damage from misuse, abuse or neglect. Damage from repair or replacement of warranted parts by non-Apperson personnel. Damage from modifi cation or incorporation of other products. Continued on page 32 - 31 -
Resources, Inc. All Rights Reserved. Reproduction, adaptation, or translation without prior written permission is prohibited, except as allowed under the copyright laws. First Edition, September 2002; Second Edition, July 2003; Third Edition, May 2008 Printed in USA Advantage™ is the property of Apperson Print Resources, Inc. 851 SW 34th Street, Bldg. B • Renton, WA 98057 800.827.9219 www.appersonprint.com • www.appersonedu.com TERMS OF THE WARRANTY The warranty is void on any product which the original identifi cation marks or serial num- bers have been altered. All exchanged parts replaced under this warranty will become the property of Apperson. EXCEPT AS EXPRESSLY SET FORTH IN THIS WARRANTY, APPERSON MAKES NO OTHER WARRANTIES, EXPRESSED OR IMPLIED, INCLUDING ANY IMPLIED WAR- RANTIES OF MERCHANTABILITY AND FITNESS FOR A PARTICULAR PURPOSE. APPERSON EXPRESSLY DISCLAIMS ALL WARRANTIES NOT STATED IN THIS LIMITED WARRANTY. ANY IMPLIED WARRANTIES THAT MAY BE IMPOSED BY LAW ARE LIMITED TO THE TERMS OF THIS EXPRESS LIMITED WARRANTY. LIMITATION OF REMEDY Apperson is not liable for any damages by the Scanner or the failure of the scanner to perform, including any lost profi ts, lost savings, incidental damages, or consequential damages. Apperson is not liable for any claim made by a third party or made by you for a third party. This limitation applies whether damages are sought, or a claim made, under this warranty or as a tort claim (including negligence and strict product liability), a contract claim, or any other claim. This limitation cannot be waived or amended by any person. This limitation of liability will be effective even if Apperson or an authorized representative of Apperson has been advised by you of the possibility of such damages. Warranty Information . . . - 32 -
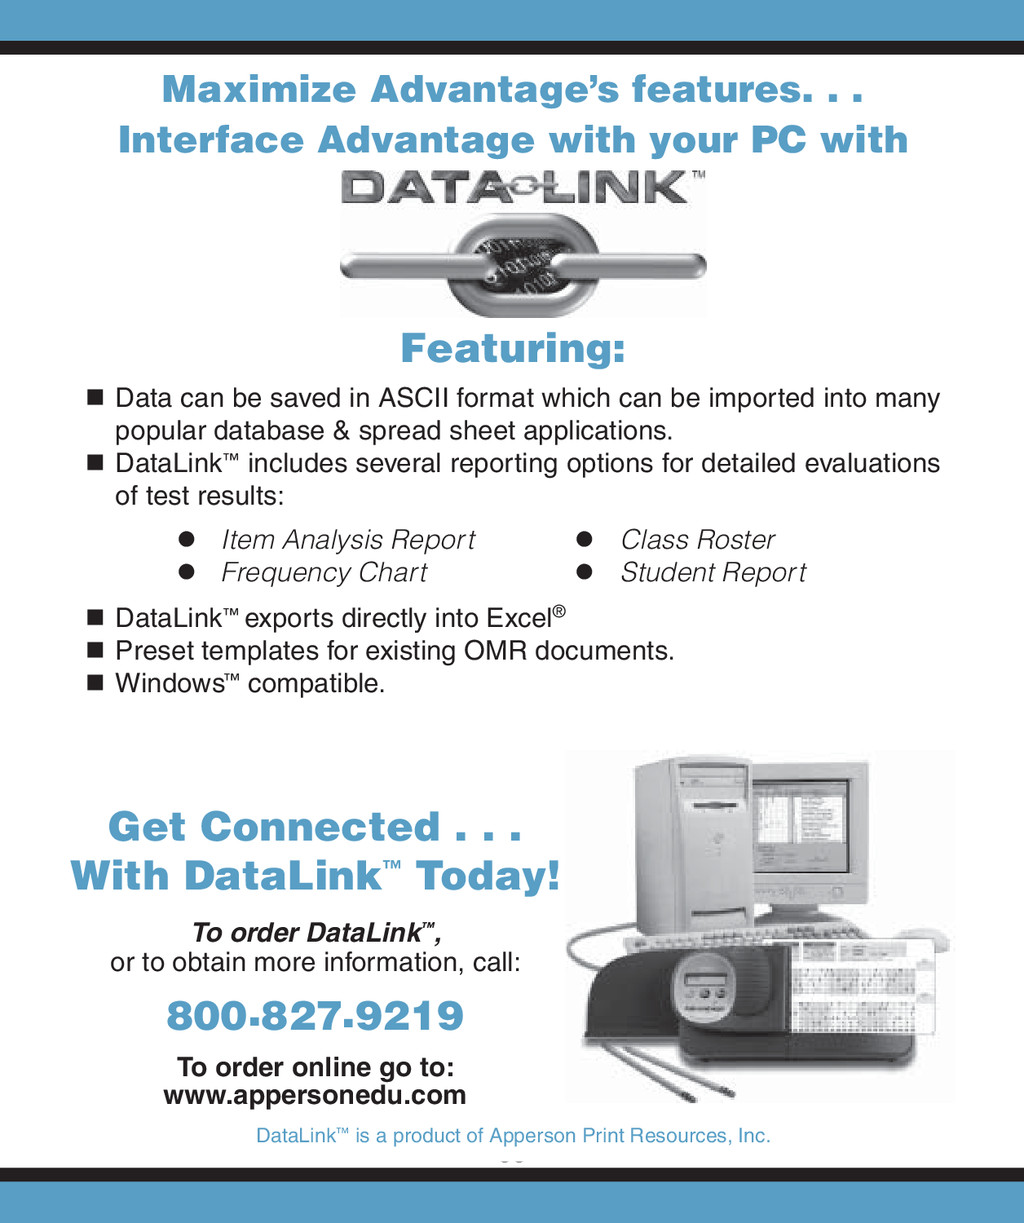
with your PC with To order DataLink™, or to obtain more information, call: 800.827.9219 To order online go to: www.appersonedu.com DataLink™ is a product of Apperson Print Resources, Inc. Get Connected . . . With DataLink™ Today! Featuring: Data can be saved in ASCII format which can be imported into many popular database & spread sheet applications. DataLink™ includes several reporting options for detailed evaluations of test results: DataLink™ exports directly into Excel® Preset templates for existing OMR documents. Windows™ compatible. Item Analysis Report Class Roster Frequency Chart Student Report
![- 5 - Mark the Rescore [R] bubble in the](https://files.speakerdeck.com/presentations/4ee27a1a04357e06d5000560/slide_4.jpg)