of the technology - Birth of the Maker movement • iSpindel Components – Buy or Build • Operation and Config • Connectivity options • Does it make better beer?
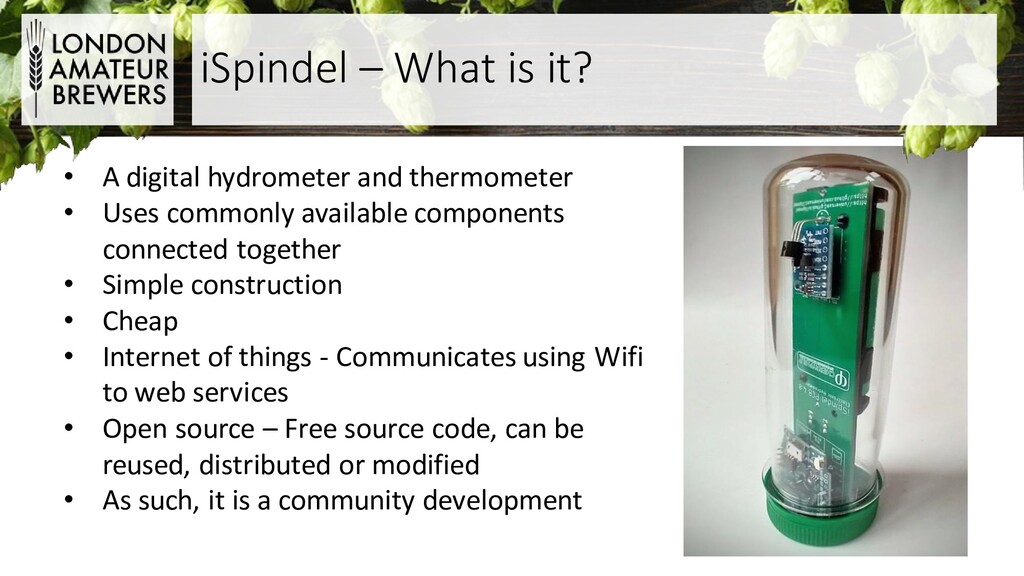
thermometer • Uses commonly available components connected together • Simple construction • Cheap • Internet of things - Communicates using Wifi to web services • Open source – Free source code, can be reused, distributed or modified • As such, it is a community development
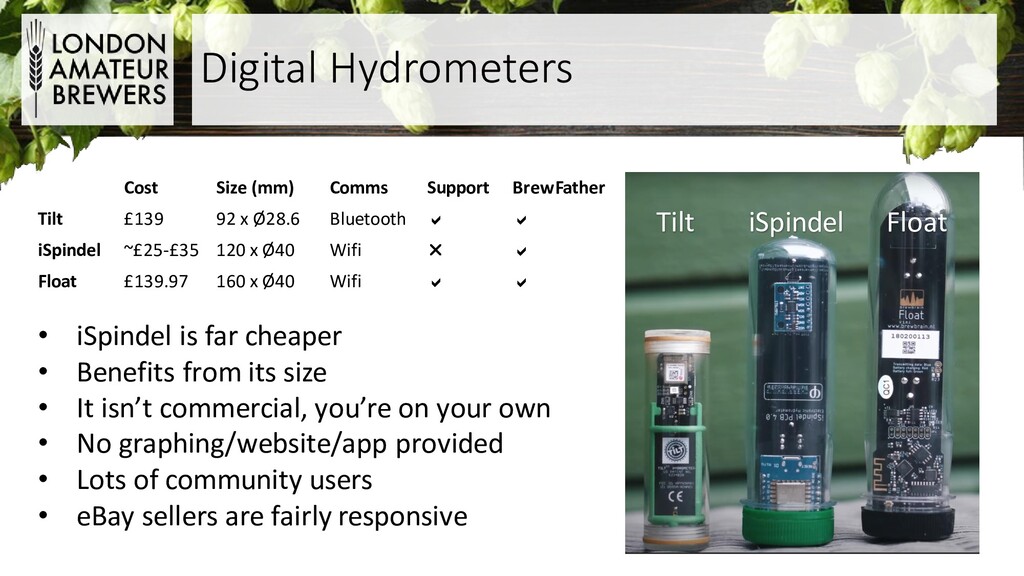
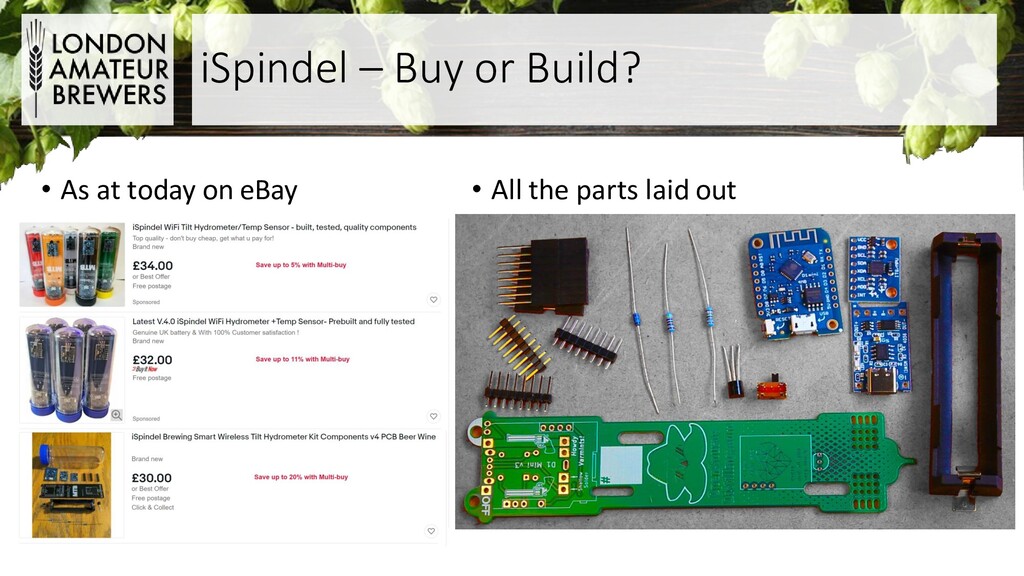
BrewFather Tilt £139 92 x Ø28.6 Bluetooth a a iSpindel ~£25-£35 120 x Ø40 Wifi r a Float £139.97 160 x Ø40 Wifi a a • iSpindel is far cheaper • Benefits from its size • It isn’t commercial, you’re on your own • No graphing/website/app provided • Lots of community users • eBay sellers are fairly responsive
a kickstarter campaign in 2014 • Fortunately, a couple of those guys were brewers, and saw an opportunity to build their own • Came out of the Arduino / Raspberry Pi open source movement • Microcontroller uses a programmable IDE • Arduino software and coding • Projects encouraged – home controllers, monitoring solutions, robots, IoT solutions, drones.
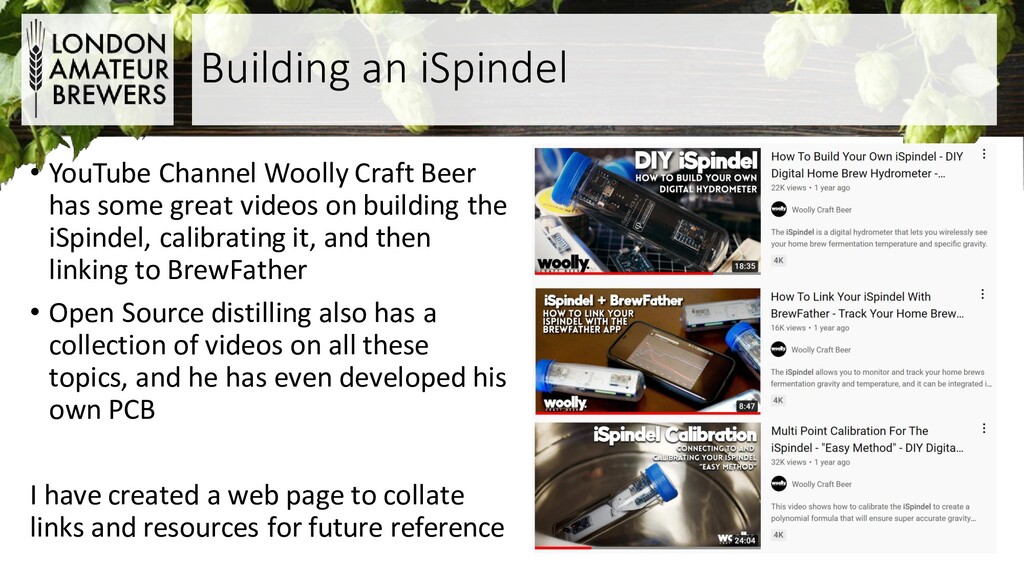
on building the iSpindel, calibrating it, and then linking to BrewFather • Open Source distilling also has a collection of videos on all these topics, and he has even developed his own PCB I have created a web page to collate links and resources for future reference Building an iSpindel
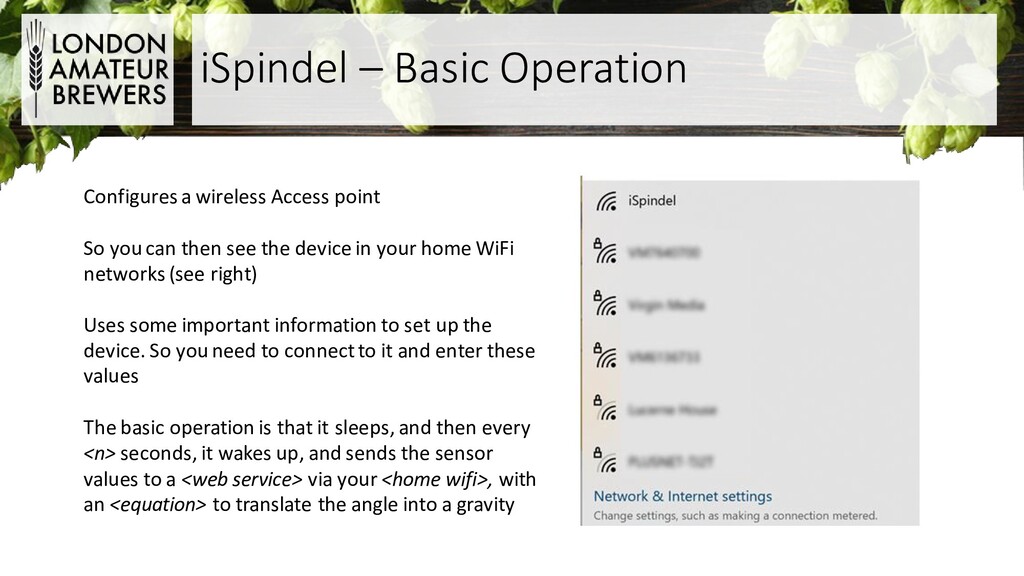
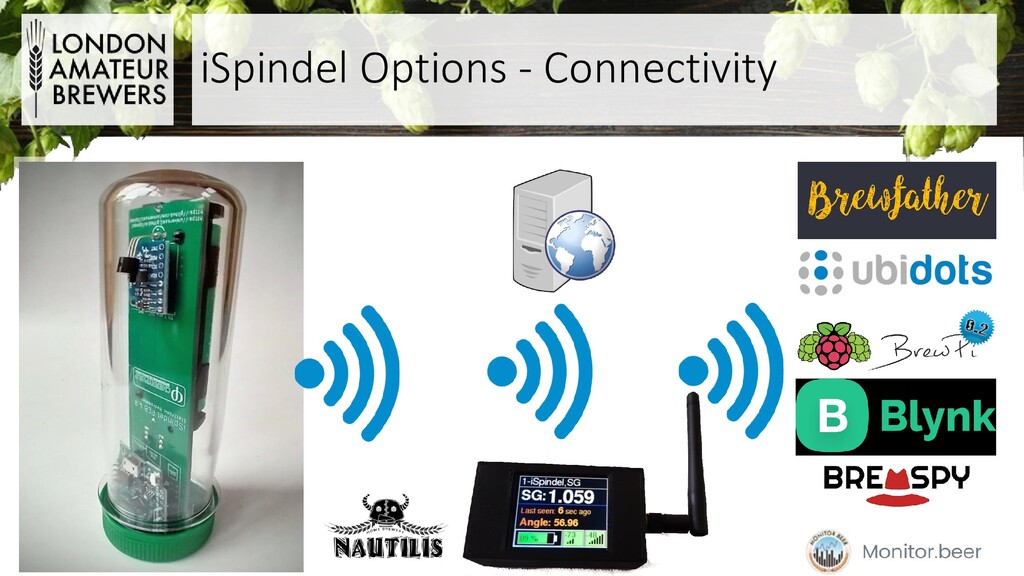
you can then see the device in your home WiFi networks (see right) Uses some important information to set up the device. So you need to connect to it and enter these values The basic operation is that it sleeps, and then every <n> seconds, it wakes up, and sends the sensor values to a <web service> via your <home wifi>, with an <equation> to translate the angle into a gravity
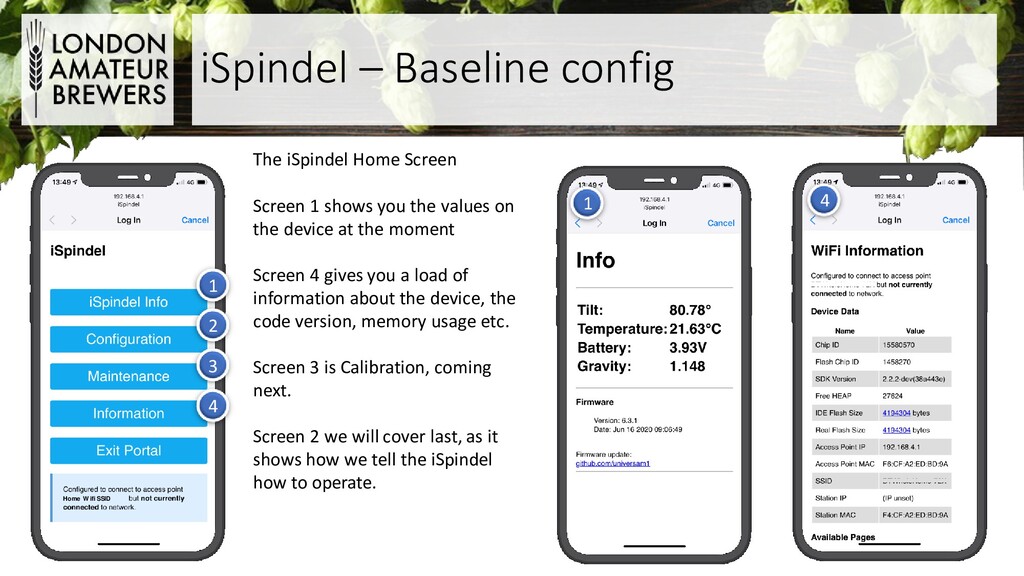
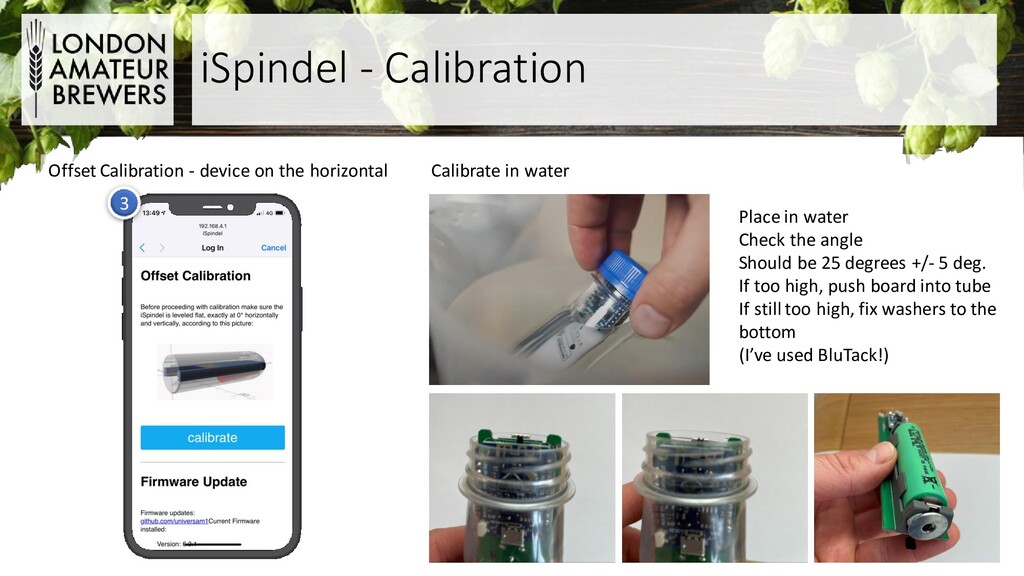
2 3 4 4 The iSpindel Home Screen Screen 1 shows you the values on the device at the moment Screen 4 gives you a load of information about the device, the code version, memory usage etc. Screen 3 is Calibration, coming next. Screen 2 we will cover last, as it shows how we tell the iSpindel how to operate.
Calibrate in water Place in water Check the angle Should be 25 degrees +/- 5 deg. If too high, push board into tube If still too high, fix washers to the bottom (I’ve used BluTack!) 3
the horizontal And water calibration – adjust to 25 degree angle Go to https://www.ispindel.de/tools/calibration/calibra tion.htm Make successive solutions of syrup (sugar and water) from 1.080 to 1.000 in 0.010 steps Enter the values in the boxes at the top, click add data each time The polynomial calculates at the bottom:
3 4 Available Wifi Networks Home Wifi that iSpindel will use Home Wifi password How you want the device to ID itself 900 seconds = every 15mins, the device will wake itself up Name of the Web Service Access Token Polynomial to convert angle to gravity
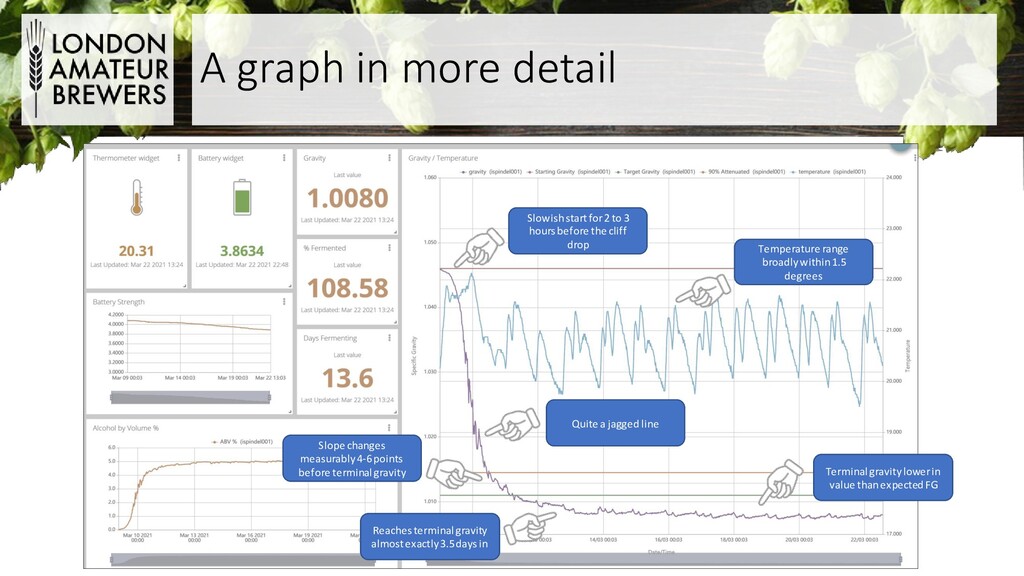
hours before the cliff drop Reaches terminal gravity almost exactly 3.5 days in Quite a jagged line Temperature range broadly within 1.5 degrees Slope changes measurably 4-6 points before terminal gravity Terminal gravity lower in value than expected FG
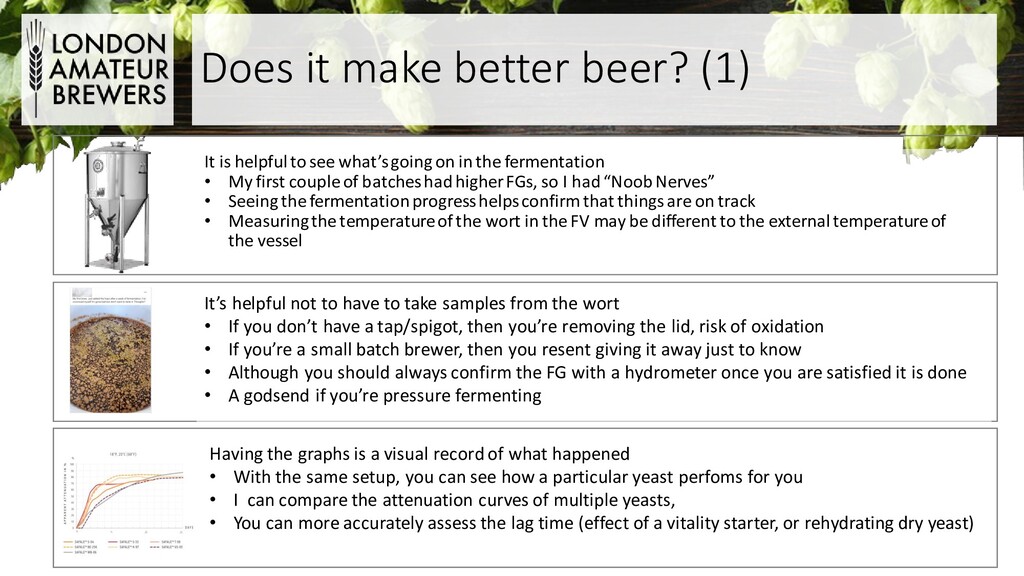
see what’s going on in the fermentation • My first couple of batches had higher FGs, so I had “Noob Nerves” • Seeing the fermentation progress helps confirm that things are on track • Measuring the temperature of the wort in the FV may be different to the external temperature of the vessel It’s helpful not to have to take samples from the wort • If you don’t have a tap/spigot, then you’re removing the lid, risk of oxidation • If you’re a small batch brewer, then you resent giving it away just to know • Although you should always confirm the FG with a hydrometer once you are satisfied it is done • A godsend if you’re pressure fermenting Having the graphs is a visual record of what happened • With the same setup, you can see how a particular yeast perfoms for you • I can compare the attenuation curves of multiple yeasts, • You can more accurately assess the lag time (effect of a vitality starter, or rehydrating dry yeast)
at high kreusen or as the fermentation is finishing, you can track that on the graph Using the fermentation process to carbonate the beer • Judging when you are 4 points away from finishing could be challenging, but you can get ball park Knowing when to package from the FV • 3 days of stable SG tell you it’s done. You can package and condition however you want thereafter. • If you’re on a schedule, you have the data to see how things are progressing Modifying the fermentation temperature profile • Timing a diacetyl rest is made easier • The precise values of the SG are affected by what’s happening in the FV • Kreusen, CO2, yeast matter all affect the angle • I have found that my FGs are lower than the target FG in a recipe • But the trends are shown faithfully, and the slope of the curve is hugely insightful
hopping liberates fermentable sugars • Enzyme activity varies across cultivars Stuck Fermentation • It wont fix it, but you’ll know when you’ve got one, and you can track the recovery steps thereafter • e.g. raising the temperature a couple of degrees or adding a little fresh yeast may encourage the yeast to process another couple of gravity points, and you’ll be able to see that, as an alternative to daily hydrometer checks
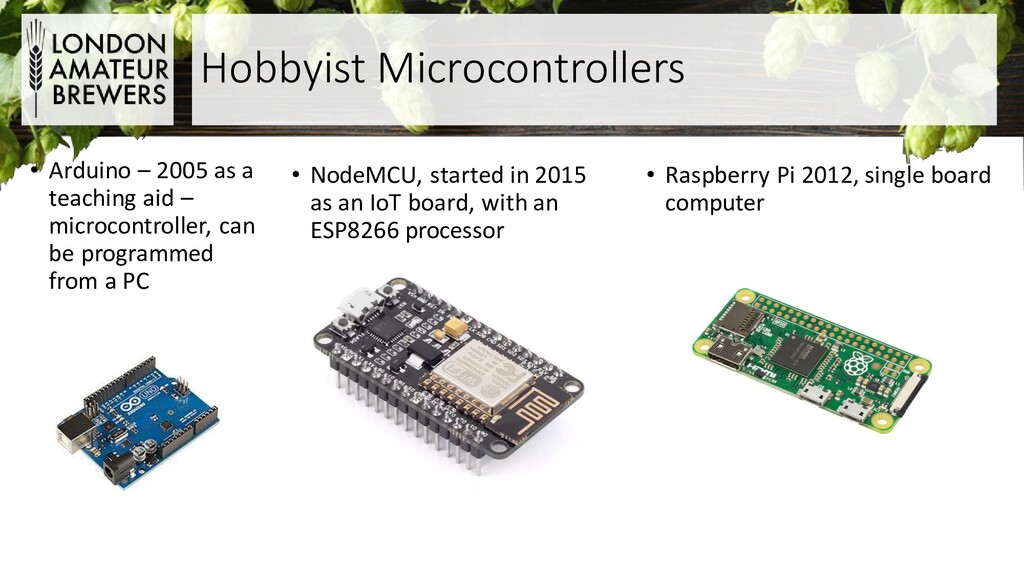
board, with an ESP8266 processor • Raspberry Pi 2012, single board computer • Arduino – 2005 as a teaching aid – microcontroller, can be programmed from a PC
beginners/kids • Because they are cheap, reliable, low power • You can connect devices or sensors to the pins • Because you can make them perform quite complex functions with some basic code, all written on your PC • There is a huge user base, and code base too • Manufacturers started seeing the benefits of using them Arduino Leonardo Raspberry Pi4 Model B WeMos D1 Mini £15 £33 £2.88 5-7V (100-200mA) 5V (2A) 3.3V (~70mA) 20g 46g 3g 68 x 53 85mm x 56mm 34mm x 25mm Arduino IDE Python, Scratch Arduino IDE