Upgrade to Pro — share decks privately, control downloads, hide ads and more …

Version control with Git and R

Version control with Git and R

Think holiday cheer and version control don’t go together? Think again! In this meetup we’ll introduce you to version controlling your R code with Git and RStudio and using browsing and collaboration features of GitHub.

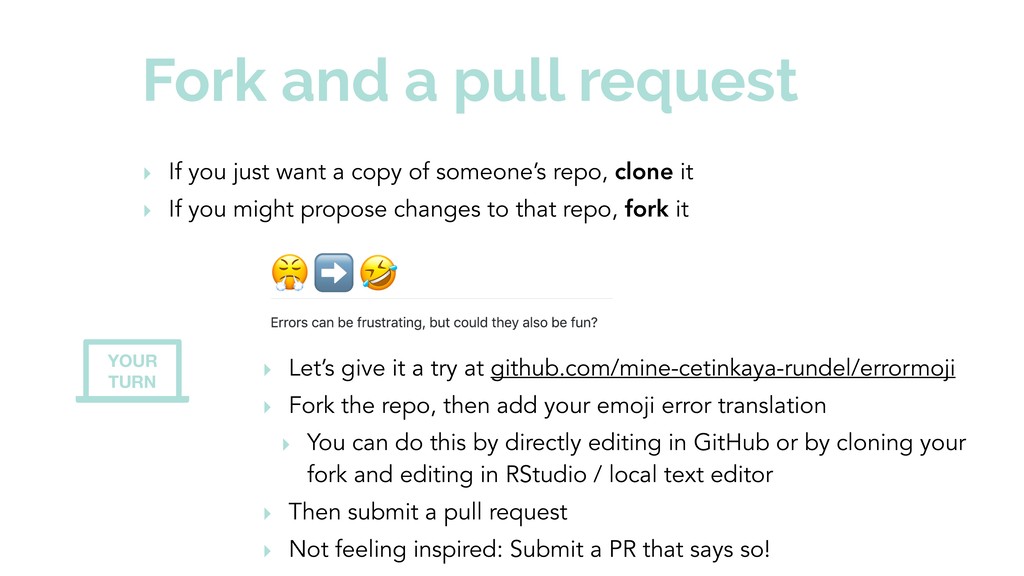
All you need is a laptop, no worries if you don’t have git set up on your computer yet. However, if you get a chance before the meetup, write down your most (or least!) favourite R error that you encounter regularly and an emoji translation for it. During the workshop you’ll get a chance to submit a pull request to [errormoji](https://github.com/mine-cetinkaya-rundel/errormoji) with your translation.

Presented at R-Ladies LA: https://www.meetup.com/rladies-la/events/256976525/

Mine Cetinkaya-Rundel

December 18, 2018
Tweet

More Decks by Mine Cetinkaya-Rundel

Other Decks in Education

Transcript

  1. Photo by Julian Howard on Unsplash Version control with Git

    and R bit.ly/r-git-la December 17, 2018 - R-Ladies LA
  2. Meet & greet Associate Professor, Duke Statistical Science Data Scientist

    & Professional Educator, RStudio R-Ladies RTP Organizer Mine Çetinkaya-Rundel
  3. happygitwithr.com This is a very hands on, scraping the surface,

    introduction to version control with R and git. For a much more complete treatment, see
  4. Getting started ‣ Do you have latest versions R and

    RStudio installed? ‣ If not, install /update ‣ R: cran.r-project.org/ ‣ RStudio: rstudio.com/products/rstudio/download/ ‣ Or use RStudio Cloud: bit.ly/rladiesla ‣ Do you have a GitHub account? ‣ If not, create one at github.com (but wait for the next slide first!)
  5. What’s in a name? If you’re just about to choose

    a GitHub username… ‣ Incorporate your actual name ‣ Reuse username from other contexts, e.g., Twitter or Slack. ‣ Pick a username you’ll be comfortable revealing to your future boss. ‣ Shorter is better than longer. ‣ Be as unique as possible in as few characters as possible. ‣ Make it timeless — don’t highlight your current university, employer, or place of residence, e.g. JennyFromTheBlock. ‣ Avoid words laden with special meaning in programming, e.g. NA or … From http://happygitwithr.com/github-acct.html by Jenny Bryan
  6. Today I start a new project! So I’ll do the

    right thing and create a repo first. ‣ Step 1: Create a new repo on GitHub ‣ Step 2: Clone it locally using RStudio, and observe the literal creation of a directory on your computer ‣ Step 3: Make changes locally ‣ Step 4: Introduce yourself to Git ‣ Step 5: Commit and push to GitHub ‣ Step 6: Confirm your changes have propagated to GitHub DEMO 1 YOUR TURN 2
  7. DEMO 1 ‣ Step 2: Clone it locally using RStudio,

    and observe the literal creation of a directory on your computer on Github…
  8. DEMO 1 ‣ Step 2: Clone it locally using RStudio,

    and observe the literal creation of a directory on your computer in RStudio…
  9. ‣ Step 3: Introduce yourself to Git git config !--global

    user.email "[YOUR EMAIL ADDRESS]" git config !--global user.name "[YOUR NAME]" DEMO 1
  10. YOUR TURN 2 but first… and if one of these

    doesn’t work for you bit.ly/rladiesla for RStudio Cloud on Terminal (Mac) / Command / Git Bash (PC) which git git !--version
  11. Caching credentials ‣ Typing your username and password over and

    over will get old quickly ‣ Quick, short term fix: ‣ Run the following in the Terminal for caching password for 2 hours (60*60*2 = 7200 seconds) git config credential.helper 'cache !--timeout=7200' ‣ Longer term fix: ‣ HTTPS credential caching: happygitwithr.com/credential-caching.html ‣ Setting up SSH keys: happygitwithr.com/ssh-keys.html
  12. YOUR TURN 2 ‣ Step 1: Create a new repo

    on GitHub ‣ Step 2: Clone it locally using RStudio, and observe the literal creation of a directory on your computer ‣ Step 3: Make changes locally ‣ Step 4: Introduce yourself to Git ‣ Step 5: Commit and push to GitHub ‣ Step 6: Confirm your changes have propagated to GitHub ‣ Step 7 (new!): Make changes to the README by directly editing on GitHub and pull to see the changes reflected in your local project
  13. ‣ View options ‣ Staging and committing all changes in

    a document at once ‣ Staging and committing various changes within a document one by one ‣ Commit messages ‣ Amending a previous commit ‣ Pushing
  14. ‣ History of commits ‣ What is HEAD? ‣ Filtering

    history of commits by File or Directory
  15. I have been working on a project for a while,

    and now I’m realizing I should have been tracking it with git. ‣ Step 0: Create an RStudio Project from existing directory (if an .Rproj file doesn’t already exist) ‣ Step 1: usethis!::use_git() and follow instructions ‣ Step 2: Create a new repo on GitHub without a README ‣ Step 3: Add remote via on RStudio ‣ Click Add remote and paste the URL, and pick a remote name (origin), then Add. ‣ Back in the New Branch dialog enter master as the branch name and make sure Sync branch with remote is checked, then Create. “Create. ‣ In the next dialog, choose overwrite. For more, see happygitwithr.com/existing-github-last.html DEMO
  16. Fork and a pull request ‣ If you just want

    a copy of someone’s repo, clone it ‣ If you might propose changes to that repo, fork it ‣ Let’s give it a try at github.com/mine-cetinkaya-rundel/errormoji ‣ Fork the repo, then add your emoji error translation ‣ You can do this by directly editing in GitHub or by cloning your fork and editing in RStudio / local text editor ‣ Then submit a pull request ‣ Not feeling inspired: Submit a PR that says so! YOUR TURN
  17. Merge conflicts ‣ Merge conflicts are one of the biggest

    challenges of collaborating on GitHub ‣ A good way of avoiding them (or at least making them less of an annoyance) is to commit and push/pull often ‣ Another tip for dealing with them is to learn to appreciate them as a toll that prevent unwanted changes making their way into your code, analysis, report, etc. 2 YOUR TURN ‣ Now you will cause a merge conflict and we’ll resolve it together! ‣ I will cause a merge conflict and resolve it DEMO 1
  18. ghpages ‣ You can get a webpage for your project

    for free with GitHub ‣ To set up, go to Settings, and then scroll down to GitHub Pages ‣ Easiest option is to link everything you want exposed from your README ‣ Alternatively you can host files for the web in a docs folder, see more at bookdown.org/yihui/blogdown/ on this github.com/rstudio-education/shiny-wsds18
  19. R Markdown ‣ Want GitHub to display your rendered R

    Markdown file? Use output: github_document in your YAML ‣ Make sure to commit and push all figures you want displayed ‣ Label your R chunks informatively for informatively named figure files ‣ And be careful about changing the label of R chunks that generate plots — figures saved under the old name won’t automatically disappear
  20. Deleting repos ‣ Deleting locally is just like deleting any

    other folder ‣ Deleting on GitHub requires going into the DANGER ZONE!
  21. Private repos ‣ Why private repos? ‣ Teaching — FERPA!

    ‣ Keeping projects on the DL during development ‣ Data privacy — but this may not address this issue ‣ Getting private repos for free ‣ Students, faculty, and educational/research staff via GitHub Education ‣ Find out more at help.github.com/articles/about-github-education-for-educators- and-researchers/ ‣ Apply for free repositories for a GitHub Organization for courses or research/lab groups ‣ Official nonprofit organizations and charities via GitHub for Good: github.com/ nonprofit ‣ Everyone else can pay for some private repos, see github.com/pricing for more info
  22. GitHub for teaching ‣ You can use GitHub as your

    course LMS! ‣ Each class is an Organization (where you can request unlimited private repositories by showing GitHub that you’re using it for teaching) ‣ One repo per student / per project ‣ GitHub Classroom offers some functionality for repository creation for students ‣ ghclass package allows you to do everything from R! ‣ rundel.github.io/ghclass/articles/ghclass.html