Upgrade to Pro — share decks privately, control downloads, hide ads and more …

Miriam Lauter - Make your own Smart Air Conditioner

Miriam Lauter - Make your own Smart Air Conditioner

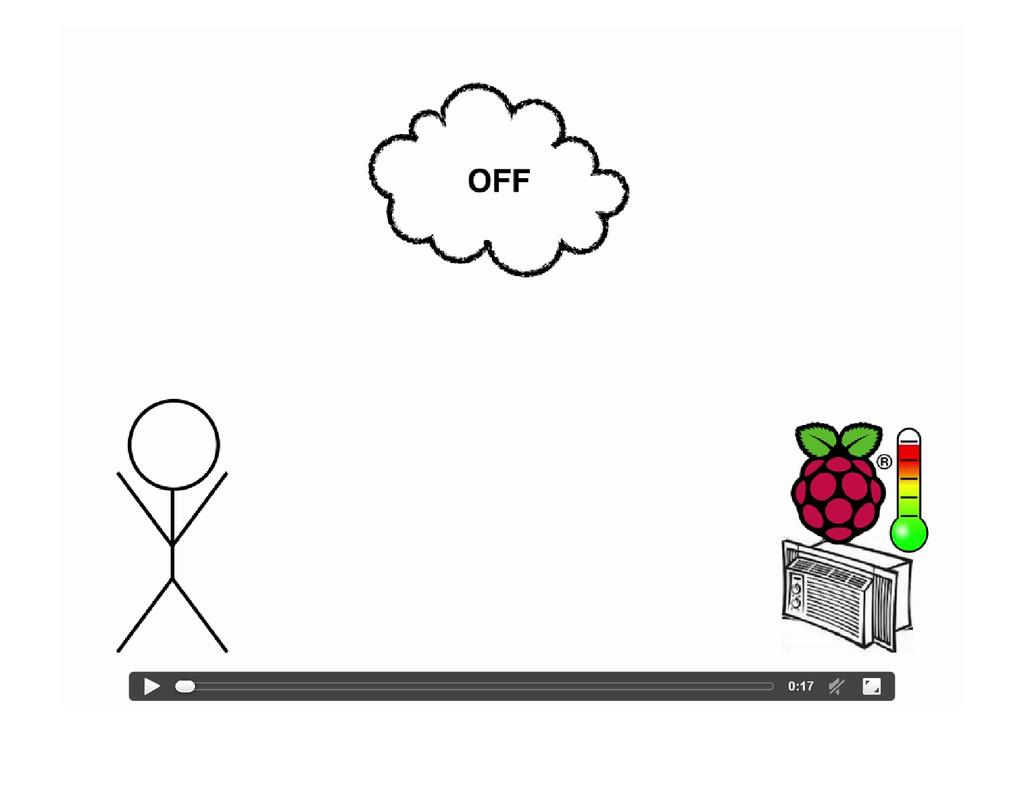
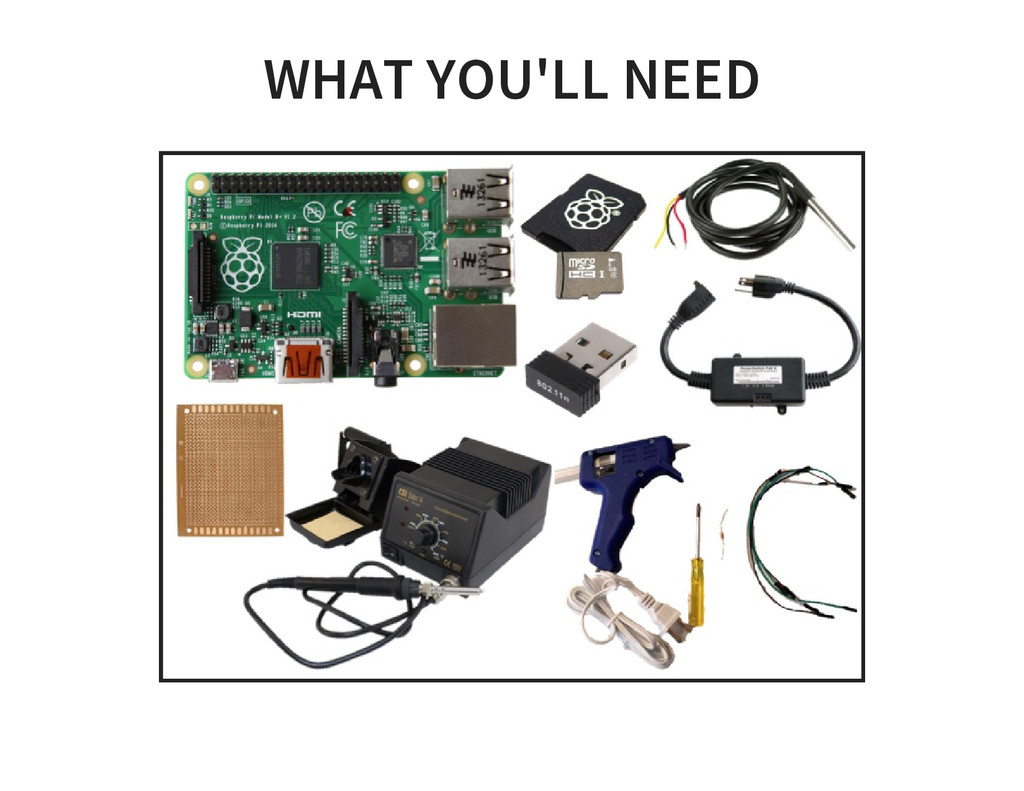
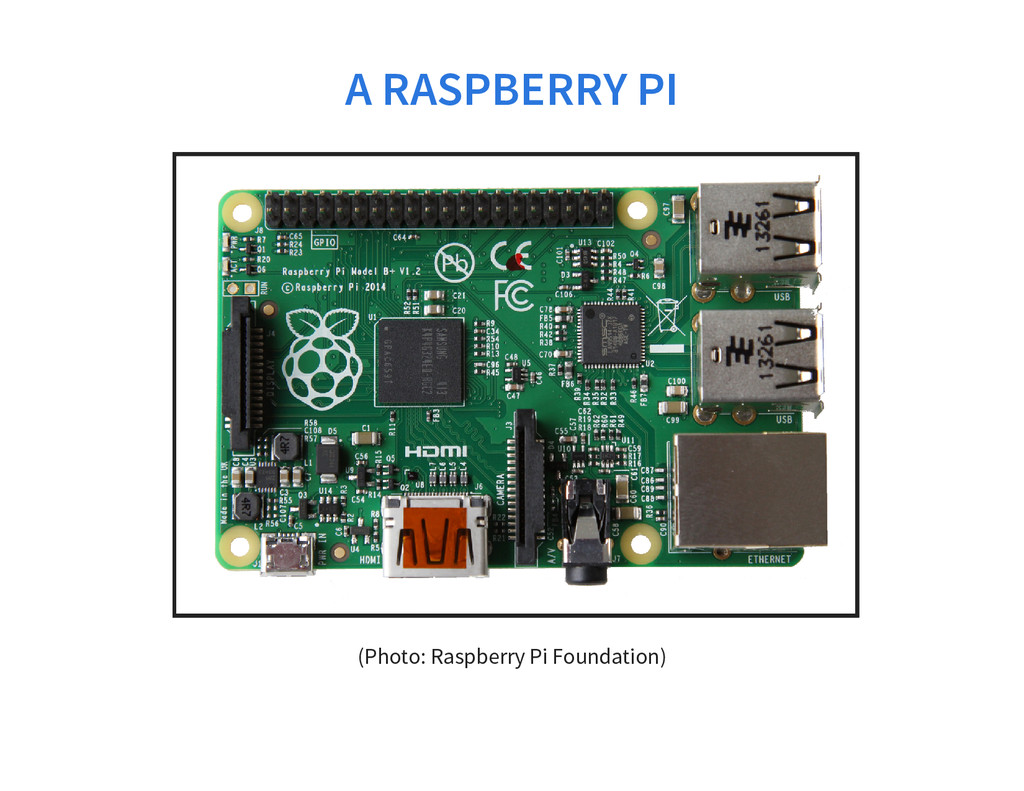
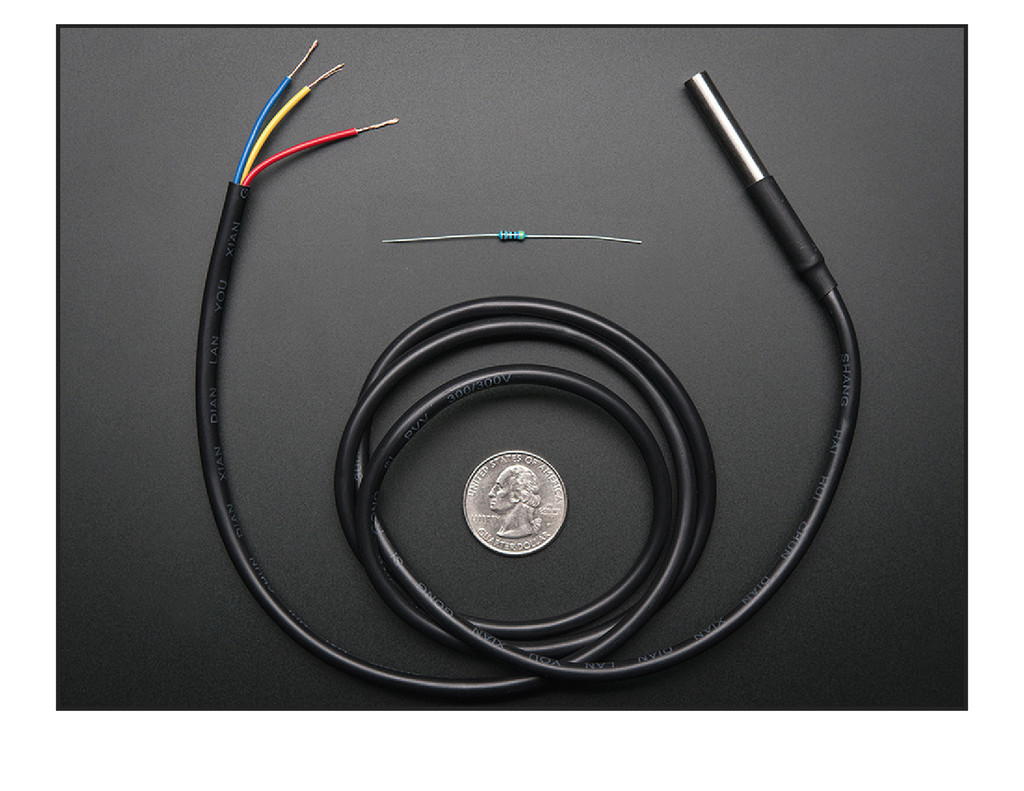
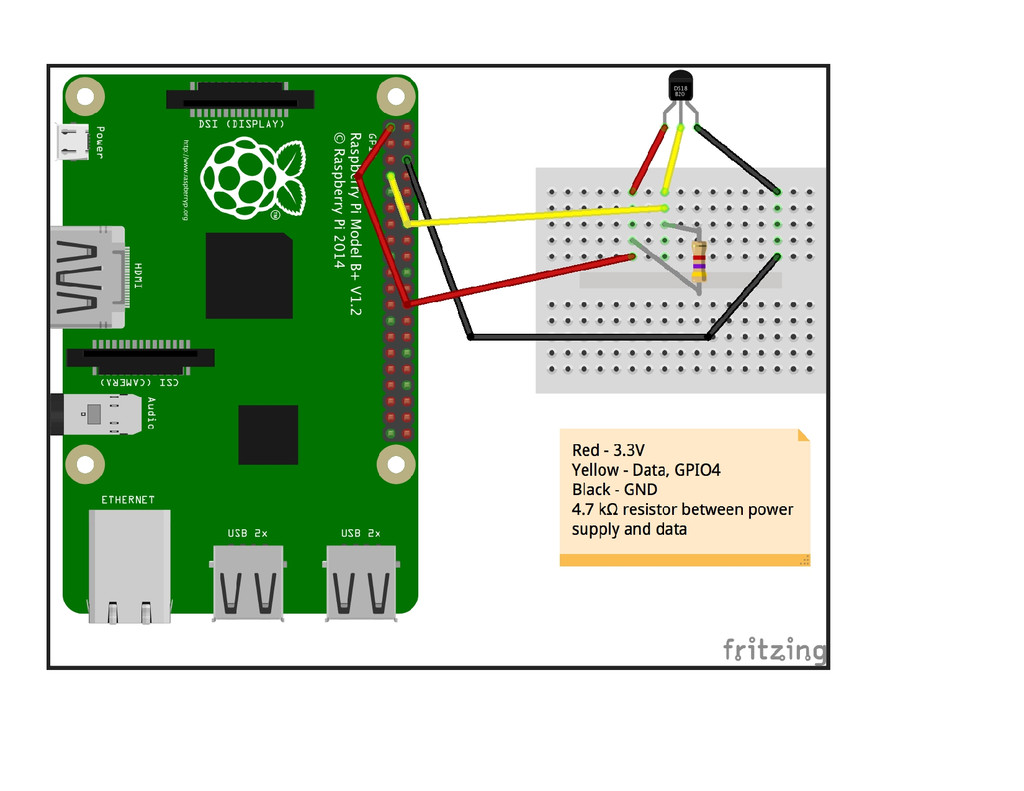
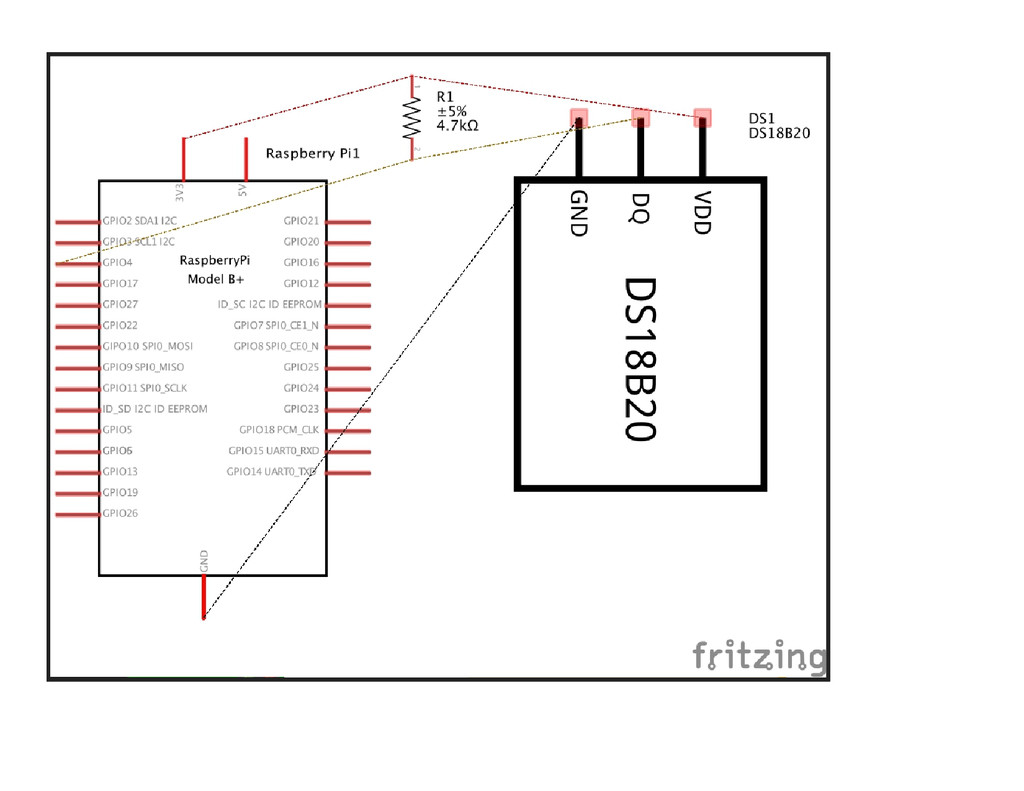
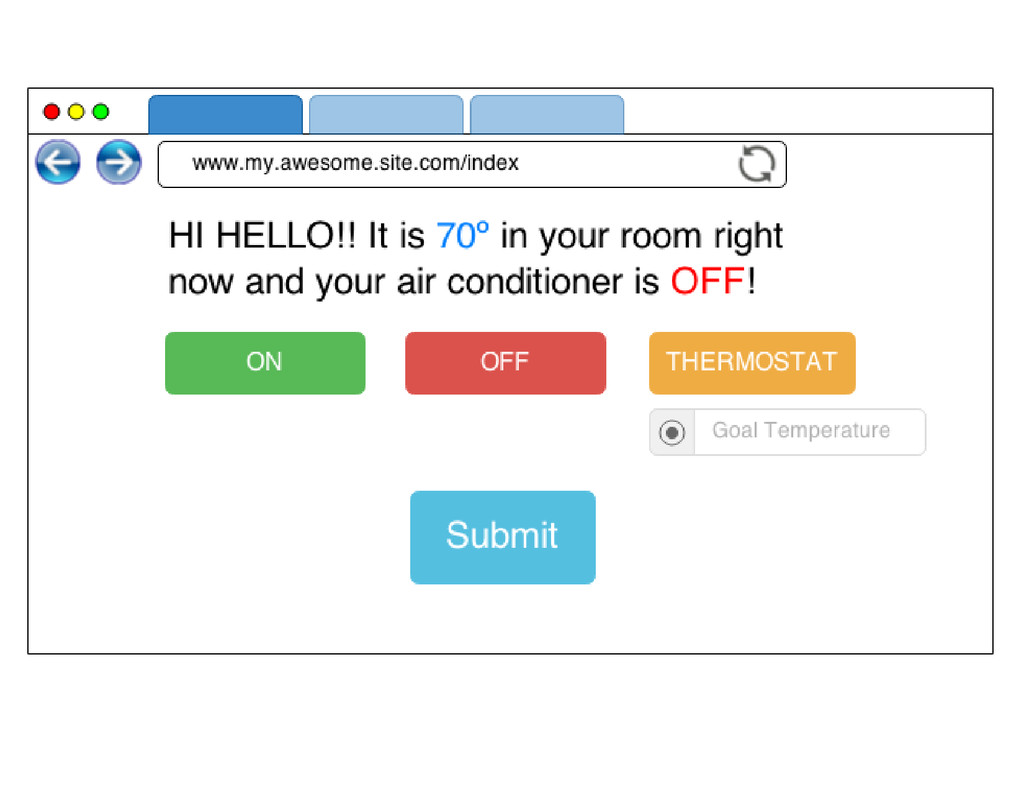
Looking for a fun, useful Raspberry Pi project? Want to connect your household appliances to the internet? Come learn how to build your own 'smart' air conditioner using a Raspberry Pi, a bit of hardware, and, of course, Python. Plus, you can save energy and never have to come home to a sweltering bedroom again.

https://us.pycon.org/2015/schedule/presentation/412/
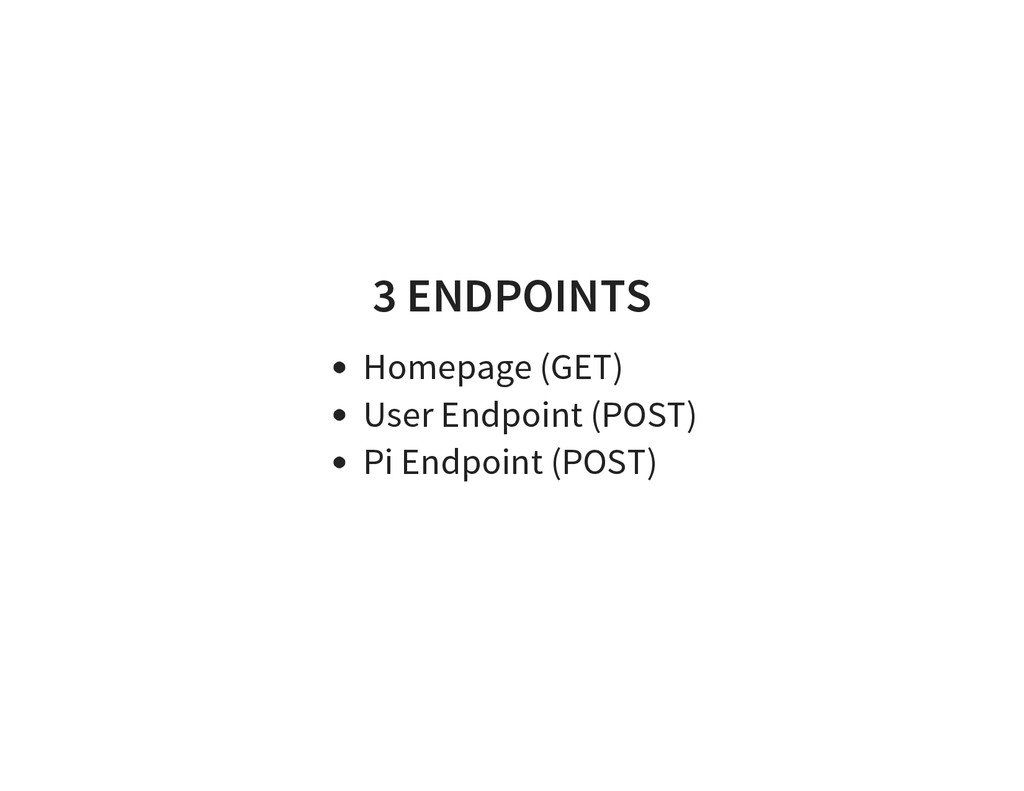
PyCon 2015

April 18, 2015
Tweet

More Decks by PyCon 2015

Other Decks in Programming

Transcript

  1. OVERVIEW Getting Started What you'll need Resources Cost Hardware A

    simple Flask application The code on the Pi Final Notes and Demo!
  2. AN AIR CONDITIONER window unit connects to AC power draws

    less than 15 amps you don't care about it that much
  3. EXTRA RASPBERRY PI COMPONENTS + (or whatever fits your R-Pi

    model) Micro USB charger wall adapter Micro SD card USB wifi (Photos: adafruit.com) mlauter.github.io/getting-started-with-raspberry-pi
  4. MOAR STUFF Male and female jumper wires Prototype PCB Paper

    Power Switch (relay) Digital temperature sensor 4.7K resistor
  5. OVERVIEW Getting Started Hardware Controlling the AC with the raspberry

    pi Measuring temperature with the raspberry pi A simple Flask application The code on the Pi Final Notes and Demo!
  6. Allow the Raspberry Pi to turn the air conditioner on

    and off #1 RASPBERRY PI | RELAY | AIR CONDITIONER
  7. CONNECT THE RASPBERRY PI Make sure the pi is not

    plugged in Find a GPIO (general purpose input output) pin Don't use GPIO4 (we'll need it later)
  8. OVERVIEW Getting Started Hardware A simple Flask application Overview Intro

    to Flask 3 Routes Translating states The code on the Pi Final Notes and Demo!
  9. APPLICATION REQUIREMENTS Raspberry Pi can: 1. Give information about room

    conditions 2. Receive instructions User can: 1. Receive info about room conditions 2. Give instructions Store information to be passed between User and R-Pi
  10. FLASK BASICS $ mkdir app $ mkdir app/assets $ mkdir

    app/templates $ touch app.py $ cd app $ tree . ├── app.py ├── assets └── templates └── index.html
  11. APP.PY: HELLO WORLD from flask import Flask, render_template app =

    Flask(__name__) @app.route("/") def hello(): return render_template('index.html', name='Miriam') if __name__ == "__main__": app.run()
  12. @ROUTE DECORATORS @app.route("/") #route(rule, **options) def hello(): return render_template('index.html', name='Miriam')

    Add the following url rule: when there is a request from a url like my.site.com/ run the hello function. If you are testing you'll be running on localhost:5000
  13. AN EXAMPLE TEMPLATE # index.html <html> <head> <title>Air conditioner remote</title>

    </head> <body> <h1>Hello World</h1> <div> Hello, {{name}} </div> </body> </html>
  14. ENDPOINT 1: HOMEPAGE from flask import Flask, render_template app =

    Flask(__name__) @app.route('/', methods = ['GET']) @app.route('/index', methods = ['GET']) def homepage(): data = #Get stored room temp and AC state return render_template('index.html', data=data)
  15. ENDPOINT 2: USER @app.route('/user', methods=['POST']) def user(): user_input = request.json

    current_temp = #Get most recently stored room temp desired_state = translate_state(user_input, current_temp) # Store the desired_state
  16. ENDPOINT 3: PI @app.route('/pi', methods=['POST']) def pi(): pi_input = request.json

    #store pi input #return ON or OFF return flask.jsonify(desired_state)
  17. OVERVIEW Getting Started Hardware A simple Flask application The code

    on the Pi RPi.GPIO Surviving unresponsive server Final Notes and Demo!
  18. THE CODE ON THE RASPBERRY PI 1. Make requests using

    the Pi endpoint 2. Set the switch pin high (on) or low (off) 3. Repeat
  19. import requests import json url = 'your.url.here/pi' data = {'info

    to send'} headers = {'Content-type': 'application/json', 'Accept': 'text/plain'} r = requests.post(url, data=json.dumps(data), headers) # 0 or 1
  20. RPI.GPIO import RPi.GPIO as io io.setmode(io.BCM) switch_pin = 17 io.setup(switch_pin,

    io.OUT) io.output(switch_pin, False) def is_running(): return io.input(switch_pin)
  21. def turn_on(): io.output('switch_pin', True) def turn_off(): io.output('switch_pin', False) r =

    requests.post(url, data=json.dumps(data), headers) # 0 or 1 if r == 1: turn_on() else: turn_off()