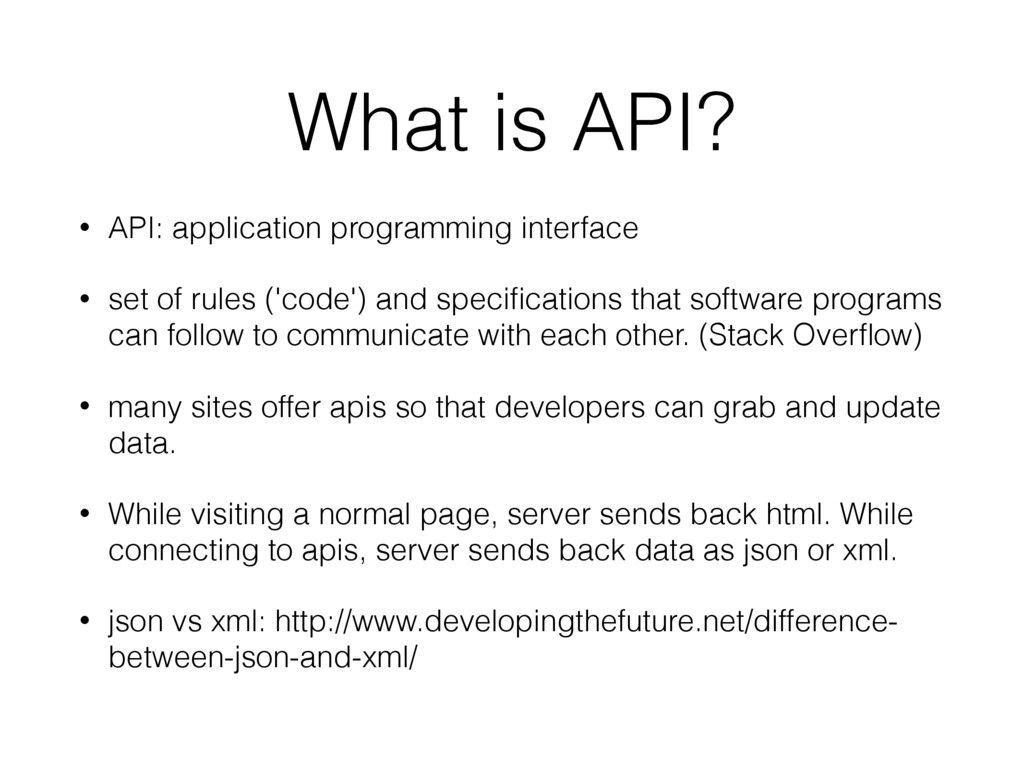
of rules ('code') and specifications that software programs can follow to communicate with each other. (Stack Overflow) • many sites offer apis so that developers can grab and update data. • While visiting a normal page, server sends back html. While connecting to apis, server sends back data as json or xml. • json vs xml: http://www.developingthefuture.net/difference- between-json-and-xml/
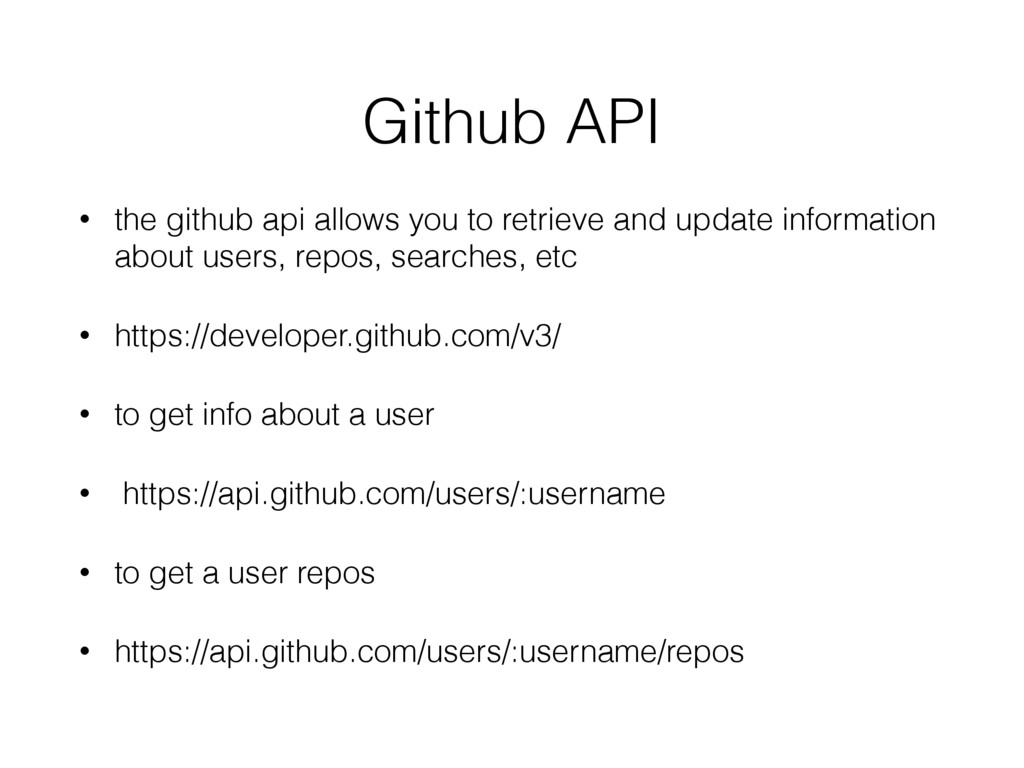
and update information about users, repos, searches, etc • https://developer.github.com/v3/ • to get info about a user • https://api.github.com/users/:username • to get a user repos • https://api.github.com/users/:username/repos
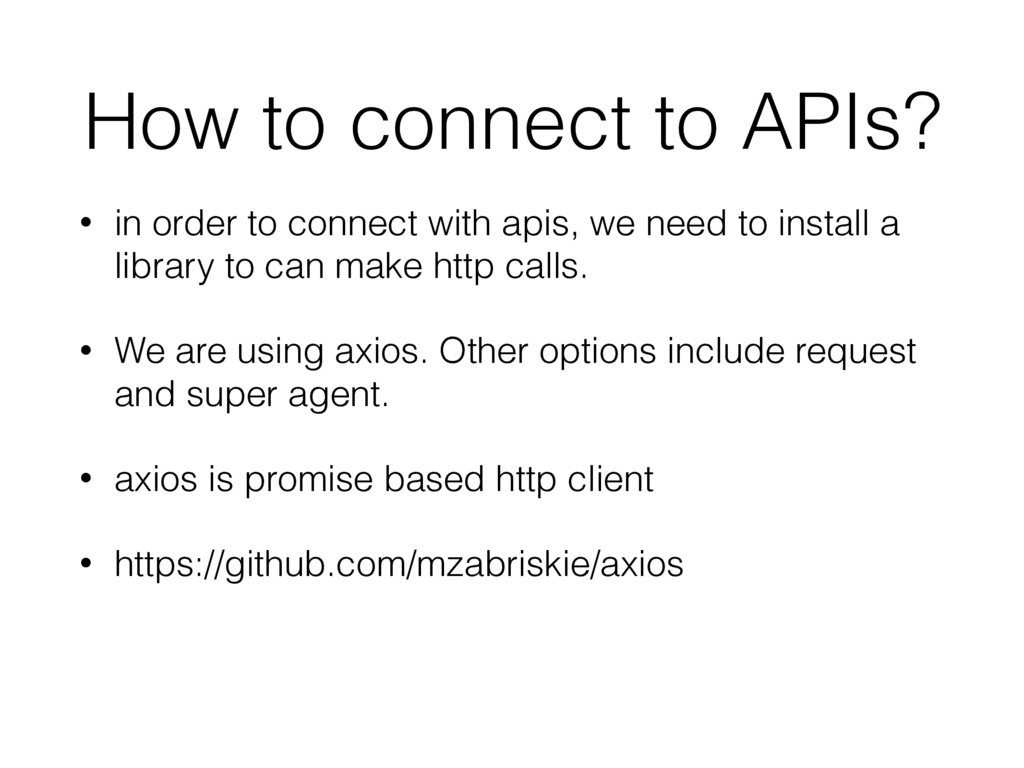
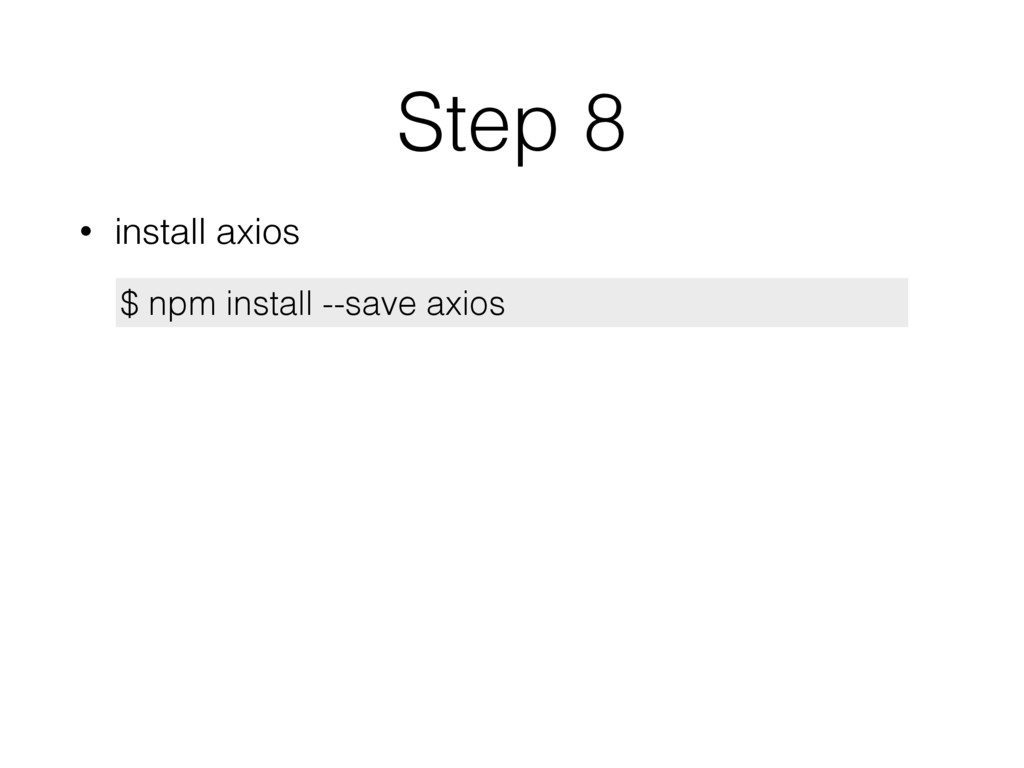
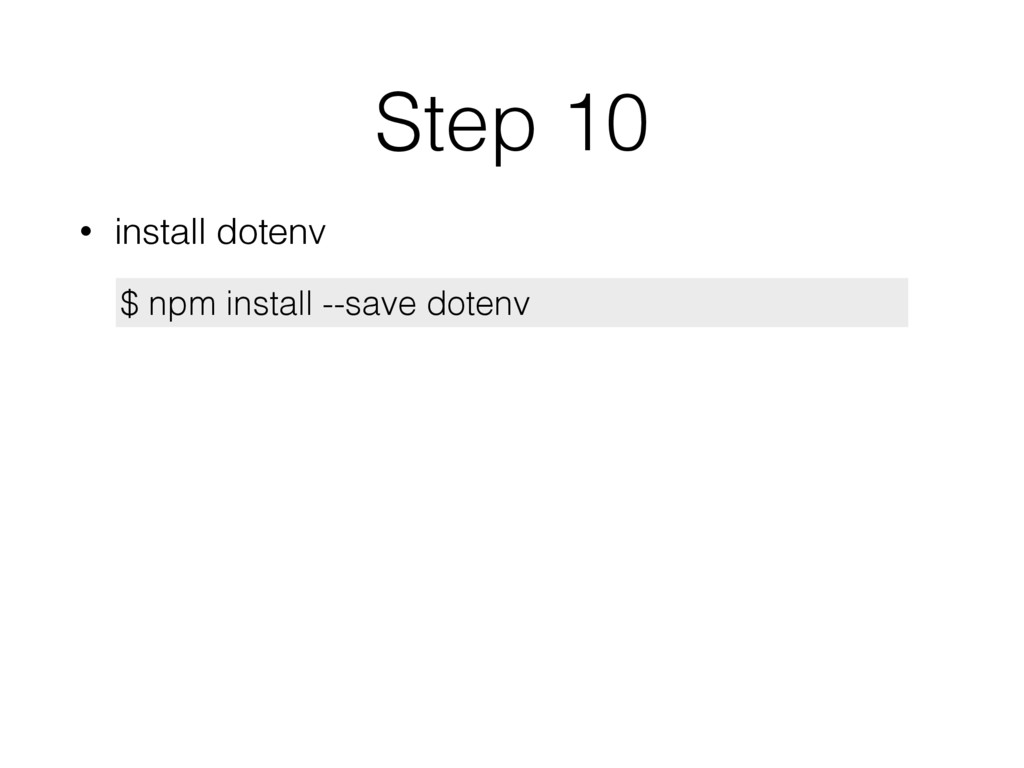
with apis, we need to install a library to can make http calls. • We are using axios. Other options include request and super agent. • axios is promise based http client • https://github.com/mzabriskie/axios
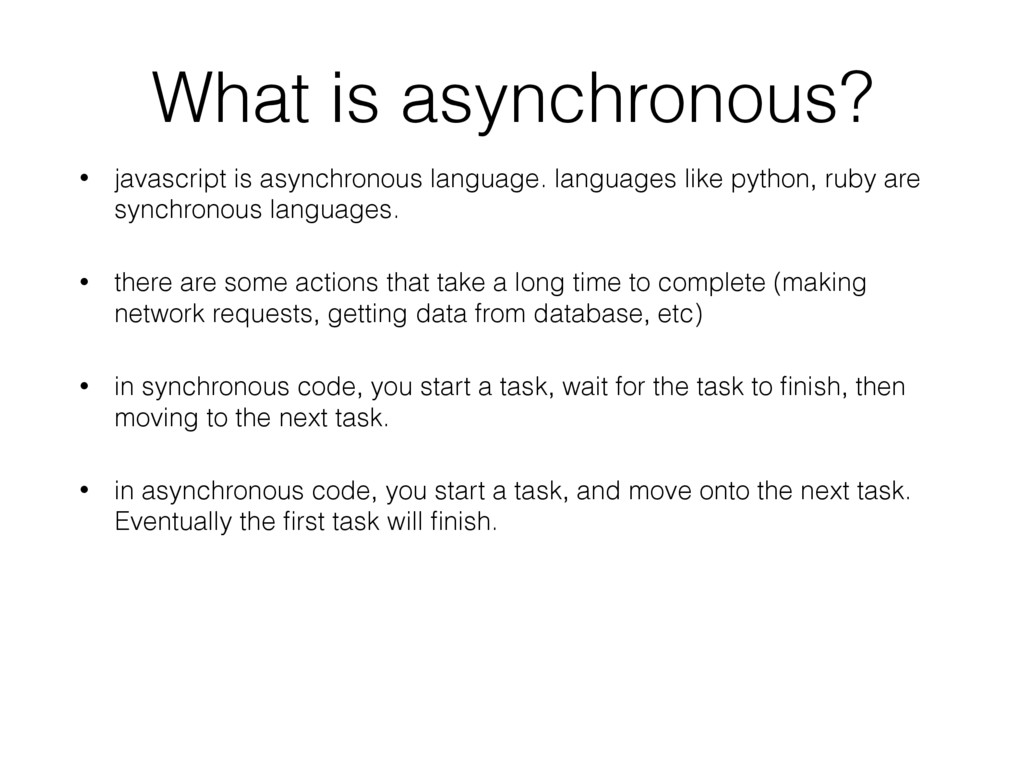
python, ruby are synchronous languages. • there are some actions that take a long time to complete (making network requests, getting data from database, etc) • in synchronous code, you start a task, wait for the task to finish, then moving to the next task. • in asynchronous code, you start a task, and move onto the next task. Eventually the first task will finish.
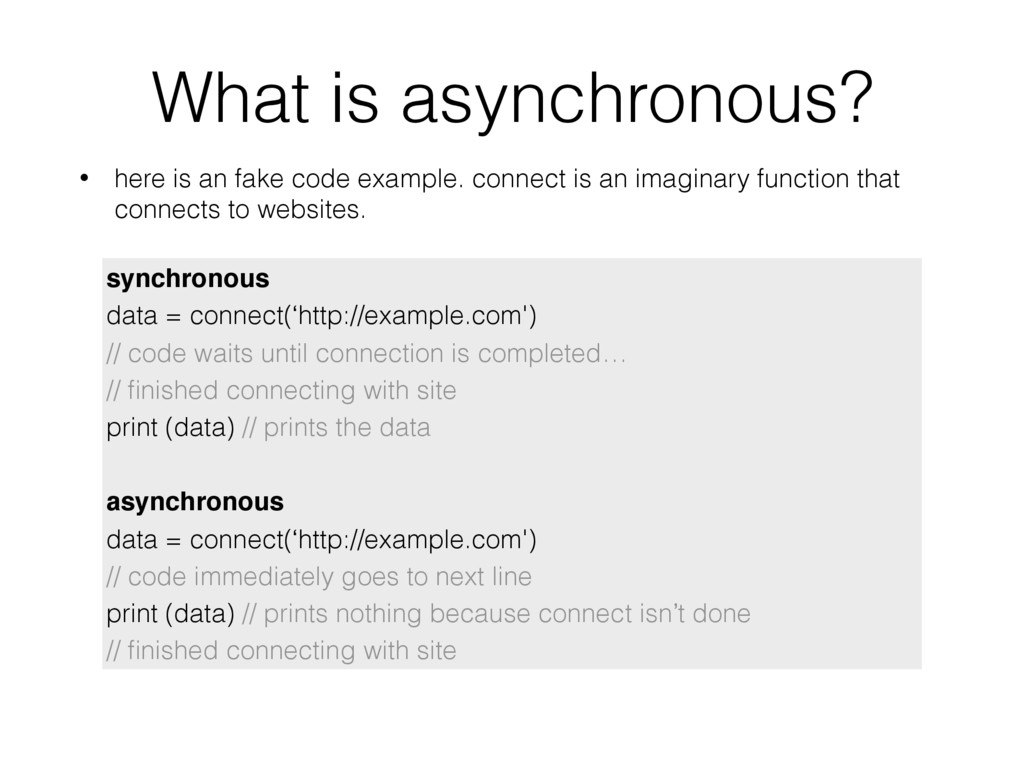
connect is an imaginary function that connects to websites. synchronous data = connect(‘http://example.com') // code waits until connection is completed… // finished connecting with site print (data) // prints the data asynchronous data = connect(‘http://example.com') // code immediately goes to next line print (data) // prints nothing because connect isn’t done // finished connecting with site
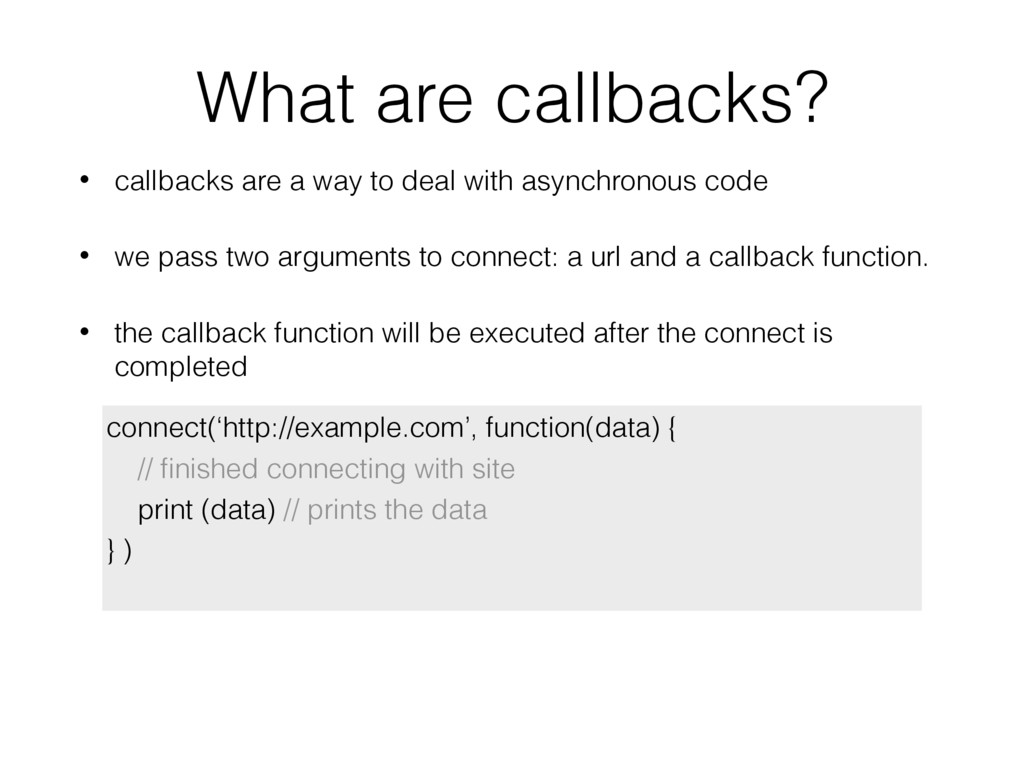
with asynchronous code • we pass two arguments to connect: a url and a callback function. • the callback function will be executed after the connect is completed connect(‘http://example.com’, function(data) { // finished connecting with site print (data) // prints the data } )
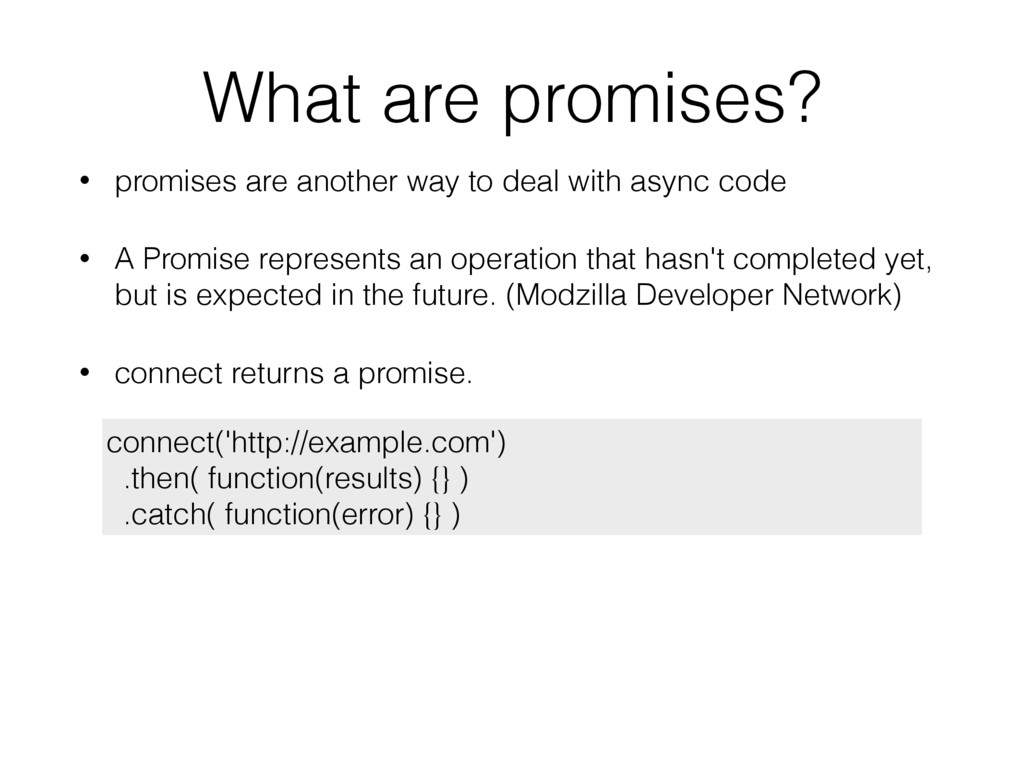
with async code • A Promise represents an operation that hasn't completed yet, but is expected in the future. (Modzilla Developer Network) • connect returns a promise. connect('http://example.com') .then( function(results) {} ) .catch( function(error) {} )
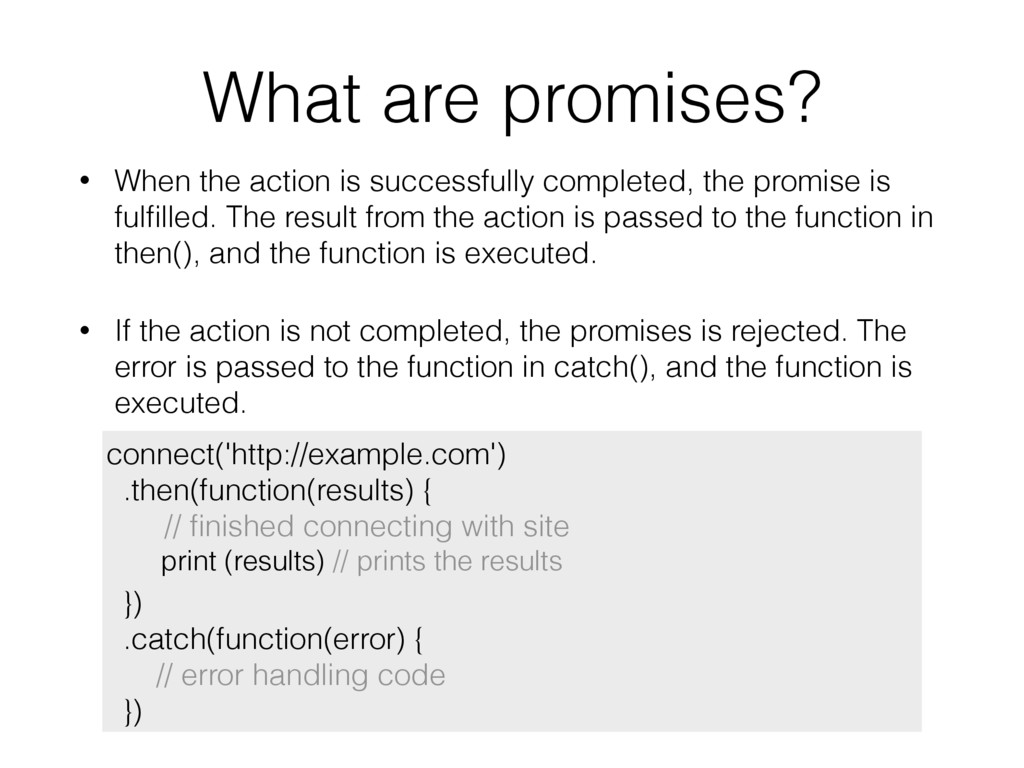
the promise is fulfilled. The result from the action is passed to the function in then(), and the function is executed. • If the action is not completed, the promises is rejected. The error is passed to the function in catch(), and the function is executed. connect('http://example.com') .then(function(results) { // finished connecting with site print (results) // prints the results }) .catch(function(error) { // error handling code })
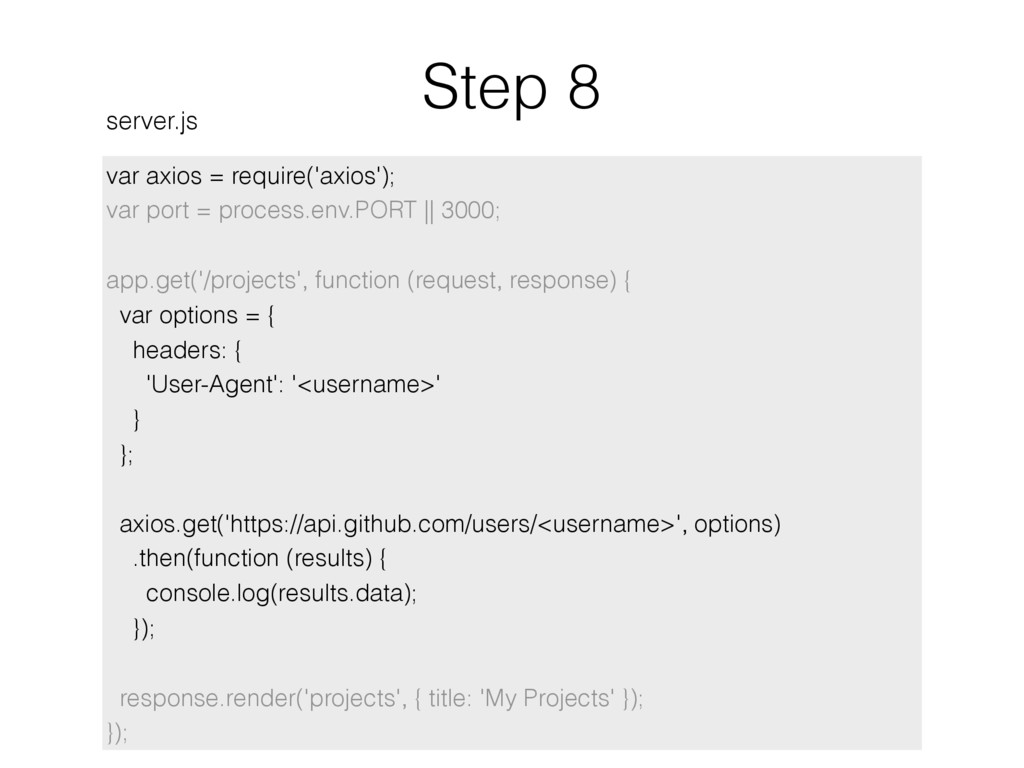
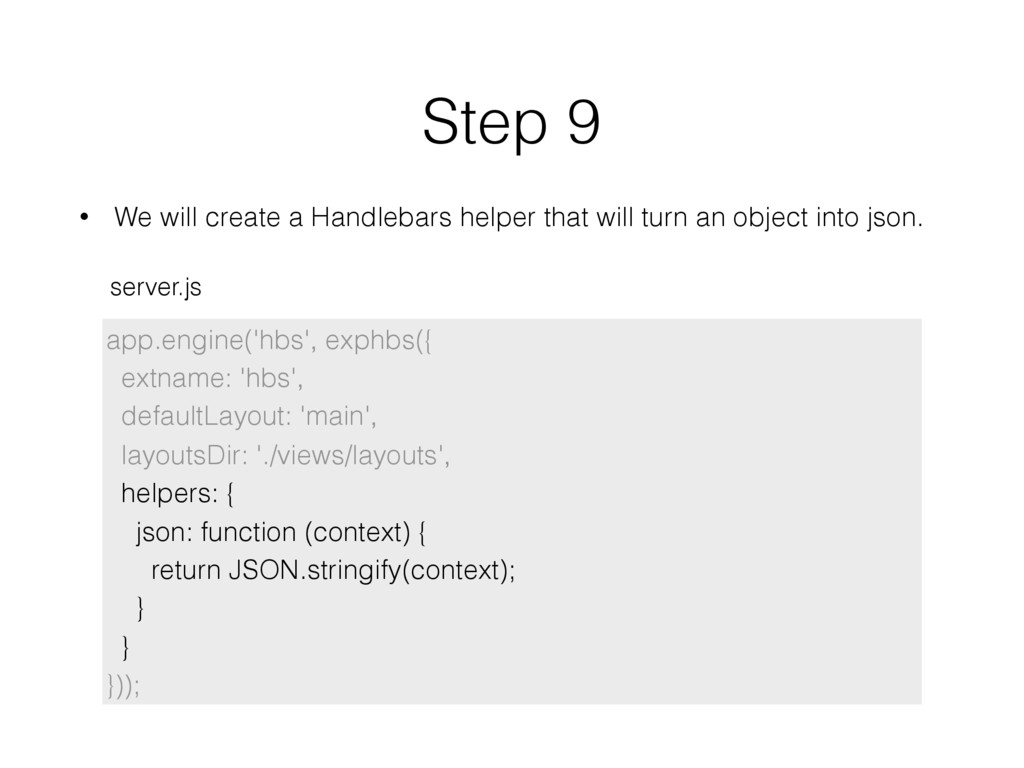
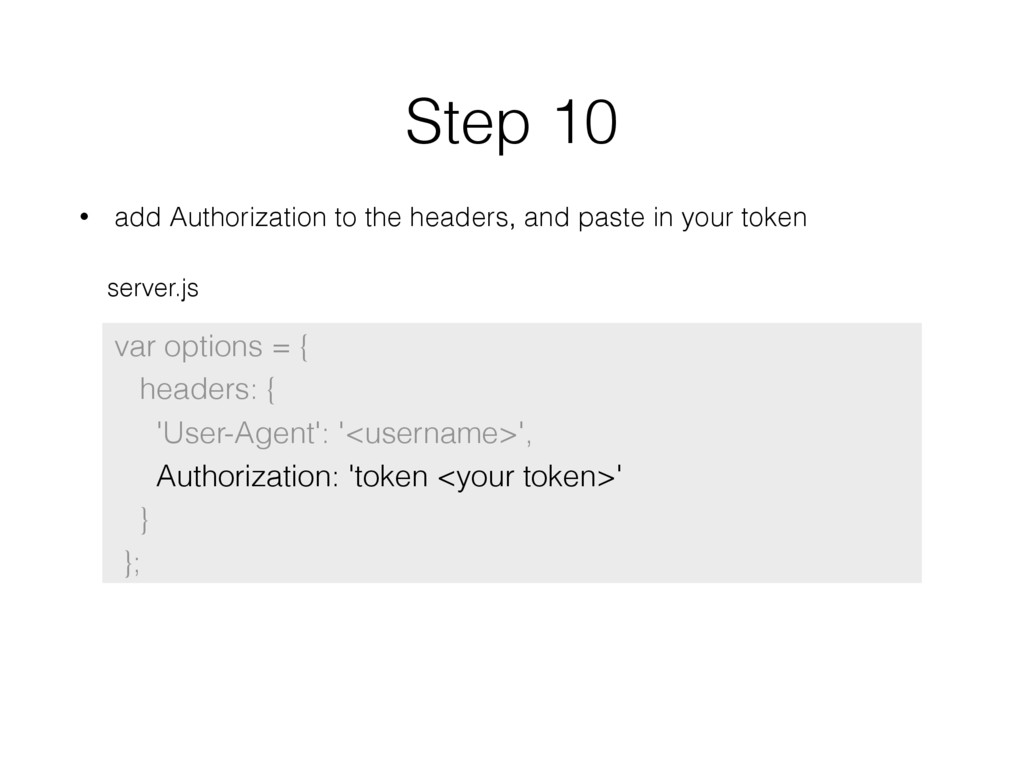
requires you to include an User-Agent in the http header. • we are going to use our username as the User-Agent. • https://developer.github.com/v3/#user-agent-required • http headers: http://code.tutsplus.com/tutorials/http-headers-for- dummies--net-8039 var options = { headers: { 'User-Agent': '<username>' } };
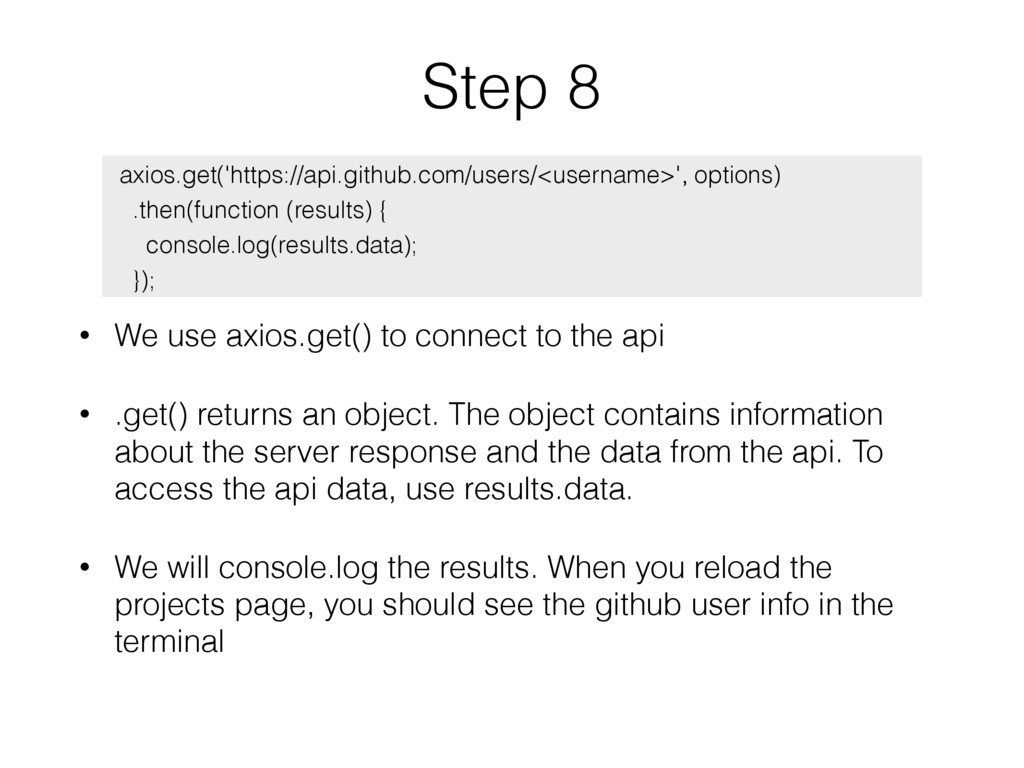
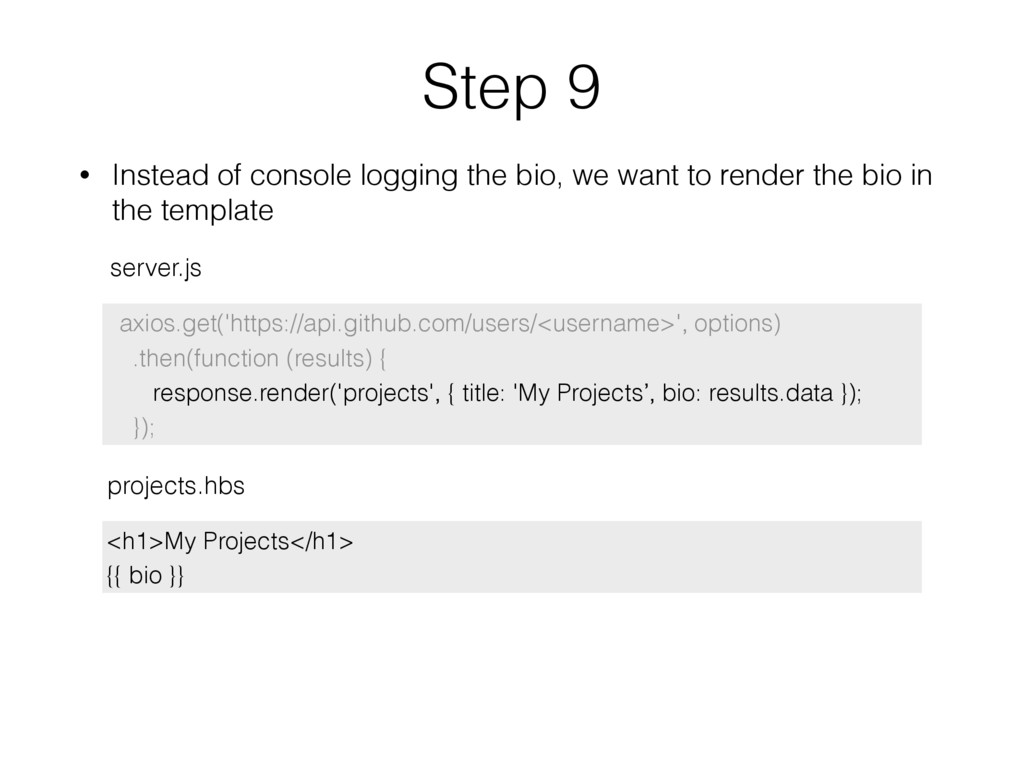
We use axios.get() to connect to the api • .get() returns an object. The object contains information about the server response and the data from the api. To access the api data, use results.data. • We will console.log the results. When you reload the projects page, you should see the github user info in the terminal
'My Projects’, bio: results.data }); }); • Instead of console logging the bio, we want to render the bio in the template <h1>My Projects</h1> {{ bio }} server.js projects.hbs
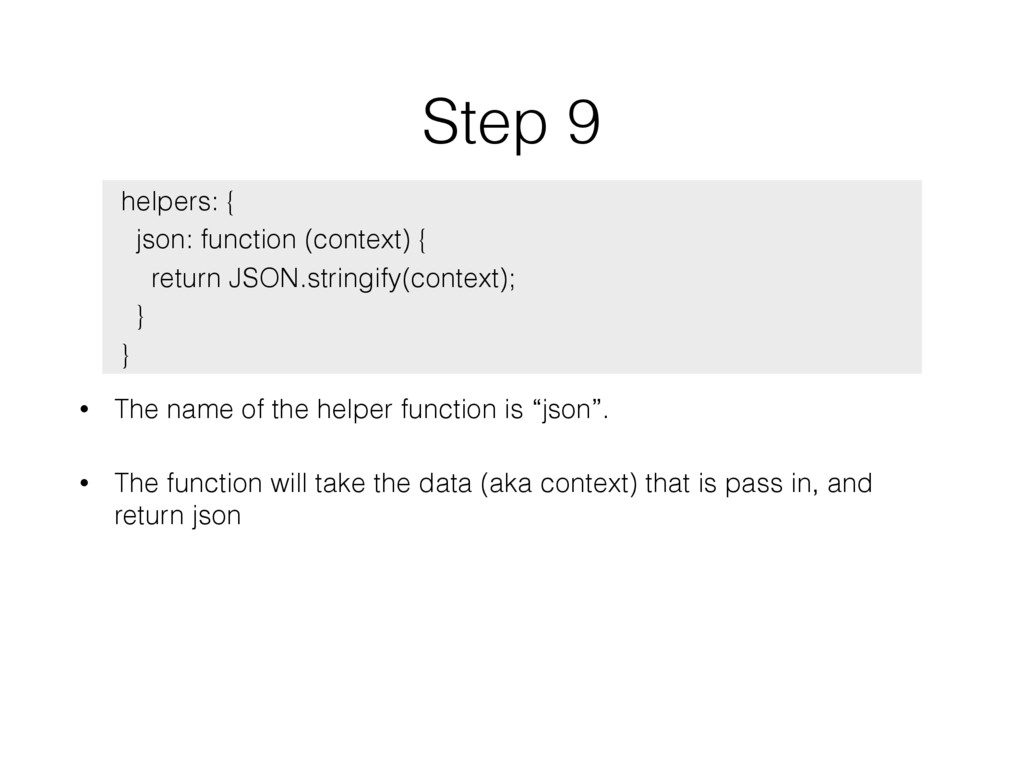
We are passing an object to the template. Handlebars automatically converts objects into strings. When it converts an object to a string, it turns the object into “[object Object] • in order to see all the keys/values in the object, we need to convert the object into json My Projects [object Object]
“json”. • The function will take the data (aka context) that is pass in, and return json helpers: { json: function (context) { return JSON.stringify(context); } }
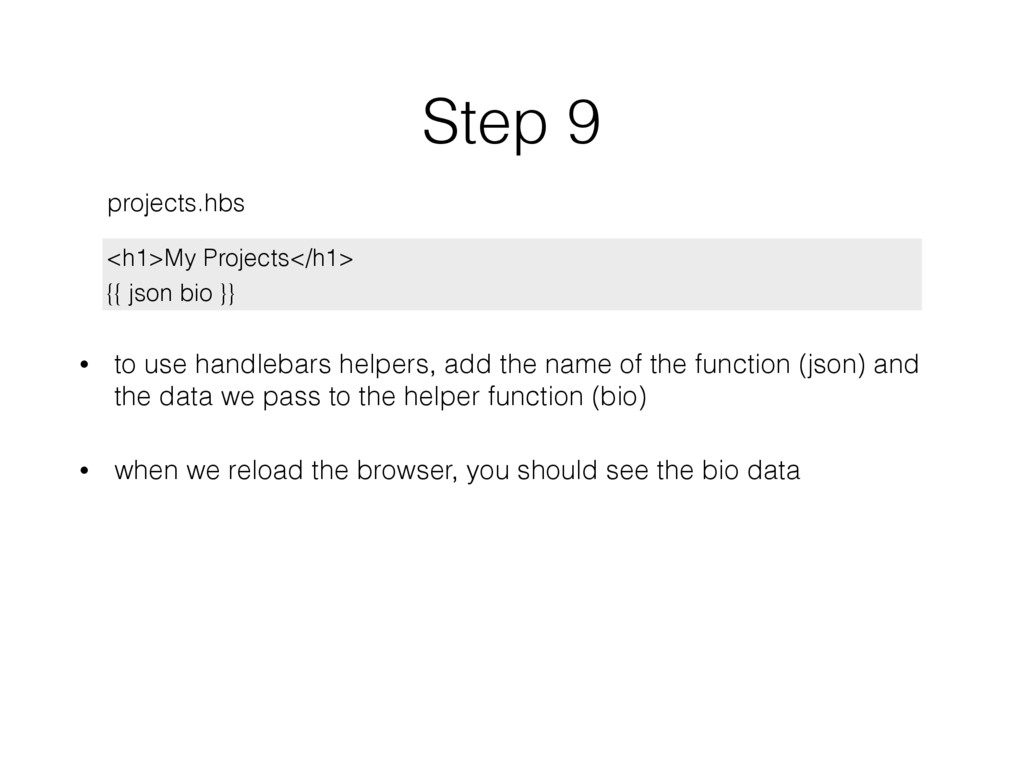
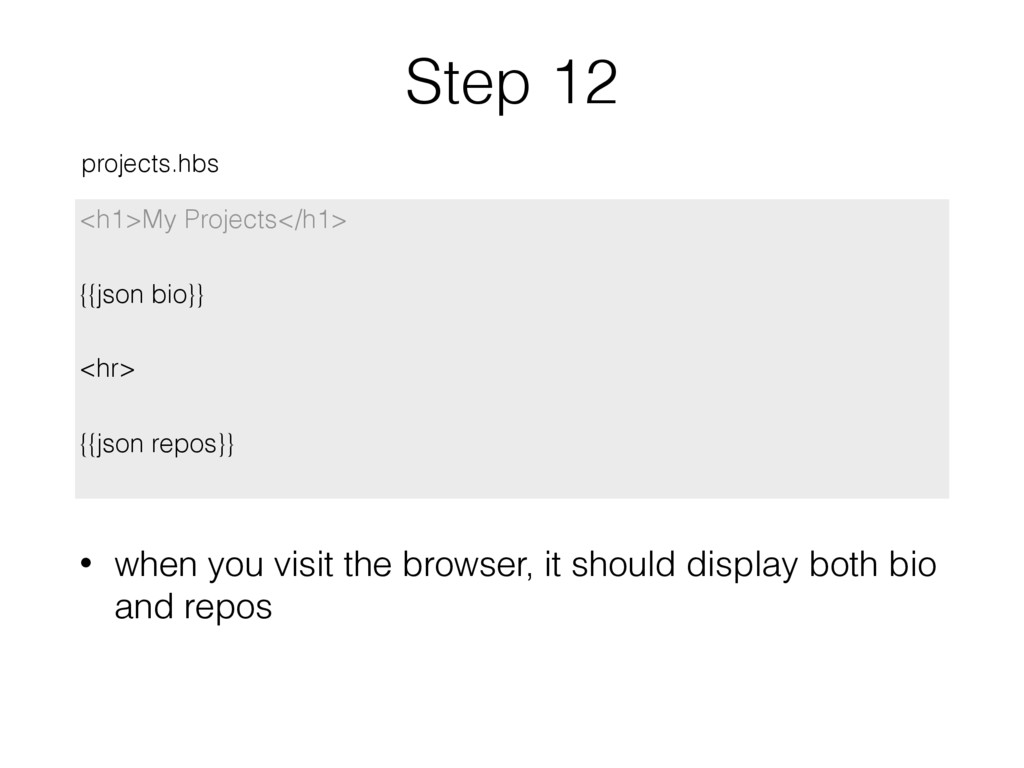
of the function (json) and the data we pass to the helper function (bio) • when we reload the browser, you should see the bio data <h1>My Projects</h1> {{ json bio }} projects.hbs
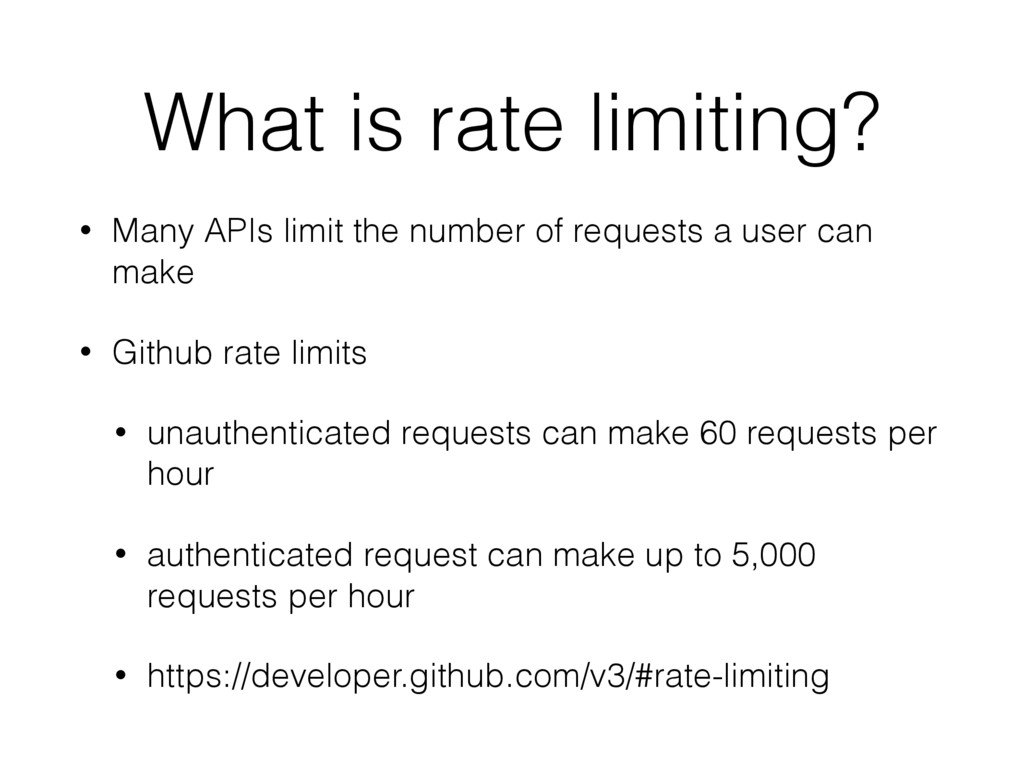
of requests a user can make • Github rate limits • unauthenticated requests can make 60 requests per hour • authenticated request can make up to 5,000 requests per hour • https://developer.github.com/v3/#rate-limiting
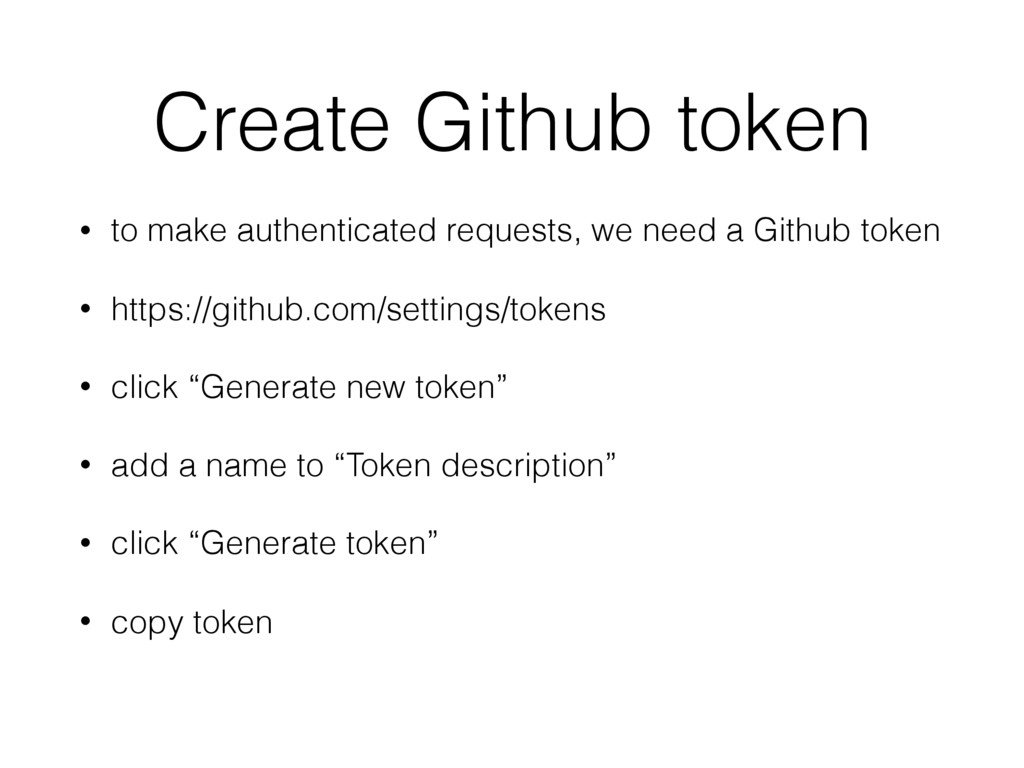
a Github token • https://github.com/settings/tokens • click “Generate new token” • add a name to “Token description” • click “Generate token” • copy token
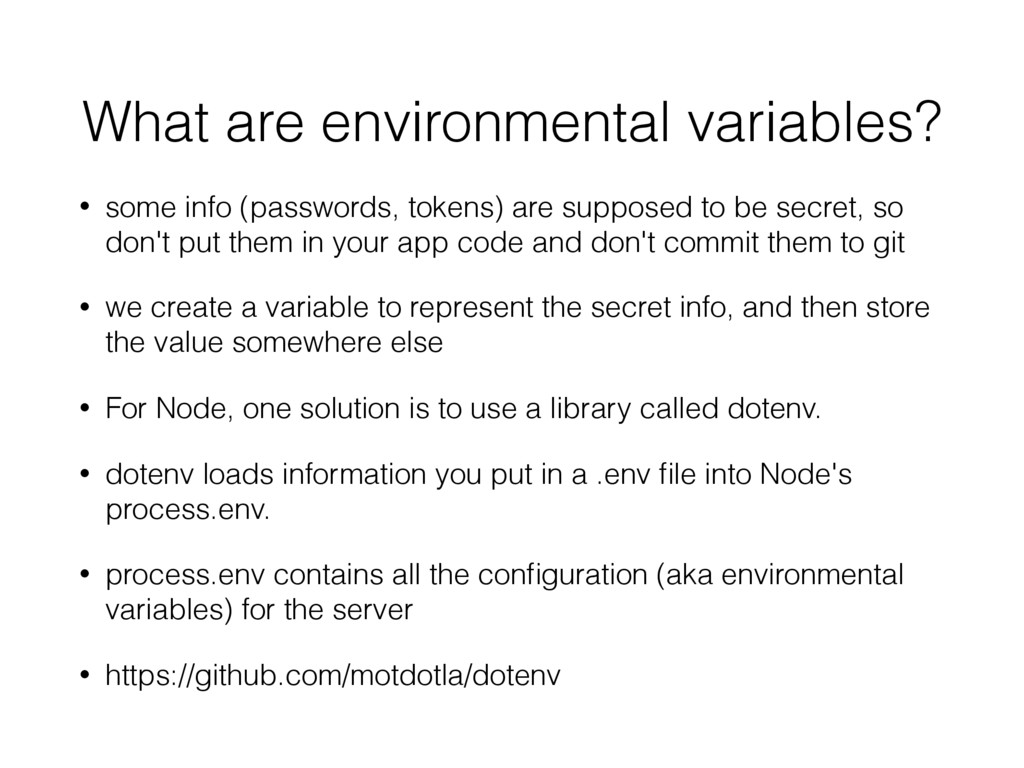
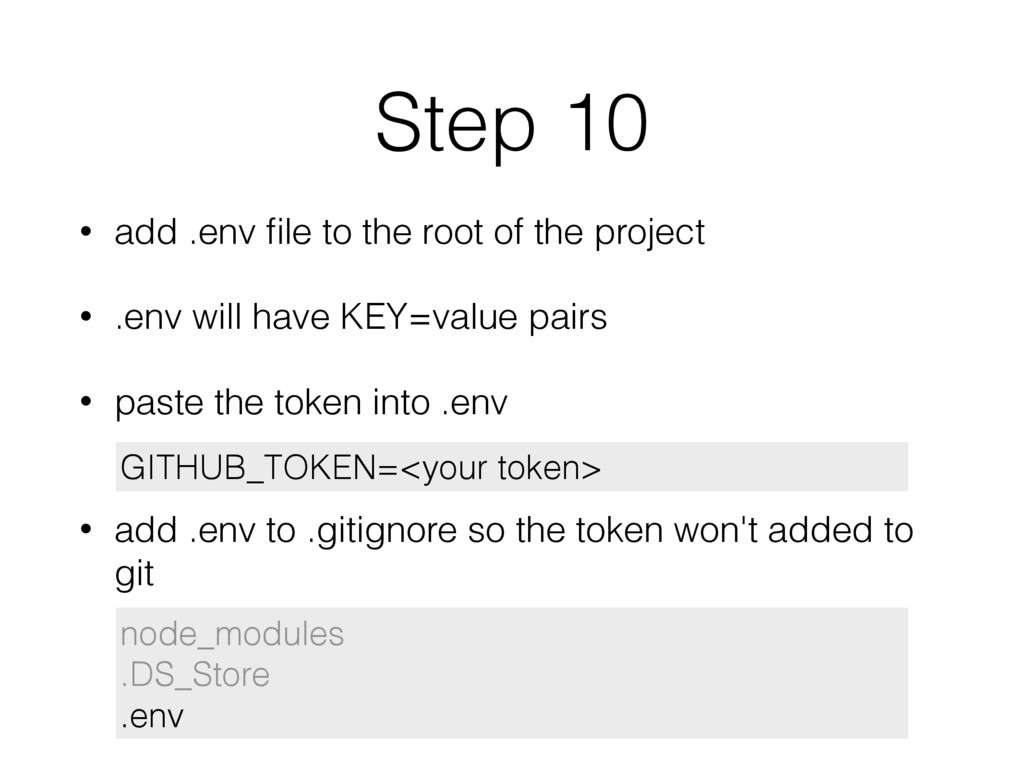
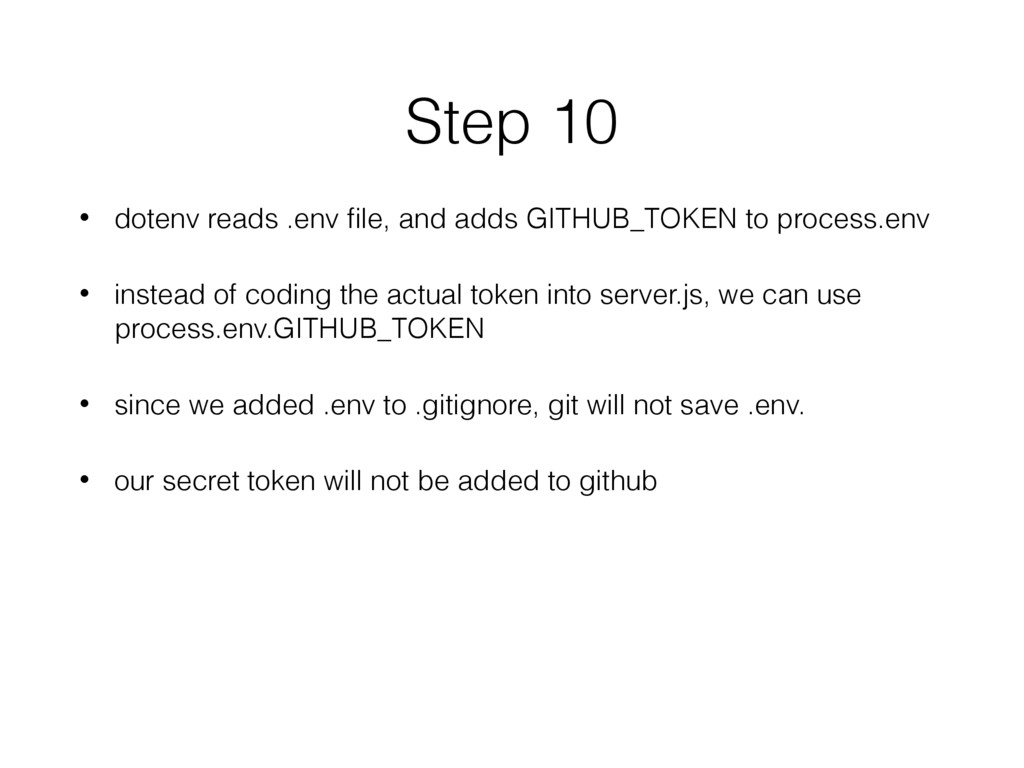
supposed to be secret, so don't put them in your app code and don't commit them to git • we create a variable to represent the secret info, and then store the value somewhere else • For Node, one solution is to use a library called dotenv. • dotenv loads information you put in a .env file into Node's process.env. • process.env contains all the configuration (aka environmental variables) for the server • https://github.com/motdotla/dotenv
the project • .env will have KEY=value pairs • paste the token into .env • add .env to .gitignore so the token won't added to git GITHUB_TOKEN=<your token> node_modules .DS_Store .env
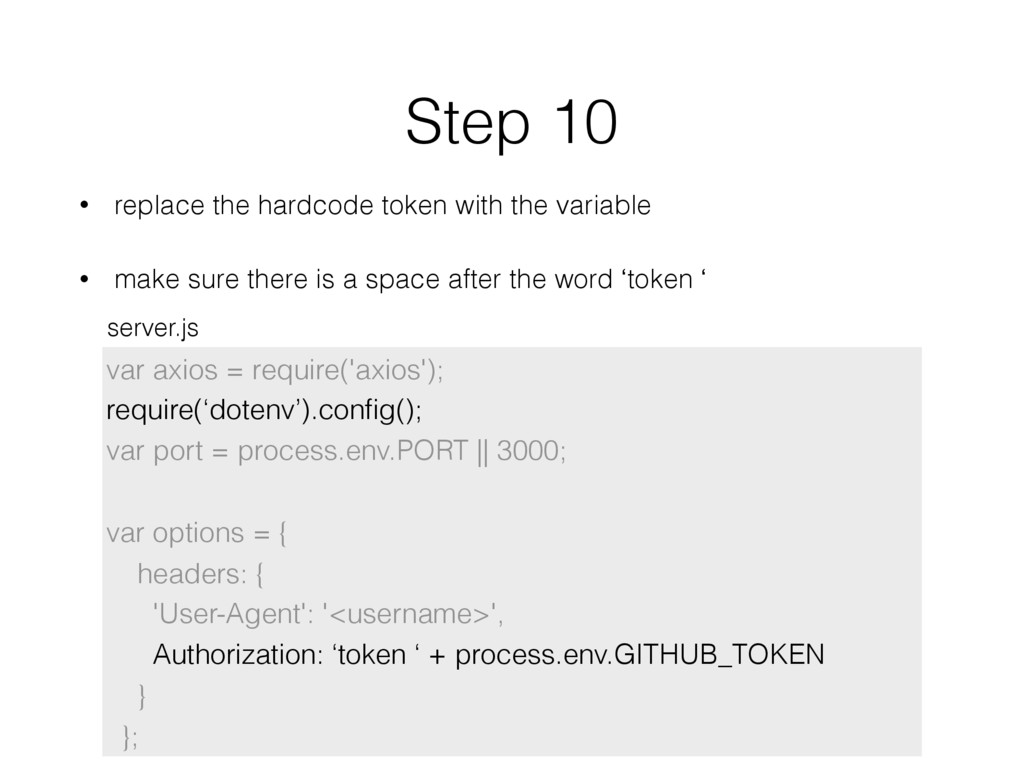
• make sure there is a space after the word ‘token ‘ var axios = require('axios'); require(‘dotenv’).config(); var port = process.env.PORT || 3000; var options = { headers: { 'User-Agent': '<username>', Authorization: ‘token ‘ + process.env.GITHUB_TOKEN } }; server.js
to process.env • instead of coding the actual token into server.js, we can use process.env.GITHUB_TOKEN • since we added .env to .gitignore, git will not save .env. • our secret token will not be added to github
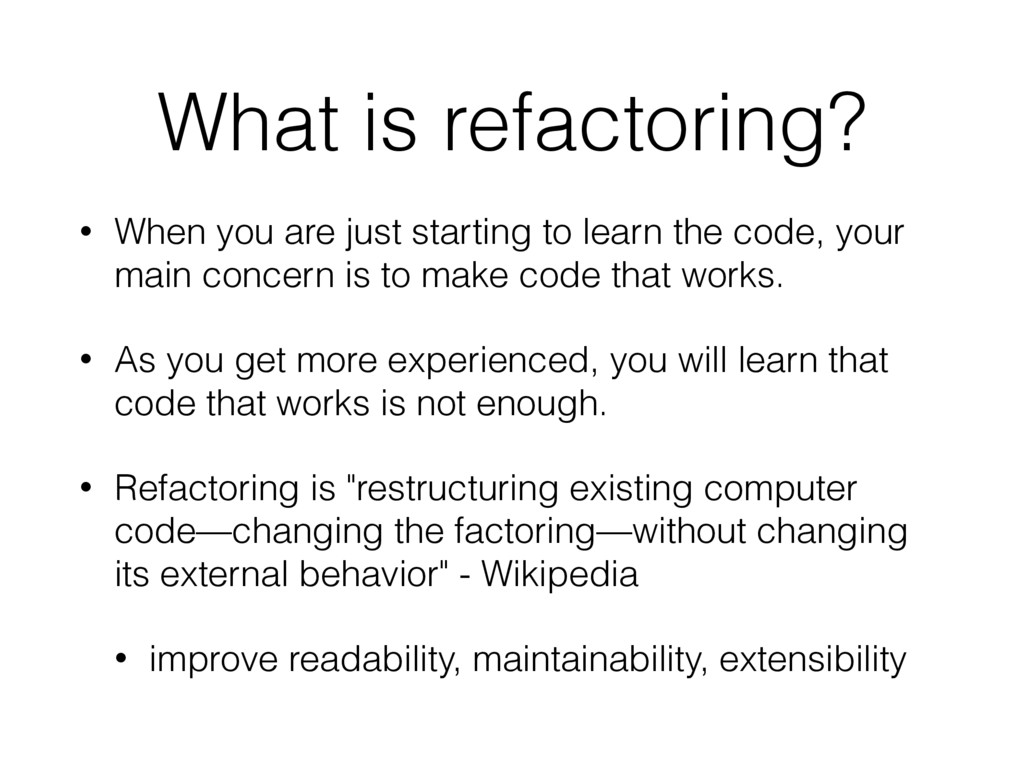
learn the code, your main concern is to make code that works. • As you get more experienced, you will learn that code that works is not enough. • Refactoring is "restructuring existing computer code—changing the factoring—without changing its external behavior" - Wikipedia • improve readability, maintainability, extensibility
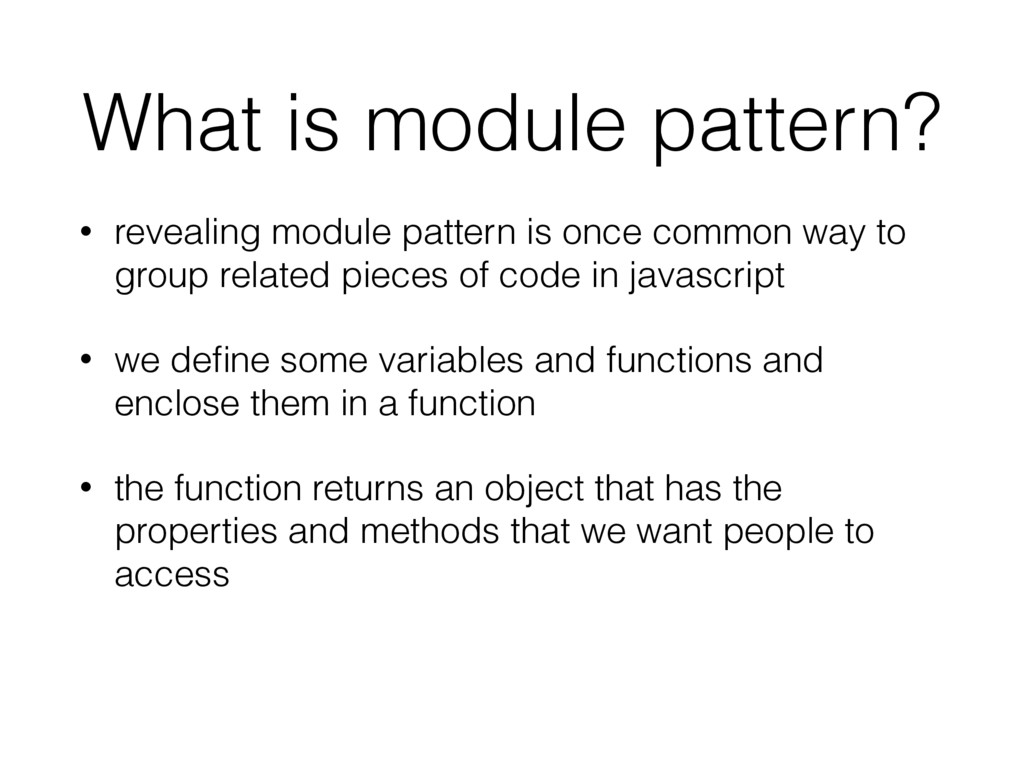
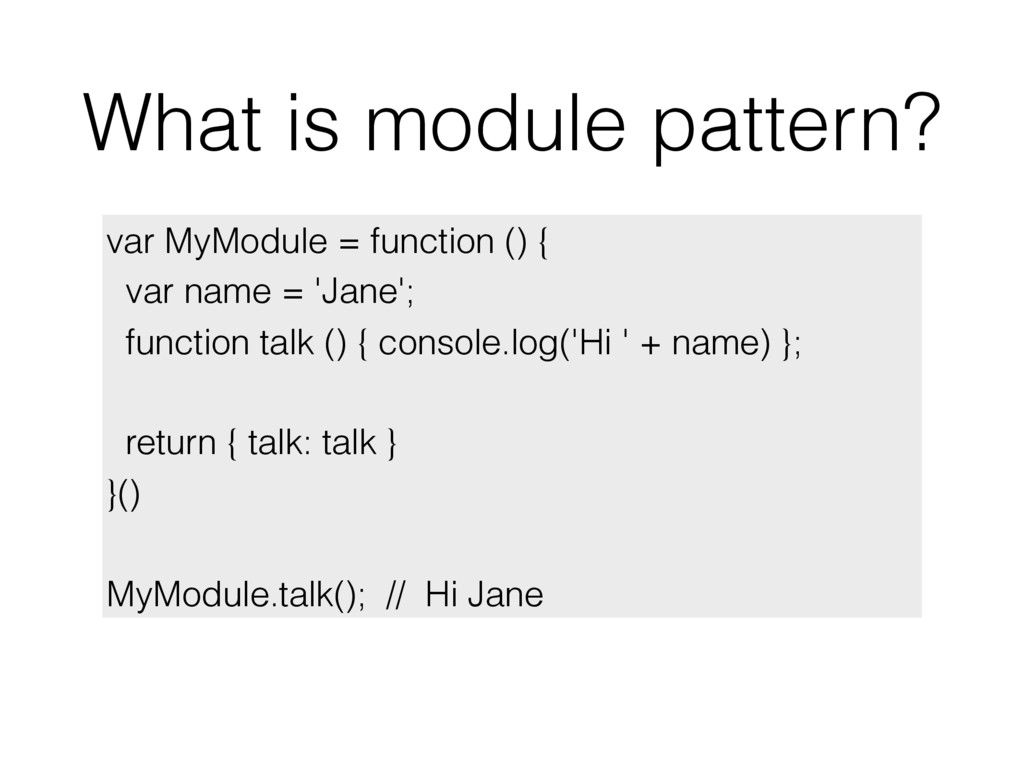
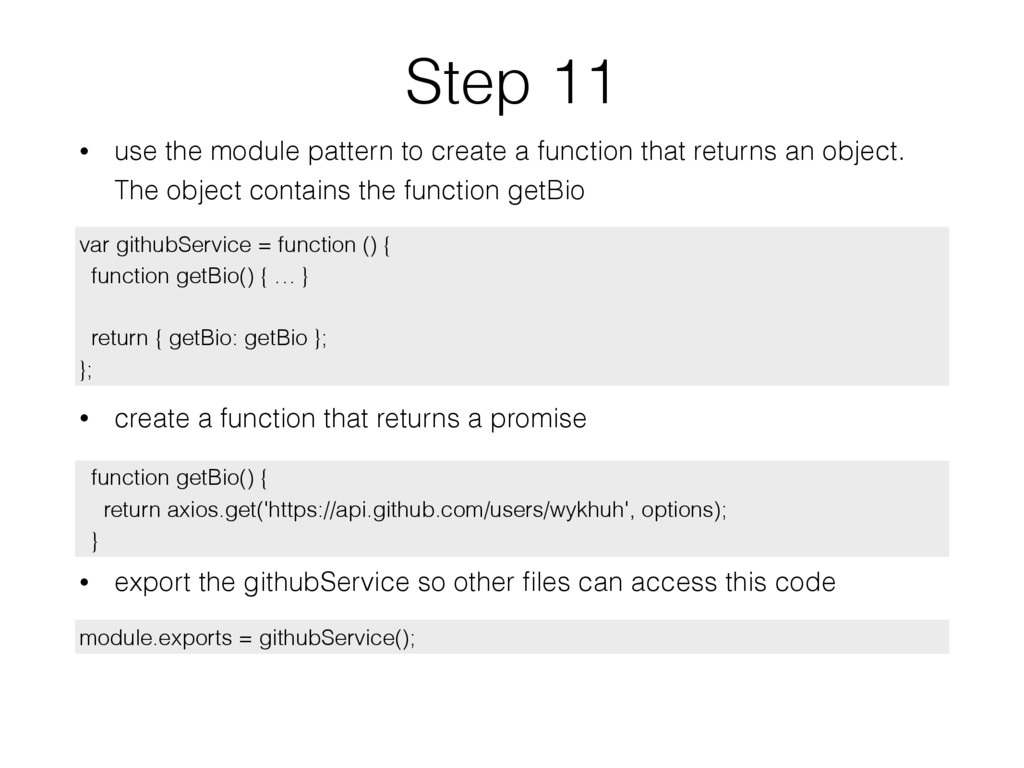
common way to group related pieces of code in javascript • we define some variables and functions and enclose them in a function • the function returns an object that has the properties and methods that we want people to access
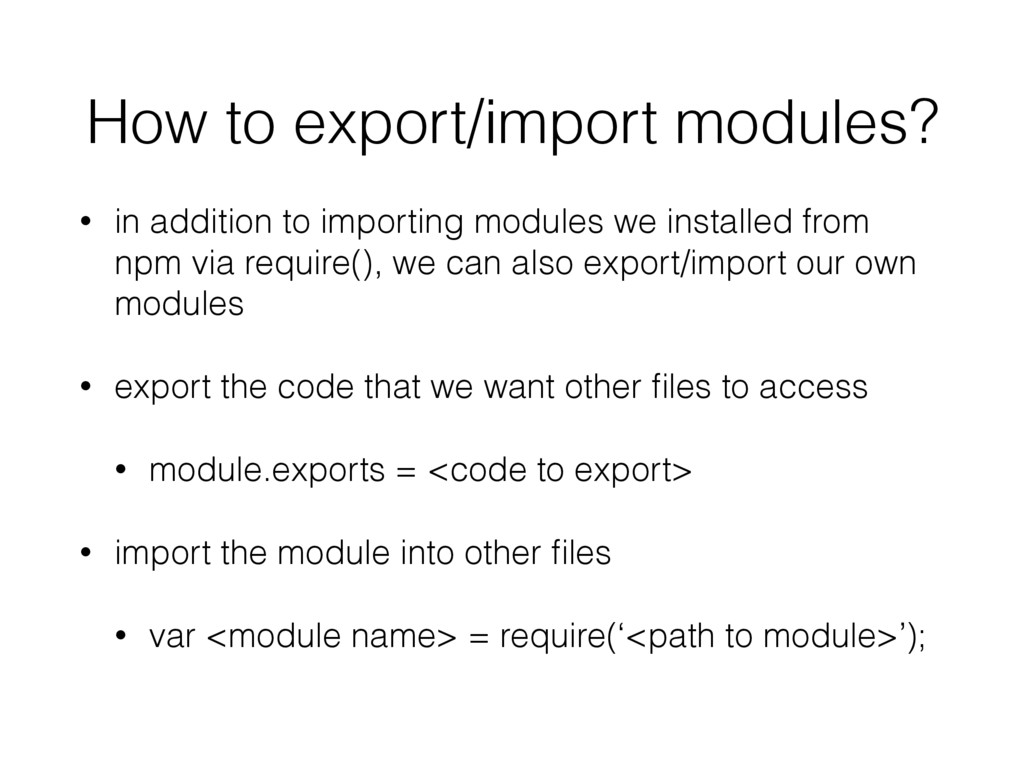
we installed from npm via require(), we can also export/import our own modules • export the code that we want other files to access • module.exports = <code to export> • import the module into other files • var <module name> = require(‘<path to module>’);
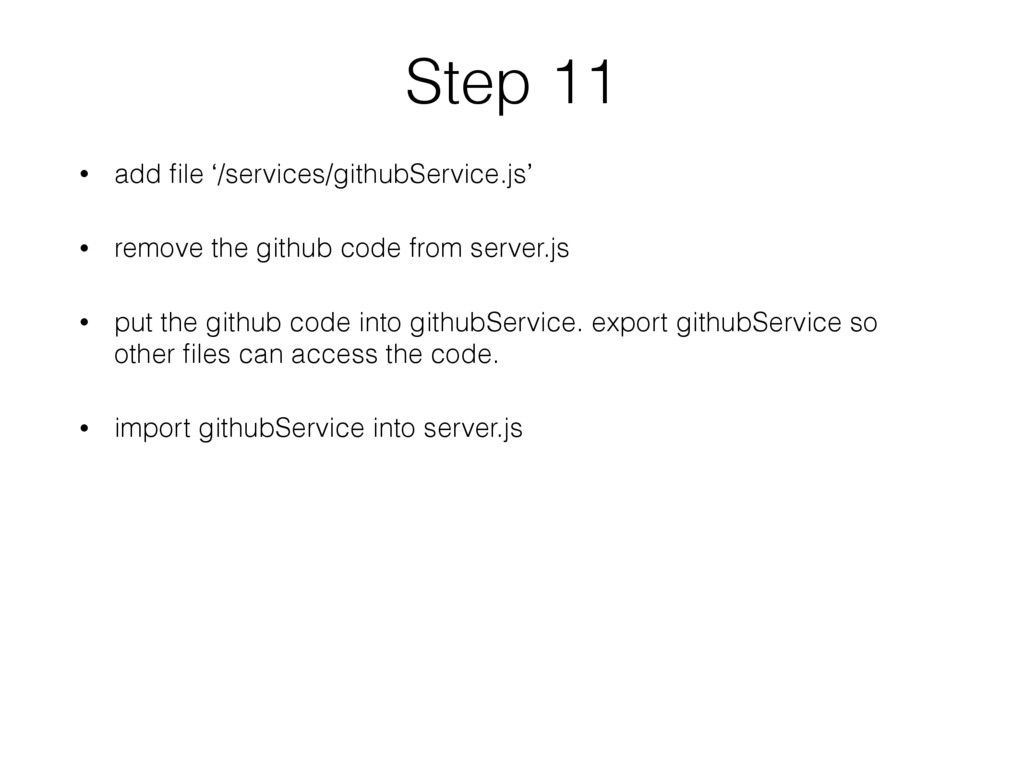
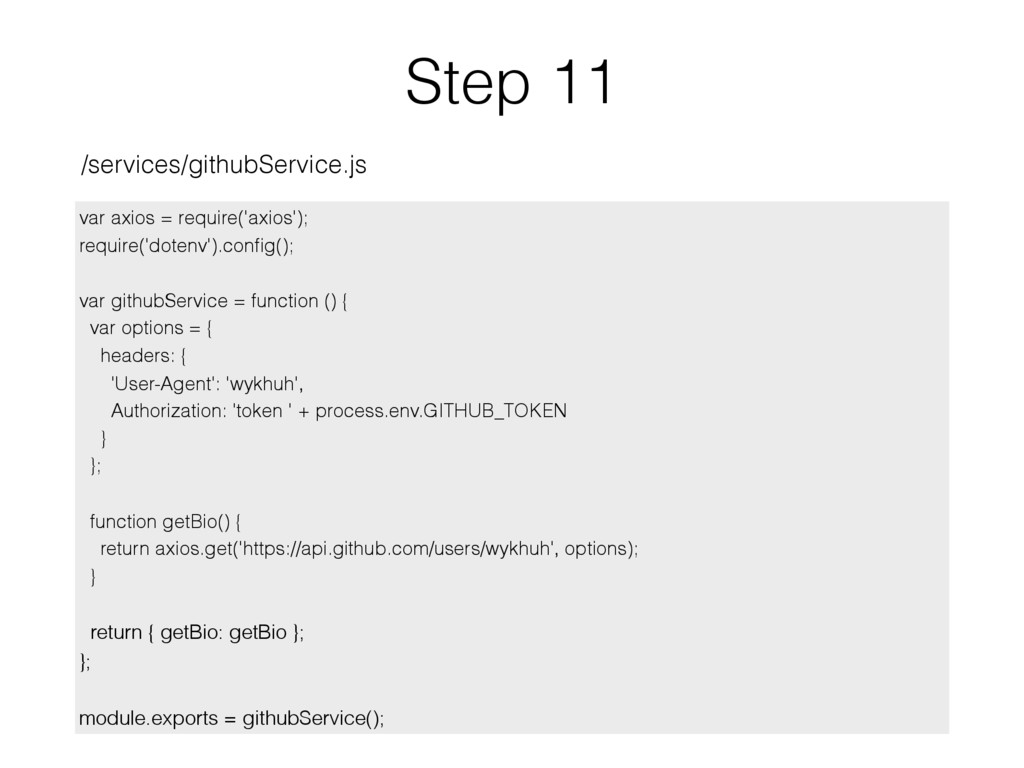
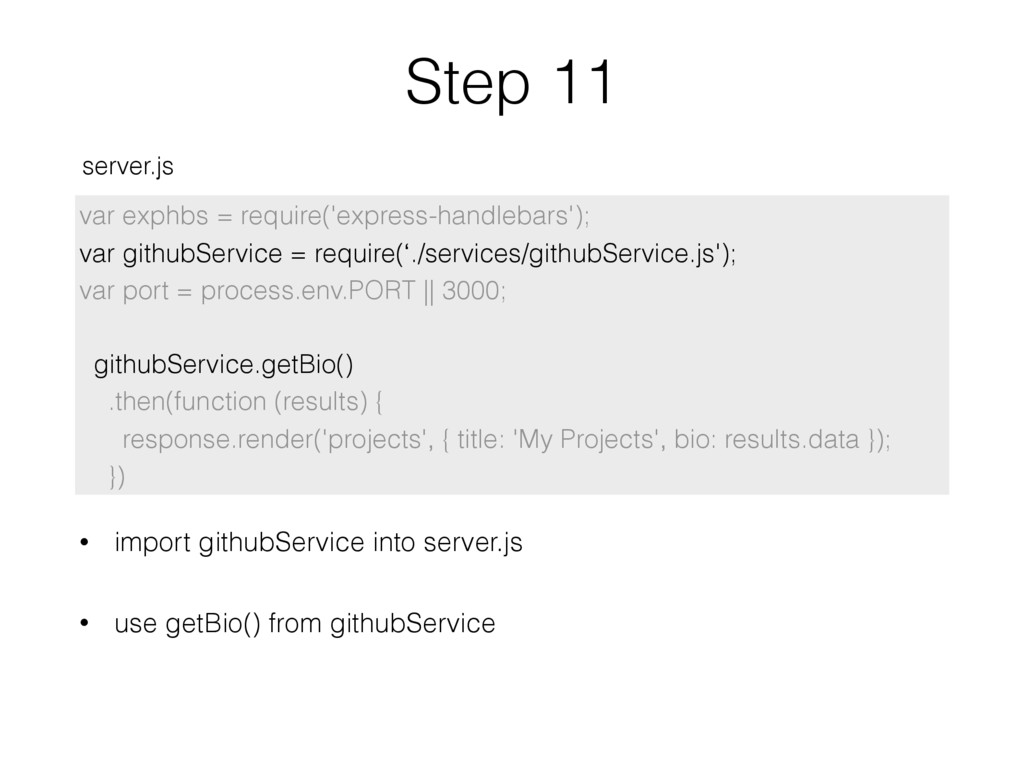
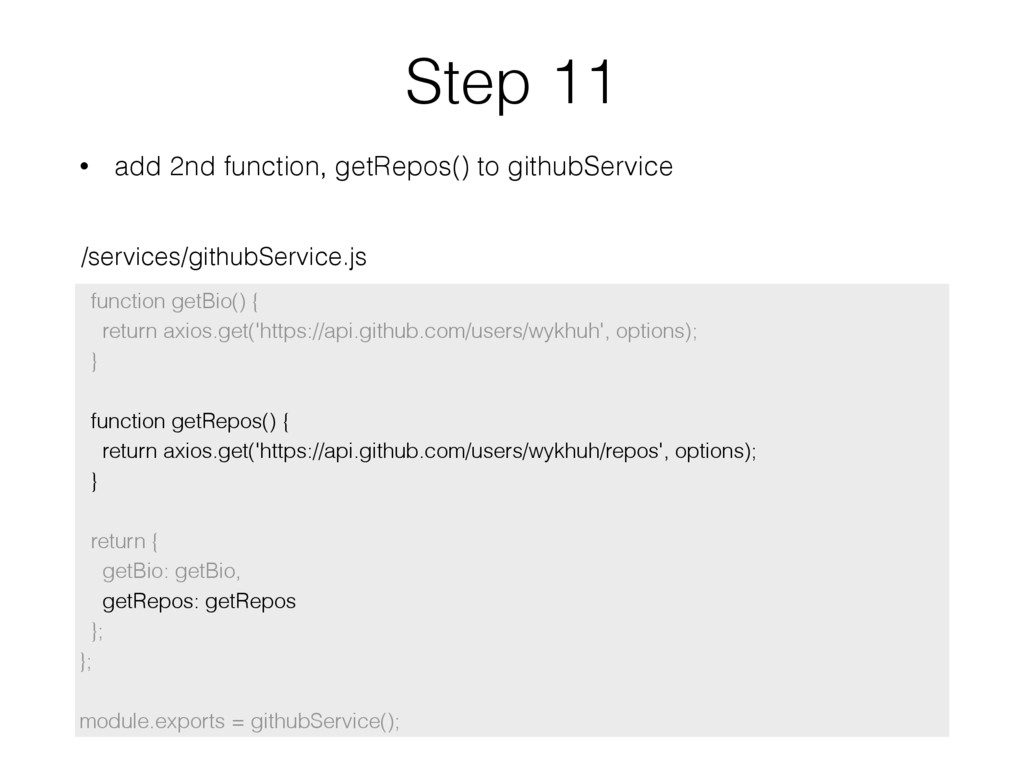
code from server.js • put the github code into githubService. export githubService so other files can access the code. • import githubService into server.js
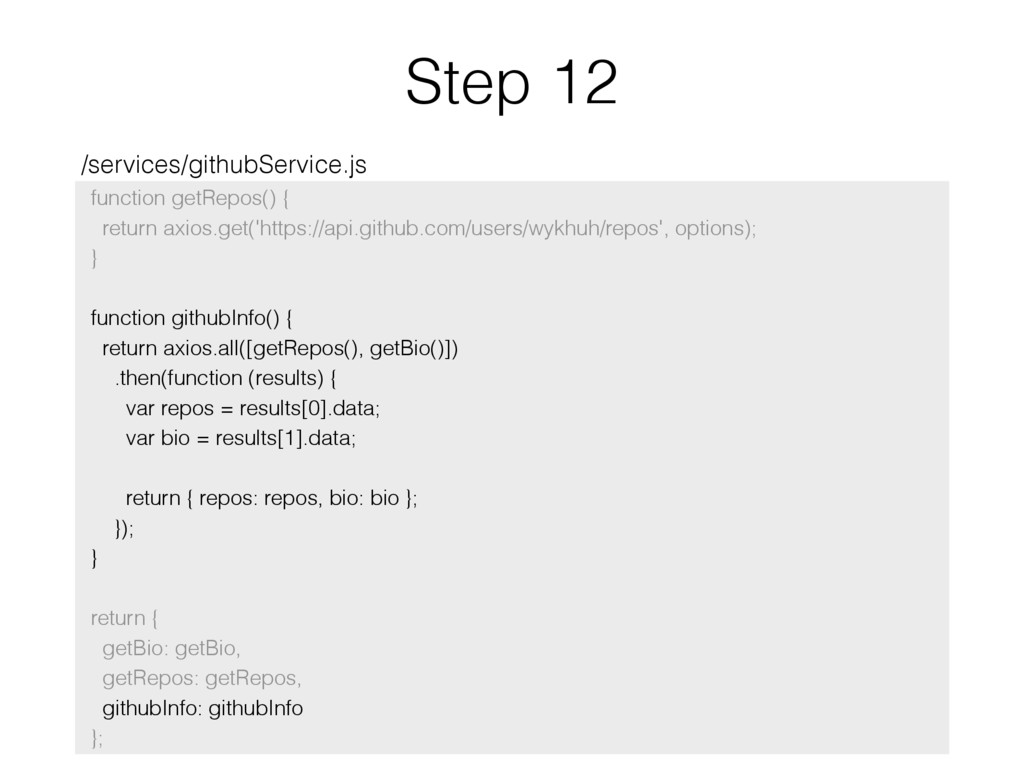
use the module pattern to create a function that returns an object. The object contains the function getBio • create a function that returns a promise • export the githubService so other files can access this code var githubService = function () { function getBio() { … } return { getBio: getBio }; }; module.exports = githubService();
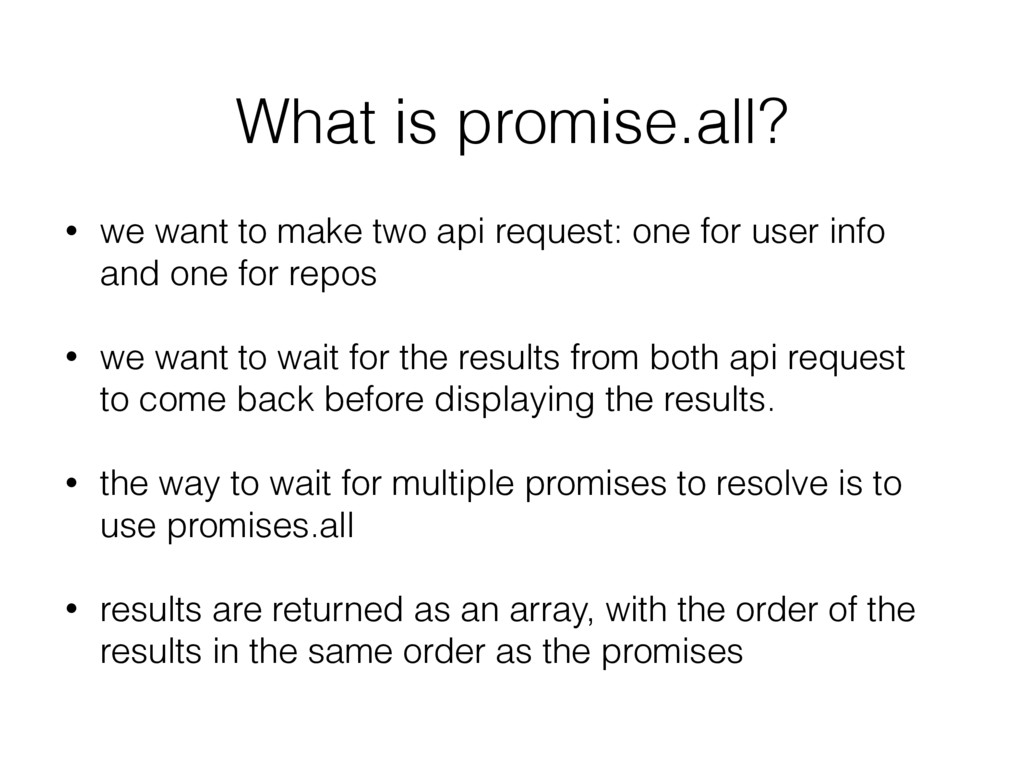
request: one for user info and one for repos • we want to wait for the results from both api request to come back before displaying the results. • the way to wait for multiple promises to resolve is to use promises.all • results are returned as an array, with the order of the results in the same order as the promises
{ var repos = results[0].data; var bio = results[1].data; return { repos: repos, bio: bio }; }); } • use axios.all because we want to wait until all the promises to resolve before displaying the data • we pass in an array of promises [getRepos(), getBio()] to axios.all • results is an array of data. the first item contains results from getRepos, the second item contains results from getBio • we return an object that has the repos and bio data
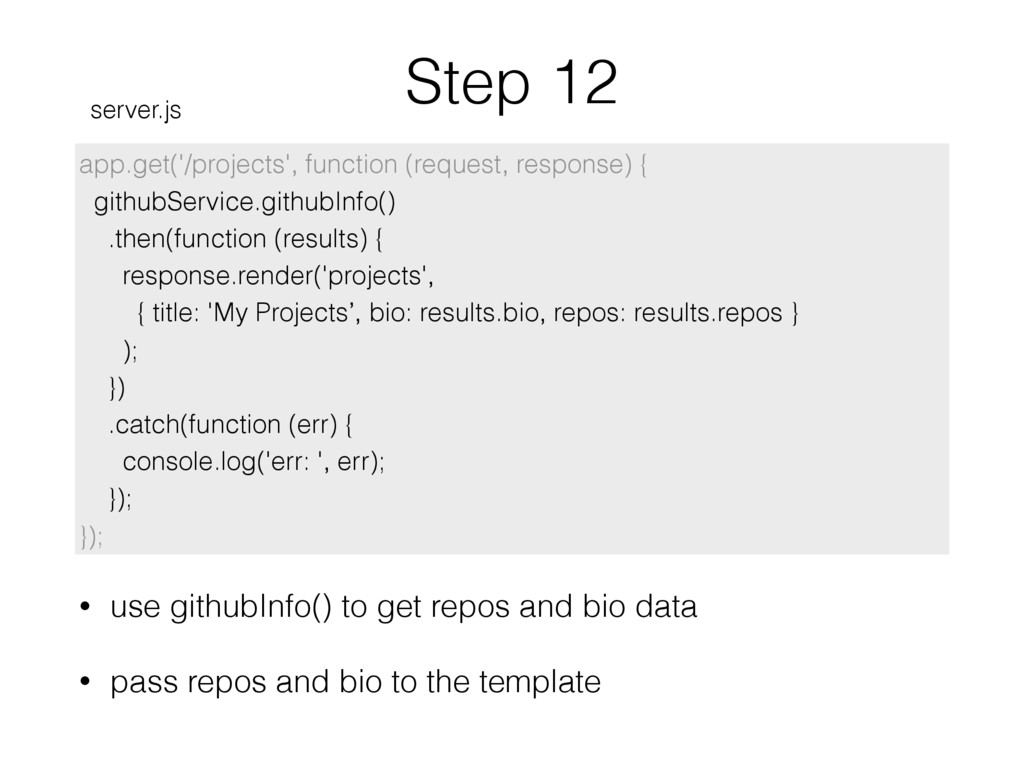
{ response.render('projects', { title: 'My Projects’, bio: results.bio, repos: results.repos } ); }) .catch(function (err) { console.log('err: ', err); }); }); server.js • use githubInfo() to get repos and bio data • pass repos and bio to the template
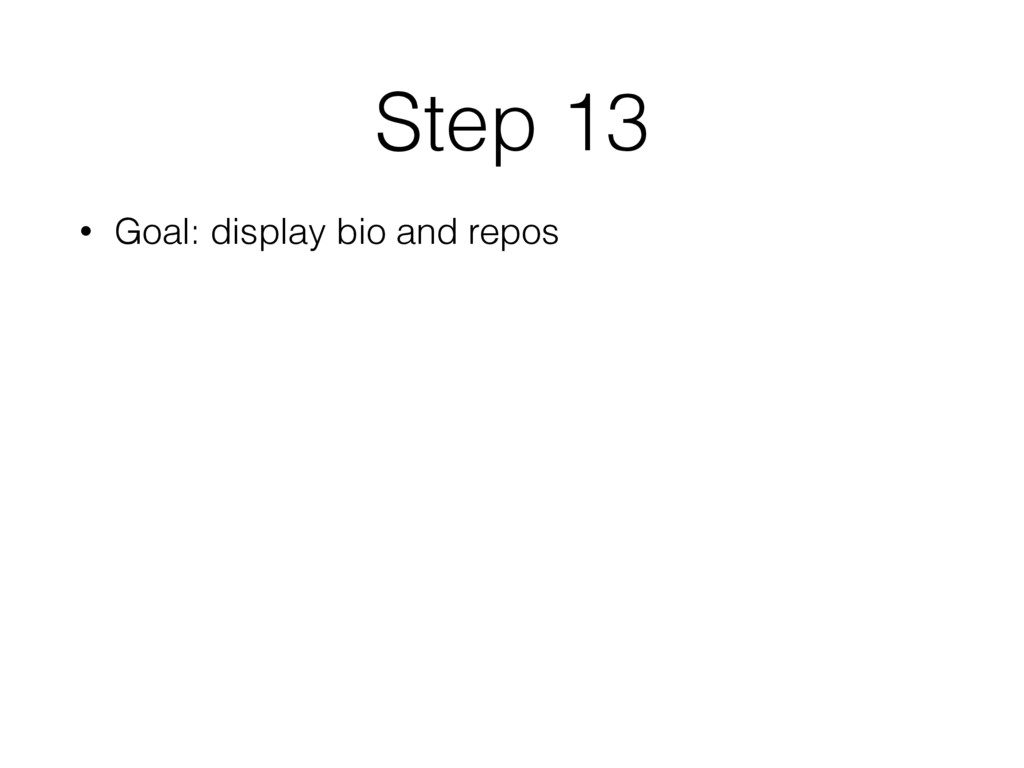
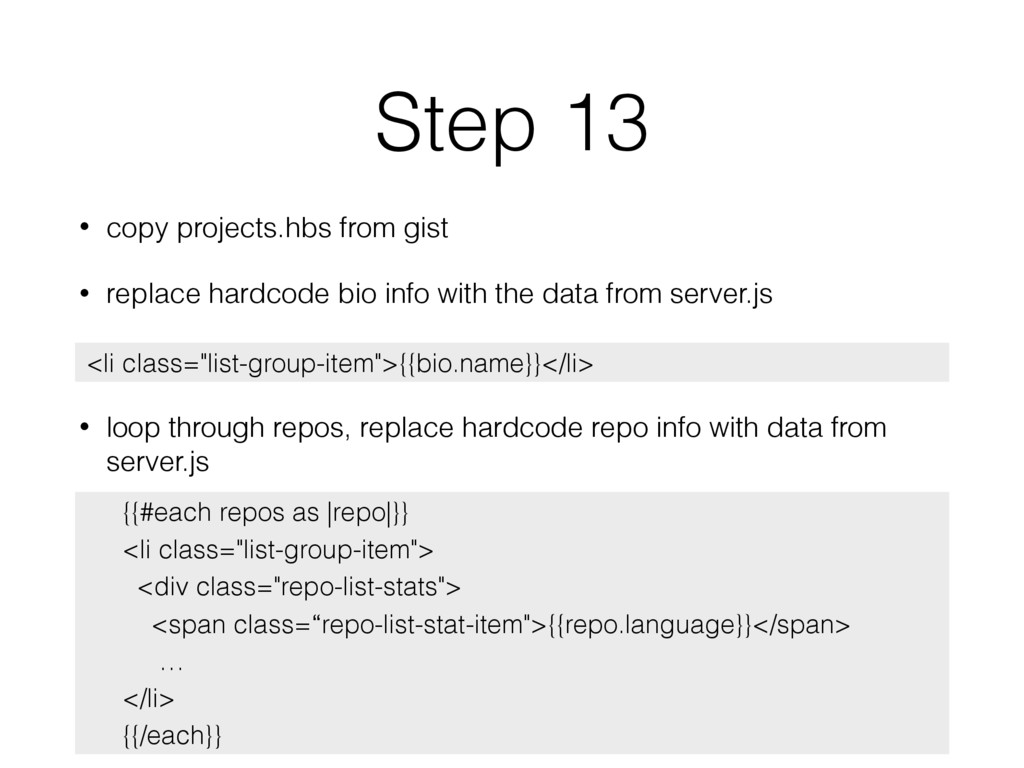
bio info with the data from server.js • loop through repos, replace hardcode repo info with data from server.js <li class="list-group-item">{{bio.name}}</li> {{#each repos as |repo|}} <li class="list-group-item"> <div class="repo-list-stats"> <span class=“repo-list-stat-item">{{repo.language}}</span> … </li> {{/each}}
![Step 12 function githubInfo() { return axios.all([getRepos(), getBio()]) .then(function (results)](https://files.speakerdeck.com/presentations/dfa67c59d3a54fcdae006567e545631b/slide_51.jpg)