Upgrade to Pro — share decks privately, control downloads, hide ads and more …

[CS Foundation] Web - 2 - HTML and CSS Web Course

[CS Foundation] Web - 2 - HTML and CSS Web Course

x-village

August 14, 2018
Tweet

More Decks by x-village

Other Decks in Programming

Transcript

  1. 開發⼯工具 • VScode + Live server (推薦) • Live reload

    + local server • Live reload 讓每次修改程式碼,網⾴頁會⾃自動刷新 • Local server 讓我們可以以 web 環境測試程式碼 • 為什什麼我們需要 Local server
  2. HyperText Markup Language <!DOCTYPE html> <html> <head> <title>Page Title</title> </head>

    <body> <h1>This is a Heading</h1> <p>This is a paragraph.</p> </body> </html>
  3. 如何使⽤用 html 檔案 • 做法⼆二(推薦):開啟測試⽤用本地伺服器 • 使⽤用 VScode 打開專案資料夾,點擊右下⾓角 Go

    Live • 即會以瀏覽器打開 http://127.0.0.1 開頭的網址,顯⽰示 index.html 檔案的內容,並即時更更新 • 注意!Live Server 建立的伺服器 ,路路徑是跟據⽬目前打開的資料夾
  4. 如何使⽤用 html 檔案 • 如果沒有看到 Go Live 的按鈕,可以⽤用以下⽅方法: • 按下

    command+shift+p (macOS)/ ctrl+shift+p (windows) • 會展開 VScode 的指令列列,輸入 live server ,找到 Open with Live Server 按下 enter
  5. 寫出你的第⼀一個網⾴頁 1. 按著「開啟你的第⼀一個網⾴頁專案」的步驟做完 2. Go Live! (參參考前兩兩⾴頁,打開本地伺服器) 3. 把⼤大標題改成你的名字 4.

    把段落落改成⼀一句句話介紹你⾃自⼰己 5. 參參考 h1 標籤,嘗試以 h2 標籤,加入⼀一個副標題說明你的 背景,例例如: X-Village 助教、屏東⼈人
  6. What does HTML say? <!DOCTYPE html> <html> <head> <title>Page Title</title>

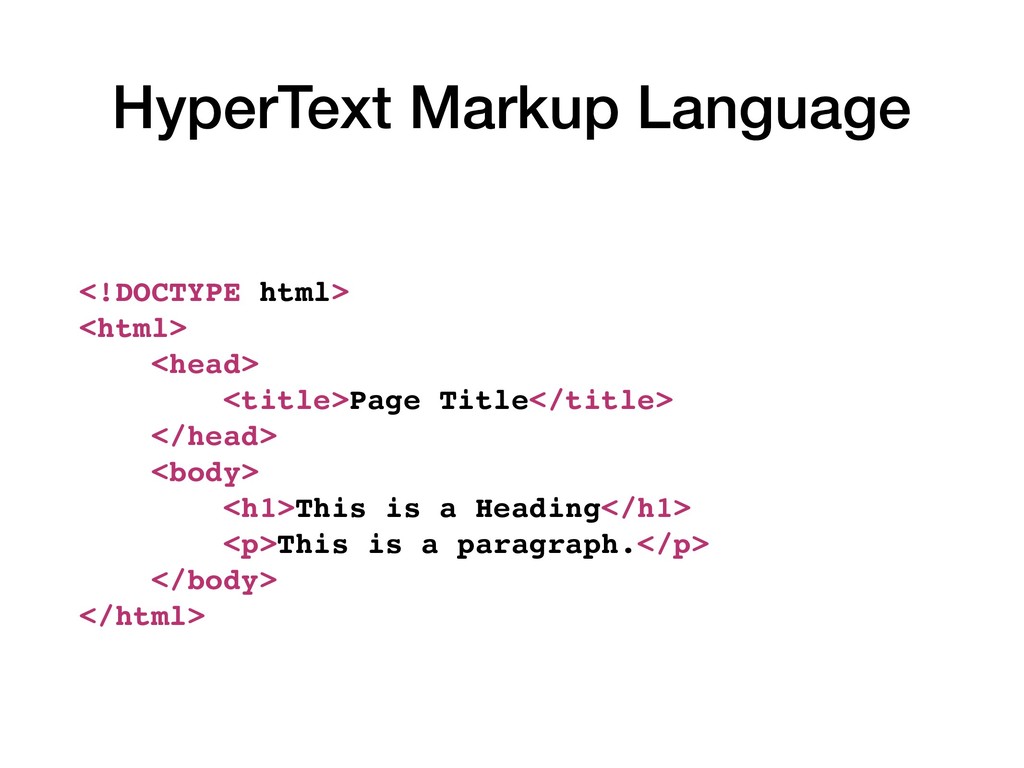
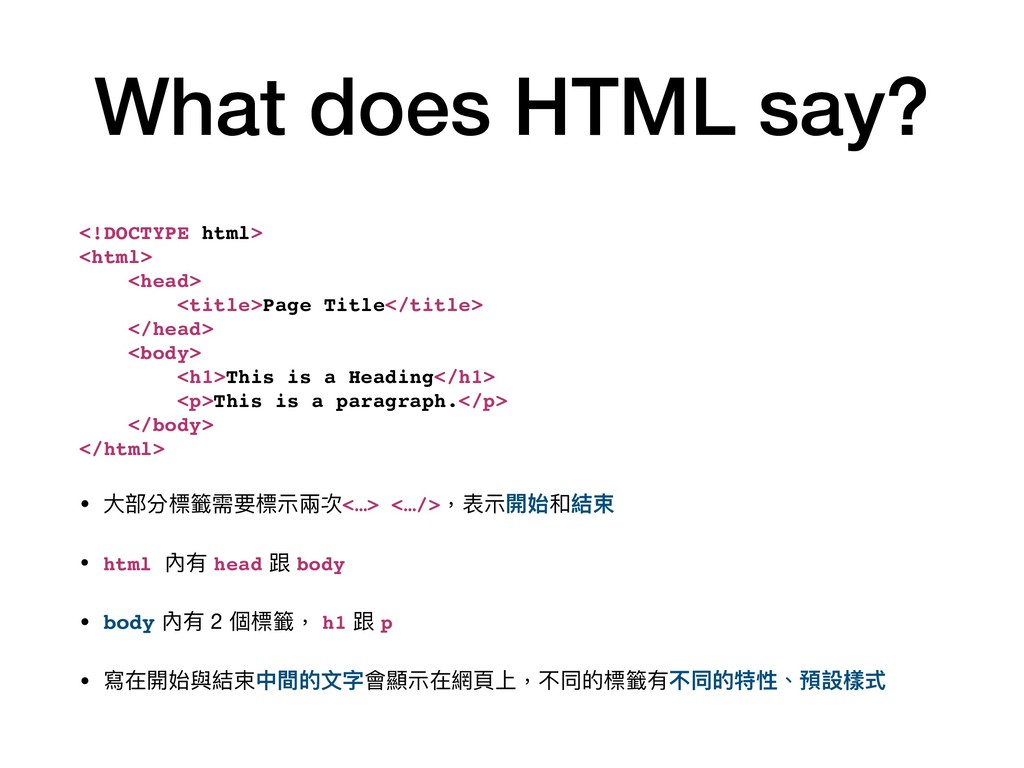
    </head> <body> <h1>This is a Heading</h1> <p>This is a paragraph.</p> </body> </html> • ⼤大部分標籤需要標⽰示兩兩次<…> <…/>,表⽰示開始和結束 • html 內有 head 跟 body • body 內有 2 個標籤, h1 跟 p • 寫在開始與結束中間的⽂文字會顯⽰示在網⾴頁上,不同的標籤有不同的特性、預設樣式
  7. What does HTML say? <!DOCTYPE html> <html> <head> <title>Page Title</title>

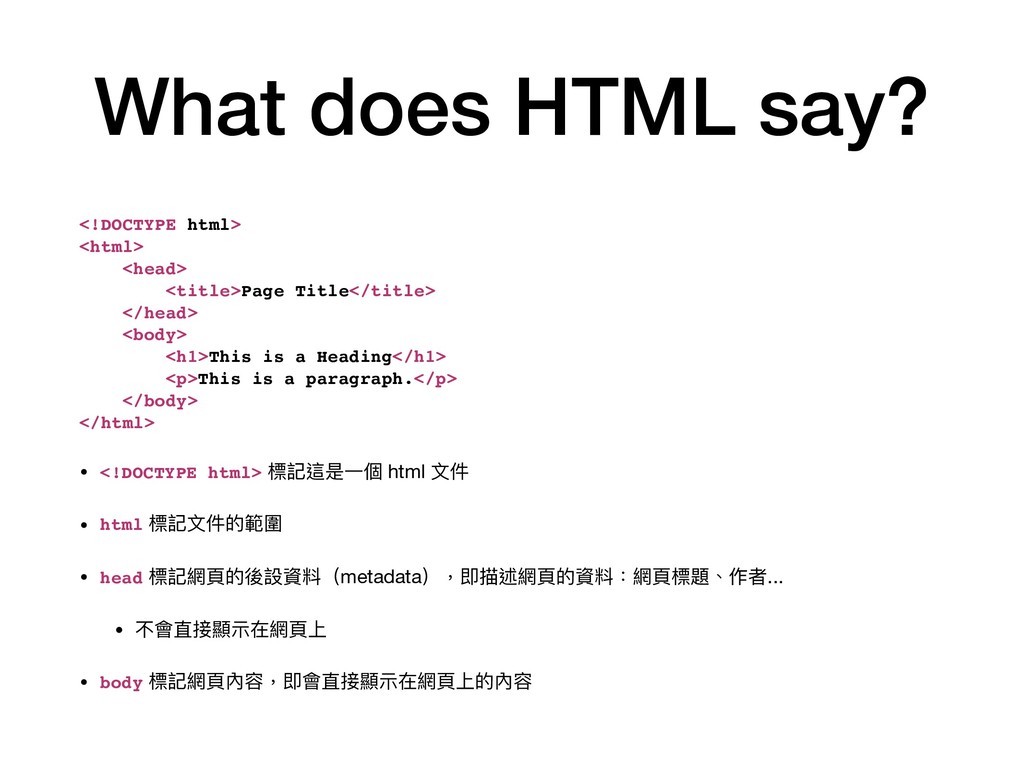
    </head> <body> <h1>This is a Heading</h1> <p>This is a paragraph.</p> </body> </html> • <!DOCTYPE html> 標記這是⼀一個 html ⽂文件 • html 標記⽂文件的範圍 • head 標記網⾴頁的後設資料(metadata),即描述網⾴頁的資料:網⾴頁標題、作者... • 不會直接顯⽰示在網⾴頁上 • body 標記網⾴頁內容,即會直接顯⽰示在網⾴頁上的內容
  8. What does HTML say? <h1>This is a Heading</h1> <p>This is

    a paragraph.</p> • 這堂課,我們會專注於 body 內的網⾴頁內容 •h1, h2, h3, h4, h5, h6 • header ,標題⽂文字的意思 • 標題標籤,h1 最⼤大, h6 最⼩小 •p • paragraph,段落落⽂文字的意思 • 段落落標籤
  9. 沒錯!標籤也有屬性 <a href="https://www.google.com.tw">估狗</a> • 在標籤開始的 "<" 與 ">" 之間,可以賦予屬性對應的值 •

    如: href="https://www.google.com.tw" • 標籤預設有什什麼屬性,可以給怎樣的值? 查⽂文件
  10. Parent and Child • HTML 同時也表達階層關係,parent (ul) 有五個 child (li)

    <ul> <li>喜歡喝⿂魚池的⽔水</li> <li>喜歡在⽑毛茸茸的地⽅方打滾</li> <li>對骨頭沒興趣</li> </ul>
  11. 使⽤用 Input 加入單⾏行行欄欄位 <input type="text" placeholder="Dog Pudding" name="name"> <input type="email"

    placeholder="[email protected]" name="email"> • Type 指定 input 種類,輸入⽂文字檢查 • placeholder 指定空欄欄位顯⽰示⽂文字 • name 指定回傳給伺服器時,欄欄位的名字 input ⽂文件傳送⾨門
  12. 使⽤用 label 加入欄欄位說明 <label for="form-name"> Name </label> <input type="text" placeholder="Li

    Pudding" name="name" id="form-name"> <label for="form-email"> Email </label> <input type="email" placeholder="[email protected]" name="email" id="form- email"> • 在 input 加上 id 以識別欄欄位,id 必須是獨⼀一無⼆二的 • 在 label 加上 for ,並給予對應的 input id 作為值 • 點擊 label時,游標會⾃自動聚焦在對應的欄欄位
  13. 使⽤用 form 定義表單動作 <form action="/sendmsg" method="post"> …(剛剛定義的所有表單) </form> • 這代表送出這個表單時,會以

    "post" ⽅方法,送出表單內的 資料(name=value),到網址 "/sendmsg" form ⽂文件傳送⾨門
  14. 使⽤用 Button 定義送出按鈕 <button type="submit">Submit</button> • Button 要是 form 的

    child • 點擊按鈕送出資料,送出的⽅方式、網址定義在 form 的屬性 內! button ⽂文件傳送⾨門
  15. ⽬目前為⽌止的表單程式碼 <form action="/sendmsg" method="post"> <p> <label for="form-name"> Name </label> <input

    type="text" placeholder="Li Pudding" name="name" id="form-name"> <label for="form-email"> Email </label> <input type="email" placeholder="[email protected]" name="email" id="form-email"> </p> <textarea name="message" id="form-message" cols="60" rows="10"></textarea> <p> <button type="submit">Submit</button> </p> </form>
  16. 語意化的 HTML • 寫 HTML 除了了要建構骨架 • 也必須和搜尋引擎打好關係(SEO) • use

    the right tag • header • section • footer • … • 搜尋引擎最佳化 (SEO) 入⾨門指南
  17. 如何查閱 HTML ⽂文件 • 推薦⽂文件 • htmlreference.io • w3schools •

    怎麼看? • 標籤需不需要標記結尾(self-closing) • ⼀一個標籤有哪些必要屬性,哪些選填屬性 • 屬性接受怎樣的值
  18. emmet:召喚 HTML, CSS的⿊黑魔法 • 在 VScode 中打開 .html 檔,輸入語法使⽤用 tab

    展開: 1. ! + tab 2. .title + tab 3. ul>li*5 + tab emmet ⽂文件傳送⾨門
  19. Exercise, 個⼈人網⾴頁 ! 1. 使⽤用 HTML 寫⼀一個個⼈人網⾴頁,需⾄至少使⽤用以下標籤各⼀一個: • h1 •

    h2 • img • p • a 2. 參參考以下連結,使⽤用 video 標籤嵌入⼀一個影片,可以是(但不 限於)你的⾃自我介紹影片: • https://htmlreference.io/element/video/ • https://www.w3schools.com/htmL/html5_video.asp
  20. 如何使⽤用 CSS • inline CSS • HTML Style • 使⽤用

    Link 標籤引⽤用 CSS 檔案 • 使⽤用 Link 標籤引⽤用 CDN
  21. 如何使⽤用 CSS:inline CSS • 寫在 html 的標籤 style 屬性中 •

    只對這個標籤有效 <h1 style="color:brown;">This is a Heading</h1>
  22. 如何使⽤用 CSS:HTML style 標籤 • 通常放在 HTML 的 head 標籤最底部

    • 包含 selector, property <style> h1 { color: brown; } </style>
  23. 如何使⽤用 CSS:使⽤用 Link 標籤引 ⽤用 CSS 檔案 • 通常放在 HTML

    的 head 標籤最底部 • 引入 css 檔案 <link rel="stylesheet" type="text/css" href="theme.css"> • theme.css h1 { color: brown; }
  24. 如何使⽤用 CSS:使⽤用 Link 標籤引 ⽤用 CDN • 引入網路路上的 CSS 檔案

    • 也就是CDN (Content Delivery Network) • 優勢在速度、缺點在安全性與控制度,但可以使⽤用integrity 確保內容不被惡惡意修改 <link rel="stylesheet" href="https://maxcdn.bootstrapcdn.com/ bootstrap/3.3.7/css/bootstrap.min.css" integrity="sha384- BVYiiSIFeK1dGmJRAkycuHAHRg32OmUcww7on3RYdg4Va+PmSTsz/ K68vbdEjh4u" crossorigin="anonymous">
  25. 如何使⽤用 CSS • 那麼,最常⽤用的⽅方式是哪個? • 使⽤用 Link 標籤引⽤用 CSS 檔案

    / CDN • 因為關注點分離,將樣式與結構分開更更簡潔 • 不過這個原則在現代網⾴頁開發也有不同的看法
  26. 寫出你的第⼀一⾏行行 CSS • 創立 theme.css 檔案,輸入把「 H1 ⽂文字的顏⾊色改成 Brown」的樣式,在前幾⾴頁投影片有! •

    使⽤用 link 標籤引入 theme.css • 注意路路徑,這段路路徑表⽰示 theme.css 要放在專案根⽬目錄 <link rel="stylesheet" type="text/css" href="/theme.css">
  27. What does CSS say? h1 { color: brown; } •

    h1 是 Selector(選擇器),想起之前學過的爬蟲嗎?概念念是⼀一樣的 • color 是 Property (屬性) • brown 是值 • 所有的 h1 ,顏⾊色都要是 Brown!
  28. CSS Selector 詳細⽂文件 .myClass 選中 class 中有 myClass 的元素 <div

    class="myClass"></div> #myID 選中 id 是 myID 的元素 <div id="id"></div> {tag} ,如: p 選中所有指定標籤 <p></p> p .myClass 選中 p 的 child 中,所有 class 中有 myClass 的元素 <p> <span class=“myClass"></ span> </p> * 選中所有元素
  29. color 調整⽂文字顏⾊色 h1 { color: brown; font-size: 36px; } •

    顏⾊色可以使⽤用: • ⾊色碼:#ffffff • 顏⾊色名字:brown 參參考 • rgba, hsla:rgba(51, 170, 51, .1), hsla(0, 100%, 50%, 0.3) • 設定背景顏⾊色要使⽤用 background-color 屬性!
  30. border 設定邊框 img { border: 5px solid #00F; } •

    依序要給三個值:寬度、樣式、顏⾊色,並以空⽩白隔開
  31. box model 了了解元件的⼤大⼩小與範圍 • Box model ⼜又分兩兩種類型,差別在於 width , height

    的定義 1. content-box,只有 content(padding, border 不會算進 width,為⼤大部分預設值) 2. border-box,padding + border + content 圖片來來源
  32. box model 了了解元件的⼤大⼩小與範圍 • 差別在哪? • 實際上,元件的範圍與 border-box 相同,因此: •

    要精準控制元素⼤大⼩小,使⽤用 border-box • 要精準控制內容範圍,使⽤用 content-box,但是要知道元 素⼤大⼩小,要⾃自⼰己算(width + padding + border) • 使⽤用 box-sizing 定義:border-box / content-box 圖片來來源
  33. box-shadow 加入陰影 button { box-shadow:#b9b4b4 0px 2px 2px 2px; }

    顏⾊色 ⽔水平 偏移 垂直 偏移 模糊 半徑 尺⼨寸 半徑
  34. transition 加入漸變 button { width: 200px; padding: 12px; margin: 12px;

    border: 1px solid black; transition: box-shadow 0.3s; } • 當有樣式變化的時候,以漸變變化
  35. font-family 設定字體 html { font-family: -apple-system,system- ui,BlinkMacSystemFont,"Segoe UI",Roboto,"Helvetica Neue",Arial,sans-serif; }

    • CSS 的 C:Cascading 階層式,像瀑布⼀一樣 • 如果找不到第⼀一個字型,就找第⼆二個 • 希望使⽤用者看到的字體統⼀一嗎?使⽤用 web font
  36. CSS 權重 • 重複指定樣式,如何顯⽰示? CSS 有權重! • 權重由⾼高到低: • !important

    • inline style • ID selector • Class, attributes, pseudo-class selector • Type and pseudo-elements selector • 其他:*, +, >, ~ … • 相同權重時,後指定的適⽤用
  37. CSS 權重 • 權重計算: • #myid 比 .myclass ⾼高,因為 id

    比 class ⾼高 • #myid h1 比 h1 ⾼高,因為 id*1 + type*1 比 type ⾼高 • #myid #myelement 比 #myelement ⾼高,因為 id*2 比 id*1 ⾼高 • 相同權重時,後指定的適⽤用
  38. CSS 權重 h1 { color: red; } <div id="content"><h1 style="color:

    #ffffff">Heading</h1></div> #content h1 { color: blue; } • 權重分別為 1. type*1 2. inline 3. id*1, type*1 • 權重:2 > 3 > 1 ,因此 color 為 #ffffff
  39. 如何查閱 CSS ⽂文件 • 推薦⽂文件 • cssreference.io • w3schools •

    怎麼看? • ⼀一個屬性有哪些欄欄位 • 每個欄欄位接受怎樣的值
  40. 看看 Bootstrap 的⼀一段 CSS 原始碼 .display-1 { font-size: 6rem; font-weight:

    300; line-height: 1.2; } .display-2 { font-size: 5.5rem; font-weight: 300; line-height: 1.2; } .display-3 { font-size: 4.5rem; font-weight: 300; line-height: 1.2; } .display-4 { font-size: 3.5rem; font-weight: 300; line-height: 1.2; }
  41. 拯救 CSS 地獄,Bootstrap 降臨臨 • what is bootstrap • front-end

    component library (CSS + JS) • Twitter 出品 • ⽤用⼾戶:NASA, FIFA, University of Washington …
  42. 如何使⽤用 Bootstrap • how to link bootstrap,CSS & JS •

    Use CDN! • 查 Documentation, Documentation, Documentation
  43. 如何使⽤用 Bootstrap • 在 head 底部放上: <link rel="stylesheet" href="https://stackpath.bootstrapcdn.com/bootstrap/ 4.1.3/css/bootstrap.min.css"

    integrity="sha384-MCw98/ SFnGE8fJT3GXwEOngsV7Zt27NXFoaoApmYm81iuXoPkFOJwJ8ERdknLPMO" crossorigin="anonymous"> • 在 body 底部放上: <script src="https://code.jquery.com/jquery-3.3.1.slim.min.js" integrity="sha384-q8i/ X+965DzO0rT7abK41JStQIAqVgRVzpbzo5smXKp4YfRvH+8abtTE1Pi6jizo" crossorigin="anonymous"></script> <script src="https://cdnjs.cloudflare.com/ajax/libs/popper.js/1.14.3/umd/ popper.min.js" integrity="sha384- ZMP7rVo3mIykV+2+9J3UJ46jBk0WLaUAdn689aCwoqbBJiSnjAK/l8WvCWPIPm49" crossorigin="anonymous"></script> <script src="https://stackpath.bootstrapcdn.com/bootstrap/4.1.3/js/ bootstrap.min.js" integrity="sha384- ChfqqxuZUCnJSK3+MXmPNIyE6ZbWh2IMqE241rYiqJxyMiZ6OW/JmZQ5stwEULTy" crossorigin="anonymous"></script> 參參考⽂文件
  44. Bootstrap colors <div class="p-3 mb-2 bg-primary text-white">.bg-primary</div> <div class="p-3 mb-2

    bg-secondary text-white"> .bg-secondary</div> <div class="p-3 mb-2 bg-success text-white">.bg-success</div> <div class="p-3 mb-2 bg-danger text-white">.bg-danger</div>
  45. Bootstrap shadow <div class="shadow p-3 mb-5 bg-white rounded">Regular shadow</div> <div

    class="shadow-lg p-3 mb-5 bg-white rounded">Larger shadow</div>
  46. Bootstrap size <div class="w-25 p-3" style="background-color: #eee;">Width 25%</div> <div class="w-50

    p-3" style="background-color: #eee;">Width 50%</div> <div class="w-75 p-3" style="background-color: #eee;">Width 75%</div> <div class="w-100 p-3" style="background-color: #eee;">Width 100%</div>
  47. Bootstrap Button <button type="button" class="btn btn-primary">Primary</button> <button type="button" class="btn btn-secondary">Secondary</button>

    <button type="button" class="btn btn-success">Success</button> <button type="button" class="btn btn-danger">Danger</button> 1. 先來來看看⽂文件 2. 可以⽤用 a tag,什什麼時候會⽤用 a ? 3. ⼀一併設定了了 hover, active
  48. Bootstrap Navbar <nav class="navbar navbar-expand-lg navbar-light bg-light"> <a class="navbar-brand" href="#">Navbar</a>

    <button class="navbar-toggler" type="button" data-toggle="collapse" data- target="#navbarNav" aria-controls="navbarNav" aria-expanded="false" aria- label="Toggle navigation"> <span class="navbar-toggler-icon"></span> </button> <div class="collapse navbar-collapse" id="navbarNav"> <ul class="navbar-nav"> <li class="nav-item active"> <a class="nav-link" href="#">Home <span class="sr-only">(current)</ span></a> </li> <li class="nav-item"> <a class="nav-link" href="#">Features</a> </li> <li class="nav-item"> <a class="nav-link" href="#">Pricing</a> </li> </ul> </div> </nav>
  49. Bootstrap Jumbotron <div class="jumbotron"> <h1 class="display-4">Hello, world!</h1> <p class="lead">This is

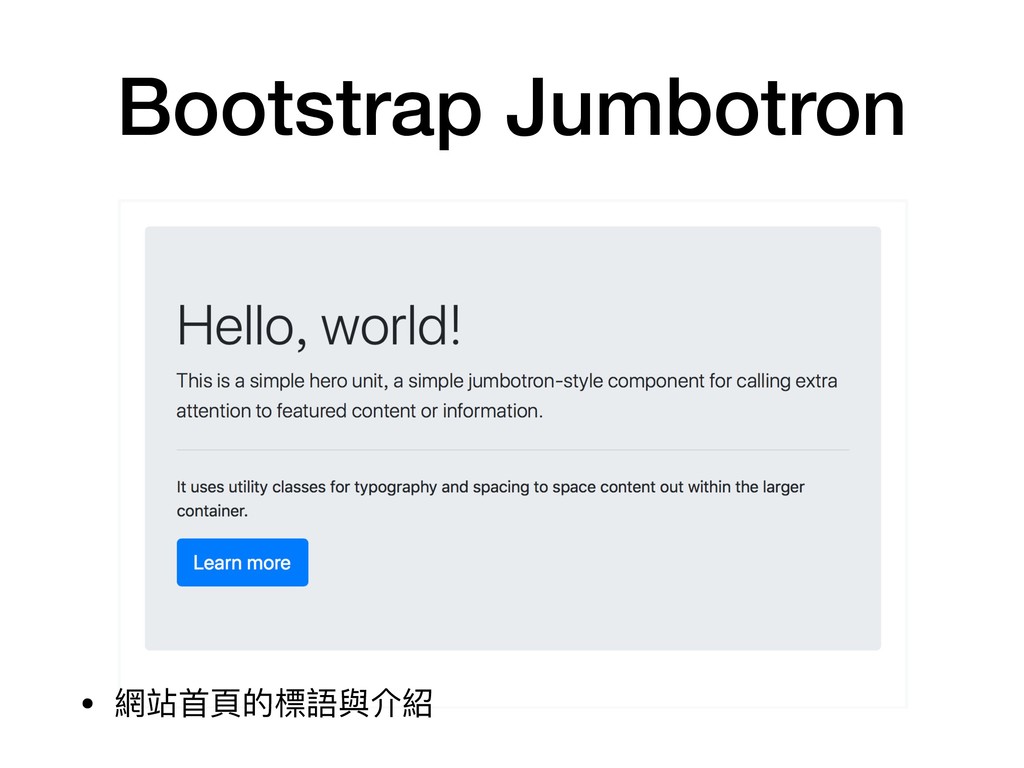
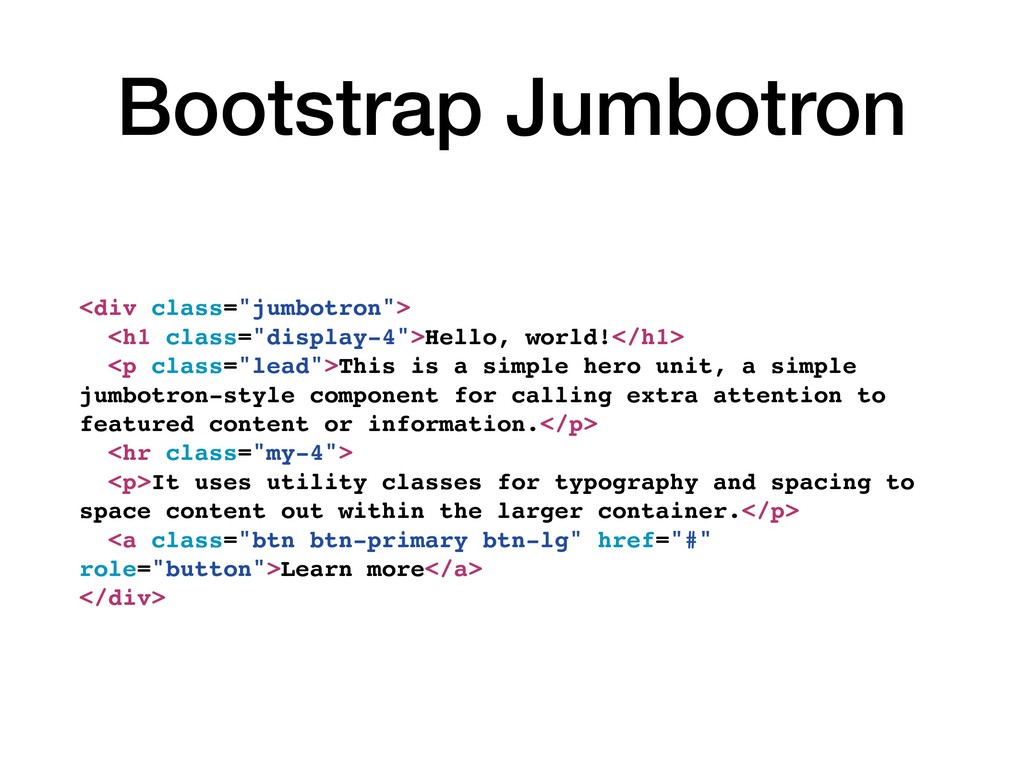
    a simple hero unit, a simple jumbotron-style component for calling extra attention to featured content or information.</p> <hr class="my-4"> <p>It uses utility classes for typography and spacing to space content out within the larger container.</p> <a class="btn btn-primary btn-lg" href="#" role="button">Learn more</a> </div>
  50. Bootstrap Grid System <div class="container"> <div class="row"> <div class="col"> One

    of three columns </div> <div class="col"> One of three columns </div> <div class="col"> One of three columns </div> </div> </div> • 使⽤用 col ,平均分配欄欄寬
  51. Bootstrap Grid System <div class="container"> <div class="row"> <div class="col-sm"> small

    break point </div> <div class="col-sm"> small break point </div> <div class="col-sm"> small break point </div> </div> </div> • 使⽤用 col-sm,製作響應式排版
  52. Bootstrap Grid System • col-sm 是 small • 什什麼的⼤大⼩小? 斷點

    (breakpoint )! • 在斷點之下的尺⼨寸,column 會折疊
  53. Bootstrap Grid System <div class="container"> <div class="row"> <div class="col-lg"> large

    break point </div> <div class="col-lg"> large break point </div> <div class="col-lg"> large break point </div> </div> </div> • 使⽤用 col-lg,製作響應式排版
  54. Bootstrap Grid System <div class="container"> <div class="row"> <div class="col-lg"> col

    is auto width </div> <div class="col-lg-8"> col for 8 </div> <div class="col-lg"> col is auto width </div> </div> </div> • 也可以和平均欄欄寬混合使⽤用!
  55. Bootstrap Grid System • col 必須是 row 直接的 child •

    row 只能放 col(和其所有變形如 col-sm) • row 必須放在 container 裏頭
  56. Give it a try, Landing Page ! • 使⽤用 bootstrap

    切出⼀一個專案介紹網⾴頁,需使⽤用以下元件: • Navbar, nav-brand, nav • Jumbotron • container, row, col
  57. reference • buldma, semantic UI • htmlreference.io • cssreference.io •

    https://medium.com/wdstack/how-to- bootstrap-94abe3525442