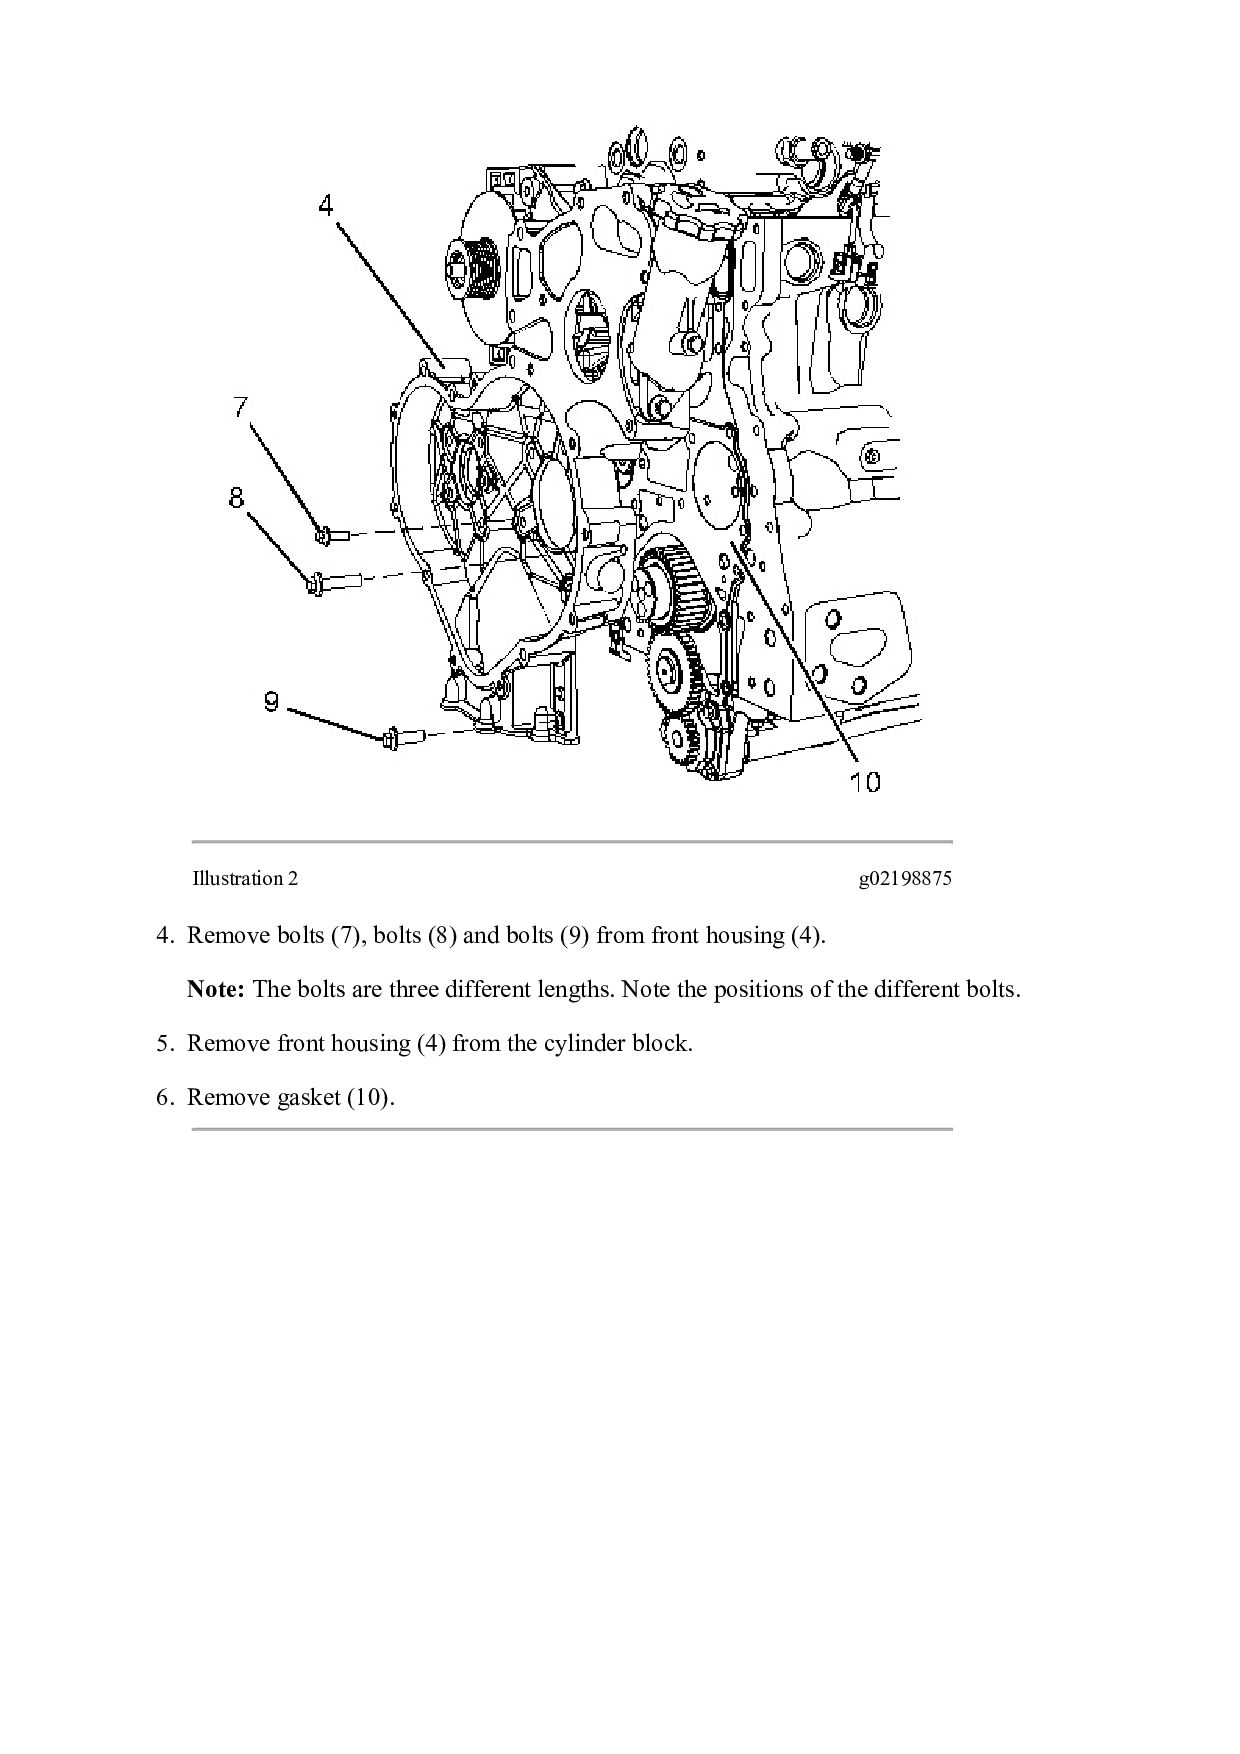
TRACK-TYPE TRACTOR RST Configuration: D6K2 TRACK-TYPE TRACTOR LGP, XL RST00001-UP (MACHINE) POWERED BY C6.6 Engine Disassembly and Assembly C6.6 Engines for Caterpillar Built Machines Media Number -KENR9249-07 Publication Date -01/09/2015 Date Updated -19/06/2017 i03914677 Housing (Front) - Remove - Heavy Duty Housing (Front) SMCS - 1151-011 Removal Procedure Start By: a. Remove the fan. Refer to Disassembly and Assembly, "Fan - Remove and Install" for the correct procedure. b. Remove the crankshaft pulley. Refer to Disassembly and Assembly, "Vibration Damper and Pulley - Remove" for the correct procedure. c. Remove the engine oil pan plate. Refer to Disassembly and Assembly, "Engine Oil Pan Plate - Remove" for the correct procedure. d. If the engine has an accessory drive, remove the accessory drive. Refer to Disassembly and Assembly, "Accessory Drive - Remove and Install" for the correct procedure. e. Remove the water pump. Refer to Disassembly and Assembly, "Water Pump - Remove" for the correct procedure. f. Remove the timing gears. Refer to Disassembly and Assembly, "Gear Group (Front) - Remove and Install" for the correct procedure. g. Remove the fuel injection pump. Refer to Disassembly and Assembly, "Fuel Injection Pump - Remove" for the correct procedure. NOTICE Keep all parts clean from contaminants. Contaminants may cause rapid wear and shorten component life.
![Please write to us. Our email: [email protected] Please go to](https://files.speakerdeck.com/presentations/e1bf1feaa11948afb68b67eb3538ddfe/slide_26.jpg)