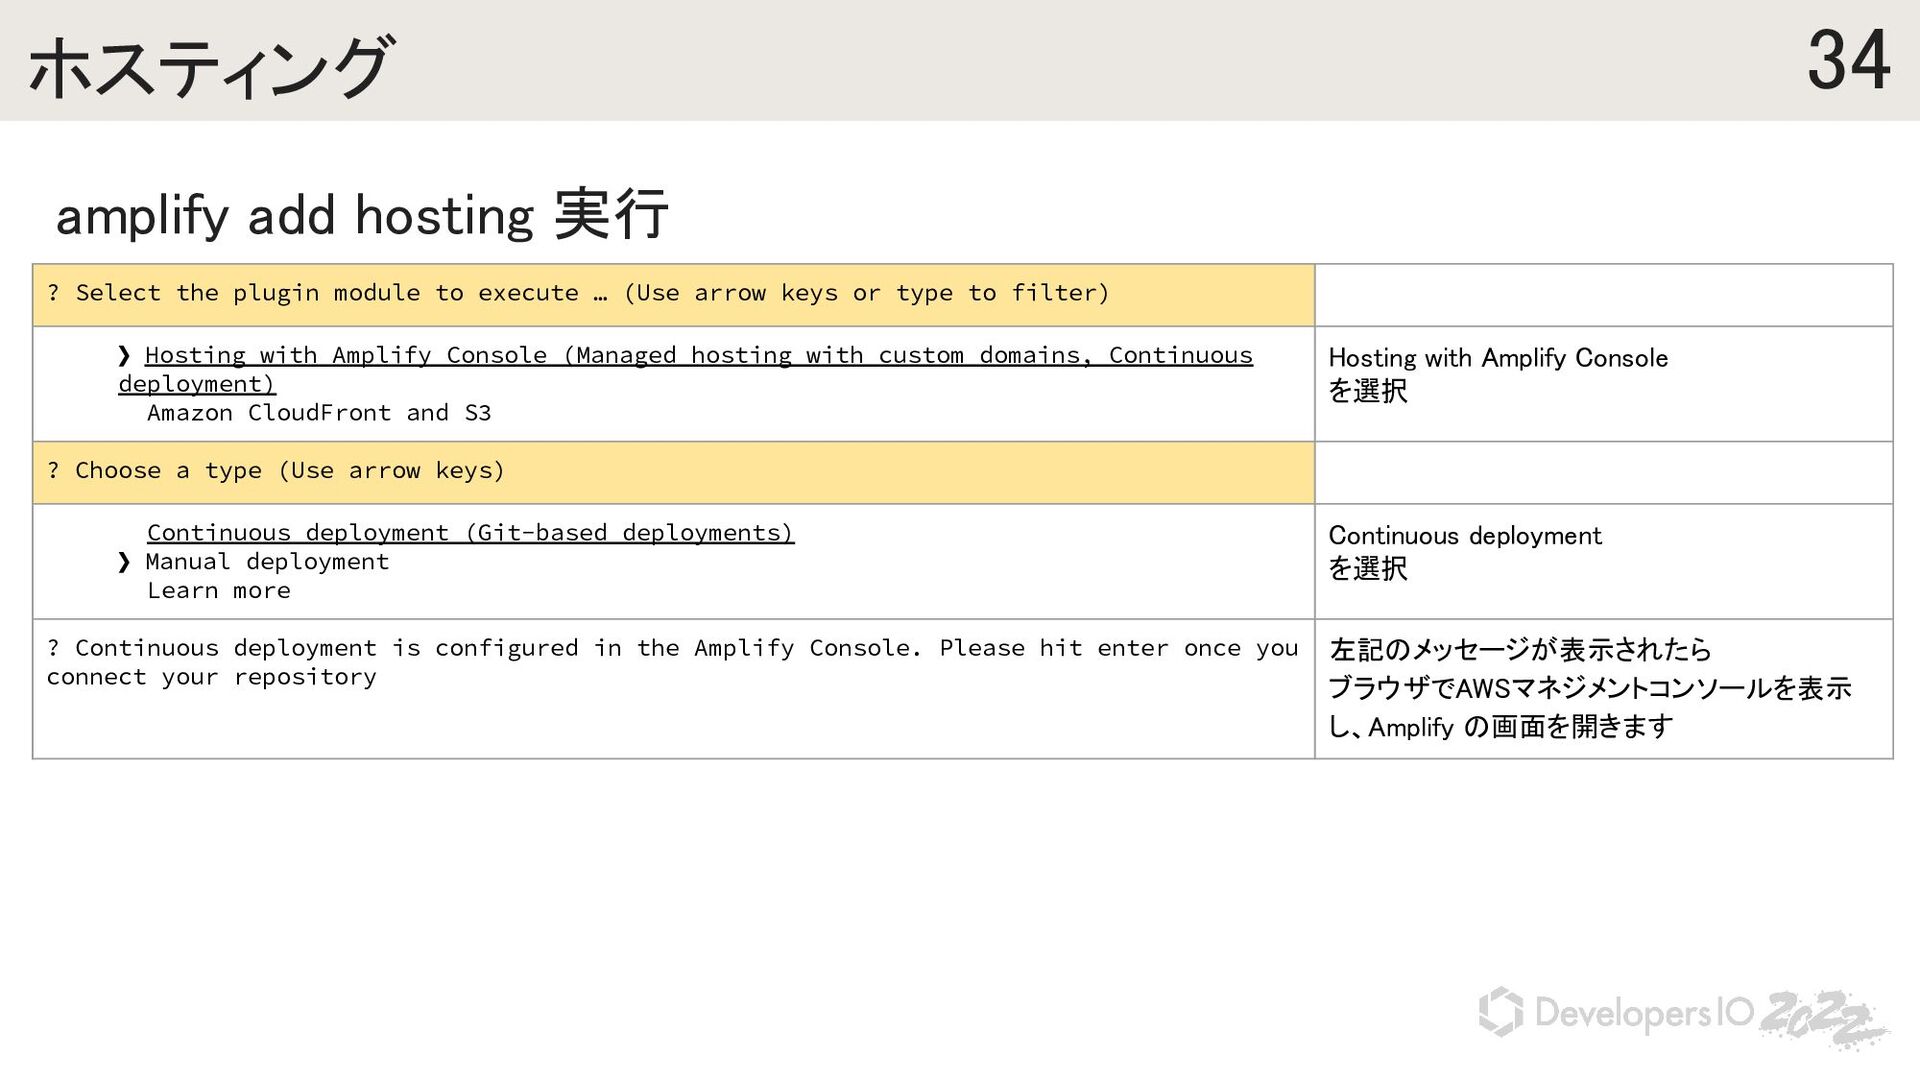
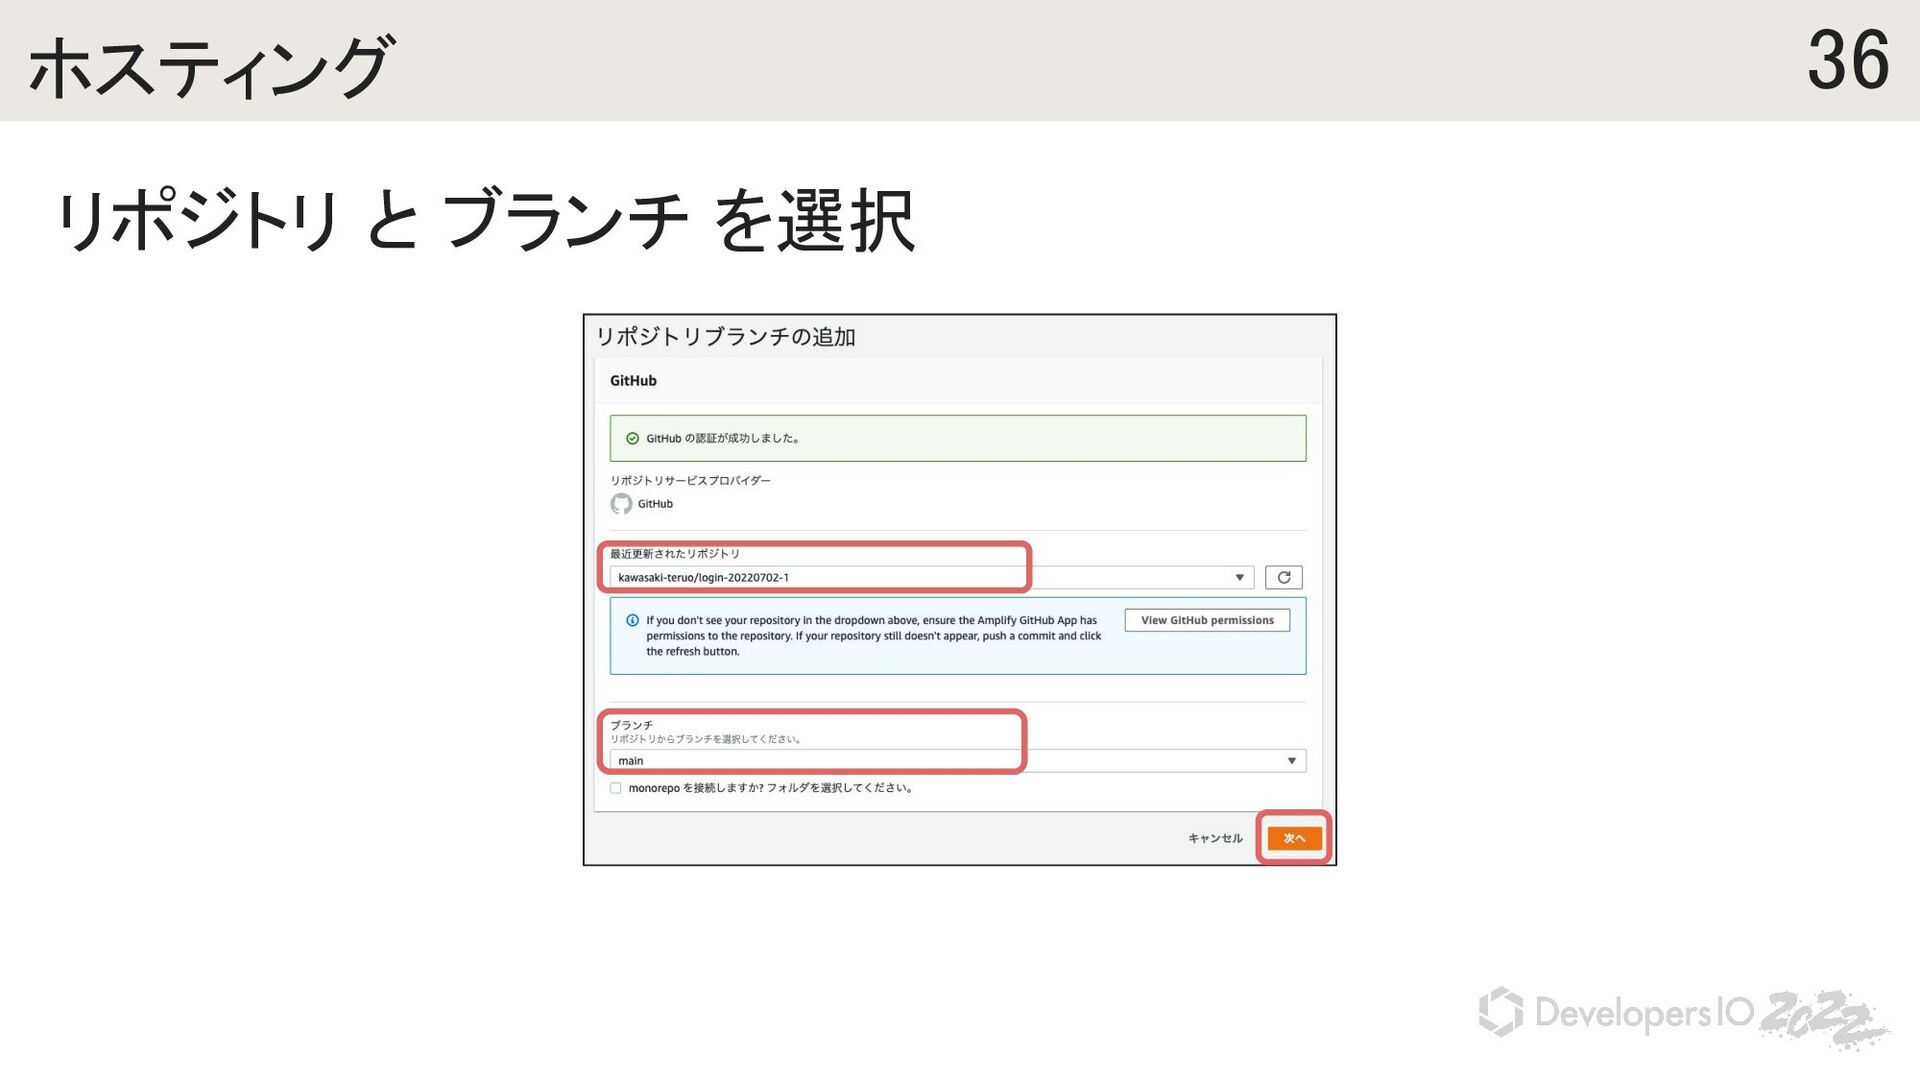
execute … (Use arrow keys or type to filter) ❯ Hosting with Amplify Console (Managed hosting with custom domains, Continuous deployment) Amazon CloudFront and S3 Hosting with Amplify Console を選択 ? Choose a type (Use arrow keys) Continuous deployment (Git-based deployments) ❯ Manual deployment Learn more Continuous deployment を選択 ? Continuous deployment is configured in the Amplify Console. Please hit enter once you connect your repository 左記のメッセージが表示されたら ブラウザでAWSマネジメントコンソールを表示 し、Amplify の画面を開きます 34 ホスティング
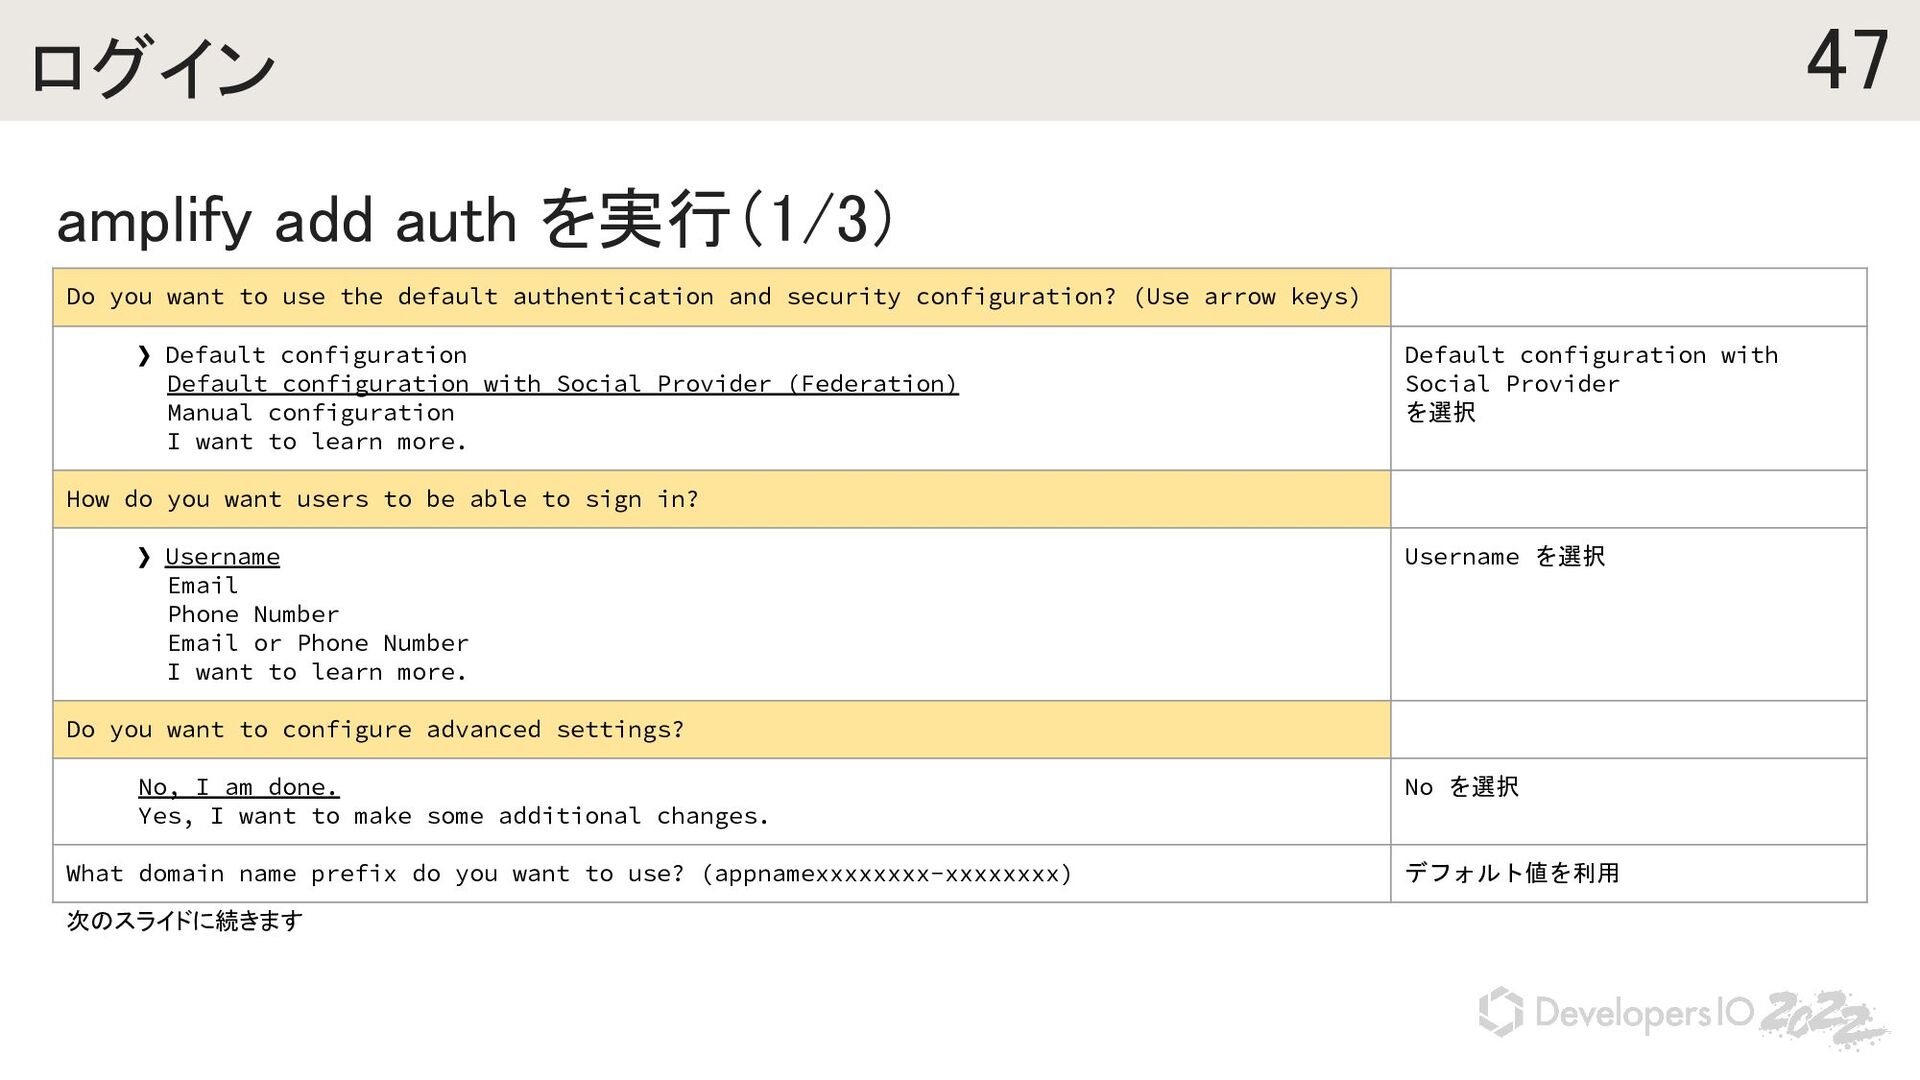
use the default authentication and security configuration? (Use arrow keys) ❯ Default configuration Default configuration with Social Provider (Federation) Manual configuration I want to learn more. Default configuration with Social Provider を選択 How do you want users to be able to sign in? ❯ Username Email Phone Number Email or Phone Number I want to learn more. Username を選択 Do you want to configure advanced settings? No, I am done. Yes, I want to make some additional changes. No を選択 What domain name prefix do you want to use? (appnamexxxxxxxx-xxxxxxxx) デフォルト値を利用 次のスライドに続きます
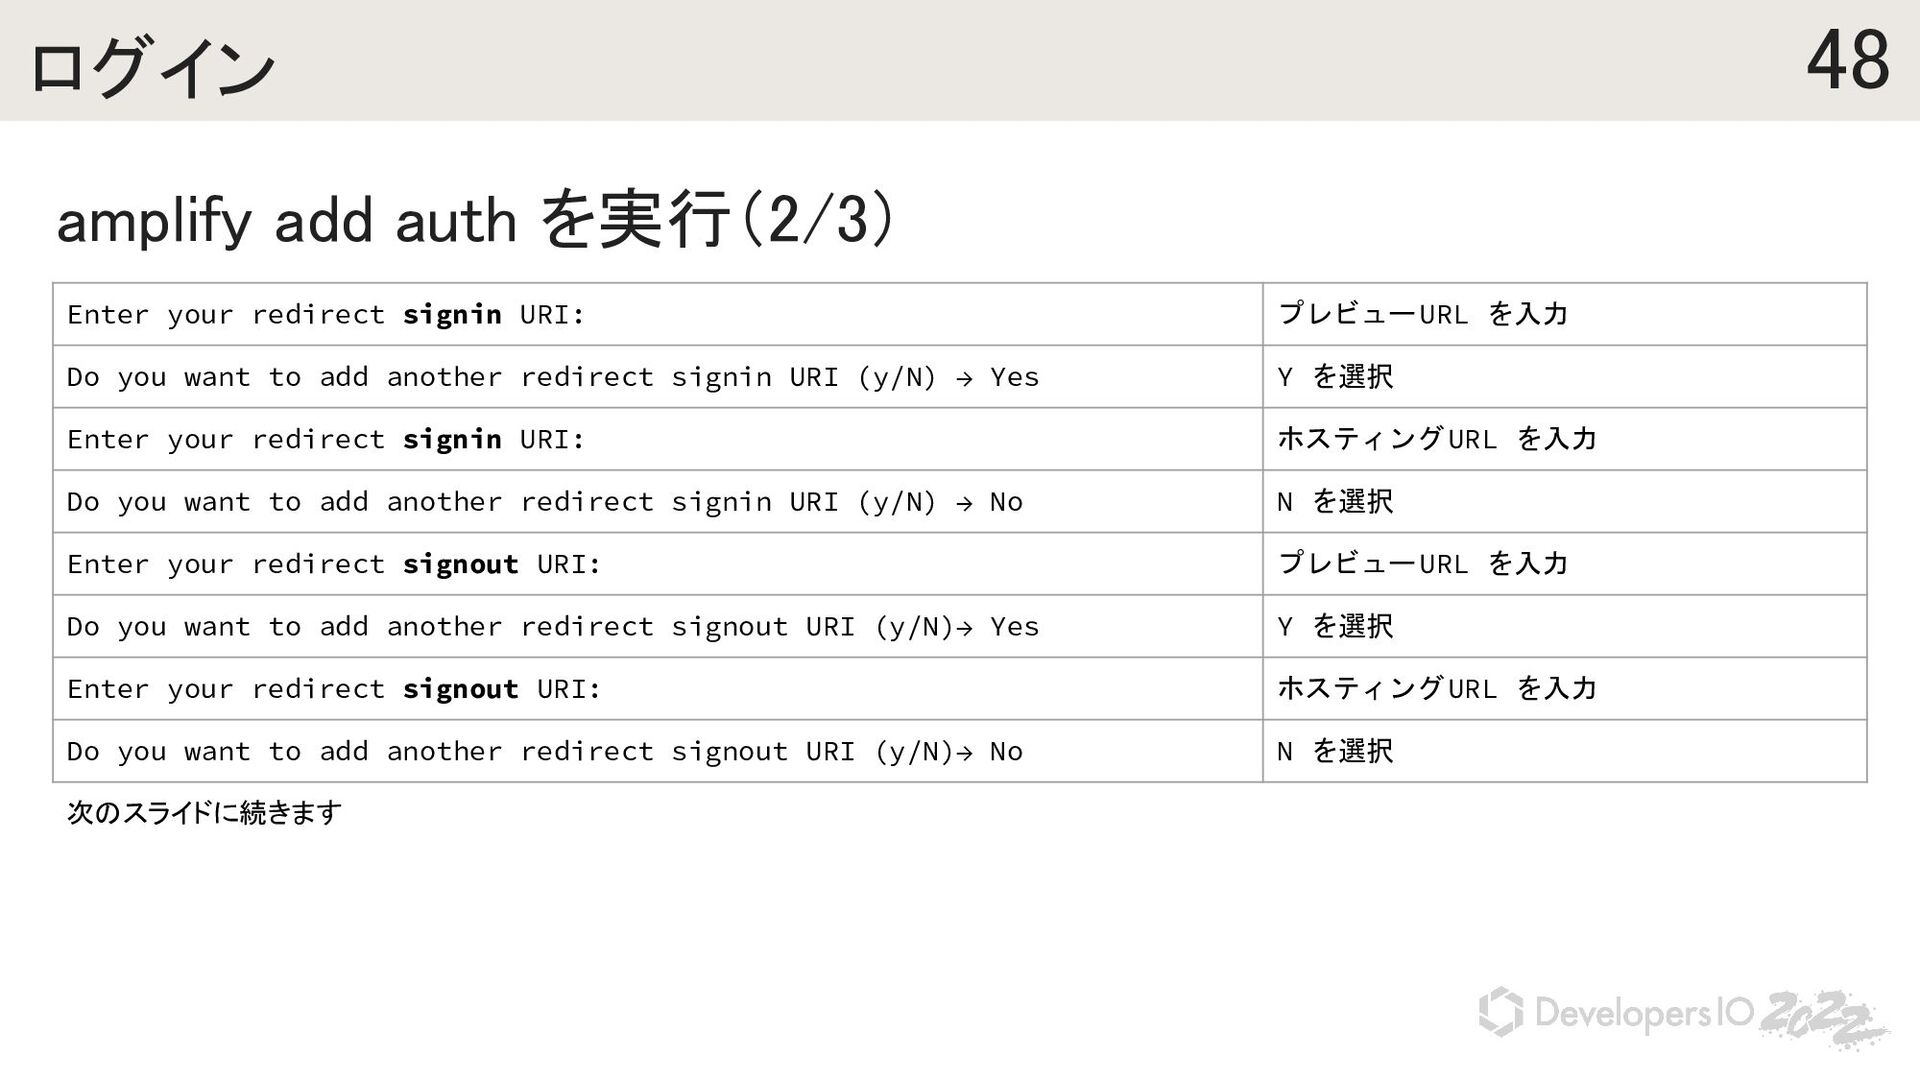
URI: プレビューURL を入力 Do you want to add another redirect signin URI (y/N) → Yes Y を選択 Enter your redirect signin URI: ホスティングURL を入力 Do you want to add another redirect signin URI (y/N) → No N を選択 Enter your redirect signout URI: プレビューURL を入力 Do you want to add another redirect signout URI (y/N)→ Yes Y を選択 Enter your redirect signout URI: ホスティングURL を入力 Do you want to add another redirect signout URI (y/N)→ No N を選択 次のスライドに続きます
amplify push -y • Google Oauth 側にも設定内容を反映します Select the social providers you want to configure for your user pool: (Press <space> to select, <a> to toggle all, <i> to invert selection) ◯ Facebook ◉ Google ◯ Login With Amazon ◯ Sign in with Apple カーソルキーで上下に移動 スペースキーを押して選択 enterキーを押して次へ You've opted to allow users to authenticate via Google. If you haven't already, you'll need to go to https://developers.google.com/identity and create an App ID. Enter your Google Web Client ID for your OAuth flow: クライアント ID を入力 Enter your Google Web Client Secret for your OAuth flow: クライアント シークレット を入力
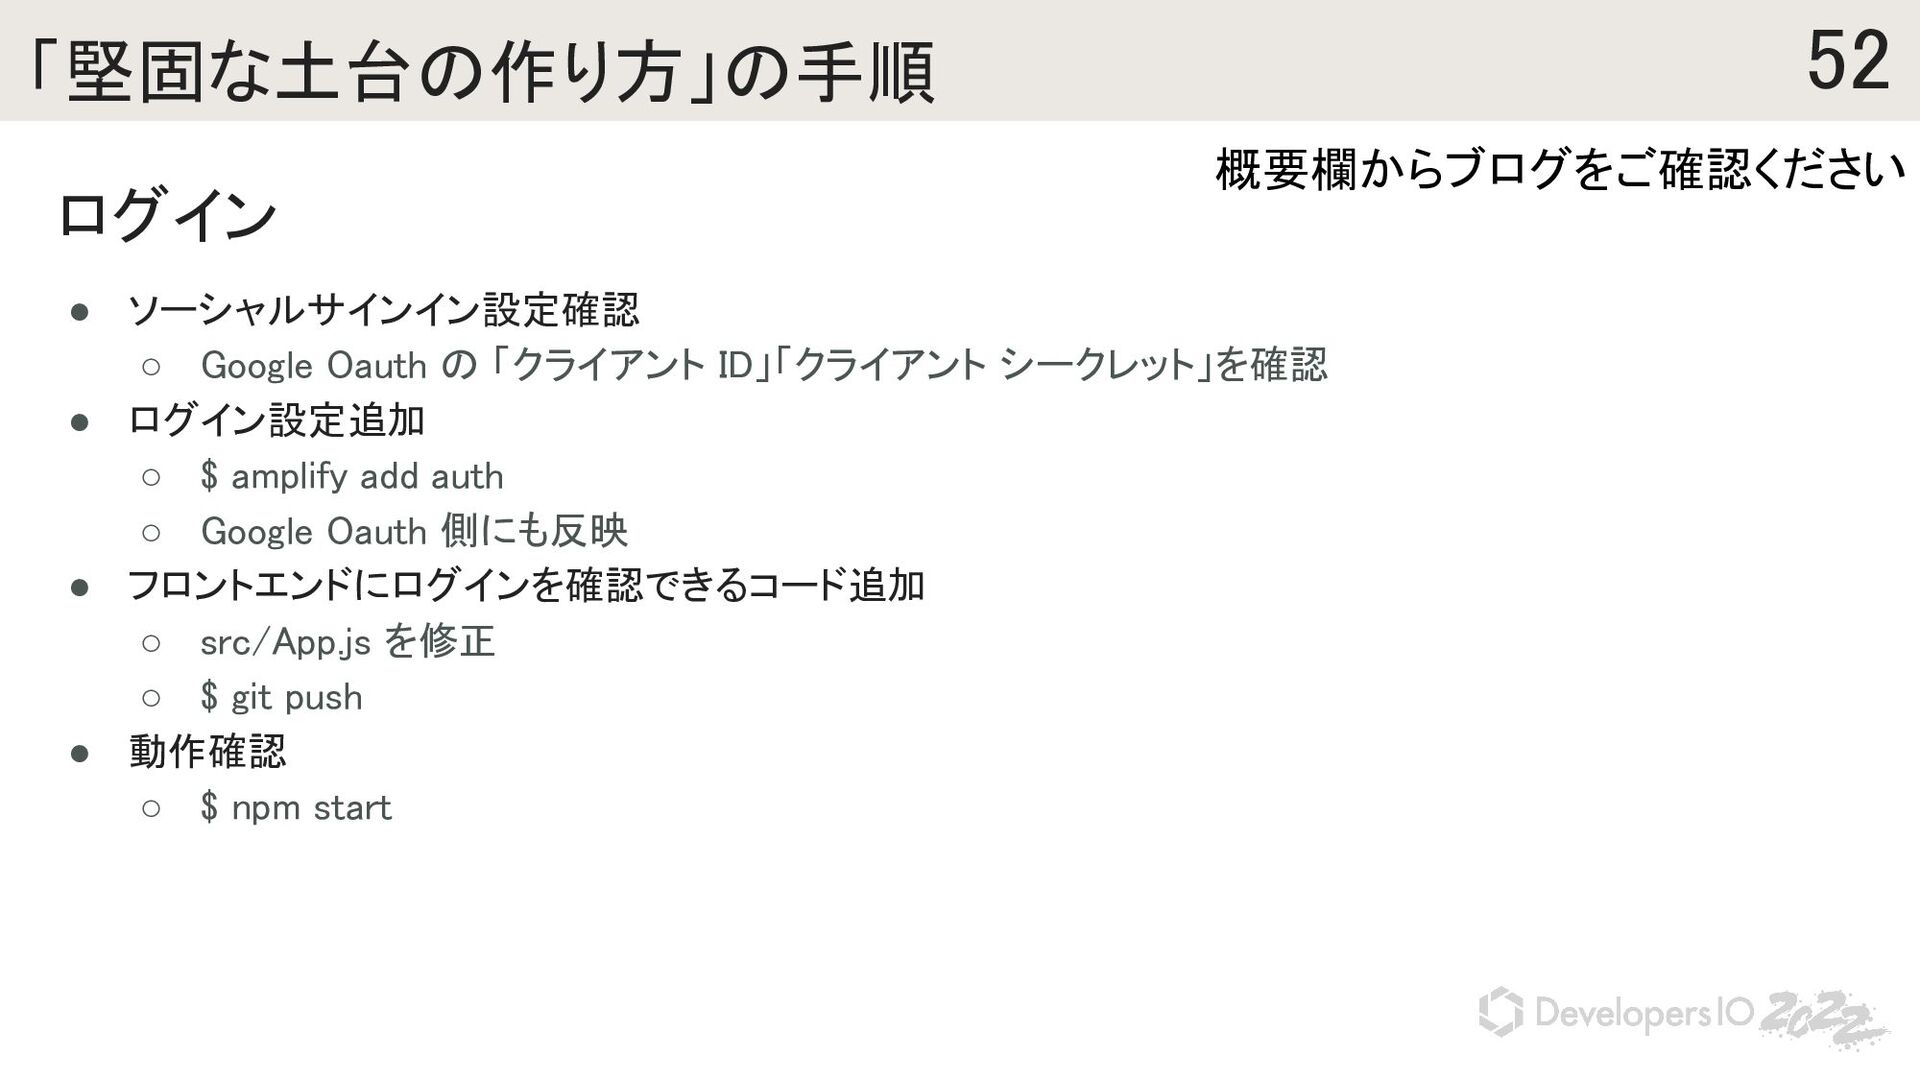
for the environment 「production」と入力 Using default provider awscloudformation ? Select the authentication method you want to use: (Use arrow keys) ❯ AWS profile AWS access keys ? Please choose the profile you want to use (Use arrow keys) ❯ default Enter your Google Web Client ID for your OAuth flow: クライアント ID を入力 Enter your Google Web Client Secret for your OAuth flow: クライアント シークレット を入力 • デプロイ先へ反映 ◦ $ amplify push -y
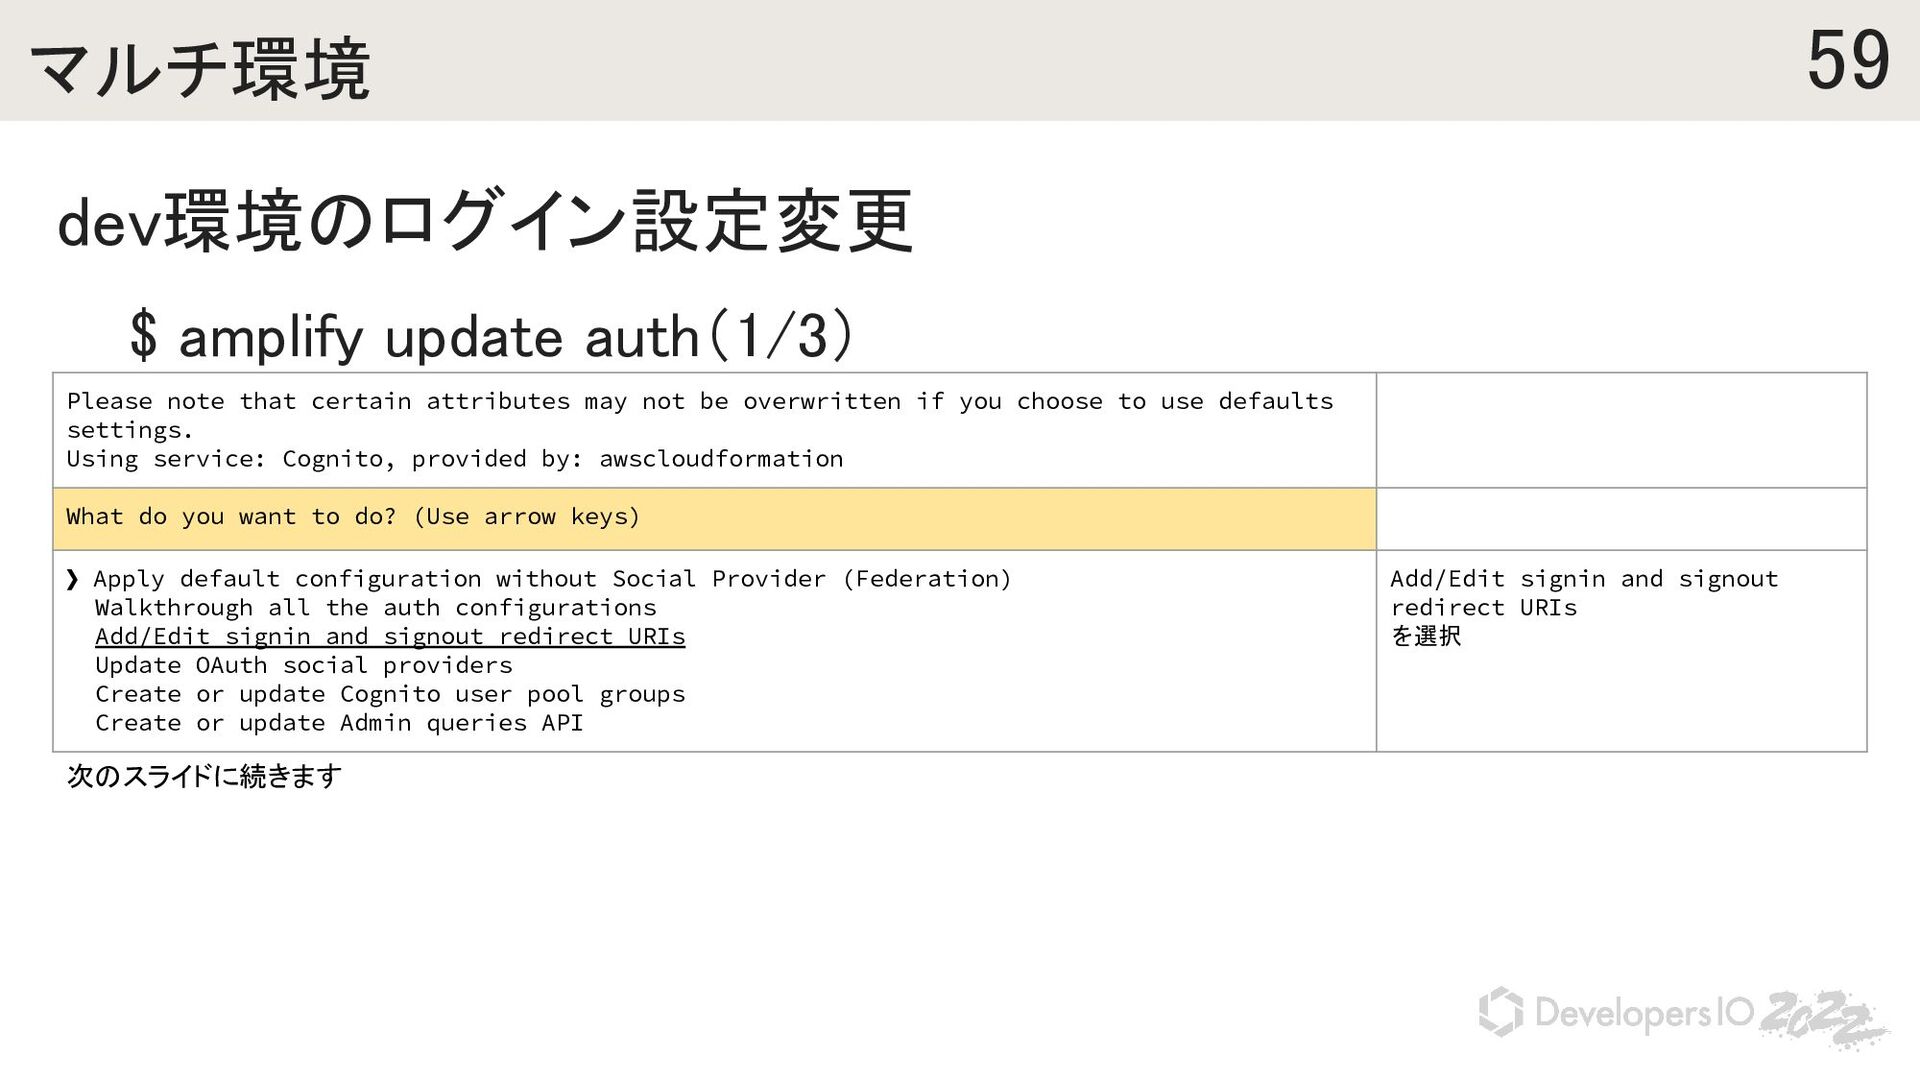
certain attributes may not be overwritten if you choose to use defaults settings. Using service: Cognito, provided by: awscloudformation What do you want to do? (Use arrow keys) ❯ Apply default configuration without Social Provider (Federation) Walkthrough all the auth configurations Add/Edit signin and signout redirect URIs Update OAuth social providers Create or update Cognito user pool groups Create or update Admin queries API Add/Edit signin and signout redirect URIs を選択 次のスライドに続きます
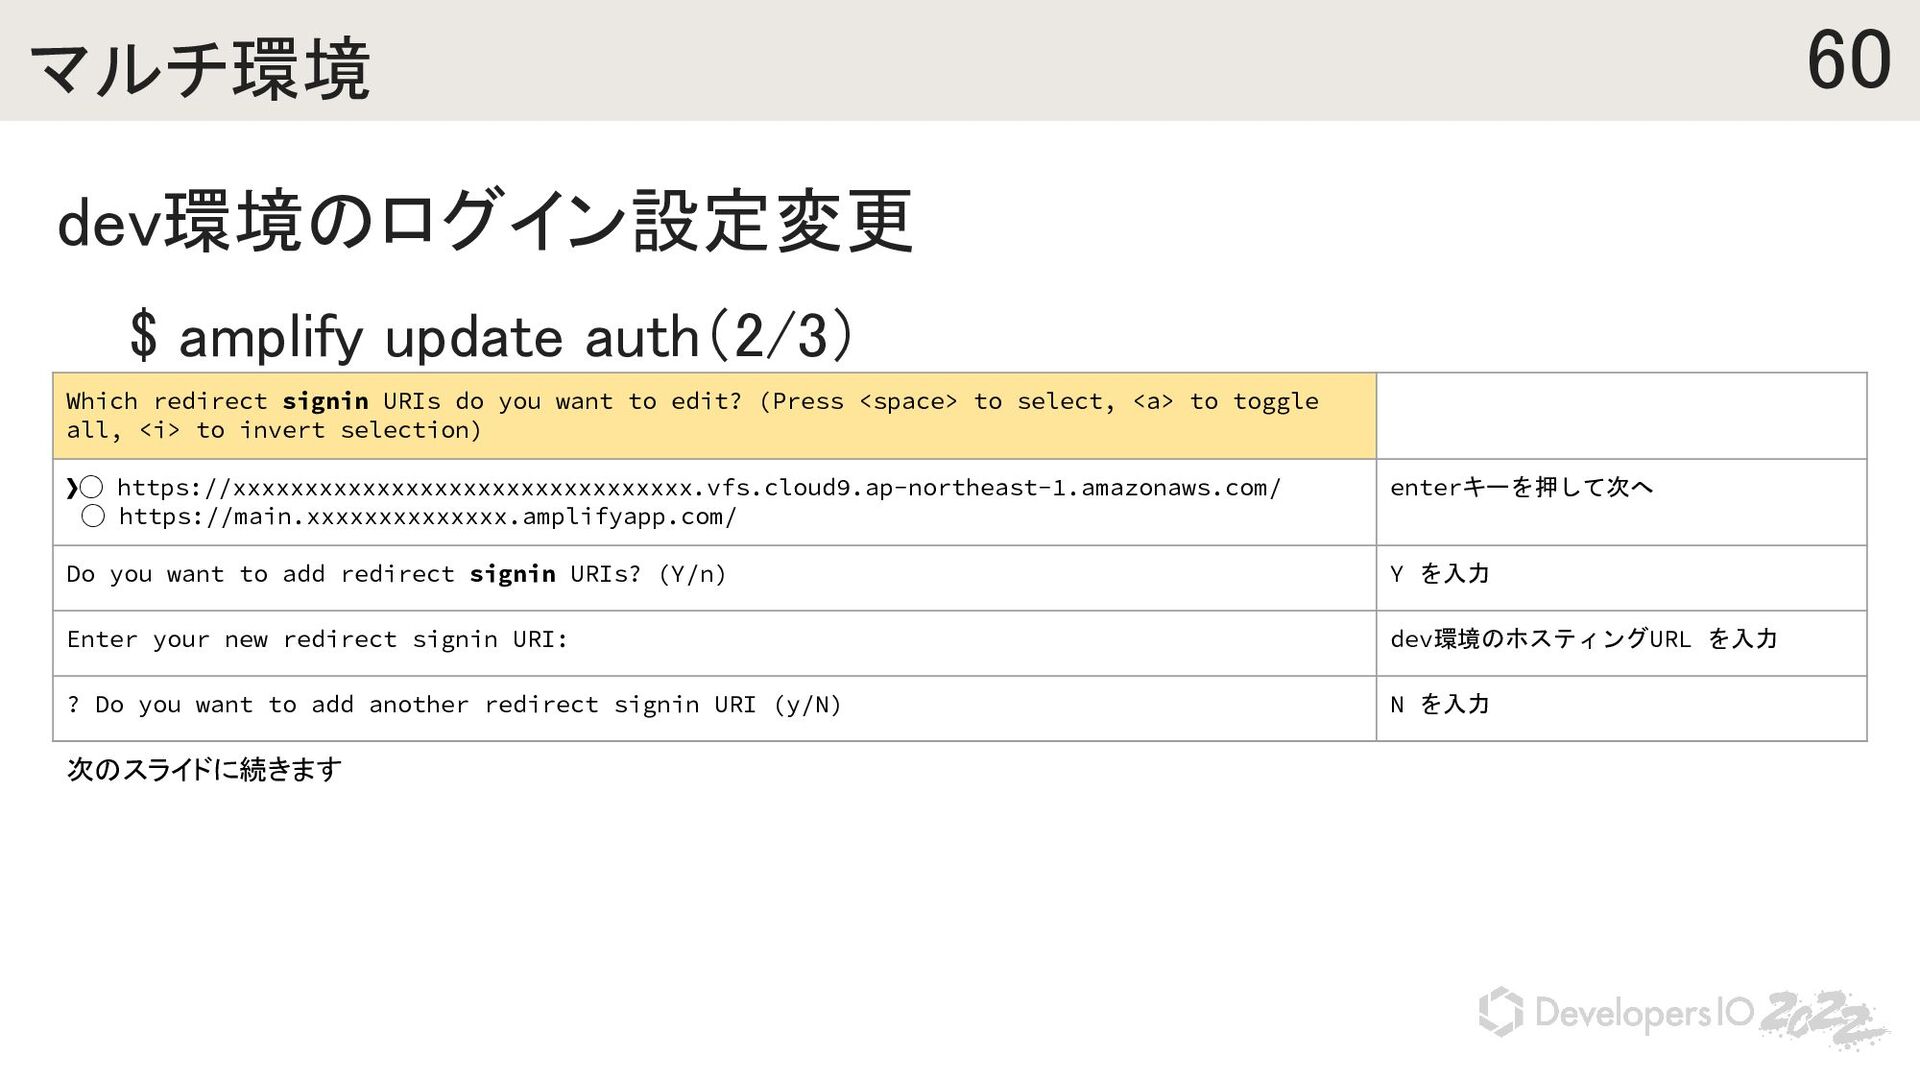
URIs do you want to edit? (Press <space> to select, <a> to toggle all, <i> to invert selection) ❯◯ https://xxxxxxxxxxxxxxxxxxxxxxxxxxxxxxxx.vfs.cloud9.ap-northeast-1.amazonaws.com/ ◯ https://main.xxxxxxxxxxxxxx.amplifyapp.com/ enterキーを押して次へ Do you want to add redirect signin URIs? (Y/n) Y を入力 Enter your new redirect signin URI: dev環境のホスティングURL を入力 ? Do you want to add another redirect signin URI (y/N) N を入力 次のスライドに続きます
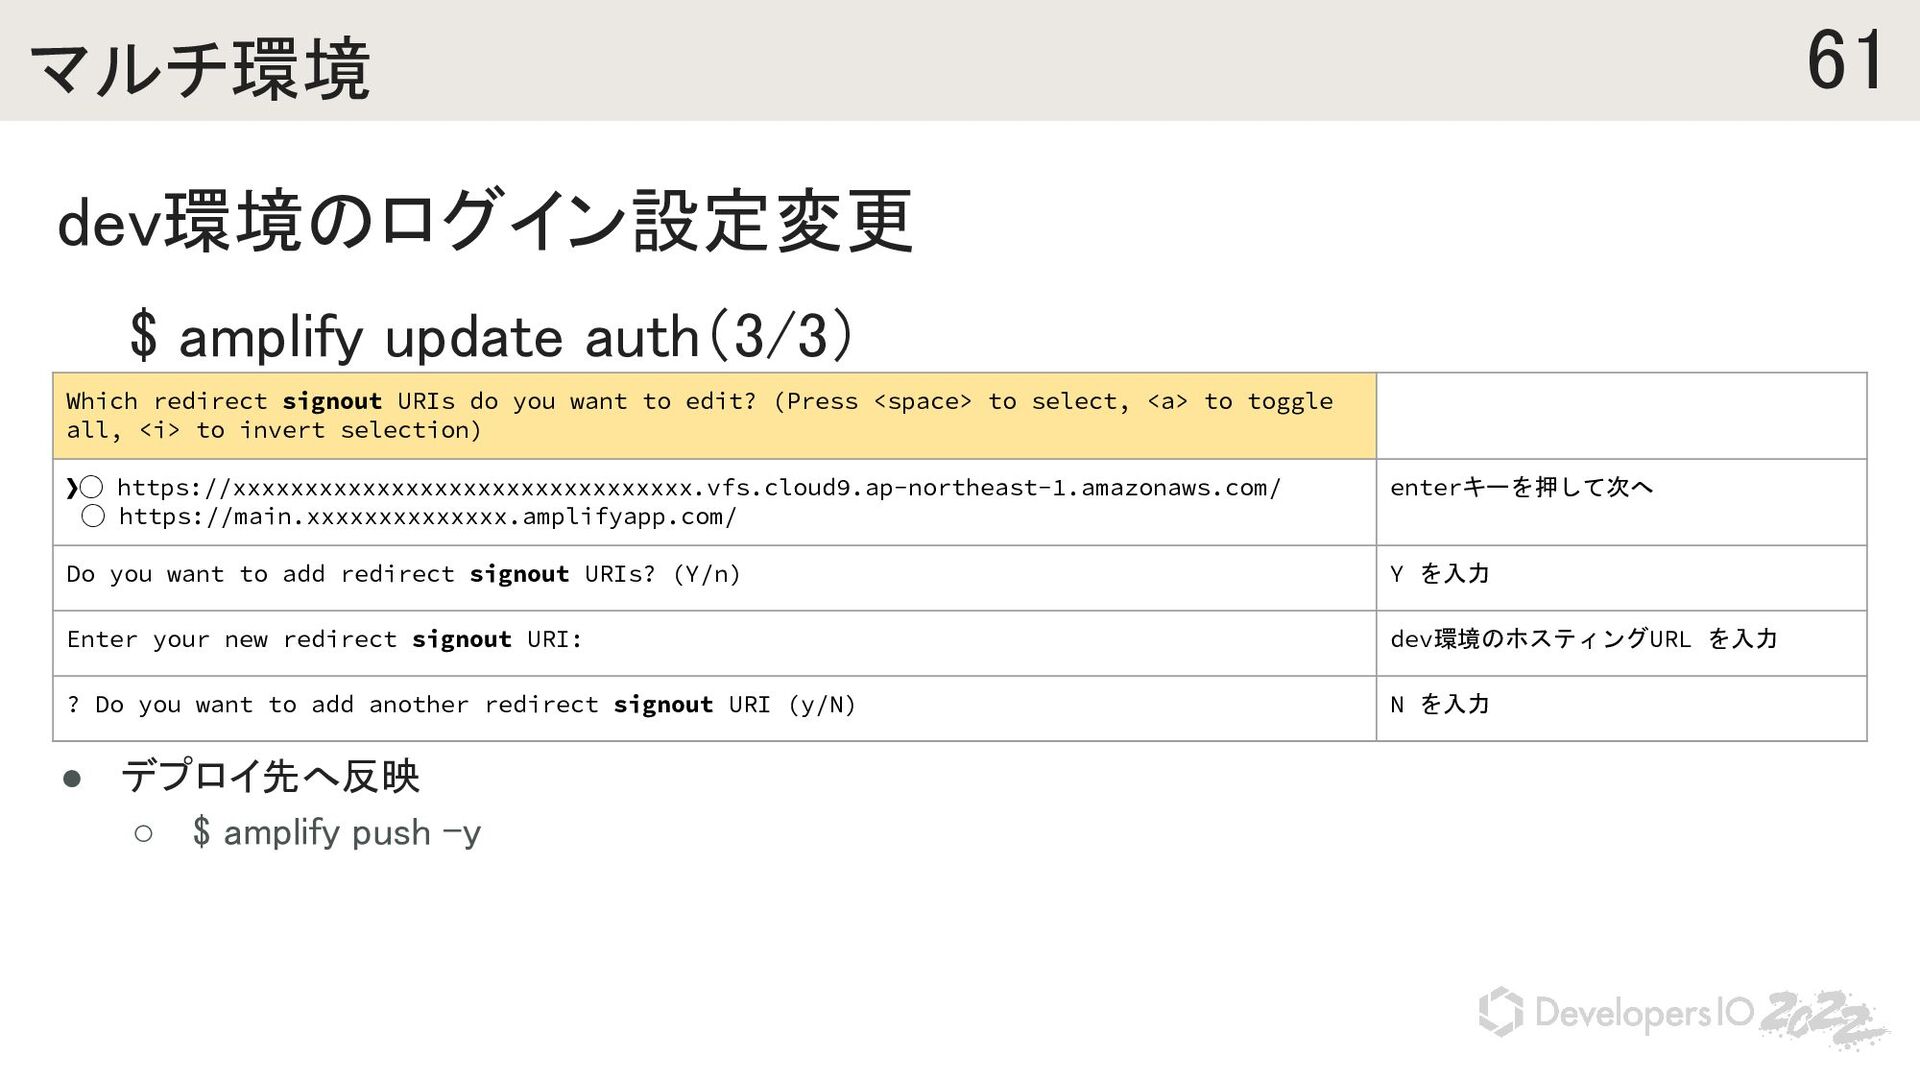
$ amplify push -y Which redirect signout URIs do you want to edit? (Press <space> to select, <a> to toggle all, <i> to invert selection) ❯◯ https://xxxxxxxxxxxxxxxxxxxxxxxxxxxxxxxx.vfs.cloud9.ap-northeast-1.amazonaws.com/ ◯ https://main.xxxxxxxxxxxxxx.amplifyapp.com/ enterキーを押して次へ Do you want to add redirect signout URIs? (Y/n) Y を入力 Enter your new redirect signout URI: dev環境のホスティングURL を入力 ? Do you want to add another redirect signout URI (y/N) N を入力