Upgrade to Pro — share decks privately, control downloads, hide ads and more …

DEVFEST BANJUL 2023: "Relay: The Future of Design to Code Workflows"

Love
December 30, 2023

DEVFEST BANJUL 2023: "Relay: The Future of Design to Code Workflows"

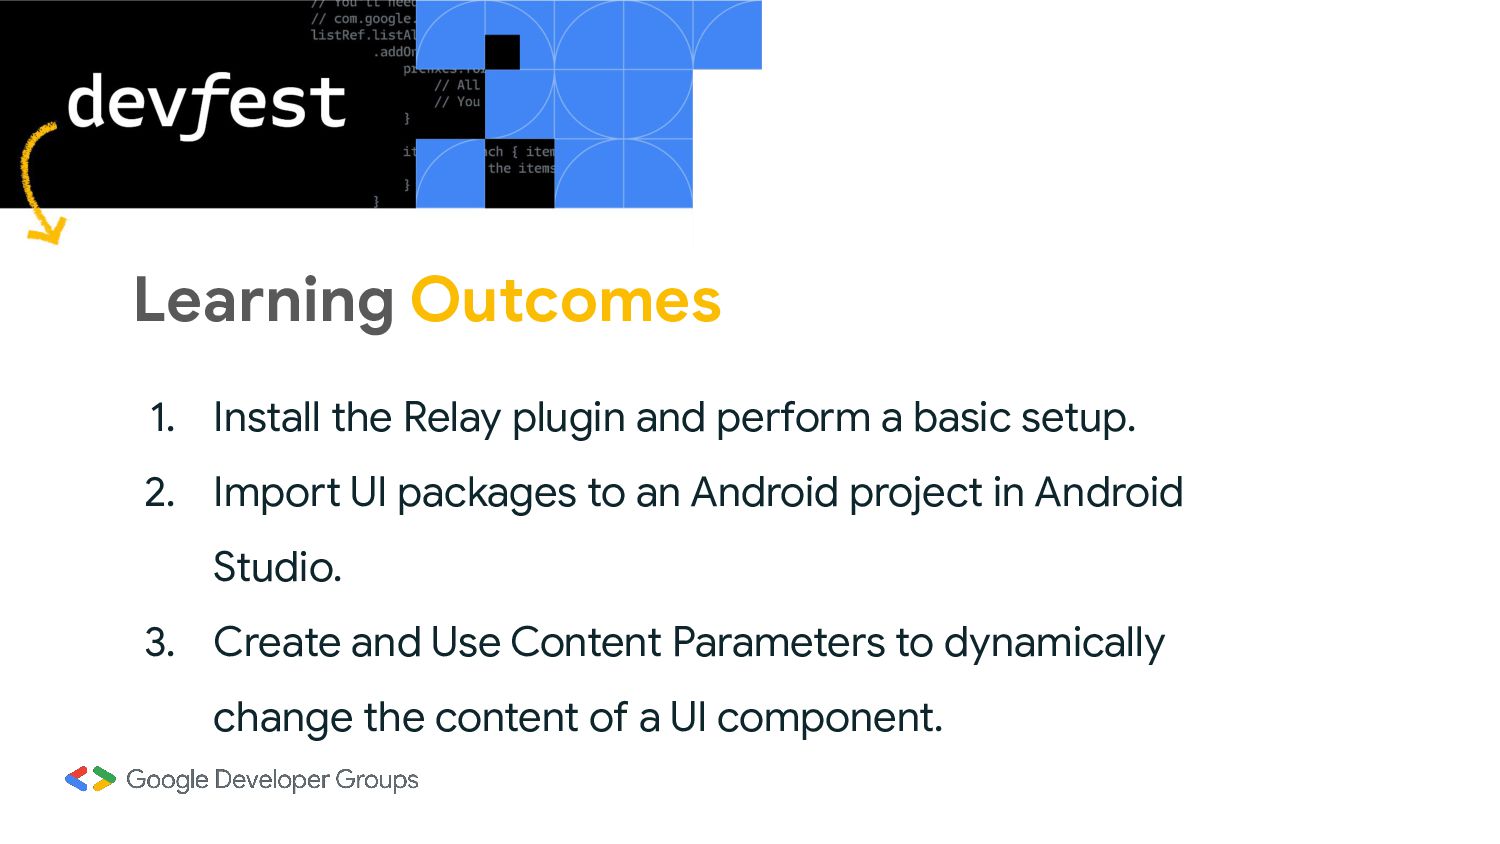
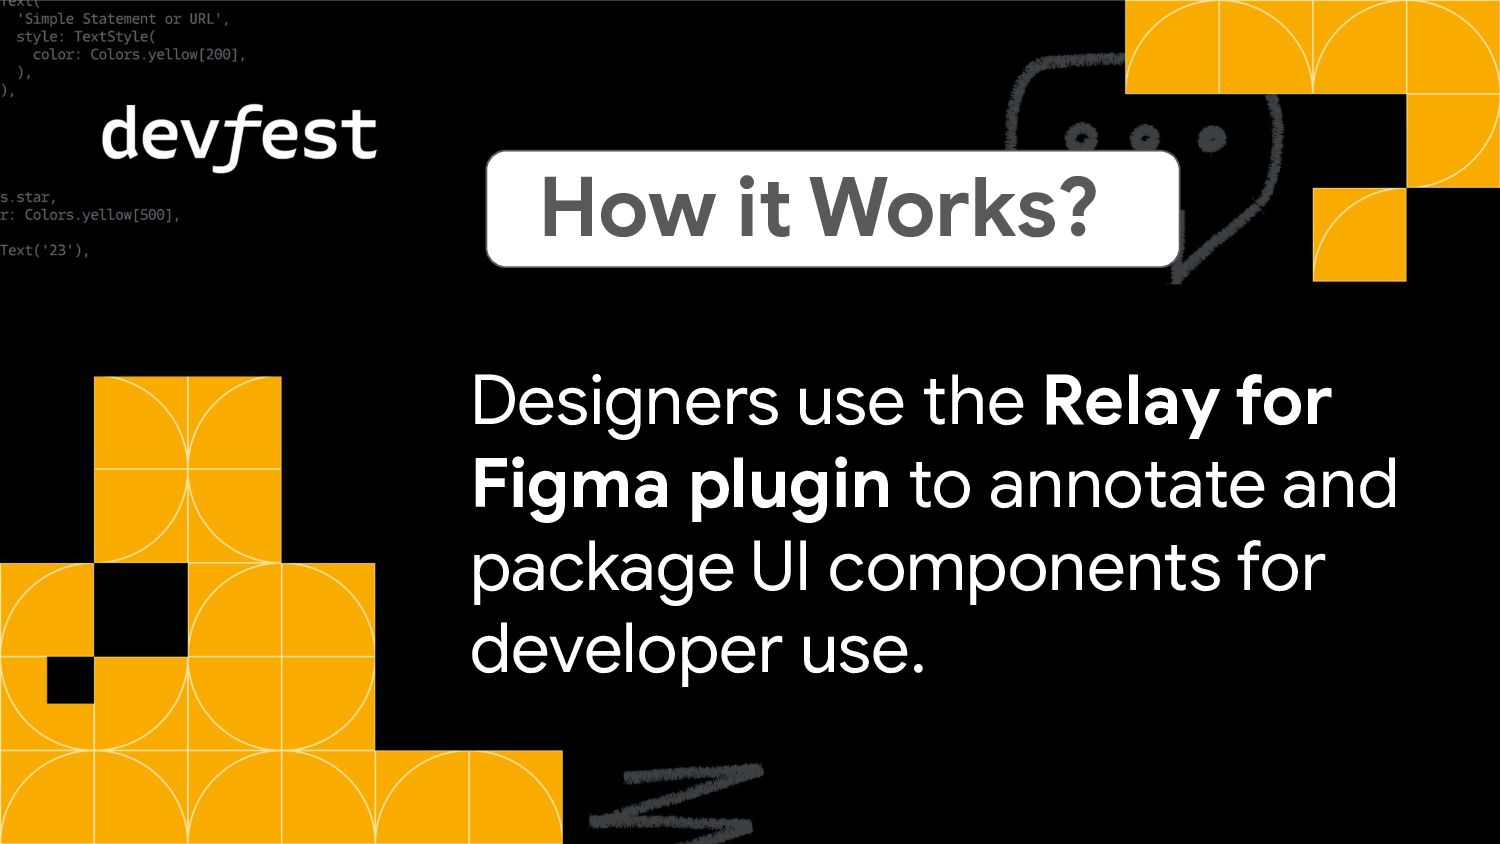
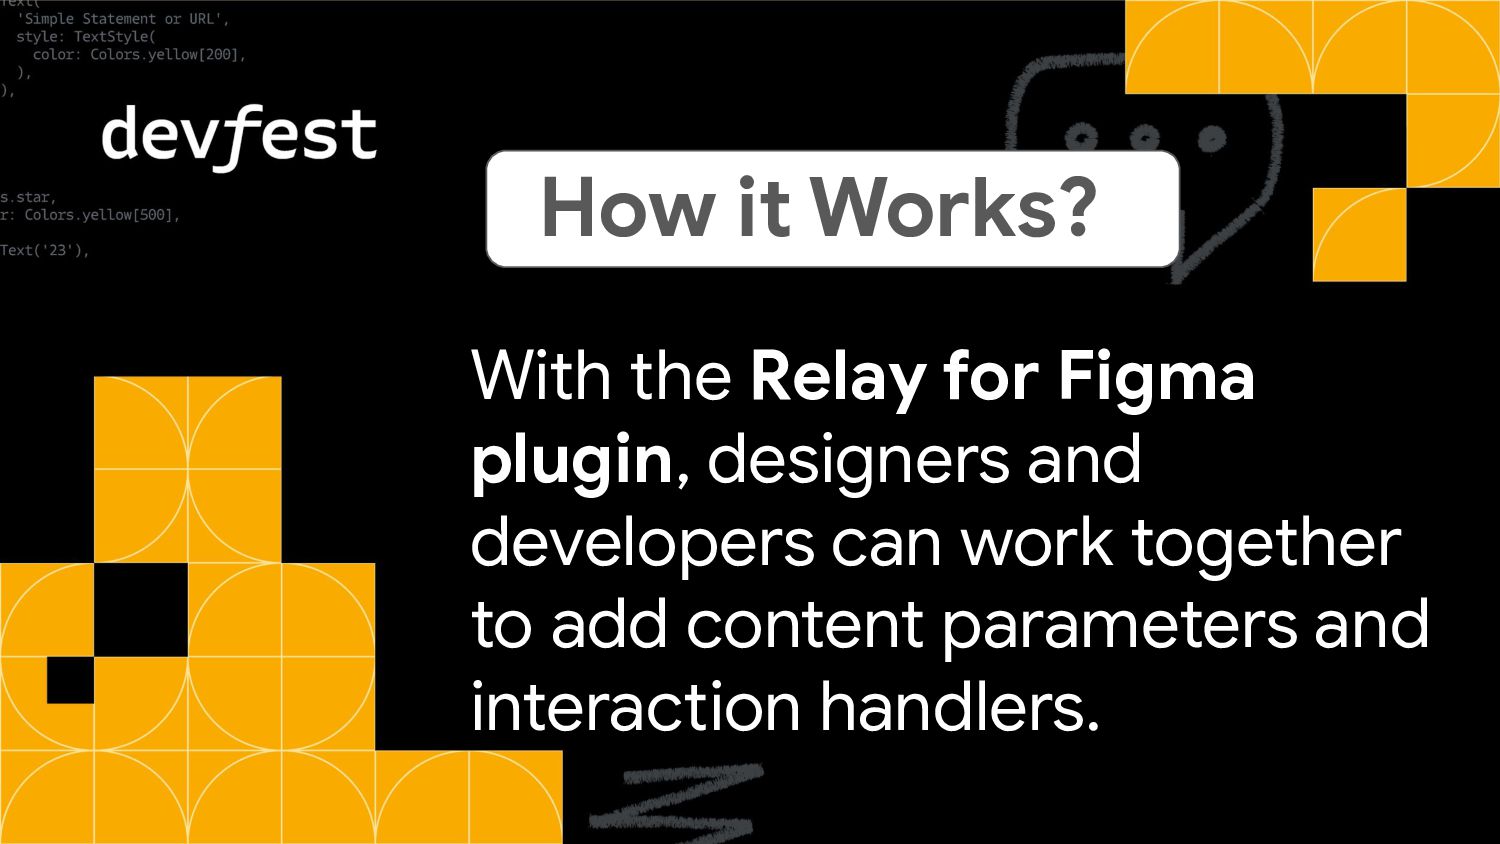
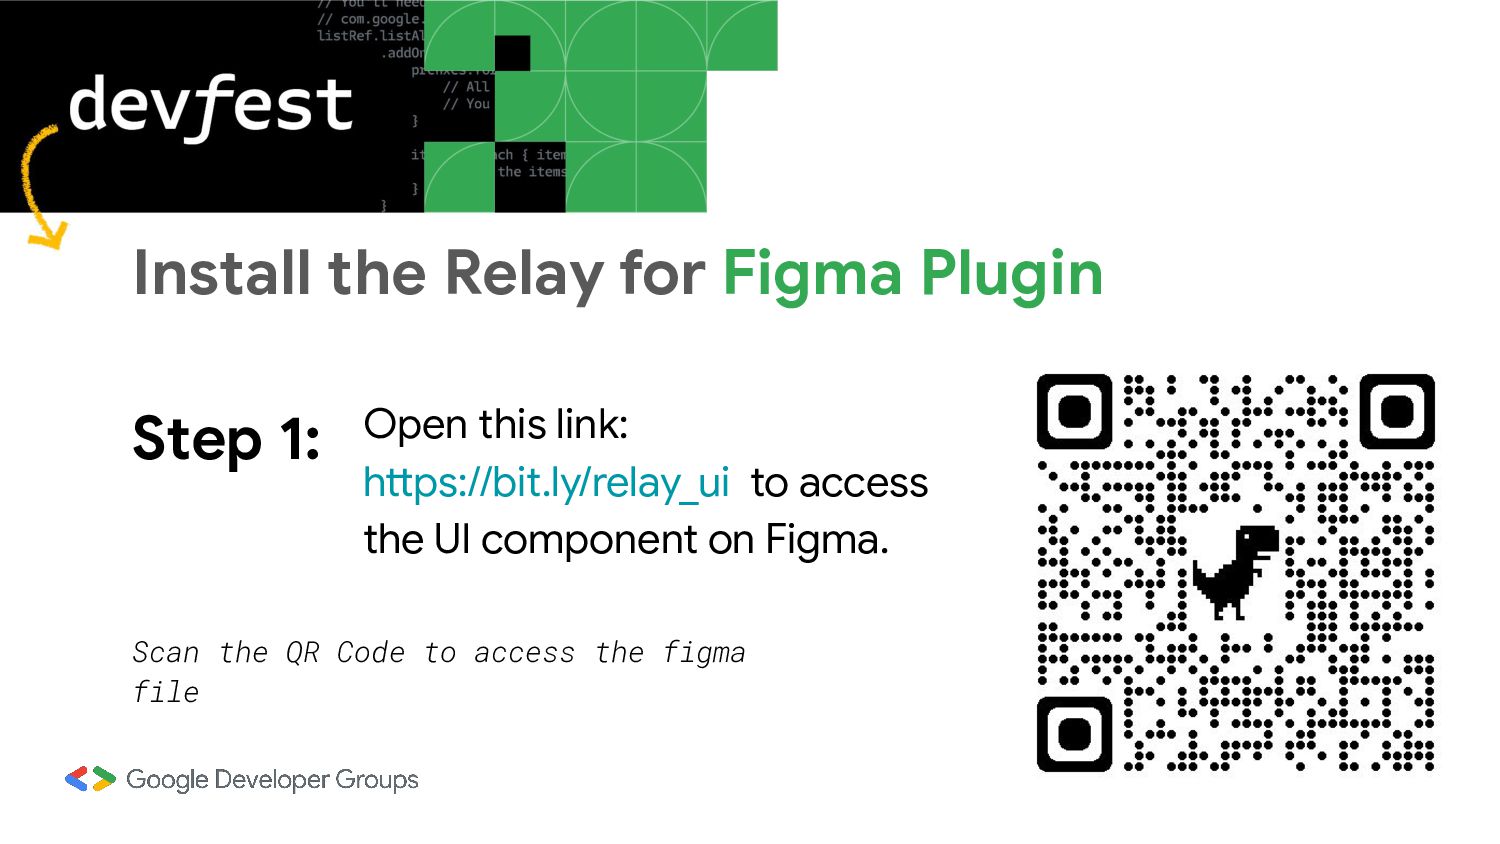
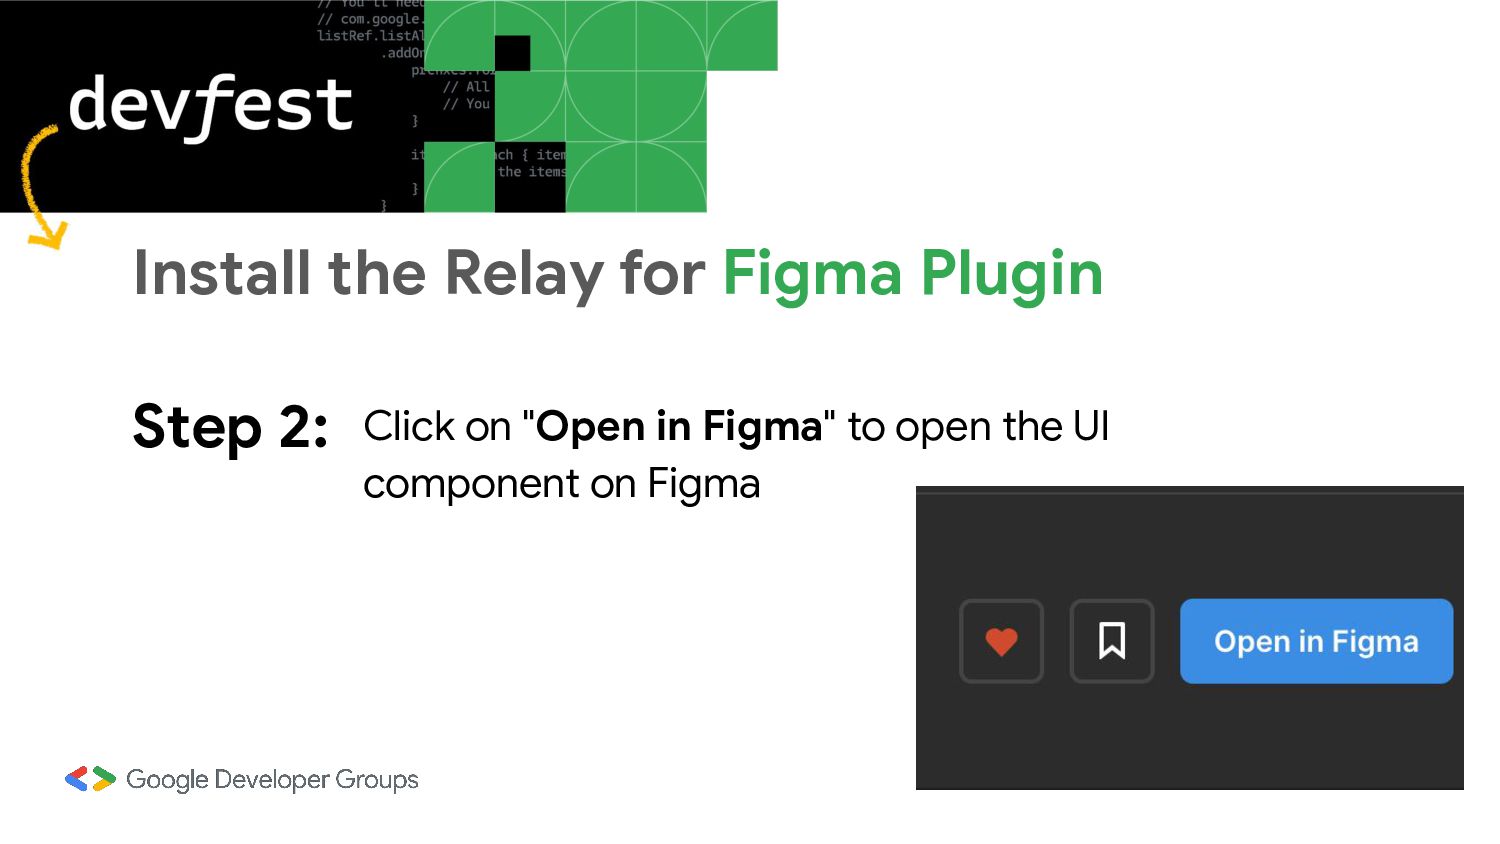
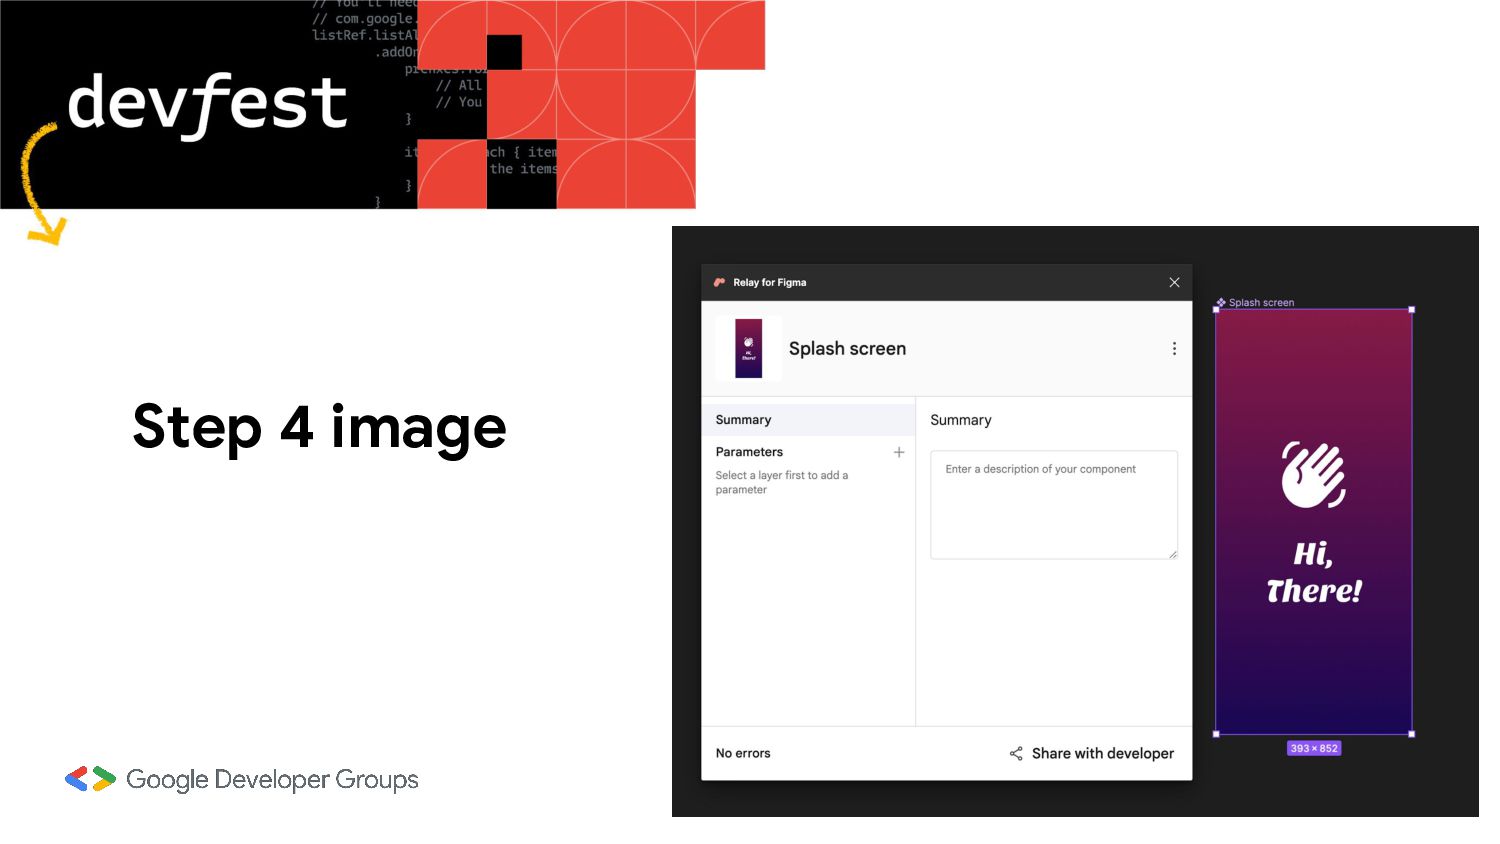
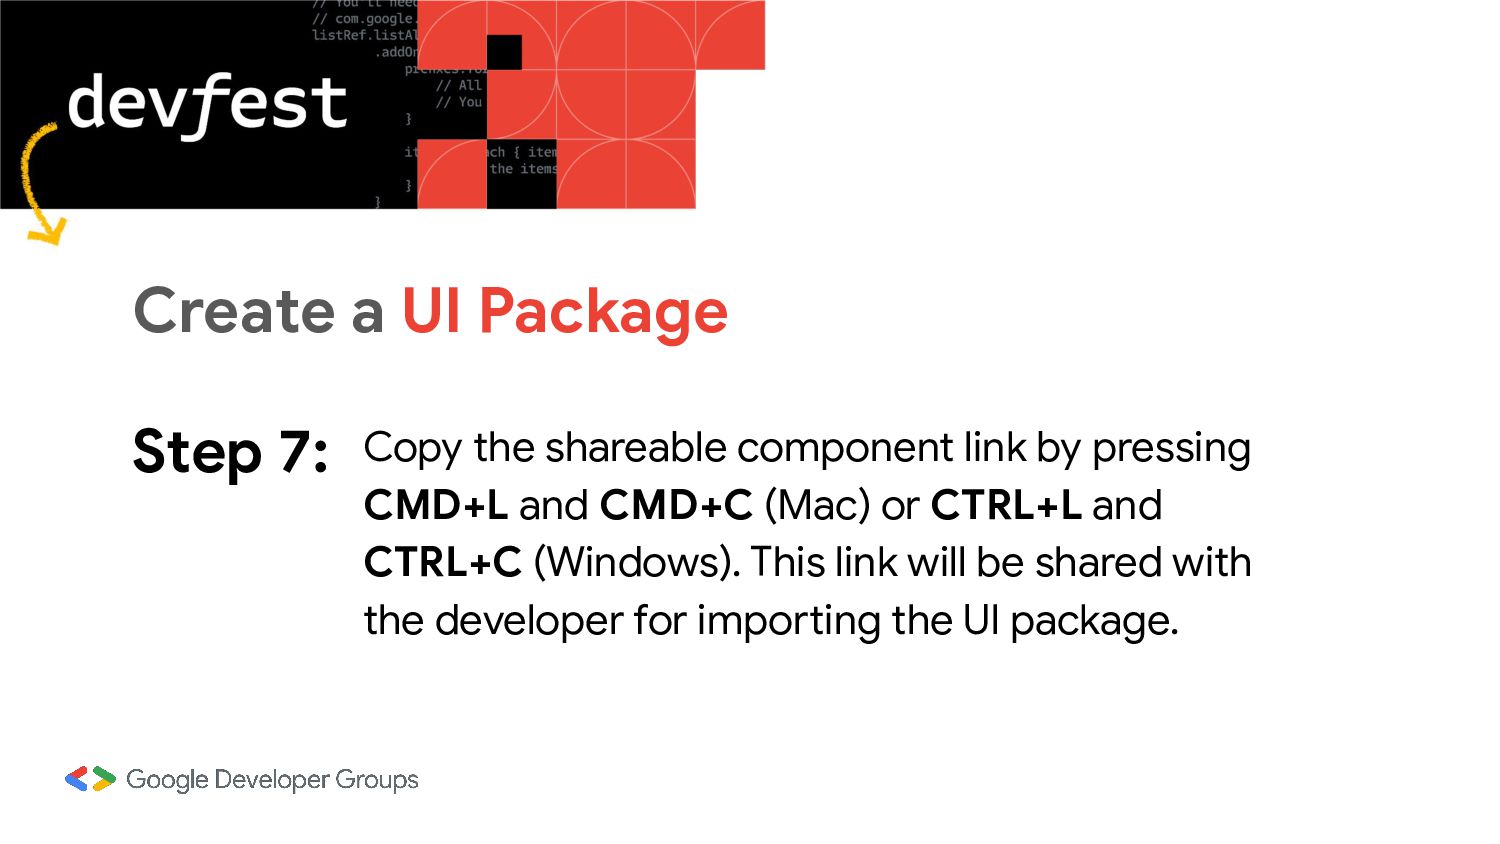
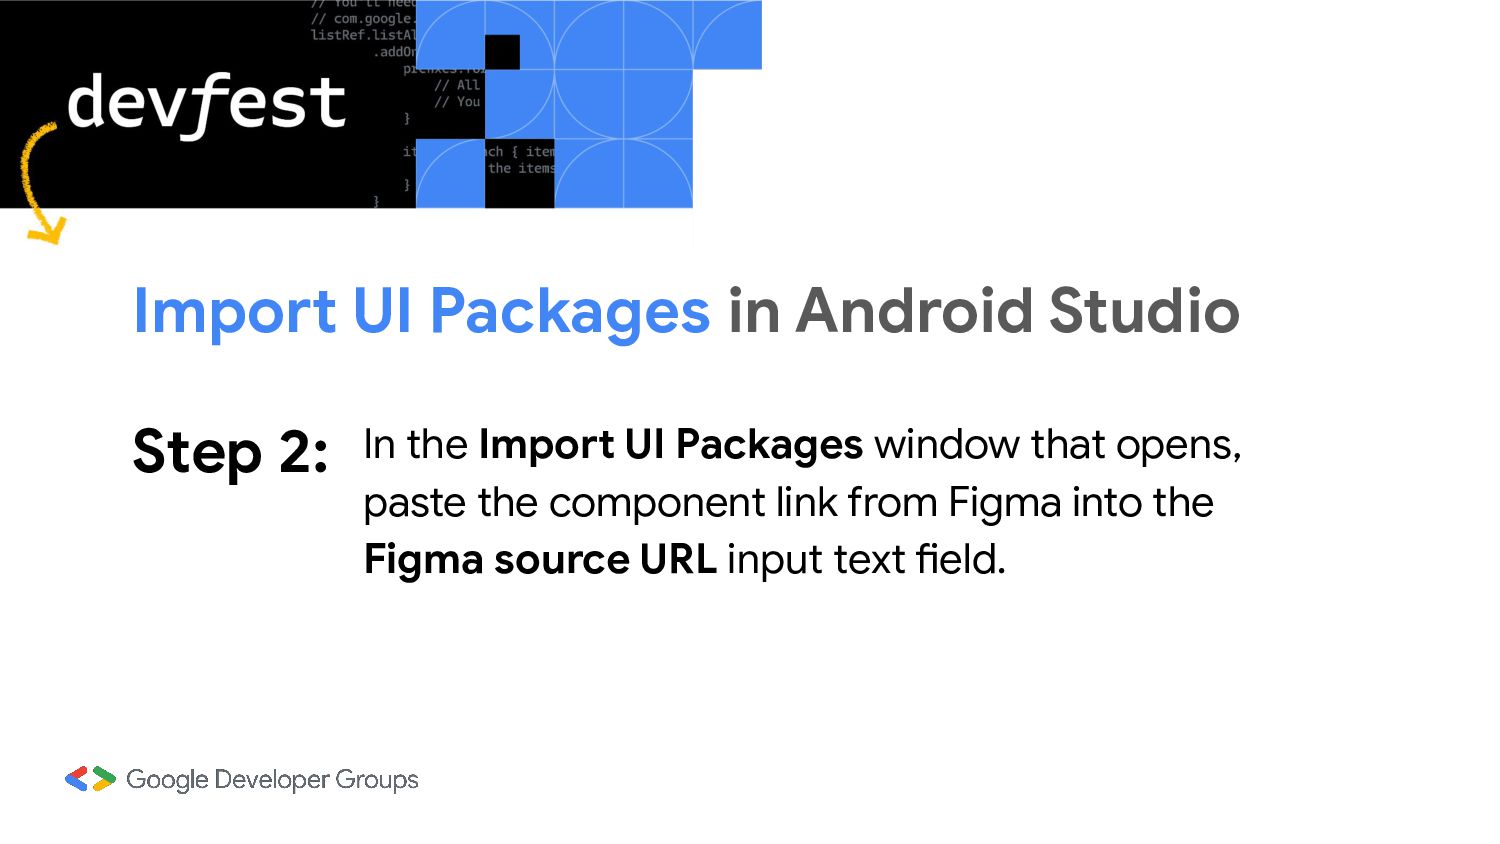
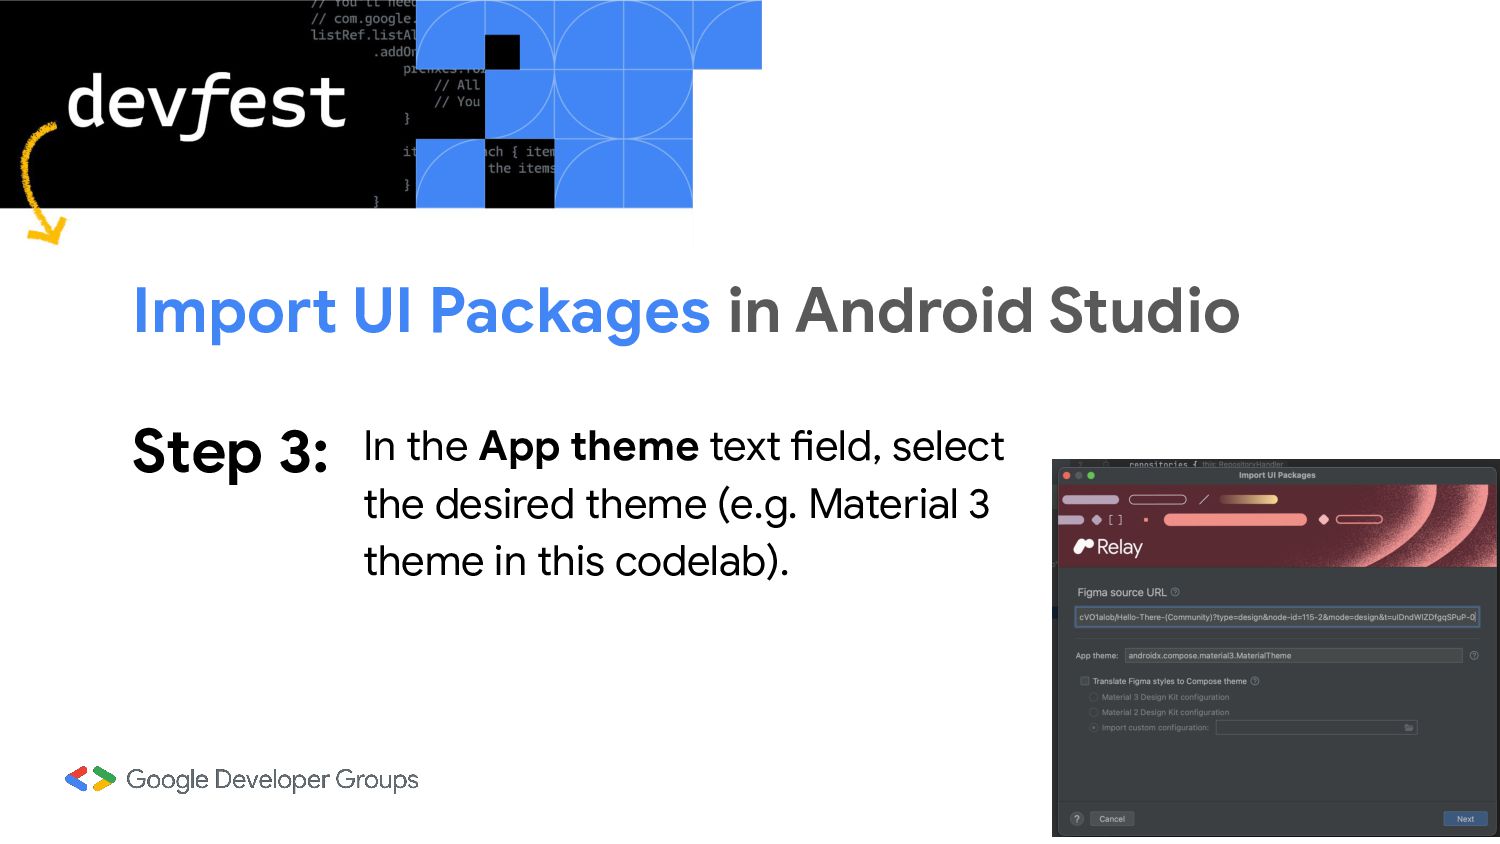
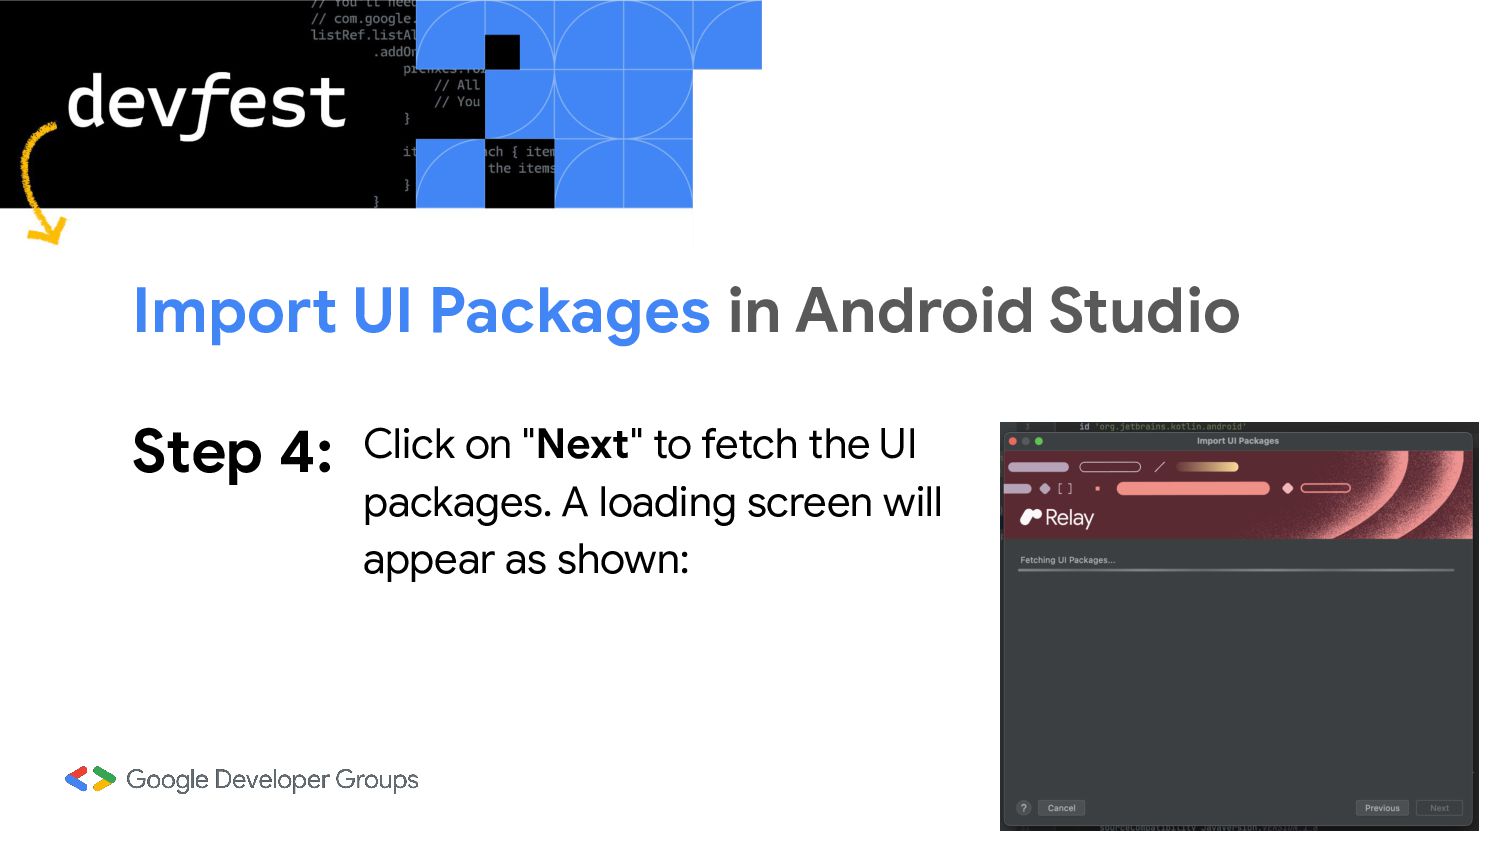
Relay is a new tool that enables seamless handoff for Android UI development. It enables you to effortlessly import Figma designs directly into your Jetpack Compose projects. Relay automates the creation of pixel-perfect Jetpack Compose code, liberating developers from manual layout coding and styling concerns. With Relay, you can focus on other critical aspects of application development.

Join my workshop to discover how to harness the power of Relay for importing Figma UI designs. Learn about its dynamic theming and adaptive layout support, and leave with the ability to transform your Figma designs into high-quality Jetpack Compose code. No prior experience with Relay or Compose is required.
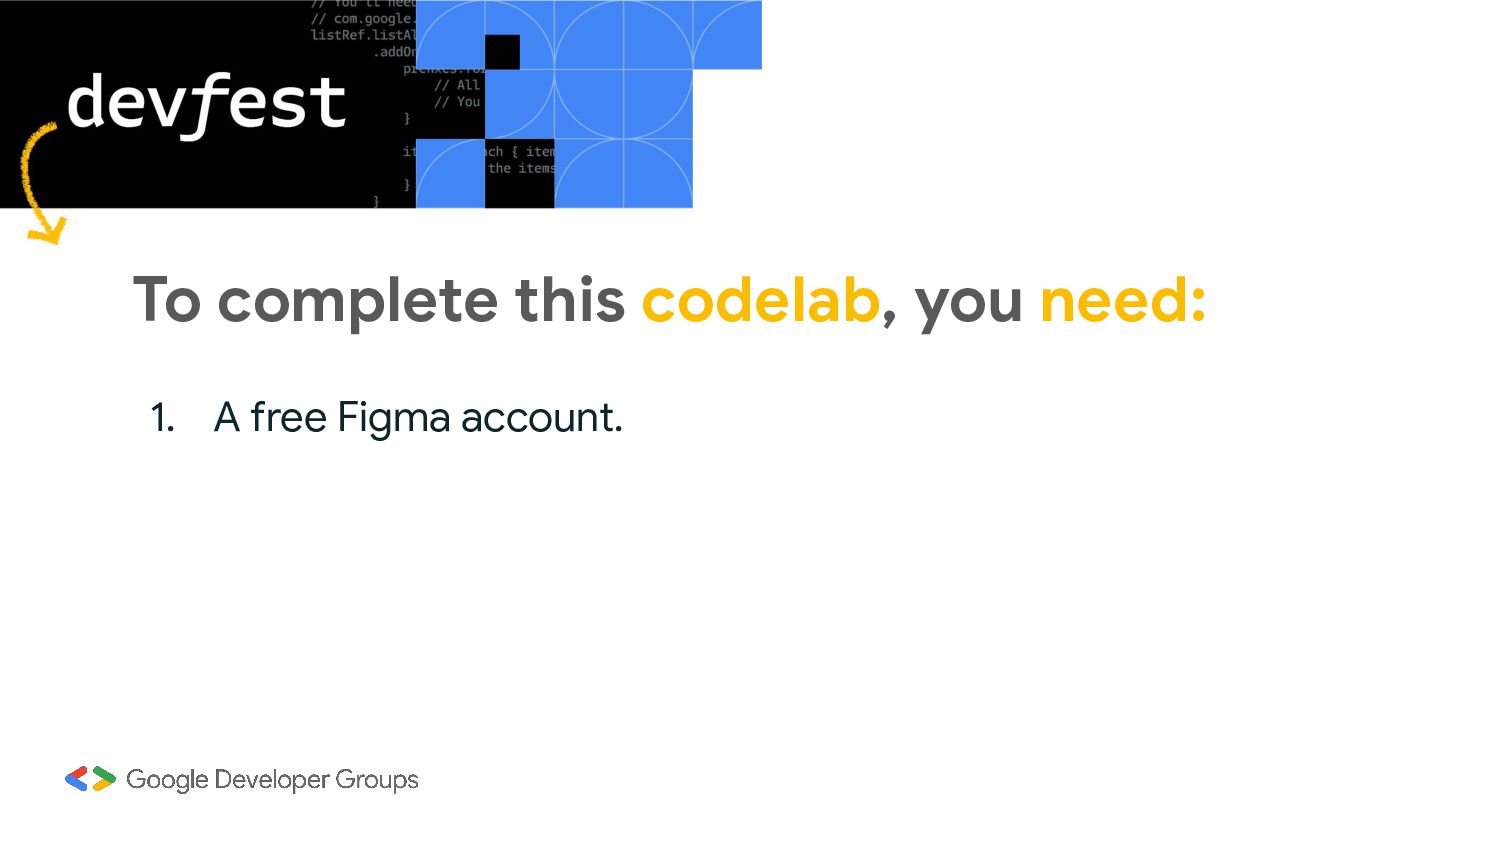
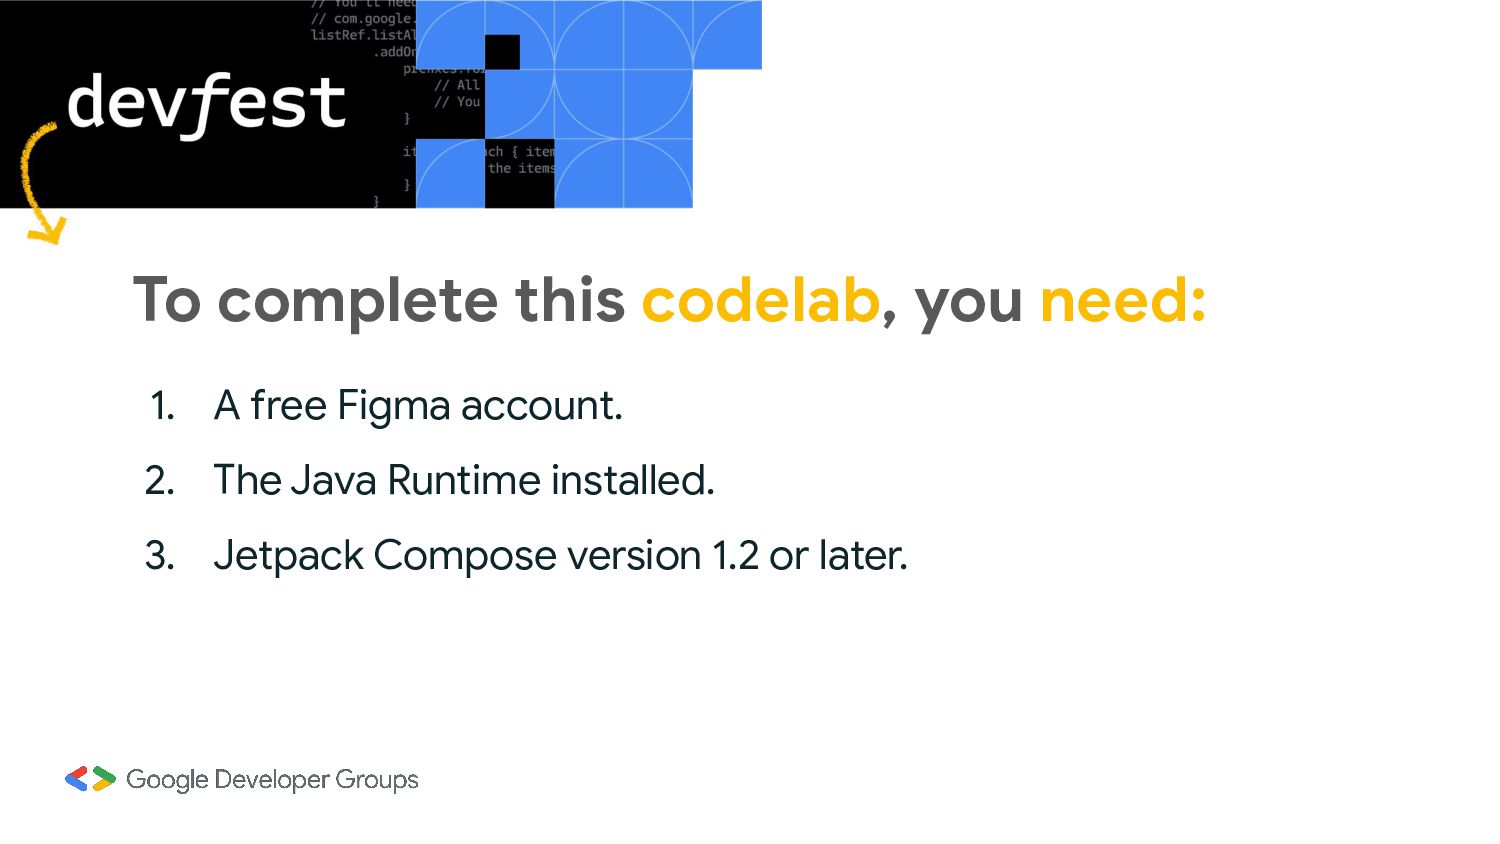
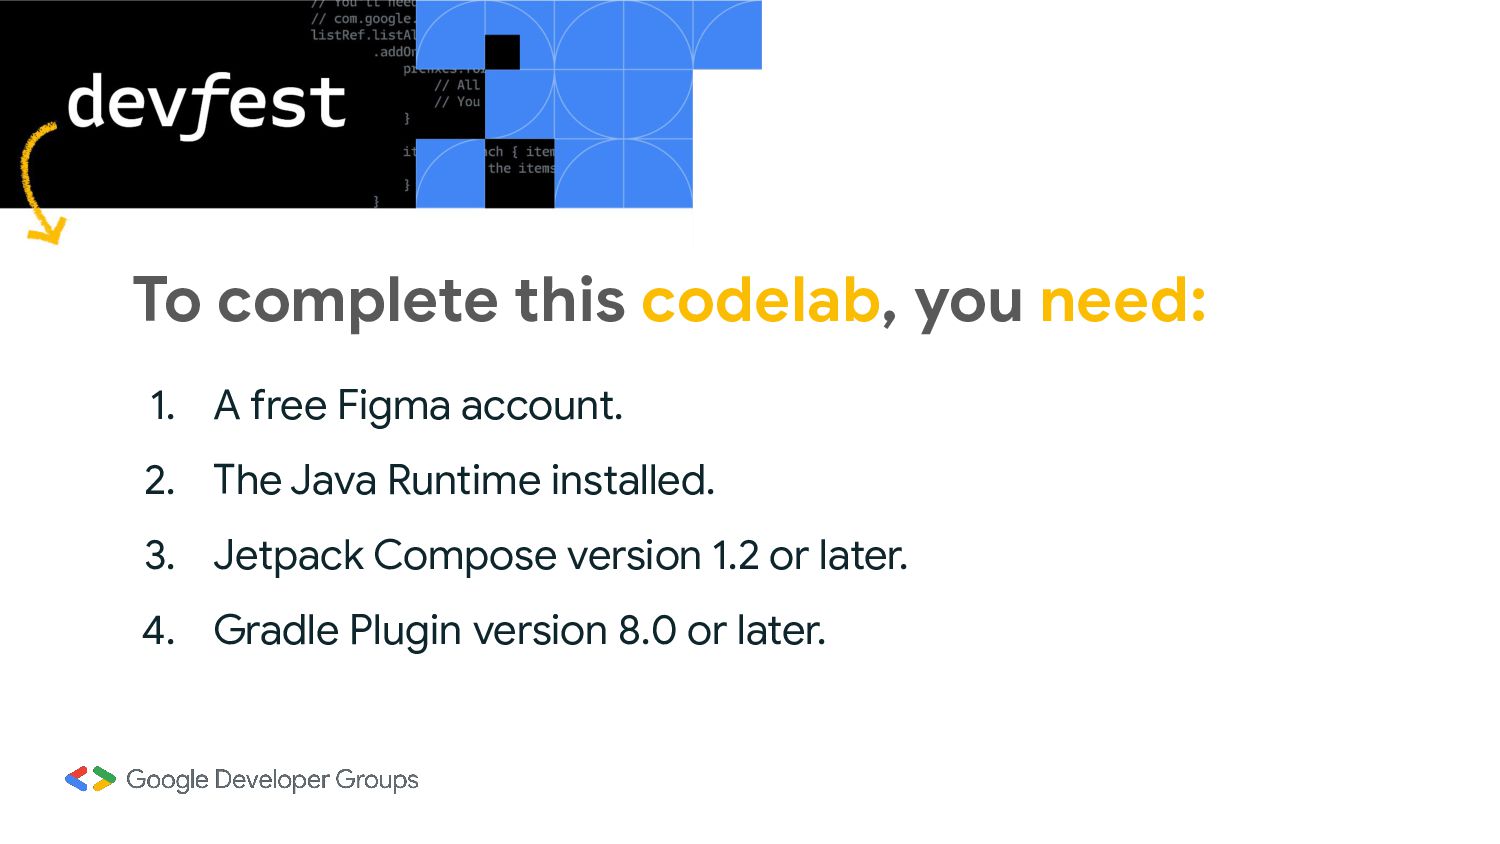
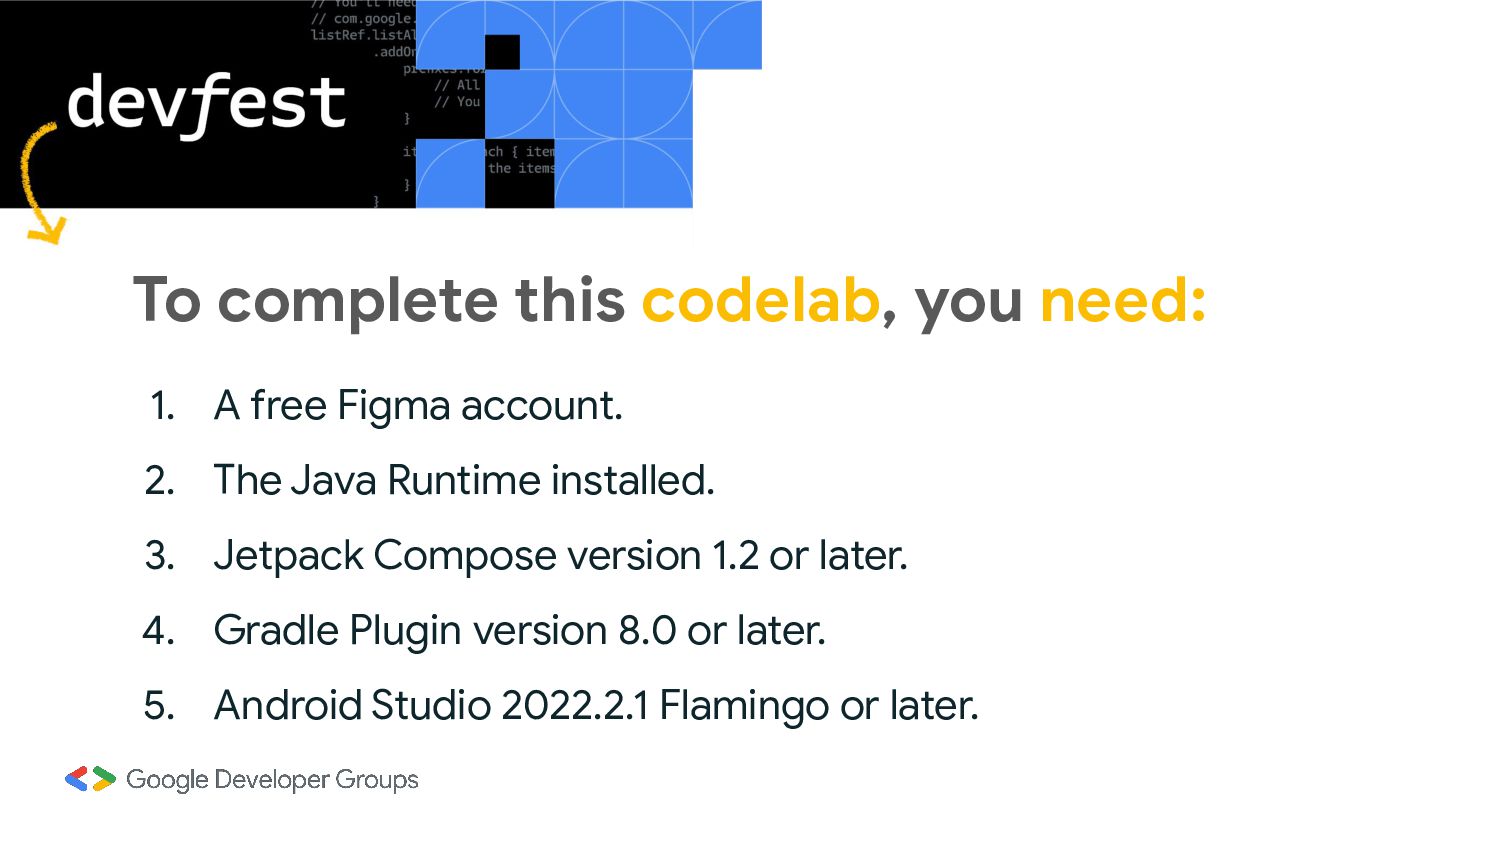
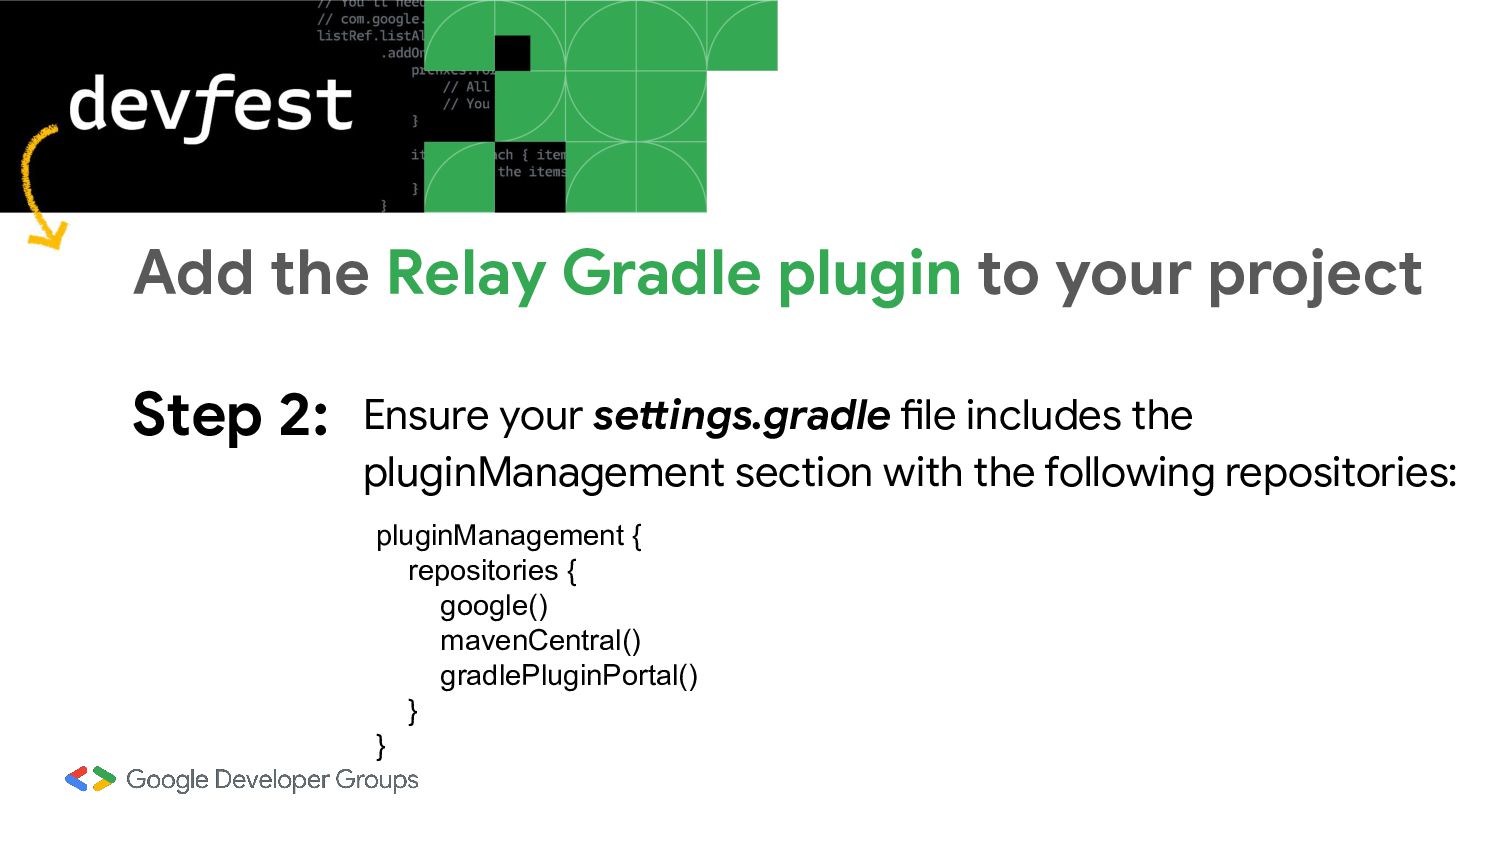
Prerequisites:
- Android Studio Electric Eel or later
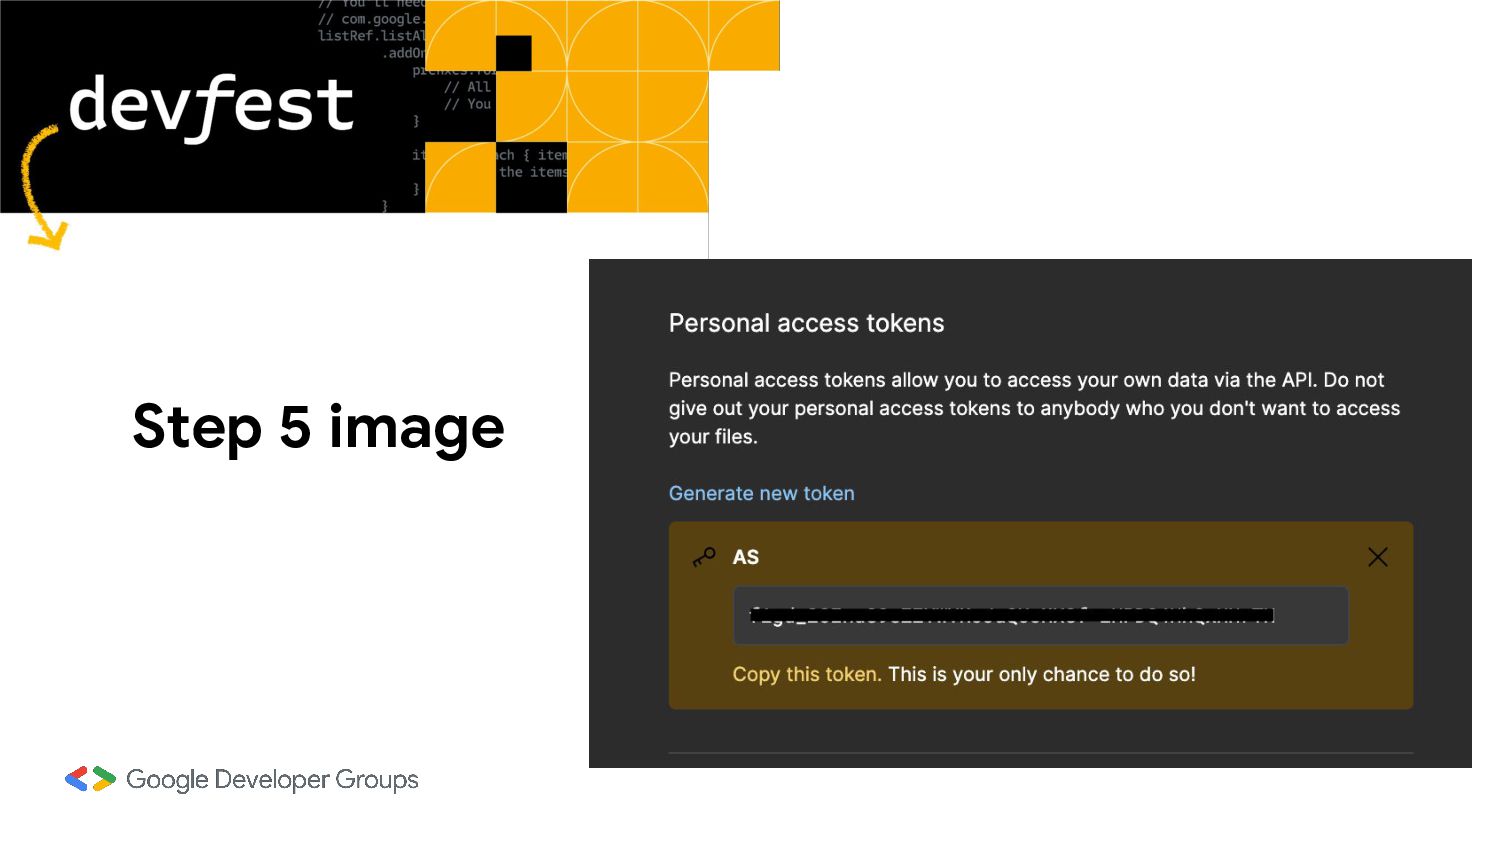
- A Free Figma account
- Basic knowledge of Android Development
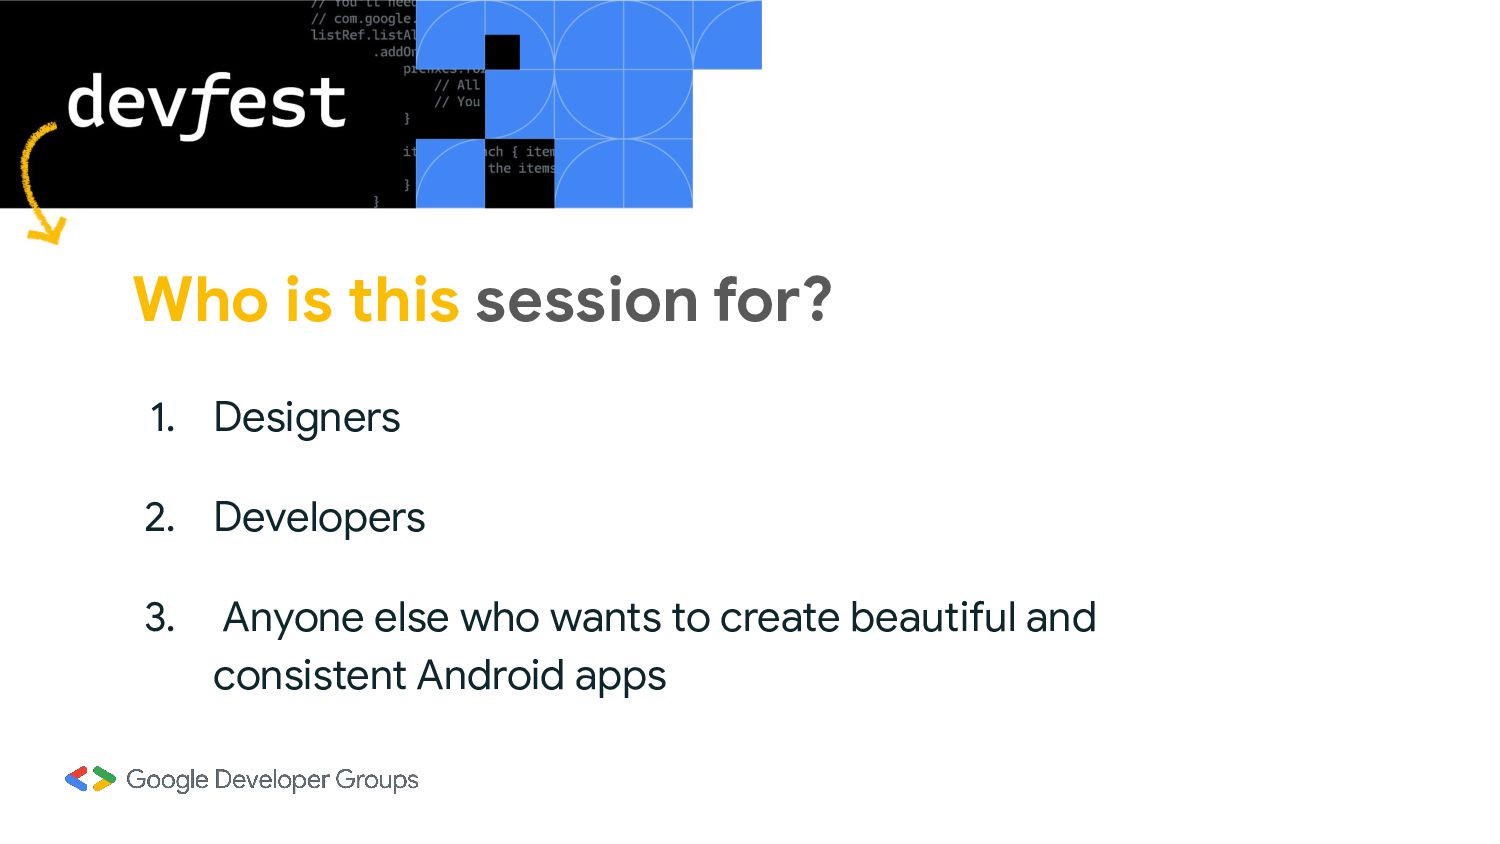
Audience:
- Android developers
- UI/UX designers

Love

December 30, 2023
Tweet

More Decks by Love

Other Decks in Technology

Transcript

  1. Who is this session for? 1. Designers 2. Developers 3.

    Anyone else who wants to create beautiful and consistent Android apps
  2. To complete this codelab, you need: 1. A free Figma

    account. 2. The Java Runtime installed.
  3. To complete this codelab, you need: 1. A free Figma

    account. 2. The Java Runtime installed. 3. Jetpack Compose version 1.2 or later.
  4. To complete this codelab, you need: 1. A free Figma

    account. 2. The Java Runtime installed. 3. Jetpack Compose version 1.2 or later. 4. Gradle Plugin version 8.0 or later.
  5. To complete this codelab, you need: 1. A free Figma

    account. 2. The Java Runtime installed. 3. Jetpack Compose version 1.2 or later. 4. Gradle Plugin version 8.0 or later. 5. Android Studio 2022.2.1 Flamingo or later.
  6. Learning Outcomes 1. Install the Relay plugin and perform a

    basic setup. 2. Import UI packages to an Android project in Android Studio. 3. Create and Use Content Parameters to dynamically change the content of a UI component.
  7. Designers use the Relay for Figma plugin to annotate and

    package UI components for developer use. How it Works?
  8. Developers use the Relay for Android Studio plugin to import

    UI Packages and generate pixel-perfect Jetpack Compose code. How it Works?
  9. With the Relay for Figma plugin, designers and developers can

    work together to add content parameters and interaction handlers. How it Works?
  10. Why use Relay? 1. Designers have more control over UI

    component quality. 2. Saves time and increases efficiency in UI development.
  11. Why use Relay? 1. Designers have more control over UI

    component quality. 2. Saves time and increases efficiency in UI development. 3. Easier updates and changes to the UI.
  12. Create a New Compose Project in Android Studio 1. Launch

    Android Studio. 2. Create a new Empty Activity project. If you are using an older version of Android Studio, create a Material3 Compose project.
  13. Step 1: In Android Studio, go to Settings -> Plugins.

    Install the Relay for Android Studio plugin
  14. Step 3: Click on “Install” and accept the Third-Party Plugins

    Privacy Note. Install the Relay for Android Studio plugin
  15. Step 4: After installation, click on the “Restart IDE” button

    and select “Restart". Install the Relay for Android Studio plugin
  16. Step 1: In the module-level build.gradle file, add the following

    code to the Plugins section: Add the Relay Gradle plugin to your project plugins { id("com.android.application") id("kotlin-android") id("com.google.relay") version "0.3.09" }
  17. Step 2: Ensure your settings.gradle file includes the pluginManagement section

    with the following repositories: Add the Relay Gradle plugin to your project pluginManagement { repositories { google() mavenCentral() gradlePluginPortal() } }
  18. Step 3: Sync your project to apply the changes. Add

    the Relay Gradle plugin to your project
  19. Step 1: Open this link: https://bit.ly/relay_ui to access the UI

    component on Figma. Scan the QR Code to access the figma file Install the Relay for Figma Plugin
  20. Step 2: Click on "Open in Figma" to open the

    UI component on Figma Install the Relay for Figma Plugin
  21. Step 3: In the top-left corner of the screen, click

    on the main menu (represented by the Figma icon) and go to Plugins -> Find more Plugins. Install the Relay for Figma Plugin
  22. Step 4: In the search bar, enter "Relay for Figma"

    and the Relay for Figma Plugin will appear. Install the Relay for Figma Plugin
  23. Step 2: Click on your profile icon at the top

    left corner of the screen. From the drop-down menu under your profile, click on "Settings". Generate Figma Personal Token
  24. Step 3: Scroll down to the "Personal access tokens" section

    and click on "Generate new token". Generate Figma Personal Token
  25. Step 4: In the window that appears, enter a token

    name in the text Field. In the "Expiration" Section, you can choose how long you want this token to last and manage its scope in the Scopes section. Generate Figma Personal Token
  26. Step 5: Click on "Generate token". On the dialogue box

    that appears, click on "Copy this token" to copy the generated token. Generate Figma Personal Token
  27. Step 1: In Android Studio, navigate to Tools -> Relay

    Settings. Add The Figma Access Token To Android Studio
  28. Step 2: In the dialogue that appears, paste the generated

    token into the "Figma Access Token" text field. Click on "OK". Add The Figma Access Token To Android Studio
  29. Step 1: Select the “splash screen” frame from the left

    sidebar, right-click, and select "Create component". Create a UI Package
  30. Step 2: If the Relay for Figma plugin is not

    running, open it by going to Menu -> Plugins -> Relay for Figma. Create a UI Package
  31. Step 3: Select the “Splash Screen Component” and Click on

    the “Get Started” -> "Create UI Package" button on the Relay for Figma Plugin window. Create a UI Package
  32. Step 4: In the window that appears, enter a description

    for the component in the summary input text field. Create a UI Package
  33. Step 5: Click on "Share with developer". In the Share

    with developer window that appears, under the “Save version history” section, enter a version name for the file and describe the changes made(similar to commits). Create a UI Package
  34. Step 7: Copy the shareable component link by pressing CMD+L

    and CMD+C (Mac) or CTRL+L and CTRL+C (Windows). This link will be shared with the developer for importing the UI package. Create a UI Package
  35. Step 1: In your project on Android Studio, go to

    File -> New -> Import UI Packages. Import UI Packages in Android Studio
  36. Step 1: In your project on Android Studio, go to

    File -> New -> Import UI Packages. Import UI Packages in Android Studio
  37. Step 2: In the Import UI Packages window that opens,

    paste the component link from Figma into the Figma source URL input text field. Import UI Packages in Android Studio
  38. Step 3: In the App theme text field, select the

    desired theme (e.g. Material 3 theme in this codelab). Import UI Packages in Android Studio
  39. Step 4: Click on "Next" to fetch the UI packages.

    A loading screen will appear as shown: Import UI Packages in Android Studio
  40. Step 5: Once the fetching is complete and the UI

    packages are fetched, make sure all packages are selected on the left panel. Click on "Create" to import the packages into your Project. Import UI Packages in Android Studio
  41. Step 6: In the project view, You will see the

    ui-packages folder, inside the app/main folder. This contains the imported Figma packages and their JSON format API. Import UI Packages in Android Studio If you do not see the ui-packages folder, right-click on the app folder and select "Reload from Disk".
  42. Step 1: On your Android Studio toolbar, click on "Make

    project" . This will generate the composable function for the UI package and add it to the project folder. Generate The Compose Functions
  43. Step 2: After a successful build, in the Android view

    of your project, you can see the generated composable function SplashScreen.kt in the generated java folder. Generate The Compose Functions
  44. Step 1: In the MainActivity.kt, inside the setContent{}, replace the

    function call to Greeting("Android") with SplashScreen() Use The Generated Compose Function
  45. Step 2: Replace the function call to Greeting("Android") with SplashScreen()

    in the DefaultPreview() Composable function in the MainActivity.kt class. Use The Generated Compose Function
  46. Update UI to Use Content Parameters You will create a

    content parameter for your name which will replace the static string: “There” in the UI.
  47. Step 1: If the Relay for Figma plugin is not

    running, open it by going to Menu -> Plugins -> Relay for Figma. Add a Content Parameter to Figma UI
  48. Step 2: Select the Splash screen component and CMD +

    Click (Mac) or CTRL + Click (Windows) on the text: “There” to select the "name" layer. You can also select the name layer by clicking on "name" in the left sidebar. Add a Content Parameter to Figma UI
  49. Step 3: On the Relay for Figma window, click the

    “+” icon next to the Parameters section to add a parameter and select “text-content” as the parameter type. Add a Content Parameter to Figma UI
  50. Step 4: Enter the name of the content parameter into

    the Name input text field. This represents the name of the parameter in the generated composable function. Add a Content Parameter to Figma UI
  51. Step 5: Enter a description that will generate a comment

    in your composable function to describe the parameter. Add a Content Parameter to Figma UI
  52. Step 6: Click on "Share with developer". In the Save

    version history section, enter a version name for the file and describe the changes made. Click on "Save". Add a Content Parameter to Figma UI
  53. Step 1: In the ui-packages folder, select the imported Figma

    package you want to update (splash_screen folder). Update UI component in Android Studio
  54. Step 2: Right-click on the splash_screen folder and click on

    "Update UI Package". Update UI component in Android Studio
  55. Step 3: After a successful download and import, click on

    “Make project” to rebuild your project and update the generated composable functions. Update UI component in Android Studio
  56. Step 4: In the MainActivity, update the onCreate() and composables

    Preview where you called the SplashScreen() function by passing an argument for the parameter name. Update UI component in Android Studio