Upgrade to Pro — share decks privately, control downloads, hide ads and more …

Learn to code: Lesson 1

Avatar for Kevin Kevin
October 30, 2013

Learn to code: Lesson 1

Bringing Dublin based HubSpotters through the process of making websites!

Avatar for Kevin

Kevin

October 30, 2013
Tweet

More Decks by Kevin

Other Decks in Programming

Transcript

  1. 1  How does the web work? 2  What is HTML?

    3  What tools do we need? 4  Lets build a sexy page!
  2. Client/Server “The cloud” is really just a term for how

    client computers talk to servers (and vice versa).
  3. Key things to note 1  Client/Server architecture was developed by

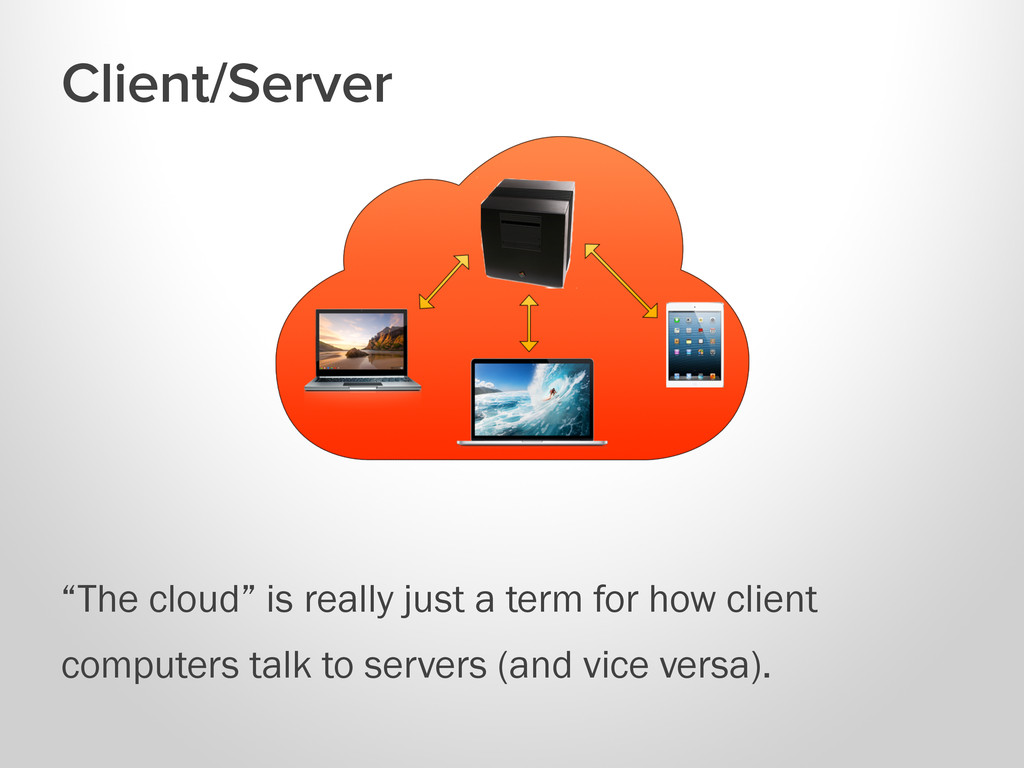
    Xerox PARC in the 70s. 2  It’s used for email, websites, networked devices (basically everything these days). 3  All devices have an address! 4  Web pages are linked with hyperlinks.
  4. HTML powers the web! 1  HTML 5 is the newest

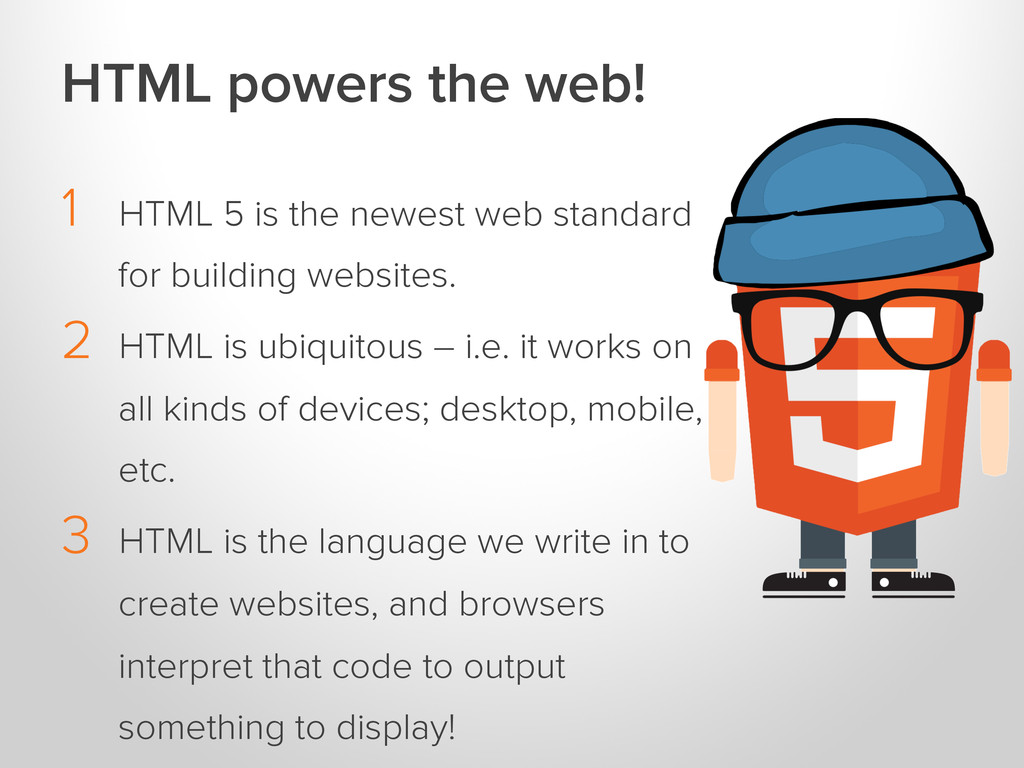
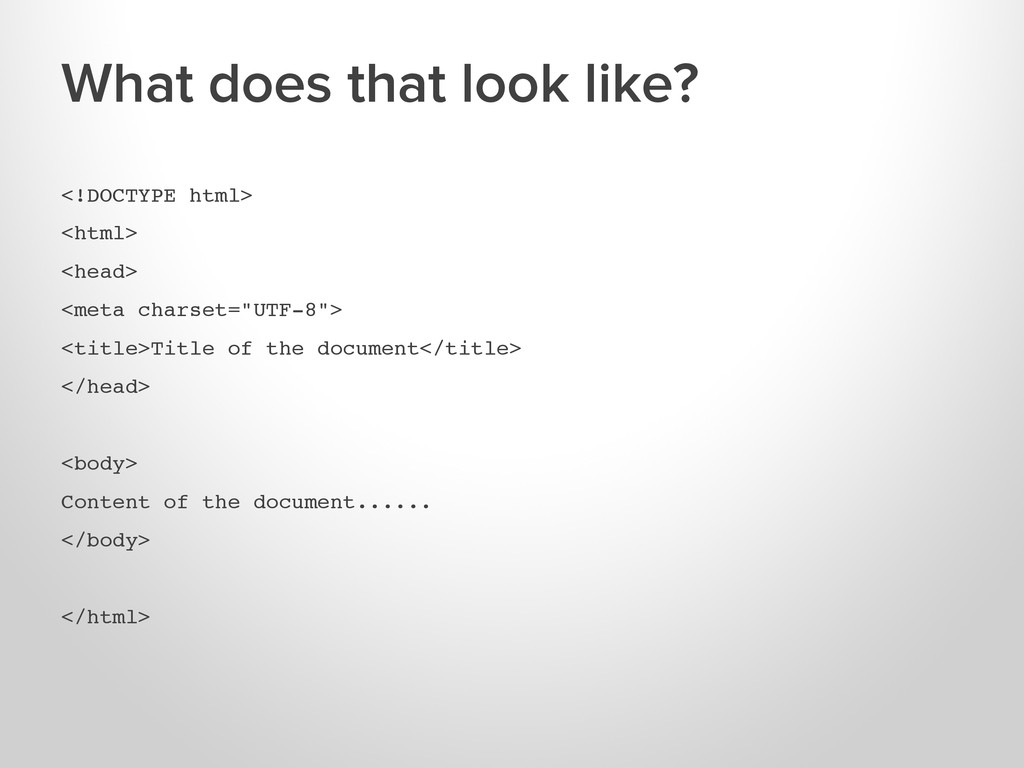
    web standard for building websites. 2  HTML is ubiquitous – i.e. it works on all kinds of devices; desktop, mobile, etc. 3  HTML is the language we write in to create websites, and browsers interpret that code to output something to display!
  5. What does that look like? <!DOCTYPE html>! <html>! <head>! <meta

    charset="UTF-8">! <title>Title of the document</title>! </head>! ! <body>! Content of the document......! </body>! ! </html>!
  6. <h1>This is a title</h1>! <p>Bacon ipsum dolor sit amet doner

    corned beef ea, kevin nostrud enim bresaola ut ut. Velit consectetur pig commodo anim. Magna ground round hamburger culpa. Ham hock duis nulla, magna beef voluptate tongue proident tempor jerky. Ground round kielbasa in ribeye adipisicing brisket tongue esse exercitation biltong.</p>! <ul>! !<li>This</li>! <li>is</li>! <li>a</li>! <li>list</li>! </ul>!
  7. Basic inputs •  <input type=“text”> •  <input type=“submit”> •  <input

    type=“radio”> •  <input type=“checkbox”> •  <input type=“file”> •  <input type=“password”>
  8. Go get tools! •  A computer •  A text editor

    that can parse code: http://www.sublimetext.com/2 •  A browser: http://chrome.google.com (anyone using internet explorer is fired)
  9. The basics: type this into your text editor <!DOCTYPE html>!

    <html>! !<head>! !</head>! !<body>! !</body>! </html>! ! Now save this as index.html and open it in Chrome!
  10. Add a title <!DOCTYPE html>! <html>! !<head>! ! !<title>This is

    my page</title>! !</head>! !<body>! !</body>! </html>
  11. Tell us about yourself <!DOCTYPE html>! <html>! !<head>! ! !<title>This

    is my page</title>! !</head>! !<body>! ! !<h1>Your Name</h1>! ! !<h2>About me</h2>! ! !<p>Some waffle about me!</p>! !</body>! </html>
  12. Show us a pic of yourself! <!DOCTYPE html>! <html>! !<head>!

    ! !<title>This is my page</title>! !</head>! !<body>! ! !<h1>Your Name</h1>! ! !<h2>About me</h2>! ! !<p>Some waffle about me!</p>! ! !<p>I look like this: <br>! ! !<img src=“image.jpg” alt=“Me” /></p>! !</body>! </html>
  13. Yeah… there’s homework •  Create another page and create some

    new content in there. •  Link index.html to the new page! •  Play with your code to change some of the parameters that we set today.
  14. Extra resources •  CodeSchool.com – Dharmesh said we can expense

    it! •  CodeAcademy.com •  W3Schools.com – they regulate this stuff! •  https://github.com/projectkevin/HubSpot-Learn-HTML- Lesson-1- The code from today’s lesson