Upgrade to Pro — share decks privately, control downloads, hide ads and more …

Poke Your Own Mongo

Poke Your Own Mongo

360iDev Min presentation on creating a basic augmented reality app with SpriteKit using iOS 10 and Swift 3.

Sarah E. Olson

October 28, 2016
Tweet

More Decks by Sarah E. Olson

Other Decks in Technology

Transcript

  1. POKE YOUR OWN MONGO
    Augment your reality with SpriteKit

    View Slide

  2. SARAH E.
    OLSON
    iOS Engineer at Trello
    Director of Women Who Code Twin Cities
    Twitter: @saraheolson

    View Slide

  3. GITHUB.COM/SARAHEOLSON/
    360IDEVMIN-POKEMONGO

    View Slide

  4. WHY AUGMENTED REALITY? AM I A GAMER?

    View Slide

  5. WHAT IS AUGMENTED REALITY (AR)?
    Augmented reality (AR) is a 
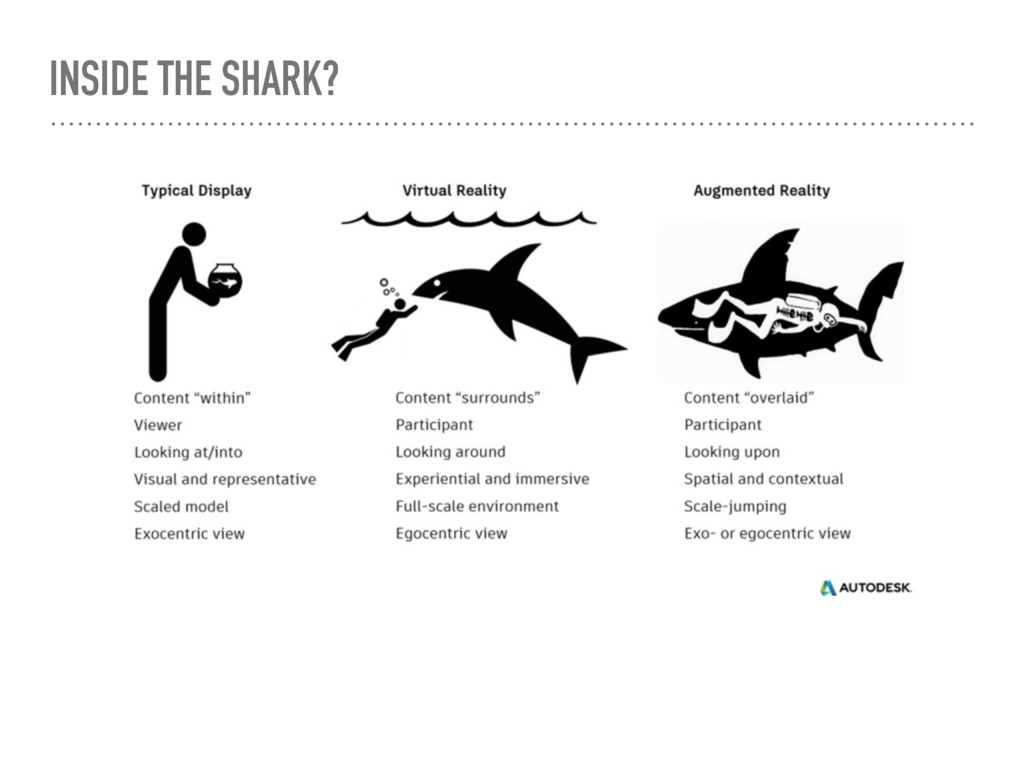
live direct or indirect view of a
    physical, real-world environment whose elements are
    augmented (or supplemented) by computer-generated sensory
    input such as sound, video, graphics or GPS data.
    https://en.wikipedia.org/wiki/Augmented_reality

    View Slide

  6. WHAT IS VIRTUAL REALITY (VR)?
    Virtual reality (VR) typically refers to computer technologies
    that use software to generate realistic images, sounds and other
    sensations that replicate a real environment (or create an
    imaginary setting), and simulate a user's physical presence in
    this environment, by enabling the user to interact with this
    space and any objects depicted therein using specialized display
    screens or projectors and other devices.
    https://en.wikipedia.org/wiki/Virtual_reality

    View Slide

  7. INSIDE THE SHARK?

    View Slide

  8. HOT MARKET

    View Slide

  9. HOLOLENS

    View Slide

  10. WAYFAIR

    View Slide

  11. POKEMON GO

    View Slide

  12. BUILDING OUR OWN APP
    Let’s start simple using built-in frameworks.
    ➤ SpriteKit — to create our 2D game.
    ➤ Camera — to augment our reality
    ➤ No location-based functionality.

    View Slide

  13. POKE MONGO (FINISHED PRODUCT)

    View Slide

  14. CREATE NEW GAME

    View Slide

  15. STORYBOARD

    View Slide

  16. VIEW CONTROLLER

    View Slide

  17. SCENE

    View Slide

  18. RUNNING THE DEFAULT TEMPLATE

    View Slide

  19. SKSCENE AND SKSPRITENODE
    (Monster) (Ball)

    View Slide

  20. CREATING OUR MONSTER
    let monster = SKSpriteNode(imageNamed: "PurpleMonster1")
    monster.position = CGPoint(x: 0, y: frame.height/2)
    monster.zPosition = 2
    addChild(monster)

    View Slide

  21. ANCHOR POINTS

    View Slide

  22. MOVING OUR MONSTER
    // Moves the monster to the right
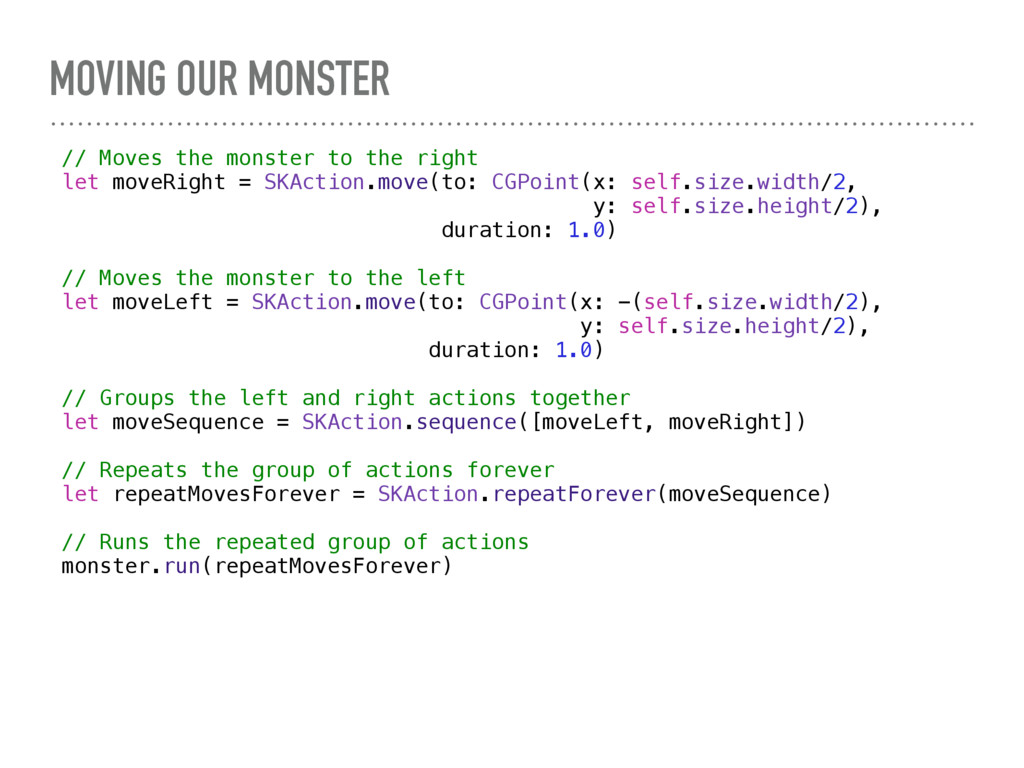
    let moveRight = SKAction.move(to: CGPoint(x: self.size.width/2,
    y: self.size.height/2),
    duration: 1.0)
    // Moves the monster to the left
    let moveLeft = SKAction.move(to: CGPoint(x: -(self.size.width/2),
    y: self.size.height/2),
    duration: 1.0)
    // Groups the left and right actions together
    let moveSequence = SKAction.sequence([moveLeft, moveRight])
    // Repeats the group of actions forever
    let repeatMovesForever = SKAction.repeatForever(moveSequence)
    // Runs the repeated group of actions
    monster.run(repeatMovesForever)

    View Slide

  23. IT MOVES!

    View Slide

  24. ANIMATING NODES
    // Create the monster from an atlas instead of an image
    let textureAtlas = SKTextureAtlas(named: “PurpleMonster.atlas")
    let spriteArray = [textureAtlas.textureNamed("PurpleMonster1"),
    textureAtlas.textureNamed("PurpleMonster2")]
    monster = SKSpriteNode(texture: spriteArray[0])
    // Animate our monster
    let animateAction = SKAction.animate(with: spriteArray,
    timePerFrame: 0.2)
    let repeatAnimation = SKAction.repeatForever(animateAction)
    monster.run(repeatAnimation)

    View Slide

  25. IT ANIMATES!

    View Slide

  26. CREATING OUR BALL
    // Create the ball node
    let ball 
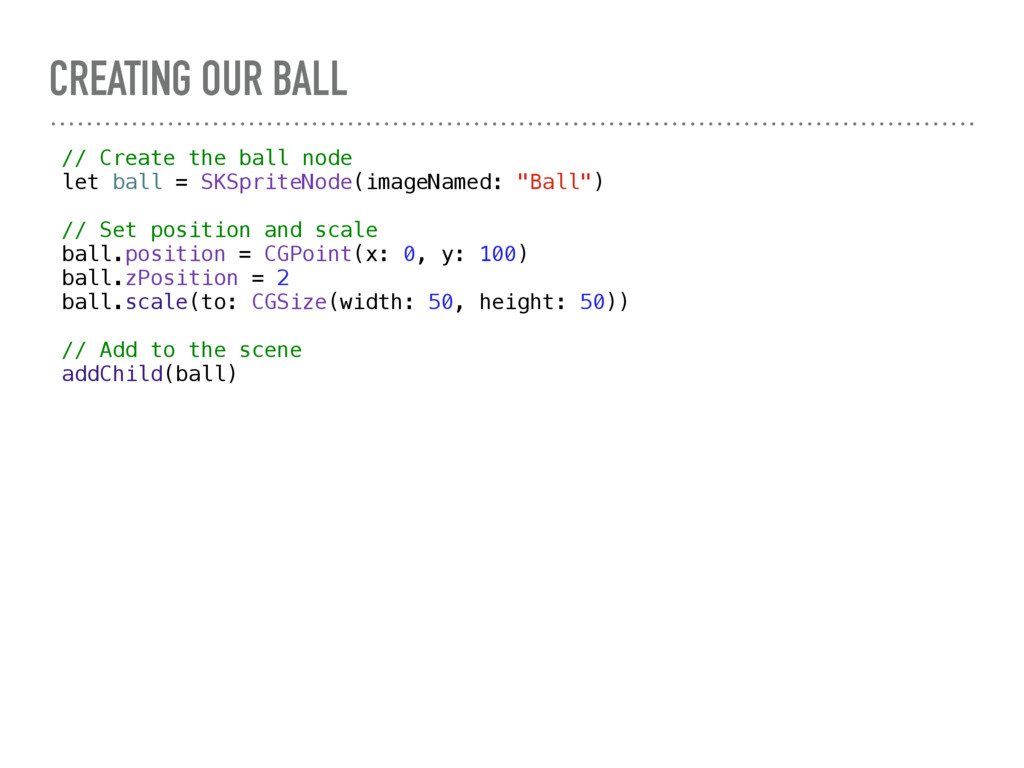
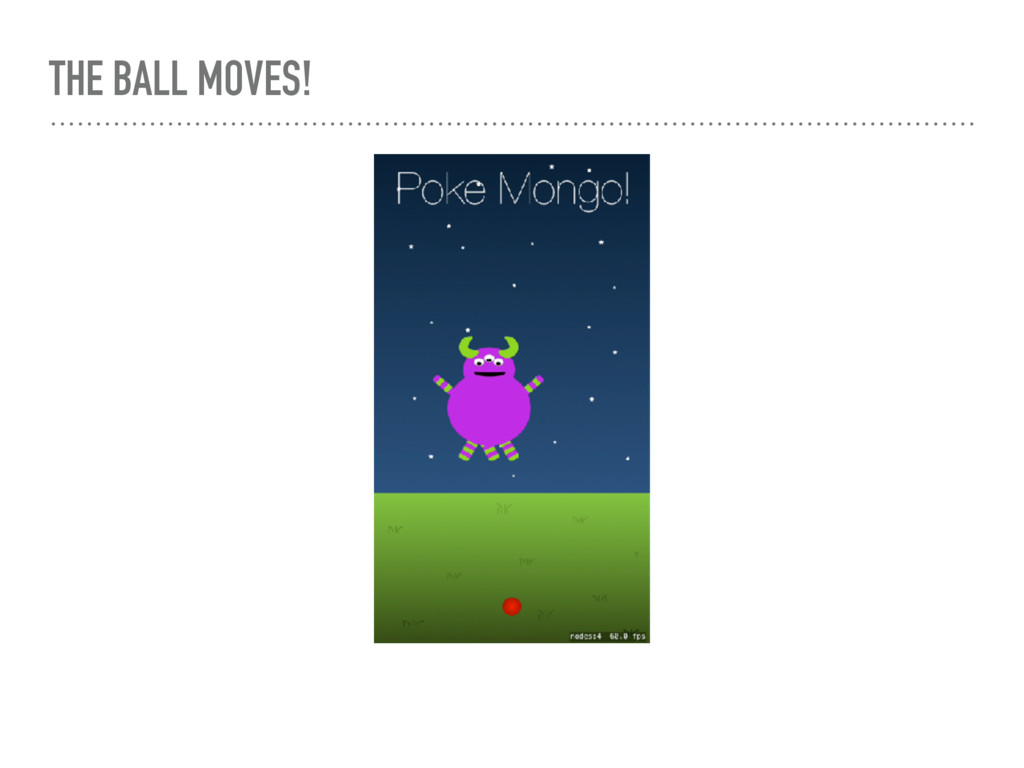
= SKSpriteNode(imageNamed: "Ball")
    // Set position and scale
    ball.position = CGPoint(x: 0, y: 100)
    ball.zPosition = 2
    ball.scale(to: CGSize(width: 50, height: 50))
    // Add to the scene
    addChild(ball)

    View Slide

  27. WE HAVE A BALL!

    View Slide

  28. MOVING OUR BALL
    // Defines where user touched
    var startTouchLocation: CGPoint = CGPoint.zero
    var endTouchLocation: CGPoint = CGPoint.zero
    /**
    * Called when a touch event is initiated.
    */
    override func touchesBegan(_ touches: Set, with event: UIEvent?) {
    // Record the beginning of the touch event
    startTouchLocation = touches.first!.location(in: self)
    }
    /**
    * Called when a touch event moves.
    */
    override func touchesMoved(_ touches: Set, with event: UIEvent?) {
    // Move the ball along with the user's touch gesture
    let currentTouchLocation = touches.first!.location(in: self)
    if let ball = ball {
    ball.position = currentTouchLocation
    }
    }
    /**
    * Called when a touch event is ended.
    */
    override func touchesEnded(_ touches: Set, with event: UIEvent?) {
    // Record the end of the touch event
    endTouchLocation = touches.first!.location(in: self)
    }

    View Slide

  29. THE BALL MOVES!

    View Slide

  30. PHYSICS
    // Add physics to our ball when created
    ball.physicsBody = SKPhysicsBody(circleOfRadius: ball.frame.size.width/2)
    ball.physicsBody?.isDynamic = true
    ball.physicsBody?.affectedByGravity = false
    ball.physicsBody?.allowsRotation = false
    ball.physicsBody?.mass = 50
    // Update touches ended to “throw” the ball
    override func touchesEnded(_ touches: Set, with event: UIEvent?) {

    // Continue the ball's movement along the same path as the touch gesture
    let factor: CGFloat = 50
    let vector = CGVector(dx: factor * (endTouchLocation.x - startTouchLocation.x),
    dy: factor * (endTouchLocation.y - startTouchLocation.y))
    ball?.physicsBody?.applyImpulse(vector)
    }

    View Slide

  31. WE CAN THROW!

    View Slide

  32. RESETTING THE BALL
    /**
    * Called before each frame is 
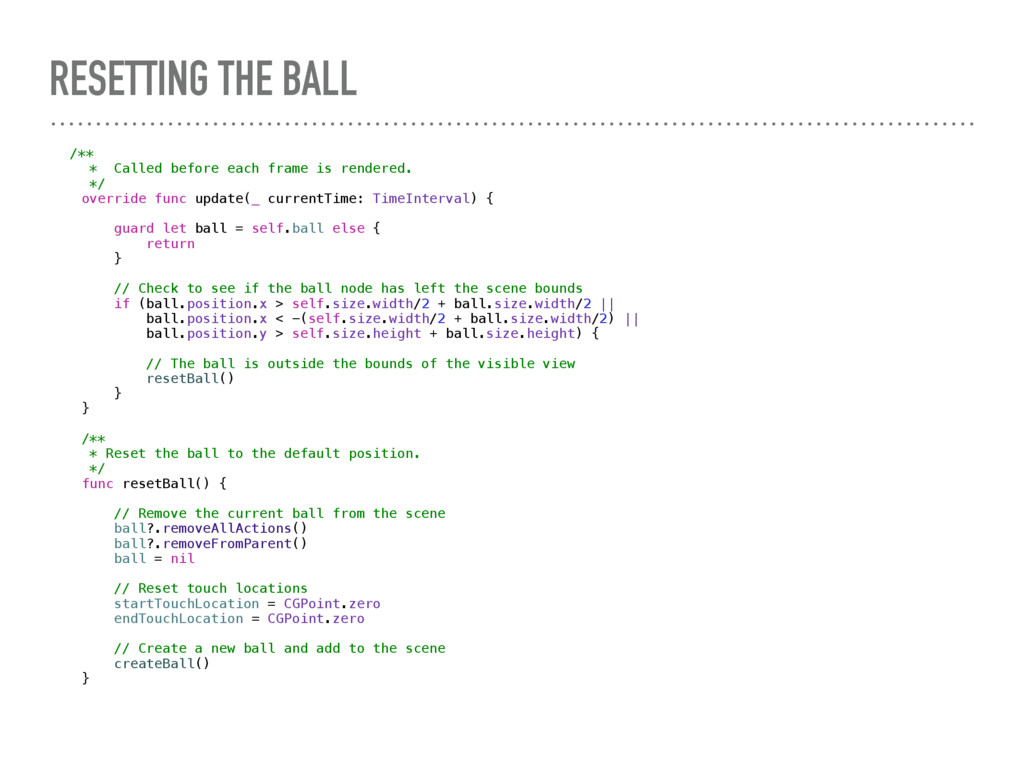
rendered.
    */
    override func update(_ currentTime: TimeInterval) {
    guard let ball = self.ball else {
    return
    }
    // Check to see if the ball node has left the scene bounds
    if (ball.position.x > self.size.width/2 + ball.size.width/2 ||
    ball.position.x < -(self.size.width/2 + ball.size.width/2) ||
    ball.position.y > self.size.height + ball.size.height) {
    // The ball is outside the bounds of the visible view
    resetBall()
    }
    }
    /**
    * Reset the ball to the default position.
    */
    func resetBall() {
    // Remove the current ball from the scene
    ball?.removeAllActions()
    ball?.removeFromParent()
    ball = nil
    // Reset touch locations
    startTouchLocation = CGPoint.zero
    endTouchLocation = CGPoint.zero
    // Create a new ball and add to the scene
    createBall()
    }

    View Slide

  33. NOW WE CAN KEEP THROWING!

    View Slide

  34. DETECTING COLLISIONS
    func checkCollisions() {
    guard let ball = self.ball, let monster = self.monster else {
    return
    }
    if ball.frame.insetBy(dx: 20, dy: 20).intersects(monster.frame) {
    monsterHit()
    }
    }
    func monsterHit() {
    guard let monster = self.monster else {
    return
    }
    // Remove monster from scene
    monster.removeAllActions()
    monster.removeFromParent()
    self.monster = nil
    }

    View Slide

  35. IT’S A HIT!

    View Slide

  36. RESETTING MONSTER
    // Create a wait action
    let waitAction = 
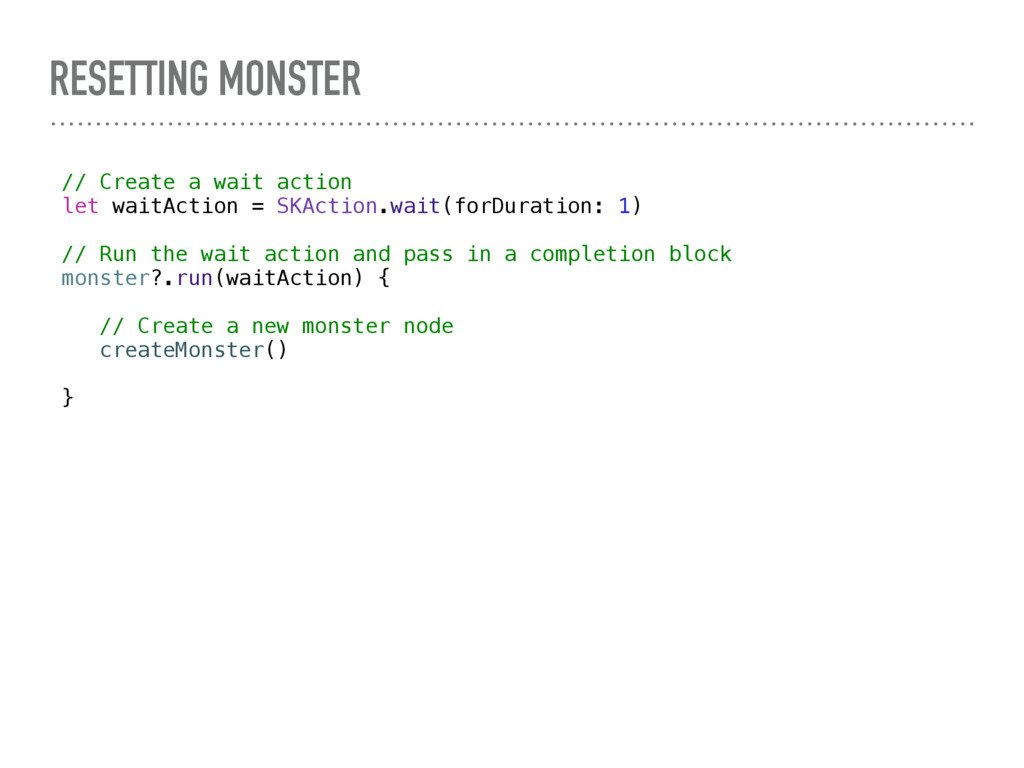
SKAction.wait(forDuration: 1)
    // Run the wait action and pass in a completion block
    monster?.run(waitAction) {
    // Create a new monster node
    createMonster()
    }

    View Slide

  37. HELLO, MONSTER!

    View Slide

  38. EXPLODING MONSTERS
    Create new Particle file:

    View Slide

  39. PARTICLE TEMPLATES

    View Slide

  40. PARTICLE SETTINGS
    Maximum: 100, Position Range: 10

    View Slide

  41. ADD SPARK ON COLLISION
    // Explode our monster
    let spark: SKEmitterNode = SKEmitterNode(fileNamed: "SparkParticle")!
    spark.position = monster.position
    spark.particleColor = UIColor.purple
    addChild(spark)

    View Slide

  42. IT EXPLODES!

    View Slide

  43. CAMERA VIEW

    View Slide

  44. LAYOUT UPDATES
    Views and UIButton @IBOutlet weak var cameraView: UIView!
    @IBOutlet weak var backgroundView: UIImageView!
    @IBOutlet weak var arModeButton: UIButton!

    View Slide

  45. ASK FOR PERMISSION
    // MARK: - Camera permissions
    func askForCameraPermissions() 
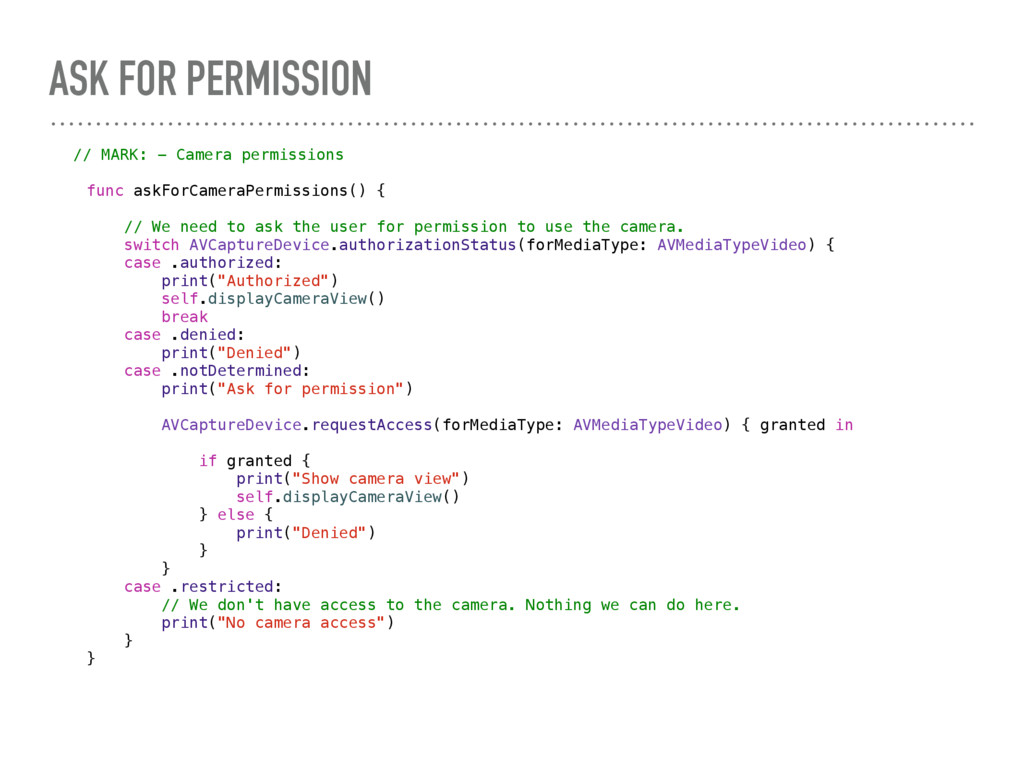
{
    // We need to ask the user for permission to use the camera.
    switch AVCaptureDevice.authorizationStatus(forMediaType: AVMediaTypeVideo) {
    case .authorized:
    print("Authorized")
    self.displayCameraView()
    break
    case .denied:
    print("Denied")
    case .notDetermined:
    print("Ask for permission")
    AVCaptureDevice.requestAccess(forMediaType: AVMediaTypeVideo) { granted in
    if granted {
    print("Show camera view")
    self.displayCameraView()
    } else {
    print("Denied")
    }
    }
    case .restricted:
    // We don't have access to the camera. Nothing we can do here.
    print("No camera access")
    }
    }

    View Slide

  46. CAMERA PERMISSIONS
    Don’t forget to update your plist!
    NSCameraUsageDescription
    Camera will be used to display live camera view
    background behind monsters (for Augmented Reality).
    string>

    View Slide

  47. CONFIGURE CAMERA CAPTURE
    import AVFoundation
    // True if camera has been configured
    var isCameraConfigured = false
    func configureCameraView() {
    // Configure AV Capture Session
    do {
    let videoCaptureDevice = AVCaptureDevice.defaultDevice(withMediaType: AVMediaTypeVideo)
    let videoInput: AVCaptureDeviceInput
    videoInput = try AVCaptureDeviceInput(device: videoCaptureDevice)
    if avCaptureSession.canAddInput(videoInput) {
    avCaptureSession.addInput(videoInput)
    } else {
    throw AVFoundationError.ConfigurationFailed
    }
    } catch {
    debugPrint("Something went wrong")
    debugPrint(error)
    return
    }
    // Set up our layer
    previewLayer.frame = cameraView.bounds
    if let videoPreviewView = cameraView {
    videoPreviewView.layer.addSublayer(previewLayer)
    }
    // Camera has been configured
    isCameraConfigured = true
    }

    View Slide

  48. DISPLAY CAMERA FEED
    func displayCameraView() {
    // Return if we're 
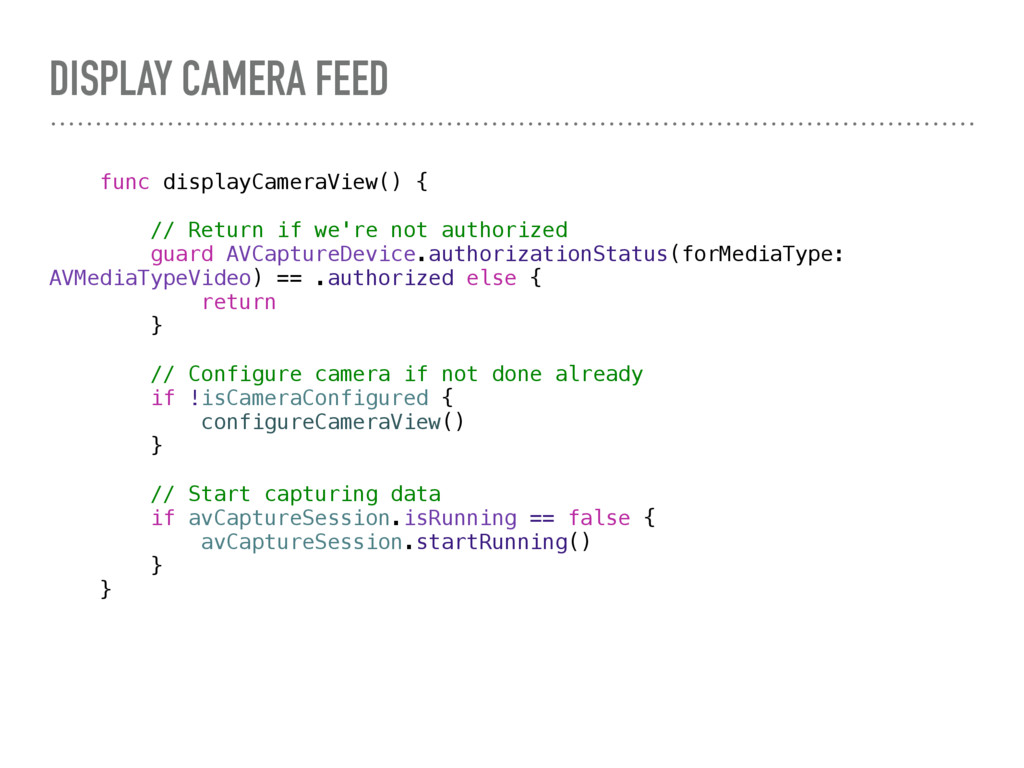
not authorized
    guard AVCaptureDevice.authorizationStatus(forMediaType:
    AVMediaTypeVideo) == .authorized else {
    return
    }
    // Configure camera if not done already
    if !isCameraConfigured {
    configureCameraView()
    }
    // Start capturing data
    if avCaptureSession.isRunning == false {
    avCaptureSession.startRunning()
    }
    }

    View Slide

  49. TOGGLE BETWEEN VIEWS
    // True if we're viewing in AR Mode
    var isARMode = false
    @IBAction func tappedARModeButton(_ sender: AnyObject) {
    isARMode = !isARMode
    if isARMode {
    // Ask for permission to use the camera
    askForCameraPermissions()
    arModeButton.setTitle("Image Mode", for: .normal)
    } else {
    arModeButton.setTitle("AR Mode", for: .normal)
    // Stop the camera session
    if avCaptureSession.isRunning == true {
    avCaptureSession.stopRunning()
    }
    }
    // Hide/display background and camera view
    self.backgroundView.isHidden = isARMode
    self.cameraView.isHidden = !isARMode
    }

    View Slide

  50. WE DID IT!

    View Slide

  51. RECAP
    ➤ Created an animated, moving monster
    ➤ Created a ball we can "throw"
    ➤ Monster explodes when hit
    ➤ Camera view for augmented reality

    View Slide

  52. Game Code: github.com/saraheolson/360iDevMin-PokeMongo
    Twitter: @saraheolson

    View Slide

  53. QUESTIONS?

    View Slide