Upgrade to Pro — share decks privately, control downloads, hide ads and more …

20200916_XRMTG_LT資料

 20200916_XRMTG_LT資料

Satoru Hayasaka

September 16, 2020
Tweet

More Decks by Satoru Hayasaka

Other Decks in Technology

Transcript

  1. <a-plane color="#6846A5" width="1" height="1" depth="1" position="0 0 0" rotation="0 0

    0"> ↓ <a-plane color="#6846A5" width="1" height="1" depth="1" position="0 0 0" rotation="-90 0 0"> <a-plane><a-image>の配置 ARマーカーに対して並行に表示したい →X軸に-90回転
  2. <a-plane color="#6846A5" width="1" height="1" depth="1" position="0 0 0" rotation=”-90 0

    0"> ↓ <a-plane color="#6846A5" width="1" height="1" depth="1" position="0 1 0" rotation="-90 0 0"> ↓ <a-plane color=“#6846A5” width=“1” height=“1” depth=“1” position=“0 0 1” rotation="-90 0 0"> <a-plane><a-image>の配置 ARマーカーの下側に移動したい →Y軸に”1”移動(浮き上がる…ソウジャナイ) →Z軸に”1”移動 Y X Z
  3. <a-entity id="panel_1" width="1" height="1" depth="1" position="0 0 0" rotation="-90 0

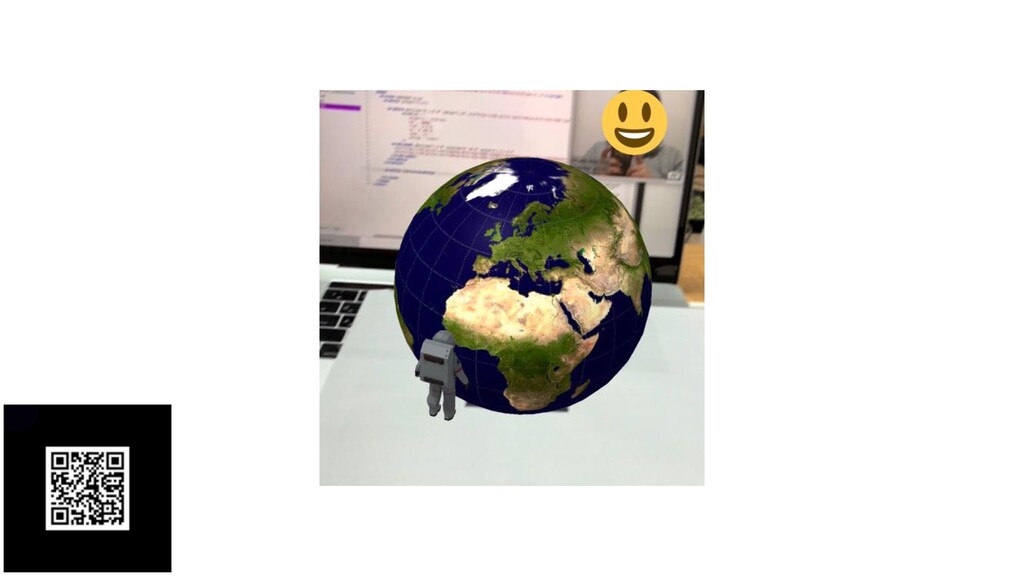
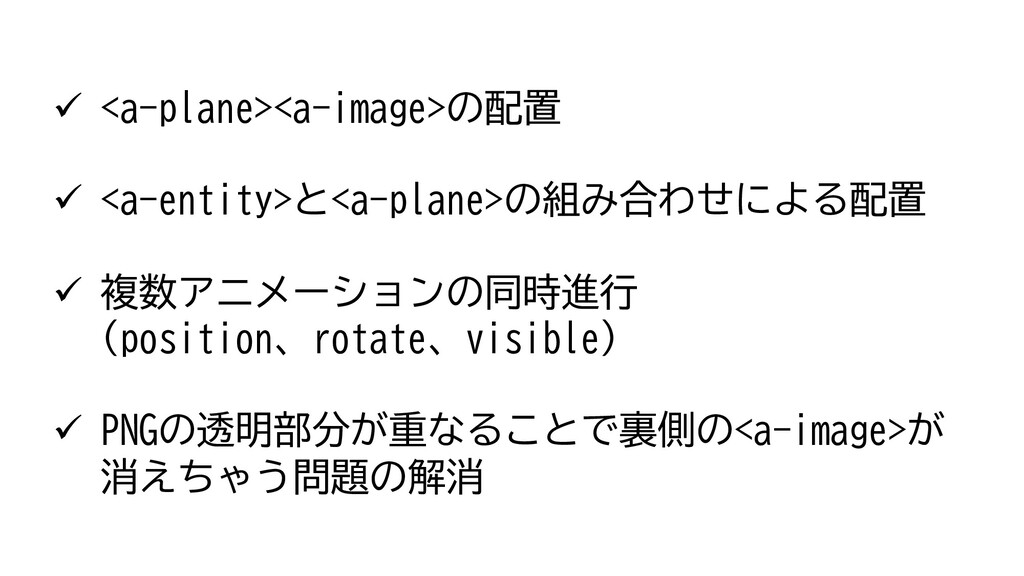
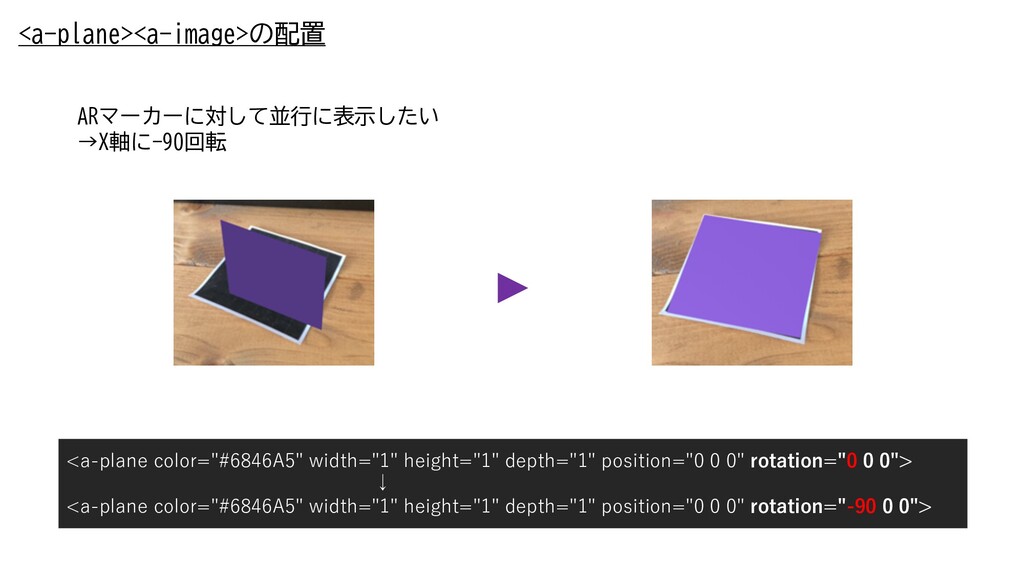
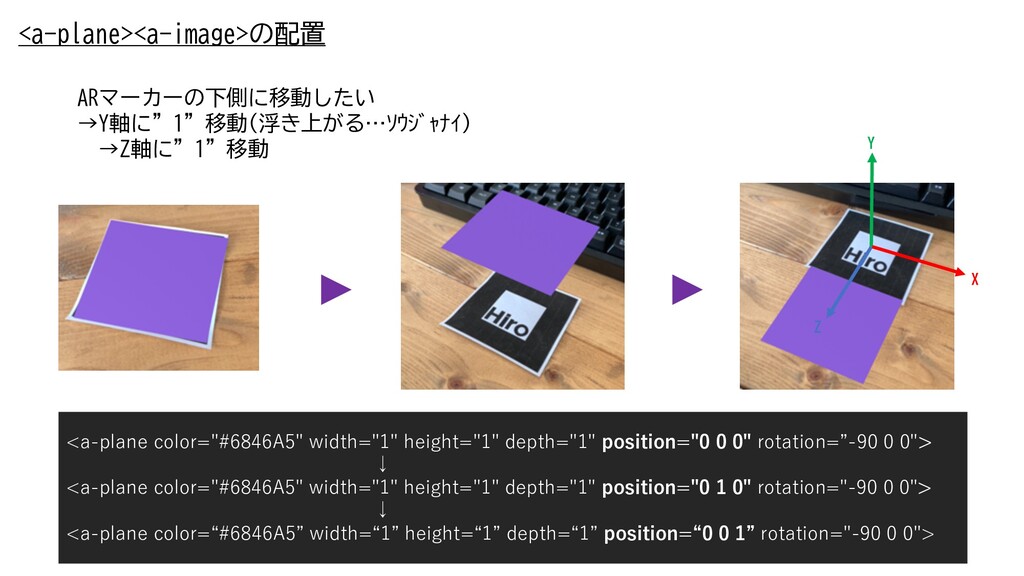
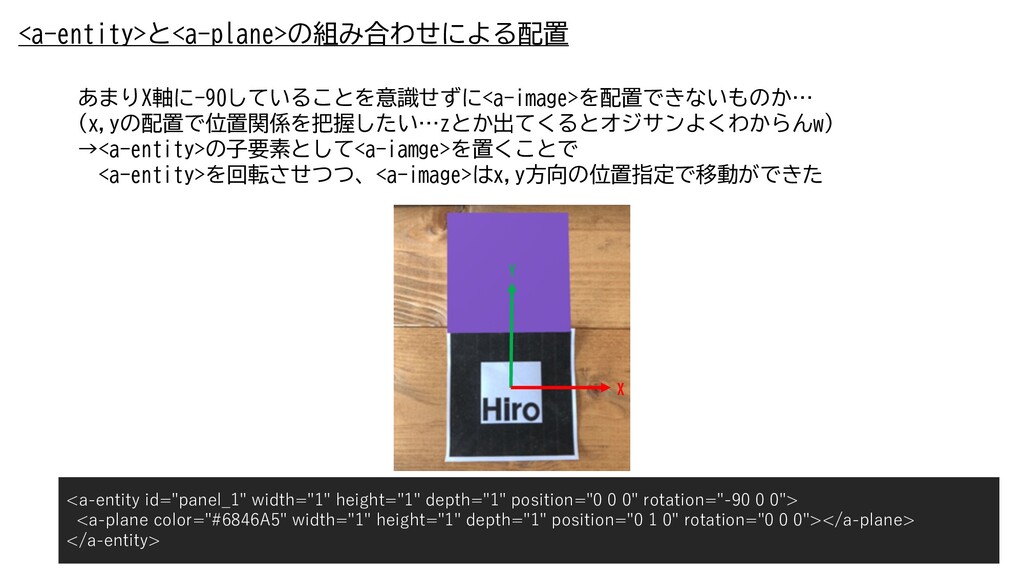
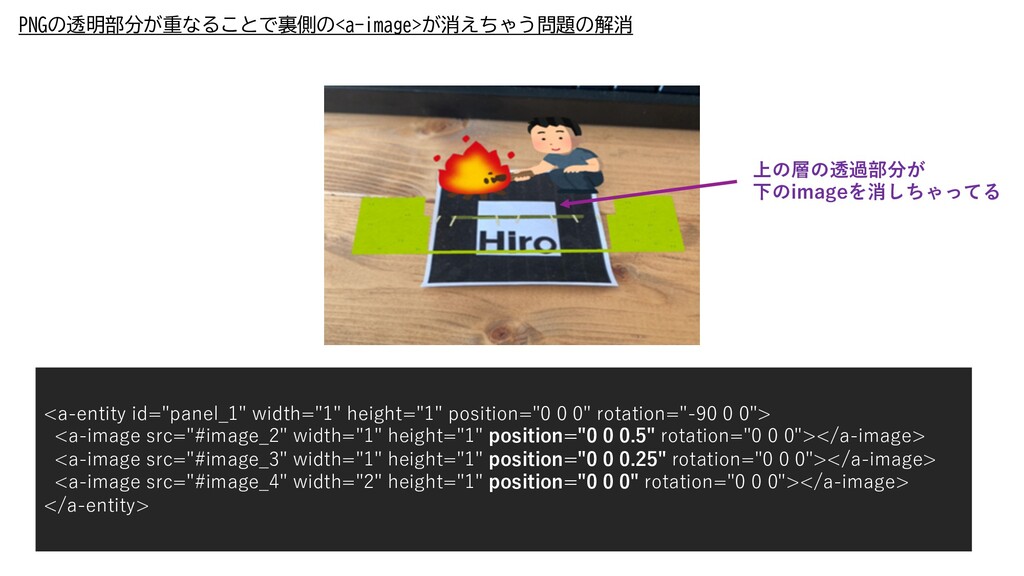
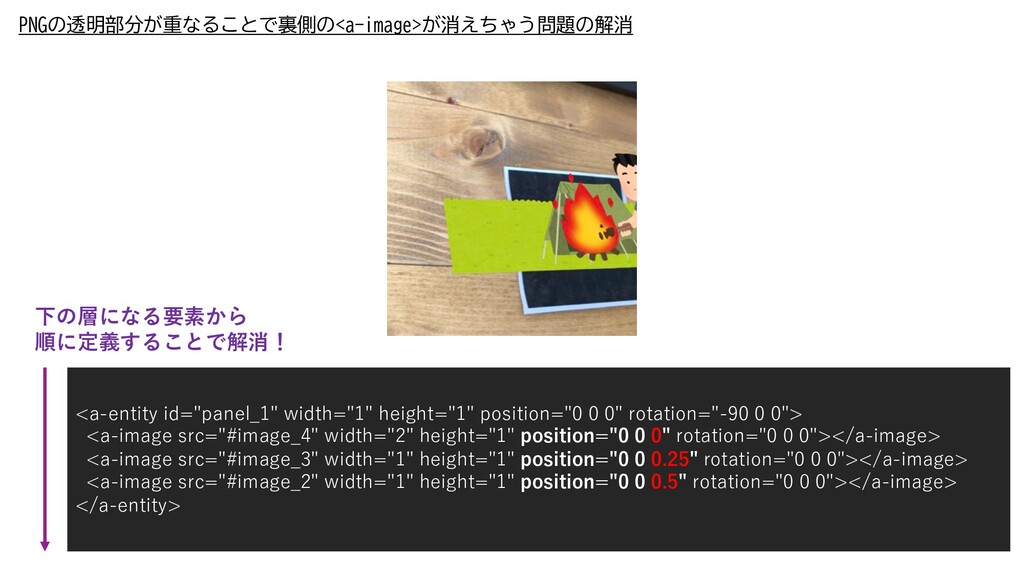
    0"> <a-plane color="#6846A5" width="1" height="1" depth="1" position="0 1 0" rotation="0 0 0"></a-plane> </a-entity> <a-entity>と<a-plane>の組み合わせによる配置 あまりX軸に-90していることを意識せずに<a-image>を配置できないものか… (x,yの配置で位置関係を把握したい…zとか出てくるとオジサンよくわからんw) →<a-entity>の子要素として<a-iamge>を置くことで <a-entity>を回転させつつ、<a-image>はx,y方向の位置指定で移動ができた Y X
  4. <a-entity id="panel_1" width="1" height="1" depth="1" position="0 0 0" rotation="-90 -45

    0"> <a-plane color="#d40010" width="0.5" height="0.5" position="-0.25 0.25 0" rotation="0 0 0"></a-plane> <a-plane color="#f2e500" width="0.5" height="0.5" position="-0.25 -0.25 0" rotation="0 0 0"></a-plane> <a-plane color="#744295" width="0.5" height="0.5" position="0.25 -0.25 0" rotation="0 0 0"></a-plane> <a-plane color="#e93587" width="0.5" height="0.5" position="0.25 0.25 0" rotation="0 0 0"></a-plane> </a-entity> <a-entity>と<a-image>の組み合わせによる配置
  5. 複数アニメーションの同時進行(position、rotate、visible) <a-entity id="panel_1" width="1" height="1" depth="1" position="0 0 0" rotation="-90

    -45 0" animation__1 = " property : object3D.position.x; from : -1; to : 1; dir : alternate; dur : 2000; loop : true; easing : easeInOutSine; delay : 0; startEvents : animation_start; " animation__2 = " property : rotation; dur : 2000; to : -90 314 0; loop : true; easing : linear; delay : 0; startEvents : animation_start; " >
  6. PNGの透明部分が重なることで裏側の<a-image>が消えちゃう問題の解消 <a-entity id="panel_1" width="1" height="1" position="0 0 0" rotation="-90 0

    0"> <a-image src="#image_2" width="1" height="1" position="0 0 0.5" rotation="0 0 0"></a-image> <a-image src="#image_3" width="1" height="1" position="0 0 0.25" rotation="0 0 0"></a-image> <a-image src="#image_4" width="2" height="1" position="0 0 0" rotation="0 0 0"></a-image> </a-entity> 上の層の透過部分が 下のimageを消しちゃってる
  7. PNGの透明部分が重なることで裏側の<a-image>が消えちゃう問題の解消 <a-entity id="panel_1" width="1" height="1" position="0 0 0" rotation="-90 0

    0"> <a-image src="#image_4" width="2" height="1" position="0 0 0" rotation="0 0 0"></a-image> <a-image src="#image_3" width="1" height="1" position="0 0 0.25" rotation="0 0 0"></a-image> <a-image src="#image_2" width="1" height="1" position="0 0 0.5" rotation="0 0 0"></a-image> </a-entity> 下の層になる要素から 順に定義することで解消!