2019/2/2および3/30、4/6に行った8thwallwebを使ったWebARハンズオン資料です。
https://xr-fukuoka.connpass.com/event/114279/
https://xr-fukuoka.connpass.com/event/124923/
https://xr-fukuoka.connpass.com/event/124923/
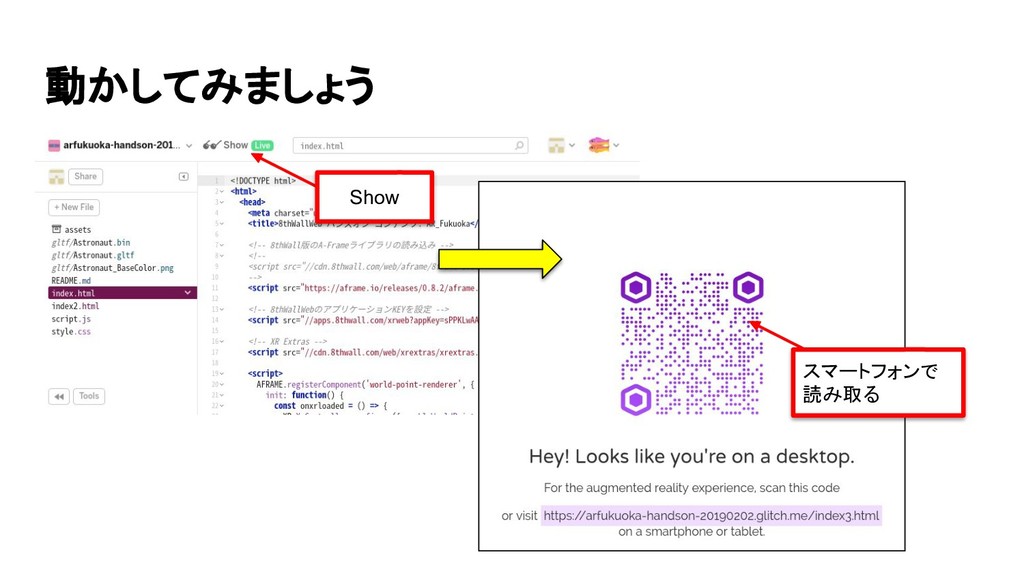
誰でも簡単にWebARできるハンズオンになっています。
ご興味のある方はぜひ一読願います。
変更履歴
----
2019/02/02: 初版作成
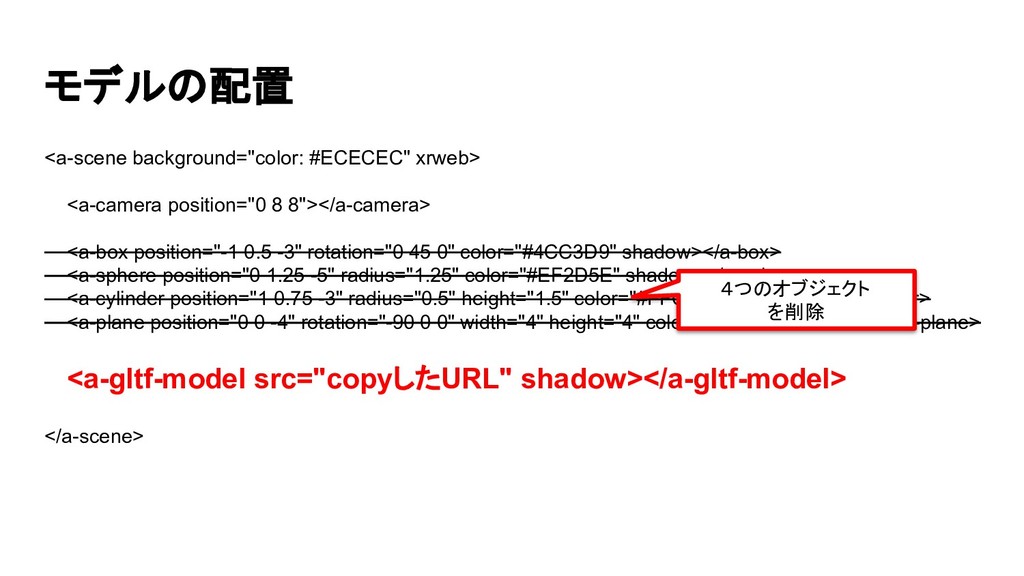
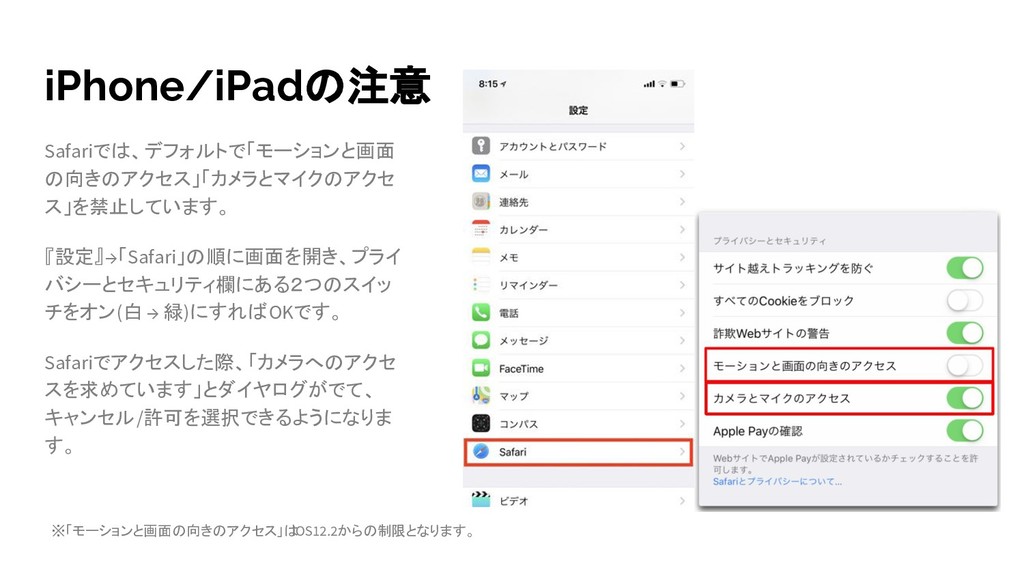
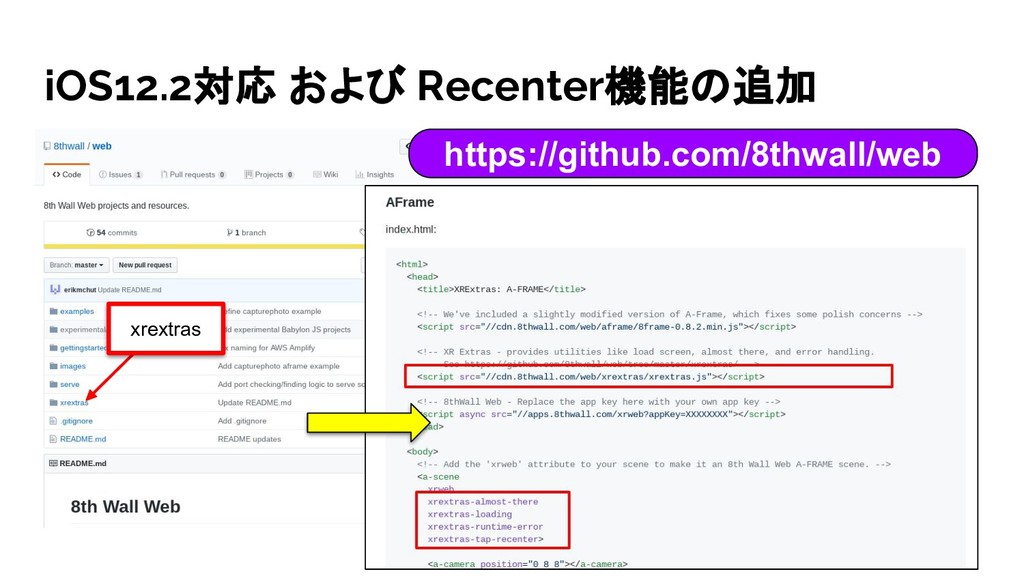
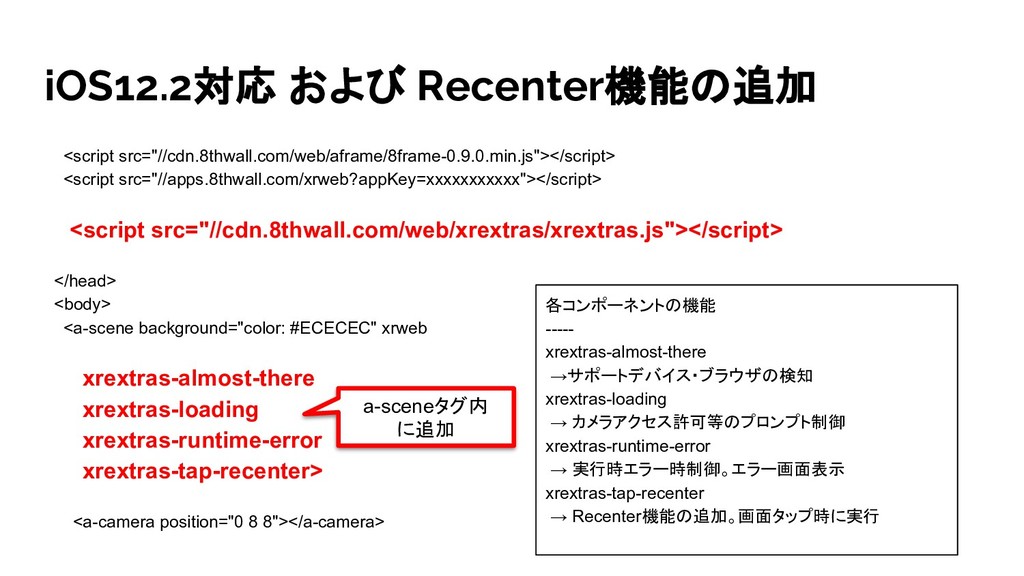
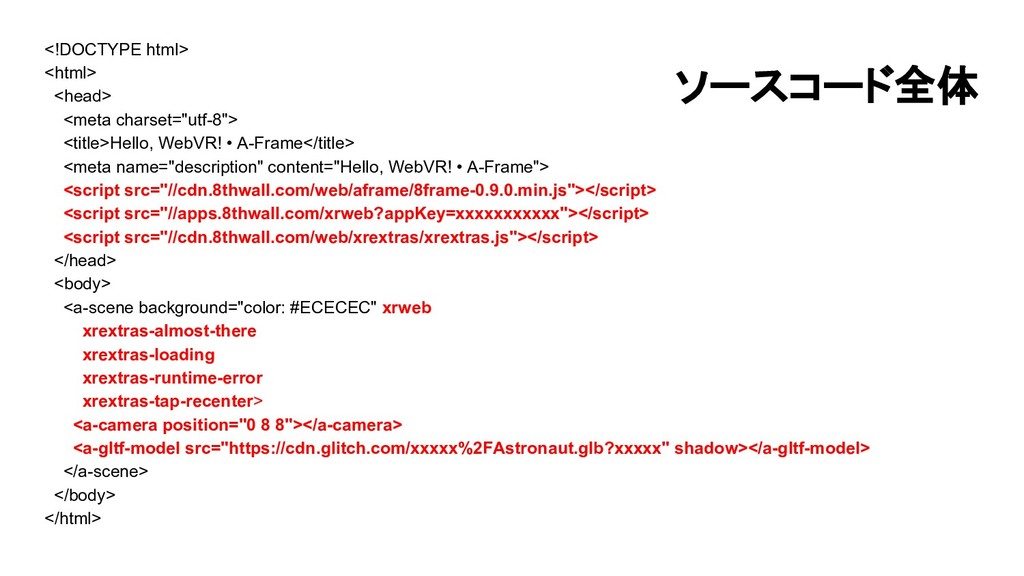
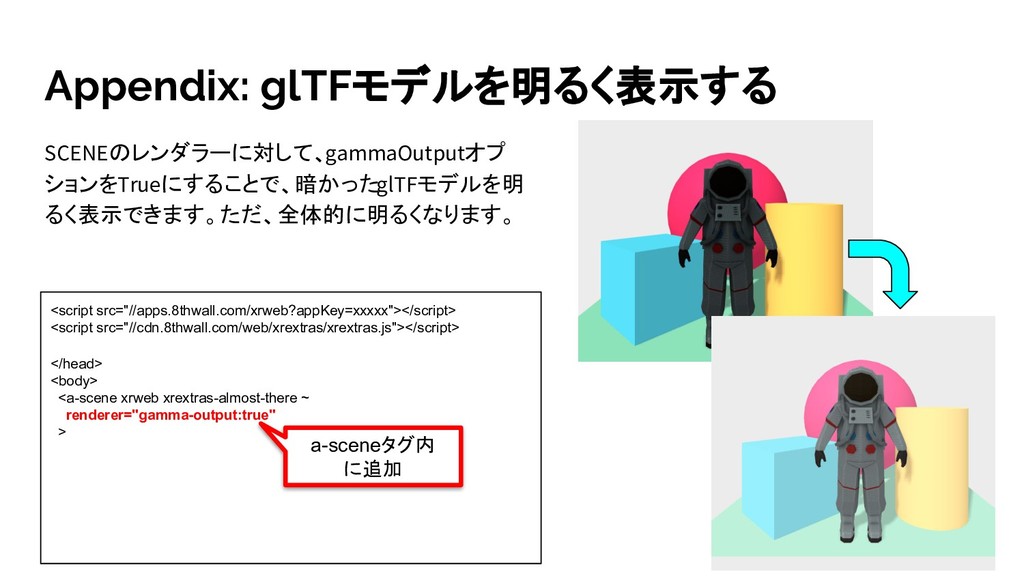
2019/03/30: iOS12.2対応。glTFモデルを明るくする方法追加。A-Frame0.9.0対応
In English document
https://speakerdeck.com/sgidon/webar-getting-started-with-8th-wall-web-in-english
#AR_Fukuoka
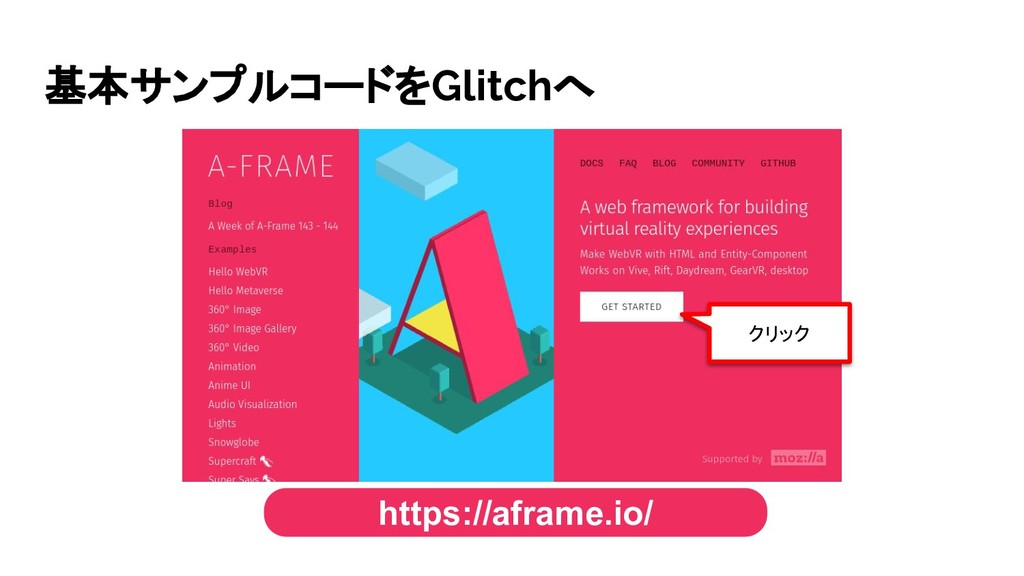
![やっぱり体験から 回転:マウスドラッグ 前後:[W][S]キー 左右:[A][D]キー https://aframe.io/](https://files.speakerdeck.com/presentations/06e20b995a244e84bd5f142502f12239/slide_11.jpg)