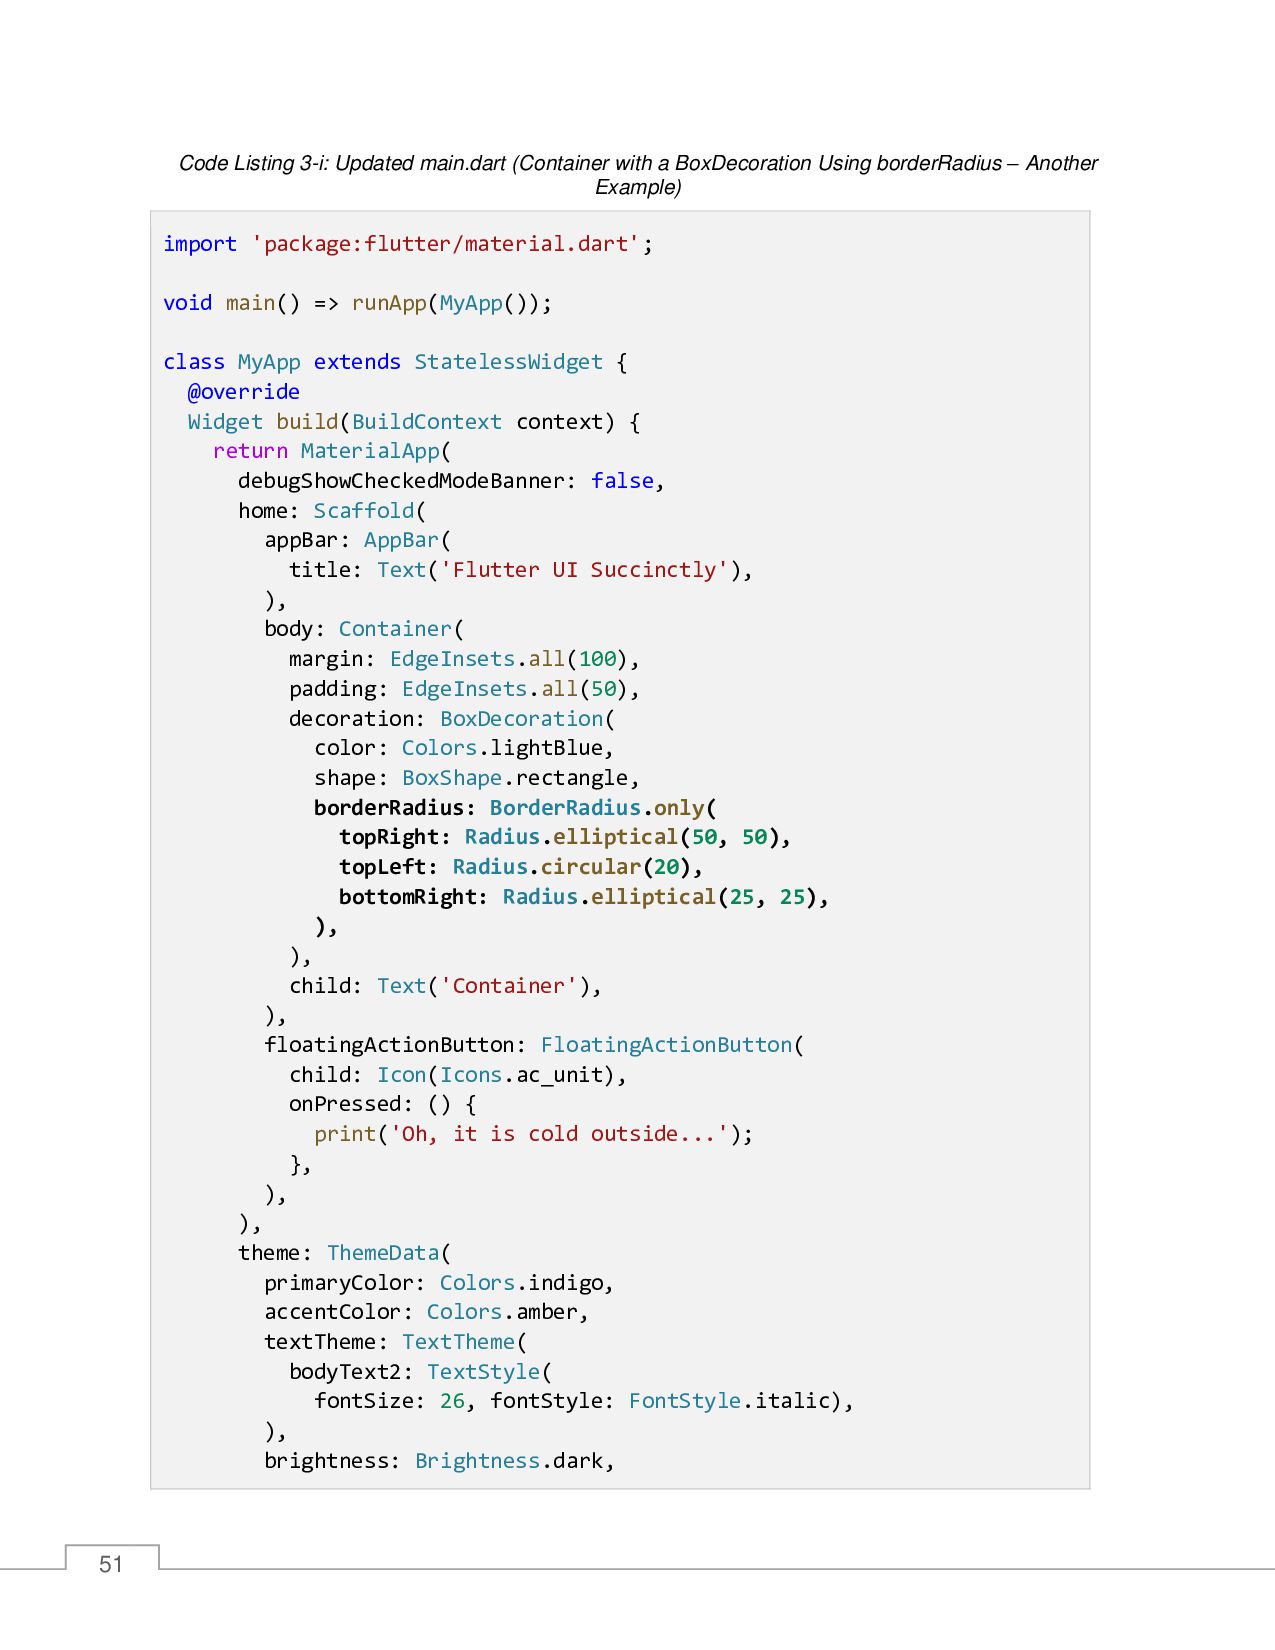
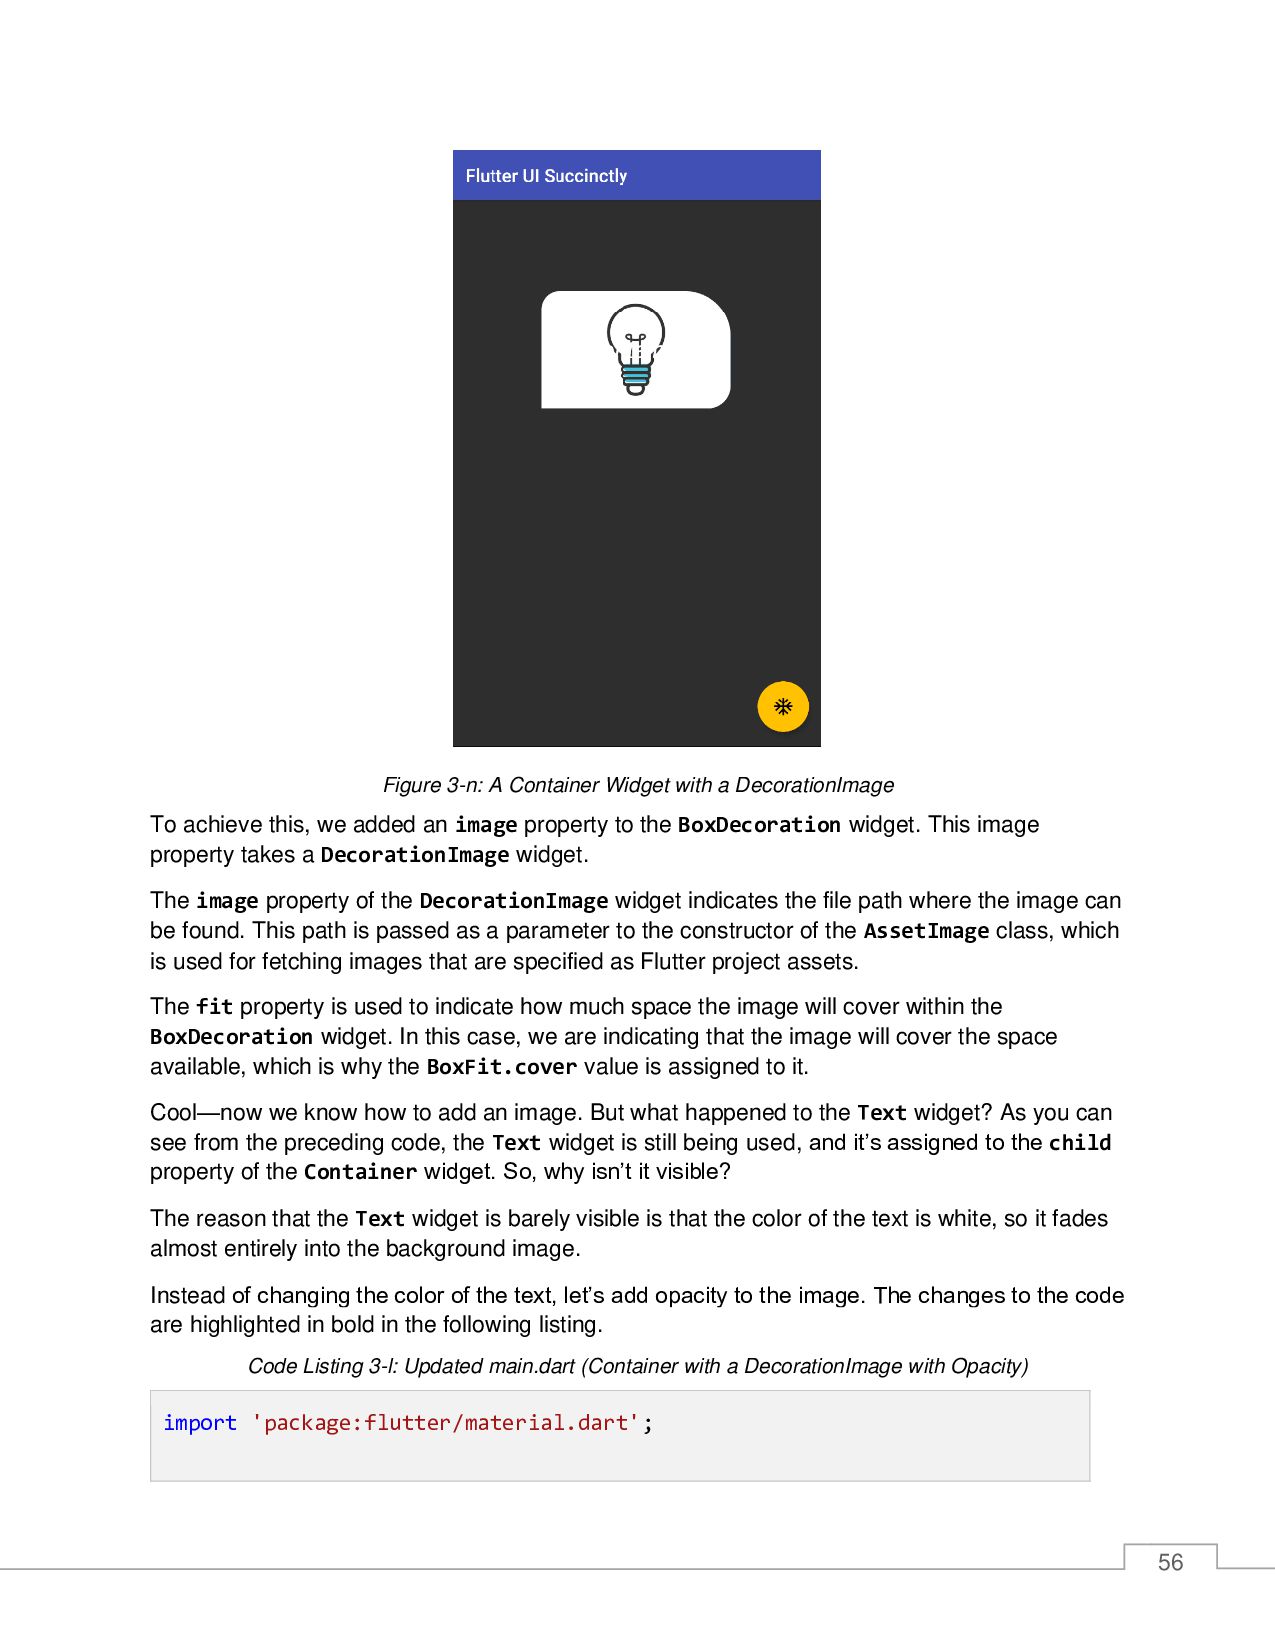
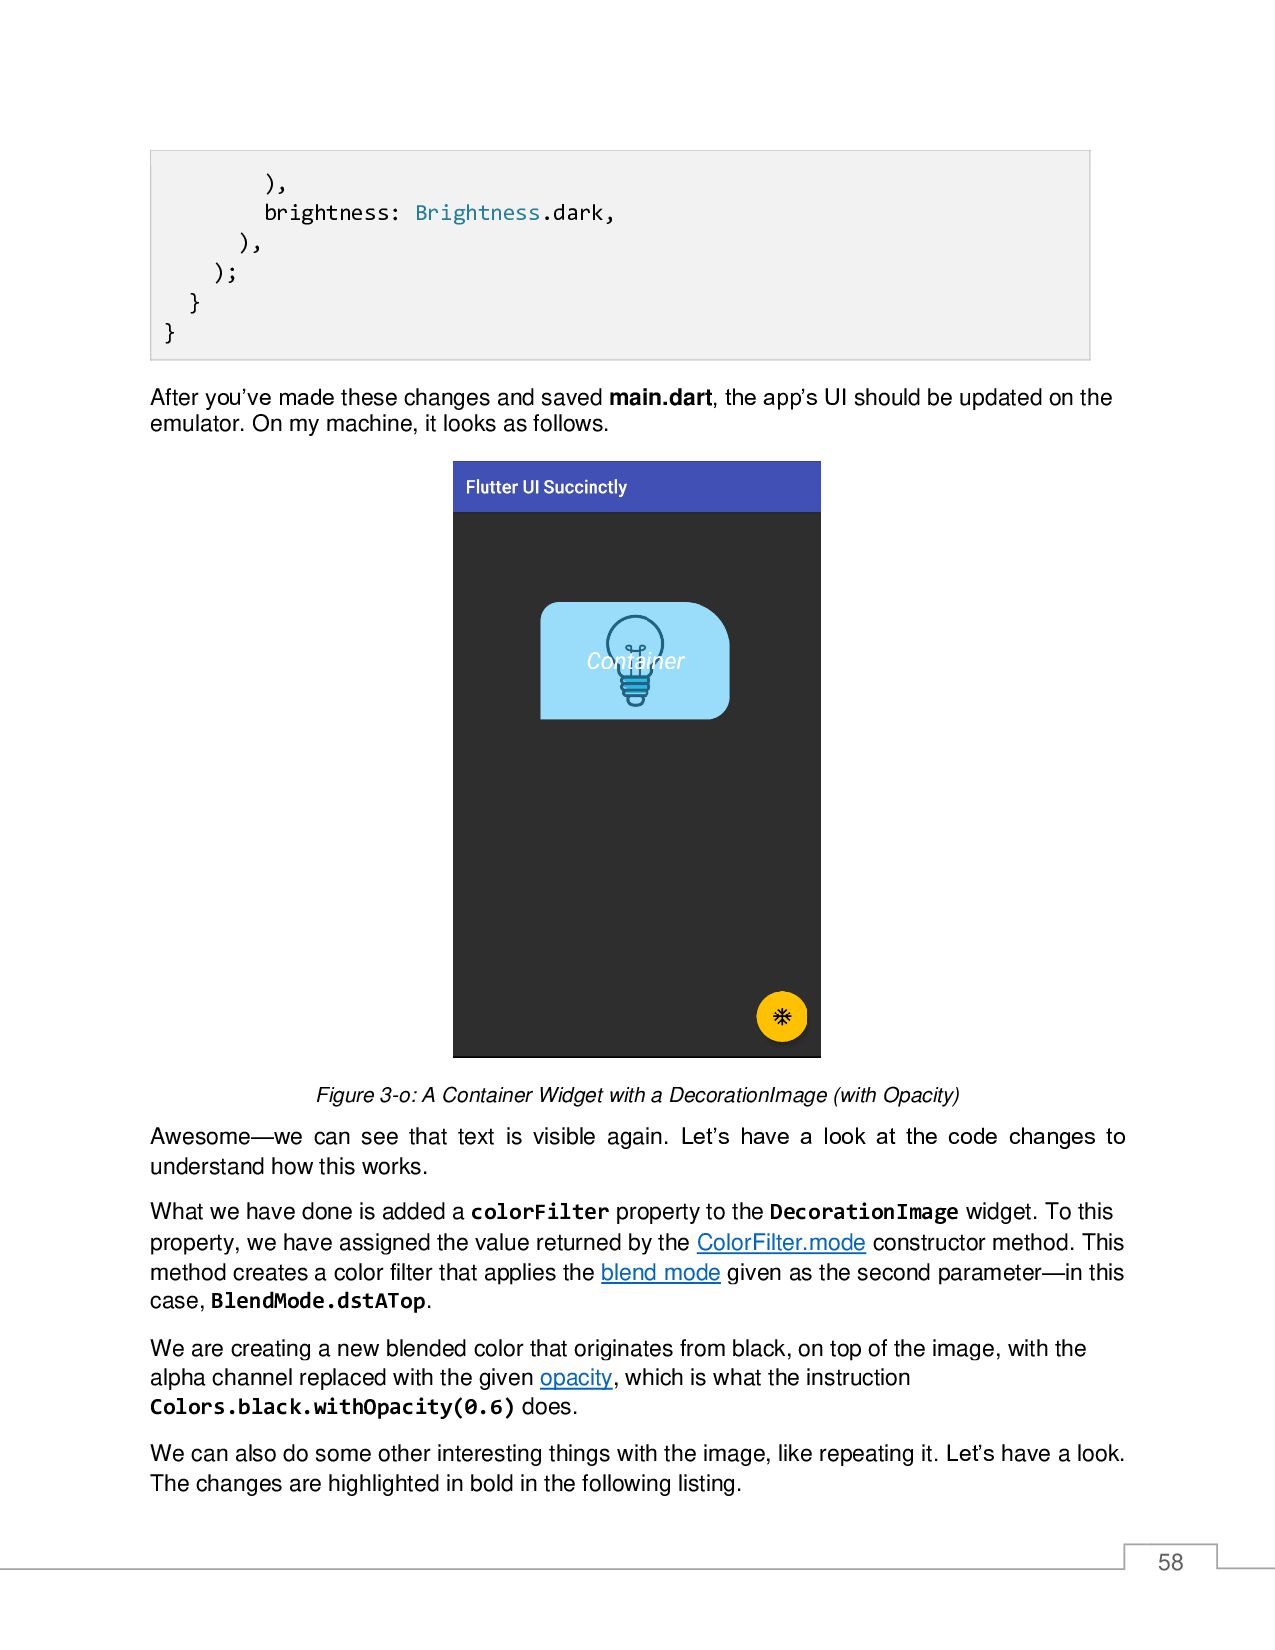
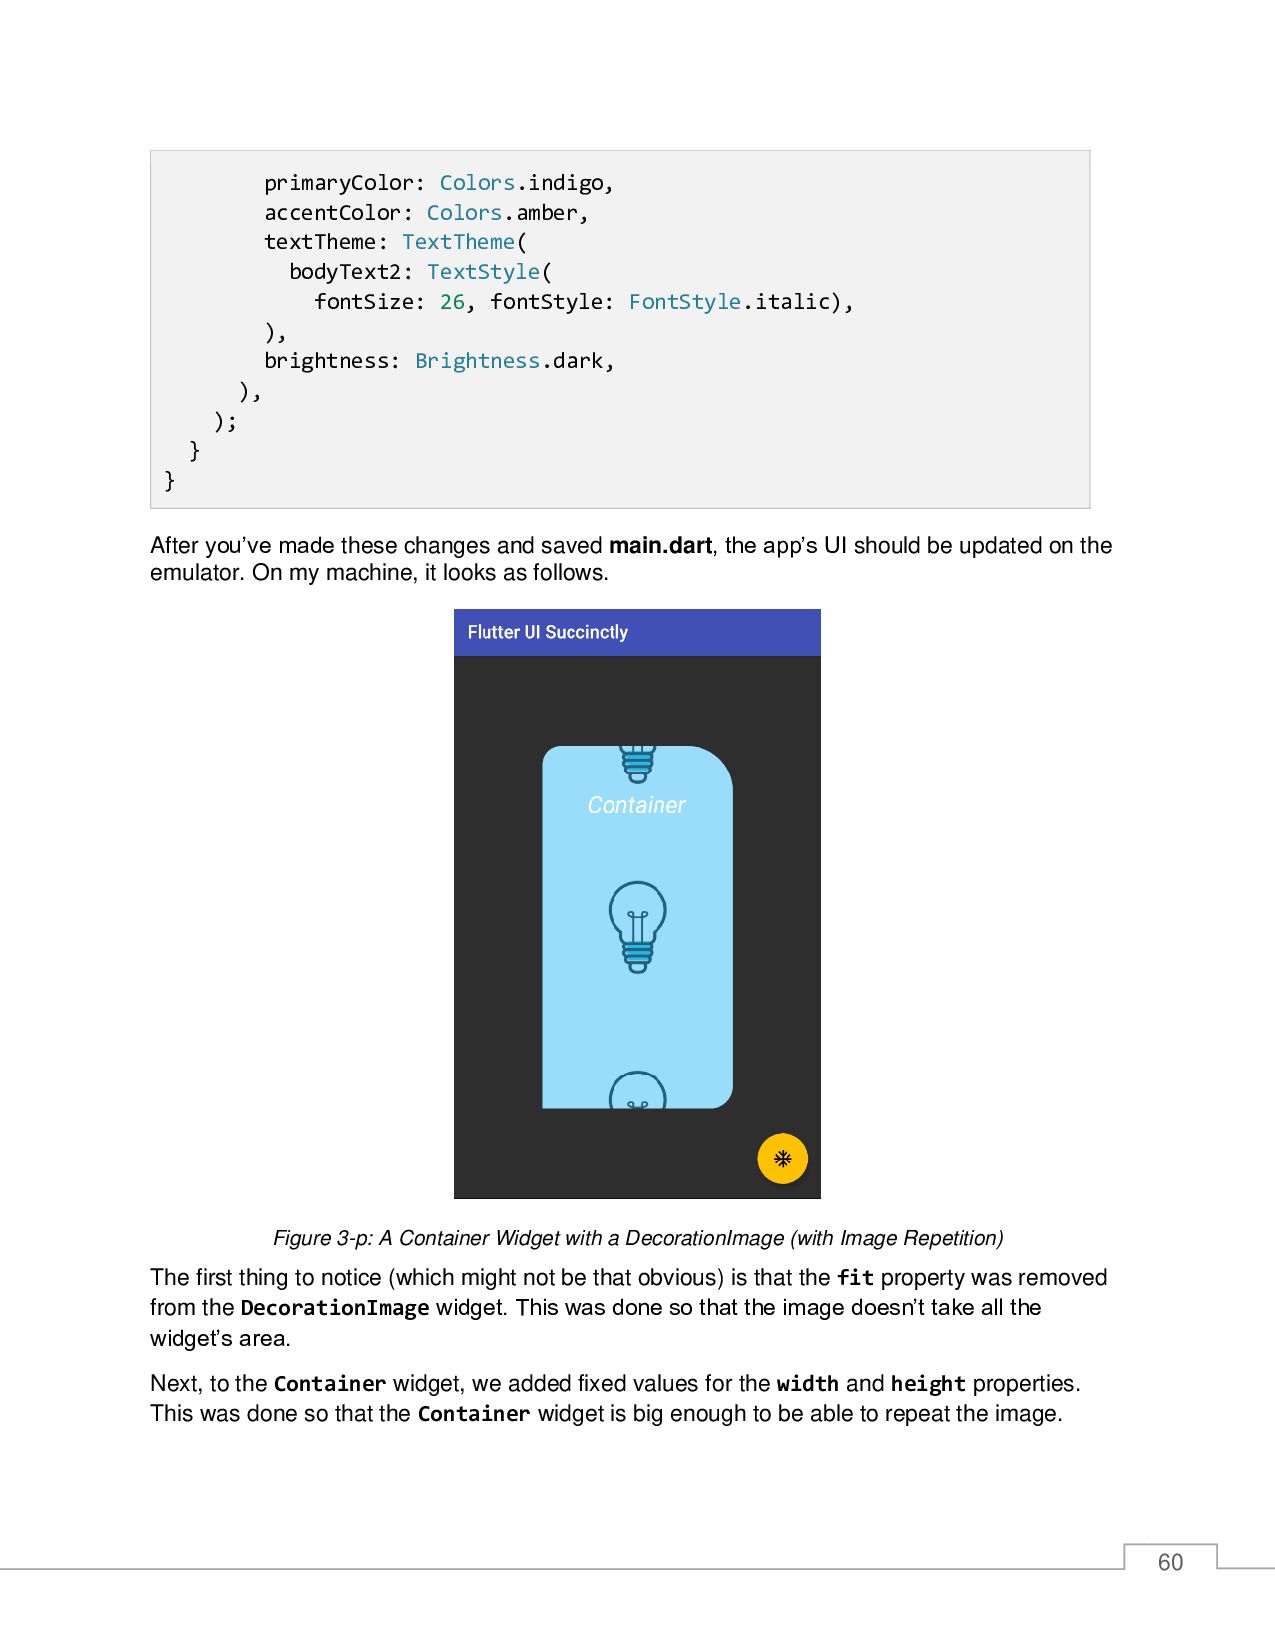
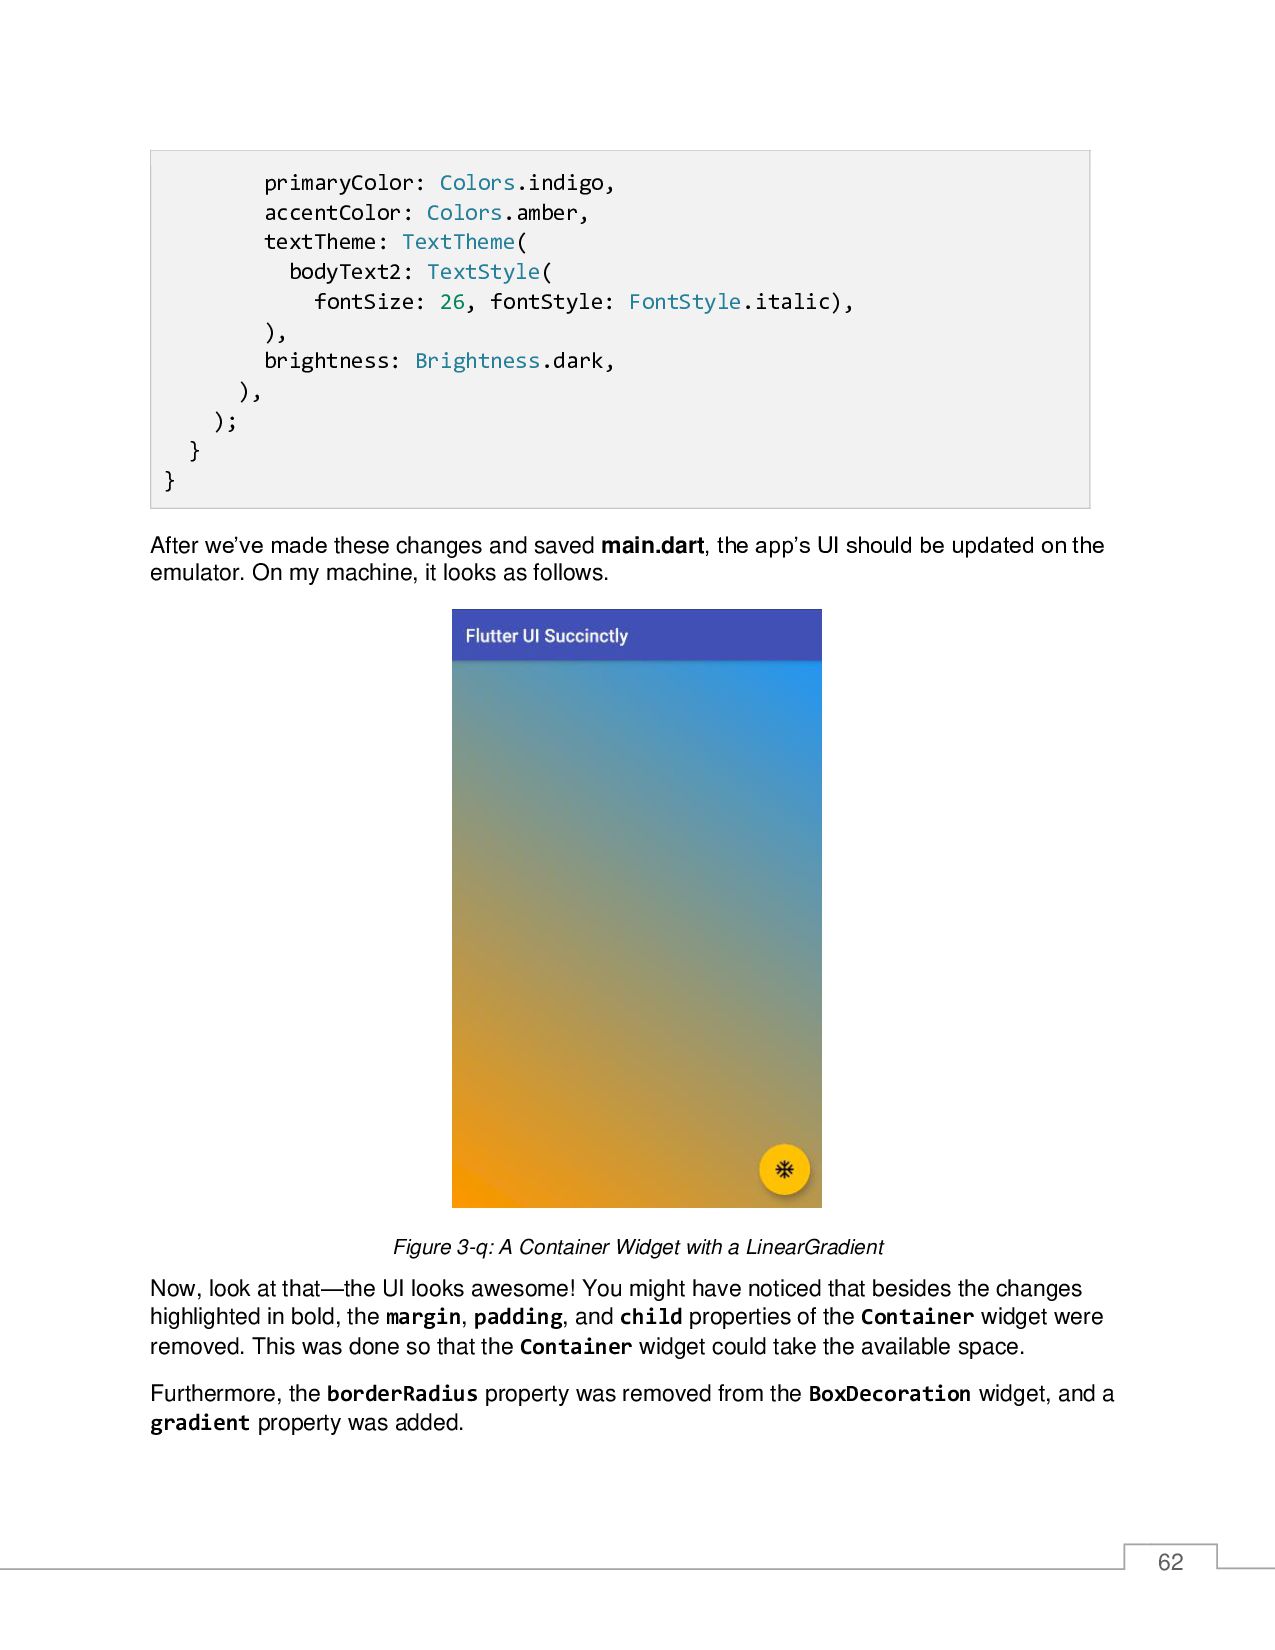
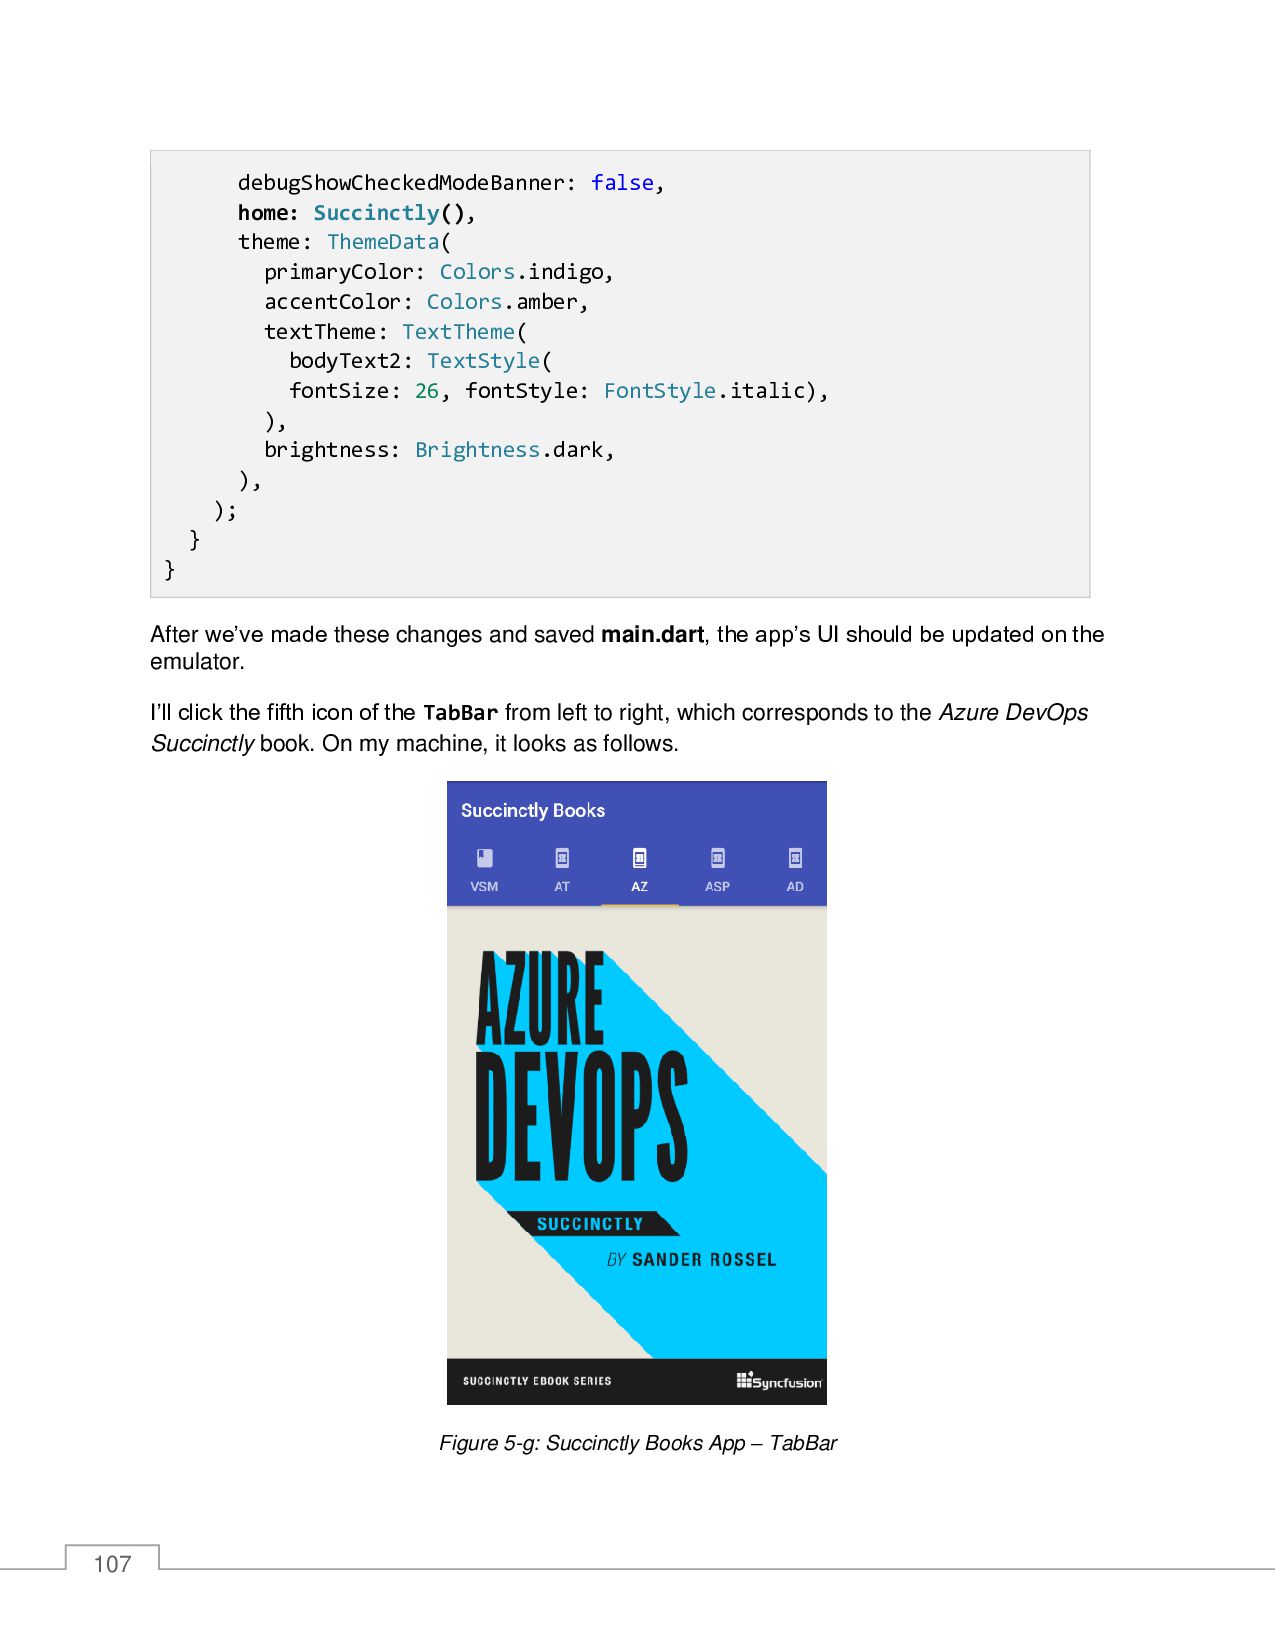
@override Widget build(BuildContext context) { return MaterialApp( debugShowCheckedModeBanner: false, home: Scaffold( appBar: AppBar( title: Text('Flutter UI Succinctly'), ), body: Container( margin: EdgeInsets.all(100), padding: EdgeInsets.all(50), decoration: BoxDecoration( color: Colors.lightBlue, shape: BoxShape.rectangle, borderRadius: BorderRadius.only( topRight: Radius.elliptical(50, 50), topLeft: Radius.circular(20), bottomRight: Radius.elliptical(25, 25), ), image: DecorationImage( colorFilter: ColorFilter.mode( Colors.black.withOpacity(0.6), BlendMode.dstATop), image: AssetImage("images/idea-1873540_640.png"), fit: BoxFit.cover, ), ), child: Text('Container'), ), floatingActionButton: FloatingActionButton( child: Icon(Icons.ac_unit), onPressed: () { print('Oh, it is cold outside...'); }, ), ), theme: ThemeData( primaryColor: Colors.indigo, accentColor: Colors.amber, textTheme: TextTheme( bodyText2: TextStyle( fontSize: 26, fontStyle: FontStyle.italic),
![87 "ASP.NET Core 3.1 Succinctly", "AngularDart Succinctly" ]; } class](https://files.speakerdeck.com/presentations/cca70777ed8843f981c67836afabdbf4/slide_88.jpg)
![88 home: Succinctly( book: StaticBooks.covers[0], title: StaticBooks.titles[0], ), theme: ThemeData(](https://files.speakerdeck.com/presentations/cca70777ed8843f981c67836afabdbf4/slide_89.jpg)
![92 home: Succinctly( book: StaticBooks.covers[0], title: StaticBooks.titles[0], ), theme: ThemeData(](https://files.speakerdeck.com/presentations/cca70777ed8843f981c67836afabdbf4/slide_93.jpg)
![97 title: StaticBooks.titles[0], ), theme: ThemeData( primaryColor: Colors.indigo, accentColor: Colors.amber,](https://files.speakerdeck.com/presentations/cca70777ed8843f981c67836afabdbf4/slide_98.jpg)
![101 currentIndex: _index, onTap: (value) { String _title = StaticBooks.titles[value];](https://files.speakerdeck.com/presentations/cca70777ed8843f981c67836afabdbf4/slide_102.jpg)