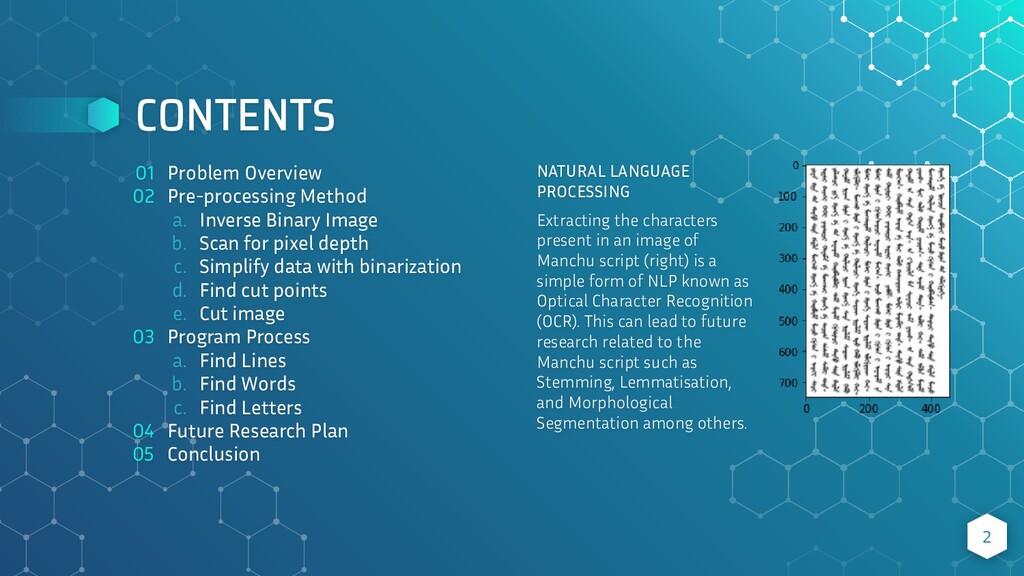
image of Manchu script (right) is a simple form of NLP known as Optical Character Recognition (OCR). This can lead to future research related to the Manchu script such as Stemming, Lemmatisation, and Morphological Segmentation among others. 01 Problem Overview 02 Pre-processing Method a. Inverse Binary Image b. Scan for pixel depth c. Simplify data with binarization d. Find cut points e. Cut image 03 Program Process a. Find Lines b. Find Words c. Find Letters 04 Future Research Plan 05 Conclusion 2
vertically and are connected without spaces within a word, pre-processing is required to separate the character area and the units that make up the characters before being able to recognize the characters. In this paper, we describe a pre-processing method that extracts the character area and cuts off the unit of each character. Unlike existing research that presupposes a method of recognizing each word or character unit, or recognizing the remaining part a er removing the stem of a continuous character, this method cuts the character into each recognizable unit and then combines the units. It can be applied to the method of recognizing letters. Through an experiment, the effectiveness of this method was verified. Keywords Manchu Characters, Character Recognition, Preprocessing, Pattern Recognition 4
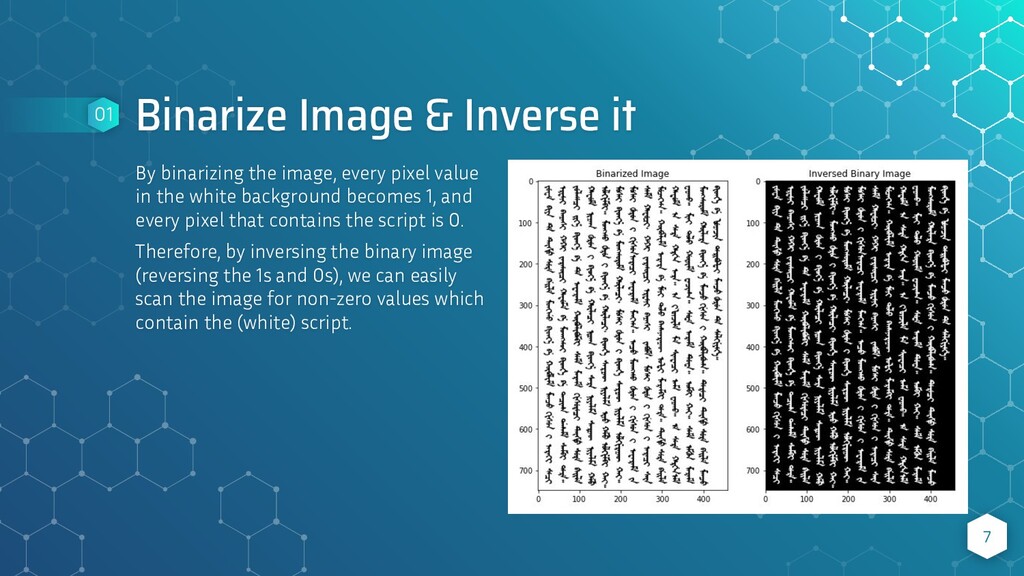
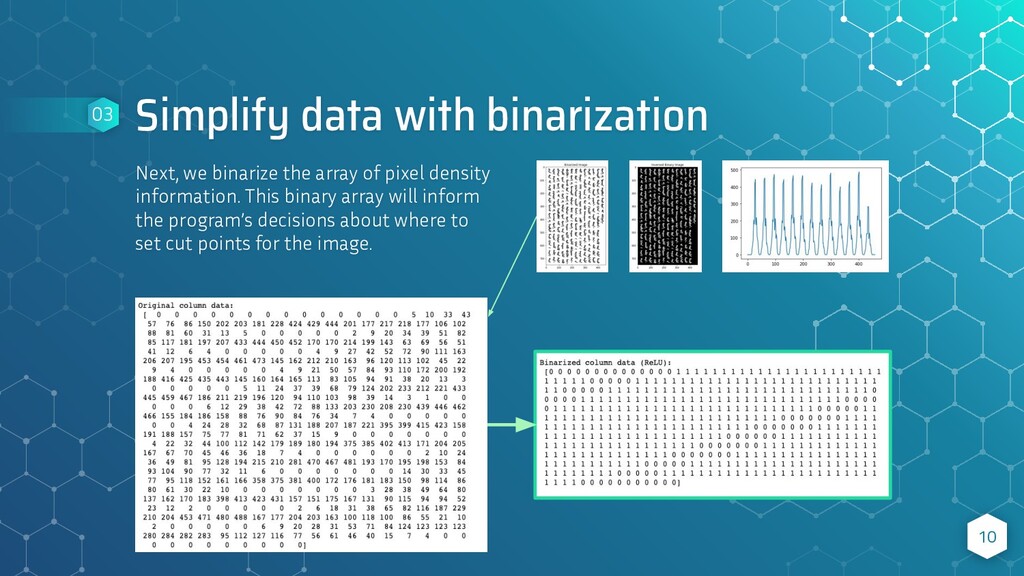
pixel value in the white background becomes 1, and every pixel that contains the script is 0. Therefore, by inversing the binary image (reversing the 1s and 0s), we can easily scan the image for non-zero values which contain the (white) script. 7 01
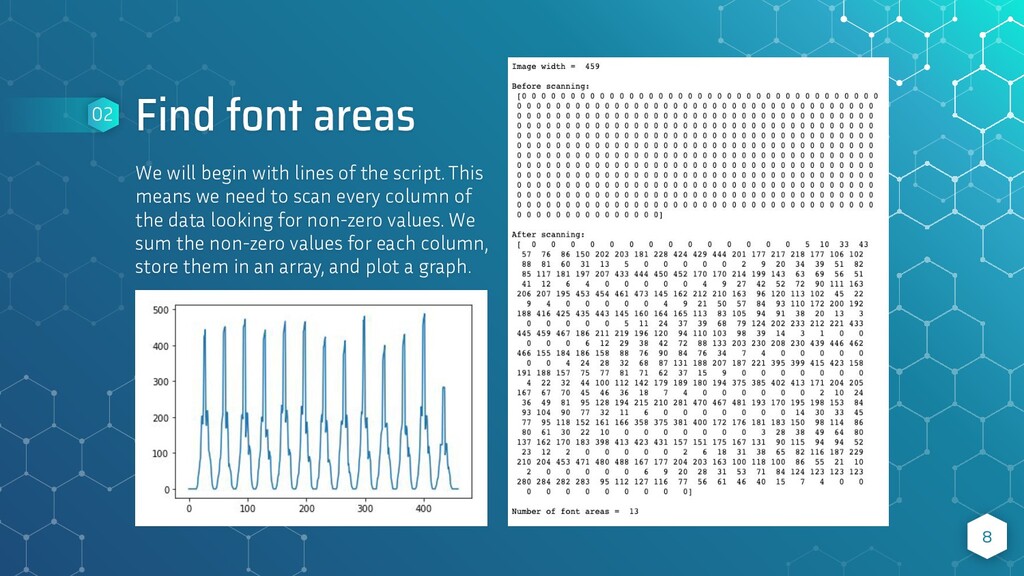
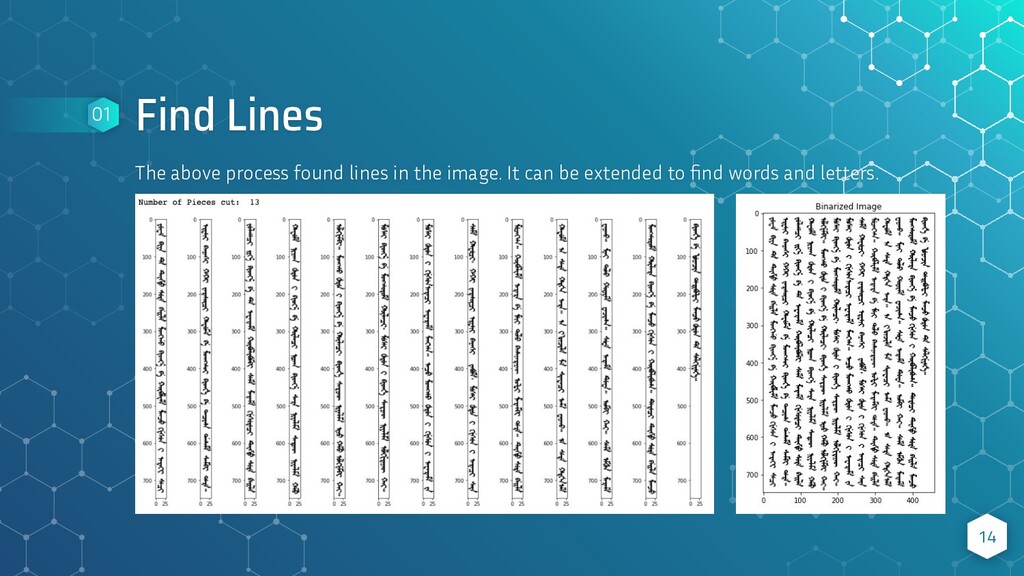
script. This means we need to scan every column of the data looking for non-zero values. We sum the non-zero values for each column, store them in an array, and plot a graph. 8 02
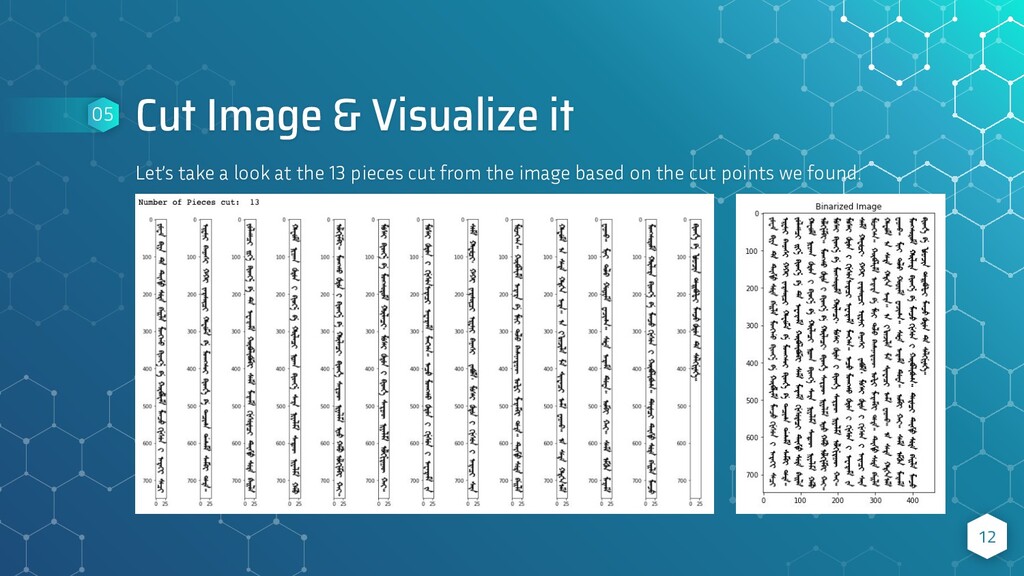
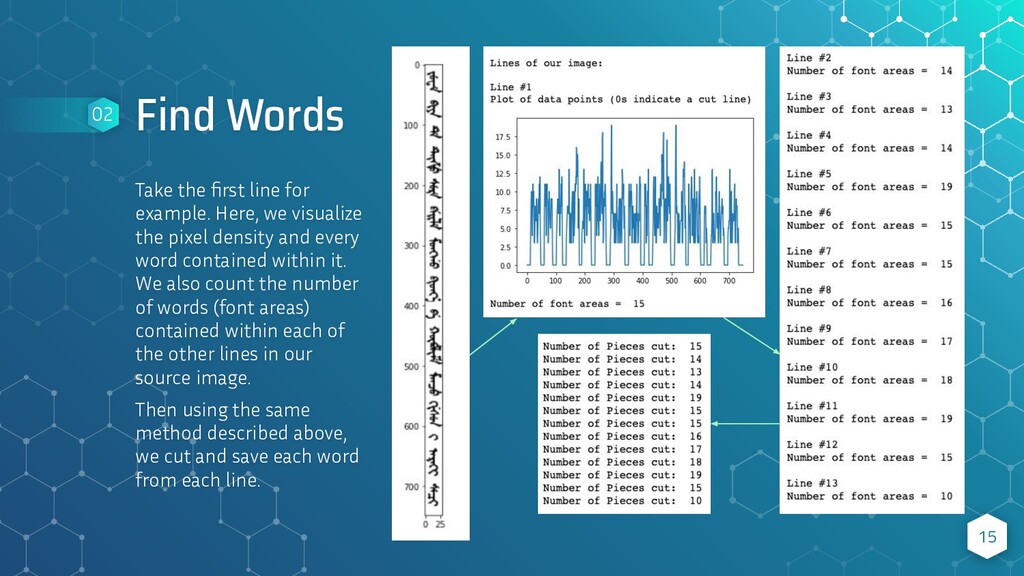
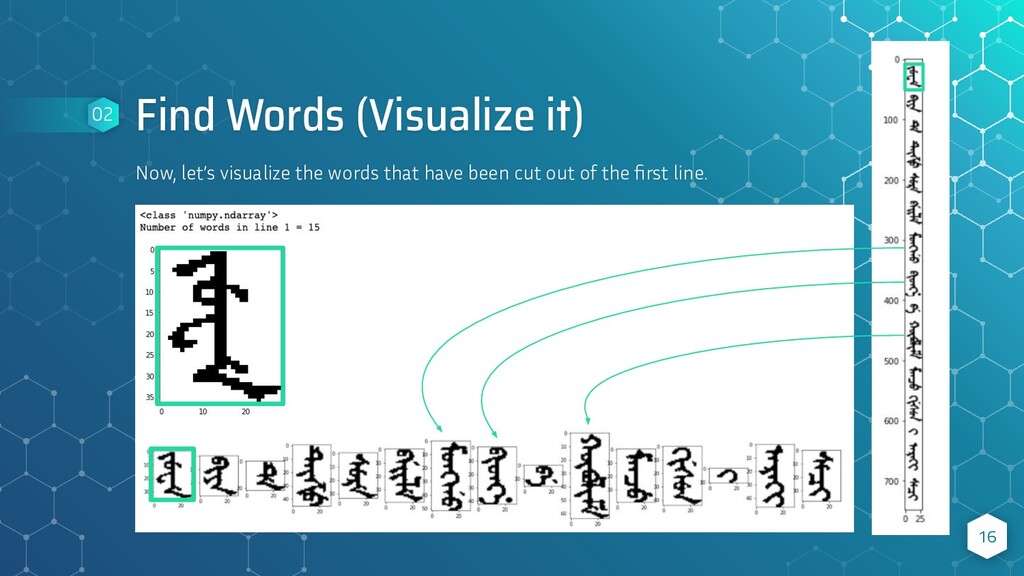
visualize the pixel density and every word contained within it. We also count the number of words (font areas) contained within each of the other lines in our source image. Then using the same method described above, we cut and save each word from each line. 15 02
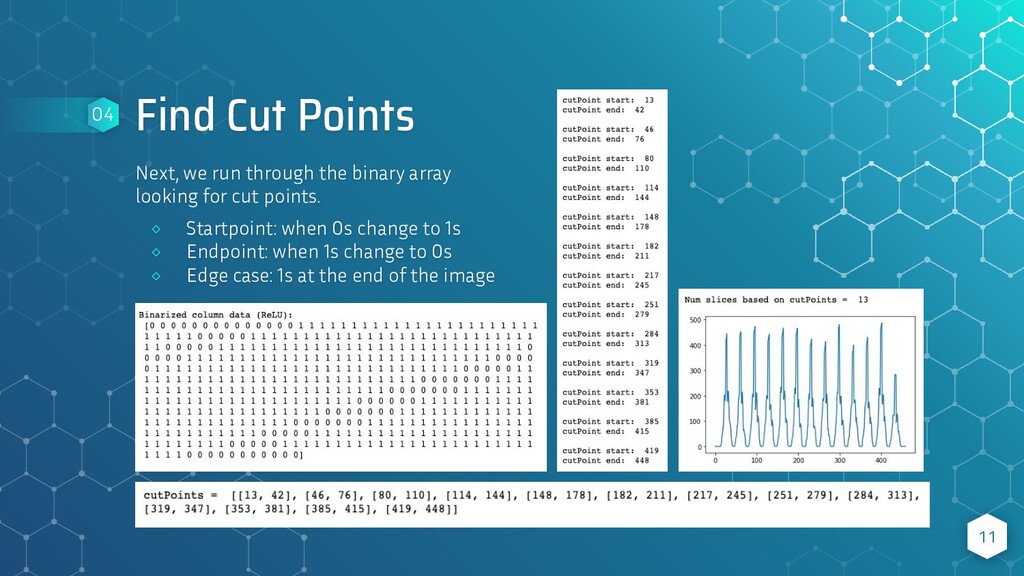
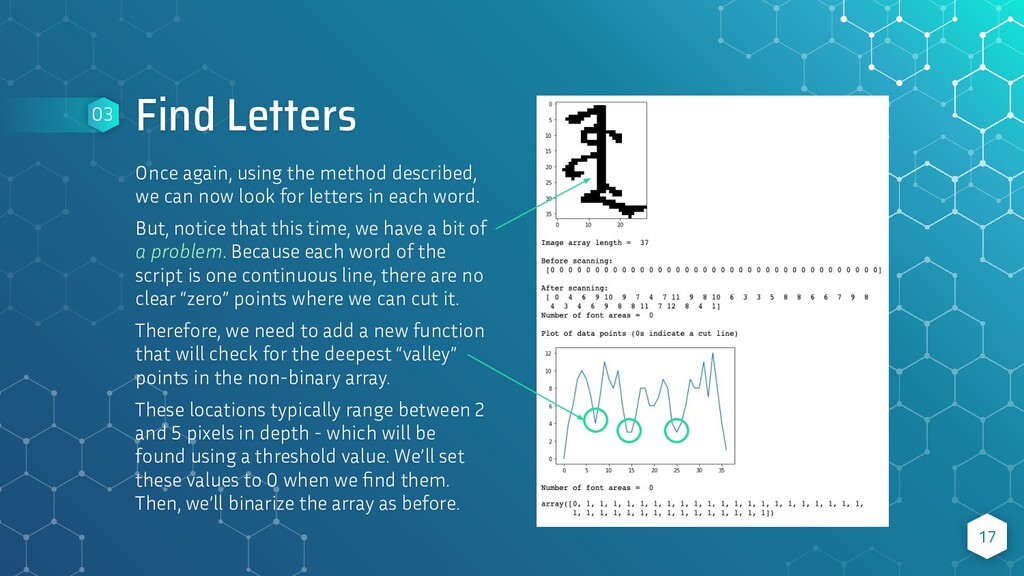
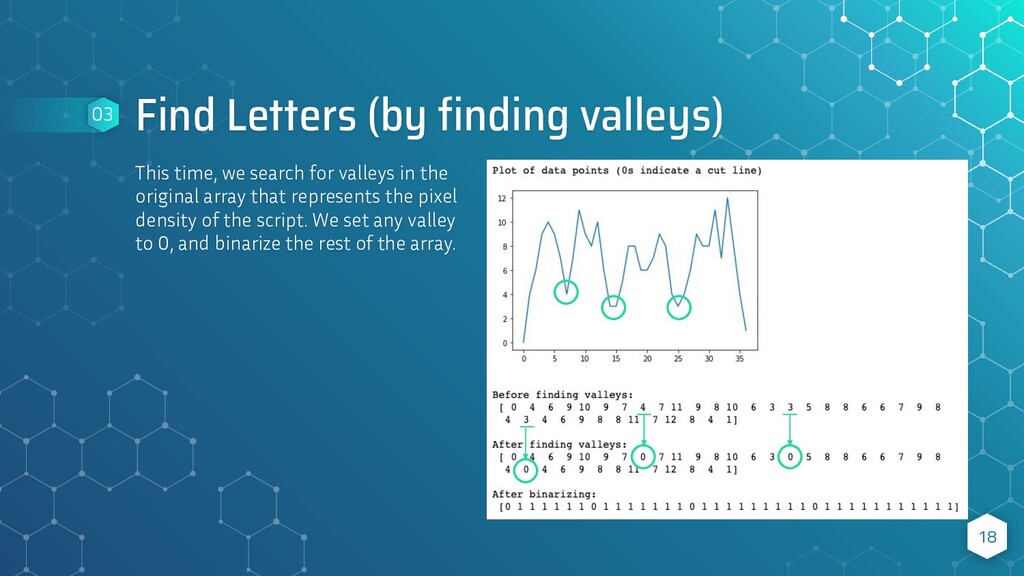
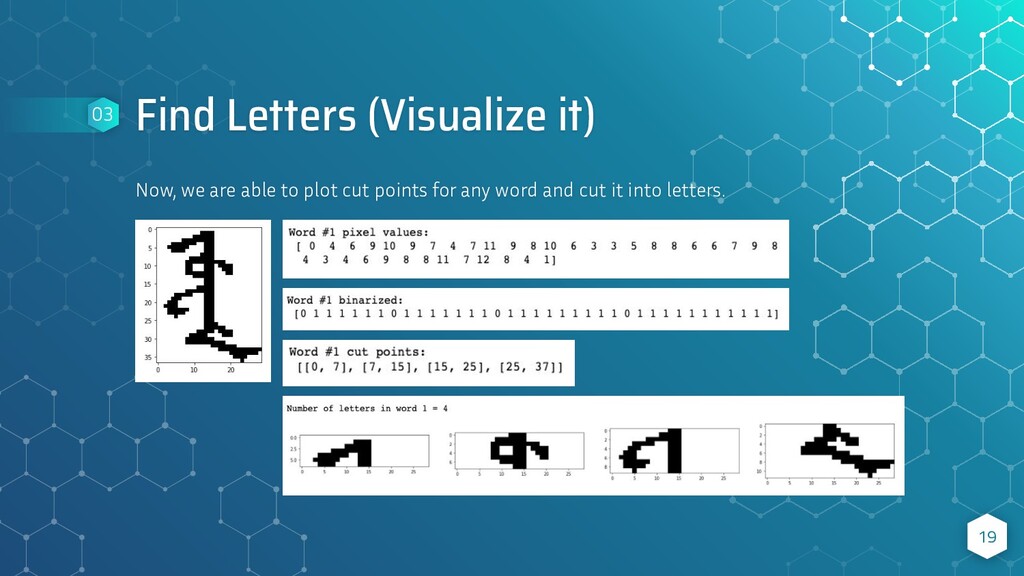
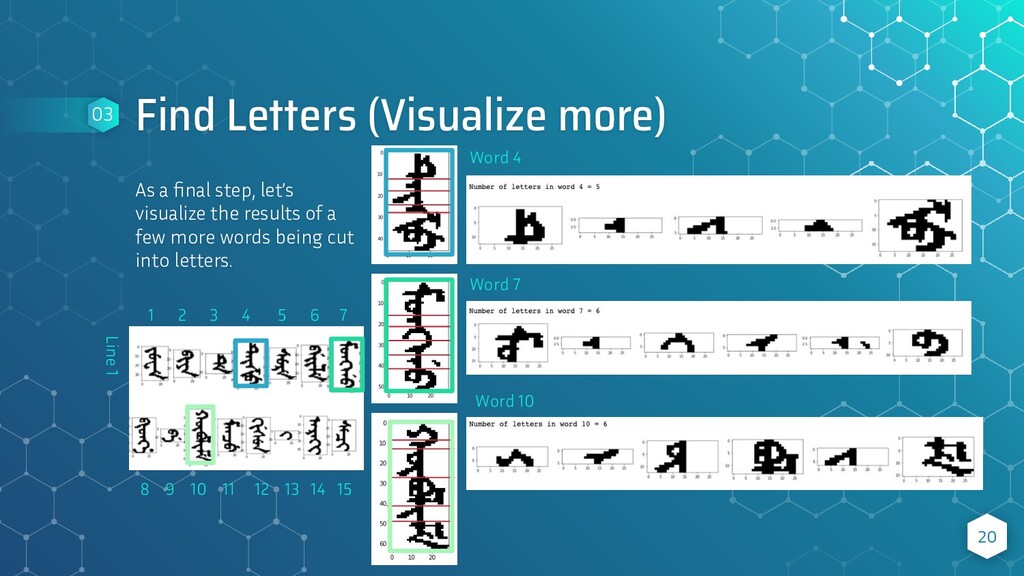
now look for letters in each word. But, notice that this time, we have a bit of a problem. Because each word of the script is one continuous line, there are no clear “zero” points where we can cut it. Therefore, we need to add a new function that will check for the deepest “valley” points in the non-binary array. These locations typically range between 2 and 5 pixels in depth - which will be found using a threshold value. We’ll set these values to 0 when we find them. Then, we’ll binarize the array as before. 17 03
included in the Unicode block for Mongolian. For future research, the letters that this program is able to find and cut from a given script image need to be matched to the existing letters in the Manchu alphabet (which is included in the Unicode block for Mongolian). A er that, we will be able to understand how accurate or inaccurate it is, and use that information to help improve the letter-cutting algorithm. 22
could be cut into each recognizable unit through a pre-processing method. The pre-processing method first standardizes the image data it reads in, then, in a step-by-step manner, divides the image into (1) Lines of the script, then (2) Words of the script, and finally (3) Letters of the script. Future research needs to be conducted in confirming whether or not (and how accurately) each unit (letter) that was cut from the image matches the actual Manchu alphabet. It is expected that there will be some margin of error due to the script cutting perfectly horizontal lines at the narrowest point of each word. Thus, a er performing an accuracy check, the algorithm may be improved upon by adjusting the cutting threshold values for each word, or by rotation of the cutting line (or the image itself) at certain locations. In conclusion, we hope to illustrate that this method of extracting Manchu characters from an image is a (relatively) simple and viable solution, even though some improvements may need to be made. 24
code examples and output can be found at: https://github.com/jekkilekki/learning-opencv/blob/main /project-manchu/Manchu%20Script%20Reader.ipynb *Filesize may require download to view* 25