Upgrade to Pro — share decks privately, control downloads, hide ads and more …

Thesis Book

Thesis Book

Brynn Bowling

May 12, 2023
Tweet

More Decks by Brynn Bowling

Other Decks in Education

Transcript

  1. B R Y N N B O W L I N G
    B F A 2 0 2 3
    PROCESS BOOK

    View Slide

  2. To The
    Most Inspiring Grandmas
    Sadie, and Debbie


    Thank you!


    View Slide

  3. William Blake Poet


    "To see the world in a grain of sand and heaven in a wildflower, to hold
    infinity in the palm of your hand and eternity in a hour, but how."

    View Slide

  4. Thesis


    A 2D animated/digitally colored and 3D background short film
    with fantastical elements featuring life in the moment, and the
    response to those effects on the world. Highlighted by visually
    appealing elements targeted at young adults. Overall aiming to
    inspire young adults to stay in the moment and live the life around
    you.
    logline
    Sadie, a workaholic, struggles to find balance between being
    overly distracted with her career and being in the present
    moment.

    View Slide

  5. CHARACTER

    View Slide

  6. Multiple styles were tested, set upon and then
    my story ended up changing once again! Sadie
    went through a crazy ride coming to the
    person who she is today. Her character
    although in different stories do look quite
    similar. Have tiny differences that made her
    perfect for the story she would be in.
    When discovering who Sadie would be, I mostly was relying on designed her based off the story, setting, and environment she
    would live in. I really wanted to make a character who was deeply inflected by her own life and surroundings.

    View Slide

  7. I found my character looking a little
    closer into the people who I was
    inspired by which was my
    grandmother Sadie! So now Sadie my
    character came to life in a simpler
    style, in which I feel people have seen
    before and can relate to! She became
    a more relatable person, where you
    could see yourself in the situation. But
    not to simple where she wasn't her
    own computer.

    View Slide

  8. This little man is
    definitely more on the
    side of a prop than a
    character, although he
    may be moving around
    in the environment and
    in Sadie's life, we watch
    him continue his steady
    cat life and watch her
    crumble. He is often the
    constant variable.

    View Slide

  9. The story! has gone through so much
    and developed through so many
    things, blood, sweat, and tears totally
    got me through to the very end, and I
    never stoped up until the due date of
    my presentation cutting and making
    new scenes to push my character and
    storytelling to the limits of my work.
    I'm so glad we've settled upon a story
    with a problem I could not solve, but
    just brought to life Being
    overworked, overwhelmed, with no
    assurance of the actual world and
    solution for the problem. But the
    little things can help cope, with
    Reality and make it worth it all.
    STORY

    View Slide

  10. Designing my set was heavily derived from my personal home!
    yet again we are pulling from something real here in this world and into Sadie's world. Going through
    making the environment and choosing 3D was honestly a lot harder than I anticipated but the results that
    came out when challenging the barrier of my work, really led me to such a beautiful result that I am super
    proud of. I've mastered whatever style I made heavily inspired by Lincoln Adams guide, pushing me in the
    direction of Pascal Companion. I also was inspired by (Yattytheman) and their art style.
    L o c a t e d i n t h e H e a r t o f O h i o

    View Slide

  11. I pulled a lot of inspiration from my current apartment of
    where I'm living right now. I knew I had a few sets and
    the easiest thing to do was something I already knew. My
    living room, kitchen and bedroom all became some kind
    of prop within my actual film. Of course, they were
    personalized for the film, and the story.
    First, I made a huge layout for my story and a couple
    mockups of what the set would eventually look like.

    View Slide

  12. Texturing the sets and props were closely done to resemble the HDRI I would be choosing for the film. Going for this
    blocky, painterly, 2D look, I tried to find the best way to texture in many programs. MANY trials and errors. Photoshop,
    Procreate, and Maya. With a combination of technique, and double layering in maya, I was able to achieve a textured set in
    a few days. heavily inspired by YattytheMan and not fully understanding what they were using to make their work look
    that particular way, I studied a lot! Eventually my sets turned out incredibly surprising and went above my expectations.
    Texturing and Modeling

    View Slide

  13. When developing the HDRI, it was a lengthily process of research and
    development, on the left are a few I made that shows my process. Some are
    unusable and corrupted. And up above is my very first HDRI test!
    A HDRI allows colors to reflect onto your 3D objects adding more colorfulness
    to them when you render your pieces out. It also gives it more of a 2D look,
    while adding a highlight on some my pieces it pushes the flatness of the
    image.
    I eventually settled upon a blue and golden HDRI on the right, this allowed me
    to rotate the HDRI when there was a time change in my scene. When it goes
    from Morning, Evening, and Night-time. These colors are what I was going for
    in the story despite the other HDRIs being more bright and charming.
    H D R I H E A R T B R E A K E R S

    View Slide

  14. View Slide

  15. As your reading this paragraph, I
    literally finished this set not
    even 2 weeks ago! Specifically,
    When I'm presenting my BFA.
    Even though this is my favorite,
    environment. Doing three
    backgrounds MAybeeee was
    going a little overboard.
    Making this set consisted of modeling a few pillows, a phone, a simple dresser, cat bed, books, and some shoes on the floor. The window
    was the most important part to me and the story. Getting it right meant a lot. Luckly for this set, only 4 scenes and type lighting which is
    morning would be needed. I really wanted to push the lighting in this scene to particularly just barely highlight the character and really
    show that she's not in the light, and sort of missing out. The light is really shining, and you want to look out the window.
    B E D R O O M

    View Slide

  16. I took inspiration from my apartment's kitchen and put in some of the details I have at home. Modeling all the props first, I looked to
    make the props a little more 2D applied simple colors on them and UV most of them. This set was my trial run, so I took the models into
    procreate, and then into photoshop... and then procreate again. I had to find an easier way to model and texture my sets since I had so
    many assets to finish. So, I learned another new technique! I also applied the HDRI to this set with the transmission set high to create the
    painted effect. Finished up with adding highlights!
    My first set and the one I'm
    most proud of. Blood sweat and
    tears definitely are imbedded
    into this background. I
    experimented the most and
    took the longest doing trial and
    error with this scene.
    My actual apartment!
    K I T C H E N

    View Slide

  17. View Slide

  18. L I V I N G R O O M
    I guess every set is my favorite set! I started off with basic models and applied simple colors, that last texture process involved doing
    double layering with... A regular Arnold Standard, and then a simple photoshop texture I made with basic squares. This texture allowed my
    model to shine just a little more with a more painterly 2D look. I applied a few more flat objects for the super reflective walls and made
    them appear like the HDRI I made. Applying and forcing many simple fake fixes to get a exceptional result!

    View Slide

  19. View Slide

  20. View Slide

  21. The hardest part for me was how am I going to make my character and
    environment match the same style. The one thing I would have to do is match
    the character who has a more simplistic style really well to my 3D
    environment inspired by Pascal Companion and YattytheMan environment,
    light, and backgrounds. . The goal was to make the 3D scenes more 2D and
    adding a little dimension to the 2D character. Also, the thought of adding
    noise on her, blur and maybe even a rim light will help bring her to life and
    separate her from the backgrounds with blending in with the highlights.
    C O M P I N G

    View Slide

  22. The comp test was the most fun to do! Finally 
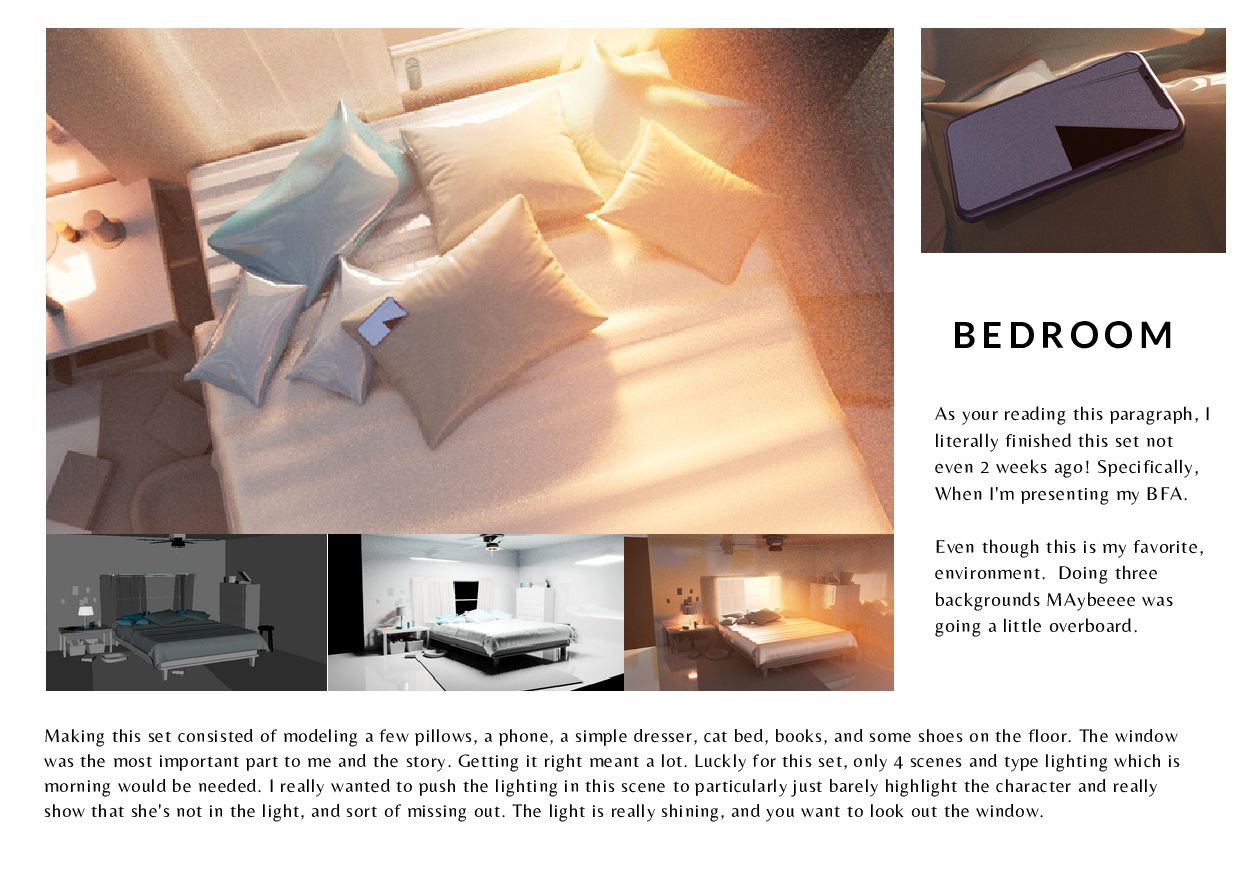
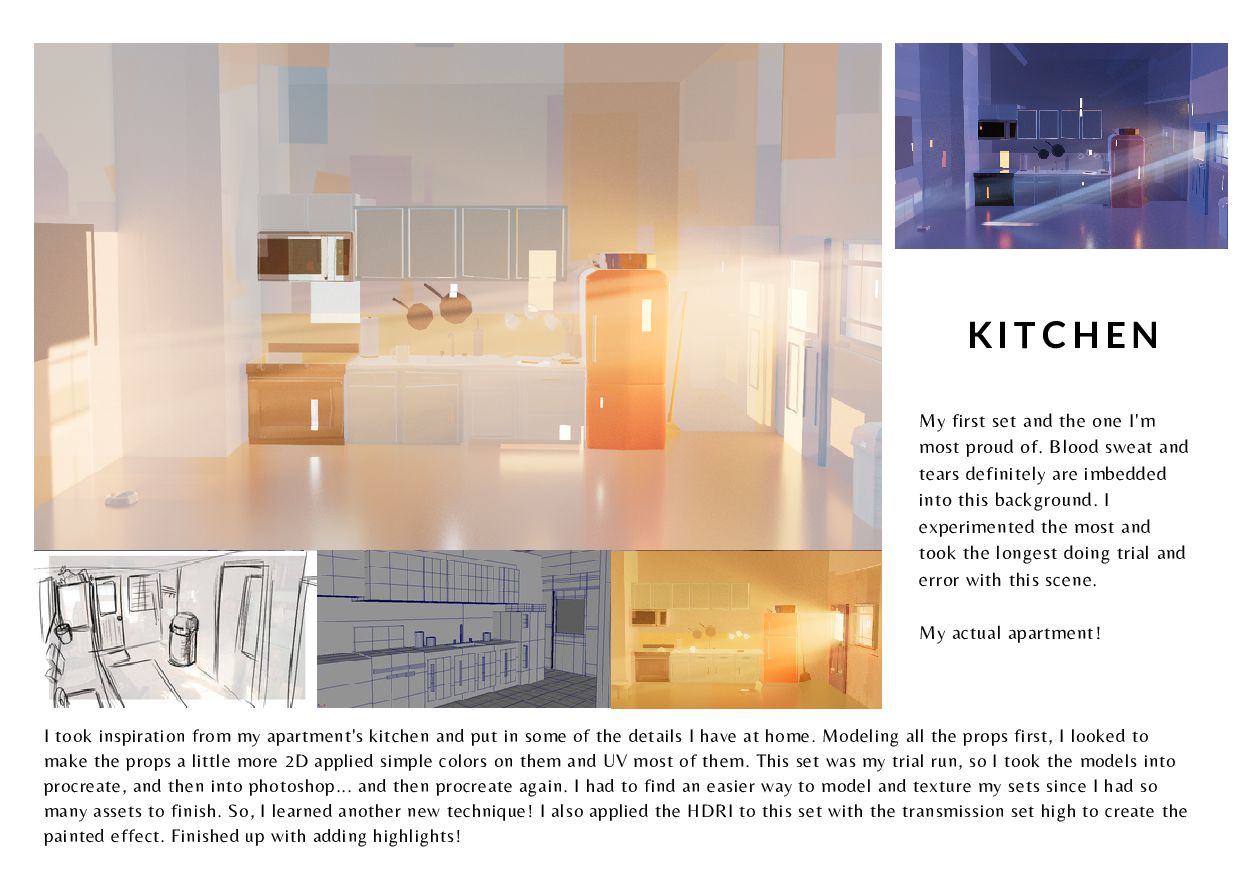
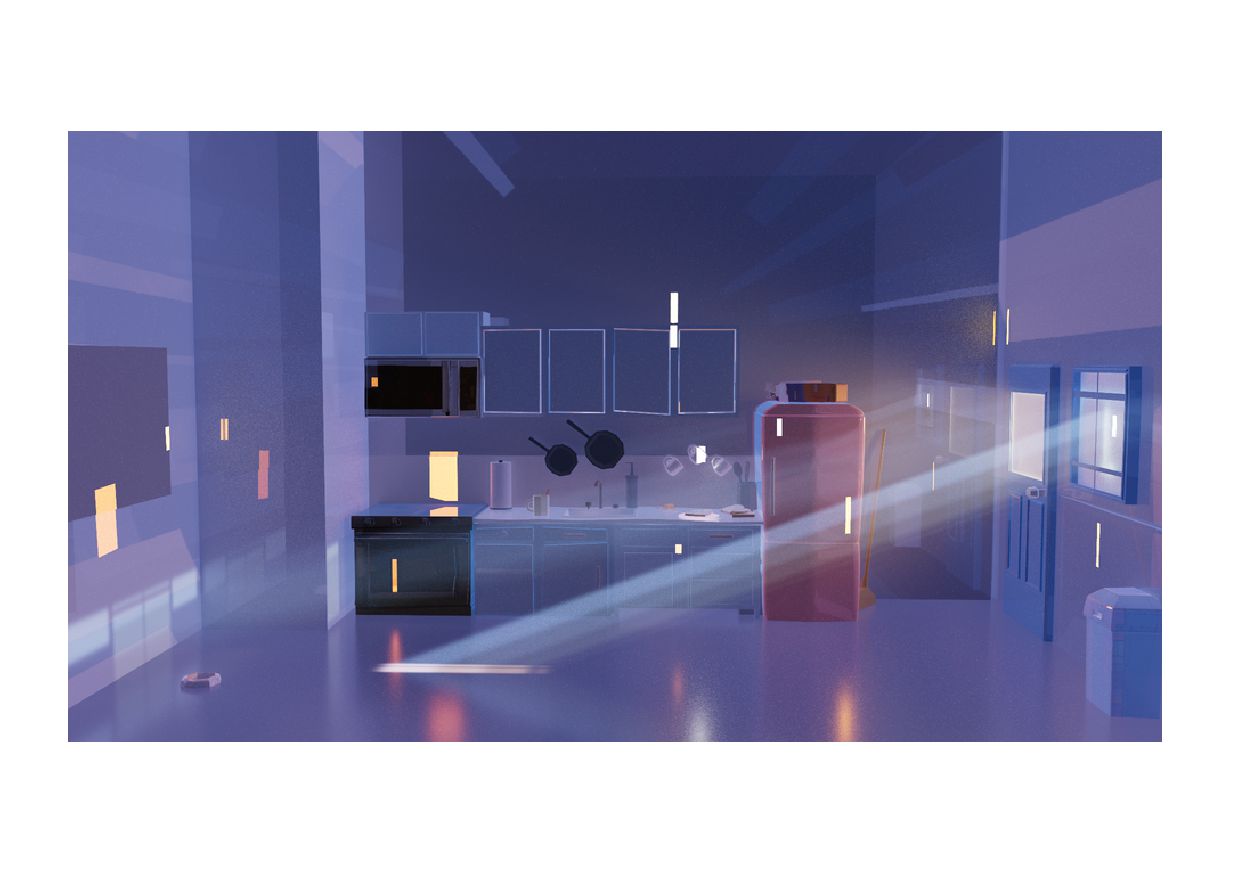
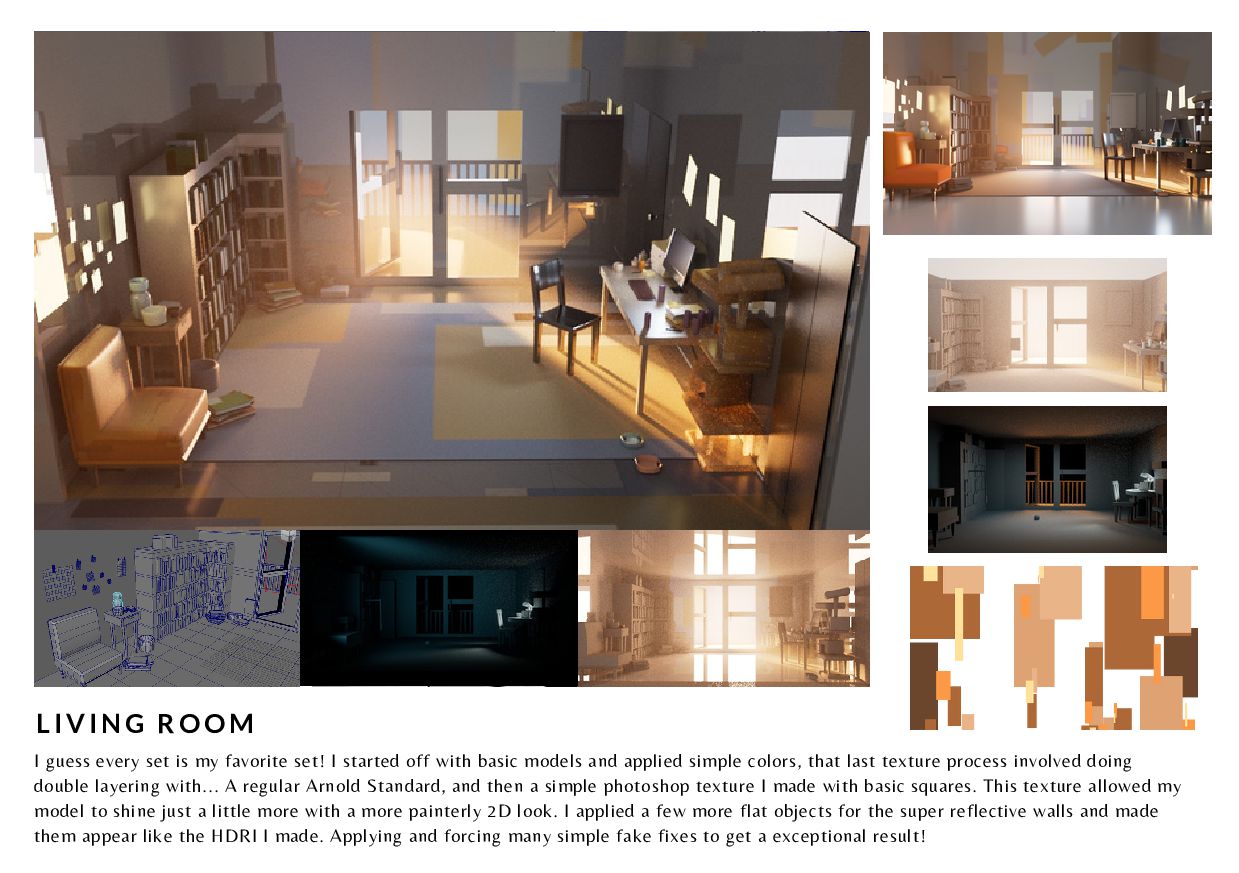
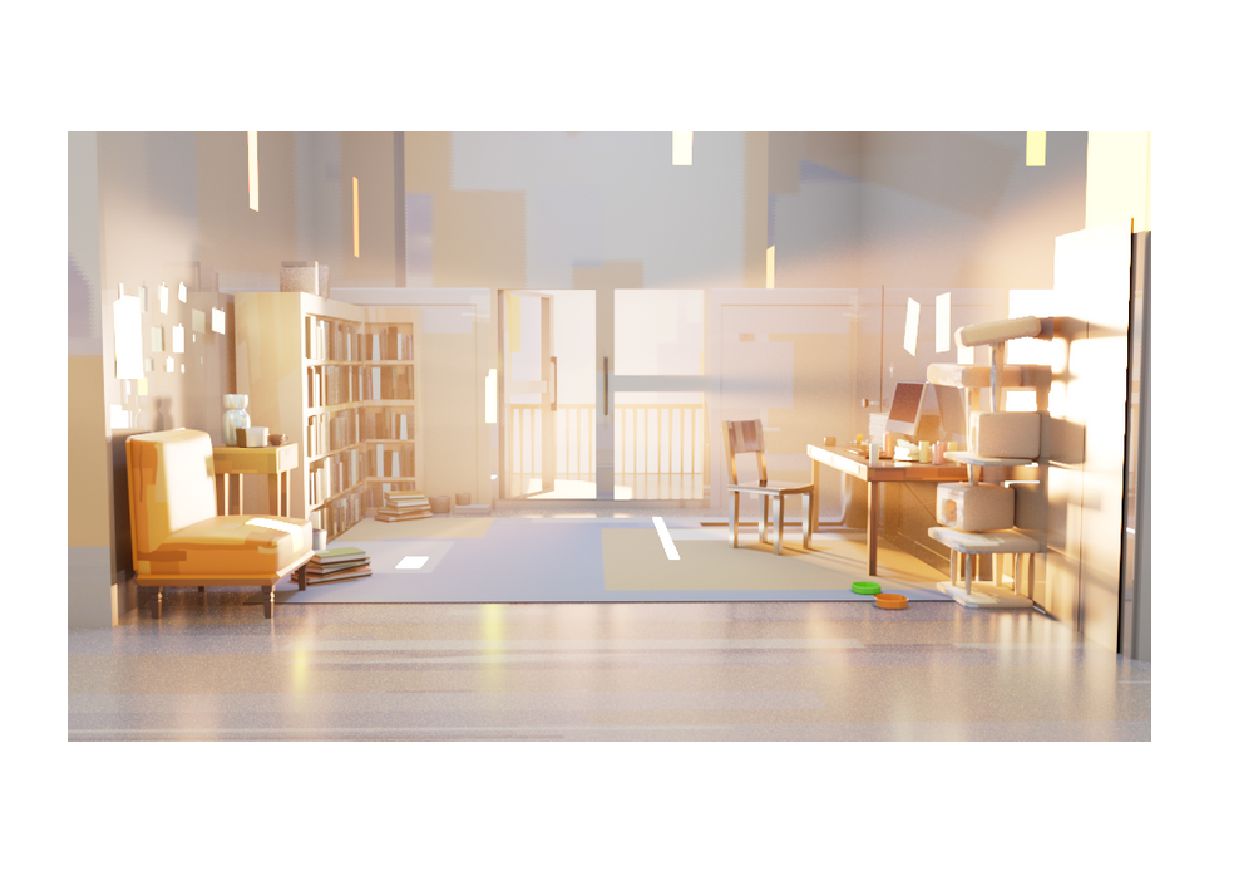
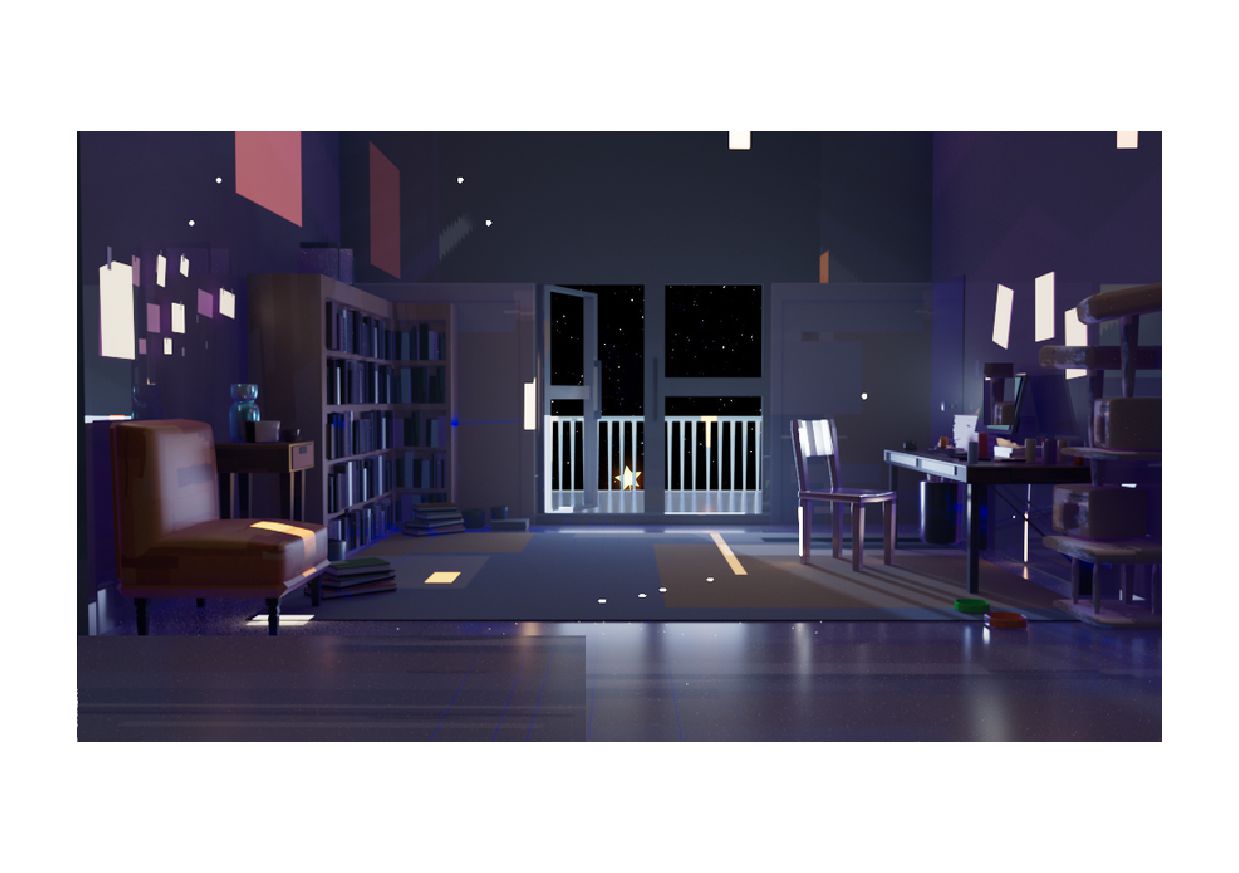
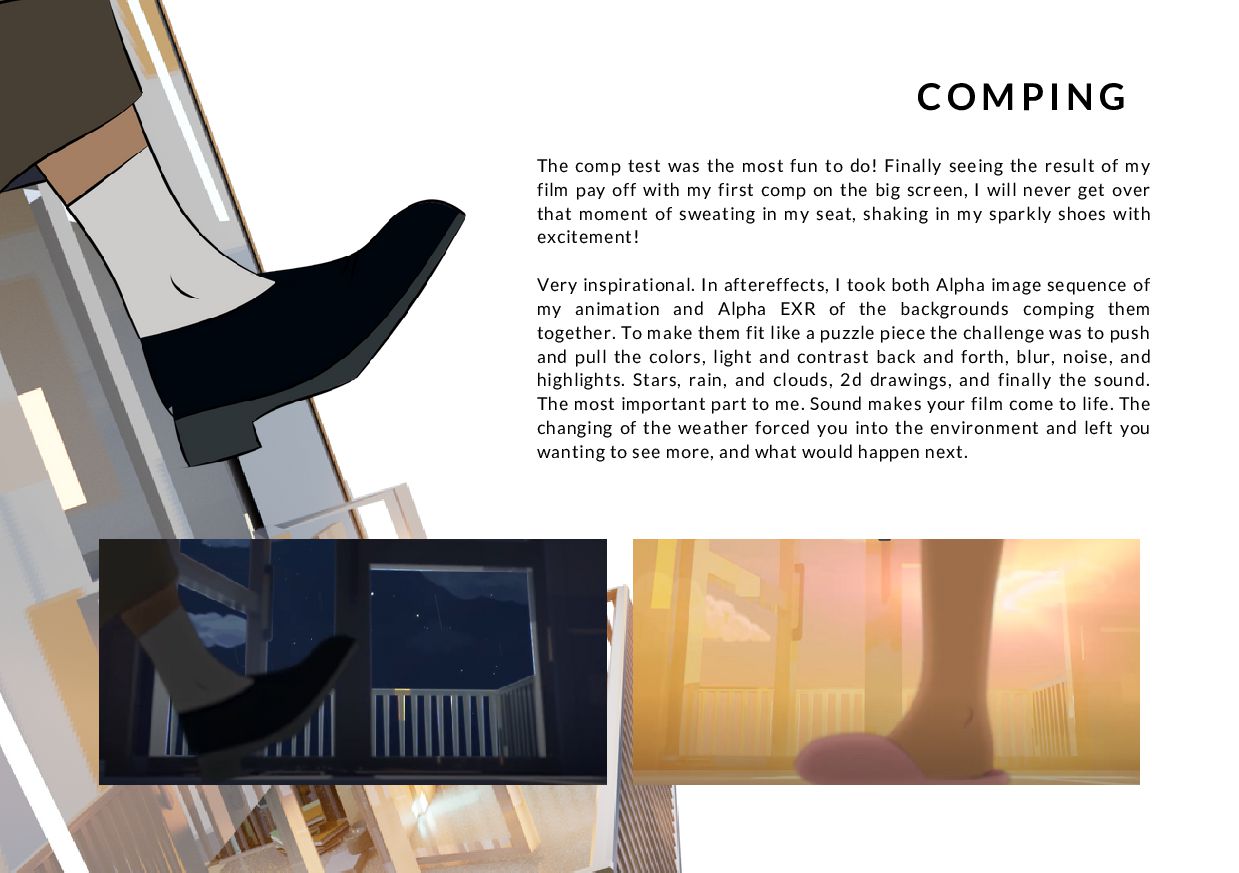
seeing the result of my
    film pay off with my first comp on the big screen, I will never get over
    that moment of sweating in my seat, shaking in my sparkly shoes with
    excitement!
    Very inspirational. In aftereffects, I took both Alpha image sequence of
    my animation and Alpha EXR of the backgrounds comping them
    together. To make them fit like a puzzle piece the challenge was to push
    and pull the colors, light and contrast back and forth, blur, noise, and
    highlights. Stars, rain, and clouds, 2d drawings, and finally the sound.
    The most important part to me. Sound makes your film come to life. The
    changing of the weather forced you into the environment and left you
    wanting to see more, and what would happen next.
    C O M P I N G

    View Slide

  23. B R Y N N B O W L I N G
    T H A N K Y O U

    View Slide