Upgrade to Pro — share decks privately, control downloads, hide ads and more …

ConstraintLayout

 ConstraintLayout

ConstraintLayout in Android

Chetan Sachdeva

January 14, 2018
Tweet

More Decks by Chetan Sachdeva

Other Decks in Technology

Transcript

  1. What? • Constraints are relationship between 2 views in a

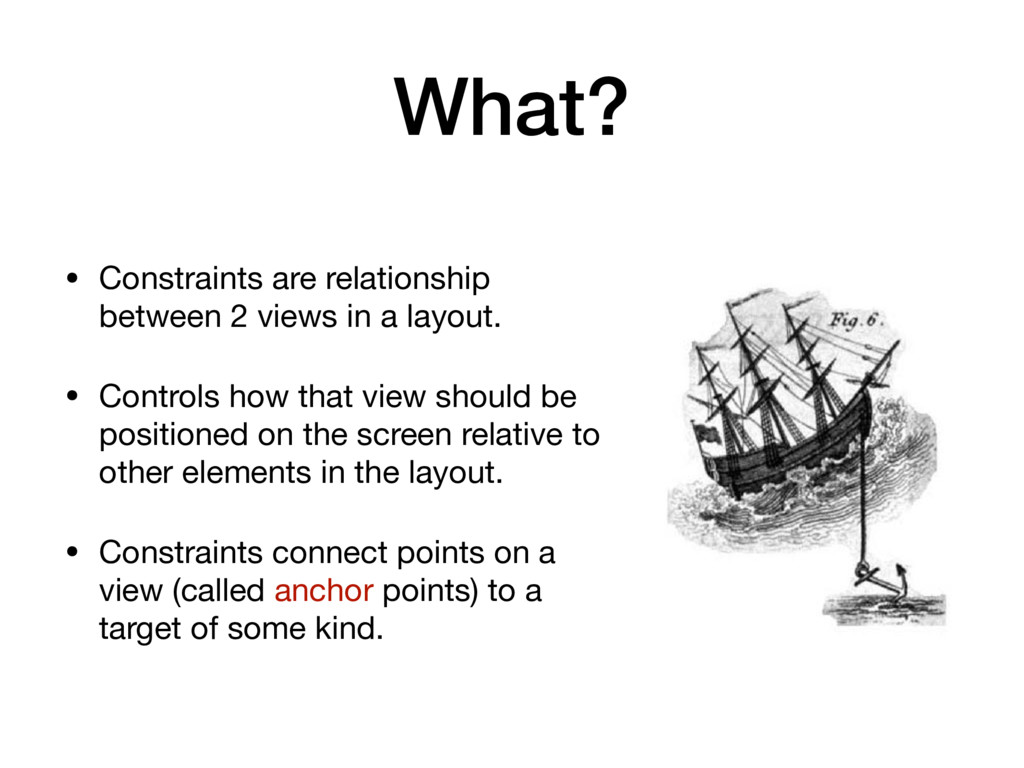
    layout. • Controls how that view should be positioned on the screen relative to other elements in the layout. • Constraints connect points on a view (called anchor points) to a target of some kind.
  2. Why? • Great IDE Support. • Ability to do complex

    layouts. • Better performance due to minimised nesting. • Supports API +9.
  3. <android.support.constraint.ConstraintLayout xmlns:android="http://schemas.android.com/apk/res/android" xmlns:app="http://schemas.android.com/apk/res-auto" xmlns:tools="http://schemas.android.com/tools" android:id="@+id/constraintLayout" android:layout_width="match_parent" android:layout_height="match_parent"> <Button android:id="@+id/button_cancel" android:layout_width="wrap_content"

    android:layout_height="wrap_content" app:layout_constraintStart_toStartOf="@+id/constraintLayout" android:layout_marginStart="16dp" app:layout_constraintBottom_toBottomOf="@+id/constraintLayout" android:layout_marginBottom="16dp" /> <Button android:id="@+id/button_next" android:layout_width="wrap_content" android:layout_height="wrap_content" app:layout_constraintStart_toEndOf="@+id/button_cancel" android:layout_marginStart="16dp" app:layout_constraintBottom_toBottomOf="@+id/constraintLayout" android:layout_marginBottom="16dp"/> </android.support.constraint.ConstraintLayout> Source-Target
  4. Biasing Constraints <android.support.constraint.ConstraintLayout xmlns:android="http://schemas.android.com/apk/res/android" xmlns:app="http://schemas.android.com/apk/res-auto" xmlns:tools="http://schemas.android.com/tools" android:id="@+id/constraintLayout" android:layout_width="match_parent" android:layout_height="match_parent"> <Button

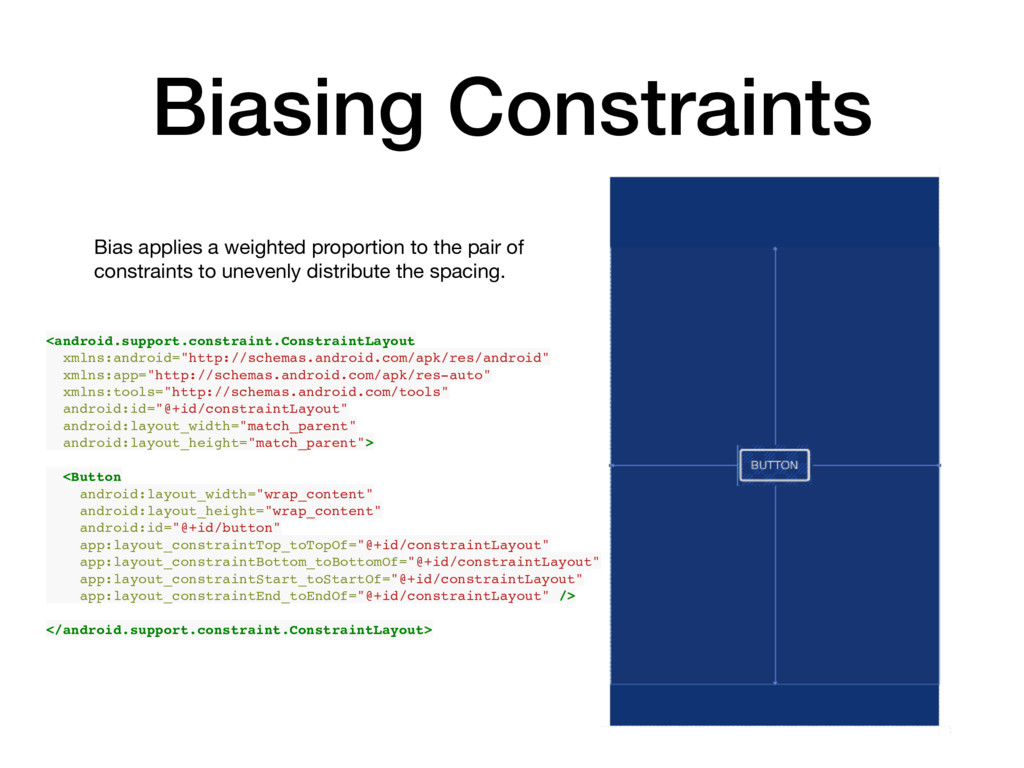
    android:layout_width="wrap_content" android:layout_height="wrap_content" android:id="@+id/button" app:layout_constraintTop_toTopOf="@+id/constraintLayout" app:layout_constraintBottom_toBottomOf="@+id/constraintLayout" app:layout_constraintStart_toStartOf="@+id/constraintLayout" app:layout_constraintEnd_toEndOf="@+id/constraintLayout" /> </android.support.constraint.ConstraintLayout> Bias applies a weighted proportion to the pair of constraints to unevenly distribute the spacing.
  5. View Measurements • Wrap Content: The view expands as needed

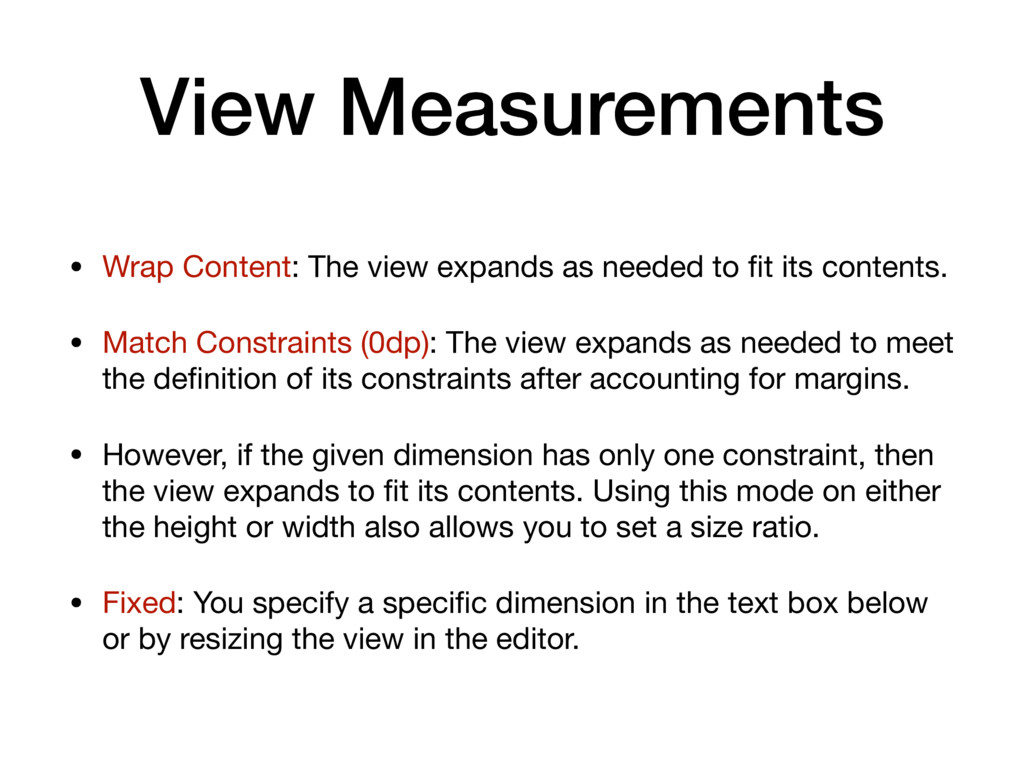
    to fit its contents. • Match Constraints (0dp): The view expands as needed to meet the definition of its constraints after accounting for margins. • However, if the given dimension has only one constraint, then the view expands to fit its contents. Using this mode on either the height or width also allows you to set a size ratio. • Fixed: You specify a specific dimension in the text box below or by resizing the view in the editor.
  6. Constraint Dimension Ratio • With ConstraintLayout, you will no longer

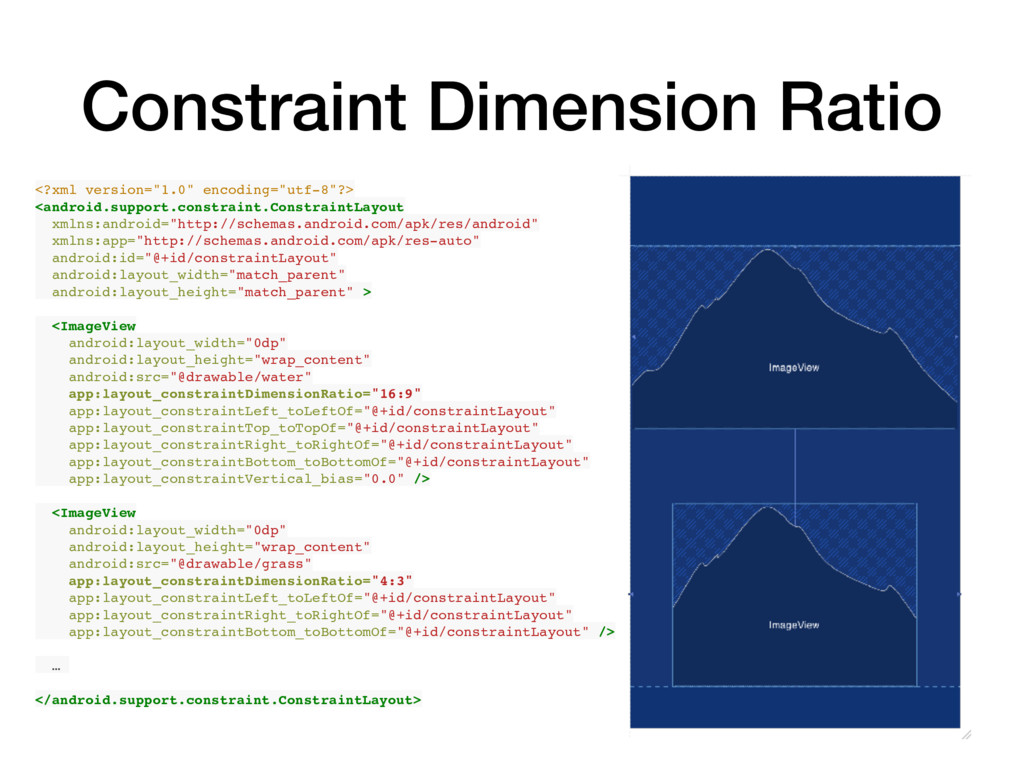
    have to create a custom subclass of View or ViewGroup thanks to layout_constraintDimensionRatio. • This feature requires one of the dimensions in the attached view to be “known” (fixed dimension or wrap_content) and the other to be “any size” (0dp).
  7. Constraint Dimension Ratio <?xml version="1.0" encoding="utf-8"?> <android.support.constraint.ConstraintLayout xmlns:android="http://schemas.android.com/apk/res/android" xmlns:app="http://schemas.android.com/apk/res-auto" android:id="@+id/constraintLayout"

    android:layout_width="match_parent" android:layout_height="match_parent" > <ImageView android:layout_width="0dp" android:layout_height="wrap_content" android:src="@drawable/water" app:layout_constraintDimensionRatio="16:9" app:layout_constraintLeft_toLeftOf="@+id/constraintLayout" app:layout_constraintTop_toTopOf="@+id/constraintLayout" app:layout_constraintRight_toRightOf="@+id/constraintLayout" app:layout_constraintBottom_toBottomOf="@+id/constraintLayout" app:layout_constraintVertical_bias="0.0" /> <ImageView android:layout_width="0dp" android:layout_height="wrap_content" android:src="@drawable/grass" app:layout_constraintDimensionRatio="4:3" app:layout_constraintLeft_toLeftOf="@+id/constraintLayout" app:layout_constraintRight_toRightOf="@+id/constraintLayout" app:layout_constraintBottom_toBottomOf="@+id/constraintLayout" /> … </android.support.constraint.ConstraintLayout>
  8. Guidelines • In cases where an arbitrary anchor point is

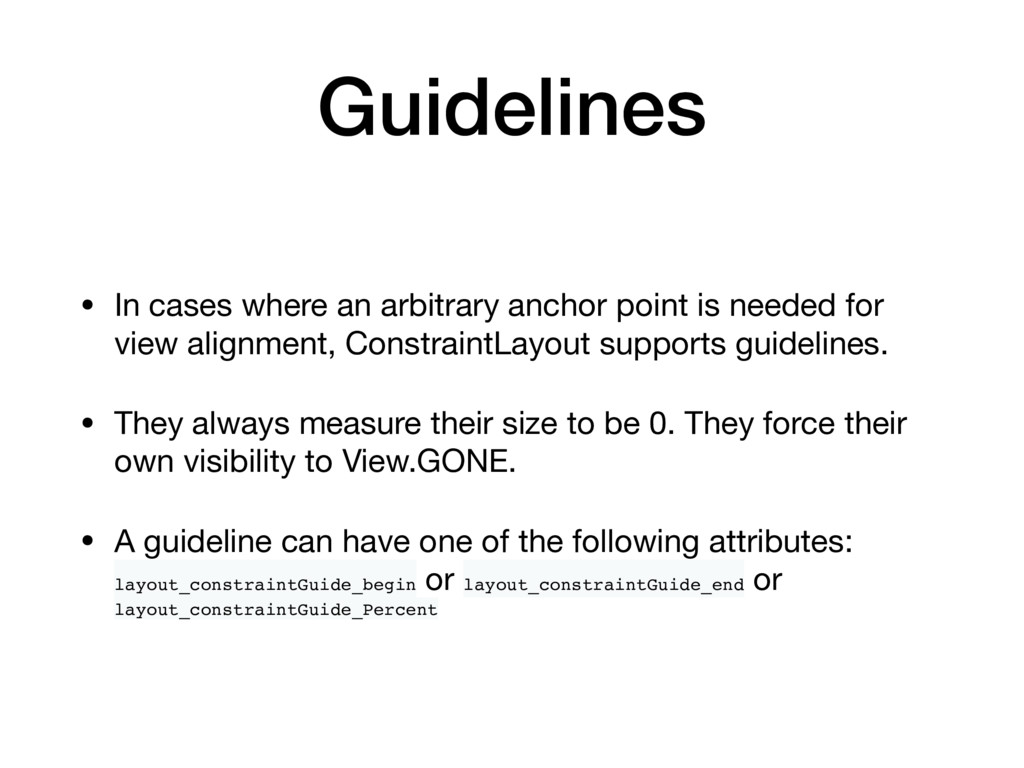
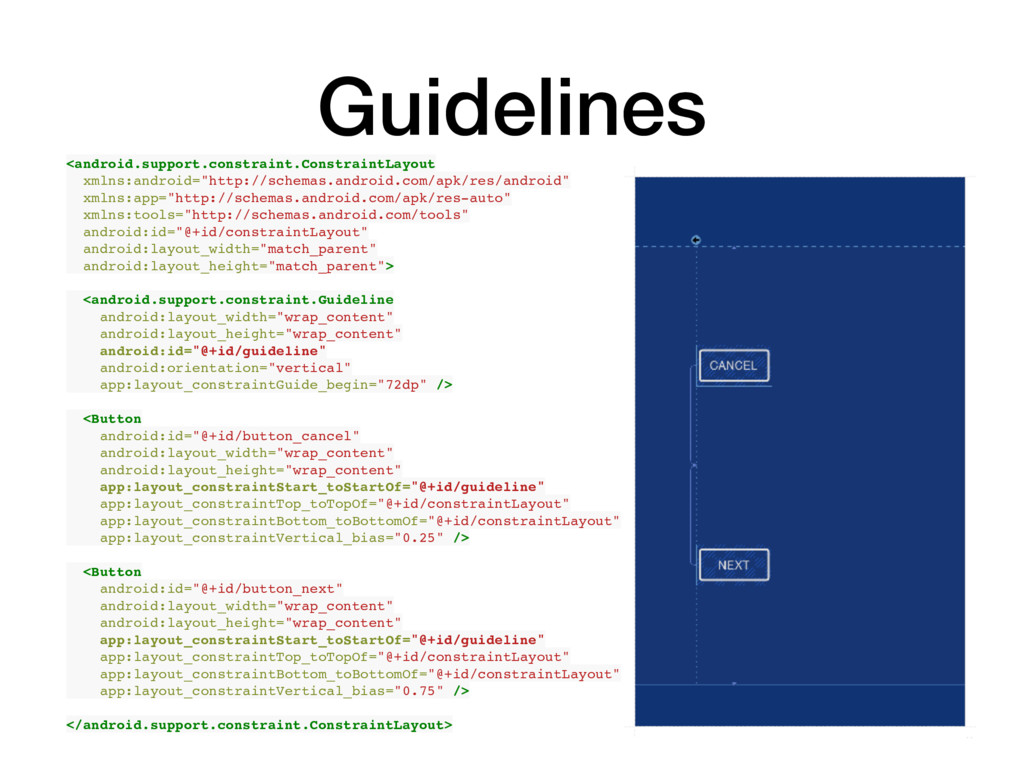
    needed for view alignment, ConstraintLayout supports guidelines. • They always measure their size to be 0. They force their own visibility to View.GONE. • A guideline can have one of the following attributes: layout_constraintGuide_begin or layout_constraintGuide_end or layout_constraintGuide_Percent
  9. Guidelines <android.support.constraint.ConstraintLayout xmlns:android="http://schemas.android.com/apk/res/android" xmlns:app="http://schemas.android.com/apk/res-auto" xmlns:tools="http://schemas.android.com/tools" android:id="@+id/constraintLayout" android:layout_width="match_parent" android:layout_height="match_parent"> <android.support.constraint.Guideline android:layout_width="wrap_content"

    android:layout_height="wrap_content" android:id="@+id/guideline" android:orientation="vertical" app:layout_constraintGuide_begin="72dp" /> <Button android:id="@+id/button_cancel" android:layout_width="wrap_content" android:layout_height="wrap_content" app:layout_constraintStart_toStartOf="@+id/guideline" app:layout_constraintTop_toTopOf="@+id/constraintLayout" app:layout_constraintBottom_toBottomOf="@+id/constraintLayout" app:layout_constraintVertical_bias="0.25" /> <Button android:id="@+id/button_next" android:layout_width="wrap_content" android:layout_height="wrap_content" app:layout_constraintStart_toStartOf="@+id/guideline" app:layout_constraintTop_toTopOf="@+id/constraintLayout" app:layout_constraintBottom_toBottomOf="@+id/constraintLayout" app:layout_constraintVertical_bias="0.75" /> </android.support.constraint.ConstraintLayout>
  10. Barriers • A barrier is an invisible view that contains

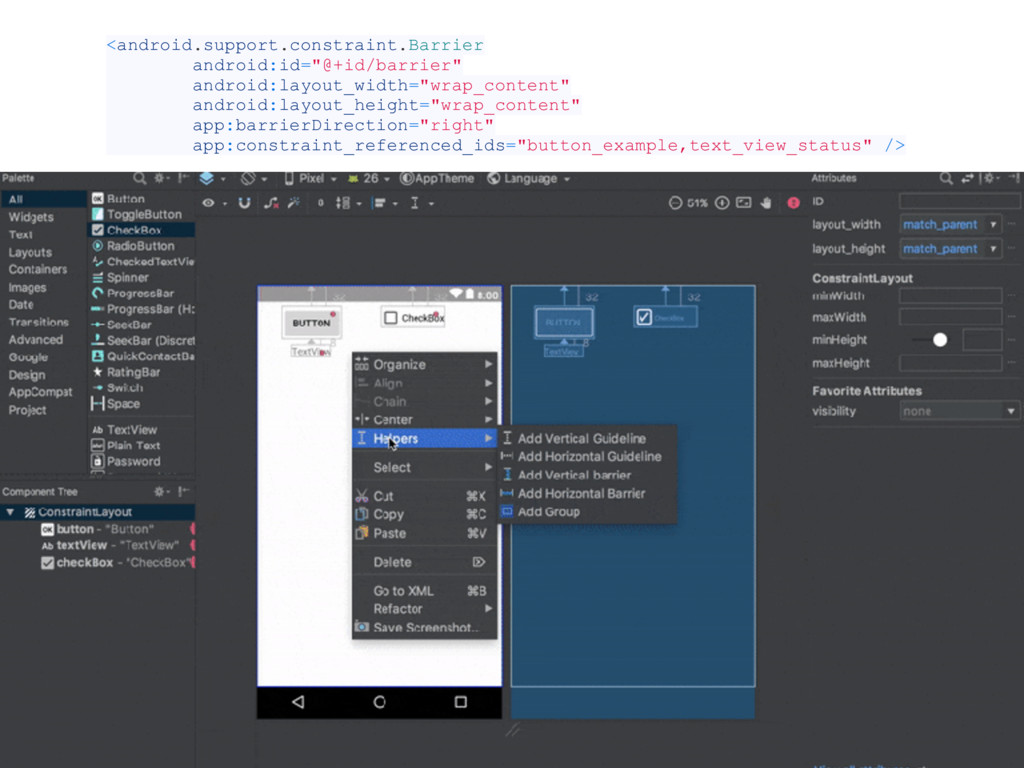
    reference to the views that you wish to use to form a “barrier” against. • If one of the views grows, the barrier will adjust its size to the largest height or width of the referenced items.
  11. Chains • Chains allow you to control the space between

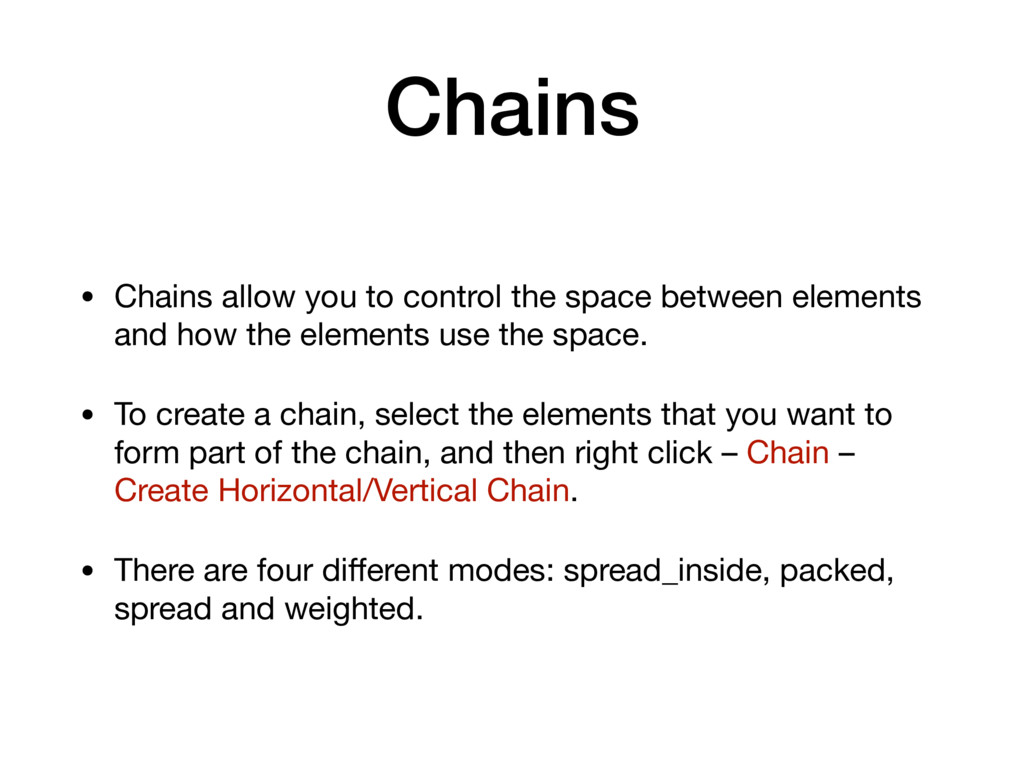
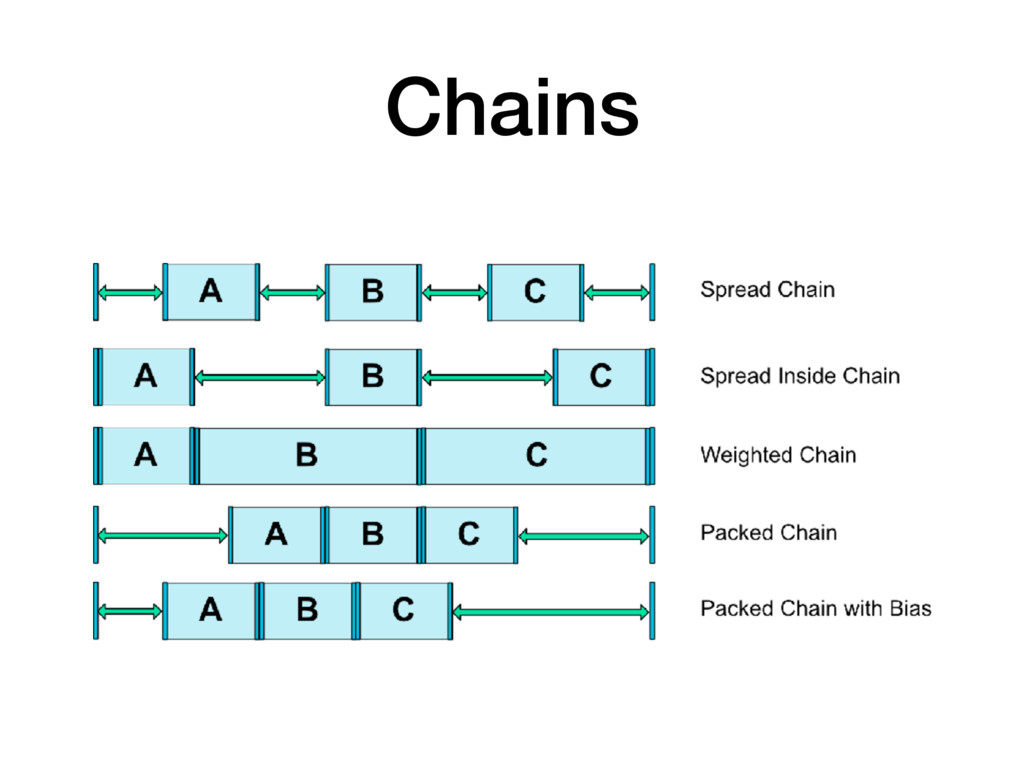
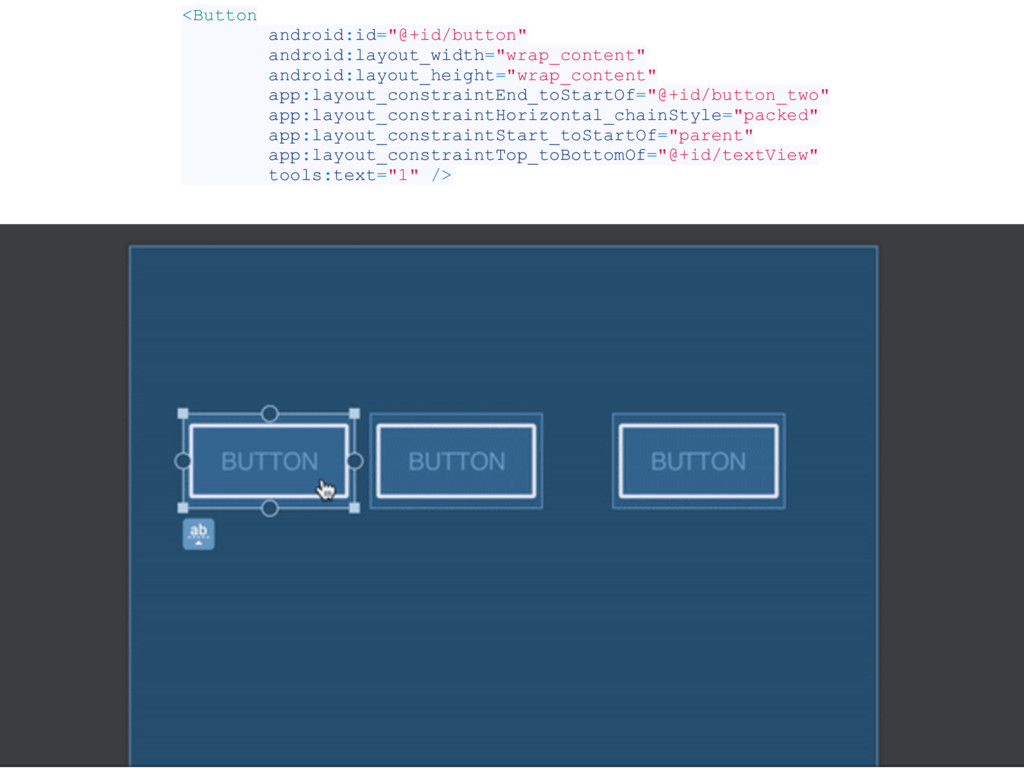
    elements and how the elements use the space. • To create a chain, select the elements that you want to form part of the chain, and then right click – Chain – Create Horizontal/Vertical Chain. • There are four different modes: spread_inside, packed, spread and weighted.
  12. Groups • With groups, you can logically group together certain

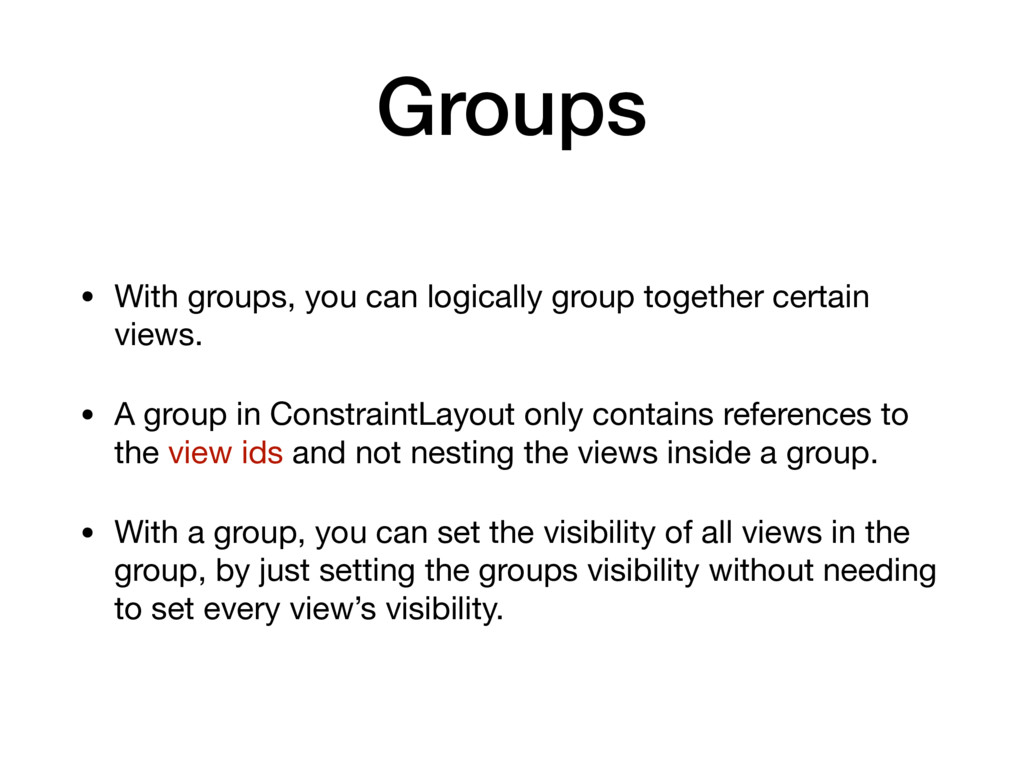
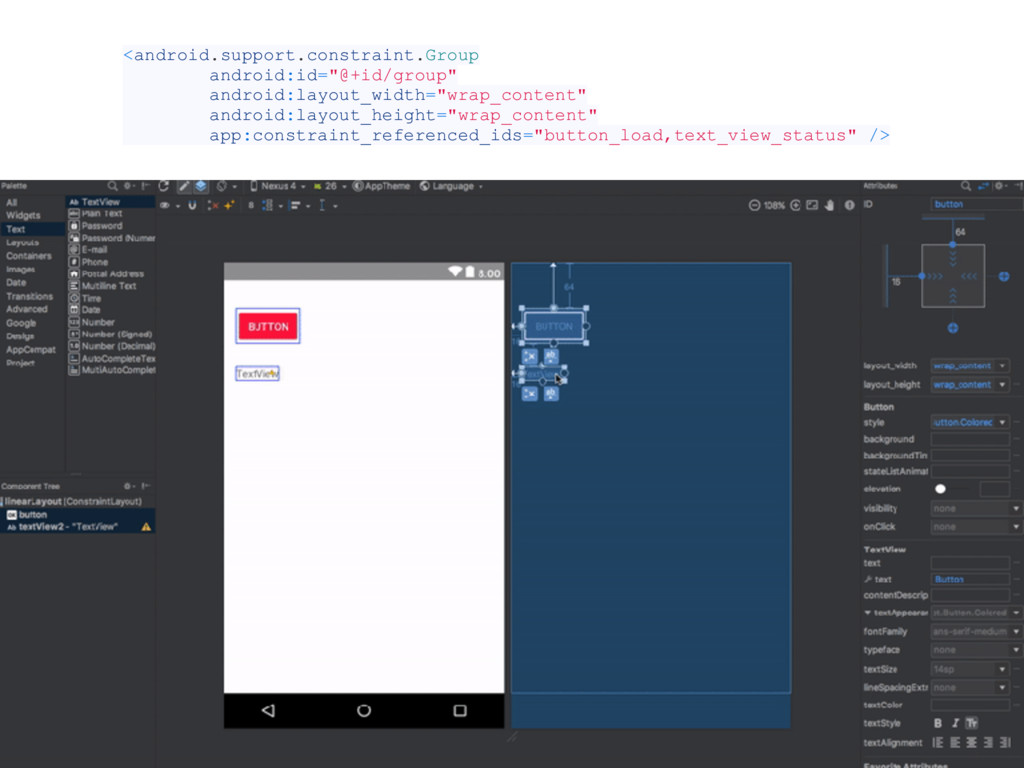
    views. • A group in ConstraintLayout only contains references to the view ids and not nesting the views inside a group. • With a group, you can set the visibility of all views in the group, by just setting the groups visibility without needing to set every view’s visibility.
  13. Constraint Set @Override protected void onCreate(Bundle savedInstanceState) { super.onCreate(savedInstanceState); Context

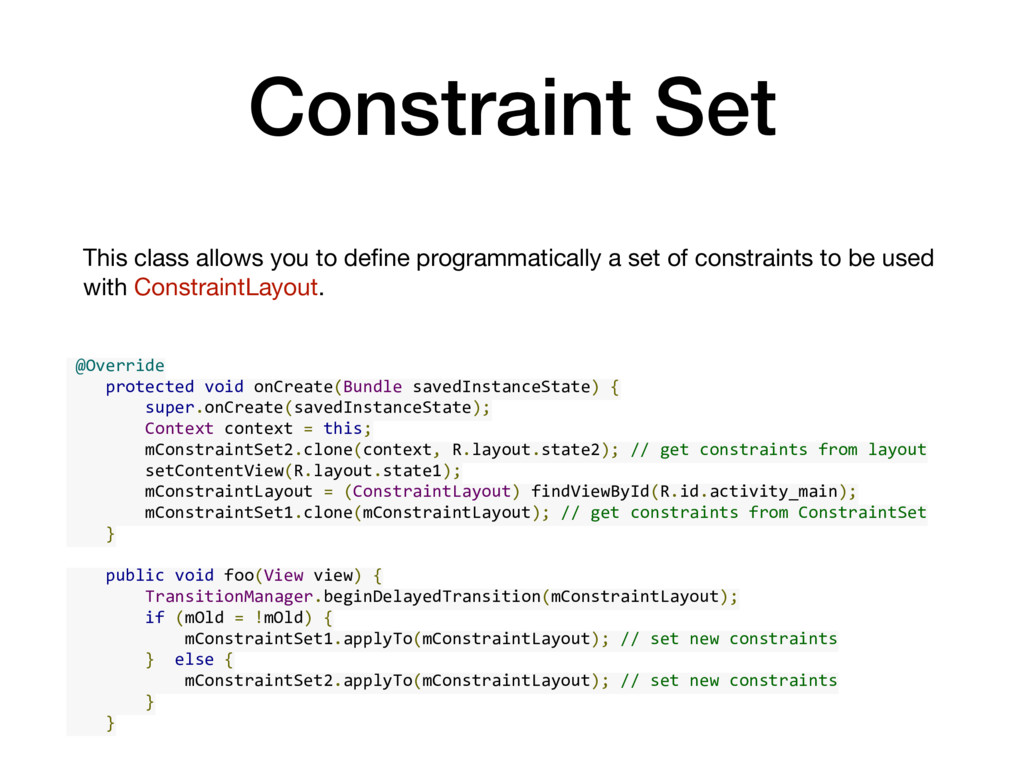
    context = this; mConstraintSet2.clone(context, R.layout.state2); // get constraints from layout setContentView(R.layout.state1); mConstraintLayout = (ConstraintLayout) findViewById(R.id.activity_main); mConstraintSet1.clone(mConstraintLayout); // get constraints from ConstraintSet } public void foo(View view) { TransitionManager.beginDelayedTransition(mConstraintLayout); if (mOld = !mOld) { mConstraintSet1.applyTo(mConstraintLayout); // set new constraints } else { mConstraintSet2.applyTo(mConstraintLayout); // set new constraints } } This class allows you to define programmatically a set of constraints to be used with ConstraintLayout.
  14. Infer Constraints • Instead of adding constraints to every view

    as you place them in the layout, you can move each view into the positions you desire, and then click Infer Constraints to automatically create constraints. • Infer Constraints scans the layout to determine the most effective set of constraints for all views. It makes a best effort to constrain the views to their current positions while allowing flexibility.
  15. Auto Connect • Autoconnect is a separate feature that is

    either on or off. • When turned on, it automatically creates two or more constraints for each view as you add them to the layout, but only when appropriate to constrain the view to the parent layout. • Autoconnect does not create constraints to other views in the layout.