$30 off During Our Annual Pro Sale. View Details »

Android Things, The IoT Platform for Everyone

Nicola Corti
November 25, 2017

Android Things, The IoT Platform for Everyone

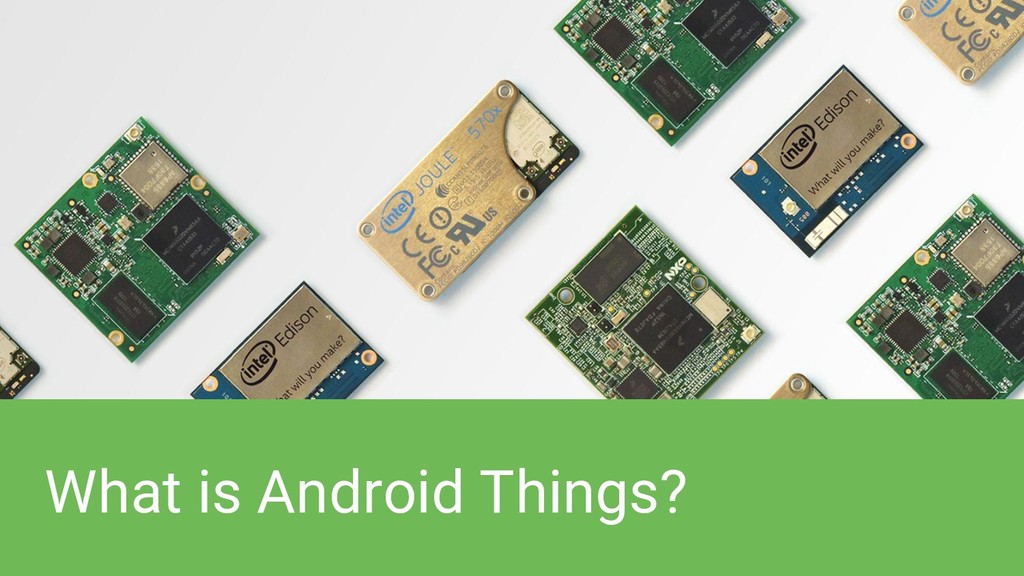
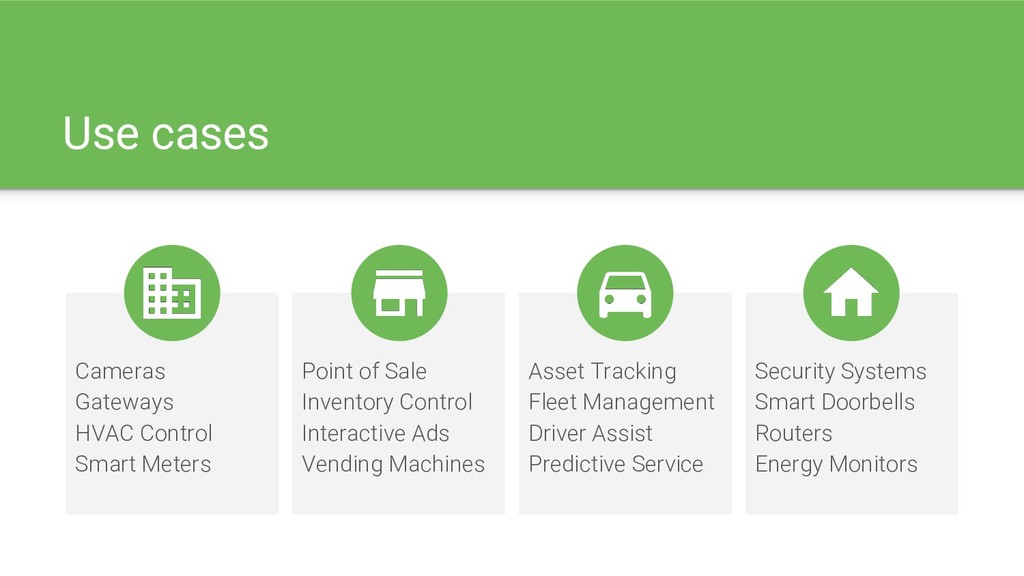
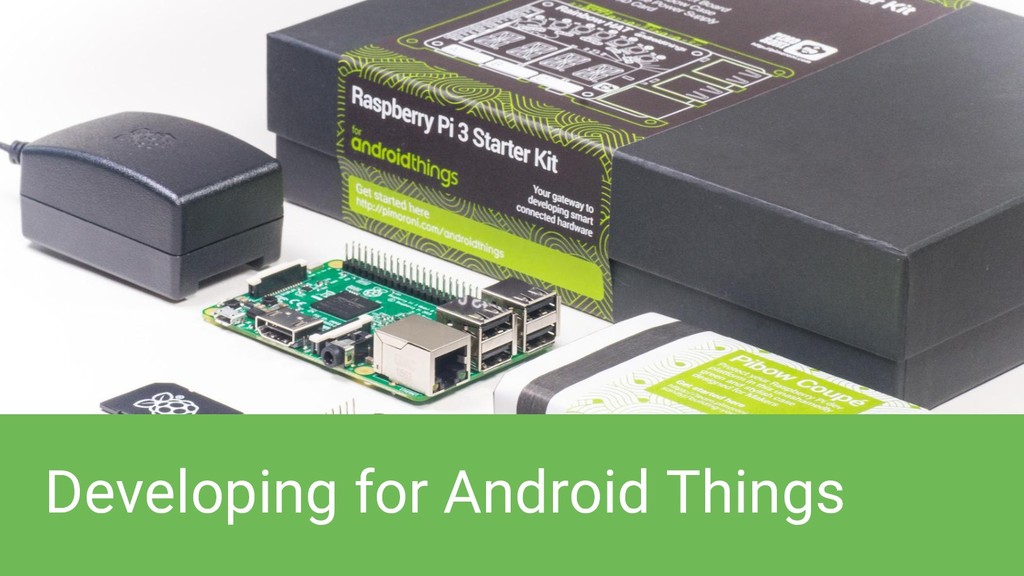
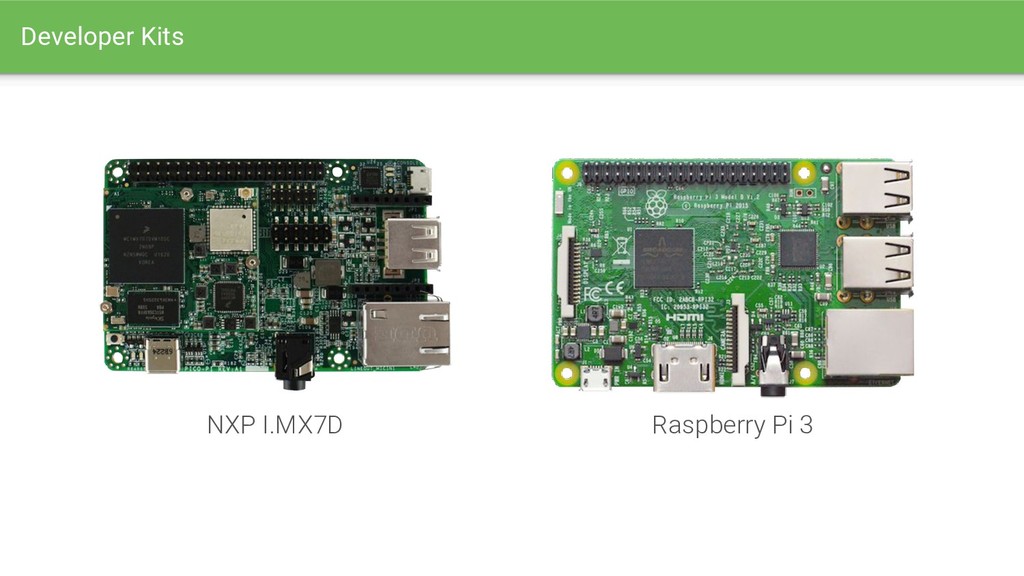
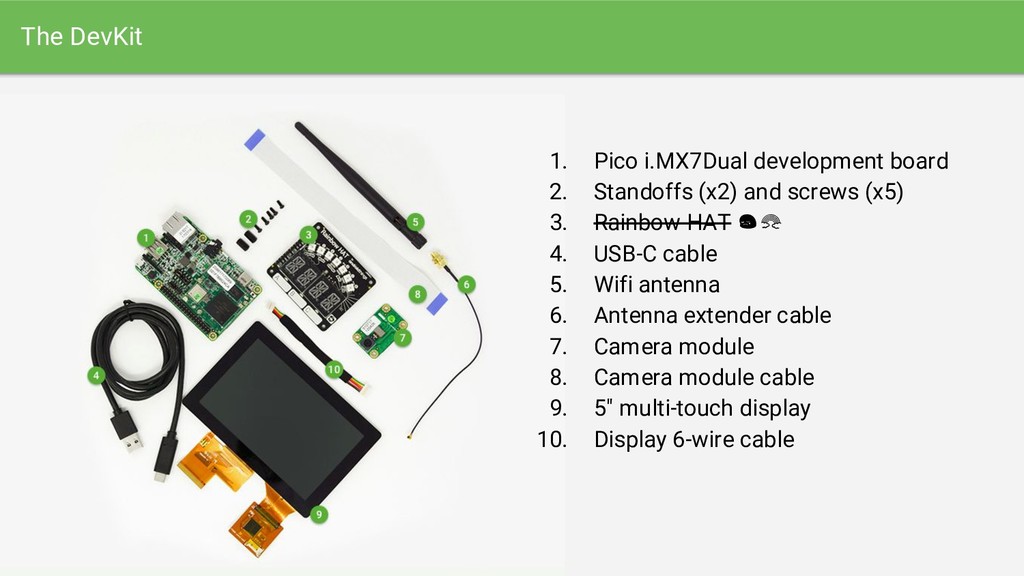
Ever wanted to try Android Things? Have you been intrigued by using Android for IOT? Visit this workshop! We will have Android Things Devkits including some cameras, buttons, LEDs, fans and more.

We will build a collective display and display a message together using buttons.

Never worked with hardware before? Don’t worry, we will help you to get up and running in a few minutes.

We will also talk about connecting Firebase to your Android Things application.

You will need your own laptop for this workshop. Please have an up to date Android Studio installed, update your SDK to at least API-Level 26 (AndroidOreo) and have a look at https://developer.android.com/things/preview/index.html Hardware setup will happen during the workshop.

Nicola Corti

November 25, 2017
Tweet

More Decks by Nicola Corti

Other Decks in Technology

Transcript

  1. Android Things
    The IoT Platform for Everyone
    Nicola Corti
    @cortinico
    [email protected]
    Michael Langer
    @mchllngr
    [email protected]
    Jossi Wolf
    @fleischwolf13
    [email protected]

    View Slide

  2. Please start downloading this file…
    bit.ly/devfesthh-iotimage
    And Android Studio in case you don’t have it ;)

    View Slide

  3. What is Android Things?

    View Slide

  4. View Slide

  5. Cameras
    Gateways
    HVAC Control
    Smart Meters
    Security Systems
    Smart Doorbells
    Routers
    Energy Monitors
    Point of Sale
    Inventory Control
    Interactive Ads
    Vending Machines
    Asset Tracking
    Fleet Management
    Driver Assist
    Predictive Service
    Use cases

    View Slide

  6. Any other Android library...
    Android SDK Play Services Firebase
    Android Studio Cloud Platform
    Similarities

    View Slide

  7. No Play Store Deploy OTAs
    Subset of
    APIs
    Custom
    Hardware
    Single Purpose
    Device
    Differences

    View Slide

  8. Consider Alternate UI
    Displays are Optional

    View Slide

  9. Applications
    Launcher Phone Messaging Contacts Calendar Browser Settings
    Application Framework
    Activity
    Manager
    Window Manager Power
    Manager
    Resource
    Manager
    XMPP
    Service
    Content
    Providers
    Wallpapers System UI
    Package
    Manager
    Telephony
    Manager
    Location
    Manager
    Connectivity
    Manager
    View
    System
    Runtime
    Permissions
    Soft
    Keyboards Notifications
    Libraries
    Surface
    Manager
    Media
    Framework
    Chromium SSL HAL
    Audio
    Manager
    SQLite Open GL libc
    Core
    Libraries
    Android
    Runtime (ART)
    Android Runtime
    Linux Kernel
    Display Driver Camera Driver Bluetooth Driver
    Binder (IPC)
    Driver
    USB Driver Audio Driver WiFi Driver
    Power
    Management

    View Slide

  10. Applications
    Launcher Phone Messaging Contacts Calendar Browser Settings
    Application Framework
    Activity
    Manager
    Window Manager Power
    Manager
    Resource
    Manager
    XMPP
    Service
    Content
    Providers
    Wallpapers System UI
    Package
    Manager
    Telephony
    Manager
    Location
    Manager
    Connectivity
    Manager
    View
    System
    Runtime
    Permissions
    Soft
    Keyboards Notifications
    Libraries
    Surface
    Manager
    Media
    Framework
    Chromium SSL HAL
    Audio
    Manager
    SQLite Open GL libc
    Core
    Libraries
    Android
    Runtime (ART)
    Android Runtime
    Linux Kernel
    Display Driver Camera Driver Bluetooth Driver
    Binder (IPC)
    Driver
    USB Driver Audio Driver WiFi Driver
    Power
    Management

    View Slide

  11. Applications
    Launcher Phone Messaging Contacts Calendar Browser Settings
    Application Framework
    Activity
    Manager
    Window Manager Power
    Manager
    Resource
    Manager
    XMPP
    Service
    Wallpapers System UI
    Package
    Manager
    Telephony
    Manager
    Location
    Manager
    Connectivity
    Manager
    View
    System
    Soft
    Keyboards Notifications
    Libraries
    Surface
    Manager
    Media
    Framework
    Chromium SSL HAL
    Audio
    Manager
    SQLite Open GL libc
    Core
    Libraries
    Android
    Runtime (ART)
    Android Runtime
    Linux Kernel
    Display Driver Camera Driver Bluetooth Driver
    Binder (IPC)
    Driver
    USB Driver Audio Driver WiFi Driver
    Power
    Management
    Things Support Library
    Peripheral
    I/O
    Device
    Management
    User
    Drivers Connectivity

    View Slide

  12. Automatic
    Security Updates
    Signed Images Verified Boot A/B Rollback
    Protection
    Security

    View Slide

  13. Android Framework
    Hardware Libraries
    Linux Kernel
    Managed by Google
    Apps
    User Drivers
    Managed by Developers
    Shipping with Google

    View Slide

  14. The Android Things Console

    View Slide

  15. View Slide

  16. View Slide

  17. View Slide

  18. Developing for Android Things

    View Slide

  19. NXP I.MX7D Raspberry Pi 3
    Developer Kits

    View Slide

  20. The DevKit
    1. Pico i.MX7Dual development board
    2. Standoffs (x2) and screws (x5)
    3. Rainbow HAT
    4. USB-C cable
    5. Wifi antenna
    6. Antenna extender cable
    7. Camera module
    8. Camera module cable
    9. 5" multi-touch display
    10. Display 6-wire cable

    View Slide

  21. The Rainbow HAT
    ● Seven APA102 multicolor LEDs
    ● Four 14-segment alphanumeric displays
    (green LEDs)
    ● HT16K33 display driver chip
    ● Three capacitive touch buttons
    ● Atmel QT1070 capacitive touch driver chip
    ● Blue, green, and red LEDs
    ● BMP280 temperature and pressure sensor
    ● Piezo buzzer
    ● Breakout pins for servo, 12C, SPI, and UART
    (all 3v3)

    View Slide

  22. View Slide

  23. Electronics 101

    View Slide

  24. Broadboards
    ● Construction base for
    prototyping electronics
    ● Useful since they are
    solderless
    ● Either big or small available

    View Slide

  25. Jumper Wire

    View Slide

  26. LED
    Emits visible light when an electric
    current passes through it

    View Slide

  27. Buttons
    Allows electricity to flow between
    its two contacts

    View Slide

  28. Resistors
    Used to reduce current flow

    View Slide

  29. Sensors

    View Slide

  30. Pico i.MX7 Pinout

    View Slide

  31. Peripheral Driver Library - Github
    + many more...
    bit.ly/androidthings-github
    Button GPS
    PWM Servo
    RGB LED Strip
    Temperature
    Sensor
    Capacitive
    Touch Buttons
    Peripheral I/O - Low Level Access
    GPIO PWM
    I2C SPI
    UART I2S
    Hardware Access

    View Slide

  32. Your First Project

    View Slide

  33. View Slide

  34. View Slide

  35. View Slide

  36. View Slide

  37. dependencies {
    provided 'com.google.android.things:androidthings:...'
    }
    Main Activity

    View Slide

  38. dependencies {
    provided 'com.google.android.things:androidthings:...'
    }


    ...


    Main Activity

    View Slide

  39. dependencies {
    provided 'com.google.android.things:androidthings:...'
    }


    ...


    Main Activity

    View Slide

  40. // Open a peripheral connection
    PeripheralManagerService service = new PeripheralManagerService();
    Gpio ledGpio = service.openGpio(“GPIO_37”);
    // Configure the peripheral
    ledGpio.setDirection(Gpio.DIRECTION_OUT_INITIALLY_LOW);
    // Set it at some point later
    ledGpio.setValue(true);
    // Do not forget to close gpio
    ledGpio.close();
    Simple Peripheral I/O: Output

    View Slide

  41. // Open a peripheral connection
    PeripheralManagerService service = new PeripheralManagerService();
    Gpio ledGpio = service.openGpio(“GPIO_37”);
    // Configure the peripheral
    ledGpio.setDirection(Gpio.DIRECTION_OUT_INITIALLY_LOW);
    // Set it at some point later
    ledGpio.setValue(true);
    // Do not forget to close gpio
    ledGpio.close();
    Simple Peripheral I/O: Output

    View Slide

  42. // Open a peripheral connection
    PeripheralManagerService service = new PeripheralManagerService();
    Gpio ledGpio = service.openGpio(“GPIO_37”);
    // Configure the peripheral
    ledGpio.setDirection(Gpio.DIRECTION_OUT_INITIALLY_LOW);
    // Set it at some point later
    ledGpio.setValue(true);
    // Do not forget to close gpio
    ledGpio.close();
    Simple Peripheral I/O: Output

    View Slide

  43. // Open a peripheral connection
    PeripheralManagerService service = new PeripheralManagerService();
    Gpio ledGpio = service.openGpio(“GPIO_37”);
    // Configure the peripheral
    ledGpio.setDirection(Gpio.DIRECTION_OUT_INITIALLY_LOW);
    // Set it at some point later
    ledGpio.setValue(true);
    // Do not forget to close gpio
    ledGpio.close();
    Simple Peripheral I/O: Output

    View Slide

  44. // Open a peripheral connection
    PeripheralManagerService service = new PeripheralManagerService();
    Gpio ledGpio = service.openGpio(“GPIO_37”);
    // Configure the peripheral
    ledGpio.setDirection(Gpio.DIRECTION_OUT_INITIALLY_LOW);
    // Set it at some point later
    ledGpio.setValue(true);
    // Do not forget to close gpio
    ledGpio.close();
    Simple Peripheral I/O: Output

    View Slide

  45. // Open a peripheral connection, like above
    PeripheralManagerService service = new PeripheralManagerService();
    Gpio buttonGpio = service.openGpio(“GPIO_32”);
    // Configure the peripheral
    buttonGpio.setDirection(Gpio.DIRECTION_IN);
    buttonGpio.setEdgeTriggerType(Gpio.EDGE_BOTH);
    // Attach callback for input events
    buttonGpio.registerGpioCallback(new GpioCallback() {
    @Override
    public boolean onGpioEdge(Gpio gpio) {
    // Return true to continue listening to events
    return true;
    }
    });
    // Do not forget to close GPIO
    buttonGpio.close();
    Simple Peripheral I/O: Input

    View Slide

  46. // Open a peripheral connection, like above
    PeripheralManagerService service = new PeripheralManagerService();
    Gpio buttonGpio = service.openGpio(“GPIO_32”);
    // Configure the peripheral
    buttonGpio.setDirection(Gpio.DIRECTION_IN);
    buttonGpio.setEdgeTriggerType(Gpio.EDGE_BOTH);
    // Attach callback for input events
    buttonGpio.registerGpioCallback(new GpioCallback() {
    @Override
    public boolean onGpioEdge(Gpio gpio) {
    // Return true to continue listening to events
    return true;
    }
    });
    // Do not forget to close GPIO
    buttonGpio.close();
    Simple Peripheral I/O: Input

    View Slide

  47. // Open a peripheral connection, like above
    PeripheralManagerService service = new PeripheralManagerService();
    Gpio buttonGpio = service.openGpio(“GPIO_32”);
    // Configure the peripheral
    buttonGpio.setDirection(Gpio.DIRECTION_IN);
    buttonGpio.setEdgeTriggerType(Gpio.EDGE_BOTH);
    // Attach callback for input events
    buttonGpio.registerGpioCallback(new GpioCallback() {
    @Override
    public boolean onGpioEdge(Gpio gpio) {
    // Return true to continue listening to events
    return true;
    }
    });
    // Do not forget to close GPIO
    buttonGpio.close();
    Simple Peripheral I/O: Input

    View Slide

  48. // Open a peripheral connection, like above
    PeripheralManagerService service = new PeripheralManagerService();
    Gpio buttonGpio = service.openGpio(“GPIO_32”);
    // Configure the peripheral
    buttonGpio.setDirection(Gpio.DIRECTION_IN);
    buttonGpio.setEdgeTriggerType(Gpio.EDGE_BOTH);
    // Attach callback for input events
    buttonGpio.registerGpioCallback(new GpioCallback() {
    @Override
    public boolean onGpioEdge(Gpio gpio) {
    // Return true to continue listening to events
    return true;
    }
    });
    // Do not forget to close GPIO
    buttonGpio.close();
    Simple Peripheral I/O: Input

    View Slide

  49. // Open a peripheral using the Driver
    PeripheralManagerService service = new PeripheralManagerService();
    Gpio buttonGpio = service.openGpio(“GPIO_32”);
    // Configure the peripheral
    buttonGpio.setDirection(Gpio.DIRECTION_IN);
    buttonGpio.setEdgeTriggerType(Gpio.EDGE_BOTH);
    // Attach callback for input events
    buttonGpio.registerGpioCallback(new GpioCallback() {
    @Override
    public boolean onGpioEdge(Gpio gpio) {
    // Return true to continue listening to events
    return true;
    }
    });
    // Do not forget to close GPIO
    buttonGpio.close();
    Peripheral I/O: Button Driver

    View Slide

  50. Introducing Firebase

    View Slide

  51. View Slide

  52. View Slide

  53. Examples Project

    View Slide

  54. Edison Candle
    github.com/androidthings/edison-candle

    View Slide

  55. Electricity Monitor
    github.com/riggaroo/
    android-things-electricity-monitor
    Based on Firebase Database, Cloud
    Functions and Cloud Messaging.

    View Slide

  56. Candy Dispenser
    https://github.com/alvarowolfx/ai-candy-dispenser

    View Slide

  57. The Power of
    Android
    Automatic and
    Secure
    Managed by
    Google

    View Slide

  58. Android Things
    The IoT Platform for Everyone
    Nicola Corti
    @cortinico
    [email protected]
    Michael Langer
    @mchllngr
    [email protected]
    Jossi Wolf
    @fleischwolf13
    [email protected]

    View Slide

  59. bit.ly/devfesthh-iotrepo
    adb shell am startservice -n
    com.google.wifisetup/.WifiSetupService -a
    WifiSetupService.Connect -e ssid betahaus2.0
    -e passphrase betahaus10?

    View Slide

  60. adb shell am startservice -n com.google.wifisetup/.WifiSetupService -a WifiSetupService.Connect
    -e ssid betahaus2.0 -e passphrase betahaus10?
    bit.ly/
    devfesth
    h-iotrepo

    View Slide