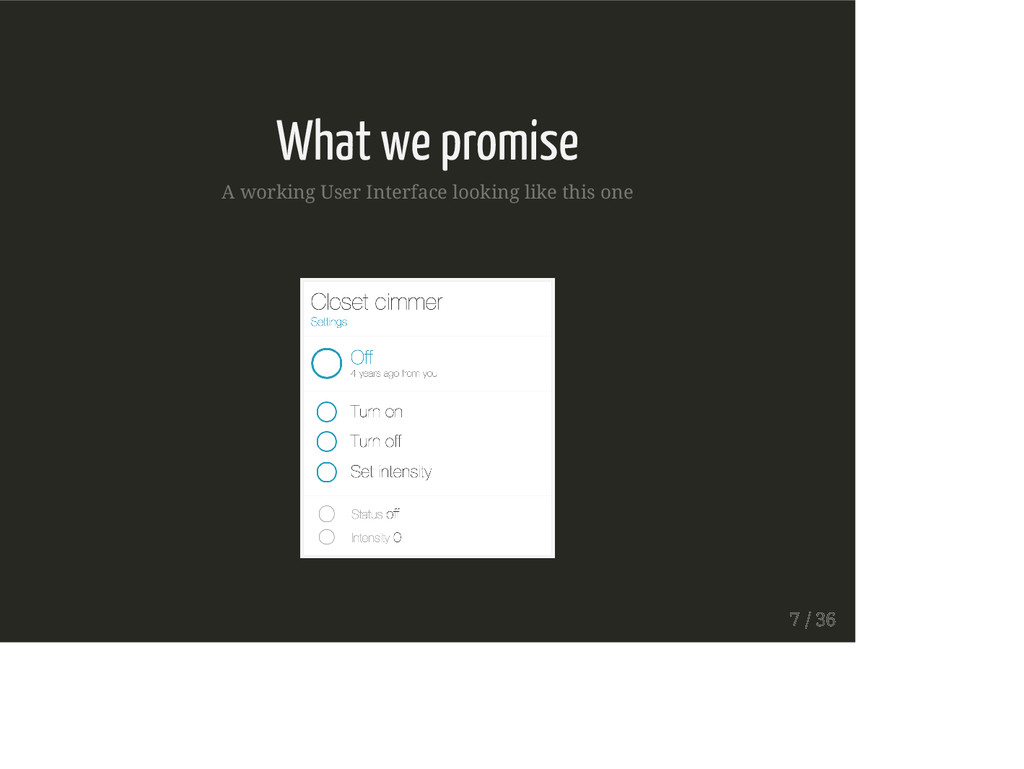
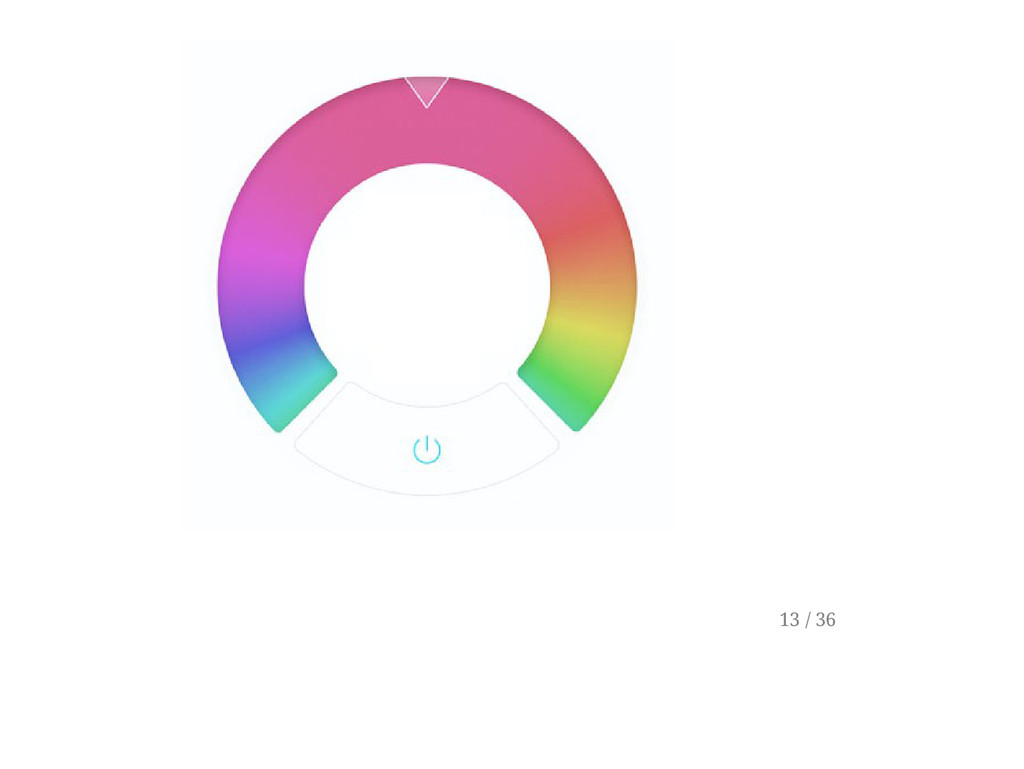
to use template to control any physical device in the real world. From simple devices like a light or a lock to more complex devices like a thermostat or a washing machine. [It's up to your imagination and it just WORKS!] 11 / 36
in mind. It offers you a default template, but when it doesn't fit your needs, you can create a new one in minutes by changing few lines of CSS and HTML. [No need to know AngularJS for any web designer] 12 / 36
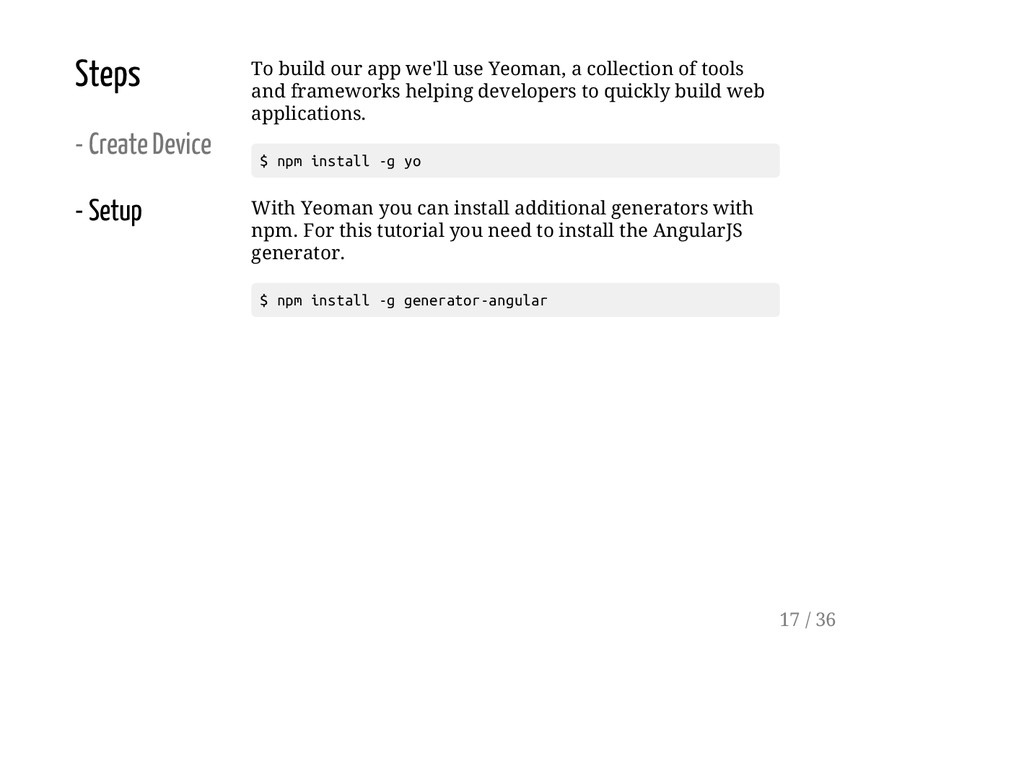
we'll use Yeoman, a collection of tools and frameworks helping developers to quickly build web applications. $ n p m i n s t a l l - g y o With Yeoman you can install additional generators with npm. For this tutorial you need to install the AngularJS generator. $ n p m i n s t a l l - g g e n e r a t o r - a n g u l a r 17 / 36
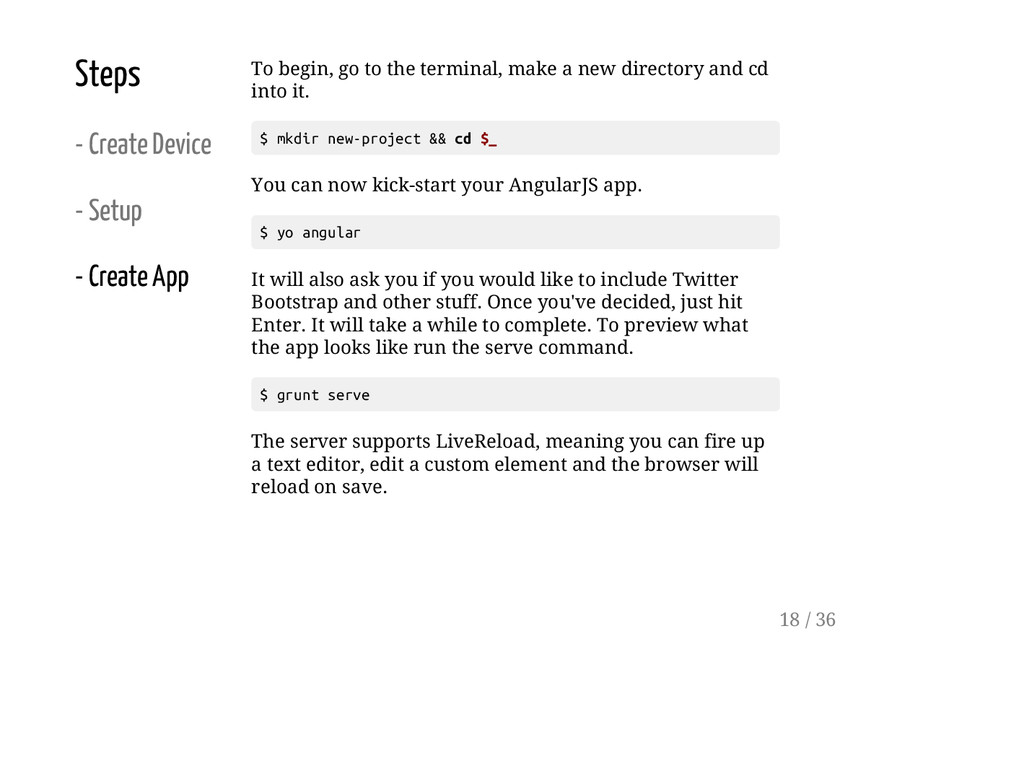
begin, go to the terminal, make a new directory and cd into it. $ m k d i r n e w - p r o j e c t & & c d $ _ You can now kick-start your AngularJS app. $ y o a n g u l a r It will also ask you if you would like to include Twitter Bootstrap and other stuff. Once you've decided, just hit Enter. It will take a while to complete. To preview what the app looks like run the serve command. $ g r u n t s e r v e The server supports LiveReload, meaning you can fire up a text editor, edit a custom element and the browser will reload on save. 18 / 36
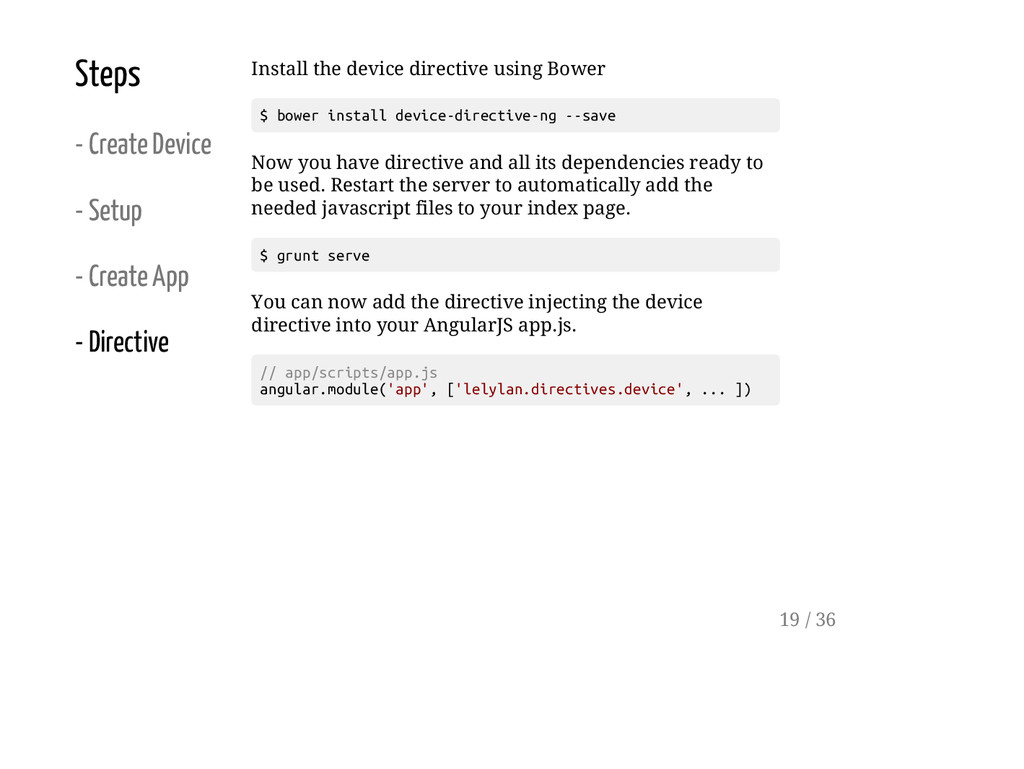
Directive Install the device directive using Bower $ b o w e r i n s t a l l d e v i c e - d i r e c t i v e - n g - - s a v e Now you have directive and all its dependencies ready to be used. Restart the server to automatically add the needed javascript files to your index page. $ g r u n t s e r v e You can now add the directive injecting the device directive into your AngularJS app.js. / / a p p / s c r i p t s / a p p . j s a n g u l a r . m o d u l e ( ' a p p ' , [ ' l e l y l a n . d i r e c t i v e s . d e v i c e ' , . . . ] ) 19 / 36
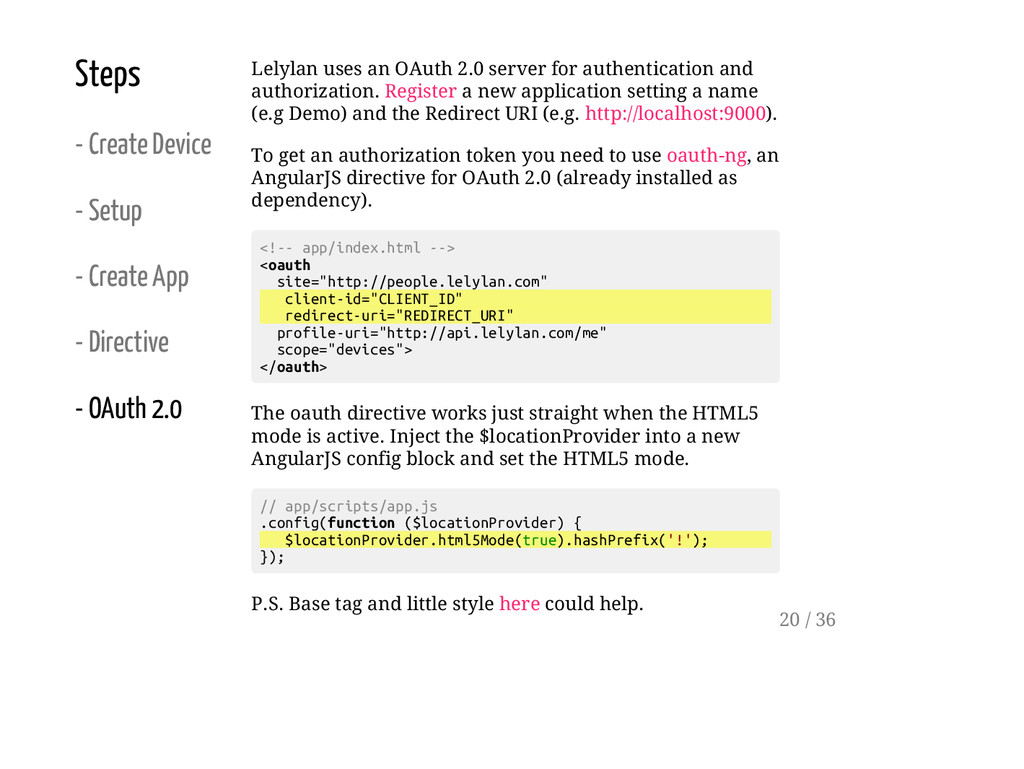
Directive - OAuth 2.0 Lelylan uses an OAuth 2.0 server for authentication and authorization. Register a new application setting a name (e.g Demo) and the Redirect URI (e.g. http://localhost:9000). To get an authorization token you need to use oauth-ng, an AngularJS directive for OAuth 2.0 (already installed as dependency). < ! - - a p p / i n d e x . h t m l - - > < o a u t h s i t e = " h t t p : / / p e o p l e . l e l y l a n . c o m " c l i e n t - i d = " C L I E N T _ I D " r e d i r e c t - u r i = " R E D I R E C T _ U R I " p r o f i l e - u r i = " h t t p : / / a p i . l e l y l a n . c o m / m e " s c o p e = " d e v i c e s " > < / o a u t h > The oauth directive works just straight when the HTML5 mode is active. Inject the $locationProvider into a new AngularJS config block and set the HTML5 mode. / / a p p / s c r i p t s / a p p . j s . c o n f i g ( f u n c t i o n ( $ l o c a t i o n P r o v i d e r ) { $ l o c a t i o n P r o v i d e r . h t m l 5 M o d e ( t r u e ) . h a s h P r e f i x ( ' ! ' ) ; } ) ; P.S. Base tag and little style here could help. 20 / 36
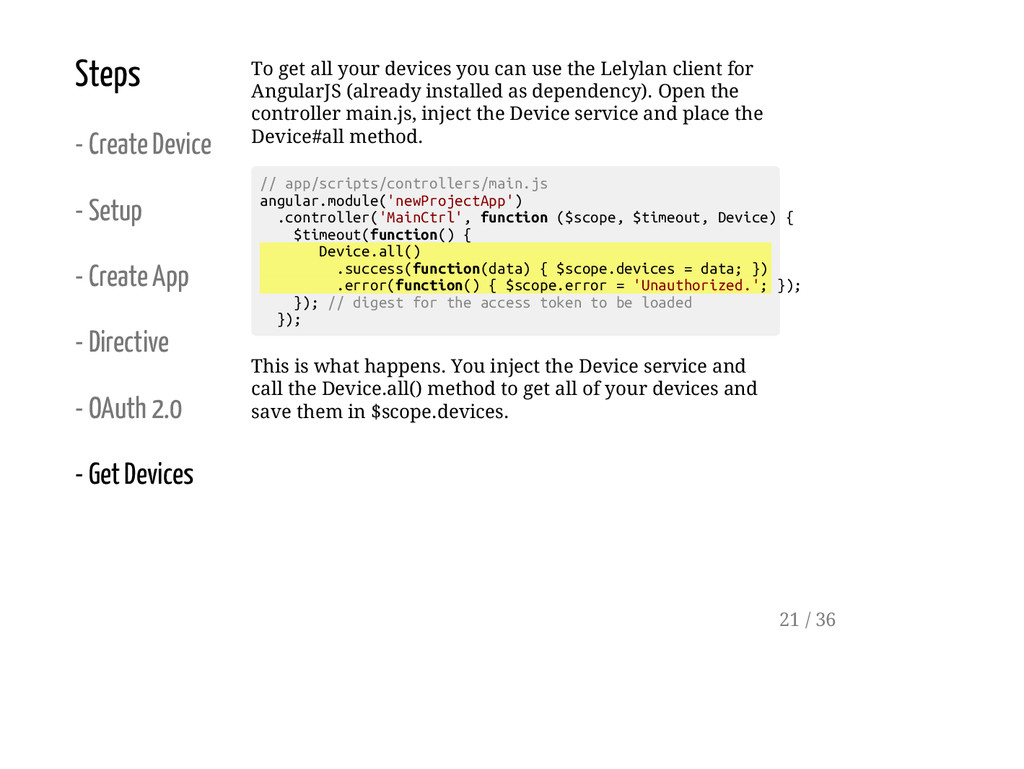
Directive - OAuth 2.0 - Get Devices To get all your devices you can use the Lelylan client for AngularJS (already installed as dependency). Open the controller main.js, inject the Device service and place the Device#all method. / / a p p / s c r i p t s / c o n t r o l l e r s / m a i n . j s a n g u l a r . m o d u l e ( ' n e w P r o j e c t A p p ' ) . c o n t r o l l e r ( ' M a i n C t r l ' , f u n c t i o n ( $ s c o p e , $ t i m e o u t , D e v i c e ) { $ t i m e o u t ( f u n c t i o n ( ) { D e v i c e . a l l ( ) . s u c c e s s ( f u n c t i o n ( d a t a ) { $ s c o p e . d e v i c e s = d a t a ; } ) . e r r o r ( f u n c t i o n ( ) { $ s c o p e . e r r o r = ' U n a u t h o r i z e d . ' ; } ) ; } ) ; / / d i g e s t f o r t h e a c c e s s t o k e n t o b e l o a d e d } ) ; This is what happens. You inject the Device service and call the Device.all() method to get all of your devices and save them in $scope.devices. 21 / 36
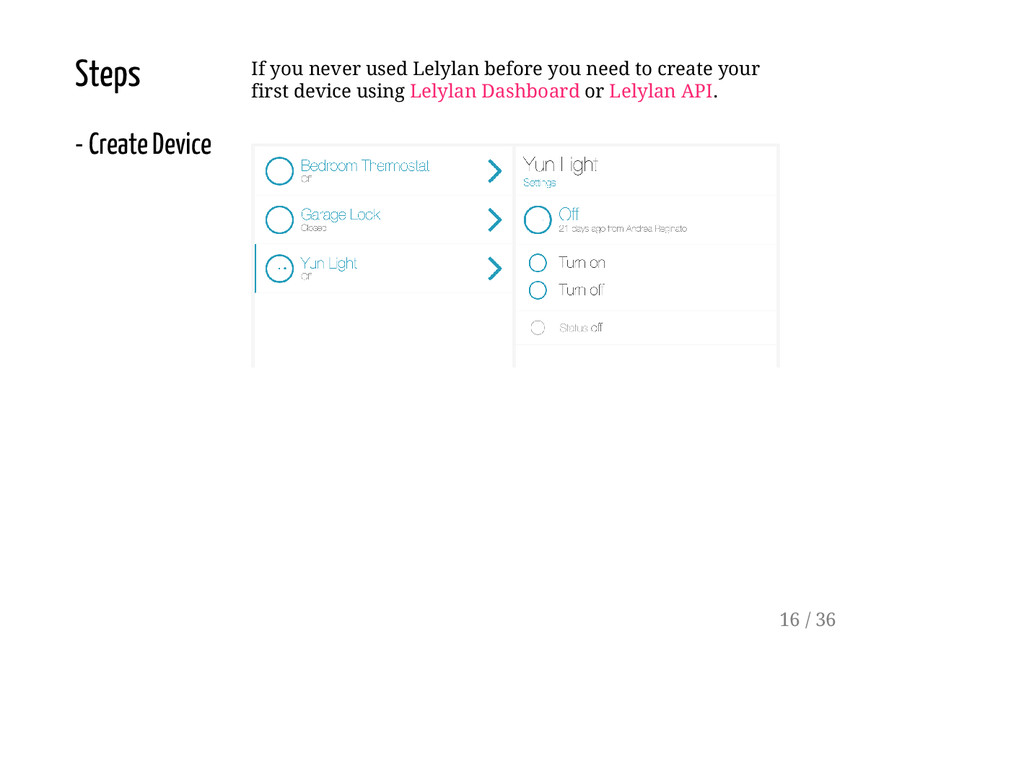
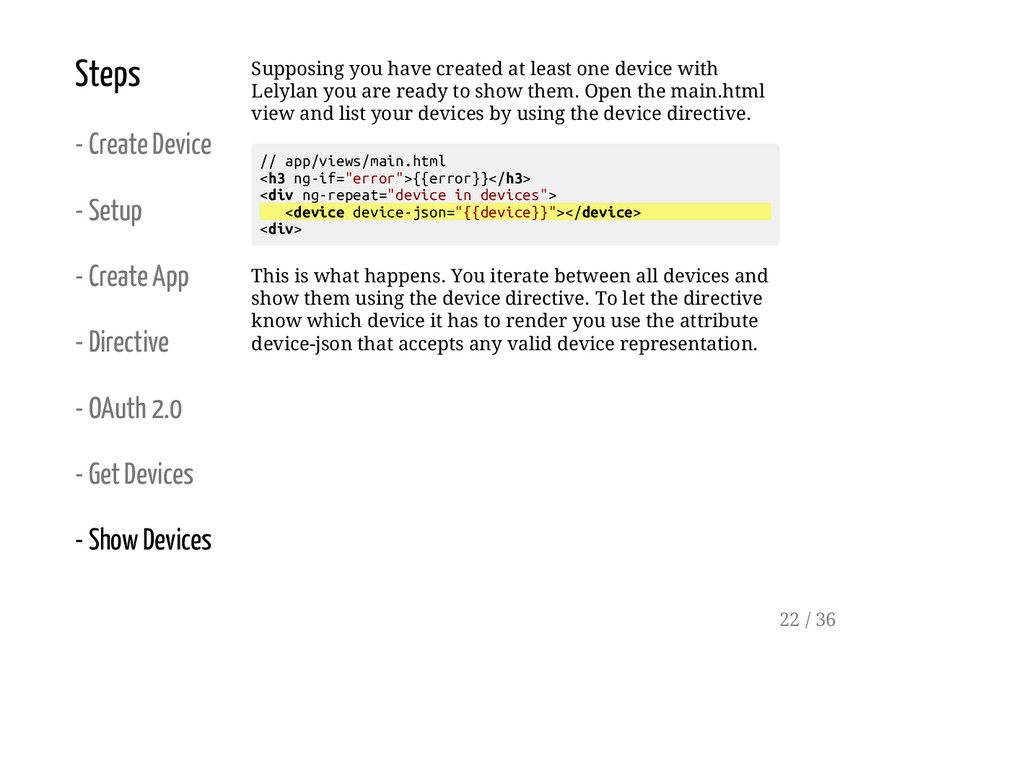
Directive - OAuth 2.0 - Get Devices - Show Devices Supposing you have created at least one device with Lelylan you are ready to show them. Open the main.html view and list your devices by using the device directive. / / a p p / v i e w s / m a i n . h t m l < h 3 n g - i f = " e r r o r " > { { e r r o r } } < / h 3 > < d i v n g - r e p e a t = " d e v i c e i n d e v i c e s " > < d e v i c e d e v i c e - j s o n = " { { d e v i c e } } " > < / d e v i c e > < d i v > This is what happens. You iterate between all devices and show them using the device directive. To let the directive know which device it has to render you use the attribute device-json that accepts any valid device representation. 22 / 36
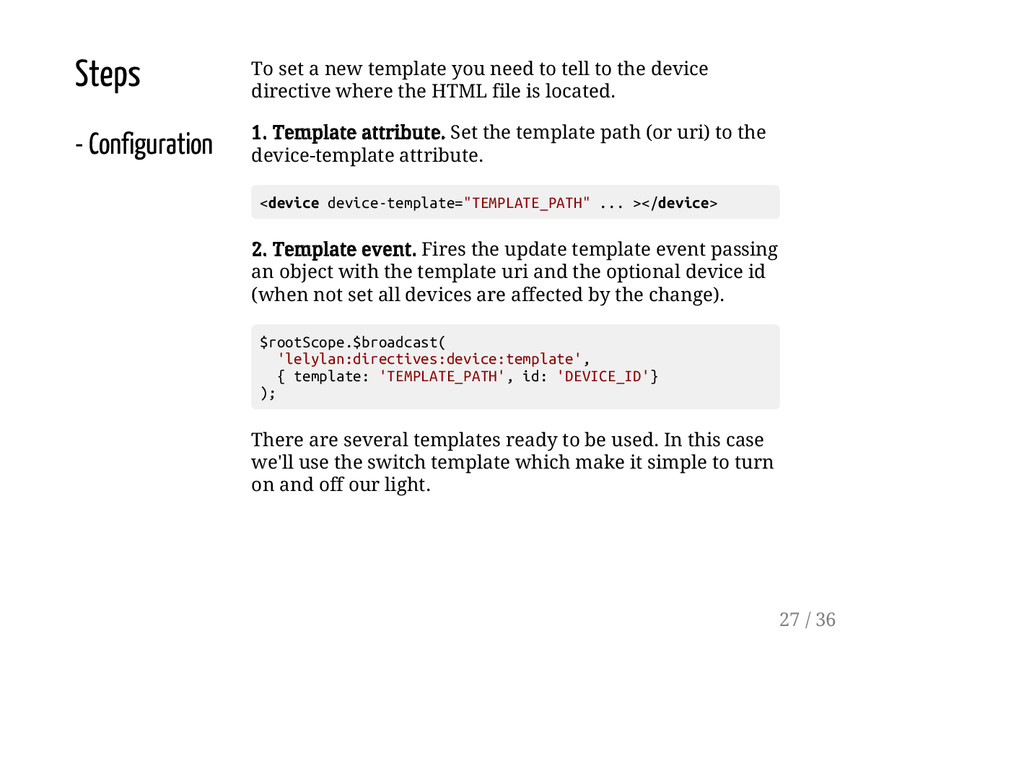
to tell to the device directive where the HTML file is located. 1. Template attribute. Set the template path (or uri) to the device-template attribute. < d e v i c e d e v i c e - t e m p l a t e = " T E M P L A T E _ P A T H " . . . > < / d e v i c e > 2. Template event. Fires the update template event passing an object with the template uri and the optional device id (when not set all devices are affected by the change). $ r o o t S c o p e . $ b r o a d c a s t ( ' l e l y l a n : d i r e c t i v e s : d e v i c e : t e m p l a t e ' , { t e m p l a t e : ' T E M P L A T E _ P A T H ' , i d : ' D E V I C E _ I D ' } ) ; There are several templates ready to be used. In this case we'll use the switch template which make it simple to turn on and off our light. 27 / 36
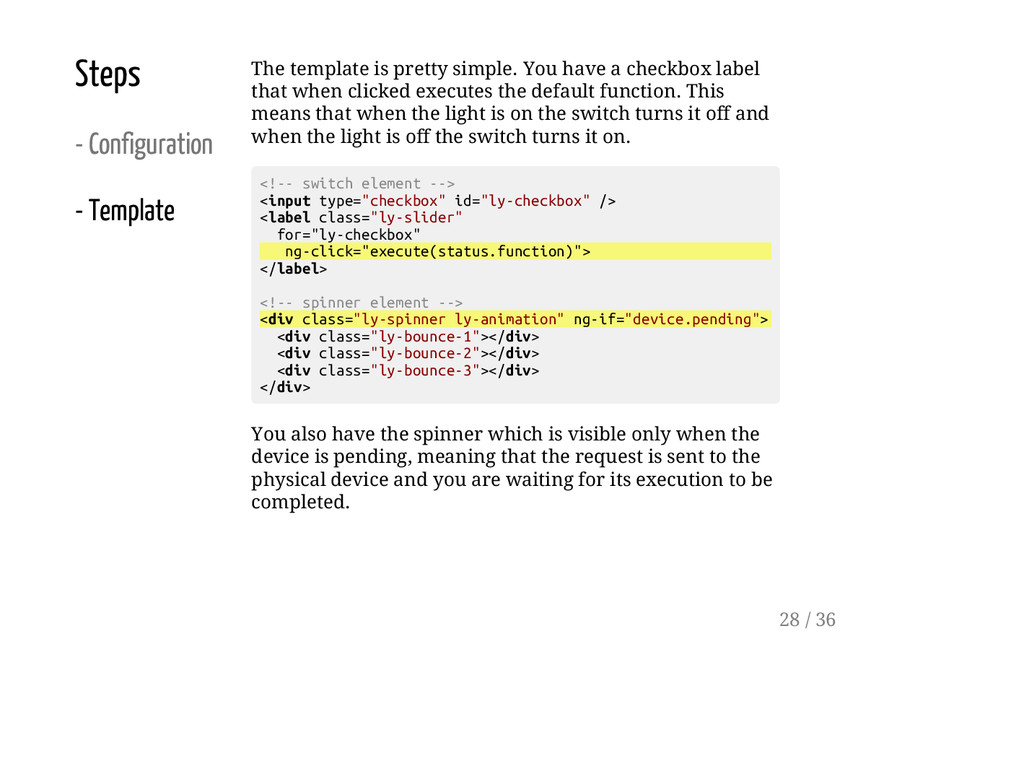
You have a checkbox label that when clicked executes the default function. This means that when the light is on the switch turns it off and when the light is off the switch turns it on. < ! - - s w i t c h e l e m e n t - - > < i n p u t t y p e = " c h e c k b o x " i d = " l y - c h e c k b o x " / > < l a b e l c l a s s = " l y - s l i d e r " f o r = " l y - c h e c k b o x " n g - c l i c k = " e x e c u t e ( s t a t u s . f u n c t i o n ) " > < / l a b e l > < ! - - s p i n n e r e l e m e n t - - > < d i v c l a s s = " l y - s p i n n e r l y - a n i m a t i o n " n g - i f = " d e v i c e . p e n d i n g " > < d i v c l a s s = " l y - b o u n c e - 1 " > < / d i v > < d i v c l a s s = " l y - b o u n c e - 2 " > < / d i v > < d i v c l a s s = " l y - b o u n c e - 3 " > < / d i v > < / d i v > You also have the spinner which is visible only when the device is pending, meaning that the request is sent to the physical device and you are waiting for its execution to be completed. 28 / 36
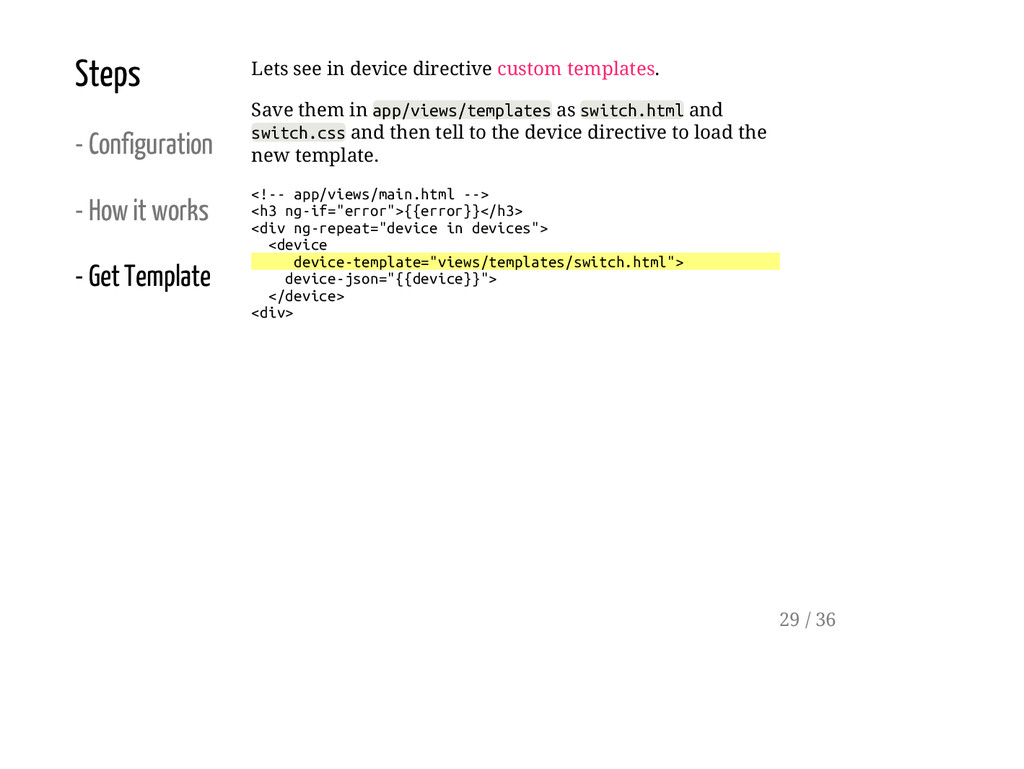
Lets see in device directive custom templates. Save them in a p p / v i e w s / t e m p l a t e s as s w i t c h . h t m l and s w i t c h . c s s and then tell to the device directive to load the new template. < ! - - a p p / v i e w s / m a i n . h t m l - - > < h 3 n g - i f = " e r r o r " > { { e r r o r } } < / h 3 > < d i v n g - r e p e a t = " d e v i c e i n d e v i c e s " > < d e v i c e d e v i c e - t e m p l a t e = " v i e w s / t e m p l a t e s / s w i t c h . h t m l " > d e v i c e - j s o n = " { { d e v i c e } } " > < / d e v i c e > < d i v > 29 / 36
![You are done! [Really?] 23 / 36](https://files.speakerdeck.com/presentations/480220bcf47f41db9de3c572096243df/slide_22.jpg)
![Yes :) [But we can do better than circles] 24](https://files.speakerdeck.com/presentations/480220bcf47f41db9de3c572096243df/slide_23.jpg)