Upgrade to Pro — share decks privately, control downloads, hide ads and more …

How to do a e-commerce website with WooCommerce

jklepatch
November 17, 2014

How to do a e-commerce website with WooCommerce

A step-by-step explanation on how to install and setup the WooCommerce plugin for doing a e-commerce website with WordPress.

For more articles and tutorials about WordPress, check out my blog at: http://julienklepatch.com/blog

jklepatch

November 17, 2014
Tweet

More Decks by jklepatch

Other Decks in Programming

Transcript

  1. How to do a e-commerce website with WooCommerce? Taipei WordPress

    Meetup - November 2014 Julien Klepatch - julienklepatch.com
  2. Summary • What is WooCommerce? • Installing TwentyTwelve & WooCommerce

    • Overview of WooCommerce • Setting up basic options • Setting up checkout options • Setting up shipping options
  3. Summary • What is WooCommerce? – The e-commerce plugin –

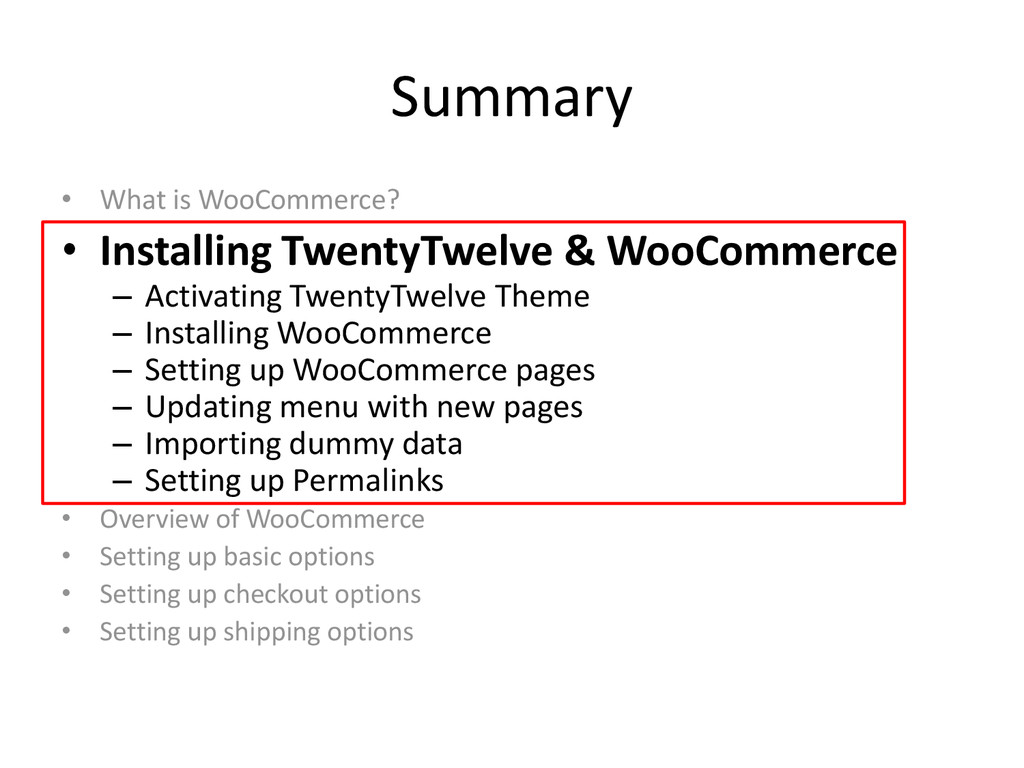
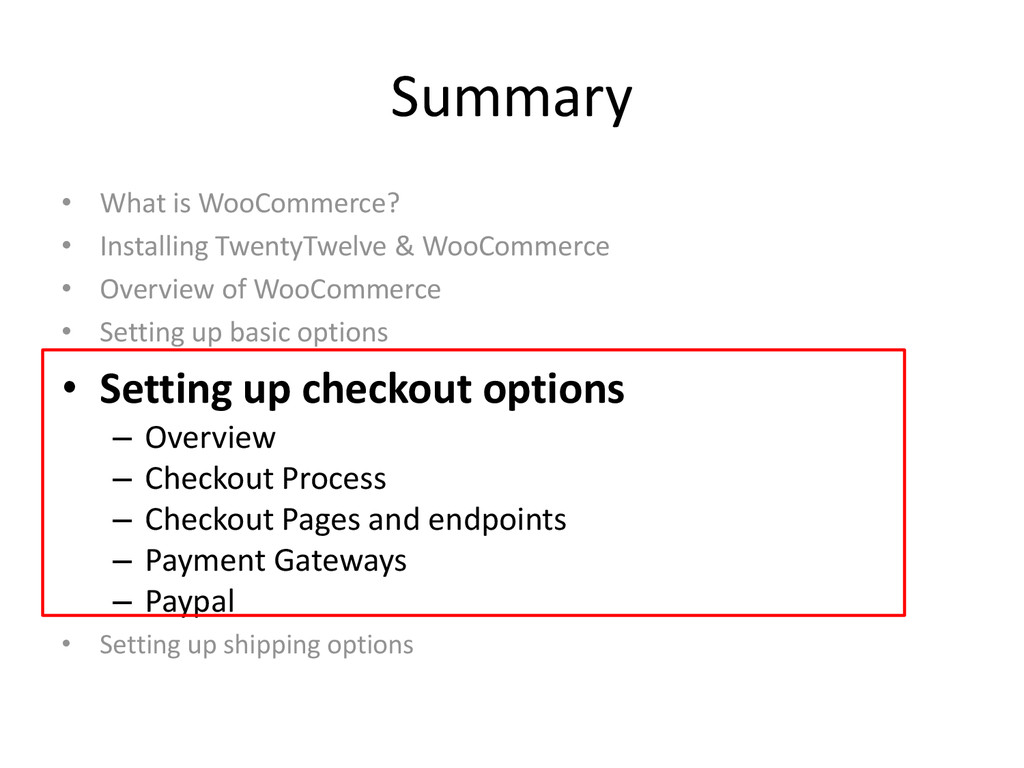
    The extensions – The themes – WooThemes, the theme shop • Installing TwentyTwelve & WooCommerce • Overview of WooCommerce • Setting up basic options • Setting up checkout options • Setting up shipping options
  4. The eCommerce Plugin • The most popular ecommerce plugin (5M

    + downloads) • Free • Available at WordPress Plugin Repository
  5. The extensions • Dozens of PAYING extensions • Available at

    WooTheme website • NOT available on WordPress plugin repository
  6. WooTheme, the theme shop • WooCommerce was created by a

    theme shop called WooThemes (http://www.woothemes.com)
  7. Summary • What is WooCommerce? • Installing TwentyTwelve & WooCommerce

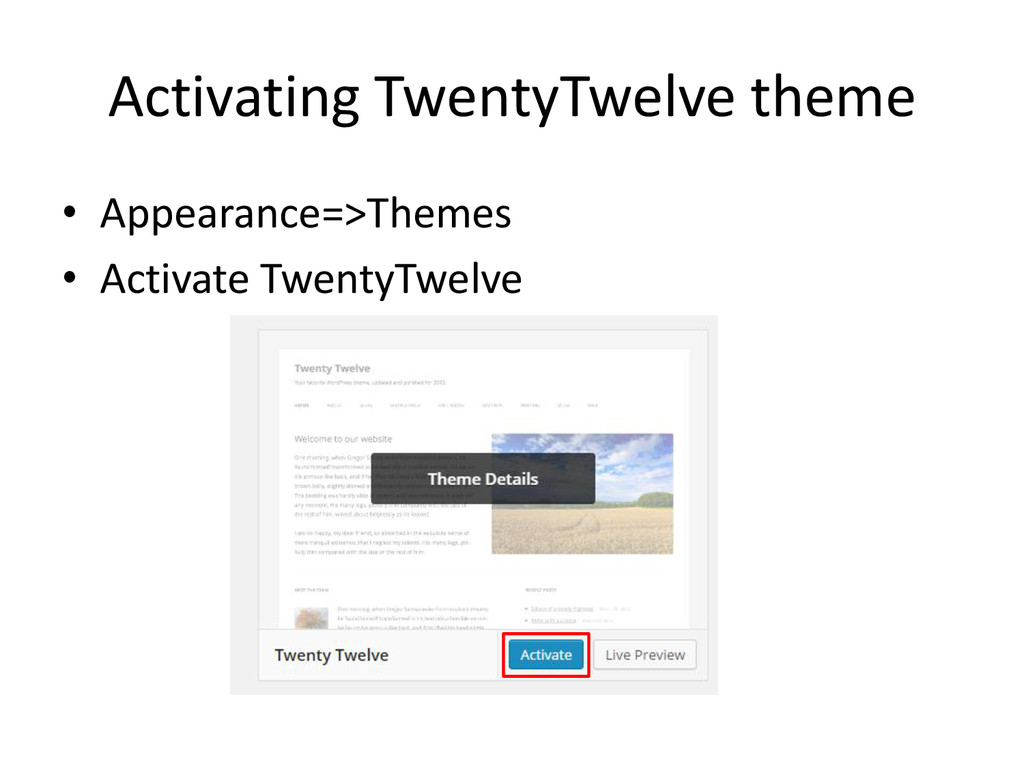
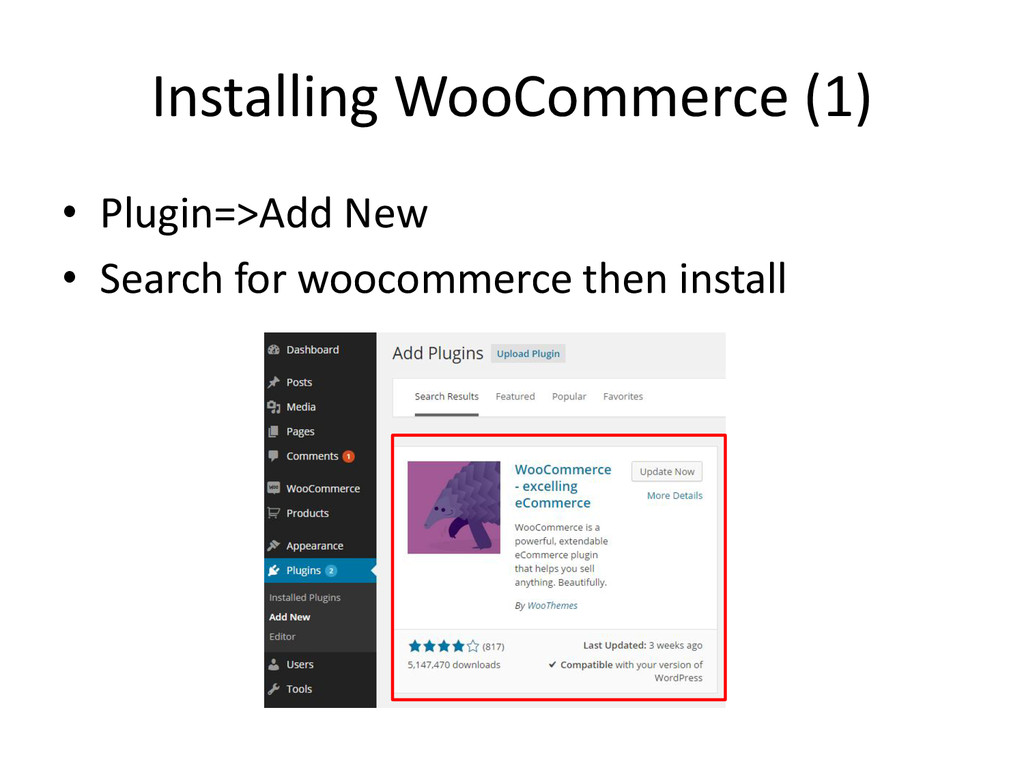
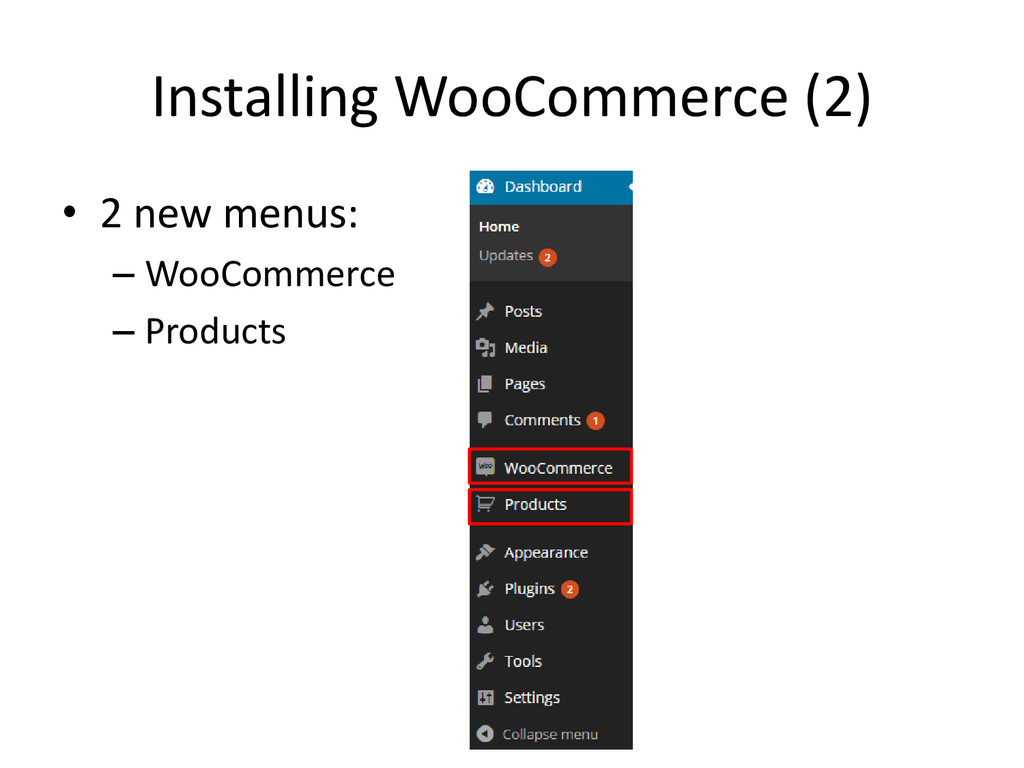
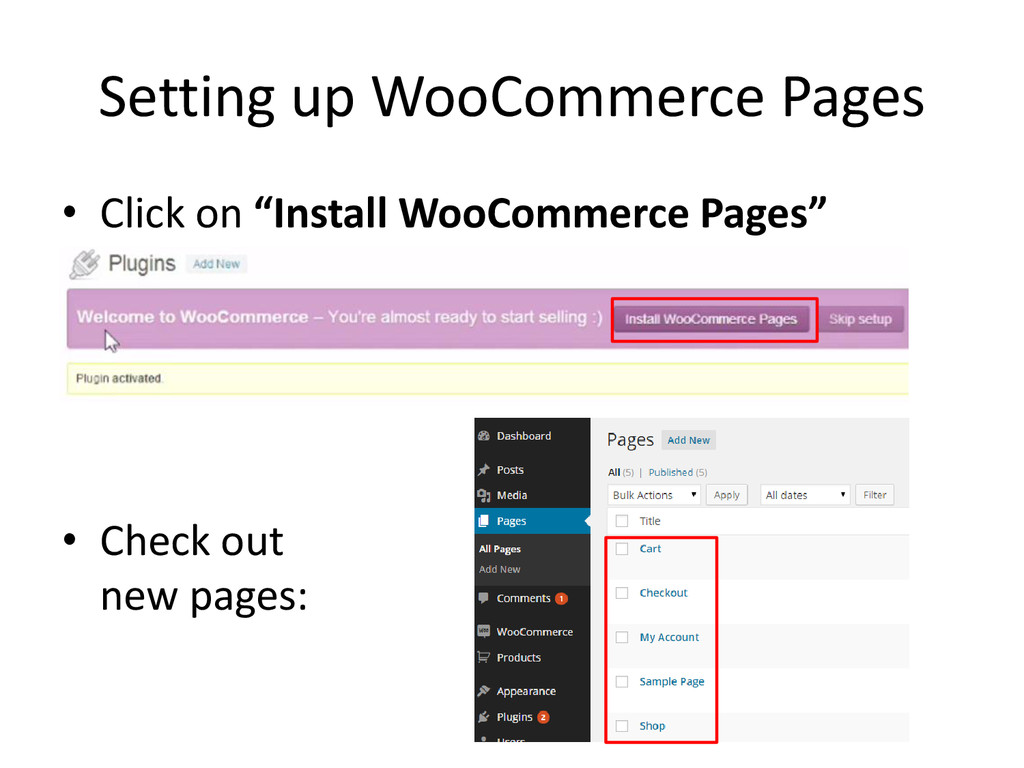
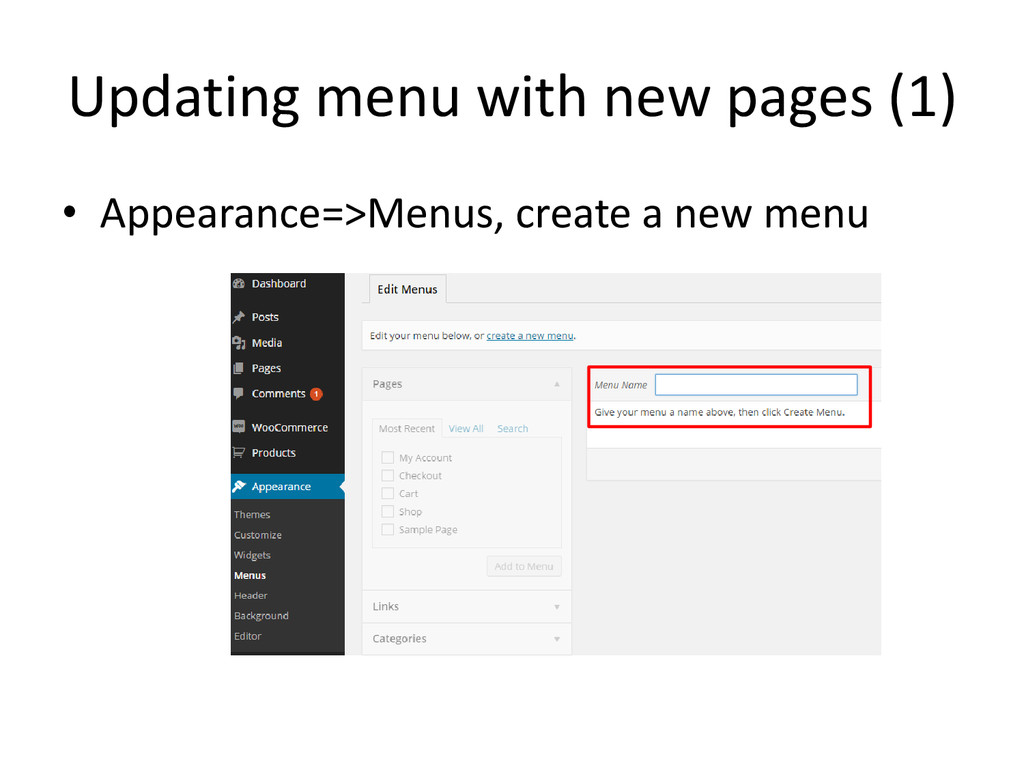
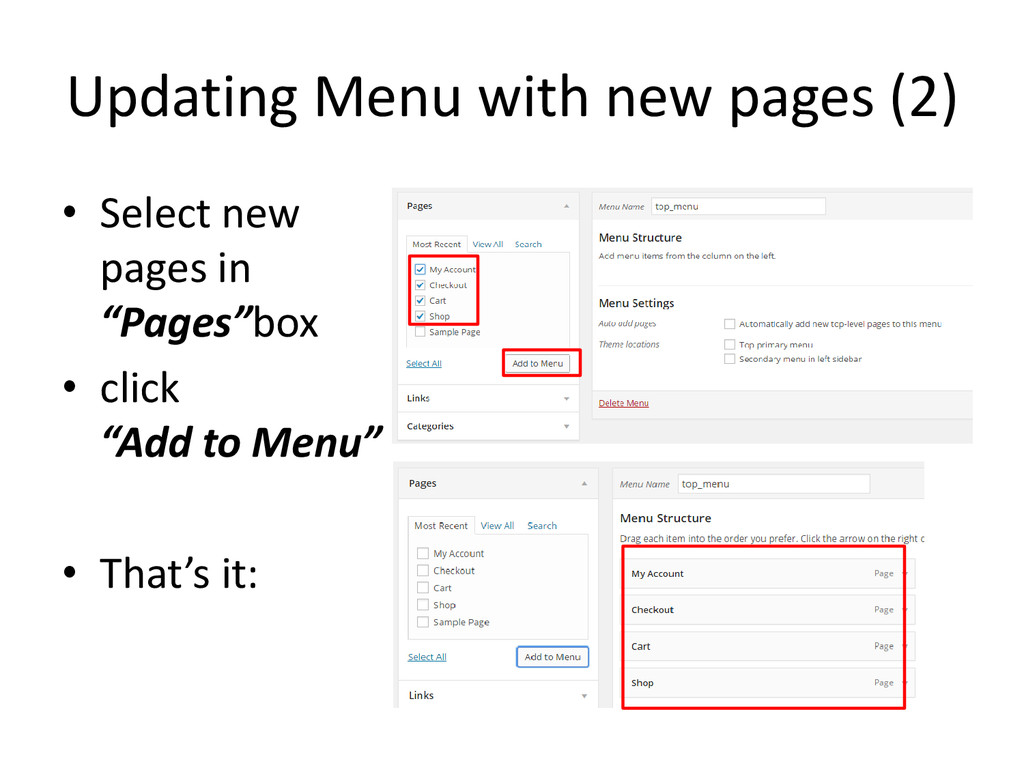
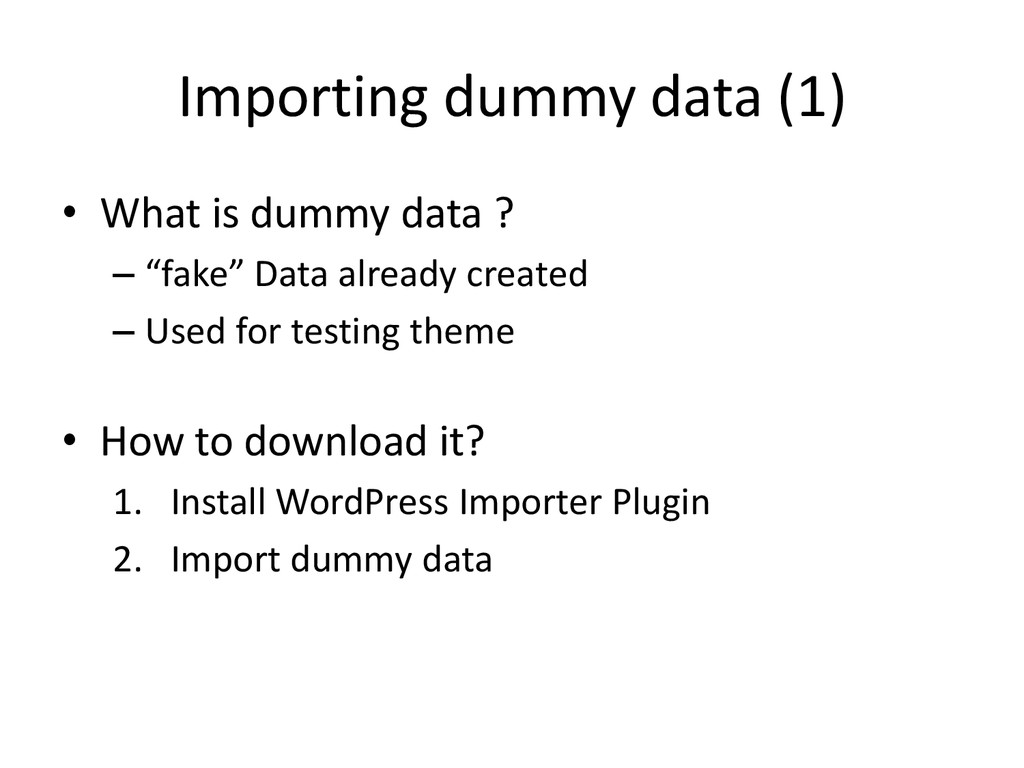
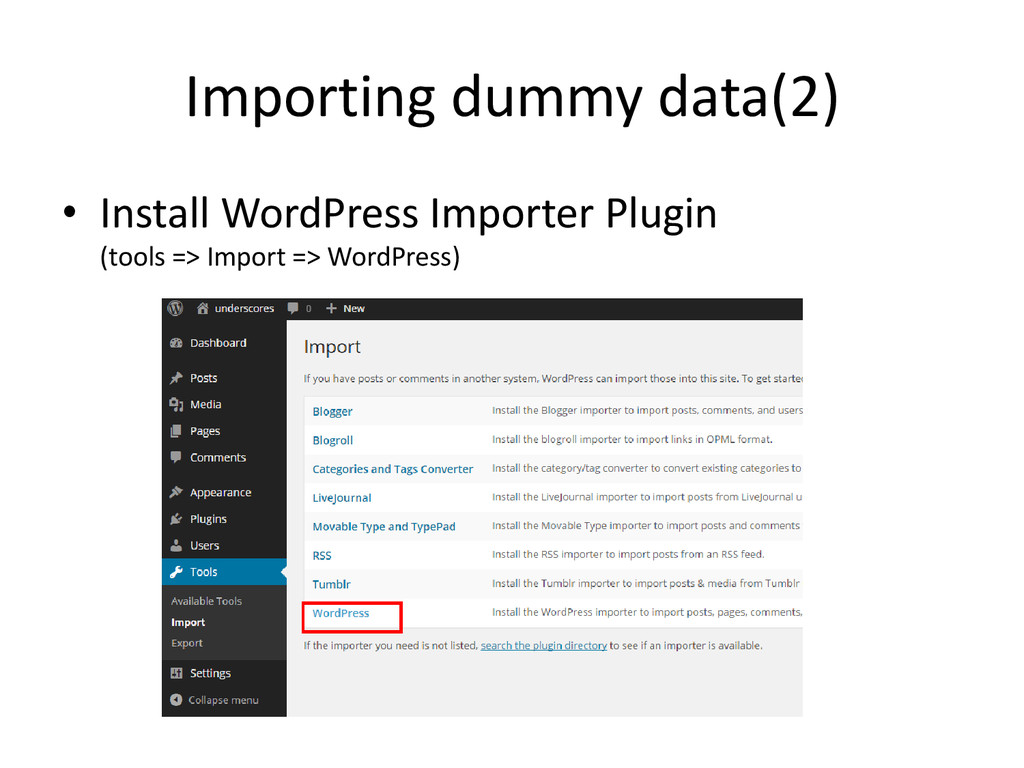
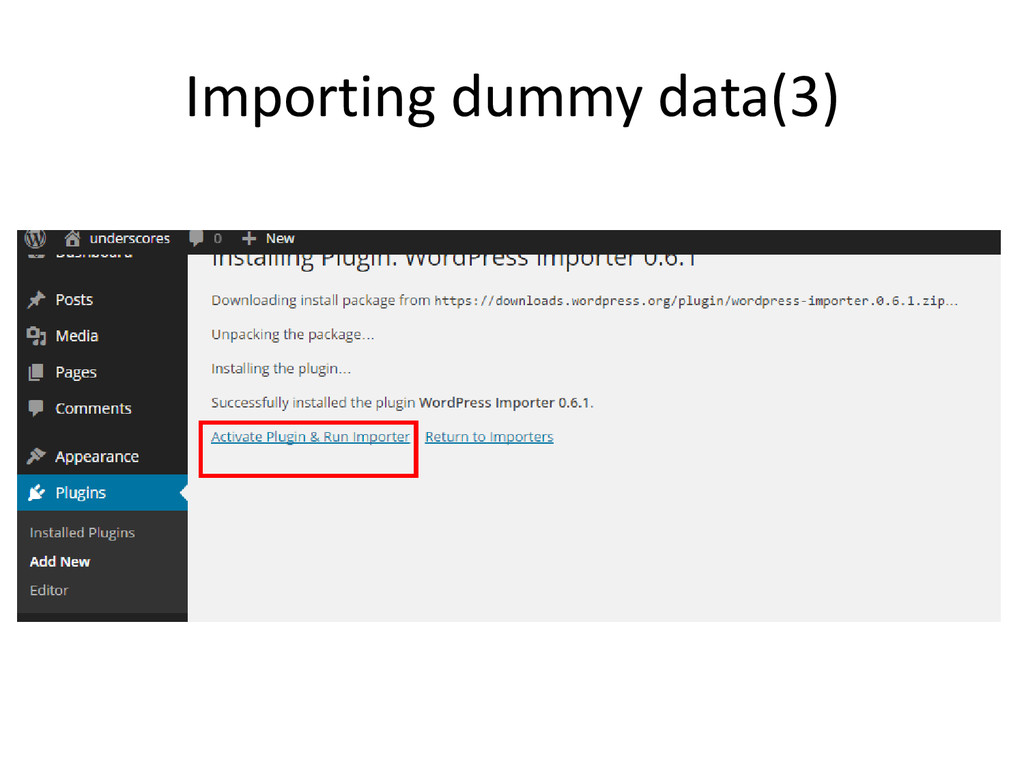
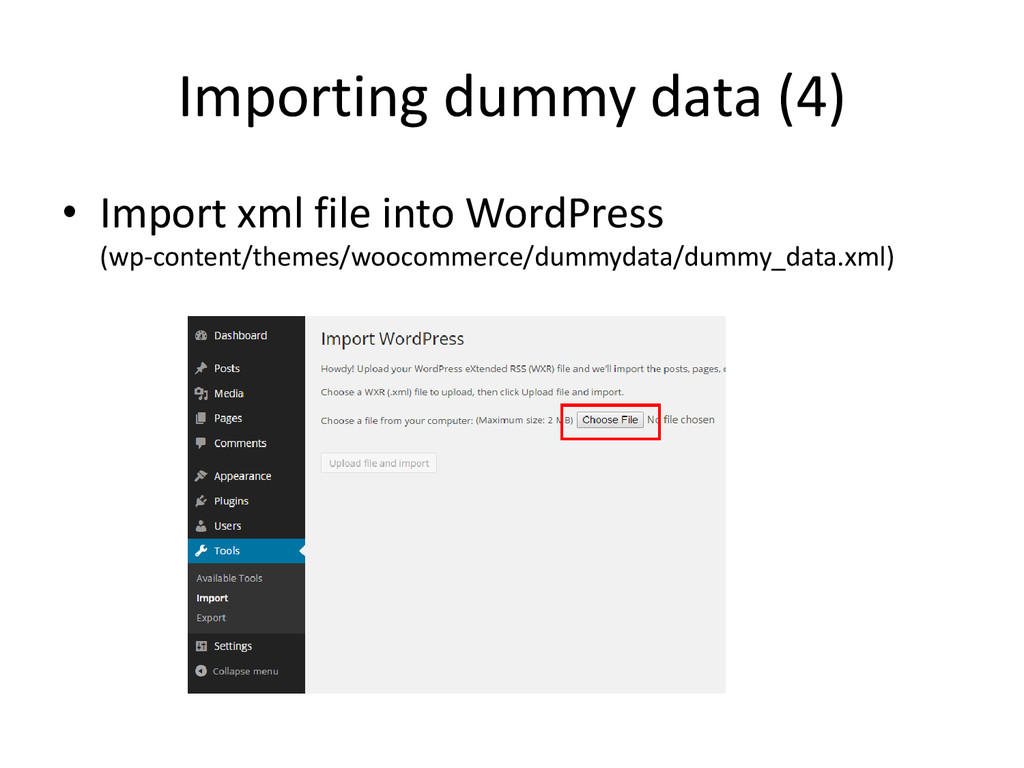
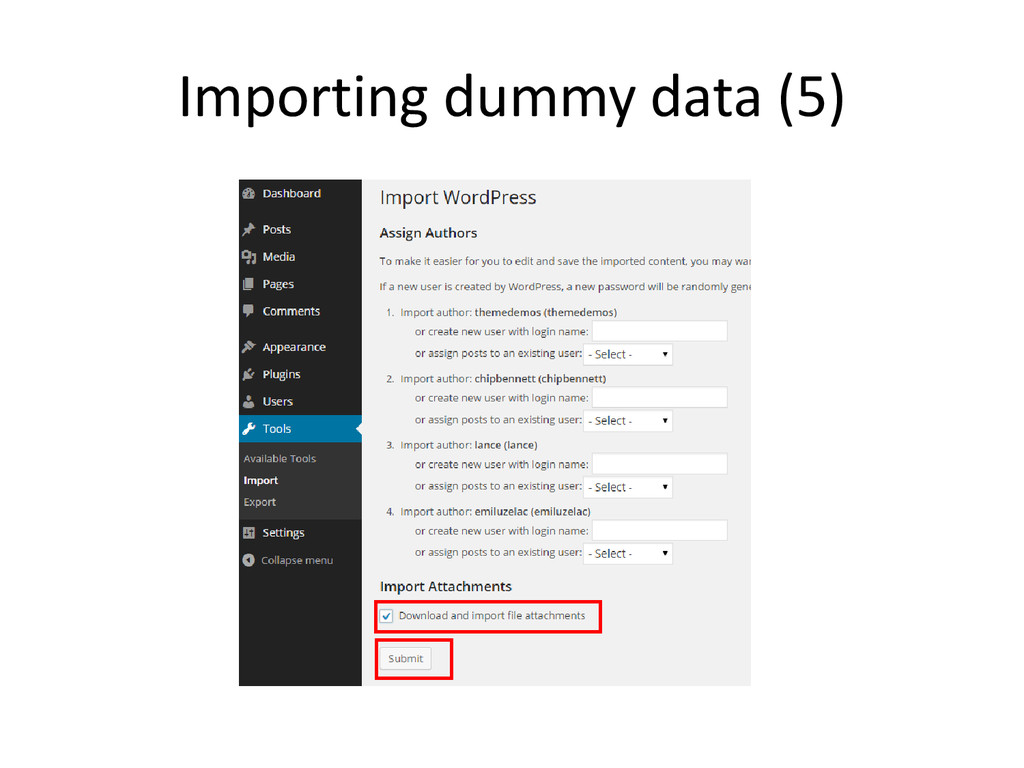
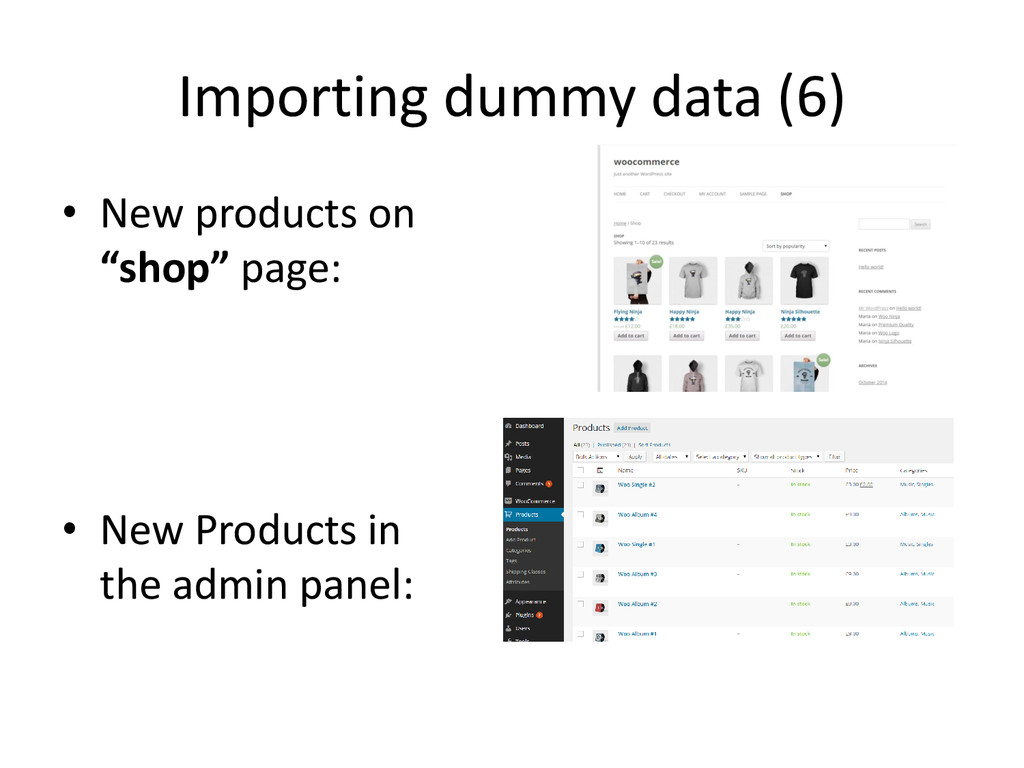
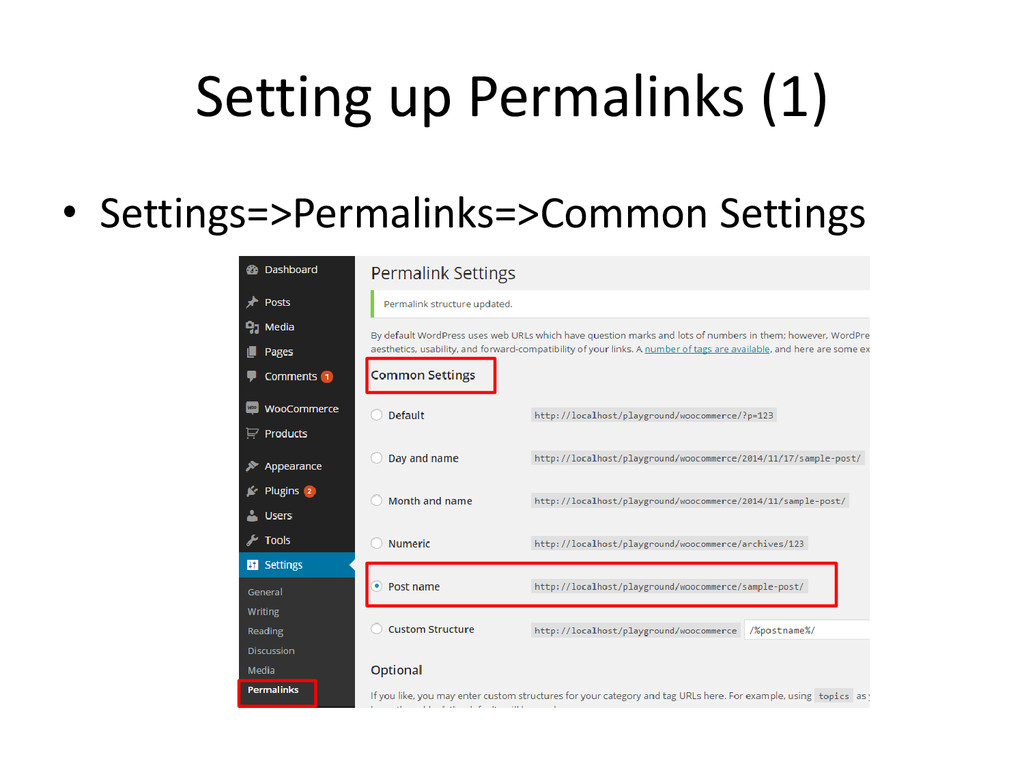
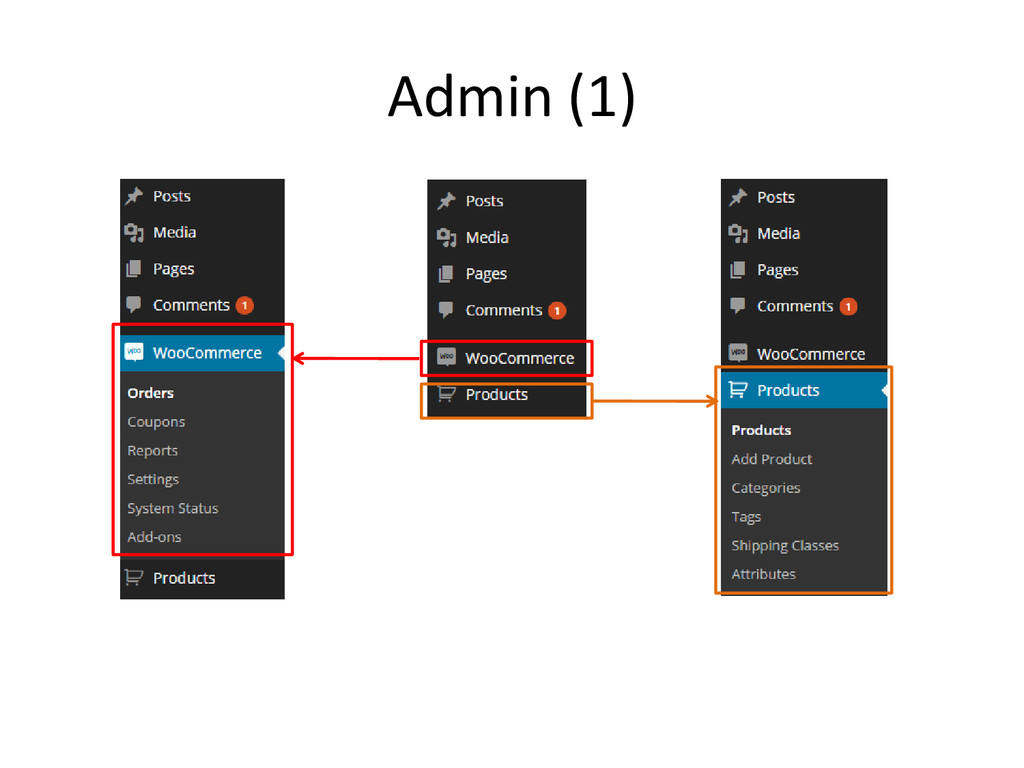
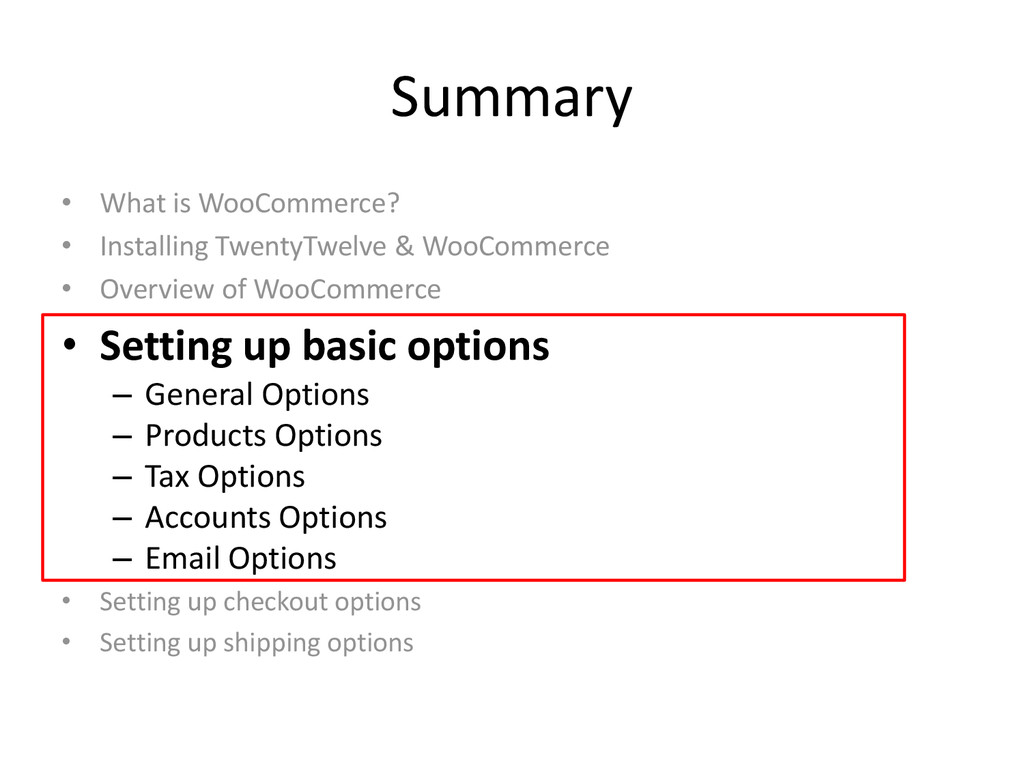
    – Activating TwentyTwelve Theme – Installing WooCommerce – Setting up WooCommerce pages – Updating menu with new pages – Importing dummy data – Setting up Permalinks • Overview of WooCommerce • Setting up basic options • Setting up checkout options • Setting up shipping options
  8. Updating Menu with new pages (2) • Select new pages

    in “Pages”box • click “Add to Menu” • That’s it:
  9. Importing dummy data (1) • What is dummy data ?

    – “fake” Data already created – Used for testing theme • How to download it? 1. Install WordPress Importer Plugin 2. Import dummy data
  10. Importing dummy data (4) • Import xml file into WordPress

    (wp-content/themes/woocommerce/dummydata/dummy_data.xml)
  11. Summary • What is WooCommerce? • Installing TwentyTwelve & WooCommerce

    • Overview of WooCommerce – Front-end – Admin • Setting up basic options • Setting up checkout options • Setting up shipping options
  12. Front-end (1) • On “shop” page, list of products with

    pictures • Click on the picture of a product
  13. Front-end (2) • Product page with more information • Product

    name and review • Short Product description • Add to cart button • Long Product Description
  14. Front-end (3) • Cart information with product name, quantity and

    price • Checkout button • Cross selling section below cart
  15. Front-end (4) • Checkout page with: – Coupon – billing

    /shipping info – Order summary – payment method
  16. Summary • What is WooCommerce? • Installing TwentyTwelve & WooCommerce

    • Overview of WooCommerce • Setting up basic options – General Options – Products Options – Tax Options – Accounts Options – Email Options • Setting up checkout options • Setting up shipping options
  17. General Options (3) • Style and Scripts TIPS - Check

    “Enable Livebox - Check “Enable enhanced country select boxes
  18. Products Options (3) • Product Image Sizes TIPS 1) upload

    square images 2) choose hard crop 3) Regenerate thumbnails with plugin
  19. Products Options (4) • Inventory Options No need for non-

    physical products TIPS 1) Enable low stock and out of stock notifications 2) Stock display format: “Only show stock when low”
  20. Products Options (5) • Downloadable Products (ex: ebooks, software) TIPS

    1) check “Downloads require login” 2) check “Grant access to downloadable…”
  21. Tax Options (3) • Adding New Tax • Tax=>Standard Rates

    • Click “Insert Row” TIPS Use csv file is lots of tax rates
  22. Accounts Options (2) • Registration Options TIP 1) Enable Registration

    on Checkout 2) Enable Registration on MyAccount
  23. Email Options (2) • Email Template TIP Copy woocommerce email

    template to your theme for more customization options
  24. Summary • What is WooCommerce? • Installing TwentyTwelve & WooCommerce

    • Overview of WooCommerce • Setting up basic options • Setting up checkout options – Overview – Checkout Process – Checkout Pages and endpoints – Payment Gateways – Paypal • Setting up shipping options
  25. Overview • 4 options: – BACS (Bank Transfer) – Cheque

    – Cash on delivery – Paypal TIP: enable it for testing TIPS: 1) standard option. 2) Stripe is an alternative (not available in every country)
  26. Payment Gateways • You can choose: – Default Payment Method

    – Display order • You can check payment method status
  27. Paypal (1) 1. Go to the paypal.com 2. Register for

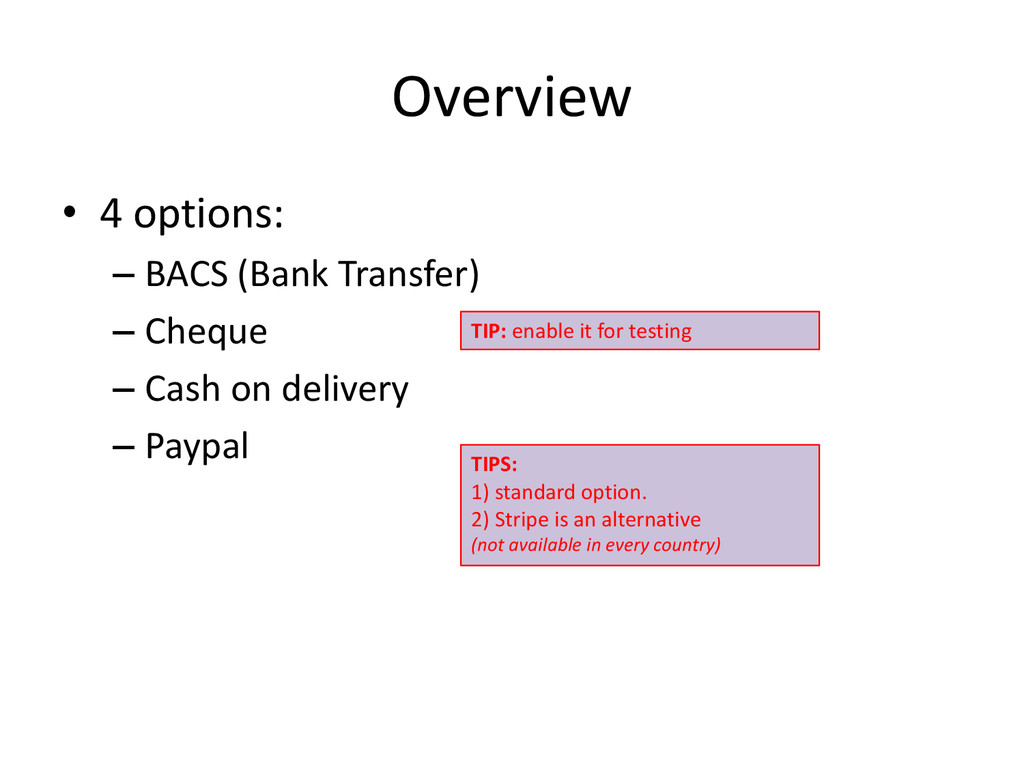
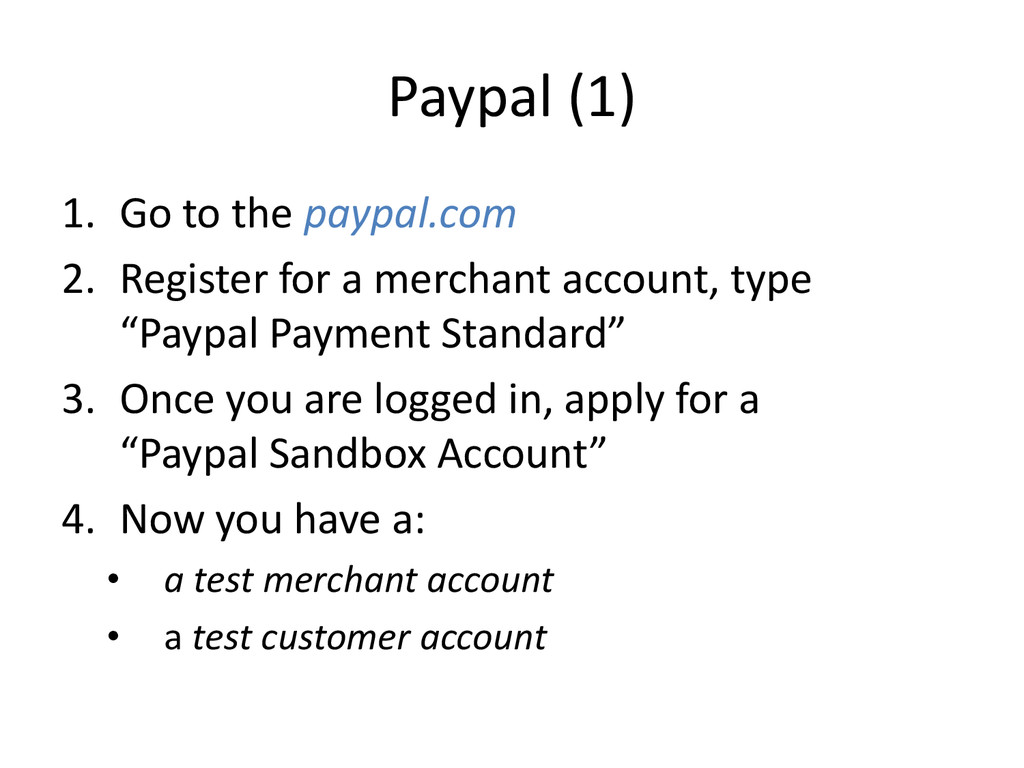
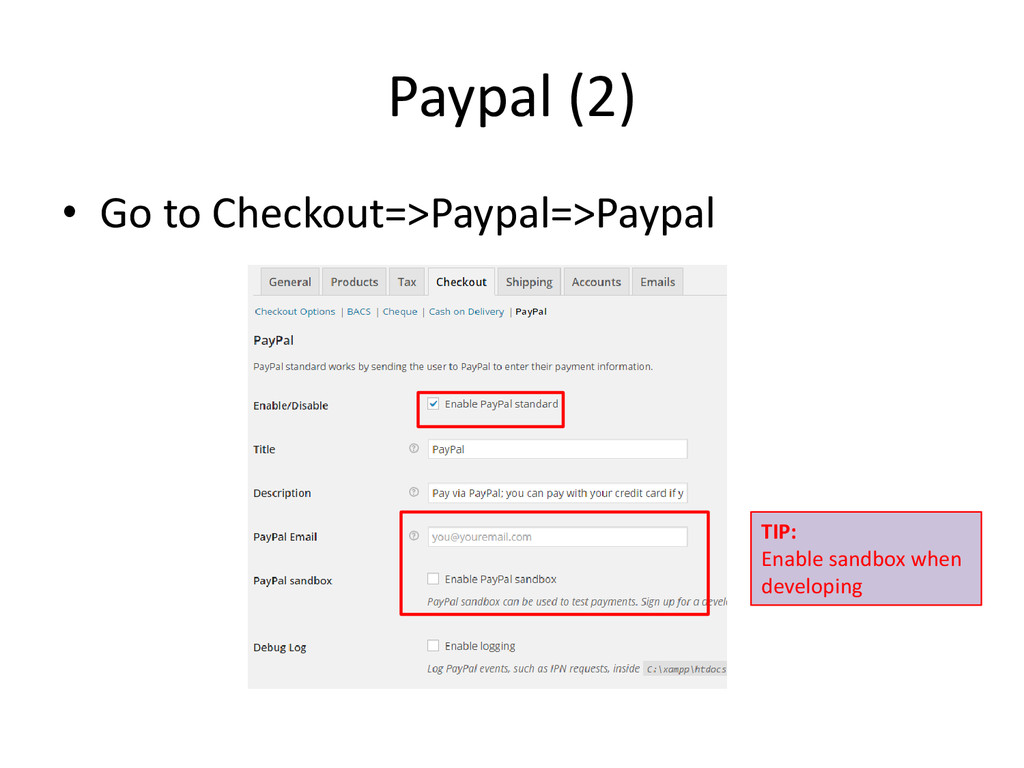
    a merchant account, type “Paypal Payment Standard” 3. Once you are logged in, apply for a “Paypal Sandbox Account” 4. Now you have a: • a test merchant account • a test customer account
  28. Paypal (3) • Shipping / Advanced Options TIP: If you

    check “Send shipping…”, also check “Enable address_override” TIP: Use this field to identify payment from your website
  29. Summary • What is WooCommerce? • Installing TwentyTwelve & WooCommerce

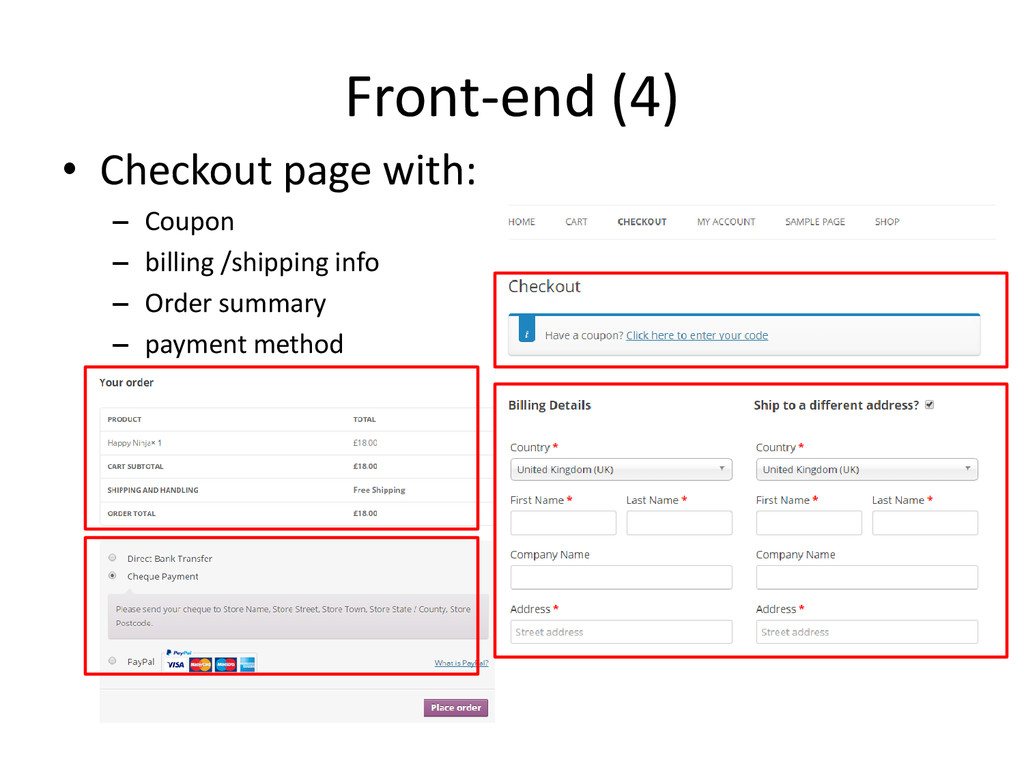
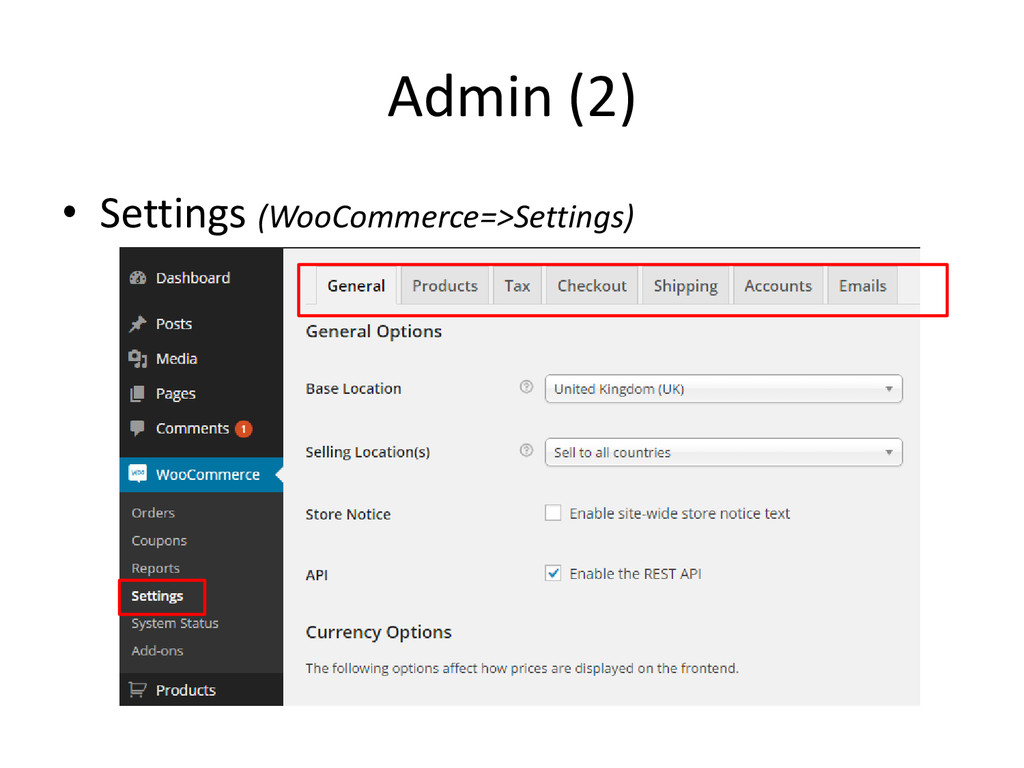
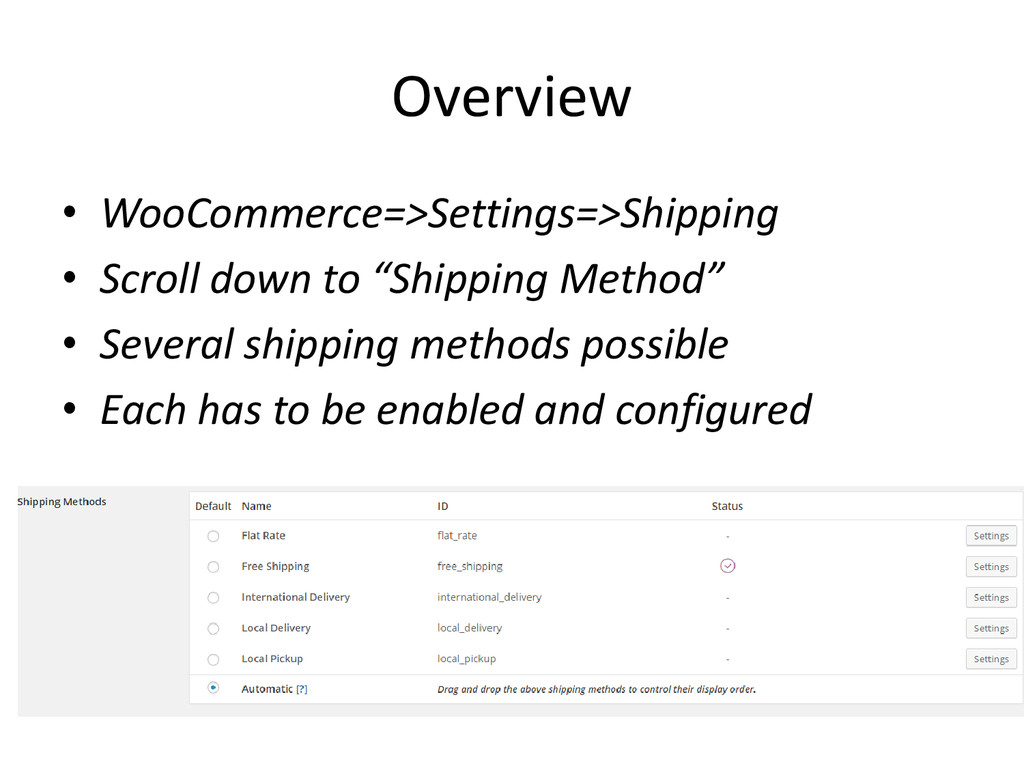
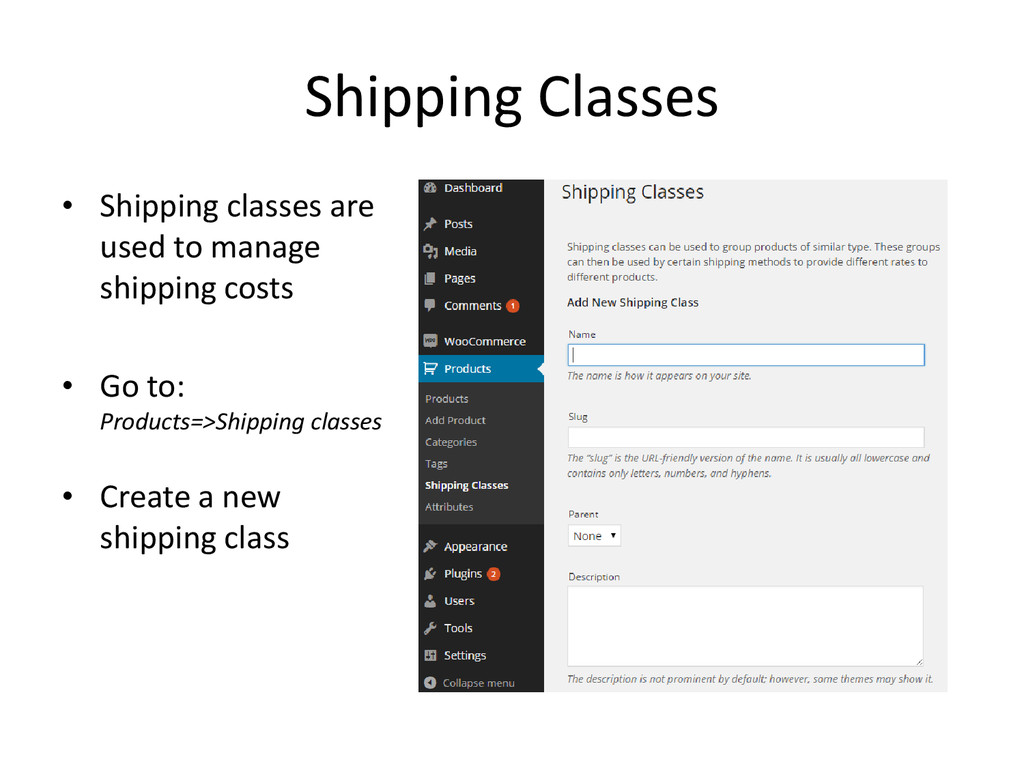
    • Overview of WooCommerce • Setting up basic options • Setting up checkout • Setting up shipping options – Overview – Shipping Classes – Mapping a shipping class to a flat rate
  30. Overview • WooCommerce=>Settings=>Shipping • Scroll down to “Shipping Method” •

    Several shipping methods possible • Each has to be enabled and configured
  31. Shipping Classes • Shipping classes are used to manage shipping

    costs • Go to: Products=>Shipping classes • Create a new shipping class
  32. Mapping a shipping class to a flat rate • Go

    back to WooCommerce=>Settings=>Shipping • Click on “Flat Rate” • For “Costs added”, choose “Per Class” • Click on “add Cost” to setup the class