Upgrade to Pro
— share decks privately, control downloads, hide ads and more …
Speaker Deck
Features
Speaker Deck
PRO
Sign in
Sign up for free
Search
Search
Build Your Own TTN Gateway with Resin.io and RA...
Search
Sponsored
·
Ship Features Fearlessly
Turn features on and off without deploys. Used by thousands of Ruby developers.
→
Tim Perry
October 04, 2018
Technology
26k
0
Share
Embed
Copy iframe code
Copy JS code
Copy link
Start on current slide
Build Your Own TTN Gateway with Resin.io and RAK Wireless
Tim Perry
October 04, 2018
More Decks by Tim Perry
See All by Tim Perry
Unlocking the Apps
pimterry
0
590
IoT Hackathon
pimterry
0
370
The Cambrian Explosion of IoT
pimterry
0
26k
Modern Easy IoT with Docker & Resin.io
pimterry
1
410
Provision, Manage & Monitor Gateways in Production with Resin.io
pimterry
0
25k
Optimizing Docker for IoT with Multi-Stage Builds
pimterry
0
31k
Hardware Hacking for JS Developers
pimterry
1
27k
HTTPS is Not Enough
pimterry
0
27k
Promises Are So Passé
pimterry
0
28k
Other Decks in Technology
See All in Technology
AI時代のエンジニアキャリアについて今一度考える
sakamoto_582
1
1.2k
CVE-2026-20833_脆弱性対応とAES 化について
jukishiya
0
360
Text-to-SQLをAgentCoreで実現し、生成されるSQLの精度を定量的に評価する
yakumo
2
550
5分でわかるDuckDB Quack
chanyou0311
4
310
FinOps X 2026 Recap from Engineer Side #JapanFinOps
chacco38
0
250
SRE Lounge Hiroshimaへの招待
grimoh
0
180
AWS Summit Japan 2026の振り返りと2027へ向けて / AWS Summit Japan 2026 Recap and Prospects for 2027
kaminashi
1
200
金融の未来を考える / Thinking About the Future of Finance
ks91
PRO
0
150
デジタル・デザイン構想 by Sayaka Ishizuka
y150saya
0
190
プロンプト_きのこカンファレンス2026_LT
yurufuwahealer
0
140
Why is RC4 still being used?
tamaiyutaro
0
290
4人目のSREはAgent
tanimuyk
0
380
Featured
See All Featured
CoffeeScript is Beautiful & I Never Want to Write Plain JavaScript Again
sstephenson
162
16k
コードの90%をAIが書く世界で何が待っているのか / What awaits us in a world where 90% of the code is written by AI
rkaga
62
44k
Building AI with AI
inesmontani
PRO
1
1.1k
Navigating the moral maze — ethical principles for Al-driven product design
skipperchong
2
410
Save Time (by Creating Custom Rails Generators)
garrettdimon
PRO
32
3.6k
Getting science done with accelerated Python computing platforms
jacobtomlinson
2
250
Have SEOs Ruined the Internet? - User Awareness of SEO in 2025
akashhashmi
0
380
Exploring the relationship between traditional SERPs and Gen AI search
raygrieselhuber
PRO
2
4.1k
Context Engineering - Making Every Token Count
addyosmani
9
1k
Ruling the World: When Life Gets Gamed
codingconduct
0
270
Visual Storytelling: How to be a Superhuman Communicator
reverentgeek
2
580
Technical Leadership for Architectural Decision Making
baasie
3
430
Transcript
@pimterry Build your own gateway with resin.io and RAK wireless
@pimterry
@pimterry
@pimterry
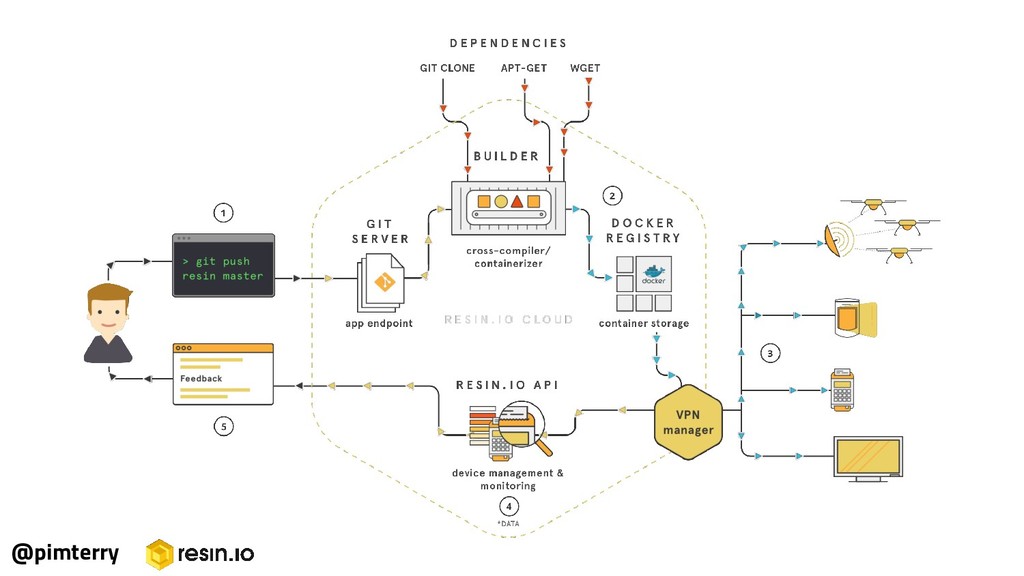
Register a TTN Gateway Create an Resin.io account & application
Provision your device Deploy the packet forwarder Configure your device @pimterry Build your own gateway
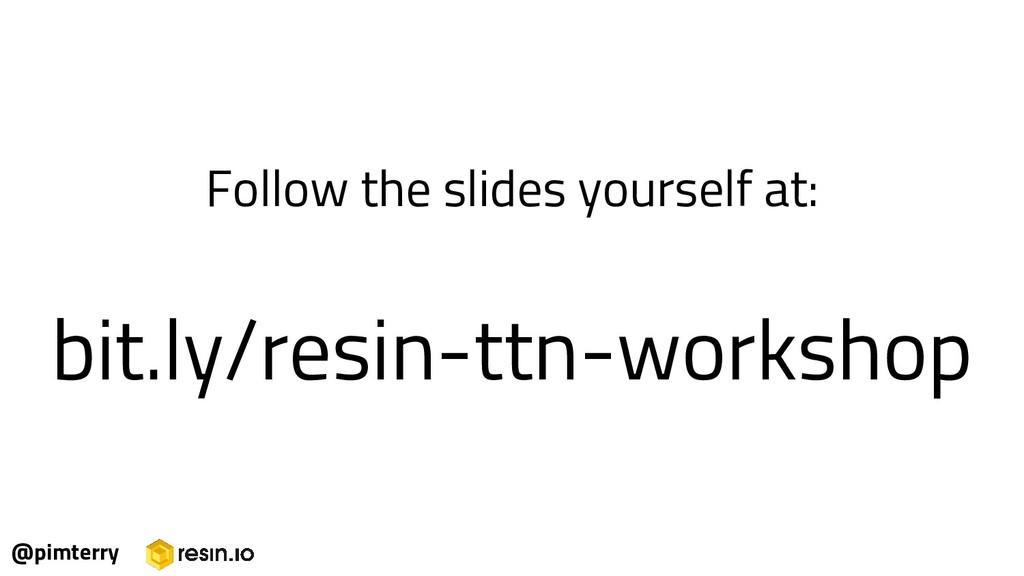
Follow the slides yourself at: bit.ly/resin-ttn-workshop @pimterry
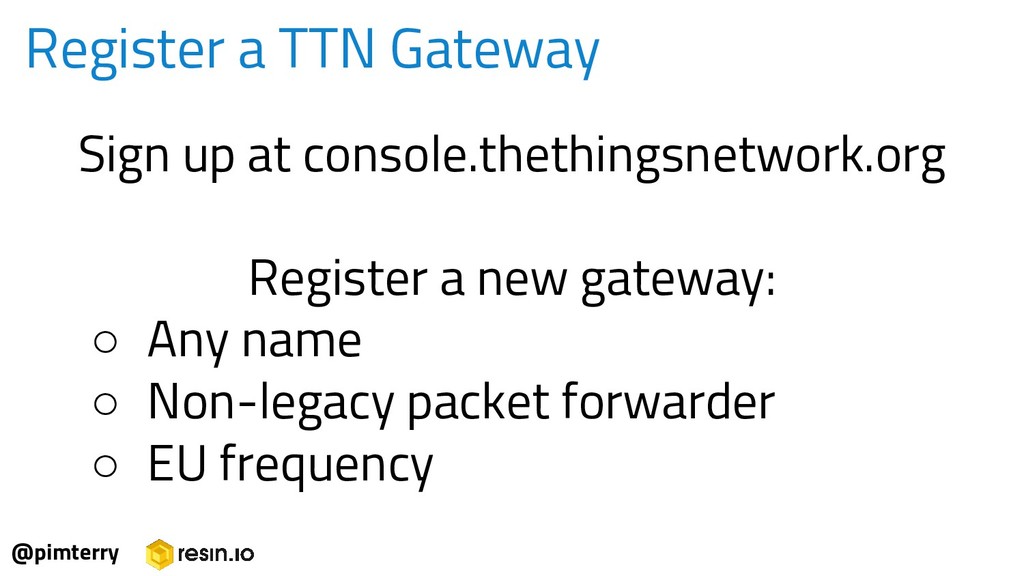
Sign up at console.thethingsnetwork.org Register a new gateway: ◦ Any
name ◦ Non-legacy packet forwarder ◦ EU frequency @pimterry Register a TTN Gateway
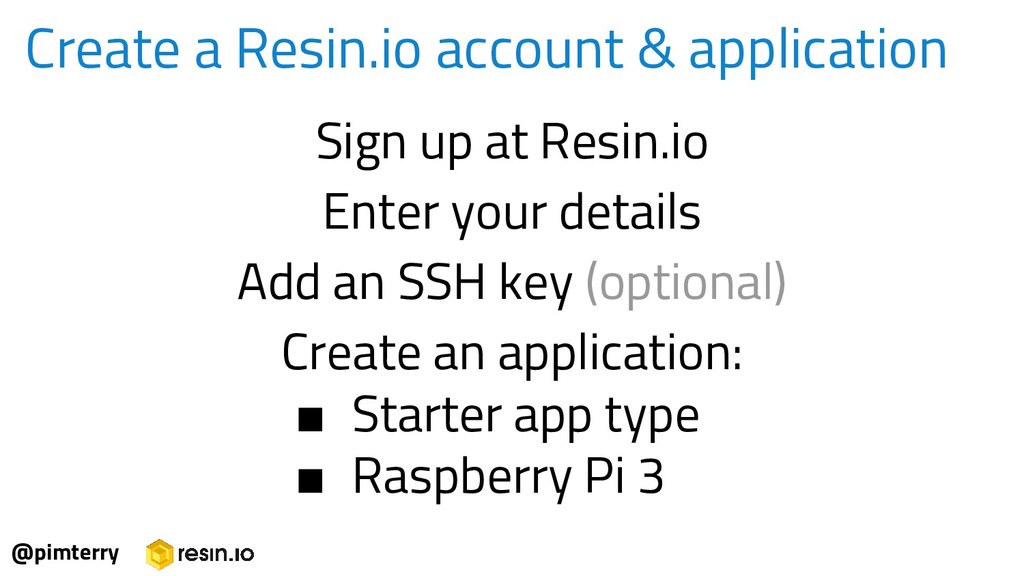
Sign up at Resin.io Enter your details Add an SSH
key (optional) Create an application: ▪ Starter app type ▪ Raspberry Pi 3 @pimterry Create a Resin.io account & application
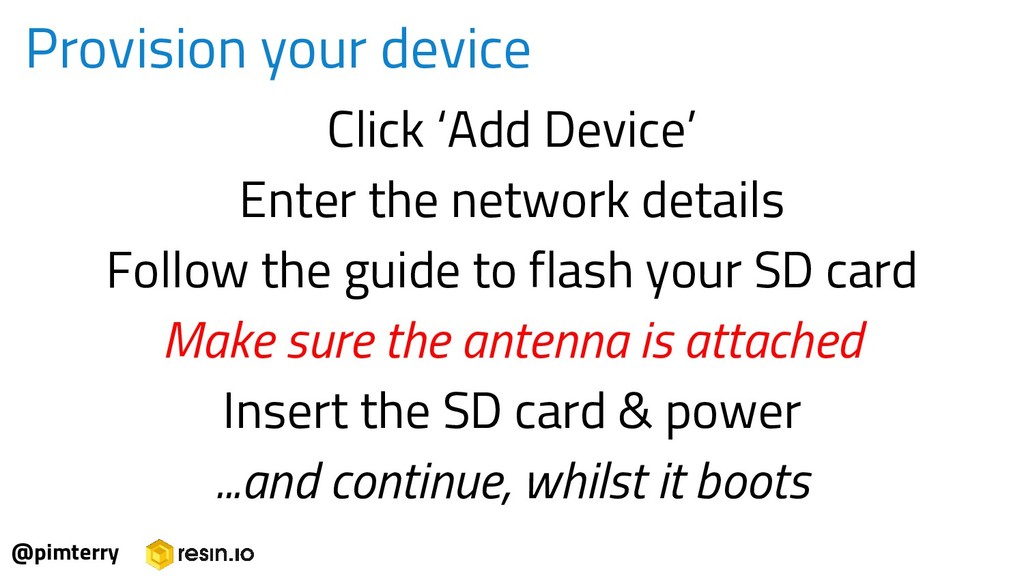
Click ‘Add Device’ Enter the network details Follow the guide
to flash your SD card Make sure the antenna is attached Insert the SD card & power ...and continue, whilst it boots Provision your device @pimterry
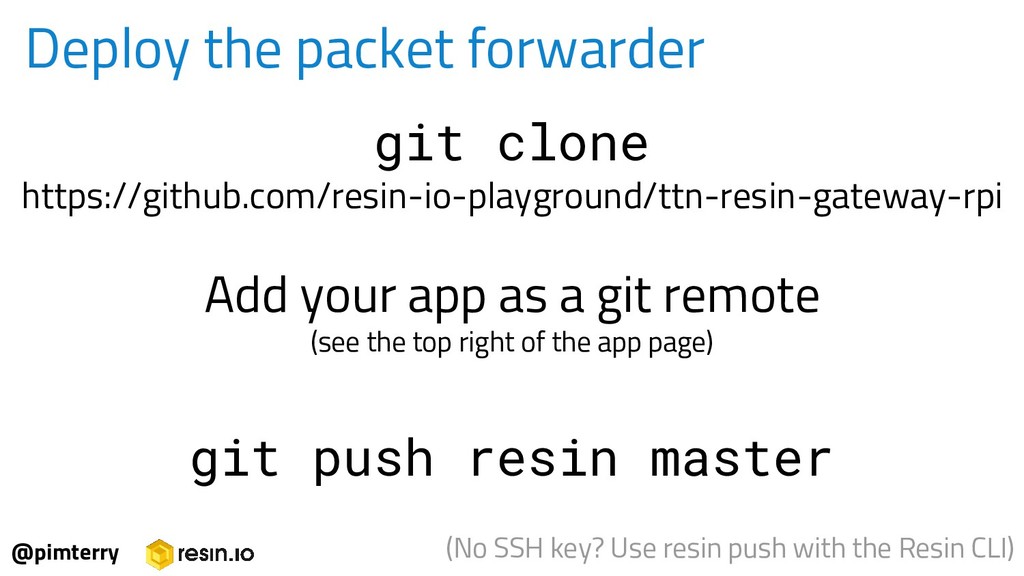
Deploy the packet forwarder @pimterry git clone https://github.com/resin-io-playground/ttn-resin-gateway-rpi Add your
app as a git remote (see the top right of the app page) git push resin master (No SSH key? Use resin push with the Resin CLI)
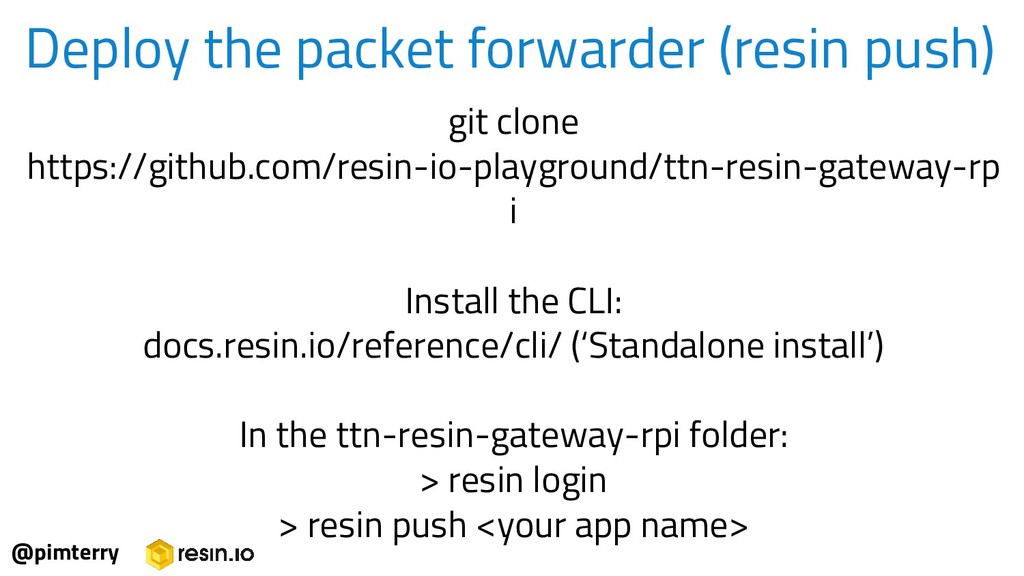
Deploy the packet forwarder (resin push) @pimterry git clone https://github.com/resin-io-playground/ttn-resin-gateway-rp
i Install the CLI: docs.resin.io/reference/cli/ (‘Standalone install’) In the ttn-resin-gateway-rpi folder: > resin login > resin push <your app name>
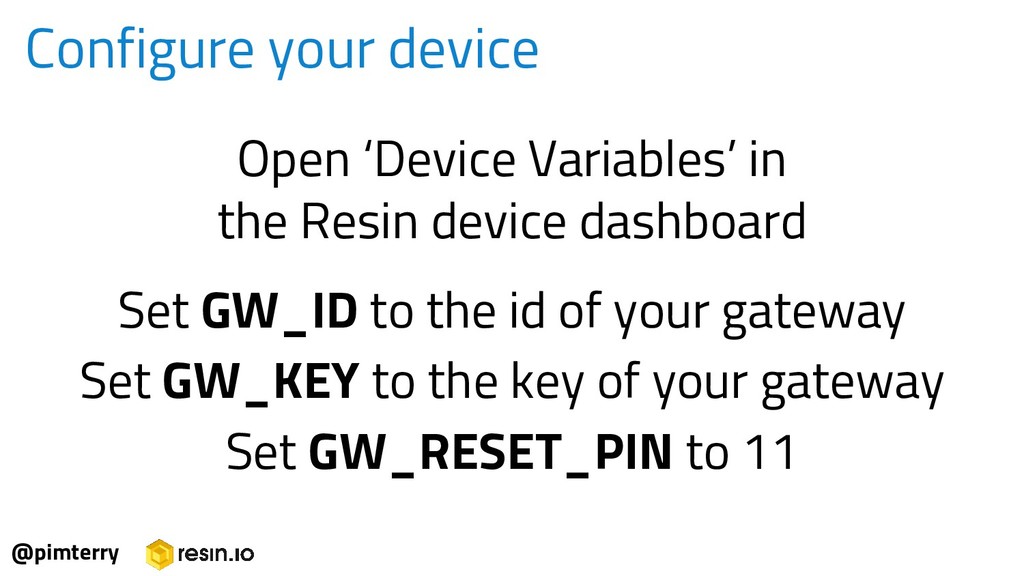
Configure your device @pimterry Open ‘Device Variables’ in the Resin
device dashboard Set GW_ID to the id of your gateway Set GW_KEY to the key of your gateway Set GW_RESET_PIN to 11
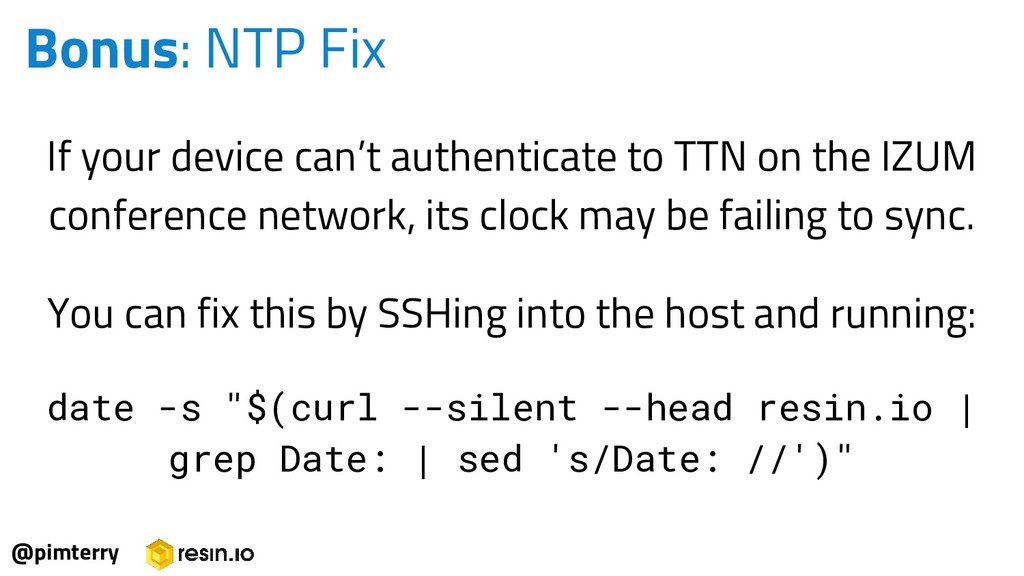
Bonus: NTP Fix @pimterry If your device can’t authenticate to
TTN on the IZUM conference network, its clock may be failing to sync. You can fix this by SSHing into the host and running: date -s "$(curl --silent --head resin.io | grep Date: | sed 's/Date: //')"
You’re done! @pimterry Monitor status via the device logs in
the Resin dashboard Monitors packets sent & received in the TTN console
@pimterry Have questions? forums.resin.io
@pimterry Build your own gateway with resin.io and RAK wireless