Upgrade to Pro — share decks privately, control downloads, hide ads and more …

Solar Lighting Design Guide

Avatar for SEPCO SEPCO
December 15, 2021

Solar Lighting Design Guide

Learn About Fixture Variances
Different fixtures are used for different applications. Each also provides different lumen packages. Learn about which type of fixture would work best for your project.

Learn About Operation Profiles
Different operation profiles provide light when it is required. This will look beyond just dusk to dawn operations into all the different controls available.

Learn About Solar Power Systems
Once most design factors are determined, such as fixtures and operation requirements, simple calculations can determine the solar power requirements.

Learn more about Solar LED Lighting Systems by visiting us online at https://www.sepco-solarlighting.com.

Avatar for SEPCO

SEPCO

December 15, 2021

Other Decks in Business

Transcript

  1. SOLAR LIGHTING DESIGN GUIDE Navigating how to design a reliable

    solar lighting solution SOLAR ELECTRIC POWER COMPANY
  2. 0 2 INTRODUCTION When you think of solar lighting, you

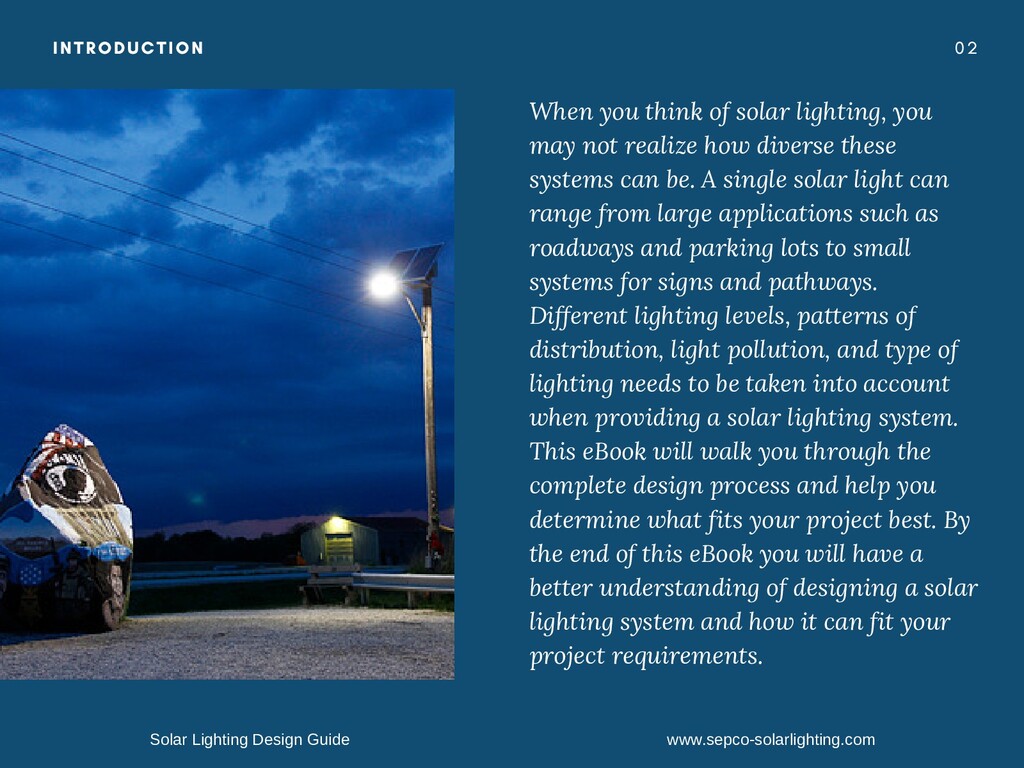
    may not realize how diverse these systems can be. A single solar light can range from large applications such as roadways and parking lots to small systems for signs and pathways. Different lighting levels, patterns of distribution, light pollution, and type of lighting needs to be taken into account when providing a solar lighting system. This eBook will walk you through the complete design process and help you determine what fits your project best. By the end of this eBook you will have a better understanding of designing a solar lighting system and how it can fit your project requirements. Solar Lighting Design Guide www.sepco-solarlighting.com
  3. 0 3 STEP 1 - CHOOSING A FIXTURE STYLE Designing

    a solar lighting system starts out with choosing a fixture style to use on a project. Each fixture has its benefits for every type of application. Flood lights are good for large or small areas, such as directional uplighting or wall washing, whereas overhead fixtures provide better lighting for applications such as roadways, parking lots, etc. Our partnership with Hubbell Lighting brands provides the highest quality LED lighting fixtures to cover nearly all applications. Solar Lighting Design Guide www.sepco-solarlighting.com
  4. 0 4 STEP 1 - CHOOSING A FIXTURE STYLE Depending

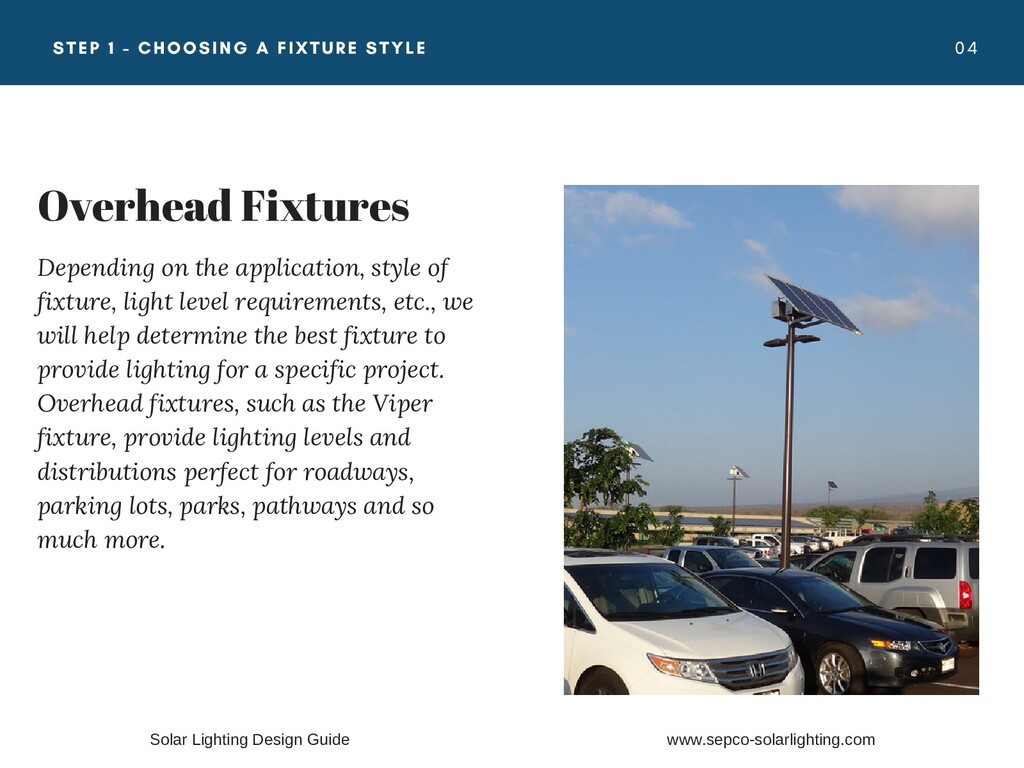
    on the application, style of fixture, light level requirements, etc., we will help determine the best fixture to provide lighting for a specific project. Overhead fixtures, such as the Viper fixture, provide lighting levels and distributions perfect for roadways, parking lots, parks, pathways and so much more. Overhead Fixtures Solar Lighting Design Guide www.sepco-solarlighting.com
  5. 0 5 STEP 1 - CHOOSING A FIXTURE STYLE Decorative

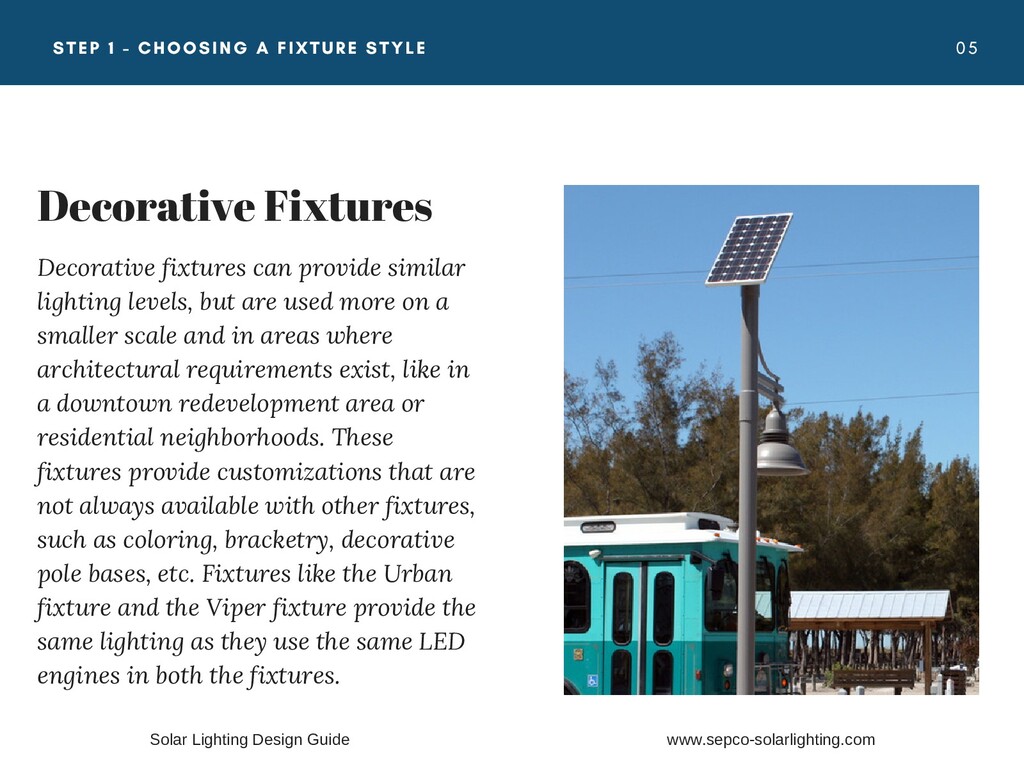
    fixtures can provide similar lighting levels, but are used more on a smaller scale and in areas where architectural requirements exist, like in a downtown redevelopment area or residential neighborhoods. These fixtures provide customizations that are not always available with other fixtures, such as coloring, bracketry, decorative pole bases, etc. Fixtures like the Urban fixture and the Viper fixture provide the same lighting as they use the same LED engines in both the fixtures. Decorative Fixtures Solar Lighting Design Guide www.sepco-solarlighting.com
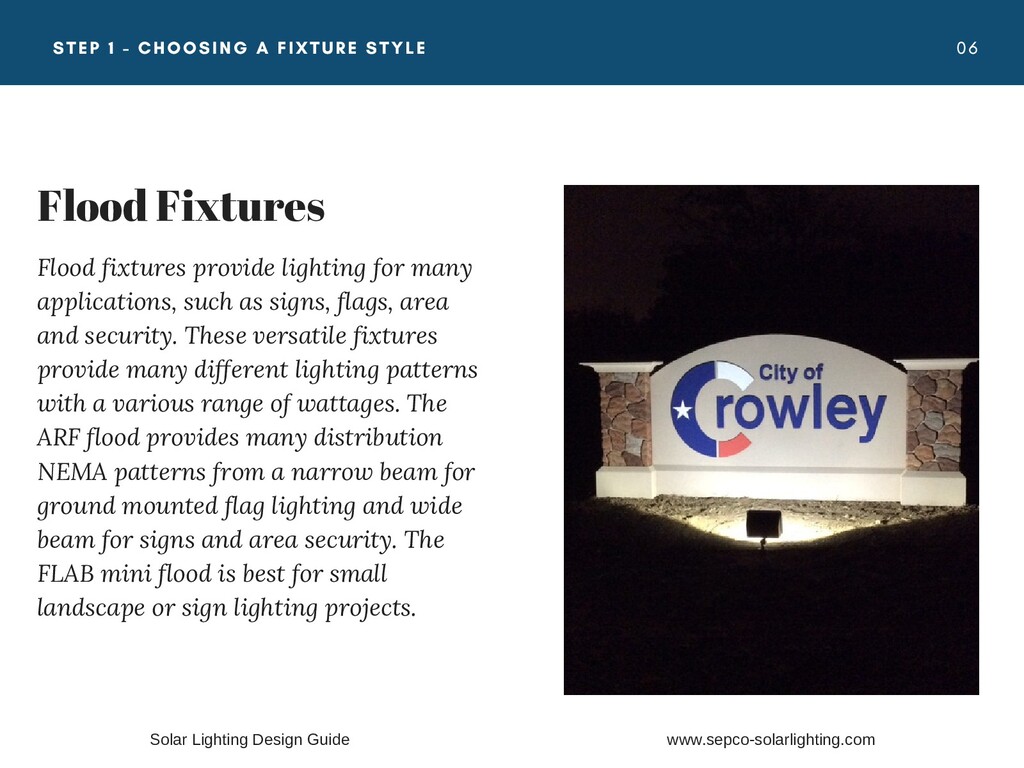
  6. 0 6 STEP 1 - CHOOSING A FIXTURE STYLE Flood

    fixtures provide lighting for many applications, such as signs, flags, area and security. These versatile fixtures provide many different lighting patterns with a various range of wattages. The ARF flood provides many distribution NEMA patterns from a narrow beam for ground mounted flag lighting and wide beam for signs and area security. The FLAB mini flood is best for small landscape or sign lighting projects. Flood Fixtures Solar Lighting Design Guide www.sepco-solarlighting.com
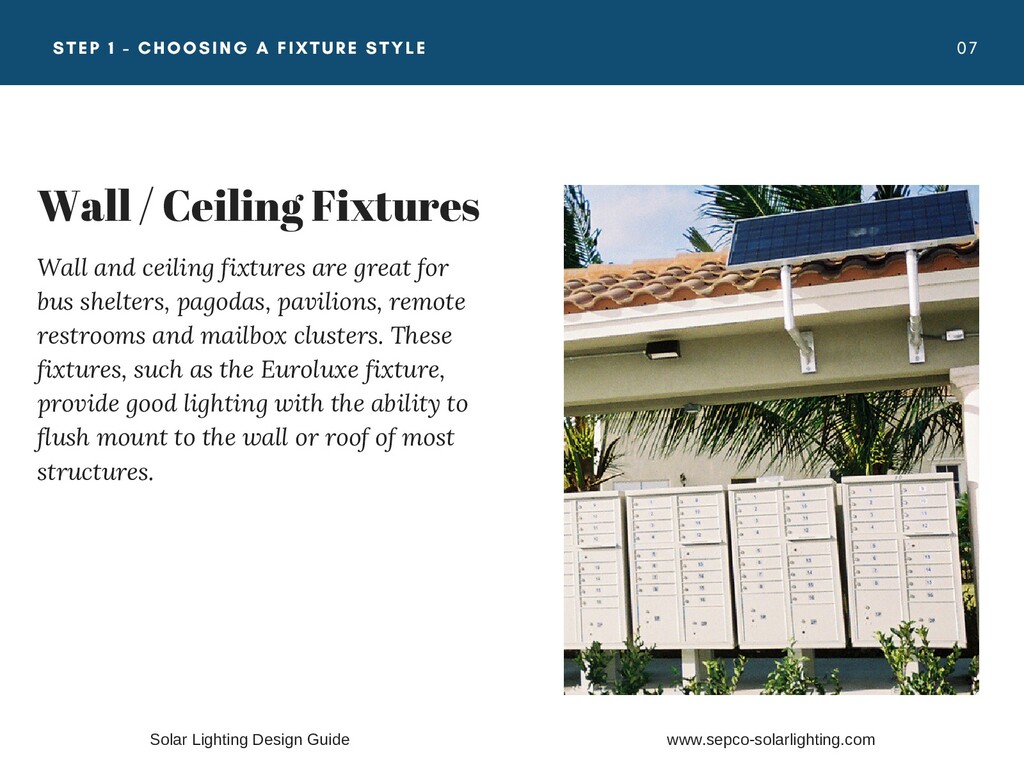
  7. 0 7 STEP 1 - CHOOSING A FIXTURE STYLE Wall

    and ceiling fixtures are great for bus shelters, pagodas, pavilions, remote restrooms and mailbox clusters. These fixtures, such as the Euroluxe fixture, provide good lighting with the ability to flush mount to the wall or roof of most structures. Wall / Ceiling Fixtures Solar Lighting Design Guide www.sepco-solarlighting.com
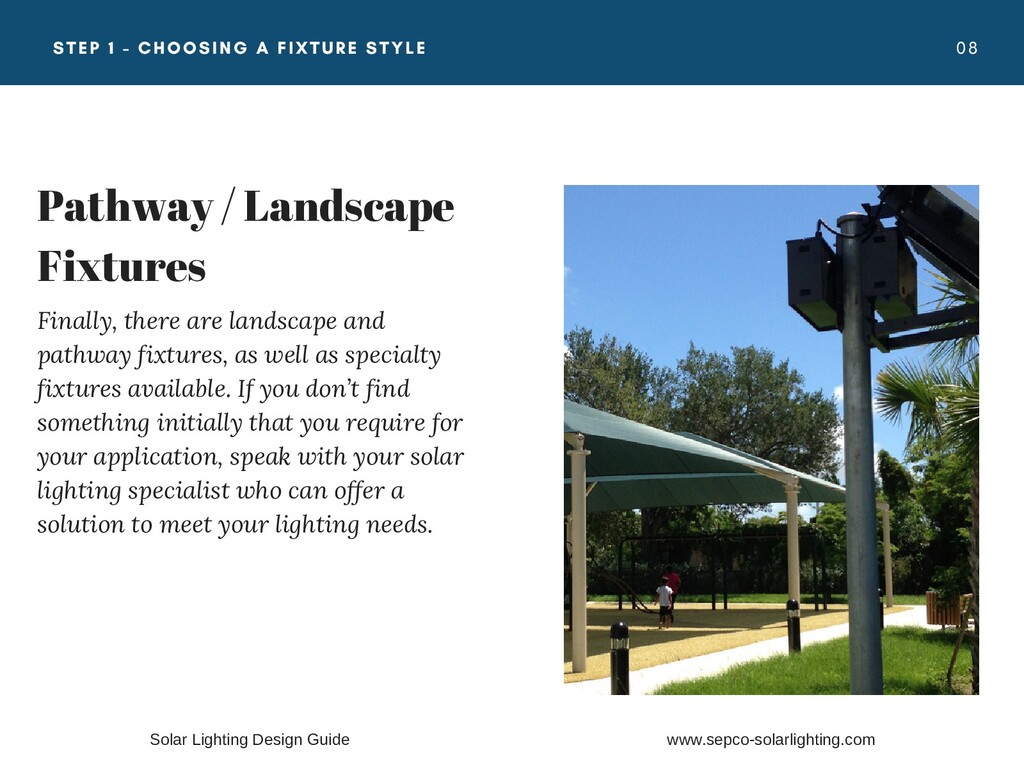
  8. 0 8 STEP 1 - CHOOSING A FIXTURE STYLE Finally,

    there are landscape and pathway fixtures, as well as specialty fixtures available. If you don’t find something initially that you require for your application, speak with your solar lighting specialist who can offer a solution to meet your lighting needs. Pathway / Landscape Fixtures Solar Lighting Design Guide www.sepco-solarlighting.com
  9. 0 9 STEP 1 - CHOOSING A FIXTURE STYLE Each

    solar power assembly can operate one fixture or multiple fixtures depending on the requirements of the project. For example, a sign may require anywhere from two to six fixtures, all powered by a single power assembly. Same thing can be done with pathways using bollard fixtures. Most overhead systems are powering a single or double fixture arrangement. The fixture selection begins the system design process. Check out the Solar Fixture section on our website to find other fixtures provided that can be used for your project. In the next section, we will discuss wattage and Lumen requirements to work on determining the light power requirements that allows for eventually designing the solar power assembly. For up to date information on the fixtures currently offered, visit us online at www.sepco-solarlighting.com/products/solar-light-fixtures Solar Lighting Design Guide www.sepco-solarlighting.com
  10. 1 0 STEP 2 - DETERMINE WATTAGE / LUMEN REQUIREMENTS

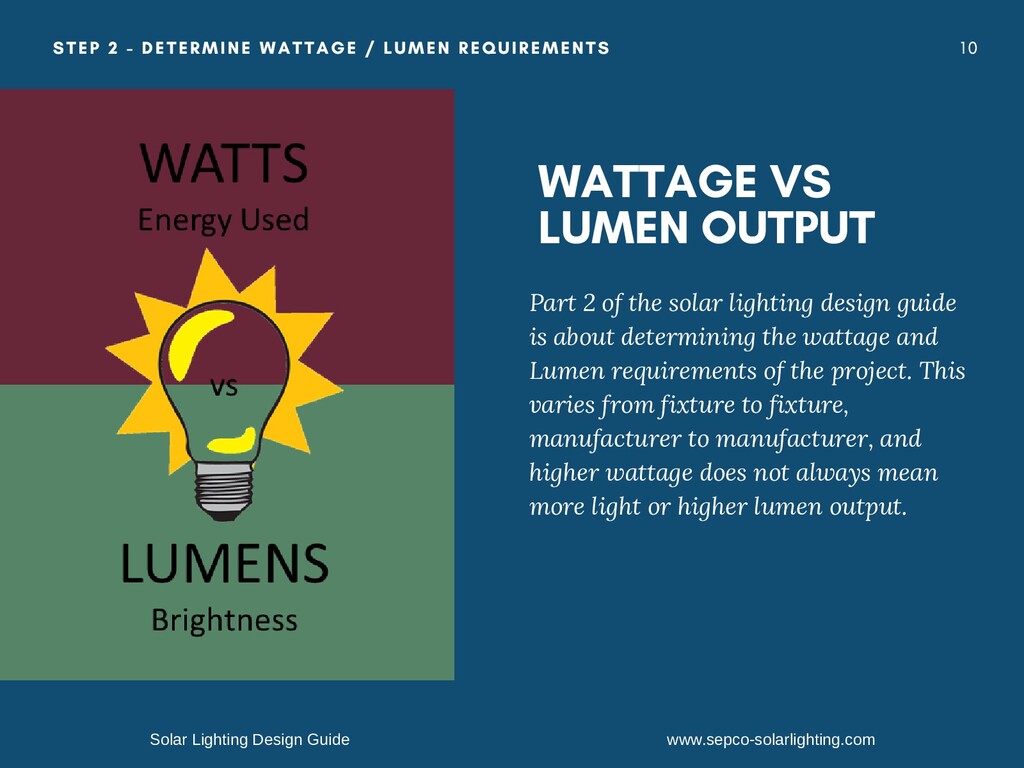
    WATTAGE VS LUMEN OUTPUT Part 2 of the solar lighting design guide is about determining the wattage and Lumen requirements of the project. This varies from fixture to fixture, manufacturer to manufacturer, and higher wattage does not always mean more light or higher lumen output. Solar Lighting Design Guide www.sepco-solarlighting.com
  11. 1 1 STEP 2 - DETERMINE WATTAGE / LUMEN REQUIREMENTS

    Each fixture has a standard LED wattage range. Depending on the application, different wattages can be used to provide the necessary illumination for the application at hand. Working with the solar lighting specialist can help determine the requirements needed for light output. For example, signs can be illuminated with a range from a 3.4 Watt FLAB mini flood for small signs to up to 30 Watt ARF flood fixtures for large signs and billboard applications. Same thing can be said for overhead lights. Small pedestrian pathways can use either bollard fixtures or overhead fixtures and are usually between 15 and 30 Watts or 1400 and 3000 Lumens and are installed low, around 15' mounting height. Higher lighting requirements of highways and parking lots start around 25 Watts / 2600 Lumens and goes up to 70 Watts / 7200 Lumens. Note: The lower the wattage, the less the LED fixture has to work to produce the light…i.e. lower wattage can at times equal higher lumen per watt output. Solar Lighting Design Guide www.sepco-solarlighting.com
  12. 1 2 STEP 2 - DETERMINE WATTAGE / LUMEN REQUIREMENTS

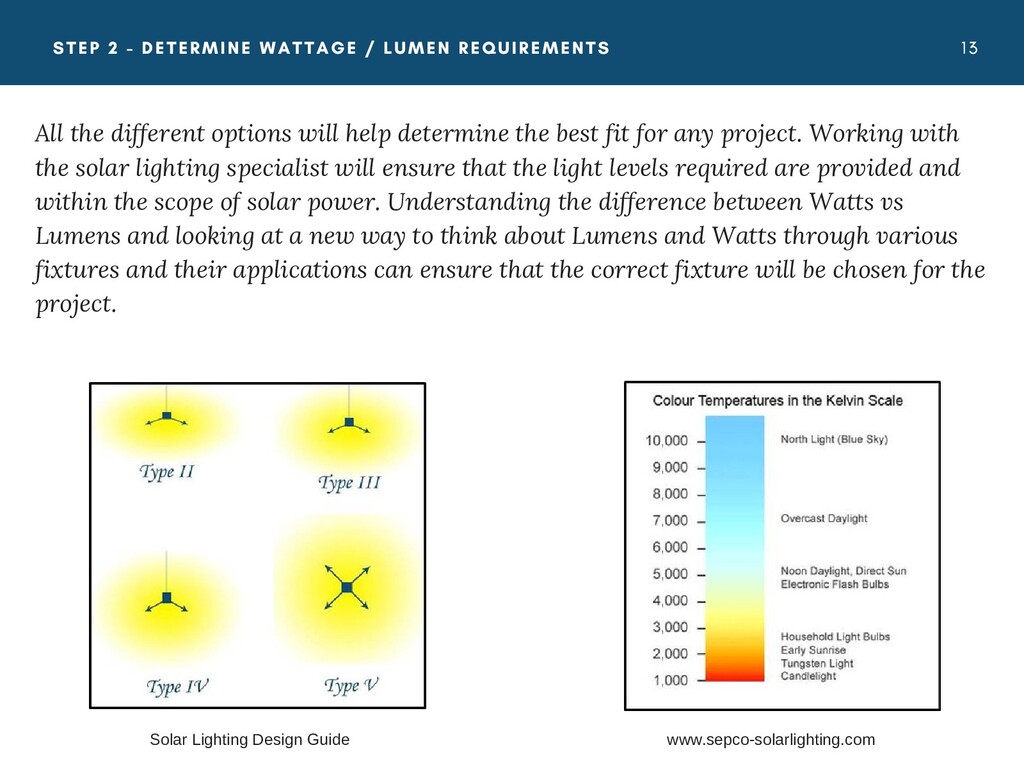
    Another factor to take into consideration is color of the light. Most of the LED fixtures come in a range of 3000K to 5000K CRI. Turtle friendly lighting is also available for coastal applications. These change the lighting requirements and wattages required to illuminate the same area. Adaptive lighting controls are another option that can be used in solar lighting applications. If you require a light to meet specific lighting requirements during active periods, but don’t necessarily require the same light levels when inactive, adaptive lighting is a great way to reduce power consumption by the light fixture while maintaining lighting on a design. Understanding these options and having an actual photometric plan showing what the light levels are during the adaptive periods will allow for better understanding of exactly what will be provided by the fixture. Finally, knowing different distribution patterns provided by each fixture will help to determine the coverage each fixture and their corresponding distribution patterns provide. Type II distributions are great for pathways and roadways whereas Type III and IV are more common for area and parking lot lighting applications. Solar Lighting Design Guide www.sepco-solarlighting.com
  13. 1 3 STEP 2 - DETERMINE WATTAGE / LUMEN REQUIREMENTS

    All the different options will help determine the best fit for any project. Working with the solar lighting specialist will ensure that the light levels required are provided and within the scope of solar power. Understanding the difference between Watts vs Lumens and looking at a new way to think about Lumens and Watts through various fixtures and their applications can ensure that the correct fixture will be chosen for the project. Solar Lighting Design Guide www.sepco-solarlighting.com
  14. 1 4 STEP 3 - CHOOSE AN OPERATION PROFILE MAKE

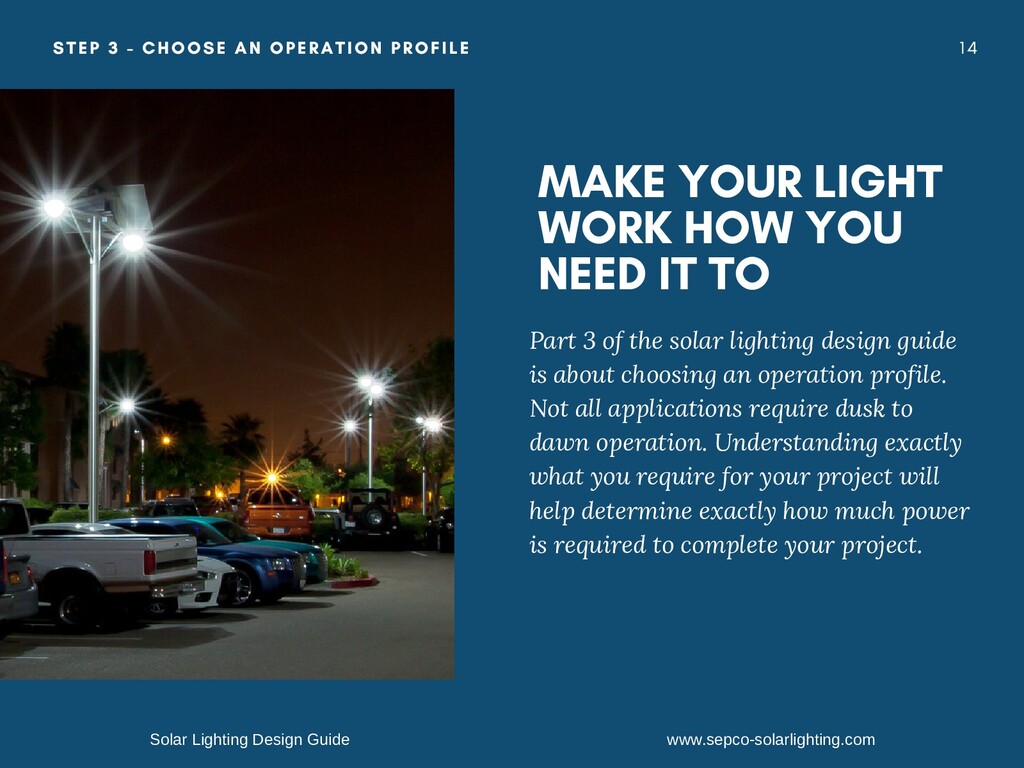
    YOUR LIGHT WORK HOW YOU NEED IT TO Part 3 of the solar lighting design guide is about choosing an operation profile. Not all applications require dusk to dawn operation. Understanding exactly what you require for your project will help determine exactly how much power is required to complete your project. Solar Lighting Design Guide www.sepco-solarlighting.com
  15. 1 5 STEP 3 - CHOOSE AN OPERATION PROFILE Dusk

    to dawn is the most popular operation profile for lighting applications. This is from the old mindset of grid tied lighting since there is no worry about the amount of power usage. Since grid lights will operate as long as there is power, there is little difference in cost for custom lighting operation. With solar, using custom lighting operation techniques can provide for a smaller solar and battery system. Second popular system is dusk activated for a set number of hours or split time operation. For example, if a business closes at 10pm and most people / customers are gone by 11 pm, having the lights shut of around midnight will reduce the solar sizing. If this same business opens again at 6 am, the lights can come back on an hour or two before dawn, making the system split time. The only time the lights are off are during the times the light is not required. For security during those off periods, the light power can also be reduced for adaptive lighting. Motion activated infrared detectors or occupancy sensors for areas where the light only needs to operate when there is someone in the area. These can either bring a light on or to a different intensity during the activation periods and then off or reduced wattage for the rest of the time. Solar Lighting Design Guide www.sepco-solarlighting.com
  16. 1 6 STEP 3 - CHOOSE AN OPERATION PROFILE Other

    options include a real time clock for specific hours of operation. These systems operate till a set time at night and then turn off, and can also be set to come on again in the morning before dawn. These clocks are great for some applications, but it must be noted that they cannot account for daylight savings time. Electronic time computers for specific operations that can be programmed, up to 365 days and are typically used for traffic flashers, work shift programming and other applications where calendar control is required. Switches such as a remote actuated switch or spring loaded timers are used when the lights are only required during certain times or for short spurts of time. Each type of operation profile will be a factor in sizing up the correct solar power assembly to operate the chosen light fixture at the wattage required. Sometimes by looking at a project with a more set schedule of operation and not just opting for dusk to dawn can make or break a project. Understand exactly what the operation requirements are when working with the solar lighting specialist to design the system. Solar Lighting Design Guide www.sepco-solarlighting.com
  17. 1 7 STEP 4 - CHOOSE MOUNTING HARDWARE MOUNTING HARDWARE

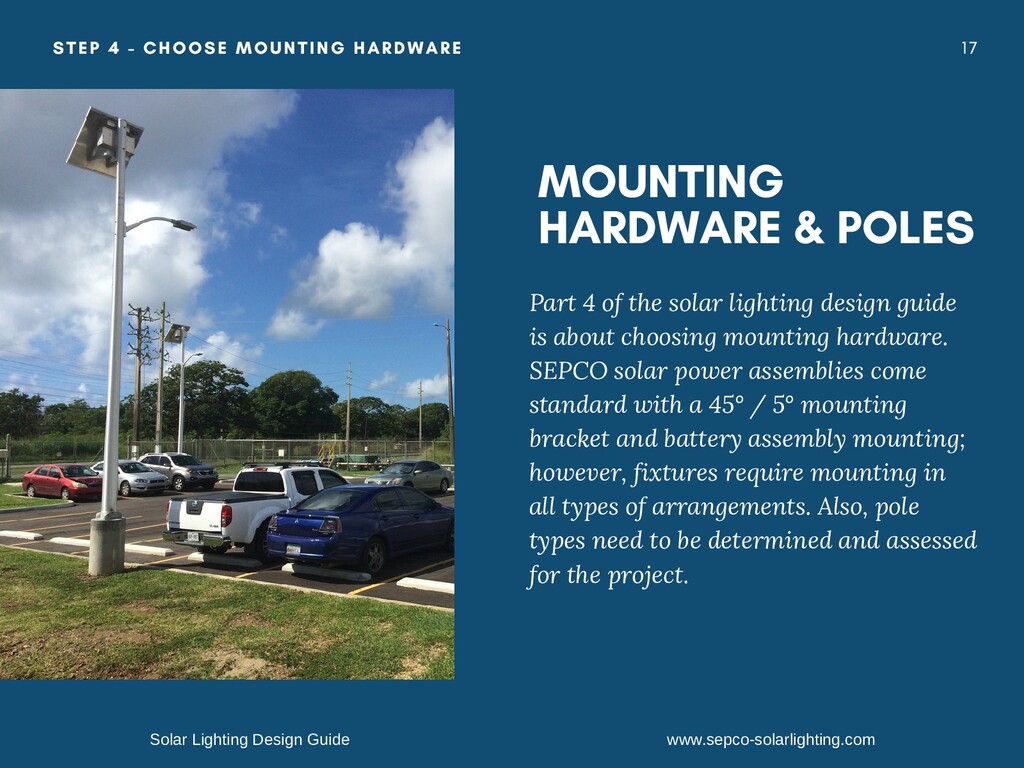
    & POLES Part 4 of the solar lighting design guide is about choosing mounting hardware. SEPCO solar power assemblies come standard with a 45° / 5° mounting bracket and battery assembly mounting; however, fixtures require mounting in all types of arrangements. Also, pole types need to be determined and assessed for the project. Solar Lighting Design Guide www.sepco-solarlighting.com
  18. 1 8 STEP 4 - CHOOSE MOUNTING HARDWARE Every bracket

    and pole choice should be designed for the specific project requirements and needs to meet the local wind load and EPA requirements. Understanding the requirements for the project will ensure that the correct bracket and pole is chosen for the project. SEPCO fixture brackets come in a variety of styles: SP – side of pole upsweep bracket which is available in 4’, 6’ and 8’ lengths. These are used for roadway and parking lot lighting where the fixture needs to be out away from the pole due to set backs or other design requirements. ST – side of pole tenon bracket which is available in 5” and 24” lengths and comes out straight from the pole or wall. These are used for areas where the fixture can be located close to the pole for shining directly down. SH – side of pole horn bracket which is typically used for flood applications where the fixture is shining out and away from the pole or area. Solar Lighting Design Guide www.sepco-solarlighting.com
  19. 1 9 STEP 4 - CHOOSE MOUNTING HARDWARE FB –

    direct burial fixture bracket used for ground mounting floods and provide not only a place to make the wire connections but also allowing the fixture to be mounted up off the ground a bit for safety from landscapers. Poles also come in a variety of styles and configurations: AP or SG – aluminum or steel poles which are designed to meet wind load requirements for holding the solar power assembly. Both manufacturing processes take into consideration life of the pole and provide an option for powder coating and galvanization. AB or DB – anchor base or direct burial poles are used for most applications. This option is determined by local project requirements. Direct burial is great for remote power systems, parks and pathways where anchor base is typically used for parking lots and roadways. Other poles such as concrete and fiberglass composite can also be used for solar lighting applications. Solar Lighting Design Guide www.sepco-solarlighting.com
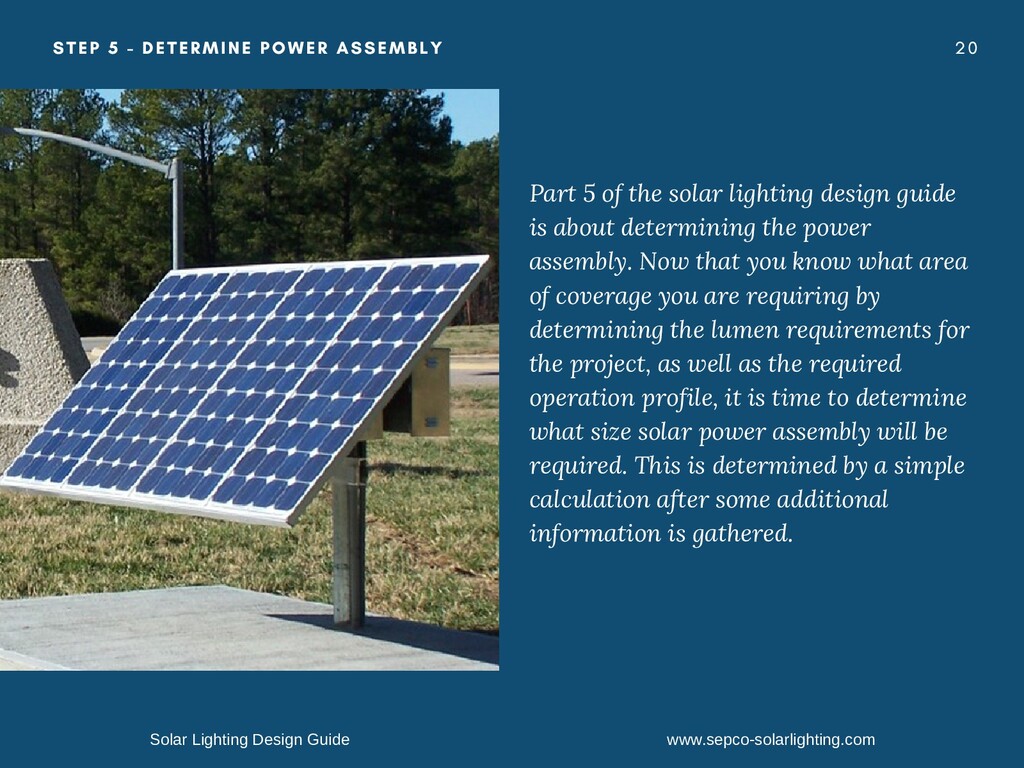
  20. 2 0 STEP 5 - DETERMINE POWER ASSEMBLY Part 5

    of the solar lighting design guide is about determining the power assembly. Now that you know what area of coverage you are requiring by determining the lumen requirements for the project, as well as the required operation profile, it is time to determine what size solar power assembly will be required. This is determined by a simple calculation after some additional information is gathered. Solar Lighting Design Guide www.sepco-solarlighting.com
  21. 2 1 STEP 5 - DETERMINE POWER ASSEMBLY Step 1

    - Take the wattage of the fixture and divide by 12 to determine the amps required to operate the fixture for 1 hour. You divide by 12 as solar power systems are typically 12 VDC; however, some are 24 VDC, but this formula will still work out correctly in the end. Step 2 - Multiplying the fixture amps by the number of hours of operation per night will provide you with the total required power consumption per night. If dusk to dawn is required, knowing the time on the longest night of the year is how this is determined. Florida has approximately 13.25 hour nights in the winter where New York has 14.5 hour nights. Split time or after dusk for x number of hours can also be used to determine. When dealing with motion, how many hours will it operate on average is what is calculated. Step 3 – Multiply the total amps required by the total number of fixtures that need to be powered by a single solar power assembly. If 1 fixture is all that is going on the power system, then you can skip this step. However, there are some applications, like with signs, bollards or landscape lighting, where multiple fixtures are all used on a single power assembly. Solar Lighting Design Guide www.sepco-solarlighting.com
  22. 2 2 STEP 5 - DETERMINE POWER ASSEMBLY Step 4

    – add 20%. This extra energy is used to bring the battery back to full after a period of inclement weather. This is also used to include a little bit of overage to ensure that the system will operate as promised for years to come. As solar ages, the power produces slowly degrades. After 25 years or so, the power is down around 20% from its original production performance. Step 5 – Divide by the total number of sun hours available in your location in the winter. This can be found online and by looking at the local NSOL guides. Remember to look at winter availability and not a yearly average as the system will not operate the same during different times of the year unless sized for worst case. Step 6 – Determine how large a power assembly is required. Each power assembly provides a different amp current and the system needs to provide over what is required. For example, our SEPA100 provides 5.46 +/- Amps per hour, up to 11 or so amps in New York or 24 or so amps in Florida for a single day in the winter. Solar Lighting Design Guide www.sepco-solarlighting.com
  23. 2 3 STEP 5 - DETERMINE POWER ASSEMBLY Step 7

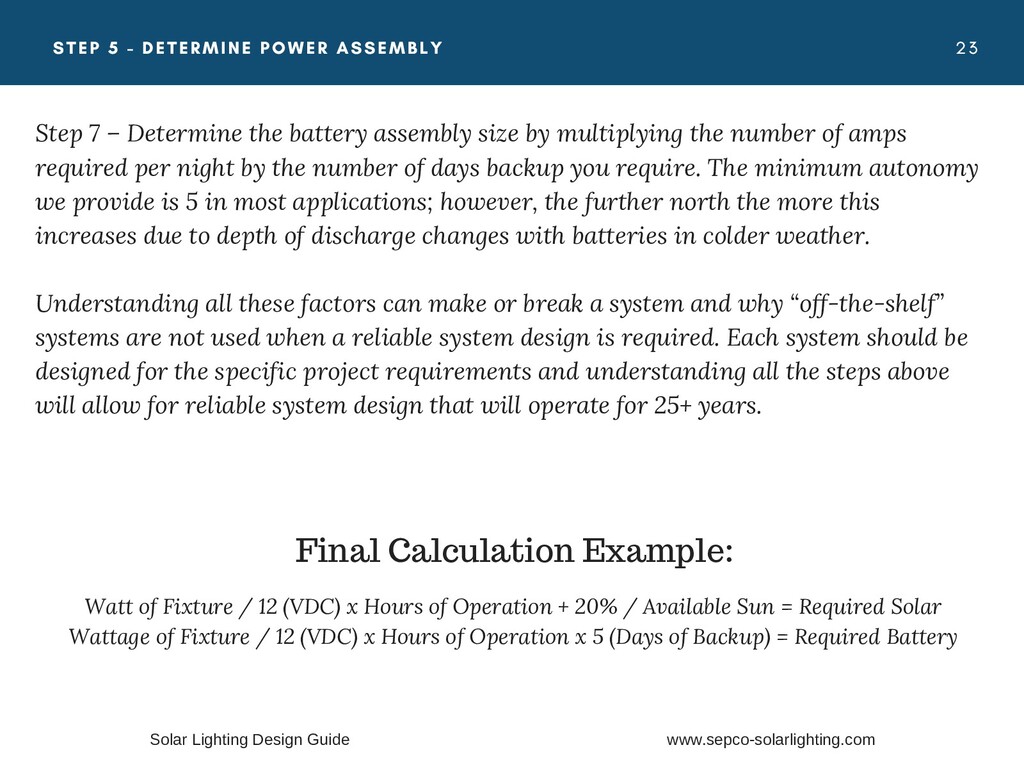
    – Determine the battery assembly size by multiplying the number of amps required per night by the number of days backup you require. The minimum autonomy we provide is 5 in most applications; however, the further north the more this increases due to depth of discharge changes with batteries in colder weather. Understanding all these factors can make or break a system and why “off-the-shelf” systems are not used when a reliable system design is required. Each system should be designed for the specific project requirements and understanding all the steps above will allow for reliable system design that will operate for 25+ years. Watt of Fixture / 12 (VDC) x Hours of Operation + 20% / Available Sun = Required Solar Wattage of Fixture / 12 (VDC) x Hours of Operation x 5 (Days of Backup) = Required Battery Final Calculation Example: Solar Lighting Design Guide www.sepco-solarlighting.com
  24. 2 4 STEP 6 - COMPLETE THE SYSTEM FINALIZING ALL

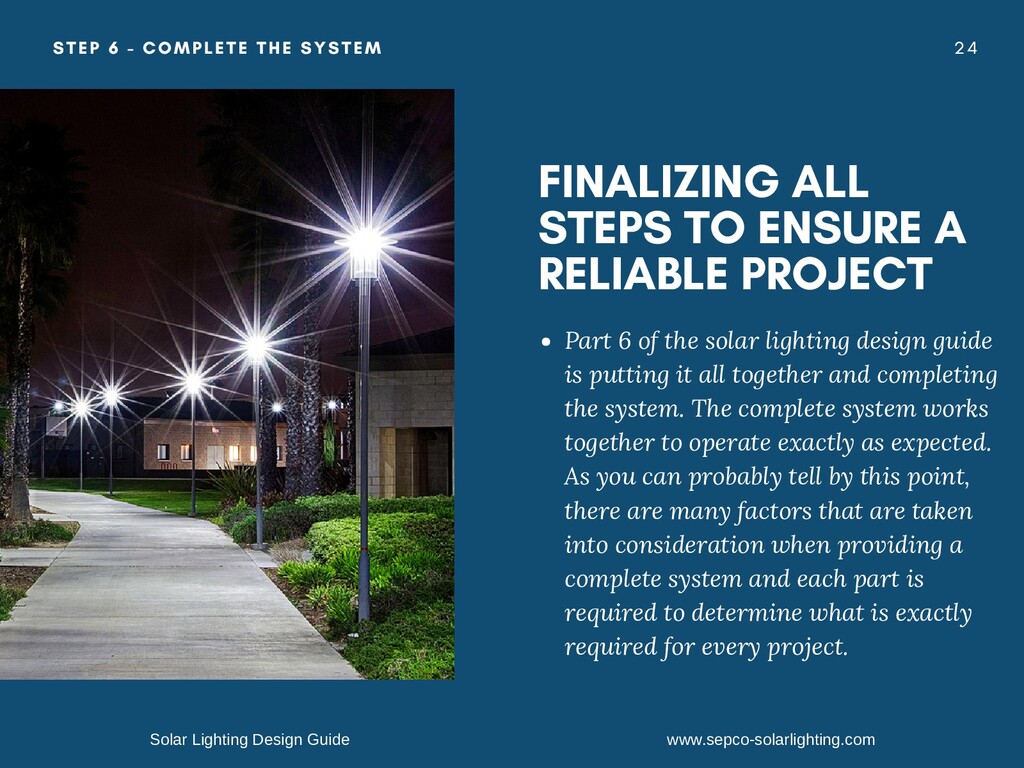
    STEPS TO ENSURE A RELIABLE PROJECT Part 6 of the solar lighting design guide is putting it all together and completing the system. The complete system works together to operate exactly as expected. As you can probably tell by this point, there are many factors that are taken into consideration when providing a complete system and each part is required to determine what is exactly required for every project. Solar Lighting Design Guide www.sepco-solarlighting.com
  25. 2 5 STEP 6 - COMPLETE THE SYSTEM Part 1

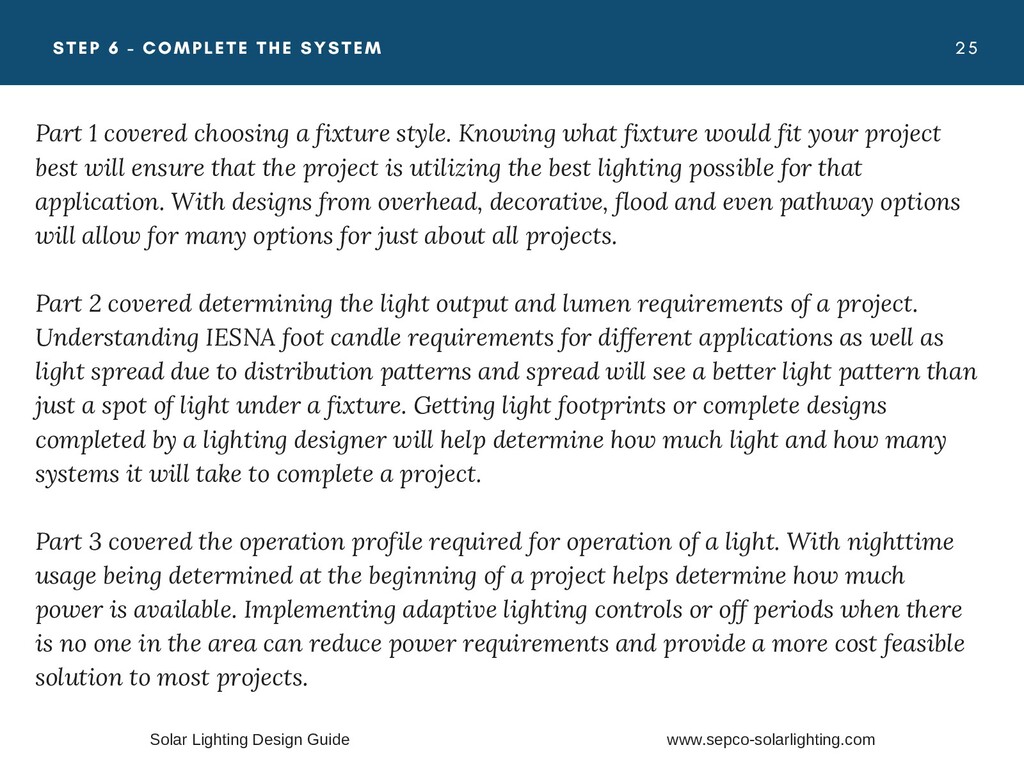
    covered choosing a fixture style. Knowing what fixture would fit your project best will ensure that the project is utilizing the best lighting possible for that application. With designs from overhead, decorative, flood and even pathway options will allow for many options for just about all projects. Part 2 covered determining the light output and lumen requirements of a project. Understanding IESNA foot candle requirements for different applications as well as light spread due to distribution patterns and spread will see a better light pattern than just a spot of light under a fixture. Getting light footprints or complete designs completed by a lighting designer will help determine how much light and how many systems it will take to complete a project. Part 3 covered the operation profile required for operation of a light. With nighttime usage being determined at the beginning of a project helps determine how much power is available. Implementing adaptive lighting controls or off periods when there is no one in the area can reduce power requirements and provide a more cost feasible solution to most projects. Solar Lighting Design Guide www.sepco-solarlighting.com
  26. 2 6 STEP 6 - COMPLETE THE SYSTEM Part 4

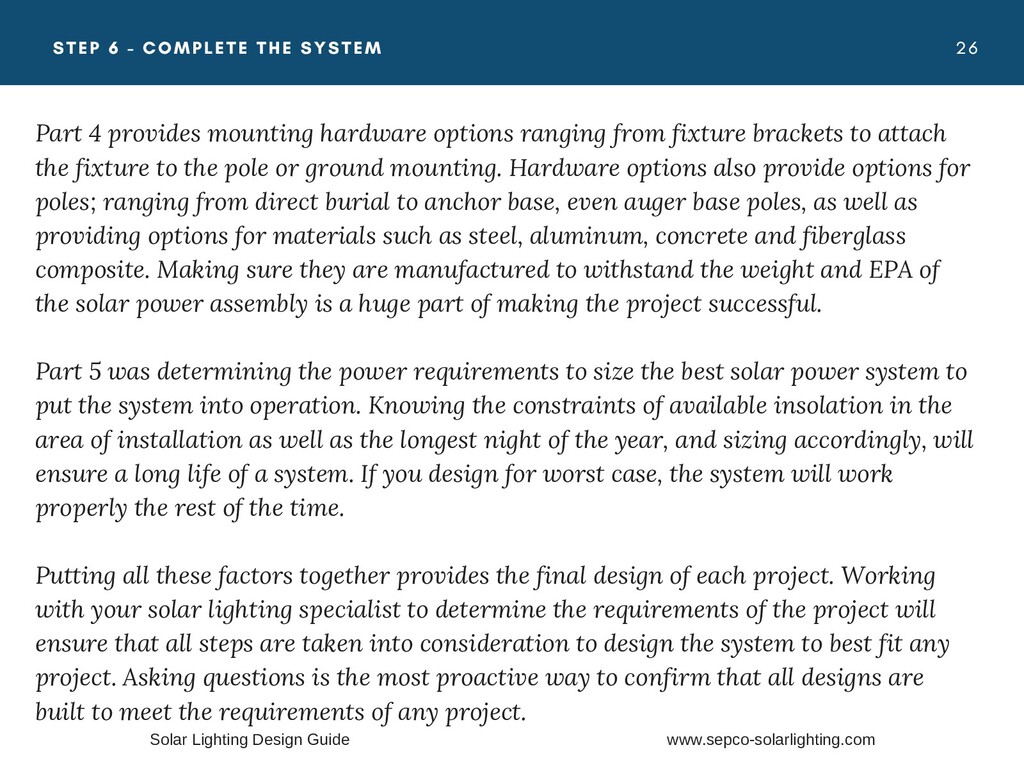
    provides mounting hardware options ranging from fixture brackets to attach the fixture to the pole or ground mounting. Hardware options also provide options for poles; ranging from direct burial to anchor base, even auger base poles, as well as providing options for materials such as steel, aluminum, concrete and fiberglass composite. Making sure they are manufactured to withstand the weight and EPA of the solar power assembly is a huge part of making the project successful. Part 5 was determining the power requirements to size the best solar power system to put the system into operation. Knowing the constraints of available insolation in the area of installation as well as the longest night of the year, and sizing accordingly, will ensure a long life of a system. If you design for worst case, the system will work properly the rest of the time. Putting all these factors together provides the final design of each project. Working with your solar lighting specialist to determine the requirements of the project will ensure that all steps are taken into consideration to design the system to best fit any project. Asking questions is the most proactive way to confirm that all designs are built to meet the requirements of any project. Solar Lighting Design Guide www.sepco-solarlighting.com
  27. 2 7 CONTACT US THANK YOU FOR YOUR TIME! Kindly

    get in touch to let us know if you have any questions. One of our solar specialists would be happy to help you choose the best option for your Solar Lighting project and provide clean, renewable solar energy! I N F O @ S E P C O N E T . C O M W W W . S E P C O - S O L A R L I G H T I N G . C O M 1 5 2 1 S E P A L M C O U R T S T U A R T , F L 3 4 9 9 4 7 7 2 - 2 2 0 - 6 6 1 5