$30 off During Our Annual Pro Sale. View Details »

Heritage

sunil
June 03, 2013

 Heritage

The ppt shows how to add content to the local heritage site.

sunil

June 03, 2013
Tweet

Other Decks in How-to & DIY

Transcript

  1. adding Content to a heritage site
    adding Content to a heritage site
    adding Content to a heritage site
    adding Content to a heritage site

    View Slide

  2. step 1
    step 1
    step 1
    step 1
    Go to
    http://localheritage.in
    Select the city in which
    you want to add content
    and click the tab Go
    Go
    Go
    Go

    View Slide

  3. step
    step
    step
    step 2
    2
    2
    2
    Once you 
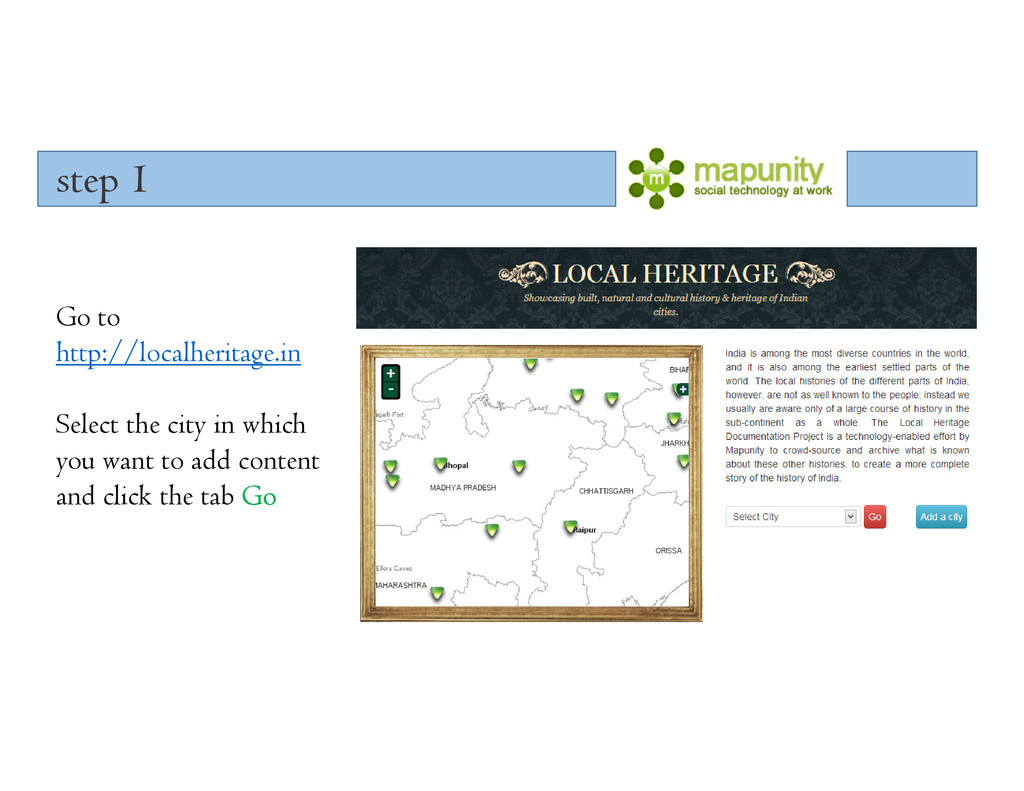
select the city, you can add information to
    either one or all the three categories.
    1. Timeline 2. Gallery 3. Map
    For e.g. if we want to add info to Pune then it shows

    View Slide

  4. step 3
    step 3
    step 3
    step 3 -
    -
    -
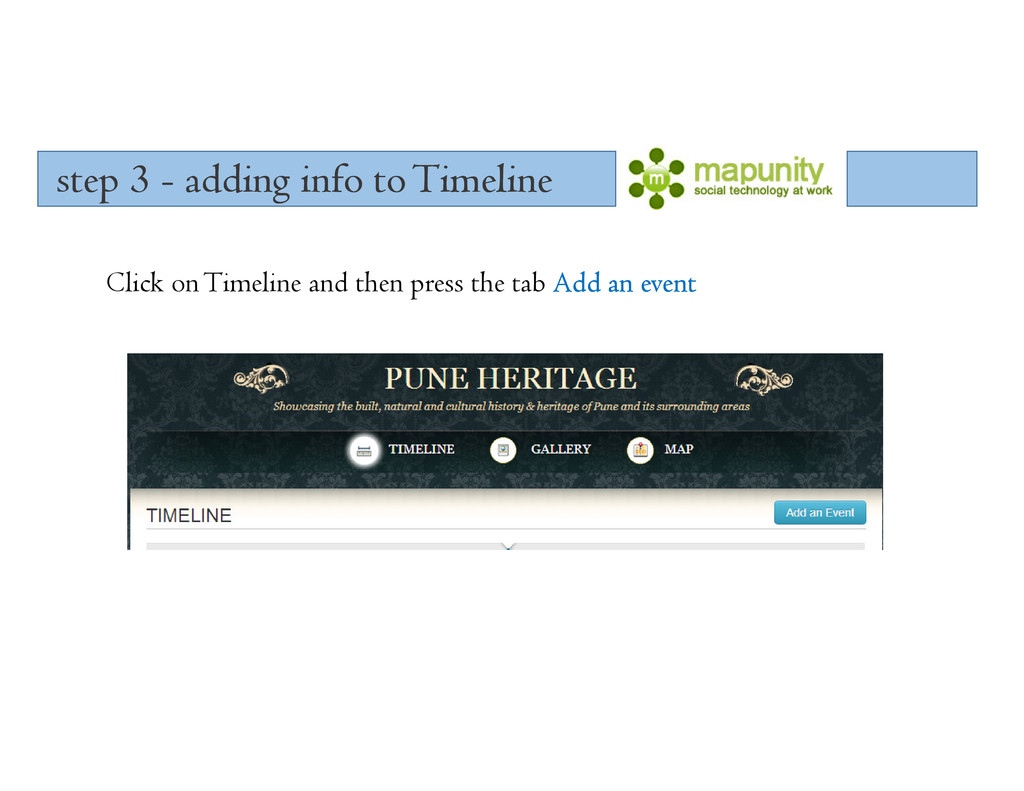
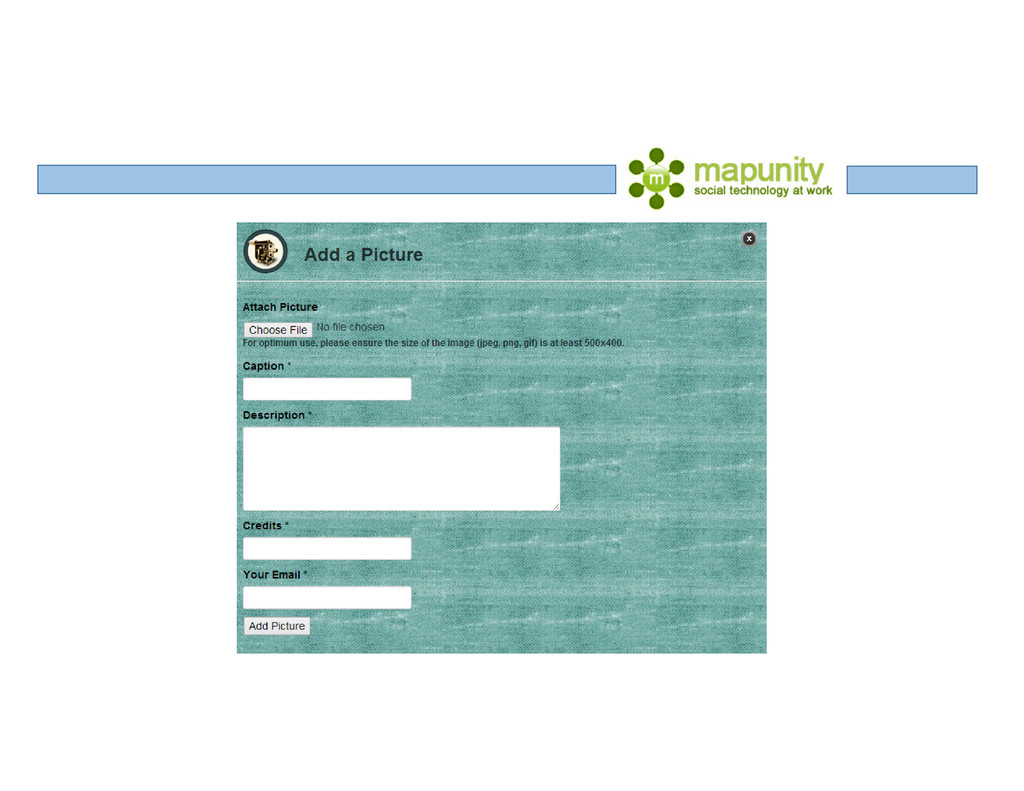
    - adding info to Timeline
    adding info to Timeline
    adding info to Timeline
    adding info to Timeline
    Click on Timeline and then press the tab Add an event
    Add an event
    Add an event
    Add an event

    View Slide

  5. View Slide

  6. adding info to Gallery
    adding info to Gallery
    adding info to Gallery
    adding info to Gallery
    Click on Gallery and then press the tab Add a picture
    Add a picture
    Add a picture
    Add a picture

    View Slide

  7. View Slide

  8. adding info on Map
    adding info on Map
    adding info 
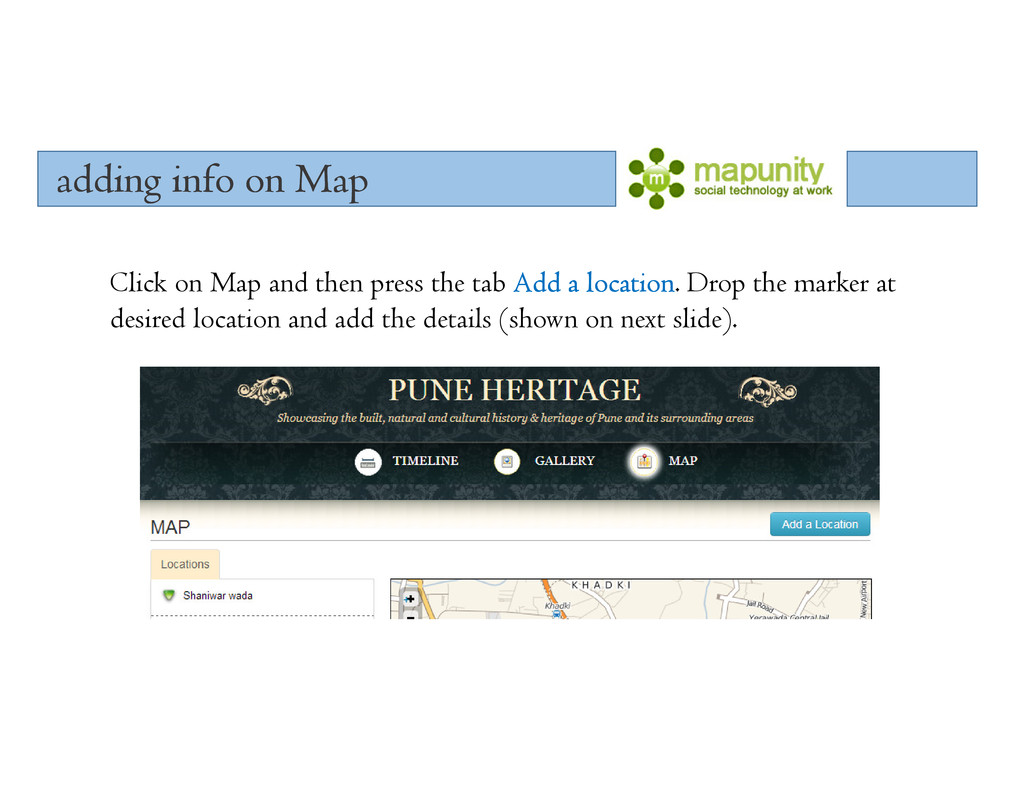
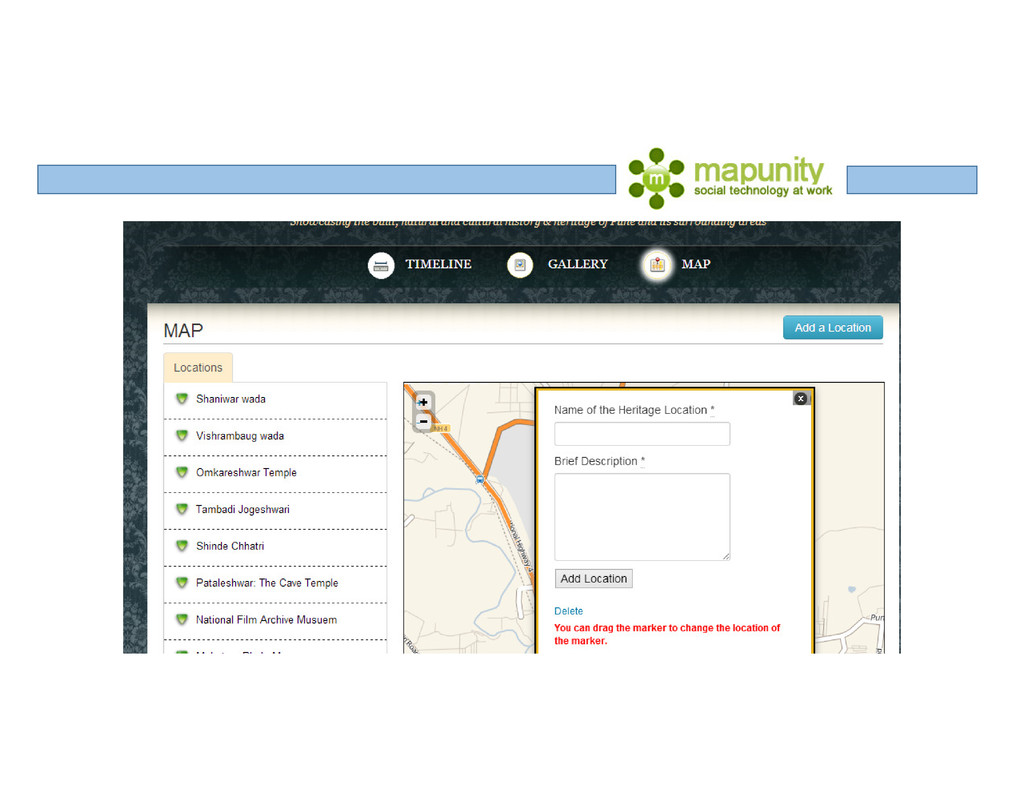
on Map
    adding info on Map
    Click on Map and then press the tab Add a location
    Add a location
    Add a location
    Add a location. Drop the marker at
    desired location and add the details (shown on next slide).

    View Slide

  9. View Slide

  10. adding a New city
    adding a New city
    adding a New city
    adding a New city
    If the desired city is not in
    the list then click on the
    tab Add a
    Add a
    Add a
    Add a city
    city
    city
    city on the main
    page follow step 2 onwards

    View Slide

  11. Thank you
    Thank you
    Thank you
    Thank you

    View Slide