cheap! • Tons of code already exists. • Generally appropriate for real-time. • Other options have better specs. • Other options use lower power. WHY USE AN ARDUINO?
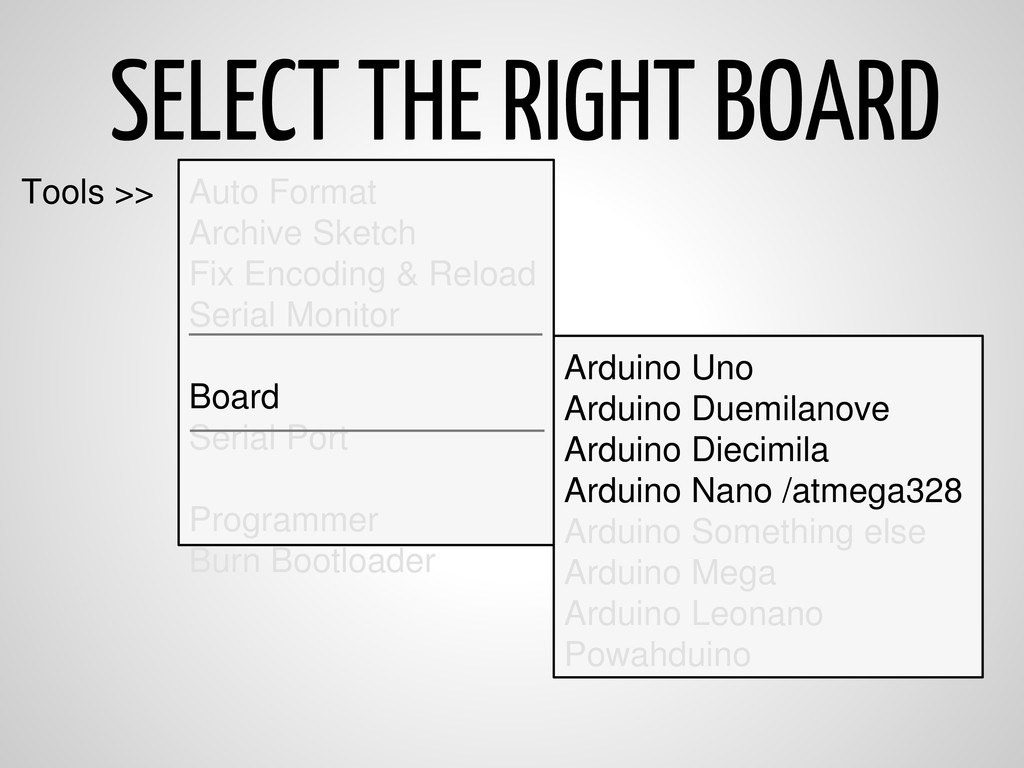
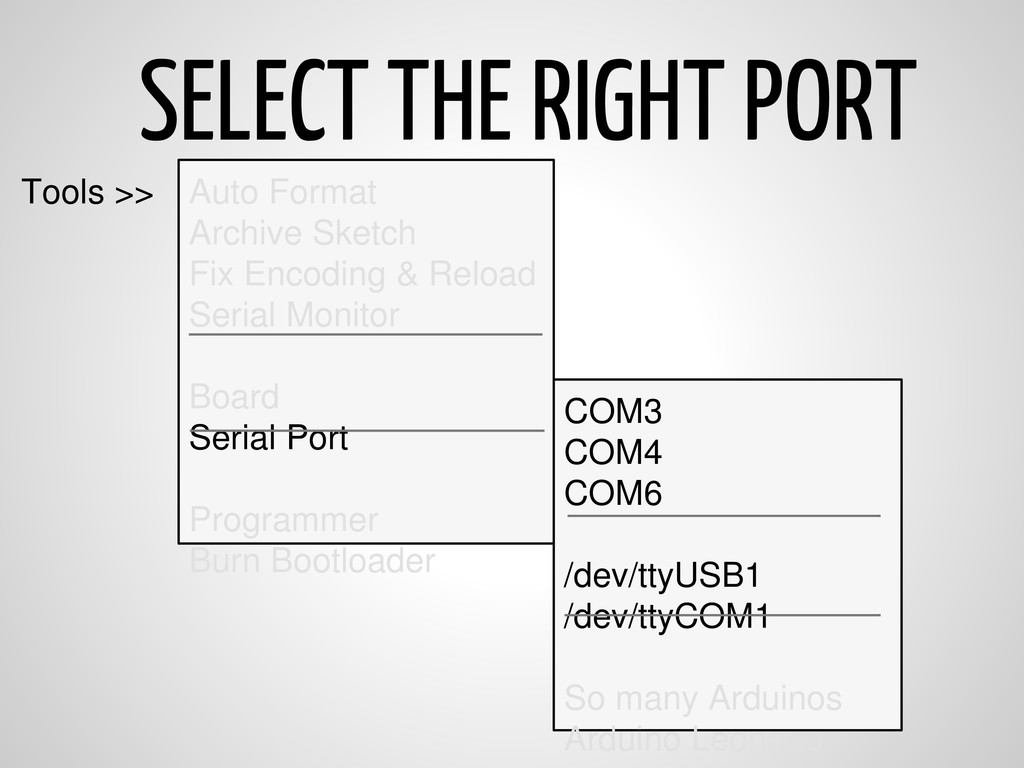
Fix Encoding & Reload Serial Monitor Board Serial Port Programmer Burn Bootloader COM3 COM4 COM6 /dev/ttyUSB1 /dev/ttyCOM1 So many Arduinos Arduino Leonano
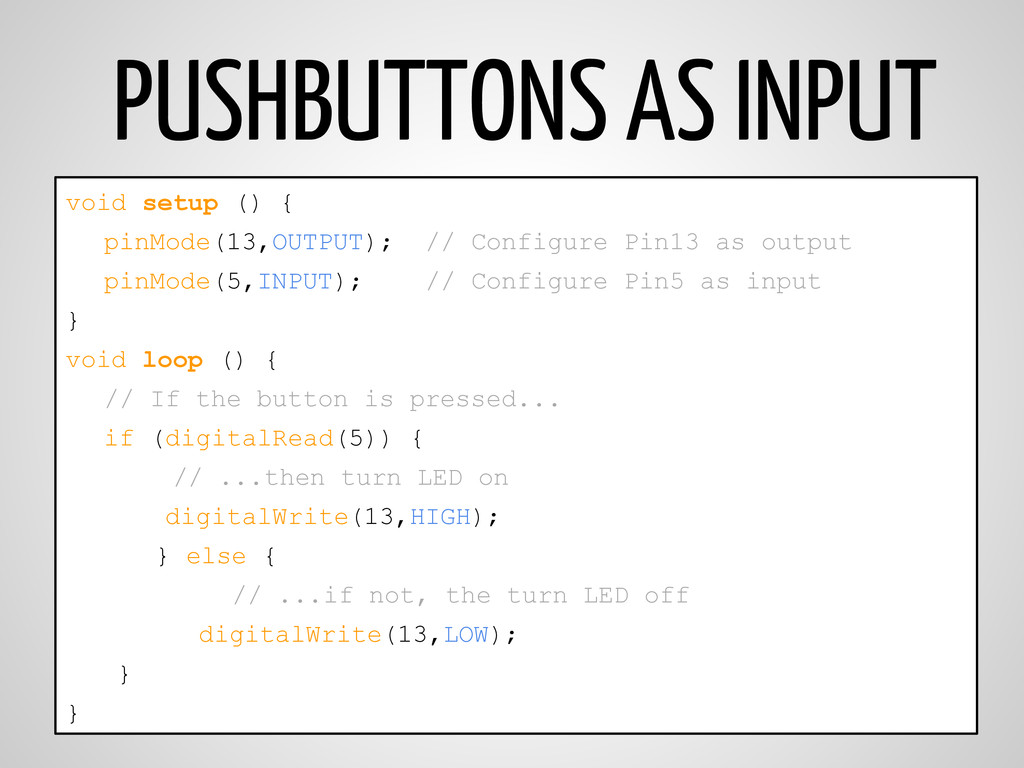
Pin13 as output pinMode(5,INPUT); // Configure Pin5 as input } void loop () { // If the button is pressed... if (digitalRead(5)) { // ...then turn LED on digitalWrite(13,HIGH); } else { // ...if not, the turn LED off digitalWrite(13,LOW); } }
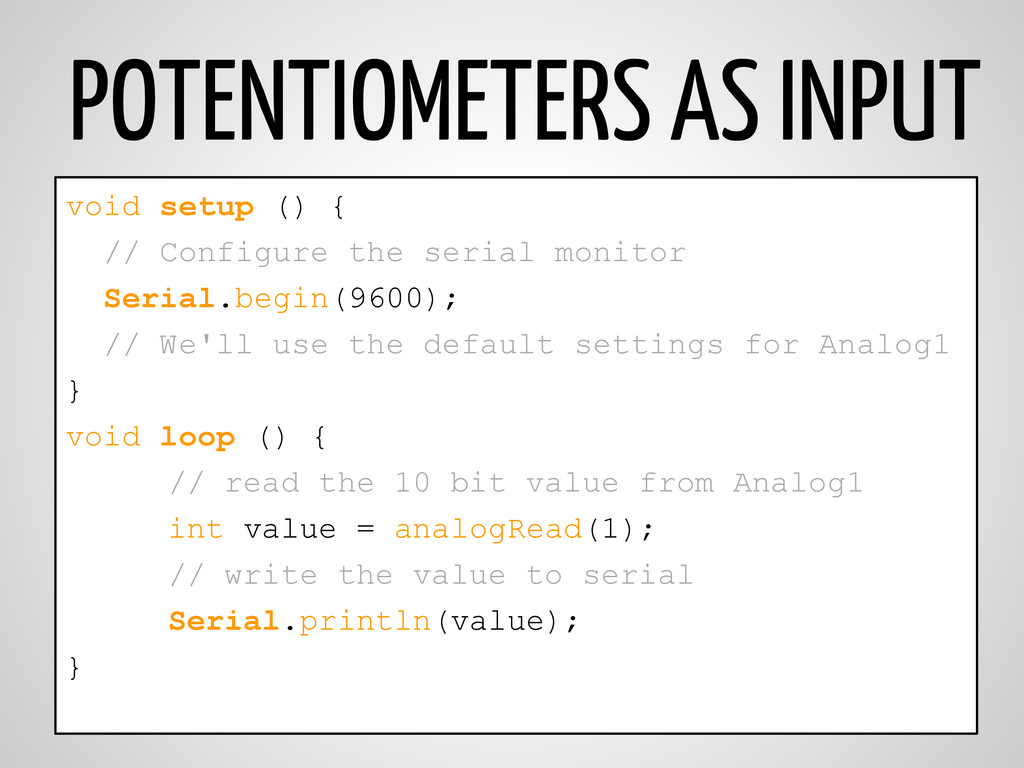
serial monitor Serial.begin(9600); // We'll use the default settings for Analog1 } void loop () { // read the 10 bit value from Analog1 int value = analogRead(1); // write the value to serial Serial.println(value); }
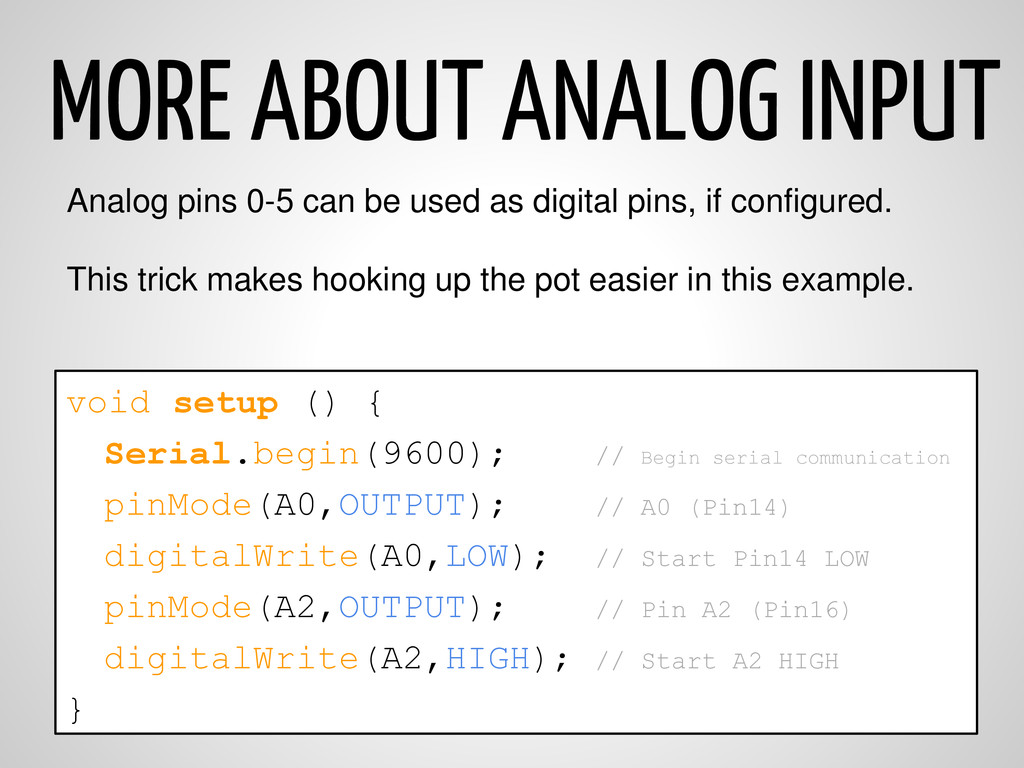
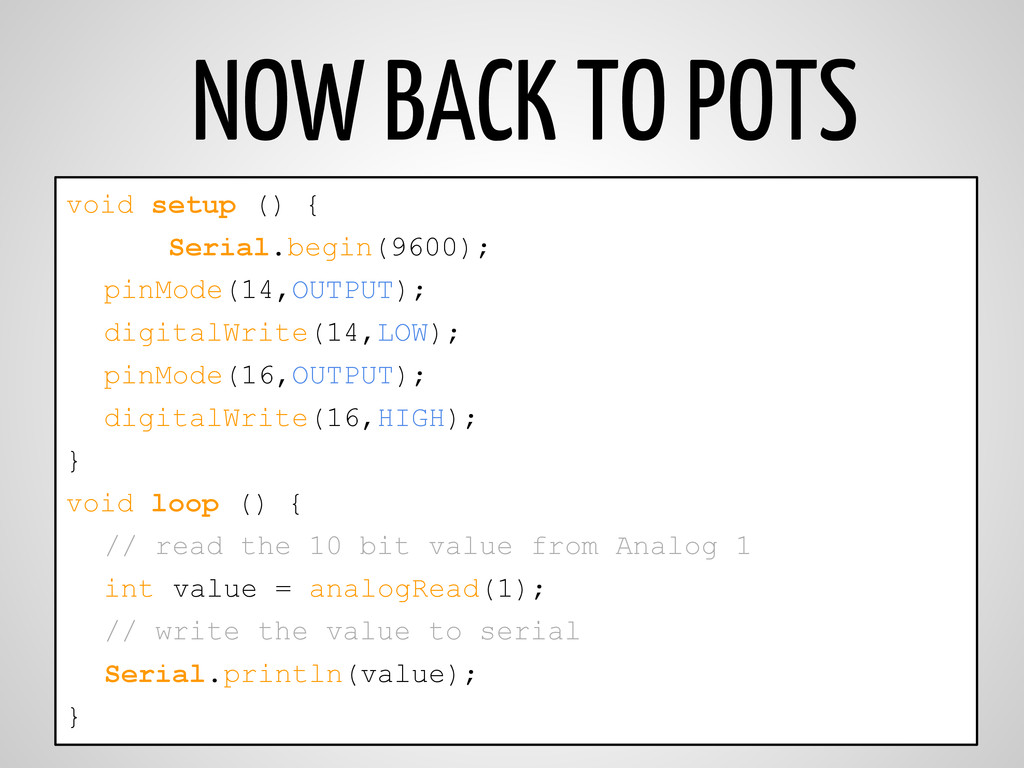
Begin serial communication pinMode(A0,OUTPUT); // A0 (Pin14) digitalWrite(A0,LOW); // Start Pin14 LOW pinMode(A2,OUTPUT); // Pin A2 (Pin16) digitalWrite(A2,HIGH); // Start A2 HIGH } Analog pins 0-5 can be used as digital pins, if configured. This trick makes hooking up the pot easier in this example.
digitalWrite(14,LOW); pinMode(16,OUTPUT); digitalWrite(16,HIGH); } void loop () { // read the 10 bit value from Analog 1 int value = analogRead(1); // write the value to serial Serial.println(value); }
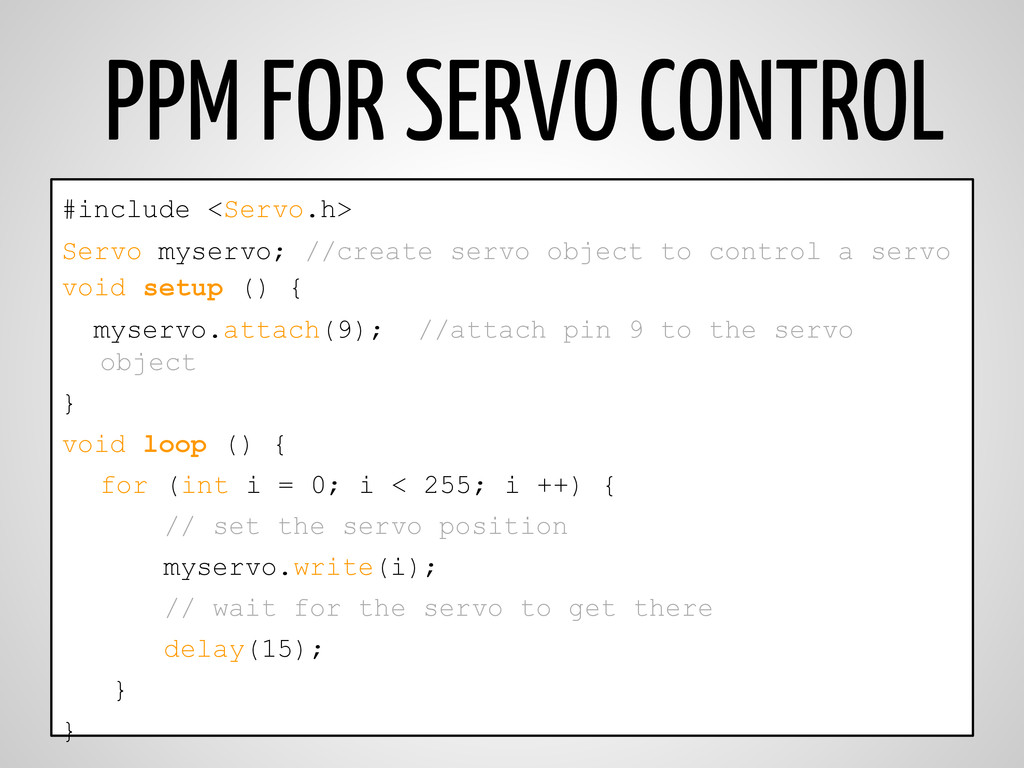
object to control a servo void setup () { myservo.attach(9); //attach pin 9 to the servo object } void loop () { for (int i = 0; i < 255; i ++) { // set the servo position myservo.write(i); // wait for the servo to get there delay(15); } }
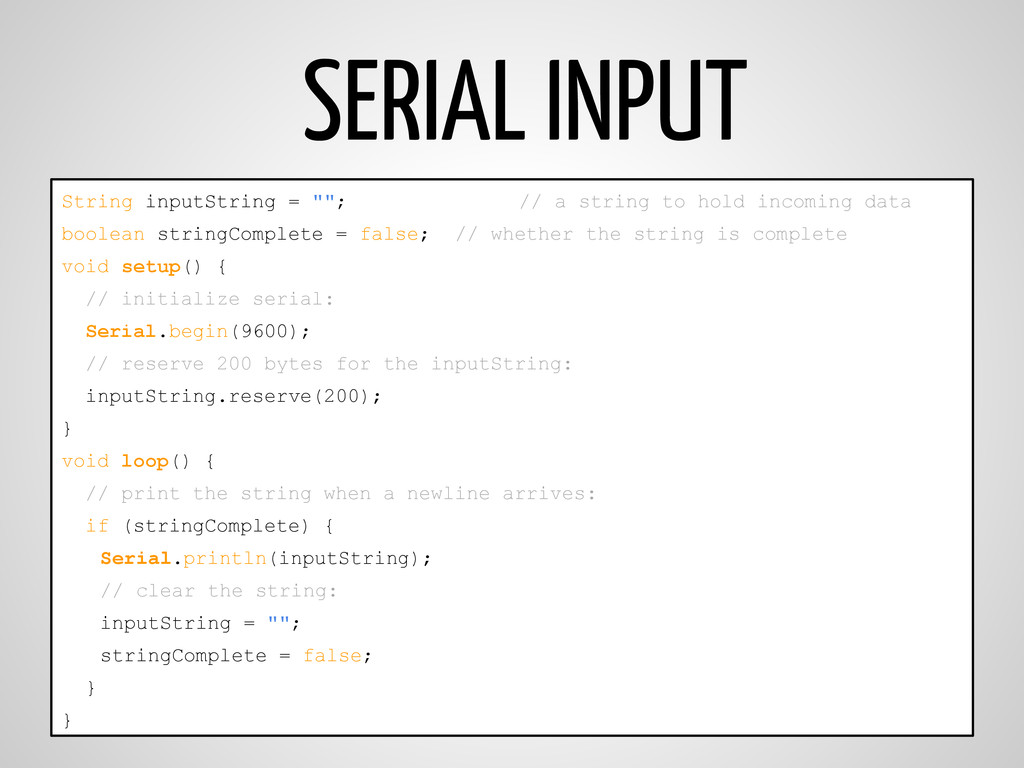
the new byte: char inChar = (char)Serial.read(); // add it to the inputString: inputString += inChar; // if the incoming character is a newline, set a flag // so the main loop can do something about it: if (inChar == '\n') { stringComplete = true; } } }
![Theo Lincoln Matt Anthony Ethan Soraya ELECTED CLUB OFFICERS [email protected]](https://files.speakerdeck.com/presentations/6c3e6d7014490131e19e0afc5870265d/slide_6.jpg)