Upgrade to Pro
— share decks privately, control downloads, hide ads and more …
Speaker Deck
Features
Speaker Deck
PRO
Sign in
Sign up for free
Search
Search
Jetpack Compose さわってみた / tried writing code wit...
Search
kenken
August 15, 2019
Programming
920
0
Share
Embed
Copy iframe code
Copy JS code
Copy link
Start on current slide
Jetpack Compose さわってみた / tried writing code with Jetpack Compose
kenken
August 15, 2019
More Decks by kenken
See All by kenken
Maintaining E2E Test Automation as We Transition from View to Compose
tkhs0604
0
2.6k
try! Swift macros
tkhs0604
1
750
Jetpack Compose ことはじめ / the beginning of Jetpack Compose
tkhs0604
1
3.4k
Other Decks in Programming
See All in Programming
Go言語とトイモデルで学ぶTransformerの気持ち / fukuokago23-transformer
monochromegane
0
140
What's New in Android 2026
veronikapj
0
200
Apache Hive: Toward a Cloud Native Lakehouse
okumin
0
160
エンジニア向け会社紹介/Findy Company Profile
findyinc
6
360k
【SRE NEXT 2026 Lunch Session】一人目専任SREの立ち上げを加速する ― AIと進めたオンボーディングで2分を0.04秒にした話
pkshadeck
PRO
0
3.1k
任せる範囲はこう広がった / How the Scope of AI Delegation Has Expanded
nrslib
1
280
Built Our Own Background Agent at LayerX #aidevex_findy
layerx
PRO
8
3.4k
5分で問診!Composer セキュリティ健康診断
codmoninc
0
600
継続モナドとリアクティブプログラミング
yukikurage
3
640
The Bowling Game - From Imperative to Functional Programming - Part 1
philipschwarz
PRO
0
340
初めてのKubernetes 本番運用でハマった話
oku053
0
130
The Past, Present, and Future of Enterprise Java
ivargrimstad
0
400
Featured
See All Featured
Keith and Marios Guide to Fast Websites
keithpitt
413
23k
Building Applications with DynamoDB
mza
96
7.1k
AI Search: Implications for SEO and How to Move Forward - #ShenzhenSEOConference
aleyda
1
1.3k
Dealing with People You Can't Stand - Big Design 2015
cassininazir
367
27k
Primal Persuasion: How to Engage the Brain for Learning That Lasts
tmiket
0
390
Crafting Experiences
bethany
1
230
BBQ
matthewcrist
89
10k
Improving Core Web Vitals using Speculation Rules API
sergeychernyshev
21
1.6k
Building Adaptive Systems
keathley
44
3.1k
Conquering PDFs: document understanding beyond plain text
inesmontani
PRO
4
2.9k
Data-driven link building: lessons from a $708K investment (BrightonSEO talk)
szymonslowik
1
1.2k
世界の人気アプリ100個を分析して見えたペイウォール設計の心得
akihiro_kokubo
PRO
72
40k
Transcript
Jetpack Compose さわってみた @tkhs0604 #love_kotlin Kotlin愛好会 vol.14 @ Wantedly, Inc.
人生初登壇です
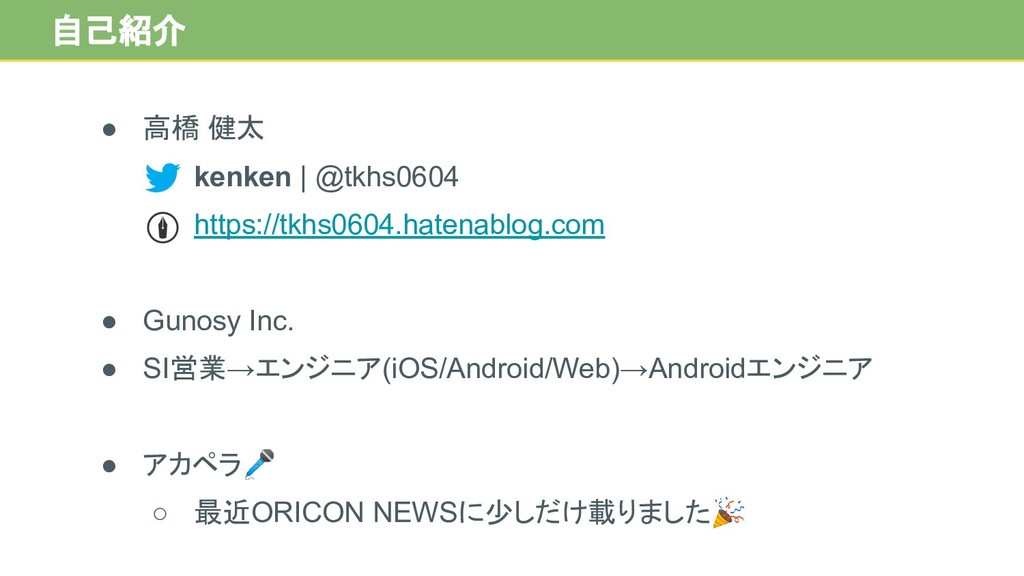
• 高橋 健太 ◦ kenken | @tkhs0604 ◦ https://tkhs0604.hatenablog.com •
Gunosy Inc. • SI営業→エンジニア(iOS/Android/Web)→Androidエンジニア • アカペラ ◦ 最近ORICON NEWSに少しだけ載りました 自己紹介
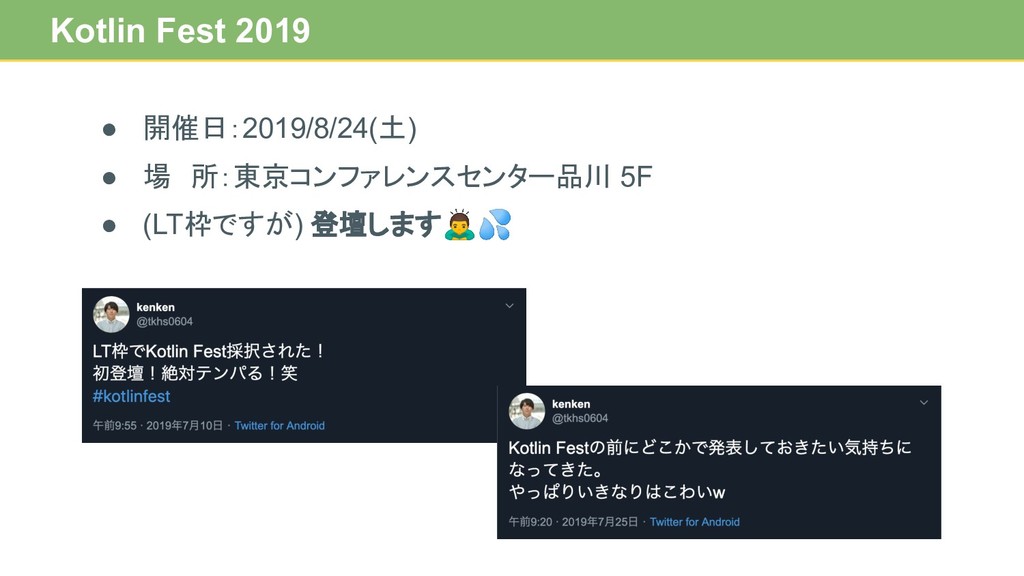
• 開催日:2019/8/24(土) • 場 所:東京コンファレンスセンター品川 5F • (LT枠ですが) 登壇します Kotlin Fest
2019
• 自分のことを覚えて帰っていただく← • Jetpack Composeの使い方を完全に理解していただく 本日のゴール
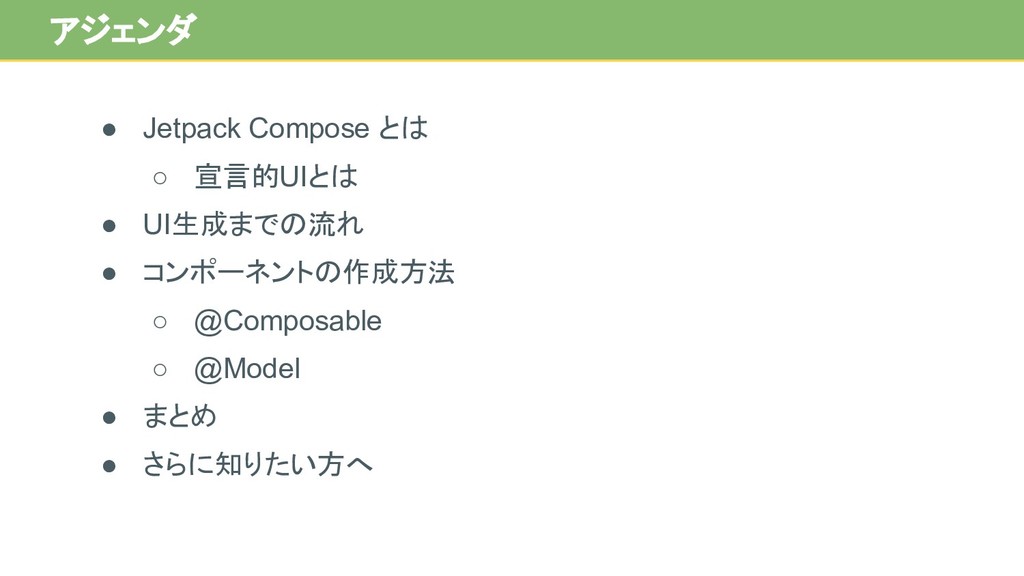
• Jetpack Compose とは ◦ 宣言的UIとは • UI生成までの流れ • コンポーネントの作成方法
◦ @Composable ◦ @Model • まとめ • さらに知りたい方へ アジェンダ
Jetpack Compose とは
• Google I/O 2019 • Android Jetpack • Kotlin •
宣言的UI ◦ cf. Flutter、React Native、Litho、Vue.js • Pre-alpha版 (2019/8/12時点) ◦ ⚠大きく変更が入る可能性があります Jetpack Compose とは
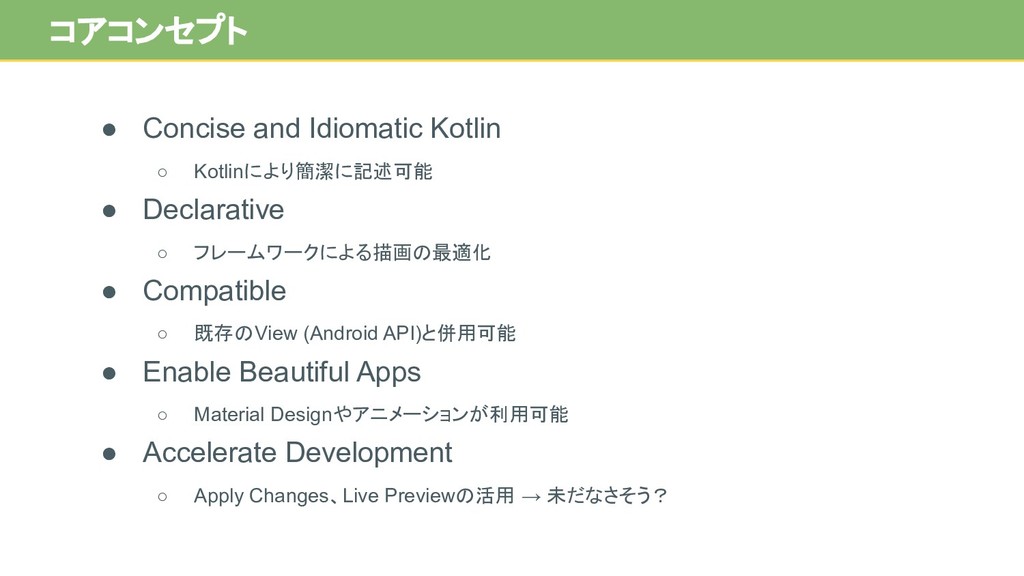
• Concise and Idiomatic Kotlin ◦ Kotlinにより簡潔に記述可能 • Declarative ◦
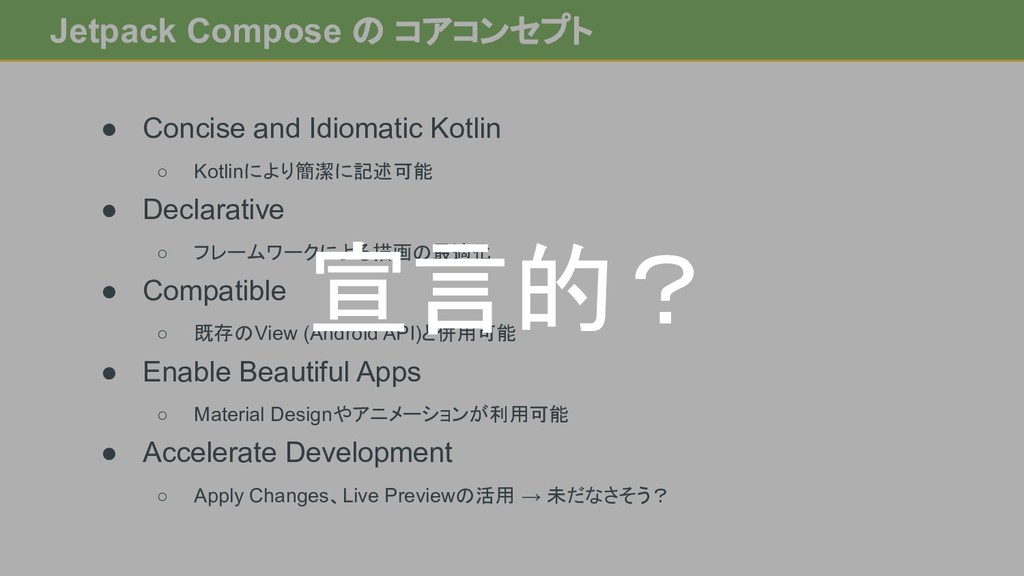
フレームワークによる描画の最適化 • Compatible ◦ 既存のView (Android API)と併用可能 • Enable Beautiful Apps ◦ Material Designやアニメーションが利用可能 • Accelerate Development ◦ Apply Changes、Live Previewの活用 → 未だなさそう? コアコンセプト
• Concise and Idiomatic Kotlin ◦ Kotlinにより簡潔に記述可能 • Declarative ◦
フレームワークによる描画の最適化 • Compatible ◦ 既存のView (Android API)と併用可能 • Enable Beautiful Apps ◦ Material Designやアニメーションが利用可能 • Accelerate Development ◦ Apply Changes、Live Previewの活用 → 未だなさそう? Jetpack Compose の コアコンセプト 宣言的?
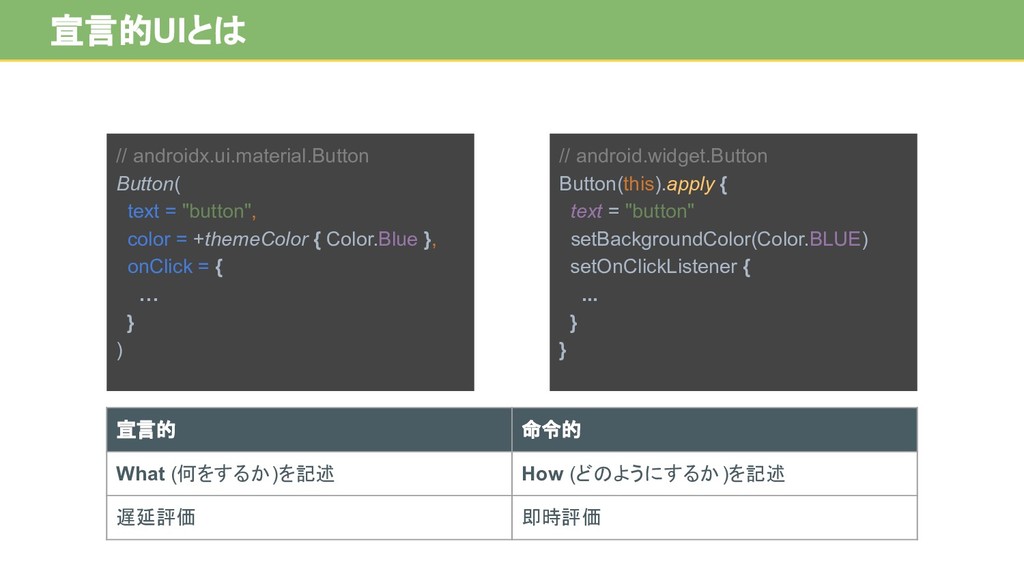
宣言的UIとは 宣言的 命令的 What (何をするか)を記述 How (どのようにするか)を記述 遅延評価 即時評価 //
android.widget.Button Button(this).apply { text = "button" setBackgroundColor(Color.BLUE) setOnClickListener { ... } } // androidx.ui.material.Button Button( text = "button", color = +themeColor { Color.Blue }, onClick = { … } )
UI生成までの流れ
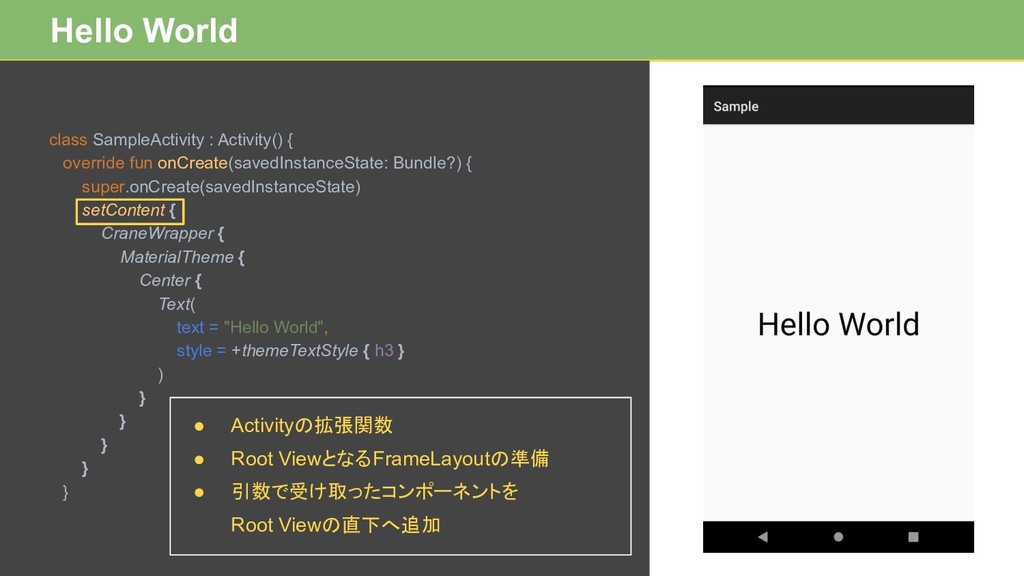
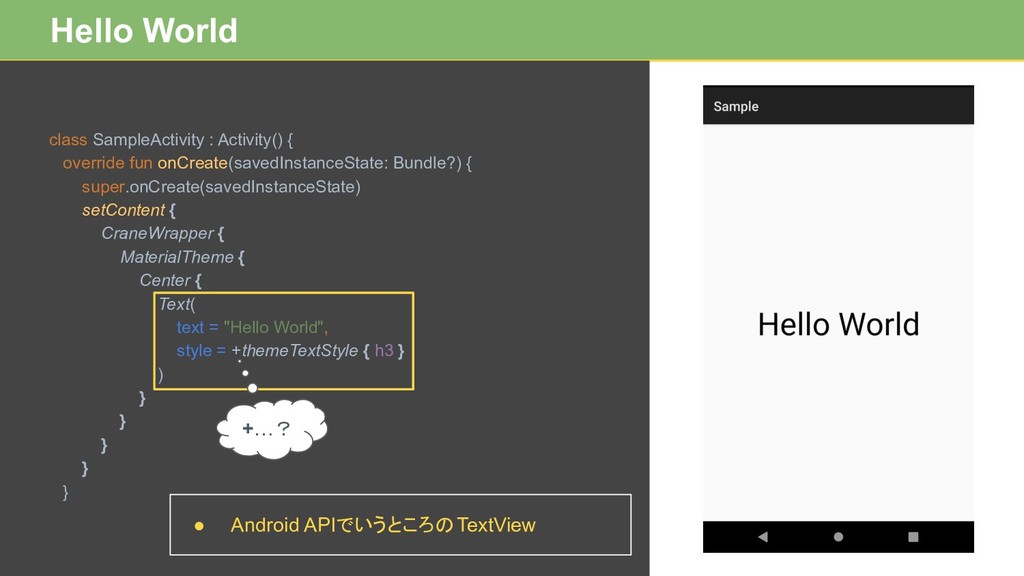
Hello World class SampleActivity : Activity() { override fun onCreate(savedInstanceState:
Bundle?) { super.onCreate(savedInstanceState) setContent { CraneWrapper { MaterialTheme { Center { Text( text = "Hello World", style = +themeTextStyle { h3 } ) } } } } }
Hello World class SampleActivity : Activity() { override fun onCreate(savedInstanceState:
Bundle?) { super.onCreate(savedInstanceState) setContent { CraneWrapper { MaterialTheme { Center { Text( text = "Hello World", style = +themeTextStyle { h3 } ) } } } } } • Activityの拡張関数 • Root ViewとなるFrameLayoutの準備 • 引数で受け取ったコンポーネントを Root Viewの直下へ追加
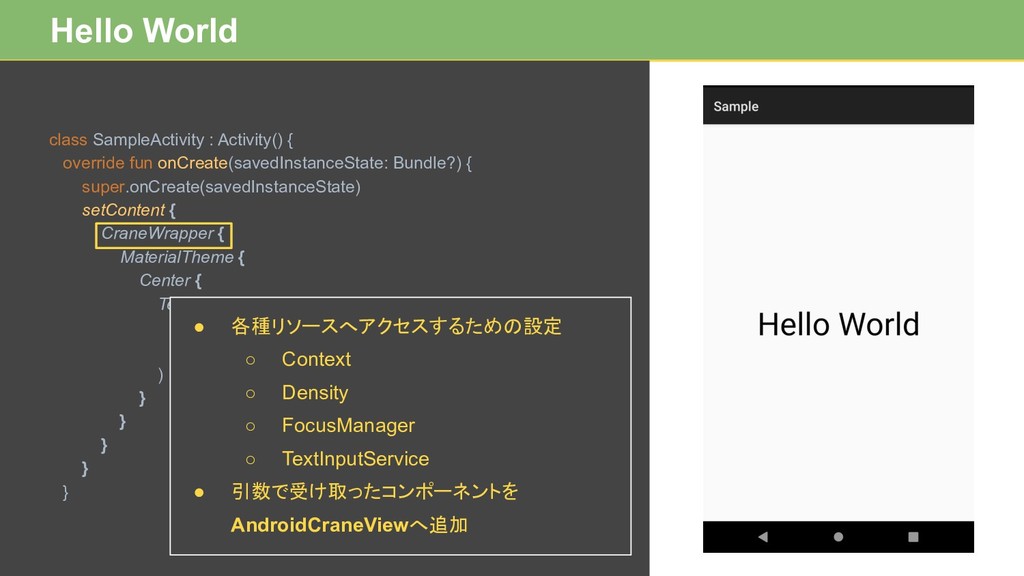
Hello World class SampleActivity : Activity() { override fun onCreate(savedInstanceState:
Bundle?) { super.onCreate(savedInstanceState) setContent { CraneWrapper { MaterialTheme { Center { Text( text = "Hello World", style = +themeTextStyle { h3 } ) } } } } } • 各種リソースへアクセスするための設定 ◦ Context ◦ Density ◦ FocusManager ◦ TextInputService • 引数で受け取ったコンポーネントを AndroidCraneViewへ追加
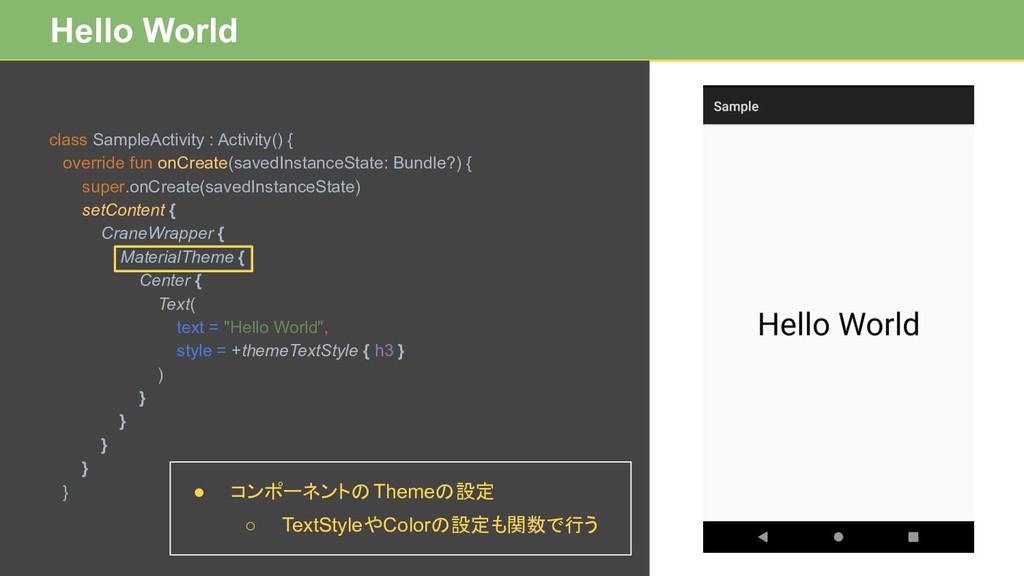
Hello World class SampleActivity : Activity() { override fun onCreate(savedInstanceState:
Bundle?) { super.onCreate(savedInstanceState) setContent { CraneWrapper { MaterialTheme { Center { Text( text = "Hello World", style = +themeTextStyle { h3 } ) } } } } } • コンポーネントのThemeの設定 ◦ TextStyleやColorの設定も関数で行う
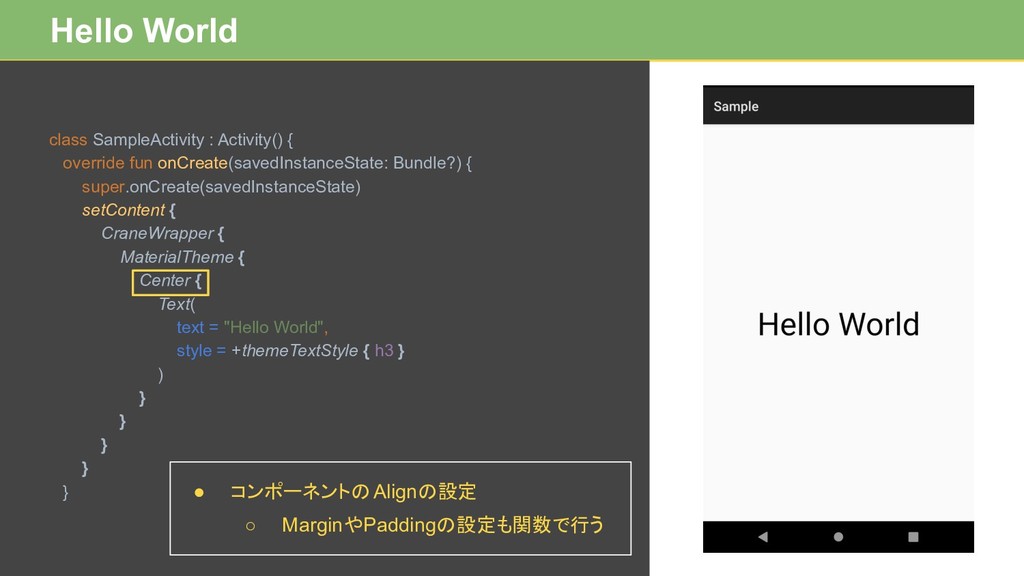
Hello World class SampleActivity : Activity() { override fun onCreate(savedInstanceState:
Bundle?) { super.onCreate(savedInstanceState) setContent { CraneWrapper { MaterialTheme { Center { Text( text = "Hello World", style = +themeTextStyle { h3 } ) } } } } } • コンポーネントのAlignの設定 ◦ MarginやPaddingの設定も関数で行う
Hello World class SampleActivity : Activity() { override fun onCreate(savedInstanceState:
Bundle?) { super.onCreate(savedInstanceState) setContent { CraneWrapper { MaterialTheme { Center { Text( text = "Hello World", style = +themeTextStyle { h3 } ) } } } } } • Android APIでいうところのTextView +…?
コンポーネントの作成方法
コンポーネントの作成 • @Composableを関数に付与することでコンポーネントとして認識 される • コンポーネントが満たさなければならない条件 ◦ 引数で与えられる値以外を操作しない ◦ 副作用が生じるようなパラメータは引数で受け取る
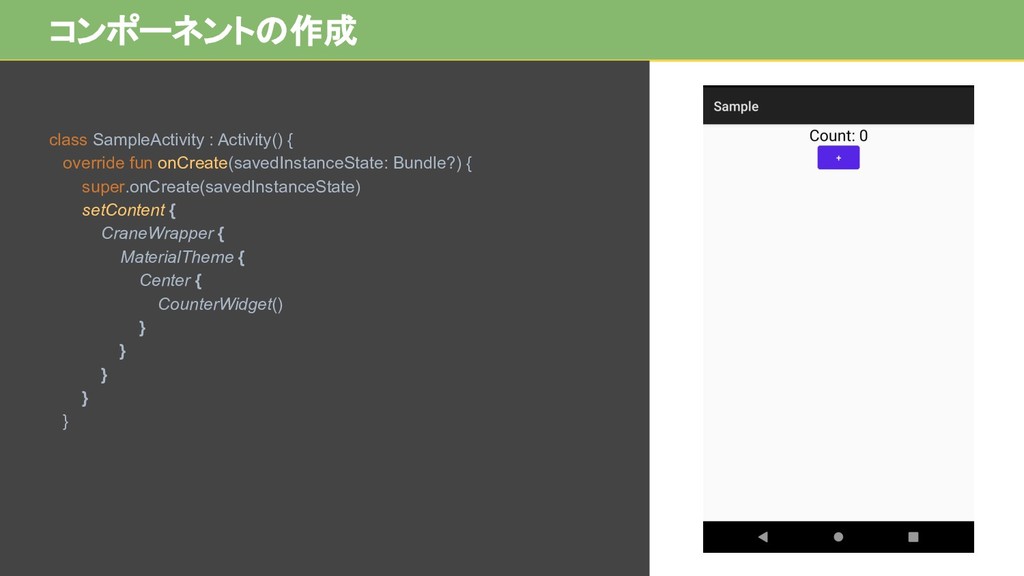
コンポーネントの作成 @Composable fun CounterWidget() { Column { Text( text =
"Count: 0", style = +themeTextStyle { h5 } ) Button( text = "+" ) } }
コンポーネントの作成 class SampleActivity : Activity() { override fun onCreate(savedInstanceState: Bundle?)
{ super.onCreate(savedInstanceState) setContent { CraneWrapper { MaterialTheme { Center { CounterWidget() } } } } }
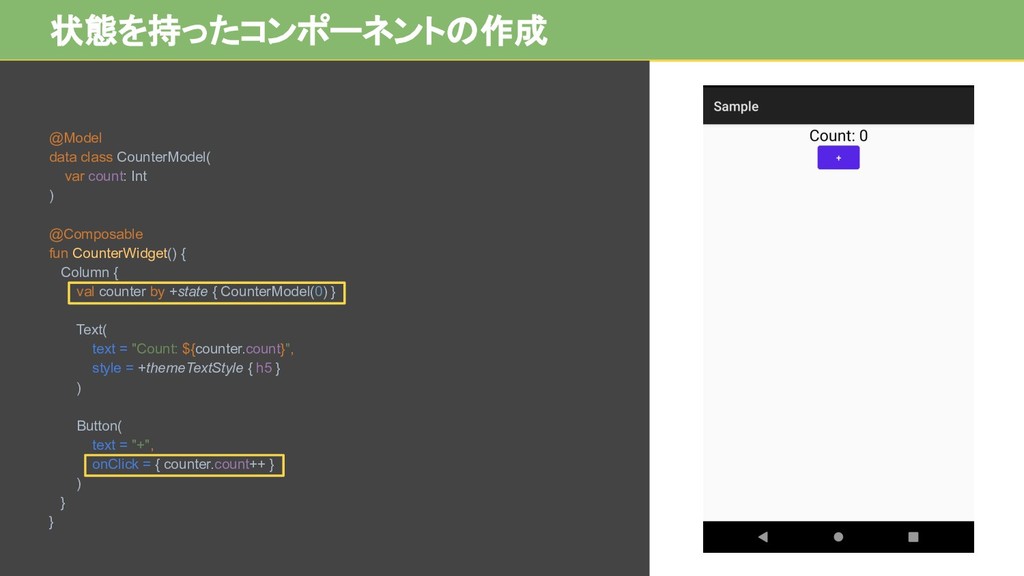
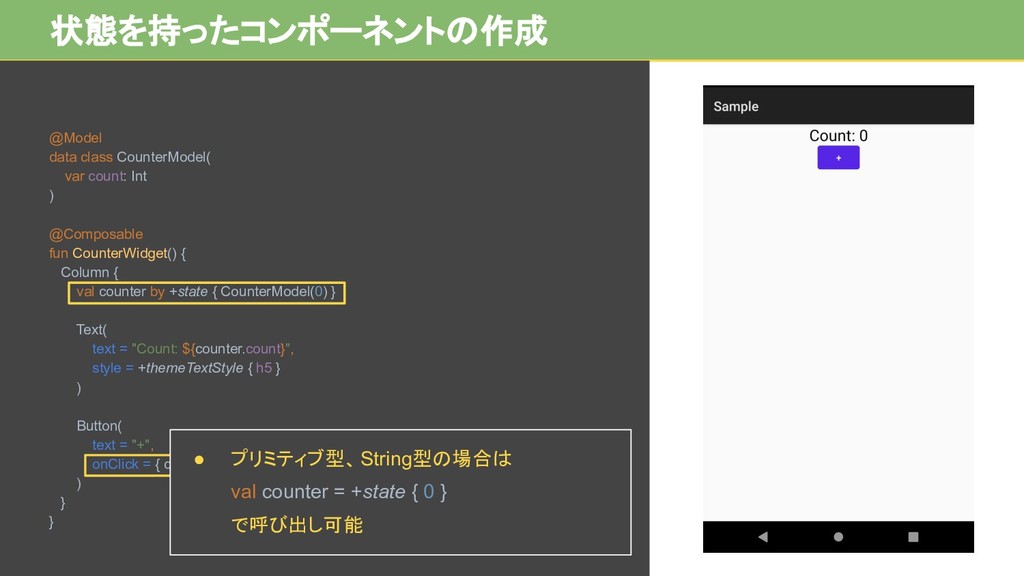
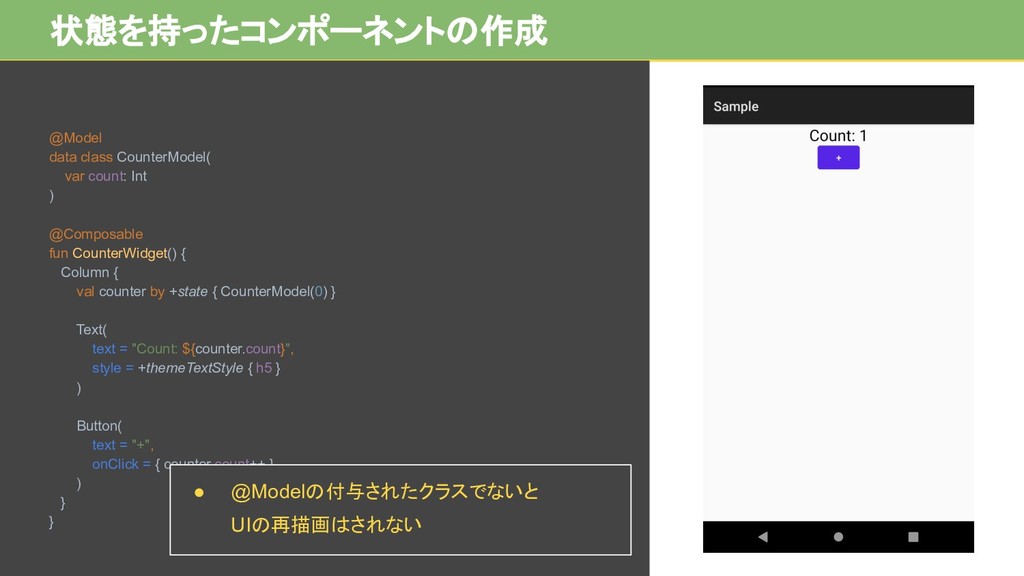
• モデルクラスを作成する ◦ @Modelをクラスに付与する • モデルクラスを利用する ◦ コンポーネント内で+state関数によって状態管理用の Stateオブジェクトを生成する •
Stateオブジェクトのプロパティが更新されると、 フレームワークによってUIが再描画される 状態を持ったコンポーネントの作成
状態を持ったコンポーネントの作成 @Model data class CounterModel( var count: Int ) @Composable
fun CounterWidget() { Column { val counter by +state { CounterModel(0) } Text( text = "Count: ${counter.count}", style = +themeTextStyle { h5 } ) Button( text = "+", onClick = { counter.count++ } ) } }
状態を持ったコンポーネントの作成 @Model data class CounterModel( var count: Int ) @Composable
fun CounterWidget() { Column { val counter by +state { CounterModel(0) } Text( text = "Count: ${counter.count}", style = +themeTextStyle { h5 } ) Button( text = "+", onClick = { counter.count++ } ) } } • プリミティブ型、String型の場合は val counter = +state { 0 } で呼び出し可能
状態を持ったコンポーネントの作成 @Model data class CounterModel( var count: Int ) @Composable
fun CounterWidget() { Column { val counter by +state { CounterModel(0) } Text( text = "Count: ${counter.count}", style = +themeTextStyle { h5 } ) Button( text = "+", onClick = { counter.count++ } ) } } • @Modelの付与されたクラスでないと UIの再描画はされない
まとめ
• まだまだ資料は全然少ない • 開発環境も整っていない (AOSPを直接DLするしか現状ない) • 独特の記法(+state関数など)がところどころあるので、 逐一実装を追って理解するのがしんどい • 今までkt/javaファイル、layout.xml、attrs.xml、drawable.xmlに書
いていたことを集約できるので、開発が進めば便利になりそうな気 はする • まだあわてるような時間じゃない 所感
さらに知りたい方へ
Kotlin Community • Kotlin Slackへの参加申請 (#composeチャンネル) ◦ https://surveys.jetbrains.com/s3/kotlin-slack-sign-up
Thank you very much for listening.