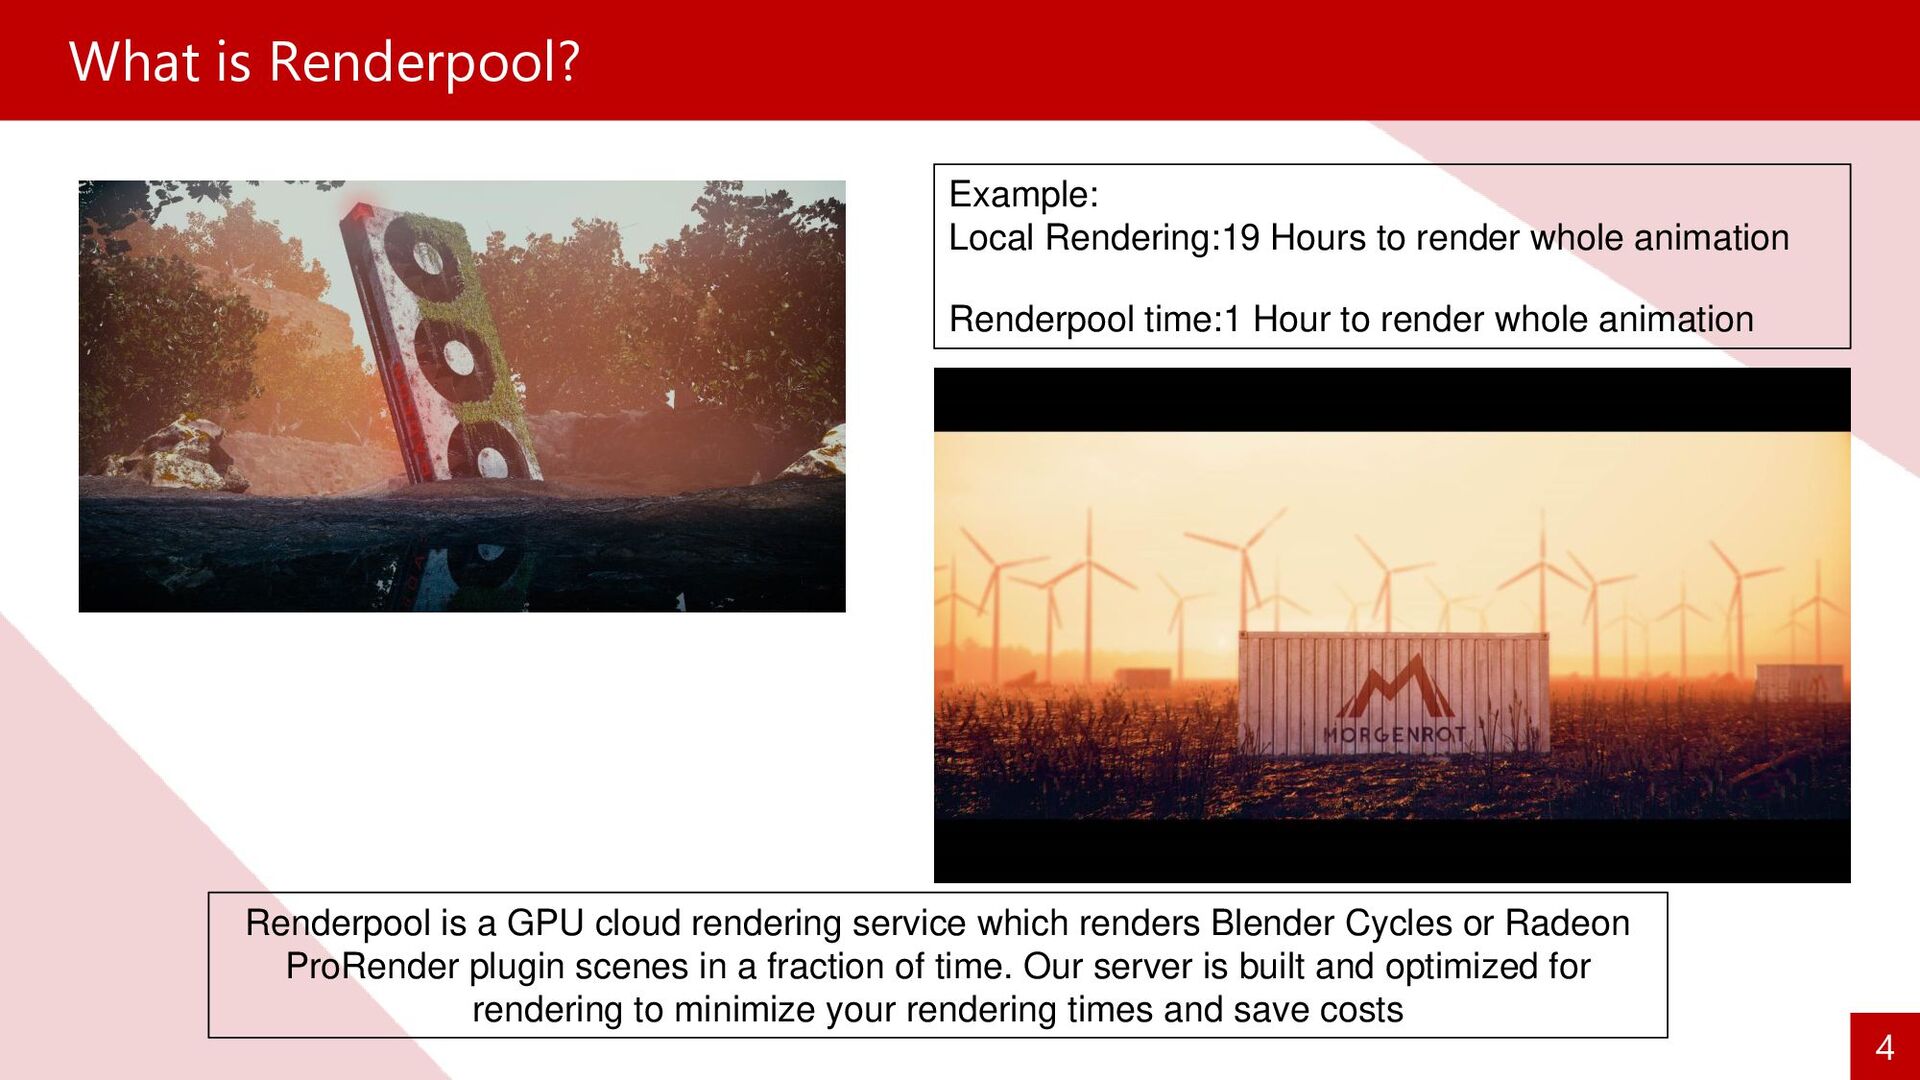
service which renders Blender Cycles or Radeon ProRender plugin scenes in a fraction of time. Our server is built and optimized for rendering to minimize your rendering times and save costs Example: Local Rendering:19 Hours to render whole animation Renderpool time:1 Hour to render whole animation
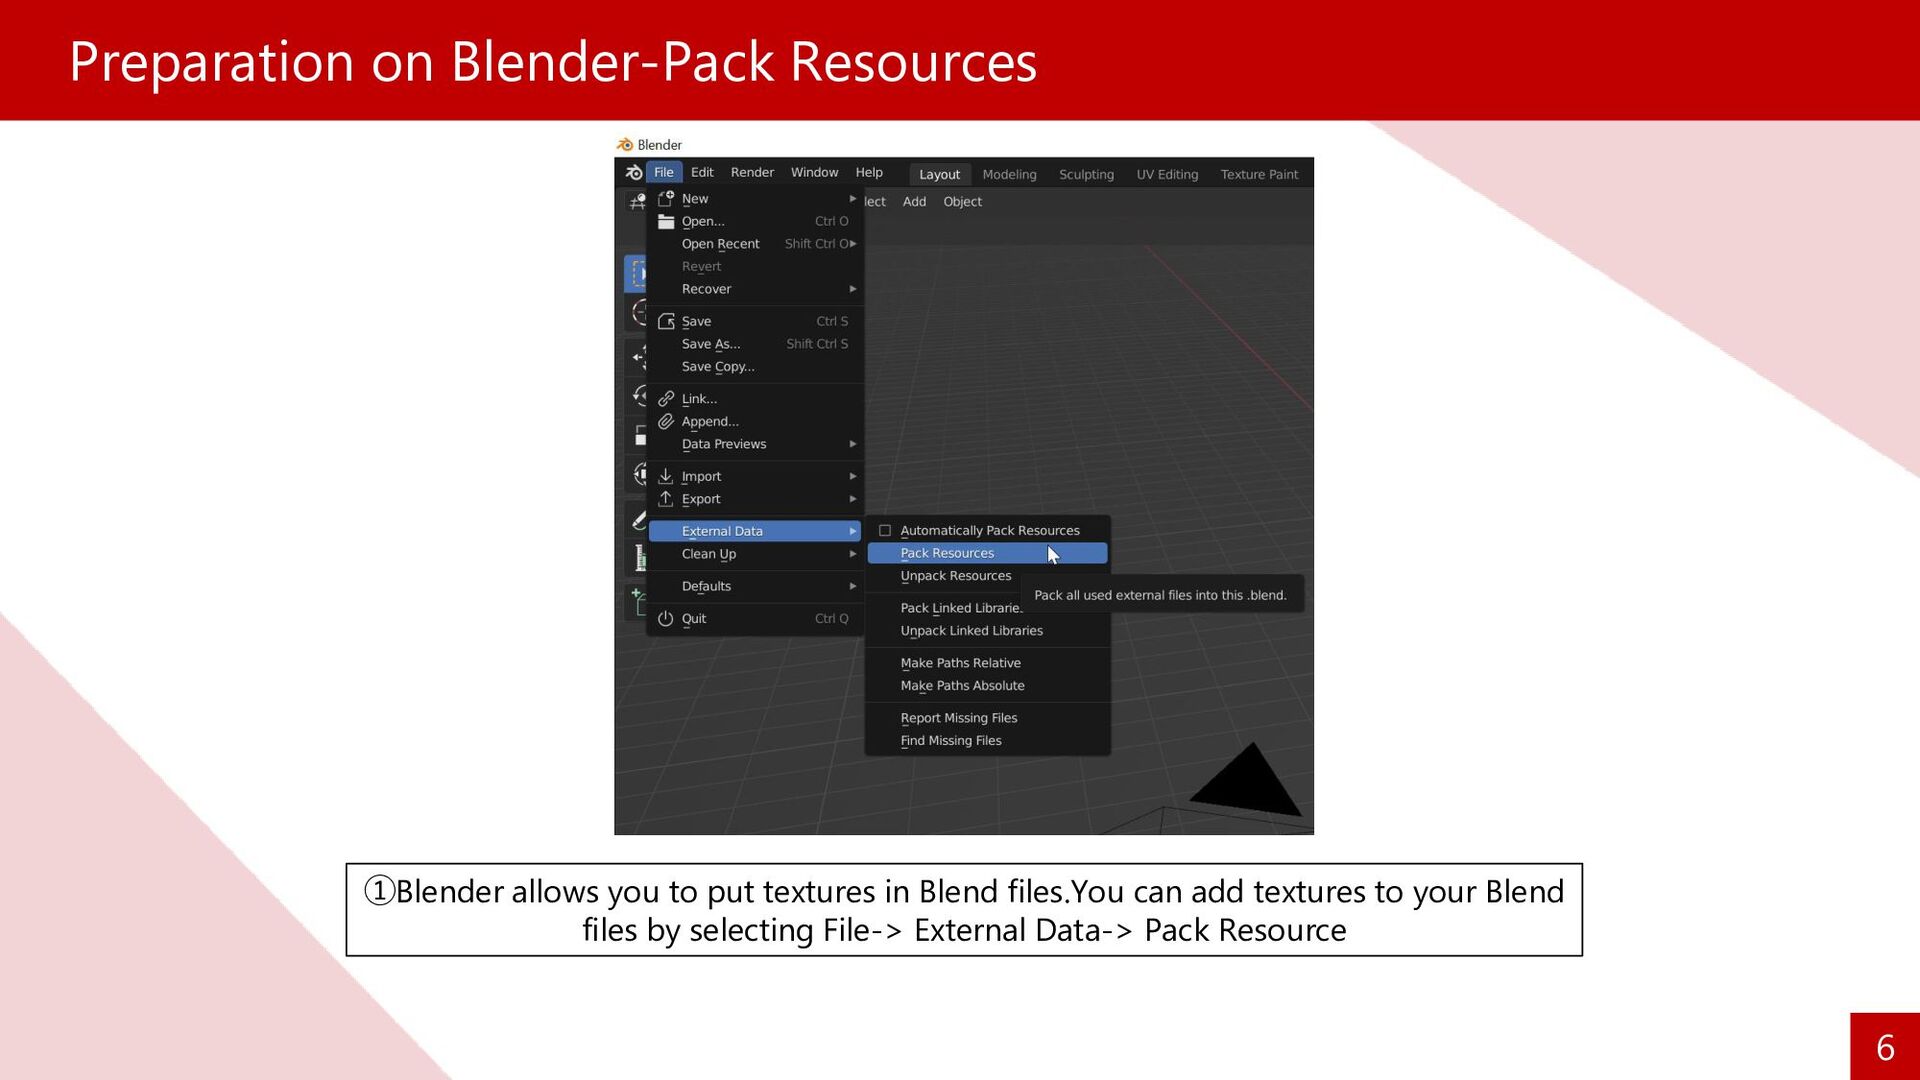
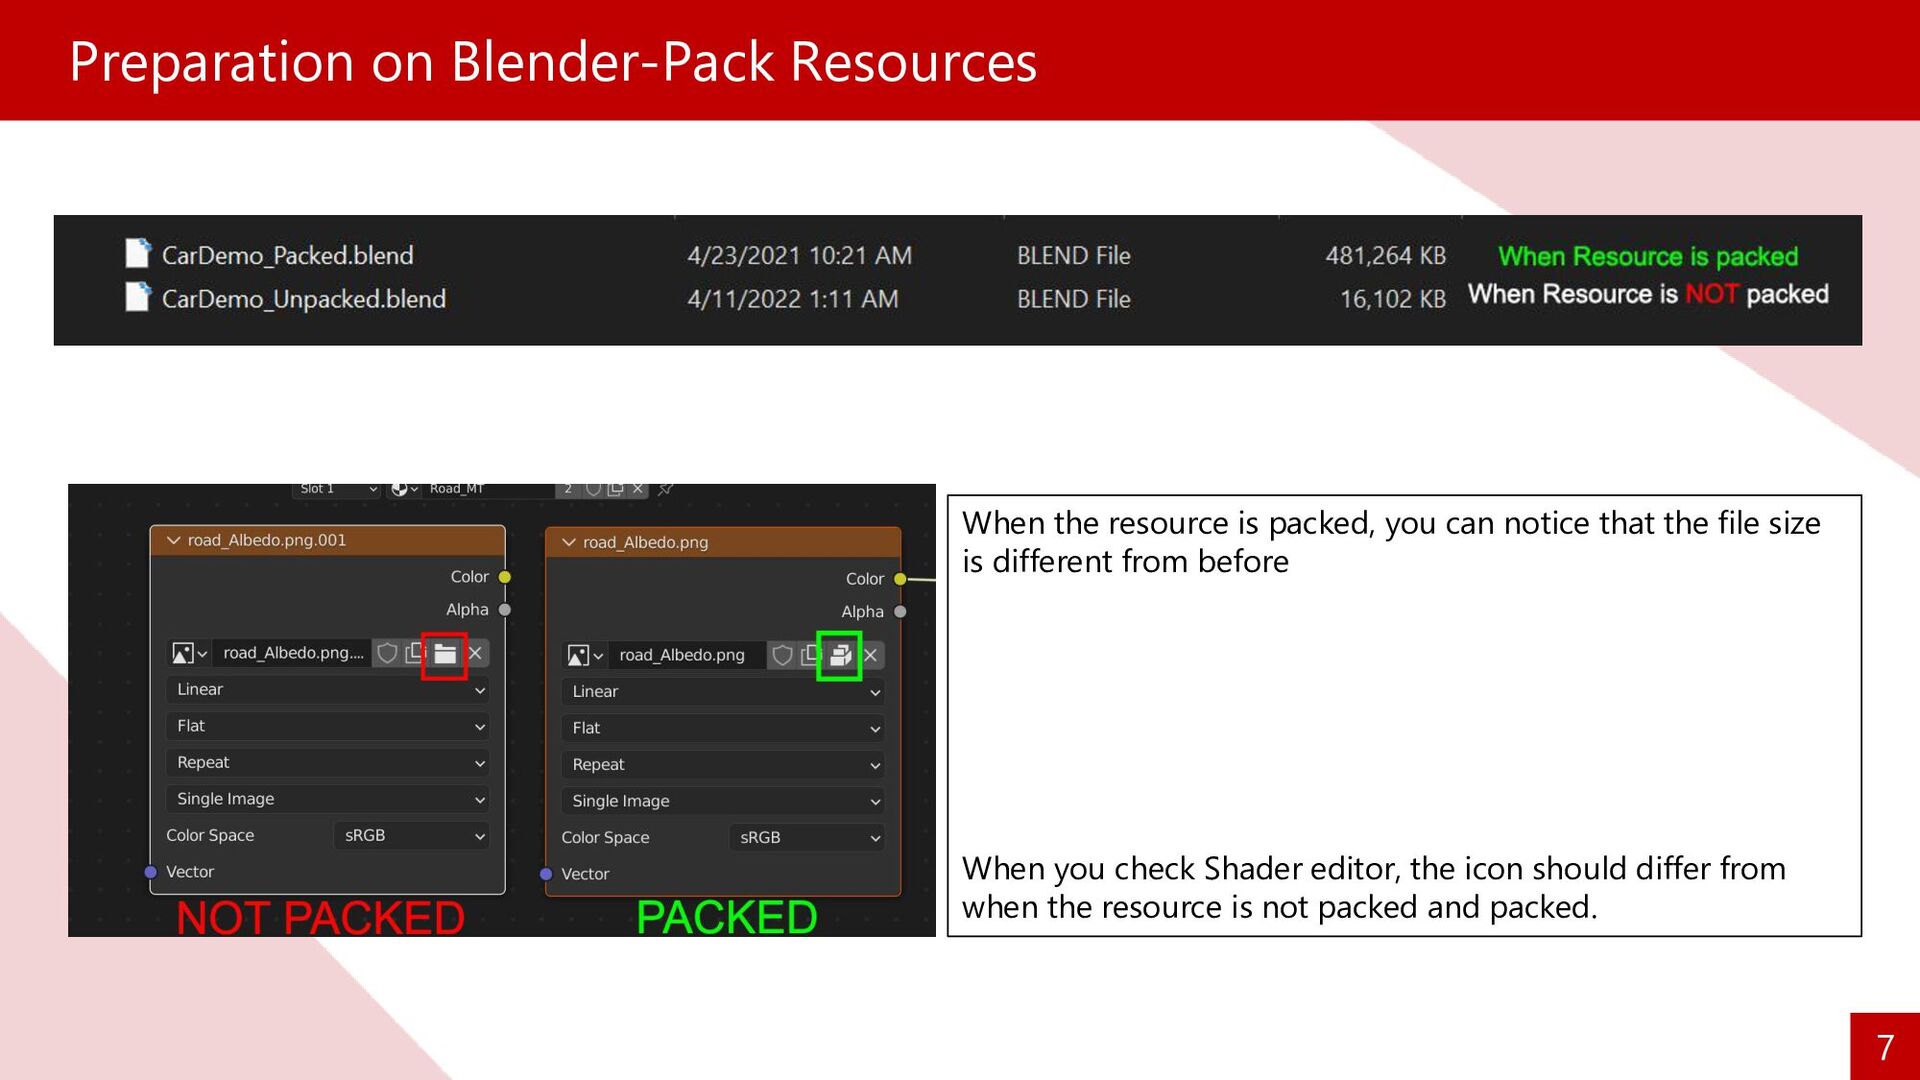
the file size is different from before When you check Shader editor, the icon should differ from when the resource is not packed and packed. Preparation on Blender-Pack Resources
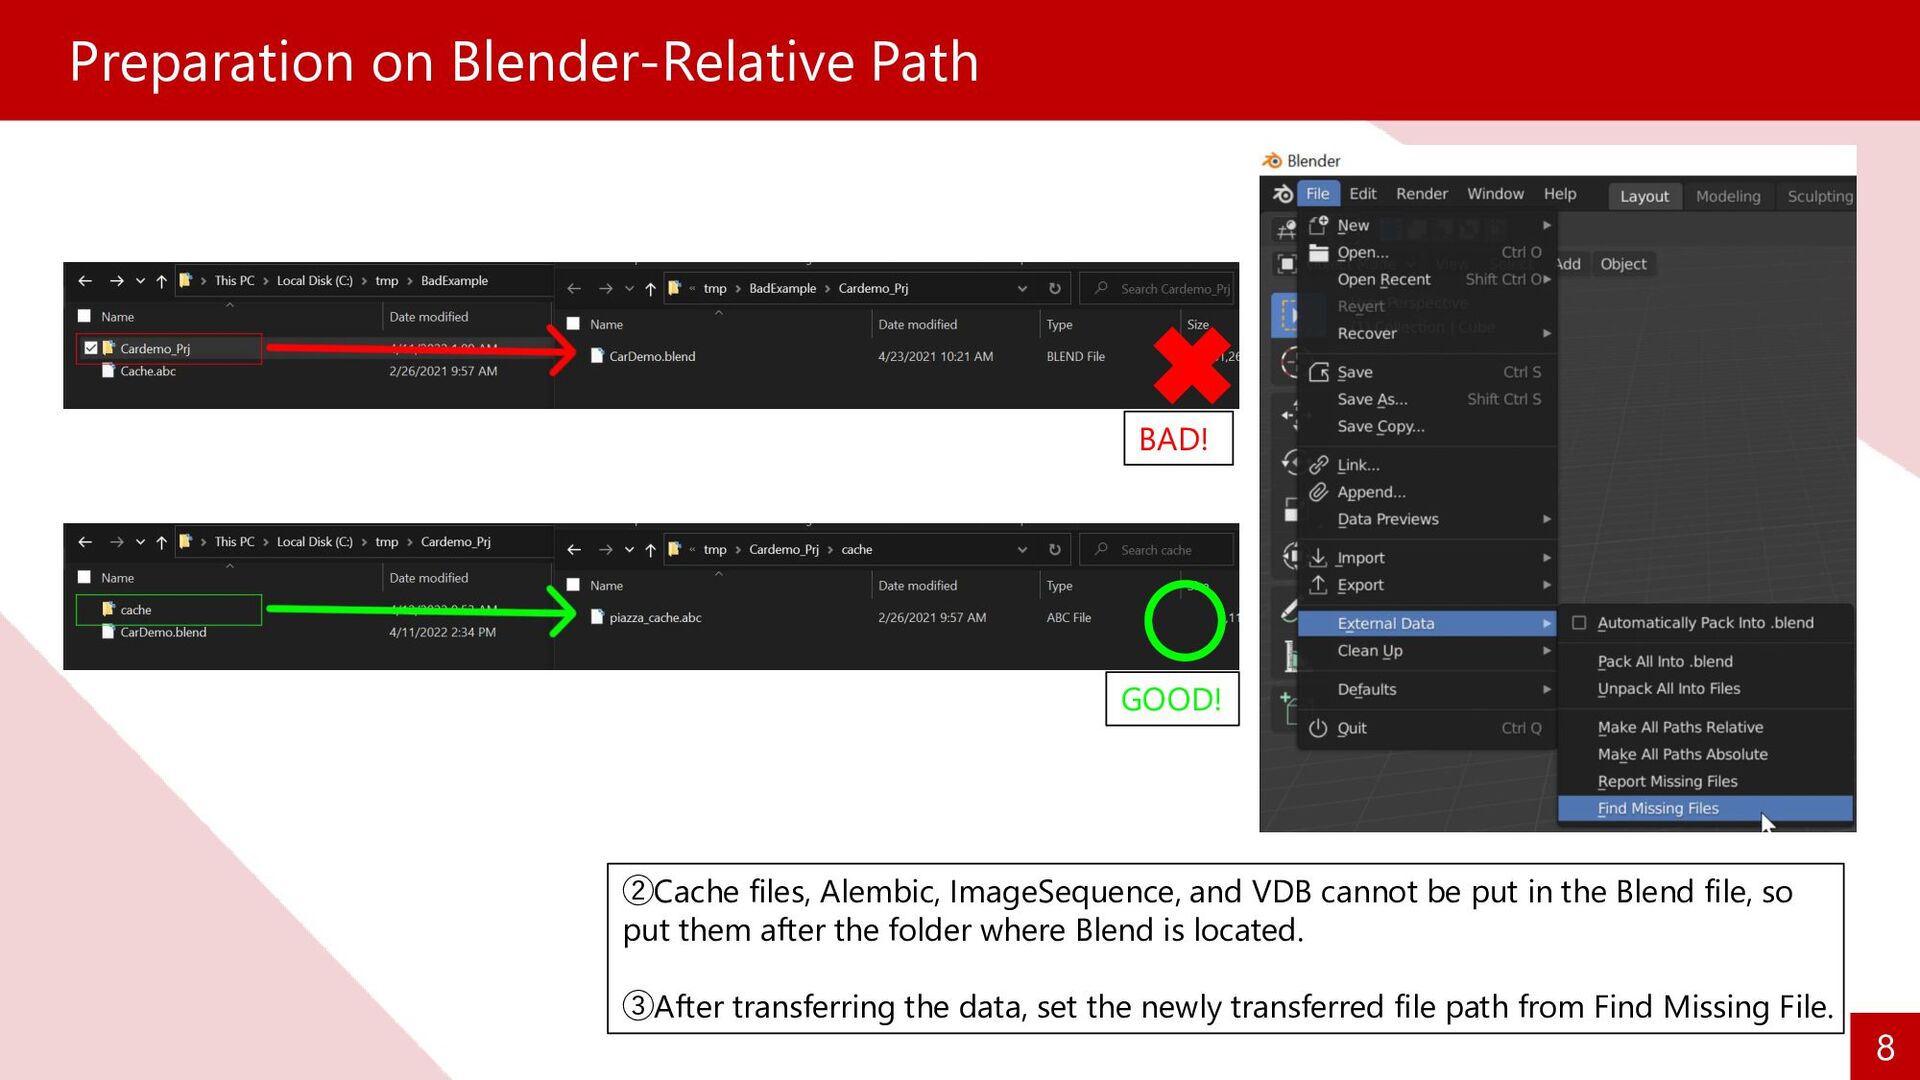
VDB cannot be put in the Blend file, so put them after the folder where Blend is located. ③After transferring the data, set the newly transferred file path from Find Missing File. BAD! GOOD!
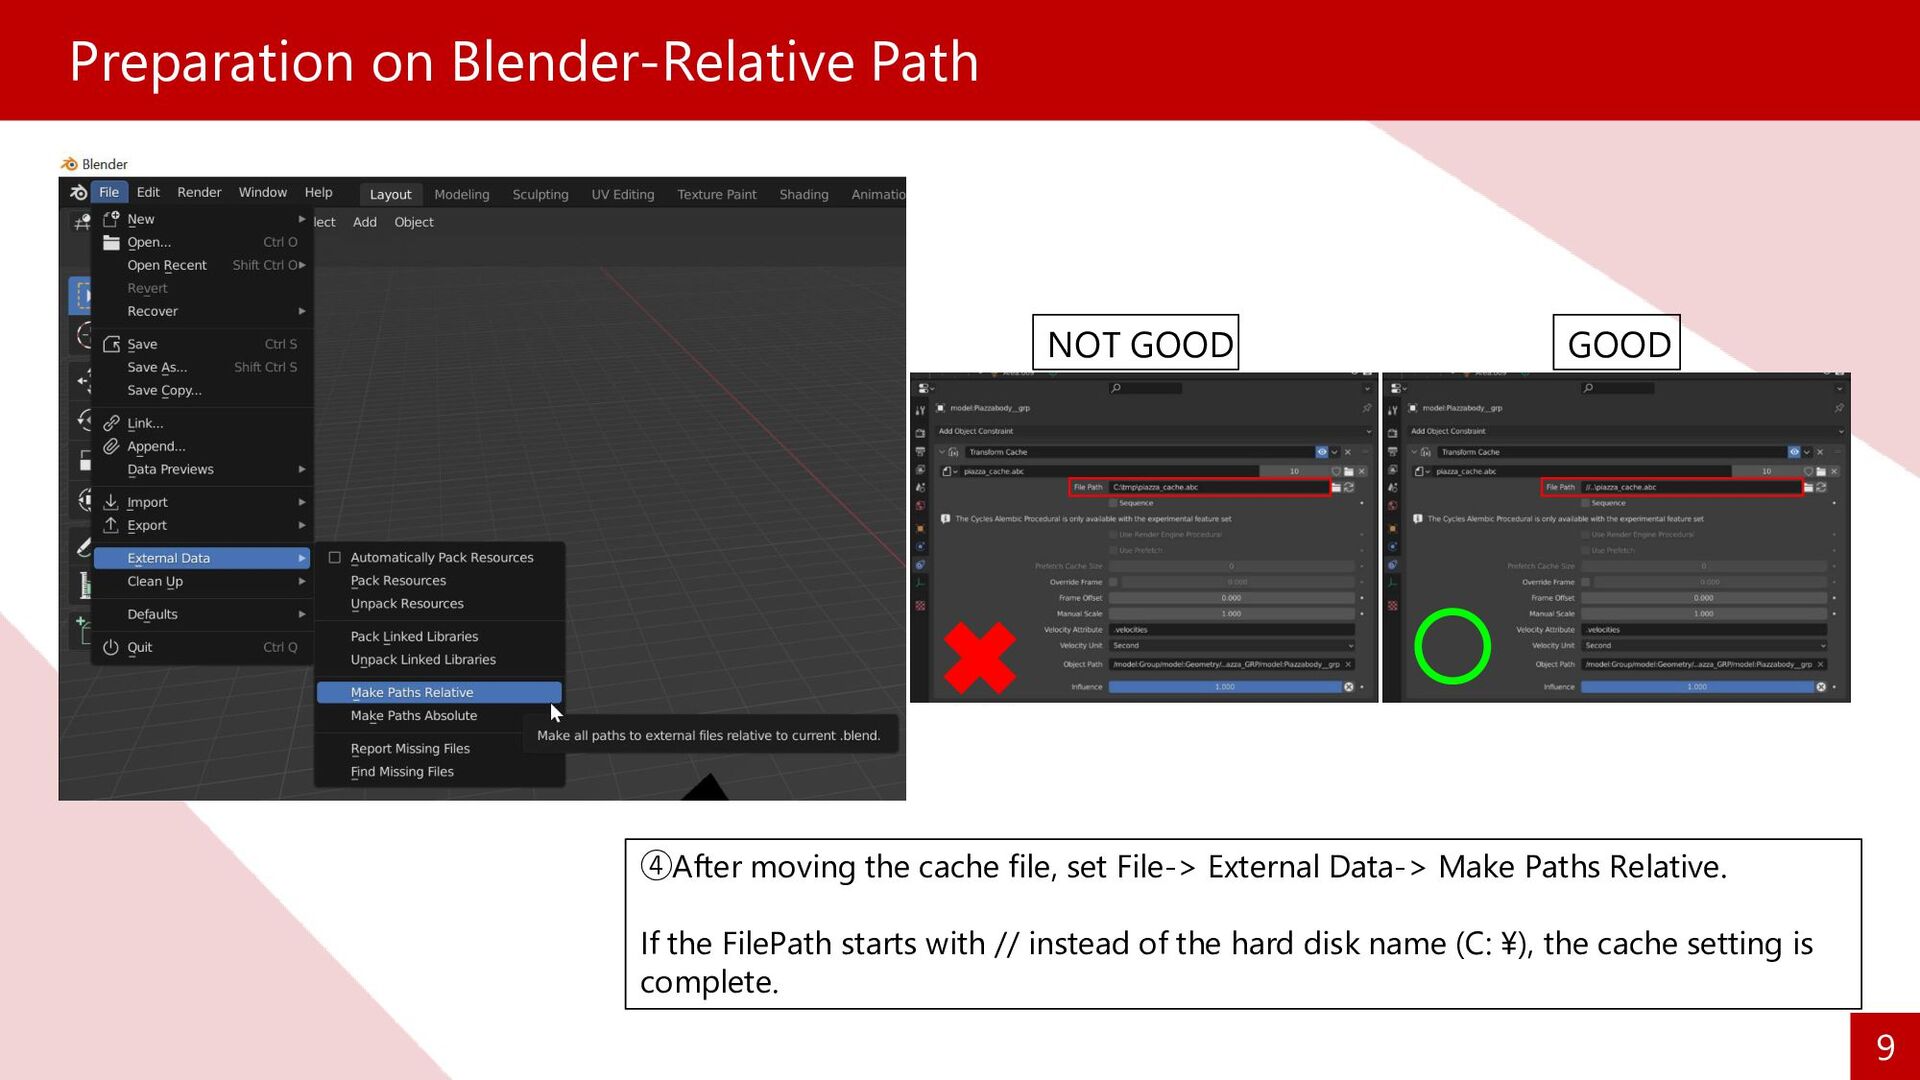
set File-> External Data-> Make Paths Relative. If the FilePath starts with // instead of the hard disk name (C: \), the cache setting is complete. NOT GOOD GOOD
override of the render settings is the sample, export format, and target frame. So set the resolution in the render settings and the Compositor and File Output for the render pass you want to export in the composer node.
have cache or any file that cannot be packed into .blend file, Ignore this step and proceed to Renderpool ⑦After setting Cache, compress it into a Zip file and we are ready to upload on Renderpool